#3d-modeling
1 messages · Page 7 of 1
 swift jolt
 toxic grotto
do i have to use unity with the vrchat creator companion
 azure rain
toxic grotto
do i have to use unity with the vrchat creator companion
azure rain
toxic grotto
do i have to use unity with the vrchat creator companion
yes that's how you upload content to vrchat
azure rain
yes
VRChat
If you'd like to see an example avatar before getting started, open your avatar project and go to'VRChat SDK > Samples > Avatar Dynamics Robot Avatar'. Step 0 - Create a model! Although most users choose to find a model instead (see step 1), it is TOTALLY possible to create an avatar model fro...
 frank plank
should I push his arms back?

 devout orchid
@frank plank youre free person, do however ya u like
frank plank
devout orchid
<@573937438167138304> youre free person, do however ya u like
yeah but to me it looks weird from the sides
devout orchid
youre the artist. id place it like 2/3 front
frank plank
how do I fix this error with the arms

It happened when I merged all the meshes into one
devout orchid
whats the error
frank plank
ok so I had to redo the arms
now how would you rig this character with separate meshes
 harsh saddle
frank plank
now how would you rig this character with separate meshes
harsh saddle
frank plank
now how would you rig this character with separate meshes
Same way you rig a character with one mesh, parent them to the armature and add weights. Though you should just join the meshes if they don't need to be separate.
 halcyon topaz


 distant cloak
is there a way to measure and replicate the length on the marked part to the area the arrow is pointing to? I'm trying to make all my doorways the same size

 spiral sigil
distant cloak
is there a way to measure and replicate the length on the marked part to the are...
spiral sigil
distant cloak
is there a way to measure and replicate the length on the marked part to the are...
there is an option to show edge length
you probably found it already though
distant cloak
spiral sigil
you probably found it already though
I haven't, could you please point me to it?
 distant cloak
Thank you
 austere roost
Commission I'm working on but I'm gonna ask should I do more with the dress or not
 harsh saddle
austere roost
Commission I'm working on but I'm gonna ask should I do more with the dress or n...
harsh saddle
austere roost
Commission I'm working on but I'm gonna ask should I do more with the dress or n...
I think we'd need more context of what the commission requested, if there has been any stylistic requests or reference images, etc. There's nothing objectively wrong with it but we don't know what you were aiming for.
 foggy granite
austere roost
Commission I'm working on but I'm gonna ask should I do more with the dress or n...
foggy granite
austere roost
Commission I'm working on but I'm gonna ask should I do more with the dress or n...
Show the reference

 quaint jasper
You should really find a proper tutorial, like Rainhet's
foggy granite
Can you show the model in just object mode and at a different angle
austere roost
Not home right now at work but sure
foggy granite
K
A little tip if you showing off a model stick to object mode and there's a little tab where you can play around to show off textures, material, etc easily with a minimum setup

 red glade
New drip in progress 🕺

 arctic obsidian
Trying to make people (sounds ambiguous, lol)..
 quaint jasper
Looks great!
 trail python
default avatar height is 2 meters isn't it? trying to scale best i can
harsh saddle
trail python
default avatar height is 2 meters isn't it? trying to scale best i can
No, the collider is 1.8m, I think and the actual body is more like 1.7. 2m would be about 6'6".
trail python
harsh saddle
No, the collider is 1.8m, I think and the actual body is more like 1.7. 2m would...
ahh thanks. that info is wildly helpful
forgot to remove the @, sorry lols
 slender ice
My friend is working on a world
 trail python
rounded to 6hrs of work. before v after, 16 obj is just from splitting it apart so i can edit better. i feel like a sunburnt weed growing in-between cracks of a sidewalk


long story short, optimizing still matters even if its a lil painful
 spice pewter


 crystal steppe
so i have a question about eye bones.
every avatar I've worked with has had two bones per eye, Eye_R and RightEye for example, as far as I've noticed vrchat only needs one of these. I'm having trouble finding why this is from googling, is this an eye tracking compatibility thing?
This is just something i've been curious about for awhile
 thin shadow
crystal steppe
so i have a question about eye bones.
every avatar I've worked with has had two ...
thin shadow
crystal steppe
so i have a question about eye bones.
every avatar I've worked with has had two ...
it's just redundancy
crystal steppe
ah, alrighty then
 cunning sun
anyone specializes in making blendshapes for guns or making vrchat/unity ready guns?
im totally new to this thing but i have a revolver from destiny and i would like to make it work for my avatar.

 small vessel
can someone give me some tips on how to model fluff like this.

I'm not sure where to begin box modeling it
harsh saddle
I'd sculpt it and retopologize but that's always my advice.
quaint jasper
A cube with subdiv will get you a sphere, I'd start from there !
harsh saddle
You could probably boolean together some subdivided cubes to get a starting shape but the topology won't be great which is where the retopology comes in.
distant cloak
Is there a way to scale these faces at once without them recessing into the sphere? I've tried everything and am actively losing my mind over it
 devout orchid
@distant cloak try different transform orientstions/pivot point modes?
distant cloak
devout orchid
<@301701475627827201> try different transform orientstions/pivot point modes?
I've tried all orientations, the extra modes of extrusion on the left in Edit Mode, also the different types of scaling
 clear geyser
small vessel
can someone give me some tips on how to model fluff like this.
clear geyser
small vessel
can someone give me some tips on how to model fluff like this.
https://youtu.be/xyUXfjBtanA?t=528 I've used their afro method to create a fluffy sheep. You could also try meta balls since they stick together then ofc retopo
(00:00) Introduction
(01:00) BRAIDS
(08:45) STYLISED AFRO USING DISPLACEMENTS
(12:44) STYLISED HAIR STRANDS USING CURVES
(12:44) STYLISED HAIR STRANDS USING GEOMETRY NODES
(22:40) COMPLETE HAIRSTYLE TIMELAPSE
(34:30) Conclusion
Thank you to the following patrons for supporting the channel!
Anthony Gonzalez
J
Tyler Bell
PizzaDeliveryMan1942
Chr...
clear geyser
distant cloak
I've tried all orientations, the extra modes of extrusion on the left in Edit Mo...
You tried this?
 small vessel
these are all good suggestions
devout orchid
@distant cloak bruh
distant cloak
devout orchid
<@301701475627827201> bruh
It's been a long day
clear geyser
devout orchid
<@301701475627827201> bruh
😂 They needed the answer to be very specific
 uncut imp
distant cloak
Is there a way to scale these faces at once without them recessing into the sphe...
uncut imp
distant cloak
Is there a way to scale these faces at once without them recessing into the sphe...
set your selection mode to individual face then scale
NVM i was too slow and didnt see that Burritony said that XD
small vessel
quaint jasper
A cube with subdiv will get you a sphere, I'd start from there !
I didn't want to at first, but I think this was actually the best move AND I avoided sculpting anything
 azure rain
cool
clear geyser
Looks good :D
 silver merlin
clear geyser
Looks good :D
silver merlin
clear geyser
Looks good :D
I got a question
clear geyser
silver merlin
I got a question
Go ahead
clear geyser
It's free and very versatile so yes. You can learn many different ways to create 3D models. Sculpting, poly modeling, texturing etc. It's a great all-in one program
@silver merlin
clear geyser
Unfortunately Blender doesn't have mobile options but older versions can run on underpowered computers/laptops
silver merlin
Is there a 3d model app for Android then?
clear geyser
No
trail python
newer versions are better for slower pcs bc its better programmed
also yeah dont expect do be able to do much in regards to 3d with android
trail python
wait until you can get employed, mow lawns, take peoples trash out, etc for basic laptop
careful if you get a dm from someone trying to sell you a model, its a scam
silver merlin
I don't have.money
trail python
either way, just something to be aware about when you're able to buy models and stuff like that
silver merlin
I won't
clear geyser
Even if you were able to create 3D models on your Android, you'd still need Unity to upload it to your account which can also only be used on the computer
silver merlin
Can't I ask someone else?
clear geyser
It's not recommended. You'd be putting your account at risk
trail python
its not solely not recommended, it goes against the TOS and can get you and whoever uploads for you banned
 nocturne hill
Someone could upload it as public to their account, so that you can use it. but risks it being leaked via cloning.
harsh saddle
Maybe one day soon we'll be able to generate high quality 3D models using AI prompts but you're still going to need Unity to put it all together an handle the lighting and stuff. Might be a while before the AI can handle that part.
thin shadow
that maybe true but looking at the pattern nowadays, any kinds of service usually being monetized to the fullest extent
 hardy turret
is it better to make cloth via the cloth simulation or poly model?
arctic obsidian
New commission 💪

 little inlet
How would I go about separating this pin from the cone it is inside of? Who ever modeled it made it all one piece. Can I cut off everything from the pin down and re-extrude the pin? This is in Blender BTW.
 harsh saddle
little inlet
How would I go about separating this pin from the cone it is inside of? Who ever...
harsh saddle
little inlet
How would I go about separating this pin from the cone it is inside of? Who ever...
If it's not actually connected, you can hover over it, hit L and then hit P to separate. Otherwise, you'll just need to manually select it and then separate.
small vessel
silver merlin
Is there a 3d model app for Android then?
yes, but you're going to have trouble using it in a may meaningful for vrchat
you'd still need to export your sculpts to a pc to rig it in blender or maya or whatever
harsh saddle
I could see modeling on a chromebook or something but trying to model on a phone seems like a nightmare
small vessel
harsh saddle
I could see modeling on a chromebook or something but trying to model on a phone...
I really wish there was a good mobile workflow
trail python
thats like trying to fit a computer into a phone
just not going to happen until technology advances
same reason questies complain about performance
(and unoptimized garbage)
harsh saddle
Blender could probably run on an iPhone so long as the polygon count didn't get ridiculous. Trying to use all the menus without a keyboard on a tiny screen is another matter
 devout orchid
tablet/phone exists for consumption, not creation
small vessel
that's why I don't own one
 solar fossil
Only creator, no consumer 
swift jolt
harsh saddle
Maybe one day soon we'll be able to generate high quality 3D models using AI pro...
You can get chatgtp to generate vertex cordinates you can turn into an obj file….. but it clearly has no idea what its doing, just making some primitives scatterd around
Still neat tho
harsh saddle
swift jolt
You can get chatgtp to generate vertex cordinates you can turn into an obj file…...
Never thought about using ChatGPT for this but it's probably not the best AI for the job (though it can apparently generate Blender scripts). The best I've seen is Imagine AI but it's in a closed beta and you need to apply to get on the whitelist. https://captures.lumalabs.ai/imagine
 small vessel
are there any worthwhile communities to share 3d models / get feedback
harsh saddle
All the major 3D modeling tools have their communities but my experience in using them years back is kind of like stack overflow for modelers, unless your work is at the highest tier, expect to either get ignored or talked down to.
spiral sigil
small vessel
are there any worthwhile communities to share 3d models / get feedback
I had a good experience with the handpainting 3d discord
Although I must warn you from my experience at least not to over-rely on your community or someone else to grow as an artist
But that depends on what your overarching objective of being an artist is to you too
Like the big picture of your entire life
Also avoid the art communities that are full of sensitive people who have no sense of comedy and are all tramuatized people and victims
that just goes for having friends in general not to be around emotionally abusive people really, for people who have experienced that they sure have no problems perpetuating the same shit online
But you don't want that to muck up your art journey and I have found that in mainstream communities with younger people
small vessel
spiral sigil
I had a good experience with the handpainting 3d discord
I've not heard of this discord
small vessel
harsh saddle
All the major 3D modeling tools have their communities but my experience in usin...
Isn't there already a stack overflow for modelers? That might interest me
harsh saddle
small vessel
Isn't there already a stack overflow for modelers? That might interest me
Sorry, this question was asked 14 years ago and answered with a link that is broken as of 12 years ago. Locking this thread.
small vessel
😭
 thorn dome
shaving off rust
its actually been a whole year since i last did anything in blender lmao
 hot leaf
 small vessel
lol


 thorn dome
shaving off rust
its actually been a whole year since i last did anything in ble...
thorn dome
thorn dome
shaving off rust
its actually been a whole year since i last did anything in ble...
progress
 spiral sigil
This technically works but u have to know who dming you is a scammer and you won't get much genuine attention here
VRC Traders Discord works the discord is about commissions #community-servers-old
clear geyser
Scammer
 tulip pasture
 jagged moat
I'm not buying it
You've got expert in your name and a low effort screenshot of an avatar as your pfp
 exotic obsidian
 steady maple
clear geyser
Scammer
steady maple
clear geyser
Scammer
Yep lol he sent me a bunch of pictures and they have very different styles and he kept saying ill do it the way you want
trail python
steady maple
Yep lol he sent me a bunch of pictures and they have very different styles and h...
dm one of the chat mods with a screenshot, theyll remove them
steady maple
i already blocked agh
trail python
it helps so other people dont get scammed
 rapid jasper
how would one make big sleeves like this?
problem here is that while looking on the inside, it's clear that it's actually completely flat.
trying to fill the inside of the bump results in non-manifold three-faces-connected edges.
would the only way around be solidifying the mesh, or is this kind of non-manifold fine?

 marble mist
Hey guys could anyone help me fix my vrchat avatar for quest on blender when I import my Avatar into unity and add the textures/materials the eye/eye brow textures look really weird could I send you the blender save file and could you help fix this for free for me please
harsh saddle
rapid jasper
how would one make big sleeves like this?
problem here is that while looking on ...
I'm confused, does something have to be airtight to be considered manifold? I thought it was just about not having enclose interior spaces, in any case, doing a partial solidify where you extrude and scale in the outside boundary loop and then extrude that into the interior until it gets to a point that wouldn't ever be seen unless you were looking directly through the sleeve should be fine. Or if you wanted to close it up, you should cap it off with a plane to suggest the arm going back into shadow.
harsh saddle
marble mist
Hey guys could anyone help me fix my vrchat avatar for quest on blender when I i...
Your problem is likely the fact that Quest avatars don't support transparency. Nothing to be done about that, you just need to sculpt the eyebrows into shape or paint them on the texture. Similarly with the eyeballs, it's likely they have a clear transparent layer that isn't supported with the Quest shaders.
marble mist
harsh saddle
Your problem is likely the fact that Quest avatars don't support transparency. N...
could I send you the blender file please I have been trying this for weeks now and nobody will help I just don't know how to do this stuff please?
harsh saddle
If your textures are set up to require transparency, it's going to be a fair bit of work to change that and I've got my own projects.
marble mist
harsh saddle
If your textures are set up to require transparency, it's going to be a fair bit...
could you at least have a look and see if its easy to do please?
harsh saddle
If your materials are only looking weird with the mobile materials, it's a transparency issue. Post a picture of how it looks.
marble mist
okay give me a sec
this is what it looks like

I am very confused could I send you the file please i don't know how to fix this and when people tell me how to fix it my brain has a mini heart attack
marble mist
harsh saddle
If your materials are only looking weird with the mobile materials, it's a trans...
Here you go does this help?
marble mist
harsh saddle
If your materials are only looking weird with the mobile materials, it's a trans...
can we dm about this please dude
Here is the file if you can help I would be really thankful
 thorn mango
Yall how do i fix the pants they wont like go to his skin its eaither clipping or to loose
 quaint jasper
Edit mode, and you move things around 
thorn mango
Ty
thorn mango
quaint jasper
Edit mode, and you move things around <:catthumbsup:1043650388072611921>
How do i move it in edit?
quaint jasper
G key

Whether you're completely new to the world of 3D graphics, switching over from another 3D Software, or a rusty returning hero from the 2.5 days, the Blender Basics will guide you through your first steps in Blender 3x! You can also watch the course on cgcookie.com: https://cgcookie.com/course/basics-intro-to-blender-3-0
Check out the full Funda...
 stiff folio
Can someone help me on using blender? I'm using a video and following along as told and each time I click the fix model button, the base of the avatar will turn pink and I'm not sure how to fix it or why it's doing it. I'm using an FBX off of another avatar. Photo reference below!

 cedar sundial
is there anyone that could 3d model my promise ring that my boyfriend go for me? id like an estimate first and pictures of previous works. ☺️
small vessel
cedar sundial
is there anyone that could 3d model my promise ring that my boyfriend go for me?...
what does it look like
cedar sundial
almost like a tiara
thin shadow
stiff folio
Can someone help me on using blender? I'm using a video and following along as t...
Before fixing, make sure that the textures are not embedded. Unpack locally on a folder.
stiff folio
thin shadow
Before fixing, make sure that the textures are not embedded. Unpack locally on a...
How can I do that ?
rapid jasper
harsh saddle
I'm confused, does something have to be airtight to be considered manifold? I th...
is there any way to fade the inside of the clothes into black?
when searching on Google, I literally have no result 🤔
thin shadow
stiff folio
How can I do that ?
It depends on versions, depends on workflow. Actual buttons, windows and text may differ.
harsh saddle
rapid jasper
is there any way to fade the inside of the clothes into black?
Sure, just using a gradient on the texture map
rapid jasper
but I don't see how I could do it so that it's more transparent on the outside, and fades gradually to black on the inside 🤔
so far I've only seen textures being applied to a surface, not a volume
harsh saddle
Nothing I've been suggesting has the intention to make something more transparent, perhaps I'm not sure what you're after.
rapid jasper
basically, for a simplication of shadow inside of the clothes, I'd like the inside to fade from transparent to black
harsh saddle
But it's a solid opaque shirt. I don't know why you would want to introduce transparency.
rapid jasper
it's a dress, sorry for not being clear about that haha
harsh saddle
A see-thru dress?
rapid jasper
well the goal is to not make it see-thru, while still keeping the body inside 🤔
or maybe there's a better way of doing it
harsh saddle
If you don't want it to be see-thru, I don't know why we're talking about transparency.
rapid jasper
because it fades to black, from the outside, to the inside
harsh saddle
Yeah, so you make the texture fade from the color of the dress on the outside to black using color. No transparency.
If you're drawing or painting shadows, you don't need transparency to make a shadow
rapid jasper
nevermind, forget it
 still wadi
@rapid jasper what you're talking about is basically some RTX style shader where it calculates light bounces and is very hard to replicate in vrchat.
rapid jasper
what about your run of the mill censorship filter? 
honestly not sure if I want censorship on my own model lmao
thin shadow
rapid jasper
nevermind, forget it
If I want to take a guess, you are talking about ambient occlusion. You can bake AO in blender.
rapid jasper
Oh! That may definitely be it yeah, how so then? 🤔
Any tutorial you'd recommend, or any process you know about?
thin shadow
rapid jasper
Oh! That may definitely be it yeah, how so then? 🤔
Any tutorial you'd recommen...
https://youtu.be/rg3i2YON8tM
Something like this, but enable AO in the baking process
 rapid jasper
how do I enable AO, is it a node, or a setting somewhere?
thin shadow
It's a drop down menu and/or checkbox in the bake menu. Depending on blender version, your mileage may vary
Can't send screen shot, I'm on my phone
rapid jasper
got it 👍
I'll try doing that once I'm done with the clothes and everything
marble mist
harsh saddle
Yeah, so you make the texture fade from the color of the dress on the outside to...
Hey dude could you help fix my avatar today?
trail python
if you pay them yeah
begging in every channel instead of learning how to fix it isnt gonna help
 idle obsidian
i want to subdivide the mesh

but only parts are subdiving
it worked before on the same mesh
but now it doesnt
i cant sculpt without it
aaa
quaint jasper
Why are you not doing this with the subdivision modifier ?
Make sure you don't have overlapping vertices
jagged moat
quaint jasper
Why are you not doing this with the subdivision modifier ?
This, or multi-res if you want to sculpt the subdivided mesh without applying it
idle obsidian
subdivision modifier does nothing
i rase the level but it doesnt change
i tried it already
only thing that worked was right click and subdivide
but now it doesnt
jagged moat
have you tried merging by distance?
idle obsidian
is that in modifiers
jagged moat
you can do it by selecting the mesh, tab->a->m->merge by distance
idle obsidian
this just moves the vertices in a weird way
jagged moat
as long as you keep it on the default value, it will connect any vertices that are in the exact same spot which shouldn't happen for clean topology
also if there are a bunch of separated faces the subdivide modifier won't work correctly
idle obsidian
idle obsidian
i want to subdivide the mesh
i somehow managed

blender so confusing
it works one time other time it doesnt
spiral sigil
 spice pewter

 azure rain
Very cool
marble mist
hey guy's so I am making my first ever VRChat avatar for quest and I need help so In unity as you can see from this image the eyeliner is messed up could someone quickly fix this for free for me please

 frozen hornet
anyone have good sources for modeling shoes in blender? i can only find speed vids that i cant keep up with
quaint jasper
frozen hornet
anyone have good sources for modeling shoes in blender? i can only find speed vi...
Slow down the vid
frozen hornet
not really a tutorial still
spiral sigil
It's best for actually learning if you find your own way
If the video isn't enough somehow
frozen hornet
i like things to be explained its how i learn most things for blender. im just having trouble finding sources that do that
spiral sigil
If that's your primary way of learning then you may eventually hit a point where you can't find your hyperspecific queries and lack the ability to problemsolve yourself
Which seems to be happening now
frozen hornet
idk if i say that i just want to know how to make a shoe
spiral sigil
I wonder if you can get detailed enough datasheets on them from contacting shoe manufacturers
frozen hornet
what
frozen hornet
so like circling back to my original question i take it you dont know any tutorial videos for blender to make a generic shoe?
 quaint jasper
frozen hornet
not really a tutorial still
quaint jasper
frozen hornet
not really a tutorial still

Rain sensei here, ask me as many questions as you need, we’re making a head out of a cube.
btw that cube was 2m by 2m I had a slip up don't fight me.
I'm using blender 2.9
I’m sure you’ve seen a lot of people who get perfect circles and start pulling here and pushing there, and in no time they’ve got a pretty face. That’s sculpting, if you want...

 split walrus
can someone tell me why these faces r different colors
 quaint jasper
Try flipping the normals with Alt + N
split walrus
nope that doesnt fix it
quaint jasper
Could be duplicate vertices then
split walrus
how would i check that?
quaint jasper
M > Merge by distance
frozen hornet
Have you recalculated them?
 stable spindle
im having some issues with normals i believe
i have feetsies on a blendshape and when there out the normals look awful and idk how to fix it
they also look awful ingame
devout orchid
@stable spindle in unity import set blendshape normals to eithet import or ignore/off whatever its called. random pic from net, dont follow it
 stable spindle
devout orchid
<@195010727273037824> in unity import set blendshape normals to eithet import or...
stable spindle
devout orchid
<@195010727273037824> in unity import set blendshape normals to eithet import or...
thanku
needed some blender work
 tight quartz
Hey! So when I export these specific objects and then reimport them they become without textures.


Im using nodes for it
 spiral sigil
tight quartz
spiral sigil
tight quartz
You have to bake your Shader effects to a texture
YouTube that
Your objects will also be just the 3d model if you try to use this asset in other programs
Until you bake the texture maps you need for the program ur gonna use it in (unity?)
tight quartz
Unity yea
spiral sigil
YouTube will help u
quaint jasper
Made those in the past two days
 jagged moat
Live gromit mug reaction

 cursive bridge
alright I cannot for the life of me figure out how to get this texture to work well on all sides of this beam. I applied scale, have messed with setting seams(may not have done this part correctly), tried the auto-texture node, manually moving/rotating around in UV editing and I just... can't get it lol. It works on the top and bottom portions but the rest are forever stretched.. does anyone know what I may be missing 😭

I feel like it's something dumb I'm missing lol
oooooo I may have got it, setting texture to flat seems to have give me many progress
quaint jasper
Is flat not the default for the Image Texture node ?
cursive bridge
It might be, but then I'm even more confused because if that's the case it was on flat for the majority of me troubleshooting hah
okay at this point I'm like 95% positive I sent myself down a rrabbit hole because I didn't apply scale before trying to do all of this hahaha. Started from scratch with a new material and all my issues were gone :^) GG me
amazing what happens when you do things correctly ; ;
spice pewter
quaint jasper
Made those in the past two days
Nice
 magic badge
Model by me and Darks.

 spring onyx
Alrighty, so I have these two ears I want to rig for my avatar, is there anyway I can rig and weight paint them both at the same time? like mirroring but with weight paints and bones?

 plush bone
weight paint has an X symmetry mode
top right of the screen
for rigging, rig the left side of your mesh and name your bones with a .L at the end, then select all and Armature>Symmetrize
 pure dagger
 quaint jasper
spring onyx
Alrighty, so I have these two ears I want to rig for my avatar, is there anyway ...
quaint jasper
spring onyx
Alrighty, so I have these two ears I want to rig for my avatar, is there anyway ...
If you have the correct bones on each side, then the mirror modifier does that for you
spring onyx
@plush bone @quaint jasper thank you both I figured it out and got the ears working now 😀
red glade
After 30 Hours of constant looking at the model seeing what I can fix. I think I can comfortably say im very happy with it. The really only thing that I could make better is the eye texture, Oh also I decided to do a patchwork style of tattooing. annoyingly because the neck and the head are a sepperate texture the upper part is higher res

Ill get to doing the face shapes (Besides the basic talking ones) Once I have the need for them besides posing
 devout orchid
whats going off means
spiral sigil
 graceful olive
how would i 3d model the ears n stuff that goes off the avi?
graceful olive
how would i 3d model the ears n stuff that goes off the avi?
Idk that's for you to figure out how you want your avatar to look
😸
red glade
graceful olive
how would i 3d model the ears n stuff that goes off the avi?
Well, elaborate more.What exactly are you thinking?
thin shadow
graceful olive
how would i 3d model the ears n stuff that goes off the avi?
the answer is, yes
harsh saddle
This is what I always recommend but I'd sculpt it. Even if you ultimately don't want to go through a full retopology process, at least you'd have a 3D concept of what you want to achieve.
 graceful olive
devout orchid
whats going off means<:vrcThinking:585749770547757086>
graceful olive
devout orchid
whats going off means<:vrcThinking:585749770547757086>
this stuff
azure rain
I suppose you could just take a bunch of triangles and apply them to a sphere

【お知らせ】 2022/12/19 v2.00 bone名称修正。VRC Avatars3.0対応ファイル追加。 別商品WAFTの【支援用】¥500の商品にてVRC Avatars3.0対応をしました。PUDDLEも対応済みのデータが同梱されています。 https://anaguraworks.booth.pm/items/1417205 【商品説明】 オリジナル3Dモデル『パドル(PUDDLE)』 VRChatにおける使用を想定して作成したアバターです。 身長約100cm(耳含めて約110cm)。 Oculus

READ ME VRChat SDK3 の使用方法確認用に作成したアバターです。 シロ は VRChat 向けに制作された Unity の Humanoid に対応したオリジナル 3D モデルです。 ## モデル概要 ポリゴン数 - 6882△ リップシンクシェイプキー数 - 15 表情シェイプキー数 - 7 クエスト対応 - 対応 ## 利用 - 再配布 - ※1 - 法人利用 - 可 - 個人利用 - 可 - 改変 - 可 - 改変パーツの配布 - 可 - スクリーンショットや放送等での送信 - 可 - 他のユーザーが利用できる状態にする - 可 - 中傷・政治目的・宗教目的での利用
some free to download cats you can modify
harsh saddle
Why I recommend doing a sculpt first is it's very hard to figure out what the aesthetic of the final model is intended to be from that sketch so it's hard to recommend a workflow. You could also come up with a more detailed character turnaround but I prefer to just sketch in 3D.
 proven linden
How do I make this in blender
 jagged moat
A lot of practise
harsh saddle
A lot of it could be done with modified primitives. You'd probably want to use a curve for the cord as trying to make a nice looking cord with a cylinder can be challenging.
 waxen mist
proven linden
How do I make this in blender
waxen mist
proven linden
How do I make this in blender
Block it out, get a rough feel for the shape, create the low poly game mesh with that as a base. Use the low poly as a starting point for a high poly version, for all the details you'd want to bake into the normal maps. Bring them into substance, bake the normals, and apply nice materials. Given the fact it's a hard surface workflow I'd recommend separating out every part that would be physically separate for the high poly mesh, as separate objects. The low poly can and should be done as one mesh.
small vessel
quaint jasper
Made those in the past two days
cheeese
proven linden
waxen mist
Block it out, get a rough feel for the shape, create the low poly game mesh with...
Like this
 harsh saddle
It would help a lot to have a side view
 harsh saddle
Yeah, I just mean in modeling it, it would help to have a side view to get the depth right but you can eyeball that if necessary.
 harsh saddle
I'd probably just use a section of a cylinder and then dial in the profile with soft selection. Then you can extrude or use a solidify modifier to get the right thickness.
 dense harbor

 leaden jacinth
its beautiful
spiral sigil
omg its adorable
thorn mango
it wont let me sculpt anmore?

and when i move like the ears it takes evreything with it
harsh saddle
thorn mango
it wont let me sculpt anmore?
Are you trying to sculpt on a shape key?
thorn mango
harsh saddle
Are you trying to sculpt on a shape key?
i do not know also its doing this
harsh saddle
You're scaling it up from the origin on one axis so that looks about right I suppose.
 manic spade
i think they're referring to the fact that the clothes dont scale uniformly with the body
which is because they have different origins
spiral sigil
anyone know blender tool in sculpt just pulls towards the camera
trying to do grab but it's uh..messy
harsh saddle
spiral sigil
anyone know blender tool in sculpt just pulls towards the camera
trying to do gr...
You want to only pull towards the camera? You can lock certain axes in the tool settings.
thin shadow
ok my turn to ask something. Let's say I have a tube that is made from nurbs curve using array and curve modifier on the mesh.
Are there any way to have it weight painted to the armature without applying modifier?
 quaint jasper
Auto weight paint doesn't work ?
thin shadow
Without applying both modifiers? no
The auto weight paint got applied to the single segment mesh that is in position 0,0,0.
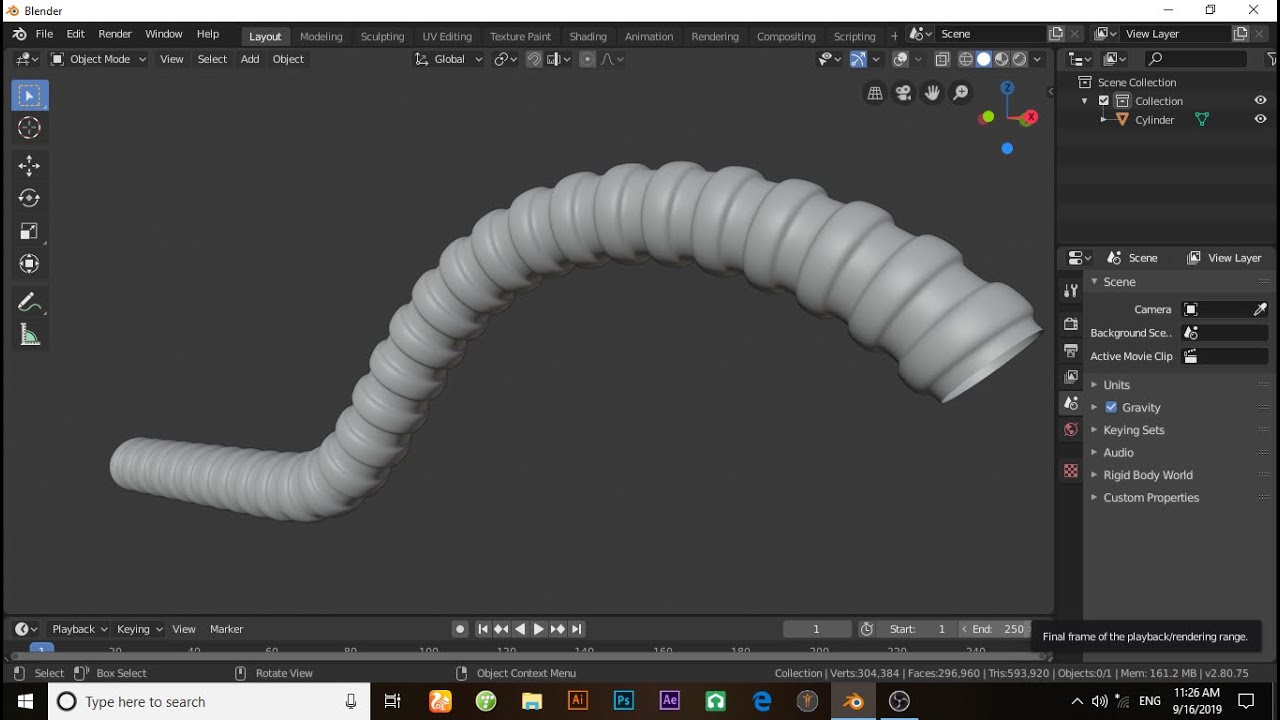
Hello friends,
In this video, you will learn that how to make 3d model of drain hose pipe or outlet tube in blender 2.80.
Thanks for watching.
Keep supporting,
Keep loving.
i followed the method of creating tubes using this one
devout orchid
@thin shadow try to model whole tube and add lattice inbetween (curve bends lattice, lattice deforms tube, when lattice disabled you have straight tube)
thin shadow
devout orchid
<@317266655824707598> try to model whole tube and add lattice inbetween (curve b...
which modifier should be applied to which part?
I tried applying the curve modifying to the lattice object, it doesn't work
devout orchid
@thin shadow it should. you have not forgot to set lattice resolution higher than 2?
on curve's axis
 urban flint
uhh... I don't know how to fix this, I finished this model and for some reason these 2 faces aren't there in unity, they're not backwards, they just aren't there

NVM, triangulate in blender seems to have fixed it
thin shadow
devout orchid
<@317266655824707598> it should. you have not forgot to set lattice resolution h...
yeap still doesn't work. even with resolution higher than 2
i suppose it's impossible
 fleet turtle
Got a decent portion modeled now just gotta rig the bones per key

 jovial seal
Why dont my downloaded blender files have my vertex groups?
this seems to only hapen to me
friends who download my file have it all working
im trying to transfer a file from school
 south saddle
thorn mango
it wont let me sculpt anmore?
south saddle
thorn mango
it wont let me sculpt anmore?
If your still got it or figured that’s might be why. If you press “g” and scroll with the mouse edited the size of it
 thorn mango
TY
 twilit cargo
At some point these shadows (lack of shadows?) appeared on my shape keys, can anyone please help me figure out what caused them and how to fix it?

Already tried recalculating normals and enabling/disabling auto smooth, so I'm not sure what it can be
quaint jasper
Are they visible with a Toon shader ?
twilit cargo
quaint jasper
Are they visible with a Toon shader ?
Doesn't show up with toon shaders, no
quaint jasper
Problem solved then 
jovial seal
jovial seal
Why dont my downloaded blender files have my vertex groups?
this seems to only h...
.
swift jolt

 vague obsidian
twilit cargo
At some point these shadows (lack of shadows?) appeared on my shape keys, can an...
vague obsidian
twilit cargo
At some point these shadows (lack of shadows?) appeared on my shape keys, can an...
it's just the 2D face mesh. it's how the face looks drawn on instead of 3D. it's potentially not attached perfectly or formed of multiple layers. it's also potentially a product of the "outline" mesh/shader if it doesn't cover the whole face. could be a lot of things outside of that regarding duplicate unmerged vertices. i wouldn't mess with it if it's a 2d animated face.
swift jolt
Just a blender moment tbh
twilit cargo
Thank you all! I sucked it up and just remade it, I'm sure there's a better way ™️ but I'm not skilled enough to figure it out
 quaint jasper
twilit cargo
Thank you all! I sucked it up and just remade it, I'm sure there's _a better way...
quaint jasper
twilit cargo
Thank you all! I sucked it up and just remade it, I'm sure there's _a better way...
People either shift UV islands by increments, for different faces, or they use toon shaders
swift jolt
Wheel

 white dock
I have a weird shading error in blender, could somebody help figure out what it is??

 gaunt hull
i need help i am attempting to make a simple clothing piece from a tutorial and that went well, but when i press play nothing happens..?
harsh saddle
gaunt hull
i need help i am attempting to make a simple clothing piece from a tutorial and ...
Are you trying to run a cloth simulation? You'll want to do that inside of the cloth modifier, not using he timeline.
gaunt hull
i fixed it
 violet spruce
 scenic cipher
Quick question, I'm modeling an avatar with floor length hair that I want to drag along the floor, I've never modeled such long hair and was curious as for how to do so. Do I model it just straight down or diagonal so it doesn't clip into the floor?
devout orchid
@scenic cipher you definetely dont want it to clip, but you can just pose the bones later so you can model it anyhow.
scenic cipher
devout orchid
<@282659696710778880> you definetely dont want it to clip, but you can just pose...
Okie, thank you!
 coarse tangle
Are there any suggestions for me to follow to reduce the poly count while keeping the wood railing shown? As you can see total the amount of polys is, for half, comprised solely of the ones for the railing. 
azure rain
could you show a wireframe of the wood railing

#b3d #blender #secrets #tutorial
Visit the Blender Secrets website: https://www.blendersecrets.org/book
e-Book bundle (20% Discount) : https://gumroad.com/l/IxofeY
you could probably dissolve some Edge loops on the railing
coarse tangle
ops wrong video
here, this is the right one
already tried unsubdividing it once, and the result is the model that is in the clip
and this is a screenshot of it flattened
 azure rain
glad you're using an array modifier so you only have to edit one of the railings
coarse tangle
azure rain
glad you're using an array modifier so you only have to edit one of the railings
from what you're writing I presume that you've encountered people who just Shift+D for things like this 💀
azure rain
Yup
coarse tangle
azure rain
you could probably dissolve some Edge loops on the railing
already did that and the poly count didn't go down even by just one...
jagged moat
That can't be right...
azure rain
Did you apply the unsubdivide in the modifier tab
 naive bolt
Don’t ask for commissions here, there’s too many scammers. Check out VRCTraders discord in #community-servers-old
spiral sigil
You guys know any discords oriented around 3d hard surface modeling comms for printing real prototypes nnshit? Or otherwise reliable marketplace not just like fiverr
 old chasm
Hello! someone is using this server to scam people with my portfolio, is there a way to report? I have their id and proof from other servers
 signal kiln
Whenever I try merging a mesh to the model the jacket does this everytime I transfer weights. Any fix?

 dull siren
hi i wanna get into modeling?
this is my end goal i want to try to get it done as soon as possible

 hushed leaf
jovial seal
Why dont my downloaded blender files have my vertex groups?
this seems to only h...
hushed leaf
jovial seal
Why dont my downloaded blender files have my vertex groups?
this seems to only h...
mismatched blender versions?
harsh saddle
dull siren
this is my end goal i want to try to get it done as soon as possible
Most of that would be pretty simple to create, looks like lots of primitive objects and slopes with grid textures and metal materials. The troopers would be a lot more work but you could probably find a source for those. The biggest challenge would be planning out the construction ahead of time so your scale and elevation was correct so you might want to study the source material and take some measurements like the size of the walls relative to the people and making some assumptions about their average height.
dull siren
their clone actually so they’re exactly 6’1 i belive
harsh saddle
dull siren
their clone actually so they’re exactly 6’1 i belive
Cool, so you could scale a human model up to that height and then the walls should be roughly shoulder height but you'll likely need to get screens from elsewhere to figure the rest out and probably have to do a bit of guessing in areas where you have incomplete information unless you have a good overhead few. You could fancy it up a bit but the majority of this could be approximated with just boxes and ramps.
 safe marsh
You could just get those assets from gmod people already have made those models
dull siren
safe marsh
You could just get those assets from gmod people already have made those models
thanks so much
safe marsh
Just look up a video on how to export models from garrys mod it's really easy
thorn mango
i imported a model than it said this?
 trail python
regular version of cats doesn't work with 3.0 and up i think?
trail python
thorn mango
i imported a model than it said this?
use the developer version
thorn mango
ohh
thorn mango
trail python
use the developer version
how do i do that-
trail python
thorn mango
how do i do that-
its probably on their github but if you join their discord, go to faq chanenl and scroll up to the literal 2nd message of the entire channel theres a direct download link
thorn mango
ok ty
thorn mango
what to do for armutures?
 dull siren
safe marsh
Just look up a video on how to export models from garrys mod it's really easy
dull siren
safe marsh
Just look up a video on how to export models from garrys mod it's really easy
i dont own garys mod is that a problem?
dull siren
@safe marsh
i dont own garys mod and i found a good map i wanna use
how do i get the models out?
i subscribed to the thing
safe marsh
i think you need to own garrys mod
dull siren
safe marsh
i think you need to own garrys mod
could you do it and send the file to me?
ik its alot to ask
but i have searched for SO LONG
and this is PERFECT
thorn dome
time to rig ig
 quaint jasper
Should be super straightforward!
 lilac crater
Does anyone know how to convert a .dff to a sensible 3d format? I have attempted this addon, yet it does not appear even after restart, probably because it is outdated.
https://www.gtagarage.com/mods/show.php?id=21598
 lilac crater
this failed too:
https://github.com/Parik27/DragonFF
GitHub
Blender Add-on to edit RenderWare and GTA Formats. Contribute to Parik27/DragonFF development by creating an account on GitHub.
lilac crater
lilac crater
Does anyone know how to convert a .dff to a sensible 3d format? I have attempted...
also tried this with blender 2.79, and all I got was a triangulated cube:
 pure dagger
Finished the Kerfus avatar, Its upon my gumroad now uwu
 pure dagger
@jagged moatthankies uwu
jagged moat
xd, looks great
spiral sigil
time to mess with the grim reaper weasel
spiral sigil
spiral sigil
time to mess with the grim reaper weasel
oh yes testing three 3d model of a fucking weasel/human hope i don't fuck up my own model and considering i'm making it scratch so yay and i did just fuck up the model great.
harsh saddle
Then I would go back to an earlier saved version. You have been saving periodically, right?
 proper ice
I'm figuring out a workflow for importing some objects into blender, and I've exported a test surface from another program and it seems to import into blender just fine, but is this an acceptable output? Will I have to go back and adjust the vertices, etc?

I know that in general I want to try to keep the number of faces pretty low and not just go all crazy
quaint jasper
You're asking if 100 triangles is going all crazy ?
I can assure you that it is not crazy, at all, keep doing what you're doing
harsh saddle
You're never gonna hit 120 FPS on a TI-83 with that spirit.
proper ice
quaint jasper
You're asking if 100 triangles is going all crazy ?
I mean I can always make it way more triangles
I'm asking more about the kinds of threshold for imported surfaces
quaint jasper
I'm not exactly sure what you're asking
proper ice
Basically if I'm importing objects or surfaces into blender for a vrc world, there are ways for me to limit the resolution of the topology of those surfaces. Is there a general limit I should try to shoot for? With that one surface I posted, I could have made it hundreds or thousands of triangles in the export. I could have made it less.
I definitely don't want to import crazy high res geometry, but I don't want it too low either
harsh saddle
I think the documentation for Quest calls for under 50k tris in a world. I'm not sure anyone actually follows this for worlds of any significant complexity. You can get by with >300k visible at any given time if you're baking lights, optimizing textures, not overusing transparency, and if you're using proper occlusion culling, it's more a matter of what's getting rendered at any given time than the polygon count of the entire world as a whole.
quaint jasper
harsh saddle
I think the documentation for Quest calls for under 50k tris in a world. I'm not...
This has changed drastically with Quest 2. Oculus suggested to have up to 1M triangles in frame maximum, PC can easily have a couple millions without much of a hit on performance. Obviously, lower is better when you can, but we're past the point of being worried about polygons. Your other points stand though 
devout orchid
yet still laughable 70k for very poor avatars. while hiding 1kk one (not in toggles, standard shader, no other bullshit, pug) was doing nothing for my old 1070.
quaint jasper
devout orchid
yet still laughable 70k for very poor avatars. while hiding 1kk one (not in togg...
70k times 80 people in an instance is potentially 5.6M polygons in frame
devout orchid
@quaint jasper and? animators and physbones will crush my cpu waaaaay before that for 80 people. and most people have most of their polys in clothes sets etc.
quaint jasper
I'm not sure how whataboutism is relevant here since we're talking about polygons 
harsh saddle
It's a little annoying having to deal with those limitations in our worlds that are built for <10 people but I can appreciate that the devs need to balance their performance ranks around heavily populated public instances.
devout orchid
its relevant, since showing 80 poor ranked people and having any expectations of decent performance is unrealistic scenario for those whos not running 13900+4080 etc for many different reasons, polygons being not first one of them. and for those who do - 6kk polys is still nothing. so this kind of math is not very convincing and we still have everyone using very poor avatars without kniwing if theyre just 100k or 2kk with 100 meshes.
spiral sigil
So you want like, draw call awareness or?
There are a lot of people who generally know there are issues they just don't care
And/or underestimate the impact
devout orchid
Theres a lot of possible metrics for performance that are ignored for now. I want nothing and thats not a canny ticket, originally I was joining to talk about amount of polygons and following dev recs in general. To put short and overly bold: a. Polys will never be your bottleneck on PC - unless youre going for it intentionally, like subdividing perfectly looking model twice more or using tesselation shaders or porting yandere sim. b. dev recommendations are to be taken with a bit of salt (or ignored and abused), if its left in players hands and not forced by code. You can see what wishfull thinking sometimes behind those and stuff that sells follows few of them.
trail python
out of curiousity why do you include yandere sim as an example of poly bloat?
yandere sim the game itself is poorly optimized because of sghetti code and the author made some system where the game checks each hair style, body shape or any other defining accessories, every single frame
plush bone
the 1mil poly toothbrush
trail python
oh god that unlocked memories
i thought they meant the character models, oh hell the toothbrush

 sudden jackal
How do I get rid of this blueeee
 quaint jasper
sudden jackal
How do I get rid of this blueeee
quaint jasper
sudden jackal
How do I get rid of this blueeee
Ctrl + E > Clear sharp
harsh saddle
 dim tiger
is there a way to sculpt specific areas if my meshs are combined?
dim tiger
is there a way to sculpt specific areas if my meshs are combined?
Yes, don't combine them but if you already have, you can select the faces (hover over and press L to select all connected faces) and then press P to separate. Then, you just need to make sure that both meshes are on the basis shape key when merging back and it should work fine.
dim tiger
harsh saddle
Yes, don't combine them but if you already have, you can select the faces (hover...
Awesome thx
 karmic reef
Could someone help me with something on unity I don’t know how to fix this problem and I would appreciate it if someone could help me out here

 harsh saddle
karmic reef
Could someone help me with something on unity I don’t know how to fix this probl...
harsh saddle
karmic reef
Could someone help me with something on unity I don’t know how to fix this probl...
The shader issue is pretty easy, you just need to change the shader in the materials on the mesh to one of the shaders in the VRChat-Mobile category. The physbones errors will require editing the avatar in a 3D modeling program like Blender. It doesn't appear to be designed for Quest so it will take some work.
karmic reef
harsh saddle
The shader issue is pretty easy, you just need to change the shader in the mater...
Thank you so much
quaint jasper
Also you can use Windows + Shift + S to take screenshots
 delicate raven
Modeled a better version of Snipe's gun from My Hero Academia. My friend managed to find a model of him, but the gun that came with it (the top one in the first image) was kind of terrible, so I made my own

I'll probably tweak the proportions a bit more before I rig and texture it, but at least it's better than the original lol
 warm trellis
Hey, anyone have the CATS blender plug-in mapping add-on? The website link broke, and I've yet to find it anywhere else. (CATS lets you move VRMs into VRC)
azure rain
https://booth.pm/ja/items/1025226 this Unity plug-in can also bring vrm into vrc

※上手くいかない場合は、まず下の方にある使い方のQiita記事の手順通りに実行してみてください ※インストール後、「VRM0」メニューが表示されない場合はUnityを再起動してください ※エラーが出ているプロジェクトでは、インストーラーが動作しません English → https://www.store.vket.com/ec/items/122/detail/ Unityのエディタ拡張です。次の3つのツールが含まれています。 • VRMプレハブをVRChat用アバターへ変換 • VRChat用アバターをVRMへ変換 • メッシュ・サブメッシュの結合
warm trellis
yeah, but I need the CATS plug-in first to make it a bit smaller and quest friendly
ya...ya girl only really rocks the quest well. My pc spits out a funny filter if I do air link. (Prolly need help with that too, for I am dumb baby.)
azure rain
that is some very helpful context
GitHub
VRM Importer, Exporter and Utilities for Blender 2.83 or later - GitHub - saturday06/VRM-Addon-for-Blender: VRM Importer, Exporter and Utilities for Blender 2.83 or later
 ashen forge
For those of you who use Clip Studio Paint I made a guide on using it to do (mostly) real-time texturing with 3D models
https://vrclibrary.com/wiki/books/random-assorted-tips-with-trixxed/page/realtime-texturing-with-clip-studio-paint-clip-studio-modeler

This one isn't mainly about Blender, however, if you own Clip Studio Paint, you can use an app that...
spiral sigil
I wish more quest worlds had the quality like this mobile game's 3d environments lol
 harsh saddle
You just need to get a full team of developers willing to work full time to create a VRChat world. Good luck with that without having a proper way to monetize their work. That being said, there are some amazing VRChat worlds but you aren't going to tend to see that level of optimization.
Plus I imagine those backgrounds are pre-rendered so it's not really a fair comparison.
spiral sigil
Yuh
azure rain
also probably takes a decent art skills to make just color texture only materials that look nice
devout orchid
ya telling me quest worlds look even worse?  but yeah, being limited in vram and be able to see stuff not from 5 meters away on a tiny display, but right in your face makes this a bit harder. as everyone says, tis miracle we have any kind of vrchat on android at all.
azure rain
you could use more than just color textures ON quest I'm just noting that would be vram efficient compared to a full PBR workflow
harsh saddle
You can bake a lot into the texture directly but then you have to contend with light probes and what not.
 elfin pawn
Anyone know how to fix this? i cut the nose off and added new faces, thought weight-painting would fix it but doesn't seem to work, i have a feeling its something to do with vertex paint but i haven't learned anything about that yet, and there is no useful videos yet i can find anywhere
thin shadow
elfin pawn
Anyone know how to fix this? i cut the nose off and added new faces, thought wei...
when cutting, make sure to not create vertices in the middle of face. cut straight from edge to edge
devout orchid
@elfin pawn select nose, separate it, delete all shapekeys, create new empty one and apply it as base (for some reason without doing so blender still remembers even deleted shapekeys), then join meshes back and merge by distance, should stop them from moving.
elfin pawn
So in other words I need to completely redo the head again?
devout orchid
uh, that totally not what i said
thin shadow
devout orchid
<@434558737470980107> select nose, separate it, delete all shapekeys, create new...
next time, I'll try this method instead. I haven't achieved this level of blender knowledge yet when that thing happens at that time. Thank you.
devout orchid
@thin shadow theres also vertex - blend from shape, that allows you to reset veticies but in that case youd need to do it for every shape so...
elfin pawn
Oh okay I got to to work now, thank you
thin shadow
devout orchid
<@317266655824707598> theres also vertex - blend from shape, that allows you to ...
i was thinking of doing the data transfer modifier thingy to the separated nose. Similar to the process of adding cloth to a base. Would that work?
devout orchid
what for? i dont get the point
thin shadow
ok so i tested myself. it works if the mesh involved with the cutting has no blendshape. In my case, the eyebrows, using the delete all blendshape method, it works, but there will be no blendshape after merging back the mesh.
So depending on the mesh that is being cut has blendshape or not
devout orchid
@thin shadow oh, yes, ofc i meant it for something that is not affected by any blendshapes, like the nose.
thin shadow
+1 blender knowledge increased
spiral sigil
99991678 knowledge left to obtain
 drowsy drum
Don’t know where to post this lol but here’s a playlist for unity and blender tutorials to help learn both programs completely beginner friendly.
https://youtube.com/playlist?list=PLl6-F1octmLlSB7DBA0VqBHqNi1E2N9k9

YouTube
This is a playlist compiled for beginner world creators with so many tutorials it can be hard to find a “easy to follow” tutorial so here you are full set of...
azure rain
Wow that is a very nice playlist
drowsy drum
I watched and followed all the videos myself to make sure their beginner friendly so hopefully 🤞 it helps others
azure rain
Cool
 winter palm
So I made an extension on some of the faces, but its coming out like this. Any idea on how I can make this smooth?
 spiral sigil
winter palm
So I made an extension on some of the faces, but its coming out like this. Any i...
spiral sigil
winter palm
So I made an extension on some of the faces, but its coming out like this. Any i...
Show wireframe and xray
winter palm
 devout orchid
@winter palm try do dissolve some verticies to get back to quads. also some normals could be flipped.
karmic reef
This is going to be a dumb question where do I go to open the physbones to remove them I did it before and forgot how to get there 🤦♀️
 steady zealot
karmic reef
This is going to be a dumb question where do I go to open the physbones to remov...
steady zealot
karmic reef
This is going to be a dumb question where do I go to open the physbones to remov...
You have to find the game object in the hierarchy that has the physbone component on it, and then delete it from there
in the inspector
 dry ocean
can someone help me with my avatar i’m almost done with it i just need help with psych bones and my hat in my avatar isnt working along with a couple other things
ashen forge
Finishing some outfits, planning for them to be semi mix-and-matchable


Only 17k tris in total surprisingly
quaint jasper
Cute 
 thorn gulch
 spice pewter


 uneven quest
I think it's time.
 uneven quest
Weighted pretty well I like to think.
 uneven quest
It's gonna be a lot of work to rig the back hair.. I might just not do so
 harsh saddle
I'd just weight it all to the head, physbones don't really seem necessary since her hair never moves like that in the show.
uneven quest
Well it moves separately a little bit in CN: Punch Time Explosion
But yeah I think you're right
devout orchid
Can someone give me some good weightpainting videos with more or less complex clothes? Cause when it comes to this, blender fells horribly wrong and awkward, so I'm either missing something/have wrong workflow/theres some musthave plugins.
trail python
devout orchid
Can someone give me some good weightpainting videos with more or less complex cl...
https://youtu.be/yr5KRYz5ybs
the shirt in this video isnt complex but ive used the method he uses for multiple different types of clothing. its not perfect so youll need to clean things up but it saves a lot of leg work.

In this tutorial I explain how to use the Transfer mesh data control in blender, this is especially useful for skin tight clothing and getting separate meshes to share vertex group data, making it super easy to weight paint new meshes to a pre-existing rig.
This one is a bit more advanced but if you understand the fundermentals of rigging, this...
the only thing i do different is that i get better results by using "nearest face interpolated" instead of what he tells you
devout orchid
trail python
https://youtu.be/yr5KRYz5ybs
the shirt in this video isnt complex but ive used ...
im not asking for data transfer, that stuff easy. i want some pro doing some victorian dress or exoskeleton idk
trail python
ive used data transfer for dresses and crap like that before lol
im not aware of any tool but most of the time anything complicated can get partially rigged by data transfer, and cleaned up manually
im on cellular so i dont have the image but ive done exoskeleton before too
devout orchid
well manual part for me seems awkward the way i see it so thats why i want to see some decent example of workflow
 prime obsidian
so i imported an avatar fbx into my blender file and for some reason it didn't import with any of the vertex groups nor shapekeys, anyone know what causes it?

i imported it in after importing a diff model into the project, which is completely fine
and also for some reason whenever i import the model the armature gets really messed up

(it's my other vrchat model so it was setup with cats already so idk what causes this)
prime obsidian
all transforms were applied as well so idk still what screws up the rig when i import it into a different blender file
 balmy sentinel
Does anyone have a free female bass I could use in blender?
azure rain

Tip: when placing edge loops for deformation, imagine the model is a rigid suit of armour with flexible rubber parts. The border edges of the armour shapes strongly help define the deformation.
💖 240 🔁 29
steady zealot
Quick and to-the-point gif I made to demonstrate how easy it is to move UVs around when manually atlassing textures

 vital drift
I need to finish this remake of the banban models and making them way better than the original
 harsh saddle
I like to sculpt using a single mesh and without worrying about topology using dynotopo and then retopologize after I've nailed down the form but there are many approaches.
solar fossil
Bonus points to whoever knows who this character is
 uneven quest
vital drift
I need to finish this remake of the banban models and making them way better tha...
uneven quest
vital drift
I need to finish this remake of the banban models and making them way better tha...
😱
vital drift
uneven quest
😱
My version is way more optimized than the original in game since the poly count isn’t abysmal 😂 don’t wanna sound like a dick to the devs of that game but their models are very unoptimized
uneven quest
H O W
That is absolutely amazing
Idk how
HOW can it look so 8K and still have a low poly count?!
trail python
baking
uneven quest
I've never tried that, ever
The models of my Powerpuff Girls avatars are unbaked
So that's probably why the performance is classified as poor
trail python
probably material count
uneven quest
I never really cared about that to be completely honest
It doesn't affect performance that heavily
trail python
yeahh the performance rankings are usually taken as guidelines instead of hard rules
uneven quest
(for me, I usually play the standalone Quest version)
trail python
ie every separated mesh counts against performance but they recommend you to keep the head and body separated meshes because of blendshapes
yeah if you're standalone its good to stick near em
uneven quest
Yeah I join every mesh together
trail python
quest can't handle as much as people think it can 🤦♀️
uneven quest
For the PPG models in CN: Punch Time Explosion, a separate mesh is used for the mouth, but mouth animations had to be replaced with a compromise of swapping out textures
I was able to fix the issue of it looking off by applying the mouth texture to the selected polygons of the head mesh, which are selected to mimic/replace/merge the mesh where the mouth textures would go onto
harsh saddle
A common method of animating flat mouths is to use texture coordinate offsets to swap them out so that makes sense. You wouldn't really get anything out of baking for your models, it's for models that need depth/normals, metallicity, differences in smoothness, the Powerpuff girls are flat and rendered the same across their entire bodies.
uneven quest
harsh saddle
A common method of animating flat mouths is to use texture coordinate offsets to...
If anyone has ever tried to add someone else from CN: Punch Time Explosion like Ben Tenesson (I probably butchered that name) into VRChat, they should follow the baking advice in this message
 snow bison
will this ever be an avatar? i cant seem to find any other ones
spiral sigil
snow bison
will this ever be an avatar? i cant seem to find any other ones
I'm pretty certain someone had posted a finished version of this character in #avatar-showcase between now and a year or so ago
If you are determined enough id sort by image in that channel and scroll
harsh saddle
There are also avatar search worlds, you can probably find it there.
 cerulean shoal
my house exploded ❤️

 flint nest
So I've been working on my avatar for my Artificial Intelligence, and I can't quite decide if there's anything that could be added to make her look nicer, or maybe if there may be some outfits out there that may be cool to add to her, anyone got any recommendations? (She is a vroid base).

Trying to go for a techy/loose feel.
karmic reef
Help please I’m lost here
 hushed leaf
karmic reef
Help please I’m lost here
hushed leaf
karmic reef
Help please I’m lost here
Likely the wrong channel, but most of those explain what the problem is - most of it is the shaders you're using aren't compatible with Quest.
harsh saddle
You're gonna have a rough time getting a 400k tri model working on Quest. It probably just shouldn't be uploaded period.
hushed leaf
oh I missed that, yeah that's not a good thing at all
karmic reef
hushed leaf
Likely the wrong channel, but most of those explain what the problem is - most o...
My bad but thank you anyway
 prisma berry
hey how do i make it so i can see the material of a face from only one side
harsh saddle
prisma berry
hey how do i make it so i can see the material of a face from only one side
You want the mesh to be invisible on one side? That's the default rendering in Unity unless you use a double-sided shader.
prisma berry
i mean if i grab the cube from blender delete all faces exept one and put it in unity the material goes in both faces tho
harsh saddle
Not if you're using the standard shader it shouldn't.
 trail python
only the dev version of cats works with blender versions 3.0 and up
hushed leaf
quaint jasper
reddit
23 votes and 22 comments so far on Reddit
Posting this here as I just discovered it, and it was frustrating the fuck out of me for quite a while
 twilit spade
Hey, I'm trying to install the CATS plugin for Blender, but I get this error when trying to enable it, does anyone know why this could be?

 supple fable
trail python
twilit spade
Hey, I'm trying to install the CATS plugin for Blender, but I get this error whe...
supple fable
trail python
twilit spade
Hey, I'm trying to install the CATS plugin for Blender, but I get this error whe...
only the dev version of cats works with blender versions 3.0 and up
trail python
hushed leaf
https://github.com/absolute-quantum/cats-blender-plugin/archive/refs/heads/devel...
this link here is what you need (thanks kazin)
 next ravine

I sculpted this
now how can I make it look way more optimized and mirrored
For example like this
 quaint jasper
You would need a remesher of some sort. Either buy QuadRemesh addon for blender, user Zbrush's ZRemesher, or manually retopologize
next ravine
Links?
quaint jasper
Quad Remesher: a new automatic quad remeshing (auto retopology) plugin for 3dsMax, Maya, modo. (and more to come : Blender, Cinema4D, Houdini)
spiral sigil
next ravine
How did u make it all hexagony like that
Did you somehow like snap a flat plane of hexagons to shrink-wrap on ur body
quaint jasper
Subdiv modifier
spiral sigil
That doesn't explain why there are hexagons with poked faces
That look pushed and pulled
harsh saddle
I've also never seen topology like that. Quad remesher is a good start but you might want to add some edge loops around the knees manually so it deforms better.
spiral sigil
So curious cuz I can't think of how
trail python
i might be wrong but i think thats what happens when you convert a metaball into a mesh thats relatively mid-high poly ish that gets subdivided?
spiral sigil
I tried and it's still quads
Very warpy windy quad topo but it's quads
No beehive stuff
quaint jasper
Manual subdiv and then subdiv modifier, or any triangulated faces to begin with tends to do that
 spiral sigil
i got it on an iconsphere

 hushed leaf
Wow that's quite a pattern
devout orchid
ok. Step 1: distribute points on mesh, get mesh normal vector and use it as rotation for instances, blah blah usual stuff. Everything looks fine BUT this setup wont work with shapekeys since points distributed randomly and appear/disaapear when changing shapekey so every plugin to preserve shapekeys wont work - amount of polys must be consistent

Step 2: Set up first geometry node that just creates quads/triangles. I intend to apply that modifier and then surface deform resulting mesh along with the original mesh with shapekeys. So it's supposed to be 'baked' version of random points distribution that is consistent with it's amount/position when doing shapekeys. It's has to be polygons since I need direction as well. For now, seems fine.

Step 3: Set up second geometry node that supposed to use every polygon from previous one as a root for new instance, also inheriting it's rotation. But the rotation is completely fucked. What do I do?
 devout orchid
Ok, asking right question always helps. Found the answer on a mf reddit. Ended up with this abomination but at least it works and SKkeeper has no problem with it as well
 spiral sigil
You want shapekeys to change the rotation of the instanced uhh long polygon stuff?
devout orchid
Yes, i want it to follow the original mesh (rotation and position) when doing shapekeys. It works for now, dont bother.
 chilly fulcrum
Got a Vroid model I need help finishing, would anyone mind lending a casual a hand?
harsh saddle
We're happy to advise, you're not likely to find someone willing to do it for you without offering payment.
chilly fulcrum
I gladly would however I don't have any loose change to spare, I normally do art commissions but lost my drawing tablet due to a break in
harsh saddle
Well, if you want to learn how to do it then I guess I'd start with what you're stuck on.
 crystal spruce
the creature
 crystal spruce
the creature
crystal spruce
crystal spruce
the creature

 snow bison
spiral sigil
I'm pretty certain someone had posted a finished version of this character in <#...
snow bison
spiral sigil
I'm pretty certain someone had posted a finished version of this character in <#...
fr?
spiral sigil
snow bison
fr?
Yeah I'm not trolling for once

 spiral sigil
A Roblin...if you will 😆
 muted raven
lol
spiral sigil
Love the boots/feet/legs thing
spiral sigil
Hair is pain, but getting there

I'd love if anyone has any good tut suggestions
So far been working with paths and curves as bevel objects, but if there are other or better methods, I'd love to learn more about others.

 quick thunder
spiral sigil
Hair is pain, but getting there
snow bison
spiral sigil
Yeah I'm not trolling for once
quick thunder
spiral sigil
Hair is pain, but getting there
snow bison
spiral sigil
Yeah I'm not trolling for once
"am i really gonna waste hours of my life to find a scampton avatar?, of course i am!"
spiral sigil
I was just trying to be helpful bro
dim tiger
the model on the left is the same as the right just after I added more in blender, however now the materials look totally different on one compared to the other....

any ideas why?
azure rain
You would assign a separate material to the interior floor so that's it's wood instead of brick
spring onyx
Does anyone know the reason why'd there be so many triangles going down this models pant leg?

 devout orchid
@spring onyx probably it had comletely different texture. you can delete those and then use bridge tool to fill the gaps but would require redoing this part of texture. or a lot of dissolving, could work too
spring onyx
ahh I see alrighty then
spring onyx
So I was messing around in blender trying out stuff, I unsubdivided my sweater and although it created some of these triangles here It looks like I could be able to clean it up by dissolving and using the knife tool, thoughts on this? would it cause any issues with the model or weight painting (just curious I'd be fine redoing it if needed)
 harsh saddle
spring onyx
So I was messing around in blender trying out stuff, I unsubdivided my sweater a...
harsh saddle
spring onyx
So I was messing around in blender trying out stuff, I unsubdivided my sweater a...
Shouldn't so long as the topology is good. It will mess with existing weight paint but if you mean weight painting you intend to do later then no. You might be able to do select all and then alt + J to do an automatic triangles to quads. Might not fix everything but it could be a good start.
spring onyx
harsh saddle
Shouldn't so long as the topology is good. It will mess with existing weight pai...
Tris to quads did clear some of them but theres still plenty left, but I think honestly I might be able to do this, even the weight painting from just unsubdividing alone seems to be alright, doesn't look theres any major issues around the joints, guess we'll see if it stays that way when I start cleaning it up 😄
harsh saddle
It shouldn't destroy your weight paint, you just might have to do a little cleanup where you're doing the dissolving.
spring onyx
Yeah that's fair 😄
 haughty cedar
muted raven
haughty cedar
muted raven
awwooga
 quaint forum
@oblique dew
 oblique dew
ty <w>
 lusty void
Does anyone know of any decent tutorials regarding mouth topology?
 white moth
Any idea when importing a FBX blender renames all the blendshapes?
In Unity, blendshapes have prefixes

import the fbx into blender and everything before the last period is gone:

Which breaks all unity animations referencing them when exporting
 noble basalt
marcus??
spiral sigil
Hi
 spiral sigil
noble basalt
cancer
spiral sigil
noble basalt
cancer
You bought it/free downloaded it off some website yeah?
spiral sigil
noble basalt
ran through questtools
Have you tried polytool yet

Hope that this helped!
Stick around for future videos where il be showing you how to setup the Creator Companion.
Get the Polytool here: https://markcreator.gumroad.com/l/Polytool?layout=discover&recommended_by=search
-------------...
noble basalt
no i havent
spiral sigil
They have a free version so you can see if it works for you
noble basalt
yeah i got it
spiral sigil
Tell me how it goes 😁
noble basalt
no but it added a random shape between the legs'
noble basalt
im too tired ima do this another day
spiral sigil
Understandable
spiral sigil
How did you solve your issue?
harsh saddle
I've never seen this but it would be hilarious if some best in class character decimator was something that is designed as a VRChat tool.
spiral sigil
harsh saddle
I've never seen this but it would be hilarious if some best in class character d...
Meaning it comes with the VRCSDK?
Or just has design specializations that just kinda does stuff better with most avatars people make on vrchat
harsh saddle
No, meaning that the tool is designed around VRChat with its settings. Something that could intelligently decimate a character while keeping proper edgeflow would be of tremendous value outside of VRChat but up till now, I've never seen one. Quad remesher can sometimes work okay but it's not going to give you the best topology and Blender's decimator falls apart once you get past a 50% reduction in tris most of the time.
spiral sigil
Ooh that would be very nice
I would be very interested to see development of how it can identify different kinds of topology and how to decimate around it
noble basalt
ok now when i run the upload program it deletes the quest version of the avatar
spiral sigil
This is expected when you are on the free version
noble basalt
how do i avoid it
noble basalt
well im done 😐
spiral sigil
25usd is going to be around 2-3 hours of work on an inexperienced wage
I think that's a fair price
Your choice if you just want to learn how to manually optimize though
noble basalt
ima just keep it on very poor XD
i dont care enough
im keeping it money and effort free as vr should be in the future
harsh saddle
Manually decimating a mesh by 2/3rds is not a trivial thing. Though it's usually required if you want really strong topology. Apparently, Polytool's decimater is a modified version of UnityMeshSimplifier but I haven't found good images to see if it can produce animatable topology.
spiral sigil
Whatever it is, it seems to be better than just blanket gross decimation
harsh saddle
noble basalt
im keeping it money and effort free as vr should be in the future
AI is doing crazy things so it could happen. Hopefully, we'll just be able to use prompts to produce full-rigged characters in a year.
spiral sigil
noble basalt
im keeping it money and effort free as vr should be in the future
I hope the future allows people to spend the least to big companies, and the most to artists
harsh saddle
I think the gold standard is quad remesher so I'd be interested to see how that stacks up.
harsh saddle
spiral sigil
I hope the future allows people to spend the least to big companies, and the mos...
If by artists you mean prompt engineer, then that's probably about right but I should probably save that for #ai-content
spiral sigil
I don't know enough about the industry or life as freelancer to know how many previous artists jobs will be replaced
Although imo I think the idea of a game company prioritizing AI art tools just to crank out more and more games as quick as possible for the pursuit of capital is just going to lead to uninspired games
Do u want to talk about this more because I feel this is something where it is especially favorable to gather the largest varieties of perspective on this
 weak ermine
Anyone know how to fix infinitely small bones in blender?
Like head and tail are on top of each other
harsh saddle
weak ermine
Anyone know how to fix infinitely small bones in blender?
Edit mode? Can you not scale them up?
weak ermine
If the tail and head are in the exact same position no
It's like trying to scale up a bunch of vertices that are in one coordinate
harsh saddle
weak ermine
It's like trying to scale up a bunch of vertices that are in one coordinate
I though you could plug in the positions of the head and the end using that tool side panel, under item, I think?
Or just increase the length in there, should be able to do that.
weak ermine
You can but for every bone at once?
harsh saddle
weak ermine
You can but for every bone at once?
What do you mean every bone at once? You can select a bone and adjust the length in edit mode. You want to do that for all bones simultaneously? Are they all infinitely small?
weak ermine
Yep :/
harsh saddle
You could try shift selecting and changing the length of all of them but some bones will need to be scaled more than others so I don't see a way to scale every bone in the body properly in a single operation. You might just have to go in an do them all individually. A humanoid only has so many bones unless there are a bunch of other bones and physbones you need to scale so it shouldn't take that long.
If all of your bones are the wrong length, you're pretty much just making a new rig at that point but there's only so much you can do when things are that screwed up.
trail python
dunno if its any help but you can scale your bones via individual origin or select individual ones in the outliner
 spiral sigil
What's the most crazy VFX you guys have been able to pull off for your quest avatars? I ask in context to the shader and particle limitations
Or have u disowned the quest and only cared to develop for the PC for projects like that
spiral sigil
I gotta check league VFX
harsh saddle
I haven't been able to do anything too fancy, you're pretty limited to a single particle system with the VRChat mobile particle shader if you don't want a very poor performance rating so it's just a question of how fancy you can get with that. Most visually impressive particle systems are the result of layering different systems on top of each other so being limited to 1 is a pretty big limitation.
spiral sigil
Let's see if I can cram it into one thang
 latent lily
So I have been working on a pre-made Model, HotogiAki, and there is an issue with the model. When you walk the breast move and cause a texture stretch where there is no texture, just a grid pattern where the texture should be. I had this Issue with the model before, and I have contacted the author of the model. The told me that they are not going to do anything about it, since it's an older model. Can anyone help me figure out a fix, since I don't know Blender.
spiral sigil
latent lily
So I have been working on a pre-made Model, HotogiAki, and there is an issue wit...
Show a video of it
Also you did get the avatar model, textures, and shaders from them right
harsh saddle
There may be an issue in Unity if you're using the wrong material but if it's a texture issue, you would need to go into Blender and have a look at the UVs
latent lily
spiral sigil
Show a video of it
That is the old model I was using, but the Issue transfered over when they Update to the Physic system.
latent lily
Going to look at the Texture, and Shaders. See if that is causing an Issue.
 hollow ermine
Currently working on this black cat on the left.
 latent lily
spiral sigil
Also you did get the avatar model, textures, and shaders from them right
latent lily
spiral sigil
Also you did get the avatar model, textures, and shaders from them right
Yes, I made sure very thing was good.
latent lily
harsh saddle
There may be an issue in Unity if you're using the wrong material but if it's a ...
I don't know anything about that stuff, I just setup avatars right now. I have not gotten into learning blender yet.
spiral sigil
The zipper is gonna be wonky if it's influenced by multiple physics bones
Besides that the model seems fine
latent lily
The model is fine, It's mainly the Zipper. that is the only thing that has the tear in like that, everything else is smooth.
I talked with the Model maker and they aren't going to fix anything because it is an Old model.
spiral sigil
If you figure out what bones are being used to do the boob physics, you can then remove the weightpaint influence on the zipper
 visual steeple
does anybody know how to take an asset meant for VrRoid and throw it into Blender? theres this cute asset i need, but it's meant for VrRoid
visual steeple
actually, got that working. does anybody know what to do in a situation like this? where there's a base underneath? i just want the hoodie itself, not the model it's attached to
 harsh saddle
visual steeple
actually, got that working. does anybody know what to do in a situation like thi...
harsh saddle
visual steeple
actually, got that working. does anybody know what to do in a situation like thi...
Go into edit mode, hit L when hovering over the hoodie to select all connected faces (you might have to do that a few times if there are disconnected pieces on the hoodie) hit P to separate it from the model. In object mode, delete the body.
visual steeple
so im a dumbass and forgot cats can do this for me. i seperated by materials and it got the hoodie clean off. is it better to use cats like i did, or do you suggest the method you provided?
latent lily
spiral sigil
If you figure out what bones are being used to do the boob physics, you can then...
I'll look into it, But I have no clue how to do that type of stuff.
harsh saddle
visual steeple
so im a dumbass and forgot cats can do this for me. i seperated by materials and...
I've only used Cats a couple times so I'm not really sure how it does what it does. If you just want a hoodie with an armature, my method will work for sure so that might be less risky but I guess you could try and see how it works.
 formal rain
hollow ermine
Currently working on this black cat on the left.
formal rain
hollow ermine
Currently working on this black cat on the left.
did you make the whole thing? cause I would totally be down to buy something like that as a base
 solid canyon
the hair for the avatar im working on keeps importing into unity with backface culling, even tho it clearly doesnt


this is making it so that lighting is reversed, and even flipping normals isnt working to fix it
jagged moat
showing backfaces is more of a shader thing and doesn't affect the model itself, you'll have to make sure the normals are facing outwards in blender or use a two sided shader however I'd recommend the first option as it's more performant
@solid canyon
Also make sure the scale is applied before flipping normals
solid canyon
may want to double check what i wrote
 jagged moat
So you've tried having normals in and out?
solid canyon
multiple times over the past few hours, yes
jagged moat
Strange, so with backface culling on in blender does it look correct?
solid canyon
inside of blender, turning backface culling on and off isnt changing how it looks
jagged moat
Are you in solid view?
solid canyon
jagged moat
You're in material view at the moment which always renders backfaces as far as I know however that box will change what's shown in solid view
solid canyon
also isnt changing anything in solid
 jagged moat
have you tried using this one? I think the one in the material tab has more to do with showing backfaces through transparent materials
 solid canyon
not that one either
jagged moat
Strange, I've never known backface culling not to work in scene view. In solid view does ticking this box highlight the hair in red?
 solid canyon
jagged moat
solid canyon
jagged moat
huh, yeah the normals look completely fine in blender then. I don't suppose you're accidently importing the wrong model into unity or something like that?
solid canyon
not a chance
i was starting to think it was import settings on unity end, but i've messed with every setting here, and nothings worked
 solid canyon
yea, no change
jagged moat
Shame, have you tried a merge by distance in blender?
solid canyon
also hasnt done anything
jagged moat
Also do you have the model in the scene or are you just checking the model thumbnail?
At this point I'm trying to think of anything
solid canyon
i ultimately fixed it by just deleting the hair and redo-ing it from scratch, idk what i or the person who did this hair originally did, but the issue has been resolved
 tranquil sierra
Can someone plz tell me why it's showing a bit of white when i paint over it?
 quaint jasper
Can you take a video of the issue ? I have no idea what bug you're referring to
tranquil sierra
quaint jasper
Can you take a video of the issue ? I have no idea what bug you're referring to
quaint jasper
tranquil sierra
What does the hair UVs look like ?
tranquil sierra
quaint jasper
What does the hair UVs look like ?
very small
 quaint jasper
That's your problem
tranquil sierra
quaint jasper
That's your problem <:catthumbsup:1043650388072611921>
Is there a way I could make it big?
quaint jasper
You either scale the islands manually with S, or re-unwrap it correctly!
harsh saddle
Just throwing on a few seams would probably make things a lot better https://www.youtube.com/watch?v=cS6B5PAzlWI\
Alright guys, we are making our way to the good stuff. I know these explanation videos might seem a little basic for those of you who are more advanced, but I really want new users to be able to follow a streamlined playlist if they've never done this before. This next video tackles what I believe to be one of the most confusing things for new 3...
tranquil sierra
I think I broke it 🥲
 harsh saddle
UV Maps as art is a novel concept but probably not what you want for your needs. Did you try putting in some seams and then just hitting U to unwrap? You might need to ctrl + a in object mode to apply all transforms.
tranquil sierra
harsh saddle
UV Maps as art is a novel concept but probably not what you want for your needs....
now it looks like this :>
 harsh saddle
tranquil sierra
now it looks like this :>
harsh saddle
tranquil sierra
now it looks like this :>
That's significantly better. I'd try changing the angle after pressing U to perhaps get fewer islands but that looks to be about 1/10th of the islands you had and none are insanely small.
tranquil sierra
can someone tell me why it looks like that?

 lilac escarp
(just a general blender question) anyone know why a part of the model isnt showing up despite its rigging and wireframe appearing (part thats disappearing is outlined + a screenshot of it actually appearing in game) (gonna repost in #avatar-help also)

 spiral sigil
lilac escarp
(just a general blender question) anyone know why a part of the model isnt showi...
spiral sigil
lilac escarp
(just a general blender question) anyone know why a part of the model isnt showi...
Probably backfaced normals + blender backface culling enabled in eevee render
lilac escarp
spiral sigil
Probably backfaced normals + blender backface culling enabled in eevee render
i already checked for the backface culling and turned it off but it still isnt showing up (the texture is properly mapped to it also)

 quaint jasper
Make a new material ?
lilac escarp
guess the material was bugging out i just made a new one and it started working again
 spiral sigil
I think it was because alpha hashed
 cunning veldt
I split my model in half so i can eventually duplicate and make it symmetrical but im having a problem- sense what i did was merge them i had some things overlapped and i cant get rid of it. i either want to clean it up inside or fill it.
Can someone help me by chance?
 cunning veldt
can anyone help me? ive looked at so many videos and nothing has helped ;-;
quaint jasper
cunning veldt
can anyone help me? ive looked at so many videos and nothing has helped ;-;
I don't think there are any simple ways do solving this given that you already merged them. I'd suggest going back in your saves before you did this
cunning veldt
quaint jasper
I don't think there are any simple ways do solving this given that you already m...
i dont think i ever saved it, i've been working with the tab open for awhile. though it should have auto saved correct?
quaint jasper
Yeah there should be auto saves available, depending on your settings
Good opportunity to learn about properly saving and backing up things
cunning veldt
yeahhhh, how do you go back to see previous saves though?
quaint jasper
 cunning veldt
i cant go back- god damn it!
quaint jasper

cunning veldt
im going to have to restart- ;-;
cunning veldt
restarted! :D doing good so far

 tired salmon
Did Blender remove the Apply Shape Key to Basis option? Or moved it at least?
 quaint jasper
Isn't that a Cats add-on function?
 dreamy epoch
Yup, you might want to update CATS. I had the same issue when I updated from 3.4 to 3.5.
cunning veldt
Hair is hard
 naive bolt
cunning veldt
Hair is hard
naive bolt
cunning veldt
Hair is hard
Use curve paths and curve circles 👌🏻
cunning veldt
how-?
naive bolt
cunning veldt
how-?

A tutorial on how to make hair in Blender 2.8 with curves, a method that is very simple and effective that I have been using for my character sculpts.
▼ Sculpting Uraraka Ochako:
Re-Sculpting My Old Art | Uraraka Ochako in 3D [My Hero Academia] | Can You Improve In Only 1 Year?!: https://www.youtube.com/watch?v=iYNdfef1Uog
▼ My Gumroad Store (...
hushed leaf
tired salmon
Did Blender remove the Apply Shape Key to Basis option? Or moved it at least?
You can go into that shape key, edit mode, select everything, then in the vertex menu, Propagate to Shapes
I too remember that being there, and I'm surprised it isn't.
tired salmon
hushed leaf
You can go into that shape key, edit mode, select everything, then in the vertex...
Thank you for the response. Only just figured out there was also that way to do it, I hope they bring the button back
 jagged bronze
could someone help me out? im trying to fix the orientation of the faces, theres an inside and an outside, but the orientations are all wonky and such
 quaint jasper
jagged bronze
could someone help me out? im trying to fix the orientation of the faces, theres...
quaint jasper
jagged bronze
could someone help me out? im trying to fix the orientation of the faces, theres...
Select all, Alt + N, Recalculate Outside
quaint jasper
Make sure you have no doubles, and that your object has its scale applied
Hopefully should fix it
jagged bronze
doubles?
quaint jasper
Oh, extruding the wrong way would do that yes
quaint jasper
No worries!
jagged bronze
well it fixed it, but now i see this, a spot where light comes through
 quaint jasper
Dissolve that edge and that should fix it

And any other that don't connect to anything
they create Ngons, and means there can be gaps in your mesh
jagged bronze
fuck
 quaint jasper
You select the mesh, and you open the search bar and type triangulate
quaint jasper
Default is F2 I believe
quaint jasper
F3 ?
jagged bronze
found it
quaint jasper
You might want to google stuff like that in general, since it depends on keymapping and blender version
jagged bronze
 quaint jasper
jagged bronze
i still have overlapping stuff, i did do a merge by distance
if i select a point and move it then i see a second layer under
 quaint jasper
Given that you made an extrude, that's expected
thin shadow
you can view it x-ray mode to see better
jagged bronze
how do i xray
 glad steeple
press Z and move the mouse to the right
jagged bronze
ohh wireframe
 ruby rivet
alt + z also works
jagged bronze
 glad steeple
Subdivision :-)
thin shadow
either wireframe or you can also view x-ray while previewing the material
 jagged bronze
glad steeple
Subdivision :-)
jagged bronze
glad steeple
Subdivision :-)
yee, i started with the basic cube lmao
then did subdivisions and smoothing
glad steeple
If you can, avoid subdivision. I think its better to learn the basics first
Subdivision lies to you! and can extrapolate bad decisions in your mesh
jagged bronze
ah
well its only my second model, only stuff i have really done in blender is editing
glad steeple
Yeah, just generally speaking
jagged bronze
well now i just realized how tf am i supposed to make it so it has a collider but you can still walk inside it
glad steeple
In unity, use a mesh collider coponent
jagged bronze
yee ik but wouldent that make it so you cant walk inside it?
jagged bronze
ok
also, how could i make it like thicker? i used extrude at first but that just fucked stuff up as you can see above, is there any way i can make it like thicker without making overlapping stuff and such?
glad steeple
Alt + S can do that, to varying degrees of success

 gentle cradle
glad steeple
gentle cradle
glad steeple
chicken nugget
 wild arch
does anyone know how I could flatten out the facial features so i have eye divots instead of holes and no nose or mouth or eyes but keeping the jawline
 quaint jasper
wild arch
does anyone know how I could flatten out the facial features so i have eye divot...
quaint jasper
wild arch
does anyone know how I could flatten out the facial features so i have eye divot...
Sculpt mode has a flatten brush
harsh saddle
You're going to run into issues turning that topology into something completely different. You can turn on dynotopo but then the topology will be impacted and you would need to retopologize to get something that will work well.
wild arch
Do you have any other ideas
Im trying to have the head somewhat match this proportion but its going to have a spiderman like mask on it
harsh saddle
Spiderman's mask also doesn't have lips and a mouth so you would need to get rid of those as well. I would probably just subdivide a cube a couple times and alter the shape in sculpt model to go around the head rather than trying to turn this into a superhero mask but you could also cut out the nose and lips and then fill in the hole with flat faces.
 ripe frost
does anyone know someone id be able to commission for a custom hair asset?
 harsh cosmos
is this where i put unfinished avatars?
 quaint jasper
harsh saddle
ripe frost
does anyone know someone id be able to commission for a custom hair asset?
Google VRC Traders, lots of scammers here.
 verbal cove
Did something happened to Blender?
trail python
like what..?
verbal cove
I cant update CATS
harsh saddle
Think Blender is fine, what version are you using?
verbal cove
harsh saddle
Think Blender is fine, what version are you using?
3.5
harsh saddle
verbal cove
3.5
I don't know if CATS has caught up to 3.5, you need the development version to event use anything past 2.9 so consider downgrading.
verbal cove
harsh saddle
I don't know if CATS has caught up to 3.5, you need the development version to e...
How do I do that?
trail python
winter palm
Thoughts on my wally darling head>


 carmine turtle
Finished the modeling part 🎉
Next part rigging. 🦴
#VRChat #vrchatavatar #b3d
accidentally posted in showcase :P got bonke'd
sorry mods
 ashen nacelle
WAit, you got bonked for that? lol There were people posting progress work in there too.
Meanwhile: Cheese.
https://gyazo.com/4d33aee5a801537baa5fd48a44f45141

Probably in a current state in which I need assistance with him.
ashen nacelle
Thank <3 I just will need help rigging it up - of which I do not do. I just make things. Possibly texture them..
spiral sigil
Keep up the work boys and women
ashen nacelle
https://gyazo.com/ed31a8170978d04da31e905691f5427e it only took 4 hours. :V


 cursive summit
It's not nearly as impressive that some of the other creations here, but i've been working on making Bowser Memory M and L from Bowser's Inside story, Luigi is still a WIP but these guys are almost perfectly pixel accurate to the original sprite sheets. They will both have toggles for two hammers (one in each hand), the ability to break into pixels, a defeat animation (like the boss explosions from the game), and the ability to throw one of their hammers like L's OG attack


 warped flicker
how come im in blender and when i click object mode it doesnt show sculpt mode?
harsh saddle
warped flicker
how come im in blender and when i click object mode it doesnt show sculpt mode?
The dropdown doesn't show sculpt mode? Are you sure you have a regular mesh selected? Try creating a cube and see if it shows up for that.
warped flicker
nvm i got it now
latent lily
spiral sigil
If you figure out what bones are being used to do the boob physics, you can then...
How wound I figure that out?
This is what it looks like when I switch to edit.

I am literally learning Blender today, and Have no Idea how to see what bone is used for the Jersey
I've checked the body and the weight paint seems good.
harsh saddle
latent lily
I am literally learning Blender today, and Have no Idea how to see what bone is ...
There's a tab on the right that looks like an inverted triangle. If you click into that with the jacket selected and go under vertex groups, you can see all the bones that are weighted to the jacket. If you switch to weight paint mode and go through the various bones, you can check their weights.
cunning veldt
I've been having some trouble, my model's mesh somehow is so small that its completely black when i put it on viewport shading. and because of it being so small it makes Blender run quite slow, is there anyway i can remesh it and fix this issue?
 harsh saddle
cunning veldt
I've been having some trouble, my model's mesh somehow is so small that its comp...
harsh saddle
cunning veldt
I've been having some trouble, my model's mesh somehow is so small that its comp...
Why would you want to remesh it? Just scale it up with the S key and apply the transforms with Ctrl + A. Not sure if that will fix the color issue but scaling doesn't require any real changes to the mesh.
cunning veldt
really? i didnt really want to change the scale but okay! thank you
harsh saddle
No worries, I think you would want to change the scale. You can scale in Unity too but it's best to just have things at the right scale in Blender.
cunning veldt
Even if i scale it the mesh is still small? and makes Blender run very slow
harsh saddle
Then scale it more? You might need to make it 100x as big if it's really small. I don't think small things tend to make Blender run slow so that's probably not your issue there. How many triangles does it have?
cunning veldt
how do i see how many triangles it has?
harsh saddle
Scroll down to "How to Show Statistics in 3D Viewport" https://brandonsdrawings.com/how-to-see-polygon-count-vertex-statistics-in-blender/
We can view polygon, edge and vertex counts for our 3D models or entire scenes in Blender. Here's how to display statistics in the Blender viewport and status bar.
cunning veldt
this doesnt look good-
 harsh saddle
Yeah, that'd be your problem.
cunning veldt
that is whats making it run so slow
harsh saddle
You could try to remesh/decimate but I'd just abandon ship. Unless it's just super unnecessarily subdivided, you're not going to make that model work in VRChat.
jagged moat
You want to be aiming for 70,000 tris at most for reference
harsh saddle
20k if you want it to be visible on Quest
cunning veldt
how do i watch for that? i want it to be good quality and be visable on both pc and quest
harsh saddle
So you're looking at a 1/400th reduction if that's the goal, only like 1/100th if it's PC focused.
You can keep the statistics open and use a decimate modifier on it but I doubt it's going to look decent with that drastic of a decimation. You'll also want to turn off the display of the modifier to avoid slowdown. You might try using the unsubdivide option in case someone took a normal model and just threw a 6x subdivide on it. https://docs.blender.org/manual/en/latest/modeling/modifiers/generate/decimate.html
cunning veldt
thats- a bit confusing but okay, thank you
leaden jacinth
the comprehensive explanation is usually the best
im not sure how else i would say it without missing stuff out
harsh saddle
The display options are the options to the right of the name in the modifier. If you disabled them, it won't show the effects of the modifier in the viewport which will keep it from slowing things down as much. Decimate has a few different options for how to simplify your mesh. Collapse is the default and usually the best for models that are designed with high-polygon details in mind. Unsubdivide works better if the model was simpler and someone just threw on a a subdivide modifier which is a tool people use often to smooth low-polygon meshes. You can try both but if it is the case that someone just went ham with the subdivide modifier, unsubdivide will be your best bet.
azure rain
the whole model
the vrchat Avatar stats system considers the entire Avatar and as if everything was turned on at the same time
azure rain
learn how to compromise
jagged moat
High to low texture baking is a good way to keep details at a lower poly count, might be worth looking at a few vids
azure rain
like as an example don't try to put every outfit you want on your avatar on one Avatar
cunning veldt
This is what i got so far
 latent lily
harsh saddle
There's a tab on the right that looks like an inverted triangle. If you click in...
latent lily
harsh saddle
There's a tab on the right that looks like an inverted triangle. If you click in...
Is there a way to view multiple bones at once?
devout orchid
@latent lily dont think so
jagged moat
cunning veldt
This is what i got so far
Just note you can shade it smooth to make it look better, think the default key is F1
azure rain
and probably a bunch of those Loops could be shaved off
jagged moat
However everything can totally come down in polys a lot more yeah
latent lily
That is how the Weight Paint is set up. both sides.


