#3d-modeling
1 messages · Page 2 of 1
 azure rain
 harsh saddle
It is called blur, the second option right below draw.
 long patio
Does anyone have any sources on making the torso look better?

 cyan stump
Made this Boba prop for a friend! would you guys say i can open commissions with this level of work for avatar props?
 cyan stump
long patio
Does anyone have any sources on making the torso look better?
cyan stump
long patio
Does anyone have any sources on making the torso look better?
1 dont use so many vertices
those are too many
- spread the vertices out more
see ti like youre
making a sculpture
and you have a big block
and you slowly carve it out piece by piece
long patio
cyan stump
2. spread the vertices out more
This is my first time using blender and i was following a tutorial so forgive me for asking, how do I spread the vertices out?
 digital hound
Can you make 1 object have multiple uv's then have them be selectable in unity per gameobject?
cyan stump
long patio
This is my first time using blender and i was following a tutorial so forgive me...
well you can merge them! and you can also double tap g to move them across the edges without changing the shape!
harsh saddle
Some people have good luck modeling things from boxes like that and if that works for you, then don't mind me but if I was to learn from the beginning again, I would focus more on the sculpting tools and then building my faces on top of my sculptures. That's how I model things and I could never do it nearly as well with box modeling techniques.
The sculpt tools are like working in clay whereas box modeling is more like origami. I'm sure you can make a human out of origami but most people are going to have more luck with clay.
 hushed leaf
digital hound
Can you make 1 object have multiple uv's then have them be selectable in unity p...
hushed leaf
digital hound
Can you make 1 object have multiple uv's then have them be selectable in unity p...
Some shaders do allow this, Poiyomi for example can use 4 different ones
cyan stump
i would also recommend learning some figure drawing basics, learning the main shapes that make a body makes your life infiitely easier
 bleak panther

i'm switching a head, is there a way to close this gap without merging the two meshes? thx!
harsh saddle
You can't merge vertices if the vertices don't belong to the same mesh but you can move the vertices to the exact same position to give the impression that they're connected.
 junior orchid
Or u scale the head down, the times I headswapped and then merged armatures it seemed to be connected well enough without gaps
bleak panther
oh ok, thanks
 tough plover
what's your budget? (fyi, this is not really the place to ask for commission work, you're better off going to VRC traders in #community-servers-old. however, we can potentially help answer some questions and prepare you better before going there)
 spiral sigil
tough plover
what's your budget? (fyi, this is not really the place to ask for commission wor...
spiral sigil
tough plover
what's your budget? (fyi, this is not really the place to ask for commission wor...
Well I’m not trying to pay as much as a vr
Because most people I’ve tried to get avatars made they tend to want over 100$
spiral sigil
tough plover
what's your budget? (fyi, this is not really the place to ask for commission wor...
Ah.
tough plover
well yea? 100$ is a bargain for a from scratch avatar
you're underestimating the amount of time and work required
spiral sigil
Yea I know
But I can make the textures and shit on my own it’s just I don’t know how to model
Which yes avatar modeling does take a while I’ll agree on that
tough plover
for that price, you're almost better off finding a base model that is close to what you want, and then modifying it/modeling new assets for it
spiral sigil
The thing is with that is I’ve been looking for one model that I know of that a lot like it but I haven’t been able,to find it
 oak hatch
Knife.

 winged grove
Help
Weird problem happening in unity

No textures
But they're still purple
Why?? ;w;
Nvm figured it out
it was exporting with weird vertex colors


 spice pewter

 stoic beacon
any chance any one will be interested in rigging something for me. im making a cursed vacuum avatar for the meme and just need the hose rigged for arm movement. im not good with blender at all.
 red glade


Still not really too sure on the entire outfit for this dood, Any idea's are welcome 🙂
 errant bronze
red glade
Still not really too sure on the entire outfit for this dood, Any idea's are wel...
errant bronze
red glade
Still not really too sure on the entire outfit for this dood, Any idea's are wel...
I think you need more solid lines of separation in the clothes
Like belts separate the torso from the legs and give it form
The full torso zip-up is a little odd
red glade
errant bronze
I think you need more solid lines of separation in the clothes
Yea ive made a puffer jacket and a set of cargo pants, just idk
It doesnt flow too well just yet
And once you see that the foll body zipup thingy makes a bit more sense

But as i said, idk i dont feel too sold on it just yet
and i am looking in to tactical rigs and stuff like that
 gray dust
I need somone to help make a model for my avatar I alredy have a sketch and if you are up to it dm me for more info!
 waxen mist
If I did anything I’d break up the solid yellow, Or give it more of a texture.
red glade
gray dust
I need somone to help make a model for my avatar I alredy have a sketch and if y...
Depends, If you are paying im sure people incudling me are up for it!
errant bronze
red glade
and i am looking in to tactical rigs and stuff like that
That’s definitely better already, just more accessories. If you’re looking for inspiration, the Square Enix artists always go above and beyond on accessorizing
red glade
errant bronze
That’s definitely better already, just more accessories. If you’re looking for i...
Yes that for sure!
I was thinking some tactical stuff and uhm
I forgot what they are called but the straps on the arms the Thai fighters have also
errant bronze
Referencing the fabric bands?

 worn grail
I hate the limitations that quest has but, I finished the shoes for the quest compatible avatar I am making

It will have quiet good jordans

 azure rain
they look fine to me
 peak iris
same
 spare kiln
worn grail
https://cdn.discordapp.com/attachments/794587437044465711/1013192904648429659/un...
spare kiln
worn grail
https://cdn.discordapp.com/attachments/794587437044465711/1013192904648429659/un...
yo nicee! how'd u go about texturing those? a lot of projection?

 quaint jasper
Cool gradient usage 
 somber frost
I am legit trying EVERYTHING I could do to UV unwrap this model but I literally cannot get it right, it turns it into this ugly thin UV thingy and it's truly pissing me off.


what the hell am I doing wrong?
Does it have to do with the structure?
 simple zodiac
Yo, I made a VRoid model... did I do something wrong?

 tough plover
somber frost
I am legit trying EVERYTHING I could do to UV unwrap this model but I literally ...
tough plover
somber frost
I am legit trying EVERYTHING I could do to UV unwrap this model but I literally ...
did you add any seams? I dont see any
 tough plover
...
somber frost
idk if I'm like being stupid or something
somber frost
I have done unwraps before
tough plover
you need to cut up the model in a way that you can flatten out every piece of it
somber frost
Never had anything like this
tough plover
there's not really that many good ways to unwrap that kind of shape
I would just split it up into 4 quadrants
to make like 4 triangles
tough plover
something like this

like I said, you need to add seams to make it so that you can literally flatten out the object
somber frost
Ill try it
tough plover
here's another way

2nd one might be a bit better
but it depends on how you will texture it
harsh saddle
For spheres, you're usually better off just subdividing a cube if you need clean topology but that should work well enough.
The second technique gets you this which should be pretty usable

But a subdivided cube that looks just as much like a sphere to the naked eye is even cleaner
 somber frost
harsh saddle
For spheres, you're usually better off just subdividing a cube if you need clean...
somber frost
harsh saddle
For spheres, you're usually better off just subdividing a cube if you need clean...
So is it better off using a subdivided cube?
I’m also trying with the other meshes, still won’t unwrap properly
harsh saddle
somber frost
I’m also trying with the other meshes, still won’t unwrap properly
Yeah, a subdivided cube will unwrap better than a sphere. You might also need to apply your transforms, ctrl + a
somber frost
How to I make it look like a sphere?
azure rain
you use the subdivide modifier on a cube
somber frost
Aight
worn grail
spare kiln
yo nicee! how'd u go about texturing those? a lot of projection?
tons of pictures, diffuse + UV Map - also sorry for the late response I had to go lmao
 spice pewter


 prime zenith
I noticed that if I export a model as an FBX from Blender and import it into a new project, the seams that were on it disappear. Is this normal ?
 mortal zodiac

 winter palm
So I subdivided the head... and it turned into a line. Any way to turn back into a head?
 azure rain
control Z should be the undo button
 atomic loom
how do i fix this- i just opened the blender file lol
 quaint jasper
atomic loom
how do i fix this- i just opened the blender file lol
quaint jasper
atomic loom
how do i fix this- i just opened the blender file lol
The tiny spheres in the bottom right, chose the second
 steady zealot

 azure rain
Cool
 still dust
I think I'm giving up

 obsidian nova
Looks like a good start to me!
Just need to make sure that your feet are facing forward and that you fix the topology on the nose.
still dust
obsidian nova
Just need to make sure that your feet are facing forward and that you fix the to...
Ah ok
obsidian nova
Once you get your colours on there, it’ll really come to life.
 exotic obsidian
https://twitter.com/SystemNotLoaded/status/1564668163958128641 Not quite for VRChat, but I made this for fun:

Here's MIA (Mechanical Interactive Assistant)! She's a little robot I made for fun in #Blender3d.
She is always willing to help out in any way possible!

 Twitter
·
Twitter
·
 muted raven


Who's Ready for spooky season?!? I know it's literally still over a month away but im excited already
 storm flower
How do you create a 3d model and use it in VRC?
tough plover
storm flower
How do you create a 3d model and use it in VRC?
any 3d modeling program (most people use blender) and upload it using Unity and the VRChat SDK
gross oversimplification but that's the idea
 lament pond
Wip

 terse stirrup
does anyone have a mech they have made
i wanna model a mech but dont know where to start
i just want a refrence
like ideas
if you had that it would really help
harsh saddle
terse stirrup
does anyone have a mech they have made
i wanna model a mech but dont know where ...
Sketchfab
Use Sketchfab to publish, share and embed interactive 3D files. Discover and download thousands of 3D models from games, cultural heritage, architecture, design and more.
terse stirrup
ive made 5000 monkey in blender
harsh saddle
terse stirrup
ive made 5000 monkey in blender
5000 more and you'll be a master monkey maker.
 feral rock
⚠️Help Wanted⚠️
3D modeler to create custom asset.
I need a harness for this boy: https://skfb.ly/o6WDZ

‘Eyyyy you’re readin’ the description!
VRC avatar available at my Ko-Fi shop! Check it here > https://ko-fi.com/s/047ebe3e47
Here’s another freebie, This time rigged for VRChat, Complete with visemes! And as always, Feel free to use this in any way you fell like, Just remember to credit me :)
*Update to the terms of use: You cannot use any p...
quaint jasper
feral rock
⚠️Help Wanted⚠️
3D modeler to create custom asset.
I need a harness for this bo...

VRChat Ask
Post about commissions for avatars in this category. Requests are not permitted, we only permit posts from those providing services.
terse stirrup
turns out im really bad at making mechs
 rough sage
terse stirrup
rough sage
terse stirrup
i know how to use blender
im just bad at making stuff like mechs
or robots
what can i add to my avitar
ive mad a piano

 cyan badge
terse stirrup
what can i add to my avitar
cyan badge
terse stirrup
what can i add to my avitar
Add when you talk the top cover of the piano comes up when speaking like it’s the mouth
You know how pianos open up to see inside
terse stirrup
It's a prop for a person
spice pewter
 harsh saddle
Piano looks good. Mechs and hard surface stuff isn't my specialty either but my recommendation would be to try and thinkbof every part as its own modeling job so don't think about making the mech, think about making the hatch or the gun barrel, etc, and then when you put that all together, you have a mech. Though you'l also need a good plan for how it all fits together so you'll want a drawing to work from. It might be good to find an existing drawing if mech design isn't sometjing you have experience doing.
storm flower
Can someone help me make something like a Robot avatar? something like this
 quaint jasper
storm flower
Can someone help me make something like a Robot avatar? something like this
quaint jasper
storm flower
Can someone help me make something like a Robot avatar? something like this
VRChat Ask
Post about commissions for avatars in this category. Requests are not permitted, we only permit posts from those providing services.
terse stirrup
harsh saddle
Piano looks good. Mechs and hard surface stuff isn't my specialty either but my ...
ill make the arm now
probly a gun style
so far

any ideas for the arm
thats the lower arm
i need a idea for a joint
terse stirrup
harsh saddle
Piano looks good. Mechs and hard surface stuff isn't my specialty either but my ...
got the arm done

now need ideas for body
harsh saddle
Sketchfab is a great place to find inspiration but I feel like you're moving a bit fast. The design of the arm is pretty cool but you could easily (and probably should) spend 2-3+ hours on that adding hatches and other small details that give it character rather than trying to pump it out in 30 minutes. Granted, you're gonna have to limit the details especially if you want it to work for Quest but you can make a lot of detail to a normal maap.
terse stirrup
harsh saddle
Sketchfab is a great place to find inspiration but I feel like you're moving a b...
i wanted to make a rough model then inpove it
 wintry summit
making the best looking centaur to come to vrchat


why did a sticker get stuck there 
terse stirrup
harsh saddle
Sketchfab is a great place to find inspiration but I feel like you're moving a b...
i want a simple model
but im adding wires and hatches
then im going to make it seem rough and bulky like metal
but im spending so much time on the hand i might as well give the model away to people to use
harsh saddle
Sounds good, starting by blocking out big forms and then going smaller is a smart approach.
terse stirrup
so ive made a arm
ima work on the barrel more
but i want it to run smoothly on quest
as a toggle
so i want it to work as a togglable for any avitar on quest
terse stirrup
harsh saddle
Sounds good, starting by blocking out big forms and then going smaller is a smar...
added some more detal
trying to keep it low poly still

any more ideas please tell me
this feels like part 1 of 6
terse stirrup
harsh saddle
Sounds good, starting by blocking out big forms and then going smaller is a smar...
need ideas for how to make the outside visable from the inside
also the body is still a rough draft

 jagged moat
terse stirrup
need ideas for how to make the outside visable from the inside
also the body is ...
jagged moat
terse stirrup
need ideas for how to make the outside visable from the inside
also the body is ...
You can put a solidify modifier on, or if it doesn't need depth find a two sided material to give it in unity
terse stirrup
jagged moat
You can put a solidify modifier on, or if it doesn't need depth find a two sided...
how would a solidify modifier help
this is the biggist blender thing ive done
im just asking and trying to give updates in this chat for help
its for quest
 upper hawk
i have a blender model but how do i turn it into something competible with vr chat?
harsh saddle
upper hawk
i have a blender model but how do i turn it into something competible with vr ch...
Export as FBX, OBJ, DAE
upper hawk
k
 small valve

 primal narwhal
Does anyone know if there's a way to get Substance Painter's Triplanar projection mapping to respect baked normals over vertex normals?
Creating textures for a model, hp to lp bake, normals are great but most of my textures use triplanar mapping, and the edges despite being rounded in the baked map, are sharp and create a seam along the edges that's strong enough to overpower the rounded normal in most cases.
It's glaringly obvious and I'm struggling to find a balance with it. This is with hard edges, setting the whole model to smooth had the desired effect, but unfortunately some areas bled over extremely harshly and for the most part ruined the whole texture in the process.
I've tried searching around but everything I've seen seems to say that there isn't a way around it. So I'm wondering if anyone here has found a way around that problem without having to go back and do stuff like inset faces on the lp model just for the sake of texturing.
 harsh saddle
terse stirrup
finished the legs
harsh saddle
terse stirrup
finished the legs
Those legs look quite nice. I think what's lacking in the arms is some variance in the silhouette, it's just straight without any strong curves or areas where the shielding has been built up to break up the form. There's no right way to make a mech but if you compare it to something like this where it almost has what we'd think of as muscles and then slender areas closer to where the joints would be to improve articulation, I'd like to see more of that in the arms. The legs are pretty good in that department with the bulky feet. I also like that single toe, that's a unique element that gives it character.
 terse stirrup
I might add a retractable sword to one hand
Like a normal hand with a sword
terse stirrup
harsh saddle
Those legs look quite nice. I think what's lacking in the arms is some variance ...
I'll bulk it up
And I want to change the second arm
Its ment for a battle mech
So in games i can use it to fight
harsh saddle
Having the arms be different would certainly add some character.
terse stirrup
I was going for a small mech at the start
Then I made the Body
So the arms and to skinny
And I'm going to bulk the arms up
And change the left to a sword
terse stirrup
harsh saddle
Having the arms be different would certainly add some character.
added some bulk
and a sword
the left arm is just a idea
 harsh saddle
Definitely liking this more. Small details like grooves and scratches will really bring it to life but that's where the normal map comes in.
terse stirrup
yep
once im done ive rig this up
and make it a Unity asset for people
 mental cradle
When you just can't find the right face so you make one 😄

 alpine venture
The phone is too boring in the show, so I spruced up and made my own! Finally, I can appease the 3 people who wanted it.
I'd go with screen accurate, but that's just a quad with a vector cross on it. Bleh. Boring. This one has all the fun masks and emission maps, etc.
The front isn't shown but that's just a simple texture. Didn't want to model out details like that. Ramps up tris for what are minscule details.
I hope to refine my UV Mapping. It's all 1 material, but quest not having seperated tiling/masking/etc lead to me going for a tightly packed material.
Could be better though... Baby steps.

Looks bland in the blender viewport cause nodes still intimidate me, so I still make all my maps/textures in gimp.
harsh saddle
Tried asking this in #world-lighting but there seems to be bias towards Unity lighting there so I figured I would try here.
Does anyone have any tips for controlling light falloff in Blender? I tried a technique I found online but it seems to dim the light near the source whenever I reduce the ray distance and setting the intensity really high seems to make the light travel a long distance regardless of how of how high (low?) I set the falloff. I'm using some forced perspective in my scene and it looks off when the lights from a house light up what is supposed to be an entire mountain in the background. This is my node setup and light settings. As I understand it, the really high divide value and dark color ramp (I'm not really sure what the difference is, they both seem to do the same thing) should make the ray length really short but the very high intensity still lights up the entire hillside.

 timber oak
When exporting a FBX from Blender to Unity, shape key normals will not be exported. If you adjust a blend shape in Unity, you will always see the normals of the "Basis" shape key (and this looks wrong). I know, that in the FBX-Importer, you can set this to "Calculate" instead of "Import", but this produces not the same results like in Blender. Has anyone a workaround or a fix for this? I want to have normals of shape keys baked in the FBX.
Edit: https://developer.blender.org/T46019
tough plover
I've seen people bake normal maps and then overlay them using something like Poiyomi's rgba masking section to add the normals gradually while increasing the blendshape
wintry summit
Personally when combining two models that aren't one whole model, it makes it extremely hard to perfect it, but without the textures showing it's entirely seamless


Like this
You can't even tell there's a seam until you add textures
@weak ermine
 weak ermine
Ah I see so did you actually merge the meshes by generating faces?
weak ermine
Alright then yeah there would be no need for custom normals
wintry summit
Which is why it looks funky rn
I have to redo the human part 
Or realign my textures
weak ermine
I can show an example of how custom normals can be useful for stuff like this though
wintry summit
If you want, but I doubt it would be super useful for the project I have haha
The armature already sent me up a wall
 wintry summit
Yeah, but it's going to have custom walk and run cycle
weak ermine
Right
wintry summit
As well as custom idol pose (standing, sitting, laying down)
Centaur stuff is horrendous, I wish there was a nicer way to do this hah
Personally I believe Ive made the best looking centaur for vrchat tho tbh. Since most centaurs I see are using the ugly mmd horse base or using things that don't match at all
They never look like they fit if that makes sense
weak ermine
I’ve never really seen em and I’m not a massive fan of horses so I don’t know what the different models look like so I can’t judge one way or the other
So far the rig and mesh merging looks good though
timber oak
tough plover
I've seen people bake normal maps and then overlay them using something like Poi...
Oouf - create additive normal maps... Sounds crazy 😅 But it is a solution/workaround. Thank you.
oak hatch
 alpine venture
Looks bland in the blender viewport cause nodes still intimidate me, so I still ...
alpine venture
alpine venture
Looks bland in the blender viewport cause nodes still intimidate me, so I still ...
That phone I modeled is in and running now! Still a bit of work to go, curious if I can use a normal map to get some face details to pop, but it's in! Also added some buttons.

 white gazelle
Has anyone ever encountered this bug in blender? it only showed up recently, so im not sure if its an option i may have accidently turned on...
For some reason when i merge something, the weight painting "Doesnt stick", and in the PAST, it has been because the weight painting accidently got painted over, or whatever..
HOWEVER, to fix this "bug" all i do is go to the vertexes IN weight paint mode. Not painting anything. Just switching to the mode and highlighting the vertex. and now everything moves..... fine.
 waxen mist
white gazelle
Has anyone ever encountered this bug in blender? it only showed up recently, so ...
waxen mist
white gazelle
Has anyone ever encountered this bug in blender? it only showed up recently, so ...
Might want to do a blender bug report on that one
 grand marten
Hey everyone! Does anyone have some tips on best practices when it comes to retopology while keeping in mind both a PC and a Quest version for an avatar?
I am working on an original model and need to retopo soon but I am not sure what a decent way to proceed is to make sure other aspects like rigging or shape keys won't have to be done twice later on.
Is it better to retopo for Quest performance targets first to make sure I end up with sufficient topology for the shape keys there or do you go with the PC version first and just manually remove topo and shrinkwrap your shape keys and hope for the best?
I am sure there are smarter ways to do it, but I am not sure how. Any input on the matter would be appreciated!
harsh saddle
grand marten
Hey everyone! Does anyone have some tips on best practices when it comes to reto...
I'd retopo with PC in mind, bake your normals (I'd subdivide the mesh and apply that in another file for ideal shrinkwrapping), rig and texture, sculpt the visemes, then create a vertex group for the faces around the mouth (or whatever faces you intend to use for the visemes), start dissolving edge loops until it's suitable for Quest making sure to avoid the faces of your vertex group, and then do a new shape from mix for each viseme which should keep them from being unaffected by the changes in topology.
I find I'm usually able to get most of my characters in below 15k tris so further retopology isn't necessary but that process should be a fairly painless way to go from PC to Quest. You could also target Quest and then add edgeloops for PC but I think that will mess with your UVs more if you intend to add more detail with them and aren't just using them to smooth curves.
grand marten
Hmm.. good point about the UV. Had not thought about that. Also thanks for the shape key tip. Makes a lot of sense now, actually. Thank you very much.
harsh saddle
Sure, np. Making a vertex group for the face is a lifesaver when you've made your visemes/expressions but then find you need to go in and make edits to the mesh. It just requires you don't edit those faces so I would try to not got too overboard with the topology of the face in the first place so it doesn't become an issue. I still keep the face fairly dense but I make sacrifices in the body to compensate. If you plan on adding clothing later, you'll probably also going to want to keep an unclothed version and just delete any hidden faces prior to exporting.
 magic badge
 grand marten
harsh saddle
Sure, np. Making a vertex group for the face is a lifesaver when you've made you...
grand marten
harsh saddle
Sure, np. Making a vertex group for the face is a lifesaver when you've made you...
Yeah, I would rather have the details in the face anyways, as I feel like the face (and hands to an extent) is the most important area to keep some good fidelity on. One thing that worries me though, is that I was planning to do some blendshapes for adjusting body proportions as well (like the width of the arms, hips, etc.) and I will definitely have to reduce topology in those areas.
So maybe I should make those blendshapes on the reduced version first and then copy over the mesh data or try to get a similar geometry with shrinkwrapping on the better version. I just want to make sure I am not putting myself into a corner later.
red glade
magic badge
Spooky
harsh saddle
grand marten
Yeah, I would rather have the details in the face anyways, as I feel like the fa...
Especially if you don't have a ton of topology in those areas, it should be fairly easy to replicate those shape keys if you keep the high poly version around to compare it to so you can make sure the shape keys have roughly the same effect but you might also find that just dissolving edge loops doesn't mess up your shape keys. They're finicky and it can br hard to figure out what messes them up.
 glad crypt
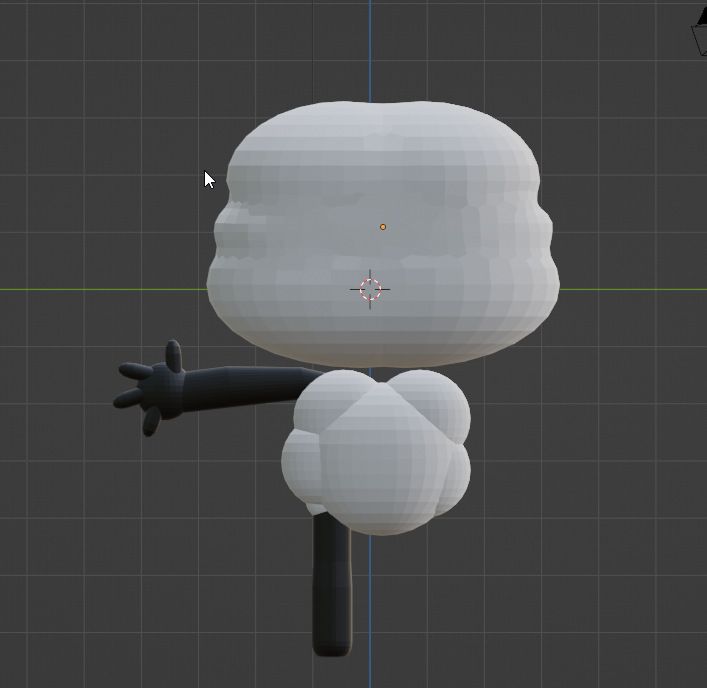
 cursive summit
Render I Made

 light garden
Made my a friend


 cerulean spear
could anyone be kind enough to recommend me a tutorial on using bones and armature? trying to make an earring right now and having trouble getting the string part to have flowy movment but also have the base of the earring stay still and just not grasping something
 tawny pollen
cursive summit
Render I Made
tawny pollen
cursive summit
Render I Made
that looks pretty good
 versed glacier
<,< anyone knows easy way to model horns like this i know the lowpoly way with subdivision surface and such but like its really hard to shape it and my brain just tends to fry

the twist on the horns makes it extra hard for me
 tame niche
Not super familiar with modelling characters but you could maybe start by using curves and bevelling them to get the basic shape
harsh saddle
I'd make a cube, subdivide, turn dynotopo on and then sculpt them using the snake hook brush. Then, once you get the shape you like, retopologize by extruding a cylinder around the sculpt.
 astral finch
totally unrelated to VRC but I made a shelf
 hushed leaf
astral finch
totally unrelated to VRC but I made a shelf
hushed leaf
astral finch
totally unrelated to VRC but I made a shelf
I was just modelling some garage shelves this weekend, trying to see what I could fit 🙂
 mystic tangle
I haven't used blender in a while what does this mean
 cursive summit
I'm having some problems with uv mapping


It keeps doing this weird thing on the corners
(The top one is broke)
 radiant ridge
light garden
Made my a friend
radiant ridge
light garden
Made my a friend
Love the HG wells War of the Worlds Tri-pod!
 naive bolt
versed glacier
<,< anyone knows easy way to model horns like this i know the lowpoly way with ...
naive bolt
versed glacier
<,< anyone knows easy way to model horns like this i know the lowpoly way with ...
This is a really good tool to learn (start at 2:55), I use it for hair, tails, and it can easily be used to make horns as well.
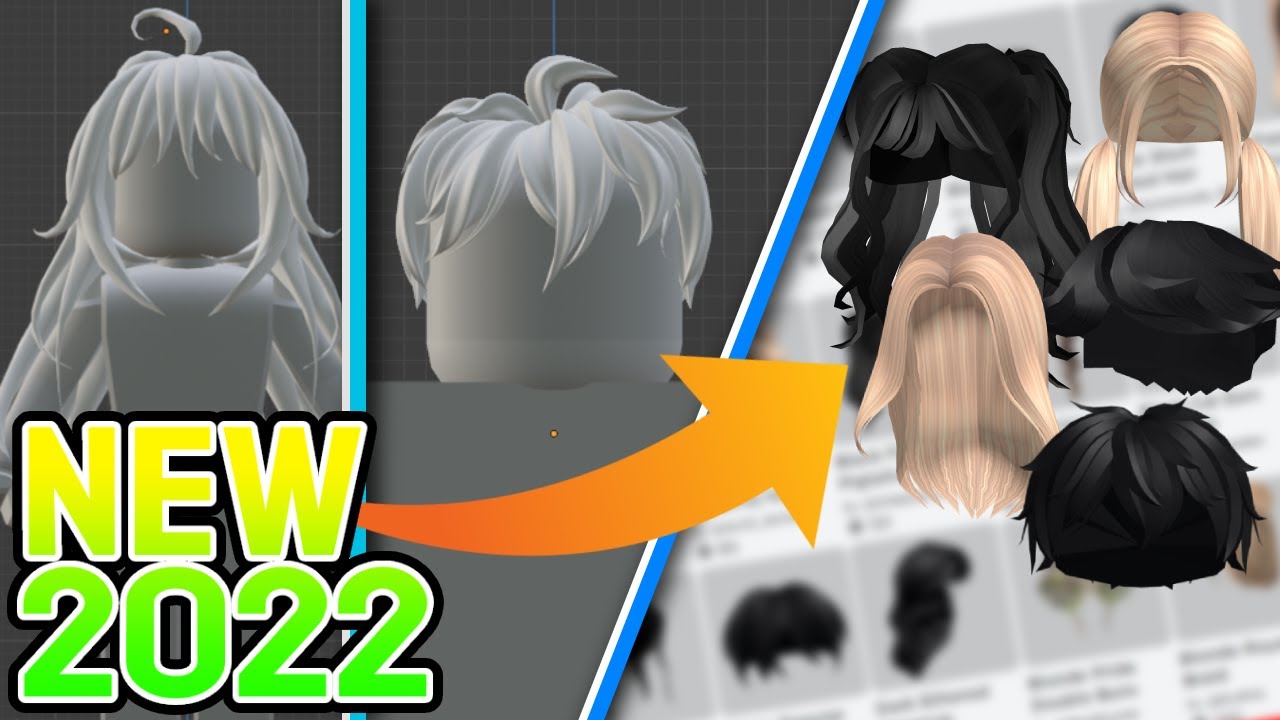
Join the Discord server!
https://discord.gg/tbgGnffpnm
Blender Download -
https://www.blender.org/download/
Hair Textures -
https://imgur.com/a/aOGgXSC
light garden
radiant ridge
Love the HG wells War of the Worlds Tri-pod!
Finally someone to recognise it
 winged zealot
Been meaning to start customizing my own avatar and was wondering if there was a good vid to learn from about adding custom clothing and making them toggleable.
 lilac crater
tactical security-camera dude
 harsh saddle
That should appear after scalingvand you use the arrow to expand it. Or you can just hit the S key and type in a number
 ionic summit
Thanks
 thorn gulch


 mellow pendant
this will appear in my nightmares because of how difficult it was to get things working.

 formal bridge
lmao
 harsh saddle
Reminds me of when they increased the world size limit for Quest. Didn't take long for my 49.99 MB worlds to become 99.99 MB worlds.
alpine venture
tl;dr - Blendshapes to make fangs of flat teeth keep the normal data of said original shape. Is there a way to not have that happen? Or perhaps some prep in blender to help mitigate?
So I knew this was coming up to deal with but I thought I had prepped properly.
This is a blendshape that forms teeth from the normally flat teeth; issue is, once they extend, the keep the normal data of the original teeth shape. My question is, is there away to get around this kind of issue? Perhaps some import settings that I can adjust.
Is there some prepping I can do in blender to mitigate this? I know my way around, but this particular issue has only cropped up recently; I used to decimate and this blendshape got broken every time. Did edge loop dissolves, specifically to not lose it and now... this. lol
 formal bridge
blendshapes are generally the last step you want to do on any given model as any changes to the model data IE deleting faces/vertices/edges will break the blendshapes as theyre dependant on vertex data that'll no longer be there
So you'll want to do the decimation/optimization and then start making blendshapes
 grave aurora
tough plover
alpine venture
tl;dr - Blendshapes to make fangs of flat teeth keep the normal data of said ori...
grave aurora
tough plover
alpine venture
tl;dr - Blendshapes to make fangs of flat teeth keep the normal data of said ori...
while technically unity does have a setting to automatically calculate blendshape normals, it does not work well and causes more issues than it solves
one way to fix it is to bake a normal map in blender using a cage
 fluid umbra
First time Making an avatar from scratch, without using any videos, at all, ive been here for more than 5 hours ||idk how to model at all lol||
 harsh saddle
Looks like a pretty decent start and modeling like that is an option but I personally prefer to sculpt the form in sculpt mode and then retoplogize. Box modeling like that works alright for big shapes but it's going to get harder for smaller details.
alpine venture
tough plover
while technically unity does have a setting to automatically calculate blendshap...
Yeah, I've read only horror stories of that settings simply being crap. I'll give the cage a whirl, but I'm afraid that making a map using the teeth blend will just end up with a similar problem in reverse; when shapes on, it'll be fine, but the minute the shape is off the normals will be wild.
Can't hurt to try though!
alpine venture
formal bridge
blendshapes are generally the last step you want to do on any given model as any...
Understandable, However, I've already done the repair that comes with optimization; went through every shape by hand. My issue here is simply the normals that are imported are for teeth flat (the basis) and when using the teeth fangs blendshape, it still uses those flat normals, hence the odd lighting.
Was just curious if there was any way around it. baking one with a cage sounds reasonable enough and could work. I'll just unwrap the teeth properly with a seam and bake some, see how it goes.
Thanks for the reply though!
tawny pollen
I noticed that somebody sent me this one on my previous account for some reason, anybody know who does this kind of topology thing? Let me know asap please
I'm about to send it

it looks very familiar
who sent me this again?
 rich raptor
tawny pollen
I noticed that somebody sent me this one on my previous account for some reason,...
rich raptor
tawny pollen
I noticed that somebody sent me this one on my previous account for some reason,...
It looks like someone just converted the model's tris into quads and just dissolved several edges/vertices around the mouth.
 analog frost
Could anyone tell me the fastest way to select only the verticies in the inside of this model? I

 tiny aurora
guys can someone help me import a model from blender into vrchat??
analog frost
analog frost
Could anyone tell me the fastest way to select only the verticies in the inside ...
nvm, found feature called select > invert
harsh saddle
Anyone have any ideas for why there's a hole in my model? I've checked the normals and they're fine, even flipped them so the backfaces were showing as a test and got the same result. It's like an entire face is just gone on export
rich raptor
Is the model exported as fbx?
harsh saddle
rich raptor
Is the model exported as fbx?
Yeah, I never really figure it out but I just added some additional cuts and that seemed to fix it. I know Unity can render ngons but for whatever reason, slicing it up into quads fixed it.
 foggy granite
tawny pollen
foggy granite
tawny pollen
Wasn’t that the mouth topology for guilty gear shading
tawny pollen
I think so
winged zealot
quick question, just got an avatar and it doesnt seem to have a controller under the animator; is it safe to just set the controller as the action layer or are those 2 different? x-x
tough plover
winged zealot
quick question, just got an avatar and it doesnt seem to have a controller under...
there should not be a controller in the animator
it should be blank
winged zealot
yeah figured it out orz but now I have a new problem
tough plover
the playable layers get compiled into one controller which goes in the main animator
spiral sigil
anyone having problems on blender to unity when exporting model with blendshapes but it doesn't show on unity?


never mind i found the problem lol
silly me i forgot to remove the boolean modifier to make holes
 sharp grove
i'm trying to unwrap part of a model, but blender keeps trying to rotate it (i assume to fit as much space as possible) - this is a problem because i want it to be mirrored. is there a way to make it stop doing this?
spiral sigil
Anyone know what the precise reason for the IOR/Fresnel effect not ending up in the tex bake? I understand the effect changes depending on your view and how the light bounces, but why can't it just bake a static freeze of the effect from this angle?
 harsh saddle
sharp grove
i'm trying to unwrap part of a model, but blender keeps trying to rotate it (i a...
harsh saddle
sharp grove
i'm trying to unwrap part of a model, but blender keeps trying to rotate it (i a...
If you haven't rigged or created shape keys yet, the best way to unwrap if you want your UVs stacked for each side is to unwrap half the model and then mirror. Otherwise, just rotate the UVs and pine them up
sharp grove
i think i'll have to go with that, originally i didn't want to because i have specific changes to the normals that aren't symmetrical
but i guess i'll just have to bite the bullet and do those again
harsh saddle
spiral sigil
Anyone know what the precise reason for the IOR/Fresnel effect not ending up in ...
I agree it would be nice sometimes but Blender just doesn't bake anything that depends on the viewing angle presumanly for that reason and I don't believe that behavior can be altered.
tough plover
sharp grove
i'm trying to unwrap part of a model, but blender keeps trying to rotate it (i a...
I would highly recommend the ZenUV addon
has options to reshape/straighten islands that work very well
and to quadrify islands
red glade
With the release of the new cyberpunk anime redoing a bunch of stuff on my cyberpunk Character cant wait to see him finished
 harsh saddle
Depends on whether you want to sculpt the details from your final avatar's topology or if you want to use a sculpt to project your normals. The former is a bit easier, just use a multires modifier, sculpt your details at a higher subdivision, then put everything back to zero and then in your render settings do a bake from multires with it set to normals. Using another sculpt is a bit more complicated but not much, this tutorial should cover it. https://www.youtube.com/watch?v=Yx9TvvnxCAM

We will go through the process of reducing the poly count on a 3d scan or a high poly mesh, down to an acceptable size, and then to bake a normal map and also a diffuse map in Blender. The model was downloaded from SketchFab
Support me on Patreon
https://www.patreon.com/Markom3D
SketchFab
bit.ly/37YudJ4
Node Preview Addon
https://blendermark...
 north tundra
 quaint jasper
Wrong channel, but it's console errors
 somber lion
you've seen worse.


 dusty heron
I am truly horrified excellent job
 inner pawn
hey guys, so I'm having a bit of an issue trying to export the Female Kiggy Model as a "VSF" avatar. Every time I try to do so, the export screen pops up but there's no text, and it doesn't export.

can anyone possibly help me out?
 summer zephyr
Turret Animation for my avatar world redesign for The Central :3
 tough plover
tawny pollen
using any word, explain how he feels
tough plover
tawny pollen
using any word, explain how he feels
looks like they are in a state of active death
tawny pollen
tough plover
looks like they are in a state of active death
yeah nah.
check off topic for him

 median marten
hello there can anyone help , after i import an avatar into blender and remove the nose rings when reimporting back into unity the avatar is completely invisible in the scene anyone know why
 pure dagger
Made a ring with an eco system for avatars


 foggy granite
pure dagger
Made a ring with an eco system for avatars
foggy granite
pure dagger
Made a ring with an eco system for avatars
Seems pretty cool and reminds me of the ark system for Ark
pure dagger
foggy granite
Seems pretty cool and reminds me of the ark system for Ark
Thankies uwu
 ocean salmon
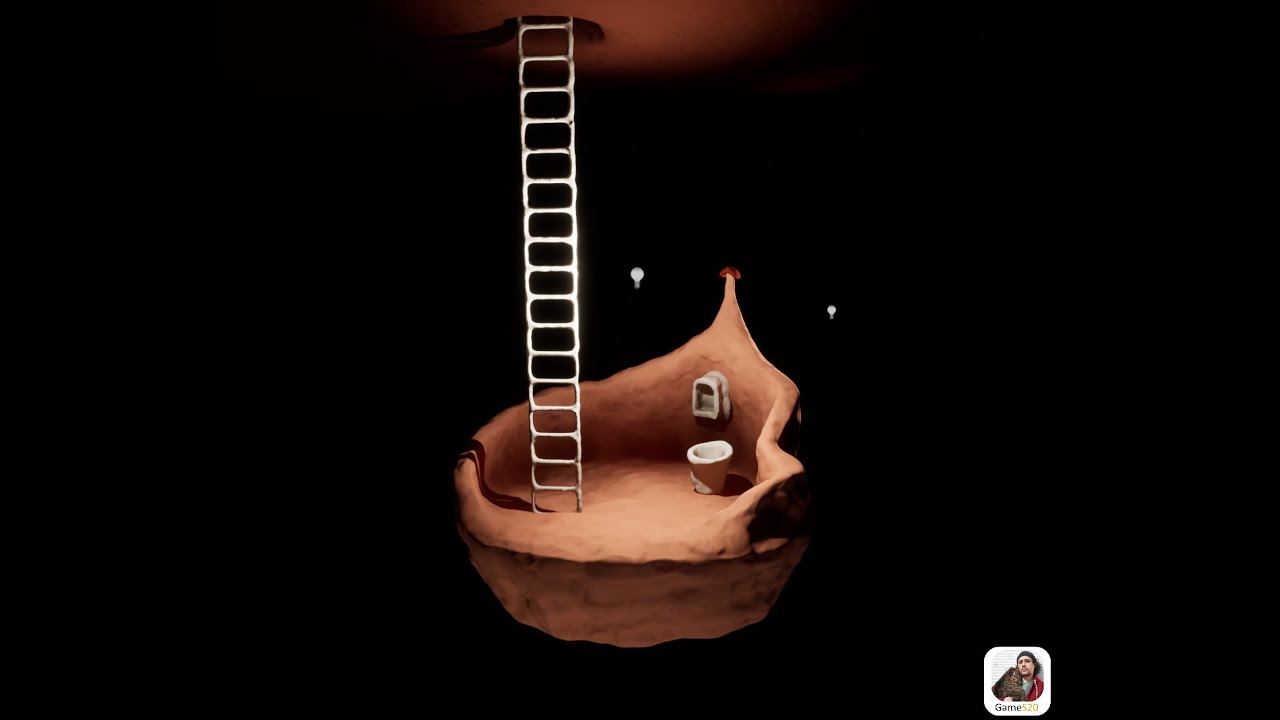
I redid everything again and it seems to me a very good result)
https://discord.com/invite/9n6wR2t6mT
http://games20.3d3d.site/
spiral sigil
mmmm mine looks like clay whyhywhywy

 sudden glacier
tawny pollen
using any word, explain how he feels
sudden glacier
tawny pollen
using any word, explain how he feels
looks like he just found out hes going to be burned again and be brought back for another FNAF game
tawny pollen
sudden glacier
looks like he just found out hes going to be burned again and be brought back fo...
Accurate
 forest path
Hi guys, I am trying to import an avatar into Unity so I can get it in VRChat but when I import the file, and change the shader for some reason the eyes aren't showing would anyone know a fix?
 harsh saddle
forest path
Hi guys, I am trying to import an avatar into Unity so I can get it in VRChat bu...
harsh saddle
forest path
Hi guys, I am trying to import an avatar into Unity so I can get it in VRChat bu...
Are you sure that's the only eye material? Sometimes eyes have an outer shell for getting the right reflectivity.
forest path
I'm not sure, the others aren't showing any thumbnails as they're blanked out for some reason..
 jovial depot
what does this mean?
 harsh saddle
forest path
I'm not sure, the others aren't showing any thumbnails as they're blanked out fo...
harsh saddle
forest path
I'm not sure, the others aren't showing any thumbnails as they're blanked out fo...
Can you show the inspector for the model?
jovial depot
harsh saddle
Can you show the inspector for the model?
ok 1 sec


 harsh saddle
forest path
<@334006467805839372>
harsh saddle
forest path
<@334006467805839372>
The mesh, not the parent object. I'm gonna be leaving the house in a minute but I'll try to help when i get back
Edit: Never mind, I didn't scroll down enough. It looks like there is just one eye material but I'd have to open it up in Blender to see how it's made, people do all sorts of weird stuff with eyes so it often just takes some experimentation to see how to get them looking right.
 rich grove
i have a new eye texture I wanna use instead of the one given by this head model, how would I rearrange the vertices so it fits the new texture?
 spiral sigil
rich grove
i have a new eye texture I wanna use instead of the one given by this head model...
spiral sigil
rich grove
i have a new eye texture I wanna use instead of the one given by this head model...
if you use the UV editing workspace in the Blender u shud be able to scale and move around the UV island on the left window, and actively watch how that changes in the window to the right
not the most precise way but its a way
tough plover
pure dagger
Made a ring with an eco system for avatars
that's some really nice detail, that no one will ever see because of how small it is and how relatively low res current gen VR headsets are
looks great though
I do hope you optimized it as much as possible though
pure dagger
tough plover
that's some really nice detail, *that no one will ever see because of how small ...
its also adjustable for bracelts, armbands, halos etc

 tough plover
pure dagger
its also adjustable for bracelts, armbands, halos etc
tough plover
pure dagger
its also adjustable for bracelts, armbands, halos etc
how many materials? texture res? poly count?
because for a ring, all 3 should be fairly low lol
rich grove
spiral sigil
if you use the UV editing workspace in the Blender u shud be able to scale and m...
how would I move it around tho? I have the vertices highlighted but cant do anything
 pure dagger
tough plover
how many materials? texture res? poly count?
pure dagger
tough plover
how many materials? texture res? poly count?
its listed on my gumroad
spiral sigil
rich grove
how would I move it around tho? I have the vertices highlighted but cant do anyt...
make sure your mouse is hovering over the window you want to do stuff in
also
G to grab
spiral sigil
tough plover
how many materials? texture res? poly count?
gumroad says 17k verts 34k tris but lists no material count
tough plover
...seriously
34K?
that's as much as my entire base model

Gumroad
A smol bunny avatar created for use in VRChat with full body tracking and AV 3.0.IMPORTANT: Make sure you read the ToS at the bottom of this page! We are removing the License key system we had been using for avatars and are swapping entirely over to assets stored on gumroad instead.Therefor you will get the assets directly through gumroad.Notes ...
tough plover
but why does it need that many polys? you need to keep in mind that it's a ring, it will be tiny
this is an engineering ring I made for a friend, this is 200 polys

you do not need more than something like 2k for a ring ever, often times a lot less
a lot of detail you can just bake to a normal map
pure dagger
tough plover
this is an engineering ring I made for a friend, this is 200 polys
eco system inside :c
 long depot
Yeah that whole ecosystem thing can be in the shader, bake details in, etc.
tough plover
yes I know, it looks great, but surely you can reduce that to something like 5k
or even less
there is no way you can justify a ring having more polys than an entire avatar
pure dagger
the ring itself is only 86 polys
tough plover
surely you can just decimate the hell out of the terrain inside
pure dagger
the glass/land water and cliffs make up the rest
tough plover
while decimation messes up topology, it retains the shape very well while reducing the poly count as much as possible
rich grove
how do I fix data transfer not working? I went thru the process id normally do but its not working
or is it broken in 2.83?
spiral sigil
Do you need you be using 2.83
rich grove
no, I just went up to .93 and it still doesnt work
tough plover
^
rich grove
cats doesnt support above 2.93 I think
pure dagger
rich grove
cats doesnt support above 2.93 I think
cats works for me
rich grove
its been a few months since my last avatar but ive cross checked this with tutorials and its all the same thing
spiral sigil
psss sacred idk how data transfer works pls come back
tough plover
rich grove
why exactly are you doing a data transfer for glasses? last I checked they should only move with the head
tough plover
you're better off just creating a vertex group on the glasses with the same name as the head bone, then assigning every vertex of the glasses to it
make sure there's also an armature modifier on the glasses with the correct armature selected
rich grove
all 4,588 of them?
tough plover
yea? just hit the A key
spiral sigil
tough plover
you're better off just creating a vertex group on the glasses with the same name...
wait so just by a vertex group being named identical to a bone it will then move with that bone like it was weightpainted?
is weightpaint information stored in vertex groups
tough plover
spiral sigil
is weightpaint information stored in vertex groups
yes
"weight painting" is literally just assigning vertices to vertex groups
just with brushes
tough plover
the armature modifier uses the vertex groups to figure out how the mesh should deform with the bones
spiral sigil
But isnt vertex group information stored on a mesh by mesh basis not bone by bone
HMM i need to open blender
tough plover
yes, but the armature modifier looks for vertex groups that match the name of the bones
if you rename a vertex group, it will stop those vertices from moving with the bone
(in blender, if you rename a bone it also renames the vertex group, but not the other way around)
spiral sigil
That makes understanding data transfer node so much easier
i havent heard that in a tutorial once
red glade
Monowire thingy 🕺

Gotta do some testuring work on the arm, so it feels like its actually attached to the arm but
Very happy with the 20 min it took to make and texture it
spiral sigil
You should be it looks like a proper tech gadget
red glade
🙏 thx
its based on the Monowire in cyberpunk.

Got a rough idea of how i wanna do the actuall wire as we can grab bones now
Thing is im not sure if it reacts to the end points of the bone or the density of the mesh so
well see what looks best
rich grove
how do I fix meshes like shoes and thihg highs clipping on the front side on one leg?
red glade
rich grove
how do I fix meshes like shoes and thihg highs clipping on the front side on one...
Explain?
Or show me something, Ill see if i can assist you
red glade
Good 🙂
rich grove
@spiral sigil after changing the eye texture, it didnt save when going into unity. So when I use the new eye texture, it just uses the white in the corner, where the vertices were originally mapped too
spiral sigil
rich grove
<@456226577798135808> after changing the eye texture, it didnt save when going i...
you need to re export the model lol
if u change the UV mapping its data is stored in the mesh
not the texture/img
also if u have multiple UV maps make sure the active one is the one u want
rich grove
ive re exporte dthe model a few times already after some debugging
so idk what you mean
spiral sigil
it sounds like its still using an old UV map then maybe you got to delete the old one
rich grove
alr ill check
spiral sigil
idk how unity chooses what one to use but i think it goes by first in order
also i vaugely remember a material option in unity where itnwas like UV0 and UV1 and u could swap between what UV map was being used in unity
idk where exactly the button is but it exists
rich grove
also how do I make the glasses frames transparent? its a separate material at least
 rich grove
spiral sigil
it sounds like its still using an old UV map then maybe you got to delete the ol...
rich grove
spiral sigil
it sounds like its still using an old UV map then maybe you got to delete the ol...
how would I delete the old one btw? Is it stored somewhere like with vertex groups?
spiral sigil
its in the same panel as vertex groups are i think
there is another drop down menu for uv maps
check how the UV mapping data changes when switching between the 2 (or more)and decide which one you need to keep
rich grove
yup i see it. is it possible ot preview the uv groups cuz theres a decent amt
spiral sigil
yea hit the camera icon thingy or something
camera means its active
camera icon next to the uv map name


 opaque solar
Is it right to put the bones to the edge of my shoes or should I put it a bit up so it won't sink or float?

Will there be a error on my body if I move the balls in Y direction like this?

 rough talon
for a body like this would it be better to use a non humanoid rig? i was going to add "dummy" leg bones for a humanoid armature but i'm not really sure how to proceed with this
 quaint jasper
You probably just want to weight paint that to a dummy copy of the left or right leg placed in the center
rough talon
quaint jasper
You probably just want to weight paint that to a dummy copy of the left or right...
thank you!! i appreciate it
rich grove
rich grove
all except the main one are the same
bumping if anyone can help. The eye texture shown in the second image is a new texture im using, which is not the one given with the head base. When im in unity and I assign the new eye texture, its pure white, like it was in blender before I rearranged the uv mapping.
rough talon
rich grove
bumping if anyone can help. The eye texture shown in the second image is a new t...
sometimes blender holds onto old data, unless you really need more than one uvmap you should delete any extras
the camera for previewing uvs doesn’t work properly for me so i can’t give advice on previewing
rich grove
how do I delete them? I tried pressing delete and right clicking, but theres no option for deleting uvs
rough talon
rich grove
how do I delete them? I tried pressing delete and right clicking, but theres no ...
you have to select the one you want to delete and hit the minus button on the right
rough talon
it’s np it’s not super obvious imo so it’s fair to miss
 rough talon
are you importing over the old fbx?
rough talon
if anything, are you using poiyomi?
rich grove
mhm
rough talon
some shaders give you the option to just use other uvmaps
click on the image drop down in the material
try selecting uv1 or uv2
rich grove
nope, i tried em all and nothing
rough talon
ngl sounds messed up
id have to look at it directly to troubleshoot more
if you don’t have it fixed by tomorrow and still want/need help send me the fbx and i’ll look at it
rich grove
you busy rn I assume?
rough talon
got off pc for the night
 forest path
harsh saddle
Edit: Never mind, I didn't scroll down enough. It looks like there is just one e...
forest path
harsh saddle
Edit: Never mind, I didn't scroll down enough. It looks like there is just one e...
If you could that would be amazing, thanks!😊😊
rich grove
how can I prevent clipping like this without having to extrude the jacket with elastic deform so much?

 spiral sigil
I turned myself into nintendo 64 ‼
 rich grove
might the jacket be weight painted to wing bones? If I delete the bones should it fix this?

 thin crystal
Anyone know any good humanoid bases that can work for VRC? No commissions, f2u
harsh saddle
thin crystal
Anyone know any good humanoid bases that can work for VRC? **No commissions, f2u...
There's a bunch on Sketchfab, also Makehuman and you can edit ReadyPlayerMe avatars.
Sketchfab
Use Sketchfab to publish, share and embed interactive 3D files. Discover and download thousands of 3D models from games, cultural heritage, architecture, design and more.
azure rain

VRoid Studio is a 3D character maker that lets you use your imagination to easily create your own original characters. By making your 2D characters able to move in a 3D space and usable in anime and game production, your creative range will greatly expand. The VRoid Project has started with the hope that many creators will have fun exploring the...
 naive crow
What’s better to use for making avatars Maya or blender
 thin shadow
it depends. blender is free, maya is not free.
naive crow
thin shadow
it depends. blender is free, maya is not free.
My school pays for Maya
thin shadow
then it depends on workflow, which is subjective. some people like maya, some people blender. Perhaps it is something like comparing between which linux desktop environment is best.
naive crow
Ah ok
harsh saddle
There isn't a huge amount of difference in what you'll be doing msking VRChat avatars, that's all pretty fundamental modeling with pretty universal workflows. The biggest differences are with high level functions like particle and physics simulations.
tough plover
naive crow
What’s better to use for making avatars Maya or blender
you'll get more support with blender as less people here use maya
 harsh saddle
 tawny dirge
Who can help me im creating avatar on unity for vrchat and i haved this error
tawny dirge
Who can help me im creating avatar on unity for vrchat and i haved this error
I would just abandon ship. Getting a model like that even close to usable is going to be a real challenge. 650k tri models are not meant to be used for these purposes.
long depot
tawny dirge
bro are u uploading a whole world as part of the avatar?
Those aren't "errors" but "severe warnings" telling you that your avatar has a very bad performance rating. You can still upload it, but with that many polys/mats/etc, I wouldn't be surprised if your single avatar caused quite some lag for some lower end systems.
Please try to be considerate of other players when uploading avatars. Even with 650K polys, make sure that no more than a small portion of them are toggled on at any given point, be sure to crunch compress your textures, avoid 4k+ textures, etc...
 potent widget
so ive recently began learning blender, i bought pandas base , bought some assets - like clothing and hair etc. ive had no problem learning how to apply them. i got the jist of merging armatures n all that stuff, weight paint etc. so how would i go about adding shaders etc? or what do i do if the bought asset was given a shader too?will they manually show up when i export the fbx to unity?
thin shadow
to utilize shader in vrchat, the usage would be in unity. they are not transferable from blender.
 limber bronze
potent widget
so ive recently began learning blender, i bought pandas base , bought some asset...
limber bronze
potent widget
so ive recently began learning blender, i bought pandas base , bought some asset...
for shaders if it's a blender material you have to append it but the shader is probably meant to be brought into the unity game engine
potent widget
thin shadow
to utilize shader in vrchat, the usage would be in unity. they are not transfera...
im so confused xD
potent widget
limber bronze
for shaders if it's a blender material you have to append it but the shader is p...
im still confused, what do u mean by append it ?
harsh saddle
potent widget
im so confused xD
Blender has materials that are created by applying certain maps and parameters to shaders. Unity has the same thing but they are not interchangeable so you need to create new materials in Unity and apply them to your Blender models. You can do this either by assigning them in the mesh's mesh renderer in the inspector or by dragging the material onto the mesh in the scene.
potent widget
harsh saddle
Blender has materials that are created by applying certain maps and parameters t...
Thankyou I’ll look into this!
 solar fossil
tawny dirge
Who can help me im creating avatar on unity for vrchat and i haved this error
solar fossil
tawny dirge
Who can help me im creating avatar on unity for vrchat and i haved this error
Good lord! How do you have 651k polys and 51 materials
 hushed canyon
For some reason this avi is 22mb in unity when converted to quest, but it has less than 200k tris, and around 140 bones
 azure rain
most of the file size of avatars are textures
hushed canyon
Yeah but just the model itself is 22mb
And all the textures are compressed down and are all lower than 1mb
azure rain
does it have like a ridiculous amount of blendshapes?
hushed canyon
Um good question
Maby a little but not anything crazy
How would i remove blendshapes?
Thats something ive never messed with before
tough plover
hushed canyon
For some reason this avi is 22mb in unity when converted to quest, but it has le...
you should remove some of those outfits/accessories if this is a quest model
and you should also join meshes for things that won't be toggled
like why are the ears and hair separate meshes
makes no sense
hushed canyon
Cause i dont want the ears on all the time
And ive made a quest model with 28 meshes and 600k polys that was still quest
So i dont understand why this one is such a big size
tough plover
just because you can doesn't mean you should...
azure rain
hushed canyon
And ive made a quest model with 28 meshes and 600k polys that was still quest
that's not going to perform well on the quest
hushed canyon
azure rain
that's not going to perform well on the quest
Yeah i know but i was just using it as an example
I just dont understand why this model is such a big download
And earlier i was having an issue to where just the armature of the avi with no meshes was 18.9mb
 proud field
Hey, I imported a .blend model into blender, but none of the textures are rendering
to I have to apply them somehow, or are they there already and I just need to fix them?
it's looking like this

wait lemme try using the CATS plugin to import it
well the textures work but it looks REALLY funky

ok someone said setting the material to opaque instead of alpha blend
wait do I use nodes
nope no nodes
hushed canyon
Ive been trying to figure this out for a couple days now, help

The avi is literally a bare armature with a rig and a descriptor that is all default settings, so im thinking its a blender issue
tough plover
hushed canyon
Ive been trying to figure this out for a couple days now, help
there are literally no meshes on that avatar
that's odd
hushed canyon
Yeah its driving me insane
hushed canyon
tough plover
there are literally no meshes on that avatar
Figured it out sorta
It was jsut an issue with the project apparently
 swift robin
here is a wip
 glad steeple
a guy
long depot
hushed canyon
And ive made a quest model with 28 meshes and 600k polys that was still quest
at what point are these just considered crashers lol
long depot
hushed canyon
Ive been trying to figure this out for a couple days now, help
https://github.com/oneVR/VRWorldToolkit/releases/tag/V2.0.0
download this, import it, click these


GitHub
After successfully importing the release unity package the toolkit menu will appear in the Unity top bar as VRWorld Toolkit - If it does not, check Troubleshooting for common problems and solutions...
gives you a breakdown of what is uploaded and how much the size is
hushed canyon
long depot
https://github.com/oneVR/VRWorldToolkit/releases/tag/V2.0.0
download this, impor...
Allready fixed it
long depot
It's for worlds, but works with avis
k, but plz dont upload a 600k poly avatar on quest, u gonna crash ppl
quaint jasper

They don't complain because so many people do the same thing, so they're always at 20FPS to begin with, but that's still an absolutely terrible idea 
hushed canyon
My past couple avis have been below 200k, that one was mainly to test how much stuff you could get away with on an avi for quest
rough talon
https://twitter.com/apyrvr/status/1572394573409976322?s=20&t=dhZp7y951z0RGz4UjGL8BA
it's not really vrc avatar stage, but the 3d model is pretty much completely finished!

Excited to post this, it's my project of a 3d model of @phisnom 's character, Phi! Original reference art by @StupidButterfIy #phillust
 Twitter
·
Twitter
·
 rich grove
why is it shrinking every asset at once instea dof just the jacket
 potent widget
anyone know what this means?
 red glade

New character soon ish. topo check doe!
Nearly perfect the chin and nose i still gotta figure out
tough plover
looks quite good, although maybe you could get rid of one horizontal loop around the nose?
also how many subdiv levels do you have on there, hopefully just one lol
tough plover
potent widget
anyone know what this means?
you are using a cutting edge version of blender with a plugin that takes time to update
you should not using the latest of the latest when you have plugins you want to work
3.2 is known to work alright, but only with the dev version of CATS
 elfin meadow
Hello, being new to blender, I would have liked to know how to match the foot to a shoe with a heel. do you have any tips thank you
 spiral sigil
ngl I wasn't proud of the model but I had it lying around so I did some refurbishment and made a render with it

still probably will remake it though
cerulean spear
what do you guys think is an acceptable level of polys for a clothing item? im making a hat right now and its about 1300 polys
wondering if maybe i should do a subsurf
azure rain
I guess that would depend if you're targeting PC or Quest as you have a lot less triangles to work with on Quest
 restive canyon
how do i add the two missing fingers?

 empty fox
cerulean spear
what do you guys think is an acceptable level of polys for a clothing item? im m...
empty fox
cerulean spear
what do you guys think is an acceptable level of polys for a clothing item? im m...
Just listing an semi-advanced technique you can use instead of increasing the final model's poly count https://www.youtube.com/watch?v=Yx9TvvnxCAM
Because personally I am happy whenever I find a accessory that doesn't have too many polygons.
And for a hat the amount of polys you have is reasonable, feel like it would have to be a creasy hat to need more, so if you want more of an opinion, post a pic.
We will go through the process of reducing the poly count on a 3d scan or a high poly mesh, down to an acceptable size, and then to bake a normal map and also a diffuse map in Blender. The model was downloaded from SketchFab
Support me on Patreon
https://www.patreon.com/Markom3D
SketchFab
bit.ly/37YudJ4
Node Preview Addon
https://blendermark...
cerulean spear
@empty fox here's what i'm making right now, i still need to texture paint it some more but i want it to be a bit cartoony in style. the left one is 1300 polys and the right one with subsurf is 8000
 tough plover
cerulean spear
<@212336574321524736> here's what i'm making right now, i still need to texture ...
tough plover
cerulean spear
<@212336574321524736> here's what i'm making right now, i still need to texture ...
why not just right click > shade smooth?
empty fox
cerulean spear
<@212336574321524736> here's what i'm making right now, i still need to texture ...
And using smooth faces doesn't look good then?
Well, try using the method the video above shows, it is neat.
tough plover
are all of the edges marked as sharp then?
check in edit mode
if all the edges are blue then they are sharp
cerulean spear
anyways my question was more about what people consider to be an acceptable amount of polys for clothing
tough plover
it really depends
1300 is fine
it depends if it's like an entire outfit or just an accessory
azure rain
besides for the left one not having shaded smooth I can't really tell a difference
azure rain
so yeah honestly the subdivide isn't really helping the look much
cerulean spear
that was my feeling too
azure rain
like if that was some fabric simulated really high poly than Maybe baking a normal map might be worth it but not really worth it with that subdivided hat not really contributing
empty fox
I think it is helping, but it is costing a bit more than a excellent Quest avatar (7500 poly).
For a cartoony accessory it shouldn't have many polygons.
azure rain
and honestly they would probably look the same if they were both smooth shaded
because the flat shading is making the low-poly more noticeable
empty fox
Agreed
cerulean spear
why does nothing happen when i click shade smooth or shade flat? nothing changes
azure rain
can you show us a screenshot of the object in edit mode
tough plover
^ like I said
cerulean spear
 tough plover
okay, not seeing sharps right away. can you select everything, then do alt + n > reset vectors
cerulean spear
awesome that helped a lot thank you
tough plover
then you can add sharps wherever needed
cerulean spear
 azure rain
now your hat looks a lot nicer
empty fox
A flat shaded buckle and it looks great
cerulean spear
good idea
tough plover
yea just add some sharps
red glade
tough plover
also how many subdiv levels do you have on there, hopefully just one lol
Yea 1
its 5kPoly atm
tough plover
you might even be able to get away without subdividing for a quest version
red glade
Maybe well see
tough plover
what does it look like without subdividing
azure rain
if it doesn't contribute to the silhouette you can probably bake it to a normal map
 tough plover
that's not bad
red glade
Yea pro gamer topology
tough plover
eyes are a bit sharp tho
red glade
was thinking of doing eye lids but
tough plover
like the silhouette around the face is fine
red glade
idk
oh yea
well thats just a simple triangle

2k not bad
Ill be uhm. making my own body base also this time. thing is i aint got a whole clue for proportions
cerulean spear
is this the kind of sharps you would make?

 red glade
This is the previous avi that i referenced the uhm the body shape from vroid

But imma try and just do it from scratch this time wel see
Also gonna redo hands any tips for getting refrence for that?
empty fox
cerulean spear
is this the kind of sharps you would make?
It is what I would do, but it is a matter of taste
red glade

Did some texturing and hopin to get the eyes and hair done later this week
Sadly gonna have to move on onto comissions for a bit but well see 🙂
pure dagger
Made a light saber for my character aswell as some imperial credits
 digital hound
what's the best way to convey something like strings of hay without a lot of polygons
 tough plover
digital hound
what's the best way to convey something like strings of hay without a lot of pol...
tough plover
digital hound
what's the best way to convey something like strings of hay without a lot of pol...
probably some basic flat concentric rings for most of it, and then some "hair cards" for the thatch
harsh saddle
Either that or a normal map
exotic obsidian
WIP of my from-scratch avatar
 magic badge
This is not finished. The flat colors are just color coding for substance painter.
I did finish the mesh and some of the expressions now.
All it needs is to be properly textured.
This is my first sonic model. I made it due to not liking the official model much.


Here is another render I did with the joke model I made a few days ago.

And a spooky one.

 sick idol
 solar fossil
magic badge
Here is another render I did with the joke model I made a few days ago.
solar fossil
magic badge
Here is another render I did with the joke model I made a few days ago.
Why let it be a joke model, set him free.
Watch the world burn.
Its what they deserve.
 jolly lake
magic badge
Here is another render I did with the joke model I made a few days ago.
jolly lake
magic badge
Here is another render I did with the joke model I made a few days ago.
LMAO
 south wolf
Hello everyone
Currently doing this on a commission
Send a DM for more info
 jolly lake
no lipsync required
south wolf
?????
 woeful wharf
What's the best thing to use to make vrchat avatars? I'm looking for something to make avi's on and idk if unity or blender would be easy to work with
Idk which is recommended more
I'm currently trying to learn how to work with doing re-works like coloring n stuff on avatars, sorry that I'm not good at wording what I want properly
azure rain
you would need to use both Unity and blender to make avatars
I guess a question would be what kind of avatars would you be wanting to make
jolly lake
south wolf
?????
I was making a joke about how the model wouldn't require lip-sync since there's no head
 mental hazel
how do i make a outline in blender?
south wolf
jolly lake
I was making a joke about how the model wouldn't require lip-sync since there's ...
Haha 😊😊
I have the full model, it's just a preview
spiral sigil
hastily retextured World Of Warcraft blade in Blender without any addons like bpainter
 rich grove
how can I fix the orientation
 south wolf
Looks good
spiral sigil
south wolf
Looks good
thanks
south wolf
Yeah
spiral sigil
rich grove
how can I fix the orientation
you forgot to select all the faces before recalculating
south wolf
Def
rich grove
bruh
quaint jasper
Select with L > Alt + N > Flip
spiral sigil
flip deez
mental hazel
how do i add outlines to something in blender
spiral sigil
mental hazel
how do i add outlines to something in blender
are you trying to get an outline done on a quest model?
mental hazel
both pc and quest
mental hazel
ive done that
the material i want to be the outline circles the entire thing
even when they are fliped
harsh saddle
As far as I know, that's the only way for Quest. PC can use shaders but Quest is limited to the mobile shaders
 azure rain

This is a quick tutorial on how to create geometry outlines in Blender 2.8. This is the same technique I use in my Item Gifs.
Music by Hooksounds.com
mental hazel
that works
now
is there a way to make it look like a series of objects with outlines look like one outline
as if it were a drawing
spiral sigil
mental hazel
that works
now
is there a way to make it look like a series of objects with outl...
can u show an example of what u mean
or are you saying your outlines are not seperated by your character's items or parts
 spiral sigil
you probably would have to apply the modifier via vertex groups of the indivudual pieces seperately
spiral sigil
mental hazel
i cant tell waht the geometry is because its just flat shading
mental hazel
this is what it is on another view
with only one color
 spiral sigil
so you want the outline to apply itself around those parts and not the entire thing
mental hazel
and this is shade flat
 spiral sigil
yeah so you can seperate them into diff meshs to apply the solidify modifier thing
and then join them after
mental hazel
spiral sigil
so you want the outline to apply itself around those parts and not the entire th...
i want it around the entire thing
spiral sigil
oh
also I am not trying to be mean but i think the issue might have to do with objects clipping into each other in your model
are those shapes boolean cut
spiral sigil
there is a Boolean modifier that can make meshs cut into other meshs
like using it as a knife almost
spiral sigil
good question
spiral sigil
@mental hazel I can't really help past that sorry
mental hazel
hm
spiral sigil
I just avoid outlines altogether its not really my style usually so
mental hazel
could you make an avatar with emission materials in blender?
south wolf
Yeah I can
 robust pawn
@mental hazel yup I can make it in emissions metarial perfect
spiral sigil
 mental hazel
why does edit mode look like this?
 spiral sigil
Spamton G Spamton?
spiral sigil
ok
harsh saddle
mental hazel
why does edit mode look like this?
Should it not looks like that? Looks like it's showing your vertices and edges like it's supposed to.
mental hazel
i figured it out
i had x ray on
but now i have another problem
i have a bowtie
and i want it to move with the neck bone
but when i select both the bowtie and the armature, then i add automatic weights, the bowtie moves with the head
and very badly at that
the whole thing doesn't move
just some of it
harsh saddle
mental hazel
but now i have another problem
i have a bowtie
and i want it to move with the ne...
Relying on automatic weights alone isn't going to get you a very good result, you need to do some of your own manual weighting. If you want the bowtie to be fully-influenced by the head, select all the faces of the bowtie in edit mode, then select the head vertex group and hit assign under the vertex group panel. There may also be vertex groups with weights on the bowtie that you don't want to be weighted to it like the neck (though you may want some weight there) and the shoulders so you can go to those groups and hit remove to make sure they have no influence over those faces.
Oh, I see I misread and you want it all weighted to the neck, same deal, though you may want some head influence as well with how little neck there is.
mental hazel
"vertex group"?
mental hazel
@harsh saddle
harsh saddle
mental hazel
"vertex group"?
Check the inverted triangle tab on the panel to the right, that's where the vertex groups are. That's what actually tells Blender what vertices are affected by which bones and how much
mental hazel
did so, now i have this as a problem
 harsh saddle
mental hazel
did so, now i have this as a problem
harsh saddle
mental hazel
did so, now i have this as a problem
I would check the weights on the bone you moved, i would assume you have some of the torso mapped to the arm.
mental hazel
it's the shoulder, and i don't see something to the right that lets me see the weights
(im very new to blender so this is kinda a first to me)
harsh saddle
mental hazel
it's the shoulder, and i don't see something to the right that lets me see the w...
If you select the vertex group for the shoulder and then go into weight paint mode with the model selected, you can see the weights. Red is 100% weighted, dark blue is 0% and then there is a gradient between that goes from orange to yellow to green to cyan.
mental hazel
 harsh saddle
Yeah, you generally want everything outside of the general area of the bone to be dark blue. Automatic weights are a nice start but the resulting weights tend to need a lot of cleanup.
mental hazel
so
i just make everything not dark blue..?
harsh saddle
mental hazel
so
i just make everything not dark blue..?
The area surrounding the bone should generally be a smooth gradient from red to dark blue with a bit of overlap with surrounding bones. Everything that should be completely uninfluenced (like the side of the body opposite of the arm being moved) should be completely dark blue.
azure rain

I've been meaning to update this video for a very VERY long time. But, we're finally here. Everything you need to know in order to start painting weight layers onto your character!!! Hope it helps :)
Female Body Model Link:
https://www.youtube.com/watch?v=_XfvLpLyulI
If you enjoyed this video, please don't forget to like and subscribe!
You ca...
harsh saddle
A good idea is to download a ReadyPlayerMe avatar if you want to see how a model should be weighted. https://readyplayer.me/vrchat

Make custom full-body VRChat avatars from a photo with Ready Player Me avatar maker. Easy upload to VRChat – no Unity or Blender needed.
That video should be titled "understanding weight painting in 5 minutes" as the job can take a lot longer to do properly but the concepts aren't too difficult.
azure rain
harsh saddle
That video should be titled "understanding weight painting in 5 minutes" as the ...
fair but found it to be a decent video to explain the concept and figured visual aid would be helpful for this kind of thing
harsh saddle
Oh yeah it's a great video, I just don't want to give the impression that you should just rush through weight painting, it's important to get it right.
mental hazel
azure rain
https://www.youtube.com/watch?v=4fICQmBEt4Y
i dont see a x mirror under options
harsh saddle
 mental hazel
yes that
but when i color it
it isnt mirrored
harsh saddle
mental hazel
yes that
but when i color it
it isnt mirrored
And you've checked the bone on the opposite side? Could be an issue of your topology not being symmetrical.
mental hazel
now the color's have changed
 harsh saddle
Looks better. Still too much weight on the torso and you probably don't want the bow tie moving with the arm but it's progress.
mental hazel
so what do i do
harsh saddle
mental hazel
so what do i do
Paint the areas that you don't want blue and the areas you want to be affected not blue? I'm not sure what you're asking.
mental hazel
how do i not make it do this
 azure rain
I've been meaning to update this video for a very VERY long time. But, we're finally here. Everything you need to know in order to start painting weight layers onto your character!!! Hope it helps :)
Female Body Model Link:
https://www.youtube.com/watch?v=_XfvLpLyulI
If you enjoyed this video, please don't forget to like and subscribe!
You ca...
mental hazel
yeah thats the thing
the mirror doesnt work
when i color something with the mirror on
it doesnt change
azure rain
then just do it manually without mirroring
mental hazel
ok ok
i think i understand this now
but
how do i make everything dark blue
so i can manually paint it
azure rain
I suppose you can just paint over the current weight paints you have
mental hazel
its not letting me paint this part dark blue
 harsh saddle
mental hazel
its not letting me paint this part dark blue
harsh saddle
mental hazel
its not letting me paint this part dark blue
If you want to unassign the entire model from a certain vertex group (make it all dark blue) you can select the entire model in edit mode and then hit remove under the vertex group tab.
 dawn steppe
does anyone know how to fix this problem in blender?? I came across it when i was using gradient for texturing her hair, I tried to find tutorials on how to fix it none so far covered how to fix it ;^l
 harsh saddle
I really wish when people asked about a problem, they would state what the problem is rather than expecting us to catch it. This looks like a wolf with an afro, is that not what you want?
dawn steppe
sorry i completely forgot to add the problem, you see on her afro hair there's these grey splotches when texture painting they'll either turn black on a white surface or grey on a dark surface
harsh saddle
dawn steppe
sorry i completely forgot to add the problem, you see on her afro hair there's t...
Do you have UVs for the mesh? Are you saving out the texture right after making edits to it? Sometimes they'll get reverted if you don't save it out right away. So is how it looks in the image how you want it to look? How does it look in texture paint mode? Can we get a picture of that?
 zenith mason
 exotic obsidian
I finished the body/base of my avatar, just gotta add hair, clothes, then rig and texture it
 robust pawn
@exotic obsidian can you send you one of my artist it will do the remaining on the avatar for you perfect if you do I will send you her name
exotic obsidian
Pardon?
exotic obsidian
robust pawn
<@586938647451009024> can you send you one of my artist it will do the remaining...
What do you mean?
robust pawn
you said you want to rig and texture it
exotic obsidian
I was going to do it myself, but thank you for the offer.
mental hazel
harsh saddle
If you want to unassign the entire model from a certain vertex group (make it al...
i tried that, still there
harsh saddle
mental hazel
i tried that, still there
And you're sure you had the right bone selected? Not sure what else to tell you, that should eliminate any weights unless there's an issue with your selection or you don't have the correct bone selected.
mental hazel
yes
i do have the bone selected
harsh saddle
Sorry, I've never seen that behavior so I don't know what to tell you. Could be a bug, could be that you've locked those faces from being editable somehow, hard to say.
spiral sigil
First retex where I used 2d program(clip studio paint) to paint everything but the solid colors

original model is from World of Warcraft: item/objectcomponents/weapon/sword_1h_rapier_a_01.m2
pure dagger
Thoughts?
 harsh saddle
pure dagger
Thoughts?
harsh saddle
pure dagger
Thoughts?
Aside from the classic issue of incredibly selective armor placement, it's a cool look.
pure dagger
harsh saddle
Aside from the classic issue of incredibly selective armor placement, it's a coo...
Its a knights of the old republic look 😭 She will have a under suit on
harsh saddle
Ah, okay. Great game but it's been way too long to remember anything from it.
 gray adder
um HI. I'm trying to cut the Pumpkin by using the boolean modified. I don't know why but when i choose or eye drop the face for it to cut in. My pumpin disappear


and do you know why it cut like this ? ( i use the knife to cut. and when i'm deleting the faces that i've cut it just delete more than that

 tough plover
gray adder
and do you know why it cut like this ? ( i use the knife to cut. and when i'm de...
tough plover
gray adder
and do you know why it cut like this ? ( i use the knife to cut. and when i'm de...
it looks like you're selecting "Vertices" when you're trying to only delete faces
spiral sigil
never used 3d coat before and I took an hour to paint in solids that kinda suc 🎉
 spiral sigil
still ass will git gud soon

 north bay
Does any one know where I can get help to figure out how to edit and re color A booth model
harsh saddle
north bay
Does any one know where I can get help to figure out how to edit and re color A ...
I'd just look up texture recolor on Youtube. At a basic level, it's just a matter of opening the texture in Photoshop (or GIMP) and changing the hue and saturation and exporting that. You can also paint over it if you want to make larger changes.
spiral sigil
i have a question for some skilled furry 3d artists for like wolfs and stuff
can somone help me please i cant figure this stuff out T-T
 loud pivot
So I don't think my boy would qualify for spookality? I made him last year, and he's one of the creepiest easter-eggs in retro gaming but still.
 harsh saddle
It looks cool but it might be getting a little too close to IP infringement for something VRChat would want to feature officially.
spiral sigil
What software do you guys suggest using to texture a model? The model is a vehicle and it has to be somewhat realistic, so normal maps etc and emissives.
pure dagger
spiral sigil
What software do you guys suggest using to texture a model? The model is a vehic...
substance painter
pure dagger
spiral sigil
i have a question for some skilled furry 3d artists for like wolfs and stuff
Whatcha need help with?
spiral sigil
pure dagger
Whatcha need help with?
almost everythinf ;-;
pure dagger
spiral sigil
almost everythinf ;-;
Are you trying to make a model or retexture/edit an existing one
spiral sigil
no im trying to use a image i have of ny sona and tracing it as a 3D model
 merry trout
Guhhh i thought i was getting the hang of blender...turns out making 2d eyes with pupils is really difficult

theres the front part (black lining) pupil, and back part (white part)
 viral canyon
I'm looking for someone who can make characters like pretty good 3D models I can pay and for those that might be interested I can explain more about why I need 3D models
loud pivot
decided I'll make something from scratch for spookality.
loud pivot
 loud pivot
 pure dagger
@viral canyon don't DM them they are a scammer
 fair jewel
I’m planning to make this into a 3D model all I need to do is learn how to model xd
 harsh saddle
fair jewel
I’m planning to make this into a 3D model all I need to do is learn how to model...
harsh saddle
fair jewel
I’m planning to make this into a 3D model all I need to do is learn how to model...
It would help to make a front view as well if you intend to model this but should be doable. The legs might be tricky to rig.
light garden
loud pivot
Slender man?
loud pivot
light garden
Slender man?
Yes sirrrrr
light garden
loud pivot
Yes sirrrrr
Nice, is it going to become a vrc avatar if so public?
loud pivot
light garden
Nice, is it going to become a vrc avatar if so public?
Yeah, it'll be both in my world and I'm making it a spookality submission
light garden
loud pivot
Yeah, it'll be both in my world and I'm making it a spookality submission
Thanks man
any michael myers avatars that are not dbd in those worlds?
loud pivot
light garden
Thanks man
~~any michael myers avatars that are not dbd in those worlds?~~
Nah, my worlds arent specifically horror. Just niche stuff that I want to make. So he's sort of like a just halloween avatar considering what I'vr made before
light garden
loud pivot
Nah, my worlds arent specifically horror. Just niche stuff that I want to make. ...
Ah k
harsh saddle
Seems like you'd run into similar copyright issues with Slenderman. I don't know who owns the copyright to that but I assume someone does. VRChat doesn't care in terms of what you upload but it might not be accepted for Spookality.
 frosty marsh
Hey I am a relatively new person to creating avatars but I am trying to push it through to quest use. Is there a way that I can merge 3 meshes together?
harsh saddle
frosty marsh
Hey I am a relatively new person to creating avatars but I am trying to push it ...
In Blender, you just select them and press Ctrl + J, not sure if it's possible just in Unity.
mental hazel
i feel like this needs something
 harsh saddle
mental hazel
i feel like this needs something
harsh saddle
mental hazel
i feel like this needs something
You could add more detail to the arm, grooves, notches, cutouts, etc. but I think the main think is the level of detail of the arm relative to the hand. The hand is quite plain and blocky, it could use some beveling, some work on the joints, grooves to split up the palm so it isn't just a flat plane, that sort of thing.
mental hazel

this looks kinda better
ok this is a big improvement


looks like it could use wires
but idk how to do those in blender
 iron onyx
anyone have an idea as to why my textures in blender are appearing washed out i looked online and couldnt really find anything that would point me in the right direction?
my guess is id have to dick around with the shaders but id have no idea what exactly id have to do
 harsh saddle
mental hazel
but idk how to do those in blender
harsh saddle
mental hazel
but idk how to do those in blender
They're doable but they can add a lot of geometry if you want them to look nice. I think things might have gotten a bit over-rounded, you want a bit of smoothness but you're getting into a cartoonish level of roundness and you probably also want some contouring in each digit https://www.youtube.com/watch?v=31rhH3FM9-c
In this video, we check out a way to extrude profiles along different curves inside of Blender! This works a lot like the follow me tool in SketchUp, but these extrusions are live and adjustable, allowing you to create profiles, lathe objects, and more!
Notice how this one has beveling but also some sharp edges? You want a balance.
 harsh saddle
iron onyx
anyone have an idea as to why my textures in blender are appearing washed out i ...
harsh saddle
iron onyx
anyone have an idea as to why my textures in blender are appearing washed out i ...
You aren't going to be able to take your Blender shaders into Unity anyway so assuming that's where you intend for it to end up, how do they look there?
iron onyx
it looks fine in unity i'm just trying to get it like to look normal for a render in blender
mental hazel
made them slightly sharper
 harsh saddle
iron onyx
it looks fine in unity i'm just trying to get it like to look normal for a rende...
harsh saddle
iron onyx
it looks fine in unity i'm just trying to get it like to look normal for a rende...
Does it look that way in rendered mode as well? Are you using Cycles or Eevee? What is your environment like? If you want a nice render in Blender, you probably want an environment map.
harsh saddle
mental hazel
made them slightly sharper
Better but you should really have some tapering and beveling on all the edges, not just the ends.

Notice how all surfaces of the fingers have a bevel there but they still have planes and aren't overly rounded.
mental hazel
 iron onyx
harsh saddle
Does it look that way in rendered mode as well? Are you using Cycles or Eevee? W...
iron onyx
harsh saddle
Does it look that way in rendered mode as well? Are you using Cycles or Eevee? W...
Im looking to render it in cycles and this is how it looks in rendered mode with a simple light my environment will not have a background all I need is a render of the character I'm just trying to get the colors right

 mental hazel
anywho
sleeptime
work more tomorrow
monkey sleep
for i must stack till the morning come
viral canyon
pure dagger
<@808673859468394507> don't DM them they are a scammer
You have proof of this accusations
harsh saddle
iron onyx
Im looking to render it in cycles and this is how it looks in rendered mode with...
You can turn off the background and just use an environment texture for the lighting. It probably looks a bit gray because the lighting is flat and the environment is gray. If you want better lighting but to keep it dark, just get a night time HDR from polyhaven.

You can also try editing the levels on the world output for a more dramatic effect
 iron onyx
harsh saddle
You can also try editing the levels on the world output for a more dramatic effe...
iron onyx
harsh saddle
You can also try editing the levels on the world output for a more dramatic effe...
thks a ton for pointing me in the right direction ill give these a go
pure dagger
viral canyon
You have proof of this accusations
They claim vroid models are theirs and that they made them from scratch.
If you need a commission I'd recommend joining the vrc traders discord as they have a system set up to make sure someone isn't lying about their skills
harsh saddle
 shadow onyx
really random does anyone have a 3d model of a rose
shadow onyx
really random does anyone have a 3d model of a rose
Plenty on Sketchfab but most require attribution https://sketchfab.com/3d-models/rose-3d-4aad2c8cd1564bc49fddb00df80d5776

This Is a Rose.
best rose you’ll see in ages.
do what you will with it.
follow for random stuff.
i cannot promise they will be great.. but i can promise ill try. ^u^ have a great day/night. - Rose 3D - Download Free 3D model by Julialovehearts
shadow onyx
harsh saddle
Plenty on Sketchfab but most require attribution https://sketchfab.com/3d-models...
Its a fbx and I can rextexture it right?
viral canyon
pure dagger
If you need a commission I'd recommend joining the vrc traders discord as they h...
Do you have a link
harsh saddle
shadow onyx
Its a fbx and I can rextexture it right?
That ones a glb but I'm sure you can find an FBX rose on there if you need that specifically and yeah, you can retexture it so long as you give attribution.
shadow onyx
harsh saddle
That ones a glb but I'm sure you can find an FBX rose on there if you need that ...
ok thanks
rich grove
is it possible to make a blendshape value default to 1 in blender? so like if I were to set a mouth blendshape to 1 (on), then save and exit blender and then open it again, it wont go back to a value of 0, but rather stay at a value of 1?
harsh saddle
rich grove
is it possible to make a blendshape value default to 1 in blender? so like if I ...
Not sure if it suits your needs but making the minimum 1 would do that.
rich grove
tyty
solar fossil
iron onyx
Im looking to render it in cycles and this is how it looks in rendered mode with...
do you have to render in cycles?
easiest way to get the right colors is to bypass the bsdf shader and just connect the texture to the output node
harsh saddle
solar fossil
do you have to render in cycles?
easiest way to get the right colors is to bypa...
That'll just get you flat color with no specularity which is good for visualizing the actual colors of the texture and I use it a lot for when I'm finished baking in my shading but it won't get you any shading unless you've done that so I'm not sure it's the way to go for the best looking render.
Unless I guess it's an anime sort of thing but even then there tend to be be some shadows in the matcap or in the toon shader.
solar fossil
if he needs anime shading he can use a ramp to mix in 2 or 3 tone shading
 abstract kernel
Just noticed I should prolly ask this in avatar not here
pure dagger
Made some clothes for a commission, what are yalls thoughts?


 spiral sigil
Props to so many people who can make most of these I can barely manage to make a model let alone a functioning avatar
tough plover
pure dagger
Made some clothes for a commission, what are yalls thoughts?
looks great, what's the poly count for each?
pure dagger
tough plover
looks great, what's the poly count for each?
3k for the hoodie and 1k for the beanie
pure dagger
Not at home to take a screen grab ATM I'll take one when I get there
mental hazel
gave it texturing
 mental hazel
now...
how do i rig this
tough plover
mental hazel
now...
how do i rig this
because it's mechanical and stuff isn't supposed to bend, you're going to want to weigh parts of the mesh 100% to their corresponding bones
you can do that by just assigning those vertices to the correct groups in edit mode rather than doing it through the weight painting mode
it's also possible to rig pistons to work accurately, but the difficulty depends on the model
placing bones accurately will also be important
you can do that by using the 3d cursor
if you select a circle of vertices, and do shift + S > Cursor to selected, it will place the cursor in the center of that circle
and then if you go into armature editing mode, you can select the tip or head of a bone, do shift + S > Selected to cursor, and it will put the end of the bone at the cursor, aka at the exact center of the circle
mental hazel
i mean like how am i gonna connect the bones
 tough plover
just have them parented correctly?
or do you mean how to make the mesh move with the bones
mental hazel
making the mesh move with the bones
tough plover
that is literally what my previous explained
look up blender rigging and weight painting if you don't know what I'm talking about
but basically, rather than using brushes to weight paint stuff (which would cause gradients) you can assign a bunch of vertices completely to a vertex group
mental hazel
so i take 2 seperate bones and join them
pure dagger
mental hazel
so i take 2 seperate bones and join them
Select the first bone in edit mode and press e to make a new bone that's patented and connected
mental hazel
is this ok
 azure rain
that looks pretty decent as you have the balls where the joints are
mental hazel
heres the wrist
 tough plover
mental hazel
is this ok
tough plover
mental hazel
is this ok
you do not need those bones connecting the fingers to the wrist
there should be one bone for the wrist, with all of the other ones parented to it
you're going to want to disable "Connected" on the first finger bones
so that they can stay offset from where the wrist bone is
while still staying parented to it
mental hazel
tough plover
you're going to want to disable "Connected" on the first finger bones
how
harsh saddle
mental hazel
how
In the panel that looks like a bone to the right under relations
mental hazel
ok they were not connected in the first place
gotcha
so i guess the rigging is done
azure rain
you would still need to apply the weight paintings so it actually moves when you move the bones
Hey everyone new Blender 2.8 tutorial! In the 5 minutes you'll never have to wonder how to weight paint ever again! Hope it helps you guys and don't be afraid to leave comments and questions below if you have them!
Song: [Chill]aKu - Love Shine
https://soundcloud.com/akuofficial
If you enjoy...
harsh saddle
But like Sacred was saying, you should probably stick to assigning in edit mode as none of the individual components in a robot will bend so they should all be assigned 100% to one bone or another.
pure dagger
tough plover
what does the wireframe look like?
 tough plover
is that hoodie really 3k? looks to be a bit more
pure dagger
3.6k apologies
pure dagger
Appreciate it, Been focusing more on that cause my old stuff was pretty bad lmao
tough plover
kek
azure rain
looks like nice clean quad topology so if you ever want Quest builds that'll be easy to make
quaint jasper
Here's @Idolomantises's Asmodeus ! Fun and quick 3D project over the weekend. That character design is way too fucking cool not to make a model out of. I love him🥹
shadow onyx
bunny

 dense narwhal
is there a software that is free to make 3d models
azure rain

The Freedom to Create
dense narwhal
thanks
azure rain
yeah it's pretty much the software everybody uses for making 3D models for vrchat so lots of tutorials and plugins
glad steeple

 keen needle
 spiral sigil
glad steeple
https://cdn.discordapp.com/attachments/872178400150843404/1026632171508748440/un...
spiral sigil
glad steeple
https://cdn.discordapp.com/attachments/872178400150843404/1026632171508748440/un...
the bait has become the angler
reminds me of einar
glad steeple
who
spiral sigil
glad steeple
who
oh there is this angler robot named einar but idk why i cant find it on google it might of been a character someone made I thought it was from a game when someone showed me
i can dm the img since i got no clue where the source is now
maybe i can search in the discord i found it in for the name one sec
OH it is from a game its from https://palia.com

 spiral sigil
first you should probably enable the flat shading view your model looks like its supposed to be rendered like that
 keen dune
like this?

 keen dune
ah let me try that
yeah i already did that i think the problem is that i changed the shading
spiral sigil
?
what did you change exactly
I still dont know how you are trying to retexture this and I dont want to guide you through through all of blender texture painting


 spiral sigil

⭐ UPDATED VERSION for Blender 3: https://youtu.be/ywR8HsNeXQQ ⭐
⭐ Get my FREE Blender Beginner Course here: https://bit.ly/3ysTglL ⭐
Learn how to easily paint your 3D models directly in Blender using Texture Painting!
Want to support me? 😃 http://patreon.com/surfacedstudio
TIME STAMPS
00:00 Introduction
01:15 Tutorial Start
01:56 Texture Paint...
i just searched on youtube "how to blender texture paint"
first result
i used this one before
keen dune
ok