
#avatar-rigging
1 messages · Page 198 of 1
 elfin meadow
What is it you've exported from? I can't see any reason it'd have that many bones (maybe for facial muscles? dear god)
 marble inlet
A program called "V-Katsu"
avoid it unless you wanna deal with this mess
but, if nothing else, this is the perfect opportunity to learn how to make bones from scratch
elfin meadow
Yup, certainly an opportunity to learn rigging and weight painting 😂
I wonder if those are like "spare" bones which aren't used by this avatar, seeing as it's a tool for making them. Maybe it doesn't delete ones it isn't using
 vivid carbon
The weightpaint and rig is fine, you just have extra bones
elfin meadow
Those rear ones definitely look like they're for a long coat
Is there a shortcut to delete bones without any corresponding weightpaint?
vivid carbon
There are probably just a lot of bones for all the extra animating you would do in the original program, you can use the ones on the face to get your blendshapes
vivid carbon
elfin meadow
Is there a shortcut to delete bones without any corresponding weightpaint?
Probably, but I only know of the easy buttons that Cats Blender Plugin give
marble inlet
yeah I'm just using the CATS plugin's "Merge weights to parents" button

CATS is a godsend
the hardest part is that there are so many bones that it's impossible to tell which ones actually matter
vivid carbon
You can uncheck everything in the fix model button settings except clear empty weight box, try that
marble inlet
I just did that, and also I think I left something about materials checked so now my avatar has its textures
screw it, I'm not fixing this
time to watch a tutorial on how to start from scratch
if I change my mind I can just re-import the file
elfin meadow
I might have a script you can run which deletes all bones without weight paints assigned to them. No idea if it still works
marble inlet
I already got rid of all of the zero-weight bones
it's just that each bone is assigned to a teeny tiny portion of the model
elfin meadow
Ah yikes
marble inlet
and there's a bajillion of them
marble inlet
I don't know why you would want more bones than a person normally has
are you gonna bend halfway down your forearm?
elfin meadow
I've used this as a base before - it's from the VRChat SDK.
marble inlet
oh my god you're a lifesaver
elfin meadow
Just a nice humanoid skeleton
marble inlet
I have no clue how to make an armature
elfin meadow
😄
Just need to weightpaint it
(which is about as difficult as making an armature if you want to do it well)
marble inlet
I also have no clue how to weightpaint, but I'm sure I can't do it on an empty stomach
I gotta go eat some dinner real quick
 icy cedar
does anyone know what causes the snapping spine right after calibrating? I have a model where I managed to fix the hips but now I'm dealing with a compressed chest area.
not single out of what felt like 100 attempts of bone adjustments got rid off it. At least not with any of: Hips, spine, chest and upper chest (supported now according to canny)
 fierce grail
Looks like you imported a model into Blender without Automatic bone orientation checked.

Might help with that model.
 junior goblet
Any way of fixing weight paints with tears on clothes or hoodies?

 rustic needle
anyone know to make the mask move with the helmet?

 velvet frigate
Make sure the mask is weight painted to the same bone as the helmet
 flint lake
does anyone know how to fix texture material in unity? i joined a body with new head and looks fine in blender, but in unity either head or the body textures is ruined (depend which join which in blender)
rustic needle
its been automatically weighted to the armature already idk how to change it
 ornate cairn
you just need to go into weight painting mode
and select bones
delete weight paint from other bones than head bone probably
junior goblet
junior goblet
Any way of fixing weight paints with tears on clothes or hoodies?
What about me I am having a weight paint issue like Sevvy?
ornate cairn
pretty much same thing too many bones are weight painted to this part
they fight for this part
creating tearing
rustic needle
how do i delete the weight paint?
ornate cairn
in blender there is weight paint mode
rustic needle
right
ornate cairn
in this mode you select bones and check if there is unneeded weight paint on some
the part will glow on yellowish or red color
if it's weight painted to bone
rustic needle
so i click on the armature and then go into weight paint mode?
rustic needle
what part of the mesh do i click on its in like 30 different peices
ornate cairn
helmet i think that's what you want to move with head bone right?
rustic needle
the helmet moves with the head bone i just want the mask to move the same way as the helmet
ornate cairn
than select mask mesh
ornate cairn
i think that is one of ways
rustic needle
i clicked the mask then the armature and weight painting mode does not show up
ok i got it, had to do it the other way around
its glowing a lightish green and blue now
ornate cairn
some bone now is selected probably
so it shows what weight paint it has on that mesh
rustic needle
the head bone is selected
ornate cairn
ok paint it fully red
 ornate cairn
so you move head bone and mask won't move at all?
rustic needle
the mask moves just not in sync with the head
i want it to move as one whole piece with the helmet
ornate cairn
ok so you need again go to weight pain mode
and select other bones
check if they doesn't have weight paint
if they do remove it
it should do the trick
ornate cairn
np
marble inlet
fierce grail
https://cdn.discordapp.com/attachments/390924372782612480/843436629782953994/ble...
ooh I've gotta give this a try
ah, I don't think that option's available for this file type
though, maybe if I import it, then export it as a fbx, then re-import it?
well, the arms look better

but this avatar really just has too many bones for me to try and salvage it
I'll have to start the armature from scratch if I wanna use it
icy cedar
asking again today. I'm trying to salvage this armature, make if FBT ready and preserve the weight paint. So this works with non full body perfectly fine. The mapping in unity is 1:1 so hips=hips not hips=pelvis what would be the actual root.
Now for FBT this messed up badly. I could fix the hips by renaming the pelvis to hip, the hip to pelvis and switching the vertex groups. (Hip doesn't have any weight painted to it but pelvis does).
I then moved the hip bone as recommended in the documentation and that worked.
However the upper part is still messed up badly. Namely spine, chest and upperchest somewhere. The area right below the boobs is stuffed together badly after calibration and the belly still has a slight tilt backwards while the hips are in an OK angle.
(The image is from the original starting point.)

So what would you do to make that work? Preferably without repainting the whole thing and not removing upperchest. I tried a lot of bone length combinations but none really fixes it.
alternatively I'll pay $50 if someone actually can fix (this particular part only) for me without creating hanging shoulders.
 pure dome
i don't mean to interrupt the previous poster's problem so i'll just leave this here and ask real quick if anyone knows a solution https://twitter.com/makorays/status/1478231187546116096

ANYONE WHO KNOWS RIGGING: is there a solution to this problem where this pendant gets desynced from the collar it's meant to attach to when the neck rotates? the pendant bone is fully following the neck bone but the collar + lower neck aren't painted 100% red since thatd look bad

 Twitter
·
Twitter
·
 crisp tendon
pure dome
i don't mean to interrupt the previous poster's problem so i'll just leave this ...
crisp tendon
pure dome
i don't mean to interrupt the previous poster's problem so i'll just leave this ...
Make the collar its own mesh and use the data transfer modifier from the body to the collar mesh to copy over weight paint data
pure dome
no that's not the issue, the problem is that the pendant on the collar rotates more than the collar itself since it's on a bone parented to the neck bone
see in the picture how the pendant is floating away from where it should be attached?
crisp tendon
That just means it's weight painted to other bones
pure dome
no i don't think you understand, the collar is weight painted to the neck bone but the pendant has its own bone which is parented to the neck bone, and when a bone rotates, its child fully follows that rotation, so the pendant is going all the way even though the rest of the polygons on the neck and collar are only moving partially
the pendant is 100% painted on its own bone
......wait what if i made it NOT 100% painted to it actually that gave me an idea
crisp tendon
Then you need the collar itself to be the same bone as the pendant
but since it rotates from the tail of the parent bone, it'll kinda always be off
pure dome
ah there we go, if i make the pendant only partially painted to its own bone then it won't fully follow it https://i.imgur.com/UTReMzZ.png
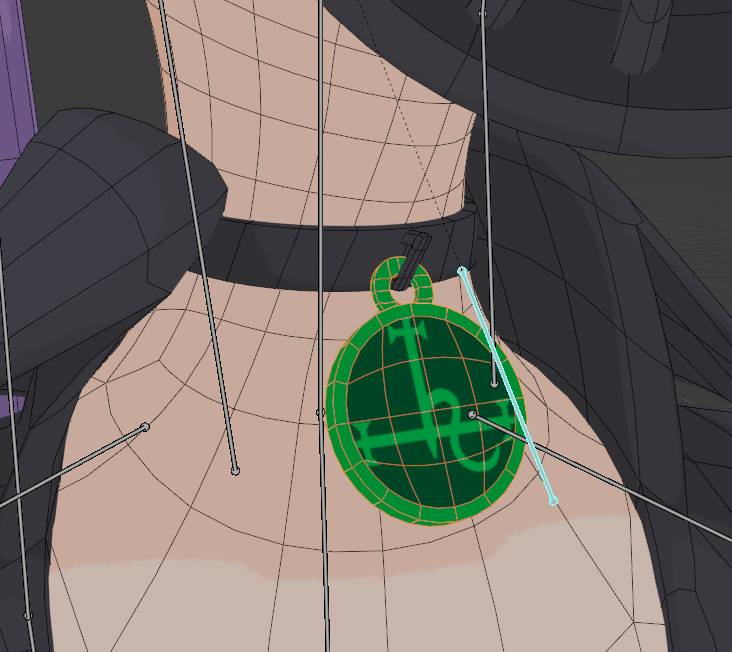
thanks for helping me come up with the idea
crisp tendon
Jank solution but glad that worked !
pure dome
as long as it works properly when i give it a dynamic bone the ends justify the means
 leaden mortar
Got this model pre rigged from a guy. Labeled super weirdly, and anytime I try to get the bones into Unity, it always tells me “both shoulder and neck need to be children of the chest” is this not being children? (Top is chest, others self explanatory)
 pure dome
i got no idea what spine_fk.003 is for but it's a different bone than the tweak_spine.003 one and the neck and shoulders are parented to each of those separately rather than both to one single chest bone
you should try to ask him what all those bones are if youre able
might not be designed for unity even
icy cedar
leaden mortar
Got this model pre rigged from a guy. Labeled super weirdly, and anytime I try t...
change the bone parents in blender and rename the vertex groups according to the new names. I'm pretty sure this isn't gonna work with that hirarchy.
should be hips>spine>chest>upperchest (optional)>neck>head. With shoulders as children of chest or upperchest (when existing)
Those are not children. Not direct ones at least and they have to be.
 ripe lance
What's causing this, is it the bones?
 icy cedar
very likely. Show pic from your armature structure and the bone placement in blender especially around thighs up to neck.
ripe lance
I'm a noob with this stuff but here you go.
 ornate cairn
check if bones in pose mode move what they should if yes unity problem it is
probably badly assigned bones
ornate cairn
if you set your avatar as humanoid there is tab that allows you to assign bones
to good parts
 wise cargo
Can somebody help out fellow blender user.
Is it possible to edit mesh scale and rig at the same time without breaking them with Armature Modifier?
Armature just allows me to have more precise control over body proportion but I'm new to this, is there better methods?
Or am I forced each time to remake rig?
 still oriole
icy cedar
asking again today. I'm trying to salvage this armature, make if FBT ready and p...
still oriole
icy cedar
asking again today. I'm trying to salvage this armature, make if FBT ready and p...
Have you tried asking in #full-body-tracking ? They might be able to answer better.
still oriole
wise cargo
Can somebody help out fellow blender user.
Is it possible to edit mesh scale and...
What are you even trying to do?
wise cargo
still oriole
What are you even trying to do?
Just trying to edit body proportions without breaking completely rig
still oriole
Well, you can apply the pose as rest pose, adjust bones if needed.
wise cargo
Yeah, which I did but upon import into unity rig breaks for some reason even though it is humanoid
still oriole
Breaks how?
wise cargo
I.e. wrists not in correct positions, weird stretching and etc.
Only happens in vrc, not visible in unity
I assume it has to do with scaling, because upon import of FBX it preserves the scaling of the armature in Unity itself which breaks the armature ingame.
still oriole
Unapplied transforms perhaps?
wise cargo
Applied pretty much everything I could, I only see that in edit mode for some odd reason they retain their original scaling despite me applying multiple times transforms.
So I'm kinda confused as to what exactly going on
still oriole
Sounds to me like the pose isn't applied as rest pose if the old one shows up in edit mode.
wise cargo
Which is weird because I did that as well and yet in edit it refuses to change
Seems like found a fix, unlinking rig for some reason helped
still oriole
Weird.
icy cedar
still oriole
Have you tried asking in <#337801456415539200> ? They might be able to answer be...
that channel really doesn't look like it but I guess I can ask there.
 stark marten
This is me in full body tracking using a kinect (Yes Ive asked for help on driver4vr) This is only apparent when im using full body with the kinect. And its ONLY apparent on this avatar. Ive done everything from freezing the armature to changing bones to rotating the bones all the way to completely getting rid of the armature and adding a working one i know for sure works with this config and to no success

Works fine in halfbody

Also to let you know i have good knowledge in avatar making but this avatar is truly making me rip my hair out. My other avatars that ive made doesnt have these issues.
If anyone has some help for me, please ping me
 rare yew
so I've been rigging a model I made in the A pose. and her fingers flare up a bit and rotate because im an artist first and dont think about these things 😂 Ingame her finger rotations are slightly off when moving between hand poses and I assume this is why. Whats the best spot to resolve this in?

Would it be best to just move her into a more traditional T-pose before I bring her into unity, and what is the default "hand pose" in that case? especially for the thumb
 drowsy wharf
stark marten
This is me in full body tracking using a kinect (Yes Ive asked for help on drive...
drowsy wharf
stark marten
This is me in full body tracking using a kinect (Yes Ive asked for help on drive...
Can I get a bone view in blender/etc?
likely related to bone distance or orientation. Matters MUCH more in full body, could also be proportions to a point


 drowsy wharf
stark marten
I'll get a pic rn
drowsy wharf
stark marten
I'll get a pic rn
Can't see the bends well, but otherwise looks fine. Have you adjusted the model to your actual proportions? (or close enough?)
drowsy wharf
rare yew
Would it be best to just move her into a more traditional T-pose before I bring ...
A T-Pose would almost definitely help, unity just kind of expects it. If it isn't in t pose you can adjust it in the humanoid rigging settings of unity, or the model itself before import (usually easier)
 barren whale
anyone know a way to set up a simple avatar that just has a moving head? I'm not experienced with making avatars, and for this one I just need its head to move but tutorials online havent been much help. if it isnt too much I'd really appreciate the help
drowsy wharf
barren whale
anyone know a way to set up a simple avatar that just has a moving head? I'm not...
Can you clarify that a bit?
do you want the rest of the avatar to be static and ONLY the head ever moves (with camera I assume?)
barren whale
yeah exactly
the avatar itself is practically just a flying head with a cloth hanging from it
(my pfp lmao)
would a screenshot help?
drowsy wharf
yes
 drowsy wharf
so you don't want the body to animate or bend, just rotate the head around?
barren whale
exactly
i already have cloth physics set up for the actual body part of it, so it's just the head that needs to turn
barren whale
for the time being, just desktop
i already have unity and all set up, im just scatter brained and cant for the life of me figure out how to get the head to animate lmao
the head is a seperate mesh, if that helps
sorry if im not being the best with giving info, like i said im fairly new to this
drowsy wharf
If you want to do it a very simple way, full weight paint on the head bone, and a dummy humanoid rig without anything bound to it would be easiest.
You could also have a skeleton separate and have a rotation constraint just have the head mimicing the head bone.
barren whale
drowsy wharf
If you want to do it a very simple way, full weight paint on the head bone, and ...
is there a way to set up a dummy humanoid rig automatically or would i have to manually create one?
drowsy wharf
I'm...not up to date on generic rigging and how to link the camera to it, but that would be another option technically
Not one I know of, I'm sure there is. Give me a sec
barren whale
camera is handled by the game iirc, so if i can get the head to move the rest should be fine
drowsy wharf
yeah I'm just not sure if thing sbecame easier with 3.0 setups for it
barren whale
ah
drowsy wharf
a dummy skeleton would mean you could use it in vr at some point as well since it'd just be the head and a fake body
barren whale
oh that'd be good
drowsy wharf
future proofing and all
barren whale
i would just make the dummy humanoid rig myself, but like i said i have literally 0 clue what im doing so theres a very unlikely chance it'd work lmao
what requirements would i need to meet?
drowsy wharf
check the pinned messages, there's a basic rig in there
barren whale
oh really?
barren whale
drowsy wharf
toes not needed, thumb and 2 fingers required
do the fingers have to be segmented in 3 parts or can they just be a singular bone?
drowsy wharf
barren whale
do the fingers have to be segmented in 3 parts or can they just be a singular bo...
I'm...pretty sure it needs 3? It's been a while since I used minimums
barren whale
hmm
ok so i have a very stupid looking rig set up
how would i actually connect the head to the head bone?
drowsy wharf
this is the doc for requirements, it's...somewhat sparse on them though
VRChat
Export Settings When exporting your rig from your 3D editor of choice, ensure your coordinate settings are correct. Most of the time, the defaults are correct. For Blender, ensure that your rest X rotation is 90 degrees. Unity will flag your humanoid rig configuration if it does not meet the Mecanim...
drowsy wharf
barren whale
how would i actually connect the head to the head bone?
assign it as humanoid in unity when you import, and assign all of those bones as the bones in the "configure" section
If your dummy rig ends at neck and the real head is attached as a child, set the head as head.
if you have a bone for your actual head and a dummy rig with a head:
assign the dummy rig as the head, place a rotation constraint on the model head, and target the dummy rig for the source, set to 1 weight on both and hit activate when the model and dummy head are in the same spot.
barren whale
so i should set the real head bone as a child of the head?
drowsy wharf
the one with the model would work better that way, yes
If you want to be able to see the head/body and not have it invisible for you keep them separate, but use a parent constraint targeting the dummy head bone
or rotation if you don't need it to move with the normal body
drowsy wharf
everything except deciding which way you want the parenting set up is unity
barren whale
got it
barren whale
yeah i cant figure it out, i'll just sleep on it to see if that helps
stark marten
drowsy wharf
Can't see the bends well, but otherwise looks fine. Have you adjusted the model ...
As best as ive been able to. Its the same as the rest of my avatars. I made legs a bit longer and sloped arms a little bit and that felt better. Nothing that fixed my issues though...
 sullen scaffold
can someone help me rigging this character from gmod https://www.mediafire.com/file/fg2wcc9kh424zwi/tv-head_playermodel_1580359640.gma/file to vrchat? md me plz

MediaFire
if u need to see the avatar u can find it on the workshop of garrys mod like "tv head player model"
 rancid magnet
Question! Im trying to rig my character and i have this dotted line from right and left leg to the top of hip bone, its correct?
 rancid magnet
Alright, it scared me a little
barren whale
if you try and upload a vrchat avatar with missing limbs, does that completely break the avatar or invalidate the limbs? i know i asked about this yesterday but im still not 100% sure on the specifics
drowsy wharf
barren whale
if you try and upload a vrchat avatar with missing limbs, does that completely b...
It really depends on what is missing, some things can be ignored like toe bones and upper chest, other things like not having a thumb, index, and middle finger will break tracking
barren whale
i might have it figured out
lemme test rq
yeah head movement is working now, i just gotta do some tweaking
barren whale
yeah thats what i ended up doing
 night compass


 hollow zenith
So my model is super low poly and only barely has modelled thumbs. If what you guys are saying is correct I should put fake fingers in the model?
 ornate cairn
you can put fake bones
so the unity will shut and let you have humanoid rig
but i think it was problem with sdk 2
 mild stratus
You don't need fake fingers on SDK3 for tracking afaik, and I don't actually know about SDK3, but you need thumb, index, and middle fingers for tracking on SDK2
drowsy wharf
Thank you...I wasn't sure if that changed with 3 or not...curse you lacking documentation
mild stratus
drowsy wharf
Thank you...I wasn't sure if that changed with 3 or not...curse you lacking docu...
Update on this I don't actually know, but it doesn't hurt to have fake fingers, just in case
 ionic sinew
Anyone have some tips for the knee area? My models calves clip through into her thighs and it's wacky.

 crisp tendon
Better weight paint
ionic sinew
Alright thanks, Ive been messing with the weights there for literal days and can't get something that works well enough to be happy with it. xD
I can fix it going through the thighs, but then I get the worlds weirdest calves.
I suppose it's just a topology/weight paint and lack of knowledge on how to get it looking proper.
Rigging vids online show an extra bone between the thighs and the calves but I'm pretty sure that's a no go for this type of rig, right?
 crisp tendon
You tried auto weight paint ?
You'd kinda want to end up with two gradients that merge around the knew for upper and lower leg
Make sure no other bones are affecting the leg mesh too !
No extra bones are needed for this, two are enough
ionic sinew
Yeah, I started the model off with Auto Paint. It was quite awhile ago at this point, and I don't remember what it looked like, but I clearly didn't like it Hahah.
I got it going a little bit better - removed a little of the extra topology and tried so other weight paints. Still not perfect but much better - so thank you 😊 A direction to go in is always nice!
crisp tendon

 void surge
i suppose that fingers in unity moves on local Z in blender so roll for bones dont need to be on zero am I right is somebody know?
 void surge
also how to prevent shoulder rotation?


 flat field
I don’t know where to start to get blinking rigged up properly
 fading verge
can somebody rid a model for me to work for vrchat quest?
 plush nymph
Hello, I’m having a issue in blender where I can’t merge a item of clothing with my skeleton
Any one able to help
I have tired merging them with my skeleton by highlighting and using CRT + j but that doesn’t seem to do anything
 vernal aspen
I'm trying to rig a blocky avatar with no deformation, and this is my first time, so How do I pair a group of blocks to an specific bone?
stark marten
void surge
also how to prevent shoulder rotation?
Can't prevent it, but you can make the shoulder bone smaller and it drops less
stark marten
flat field
I don’t know where to start to get blinking rigged up properly
Cats blender plugin
stark marten
plush nymph
Any one able to help
Press on mesh, hold shift, press skeleton, release shift. Right click and go down to parenting and choose either auto weight paint or empty groups depending on what you're intending to do.
void surge
stark marten
Can't prevent it, but you can make the shoulder bone smaller and it drops less
thank you ill try
stark marten
If you wanna eliminate the drop all together you make the bone so small nothing really moves. I did this to combat shoulder drop on an avatar i didn't want it on
Np
 sudden drum
are there bones that vrchat expects you to have in a model?
i.e. does it particularly care whether or not you have two bones for the torso instead of one
vernal aspen
How do I make the armature visible on top of the mesh?
sudden drum
in blender?
vernal aspen
Yes. Also how do I rig so that my block avatar doesn't deform from the armature?
My avatar is made up of a lot of cubes, and I want to keep them cubes.
when I do auto-weights, it works but it deforms the cubes.

https://gyazo.com/45ab8fe08673145c66aa0f3b447bc19b
Here's the general grouping I want on Blockbench by comparison. The not-animated picture is from Blender.
 rare yew
wait. can several joints in blender have 100% influence on a vertex? When i paint skinning in maya they can only share a weight up to 1.0 (and adding more to one detracts from the others) but I see several of my joints affecting the same vertexes with red color intensity
 muted fjord
rare yew
wait. can several joints in blender have 100% influence on a vertex? When i pain...
muted fjord
rare yew
wait. can several joints in blender have 100% influence on a vertex? When i pain...
Yes, that's why it's important to make sure Auto Normalize is enabled in the Options menu of the Tool settings during weight painting.
muted fjord
vernal aspen
How do I make the armature visible on top of the mesh?
Go to the Object Properties tab of the armature and enable "In Front" in the Viewport Display menu.
vernal aspen
I want to know if there's a method to perserve the cubes' shape.
muted fjord
Yeah, just paint the entirety of each cube's mesh region with a weight of 1 for each associated bone.
vernal aspen
clipping is fine
Can you explain the process a little more? I am very new to manual rigging.
I currently am using a metarig from rigify
muted fjord
Two options: in the Brush Settings of the Tool menu when manually weight painting, you can set the Strength and Weight sliders to 1, then isolate each cube mesh at a time, select the bone you want to control it, and just flat paint it - Alternatively, just create a vertex group for each rigid cube group and assign them to a matching bone name.
Ah, sorry, thought you were using blender.
plush nymph
whats the proper way of moving the model to see if my meshes ar corectly murged
pose mode then what exatly (Thanky you, @ me when you respond)
vernal aspen
I am using blender, keep continuing, thank you 🙂
How do I select the specific bone in weight paint?
muted fjord
Ah, so you imported it after letting rigify handle it? I see what you're saying. Well... I'm not sure that much of rigify's work is going to useful, since I think it assumes distributed deformation - most of this use case is manual assignment - but luckily it's also simple because you don't need to worry about transition regions.
ctrl-click the bone
Oh - rigify the add-on, lol, my bad - yeah I haven't used it, sorry. Perhaps there's options in there for this, but I wouldn't know.
For some reason I was thinking you meant Mixamo's auto-rigger, brain fart.
vernal aspen
Working on it rn, my next question is, how do I rig my lower jaw to just move up and down when talking?
muted fjord
I don't know if this deviates from the rigify workflow, so I'm not sure if it's useful advice - but I usually just select the head bone in edit mode, extrude a new bone along the y-axis to rename "Jaw", remove "Connected" in the Bone Properties tab, offset it on the y-z plane to where the head (as opposed to tail) is at the desired point of rotation, then switch over and weight paint the mesh section that I want to move - in this case it looks like it's just the teeth and lower box? Once again, a solid, uniform weight paint of 1 should work for robotic movement, or just assign those faces to their own vertex group called "Jaw". Then just assign that bone to the humanoid rig in Unity and plug it into the VRC Avatar Descriptor field under LipSync's "Jaw Flap Bone" Mode.
muted fjord
plush nymph
pose mode then what exatly (Thanky you, @ me when you respond)
I don't know about "proper", but I just select the bone and double tap R then wiggle it around to make sure everything's following as intended.
You can right click when done checking to reset it to the original position.
muted fjord
By the way, does anyone happen to know if there's a Unity equivalent for vertex parenting? Or is this just a non-transferrable, blender-specific feature with no appropriate analogue?
vernal aspen
@muted fjord Third question. If I wanted my avatar's ears to be posable dynamic, what do I do?
muted fjord
Similar to the jaw, just make two child bones offset from the head bone, aligned with the lower ear boxes, and extrude from each of those another child bone for the tip boxes, and paint/group those regions. It may actually look better with a small intermediate bone to separate them, but that just takes iteration and examination. By posable dynamic, do you mean you ultimately want dynamic bones, or just gesture/expression controls, or both?
plush nymph
my skeleton seems to not be boud to my mesh, like at all, not even my player model
vernal aspen
I just want the ears to move when I move, but also are posable by grabbing them with my hands.
ty, is the armature the parent or the child? armature only can control mesh if it's the parent.
Gizmo, how do I make textures partly transparent?
muted fjord
Right, the armature object is the parent of the mesh object - when I refer to child bones I mean a child of the head bone within the armature itself.
vernal aspen
In Unity.
muted fjord
That's an aspect of the shader you're using - but it's not really a rigging topic.
Just a heads up if you're developing for quest, partial transparency isn't supported on any of the mobile shaders for avatars.
vernal aspen
Okay, when I meant partly transparent, I meant one part of the texture is fully transparent, and the other parts are opaque. Sorry for not clarifying, I can see how partly-transparent can be confused with transculent.
muted fjord
Right, even for binary transparency regions, it's the same - but yeah like I said, probably want to address that in either the shaders or general avatars-3-help channels rather than this one.
vernal aspen
Okay, thank you.
muted fjord
As for alternating between dynamic bones movement and grabbable posing - that's an interesting feature that I've never really tried. If there's an easy way of doing it, I'm unaware. hopefully someone else who has can share their method.
I will say though, I think the new physics bones update that is being teased should actually have that as a built-in feature, if I'm not wrong.
muted fjord

VrChat Avatar Dynamics Sneak Peak from the Live Stream. This update is predicted to be released "Around Summer"
plush nymph
i fixed it
plush nymph
is anyone willing to watch me screen share and tell me what im doing wrong, my amature wont apear
rare yew
muted fjord
Yes, that's why it's important to make sure Auto Normalize is enabled in the Opt...
thanks! still figuring out where all the bits and bobs are in blender 😅 The transisiton is rough but i figured it's worth knowing both
 unborn marten
I have a model ready for VRChat but it needs to be rigged for VRChat to be ready. I'm new to blender so any help is appreciated.
 toxic fulcrum
Hey there! I have a very specific question that may be relatively simple but I have not been able to find anything searchable that fixes my particular case.
I am trying to update a model I previously uploaded after fixing some of it's janky weight painting, however the model has a lot really particularly calibrated dynamic bones and bone scaling that I don't want to have to re-do every time I need to iterate on its weight painting. I have tried replacing the FBX with a new updated FBX with the same name, but this has not updated the weight painting and I'm unsure why.
What I would like to know is if anyone here knows why the weights are not updating or alternatively another way to replace weights without redoing the entire upload
I mostly ask this because the more of this I do the longer the process becomes and weights are so hard to get right in the first place that I really want to set up a workflow where I can update them without redoing work I've already done
 mortal oriole
could someone help me, i need some help with bones
mortal oriole
figured it out
 hushed agate
trying to get this model to work, and I already did all of the weightpainting and other stuff for blender, but when importing it into unity, the animator fails to find the avatar, and thus causing the rig to fail

 hushed agate
yeah checked and i did
ornate cairn
you checked if animations work in unity?
hushed agate
i'm not sure how to check, still new to this very sorry
when checking my source for the rig though, it doesn't even show my avatar to use the rig for
ornate cairn
did in blender rig works properly?
 ornate cairn
it seems like the armature isn't parented properly to avatar
 vivid carbon
restart Unity
ornate cairn
there is button to force t pose
fading verge
Work out the soultion was weight painting error
 wheat hamlet
can someone help me get eye tracking working?
ornate cairn
Look at channel name....
delete it better
it always has been like that just accept it
still oriole
Common VRC like, being too scared to join a place because of crippling anxiety even though you came here to fight it in the first place.
 zenith herald
I have possibly the weirdest bug I've ever seen. I just made all my visimes and stuff, exported my avatar via the CATS plugin for Blender, and suddenly upon importing the fbx into Unity, the fingers on both hands are broken horribly! I've never had this happen in the last 8 avatars I've made, all the same way. Does anyone know what's going on here?

 rose hinge


I'm getting this bug where the legs and hips slowly begin to shoot out in front of or to the side of the avatar when walking, and snapping back to place when I stop. This only happens in VR and not Desktop.
crisp tendon
zenith herald
I have possibly the weirdest bug I've ever seen. I just made all my visimes and ...
Make sure to clear bone rolls before export !
zenith herald
Just double checked, all the fingers do have a roll of 0d
crisp tendon
Pose applied as rest pose and bones name are correct ?
rose hinge
crisp tendon
Pose applied as rest pose and bones name are correct ?
I'm having another bug on the same avatar I just posted where the biceps roll really far back. The bone roll for them is set to 0 degrees as well

bone roll be acting up for people lately
crisp tendon
Unity is still the same so unless you're all using blender 3.0, i'm not sure what the cause could be
rose hinge
I am using Blender 3.0
crisp tendon
@zenith herald What about you ?
zenith herald
The default pose is applied yes, and the naming convention for the bones go as Finger_Index_1_L, Finger_Middle_1_L, etc. (same convention as previous avatars I've made)
crisp tendon
And are you using blender 3.0 ?
zenith herald
No, I'm using 2.9. Same version I've used for the previous avatars too
rose hinge

says 0 degree roll but the bone is still rotated
same goes for all the others
at least on the arms
I still have no idea what's up with the legs. I had the same issue on another avatar before and only fixed it by completely replacing the skeleton with a virtually identical duplicate. I don't have a duplicate for this avatar
zenith herald
Ok so small update. I just fixed it, though I still have no idea why it happened in the first place. I was able to correct the fingers issue by clicking 'Start Pose Mode' and then 'Apply as Rest Pose'. The strange thing is though I have never once had to use that button for the last 8 avatars I've made. I'm sure I followed all my usual steps in building this avatar so I'm not sure why this case was different.
 mortal oriole
im having trouble getting some bones to stick to a mesh, i need some assistance
rose hinge
Alright the problem I had with the legs just kind of fixed itself but the arms are still broken
 dusty breach
does anyone know how to map/rig something else on the model so it corresponds to the model's face smiling as well i.e. like this model (the cat on the bag smiles, eyes open, etc with the models face)? 🥺
https://www.youtube.com/watch?v=ZNVJKuSUp6s&t=46s https://booth.pm/en/items/3166554 heres an example!!

VRChat向けアバターの「ラウラ」の紹介動画です
様々な表情や動き、機能をご覧ください
出演協力:ティンバー( https://twitter.com/timberforester )
撮影協力:ことのし( https://twitter.com/color_kotonoshi )

・VRChat向けオリジナル3Dモデル「ラウラ」(Rawra/らうら) ・VRChatのAvatar3.0向け設定済み(Unity2018、Unity2019対応確認済み) ・DynamicBone設定済み (持ってない方はMissingのコンポーネントを外してください) ・Psdファイル付属 ・ユニティちゃんトゥーンシェーダー2.0使用 ( https://unity-chan.com/download/releaseNote.php?id=UTS2_0) ・Quest非対応 ・VRChatアバター試着ワールド (
 odd tapir
What do I do so the coat does not clip through the legs ? I have colliders set up, dynamic bones have the colliders setup in them too,
 ornate cairn
the most optimal thing would be to weight paint coat but your problem could be that you haven't connected colliders to bones
odd tapir
I have connected colliders to bones
Also the coat is weight painted 
Not the legs though, it's weight painted to it's own bones
rare yew
odd tapir
I have connected colliders to bones
im pretty fresh to this so maybe this is dumb. but have you assigned the leg colliders in the dynamic bones for the dress?
 rare yew
all the tutorials I can find on attaching expressions to hand gestures involve duplicating the existing FX controller for the hand gestures and replacing them with the face animations. But Ive already made a custom FX controller for switching outfits/toggle items. Is there no simple way to add the expression stuff onto my current FX controller or should I migrate those few extra things onto a copy of the hand_gestures stuff?
 analog aurora
does this look correct? Or do I need to move the shoulders up more?
 odd tapir
rare yew
im pretty fresh to this so maybe this is dumb. but have you assigned the leg col...
odd tapir
rare yew
im pretty fresh to this so maybe this is dumb. but have you assigned the leg col...
Yes
ornate cairn
analog aurora
does this look correct? Or do I need to move the shoulders up more?
for aesthetics move bones inside mesh
analog aurora
Well yeah. I meant are the shoulder high enough?
analog aurora
Cool. Also, how far should I bring the hand bone in the hand if i want to add fingers?
Is where the length they are now fine?
ornate cairn
the bone which will connect all finger bones should be placed before hand mesh starts
just look at other rigs
analog aurora
ok
I am so glad that the mirroring feature exists
I would hate to have to rig both hands individually. My OCD would drive me crazy even if there was a miniscule mistake, lol
ornate cairn
it is very good feature when avatar is symmetrical
analog aurora
i added a new bone and it didnt mirror on the other side. How come?
fading verge
so i have set everything on the robotic arm using vertex groups it works fine in blender and revolves around the point i want it to and it does in unity too i think ill double check this in a minute BUT ingame the arm does not revolve around the joint the bones connected too as if its being pulled away how do i fix this (new to rigging never done it for arms)
 fading verge
can somebody rig me a model, I have no idea how to model and I dont have any money to pay somebody
dm me if you can help
 sturdy belfry
why do my eyebrows move when i talk in game? does anyone have a fix, by chance?
ornate cairn
What type of lip sync you use?
sturdy belfry
Viseme
ornate cairn
you checked if in blender they move eyebrows?
sturdy belfry
No, however I was curious how i'd go about fixing that if they do?
I imagine they probably do, so I just kinda wanna know how to fix it.
ornate cairn
if they do you just delete blendshape and re do it
or just copy eyebrows from normal blendshape
 wanton dove
would this cause the feet to sink below the floor when wearing the avatar? or is this fine

also, do i need to flip the hip bone here? or is it fine.

oh, and one more thing. the model does not have shoulders (and shouldnt. it's a robot). will that cause problems for fbt?
vivid carbon
You need the bones, but they do not need to have any vertices attached to them
drowsy wharf
Hip bone should point up, legs should point down.
Your feet should be fine in VRC as is
You can make the shoulders an ity bitty bone at the head of the upper arm bone
wanton dove
ah ok
drowsy wharf
the smaller it is the less it will move, so it won't actually shift around if tiny
wanton dove
then this is more of a blender question: how do i do that in blender? adding a bone in the middle of a hierarchy
drowsy wharf
select point to extrude from, Press E, drag and click (or press x y or z to lock to an axis first), move to where you need it and resize
Select upper arm bone, set parent as new shoulder bone
wanton dove
and just move the head and tail of the new bone to the head of the arm in question?
drowsy wharf
yes, I'd give it a small difference just so unity doesn't act up with it though
shoulder tail and arm bone head can be in the same spot, just shift the shoulder head over towards the chest a little
wanton dove
about how much of a difference?
this is enough to keep unity from freaking out, right?
 drowsy wharf
wanton dove
this is enough to keep unity from freaking out, right?
drowsy wharf
wanton dove
this is enough to keep unity from freaking out, right?
yeah you should be fine
wanton dove
thanks
 thorny valley
how

I just want to hold an object but the finders just go back to curled
I moved his fingers so they did not do this but after I published it to test and got that error they went back

Here is the
 muted fjord
It looks like you're trying to animate the transforms of the fingers directly - you need to use the associated Animator parameters from the humanoid rig (should be just below the Transform root in the properties list). Check the proxy_hands animations in the VRCSDK examples folder for a reference.
thorny valley
Sorry for asking but where is it?

well I found it in the sdk example assets but they are not on my model anywhere. (Fist time doing this)
 thorny valley
mmm
ok found that thanks
c
I can only spin them on an axis like a pinweel. How do I postion them so that I can move them around
like move left and right
 muted fjord
There should be a property called "spread"
thorny valley
in the animator section?
 muted fjord
The spread? It's in the list under each segments stretch property. Sorry, maybe I'm misunderstanding what you're looking for? If you need wrist control, I don't think that one is included by default in the examples, but you can duplicate the animation, rename it, and add the property to mess around with. I think it's called Hand something.
thorny valley


The first one I moved the fingers around and got the error. The 2nd one is what happens when I try to run the model. I can't use the baic transform on the hand parts to do this for reasions that the sdk does not like. How do I get photo 1 to do it without using the trans tool on the main parts
muted fjord
You're probably better off repositioning that prop to a more natural angle for the fingers to grasp it.
mild stratus
for reasions that the sdk does not like
That's more a Unity issue than a VRChat SDK issue
mild stratus
yep
thorny valley
Ima just make a new hand model and overlap it with the old one then make the other one invisible
 signal tapir
Friendly reminder; never put a descriptor on a non humanoid to humanoid avatar
This will make your FX layer go crazy and multiply on the descriptor after uploading
fading verge


my legs are not the same
well they are the same
but the hip and spine bones are smaller
is it a big deal
ornate cairn
make a hip bone a little more above leg bones and should be fine
fading verge
 ornate cairn
now it's good
 vivid carbon
They need a bone if you want to show or hide them with an animation
vivid carbon
make sure the bone is parented to whatever body bone they move with, like that axe should probably be parented to Chest
vivid carbon
what do you mean solid
ornate cairn
you can't add to them psychics if you want use them in vrchat that won't apply
fading verge
vivid carbon
what do you mean solid
like manifold

solid like this
i guess you could call it two face
vivid carbon
Yes/no, it depends
If it is in an area that you will see both sides, you should have a back with normals flipped from the outside, but the whole mesh shouldn't be, that adds a lot of extra polygons
only have vertices for the side you are going to see
fading verge
if you look into the collar of the shirt you will see inside though
crisp tendon
Disable backface culling
fading verge
that was the plan
thats why i added pipe to the clothes
so i could imitate it being solid
 vivid carbon
You can disable backface culling for PC, but not for quest, so the mesh would be needed if you plan on using on quest
fading verge
i dont use quest so i guess its fine
vivid carbon
You should think about uploading a lower quality version to the Quest unless you want to use a public fallback avatar
or plan to create your own fallbacks
fading verge
i dont play with people on quest its fine
can i use curves in unity
or does it need to be a mesh
the pipe

also how would you suggest i do weighting if the topo is bad
do i need to re topo
i would rather not
 fading verge
does the deform look good

 amber moth
Hey guys, im looking for a simple but helpful tutorial on adding dynamic bones to meshes or more specifically converting some bones that are already on my armature into dynamic bones
Id like to setup my avatar model so its ready to be converted into avatar dynamics as I'm a quest user so I can't use them just yet
 sleek isle
You can only wait. Only thing you need is bone.
amber moth
I have bones setup already in my model its just they're not dynamic but if all I need to do rn is wait then I can do so
 wet linden
For dynamic bones, you literally just add the dynamic bone component to an existing bone in unity.
 woven dagger
could someone so kindly provide me with a youtube video on how to make mouth and eye tracking? i cant seem to find a good video
 sleek radish
-yikes- that topo
 shut tundra
Can someone explain to me how in this video at 3:44 he's able to rotate the bone and edit the weight paint. I know how to rotate bones. But if i leave the bone in a different position it stays like that and doesn't go back to normal. https://youtu.be/4fICQmBEt4Y?t=224

I've been meaning to update this video for a very VERY long time. But, we're finally here. Everything you need to know in order to start painting weight layers onto your character!!! Hope it helps :)
Female Body Model Link:
https://www.youtube.com/watch?v=_XfvLpLyulI
If you enjoyed this video, please don't forget to like and subscribe!
You ca...
shut tundra

I want to be able to do this
i'm in blender 2.93
nevermind i just figured it out. ALT R to reset all rotations,
ALT G to reset all translations,
ALT S to reset all scales.
sleek isle
ALT F4
 bright grail
https://gyazo.com/ec9aef462de5fb5e9331f05c0cb98467 Would anyone be able to help me figure out why my model is doing this when I bring it from blender 2.83 into blender 2.79 or even unity? It opens just fine in 2.83 btw. From right to left is the order
 ornate cairn
bright grail
https://gyazo.com/ec9aef462de5fb5e9331f05c0cb98467 Would anyone be able to help...
ornate cairn
bright grail
https://gyazo.com/ec9aef462de5fb5e9331f05c0cb98467 Would anyone be able to help...
Try using cats addon for blender maybe it will help there is fix model button
but it seem like rig is broken
completly
bright grail
It doesnt, It just makes the materials have the incorrectly assigned textures. And everything is still weight painted correctly to where its supposed to be
ornate cairn
ok when you are in 2.83 in pose mode everything is fine?
bright grail
Yea, in 2.83, I go into pose mode, everything works as intended, I can close 2.83 and reopen the project, and its just fine
ornate cairn
bright grail
Yea, in 2.83, I go into pose mode, everything works as intended, I can close 2.8...
Can you in blender 2.83 click on armature and avatar and than hit ctr+ a and apply scale
bright grail
Alright did that, nothing seems to have happened.
ornate cairn
so you tried after that opening it in different blender?
bright grail
I havent tried opening it in my other blender, I wasnt sure if there were other steps, one second.
Its still broken in 2.73
It seems to have something to do with the export process, because whether I use cats, or blenders exporter, I get the same result, and if I open an exported version in 2.83, I get the jagged broken mesh
ornate cairn
when you export can you in apply scalling select fbx all?
bright grail
 ornate cairn
yes
bright grail
Yea thats been on every time ive exported it would seem
ornate cairn
Well i have no clue now what it could be, it's seems like data mesh aren't proper but don't know why
you downloaded this model from somewhere or made it yourself?
ornate cairn
can you try ctr+ a and all transforms
bright grail
Still the same result
I think its basis thats corrupted, I just went in to 2.79, and tabbed into one of my shape keys and the mesh was fine
vivid carbon
bright grail
I think its basis thats corrupted, I just went in to 2.79, and tabbed into one o...
if that is true then you need to https://docs.blender.org/manual/en/latest/modeling/meshes/editing/vertex/propagate_shapes.html
If what others have said to fix is correct
bright grail
Is that for 2.8 or 2.7?
ornate cairn
you need to go to edit mode
vivid carbon
that link specifically goes to current docs, so 3.0, but the page shows for 2.83 as well
bright grail
Ahh ok. I followed it, but it unfortunately got rid of all my shape keys data entirely, and I just spent 3 hours doing advanced mouth tracking visemes, but I luckily have some empty visemes that I can use to make a new basis which works just as well, but I do appreciate your help alot
vivid carbon
This had been suggested multiple times from other people, I have never done it myself so I didn't think it would do something like that. Sorry about that, you can always undo of course and hope someone else has a fix, or at least save a copy of before doing that
bright grail
Ya no its all good. Making a new basis from one of the unused shape keys worked thankefully
 rugged stone
 fading verge
any idea if this awful hand setup will work

ok im just gon go with it
does anyone have the bone naming conventions?
fading verge
shut tundra
Can someone explain to me how in this video at 3:44 he's able to rotate the bone...
ooh i know this
click on your armature
then shift-click your mesh
use the little drop down menu to go into weight paint mode
then you can shift or control click bones to select them and rotate like normal
while also weight painting
drowsy wharf
fading verge
does anyone have the bone naming conventions?
actual bone names do not matter, though generally you want something mentioning L/R for either side
You also don't NEED to have a mesh for every bone if you don't want to, like if you don't want hands, you can have the bones for them and no mesh
fading verge
wait how is unity gonna know what is what then?
drowsy wharf
unity only moves the bones, the model itself decides where the mesh parts move based on those bones
unity doesn't care if you have a mesh for a bone
It treats bones the same as any other object, like unity cube is the same as other objects
fading verge
oh i thought that it was gonna like work with premade animations or something
drowsy wharf
technically it does, but the animations move the bones not the mesh
the only mesh moving in unity is either pre-made blend shapes, or shaders
(or unity cloth...)
I've set up a full humanoid skeleton with no weight at all and something else that has a mesh and bone on it
fading verge
umm sorry but which one of these is the chest, upperchest, spine, and hips?

theres only 3?
 slow forum
Hope I can get some help with this as I am so close to getting my first avatar into vr. The issue I am having is that everything works yet when I use the avatar it is sitting halfway in the ground with his hands up over his head. The hands move when I move mine but when I look around the avatar swings like its parented to where my view is set. I am rigging in Maya and using the send to unity with fbx
slow forum
Fixed, Armature had wrong up direction. Now to fix scaling issues
 viscid narwhal
Hello, I've been having this issue since I started trying to make avatars back in August of 2021.
I try to add a new hair mesh to the avatar of choice, but everything I've tried, Automatic weights to the original armature,
Bone relativity, and even just going into Unity after going into blender and making the head/neck the parent. The hair will never
move with the avatar. What can I do?

Even joining the hair mesh to the original body mesh hasn't worked.
 ornate stone
How would I best make these match? Should I make planes underneath, and how would I do that?
 shut tundra
ornate stone
How would I best make these match? Should I make planes underneath, and how woul...
shut tundra
ornate stone
How would I best make these match? Should I make planes underneath, and how woul...
Are you talking about connecting the 2 highlighted loops together? Or do you just not want that gap?
ornate stone
Yea, I want to connect them somehow, hopefully like this....

I actually want it wrapped all around the neck part, because it looks off now:
 shut tundra
https://www.youtube.com/watch?v=iYmH1PoyYSg You could try this maybe.

Simple blender tutorial that will show you how to join loops with different vertex count.
 ruby oxide
ornate stone
How would I best make these match? Should I make planes underneath, and how woul...
ruby oxide
ornate stone
How would I best make these match? Should I make planes underneath, and how woul...
i thought this was a skirt
shut tundra
I thought so too
viscid narwhal
:/
 wispy coral
hey does anyone know how to fix this
 ornate cairn
wispy coral
hey does anyone know how to fix this
ornate cairn
wispy coral
hey does anyone know how to fix this
It's parenting problem easy to fix in blender
wispy coral
ok when i click on the bones how do i make the bones parents
ornate cairn
watch some tutorials on youtube it will help more
 ornate cairn
oh god that is indeed mess
wispy coral
yes
ornate cairn
try mixamo auto rigger
wispy coral
oh wait i dont have that were is that
ornate cairn
site
wispy coral
it work thank you
 jade verge
Anyone here got experience with auto rig pro (the blender addon)?
I have it installed and partially working, but got some questions on how it works and how to get it into vrc
fierce grail
wispy coral
hey does anyone know how to fix this
Look at pinned messages.
 undone basin
So i have a model thats alredy rigged but it doesnt have finger bones. I added them try to parent them to the object dint work. What im I doing wrong? (In blender)
 fast bane
Doing something for a friend
How do I make this R6 roblox model (it has only 4 limbs + head/torso, hence the name) bend rigidly

I do not want elbows to be taken into the equation when I basically just want the model to care about where the hand is so the arm just points that way
drowsy wharf
fast bane
I do not want elbows to be taken into the equation when I basically just want th...
as long as it isn't for full body, it just needs to have the correct humanoid bones to work out of the box for vrc
even if those bones are so small they do nothing, but are still in the right order.
From what I can see:
You already have elbows made (upper/lower arm joint)
You're missing a neck bone (just make it tiny between head/chest)
And you're missing at least thumb/index/middle fingers (I think it was 3 bones per finger required...can't remember)
Bones do not NEED to have weighting, just need them to exist for unity's humanoid rig system
fast bane
drowsy wharf
as long as it isn't for full body, it just needs to *have* the correct humanoid ...
Genuinely big thanks, no one else I went to had a clue on how to help
There is a neck, just very very tiny

So all I need are just the fingers?
drowsy wharf
that's fine then
just make sure you have the order correct too, you can check the pins for a hierarchy
The top pin is still somewhat important for you as well, make sure the elbow/knees are bent slightly in the correct direction, and otherwise mostly straight
you mentioned not caring about an elbow, so if you don't want the arms to bend at the elbow/knee you can technically make the upper or lower arm really tiny as well
 drowsy wharf
fast bane
for the knees
drowsy wharf
fast bane
for the knees
as long as they're also straight from the front view, yes
fast bane
Ok
fast bane
drowsy wharf
as long as they're also straight from the front view, yes
Should the lower arms when downscaled be positioned in the middle like this?

Because idk if it will get in the way when rigging it up in unity
drowsy wharf
make sure they have the "connected" checkbox marked or things will likely get weird
But generally you'd just scale the bigger bone up and the smaller one down
So for the lower arms you'd shrink it down near the wrist and have the upper arm cover the rest of it
You will pretty much not have any elbow bending though, so vr may be weird if you do it and don't hold your elbow straight all the time to do things
fast bane
Ok
fierce grail
Finger bones are not needed for humanoid SDK3 avatars to work properly.
 rustic depot
I have an issue with a model im creating where my shoulders turn inside out or flip over when i lift my arms up


Can someone help me fix this

it also makes the neck longer and the hoodie gets flipped too
 devout lantern
Hey all, i'm working on an update to my character at the moment and i was wondering
is there any indication that the avatar dynamics update will allow for driven keys and corrective blendshapes?
fading verge
Anyone know how to fix that issue where the hands look very weird in game like they close wrong it happens on a lot of avatars
drowsy wharf
fading verge
Anyone know how to fix that issue where the hands look very weird in game like t...
first guess is not having bone rolls cleared/reset before export from blender
fading verge
drowsy wharf
first guess is not having bone rolls cleared/reset before export from blender
I’ll try that Thankyou I’m kinda inexperienced in blender
fading verge
drowsy wharf
first guess is not having bone rolls cleared/reset before export from blender
Where would I find the menu to do that
drowsy wharf
newest blender? hit F3 type roll and you should find it
make sure you're in bone edit mode with all bones selected
fading verge
drowsy wharf
newest blender? hit F3 type roll and you should find it
I hit f3 and nothing happens
While all the bones are selected in edit mode
drowsy wharf
which blender version?
fading verge
uh 2.93.6
drowsy wharf
try space instead, you should get a search/finder
fading verge
drowsy wharf
try space instead, you should get a search/finder
I hit space and it started to play an animation
drowsy wharf
uh... Alt+R I think was the binding for reset rolls
it should be F3 then if it's playing anims on space
fading verge
drowsy wharf
uh... Alt+R I think was the binding for reset rolls
Do I do that command when I have all the bones selected in edit
drowsy wharf
yes
if you're on a laptop you might have to hit the Fn key and F3 to actually press F3...because designers are stupid
fading verge
drowsy wharf
yes
😂that brought up my performance overly idek I’m on a desktop but I do have a fn key so lemme try that
drowsy wharf
what kind of weird bindings do you have...and fn on a desktop too?
fading verge
It still did nothing
It’s a weird keyboard
Is there a way to access it without a key bind
Oh wait

It has these
drowsy wharf
need to have your cursor in scene
yes, second option, though normally you'd search for roll
drowsy wharf
any time you're affecting something in the scene, have the cursor over the scene
(including search)
fading verge
drowsy wharf
any time you're affecting something in the scene, have the cursor over the scene
Ok
What do I set the roll to
drowsy wharf
just clear rolls
alt+R or the second option, hit it and you don't have to adjust anything else
fading verge
 drowsy wharf
leave it
drowsy wharf
do you have NZXT Cam?
fading verge
drowsy wharf
do you have NZXT Cam?
Yeh but it’s my nvidia one
drowsy wharf
control+o apparently disables that
But as long as the clear roll window came up, it should be good
fading verge
Ok cool ima test it in a min but would u also happen to know why in unity after I combined all my models of blender into 1 when I add a material to the models hood it colors the who avatar but for every other body part it color the individual part
drowsy wharf
If you atlased everything, you're NOT just applying a material to the hood, you're applying it to the whole model
That's what atlasing is. Making an atlas (like unwrapping a globe into an atlas) of all your textures/materials chosen.
If you want to recolor the hood, make a copy of the texture and edit that, changing only the hood section.
fading verge
drowsy wharf
If you atlased everything, you're NOT just applying a material to the hood, you'...
I didn’t atlas anything I don’t think I just used control j to combine them all
And if I did Is there a way to un atlas the hood
drowsy wharf
are you dragging the material onto the model or into the material slots?
fading verge
drowsy wharf
are you dragging the material onto the model or into the material slots?
In unity I drag it onto the model
drowsy wharf
if you only joined meshes into one, that's not atalsing
fading verge
Itself
fading verge
drowsy wharf
if you only joined meshes into one, that's not atalsing
Yeh that’s all I did
drowsy wharf
I would not suggest doing that...it's an option but it's really finicky and not suggested other than for single material objects
fading verge
drowsy wharf
I would not suggest doing that...it's an option but it's really finicky and not ...
but in game the hood the glasses and everything moved separately
drowsy wharf
select the mesh, and swap the material directly in the sinspector
drowsy wharf
fading verge
but in game the hood the glasses and everything moved separately
not sure what you mean, joining meshes doesn't make them move as one, they still follow their bone weights
fading verge
drowsy wharf
not sure what you mean, joining meshes doesn't make them move as one, they still...
oh good to know 😂I’m screwed then
Idk how to make them move as one
drowsy wharf
you'd just have to weight paint and parent things properly
like if the glasses are parented to the chest instead of the head bone, they'll move with your chest, not your head
fading verge
oh ok is weight painting necessary
drowsy wharf
and if they don't move at all, they're either parented to your root, or they're not weight painted at all
unless you just have a floating object that doesn't move it's arms separately from it's body...yes
weight painting is what makes each vertex actually move the specific amount needed compared to one or more bones
generally for glasses for example, you'd fully paint them to one bone, either a glasses bone, or to the head bone
did you just merge a bunch of things together that had separate armatures or similar?
fading verge
oh alright that kinda stinks So for a hood would I weight paint the hood itself or the part of the body it’s attached too
fading verge
drowsy wharf
did you just merge a bunch of things together that had separate armatures or sim...
The stuff I merged was a body then objects that didn’t have ametures
drowsy wharf
you would weight paint the hood to the bone it follows
you'll want to look up tutorials for it. It's a bit confusing at the start.
fading verge
drowsy wharf
you would weight paint the hood to the bone it follows
you'll want to look up tu...
Yeh I’ll do that Thankyou tho I rlly aprechiate it
drowsy wharf
fading verge
The stuff I merged was a body then objects that didn’t have ametures
you merged a body into another one? or just put a body in the scene and added things to it?
fading verge
drowsy wharf
you merged a body into another one? or just put a body in the scene and added th...
Put a body in the scene and added things to it
drowsy wharf
also...look up CATS plugin if you're not using it, it simplifies a bunch of things for vrc
fading verge
drowsy wharf
also...look up CATS plugin if you're not using it, it simplifies a bunch of thin...
I have that already but I just use it to import models
drowsy wharf
fading verge
Put a body in the scene and added things to it
then yeah, assuming the parts you added had no armature, you'll have to weight paint everything
drowsy wharf
fading verge
I have that already but I just use it to import models
it can do a lot more...like mass joining all those meshes you did one by one by selecting them and hitting a button, or just join everything at once or merge armatures, combine materials, etc
fading verge
Rip ok um ima try to do that watching a Tutorial but I didn’t add to much so if I added two models without armature do I just have to weight paint those
fading verge
drowsy wharf
it can do a lot more...like mass joining all those meshes you did one by one by ...
Oh that’s actually sick
drowsy wharf
anything that doesn't have weight painting will not move until it does, yes
fading verge
drowsy wharf
anything that doesn't have weight painting will not move until it does, yes
Ok Thankyou here goes nothing 😂
drowsy wharf
if you select the armature first, switch to pose mode, and then...control select the mesh and switch to weight paint, you should be able to position the bones (and more easily select them) while still painting
...helps a lot with checking and adjusting things. I think the hotkey to toggle mesh edits is still M but I'm not sure
shut tundra
Is there a way to prevent the hip tilt for full body. When adding a rig to a model from scratch? I rigged a model from scratch and everything was done correctly and i still had to do the hip tilt fix. Every other model i've made has that issue. And majority of the other models already came with a full rig.


 pine sapphire
Nice
 tired idol
I just have to parent it with automatic weights-
 jagged matrix
Trying out Blender Rigify and it's.... it's a lot.
 shut tundra
Yeah blender rigify is a lot. But it actually works really good for the face. I mainly use it just for the face. The rest i rig myself since vrchat has certain spine requirements that it likes.
jagged matrix
Yeah that's the main reason I want it, just for making expressions and visemes
I found this playlist which has a really good technique for turning a Rigify armature into one that's suitable for Unity that I'm gonna try tomorrow https://www.youtube.com/playlist?list=PLdcL5aF8ZcJvCyqWeCBYVGKbQgrQngen3

YouTube
If you are interested in Exporting character (or rigged/skeletal meshes) from Blender 2.8 or 2.9 to any game engine, I think you'll find this ongoing series ...
If all goes well I'll be able to keep both my Rigify "control" armature and my simplified "game" armature around, export the game one for Unity, and use the control one for making animations and blendshapes
🤞
 plain prairie
I am rigging a model in unity for VRchat/Veeseeme/Animaze and I am just stuck on getting the mouth to work and add physics to some parts of it
 young mantle
man
i found an old model i made in 2017

and i was ilke
like
"imma rig it."
and then i realised how SHIT my topology in 2017 was.
fading verge
tired idol
I just have to parent it with automatic weights-
How do u use automatic weights
I tried following a YouTube tutorial to do some fast weight painting solution but it didn’t work as I didn’t have an apply button when I set it to groups
 fallow moth
hold shift + select your mesh + the armature and then strg p
tired idol
fading verge
How do u use automatic weights
click on the mesh first, then next click on the bones, right-click and there are alot of options to parent them, there you will see "Parent with automatic weights", It should do the trick.
 junior turret
Question. Would rigging for VRchat also work well as rigging for vtubing or would those require different methods?
ornate cairn
junior turret
Question. Would rigging for VRchat also work well as rigging for vtubing or woul...
yes if your avatar has blendshapes etc
than using vseeface or something and you can use it as vtuber
junior turret
exellent.
 hearty thunder
young mantle
and then i realised how SHIT my topology in 2017 was.
hearty thunder
young mantle
and then i realised how SHIT my topology in 2017 was.
How do you screw up topology for a 'low' poly minifig? Aside from not having soft shading on, what's in that screenshot looks fine.
fading verge
tired idol
click on the mesh first, then next click on the bones, right-click and there are...
cool Thankyou
 honest prawn
what does it mean by not the first child?

nvm i found out unity decided to re order my bones on me for no reason
 somber pagoda
Uh oh
 plain prairie
Would anyone would be wlling to help me add blendshapes and minor cloth physics to an Avatar?
 livid gulch
Anyone good with dynamic bones?
For some reason when I hit play I can't move the camera and nothing wobbles
drowsy wharf
livid gulch
Anyone good with dynamic bones?
For some reason when I hit play I can't move the...
switch back to scene mode instead of game, and select your main model to test movements
(bonus note: you can attach a camera to your model with parent constraint, and watch it on another game window if you want to)
and did you assign the root bones for the dynamic script?
(should also probably be in #avatar-help for this instead, rigging is more bone setup and weight painting than anything else)
tired idol
somber pagoda
Uh oh
Maybe it's a problem with weight painting
tired idol
Why is it transparent-
 drowsy wharf
tired idol
Why is it transparent-
drowsy wharf
tired idol
Why is it transparent-
recalculate normals (outside)
livid gulch
drowsy wharf
switch back to scene mode instead of game, and select your main model to test mo...
Oh, this worked, thank you!!!
livid gulch
drowsy wharf
(should also probably be in <#730948173379535022> for this instead, rigging is m...
Ohhh, my apologies!! Noted!
 manic junco
in unity, my dynamic bones point outward, while my bones in blender point forward. the bones pointing outward means i don't get the same dynamic bone effect that i want

and then in blender:

how can i fix this?

looks like this is related to the issue
fading verge
manic junco
booba
ornate stone
Is there an easy way to only select the inside Face of this mesh?

 stray wind
okay guys so basically
I have a rigging issue

with dynamic bones
can anybody help me out with that?
crisp tendon
manic junco
That's just how unity displays bones iirc, a bone's origin will point to the parent, unless I'm wrong
somber pagoda
tired idol
Maybe it's a problem with weight painting
No The official D2 Cayde-6 model is a bit wonky in terms of meshes and model prioritization so you get stuff like that happening
crisp tendon
ornate stone
Is there an easy way to only select the inside Face of this mesh?
You can maybe select a loop that goes all around, press V to split the edge and then you'll be able to select the inside part only
 clever viper
fading verge
I tried following a YouTube tutorial to do some fast weight painting solution bu...
clever viper
fading verge
I tried following a YouTube tutorial to do some fast weight painting solution bu...
Even the automatic weights are not very reliable.
clever viper
stray wind
https://gyazo.com/f64bedeeba61bd6230c00de3c2fce523
Reparent or something to make a chain.
stray wind
clever viper
Reparent or something to make a chain.
understood X
 dreamy hull
Stupid question: Should I adjust the feet so that they're flat on the ground for the t-pose? The model came out posed like this when I imported it.
 crisp tendon
Usually better yes
 civic sable
how would i go about fixing for fullbody? 🤔 i keep getting this msg in unity but not sure what exactlly to change/fix

 crisp tendon
civic sable
how would i go about fixing for fullbody? 🤔 i keep getting this msg in unity bu...
crisp tendon
civic sable
how would i go about fixing for fullbody? 🤔 i keep getting this msg in unity bu...
That warning shouldn't be related, can you post a screenshot of your armature in blender ?
jagged matrix
So here's a tricky Blender rigging problem, maybe someone can point me in the right direction... 🙏 I have two armatures. The first one is a simple armature meant to be exported to Unity, which controls the body. The other is a fairly complex Rigify armature meant to help me create the blendshapes for visemes and expressions and stuff. This is working great for the eyes! But now I'm starting to work with the jaw, and I realize that the automatic weight painting has caused the rest of the body to get associated with the jaw of the face armature, producing some really horifying results when I open the mouth 😅
Is there a way (hopefully other than manual weight painting... there would be a lot of bones to paint) to get the face armature to only affect the face, and leave the rest of the body alone?


Suppose I could also try separating the head into a different mesh, so the face armature only applies to that mesh... 🤔
Ok that's actually better, at least there's less to weight paint

🤔 even just finding all the groups that are affecting this region is tricky

!!!! oh I got it!
I had to manually edit the rigify armature though, so I'll have to redo it if I tweak/regenerate rigify...
But ok at least I can make some blendshapes with this.
 fallow jasper
Does anyone know how to fix cat fix model button doing this to the armature
 clever viper
I have a question, although is more into the whole unity side... suppose I have a piece of clothing separate from the body mesh, both of them rigged to the same skeleton, how do I import that one without getting duplicated skeletons?
looks like I can't have less bones in my clothing mesh if I want to have it based on the main body armature.
clever viper
Everywhere I look for an answer involves code.
which means it may not even be applicable to VRC.
jagged matrix
clever viper
I have a question, although is more into the whole unity side... suppose I have ...
Rather than importing the entire top-level model (which would import the skeleton a 2nd time) you could import just the mesh underneath it. (1st Screenshot is my avatar model file, which contains seven different meshes.) Then you can create a new blank GameObject to represent the clothing, add a Skinned Mesh Renderer to it. Drop in your clothing mesh from the project files, and associate your existing root bone from your character.


 warped rose
uh... im not sure where to put this but i might need someone with experience with simplifying rigs because i bought a model that has 800 bones and it's mostly ik and there are so many bones i dunno which does what

ive simplified the mesh
to around 40k verticies
i can get it simpler if needed
but the main help here is it has so many bones
there are so many layers aswell and when i try to delete/parent bones using cats it messes up the whole rig
ornate cairn
this rig wont work well in vrchat
warped rose
so i have to rerig it?
ornate cairn
depends, this rig is probably not that bad to totally ditch it but without experience fixing it might be hard
warped rose
when i bought it came with a meta rig
with face bones
and i can use bones that came with the main rig
ornate cairn
the rig needs to be humanoid like here

it might be fitting it
maybe it just looks bad
also the skirt bones and hair bones are fine they probably were planned for dynamic bones
jagged matrix
fwiw it probably won't be a problem to just delete the ones you don't need, especially the ones where "Deform" is unchecked in Blender
1s I'll grab a screenshot
Easiest place to start is to delete any bone that has "Deform" unchecked

That will get rid of most of the IK stuff
Don't forget to check for bones hidden on other layers too

I've been working on this too, trying to take complex rigs and break them down into something that'll work well in Unity, and I've found this video/series to be really helpful @warped rose https://www.youtube.com/watch?v=6nCriSbfHjc

This is a new video in my Blender to Game Engines series (aka "Bridging the Gap"). Here is the full playlist:
https://www.youtube.com/playlist?list=PLdcL5aF8ZcJvCyqWeCBYVGKbQgrQngen3
This video is made possible by the people who support me on Patreon and Gumroad.
Get early access to CGDive content:
🔸Youtube Memberships
https://www.youtube.com/...
plain prairie
I am having issues trying to understand blendshapes so I can make a game ripped model work, its Gabumon from Digimon and the tutorials are not helping me
 fair plank
plain prairie
I am having issues trying to understand blendshapes so I can make a game ripped ...
fair plank
plain prairie
I am having issues trying to understand blendshapes so I can make a game ripped ...
Mind elaborating?
plain prairie
fair plank
Mind elaborating?
I am struggling to figure out how to add blendshapes to do talking and other movements
fair plank
Ahh
If you can't figure it out still by some time later today I'm sure someone here (or me) wouldn't mind helping you
I'm currently busy helping someone else though

 arctic ember
Okay my idea worked! Instant rigging of a clothes mesh, based on a projection of the underlying body's rigging.


 arctic ember
Yeah it's literally just data transfer, I have no idea why I didn't think of that before
 signal iris
I know kinda literally nothing about rigging and I'm trying to rig a model, sooo uhmmm, does your model have to have separate parts, like hands and head being separate, rather than being a single mesh?
Wait ofc omg
My brain 🤯
riiight?
ornate cairn
why would you need model with separate things to learn rigging
signal iris
Idek I'm confused af
ornate cairn
watch some tutorials it's not that complicated
crisp tendon
It doesn't need multiple separate parts no
signal iris
ornate cairn
watch some tutorials it's not that complicated
Ok so like, the tutorial I was watching had some of the limbs separated aaa, I'll watch a different one
ornate cairn
signal iris
Ok so like, the tutorial I was watching had some of the limbs separated aaa, I'l...
watch for example this https://www.youtube.com/watch?v=6WqCUdilzS8&ab_channel=RainhetChaneru

Hoi there, Rain sensei here, this video is a recap of my 3D modelling series Parts 12 to 13, covering rigging your model.
if at any point you feel as if you need a more thorough explaination, seek out the relevant episode and scrub through it to find what you are looking for, I will slowly explain things in those videos, so please check the ori...
signal iris
Hhh, does the head have to be separate?
crisp tendon
nope
fair plank
arctic ember
Okay my idea worked! Instant rigging of a clothes mesh, based on a projection of...
Oooo
Is it like this but more automatic?
https://www.blendersecrets.org/secrets/rigging-clothes-blender

Blender Secrets
This character is already rigged but the shirt is not, as it has been modeled afterwards. Luckily, rigging the shirt will only take 30 seconds. How? Check out this short video to find out.
arctic ember
fair plank
Is it like this but more automatic?
https://www.blendersecrets.org/secrets/riggi...
Same approach yeah. I also cover a couple other niceties, like it only does it for bone vertex groups (won't accidentally copy a vertex mask or something) and that tutorial uses nearest vertex instead of nearest face interpolated
arctic ember
tbh I had no idea it was a semi-known technique when I thought of it this morning x3
arctic ember
fair plank
Is your thing available to download/test/use yet?
Yeah, it's in CATS blender plugin, the development release
fair plank
arctic ember
tbh I had no idea it was a semi-known technique when I thought of it this mornin...
Eh even so it's nice to automate and do other niceties
fair plank
arctic ember
Yeah, it's in CATS blender plugin, the development release
Ahhhh
I'll keep that in mind
ornate stone
I'm not sure if anyone knows a fix around this, but whenever I am using "heel" bases, and I let my foot rest, it's like my ankle is getting dislocated and gets flipped forward, looks in-humane and un-natural, is there a way around this somehow?
What should I do in Blender?

This is how it looks on the "flat" base:
 crisp tendon
ornate stone
I'm not sure if anyone knows a fix around this, but whenever I am using "heel" b...
crisp tendon
ornate stone
I'm not sure if anyone knows a fix around this, but whenever I am using "heel" b...
Merge vertices ?
ornate stone
It's not due to that, just ignore that one
I have a blendshape to hide the feet, the issue is with the heels
crisp tendon
If you mean the bones, then that can't be solved with blendshapes
ornate stone
It's doing this...
 crisp tendon
The armature can't be moved independently 
ornate stone
So there's no workaround to fix this? It mostly happens if I am sitting down of course...
crisp tendon
Is it only on this foot ?
arctic ember
ornate stone
It's doing this...
this is fairly realistic to my experience of wearing heels for more than an hour or two
ornate stone
Yeah, since the ankle is making any slight movement forward with my ankle, makes it look strange
crisp tendon
Heel might need to be your default and switch to flat instead 
ornate stone
I cannot wear heels on the flat 😢
crisp tendon
But it's not something that models are expected to do tbh, in terms of rigging
You could maybe rely on constraint bones to adjust the weight paint
 orchid echo
@ornate stone yeah you could easily do this with rotation constraint, if you want to pursue it I can tell you how if you dm me. I’ve never specifically done this for human feet but I’ve done stuff just like it that worked fine.
might take me a bit to get back to you but you can do this if you’re willing to adjust ur avatar’s height via playspace to account for the difference btwn flats and heel
can’t do anything about only being able to have one stepping height, but if you’re willing to float a lil in the flats, it can easily be done.
ornate stone
orchid echo
might take me a bit to get back to you but you can do this if you’re willing to ...
Yeah, I'm already using OVR Adv Settings with Bindings set to play space move, it was more along the lines of the rotation contraints
orchid echo
@ornate stone so what you do is, and I’m assuming you’ll default to high heels btw, in Blender, clone your foot and toe bone. They should still be children of your legs. You can leave the clones named .001. Then in Unity, click on your fbx and reimport it as Humanoid, but this time put those .001 bones in for your feet and toes.
NO WAIT… default to flats.
Do this from flat feet imo. I think.
Anyway that step’s the same either way.
So now in Unity your avatar thinks the 001 bones are its feet, so your “real” weight painted feet are just kind of hanging out.
Add a Rotation Constraint component to your real feet and toes, one constraint per bone.
Now I think you can get away with doing just this, but like
so you put your .001 feet in the source boxes. Your real feet will now “rotate like” your 001 feet.
When you put your heels on, add a new thing in the heels-on .anim that turns the big Constraint Weight down to 0.5 on your real feet and toes.
This might be sufficient to fix your feet since the issue is them getting too extreme, and feet in heels are a little more stiff anyway.
So your default is flat feet, while your feet are flat, these constraints are at 1 strength. When you toggle your heels on and do your blendshapes and stuff, set your constraints to 0.5, and then your feet will only rotate half as much as they do now.
Your default can be either foot state…
ornate stone
I'll check it out tomorrow, too late to do anything now
orchid echo
Good luck, I think this should fix it
arctic ember
I threw together a tutorial for twistbones (how easy they are to setup, and how wild of a difference they make): https://github.com/absolute-quantum/cats-blender-plugin/wiki/5-Minute-Twistbones

GitHub
:smiley_cat: A tool designed to shorten steps needed to import and optimize models into VRChat. Compatible models are: MMD, XNALara, Mixamo, DAZ/Poser, Blender Rigify, Sims 2, Motion Builder, 3DS M...
 crisp tendon
arctic ember
I threw together a tutorial for twistbones (how easy they are to setup, and how ...
crisp tendon
arctic ember
I threw together a tutorial for twistbones (how easy they are to setup, and how ...
Ty for your continuous hard work 
 somber trail
Hey so I made a model but it doesn't have any mouth or eye rigging and I need help making some
crisp tendon
somber trail
Hey so I made a model but it doesn't have any mouth or eye rigging and I need he...
How can we help ?
somber trail
crisp tendon
How can we help ?
How do i add them for vrchat
crisp tendon
There's no need for mouth rigging, only blendshapes, for the eyes you need a vertical bone in each eye
 rustic forge
Hey so I've been having an issue with a client's model, For some reason the skin weighting is cursed and I was wondering if anyone has any tips or tools that can be used to make skin weighting a little bit less of a nightmare.
somber trail
crisp tendon
There's no need for mouth rigging, only blendshapes, for the eyes you need a ver...
I've only been modeling for a week so I'm not too familiar with other terms, but somebody did tell me something about blendshapes. I guess I need help with blendshapes and vertical bones for the eyes
 crisp tendon
rustic forge
Hey so I've been having an issue with a client's model, For some reason the skin...
crisp tendon
rustic forge
Hey so I've been having an issue with a client's model, For some reason the skin...

Gumroad
Addon for Blender 2.9 and 3.0 containing tools for simplifying workflow in blender weight paint mode. Useful for riggers, animators and character artist but not only.easy menu for applying weights to vertices - with properly working symmetry and auto normalizationcustom weights mirroring for all tools, works even if topology is not symmetrical.s...
rustic forge
crisp tendon
https://bartoszstyperek.gumroad.com/l/weight_paint_tools
😭 Just exactly what I needed- Thanks man I owe ya one
somber trail
crisp tendon
https://bartoszstyperek.gumroad.com/l/weight_paint_tools
so this will make weight painting clothes easier?
 flat basalt
What if I wanna do a new skeleton instead of using VRChat's, examples of reasons being the bad way the current movements are implemented. How should I proceed?
somber trail
ooof $30
crisp tendon
somber trail
so this will make weight painting clothes easier?
Yep, one click, project weight
somber trail
30 dollars tho xD
pine sapphire
Looking for advice. Why does unity constantly cause my shoulders to slouch? The rigging in Blender/Unity looks fine but in VRChat, my shoulders droop.
Is this a common issue? Playing Quest 2 to Virtual Desktop wt. no full body.


 hasty shell
Hey guys! I think i have the same issue as SleeponSunday. I searched tutorials to help me on the subject but found nothing that worked. Looks fine in unity, looks fine in blender but looks like that in vrchat... (also, if one of you know how to fix the hip tilt rig hack i need to use, i would be really happy)

Note that it is for FBT, i don't know if matters
pine sapphire
I did some testing in VRChat...This is standing normally.

This is with T-Pose enforced....

For anyone who is curious, the world is Avatar Bone Chacker — by kurotori (yes, spelt like that).
signal tapir
Chacker lol
hasty shell
@pine sapphire i think i found a solution, but it feels more like a rig hack than an actual solution. I modified the weight paint of the chest and the shoulder to limit the movement of the shoulder and it improved enough for me to call it a day.
Modified the weight paint
moved the shoulder bone towards the arm (in T-Pose) to move the rotation point further away
Reduced the size of the shoulder bone
Before:


After


 plush badge
So, having these 2 issues. Is it with my actual bones?
I brought this from Vroid Studio to Blender, then Unity
in addition, my feet wont stay planted when i move my head, it moves with the body. these problems dont appear when not using VR
hasty shell
don't know much about imports from vroid, but about the hip tracker, it might be a problem with the fbt calibration. If you're sure the calibration is right, then i have no clue about the cause of that.
plush badge
hasty shell
don't know much about imports from vroid, but about the hip tracker, it might be...
it also happens without the hip tracker, ive tried a couple things but im using my phone as a hip tracker so not much depth to it lol
hasty shell
oh i see, and you made sure to activate the fbt setting? because the whole body follows the head when you use standard headset-controller
3 is ideal plus wrist to make a decent hand. i guess it could work with 2 (from what i've seen in game) but it's not that pretty

i think i have an avatar with less bones in the hand, lemme check
ik you an have less than 5 fingers, but one bone per finger, i fear you'll have to test it out
I like the character designs, but i haven't got the time to watch it yet~~
plush badge
hasty shell
oh i see, and you made sure to activate the fbt setting? because the whole body ...
would this be in unity or blender? I don't have this issue with any other avatars is this is in VR chat
hasty shell
plush badge
would this be in unity or blender? I don't have this issue with any other avatar...
Well when you imported the avatar from vroid, i assume you configured the bones with the "humanoid" setting in unity?

 plush badge

yep
oh yea, i can see the body moving when i move the neck nod/tilt sliders in the muscle menu
hasty shell
then the only thing i see would be the connection between the bone? make sure they are all connected at the right parent in blender
there can also be some plugins in blender or unity to make the hair spring around. you might want to check if they are activated for the head
 pine sapphire
The add-on to make the hair spring around is called “dynamic bones” and you can find it in the unity store. Wiggle bones will not transfer over.
fierce grail
It was like that only with SDK2 avatars. With SDK3 you don't need any finger bones to have a fully functional humanoid avatar that can work with full body tracking.
pine sapphire
pine sapphire
Looking for advice. Why does unity constantly cause my shoulders to slouch? The ...
@hasty shell & I are still looking for a better solution. If you know how to fix the slouched shoulder problem, please let us know. Thanks
jagged matrix
pine sapphire
<@257248472183472132> & I are still looking for a better solution. If you know h...
https://youtu.be/2sfTEBAl8sA?t=621 Timestamp links to where they talk about shoulder sag, but honestly the whole video is worth a watch.

[Update 11/10/2021]
In Unity 2019 it's easier for the project to break during file overwrite. It's better not to delete the .meta file when overwriting anymore.
[Update 8/6/2020] (Avatars 3.0 info / current state of "RIG HACK" fixes):
*With the new FBT head-locked binding method the "Shoulder Flop Fix" of lowering the viewball is no longer r...
hasty shell
jagged matrix
https://youtu.be/2sfTEBAl8sA?t=621 Timestamp links to where they talk about shou...
I followed this exact same tutorial and fixed the bone before asking in here. My shoulder bone can't be straighter than that like you can see in my screenshot. Do you think that making the tail of the shoulder bone higher than the head would fix the issue?
hasty shell
hasty shell
Hey guys! I think i have the same issue as SleeponSunday. I searched tutorials t...
Screenshot here
sleek isle
hasty shell
Hey guys! I think i have the same issue as SleeponSunday. I searched tutorials t...
make the hip bone strait and lift his root a little up.
hasty shell
sleek isle
make the hip bone strait and lift his root a little up.
The hip bone is a rig hack for my hip tilting to the side when I calibrate in fbt. Ik I shouldn't use that, but it's the only solution I found. You suggest that lifting the root could fix my shoulder problem?
sleek isle
plush badge
You could use a different locomotion controller setup if you don't want the head to sink when jumping
I made a good one

Gumroad
This locomotion prefab was created to improve the default movement controller. On top of that, you have multiple toggle to turn off legs movement or jump animation as example.You can cycle between multiple pose to simulate that you have full body tracking.-Sit anywhere, on the floor or an invisible chair.-Lay down on the front or the back ( slee...
sleek isle
hasty shell
The hip bone is a rig hack for my hip tilting to the side when I calibrate in fb...
your spine is curved in your video. your hack don't work
so the shoulder are disbalanced
plush badge
sleek isle
You could use a different locomotion controller setup if you don't want the head...
thanks a ton! ill add this and ill let you know :)
hasty shell
sleek isle
your spine is curved in your video. your hack don't work
Yeah it wasn't perfectly adjusted. I'll try to re-straighten it and come back to you with what I get
 hasty shell
sleek isle
your spine is curved in your video. your hack don't work
hasty shell
sleek isle
your spine is curved in your video. your hack don't work
I admit it wasn't adjusted, but that's what it does if i place it straight. I have no clue how to fix it without a rig hack
should probably use another world to demonstrate it huh~
 sleek isle
you miss the part of moving it up a little
hasty shell
sleek isle
you miss the part of moving it up a little
i'm working on fixig the stuff in the last pic. I'll try to make it smaller too this time
 weak cave
I keep getting an error that says 'spine hierarchy missing element please map neck'
The avatar had a neck before I fixed another spine heirarchy issue though now its not mapped and im not sure how to map it.
hasty shell
that's in unity i suppose?
weak cave
Yeah its in unity
hasty shell
probably this window:

make sure to bring the bone at the correct spot
in this case, it would be in the "head" tab
 weak cave
Oh I had no idea you could do that
Thank you I was able to fix it!!
hasty shell
sleek isle
you miss the part of moving it up a little
fiddled a lot and even though there is still a slight tilt, it's unnoticeable. Thanks
 sleek isle
not too smallor in 3 pt you character will have a weird rotation in a chair
hasty shell
welp it restarts to tilt if i make it bigger~ 😅


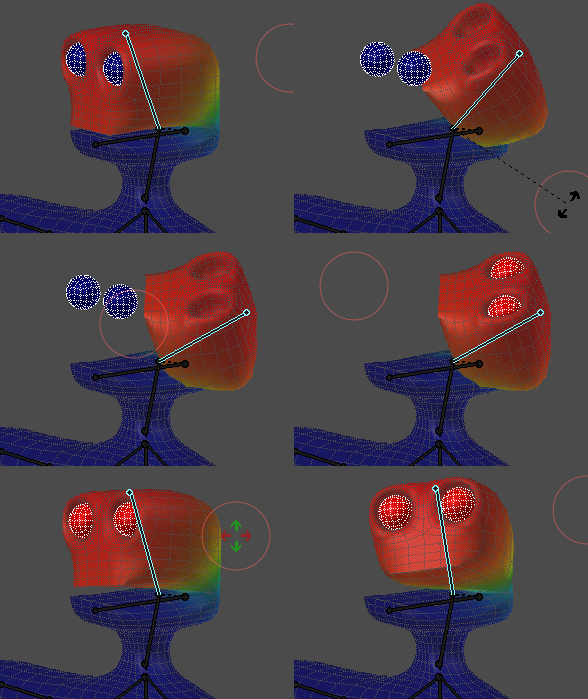 sleek isle
transfer weight from the body to the shirt
 lilac quest
yesss i did that, someone in a different server told me to do data transfer :D

it worked on one side better than the other
hasty shell
sleek isle
not too smallor in 3 pt you character will have a weird rotation in a chair
Idk what I did, but now it works when the hip bone is straight (and a bit longer to prevent the problem you warned me about). Gotta be blender god 🤷
hasty shell
pine sapphire
I'll be sure to check this out after work. Thanks
I found a way to fix my shoulders btw, doesn't feel like a rig hack this time so it could work for you if the video didn't help. I recorded it but I forgot to upload it here so I'll ping you when I wake up
pine sapphire
Great, let me know.
 viral seal
question:
is the rigify addon's metarig good to just use for avatar creation without generating a rig?
 viscid glade
trying to create a rig but when i name one bone it names all of the extrusions the same thing 🤨
nvm im stupid 😭
 wicked ibex
hey all, finished making a new avi in Vroid studio, took it through Blender and then uploaded in Unity. All looks good w/ just headset and hand controllers, but once I put on FBT the following issues happen:
- Avatar arms are always bent even when mine are straight
- Avatar hips are pushed forward, causing upper body to lean back in a weird way
- Avatar knees are always bent even when my legs are straight
any ideas are appreciated! 🙂
hasty shell
pine sapphire
Great, let me know.
basically, reshape your shoulders (mesh) so they are higher. be careful because it might make your arms longer, i had to reduce the length of the shoulder after testing. I didn't have to move it up a lot, but you might need a little more since i fiddled with my weight paint before
hasty shell
wicked ibex
hey all, finished making a new avi in Vroid studio, took it through Blender and ...
Arms and legs bent are probably due to proportions. The hip bent forward/backward is only an alignment issue. That video tutorial should be able to cover everything: https://youtu.be/2sfTEBAl8sA?t=621
[Update 11/10/2021]
In Unity 2019 it's easier for the project to break during file overwrite. It's better not to delete the .meta file when overwriting anymore.
[Update 8/6/2020] (Avatars 3.0 info / current state of "RIG HACK" fixes):
*With the new FBT head-locked binding method the "Shoulder Flop Fix" of lowering the viewball is no longer r...
wicked ibex
Thanks I'll take a look! Here are two photos of the issues, front and side.


I followed this tutorial - https://youtu.be/Qbwl9XIONuQ

My beginner VRoid to VRChat videos using the VRM converter in Unity 2018 were exceptionally popular, so I have decided to make an in-depth tutorial for those who are looking to make a PERFECT VRoid model :D Using minimal blender skills and Unity 2019, this is an up-to-date tutorial on how to fix your model to perfect. This video includes fixes f...