
#avatar-rigging
1 messages · Page 185 of 1
 sage patio
 cyan adder
thanks
 livid pond
Sorry I would say no..
 fading verge
I've made edits to this model how would I rig this, I would Imagine I would have to Re-rig it


 lethal lark
Hey guys, I have an avatar where the hip is slanting upwards on the right side when using full body. I've seen issues like this before and it's normally to do with the hip and spine bone placements & size. But I've looked at those and done everything I can to line them up perfectly. What else could cause the hip to slant up?
 dusty stone
Strange. My armature doesn't appear to be exporting into an FBX file.
nevermind - ignore me
Ignore me again - seems like the rig isn't actually being recognised? Also, it is on the wrong direction.

How do I ensure the Armatures export correctly?
Cuz something is fucking up when it is being exported - it doesn't recognise an armature in the FBX File on export.
 crisp tendon
Can you show your blender window ?
dusty stone
What do you want to see specifically?
Part of the weight painting to confirm it is recognised, or...?
... Guess this?

I'm doing an unorthodox thing - making an avatar based on a non-humanoid, but using a humanoid rig to do it.
I just added more bones on the original armature to suit my needs for the wings.
except those front, super long pairs - they're actually arms.
Haven't used CATS to fix the model, but I imagine I might need to do some of what CATS does manually in order to do other rig stuff?
sage patio
fading verge
I've made edits to this model how would I rig this, I would Imagine I would have...
yes, you might need to redo some weight painting. one thing I noticed is that you probably exported and re-imported the model a few times, and you exported with the "Add leaf bones" option enabled, which adds those "Ankle.001" bones or whatever.
those are the extra bones that stick out
you can remove those
just to be sure that the bones you are removing are not actually moving anything, you can go to pose mode and try to move them and see what happens
if nothing on the mesh moves, you can just remove those bones
dusty stone
Normally I would use the CATS tool, but I was told specifically not to.
So I guess I need to do some of what CATS does for it to appear in Unity...?
sage patio
dusty stone
Normally I would use the CATS tool, but I was told specifically not to.
So I gue...
what would you need to use CATS for?
dusty stone
Just fixing armatures in Blender, usually
That was for MMD ones that I used as a base, but this one's unique - I had to piece this one together on my own.
So I was told to not use 'Fix Model' for here.
crisp tendon
dusty stone
... Guess this?
How are the hip/spine/chest weight painted ?
dusty stone

The word 'Armature' didn't appear before, I should mention.
Just imported it again now.

and it has the word 'Armature'. It had 'Hips' before, not 'Armature'.
As for the hips...
They have none.
I didn't give them any.
The model is a floating baby Jesus Fetus - The hip does nothing for me and needed unique stuff.
i've been recreating this feller - WhiteNight

From a side-shot, it has 3 unique bones from the Chest.
WNTail1, WNTail2, WNTail3.
It was so I could animate the tail; I wanted to give this model a custom idling animation - since it is floating, that idle animation could play while I move around anyways.

I positioning the mesh to where it fit best on the humanoid rig that I snatched from a previous avatar.
The armature that WhiteNight mesh is using is fixed, but it was fixed in another project by CATS - I just imported that FBX from that Blender project into the WhiteNight Blender project and used that rig as a base.
if that information is useful.
New development:

Armature faces the correct way.
Armatures are blasted to hell, though.
It seems like it mostly just didn't connect them itself, since the Armatures are still there.
 sage patio
dusty stone
It seems like it *mostly* just didn't connect them itself, since the Armatures a...
sage patio
dusty stone
It seems like it *mostly* just didn't connect them itself, since the Armatures a...
first, make sure the bone parenting is correct
second, in that same screen, make sure that all of the bones are correctly assigned
then go to Pose (at the bottom), hit Reset, then Enforce T pose
dusty stone
Well it's not... in pain, anymore.

I need to check the parenting, though.
Not sure what's up with left and right leg. They're set correctly.
but it isn't here.
 dusty stone
sage patio
first, make sure the bone parenting is correct
dusty stone
sage patio
first, make sure the bone parenting is correct
I assume this is in Blender, so I'll check there.
How should bones be parented?
crisp tendon
 dusty stone
alrighty

Seems the same to me - Left and Right leg function similarly.
unlesss those WingBones and stuff being parented to the chest mean something?

and the Tails.
 smoky cradle
Is there anything I can do to fix the Ishue?
 sage patio
smoky cradle
Is there anything I can do to fix the Ishue?
sage patio
smoky cradle
Is there anything I can do to fix the Ishue?
yes, go to your FBX file, go to the Rig tab in the inspector, click Configure, then make sure the bones are mapped
smoky cradle
sage patio
yes, go to your FBX file, go to the Rig tab in the inspector, click Configure, t...
thank you. 🤝
dusty stone
I still have no idea what's going on.
the legs are perfectly normal here on the rig,

but broken in Unity.
dusty stone
dusty stone
Well it's not... in pain, anymore.
as seen here
dusty stone
I cannot figure this out. ¯_(ツ)_/¯
My last idea involves putting my other VRC Avatar's FBX into the same project and copying the armature source into the WN model.
I've exhausted every single trick I could find and come up with.
There's nothing wrong the hierarchy.
There's nothing wrong the with naming scheme.
All the essential bones are there.
I am stumped.
sage patio
dusty stone
I cannot figure this out. ¯\_(ツ)_/¯
what does it look like in Pose mode?
dusty stone
In Blender?
sage patio
yes
dusty stone
dusty stone
That's part of it
 sage patio
while in Pose mode, go to the "Pose" menu in the top left, and go to Clear transform > Reset unkeyed
see what happens
 sage patio
in Edit mode, try this

and for good measure, in Object mode, select everything with A and try this
 dusty stone
Is there some visible thing you're looking for, just outta curiosity?

I did notice the armatures are now see-through.
but that's probably because i was in pose mode originally
dusty stone
Okay, it seems to have... normalised somewhat in Unity.

Muscles & Settings, it looks fine, so...
It'll work.
It's bodged together, but it will work.
hopefully
 remote notch
I am trying to set a rest pose so that I can edit some meshes while they are turned a certain way, is there a way that I can save my default pose and revert to it after I am done editing the meshes?
crisp tendon
alt + R to reset bone rotations
 fading verge
sage patio
yes, you might need to redo some weight painting. one thing I noticed is that yo...
fading verge
sage patio
yes, you might need to redo some weight painting. one thing I noticed is that yo...
I gave up and deleted all the bones, I'll redo it and I'll look for a few tutorials
 sharp viper
dusty stone
Okay, it seems to have... normalised somewhat in Unity.
sharp viper
dusty stone
Okay, it seems to have... normalised somewhat in Unity.
I think, for next time, what was happening to you was that the bones had no skinned meshes associated with them (no parts of your mesh did anything with those bones floating in space
when you do that, unity will remove them
also, there's something going on over here

so you might now have some weight in those bones
if you want invisible bones, generally you would do that by inverting normals and using backface culling, or a shader that is completely transparent
or, look into generic rigs
if you're curious how those work, flowerofgood's flowerpot is free to download and has one
dusty stone
sharp viper
I think, for next time, what was happening to you was that the bones had no skin...
Can I tell unity to not do that?
Or does reapplying the bones do that?
Also, there's probably weighting issues still; I just wanted to make sure the rig would work
@sharp viper I could do tell it to not create an armature from this model and assign it all myself, right?
fading verge
Bruh is blender messing with me?

Parent and keep offset
yet its not folowing
bruh
sharp viper
dusty stone
<@272890433787527168> I could do tell it to not create an armature from this mo...
If there's no mesh associated to the bone it will just ignore it, but you can manually assign, sometimes.
 uneven onyx
Trying to tidy up my rigging to fix a few small IK issues I've been having, wondering if anyone notices any glaring issues (I've hidden most of the non-humanoid bones to make things easier to see)

 sage patio
uneven onyx
Trying to tidy up my rigging to fix a few small IK issues I've been having, wond...
sage patio
uneven onyx
Trying to tidy up my rigging to fix a few small IK issues I've been having, wond...
the hip bone should be very small
 uneven onyx
I am still getting this error as well

and I understand what it's supposed to mean
but I can't see the angle discrepancy
 unreal shoal
So... nobody is pointing this out, but it seems that "height" scale for full body rigging there.. involves the EYE BONES
I copied my armature, rotated it with snap on so that the fingertips went down to the ground

the highlighted bones are the fingers, the two standing up on the side are the eye bones.
this avatar is almost perfect for fullbody
 wooden verge
okay so
i have this jacket texture right
im using texture painting to give it a proper design, etc etc,
however as you can see by the blue circles, the base colour texture ive made isnt applying to the material slot?
it just ends up as a black sphere, and when i render it doesnt work.
how do i apply the material properly? am i making some kind of rookie mistake? I havent touched this program since 2016 in any serious capacity lmao
i cant really atlas my materials if its all just black spheres, so im a bit stuck
 fading verge
Hello guys is it possible to convert the rotation of a bone into the translation of another bone for twist bones in unity ?
Without final ik that Is
Thank you
 sleek isle
unreal shoal
So... nobody is pointing this out, but it seems that "height" scale for full bod...
sleek isle
unreal shoal
So... nobody is pointing this out, but it seems that "height" scale for full bod...
I don't really get what you show here
sage patio
fading verge
Hello guys is it possible to convert the rotation of a bone into the translation...
yes, using Rotation constraints
add a rotation constraint to the twist bone, add one Source, drag the wrist bone (for example) in it, and set the weight to 0.5
fading verge
sage patio
add a rotation constraint to the twist bone, add one Source, drag the wrist bone...
I know about rotation contraints but I’m trynna slide the bone instead not rotate it
sage patio
hm
fading verge
Like everytime the hand bone rotatateson the z axis the twist bones slided back
Also thinkinf of using something similar for hard surface rigging like a bionic arm with pistons and such
fading verge
Yeah but it copys rotation as far as I know it won’t do a translation
I want my twist bone to rotate and translate
Basically like for every degree of rotation move the bone on the z axis by 2mms type shit
 fervent hornet
fading verge
Basically like for every degree of rotation move the bone on the z axis by 2mms ...
fervent hornet
fading verge
Basically like for every degree of rotation move the bone on the z axis by 2mms ...
Cant really have it be that accurate IIRC but rotation at a distance has translation to it so you can mess with that
fervent hornet
I can send a mini prefab to show what I mean if you struggle with it 👍
 late helm
Can I create an avatar that has no arm? And because I am creating a character that is a bird. Can this give any bugs?
crisp tendon
You still need the arm bones, even if they are not weight painted
late helm
even if my avatar doesn't move your arms?
crisp tendon
correct
late helm
so I add the arms and remove the weights from him?
crisp tendon
yep
late helm
Ok, Thanks bro
 kindred pollen
Again, I'd highly recommend downloading Blender and trying it yourself! o:
livid pond
again, i hate blender and im not installing it again even if someone paid me money
thats why im begging
kindred pollen
You're likely going to have to commission someone to do it then, unfortunately
livid pond
its jsut a bone!
a jaw bone! its rigged in mixamo
5 minutes!
please
it sucks making 3d models on your own with no help for them later to be motionless due to 1 bone
kindred pollen
Sorry, I really don't know what to suggest lol
If you learn how to do it in Blender, you could rig it yourself and fine-tune it how you see fit (heck, you could avoid jaw bones altogether and use visemes/blendshapes too)
livid pond
dude , im going to tell this again
its not funny, im very stressed
im about to stop making avatars from how greedy people is
kindred pollen
It's not strictly greed, rather they learned how to use Blender/Maya/their modelling software and became proficient enough (presumably lmao) to warrant asking for money - while adding a bone and weight-painting it is relatively simple work, it's still work
I'd recommend trying it out again! there's lots of tutorials available on rigging c:
(specific terms to look for would be "adding bones in blender", "how to weight paint in blender", "add bone to existing armature", etc)
livid pond
ill have to say no again, because i already tried and had lot of rages attacks, im here because i gave up, that doesnt mean i even tried. i dont want more rage attack, and more unuseful tutorials i always fail do to my short mind, and i dont even understand the half of the words you say and im not interested
ill give stuff for the work
like art
kindred pollen
I commend you for trying! people def don't just pick up Blender on their first couple goes lol, but the fact that you gave it a go anyway is vv respectable c:
Nonetheless though, if you want someone else to rig the avatar, you'll likely need to commission them unfortunately
livid pond
please , stop saying "lol "and "commision". im about to have an stroke
 fallen temple
livid pond
please , stop saying "lol "and "commision". im about to have an stroke
fallen temple
livid pond
please , stop saying "lol "and "commision". im about to have an stroke
Anything I can help with?
fallen temple
Does anyone know anything about twist bones?
I can't seem to make it look good on my rig
sage patio
fallen temple
Does anyone know anything about twist bones?
have a rotation constraint on the twist bone with 0.5 weight
the source should be the bone below it
fallen temple
Thanks! I'll try it out after I set it up in blender
 golden kernel
I'm having a problem with merging armatures with meshes, I have everything scaled and when I merge the armatures the scale of the mesh resets.
fading verge
does anyone know why my deformation looks different in unity compared to blender ?
unity

blender

thanks in advance
 frozen jacinth
my stomach moves in when I bind in FBT but is fine other wise how do I fix this?
 crisp tendon
weight paint better i guess
crisp tendon
fading verge
unity
how many bones are there supporting this and what does the weight painting look like ?

 crisp tendon
shapekeys ?
 proven belfry
yeah but for some reason they've attatched themselves to the clothing
I spent so long fixing up these clothes and now they're all kinds of busted
livid pond
fallen temple
Anything I can help with?
yeah, jawbones
sleek isle
@fading verge 4 vertex group is the maximum in the current unity version.
If more affect it . They will get discard
@frozen jacinth the spine is to far from the leg/hip. Something like that.


 viral kraken
if i make the legs smaller in blender (after mixamo rig) will he be shorter?
sleek isle
mixamo dont like when limbs are separated
 scenic lichen
proven belfry
how and why is this a thing?
scenic lichen
proven belfry
how and why is this a thing?
Seperate the clothing as a mesh and delete the shapekeys. Then join meshes again
proven belfry
it's my first time doing stuff like this
 fickle cosmos
@livid pond I hope this could motivate you to learn new skills!
I have had 0 experience from blender or any other 3d software. I have ADHD so my consentration can be hard sometimes and also I bang my head on the wall all the time!
But you get better at it when you do it more. I have burning desire to get my own avatar to VRchat, It wasn't that fast, or easy as I thought. But just dont give up! You wont get anything in life if you just giveup.
I took the hard route and I want to make everything, I mean Everything from Scratch, I started from basic cube and I havent took any image textures from internet, I have just made all by my self. Why not, It cant be that hard.. 😄
I just try to find something positive from every part of avatar making, This Rigging part will shorten my life for sure 😄 haha ! Still great amount of work ahead, and I don't even know what I don't know yet.
You should find some friend who could help you with basics if you struggle a lot.
-MadDusa
 proven belfry
scenic lichen
Seperate the clothing as a mesh and delete the shapekeys. Then join meshes again
proven belfry
scenic lichen
Seperate the clothing as a mesh and delete the shapekeys. Then join meshes again
do you know what this stuff means?
 proven belfry
I did, but that's what caused my problem
it might also be this

there might be too many.. polys?
I think?
livid pond
fickle cosmos
<@!510907211585683477> I hope this could motivate you to learn new skills!
I ha...
i do that omg, also i did that from scratch too , could i see your stuff? also the problem is rigging but i advanced a lot for sure
livid pond
fickle cosmos
<@!510907211585683477> I hope this could motivate you to learn new skills!
I ha...
also mad dusa... this is ABSOLUTELY stunning
i LOVE the model
every single one its made from scratch (except mixamorig)
 fading verge
sleek isle
<@456226577798135808> 4 vertex group is the maximum in the current unity version...
fading verge
sleek isle
<@456226577798135808> 4 vertex group is the maximum in the current unity version...
I do have 6 bones affecting that area thank you make sense now
fickle cosmos
livid pond
i LOVE the model
One jaw bone wont stop you! I added bones for expressions like corner of the mouth, jaw, cheeks, eyebrows, lips.. But It will make my life easier at the end (I hope so 😄 )
Good job, You will get far if you just continue, cladly nowdays you can watch tutorials for everything ! and most of thema are free!
livid pond
proven belfry
do you know what this stuff means?
It looks like the model is so complex
proven belfry
It's alright, I've gone back into blender and combined a load of the meshes without breaking anything
it's now gone from 6 to 2
livid pond
fickle cosmos
One jaw bone wont stop you! I added bones for expressions like corner of the mou...
sadly the trouble is so big, but i still im okie using my inexpressive sculptris stuff it took 2 whole years to learn
my concern is people calling my avatars trash due to the failed mixamo rigs and lack of expressions or mouth movement
fickle cosmos
livid pond
my concern is people calling my avatars trash due to the failed mixamo rigs and ...
Dont let other people stop you, Show them that you can do something cool!
If you want some expressions/mouth movement, then you will learn how to do them/fix them, or pay for someone to do that job for you. Sadly nothing is free in this world, exept some advises like this 😄
Good advice is not to rush with your model, If you make something in hurry and make shortcuts, It propably will show in final product!
livid pond
lmao thats what im doing, asking people for a little viseme and ill be done
well i actually rush in every single model
i can make 5 a day!
its not because i want to rush, im naturally speedy and nervous
im a perfectionist so i update all
the pinacle was making myself

it took 7 updates
sleek isle
fading verge
I do have 6 bones affecting that area thank you make sense now
you can do that in blender
 fading verge
I ended up getting rid of one of the bones and cleaning up manually thanks for the tip tho you're amazing
I had twist bones and volume restoring ones on basically every joint
Now the shoulder get no love 
@sleek isle
 sleek isle
the deformation possible with that one extra bone is something
fading verge
what does that one do exactly and what is it parented to ?
sleek isle
it parent to the hip and copy the 100% rotation of the leg
fading verge
and it targets that area that tend to cave in right ?
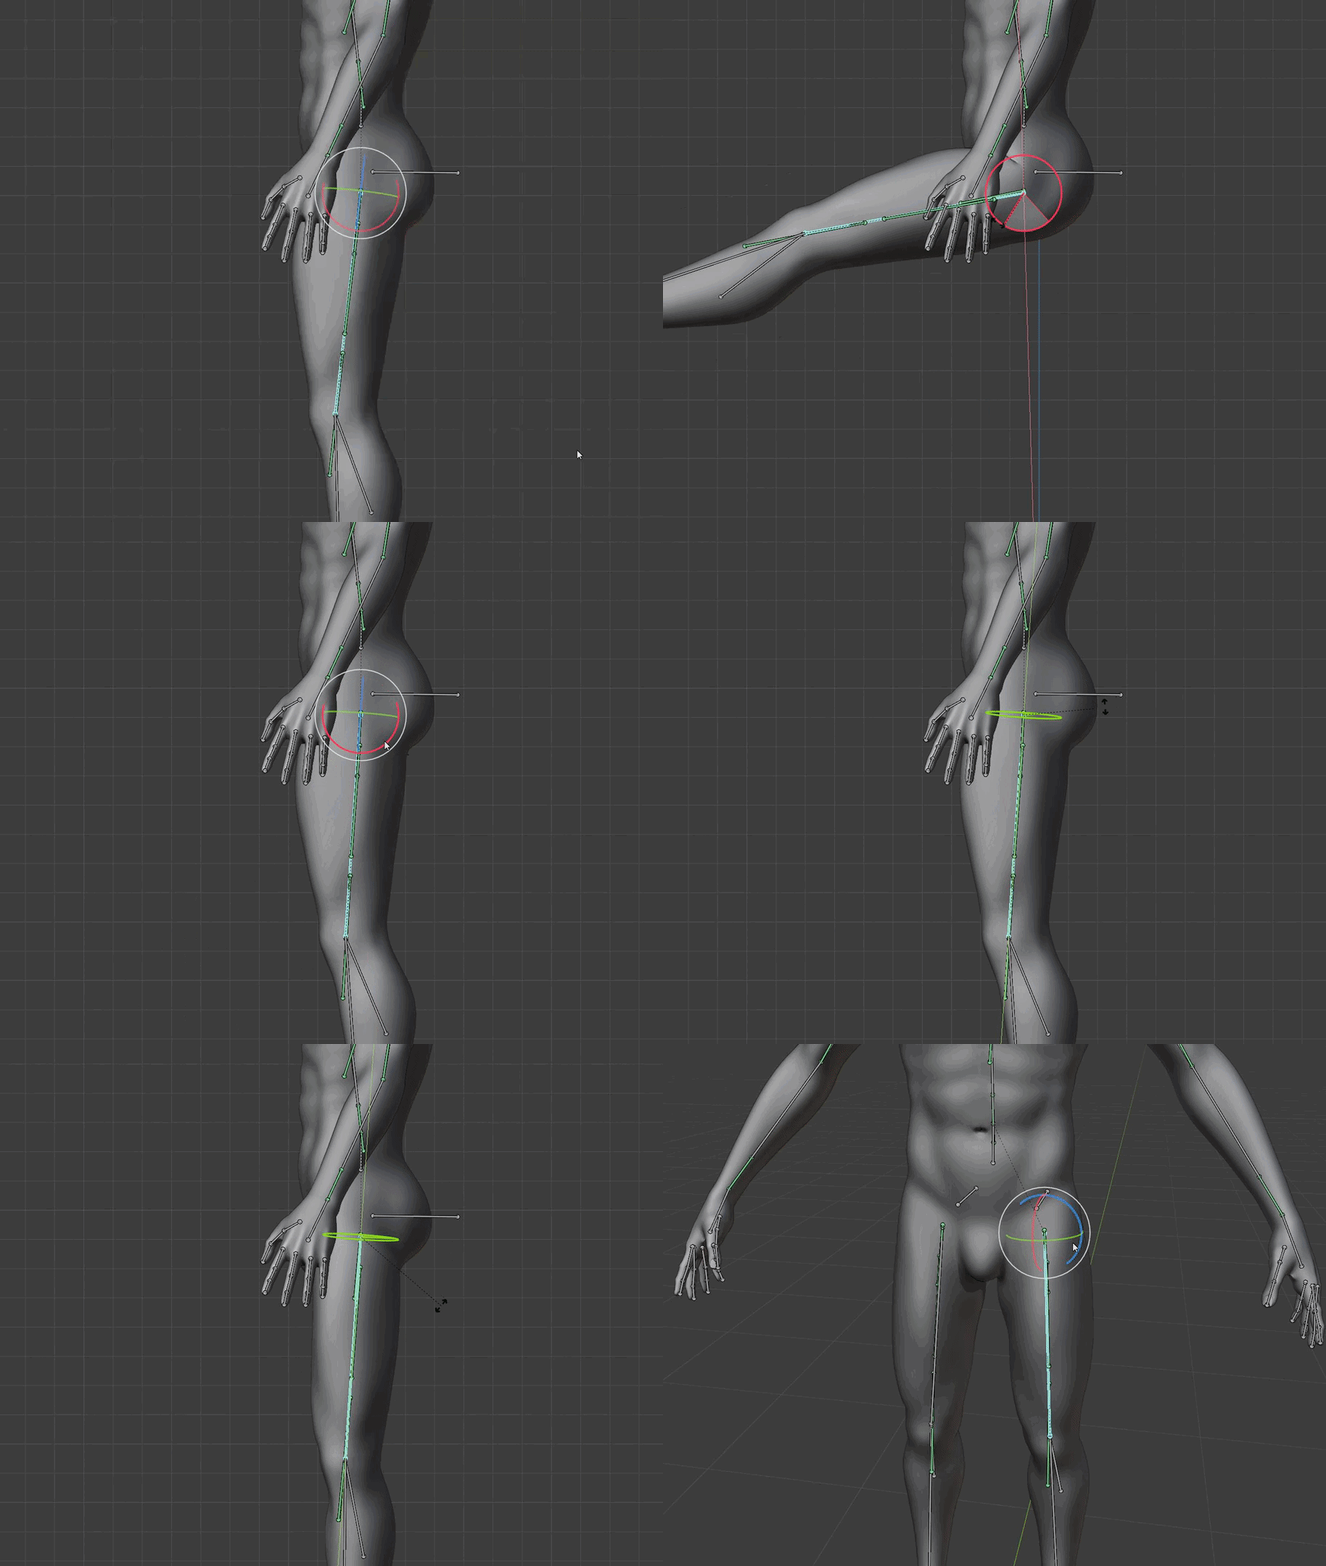
this area

Another way to weight paint is in blender it had added the ctrl+a in 2.8/2.9 that makes a perfectly circle weight paint on limbs. Body parts makes it a little more complicated. And I’d recommend if it’s the legs cut them off from the body and do the legs one at a time to the bones.
sleek isle
 sleek isle
but for your model its since fine without
fading verge
Well what I’m saying is MMD models are borked up the ass sometimes
but his rigging is really good tho
fading verge
sleek isle
but for your model its since fine without
yeah Imma stop here coz I'll never stop if I continue it can always be better lol
 wind night
say i don't want my fingers to bend in the middle, just flip up and down as a whole
which finger bone should i weight the whole finger to in that case? base? middle? tip?
 feral saddle
Hello! Has anyone had any problem with Blender's FBX exporter making the last shapekey as Basis and the Basis as the last shapekey? I've tried putting an empty shapekey in the end to see if it fixed it but it still applies the last (with actual moving data) shapekey as basis.
sage patio
@feral saddle try exporting using CATS plugin and not blender's exporter
feral saddle
Already tried it. I got it fixed by going to the basis shapekey and moving one of the vertices 0,00001. Yep, it's weird but it worked now.
frozen jacinth
should I use IK bones on my avatar for FBT? It was designed with sdk 2.0 in mind so I don't know if the automatic IK means anything in the vr descriptor.
 sleek isle
wut
sage patio
frozen jacinth
should I use IK bones on my avatar for FBT? It was designed with sdk 2.0 in mind...
no
there is nothing different rig wise setting up avatars for 3.0
 raw heath
Is this a good bone setup?

 glass sphinx
Does my head have to be a seperate mesh from the body?
sleek isle
raw heath
Is this a good bone setup?
From the front. Probably yes
sleek isle
glass sphinx
Does my head have to be a seperate mesh from the body?
No but it's a good practice with hight density mesh.
glass sphinx
@sleek isle Oh ok. I have a low poly count one. Um. So when I rotate the bones why doesnt the model move with it? Like if I rotate all the bones the body stays behind.
glass sphinx
sleek isle
Or armature attached to it
I built a whole armature and attached it. I was following along a YT video and did excactly as she did. But when she moves hers its different from mine. Idk why mine isnt attached.
 gleaming mesa
is there a way to browse the animation frames without actually putting that state into effect?
in blendar
i want to insert a keyframe based on a keyframe earlier in the animation
i could copy paste the keys in some cases, i know
gleaming mesa
sometimes i animate though without changing the frame first for example, so i need to navigate frames without the current pose being reset
glass sphinx
Did I do this right? When I rotate the bones the mesh won't move with it. Is that normal? I haven't done weight painting yet
 crisp tendon
Well, probably do the weight painting lol
glass sphinx
ok I started and it helps. But how do i make it so only specific bones conrtrol specific parts? It seems to be general overall weight painting
glass sphinx
If I select a bone it selects all bones..
sage patio
glass sphinx
If I select a bone it selects all bones..
create vertex groups with the same name as the bones you want the vertices to move with
and then paint some vertices
glass sphinx
huh? I'm new to this. This is my first avatar I'm making
sage patio
you should search up weight painting tutorials
glass sphinx
I have but they do it differently from me and it's confusing
like this one tutorial she just could click on in and weight paint but for me I cant do that
sage patio
well yea
but you need vertex groups to weight paint lol
like I said, create vertex groups with the same name as your bones
there are also ways to do automatic weight painting
with varying results
glass sphinx
could you discord call and walk me through?
glass sphinx
😦 aight
 gleaming anvil
@glass sphinx
https://www.youtube.com/watch?v=8mZd19L30FU&list=PL2EEbgwoJzdt5kFVDyY2lliNqf7cWJeD3&index=13
I suggest watching this video and the next video in the playlist
It's quite long so if you want you can turn it to 2x speed and wait until she talks about vertex groups, or start your armature from scratch following this and then weight painting in the next tutorial.

Hoi there, i went to bed pretty late but hopefully gonna teach you how to make an armature for your model, sit tight.
Blender 2.9
gleaming anvil
glass sphinx
I followed everything she did
what does your vertex group menu look like. This is what mine looks like after symmetrizing (if that's the right term) my armature

this should happen when you Ctrl + click the bone
 glass sphinx
Hmmm you seem to have found something

yeah mines empty. huh. I named and saved all the bones
gleaming anvil
Hmm yea, might be worth starting over since it doesn't take too long and paying more attention to the vertex group creating part of the tutorial?
not a super expert myself lol
glass sphinx
ah. yeah I see the part of the video I accidentally skipped over
gleaming anvil
Not sure if you'll be able to do it vith the mesh merged, but ik that tutorial suggests creating a copy of it before you join everything together
cool! I hope you get it fixed!
glass sphinx
Yeah. Seems I'll have to resort to a previous save and re texture lmao. I messed up but it's not that bad.
That is.. If I cant un parent things. I don't save at periodic intervals....
yeah but in this her model is plit up into different meshes. My whole model is One solid mesh
gleaming anvil
If I remember correctly, there's a point where she tells you to save a copy of your blender file before merging the head and bodice. Did you do that?
glass sphinx
yeah... nooo
gleaming anvil
Is it possible you could go into edit mode, select everything that's separated in the tutorial (head, body, teeth, tongue etc) with L copy the vertices, delete them and paste them back?
 glass sphinx
oh and just manually seperate them that way? Great idea! Thank you
ok do ears have to be seperate? Since she's a furry avatar? Rigging furry avatars seems different than human ones. Since we have different ears and tails
and idk what to name those bones
gleaming anvil
Most likely yes if you want to rig the ears. I didn't because mine is human and you can't usually move your ears.
I'd probably name it like "Ear Left" and symmetrize it and add a vertex group for that when you're going into weight painting.
That's my guess!
glass sphinx
ok thank you. There doesn't seem to be any in depth tutorials for furry charaters. Most YT videos are "Just download a model from this website and repaint it in blender or this other program" or "Just go in and ajust the bones so they fit" Nothing real in depth like Rainhet's videos
gleaming anvil
yea, her videos are a real life saver
 scarlet jasper
When adding clothes in blender that have their own armatures, do I need to delete the old armature once I "join" it to my base model armature?
sage patio
@scarlet jasper no, you need it
you merge the bones and their associated weights using CATS plugin
don't forget to change the specified armature under the mesh's armature modifier
scarlet jasper
thank you
 vital void
I spent hours trying to rig my avatar and nothing worked
 elfin meadow
vital void
I spent hours trying to rig my avatar and nothing worked
elfin meadow
vital void
I spent hours trying to rig my avatar and nothing worked
"Nothing worked"?
elfin meadow
You just need to parent your mesh to your armature
And then weight paint it - there's lots of tutorials on it.
elfin meadow
It's how you say which bones affect which parts of your mesh
 strong spruce
Does anyone know if I can copy the blendshapes from an older version of my model to a newer one? I feel like the short answer is no
 buoyant badge
anyone know how to fix this im struggling alot
 sage patio
buoyant badge
anyone know how to fix this im struggling alot
sage patio
buoyant badge
anyone know how to fix this im struggling alot
what, the hoodie moving weirdly?
looks like it's weighed to bones it shouldn't be
click one of those vertices in edit mode, then hit N to open the menu on the right side, and then go to the Item tab
there should be a list of vertex weights
crisp tendon
probably forearm or whatever bone that is in the arm
buoyant badge
go i click on the hoodie enter edit mode then click on the hoodie to draw some vertices, then hit n? cuz it only closes and opens the cats menu @sage patio
all arm bones had vertex groups connected to all bones, eyes, face, shoes. I removed them all and now the arm wont move with the hoodie, obviously, but how can i add a the proper vertex groups
sage patio
buoyant badge
go i click on the hoodie enter edit mode then click on the hoodie to draw some v...
that is NOT just the CATS menu, there are multiple tabs arranged vertically
CATS is one of them
there is one tab called Item
if you have a vertex selected in edit mode, you will see in that tab all of the vertex groups that vertex belongs to
aka, which bones have an influence on that particular vertex
that will tell you which vertex groups you need to go look for in Weight paint mode so you can remove the weight painting in the wrong spots
 primal flare
How do I fix this?

 rose wagon
primal flare
How do I fix this?
rose wagon
primal flare
How do I fix this?
Honestly it looks fine to me. If it's T posing it's T posing. Sometimes unity is weird and says it's not
You could always press enforce T pose and see what happens
 valid relic
having some trouble with transfurring weights during a little kitbashing. could i get someone willing to view screenshare for a bit
both the models being kitbashed are mine and where made and exported by myself from vroid
fickle cosmos
Im propably missing something here. I want to attach snakes to my base armature, but it does this weird thing when I Ctrl + J it in object mode.
snake bones stays in right position, but mesh goes straight!
I managed to parent these bones to base armature, but it didnt help
 crisp tendon
Apply transforms before merging
You can also bake pose with cats if not already done
fickle cosmos
I think im improving! 😄 oh my...

It might have something to do with my weightpainting, wild guess
but it didnt explode with cats, but it deletes all bones from snakes
 teal mantle
can anyone help? I am following the tutorial to lower my avatar to my normal height so i can touch the ground with my hands but its saying my armature isnt in there?

https://youtu.be/2sfTEBAl8sA. I’m following their tutorial

[Update 8/6/2020] (Avatars 3.0 info / current state of "RIG HACK" fixes):
*With the new FBT head-locked binding method the "Shoulder Flop Fix" of lowering the viewball is no longer recommended (However if you need it you can still use this fix with VRChat's launch commandline option --legacy-fbt-calibrate)
*The zigzag neck problem is less pre...
fickle cosmos
I will skip rigging for today, This goes just worse... 😄
crisp tendon
teal mantle
can anyone help? I am following the tutorial to lower my avatar to my normal he...
select the armature and press S
teal mantle
Not home at the moment now but what will that do? @crisp tendon
crisp tendon
scale
teal mantle
Is it not scaled right? Looks ok to me
teal mantle
@crisp tendon How can I tell if it’s scaled right on the avatar? I can’t export it because it’s not in the right place right?
crisp tendon
How did you plan on making the avatar your own height ?
teal mantle
From that video. Basically just shorten that and the armature
crisp tendon
You just need to ace the armature down, not the mesh
@fading verge You just need two bones for each three fingers
The left one is the most correct one except there's three bones
kindred pollen
heck I haven't seen Maw in forever
teal mantle
Ok thanks
crisp tendon
Try alt + R on bones in edit mode before exporting
crisp tendon
You can just weight paint it to the middle bone yeah
 tardy root
Anyone know if this is even fixable? It looks like the rig and weight paint are just not made for FBT. The hips are too far forward and when I move things around it just breaks. Here's an exaggerated example of what I mean
 sleek isle
Chest don't really rotate forward in vr. Move it more back.
tardy root
Like the whole mesh? or the bones
 ruby furnace
can someone help me with all these errors on my avatar? i'm putting together the bones and half of them are coming back as red
 teal mantle
I have this problem now lol.
 fickle cosmos
teal mantle
I have this problem now lol.
fickle cosmos
teal mantle
I have this problem now lol.
How is your Weight paint looking like?
Looks like you are missing some weight paints
 plucky glacier
hello! i'm still very much a noob with blender just started learning to create my first avatar, i have a question did i just screw myself over and delete everything till the structure and do i have to start it all over again?

apologies if it's not the right channel i'm not even sure what to call this process
teal mantle
fickle cosmos
How is your Weight paint looking like?
Looks like you are missing some weight pa...
Will look into that thanks. Thought that might be it
fickle cosmos
plucky glacier
hello! i'm still very much a noob with blender just started learning to create m...
Hello! This is more #3d-modeling at the moment what you are doing ^^
I would go there to continue discussion and maybe explain your problem littlebit more!
plucky glacier
alright thanks!:)
 meager ether
ruby furnace
can someone help me with all these errors on my avatar? i'm putting together the...
meager ether
ruby furnace
can someone help me with all these errors on my avatar? i'm putting together the...
do you have a "hips" bone?
fickle cosmos
I managed to attatch snake armature to my base armature now! But it wont remember weightpaints what i have already made, is there way to parent mesh to armature without needing to do it all over again?
I did one snake seperetly, weightpainted it correctly and dublicated it then and now I managed to join armatures, but it looks like I need to fix all of them manually.... But all snakes already have "fixed" weightpainting but they didint like when i had to seperate mesh that I could join them.
I might go couple saves back and see if i can do this differently
 fervent hornet
fickle cosmos
I managed to attatch snake armature to my base armature now! But it wont remembe...
fervent hornet
fickle cosmos
I managed to attatch snake armature to my base armature now! But it wont remembe...
Are all the bones named differently? If bones have the same names then their vertex groups will merge instead of creating new groups
fickle cosmos
fervent hornet
Are all the bones named differently? If bones have the same names then their ver...
Thats one thing what i was thinking, lets see what i can do
Damn, okey, first problem comes when I apply armature, snake stops to respond to armature in posemode. Which I think is the idea.
but If I wont do it and try to join them they just teleport and wont stay where bones were...
So I kind of have to apply and re weightpaint them, but it just doenst make any sense in my head..
fervent hornet
How are you applying the pose mode? CATs?
 fervent hornet
When I've done similar things to this, I did these steps:
- Apply pose as rest pose via CATs
- Rename all bones if other armatures share the names
- Apply rotation, position and scale of armature and mesh if needed
- Join meshes and armatures
fickle cosmos
Fixing model deletes all snakes.. 😄
fervent hornet
Yeah dont use that fix model when youre not a perfect humanoid imo
fickle cosmos
It wont let me to merge armatures in cats if i wont fix model first
fervent hornet
You should be using this, and joining armatures one at a time with Ctrl+J
 fickle cosmos
this happens when I join armatures with ctrl + J
 fervent hornet
Did you apply the pose as rest before joining? How many armatures do you have right now in total?
I guess one thing about CATs is if you have multiple armatures in pose mode at the same time it really struggles doing the right one
fickle cosmos
Yes and still teleports like that.
Every snake has seperate bonestructure at the moment
and I have been trying to do this with only one snake at the time'
fervent hornet
fickle cosmos
Hmm hey thanks ! Thats lots of work for helping me!
That looks easy to follow!
fervent hornet
Took me like 6 tries because I kept fucking up lol
You're just lucky I was making my own medusa at one point 😏
fickle cosmos
I still have problems, Let me restart blender and I will follow that video and see what happens
fervent hornet
Like I said earlier, make sure you are not in pose mode for any armature besides the one you are working on
fickle cosmos
Almost works! 😄

I fixed it! Ah.. I had to change snake mesh armature to base armature first
damn.. I need break now
fervent hornet
When I get burnt with blender, I usually relax with some more blender
fickle cosmos
Nope, still problems :DD I just dont get thisI might miss something or I have something wrong in here! im so close, but so far!
fervent hornet
Might be something small or a difference in versions. I know rigging has changed from 2.79->2.8+
fickle cosmos
My snek likes to teleport to sky for some reason, it looks first fine but that happens 😄 I need to triple check stuff and I will save that video of yours even thoug It wont go that smoothly for me.. 😄
fervent hornet
Make sure that your main armature is also applied on all transforms
fickle cosmos
good point
ruby furnace
meager ether
do you have a "hips" bone?
I do. I'm pretty sure I put all the bones to the correct spots. The main errors are saying on the feet and the hands
fickle cosmos
fervent hornet
Make sure that your main armature is also applied on all transforms
Okey, I have to just rename bones, Looks like it fixes my problems!
It works the way how you showd when bones are named correctly!
Lesson learned here 😄 Thank you for your help!
 spiral bobcat
hi, this is surely a stupid question, but how do you link the bones? because I have watched several videos on youtube but in my version of blender it is different, it does not appear as in the videos and I do not know where to link, if someone could help me please.
 fickle cosmos
spiral bobcat
hi, this is surely a stupid question, but how do you link the bones? because I h...
fickle cosmos
spiral bobcat
hi, this is surely a stupid question, but how do you link the bones? because I h...
If you havent done weightpainting, you can use automatic weightpaints, or if you want to make it from 0 use empty
spiral bobcat
fickle cosmos
If you havent done weightpainting, you can use automatic weightpaints, or if you...
I'm sorry, I don't know what you mean, what I mean is to join the bones
fickle cosmos
@spiral bobcat ctrl + J in objectmode
spiral bobcat
fickle cosmos
<@!415169841167597580> ctrl + J in objectmode
ohhh Thank you very much
 hardy sail
Hi, I've used the Data Transfer modifier to add clothing to a model in Blender 2.9, in Pose Mode via CATS it works totally fine and well, but when I import it to Unity the Data Transfer is not applied/is wrong. Anyone know why? I've exported about 5 times now. Please ping me if you do
crisp tendon
Apply it manually ?
hardy sail
In Unity or Blender?
It works perfectly in Blender. Unity is the problem. Or the way Blender is exporting it
crisp tendon
In blender
hardy sail
Ah, I can try to do that.
 dire urchin
Anyone know how to parent bones in blender?

 vague moat
Select bones, select parent as last and Ctrl + P
sage patio
dire urchin
Anyone know how to parent bones in blender?
if you're wondering how to get the mesh to follow the bones, that is called Weight painting
simply having an armature with bones and a mesh parented to the armature isn't enough
you need to tell the mesh, or more precisely, each vertex, which bones have an influence on them
ruby furnace
does anyone know how to fix this error?
 livid pond
can anyone remove the weightpainting from my mixamo model? i dont want deformed stuff lol
 tulip ravine
if you remove all weight painting, nothing will move though
and it's extremely easy to do in blender too, no need to get someone else to do it
livid pond
i said tons of times i dont use blender
its just a little help to remove it from the head and mane
crisp tendon
You keep asking people to do everything you don't want to do, at some point you'll need to learn how to use any program, it doesn't have to be blender
livid pond
like what program?
livid pond
crisp tendon
You keep asking people to do everything you don't want to do, at some point you'...
reeplace i dont want with " i cant"
tulip ravine
why can't you use blender? the thing you're asking is a few clicks at most
crisp tendon
Maya is another one
tulip ravine
select your vertices you don't deformed -> mesh data block -> remove from all vertex groups
teal mantle
Almost there. Anyone know about this? The knees ben into each other as well when Im kneeling or in crouch position
 livid pond
tulip ravine
why can't you use blender? the thing you're asking is a few clicks at most
livid pond
tulip ravine
why can't you use blender? the thing you're asking is a few clicks at most
dammit stop with blender..pleaSE
livid pond
crisp tendon
Maya is another one
can you do bone and weightpainting
tulip ravine
i'll stop bothering you then 👍 don't worry
livid pond
tulip ravine
i'll stop bothering you then 👍 don't worry
nooo i didnt meant that
its cause i get angry with that ...conversation)?
crisp tendon
Yes you can do the same thing in Maya
crisp tendon
Nope, harder than blender, but that's your only option since you can't use blender for some reason
livid pond
oh god_ i cant use it because of my learning problems
i said it TONS of times
and the anxiety stuff
crisp tendon
That's only stopped you so far, everyone else with learning disability i've helped before managed to do it
fickle cosmos
My mood after weight painting and im not even ready yet... 😄
 crisp tendon
I highly recommend the weight paint master addon
The project weight feature is godlike
And overall more tools available at hand
fickle cosmos
Is it free?
I think I would propably want something to help with this, I can't turn this to fun activity 😄
fickle cosmos
where i could find it?
crisp tendon

Gumroad
Addon for Blender 2.83 and 2.9 containing tools for simplifying workflow in blender weight paint mode. Useful for riggers, animators and character artist but not only.easy menu for applying weights to vertices - with properly working symmetry and auto normalizationcustom weights mirroring for all tools, works even if topology is not symmetrical....
teal mantle
Just wanted to say thanks guys. Got it figured out for full body even
fickle cosmos
crisp tendon
https://gumroad.com/l/weight_paint_tools
Thank you! I will check that tomorrow!
 limber junco
not sure if this is the right channel but, what do you do when the avatar is rigged correctly but it says this?
 fading verge
If my model doesnt have arms, do I still create hands for the armature
sage patio
fading verge
If my model doesnt have arms, do I still create hands for the armature
yes
 atomic hemlock
Hi, I’m currently trying to make an Avatar but it has a naturally hunched over position and it’s leaning forward. It’s supposed to be leaning forward. How do I rig it so that it works well while leaning forward? I’ve tried it before and the result was really bad.
 halcyon mortar
atomic hemlock
Hi, I’m currently trying to make an Avatar but it has a naturally hunched over p...
halcyon mortar
atomic hemlock
Hi, I’m currently trying to make an Avatar but it has a naturally hunched over p...
smooth
atomic hemlock
yes
 tall vine
Is to possible to add a mask to an avatar with its own lip sync?
Like id have a mask that was togglable and also moved with speech
crisp tendon
Sure, just do the visemes on the mask with the same shapekeys, and scale that mask with a bone
 dim monolith
So I've seperated my avatar to make weight painting easier for myself, I've painted the hair and skirt fine but when it comes to the body and these accesories I can't select any bones or do any weight painting :I
 sage patio
dim monolith
So I've seperated my avatar to make weight painting easier for myself, I've pain...
sage patio
dim monolith
So I've seperated my avatar to make weight painting easier for myself, I've pain...
you don't select bones, you select vertex groups
if a vertex group has the same name as a bone, it will move with that bone.
changing the name of the bone will change the name of the vertex group
dim monolith
I used to be able to select the bones with ctrl left click, so I don't have to click on the vertex group window, but now I know there's another way I thank you
(didn't know you can select the other way round)
yeah I can select the bone with ctrl left click with the hair, and then blender megically selects the associated vertex group
 tall vine
crisp tendon
Sure, just do the visemes on the mask with the same shapekeys, and scale that ma...
tall vine
crisp tendon
Sure, just do the visemes on the mask with the same shapekeys, and scale that ma...
Thx
tall vine
@crisp tendon do you mean like using the shape shape keys from the avatar and scaling it?
im new to this so im just trying to fully understand what you said

If so I only have the avatar in unity so I guess id export it to blender and yoink the shapekeys if thats what u mean
crisp tendon
You want to create a child bone for the jaw, weight paint the mask to it, and for your toggle you just scale that bone up. The shapekeys will be the same on the mask and mouth
tall vine
oooooooooh
What exactly do you mean by scaling up the bone?
Would it also be possible to add a new bone or rather use the on in the gif and just pose it for the shapekeys manually?
crisp tendon
Press S on the jaw bone
Go up and down
It'll shrink what's weight painted to it
Your gesture in vrchat will just be enabling an animation that scales the bone that was the mask from 0 to 1
tall vine
Thats definitely a thing seems like i need to learn a bit more about this stuff
tall vine
Would anyone be willing to walk me through it id pay
 raw lake
I need some help, when it comes to this

Atlas is non-functional as i need a script to fix it
crisp tendon
Click Join Meshes ?
 sleek isle
tall vine
https://gyazo.com/78cbbb797362cff14fb5ae65d435442e
sleek isle
tall vine
https://gyazo.com/78cbbb797362cff14fb5ae65d435442e
In avatar 3.0, you could make a bunch of animation that move the jaw up and down that get fire when the viseme parameter are detected.
or the simple way. Move the bone and pose to shapekey with the cats plugin in blender.
name the shape key the same as your face
merge the mask mesh to the face mesh
to toggle the mask on and off. weight paint the mask to a bone and parent it to the head bone
in an animation scale that bone
tall vine
Im so lost in the sauce right now. So can I use the bone present on the mask to pose?
I feel like im doing this all wrong I legit cant even replicate the bone on the mask like I do it that way I did it the first time and only the bone moves nothing else


 tall vine
I cant select the bone while in pose mode with the CATS plugin should I pose, turn it on, save , turn it off, and repeat?
oh im stupid ur legit doing that in the gif my bad im brain dead
Where do these shape keys go when i do them through the cats plugin? The bones shape key list is empty
tall vine
I deadass cant make the shapekeys do anything😂

if this shit didnt look as fire as it does I woulda gave up hours ago lmao
fading verge
can someone please help me
sleek isle
not like that
tall vine

Is there something im leaving out when doing this? still does nothing when i pose in pose mode
Though the mouth is open when i switch to edit mode but moving the value does nothing
crisp tendon
You're moving the object in object mode, shapekeys is edit mode
Watching basic tutorials would help you a lot, and quicker
tall vine
true
crisp tendon
Yep
tall vine
💦
tall vine
Im guessing now I should connect the bone to the head and weight paint it
tall vine
The bone connected to the mask doesn't have to be functional right? It just has to be there to be scaled later?
crisp tendon
wdym by functional
tall vine
Like it doesnt have to connect to anything except the mask parts
crisp tendon
Well you should merge your meshes, and your bone should be a child of the head bone
tall vine
oooh yeah my bad I forgot that part
tall vine
https://gyazo.com/ce683394ccd409f94f600a89b63b0028
How do I select bones in the armature?

Sorry Ive been blowin up this channel all day I just really wanna make this work
 vernal onyx
When I get the error that a certain bone isn't the first child of another bone, is the only way to fix that to rename the rest of the bones so that they are alphabetically after the bone that is supposed to be the first child?
Or am I missing something
fervent hornet
Yeah because unity doesn't let you reorder stuff in the prefab
fading verge
Does anyone know a fast way to rig avatars good?
Trying to use mixamo results in buggy models for me.
Most of the time it messes up materials for me, leaving only 1 material for everything which completely borks UV mapping
Secondly I get no jaw / mouth bones even on ones where existing mouth bones exist
I have 0 experience in Blender so idk how to do that...
I have about 20 models I need rigged and unless there's a way to to do this in batches...
sage patio
@fading verge https://youtu.be/4fICQmBEt4Y

I've been meaning to update this video for a very VERY long time. But, we're finally here. Everything you need to know in order to start painting weight layers onto your character!!! Hope it helps :)
Female Body Model Link:
https://www.youtube.com/watch?v=_XfvLpLyulI
If you enjoyed this video, please don't forget to like and subscribe!
You ca...
fading verge
thx ❤️
sage patio
fading verge
thx ❤️
I will warn you though, even though it says "5 minutes" it's still manual work, and "5 minutes" is more like "5 minutes, for someone who knows what they're doing"
fading verge
So, could be hours. Hmmpf.
sage patio
fading verge
So, could be hours. Hmmpf.
there's a reason people charge a lot for models, especially scratch ones lol
fading verge
Yeah my friend apparently paid $200 for a scratch model... I'm thinking about shelling out money to have all mine rigged
sage patio
fading verge
Yeah my friend apparently paid $200 for a scratch model... I'm thinking about sh...
I would suggest trying to do it yourself, since if you get decent at it, you can start charging to do it for people
vernal onyx
Maybe a stupid question, but when it comes to constraints, and having multiple sources, having both at 1 weight is functionally the same as having both at .5 right?
sage patio
vernal onyx
Maybe a stupid question, but when it comes to constraints, and having multiple s...
that's a really good question, I feel like it would yea
I think that having the sum of all weights be equal to 1 is probably good practice though'
vernal onyx
sage patio
I think that having the sum of all weights be equal to 1 is probably good practi...
I think if you want every weight to be exactly evenly split, you would want to use 1, as it would automatically split the weights for you. In cases where you want certain things to exert more influence over the constraint, you would want to divide it up evenly. Maybe.
fervent hornet
vernal onyx
I think if you want every weight to be exactly evenly split, you would want to u...
Constraints work off percentage of the whole. If you have a constraint linked to two things with equal weight to both the actual number doesnt matter since it will be weighted evenly between the two IIRC
sage patio
for two sources it probably matters less, but he does have a point for more than 2 sources
doing 1 for all of them would be better than 0.3
since more precision
fervent hornet
lmao
How many 0.3's can you put in the field anyways
Honestly I mainly use constraints for moving things around so my stuff is usually boolean
Just tested it, number does not matter if they are all equal, if you have something constrained to 4 other things with 0.1 weight then it is equally constrained to the 4 of them. Doesnt matter if you use 0.1, 0.25, or 1.
fervent hornet
👍
tall vine
I swear I ask a question and then like a minute later I somehow manage to figure it out
tall vine
Im trying to merge a mesh to a bone but I cant see the bone I added in the list.
https://gyazo.com/7c340fce539436d6b8a46de95aa98540

 robust crescent
select both 2 bones, ctrl+p (keep offset) , have to fix it after tho but should be visible
tall vine
The new bone is parented to the head already and I fixed but still isnt there
Should I just connect a new bone to the mesh and merge the armatures?
tall vine
ok that works
tall vine
tall vine
when I merge the armature the mask just goes where every it feels like and since the mesh gets merged I cant do anything with it I think its capped 😦
 tender summit
can anyone do a ms paint and show me where i would postion the bones for this model?

 red charm

Any reason as to why the "mouth" would come out of the head as it tilts down? Don't fully understand weight painting. But the head has the entire "mouth" red, and nothing else has any weight set for it
crisp tendon
it definitely does have weight on another bone
red charm
The only vertex groups with weight on it are "head" "mmd_edge_scale" and "mmd_vertex_order"
Cause yeah, I assumed that was the issue at first. And there was some weight on it from the neck and the... shoulders for some reason... but I removed that
 languid ermine
Need some help. I'm trying to export an animation that has IK rigging to unity, but it's not working.
I know that Unity doesn't support IK rigging models for VRChat, so I have another question: How do I transfer movement data from an ik rigged animation to an fbx file that unity can read and use?
languid ermine
Really need some professional help here. I'm trying to export an animation to unity, but my model has IK rigging. I've spent over 10 hours working on this animation, and the majority of the movements require the IK rigged extra bones. I'm trying to put all of the transform, rotation, and location information of the model to the base bones that unity can read. Is there a way to do that. Please i really need help here.
valid relic
I can't figure out how to select bones in weight painting :/

everything points to stupid tutorials that don't tell you the information
crisp tendon
Select bones then shift select the mesh in object mode, then ctrl + tab
crisp tendon
Have both in object mode
valid relic
yes
crisp tendon
then follow the steps above
crisp tendon
Then whatever you did to your blender configuration would be different from the default, i guess
crisp tendon
I've done these steps for the past two years, and so have all the people i know 
i'll record a video
valid relic
right, so maybe doing something that you don't need to think about normally
crisp tendon
valid relic
select armature, select mesh while holding shift so it's selected 2nd
press control and tab to go to weight paint mode via selector, only switches to weight paint mode without being able to specify which bone
crisp tendon
do you use left or right mouse click to select things ?
valid relic
so in this example here, what is making it select the top left segment
valid relic
okay, so how did you do that, because thats what im asking
not how to get to weight paint mode
valid relic
i'm on 2.91 if that matters
 valid relic
same agan
crisp tendon
Did you save the settings ?

 valid relic
the what what
 valid relic
thanks, god that was stupid easy
crisp tendon
I couldn't tell in your first screenshot because you had nothing selected
valid relic
you know how many tutorials i've had to do to satisfy people that where completely unhelpful
waisted days on donuts and anvils just for you to make it happen in a click
crisp tendon

crisp tendon
no worries, good luck with the rest !
valid relic
if you wanna lurk, i'm twitching
crisp tendon
You might wanna add your twitch to your discord profile 
 gloomy ether
so i keep getting this problem in unity. it has to do with a twist bone. the thing is. the bone is set properly in blender but for some reason in unity the twist bone is above the wrist. when i manually change this it doesnt save for some reason. and nothing happens. how do i go about fixing this issue?
 crisp tendon
You can ignore this one afaik
gloomy ether
crisp tendon
You can ignore this one afaik
I thought I could but when I went to make a test version and check it out in game I saw the problem with the twist bone not working properly. Thought I’d ask here before giving up on trying to figure it out. It’s not really too big of a deal in retrospect
fading verge
I’m looking for someone who’s god tier at rigging and understands the full body ik well to sit down with me later and trouble shoot a rig especially around the shoulder area I will pay you handsomely for your troubles dm for info
Issues like these
 sleek isle
If your arm don't str... I need to make to make it visually at some point
unreal shoal
@gloomy ether vrchat doesn't use twist bones as far as i know, and they should be deleted
kindred pollen
Fairly certain VRChat does use twist bones o:
sage patio
@unreal shoal @kindred pollen it does not. that doesn't mean you can't use them, you still can. just add rotation constraints to the bones, with 0.5 weight to the bone below it

 kindred pollen
Add a VRC_AvatarDescriptor component to the top-most thing in your avatar's hierarchy o:
also if that avatar came with an SDK, you def might want to use the most recent one instead
fading verge
its not working
crisp tendon
gloomy ether
so i keep getting this problem in unity. it has to do with a twist bone. the thi...
How are they set in Blender ?
 river dune
Is Blender required for rigging? Can you not do it in Unity? Because all I'm trying to figure out how to do is change the rig type on the model so I can upload it, because it currently shows 'Rig Type: Non-humanoid.'
Another thing I'm trying to figure out is how to select default animation type and set it to Female, but there's no option that shows that here. Can someone please help me with this?
tender summit
Any knowledgeable people can tell me if the bone placements are fine?
 gloomy ether
crisp tendon
How are they set in Blender ?
gloomy ether
crisp tendon
How are they set in Blender ?
It’s a hand twist bone. The parent is set as the elbow armature. Weird thing is both the left and right arms have identical armature set ups but only the right one is messed up in the conversation to unity
crisp tendon
river dune
Is Blender required for rigging? Can you not do it in Unity? Because all I'm try...
Look up a basic upload tutorial
crisp tendon
gloomy ether
It’s a hand twist bone. The parent is set as the elbow armature. Weird thing is ...
You tried symmetrizing that your entire arm armature ?
gloomy ether
tender summit
Any knowledgeable people can tell me if the bone placements are fine?
I would make the hip bone a little bit smaller to the green point. That’s just what I usually do when rigging
 gloomy ether
crisp tendon
You tried symmetrizing that your entire arm armature ?
gloomy ether
crisp tendon
You tried symmetrizing that your entire arm armature ?
I’ve made them symmetrical manually if that’s what you mean? It seems like it could just be a weird conversation issue when it gets uploaded into unity
river dune
crisp tendon
Look up a basic upload tutorial
The problem that I am having is that I don't see this menu anywhere, this is a YT Tutorial I took a screenshot of

 turbid cedar
Huh, trying to weight paint but the Fallout Shape options are missing
 tender summit
gloomy ether
I would make the hip bone a little bit smaller to the green point. That’s just w...
tender summit
gloomy ether
I would make the hip bone a little bit smaller to the green point. That’s just w...
Is the neck fine?
its hard for me to see if its done fine
gloomy ether
tender summit
Is the neck fine?
hard to say with such a unique head shape. only way to really tell is to test it in pose mode or just upload a test model and see if its the way u want it to be. i usually like to make the neck bone smaller than standard so i dont get so much neck tilt. https://www.youtube.com/watch?v=2sfTEBAl8sA this video goes over a good bit on how to make an armature fit well in vr chat. especially if u have full body
[Update 8/6/2020] (Avatars 3.0 info / current state of "RIG HACK" fixes):
*With the new FBT head-locked binding method the "Shoulder Flop Fix" of lowering the viewball is no longer recommended (However if you need it you can still use this fix with VRChat's launch commandline option --legacy-fbt-calibrate)
*The zigzag neck problem is less pre...
@crisp tendon I figured out how to fix the issue and i feel like an idiot for not realizing it sooner lol. i just needed to unpack the prefab than rearrange the bones manually.
crisp tendon
oh, i thought you already did that since you said "when i manually change this it doesnt save for some reason" glad you fixed it
river dune
I managed to figure out how to get to the avatar mapping, and I noticed for this particular avatar, the 'Chest (Transform)' was in the Spine's little green dot. I moved the 'Spine (Transform)' to the Spine's little green dot, and then the dot turned red saying 'Spine Transform 'Spine' has bone length of zero.' What does this mean?
Is it fine?
 crisp tendon
the bone length is zero, needs to be fixed in blender
 willow knoll
Is there a reference rig of some sort that the game uses internally when deciding how to operate each avatar's?
 umbral idol
I tried searching for an answer, but my search-fu has failed me. I am having an issue with my hands being really really wide in VRC, but it looks fine in Unity and Blender. Am I missing something obvious?
umbral idol
willow knoll
Is there a reference rig of some sort that the game uses internally when decidin...
VRC uses the Humanoid rigging from Unity. In Unity, there is a configure button in the rig section of the model. That will show you a hierarchy that will work. Leave upper chest: None
crisp tendon
What does your armature look like in blender ?
 crisp tendon
What about the rest of the avatar, proportions matter a lot
umbral idol
 willow knoll
@umbral idol Thanks I'll look into that, as for your issues, perhaps the Inherit Scale option for some bones is set to something strange?
umbral idol
Oooo! Good point Krunk.
willow knoll
Also check that the Roll for each bone is 0 degrees. I haven't heard of that causing any specific issues, but people seem to imply it is a soft requirement.
umbral idol
Testing a version with the wrist not inheriting scale.
willow knoll
Hmmm, what was it set to before? Also check every bone around it, all the way up the shoulder, too.
crisp tendon
You need to connect your neck/chest/spine/hip bones, scale your shoulder bones down
willow knoll
It's supposed to be set to Full afaik.
umbral idol
Inherit Scale was set to "Full"
Does connected versus not connected matter?
Disregard that question.
Just slowed down and read what you said Ruuubick. 🙂

TIL how to take a screenshot in VR. ^_^
Hey doctor, does this look normal to you?
willow knoll
The Connected option just causes the head of the bone to snap to the tail of it's parent.
The legs, the shoulders, the eyes and the first finger bones should not be connected, everything else should.
Basically anything with a position offset from it's parent.
umbral idol
That's what I would assume. Also make editing easier. But the dreaded CATS has other oppinions.
umbral idol
I bet that is it.
willow knoll
That's one of the reasons I asked about that reference rig too. 😅
umbral idol
I assume the main axis of rotation for the thumb is the x?
willow knoll
My thumb bones always seem offset by the time they get moving in game.
umbral idol
I would go with Rigify's default skeleton if I was going from scratch,
But I am a nubbins. Take that with salt.
crisp tendon
Are you both on index ?
willow knoll
It shouldn't, I'm on Quest.
umbral idol
Ah. I think this avatar will not run on Quest. 😛
crisp tendon
It's worse on Index by default yeah
sleek isle
Unity rotate the thumb0 up. Rotate back down. You get a t-pose warning but you can ignore.
For index I usually un-map the third bone.
You could make an animation for it but. Whatever
crisp tendon
You mean the first bone of the chain right ?
sleek isle
Yes thumb0
Animate the transform of the third
Since it's not control by the animator
That way you can have a straight thumb and a rotate one
 tender summit
Anyone know why i get an error saying that weight paint cant find a solution for one or more bones
 fading verge
anyone know why my avatar's head is tilting up like this? how its supposed to look in unity: https://i.imgur.com/SDHpeU3.png versus how it looks in game: https://i.imgur.com/cRGvObi.png
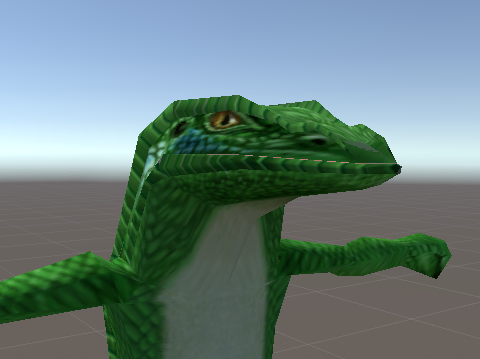
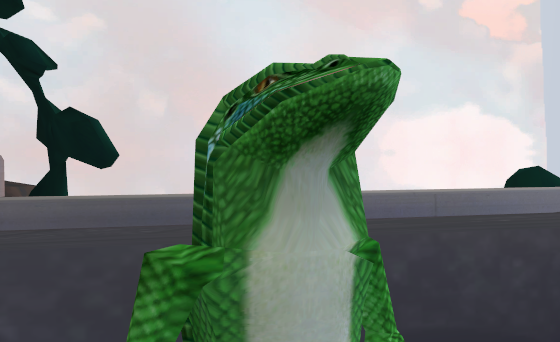 kindred pollen
would you mind posting a screenshot of the armature? o:
fading verge
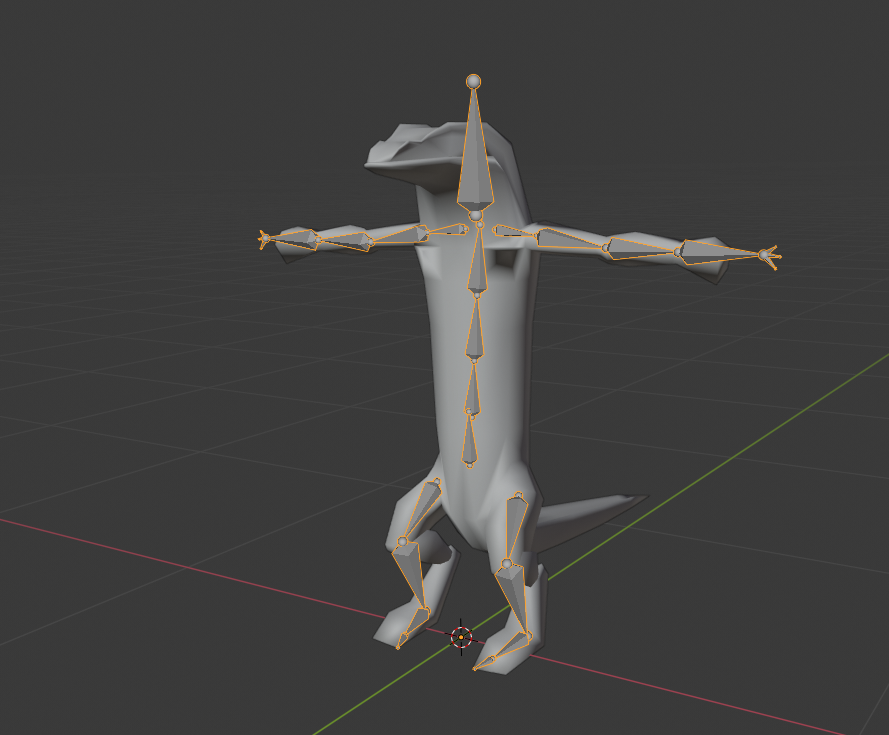 fading verge
are you sure? looks fine to me https://i.imgur.com/JKHyZmk.png
 fervent hornet
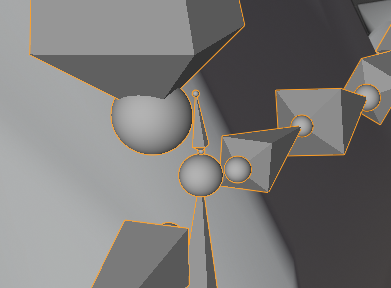
Bone tails dont exist in unity, they are only gameobjects, your neck bone is tilted because the connection from chest to head is tilted
tender summit
Anyone know if its possible to auto weight paint only some bones?
crisp tendon
You select one in weight paint mode and do weight > assign auto from bone
tender summit
Wait for some reason in weight paint, theres more bones on the hands than there should be
and i cant delete them since they go away in edit mode
and they show up in pose mode
crisp tendon
Alt + H in edit mode ?
tender summit
yep thanks that did it
tender summit
crisp tendon
You select one in weight paint mode and do weight > assign auto from bone
how do i do the weight > assign auto from bone
i select the bone from the hierarchy right
crisp tendon
Sure, then you have the weight paint menu at the top
tender summit
top left of main window?or top left of screen
crisp tendon
They're kinda the same since the main window is 90% of the screen
fading verge
yeah so no matter what i do, i can't fix that issue with my avatar's neck from earlier
doesnt seem to be the angle of the bone i think
fading verge
nevermind, it turns out for some reason the rig's neck bone in unity was somehow rotated -18 degrees
 brisk terrace
I have a question but its not entirely about rigging. Im trying to make a 4 armed model but i'd like to have my extra limbs move with the opposite arm. Ex: when i lift my right arm , my secondary left arm moves too. How would i go about that?

i already tried with rotation constraint but i cannot get them to work in the opposite direction
sage patio
@brisk terrace did you try setting the weight to -1
brisk terrace
i did , and when its at -1 it doesnt move at all

 unborn sandal
So I changed the chest and upper chest settings that a tutorial said was required to change, what would this error need me to do

Upper Chest=None
Chest=Spine 2
unborn sandal
So it says it should have the shoulders and neck set to spine 2, how do I move them and should I delete spine 3?

 worn quiver
Maybe something to do with animations?
fickle cosmos
I have been doing some silent rigging and tried to find answers by my self from google.
Now im at the point I have kind of done all visemens and I need to do some small tweaking and finish my textures before I familiarize my self with Unity and AV3.
Help!
I cant remember how it was called when you want to clean your shapekeys.
Like if I remember wrong there was some command that does something when your shape keys suck!
I have modified my basis and I want to apply modifications to rest of the shapekeys. Not the visemens but like hair and all other parts of the model.
Probably I select everything else but the face and then do something, but I just cant remember what it was called!
 fickle cosmos
I have probably done something wrong with shapekeys then!
But there was some trick what can help me here, I just cant remember what it was called
fickle cosmos
Shape propagate was thing what I was looking for! ah !
 thorn cobalt
I helped uwu
crisp tendon
Oh, i see what you were looking for, usually i wouldn't expect someone to voluntarily shape propagate something than something that they don't want to change
fickle cosmos
I dont know what it does/or how it should be used 😄 but it gets the job done If I leave face un-selected!
thorn cobalt
crisp tendon
Oh, i see what you were looking for, usually i wouldn't expect someone to volunt...
if you only select the few vertices you want to propagate, and they don't affect your shapekey areas, it's gucci (so far when I've created avatars or helped Lady 'Dusa here create hers)
I could've understood it's function completely wrong, and this is a similar situation like in W40K where the Orcs simply believe strongly enough in their tanks to work, and they do
crisp tendon
Yeah, i just never saw someone ask to propagate something purposefully working, so that caught me off guard
thorn cobalt
in this case she just had a few hairs messed up, so propagating their shape into all shapekeys was legit. Now if she had messed up facial vertices that would be a whole nother headache
crisp tendon
Then my solution would have been the correct one
thorn cobalt
good to know, will hafta return to it if need arises!
(that was not a passive aggressive "good to know" I'm just still waking up and my English is fumbling a bit)
fickle cosmos
What is the difference? Like does shape propagate do some damage what I could avoid by doing blend from shape?
thorn cobalt
to my understanding you can uhhh mix different shapekeys to create a new basis with the "Blend from shape" option, but I never had much luck with the option myself for some reason, I believe we were both having trouble with this the last time you and me were making avatars
I think it might not be the right option for this case because if you have had the wrong shapekey selected and you modified the vertices, then those modified vertices become part of the shapekey that was selected, so a new basis wouldn't fix them
the (wrongly) modified shapekey would still be wrongly modified and apply on top of the basis like any other shapekey, which is why you want to override those vertices with propagate. But propagate will also completely override those vertices in all shapekeys so it's only useful if that area is not affected by any shapekeys
idk tho
fickle cosmos
This Blender sounds like fun!
crisp tendon
Blend from shape is pretty powerful if you can figure it out !
 vivid lark
Where can I start with an avatars bones to make it close to 1:1 with full body? It’s kind of like stilts right now.
sage patio
 vivid lark
Match the number and style of bones?
sage patio
vivid lark
Match the number and style of bones?
pretty much. some bones are not required, like the toe bones
you can also have chest and upper chest bones, rather than just the chest
but not necessary
vivid lark
Because my thing right now is my leg trackers are calibrating in the avatars knees.
sage patio
vivid lark
Because my thing right now is my leg trackers are calibrating in the avatars kne...
did you adjust the User real height in your settings
vivid lark
Yeah, I’ve used other avatars that match up perfectly with all my trackers.
sage patio
vivid lark
Yeah, I’ve used other avatars that match up perfectly with all my trackers.
do you maybe have your viewpoint too far back?
 lethal cedar
I have a model, rigged it in blender, named bones, named vertex groups, works, but in unity (generic) rig only makes the root bone affect the mesh

I'm considering either making a "fake" humanoid rig (if it'll even work) or just splitting it into separate objects
sage patio
lethal cedar
I'm considering either making a "fake" humanoid rig (if it'll even work) or just...
if you want it to track at all, you NEED it to be humanoid
even if it doesn't look like it
all the humanoid bones need to be there
whether they are used or not
vivid lark
sage patio
do you maybe have your viewpoint too far back?
Got it right on the bridge if the nose in between the eyes. Would that have anything do do with the feet position though?
sage patio
vivid lark
Got it right on the bridge if the nose in between the eyes. Would that have anyt...
that should be fine. and yes, it can cause issues
because the whole avatar will be shifted either forwards or backwards
lethal cedar
well yea, I did some like that before, but what if I just want to have it animated on my shoulder or something?
sage patio
lethal cedar
well yea, I did some like that before, but what if I just want to have it animat...
oh well if it's not supposed to be an avatar, then a generic rig should work
after all, gun models also use bones
last I checked guns don't have humanoid rigs kek
vivid lark
sage patio
that should be fine. and yes, it can cause issues
Gotcha, I’ll check the bones
sage patio
vivid lark
Gotcha, I’ll check the bones
send a screenshot of your rig while you're at it
lethal cedar
sage patio
oh well if it's not supposed to be an avatar, then a generic rig *should* work
yea well, it doesn't, is it maybe that I'm importing as .blend? it worked for humanoid rigs
sage patio
lethal cedar
yea well, it doesn't, is it maybe that I'm importing as .blend? it worked for hu...
could be. try exporting as fbx
lethal cedar
I also noticed it doesn't import as a skinned mesh by default, I changed it myself before, what could be causing that?
sage patio
lethal cedar
I also noticed it doesn't import as a skinned mesh by default, I changed it myse...
could be FBX import settings
lethal cedar
imported as fbx, no change
sage patio
check the import settings

 lethal cedar
 sage patio
lethal cedar
sage patio
lethal cedar
this is unrelated to the issue but you should have this on Import

otherwise it'll double (at least) the file size
lethal cedar
I know it pops up in the builder, I don't have any blendshapes anyways
sage patio
so what happens if you try moving one of the bones in the scene?
lethal cedar
I have to replace mesh renderer with skinned mesh renderer and set root as root, then only root moves the whole
lethal cedar
no idea what I did but it has skinned rendered as default now
what I THINK I did, maybe, possibly... I unparented the mesh from the armature in blender and added an armature modifier instead (friend made this model for me, I just added the armature)
fading verge
I am making an avatar that works fine in desktop mode, but when I test it in VR, the avatar's head flops upwards when I move in a forward direction as if i'm looking straight up in that direction. Anyone know what causes this? I dont have any animations on it or anything
tender summit
Anyone know why the arms on my rig in vrc are very bent at the elbow? as in i cant straighten out the arms
sage patio
tender summit
Anyone know why the arms on my rig in vrc are very bent at the elbow? as in i ca...
check your User real height
you meant in game right
unborn sandal
So it says it should have the shoulders and neck set to spine 2, how do I move them and should I delete spine 3?

 deep marten
I'm.trying to weightpaint a long sleeve shirt onto a male base and it seems like no matter what I try, when I go into pose mode to check and see if everything works there is always clipping somewhere on the elbows, shoulders, etc. I have tried weight painting , I have tried sculpting the shirt to fit better, but it seems like nothing is working. I fix one spot and another spot starts to clip.
Does anyone have any tips or advice because this is driving me crazy lol
crisp tendon
Tried the data transfer modifier ?
deep marten
No, I am fairly new to blender so I'm not sure what that is !
crisp tendon

The Data Transfer modifier transfers several types of data from one mesh to another. Data types include vertex groups, UV maps, vertex colors, custom normals…
Transfer works by generating a mapping between source mesh’s items (vertices, edges, etc.) and destination ones, either on a one-to-one basis, or mapping several source items to a single ...
 grand bough
wait so
whenever I create shape keys I need to create 4 right?
1 for each lid
2 bottom
2 top
crisp tendon
nope
remote notch
grand bough
what do I need to do then?
if you didn't make the shapekeys from scratch, in blender CATS plugin should have generated them for you and in Unity you can click "detect shape keys" and it will fill them out for you
grand bough
I made my own shape keys
remote notch
yeah I have no idea then :/
grand bough

???
I assume I only need 1 shapekey then
whenever in unity, the VRC descriptor only had one shapekey option for blinking
crisp tendon
grand bough
isnt there a way to limit how much the eyes can move?
I thought it was possible to do that because in the CATS plugin on blender it allows me to change the movement range
oh wait
I found it
sorry
I'm getting back into the swing of everything
fading verge
Guys i got this model for free and it got bones but not ones for boobs and this script in unity makes the bone/mesh jiggle but i cant do it on boobs since there is no bone i can attach this to
how do i fix it
i can send u model and u can fix it maybe or even show me?
tender summit
Anyone know how to fix this?
 kindred pollen
tender summit
Anyone know how to fix this?
tender summit
kindred pollen
tender summit
Anyone know how to fix this?
tender summit
oh thats great thanks
kindred pollen
yw! c:
unborn sandal
Sorry to keep asking about this, but I still can’t figure out what I gotta do here. Says these are supposed to be under spine 2 but how do I fix that
 crisp tendon
Merge it with the below spine bone in blender
tender summit
Anyone have any good tips for setting up cloth coliders
along an uneven surface?
if im putting colliders on the the back for cape how many coliders should i use and attached to what bone
unborn sandal
This is my first time trying to port an avatar, any idea where I’d want to go about doing that?
crisp tendon

VERY IMPORTANT - PLEASE READ:
This tutorial may still be mostly useful, but there's a few major changes that you need to pay attention to. First off, VRChat now uses Unity 2017.4.15f1, not Unity 5.6. Additionally, there's some new tools for helping with atlasing that you should read about. Check out Cat's Blender Plugin docs to see more about th...
unborn sandal
Thanks pal, appreciate it!
unborn sandal
So two questions:
- I’m assuming I’m going to want the Cats Pluggin for most things I’m gonna do
- Is my avatar bones supposed to look like this by default
 frozen jacinth
grand bough
oh, so I do need 4
frozen jacinth
grand bough
oh, so I do need 4
I believe in avatar 3.0 if you use shape keys/ blend shape you actually only have one. I had to make a new one for my avatar coming from 2.0 at least
 spice dirge
I got two questons:
1: This character i am working on, when I test them out in VR Chat and look down, their legs lift up off the ground
2: This character's shoulders when I am testing the avatar are much narrower than I set them up to be on the rig in blender, resulting in their wings ending up being INSIDE their body in VR Chat

here's my rig setup in blender

 dusky socket
Anyone got some good weight painting and rigging tutorials? I built my first avatar from teh ground up...and while it mostly works, its still got some wonkyness that I'd like to work out. Like at the knee it divits in.
https://cdn.discordapp.com/attachments/683557850454556675/826127261694296064/0002.gif
 frozen jacinth
sleek isle
with a well place bone and weight paint. 4 group is enough I would say.
frozen jacinth
sleek isle
with a well place bone and weight paint. 4 group is enough I would say.
what would you call the green bones and is there tutorial on where to learn this?
might try to edit this area, but new to blender

 regal copper
spice dirge
I got two questons:
1: This character i am working on, when I test them out in V...
regal copper
spice dirge
I got two questons:
1: This character i am working on, when I test them out in V...
this is a shot in the dark, but it might be where the viewpoint is?
sleek isle
frozen jacinth
might try to edit this area, but new to blender

I think its call. corrective bone
spice dirge
regal copper
this is a shot in the dark, but it might be where the viewpoint is?
Could be... the character is kind short (like 3 feet tall) and has proportions that are diff from humans
ive been putting the viewpoint where the eyes are
regal copper
I usually put the viewpoint right in between the eyes, but I think if the avatar is small it might do that
 odd hill
unborn sandal
So two questions:
1. I’m assuming I’m going to want the Cats Pluggin for most th...
odd hill
unborn sandal
So two questions:
1. I’m assuming I’m going to want the Cats Pluggin for most th...
- Cats will be useful in a lot of ways, yes
- Those bone orientations are typical for game rips, but they aren't the end of the world unless you have dynamic bones on them. If you need dynamic bones, you'll need to reorient those manually and merge bones
 burnt goblet
would i fix this with bone roll or rotating the leg bones
 odd hill
what are you trying to fix exactly
odd hill
you'd want to do bone roll for that I think
odd hill
You can see what it does if you go into Pose mode. When you give a bone roll, you can determine the angle at which it rotates along its local axes
odd hill
unborn sandal
So two questions:
1. I’m assuming I’m going to want the Cats Pluggin for most th...
btw also, you can possibly fix the bones being oriented like that by checking/unchecking "automatic bone rotation" on the import settings in blender
burnt goblet
will would i adjust the bone roll in ward or outward to fix this
unborn sandal
odd hill
btw also, you can possibly fix the bones being oriented like that by checking/un...
Where would find these setting at and would they need to be done before anything else has been done to the mode, such as Mixamo
odd hill
@unborn sandal You'd find those settings as you import the FBX into Blender.
@burnt goblet Inward, just roll them until they look right
unborn sandal
Is the only way to tell if it worked to put it into unity again I guess?
fading verge
Just finished rigging my character in blender
Never again.
 bold patrol
So Im trying to get a model that was rigged in Maya using Advanced Skeletons into blender. Whenever I import the model into Blender, this is what I get, any suggestions?

 crude schooner
hey folks, not very active here, but i have a question related to rigging/animating. I've got a character with double jointed knees (image below) and I was wondering if anyone had tips for working with this sort of character design? Thanks! (this is just a very rough 3d mockup btw)

If this isn't the right channel to ask just lemme know
 solid adder
Probably set it up like a normal leg, but have constraint or two perhaps. If there's a specific way you want it to bend I guess.
crude schooner
Yeah, it doesnt bend at the ankle or top knee
 coarse delta
bold patrol
So Im trying to get a model that was rigged in Maya using Advanced Skeletons int...
coarse delta
bold patrol
So Im trying to get a model that was rigged in Maya using Advanced Skeletons int...
The Autodesk® FBX® Converter Archive
bold patrol
coarse delta
https://www.autodesk.com/developer-network/platform-technologies/fbx-converter-a...
Its already an FBX file, would putting it through this program help the issue? Im new to this sort of stuff so I have no idea
fickle cosmos
crude schooner
hey folks, not very active here, but i have a question related to rigging/animat...
I dont know enough about bones, but im pretty sure this is easy to do if you just find out how bones work!
I think you should have your normal humanoid armature and have extra legs next to it that follow your legs and they can bend in "wrong" direction!
Like exo-skeleton 😄

more like this, I dont know how those legs even work.. 😄
 fading verge
hey i got this model for blender and it seems to be humanoid rigged but i wanna add bones to parts so they can be moved too
i even got it to tpose and export to fbx or obj and load up on mixamo and the animations work there but can i add more bones to parts?
like in unity i wanna attach a script to certain bone then and do things in code to modify there position
sage patio
crude schooner
hey folks, not very active here, but i have a question related to rigging/animat...
easiest way would be to rig it like a normal leg, with one of the joints being the actual knee, and the other not moving. what you're trying to do with those two opposite joints is essentially a digitigrade leg
the issue with that is that you not only need to have the bones for that, but since you need to have only 2 leg bones for Unity to consider it a humanoid rig, you need to have another set of leg bones which are normal
then, you would either need to use Constraints to make it work, or FinalIK, which would in theory work better, but is MUCH harder to set up
 foggy flower


