#avatar-rigging
1 messages · Page 11 of 1
 rotund kraken

In this tutorial I explain how to use the Transfer mesh data control in blender, this is especially useful for skin tight clothing and getting separate meshes to share vertex group data, making it super easy to weight paint new meshes to a pre-existing rig.
This one is a bit more advanced but if you understand the fundermentals of rigging, this...
try to stick to one channel in the future, kind of annoying when someone has already helped
 steel dune
Can I have help making a vtuber avatar? Or something along the lines of that
rotund kraken
last i checked blender didnt remove one of 3d animation's most important feature
no armature = no animations
 stray wind
rotund kraken
no armature = no animations
stray wind
rotund kraken
no armature = no animations
at least Anakin's actual model has a rig
and a complex one at that
 quaint cosmos
Most rigs from games are specialized to the needs of the game, usually better to just scrap them and start from scratch than trying to alter the rig to work in VRChat
 modern crystal
What’s the required bones for fingers?
Like is it okay if the body has 4 instead of 5 fingers?
 fluid frigate
Heya. Forgive if this is the wrong place, don't see a channel for clothing rigging. Have a shirt that works with fullbody, but not in 3 point, while also looking fine in maya/blender. Any ideas? Banging head against a wall trying things here lol.
 gaunt basalt
so I want to weight paint a specific bone in blender but i can't get it to work for the life of me. I'm not trying to do anything complex but it just won't let me.

I just want to select one bone at a time and weight paint for that specific bone. I've been pulling my hair out figuring out how to do that.
quaint cosmos
gaunt basalt
so I want to weight paint a specific bone in blender but i can't get it to work ...
I just select the vertex group and go into weight painting, never used the bone selection method. Seems to work well.
gaunt basalt
quaint cosmos
I just select the vertex group and go into weight painting, never used the bone ...
but it won't let me add bones as a vertex group
I can't make a new vertex group for the bones I added
quaint cosmos
gaunt basalt
I can't make a new vertex group for the bones I added
You press the + in vertex groups and nothing happens? What mode are you in when trying to do this?
 thin jay
my avatars feet lift off the floor when i look down how do i fix that?
quaint cosmos
thin jay
my avatars feet lift off the floor when i look down how do i fix that?
Probably view position. I think that means it's too high but just make sure it's right around eye level.
 fading verge
is this how I should be naming tail bones?
 rotund kraken
doesn't matter for anything outside of the humanoid bones, just name it something you can easily identify
ie: bone 1, bone 2, bone 3, vs "tail 1, tail 2, tail 3" - the latter is easier to know what its referring to in the armature
quaint cosmos
Yeah, the only thing that bone naming conventions accomplish as far as Unity is concerned is allowing their configuration tool to automatically map the bones to its humanoid system for things like the locomotion animations VRChat uses. You can still manually assign those if they become unassigned for some reason but there is nowhere to assign tail bones in the Humanoid system so it doesn't interact with that regardless of your conventions,
 high shadow
How do I rig a hand with less than 5 finger this one only has 3 (I already did the thumbs)
 fading verge
rotund kraken
ie: bone 1, bone 2, bone 3, vs "tail 1, tail 2, tail 3" - the latter is easier t...
fading verge
rotund kraken
ie: bone 1, bone 2, bone 3, vs "tail 1, tail 2, tail 3" - the latter is easier t...
cool, thank you
It does this to my model every time I make one. Did it to the last one, it's doing it now.

it's super frustrating and last time it happened I rememeber I just sadly exported it without any shape keys and in vrchat my model just looked like 👁️👄👁️
thin jay
high shadow
How do I rig a hand with less than 5 finger this one only has 3 (I already did t...
You'd wanna rig it like this

 grand star
why does the neck do this, id like the head to be (in this example) facing down


 maiden haven
- mess with your bone settings
- that model is meant for blender animations most likely
 mortal silo
grand star
why does the neck do this, id like the head to be (in this example) facing down
mortal silo
grand star
why does the neck do this, id like the head to be (in this example) facing down
i dont have much experience myself but i think the eye bones might be whats messing it up they could be ik or smtg
fading verge
high shadow
How do I rig a hand with less than 5 finger this one only has 3 (I already did t...
I recommend still rigging it as it had five fingers. Just don't weight paint the unecessary ones. Otherwise this model will be generic and not humanoid.
That will cause problems for you later.
 void tiger
Anyone have any Blender plugin tools similar to Cat's Blender MMD where you can Merge Armature

Currently using Blender 3.6 LTS
 sleek isle
grand star
why does the neck do this, id like the head to be (in this example) facing down
sleek isle
grand star
why does the neck do this, id like the head to be (in this example) facing down
The head has its rotation independent of his parent
In pose mode, check the bone setting yeah
But that doesn't matter in the end in unity
high shadow
Right now I’m unity and I configured the bones and now the model is gone I made sure that the model is enabled but it’s just gone
 tall willow
 rotund kraken
https://youtu.be/4fICQmBEt4Y you can slow this down and pause when you need but its essentially going into the upper left corner where it says "object mode" (or edit mode) and switch to weight paint

I've been meaning to update this video for a very VERY long time. But, we're finally here. Everything you need to know in order to start painting weight layers onto your character!!! Hope it helps :)
Female Body Model Link:
https://www.youtube.com/watch?v=_XfvLpLyulI
If you enjoyed this video, please don't forget to like and subscribe!
You ca...
quaint cosmos
I've never rigged wings so maybe there's some benefit and I realize it's anatomical but you could probably get away with a 4 or 5 bone chain going along the surface of the wing rather than having 6 for the outer structure and 3 for each finger. You might get some additional control with your rig but it requires way more bones and will be significantly harder to weight paint and pose than using a simple chain that just controls the angle of certain parts of the wing.
 dim pond
having trouble finding if there's a simple trick to weight painting a tail so it bends smoothly. Last time I asked around (elsewhere) the answer came down to "just add more bones lol" but I'm still encountering a 'scorpion tail' segmented flex when stuff bends, even though it looks like it's behaving well enough in blender


being a plain tail I CAN just go and like, manually set weights loop by loop by loop but I plan on working out a nicer tail before too long
 tawdry imp
dim pond
having trouble finding if there's a simple trick to weight painting a tail so it...
tawdry imp
dim pond
having trouble finding if there's a simple trick to weight painting a tail so it...
Are the weights normalized in Blender?
Also I believe VRChat has Unity set to only allow 4 bones per vertex and I don't know how Unity handles it when you import an FBX with more weights than that
dim pond
I've normalized em, yeah. it tries to weight too hard at the center of each bone, and falls off sharply by default
tawdry imp
You can force blender to limit the max number of bones per vertex by going to weight paint, "Weights" menu and select limit total.
tawdry imp
dim pond
I've normalized em, yeah. it tries to weight too hard at the center of each bone...
thats pretty normal
rotund kraken
personally ive also noticed that consistent sized weights helps too
i was gonna say "all the same bone size" but a bone could be really big and only affect a small part
dim pond
haven't gotten around to the tail but here's another one- is there any way to fight how the humanoid rig targeting seems to completely reshape my hands into a broad, blocky, straight-knuckled mass


 dry heath
I don't know how to auto fix MMD Modeling rigging to VRChat.
dim pond
I modeled and rigged this myself. All other bones seem to be fine staying in position but the hands go broad and chunky on a few models I've looked at
sleek isle
dim pond
having trouble finding if there's a simple trick to weight painting a tail so it...
each vertex can only have up to 4 bone connected to it
so, yeah, annoying
sleek isle
dim pond
haven't gotten around to the tail but here's another one- is there any way to fi...
the thumb get often rotate when setup as humanoid. Rotate it back and don't pay attention to the tpose warning
dim pond
from what I can see, the tail didn't have an issue with more than 2-3 bones/vert at most
 dark crag
i have a new version of my armature and mesh that i've added a couple of bones and weight painting to, but im not sure how to apply it to my vrc avatar descriptor or physbones or anything
 bold locust
dim pond
haven't gotten around to the tail but here's another one- is there any way to fi...
bold locust
dim pond
haven't gotten around to the tail but here's another one- is there any way to fi...
Do you have an image of the hand armature?
Or did you already fix that.
dim pond
bold locust
Do you have an image of the hand armature?
haven't touched on that yet, going through a pile of random things as I reach this point in cleaning up the rig haha
bold locust
No worries.
dim pond
here's the hand bones as it's modeled, I'll get at how the rig looks like in the humanoid config in a bit. I'm assuming it's trying to put the root of the thumb bone up where the next bone starts, though the fingers also feel like their roots are all in a straight line, really blocky in vrc
 bold locust
Yeah, first bone of the thumb has the head pretty far up.
Which should be anatomically correct but VRC doesn't care.
If I was going for anatomically correct deforming hands, I might resort to support bones, but it's a good idea to maybe consider contacts and motion time animations also. So you can save constraints for add-ons and such.
dim pond
seems to be in place here, hmm
likely have to adjust bone positions in the animations?
 bold locust
Do you test the limits for Fingers in the Unity rig config?
Humanoid animations are different than you'd hope.
dim pond
tinkering with the anim, I see the problem, the thumb wants to read all 3 bones as if it's the finger, but it doesn't account for it as a palm. I just gotta set bone 2 as the first in the chain, I think
bold locust
Yes. That's what I was illuding to. Thumbs in VRC are usually just 2 knuckles. Tori did well with some of their hands.
dim pond
wait, it's definitely asking for the proximal. that's annoying. May just require I reweight that bone so it doesn't affect nearly as much of the palm shape
 bold locust
You can bump them back in the rig config hierarchy to see.
.001 to Proximal, etc.
I might need to check some of my favorite hands tbh.
bold locust
dim pond
having trouble finding if there's a simple trick to weight painting a tail so it...
How long are the weight gradients for each bone along the tail? Much overlap?
dark crag
okay, for some reason when i try to impliment the same values for old physbones on the new version of my armature, they're just huge for some reason?

 dim pond
they don't overlap past the next bone, I restricted to 3 bones/vert influence. Also poor practice rigging a simple tail in-pose instead of doing the straight line and posing with an anim
 bold locust
dark crag
okay, for some reason when i try to impliment the same values for old physbones ...
bold locust
dark crag
okay, for some reason when i try to impliment the same values for old physbones ...
Export settings might have changed your scale somewhere? But that's a weird difference in size compared to what you'd usually see under those circumstances.
dim pond
reasonably could have moved from cm to inches on export, that looks like it could be 2.54x the size
multiply the value of the now-bigger ones by 0.393701 and see if it looks right
dark crag
that does actually
goddamn it, such a dumb problem lol
how do i set what units im exporting as in blender?
dim pond
check the menu tab on the right (cone/spheres icon) and see if you're in imperial or metric. Change back to metric/cm perhaps
then when exporting (left menu here) the scale should just read 1.0
though sometimes I have weird luck (or lack of luck) with it just pretending to be consistent on me, haven't had to change these out for a while
 dark crag
its set to metric so im not sure actually...
 dim pond
maybe the other way around then? I hate system units finagling between softwares
bold locust
dim pond
seems to be in place here, hmm
likely have to adjust bone positions *in the anim...
This hand might look familiar, but it's my favorite hand right now and an example of what I'm going to be aiming for. It's not exactly like it was when I first got the model, there are slight edits, but Tetsuko has pretty decent hands, imo.

I have first thumb selected.
Motorcycle pose.
 bold locust
This hand might look familiar, but it's my favorite hand right now and an exampl...
bold locust
bold locust
This hand might look familiar, but it's my favorite hand right now and an exampl...
This is rest pose btw.
dark crag
okay this is bizarre, the size is still messed up, but for some reason not on her tail???


but it seems like the rotation is messed up or something???
i hope i dont have to go through and manually apply the right values to every bone
bold locust
dim pond
they don't overlap past the next bone, I restricted to 3 bones/vert influence. A...
Here's a gradient I use in tails right now.

The red and yellow in your current gradient may be too jarring of a transition and may be causing the sharpness you're seeing.
VRC defaults uploads back down to 4 bones on upload, you can change the max affecting bones in Unity, but VRC forces it back to 4.
So some special areas make use of support bones to compensate. - Tori told me.
dim pond
yeah the 4 bones influence was brought up initially, but reducing the maximum influence and spreading influence a whole extra bone from what I've been doing should be helpful
bold locust
Just know that you can change it in Unity but VRC doesn't care. So you can use that knowledge for testing and deciding if support bones will be necessary and such.
dark crag
so yeah, why is the tail on this armature correct, but her breast is tiny and misplaced?

Im genuinely really confused
i thought i could just like, rescale it to fit her properly
but like, i cant if it'll just scale her tail up too right?
quaint cosmos
Those look like pretty normal breasts to me but you can go bigger if you like. I'm not sure what the tail has to do with the breasts, if they're both weighted to the same bone, you have bigger issues than just modest breast size. If you have breast bones, you can scale them to scale the faces they influence but this would be reverted if you ever cleared the scale of the bones and might cause the topology to get warped so I'd just scale them in edit or sculpt mode and adjust the bone placement to match if necessary.
dark crag
i think you're misunderstanding the issue
quaint cosmos
Quite possibly, could you clarify?
dark crag
im trying to set up a new version of the armature with a couple extra bones and a bit of extra weight painting. i have the new fbx in unity, but the scale seems to be all kinds of weird

 quaint cosmos
So it's weird when importing into Unity but not in Blender? Are you importing this as a new model or trying to overwrite an existing one?
dark crag
the difference in the two armatures is made even weirder by the fact that the tail is correct on both
dark crag
quaint cosmos
So it's weird when importing into Unity but not in Blender? Are you importing th...
trying to overwrite an old one i think


the tail is correct on both, but the origin point is still in a weird spot
quaint cosmos
Yeah, try importing as a new model. I'm not seeing the issue but I'm not super observant sometimes and I don't know how it's supposed to look.
quaint cosmos
Oh, so you have the tail bone selected in that image where it looks like the leg bone is selected? Is the selection transform set to pivot?
I don't know from the pictures what you're attempting to select so that's important context.
dark crag
quaint cosmos
I don't know from the pictures what you're attempting to select so that's import...


does this show a little better whats weird?
quaint cosmos
Yes, that makes things much more clear. It seems like your origins are wonky if you have the pivot transform option selected, though even if it's set to center it's weird it's that far off. I would try importing it as a new FBX. And you've tried posing it in blender and confirmed that the origin isn't weird in Blender? I initially thought you were having a scale issue but nothing scale related is going to fix this.
You also seem to have capsule colliders to these bones which seems kind of weird, not sure if that is throwing anything off. Is this intendd for some sort of physbones purpose?
dark crag
quaint cosmos
You also seem to have capsule colliders to these bones which seems kind of weird...
i wasnt the one who made the original armature, thats just what my model maker did
i have almost no experience in blender or unity, im just trying to figure it out as i go
tawdry imp
I've run into this before but can't for the life of me remember what causes it. I'll have to find my project later
quaint cosmos
If I were you, I'd start back at what they sent you as you may have made an error which will be difficult to solve at this point. Character rigging is not the best entry point to learning Blender.
tawdry imp
Is the avatar a prefab in unity?
dark crag
i've ripped the .fbx out of the prefab and put it into blender to add the bones and weight painting
tawdry imp
its something to do with the fact its a prefab. When you replace the FBX in unity the scaling gets updated, but not for both the mesh and the armature
dark crag
so its just scaling one of them and not the other then?
i've tried messing with the scale, but it still makes problems
like, again, the tail has correct positions for its bones, but nothing else does
tawdry imp
I'm assuming if you go through all the bones, the whole armature is smaller right?

 tawdry imp
are the origins for other bones right?

 tawdry imp
so bones in like the arm and leg are wrong as well. Ill have to wait til i can open blender and unity because it looks like something i had an issue with before
dark crag
yeah, it looks pretty totally borked
should i just try making a new one? what about all the animations and peramaters and stuff. would i have to do them all again aswell?
tawdry imp
I can't give an answer right now. I need to try some stuff first. I can recreate the issue with an old project and figure out what causes it a bit later
dark crag
alright
ngl i've been working on this for like a week now with almost no progress. im getting to the point of looking into hiring someone to do this for me
quaint cosmos
dark crag
ngl i've been working on this for like a week now with almost no progress. im ge...
I get that you want to be able to do your own custom characters but there's typically a lot of fundamental learning that you need to establish beforehand. What you're doing is kind of like spending a ton of time bashing your head against the wall trying to recreate a Rembrandt with no painting experience. You might get somewhere eventually but you're going to struggle a lot more and run into a lot more roadblocks than if you got there via a series of more realistic goals.
dark crag
quaint cosmos
I get that you want to be able to do your own custom characters but there's typi...
I already have the model made, im just trying to make a couple small edits to what i had made for me
quaint cosmos
The only way I see you being able to do this without learning the fundamentals is to commission it or to have someone sit with you to show you how to do it step by step which will likely take more time and probably cost more. Even if it's small edits, you need to know to to do them properly and how to export everything properly. If you're just making bigger breasts, there should be no reason to touch the rig in the first place but if you have no Blender experience, then you don't really know what tools do what.
dark crag
quaint cosmos
The only way I see you being able to do this without learning the fundamentals i...
i dont care about her breast size, im trying to add physbones to her ears
i already added the bones and weight painted them to the mesh in blender
tawdry imp
quaint cosmos
The only way I see you being able to do this without learning the fundamentals i...
the issue looks like when exporting from blender to unity and replacing the existing FBX, unity in certain situations will update the armature but not the mesh.
quaint cosmos
Adding new bones and weighting them is not a trivial thing, especially trying to make them physbones. It's not an arduous task if you know what you're doing but there are a lot of ways things can go wrong as it's hard to triage if you're fumbling around in the dark and haven't learned how to properly do these things.
Yeah, you just generally don't want to replace the FBX if you've made major alterations but that's just one area where this may have gone awry.
dark crag
i didnt replace the fbx
tawdry imp
well then the armature and mesh scaling being different is even more odd
dark crag
i have separate versions that im trying to copy the component values from one to the other so i dont have to redo them all
quaint cosmos
dark crag
i have separate versions that im trying to copy the component values from one to...
That could very likely be part of your problem. If anything is different with the scaling or transforms on import, those values aren't going to be the same from one fbx to another.
 gloomy ether
I have a complex ik rig that I would like to make compatible in vrchat. Is there any way I can do this? Maybe simplify the rig automatically?
 novel kraken
Anyone want to play VR chat?
dim pond
I vaguely remember seeing something about new limits on constraints. Is that a 'total number of constraints' schtick, or 'number of constraints on a bone chain'? I'm having trouble getting the 'toes' foot (4th position in a digitigrade leg) to follow the rotation of the plantigrade rig that's actually tracking

this is how I'd Ideally like it all to flow, but adding the knee complicated my woes, as it and the shin both had a constraint, sharing the control shin's rotation by .6 and .4.
In this case, I think but can't totally test, that the foot-stalk became unresponsive, backing up the theory that it stops after 3(?) bones in a row.
 fair fern
So I am using blender for the first time and trying to allow physbones to work on my avatar so I took some pre existing bones and attempted to apply them to the hair of a model I am using but I don't know how to do that so could someone help?
void tiger
Is there a blender plugin where you can merge armature/Mesh similar to Cat's plugin.
Or any other methods similar to this.
 bold locust
dim pond
I vaguely remember seeing something about new limits on constraints. Is that a '...
bold locust
dim pond
I vaguely remember seeing something about new limits on constraints. Is that a '...
It's total number. You can link them all sorts of ways. Getting them to play nice isn't always the most straightforward though.
I'm about to be doing double-jointed knees here soon too. I'm considering proximity contacts to keep it Quest viable.
Since knees don't need to rotate on 2 out of 3 axii, they won't need all that specific control.
 modest yacht
Simple rigging isnt working and im very confused
Never rigged before as a warning
using Cats and youtube videos
Armature is connected to the mesh but legs, arms and any other joint does not move
bold locust
Did you use your vertex groups and add an armature modifier? And then did you select the right object for that modifier?
@modest yacht
modest yacht
ok the only thing it said to do was add a bone and build off it i have no clue what you just said
bold locust
So you need a way to tell the bone what verts to move. That's what vertex groups are. You assign a group of verts to that vertex group, and that vertex group must share the same exact name as that bone.
modest yacht
right im gonna delete the armature, can you guide me through it in basic terms?
bold locust
So you can leave the armature.
modest yacht
its not complete
i was remaking it
for some reason, pressing fix model doesnt join bones
bold locust
What kind of model is this that you're rigging?
modest yacht
like the humanoid ones
bold locust
Because they do not deform.
 bold locust
A lot of polygons oh god.
modest yacht
i just found the model idk
bold locust
Not terrible, just how they exist.
No, it's fine.
They just are messy topology.
There's an easy method which would cause stuff to bend and deform, or you can manually add verts to a vertex group to get them moving mechanically.
modest yacht
ive gotta do fingers aswell dont I?
i have no clue how to do the fingers so i left them
bold locust
It may help you more efficiently if I can find you a better video.
modest yacht
ok that would be grateful
something thats really basic and easy to follow
im more of a landscape Blender artist
rotund kraken
I've been meaning to update this video for a very VERY long time. But, we're finally here. Everything you need to know in order to start painting weight layers onto your character!!! Hope it helps :)
Female Body Model Link:
https://www.youtube.com/watch?v=_XfvLpLyulI
If you enjoyed this video, please don't forget to like and subscribe!
You ca...

Hoi there, Rain sensei here, this video is a recap of my 3D modelling series Parts 12 to 13, covering rigging your model.
if at any point you feel as if you need a more thorough explaination, seek out the relevant episode and scrub through it to find what you are looking for, I will slowly explain things in those videos, so please check the ori...
tons and tons of videos on rigging
bold locust
Thank you. I was just about to link this one as well.
Learn to rig NOW. I show how to set up an armature, how to parent things to bones, weight painting and how to solve common issues, and basic inverse kinematics.
Patreon, Gumroad Shop, Discord, and other stuff:
https://linktr.ee/Joeycarlino
Parent to nearest bone addon: https://github.com/g3ntile/parentToNearestBone
Rigging playlist: https://y...
modest yacht
yes your one is perfect Saigo im very impatient and just want to colour in my boy and add a nice fitting pirate hat
bold locust
It's a good video. Ignore the name. XD
Then good. LOL
He goes through a lot quickly.
Some stuff like IK in blender, you're probably never going to use. But it's good.
rotund kraken
still has some fluff to get through
royal skies has 0 fluff
other blender/substance tutorials too
bold locust
The idea behind his format is probably to not put you to sleep.
For people that don't do this regularly.
Royal Skies is also really hard to follow for a beginner that doesn't know where they're supposed to be looking.
rotund kraken
could throw it through mixamo and clean it up in blender if the pause button doesnt work :P
bold locust
Teaching is more than simply doing the thing at high speed without any explanation or context though. So pausing isn't the issue.
nod nod
fading verge
I finally got a pc to make avatars again
dim pond
Royal skies vids are like a 15 minute tutorial in 3 minutes
I like them for how quick he gets to the point but it's more like a reminder of where/what settings do a complicated task, instead of a learning thing
 balmy delta
I still have to have a notepad with my keybinds on my other monitor for blender lol
 silver brook
So I have a problem.
This skull is one mesh (because mesh count is part of optimization)
and I want the whole skull to move with the "Head" bone, and just the lower Jaw part moving with the "Jaw" bone.
How would I go about doing this?
I've already tried different things, to no avail.
 balmy delta
if the jaw is already weight painted to the jaw bone where that part works perfectly fine
then go and combine the head bone of the skull with the body's head bone you are wanting to put it on to
silver brook
omg i finally got it working
it's just that i didn't understand weight painting properly
dim pond
@bold locust since you mentioned this earlier- how do you go about constraining a sleeve independent of the arm? I've duplicated the arm/forearm bones and set the shawl up on the dupes. At the moment they're just parented to the root bone, and held in place by translation constraint
I'm trying to use constrain rotation and leave the Y axis alone, which I'd expect to affect the green Y local axis, but it seems to only allow me to lock its actions on the world-aligned axes, doing some (quaternion?) translation stuff where Y and Z are both basically sharing the blue directional here to start, and Y drifts all over as the arm is moved
 bold locust
dim pond
<@491430801192386561> since you mentioned this earlier- how do you go about cons...
bold locust
dim pond
<@491430801192386561> since you mentioned this earlier- how do you go about cons...
It's getting the position and rotation of the object relative to the scene space. Parents create the illusion of this not occurring, but it's looking at values of the source in scene space iirc.
dim pond
this is what's happening
bold locust
You can bang rocks together to get a mechanism to handle it though. Usually the case. I'd have to open up Unity and try to draft a thing. I did something similar I think a while back.
dim pond
no rush, this is just on my to-do list and I started bangin rocks myself haha
bold locust
Real quick how many polygons for the shawl? Just checking if this is potentially an xy.
I guess I should assume too high to say it's worth it to use cloth.
dim pond
7k in its current state, though I'm gonna do some serious retopo on it. Looking at cloth controls this is proooobably not optimal lmao
 dim pond
kinda cool, but I don't think cloth sim in such a collision-heavy space is gonna work out lmao. Also seems to mess with the offset of the thin outlines I have going
bold locust
Lol Typical cloth.
bold locust
dim pond
this is what's happening
Okay, so I thought of something and it "works". But-
It's jittery af.
I wanna mess with it a bit. Could probably dampen it.
bold locust
dim pond
this is what's happening
Something like this good enough? The blue is your shawl.
Position constraint and aim with object up to handle rotation. World up could probably be chest. I'll mess a bit more.
Kinda heavy for this effect though. tbh
4 constraints.
Yeah, this is pretty decent for that.
dim pond
brought it down to a single constraint (just made the scarf bones parented to each of their equivalent arm bones), and made the bicep 50% influence to help a little. Might need to sculpt a little more rotation room in there so the arm doesn't peek out, but I'll see how it works in the game's IK
bold locust
That's awesome.
Better to see it working than just doing a dirty prefab using primitives. lol
 hollow agate
I downloaded an fbx but it has loads of twist bones, I was gonna do the cats fix model but I need to rename a load of them to get the right arm bones and stuff,
anyone got tips before I go ahead and rename a load of them?
I'm worried I'll use the wrong bones for it
 visual arch
i need help. im trying to copy weight paint from my top arms to bottom but whenever i join the two arms together, the bottom mesh goes to the top and the armature wont work for the bottom (top moves bottom arms)
they're the same arm and should have same weight paint ( i lazy to redo fingers)
 rotund kraken
duplicate the top arms and the bones, copy them, paste into new blender project, rename bones and vertex groups to the appropriate bottom ones
repaste into original project, join armatures and reparent whatever bones need to be reparented
thats how i do my 4arms
visual arch
rotund kraken
duplicate the top arms and the bones, copy them, paste into new blender project,...
thank you! i had do some asjusting to make it work but it did! so thanks!
visual arch
Now i Need to know how to make the bottom pair of arms move with the top, I know rotation constraint but do i do it for each arm or group them together like this?

 rotund kraken
1 at a time
for each bone youll need to do the constraint
you put the constraints on the 2nd pair/bottom arms
visual arch
okay thank you! lets see if i can make it work
 knotty ginkgo
why is extract from prefab greyed out
 rustic silo
Have a bit of an odd one. Got a new avatar, wanted to make adjustments to it in blender, and export that back to unity. Typically, if I can match the original export settings, I can just drag the mesh onto the corresponding mesh slot in an object's skinned mesh renderer component (see image).
However, for some reason, doing the same now has the mesh, which SHOULD be weighted to the head, become weighted to the left hand's fingers. Nothing I've tried so far (different export settings, via stock blender, cats, beterfbx, different humanoid avatar settings on unity, etc) seem to have fixed this.
Would really like to avoid setting stuff up from scratch again (unless there's another option I'm not aware of for updating in place that I'm not aware of)

 tender flame
So, I want to use a rotation constraint to move some fabric so it doesn't clip thru the elbow. The video shows how it works in Blender.
How do I make this work in Unity?

 tribal pagoda
tender flame
So, I want to use a rotation constraint to move some fabric so it doesn't clip t...
tribal pagoda
tender flame
So, I want to use a rotation constraint to move some fabric so it doesn't clip t...
I can't be sure this'll help fix your issue, but if you don't already know, in the "Constrant Settings" dropdown, right below the weight, you can select which Axis are affected. By default all three are constrained, but it might work out better if only one of them is. In your example, It seems like only the Z-Axis needs to be constrained?
I tried doing something somewhat similar, where I tried to keep an oversized sleeve level with the ground via Rotation Constraint, and only having it affect the Y Axis helped, but I ultimately couldn't get it to work in a way I was satisfied with via that method.
dim pond
tender flame
So, I want to use a rotation constraint to move some fabric so it doesn't clip t...
from all the fiddling I was doing earlier with the shawl, I might say you could try putting an aim constraint on that bone, and set the target to the shoulder
bold locust
Tbh, as long as the bone is a child of upper arm and sibling of lower arm, a rotation constraint sourced to lower arm with like .3-.5 weight could work alright in this case.
Since they want it to rotate with lower arm but at a slower rate, pretty much.
🤷♀️
bold locust
Could alsooo do it with a proximity contact if you're full of constraints already or want to make it Quest compatible. Since that bone should only rotate within a small range, if IK is doing its job.
bold locust
tribal pagoda
I tried doing something somewhat similar, where I tried to keep an oversized sle...
Also, you're describing almost exactly what this is #avatar-rigging message and what @dim pond was referring to with the aim constraint. So that might help?
 flint lance
HI SORRY TECHNICALLY A RIGGING ISSUE!
I was wondering if anyone was able to help me fix a rigging issue regarding the physbones for one of my avatars! Everything is fully converted, but there's some issues with said bones. I'd also would like to see if the front part of the skirt for said avatar can be hooked to the legs. I can provide the unity project file and blender file as needed, too!
I can't do it myself because I'm still new to doing avatars and I had to use cats.
bold locust
You're more likely to find help if you're willing to help yourself. But I wish you luck in your search of free workers.
Unless I misunderstood what you meant by sending project files.
flint lance
Yeah, everything is converted, it's just a bone that I can't fix.
Basically: Avatar is 99% done, it's just some bones that are acting weird for some god forsaken reason
It has viscemes, it has eyelook, it has expressions, the wings are fully animated like I wanted them to be, EVERYTHING. It's just! An inverted! Bone! That! I can't! Fix!
 reef surge
flint lance
It has viscemes, it has eyelook, it has expressions, the wings are fully animate...
reef surge
flint lance
It has viscemes, it has eyelook, it has expressions, the wings are fully animate...
inverted bone? is it just like, upside down?
flint lance
It's really weird to describe, hence why I offered the project files for blender and unity.
reef surge
send me over the blender file i can have a look !
cant guarantee ill know what you're intending tho lol
reef surge
flint lance
It's really weird to describe, hence why I offered the project files for blender...
my dms should be open ^_^
 ornate scarab
if I'm making a rigged accessory (a piercing in this case) do I need to export the entire armature with the fbx or just the bone the accessory is painted to?
 plush badger
Hai there! very new to rigging in Unity. I can't seem to figure out the correct position for these two bones. Does anyone have a guide for hands?

 balmy delta
you dont exactly need it to be in tpose
you just put it to whatever works for the avatar
gesture wise in this case
plush badger
balmy delta
you dont exactly need it to be in tpose
I do cause otherwise the animations don't work
balmy delta
what kind of animation
plush badger
Ive been doing it for a while and keep getting it into position and it resets after hitting apply and done, I've done it 4 times now I'm so mad
 balmy delta
um
it says the head bone is not a child of the neck
also Im guessing
in vrchat
its just tposing?
have you also tried enforcing tpose
plush badger
plush badger
balmy delta
its just tposing?
No it works perfectly fine in VRChat (i think) but when I go to record an animation it dies
balmy delta
ehhhhhhhhhhhhhhhhhhhhhhhhhhhhhhhhhhhhhhhhhhhhhhhhhhhhhhhhhhhhhhhhhhhhhhhhhhhhhhhhhhhhhhhhhhhhh
did you edit the mesh in blender or anything
plush badger
No, I added a bone in blender and assigned it weights to a mesh differing from the body
balmy delta
thats
editing
every time you add or delete a bone
it commits funky to the old one if you try swapping the mesh
plush badger
Ahhh... shoot, how can I go about fixing it?
balmy delta
instead of trying to slap the mesh onto the old model
just drop the new model onto the scene and work on that one
plush badger
I'm not I did use a new fbx and just added it to the original scene
 balmy delta
also the neck and head thing could also be an issue
plush badger
Actually wait
balmy delta
which the neck and head thing is an easy fix by going into blender and parenting the head to the neck
so the head is a child of the neck
plush badger
balmy delta
try enforcing tpose
I did that but keeping the head offset?
plush badger
All rigging issues are fixed but it still won't work so off to #avatar-help ig lmao
 balmy delta
plush badger
All rigging issues are fixed but it still won't work so off to <#73094817337953...
balmy delta
plush badger
All rigging issues are fixed but it still won't work so off to <#73094817337953...
whats the animator look like
plush badger
Not sure what I'm looking at but it looks normal to me

 clever seal
how do i rig this?
every tutorial ive seen uses human models with limbs and stuff
 balmy delta
plush badger
Not sure what I'm looking at but it looks normal to me
balmy delta
plush badger
Not sure what I'm looking at but it looks normal to me
the animator component on the same window as the avatar descriptor
balmy delta
clever seal
how do i rig this?
every tutorial ive seen uses human models with limbs and stu...
humanoid armature with the hands and feet being weightpainted to the hands and feet bones while the body itself is weightpainted to the head bone
the armature can get pretty funky scale wise and still work
plush badger
balmy delta
the animator component on the same window as the avatar descriptor

Wait
The Avatar isn't set to the right one
balmy delta
and the controller is supposed to be empty
plush badger
I want to commit arson
plush badger
balmy delta
and the controller is supposed to be empty
I found that doesn't really matter but having it there makes making animations possible and easier
clever seal
balmy delta
humanoid armature with the hands and feet being weightpainted to the hands and f...
wait do i combine everything first
like his hands, shoes, body, etc.
plush badger
It worked
balmy delta
clever seal
wait do i combine everything first
like his hands, shoes, body, etc.
you can combine them all to one mesh if you want to but its not needed
clever seal
ok
balmy delta
depends on if you want them all seperate toggles
clever seal
balmy delta
humanoid armature with the hands and feet being weightpainted to the hands and f...
do i get the humanoid armature from anywhere?
or do i make it myself
clever seal
am i doing this right
uhhhh
i forgor 💀
 plush badger
Looks right to me! Make sure to name them correctly and ensure their all parented correctly
 clever seal
plush badger
Looks right to me! Make sure to name them correctly and ensure their all parente...
clever seal
plush badger
Looks right to me! Make sure to name them correctly and ensure their all parente...
by the way what do i name them
uh
rotund kraken
hand_r hand_l and head
foot_r foot_l too
theoretically this could work but ive never rigged a character with those type of proportions
 balmy delta
well
avatars with these proportions usually have big limbs and shrunken torso
short but wide torso
rotund kraken
kirby blobbert vs human proportions
balmy delta
yea
 vague bramble
Ah
This is so hard
like I can't even get the unity hub to work with me
Do we have a vc
 sand sky

 cold totem
I tried restricting every shape key to their respective vertex group and now my model evaporates when I hit play in Unity. Any ideas?


It exports just fine and works great in Unity without the shape key restrictions btw
uploads and all, it's just as soon as I start talking or activate any blendshape on my model, the patches and belt permanently deform
balmy delta
cold totem
uploads and all, it's just as soon as I start talking or activate any blendshape...
Whats the default state/ blendshape zero'd out
cold totem
figured it out

needed to propogate to shapes so the new basis would be reflected in all the shape keys
quaint cosmos
Never done it that way but yeah, Unity doesn't respect your vertex groups for shape keys so if I need to use one, I just put the shape key to 1 and then do a new shape from mix which looks the same but doesn't have the vertex group in it.
cold totem
not propogating to shapes is probably what made my model evaporate when hitting Play
I guess we'll find it, about to export to Unity again
Prayge
bruh I was just excited smh
rotund kraken
dyno try not to be insane challenge
 plush badger
clever seal
by the way what do i name them
plush badger
clever seal
by the way what do i name them
Doesn't really matter as long as you remember what their called
rotund kraken
better practice to name them correctly
quaint cosmos
Yeah, I believe Unity uses those names to handle automatic assignment for humanoids. You can manually assign but it's a pain in the ass to manually assign bone1, bone2, bone3...
 untold epoch
Out of curiosity. Does anyone know if it's possible to rig sever limbs to where they move together in unison. With of course only the original limbs actually working but to where it looks like all of the can independently move

This being a good example
quaint cosmos
untold epoch
Out of curiosity. Does anyone know if it's possible to rig sever limbs to where ...
Doing it well requires constraints which are only supported for PC but if that's not an issue then yeah, it's doable.
untold epoch
quaint cosmos
Doing it well requires constraints which are only supported for PC but if that's...
Is this a unity or blender thing?
Cause I can do both
quaint cosmos
untold epoch
Is this a unity or blender thing?
Both Unity and Blender have constraints so you can set them up in Blender but Blender constraints won't transfer into Unity so you would need to recreate any constraints you have in Unity. I've never actually created multiple arms on a character so I can't give you much more than that but it has been done.
untold epoch
quaint cosmos
Both Unity and Blender have constraints so you can set them up in Blender but Bl...
Sick. Thank you so much
 fervent mantle
untold epoch
Sick. Thank you so much
fervent mantle
untold epoch
Sick. Thank you so much
only thing you wont get is individual movement as constraints wil make the second set parent the first
untold epoch
fervent mantle
only thing you wont get is individual movement as constraints wil make the secon...
That's okay. What I'm look8ng for is to have all of my limbs (depending on how many I have) move in unison to my original set of limbs
fervent mantle
then yeah constraints work i have a few that do that
bold locust
fervent mantle
only thing you wont get is individual movement as constraints wil make the secon...
You can have a dummy set switch between them if you wanted. It's not too bad. Then you can pose them all individually or have them all track together. I'd put it on toggle and use gestures to make it responsive and intuitive.
untold epoch
bold locust
You can have a dummy set switch between them if you wanted. It's not too bad. Th...
I want them all to track together. You don't have to explain everything to do so, but what would I be looking to add in unity for that?
quaint cosmos
untold epoch
I want them all to track together. You don't have to explain everything to do so...
Not quite what you're looking for but this might be good to familiarize yourself with constraints. https://www.youtube.com/watch?v=QAhGS1i8wlM

This video is the first of two parts of parent constraint videos I will be making, explaining how to set them up on your avatar.
This setup will work with Write Defaults on or Write Defaults off.
In this video, we are setting up a normal parent constraint and the foundation for using a world transform to drop our object in world space. In th...
untold epoch
quaint cosmos
Not quite what you're looking for but this might be good to familiarize yourself...
I'll take a peak. Thanks
rotund kraken
bold locust
You can have a dummy set switch between them if you wanted. It's not too bad. Th...
oh god thats how its done?
ive added a 2nd pair of arms to every avatar but couldn't figure out how someone controlled them individually for some reason lmfao
 acoustic epoch
Okay, so I made this custom avatar today and for some reason, the cameras facing the character instead of being third person. I feel as I did something wrong.
 rotund kraken
they come with the sdk
quaint cosmos
Assuming you're talking about avatars. Physbones aren't support in worlds. Presumably they will be at some point but we've been waiting for that one for a while.
bold locust
rotund kraken
ive added a 2nd pair of arms to every avatar but couldn't figure out how someone...
Keep sync in mind. It can be complicated if sync is a priority. Not super, but enough.
untold epoch
bold locust
Keep sync in mind. It can be complicated if sync is a priority. Not super, but e...
so does that mean parent constraints in unity have the ability to move several objects ay their own origins from one bone?
rotund kraken
bold locust
Keep sync in mind. It can be complicated if sync is a priority. Not super, but e...
hrmm good to keep in mind if i try it
might just comm that part of my avatar lol
bold locust
untold epoch
so does that mean parent constraints in unity have the ability to move several o...
Well, you can add a constraint component to multiple objects and then source them all to the same object. Then moving the source affects all of the objects constrained to it.
If that's what you mean.
Constraint components only affect the object the component is on (and its children, of course).
fervent mantle
acoustic epoch
Okay, so I made this custom avatar today and for some reason, the cameras facing...
Is there a camera component attached to the model?
 wise brook
Im having issues with some of my clothing not moving with the body and i have no idea why plz someone help
 quaint cosmos
wise brook
Im having issues with some of my clothing not moving with the body and i have no...
quaint cosmos
wise brook
Im having issues with some of my clothing not moving with the body and i have no...
It needs to be weighted to the rig. https://youtu.be/4fICQmBEt4Y
I've been meaning to update this video for a very VERY long time. But, we're finally here. Everything you need to know in order to start painting weight layers onto your character!!! Hope it helps :)
Female Body Model Link:
https://www.youtube.com/watch?v=_XfvLpLyulI
If you enjoyed this video, please don't forget to like and subscribe!
You ca...
acoustic epoch
fervent mantle
Is there a camera component attached to the model?
Yeah there was, I had to get rid of it. Thank you. He's working now.
fervent mantle
Lol
 unborn oar
Any ideas how i can fix "the angle between pelvis and thigh bones should be close to 180 degrees"? I tried to move hip bone, rotate hip bone, move upleg bones, move foot bones to make straight line, nothing works. The angle is all the time the same
 quaint cosmos
unborn oar
Any ideas how i can fix "the angle between pelvis and thigh bones should be clos...
quaint cosmos
unborn oar
Any ideas how i can fix "the angle between pelvis and thigh bones should be clos...
It doesn't have to be 180, just close, so 167 isn't too bad. This angle isn't the best for judging that, I would go into side view and if you want to get as close to 180 as possible, the hip and thigh bones should form a straight line.
unborn oar
quaint cosmos
It doesn't have to be 180, just close, so 167 isn't too bad. This angle isn't th...
I fixed this but it must be 180. If you will not do 180 you will have this glitch when you are higher you legs will break in this way

Now it's working completely fine
quaint cosmos
If it had to be 180 exactly, it would be physically impossible to achieve but I'm glad you got it sorted.
At least by eyeballing it.
 steep tusk
Hey, a friend of mine has been working on a model and was wondering how to rig the clothes? They’ve already added bones to the body and it moves just fine, but they’re stuck as to how to how to rig the clothes and mouth (for talking). Any tutorials, suggestions, or ideas?
Here’s the model btw:

 quaint cosmos
steep tusk
Hey, a friend of mine has been working on a model and was wondering how to rig t...
quaint cosmos
steep tusk
Hey, a friend of mine has been working on a model and was wondering how to rig t...
This will get you started but for loose-fitting clothing like this, it will require some manual clean up of the weight paint to get a good result. Mouth movement (visemes) doesn't require rigging at all but the use of shape keys. If you just look up "VRChat visemes" that should get you started.
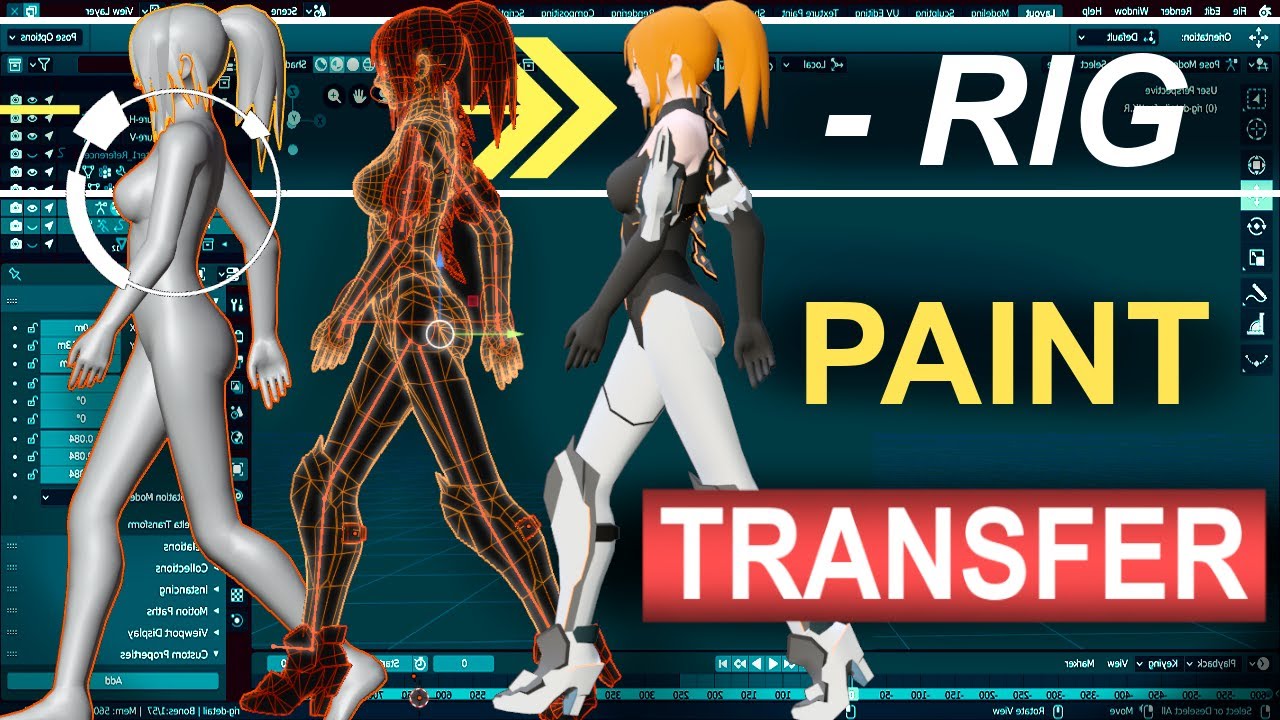
Never waste your time re-painting a new character ever again. In the next 60 seconds, you'll learn everything you need to transfer your Rig's weight painting from one character to another under a minute!!! Hope it helps :)
Free Female Base Rig Download:
https://www.youtube.com/watch?v=_XfvLpLyulI
Sayuri Artsy Weight Paint Transfer Video:
http...
 umbral nymph
Not sure why but my feet are backwards, tried rotating the bone in blender thinking it might fix it but only made it worse?????
 fading verge
SOO i had to remove a dumb avatar creators name from the avi and now the avatar is like really thin and like a toothpick how do i fix
 sweet dirge
can anyone help me rig a knife to my avi?
quaint cosmos
fading verge
SOO i had to remove a dumb avatar creators name from the avi and now the avatar ...
Don't overwrite the FBX in the scene, create a new file and bring that in.
quaint cosmos
sweet dirge
can anyone help me rig a knife to my avi?
You don't really need to rig held items, you can just parent it to the hand bone
sweet dirge
quaint cosmos
You don't really need to rig held items, you can just parent it to the hand bone
i did anchor overide and connected it to my wrist but it just floats infront me
quaint cosmos
I don't know what an anchor override is but if you put it in place and then drag it on top of the hand bone (or wrist if that's what yours is called) it should move with it but you need to make sure it's in the right spot before doing so.
Oh wait, I know what an anchor override is, at least for reflection probes but I'm not sure what it means in this context but you shouldn't need to do it regardless.
sweet dirge
quaint cosmos
I don't know what an anchor override is but if you put it in place and then drag...
imma try it
 hushed folio
Could someone make me my own avatar
fervent mantle
hushed folio
Could someone make me my own avatar
this isn't the place for this check the community-servers and go to vrc traders, just be prepared to pay money
sweet dirge
quaint cosmos
Oh wait, I know what an anchor override is, at least for reflection probes but I...
it worked
wise brook
Been having an issue on adding skirts to this avi base its alr weight painted but when i merged the amarures it doent move with the leg its like a sub bone in there and when i move it, it moves but doesnt look right been stuck on this for days please help....
 alpine moss
Figured I should here because it's more rig related.

Made a fox in blender with a custom rig and custom anims for vrc. How do I import this into vrc with the rig and anims fully functional?
I kinda gotta get this ready tomorrow for an event
I also already got the unity project fully set up btw
fading verge
can some teach me how to rig
quaint cosmos
fading verge
can some teach me how to rig
Auto-rig with Mixamo.com, look up weight paint videos on Youtube to fix up the weights.
quaint cosmos
It does not
quaint cosmos
I know how to rig and I still don't most of the time, if it's a humanoid, it's easier to just start with Mixamo and clean up any areas it doesn't weight properly.
If it's not a humanoid, don't bother
fading verge
bro If u know how Than can u just call me
quaint cosmos
I'm not going to walk you through the entire process of rigging when you don't even need to manually rig. What does your model look like?
quaint cosmos
I can't play mkv videos on my laptop, can you just post a screenshot?
fading verge
are u on windows
quaint cosmos
I'm on a chromebook at the moment. A video is not necessary, I just want to see if your model looks reasonable to rig.
 uncut breach
mkv doesn't embed on discord, just press windows key + shift + s to capture a screenshot.
fading verge
It just puts it in the cload
quaint cosmos
Figure out how to take a screenshot and we'll go from there. There's snipping tool, print screen, lots of options.
quaint cosmos
Cool. I'd still look up weight painting on Youtube as the results from Mixamo won't be perfect. One of the top results should be weight painting in 60 seconds which gives you a nice overview but you might want to check out some more in-depth tutorials as well.
 marble olive
When uploading an avatar I have the error "Humanoid avatar must have head, hands and feet bones mapped." When I configure the rig all of the bones are assigned okay but it's still giving me the error, how do i fix this pls?


this is actually driving me insane
uncut breach
marble olive
When uploading an avatar I have the error **"Humanoid avatar must have head, han...
If you’re still having the issue you need to do this, it doesn’t need to be the robot sample fbx btw. The SDK forgets the entire rig so doing this will refresh it
marble olive
uncut breach
If you’re still having the issue you need to do this, it doesn’t need to be the ...
thank u for the video ill refer to this next time it happens, the fix i found in the mean time was to make a new project and start fresh
another thing, when i calibrate in-game my hip tracker is way too low, is there a way to fix this? the hip bone looks like this in blender so it looks like in a good position though:

 golden sandal
im tryna make an avatar for vrc rn with the halo infinte elites with halo reach body idk how to make a more simple rig to assign the bones so it can be a humanoid rig in unity?
rig rn for reference

file used
 gloomy ether
do i put twist bone weight painting on clothing meshes too?
quaint cosmos
golden sandal
im tryna make an avatar for vrc rn with the halo infinte elites with halo reach ...
I'd just scrap it an use Mixamo but you aren't going to get legs like that looking good without constraints which are only supported on PC avatars.
thin jay
I found this avatar in vrchat that can clone itself and the clones perfectly match the movements of the main one, without parent constraints, or rigid bodies, and it only has 44 bones. does anybody know how to recreate this effect?

 wet holly
thin jay
I found this avatar in vrchat that can clone itself and the clones perfectly mat...
wet holly
thin jay
I found this avatar in vrchat that can clone itself and the clones perfectly mat...
Gpu mesh instanstiation, aka a custom shader. But def wouldnt be quest compatible tho
thin jay
wet holly
Gpu mesh instanstiation, aka a custom shader. But def wouldnt be quest compatibl...
that's the thing...it IS quest compatible
I have no idea how, but it is
wet holly
Maybe the quest dosent have this option to be multiple?
thin jay
wet holly
Maybe the quest dosent have this option to be multiple?
I tested it on quest and it works identically on quest
thats why im so confused XD
rotund kraken
they probably used a crap sdk
theres a reason why shit is disabled on the official, real sdk
wet holly
thin jay
thats why im so confused XD
Well im just as much as you now
wet holly
rotund kraken
they probably used a crap sdk
Even with a modified sdk im pretty sure vrc set the shader themselves
On quest only
rotund kraken
you realize that can bypass shader limits??
wet holly
Wdym?
rotund kraken
not advised
wet holly
You can upload avatars with higher then limited amounts of many things, but changing the shaders no, else it would make a while somenone would have made a custom vrc quest shader, but it never happend cuz u can't change it
rotund kraken
yeah people upload very poor avatars but thats not the same thing
modded sdks do all sorts of shit
not really sure how else to explain
 chilly ferry
this was literally working a minute ago but then the program crashed and this happens now

can anyone help
 wispy lily
does anyone know how i would rig a blob slime creature thing with pseudopod arms
as in arms formed by deforming the surface of the blob into a kind of tentacle
if i rig it so the surface of the blob is tied to my hands, it would pull the surface inward when i have my hands too close to my body
which i don't want
is there any way to achieve this effect of just pushing out the surface of the blob (preferably starting from the point on the surface closest to where the 'hand' is, not from a fixed 'shoulder' position) when the arm is extended
in blender itself I think i can do it by using the mesh deform modifier but I don't think that will carry over to Unity
can anyone help with this i can't find any tutorials or anything for rigging a blob creature
guh
i could probably just make the arms seperate meshes and find some way to mask them when in the body
but that would cause other issues, like there would be a sharp angle between the arm and the blob surface which would look weird
ugh i wish i could use metaballs to make an avatar
would solve everything
uncut breach
chilly ferry
this was literally working a minute ago but then the program crashed and this ha...
You'll need to get the SDK to refresh it's rig knowledge, easiest way is doing this with what I've found
it doesn't need to be the sample robot, it can be the same avatar's FBX
chilly ferry
uncut breach
You'll need to get the SDK to refresh it's rig knowledge, easiest way is doing t...
i have come to the conclusion that one weird item is breaking everything, thank you anyway
quaint cosmos
wispy lily
ugh i wish i could use metaballs to make an avatar
You can, just just have to convert it to a mesh at the end. Not sure if the topology will be any good.
wispy lily
quaint cosmos
You can, just just have to convert it to a mesh at the end. Not sure if the topo...
wouldn't help with what i'm trying to do though, they wouldn't retain the "merging" property when animating
quaint cosmos
Ah, yeah, that is true.
wispy lily
i'm trying to make a slime creature with a surface that smoothly deforms for the pseudopod arms
with metaballs i could literally just make the arm a seperate part of the model
and it would do the smoothly deforming part by itself
with a mesh i have to
actually wait a second
wispy lily
wispy lily
does anyone know how i would rig a blob slime creature thing with pseudopod arms
is there any good method of doing this
the current best method i have been told or can think of is either A: using seperated meshes for the arms and not weighting the body at all, but
- this would mean it would look more like kirby limbs, with a sharp angle between the start of the limb and surface of the body, and
- I have no clue how to make the arms not be visible through the body since this avatar will be transparent
or B: just weight painting an area on the surface of the slime and using triggers to downscale the bones so the arms don't invert, but this would mean the arms can't slide around on the body which would suck
is it possible to dynamically change weight painting based on angle of polygon compared to angle of arm
because that could let me do a smoothly deforming sliding arm if it's possible
my goal is a a smoothly deforming sliding psuedopod arm (picture kirby arms but a bit longer and curving smoothly from the body instead of a sharp angle).
does anyone have any other ideas that could help me with this
quaint cosmos
I don't think any of this is possible in a VRChat avatar but I don't know what I don't know so maybe someone else will have some leads for you. As far as I know, it's just meshes with weights and aside from things like being able to toggle separate meshes off and on, those meshes and weights don't change. You can have shape keys but those don't fundamentally change the makeup up the mesh, just its shape.
Your best bet might be some sort of shader-based solution but that's just a guess. I don't think this sort of dynamic mesh alteration is possible.
wispy lily
quaint cosmos
I don't think any of this is possible in a VRChat avatar but I don't know what I...
i figured out a way to do it, this shitty image kind of explains it

the arm is a seperate mesh just under the "skin" with two bones
one rotates the arm, the arm is 100% weight painted to this bone
the other just rotates up and down and makes the arm extend, with the weight painting creating a (hopefully) smooth curve between arm and surface
quaint cosmos
I don't know if I get it but I'd certainly love to see it if it works
wispy lily
hopefully it works lol
wispy lily
need help with an issue
i've set up the goo arm psuedopod thing
but in blender pose mode, when I extend it by scaling the length
the end of the arm doesn't end up at the end of the bone

the bone extends past
 frail ferry
I’m adding robes to my model and want to make them flow more realistically with Physbones, how would I add Physbones to that if the robes are already attached to my main body model?
wispy lily
I finished building my pseudopod arm rig, does anyone know of it will be possible to use the humanoid or generic animation controllers for this?
Or modify it to work with them? Or do I have to make my own
How does one even make an animation controller
 iron solar
ok wait in unity is there a way to overlay an image on a sphere (to add something like a 2d face?)
gloomy ether
can anyone help me figure out why my eye tracking isn't working on this model. this is what cats is giving me every time i try to test

 normal trail
quaint cosmos
I'd just scrap it an use Mixamo but you aren't going to get legs like that looki...
normal trail
quaint cosmos
I'd just scrap it an use Mixamo but you aren't going to get legs like that looki...
Would Mixamo automatically apply a bones rig to a model? I was trying to use it earlier but I wasn't sure it was going to do well.
Very new to all of this, been lurking for information
Okay, so as mentioned above I am very new to all this. I can definitely go through and rig this from the bottom up again, but is this the right amount of bones? What about fingers? I'm guessing I'm way off for a first attempt.
 thin jay
So i was working on a parallel nightmare avatar, and his starting pose is like this

but i want it to be posed like this, the problem is when i apply it as the rest pose the hands go back up

 rose epoch
I'm re rigging a model as when the arms go forward they lock out way before the person's arm is even a little bit stretched.
I'm assuming the Forearm Bone is to short, any advice or guides that show correct proportions?
 balmy oar
normal trail
Okay, so as mentioned above I am very new to all this. I can definitely go throu...
balmy oar
normal trail
Okay, so as mentioned above I am very new to all this. I can definitely go throu...
That's way off. The bones are going the wrong way and aren't connected. Got fingers, you just make a hand bone and extrude your fingers. YouTube is a great resource for learning things like this!
tribal pagoda
I'm not entirely sure how to describe what I need help with, but I'll try.
I need a way to make a cord that's attached on two points, and have both sides be able to affect it. It's kind of like the reverse of a Bow string, where it's the two ends that get moved around, instead of pulling on the middle. And the two ends in this case are attached to your wrists, basically.
er, to be a little more specific, it's that each wrist has a seperate cord that connects to the chest, not one cord connecting both wrists.
and maybe a Cup and Ball is a better analogy than a Bow string

a cup and ball that's attached to your body... Like I said It's hard to explain.
balmy oar
So like... It's just a line that connects between your two wrists?
golden sandal
anybody know how to make vimeses for amth that doesnt use a human mouth i dont know what a vinese even is except it moves the kiuth so beat with me please
quaint cosmos
golden sandal
anybody know how to make vimeses for amth that doesnt use a human mouth i dont k...
Visemes are typically shapekeys but there are various options depending on mouth type. Some avatars will use a texture and have the visemes control a mapping offset but it would probably be good to start with what your character mouth looks like and what you're trying to achieve.
golden sandal
quaint cosmos
Visemes are typically shapekeys but there are various options depending on mouth...
i have pictures sorta this is he avi

and this is someone who used the same body and mouth

only thing is idk wtf this is
quaint cosmos
golden sandal
only thing is idk wtf this is
They're the mouth shapes that correspond to various sounds which is what visemes are. Those are just shape keys like you would do with any human avatar. You can learn the basics here. Convention is to use those names with the prefix vrc.v_, so vrc.v_aa, vrc.v_ch, etc. but they can all be assigned manually if they aren't picked up automatically. https://www.youtube.com/watch?v=B11XBZmIIZc
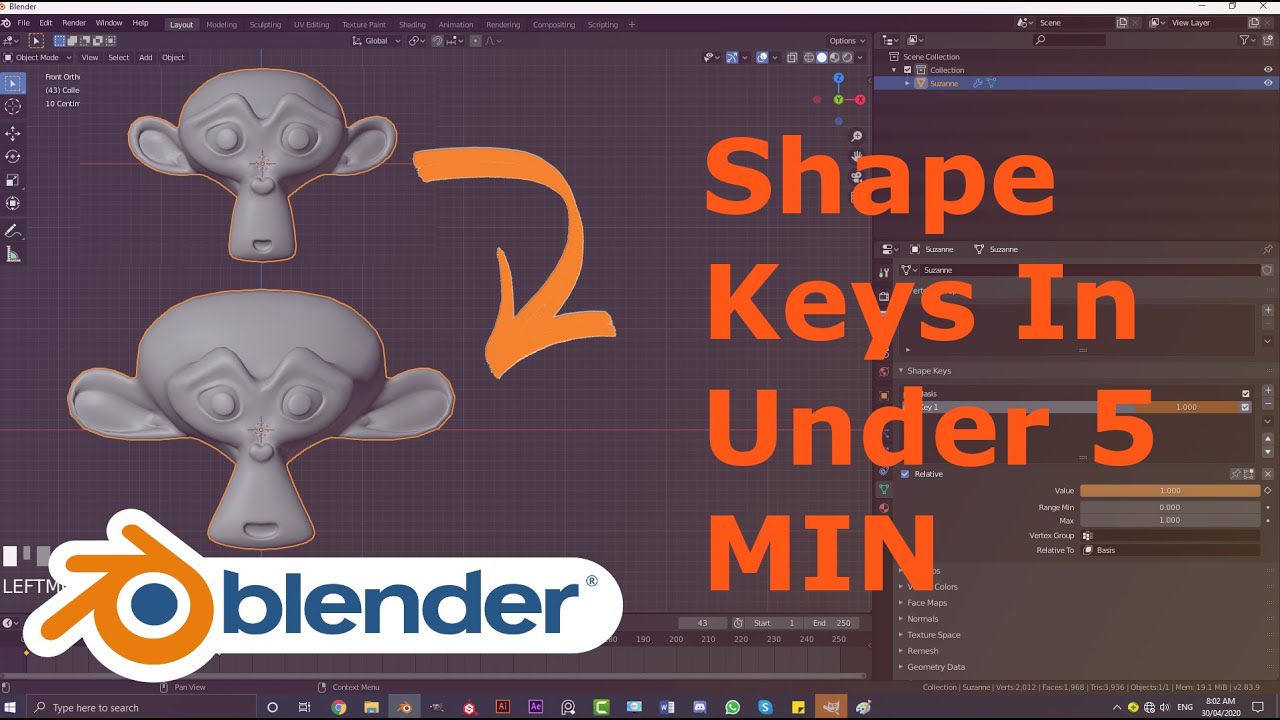
Understanding Shape Keys in Blender in under 5 minutes. This is for all you beginners out there. I don't cover everything there is to know about shape keys, but just enough to get you to understand what they are and how to use them.
Patreon► https://www.patreon.com/PIXXO3D
#Blender #Basics #3D
This is the reference sheet I usually use which is made for humans but you can just try and copy what you see on that chart if you like how they went about it. https://developer.oculus.com/documentation/unity/audio-ovrlipsync-viseme-reference/
A complete table of visemes detected by Oculus Lipsync, with reference images.
golden sandal
quaint cosmos
They're the mouth shapes that correspond to various sounds which is what visemes...
so how do i get the shapekeys from blendernto unity?
quaint cosmos
golden sandal
so how do i get the shapekeys from blendernto unity?
If you export an FBX into Unity with shape keys, they'll appear in a dropdown labeled blendshapes in the skinned mesh renderer. There is an auto-assign button in the avatar descriptor to assign the shape keys to the various sounds but they also have dropdown boxes if you need to assign them manually. You'll also want a closed mouth shape key (vrc.v_sil) and a blink shape key if you want your character to blink.
thin jay
Does anyone know how to fix this?

 balmy oar
thin jay
Does anyone know how to fix this?
balmy oar
thin jay
Does anyone know how to fix this?
Your neck and head are way to far in front of your spine
Usually when I make characters with their head so far in front of their body, I try to fix their posture in blender, but still make it look natural. Also make sure your neck and head home are lines up.
Makes sure the legs are also lined up with your hips and spine
Good to have it pretty even
Make it work well with the vrc bone pizzazz
 main badge
someone can help me with this?
thin jay
I have the neck set up like this becasue of his posture, but when im using 3 point tracking the head bobs weirdly when i walk, I know its because its not straight but i dont know how to make it straight without it breaking how it rotates
 balmy oar
thin jay
I have the neck set up like this becasue of his posture, but when im using 3 poi...
balmy oar
thin jay
I have the neck set up like this becasue of his posture, but when im using 3 poi...
If it's gonna be PC only, a good way to do it is with rotation and parent constraints. If it's on quest, unfortunately, you gotta straighten up that skeleton as much as possible. The more human it is, the better it works
thin jay
So is it better to put bend in the legs so they would technically be longer? or is it better to make them straight?
bold locust
Slight bends so the IK can more easily tell which way to bend. It doesn't have to be in pose mode. You can slightly edit the bones in edit mode.
fading verge
Can't use it from another avi. Have to make it yourself. Each avi has different blendshapes. Blendshapes are smaller edits made to the mesh.
Click the face, on the right side, you see a blendshape tab. Expand, and you see sliders with what it has. You'd have to press ctrl+6 to open the animaiton window, record, and start alterting these to your liking. When done, stop recording, and you have an animation. Then you have to add this to the FX layer, and create some type of toggle for it. For example, add GestureRight to the paramaters. Then add GestureRight equal 4 as a condition.
When you do a victory gesture, you'd activate the blendshape.
Here's an encompassing tutorial, https://www.youtube.com/watch?v=UU9NFJz2qls
Here's some additional condition info that might be useful. https://creators.vrchat.com/avatars/animator-parameters/#gestureleft-and-gestureright-values
cold totem
Is it possible to bake the texture of an object lying on another object into the object underneath? Been trying to get these fucking tights to work properly for AGES with no progress

Weight painting, they still clip a shit ton even with my best work
Rotationally-driven shape keys don't transfer to Unity
I have no idea how tf I would set up a cloth modifier for tights, or if that could even work?
cloth modifier is kind of my last hope if anybody has any idea how to do that
this is what happens currently when I try to use a cloth modifier set to cotton and have the body have a collision modifier

they're not connected to each other, not sure if that changes anything in how the cloth modifier behaves

using unity's capsule stuff for cloth sim will simply not work by nature and it'll be super visible unless I have like 5 capsule colliders in each leg lmao
I have no idea what to do 💀
reef surge
cold totem
I have no idea what to do 💀
are the tights not weight painted?
you can try data transferring the weight data from the body onto the tights
should work fine
click on your tights mesh > modifiers > data transfer > vertex > vertex groups
and select the target object as the mesh that has your legs
 indigo nacelle
My models sholder bones are collapsing in on themselves, anyone know what causes this?


 sage patio
cold totem
I have no idea how tf I would set up a cloth modifier for tights, or if that cou...
sage patio
cold totem
I have no idea how tf I would set up a cloth modifier for tights, or if that cou...
those should absolutely be done via tiling a texture with alpha
there are many shaders, like Poiyomi's, that allow you to have decal textures and tile them
fading verge
So I have this model with hinges on its joints and they become displaced with the slight rotation of a default rig. I've never worked with constraints before, but I'm assuming there must be some way to make it so the forearms and knees only rotate on a single axis?
cold totem
reef surge
are the tights not weight painted?
they are, I've already done the data transfer and even improved the weight painting past that
cold totem
sage patio
there are many shaders, like Poiyomi's, that allow you to have decal textures an...
noted, thanks
Is there a way I can stop the tiling past a certain point on the mesh or would I need to separate the lower and upper body to do that tho?
quaint cosmos
 tender pendant
im needing help to start making avis!
tender pendant
im needing help to start making avis!
Start with learning to make simple models. You don't generally start with characters
sage patio
cold totem
Is there a way I can stop the tiling past a certain point on the mesh or would I...
yes, you can have a mask
however, you'll probably want the netting to be a separate material if it will have transparency
if it's just cutout transparency it might be alright
I'm also not sure if you plan on having the tights be "stamped" onto the body, or if you want it to be a separate mesh layer above the legs
there's pros and cons to both
first option uses less polys, but second method allows you to be more flexible with the shape of the tights
so you can do stuff like have them go around the toes properly
cold totem
Yeah I've been trying to do it as a separate mesh, but they just clip a shit ton and I've been working on and off on this model for 15 fucking months 💀
I'll probably just make them stamp since my model uses heels and can't really take the shoes off lol
sage patio
you can just duplicate the lower body mesh and extrude it out using alt + S
and then do fixes from there
the weight painting will be by nature identical
sage patio
just be mindful of the poly count, that will depend on the poly count of the body you're duplicating from
cold totem
this model is too far gone already to worry about that 😂 the person I bought the bodysuit from did a shit job of optimization and I can only fix it so much
 native haven
I can rig models if anyone needs them.
quaint cosmos
Maybe you can but I wouldn't commission anyone from here since there is no verification system
tender pendant
quaint cosmos
Start with learning to make simple models. You don't generally start with charac...
like what. helpppp
quaint cosmos
tender pendant
like what. helpppp
Some people seem to like this one. I think the most famous beginner tutorial series is the cgcookie donut but some people don't like that one. I'm sure you'll learn stuff regardless. https://www.youtube.com/watch?v=bpvh-9H8S1g&ab_channel=CGFastTrack

Your journey awaits in this new Blender Beginner tutorial series. Dive into Blender 2.9 with CG professional Robby Branham!
Join CG Fast Track PREMIUM MEMBERSHIP: https://www.cgfasttrack.com/subscribe?utm_source=youtube&utm_medium=link&utm_campaign=BFT2&el=BFT2-youtube
FREE Download files: http://cgfasttrack.com/blender-fast-track2?utm_source=...
tender pendant
quaint cosmos
Some people seem to like this one. I think the most famous beginner tutorial ser...
tysm
tender pendant
what app do they use @quaint cosmos
quaint cosmos
tender pendant
what app do they use <@334006467805839372>
It is called a Blender tutorial so Blender. That's what pretty much everyone uses, there isn't much reason to use anything else unless you're in film production and your company is paying for it.
quaint cosmos
tender pendant
<@334006467805839372>
Uploading to VRChat requires Unity. You don't even need to be able to model to make worlds and upload them to Unity but for characters, you're going to need to model, rig, map, and texture them before they'll be ready to be used in VRChat. The last 2 aren't strictly necessary for a test upload but you'll need to learn that stuff to create anything high quality. I wouldn't worry about uploading characters to VRChat until you're able to model them reasonably well and then rigging can be somewhat automated.
fading verge
Does anyone here know how to do quadruped avatars?
fading verge
fading verge
Does anyone here know how to do quadruped avatars?
Because I've gotten a couple DMS about people wondering if I'm looking for an avatar, I'm asking specifically if anyone knows how to do quadruped avatars cuz I want to know if there's a way to stop their front ends from clipping into the ground when crouching or they're back end from sticking up in the air when crouching.
quaint cosmos
Yeah, be careful about the flood of offers, probably many scams in there. All I know is that you're probably going to need constraints unless you want to avoid tracking completely and just use custom animations.
 odd mist
does anyone know how to create a rig and tail in blender? I have no idea what I'm doing none of these videos on youtube make sense to me
rotund kraken
fading verge
Because I've gotten a couple DMS about people wondering if I'm looking for an av...
DMs from here are scams. theres a discord server called Virtual Limbs where a lot of vrchat people are quadrapedal. im not sure if the link is in #community-servers-old but i can toss you an invite if you're still interested
wispy lily
can i set a bone constraint in unity to only rotate on one axis?
sage patio
wispy lily
can i set a bone constraint in unity to only rotate on one axis?
yes
it wouldn't be called a bone constraint, it would simply be a rotation constraint
wispy lily
yeah i figured it out
forgot to say it here
can someone smarter (and less tired) than me explain what i've fucked up here
how do i prevent the weird bulging when the hand rotates while inside the body
everything else is working as intended btw i know the rig and mesh is weird
uncut breach
The hand wouldn't move like that from the IK in VRChat
wispy lily
uncut breach
The hand wouldn't move like that from the IK in VRChat
oh so theres no need to fix this?
wispy lily
guh
wispy lily
uncut breach
the hand/wrist can't move independently
yeah i know that but the wrist is the only thing that is weight painted
let me explain
my current issue
actually let me ask the question first
or
nevermind i think i know how to fix it it's just a pain in the ass
is it possible to export a model in a pose that is not its default pose?
i mean i know it's possible
but will it work as an avatar
 sleek delta
Alright
Anyone up right now?
I uh
I really need help
I had an avatar that wasn't outfitted with physbone, applied physbone to "plug the holes" and now everything's floaty
sleek delta
I need help with hands not being floaty noodles
sleek delta
Please?
wispy lily
sleek delta
I had an avatar that wasn't outfitted with physbone, applied physbone to "plug t...
Dont use physbones on IK enabled bones (the human skeleton)
sleek delta
What should I use then?
wispy lily
For what?
What are you trying to do
If the model doesn't have any parts that need physics like hair you dont need physbones
sleek delta
Alot of the avatar I’m working on has no scripts for some reason
wispy lily
Physbones are only for stuff that has physics like hair, breasts, tails, etc
sleek delta
What about wrists, neck, etc.?
wispy lily
Dont need physbones
sleek delta
Any idea what I should put as a script on it then?
sleek delta
Yeah, Unity ain’t happy about there being no script
wispy lily
sleek delta
Yeah, Unity ain’t happy about there being no script
I think that might mean it's an old avatar that used dynamicbones which are now deprecated
Not really sure
wispy lily
sleek delta
Yeah, Unity ain’t happy about there being no script
There should be an auto converter tool
In the tools menu
of the sdk in unity
I think?
probably back up first
balmy delta
sleek delta
It says there's no dynamic bones found
Did you import dynamic bones before the avatar
sleek delta
I got what the issue was, I got dynamic bones, probably used to be included in the sdk and isn’t anymore
balmy delta
They never were
sleek delta
Weird
balmy delta
Dynamic bones were a comoletely seperate script
sleek delta
I must’ve forgotten that step
balmy delta
Before the sdk got physbones
You just need to go in to the bones the console is telling you and remove the missing script component
sleek delta
Nah I just got dynamic bones and reimported the model
And then had the sdk convert to phys
balmy delta
I c
sleek delta
Hopefully that works
 sand patrol
Does anyone know why this part doesnt follow the bone?
FYI. Its fully weight painted

 bronze sandal
Probably an easy fix but is there a way to get symmetrize to stop doing this? I've tried rotating the character + armature every which way and can't seem to make it stop doing it

Was hoping not to redo the bones but it's fine if I gotta
 golden brook
can anybody help me figure out a rigging problem with a mouth I purchased on gumroad?
I'm sure I can navigate the transfer to vrchat from there on my own, it's mainly to do with a blender problem I'm encountering before hand
reef surge
golden brook
I'm sure I can navigate the transfer to vrchat from there on my own, it's mainly...
hey! i can try. what does the problem look like before i give it a shot?
golden brook
Thank you! Let me grab some screenshots


trying to get the vertex groups from mouth 1 to mouth 2
so that the bones will work for this mouth that is already part of the face
which I will need to merge the bones to the seperate armature I have already created
the original mouth worked like this

I appended the mesh and the armature to my current project
not sure if there were other steps I missed out on
dim pond
hey so I've discovered something annoying with my rig, after getting FBT and testing stuff out with an acquaintance who does a lot of dancing-
I gave my character some butt bones to better control the butt shape as the legs bend, They are rotation constrained, taking 50% of the rotation of the thigh bones. All I'd tested with it is MMD worlds and flexing around, particularly squatting. It moves appropriately in these situations-

BUT (heh)
if you have a tracker controlling the hip, it doesn't account for the change in rotation vs the thigh bone, I think because the thigh isn't technically moving, just the hip. So what you get is, the butt bone stays in the same position relative to the hip, which then causes the butt to very sharply clip into the back of the thigh


is there a better way to make this bone split the difference, if it's going to ignore the leg rotation in this edge case? I'd rather not just rely on straight weight painting around the butt , it's not a good pivot point for the shape and it folds really sharply without it
sage patio
a simple rotation constraint should just work in theory, not too sure what's going on in your case
dim pond
I'll have to get a video, it's really odd
sage patio
I have some pretty fancy butt rigging myself lol
besides some other funky stuff, I have a similar setup with a rotation constrained butt bone with a weight of ~0.5
dim pond
(don't worry the individual toes aren't doing anything in unity). I also swapped the double knee for a single and a support stalk like the butt, the rotation constraints seemed to give up after a third bone in a row so the feet were staying frozen
so the bone working properly, you get this going on

but the same hip:thigh angle, but as a result of the hips being moved by a tracker, folds in on itself
 fading verge
sage patio
I have some pretty fancy butt rigging myself lol
fading verge
sage patio
I have some pretty fancy butt rigging myself lol
The deformation is definitely a lot better with the butt bone.
I'm going to have to experiment with that in future rig iterations.
Care to show off the actual rigging 🥺
sage patio
that wouldn't be as fun would it though? xD
fading verge
boo
sage patio
alright alright, here's the rig, but I won't explain how it works xD
 sage patio
yea, there's a lot going on
fading verge
Must be thigh too
sage patio
dim pond
but the same hip:thigh angle, but as a result of the hips being moved by a track...
are your butt bones parented to the hips or to the legs?
dim pond
parented to the hip
I'd assume parenting them to the legbone would result in them not being able to do the 50% rotation, as it's just 1:1 with the leg already
dim pond
unrelated, but is there a target pose I can edit for the closed hand in humanoid? the fingers close so noodly weird and I'd love if I can just like, have a real pose that it morphs to instead of that
dim pond
or do I just like, go through all the gesture animations and manually pose those

 half wagon
can somebody help me how to fix this?
I checked the bones and stuff and they are in the right places but there still this error
 uncut breach
half wagon
can somebody help me how to fix this?
I checked the bones and stuff and they are...
uncut breach
half wagon
can somebody help me how to fix this?
I checked the bones and stuff and they are...
Really late but if you're still having this issue, it's due to the VRCSDK just entirely forgetting the rig. You can do this with any avatar FBX to refresh it
half wagon
uncut breach
Really late but if you're still having this issue, it's due to the VRCSDK just e...
Ill try this. Ill send an update later
 fading otter
sand patrol
Does anyone know why this part doesnt follow the bone?
fading otter
sand patrol
Does anyone know why this part doesnt follow the bone?
super delayed reply but i had a similar issue caused by weights also existing for the wrong vertex group
sand patrol
fading otter
super delayed reply but i had a similar issue caused by weights also existing fo...
I manage to "fix" it by simply removing that part and have it as a seperate model and attaching as an accessory on unity.
fading otter
that also works lul
if you finess that well enough you can actually make it not a skinned mesh renderer which makes the perf meter slightly happier
was very happy to figure that out a few days ago :)
 charred coral
I'm pretty green at rigging, but I do not understand what it's asking for here. In the SDK it's telling me to make sure parent of soulders and neck is the chest. I've checked, and it is... what does it want?
 sage patio
charred coral
I'm pretty green at rigging, but I do not understand what it's asking for here. ...
sage patio
charred coral
I'm pretty green at rigging, but I do not understand what it's asking for here. ...
can you screenshot your bone hierarchy?
charred coral

spine003 is set to 'chest', spine004 is neck
the shoulder parts are appearing as red in the model, but I do not know what that means, I assume they should be green but unsure how to make them green :D
 sage patio
you really should have your bones named properly, and you should never unpack the avatar in your hierarchy (if you did)
can you screenshot your bone mappings in the rig config?
 sage patio
can you screenshot the Head tab of the rig config
 sage patio
unbind the Jaw bone, and try doing Pose > Reset pose. might not fix the issue but will prevent other issues.
fading verge
The bones looked fine in Blender what happened??

 sage patio
try also dragging the fbx into your scene again, not unpacking it this time
sage patio
fading verge
The bones looked fine in Blender what happened??
that is not fine at all actually
charred coral
ok, it's also telling me character is in Tpose but unsure if that matters
fading verge
sage patio
that is not fine at all actually
O
sage patio
quite wrong for VRC
fading verge
Oh
sage patio
charred coral
ok, it's also telling me character is in Tpose but unsure if that matters
should be fine but you can click Enforce t pose if you want
sage patio
focus on fixing the rig first before worrying about how it looks in unity. garbage in, garbage out, common IT saying
charred coral
 fading verge
T.T I'm not trying to make the highest quality thing right now, just looking for some kind of explanation on why? does it automatically move bones??
charred coral
where I'm at now
fading verge
sage patio
focus on fixing the rig first before worrying about how it looks in unity. garba...
Also that doesn't really tell me much either. Just told me it was garbage :<
uncut breach
charred coral
Click Pose>Enforce T-Pose
it needs to be a in a T-Pose state for Unity to accept it properly
charred coral
so everything is green now, did the set t-post but I'm still getting the same error message in the SDK thatthe hierarchy is incorrect
fading verge
Is this better????
 sage patio
fading verge
Also that doesn't really tell me much either. Just told me it was garbage :<
sage patio
fading verge
Also that doesn't really tell me much either. Just told me it was garbage :<
sorry, I'm not saying your rig is garbage. "Garbage in, Garbage out" is a saying used in the tech field to explain that if you feed a function a bad input, the output is guaranteed to be also bad. in this case, a bad rig going into unity will not magically become a good rig in unity
 fading verge
sage patio
sorry, I'm not saying your rig is garbage. "Garbage in, Garbage out" is a saying...
fading verge
sage patio
sorry, I'm not saying your rig is garbage. "Garbage in, Garbage out" is a saying...
Thank you for clarifying. I understand it's a saying (I work in that field too lol). just didn't know if you meant something further by it >->
fading verge
sage patio
I followed this guide
 sage patio
I think you misunderstood the lines with arrows as bones, those simply indicate the parenting
the dots are the bones
fading verge
ohhhhhhh
sage patio
your rig is still salvagable
- delete Pelvis bones, and move bottom of hip bone upwards to shorten it and move it slightly higher above the thigh bones
- disconnect shoulder bones to move them up and closer to the arms
- move base of neck upwards to shorten neck and lengthen chest
- add eye bones
fading verge
Ok thanks!
How do I move bones within the hierarchy? The two thighs are not within hips after deleting the pelvis's
wont let me drag and drop them
Also how do eye bones need to look?
The eyes are funky but Is everything else good?


How do I get both legs to be children of hips?
sage patio
fading verge
click on a bone in Edit mode, go to green bone tab in the bottom right
under Relations, you can choose a parent bone, and you can untick Connected to move the head of the shoulder bones separately
sage patio
fading verge
What about the eyes?
the eye bones and head bone should all be perfectly upright. the eye bones don't necessarily need to have associated weights, but if you want to have moving eyes you'll want to use them
 fading verge
Yeah I'll probably add those tomorrow. Thank you so much for your help!!
half wagon
uncut breach
Really late but if you're still having this issue, it's due to the VRCSDK just e...
unfortunately it didnt work ;-;
 vocal quiver
Posting to all avatar channels:
We've just opened up the #1139216499123437668 forum! Use this forum to make posts on specific topics and get responses in a more organized way. You can ask questions, post guides, instructions, and more!
Check out the first post here: https://discord.com/channels/189511567539306508/1139228456090087495
These channels will remain open, but we may close some less active ones over time.
 steady lily
tryna rig this model, what needs altered


 frail ferry
Ok, I've finished texturing everything and Weight painting the main body, now what is the best way to attach the clothes to the body?
 fading verge

is this good?
or do i need to connect the hoodie parts
also, is the thing to connect the legs good?

quick update
i added knees so i can go down
wise brook
So i merged all my armatures but there are like a crap ton of armatures in one can i fix this?
fading verge
sage patio
sorry, I'm not saying your rig is garbage. "Garbage in, Garbage out" is a saying...
should i use this?
sage patio
fading verge
should i use this?
your rig is incorrect. you're missing feet, hands, spine, chest, and eyes. you have pelvis bones but those shouldn't be there. your shoulder bones should probably be shorter and away from the spine a bit (untick Connected in bone relations)
fading verge
sage patio
your rig is incorrect. you're missing feet, hands, spine, chest, and eyes. you h...
😦 im not using hands for now, or am i forced to make hands
because i cant make hands even with tutorials
sage patio
you should at least have the bones, even if unweighted
sage patio
wise brook
So i merged all my armatures but there are like a crap ton of armatures in one c...
you'll have to elaborate and provide screenshots. the answer to "can I fix this" is almost certainly yes, but how much effort it will require depends on a lot of factors
fading verge
can u do it for me?
fading verge
sage patio
you'll have to elaborate and provide screenshots. the answer to "can I fix this"...
.
sage patio
fading verge
.
my last message was a reply to someone else. as for if I can do it for you, no sorry. ignoring the fact that I'll be 1000km away from my PC for the next 3 days, you should learn to do it yourself so you know how to do it in the future
wise brook
sage patio
you'll have to elaborate and provide screenshots. the answer to "can I fix this"...
sorry was sleeping yeah so there are multiple body armatures and idk how to get them on the base armature and i alr merged them but it doesn't look like i did it correctly.

 pale pumice
wise brook
sorry was sleeping yeah so there are multiple body armatures and idk how to get ...
pale pumice
wise brook
sorry was sleeping yeah so there are multiple body armatures and idk how to get ...
In order for merging to work properly, you should rename the bones in a consistent way - i.e. both left thigh bones should have the same name, both left shin bones the same name, etc.
otherwise it just assumes they are different and a merge will result in all of them 🙂
wise brook
pale pumice
In order for merging to work properly, you should rename the bones in a consiste...
Mmhm so there is no way to fix it from here?
pale pumice
Sure there is, there's always a way. I think you could merge each bone into another. You could certainly split the secondary armature back off again then rename and merge. You could probably just copy the vertex data from one group to another, since that's what really matters here.
could also restore from your last backup. You do make backups, right? 🙂
sage patio
@wise brook were those outfits made specifically for that model?
or did you retrofit them onto a different model
wise brook
sage patio
<@473334933490892801> were those outfits made specifically for that model?
yeah ther all fitted to zin fit
sage patio
wise brook
yeah ther all fitted to zin fit
if those outfits don't have any extra bones, for like hoodie strings for example, you don't need to do any kind of "merging" whatsoever
just delete the armature that came with the clothes, parent the clothes to the avatar's armature, then go to the modifiers tab on the clothes and select the avatars armature in the Armature modifier
pale pumice
This assumes the vertex group names match, of course - which they should if the asset is designed for the avatar. If not, it's renaming time.
fading verge
can someone rig my model?
ive watched billions of tutorials but im just stupid
for free btw
Does anyone know why this is happening? the bones are above the model for some reason
 quaint cosmos
fading verge
Does anyone know why this is happening? the bones are above the model for some r...
quaint cosmos
fading verge
Does anyone know why this is happening? the bones are above the model for some r...
Can you try opening it in Blender to see if it looks the same? I'm not sure you'll be able to fix that in Unity.
fading verge
quaint cosmos
Can you try opening it in Blender to see if it looks the same? I'm not sure you'...

It looks fine in blender
fading verge
fading verge
since you know thow to rig, can you rig my mode ?
im stupid after watching tutorials i still cant
quaint cosmos
fading verge
Maybe try applying all transforms to the rig?
fading verge
fading verge
since you know thow to rig, can you rig my mode ?
Sorry but no. I'm trying to focus on my own model right now
fading verge
quaint cosmos
Maybe try applying all transforms to the rig?
How do I do that?
who rigs models for free?
i cant pay rn im broke
fading verge
fading verge
im stupid after watching tutorials i still cant
It takes time. Blender has a really big learning curve. I can send you tutorials that helped me
quaint cosmos
fading verge
How do I do that?
In object mode, you can select the rig and then Ctrl+A and then "Apply All Transforms" you should be able to do the same by selecting all the bones in pose mode and then doing the same. Also,the model is weighted, right?
fading verge
fading verge
It takes time. Blender has a really big learning curve. I can send you tutorials...
they're a lot shorter
yes please
quaint cosmos
fading verge
who rigs models for free?
Very few people are going to do free work but you can try uploading your model to Mixamo.com for easy, generally semi-decent results.
fading verge
ok
fading verge
quaint cosmos
In object mode, you can select the rig and then Ctrl+A and then "Apply All Trans...
yes the model is weighted. I used the automatic wiegting though
weighting
also by rig, do you mean both the bones and the mesh or just one or the other
quaint cosmos
Automatic weighting in Blender? That's not going to give you a very good result without manual clean-up of the weights. Mixamo is much better for that, though still not great on its own. You can apply transforms to the mesh and the rig but you'll want just the rig selected to go into pose mode.
fading verge
ok. and yeah I plan on cleaning up the weights later
Could that be why the model currently looks like tortured spaghetti? or could it also be the rig being above the mesh too
fading verge
quaint cosmos
In object mode, you can select the rig and then Ctrl+A and then "Apply All Trans...
That worked btw thanks!!
quaint cosmos
fading verge
Could that be why the model currently looks like tortured spaghetti? or could it...
If the origin of the bone rotations seems to be right, it's probably the weighting. It's arguable if automatic weighting even saves any time with how bad it is. You'd be better off just deleting the rig and going the Mixamo route or else you're going to be pretty much starting from scratch with a lot of weights.
fading verge
It seems spaghetti monster was fixed!
I'll keep that program in mind though in case I end up needing it. thanks!
Also, IDK if its a rigging problem but the eyebrows and parts of the hair do not move with the rest of the model
quaint cosmos
fading verge
Also, IDK if its a rigging problem but the eyebrows and parts of the hair do not...
Most likely weights, yeah.
fading verge
Oof. I'll have to look into that then I suppose
quaint cosmos
I can pretty much guarantee you're not gonna be happy with how the avatar moves with pure automatic weights. To have that system even get you in the right ballpark is a miracle.
Mixamo does 10x better and you don't even have to make your own rig, though it will almost always still give you gnarled fingers and weird neck articulation that needs to be fixed manually.
steady lily
any one have a better alternative to mannually weight painting apart from mixamo?
sage patio
steady lily
any one have a better alternative to mannually weight painting apart from mixamo...
do it in blender?
quaint cosmos
Never used it but you could try this one. I'm not aware of any way to automatically weight from an existing rig other than what's included with Blender. I actually use a plugin called Auto-Rig Pro that costs money but it's also an all-in-one rig and weighting tool like Mixamo.
 pale pumice
fading verge
pale pumice
fading verge
make sure there aren't any un-applied transforms on the mesh or armature objects
 sage patio
progress though
fading verge
sage patio
progress though
true
is it correct tho? also, do i have to name the bones or can unity do it for me?
sage patio
you should name your bones properly
fading verge
sage patio
progress though
oo also, do i make the whole hoodie one mesh? i will join them if i need to
so i can give them my own names?
ive been following a hierarchy one
sage patio
you can name them whatever you want but preferably what they actually correspond to
fading verge
phew
because i clicked an arm and i used the hierarchy chart to label them and the arm was named chest

do i use this exact rig?
also, i dont want to add fingers yet
sage patio
doesn't need to follow that exactly
I'd actually do it a bit differently
I'd make the chest bone bigger, and upper chest smaller
basically swap their size
steady lily
quaint cosmos
https://actorcore.reallusion.com/auto-rig
didnt work, when it rigged the model the finger tip bones werent there, and there were 2 bones in the upper arm bone
fading verge
sage patio
doesn't need to follow that exactly
do i need to join every mesh of the hoodie?
i made them all seperate
do i also need to join the model?
sage patio
fading verge
do i need to join every mesh of the hoodie?
your hoodie should be one mesh
sage patio
it can be separate from the body if you intend on toggling it
fading verge
ehh i dont think so
sage patio
also, make sure the hoodie only has one material slot
fading verge
my avatar is meant to be like the pfp i drew ( the one i have rn)
wdym?
bruh i need to change the head from meta sphere to normal sphere
ok the full body is one mesh
@sage patio
steady lily
any one here do wanna do weight painting instead of a full custom avi?
fading verge
wdym
steady lily
weight painting is hard
i wanna get this avi done
ive got the rig all made, everything else will be me, textures toggles and all
so i want someone to weightpaint this for me
for a price of course
fading verge
ngl weight painting just looked easy for me
 fading verge
do i need to unrig the eyes?
If you have eye bones, they should be pointing straight up and have a bone roll of 0 in their neutral position.
Otherwise when you hit play they snap to that position and move them to somewhere weird.
You might have to play with the alignment to get them to move right.
 fading verge
If you have eye bones, they should be pointing straight up and have a bone roll ...
fading verge
fading verge
If you have eye bones, they should be pointing straight up and have a bone roll ...
i used build and run, do you know if its already for standalone quest?
 wet vigil
So... I took this avatar out into Blender, remodeled the feet into hooves, and the FBX is fine stationary, but during runtime evereything I've edited gets sucked up into the calves. Not a weighting issue as far as I'm aware of, since they can be posed normally otherwise. Maybe an export issue? I'm honestly at a loss here and could use some pointers.


 merry gust
does anyone know how to delete polygons on your avatar ? i have 227 680 polygons and i need to have less than 70 000 😅
merry gust
is CATs plugin not working in blender 3.5 ?
merry gust
Thank you
merry gust
my sdk tells me i dont have hands feet head and upper arms but i mapped them, does anyone know how to fix this ? (dont hesitate to ping and dm)


 inner quiver
@uncut breach you got ignored LOL
uncut breach
my original message was a message link, click it and it'll highlight the message with the solution to this issue


 merry gust
Thanks
merry gust
If you want i can show you the model with textures, hit me up in dms
sweet dirge
hi yall can anyone help me fix my male avis chest physics just dm and call for a few minutes
 orchid echo
@wet vigil it’s a blendshape issue, you’ll have to select the affected area, go to your Basis blendshape, and then select “propagate to blendshapes” or whatever it is.
This will make your hoof changes take effect on every blendshape or something. idk. I forget, I’m tired, but it’s definitely a blendshape issue you can run into when adding edits, because it’s happened to me before.
wet vigil
orchid echo
<@228276960717963267> it’s a blendshape issue, you’ll have to select the affecte...
Thank you so much for your reply- I'll take this into account in the future. I did manage to figure out a workaround by separating the hooves into a separate mesh object, and I ended up not having the issue anymore. But I'll definitely go back and fix it proper.
fading verge
wet vigil
Thank you so much for your reply- I'll take this into account in the future. I d...
That just means the hoof blendshapes aren't activating the furr. If you activate the furr's blendshape, they'll go like that again.
You can now easily delete the blendshapes from there, then remerge the meshes and it won't happen
 viscid whale
hello!!
i'm trying to weight paint my new model. however it's way too frustrating for me. there's weights where weights shouldn't be (i.e. on the left side of the model where it should be on the right, etc.). is there any advice :(?
sage patio
viscid whale
hello!!
i'm trying to weight paint my new model. however it's way too frustratin...
make sure vertex groups on both sides have proper names with L/R or Left/Right in the names
 rotund thorn
Hello. I have an issue with blender and Unity
When I use the .blend file or export to .fbx, when I use it on unity, the scale does not match
I did'nt found any way to fix this on internet
Example :
 sage patio
rotund thorn
Hello. I have an issue with blender and Unity
> When I use the .blend file or ex...
sage patio
rotund thorn
Hello. I have an issue with blender and Unity
> When I use the .blend file or ex...
don't put the blend file in the unity project, export it as FBX. when you export, make sure to set Apply Scaling to FBX All, and uncheck Add leaf bones under Armature
 rotund thorn
sage patio
don't put the blend file in the unity project, export it as FBX. when you export...
rotund thorn
sage patio
don't put the blend file in the unity project, export it as FBX. when you export...
Thanks. I tried that. But still the same issue
Scale are different between the 2 versions

I think I found a quick fix, but not very good
Import setting : scale factor = 0.01
And I put the avatar scale xyz at 100
And then, the component scale are the same
But I wish there is a way to fix this
rotund thorn
I think I fixed my issue :
- In blender, transform the scale armature to xyz 1.0 (from 0.01)
- Scene --> Unit scale --> 0.01
Conclusion : play with the armature scale, unit scale, scale factor in import settings until it's good
 copper halo
rotund thorn
Thanks. I tried that. But still the same issue
Scale are different between the 2...
copper halo
rotund thorn
Thanks. I tried that. But still the same issue
Scale are different between the 2...
Apply scaling when exporting : use the one thats not default. I cant remember its name but thats were the problem is
fading verge
anybody know how to fix this to be a normal armature?

 steady lily
how should the thumb and fingers weightpainting look if its good
quaint cosmos
steady lily
how should the thumb and fingers weightpainting look if its good
Each bone should be weighted to a particular joint so the fingertip bone should just be weighted to the fingertip, etc.
steady lily
where my layers at

 river ingot

 sick vessel
Guys, is the rigging of this model good? or do i need to change it to be able to use it in vrchat?

 fathom sun
Can anyone help? my thumbs aren't moving properly on the model. They should be moving left to right, and up to down,
but instead they're rotating and moving left to right.
dim pond
if my armature is completely symmetrical and the legs aren't rotated in, is there something I need to do to get the humanoid rig to stop doing this with its breathing animation

 rain mountain
im pretty new to weight painting, and whenever i bend the knee bone it makes the rest of the leg shrivel up. is there an alternative way to rig it or anything that can fix this?
sage patio
rain mountain
im pretty new to weight painting, and whenever i bend the knee bone it makes the...
you need more geometry around the knee area, and you need to have the weights not be as smooth
use the Smudge tool to "nudge" weights around
rain mountain
alr thank you
 supple merlin
if anybody can help me rig this properly hmu
btw it is rigged but its not rigged for vrchat
 rain mountain
uhh wtf happened to the rig??
it's completely normal in blender but for some reason when i put it in unity the main body bones are all wacky like this. the only normal parts are the legs and kind of the arms

i'll probably figure it out before anyone helps with this though so uhh.. yea