#avatar-rigging
1 messages · Page 6 of 1
 sage patio
 gritty basin
Also using Blender that CATS has yet to supoort.
gritty basin
Also using Blender that CATS has yet to supoort.
blender up to 3.3 is supported, you need the dev version
from the faq channel in the discord
also yes, that's correct
gritty basin
Ah ok. I'm on 3.3 but I checked the site and I'm sure it didn't support up to that. I'll go check.
Hmm... Well if they're merging with the Hip Bone, couldn't I just ignore them since the Hips already control them?
Or would it be best merging them with the thighs instead?
 ivory tiger
Hey I'm new to all this avatar making stuff, I was wondering if anyone could help me as this may be an obvious fix but I'm just a little lost on how to do it/ask the question haha! So the clothes I edited to fit my model don't move with the bones of my model, all the bones align and everything it just doesn't seem to be moving if I test posing the model in blender. Would there be an easy and obvious fix or is any more information needed? Any help would be greatly appreciated!
gritty basin
You need to do what's called weight painting. There's plenty of tutorials on YouTube that may help, but I'll say this, it's a pain and tedious XD
There may be quicker and easier methods to doing so though. I mean, if your outfit came with bones, you could merge the weighs of the bones with the bones in your main body.
 quaint cosmos
Yeah, best way to start would be to select the body, shift select the clothing, then go into weight paint mode, and then in the top go to weights -> transfer weights, then you need to go in the bottom left and switch the transfer to be by name and change the type to nearest face interpolated, I believe. It's simple but hard to explain in text without Blender in front of me so you might just want to look at a tutorial for transferring weights
ivory tiger
quaint cosmos
Yeah, best way to start would be to select the body, shift select the clothing, ...
tysm I'll try that!
 fringe kite
I made my whole model in mirror mode and now I need to apply it so I can UV Unwrap and stuff, but I have already made keyshapes. Is there a trick to applying my mirror without having to delete the keyshapes or do I just need to remake them all?
 brazen island
GitHub
Blender addon for applying modifiers with respecting shape keys. - GitHub - SAM-tak/ApplyModifiersWithShapeKeys: Blender addon for applying modifiers with respecting shape keys.
fringe kite
Cool, ty!
gritty basin
If anyone is able to help/fix the spine of my model I'd be very grateful XD I normally work with MMD or Game Models and have never had a model with 4 spine bones XD
 pale pumice
brazen island
<@278111258085949441> https://discord.com/channels/189511567539306508/3909243727...
pale pumice
brazen island
<@278111258085949441> https://discord.com/channels/189511567539306508/3909243727...
Love this tool (when it works)
 crisp tendon
I wonder what differences there are between the above and this one which I've used a handful of times and saved my ass on a big project https://github.com/llealloo/join-modifiers-and-shapes

GitHub
Join blender objects that contain modifiers and shape keys into a single object - GitHub - llealloo/blender-join-modifiers-and-shapes: Join blender objects that contain modifiers and shape keys int...
pale pumice
just don't set a mesh for the visemes
 fading verge
what does this mean

 rich isle
It’s fine, it should work perfectly normal and not be any issues.
 timid cipher
Having problems rigging. Cant really explain it, but despite all the bones looking fine some vertices remain still when moved
So when I rotate the whole upper body, everything but the elbows moves if that makes sense
So it stretches out


File if interested
 cosmic tulip
timid cipher
File if interested
cosmic tulip
timid cipher
File if interested
I can take a look at this for you!
These need to be parented to the upper arm btw, assuming those are part of the arm, they're currently set to the shoulder
 timid cipher
Oh
I’ll be sure to adjust that tomorrow morning
Is the main problem something to do with weight painting?
cosmic tulip
it's 100% weight painting.
here's a touch up on it, just adding that row of verts to the upper arm vertex groups
timid cipher
Sweet, thank you so much
cosmic tulip
might do a touch up cause the elbow bend is looking rough, unless you don't mind it
 timid cipher
I do mind
I noticed that prior but the primary focus was most definitely the quirked up rigging
timid cipher
When I try to select a new bone in weight paint mode using ctrl lclick, it just selects a vertex
Not a bone
brazen island
timid cipher
When I try to select a new bone in weight paint mode using ctrl lclick, it just ...
you have to disable this one every time you need to change a bone ig
 timid cipher
I did
Now it just doesnt select a bone
Bone Heat Weighting: failed to find solution for one or more bones
After attempting to apply armature deform with automatic weights
Removed doubles, messed with the GACT material by making it gone
Hopefully I can fix it, if not oh well
timid cipher
The yellow bones I cannot rotate freely

And cannot fix the posing problem
The yellow bones are limited by something
Solved
timid cipher
The teeth move when the head moves, I want them stationary all the time. How do I go about doing that?
Ive tried weight painting but it doesnt affect much
timid cipher
I want them to stay like this

but when the headbone is rotated, they're rotated

ive tried it without the tooth bone, no difference
quaint cosmos
timid cipher
The teeth move when the head moves, I want them stationary all the time. How do ...
It seems like that would cause the teeth to move outside the head when the head moves if you want that, removing all the weights should do it. One way to make sure there are no weights is to separate them from the mesh, then delete all the vertex groups, and then join them back
timid cipher
quaint cosmos
It seems like that would cause the teeth to move outside the head when the head ...
I meant the teeth move with the head, but keep their allignment
so a constant baring of the teeth
the bottom teeth are fine
its that top one thats a problem child
nvm, bottom move too
quaint cosmos
If the teeth are rotating relative to the head and not staying in place, they're probably not fully weighted to the head or weighted to some other bone. For that, you can do kind of like what I said, separate them from the rest of the mesh, delete all the vertex groups aside from the head, select all in edit mode, assign to the head vertex group, then join it back with the mesh. If you have shape keys, make sure you're on the basis when separating and rejoining.
timid cipher
can you walk me through it?
quaint cosmos
Probably not much more than that, that's all the steps. It's P to separate from the mesh, so you just select the mouth faces, P, delete the vertex groups aside from the head, select all, assign, then Ctrl + J to join them back together.
timid cipher
quaint cosmos
Probably not much more than that, that's all the steps. It's P to separate from ...
what?
i seperated the mesh
wdym by delete the vertex groups aside from the head
Tried doing what you said, still a problem
file if interested
quaint cosmos
timid cipher
wdym by delete the vertex groups aside from the head
In the right panel, if you go to the tab that looks like an inverted triangle, you can find the vertex groups for that object. Delete all of them but the one for the head. This is also how you can easily go between vertex groups in weight paint mode without selecting bones
They're also useful for creating groups of faces for other purposes like if you only want to apply a modifier to one part of the mesh and they can help fix shape keys that are influencing parts of the mesh outside of the faces you want them to influence for whatever reason, good to learn how to use those.
timid cipher
I did that
I separated the teeth as a separate mesh, deleted all but the head groups which had the teeth, then merged the teeth mesh with the original full mesh
And now it still does it
quaint cosmos
Did you assign all the faces to the head group?
If so, the teeth shouldn't be moving relative to the head unless there are faces in the head not fully assigned to the head bone
quaint cosmos
If you deleted the vertex groups on the teeth prior to rejoining, then the head bone is the only bone that could be influencing the teeth. If you didn't assign all the faces to the bone, then it might have faces with no weights which could impact things. So long as the surrounding mouth faces are also completely weighted to the head and no other bone, then the influence should be identical for the entire mouth.
quaint cosmos
It can be tricky to catch everything which is why I like to use that separate and delete vertex groups method. It's the only way to ensure that faces don't have any incorrect weights aside from going through every bone with the faces selected and removing the faces from that vertex group one at a time.
timid cipher
I’m now having some problems with texturing
When I removed the double vertices, I removed the double vertices use for the separate GACT texture on the chest and head
Now, the texture isn’t there
How do I put it where it formerly was? I opened the gact text on the UV editor and unwrapped the parts I wanted and positioned them, but it shows the full model texture where I want it to show the GACT texture
What I want

What I got

Current
 brazen island
@timid cipher bringing back missing polys is somewhat challengeing so i just suggest you to separate meshes by material before cleaning them up, then join them back together. Or in your case just put these letters onto main texture, doesnt looks like theres a lot goin on
timid cipher
fixed it
but now i need to put the original main texture underneath the text if that makes sense
it has the text, but the rest is transparent
so instead of faint grey text on a opaque body, its faint grey text on nothing
 timid cipher
What I got
timid cipher
timid cipher
What I got
need a way to put this underneath so to speak
brazen island
just edit the og texture with some paint net i guess to mix layers
timid cipher
with the way it all curves, thats a no go im afraid
would take an ungodly amount of time
brazen island
stencil?
sage patio
warp projection in Substance
or, alternatively, make another UV map on the text mesh that lines up with where it should be on the main texture, and bake a new texture to that UV
timid cipher
sage patio
or, alternatively, make another UV map on the text mesh that lines up with where...
elaborate
brazen island
oh yeah lemme drain my bank account... oh wait nvm, its always apropriate to pirate adobe products.
sage patio
if you line up the UVs for the text with where it should go on the main texture, you can bake it to that new spot to make a new texture. then, use an image editor to combine them. you can skip the last step by just using the shader nodes to mix the main texture and the text (using the new UV) and the output will be your main texture with the text stamped in the right place
timid cipher
sage patio
if you line up the UVs for the text with where it should go on the main texture,...
i still dont follow unfortunately
sage patio
yea it's a bit more complicated
if you have substance painter, the first option is definitely the best one
can literally do the projection of the text in 3D
 nimble quest
can someone help me understand how tf to rig this?
 brazen island
@nimble quest "back knee" is nonexistent, otherwise select group of verticies and while using masking, paint them red for each bone. Keep bones position along x axis close to normal humanoid, it better than to try and make them apart, on y/z move them accordingly to model. Rigging rigid robots is easy.
this one doesnt have a distinct head tho, no idea how to enable it look up/down, if were talking easy
nimble quest
yeah no it doesnt look up and down but it does need to have 4 joints per leg\
brazen island
you just dont
brazen island
ok then idk. need some extra bones then with constraints i guess. too much pain. and you also need to limit sideways anlgles for fbt? uh
nimble quest
its not really meant for fbt
 timid cipher
The textures are mirroring, I do not want this.

 last gazelle
just edit the uv mapping on that part of the mesh, you can flip it
 upbeat atlas
so uh why doesn't this joint bend all the way, it's at 1.0 weight so it should bend all the way, right?
am i missing something?
 brazen island
@upbeat atlas you dont use normalize weights, so some other bone still also painted red, result - 50% movement
upbeat atlas
omg that works. thanks so much!
timid cipher
last gazelle
just edit the uv mapping on that part of the mesh, you can flip it
It still mirrors
Just backwards
 tender saddle
hey is it ok if someone here can help me rig it doesn't really work well when I try
last gazelle
timid cipher
It still mirrors
ah then try turning it upside down ?
timid cipher
no
the problem is the text is backwards on the left side
Its mirror mapping, I need both parts mapped seperately if that makes sense
quaint cosmos
timid cipher
Its mirror mapping, I need both parts mapped seperately if that makes sense
So are your UV tiles overlapped? You might need to move them to a different part of the UV space
sage patio
@timid cipher don't use Symmetrize, it basically deletes half the mesh and mirrors the remaining side
the resulting UVs are overlapping and basically folded over
timid cipher
How do I disable it?
sage patio
uh, you don't? symmetrize is a button you click and it does stuff to your model. you would have had to undo it when you did it
timid cipher
Unfortunate
 left warren
hi how do i close the mouth its stuck open in game
sage patio
left warren
hi how do i close the mouth its stuck open in game
make sure your jaw bone is not mapped in the rig config
 unkempt fossil
real quick, so, i'm tryna get the animation to where i make the fist gesture and it draws the sword from the scabbard i have on my back, anybody know how i could easily rig that up?
left warren
Did that and it's still wide open
 dusky rover
left warren
Did that and it's still wide open
dusky rover
left warren
Did that and it's still wide open
Map the jaw bone and rotate the jaw bone in rigging
Till the state that when you press play, the mouth is closed
 oblique basin
Hello! I have a question regarding adding bones, I 'm trying to add toe bones to an avatar which didn't previously have them. I did add them and weight them in Blender but when in Unity in any animation it rotates all toes up. I'm trying to set them on the ground like the left foot below.
 sage patio
oblique basin
Hello! I have a question regarding adding bones, I 'm trying to add toe bones to...
sage patio
oblique basin
Hello! I have a question regarding adding bones, I 'm trying to add toe bones to...
in the rig config, reset the pose
oblique basin
I'm either doing it wrong or its not working for what I need, In the rig config its the pose drop down and reset right?
sage patio
yes
oblique basin
Ok yeah that doesn't seem to be working for it , when I select reset it does say "Character is not in T pose" Sorry im new to the whole rigging side of this
sage patio
what happens when you remove the toes from the rig config?
oblique basin
The same thing, I tried it without the toes selected in the config and with it they both produced the same results


 quaint cosmos
 glad pier
Looks pretty correct, there looks like a bit of tilt and roll on the hand bone and the fingers could probably bit a bit more parallel. It's okay if they're right up next to each other. Maybe that would help with your issue.
 kindred belfry
anyone know how to rig an upperchest bone and optimize shoulder tracking? Im trying to edit a pre existing base
crisp tendon
I believe Kung's FBT video has that information?
kindred belfry
the one from 2020? cuz if so that one only goes over how to optimize your model for your proportions and fixes for some old issues that have been fixed i believe
 azure fjord
Hello! I made my mouth blendshape but it barely activates unless I'm really loud
Is there any way to tweak the threshold so it uses the full blendshape earlier?
crisp tendon
You can multiply the intensity of your blendshapes in Blender and make that the default, but there's no multiplicative way to do that in Unity/VRChat afaik 
 tight cobalt
can anyone explain to my why this arm is twisted? this is drag and dropped straight from the fbx which looks fine in blender.
 crisp tendon
tight cobalt
can anyone explain to my why this arm is twisted? this is drag and dropped strai...
crisp tendon
tight cobalt
can anyone explain to my why this arm is twisted? this is drag and dropped strai...
Make sure to clear your rolls in edit mode before exporting ! Alt + R iirc
tight cobalt
crisp tendon
Make sure to clear your rolls in edit mode before exporting ! Alt + R iirc
thanks for replying, alt + r opens an amd window or something. Also tried do combine R with other keybinds but couldnt find it.
crisp tendon
It's the clear roll function, you can find it in the search bar
tight cobalt
this fixed it! tysm
 fervent vigil
A reminder for everyone. Avatar acting generally jittery and weird for no apparent reason? Check that you don't have any physbones on your humanoid skeleton bones!
 swift basalt
Anyone know how I can rig the feet? Fran's model is weird in that she stands up on her tippy toes instead of the foot being flat

I'm not 100% sure how to translate this with rigify


 earnest olive
I think you would need to get a whole other base sense this is a heeled one, I may be completely wrong but from my knowledge this is what I know
 modern crystal
Does anyone know a way to rig properly to little to no problems?
I kinda need help as I’m new to rigging and i wanna rig non-humanoid characters yet let it be allowed to use on VRChat
sage patio
modern crystal
Does anyone know a way to rig properly to little to no problems?
I kinda need he...
"let it be allowed to use" is not really a concern. you can rig your model however you want
the issue is if you want it to be able to use any of the default animations, in which case it needs to have a humanoid rig
whether the model looks like a humanoid doesn't really matter though
modern crystal
sage patio
the issue is if you want it to be able to use any of the default animations, in ...
Well how do I implant and where do I get animations for the non humanoid rig?
I’m quite new to this (especially rigging) so knowing how to rig properly with no problems for all types would be great!
sage patio
newcomers tend to use the wrong terminology for things so it would help to know more about what it is you're trying to do exactly, and what your model/its rig look like
modern crystal
sage patio
newcomers tend to use the wrong terminology for things so it would help to know ...
Well I’m trying to rig this low poly human model I made watching the tutorials to get the gist of it atleast, and plan to model a full moon (small one tho) to help train myself for sculpting.
I just wanna rig the neck, arms legs and head
So Thighs,Calves Upper Arm Collar body and head
sage patio
VRC has a minimum set of bones your model needs to have in order to be considered humanoid. as for actually rigging, you should learn about armatures and weight painting. Royal skies has good tutorials
from the bottom up, you need: feet, lower leg, upper leg, hip, spine, chest, shoulder, upper arm, lower arm, wrist, neck, head, eyes
optional bones: toes, fingers*, upper chest, jaw
*some worlds require finger bones for interaction, and you need finger bones for finger colliders/contacts. you should have the bones there regardless of if the model has hands or not
modern crystal
Hmm okay, I’m on 3.4, know a good video for beginners?
And also for Non-Humanoid Model with rigging, you know a animation that’s available for the avater to move well?
sage patio
"non humanoid" is too broad of a term
 orchid echo
Is there a problem with my Hips? They’re straight up and down and my thighs are straight down from them (no warning abt the angle), but when I try to use the _Angle parameter off a physbone with gravity on it that’s a child of my Hips/has my Hips as its parent, the parameter flickers really obnoxiously while I’m standing still.
Like, I want to get the _Angle of essentially some skirt Physbones, but there’s this weird flicker in the parameter, it sucks. It doesn’t look like my Hips themselves are wiggling at all, they’re steady; and I get the values I expect once I’m in motion, nice and smoothly. It’s just while standing still I get this stupid flicker in the parameter, which makes the stuff I use it for misbehave…
sage patio
restless hip syndrome
orchid echo
Okay searching “hips root” on here reveals that my blank physbone scripts directly on my transforms which are children of my Hips… should be… fine…?
I don’t think they’ve got Hips as root, neither would they automatically be using Hips as root despite being blank
I just have, think of them as some skirt bones. The physbone scripts are on the skirtbones themselves. The root is blank, but should be autofilling the first skirtbone, not the Hips.
But when I’m standing still there’s this flicker in the _Angle parameter despite my hips seeming to be still.
brazen island
@orchid echo i double that. In av3emulator or i think even with it disabled I had ~0.1 jerking of _Angle value even if the bone (child of hip) is absolutely steady, as well as avatar itself. And mine had zero physics, like gravity or spring to it. Never got the answer. Tho it belongs to avatar-dynamics
orchid echo
I feel like there’s something going on with the playspace/worldspace and the ik and the hips 😦
AAARGH you have it too?! Okay I will move thread
or like. go there.
Yeah dynamic bones didn’t effing do this btw!!!
I’m hopping mad lol.
I guess I’m just going to have to uhhhh. “While standing still, don’t do anything unless the parameter changes by more than .2” which I guess is something I’m skilled enough to implement. Still annoying ngl
brazen island
@orchid echo yeah i went with some threshhold in the end too.
sage patio
what if you just feed it through a blendtree smoothing thing lol
 finite stratus
whats the max amount of materials for quest?
sage patio
finite stratus
whats the max amount of materials for quest?
any higher than 4 and you're very poor, so try to stick to 4 or less
VRChat
The Avatar Performance Ranking System allows you to see how much a user's avatar is affecting performance via analysis of the components on that user's avatar. You can also use it on yourself to see how performant your avatar is. This system is provided to inform users what is likely the most perfor...
finite stratus
Thank you Omg I’ve been looking for this table everywhere thank you thank you
 lime elbow
Hello! Qucik Q - Does the avatar need to be rigged before I put it into the SDK? I'm LUCII btw a creator active in Decentraland happy to come here and see what you guys are up too, trying to expand my knowledge 💜
quaint cosmos
lime elbow
Hello! Qucik Q - Does the avatar need to be rigged before I put it into the SDK?...
Yeah, I'm not aware of any automatic rigging programs in Unity, though there are automatic rigging programs like Accurig and sites like Mixamo.com
sage patio
lime elbow
Hello! Qucik Q - Does the avatar need to be rigged before I put it into the SDK?...
Unity is a game engine, not a 3d modeling program, so yes your model should be properly rigged with a humanoid rig before you import it
lime elbow
awesome! thank you for your help!
 somber bolt
I created a new hat .fbx for my avatar. Is there a way to merge the hat armature with an identical armature already in the scene?
brazen island
@somber bolt do you really need an armature for a hat?
somber bolt
it's weight painted to the head bone
I don't like using unity parent constraints and the hat texture/mesh disappeared when I deleted it's armature, only bounding box remained
My current workflow is Blender adding clothing, SubstancePainter for making the texture atlas, and Unity for uploading from a single .fbx from Blender
brazen island
@somber bolt i mean if you have hat as separste mesh, all you need to do is place it onto the head bone in unity. if you wsnt single fbx then just change armature in armature modifier if both armatures has same bones names (head)
somber bolt
that would work
somber bolt
brazen island
<@212972248238129152> i mean if you have hat as separste mesh, all you need to d...
Found a free avatar dresser plugin that combines 2 identical armatures into one, no prefix shenanigans either 😉 https://github.com/SophieBlueVR/AvatarDresser

GitHub
A Unity editor tool for adding accessories like clothing to a VR Chat avatar - GitHub - SophieBlueVR/AvatarDresser: A Unity editor tool for adding accessories like clothing to a VR Chat avatar
sage patio
somber bolt
I created a new hat .fbx for my avatar. Is there a way to merge the hat armature...
you can pretty easily add that in blender
takes less than in a minute
 reef coral
having a problem where the origins of certain objects are like linked to the one of the armature (which is causing the rotation in unity to be down there too)

i hid the body so it would be visible but basically here
 reef coral
having a problem where the origins of certain objects are like linked to the one...
reef coral
reef coral
having a problem where the origins of certain objects are like linked to the one...
this is from an older model but how do i make it so it's basically like this

aight nvm i reparented them again and it's fixed now
somber bolt
reef coral
aight nvm i reparented them again and it's fixed now
In object mode you can click the "Object" drop down from top panel -> Origin point -> Set origin to center of mass
 tough roost
Ive never worked on an avatar, i have only little idea but i have a skirt that legs clip through, i do not know quite how to work with colliders or if colliders r even the issue
 brazen island
tough roost
Ive never worked on an avatar, i have only little idea but i have a skirt that l...
brazen island
tough roost
Ive never worked on an avatar, i have only little idea but i have a skirt that l...
add physbone colliders capsules onto legs that roughly follows its shape, add those colliders to the list of colliders for skirt's physbone component, fiddle with values. Also it's more avatar-dynamics than rigging
tough roost
Ohhh okay thank you, wasnt sure which category it would fall under. my bad
Much Appreciated!
 stone frost
Hi there, I'm trying to test out the eye rig using cats on blender yet everytime I do, it quickly goes back to object mode
sage patio
stone frost
Hi there, I'm trying to test out the eye rig using cats on blender yet everytime...
don't use the "Create eye tracking" section in CATS. all your model needs is eye bones and the eyes weighed to them
you can test it out in Pose mode, don't need CATS for that
stone frost
sage patio
don't use the "Create eye tracking" section in CATS. all your model needs is eye...
thank you! <333 you were right in time too!
oblique basin
@sage patioI know its been a couple days for it but I found the problem, I was adding the bones to the model in blender and using Pumkin to transfer the information to it. But it was sending the Rotation and Position of the bones after I had to change and move them around in Blender. Rigging is fixed now and its working. (Figured I'd let you know and anyone else if they experience a similar issue
oblique basin
sage patio
in the rig config, reset the pose
This question I had*
 opal flint
New to blender anyone know how I can get rid of those floating bones from the head I just removed?

google aint helping me here
I click on 1 and it selects all of them
quaint cosmos
opal flint
I click on 1 and it selects all of them
You need to be in edit mode to delete individual bones
quaint cosmos
opal flint
How do you edit mode?
You change the mode in the top left
opal flint
thxs
finite stratus
the mouth isnt closing on my model even if my mic is muted or im not speaking or havent yet. ive tried seeing if it was a toggle mess up or it being uploaded weird already and that doesnt seem to fix it is there another way to fix this?
 kind mortar
finite stratus
the mouth isnt closing on my model even if my mic is muted or im not speaking or...
kind mortar
finite stratus
the mouth isnt closing on my model even if my mic is muted or im not speaking or...
make sure on Visemes it says SIL and that should be mouth closed if you set it correctly
finite stratus
It does it still doesn't work I'm taking a break form it today u was up all night working on it
brazen island
@finite stratus if your model's mouth opened when no visems is active, it will be like this till you said something. create layer that activates sil viseme forcibly (Viseme=0)
 astral kindle
finite stratus
the mouth isnt closing on my model even if my mic is muted or im not speaking or...
astral kindle
finite stratus
the mouth isnt closing on my model even if my mic is muted or im not speaking or...
when using visemes remember to unbind the jaw bone in your rig configuration
(at least if your av has a jaw bone)
 tawdry imp
finite stratus
It does it still doesn't work I'm taking a break form it today u was up all nigh...
tawdry imp
finite stratus
It does it still doesn't work I'm taking a break form it today u was up all nigh...
When you are back to working on it I'd say you should set your gesture animation layer to default on the VRC descriptor and make sure all shapekeys/blendshapes on the face mesh have their sliders at 0 in Unity. Then test and see if it persists. Also a question is does it move when you talk and just return to the open mouth or is it not moving in response to speech at all?
 steady loom
somber bolt
Found a free avatar dresser plugin that combines 2 identical armatures into one,...
steady loom
somber bolt
Found a free avatar dresser plugin that combines 2 identical armatures into one,...
Did you manage to get this working? It's throwing an error about undeclared variables for me.
 visual marsh
Anyone here suggest a better way of rigging a model that gives more bones ive been using mixamo alot
steady loom
Whelp, got that working buuuuuuuut it has it's own issues ._.
steady loom
visual marsh
Anyone here suggest a better way of rigging a model that gives more bones ive be...
Try the Meta-rig addon for blender?
visual marsh
steady loom
Try the Meta-rig addon for blender?
ty i’ll look it up
steady loom
creates rigify friendly rigs, you can just modify their default poses to suit your avi, and it should work for Mixamo animations
Anyone know a good way to combine rigs in blender, because I tried SophieBlue's Avatar Dresser but... it doesn't end well.
 visual marsh
steady loom
Anyone know a good way to combine rigs in blender, because I tried SophieBlue's ...
visual marsh
steady loom
Anyone know a good way to combine rigs in blender, because I tried SophieBlue's ...
you wanna combine armatures ?
steady loom
(i'm trying to replace a base-mesh that's clothed, with a nude one so i can add my own clothing, and i need a workflow for adding clothing but unfortunately there's a few issues with that as-is.)
yeah, need to do it in unity though, or i'd end up having to re-do like half the avatar if i have to re-import from blender
The new mesh has the same bones in the same place as the other one (well, most of them, there's a few less bones but that's fine.)
visual marsh
steady loom
The new mesh has the same bones in the same place as the other one (well, most o...
couldn’t you combine it in blender
/merge it
steady loom
Easily, but if i have to re-import into unity, then I'll have to re-do everything else on my avatar (including dynamic bones, anims, ect) i think.
visual marsh
steady loom
Easily, but if i have to re-import into unity, then I'll have to re-do everythin...
couldn’t you name the thing the same file name then
open the directory
of the actual unity project
where it shows your fbx
and then just replace it there instead of in the actual unity project
in the files instead of the application basically
steady loom
Well, that seems like it'll go horrifically, but i can give it a go i guess. Gonna back-up the project first tho
visual marsh
i mean
steady loom
Right, let's see how fucked this is...
sage patio
steady loom
Easily, but if i have to re-import into unity, then I'll have to re-do everythin...
no, you don't. if you use the correct Apply scaling setting in blender, you can just override the FBX in unity and it will update properly
if you use a different scale setting, you will get exactly that
sage patio
to avoid that entirely, export as a new FBX, and use Pumkin's to copy every component from the old avatar to the new one
steady loom
all the meshes have vanished
 sage patio
you don't need to ever start from scratch
steady loom
So, replacing the FBX (with unity closed ofc) has caused all of the skinned mesh renderer's in the scene to not show anything anymore.
sage patio
did you make sure to actually export meshes from blender?
steady loom
yeah, it's exported everything, they're in the FBX prefab, but don't show up in the scene anymore
brazen island
@steady loom and to not export lights cameras etc. also is your prefab is packed in unity?
sage patio
make a preset with these settings

yea, if you ever unpacked your model, you can't just replace the FBX. you broke the link to the original file by unpacking
brazen island
bring old fbx back, drag new along and use pumpkin to migrate. and never unpack humanoids in future
steady loom
Gonna undo that
steady loom
brazen island
bring old fbx back, drag new along and use pumpkin to migrate. and never unpack ...
pumkin?
brazen island
pumpkin avatar tools
visual marsh
sage patio
no, you don't. if you use the correct Apply scaling setting in blender, you can ...
my unity doesnt update it for some reason in the actual app so i just replace it in the files
still works
steady loom
visual marsh
my unity doesnt update it for some reason in the actual app so i just replace it...
if you don't unpack it will, but i had to unpack mine to do something with it,
visual marsh
🤨
sage patio
steady loom
if you don't unpack it will, but i had to unpack mine to do *something* with it,
no, you basically never need to unpack
if you did, you should've have done it in blender
anyways. that model in your scene is screwed. import the FBX into your scene again, use Pumkin's to copy everything over
steady loom
probably yeah, but I'm fairly new to Unity and it worked
tbh this doesn't actually fix my issue anyway, it's just a work around. Is there no way to just copy the armature that one skinned mesh renderer uses to another skinned mesh renderer?
 spice mason
idk where to put this, but i keep getting this error when trying to upload avi from unity to vrc
 steady loom
spice mason
idk where to put this, but i keep getting this error when trying to upload avi ...
steady loom
spice mason
idk where to put this, but i keep getting this error when trying to upload avi ...
Are you using the Vrchat Creator Companion?
brazen island
@steady loom cats can try and rename them then merge
spice mason
yes
steady loom
don't need CATS, they're literally the same armature, can just reparent. I was hoping to do it in unity so i don't have to keep fucking with things in blender. It seems like a fairly simple option, kinda weird that you can't just reassign to a different skeleton like you can in Unreal for example
steady loom
spice mason
yes
Do you have the Avatar manager installed?
spice mason
whats that
steady loom
 steady loom
nah you need all four of these installed or it seems to throw that error
spice mason
ok how do i get the others?
steady loom
at least, that was the fix I had for it.
just scroll down until you find them in the list
visual marsh
steady loom
this launcher so useful
steady loom
Alright, so now that I have an avatar that's based on a still packed prefab, is there a way to reimport the FBX with a new file?
sage patio
yes
you just override the file
from blender you can export directly to where the file is
steady loom
Right,
sage patio
make sure to use same export settings, but more specifically the scaling setting
steady loom
and the scene updates to match?
and is this with unity open or closed?
well, i should ask will it work if unity's open,
because i'm gonna be doing this a lot and I wanna find a workflow that isn't a giant pain in the ass
sage patio
open, closed, doesn't matter
steady loom
good to know, thanks
steady loom
ah yeah, that's broken everything correctly, nice!
dumb question,
how do i get unity to show the updated FBX once i override it?
without rebooting everything.
oh, just give it time apparently?
 fierce grail
Unity should detect changed file immediately and reimport it once window is focused.
steady loom
took a moment, but it did do that thing,
 gloomy cedar
Hello ! So basically I have my avatar in unity ready to be exported into vr chat but it says I can't upload avatars yet cause I haven't spent enough time in the game , but I have few hours on vr chat so I wanted to ask how many hours of playtime do I have to have to upload avatars
fierce grail
?upload
 tough forgeBOT
You must obtain at least "New User" Trust Rank in our Trust and Safety system in order to upload content. You can get this by just spending a few hours in VRChat, hop some worlds, and make some friends. Give it some time and you'll be able to upload content in no time.
As an aside, you must have a VRChat account to upload content. That means you can't use a Steam account, Oculus account, or Viveport account to upload content like worlds or avatars.
Source: https://docs.vrchat.com/docs/frequently-asked-questions
gloomy cedar
alright thanks for the help
visual marsh
gloomy cedar
Hello ! So basically I have my avatar in unity ready to be exported into vr chat...
i got mine around 10 hours
if that helps
 pure pumice

 fringe kite
That looks good Human
 fathom hawk
im super confused on rigging in blender anyone know any good vids that explain it step by step?
gloomy cedar
visual marsh
i got mine around 10 hours
alright , thanks :D
fading verge
Do legs even really benefit from having twistbones?
I get arms, but legs don't really twist that much normally
visual marsh
fathom hawk
im super confused on rigging in blender anyone know any good vids that explain i...
for beginners try using the site mixamo to get a skeleton to whatever model you have
if its not rigged
already
fathom hawk
visual marsh
for beginners try using the site mixamo to get a skeleton to whatever model you ...
i ended up using rigify but thank you i will keep that in mind if im ever feeling too lazy to rig by hand
visual marsh
rigify also good
fathom hawk
quick question tho how do i change the origin point of my model in blender?
fathom hawk
i think i found it
visual marsh
or just press shift s then the cursor should be selected. And then go back to object mode by pressing tab
oblique basin
Ok, I thought I had this fixed but I was incorrect and am unsure what to do from here.
When in the scene bone locations fine but when animating it changes to be all bent like this instead of flat on the ground.
 oblique basin
If I need to add it to the locomotion layer (default VRCSDK Locomotion) Please let me know how as much as I don't want to take the next day add animations for it I will at this point.
 restive garnet
I'm having trouble with armature, I have a pair of rigged socks, weight painted to the same mesh on a different armature. When I delete the socks armature, the socks become huge, what am I forgetting here?

 quaint cosmos
restive garnet
I'm having trouble with armature, I have a pair of rigged socks, weight painted ...
quaint cosmos
restive garnet
I'm having trouble with armature, I have a pair of rigged socks, weight painted ...
There's probably scaling tied to the armature. I think you should just be able to change the armature in the modifier, otherwise, alt + p to clear parent and keep transformation and then rig to the body rig
restive garnet
Hey that was all I needed, thank you
brazen island
@fading verge uh, twistbones exist since your lower arm literally has two bones to rotate them replwr ñd eash goesto each other. Other limbs wont have none of theese.
fading verge
Indeed, but legs wouldn't really need them though, correct. Just upper and lower arms.
I'm not sure how VRChat IK 2 handles leg rotation and I don't have FBT
I should specify, it needs to be compatible for FBT
Most of the JP models I have for reference use no twistbones at all. Most of the western avatars use two to three per arm segment and sometimes legs too.
 last brook
I'm working on my very first avatar (so i really dont understand much at all) but I am trying to understand how bones work. If an asset I purchase is pre-rigged and has its own set of bones, do I need to do anything besides merge the armatures to get it to move properly? because it doesn't in blender when I pose it. If I Data transfer, it grabs finger bones that it shouldnt. I am trying to connect a pair of arm warmers, and the merge with cats helped, but then it clips horribly when bending the arm, and sculpting makes them look awful in rest pose. Please use laymens terms, i really have no idea what I'm doing lol.
quaint cosmos
last brook
I'm working on my very first avatar (so i really dont understand much at all) bu...
And the arm warmers are already rigged to another skeleton? Simplest option would probably be to rename the vertex groups to match the ones on the body and then assign it to the armature the body is using
Assuming they're already rigged and weighted, otherwise yeah, you need to weight paint.
 kind ore
quaint cosmos
And the arm warmers are already rigged to another skeleton? Simplest option woul...
kind ore
quaint cosmos
And the arm warmers are already rigged to another skeleton? Simplest option woul...
valid question to be honest, oversight on my part
maybe theyre rigged to another skeleton 🤷
quaint cosmos
Even then, they might not move properly depending on differences between the bodies so it might be easier to delete the vertex groups and transfer the weights. Unfortunately, this just isn't that simple of an issue.
You might want to watch some tutorials on weight painting or vertex groups.
last brook
and just for clarification, do i have to weight paint everything? im trying to check if some things are weight painted, but I dont know how to make it so i can click a specific bone when in weight mode.
quaint cosmos
Yeah. You can check if the object has weights but selecting it and then going into weight paint mode and then going through the various vertex groups (that's in the panel with the inverted triangle)
last brook
panel with inverted triangle ok, let me see
quaint cosmos
If it has them and they aren't all dark blue, it has weights
It's on the right near the bottom
kind ore
slightly off topic but if you get proficient with rigging and weight painting, its a very marketable and valuable skill for all 3D Tech
quaint cosmos
What sort of theory?
fading verge
Whether or not it is beneficial to use twistbones on upper and/or lower legs
kind ore
im “ok” at most, with 2D / 3D character animation being my forte theory and practical wise
fading verge
Before I spend the time splitting off and weight painting useless bones
kind ore
im confident krampus can assist more than i can
last brook
ok so they are painted, so just rename the vertex's and assign?
quaint cosmos
Honestly, I'm not real sure either. I know about weight painting but I use an automatic rigging program for generating the rig itself.
fading verge
I'm doing everything from scratch for the first time
quaint cosmos
last brook
ok so they are painted, so just rename the vertex's and assign?
You don't need to assign if you rename the groups, it will associate those weights with the bone that has the name of the vertex group
fading verge
I'll probably add them to the upper to reduce butt twisting, and just see how it works when I can get someone with FBT to try it out
last brook
quaint cosmos
You don't need to assign if you rename the groups, it will associate those weigh...
and then would I just put the arm warmers in the folder for the main armature or would that happen automatically?
quaint cosmos
last brook
and then would I just put the arm warmers in the folder for the main armature or...
You mean parenting? A model doesn't need to be parented to an armature to be rigged to it but unless these arm warmers are going to be on a toggle, you should just join them to the body with ctrl + j
last brook
they will probably be a toggle
not a clue if this helps at all https://gyazo.com/536df91c7479c0f694cf9a1ae7089d85
 quaint cosmos
Then I think you can get away with just changing the arm warmers to use that rig in the modifier but just to be safe, you can set the parent with ctrl + p, just only set parent, don't give it any weights
last brook
but basically i would be renaming each bone to what those bones are called on the body?
quaint cosmos
Yup
last brook
sorry i am literally brand spanking new so i really appreciate the help
this week was my first time touching blender
quaint cosmos
No worries
kind ore
im going to give you plenty of points for asking questions the way you are
its the best way to do this
last brook
i was struggling so much on my own ngl, so i was like I GOTTA FIND HELP
kind ore
its a place for collective learning so ye
quaint cosmos
When you select the arm warmers, shift select the armature, then ctrl + p. A menu should pop up and you can select set parent, just don't select any of the options below it like automatic weights.
last brook
empty groups right?
is this like data transfers?
i did try a data transfer on them, but it only moved in pose where the fingers were, and stretched horribly
quaint cosmos
No empty groups, just the top option to set parent.
quaint cosmos
Empty groups is probably fine but if you haven't renamed everything, it might create duplicate groups which will just be confusing.
last brook
so let me just make sure i have this straight. Rename all the bones on THIS armature for the warmers and bracelets to the identical bones on the body? and then..... parent just the models, or the WHOLE set with the armature?
quaint cosmos
What do you mean the whole set, it should just be models. Unless it's still got the rig for the arm warmers, in which case you should select the arm warmers and press alt + p and then unparent and keep transformation.
last brook
oh ok, and that wont kill the weight painting?
quaint cosmos
No
You'll also need to go into the modifier panel (the wrench) and associate the model with the right rig there.
It should just be a dropdown menu on the armature modifier.
last brook
i wish this had voice channels ngl, im really bad unless someone is like OK CLICK THERE AND DO THIS AND BOOM
quaint cosmos
It should be pretty easy to tell if you're in the right place, you can post screenshots if you're not sure.
last brook
is there a way to select a bone on the armature and it shows me which is it?
wait i think i get it now. i think they are all named the same, but because i tried to data transfer it added the finger vertex's and so it ruined it. if i just parent the warmers to the body, it should just already work. i think?

it did not work
quaint cosmos
If you have vertex groups with weights that shouldn't have them, you may want to delete them. You can delete all of the vertex groups but the ones relevant to the object (the lower arms, maybe the wrists) before joining. You also might want to go back and load a version before you did the data transfer in case that did anything weird.
You also want to verify it's associated with the right armature in the modifier panel.
last brook
quaint cosmos
If you have vertex groups with weights that shouldn't have them, you may want to...
that screenshot was me parenting the arm warmers to the armature that has the body in them. i did that wrong, didnt i?
quaint cosmos
last brook
that screenshot was me parenting the arm warmers to the armature that has the bo...
I'm not sure, I don't use CATS for that, I use the modifier tab.
last brook
im a bit lost at what the modifier tab is, to be completely honest
also, is it possible to unparent things? like take things off but not delete them?
quaint cosmos
Yeah, alt + p then select unparent.
The modifier tab looks like a wrench, you need to be in object mode to see it.
Mod bot doesn't like the caps
last brook
the bot got mad at me for yelling lol, and ok lemme find the wrench lol
i found the wrench, the blue one right?
quaint cosmos
I think it might be blue if it's selected? Feel free to post a screenshot if you're not sure
last brook

i think so since it says modifier in it. what do now?
i reopened the old vers before i data trans'd
quaint cosmos
The Object in that panel should be the armature, not the object the modifier is on. The way you have it, you're trying to rig the arm warmers to themselves.
last brook
ok, so select that tab while on the body armature?
quaint cosmos
You should just be able to select it and a panel will come up where you can select the armature
last brook
is this before or after i parent the warmers to the body armature?
currently the warmers are still paired to their own armature
quaint cosmos
It doesn't matter. You can do it before or after
last brook
oh is it this https://gyazo.com/c6001cecba214f14d32da3264e274e6e

the one named armature is the one with the body
quaint cosmos
Yeah, select that one
last brook
okay, do i do anything else?
quaint cosmos
Assuming the vertex groups are named correctly and the weights are correct, no.
last brook
it WORK! ahhhh!
quaint cosmos
🙌
last brook
ok next question would be, when i did that, it changed the position. the warmers are closer to the fingers
is there an ez way to move them inward without doing each warmer seperatly in edit mode
quaint cosmos
Probably differences with the rig it was on and this rig and no, not really, best option is to move them into place in edit mode. At least the best option I'm aware of.
What you could try is undoing a bit and then doing an alt + p and unparent and keep transformation before changing the armature. Might fix it
last brook
i realized it was less of a move issue and more of the size. the armature they were on had a size modifier or something im guessing. just need to size it back proper]
quaint cosmos
That's what the keep transformation bit is for, it essentially applies the scale changes to the model and zeroes them out
so that becomes the default
last brook
oh okay, yes that makes sense, lemme try that
last brook
quaint cosmos
That's what the keep transformation bit is for, it essentially applies the scale...
im having trouble finding the keep transformation option
nvm im silly i found it
 opaque crag
How can I make A-pose clothes match my T-pose body?
I'm familiar with how weights work and want to transfer weights from my body to my clothes so I can then make the clothes T-pose
i know I can I just don't remember how
kind mortar
opaque crag
How can I make A-pose clothes match my T-pose body?
I'm familiar with how weight...
There's probably better ways but I tend to just change my rest pose to an A pose and then parent the clothes, that or sculpt them.
 past wave
i t pose the clothes and then merge/transfer mesh data (basically the same thing but backwards)
somber bolt
steady loom
Did you manage to get this working? It's throwing an error about undeclared vari...
The AvatarDresser worked perfectly for me, what issues did you later encounter?
 vestal condor
How to you automatically weight a mesh to a single bone
brazen island
@vestal condor like, pure red or try to envelop it?
vestal condor
I just did it the normal weight paint way, stroke flat and weight and strength at max. moved it around in pose mode and it was good
quaint cosmos
You can assign faces to a single vertex group using the assign button in edit mode.
 pale pumice
vestal condor
I thought there was a way to assign it somehow
pale pumice
vestal condor
I thought there was a way to assign it somehow
Select the mesh, then use the Paint Mask button to only work on that mesh, then you get Weight -> assign weights in the menu
 near nebula
Does anybody know if there is a good way to have 4 arms on Quest. I have the pc rigged with fixed bones. But you can't use them on quest
 astral kindle
near nebula
Does anybody know if there is a good way to have 4 arms on Quest. I have the pc ...
astral kindle
near nebula
Does anybody know if there is a good way to have 4 arms on Quest. I have the pc ...
are rotation constraints not a thing with quest avis?
literally just a constraint to copy the rotation for each arm segment, i see no reason to use physics for them with a fixed joint
pale pumice
astral kindle
are rotation constraints not a thing with quest avis?
They are not, Quests don't have constraints
astral kindle
that is rather unfortunate :')
pale pumice
Yep, it's pretty limited
brazen island
@near nebula wild guess but align hands (or copy) and rig them the same, then weightpaint second set with like 20-30% to some extra bone and pose it to move second set away. but thats very theoretical and definetly wont work for every position
restive garnet
I'm trying to make a card, just a simple plane in blender with two image textures, one on the front and back. I created two materials. unwrapped the mesh, and was able to drag the faces to get my image on my card (Plane) mesh. My problem is that the image shows on both the front and back of my plane. How would I get my second image to show? Any help would be greatly appreciated.
quaint cosmos
restive garnet
I'm trying to make a card, just a simple plane in blender with two image texture...
If you just created a plane, there isn't really another face to put the image on and it will be invisible on one side in Unity without using a special double-sided shader. What I would do is make a very thin cube (probably with some beveled edges as cards often have) and then align the UVs with the front and back images for the card.
restive garnet
quaint cosmos
If you just created a plane, there isn't really another face to put the image on...
it's technically a cube, but I have two material slots for the two images, but only one image is showing
quaint cosmos
Let's move this to #3d-modeling since it definitely isn't a rigging thing
 worldly prism
any pros able to help with chest mapping? Im new with unity, no clue on my end. I dont have a chest to set as, so its set to none and cant upload.
quaint cosmos
worldly prism
any pros able to help with chest mapping? Im new with unity, no clue on my end. ...
If you've got no chest, you don't have a humanoid so you'd either have to supply your own animation set or go into blender and add a chest bone.
worldly prism
quaint cosmos
If you've got no chest, you don't have a humanoid so you'd either have to supply...
I tried to import to blender to add one, but its giving an error saying ASCII fbx isnt supported
quaint cosmos
You can find the FBX exporter in the package manager and in there you can export it as a Binary FBX rather than an ASCII FBX
worldly prism
Where exactly should I find this? I have no experience in anything here.
quaint cosmos
Package manager is in the window tab at the top, then you should just be able to search for FBX. From there, you're going to need to add the bone and add the proper weights to the bone https://www.youtube.com/watch?v=4fICQmBEt4Y . You might want to watch more in-depth tutorials on that but it'll get you started.

I've been meaning to update this video for a very VERY long time. But, we're finally here. Everything you need to know in order to start painting weight layers onto your character!!! Hope it helps :)
Female Body Model Link:
https://www.youtube.com/watch?v=_XfvLpLyulI
If you enjoyed this video, please don't forget to like and subscribe!
You ca...
worldly prism
quaint cosmos
Package manager is in the window tab at the top, then you should just be able to...
do u have a guide or something that id be able to use to learn how to export as binary instead of ascii
something easy to understand
worldly prism
or maybe u could give an walktrhough
quaint cosmos
worldly prism
do u have a guide or something that id be able to use to learn how to export as ...
Did you find the FBX exporter? If so, you just select the object (the parent object of the mesh and the rig) then the FBX exporter should be in the GameObject tab. Just select that and there will be a dropdown that says ASCII. Change it to Binary and export.
worldly prism
quaint cosmos
Did you find the FBX exporter? If so, you just select the object (the parent obj...
I exported it as Binary but it still shows the ascii error
\

 quaint cosmos
Assuming you properly exported it as Binary and aren't trying to import an old version, I'm not sure. At the top of the exporter, you can choose to export it to a different location so you don't get them mixed up. You might also want to provide a picture of your export settings but it should just be the one button.
worldly prism
I am using an old version of unity may that be a problem?
quaint cosmos
You should be using 2019.4.31f1. If not, you've got bigger problems than the FBX exporter.
worldly prism
quaint cosmos
You should be using 2019.4.31f1. If not, you've got bigger problems than the FBX...
yep im using 31f1
quaint cosmos
Then I'd post an image of your exporter export settings and make sure you're exporting to a different folder so you don't get your exports mixed up.
worldly prism
Now when I try to click export, it exports without letting me view my settings
@quaint cosmos
 quaint cosmos
You could change the export path but if Lilac Soup 2 is a unique file name and you are opening the right file, it should be saved as a binary fbx
worldly prism
ill make a quick clip of me exporting and trying to open in blender'
then u can see if there is any issues
okay what thehell
as soon as i record it works -_-

when I import it tho, the skirt goes spaz.
quaint cosmos
worldly prism
when I import it tho, the skirt goes spaz.
Part of that might be the rig not being in its rest pose. Select the rig, then go into pose mode, then press A and alt + G, alt + S, alt + R
worldly prism
is there a shortcut for pose mode
or where is it located
found it
yeah it fixed it
thanks
now where would i go to add a chest
quaint cosmos
worldly prism
now where would i go to add a chest
You can select the armature in edit mode and either subdivide the existing bone beneath the neck or extrude out from it but then you'd also need to create the corresponding vertex group and add weights to that bone. I would at least watch that video I posted and you might want to watch some beginner rigging tutorials as well, it's kind of a big subject to explain step by step
 gray dragon
Hey there! Happy New Year! Could smn pls help me with creating an anime-cyborg avatar? I've got a ton of questions, and it would be great if I could discuss it in dms with smn
i'm half way through, trying to make a robotic arm, and I don't know how to make it properly regarding all the ball joints etc.
 radiant seal
I need a dread file pls
quaint cosmos
Is that like a death note?
near nebula
astral kindle
are rotation constraints not a thing with quest avis?
Yeah constraints are blocked on quest. According to the there website there are no plans to implement them. I do have pc versions using constraints.
 mint quartz
I have an issue that I've been holding off to fix for quite a long time now, namely my neck while I'm in full-body tracking is frozen. My head rotates just fine it's just the neckbone that is frozen and it can look quite funny at times 🙂 Anyone know what can cause that? The neck seems to work just fine in half-body
 prisma knoll
Is it possible to have this into vr chat using bone constraint. If no is there other way i would be able to do that ?
prisma knoll
Using Fix model also gets rid of it
fading verge
any advice for first time rigger please
 tulip steppe
Anyone knows why thumb animations are not working correctly?
I made a custom animation for my avatar, but thumbs for some reason are not animating correctly, even though I've changed the range at which they can bend

Here is how it looks in Unity
And here is how it should look
Discord doesn't let me post a picture for some reason
The first bone is in the right position, but the next two don't bend at all
Or maybe it's only the last one, not sure

 sleek isle
prisma knoll
Is it possible to have this into vr chat using bone constraint. If no is there o...
sleek isle
prisma knoll
Is it possible to have this into vr chat using bone constraint. If no is there o...
rotation constraint yess. but you still need a neck bone. you can probably have it really small
 royal condor
im getting this issue
"spine transform "spine" has bone length of zero" can anyone please tell me how do I fix that?
 sleek isle
if I remember it's because your hipis upside down
sleek isle
royal condor
im getting this issue
"spine transform "spine" has bone length of zero" can anyo...
flip it in blender
royal condor
 royal condor
i cant, it wont let me upload unitil i fix it
quaint cosmos
Do you have a spine bone with zero length? That is literally what the error is saying.
royal condor
how do i check that
 robust crescent
zero is flipped, aka you downloaded a REALLY old avatar
only very old cats did that
royal condor
is there a updated version?
robust crescent
we're talking years , and this av is from where
 robust crescent
0 degree on hip (unity) is flipped otherwise its could just be super tiny, newer cats can just resize it on 'fix' (also break if rig is wierd)
royal condor
robust crescent
0 degree on hip (unity) is flipped otherwise its could just be super tiny, newer...
can i dm u rq
fringe kite
I am working on my character's eyes. My eyes are flat planes and I need my irises to be flat and move over the surface of the flat plane, either as a seperate object or a moving texture that follows a bone. I also need the movement to be flat in 2 dimentions and not cross a boundary so that they don't clip out of the side of the head. Can anyone help me do this?
prisma knoll
sleek isle
rotation constraint yess. but you still need a neck bone. you can probably have ...
Neck bone is one im moving in video its just not connected to head directly. But problem is when i fix model constrain get removed. Ty anyways
sleek isle
you add them in unity manually
prisma knoll
sleek isle
you add them in unity manually
Ok ty I will try
 tawdry sigil
in the mapping inspector my hand bones show up mapped correctly but the default position and in turn the in-game position ends up having them curled in and janky. any idea on why thats the case?


 fading verge
tawdry sigil
in the mapping inspector my hand bones show up mapped correctly but the default ...
fading verge
tawdry sigil
in the mapping inspector my hand bones show up mapped correctly but the default ...
Basically the default resting position, but the fingertips are already curved a bit, so I think that makes it look more claw-like than it normally would.
Also, it is a giant skeleton hand, and the finger bones seem to be extending well into the area I would normally consider "hand"
If all those fingers were slid down a digit, realigned, and weight painted for the new position, it would look more natural.
He's basically all fingers 😆
 pine steppe
prisma knoll
Is it possible to have this into vr chat using bone constraint. If no is there o...
pine steppe
prisma knoll
Is it possible to have this into vr chat using bone constraint. If no is there o...
Which programme is this pls
And can anyone help me get started pls any links or videos
Thank you
kind ore
blender
 torpid burrow
anyone know how id rig the neck here? tthe black part keeps fading in and out of existence and the silver parts clip through it all the time
 prisma knoll
pine steppe
Which programme is this pls
prisma knoll
pine steppe
Which programme is this pls
Blender?
 gusty jetty
Anyone have an idea as to why my chest may not be getting auto-mapped when I try to configure the humanoid armature? The parents all seem correct and everything should be named correctly as well 🤔

For anyone else having a similar issue, I raised the height of the tail of the chest bone and that fixed it
 hollow kraken
Unity automatically map humanoid bones by both mane and position, if bones location are differ too much from ideal location, they will not get auto mapping.
fervent vigil
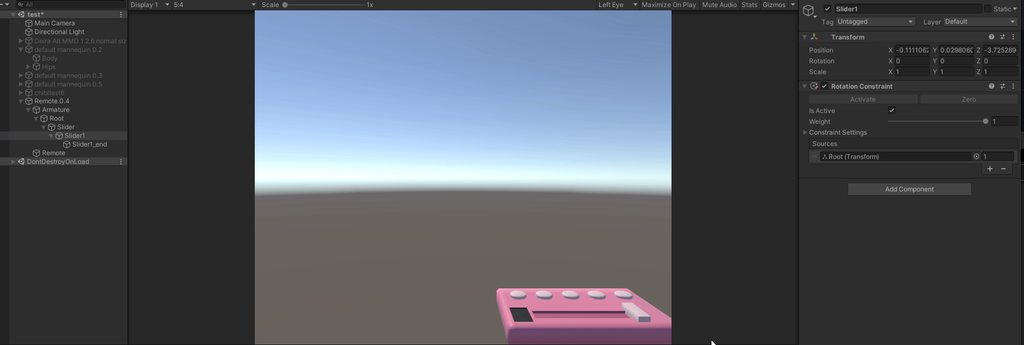
Non-humanoid rigging question.
I'm setting up a remote with a slider. This will be attached to an avatar. I am trying to use the angle of Slider_Angle to determine the position of the slider. I'm using a rotation constraint to make it so that the switch doesn't rotate around, but how would I make it so that the switch does not move from the face of the remote?
https://i.imgur.com/qj3qHET.gif
 brazen island
@fervent vigil same, position constraint with one axis enabled. but id rather have a motion time that animates slider (ie physbone itself is invisible and slider's visible position is also depends on angle and interpolates between two states)
 hollow inlet
Hey guys, question, I have a .vrm model I brought into unity, and decided to just make a root bone so I can dynamic bone all the hair nice and easy - but when I created the game object, and added it to the prefrab, I somehow broke the rigging, and can't find the place to fix it, any help?
fervent vigil
brazen island
<@133466753681326081> same, position constraint with one axis enabled. but id ra...
yeah i think this is an easier way of doing this. i think i accidentally made a very complicated solution :x
fervent vigil
hollow inlet
Hey guys, question, I have a .vrm model I brought into unity, and decided to jus...
make sure you did not put a dynamic bone on a humanoid bone or everything will cease to work and your avatar will jitter all over the place. make sure your new root bone did not get selected as the head
fervent vigil
brazen island
<@133466753681326081> same, position constraint with one axis enabled. but id ra...
Position constraint doesn't work because the needed position is a position relative to the remote, not relative to the xyz position of the bone :/ Regardless, it works just fine even if the invisible physbone is arcing up over the remote at an angle, but I wish it was a little more optimal.
brazen island
@fervent vigil you can try stretch parameter with bone parallel to slider
 crude night
can someone please help me rig this .fbx model

I have no idea what to do
I shoved bones into a model and now it looks like this
this is literally my second time ever using blender 😭
if somebody knows how to do it or it may be easier for them to walk me through doing it that would be greatly appreciated
I can attach the file here too though
crude night
man nobody?
 tawdry dragon
Mixamo website
 final idol
my avatar's viewpoint in unity does not match the result in game, I've applied all transforms but in the end it's always off by quite a lot, does anyone know what may be causing it ?

 sleek isle
final idol
my avatar's viewpoint in unity does not match the result in game, I've applied a...
sleek isle
final idol
my avatar's viewpoint in unity does not match the result in game, I've applied a...
check the humanoid, am guessing you have big feet
unity move model using the bone of the toe/feet
lift the hip up like the original model
 noble minnow
Hey all, would importing this arm part to an existing model need to be weight painted again?


When merging the armature using the CATS plugin, it leaves me with duplicated bones for the arm and forearm
pale pumice
I don't use CATS for this but you may be able to get away with not re-painting if you match the new arm part's vertex group names to the existing armature
 jade verge
noble minnow
When merging the armature using the CATS plugin, it leaves me with duplicated bo...
jade verge
noble minnow
When merging the armature using the CATS plugin, it leaves me with duplicated bo...
make sure bone names are the same for new robot arm and old flesh arm
quaint cosmos
If the robot arm is already weighted, it's probably better to rename the vertex groups to match the base mesh as renaming the bones won't change the name of existing vertex groups.
noble minnow
jade verge
make sure bone names are the same for new robot arm and old flesh arm
Bones and Vertex Groups are both named the same as the original mesh. Getting closer, but looks like the bones aren't parented correctly now?
jade verge
If it's just a parenting issue, you can fix it manually. Unparent the bad bones and re-parent them correctly.
I believe it's alt+p to clear parent and Ctrl+p to parent under active.
noble minnow
jade verge
If it's just a parenting issue, you can fix it manually. Unparent the bad bones ...
I'll give that a shot, thank you
quaint cosmos
You can keep the transform when unparenting in case the model has been moved or scaled by the rig
 violet lotus
Here are the stuff I can do:
•Dynamic bone and toggles
•Rigging, Rig edits(Including Facial rigging for eye tracking and lip syncing)
•Mesh Edits: Add clothes, Fix accessories
 still fossil
Scammer ^
 tribal mauve
noble minnow
tribal mauve
noble minnow
It is a parenting issue yea, what Rishi said should pretty much help fix it
kind ore
violet lotus
Here are the stuff I can do:
•Dynamic bone and toggles
•Rigging, Rig edits(Incl...
l o l
noble minnow
tribal mauve
It is a parenting issue yea, what Rishi said should pretty much help fix it
Thanks! Turns out I'm just dumb 😅 forgot to retarget the mesh to the new rig. Posing looks good, will port to VRC and test it today
violet lotus
still fossil
Scammer ^
Let me prove you wrong doo
 midnight comet
Sophiay#7370 is also a scammer I’m pretty sure but idk
 warped comet
Does anyone know how or know a tutorial that actually shows how to rig a skeleton into a character model?
quaint cosmos
warped comet
Does anyone know how or know a tutorial that actually shows how to rig a skeleto...
You can find a ton if you just look up "Blender rigging" on Youtube but if you want something relatively quick and easy, I'd start with putting it through the automatic rigging program on Mixamo.com and then just looking into weight painting to clean up some of the spots that the automatic rigging doesn't get right.
 hazy condor
Okay so I don't know what the fuck I'm doing wrong but The rig is fine and it's all green but It's still giving me this dumb error


I've been trying to figure out how I can fix it because I just want to publish it so that way I can use it
But for some reason it just won't let me publish it at all That's why I've been trying to fix it
 quaint cosmos
hazy condor
Okay so I don't know what the fuck I'm doing wrong but The rig is fine and it's ...
quaint cosmos
hazy condor
Okay so I don't know what the fuck I'm doing wrong but The rig is fine and it's ...
You at least need a chest, seems like maybe the neck isn't assigned either? Those are both required/.
There is no way that avatar needs that many meshes or materials but I guess on PC you can get away with it if you don't mind it being very poor quality.
VRChat needs a level below very poor
"Please, God, no" level
hazy condor
quaint cosmos
There is no way that avatar needs that many meshes or materials but I guess on P...
The only reason why it's like that is because for some reason it's counting the spikes on the Avatar as a separate mesh which is Dumb and annoying to work with to try to get it ported over to Quest
Also I think I have to go back in blender and add a bone so that way it fixes it
But if that error is gone it will allow me to publish it right???
quaint cosmos
hazy condor
The only reason why it's like that is because for some reason it's counting the ...
The spikes aren't a different mesh? You should just join them to the body unless they need to be a toggle or something. It should after you add the necessary bones but you'd also need to add weights to those bones if you wanted it to move properly.
hazy condor
Everything moves properly And it works fine But the only issue is is that since well it won't let me publish it I'm going to have to add a head bone So that way it can work properly in vrchat In the model was posted in sketchfab and it was originally made for just making animations or making posters and make renders in blender I'm just trying to geting it work in vrchat
quaint cosmos
It might move well with the existing armature but if you add a head bone without any weights, it won't respond when the player moves their head.
Same with the chest and neck, those are mapped to parts of the body that are going to be moving so if you just add the bones, you might be able to publish the avatar but it isn't going to work very well.
hazy condor
quaint cosmos
It might move well with the existing armature but if you add a head bone without...
Or either that it will just t-pose I had that happen to me with a model before But yeah I think if I just make a neckbone and attach it and shit but I don't think I have to add any weights to the neck so I think you'll be good I think Also there's already a existing one but I'm just going to Rename it to head sense All the weight painting For the neck bone is just the whole head
But anyways thanks for your help
quaint cosmos
If you just have a neck and rename it head, you won't have a neck so I don't think it's going to let you publish that way either. Those are both required bones
hazy condor
I'm going to add the neck though I'm just going to put it between the head and the chest
But there's already a existing neckbone but it's technically a head bone
Since the bone goes from top to bottom on the head
pale pumice
this is not going to work well for FBT
 cedar wave
Just so I can spread workload for others, a group of people including me at the head of it are seeking an expert’s advice, something not many people can actually answer.

Blender Artists Community
Environments: Blender: 2.93 Unity version: Unity-2019.4.29 OS: Windows 10 Description: I have made a model in Blender containing blendshapes (specifically ARKit iPhone blendshapes). I export it from Blender as an FBX. I then import the FBX into Unity as I use Unity to convert it to a VTuber format using UniVRM. I am aware of the issue with b...
This is the issue we are experiencing but cannot find a cause. Using legacy Blendshape normals deforms mesh incorrectly on blendshapes- I am looking for the answer on why this is occuring, rather/and than/then how to fix it! Once I find this out I will message those who are needing the same thing, and I will inform them, if anyone is up to the challenge, let me know.
Information;
- All shapekeys are behaving normally between any instance of blender. Either between projects or importing fresh FBX
- All shapekeys/blendshapes are behaving normal before “legacy blendshape normals” is checked off
- When legacy blendshape normals is checked off, mesh deforms in the wrong way that it is requested to- rendering blendshapes/shapekeys useless.
What is a legacy blendshape normal doing? Is there not a way to set the values of what blendshape normals are doing?
 fathom sun
Legacy blendshape normals specifically affect how the normals (or shading) of the mesh is formed from blendshapes being controlled
with legacy on, it sets the normals as what was originally set before the blendshape was controlled
can you show what was happening with the "blendshapes not behaving normally"?
cedar wave
fathom sun
with legacy on, it sets the normals as what was originally set before the blends...
So basis…?
fathom sun
cedar wave
So basis…?
yes, technically
cedar wave
It’s strange because this is manipulating the function of keys
fathom sun
cedar wave
It’s strange because this is manipulating the function of keys
so the verticies are moving all wonky?
cedar wave
Creating random verts dragging as if the shapekey isn’t 100% manipulating mesh
fathom sun
can you show me?
cedar wave
A good example is in the link I sent, this guy is going through the same exact issue- just nobody could figure out an answer…
Is there some sort of thing I can do in blender to make sure legacy works the same as non legacy?
With legacy non checked off, everything behaves normally.
I can send my example if you would like!
 fathom sun
that would help
cedar wave
Both have same keys activated, one with color is legacy blendshape normals being use, bottom is how it should be, but legacy blendshape normals are not checked
Pay attention to the white circle
fathom sun
hmmmm, do you have auto-smoothing on and off on different parts of the mesh?
fathom sun
ok, that's what i have for my import settings.
Do you have:
- Normals: Import
- Normals Mode: Area And Angle Weighted
cedar wave
Yes
fathom sun
i see....
can you send two uncolored photos showcasing what is happening with and without the legacy blendshape normals?
I know you already did with the two colored and non-colored photos, but i'm still having a hard time figuring out what's your goal with the blendshape
cedar wave
Do you know what causes legacy blendshape normals to misbehave?
This blendshape/shapekey increases eye size
fathom sun
ok, are you certain that it's the only blendshape being affected? Like is there another blendshape active?
cedar wave
Works perfect everywhere but does not work with legacy on- also there are various keys they are messed up with legacy on..
Only shapekey active
 cedar wave
Do you know what causes legacy blendshape normals to misbehave?
cedar wave
cedar wave
Do you know what causes legacy blendshape normals to misbehave?
This question is nowhere on Google and nobody seems to know… interesting to me!
Have done this no worries
fathom sun
maybe you could try reimporting the fbx under a different name. It may just be that one fbx file being buggy
fathom sun
you can put the new file into the old name slot if the reimport works
cedar wave
I tested it- confirmed it’s all of them
fathom sun
ok, is it on the fbx itself, or can you try reimporting under a different name?
fathom sun
ok, is your console sending any warnings or errors?
cedar wave
cedar wave
Do you know what causes legacy blendshape normals to misbehave?
It’s whatever the answer to this is
fathom sun
fathom sun
ok, is your console sending any warnings or errors?
like a "can't generate normals for blendshape ..."
cedar wave
What causes them to break?
fathom sun
I don't know.
cedar wave
fathom sun
ok, is your console sending any warnings or errors?
No messages of this nature
fathom sun
Got it.
cedar wave
I scanned my topology for N-gons multiple times
fathom sun
If it's happening across every scene in the project, maybe you could try launching a new project and importing the same fbx into that? That way we can remove the possibility that it's either the project being the issue, unity being the issue, or the fbx being the issue
cedar wave
I can try this
fathom sun
You don't need to remove the old one, just use either creatorcompanion or unityhub to create a new project, and import the bare-bones things you need, like the VRCSDK
oki
cedar wave
Do you think it could be the project causing this?
I never had this issue before it started across all of my FBX today
Which is… bizzare.
I never have seen this happen
fathom sun
Yea it really is. It's best to test around and see what it is and what it isn't
cedar wave
The project size is 23GB
fathom sun
oh god......
cedar wave
Very easy workflow
fathom sun
until something breaks.
cedar wave
Let’s see if this theory is correct and I’ll get back to you
fathom sun
oki
cedar wave
I think the answer still lies within what’s creating the issue with legacy blendshape normals
fathom sun
Right, but I'm not sure why that would do anything to the actual blendshapes themselves
cedar wave
Could I give you an FBX to try possibly
fathom sun
which is why I might think it may be unity being a goober
sure go ahead
cedar wave
fathom sun
Right, but I'm not sure why that would do **anything** to the actual blendshapes...
This is what I’m trying to figure out tbh! Haha
I did update Unity hub- which usually causes things like this to happen
fathom sun
yea i'm still on 3.0.1
cedar wave
I probably nuked everything because of damn unity Hub haha
it could be my issue.. ughhhh
fathom sun
yea, it's a mess....
fathom sun
here's hoping :3
cedar wave
And let’s hope it breaks
 bright ridge
Would anyone be able to convert a pc only avi to quest compatible for a freind of mine? I would do it but my pc is broken rn
midnight comet
Felt on the pc broken part lol
 fleet compass
having a brand new issue here.. made a new avatar in blender 2.79 (in the process of learning the newest blender) and when exporting it, in both the new version of blender and 2.79, the body mesh straight up disappears. it looks and acts perfectly fine in blender. not sure whats going on.

ive tried exporting with and without cats, and again im really not sure how to fix this
note: the rig is still there too. its just the body mesh that disappears
 burnt goblet
are you exporting as obj or fbx
fleet compass
fbx
burnt goblet
What are your export options for fbx
fleet compass
wdym, like the warning screen that'll pop up with cats?
only thing thats hows is the 7 materials warning for optimization lol
theres no errors in blender at all showing
burnt goblet
So you only use cats to export? I usually go to File > Export > FBX
burnt goblet
Ok but what are your export options
Also are you selecting the entire mesh and armature when exporting?
fleet compass
ive never had to do that before lmfao
thats why im confused
i just click export and every other time the entire thing exports properly
 fleet compass
like i said i used 2.79 but i can open the blend into the newest blender and do that
it does it there too
oh shoot let me get the drop down menus
whoopsie

everything is the same
burnt goblet
Does the Mesh Disappear only visibly in Unity ? or does it also remove the Mesh from the hierarchy of the armature as well?
fleet compass
its entirely gone
the name is still there, but its like all the vertices got deleted
burnt goblet
Ok so only visibly
My thought would be unapplied modifiers and or something going wrong whilst exporting, I would try first seeing if you select the mesh and then export and make sure you have ( Limit to selected objects only ) checked and attempt to get it to show up in unity, if that fails possibly recalculate the normal's on the mesh
For whatever reason I've also had your same problem in the past and it just took a lot of random trial and error until something eventually fixed it.
fleet compass
there are no unapplied modifiers on the model, that i know for sure.
okay after doing the limit to selected mesh, it still doesnt show up.
its giving me this error.

okay, after looking into it more - the vertex groups for some reason were selecting the entire mesh for each individual one. this was a headswap, so i just redid it entirely. it fixed it. not sure what caused this problem.
burnt goblet
way to go
pale pumice
burnt goblet
Interesting, I use scaling: FBX_All and turn off leaf bones.
 urban plume
are their any tutorials on how to rig a velociraptor for full body?
cedar wave
Can someone tell me what Legacy Blendshape Normals are. What do they do, and is it true smoothing angle or whatever they are called groups are key for them to work
warped comet
I need help with this. I've been trying for hours nonstop to rig this f'n model and it refuses to work. I got everything down except the chest. The character's upper area keeps sucking in. Does anyone see what the problem is here? I'm new to this and I can't figure out a fix.


I used the Cat's vrchat auto fix thingy in blender too.
i'M rEaChInG mY bReAkInG pOiNt
pale pumice
warped comet
I need help with this. I've been trying for hours nonstop to rig this f'n model ...
I'd probably see what the weight painting on that looks like, your setup in Unity seems okay.
warped comet
pale pumice
I'd probably see what the weight painting on that looks like, your setup in Unit...
Alright. Let me check.
warped comet
pale pumice
I'd probably see what the weight painting on that looks like, your setup in Unit...
Where do I check that in Blender?
pale pumice
warped comet
Where do I check that in Blender?
in weight painting mode?
warped comet
pale pumice
in weight painting mode?
I forgot how to get there but I figured it out.
This looks odd

Everything is blue except for that one area
Also sorry if these are really dumb questions. I just started yesterday.
warped comet
What should I do about this? I feel like i'm so close to being finished.
Assuming the weight paint is the issue, i'm lost lol
quaint cosmos
Weight paint mode will only show you the weights of the currently-selected vertex group. Aside from the weights, the bones look strange. The torso should have a chain of bones going from the hips to the spine to the chest to the neck but it looks like your spine bone is inside of you chest or vice versa, it's hard to tell
If it were me, I'm probably just get rid of the existing rig and use an automatic rigging program like Mixamo.com or accurig as this rig looks strange and has a lot of unnecessary bones.
If you want to try and make that rig work, you could look up weight painting on Youtube and try to fix the weights on the chest but I'm not sure it's going to fix everything with how these bones are arranged.
warped comet
quaint cosmos
If it were me, I'm probably just get rid of the existing rig and use an automati...
Will do!
Thanks man
warped comet
quaint cosmos
If it were me, I'm probably just get rid of the existing rig and use an automati...
It worked!
Thank god lmaoooo
quaint cosmos
You might still want to look into weight painting to refine how the avatar moves but Mixamo tends to provide a decent result out of the box for typically-proportioned humanoids
warped comet
quaint cosmos
You might still want to look into weight painting to refine how the avatar moves...
Yeah the only thing disproportioned was one single finger
so i was quite surprised
quaint cosmos
warped comet
Yeah the only thing disproportioned was one single finger
That's lucky, fingers are the one thing that automatic rigging programs consistently get wrong.
warped comet
Maybe not just the fingers. She has a dunce hat now lol
 quaint cosmos
warped comet
Maybe not just the fingers. She has a dunce hat now lol
quaint cosmos
warped comet
Maybe not just the fingers. She has a dunce hat now lol
Yeah, Mixamo will give you a head top bone. It shouldn't cause any issues but you can delete it if you like as well.
warped comet
quaint cosmos
Yeah, Mixamo will give you a head top bone. It shouldn't cause any issues but yo...
Ah. I'll just leave it alone out of fear that i'll break something else lol
I DID IT
I finally made the avatar
WOO
Crap, the veiwpoint is sticking to the avatar and when I try to move it, it moves the entire avatar
warped comet
warped comet
I finally made the avatar
Celebrated too early lol
quaint cosmos
warped comet
Crap, the veiwpoint is sticking to the avatar and when I try to move it, it move...
Are you changing the view position using the inputs in the avatar descriptor?
That shouldn't have any effect on the avatar placement
warped comet
quaint cosmos
Are you changing the view position using the inputs in the avatar descriptor?
This?
 quaint cosmos
warped comet
This?
quaint cosmos
warped comet
This?
yeah
warped comet
It doesn't even show up the thingy lol
usually there's a ball that shows up but I don't see it
warped comet
I'll check
quaint cosmos
It could be way above or below the avatar if it's too big or too small
You could add a cube at the origin to get a better idea of the scale
warped comet
quaint cosmos
You could add a cube at the origin to get a better idea of the scale
Never thought of that
I'm literally not finding it anywhere
like it isn't spawning
I tried moving the position to 0,0,0
quaint cosmos
The viewpoint isn't spawning or the cube?
warped comet
The viewpoint
quaint cosmos
And you checked the scale of the model to make sure that was in the right ballpark?
warped comet
Yeah it's at .22 on everything which is usually the right size for what I'm going for with this avatar
Even the main camera and sun thingy isn't spawning
quaint cosmos
But you compared it to an object of known size like a cube?
warped comet
I'll check to be sure. How do I spawn a cube?
quaint cosmos
.22 is just the scale relative to what it was imported as
At the top of the hierarchy there's a + icon, you can add a cube there and then move it to the origin
warped comet
Yeah it looks right to me
quaint cosmos
Unity cubes are 1 cubic meter so it should be roughly 1 cubes tall
More than that but in that ballpark
 quaint cosmos
If you want your lady to be like 20 ft tall
quaint cosmos
If you scale that cube up on the y to 1.7 (or the z, I forget) that would be 5' 8'' so then scale the object that is the parent of the model and the armature to about the size of that cube
urban plume
urban plume
are their any tutorials on how to rig a velociraptor for full body?
any help?
quaint cosmos
urban plume
any help?
No clue, sorry. Sounds really complicated and you'll probably need to use bone constraints so it won't work well on Quest but maybe that isn't a concern.
warped comet
Okay I think this is correct now
I THINK

The cube clips through the ground a little
quaint cosmos
I would try to align the cube with the bottom of her feet to be accurate and then make sure its scale in meters is right for how tall you want her to be.
warped comet
I aligned it
it's the perfect height lol
so hopefully now that the size is smaller I can find the ball
quaint cosmos
Try moving it up and down, should make it easier to find. They really should make it bright red or something instead of white
warped comet
quaint cosmos
Try moving it up and down, should make it easier to find. They really should mak...
Right? So hard to see
Okay this is weird
I still do not see it
even the directional light is just gone
I found the light but it's invisible

hope that isn't the case for the ball
quaint cosmos
Might be the visibility of the lights gizmo is turned off. Could have an effect on the viewpoint ball but I'm not sure.
warped comet
quaint cosmos
Might be the visibility of the lights gizmo is turned off. Could have an effect ...
It was! The gizmos was off
Wallah
 quaint cosmos
🙌
warped comet
Now to do the rest
Hopefully there isn't any more errors
It's ready for testing!
It's done! And it works in game!
 rapid arrow
I need some help
I bought this avatar off of a website and wanted to put it into unity and publish to vr chat. I’m trying to rig it but have no idea where to start with this monstrosity, any ideas?
 robust crescent
Blender, nothing is connected right
rapid arrow
The rig for the model the guy sent me is messed up for some reason and I have no idea how to fix it and youtube videos aren’t helping. In the download’s he sent me, there is a folder called auto rig which contains a bunch of ‘PY’ files. This is the point I am stuck on and not sure what to do.
The rigging tools he included. I cannot drag them into the project.

When I go and try rig the character, there are a tonne of missing bones and none of them match. I am wondering if I should go into blender and re rig the entire thing?
 pale pumice
rapid arrow
When I go and try rig the character, there are a tonne of missing bones and none...
pale pumice
rapid arrow
When I go and try rig the character, there are a tonne of missing bones and none...
You may be able to drag bones into there, if it doesn't automatically find them by guessing the names
rapid arrow
I think I fixed it, I just went into blender and re rigged the entire thing, only problem is it’s coming up with an error saying “There is no animator attached”. Not sure what that means.
sleek isle
Where that error
rapid arrow
it’s bottom left, it is saying that a script is trying to access it.
robust crescent
av descriptor require an animator wich you didnt add - generic av's will not have one (manually add) humanoid should have it unless bones a mess and fails
 sleek isle
Delete everything and import again. Set up the FBX to humanoid
rapid arrow
I got it working, thanks
 prisma shadow
hey! i got the armature set up, but my avatar has multiple separate parts, how do i join everything to move together?
 final idol
So my avatar spins uncontrollably while in full body and having my legs partially underneath the ground, anyone knows what the cause may be ?
final idol
nevermind
rapid arrow
I’m actually going to tear unity apart in a second
doesn’t matter how much I fix the problem there is always a error message
When going to the ‘rig’ tab it is all green meaning that all the bones are correct. Then when I go to publish the avatar it says, “Upper arms aren’t specified”. Like wtf do I even do, I click on select to view the issue and the button does nothing
pale pumice
try switching your rig to generic, apply, then switch back to humanoid and reconfigure it
pale pumice
if you switch it to generic, hit apply, then switch to humanoid and hit apply, you also have to click the 'configure rig' button too
rapid arrow
I did that but it doesn’t solve my issue
quaint cosmos
When you go to configure the rig, do you have bones assigned to the upper arm slots?
rapid arrow
yes
quaint cosmos
It might be a good start to share a screenshot of the configuration screen so we can see what might be up, ideally also showing the rig in the hierarchty


 pale pumice
the scene view doesn't have any red bones that it says are out of place, right?
rapid arrow
correct
it will allow me to publish as a generic model, when I switch to humanoid is when the errors come up
won’t even let me switch to humanoid now, just restarted and loaded in and the level and still won’t switch.
kind mortar
rapid arrow
won’t even let me switch to humanoid now, just restarted and loaded in and the l...
Unity can be stupid sometimes, happens sometimes where I am in a situation I can't explain or fix, in that rare but annoying cause, I just restart my entire project. Why fight with it.
rapid arrow
what does this even meannnn

 tranquil iris
I've tried creating a simple rig from some youtube tutorials but for whatever reason the meshes do not want to stay together. Tried troubleshooting but nothing's working as of yet


Mind you I've literally never touched blender before so
Also, have tried mixamo but for whatever reason it hates his chin and refuses to not warp it
quaint cosmos
tranquil iris
I've tried creating a simple rig from some youtube tutorials but for whatever re...
Have you done any weight painting on it?
tranquil iris
I'd assume not since I don't even know what that means
The tutorials I've used have been simple models so they haven't really helped in that regard
quaint cosmos
tranquil iris
I'd assume not since I don't even know what that means
There's your issue. Rigs don't just automatically know what part of the model you want the bones to control, you have to paint the vertices depending on how much influence you want each bone to have.
tranquil iris
Glad to at least get an idea of what went wrong
quaint cosmos
This will get you started but you'll likely want to watch additional videos if you really want to figure out how to weight paint properly. https://www.youtube.com/watch?v=4fICQmBEt4Y
I've been meaning to update this video for a very VERY long time. But, we're finally here. Everything you need to know in order to start painting weight layers onto your character!!! Hope it helps :)
Female Body Model Link:
https://www.youtube.com/watch?v=_XfvLpLyulI
If you enjoyed this video, please don't forget to like and subscribe!
You ca...
tranquil iris
Thanks
quaint cosmos
Mixamo is a good starting point so the weights probably aren't too horrible but you'll need to clean up the areas that aren't moving right
tranquil iris
The issue with mixamo for me is that it can't seem to differentiate the chin with the rest of the neck and just ends up stretching the chin

Like that's literally the only problem lmao
It's a lot easier to see the stretching in motion but eh
brazen island
its still a minor manual fix instead of tedious complete manual rigging
tranquil iris
Ah side view actually shows it better

@quaint cosmos So I've started the tutorial but for some reason it's only allowing me to weight paint a single mesh, rather than all of them
brazen island
thats how it works. you better combine them anyway. you can separate them by material later but better not
tranquil iris
No worries
tranquil iris
Just gonna wait for an experienced rigger to do it this it too much for my tiny brain
rapid arrow
Can someone please explain what this means!

literally the only thing holding me up from uploading
 humble beacon
rapid arrow
Can someone please explain what this means!
humble beacon
rapid arrow
Can someone please explain what this means!
Hi, can you show the full text of the error? Or better yet, open console and show all the red errors if there's more
robust crescent
reasons : your av isnt humanoid , its generic wich do not come with an animator , you have avatar descriptor on wrong mesh (root only)
very common error to see
humble beacon
@rapid arrow I just noticed from you older screenshot that your armature has a Root bone that the Pelvis is connected to. Some rigs made for animating have a root bone at the bottom of the avatar, used to move the whole thing if the pelvis is moved via IK. VRChat doesn't need that, normally the pelvis should be the only root. If you have that, delete that bone in blender
rapid arrow
Ok I will delete it
humble beacon
Also, how exactly do you re-upload the fixed model from blender into Unity? Do you delete the old FBX?
rapid arrow
Now i’m back with these errors. It’s like a constant loop
 humble beacon
Ok, so when you fix a model in blender, you would delete the old FBX from your Unity project and then import the new one. Once you do that though,you need to again specify the humanoid rig and configure it. After that it should be fine
 true cedar
Hey guys, not sure if this is the right channel to ask this, but...
I'm currently making my own repaint of the NKD Protogen and it kinda works n stuff, but for some reason it seems to track my hands only in 3 axis (i can rotate my hands n stuff but can't move them forward/backward) or at least it looks like it does that. This problem only affects my avatar, other avatars work fine.
the avatar is targeted towards quest 2 if that helps
humble beacon
true cedar
Hey guys, not sure if this is the right channel to ask this, but...
I'm current...
Hi, that sounds like a very weird issue, I have not heard about this before. I know the protogen arms are kinda short, maybe it just looks that way for you?
true cedar
no, i've used another avatar built on the same base and it works just fine
humble beacon
Ok, so what is different with this one? Just the texture?
true cedar
well that's the only thing that i've changed at least
humble beacon
Do the other bones move correctly? Legs, head?
Does it maybe have GoGoLoco or something similar
true cedar
humble beacon
Do the other bones move correctly? Legs, head?
i think so, havent checked it yet, lemme see
true cedar
humble beacon
Does it maybe have GoGoLoco or something similar
idk honestly
humble beacon
true cedar
idk honestly
Well, if the two avatars are built from the same thing, with only difference being texture/material, that's just impossible. Are your controllers working properly?
true cedar
ok so i've played with it a bit more
it seems like the position of my point of view is wrong on this model (its somewhere in the torso)
true cedar
humble beacon
Well, if the two avatars are built from the same thing, with only difference bei...
yes they do
humble beacon
true cedar
ok so i've played with it a bit more
it seems like the position of my point of ...
Ah, that was the next thing I was going to ask. The hans move assuming that your head is where the POV gismo is
true cedar
i've updated the view point position, hopefully that helps, thanks!
kind mortar
rapid arrow
Now i’m back with these errors. It’s like a constant loop
you need to map out the bones in unity
 gilded dome
Not sure if this is the right place to ask. I've just added an object that I can spawn/despawn with my avatar. Is there a way to make that object able to be grabbed and moved without using abstract scripts?
burnt goblet
I have to use OVR advanced settings to get my viewpoint correct on my avatar by -0.03 units (raising myself) because of its height (the rig is essentially perfect when i raise myself and fits all of my irl joints) and because Steamvr isn't very good at calibrating where my floor should be ( when i say this I dont mean in game i mean in the steamvr home application, i know vrc scales me to my avatar), Would this be something I could fix by reducing the height of my avatar (which I have attempted mutiple different times and it has ruined the inverse kinematics of the legs) and or trying to fix the issue with my floor being at the wrong height in steamvr? I know there are alot of different variables that play into this but I need a general direction, with OVR advanced settings not being updated in forever and it giving me terrible crashing issues whilst using it when playing vrc I so badly wish I could make my avatars viewpoint correct and not need ovr, I know kungs videos on avatar optimization exist however I feel like there is something im either missing or there is a certain method most fullbody avatar creators use to get perfect fitting rigs, I guess thats kind of what im looking for overall, Theres just gotta be something I'm missing here.


Since Yam-Yam is quite tall you'd think oh just shorten the thighs or the legs a tad but for whatever reason when I do this the legs seem to feel lazy and don't move at the same rate as my irl legs
Like I will have my irl leg at a 90* angle to my chest and the one in game would be almost half of that
I don't think Her neck really needs to be much shorter but That could be another direction I try to see if that maybe would also get me closer to where I would like my stock viewpoint to be
With the recent IK updates my viewpoint is now in the mouth/chin region of the face and no longer the center of the eyes
It is sometimes fixed when i use Head lock and hip lock kinematics however then when i look up or down my neck leans forward like a cat trying to yack something up, I know avatars aren't always exactly perfect but If I could just get everything close and all the little details sorted out I could be so much more immersed
I wish I could find some rig like the one they used to include in the SDK that I could use to see what needs to really be altered so I stop chasing my tail
fading verge
Any Blender wizards?
Is there a way i can copy my avatar's armature bones into outfits?
burnt goblet
Can I ask what you are trying to accomplish by doing so?
fading verge
Trying to copy the bones that are assigned to the butt to my pants.