#visual-fx
1 messages · Page 12 of 1
imho this goes more into #graphics and not #visual-fx
hey guys! I have forgotten the name of a node in the material editor for particles. I want to say its called "Custom Color" or something and it is basically just the same as the "Particle Color" node, but you can name the inputs for the particle system. very noob question. I have googled.
dynamic?
thats the one, thanks a lot! I dont know how I forgot,
hehe we've all been there.
I still have it with the scaleUVfromCenter node or whatever its called
cant say ive used that one? scale the UVs on the particle effect?
its for general usage, it doesnt scale them from 0/0 but 0.5/0.5 in uv space
can be handy for a lot of things
oh! I see it now! that is cool. it allows different scales on the UV... though I still dont know what the mask output is for
connect to multiply, preview it while changing values
Cool Stuff!
another one for you guys... this time I know the name and I cant find it... has "motion 4 way chaos" changed name? or just not available in 4.18?
@subtle idol Enable show engine content in the content browser and search for it there
No luck with that unfortunately :/ I just made a basic one myself for now I suppose
@subtle idol show engine content > click on engine content folder > search > motion 4way
its there
i just shwocased it on livestream :p
@fossil swan
How would I make a material for a radial (flat) blast material, where the width of the ring stays the same?
I dunno hwo to visualize this
the ring should stay the same width instead of getting wider (because bigger UVs to cover)
(The inner of the Ring gradually fades to transparent)
somethingsomething object size and use that to change the thinckness of your procedurally made ring
(bit busy atm so cant go into detail)
Okay thanks anways 😃
i'd use radial uv's
and a line
these are sometimes called Polar Coordinates
might be hard to find good radial uv function, this pack has one in it https://www.youtube.com/watch?v=NKWxG0Kaev8&feature=youtu.be

Check out the pack on the UE4 marketplace: https://www.unrealengine.com/marketplace/fx-and-ui-functions Check out the UE4 forum post for more info and suppor...
not mine, but has good example of ring doing what you described
portal FX
very basic material, similar to the thing i showed yesterday
@fossil swan . Im looking to create a spark FX for sword hits
the issue is that its VR, i cant control the hit direction
got any idea how could i do it? maybe have the fx work on the X axis and align it as needed?
what do you mean you can't control the hit direction? you mean you don't know in which direction the particles should move when you hit a target?
the thing is how exactly to rotate it
becouse for example there is normal from the hit
and there is also sword direction
so your sparks are not small particles, but actually a plane like this and you don't know how to always rotate them to the player?
When a Particle Mesh data has a mesh with 2 materials how does one identify a color overlife for each?
you cant really, though you could probably control one with regular particle color node, and the other with dynamic? if I where you i'd try to combine the two materials into one unless one is masked/opaque and the other transparent
i think my problem is moreso the shape of the item a ball fading out alpha takes longer then the spikes on it due to fresnal 😄
https://gyazo.com/052c5f7d6dda21b6db2b096e507a7fd4.gif starting to be disgusted by panners now and vertex colours

@celest birch looks weird. What should it be?

More Game Art Tricks: http://simonschreibt.de/game-art-tricks/ Article to this Video: https://simonschreibt.de/gat/stylized-vfx-in-rime/ This talk was given ...
working on this
If you want to mask the foam only in the lower part, you can mask it with a Linear Gradient
its meant to be at the top on the corner and the bottom
its also 4 pieces of geometry
still got a long way to go

anyone know why my materials detail looks completely different ive followed the thread and guides and i never get the same result
Again, this is more related to #graphics than #visual-fx
Will delete and post in correct area
appreciated! 😃
Hello guys, I have an illustration with glow (aura) around it and it shows correctly as a texture but when I try to make it as a material instance, the aura looks like a pancake. Has anyone come across a similar poblem?
image please, we cant help you without knowing what went wrong
Sorry, here it is. The first one (texture) looks correctly and the second one is a material instance and I was wondering how to make them match
@celest birch can you show your material graph?
@TadasJ#4765 you are using masked, need to use transparency.
(in the material editor)
Thanks! I'm trying to fix this now, but do you mean Transparency or Traslucency instead of Masked in the blend mode?
yuz
it looks like this now which is looking acceptable in-game but still rather different from the texture glow
and my graph is very simple
if you dont need color set it to unlit
and you might want to try and use a power or multiply after the alpha channel to tweak it

great, many many thanks!
np 😃

i think you can only set a min/max trough bp in that case
(afaik)
you also need to change the min/max output ofcourse
else its extremely slow hehe
@celest birch i think you're headed in the right direction, but i'd get a noise panning texture that has more detail so you can set it to only tile ONCE horizontally down the length
it's very clear that one shape in that texture is appearing twice at same height along waterfall
@indigo jolt yeah i'll do that at the moment im just trying to get the foam to look more like this

Hey guys, I've been pulling my hair over something for a few hours now- what's happening is that my anim notifies seem to trigger several times during gameplay instead of a single one.
I have footstep particle effect setup on my Run animation, which looks good in the animation editor (one single burst per footstep), and look good as well when I drap and drop the animation into my level- but on my pawn character each footsteps have multiple particle bursts happening at once instead of a single one, resulting in too many particles.
My animation is setup inside a blendspace, and is the only animation inside this blendspace that has anim notifies (so it's not other animation triggering notifies at the same time), I've tinkered with trigger weight threshold and notify trigger mode, to no avail...
Kinda hitting a wall here, was hoping you guys would have an idea
cheers ! 😃
@stark dust i had this issue and its all to do with the blending, between 1 animation to another
@celest birch That was my first thought too, but my run animation is the only one that has notifies on it, so the extra triggered can't possibly come from another animation in the blend space.
@stark dust again thats what i thought
if its smoke for example coming off the feet you would set it in the anim and then notify every frame the foot touches the floor
when i did it, it was appearing on all 3 stages of the blend, walk run and sprint
because dont forget its blending everything for 1 animation and then moving onto another
if that makes much sense
best channel to probably ask would be #animation
Thanks for answer 😃 I'll try #animation, you're right ! Cheers
@celest birch AH ! I figured it out- it's because my character is setup using several skeletal meshes, all using the same anim blueprint (it's a customisable character)- so each 'body part' is triggering its own notify. Not sure how to handle that differently though...
The SetMasterPose component was the solution, if anyone has the same issue 😃
Hello! everyone happy monday. Is it possible to set a particle's vector parameter to a random range?
@outer fulcrum nope, only trough code/bp
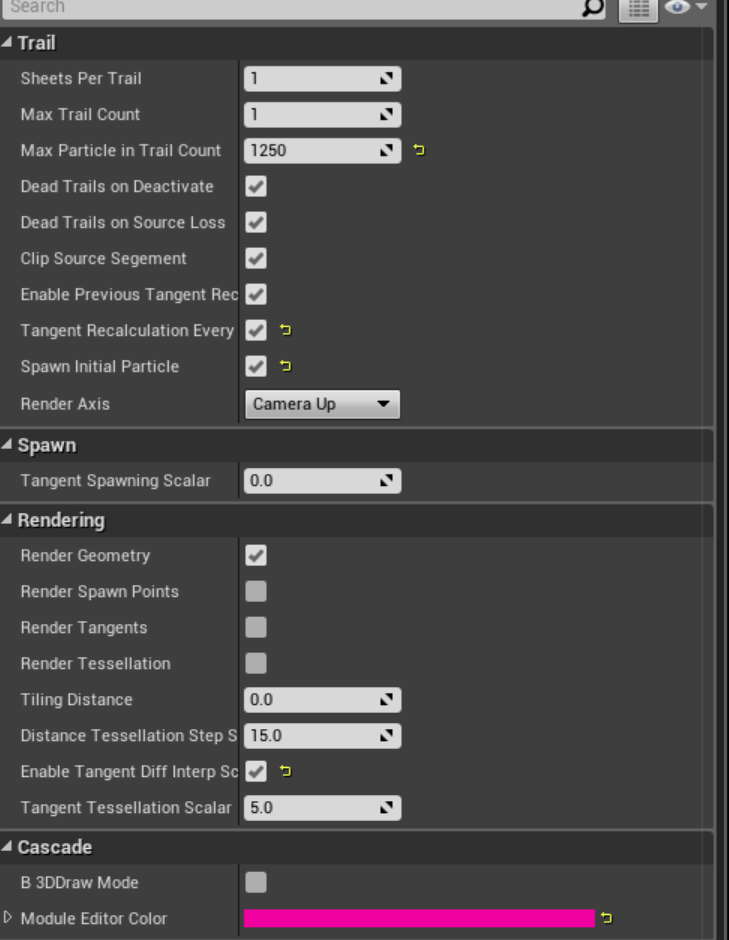
oh length of ribbons not controlled that way
they're kinda weird
like 3 things affect their length
one is Lifetime
another is Spawn rate (unless you're using Spawn Per Unit)
the it's the spawn rate inside that
and the max particles thing affects it but only in that it provides a "cap"
so set that at like 500 or whatever, then set lifetime to like 5 seconds and jack up particle spawn rate to 90 or something and you should get some really excessively long ribbons
there's only one OK ribbon tutorial out there, otherwise the documentation and tutorials for ribbons are kinda horrible tbh
so it's easy to get stuck
right so jack up spawn rate in spawn per unit
i think emitter duration might also impact this? i forget but might want to touch that too
btw what kinda trail usage you doing - following a different particle within same particle system?
as an arcing trail?
on a character?
any reason you're not using Anim Trails for this?
(ribbons still could be right answer, just curious)
they tend to be restricted to pre-defined animations, they're pretty awesome for that
but yeah if you are trying to get a trail that follows a player-controlled movement rather than an anim, ribbon is answer
so if it's locked to a player hand, you'll get super super short ribbons whenever you're not moving unless there's some existing Velocity added
which is kind of an annoying thing to force on anything that isn't smoke
works great if it's little wispy cigarette smoke trails....but yeah otherwise you're probably seeing your ribbon as like 3 inches long then 3 feet long depending on player movement i'm guessing
well that's best case scenario i imagine if you don't have some velocity on there
np
@celest birch complete shot in the dark but try adjusting spawn rate scale in proportion to velocity?
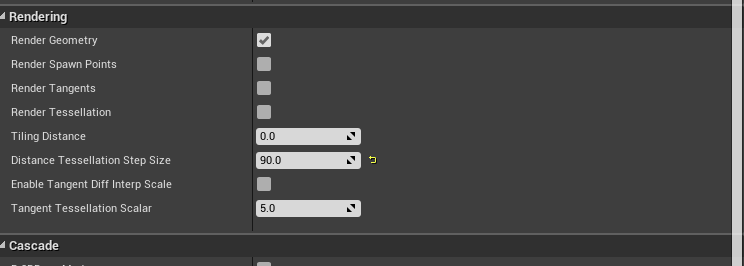
mess with these values https://i.gyazo.com/718cdc57f273ccfc25ad1f91573c89cc.png

tangent tessellation scalar and step size
i think one or both of those impact it
but to a certain degree there's usually a certain "shakiness" to ribbons if they aren't going along a very clean arc
it's something that i don't see as much in anim trails
so in a real-time VR situation with ribbon attached to hand, you'll usually want some velocity to keep the whole thing "taut" otherwise it starts getting shakey
and if you get the tessellation too high, you'll start getting overlapping poly shapes
which is super ugly
anyone know if interactive vector fields are possible in ue4
for example if an object enters the space it modifies the vectors
Additionally, vector fields may be reconstructed from a 2D image. In this case, an image much like a normal map can be imported and used to reconstruct a volume texture by extruding or revolving it around a volume. A static vector field may be added on top of this reconstruction to introduce some noise and randomness. Further, the 2D images may be animated by storing individual frames in an atlas texture. Doing so allows you to perform a fluid simulation offline and reconstruct the motion in real-time at very little cost.
I am guessing you need to use a camera actor to project a texture which includes the collision mesh (which is moving each frame) and blend it into the vector field, then modulate said field with a material which is changing. Is that possible? Does it require a precomputed atlas of frames or can it be generated and updated through a material
@celest birch for ribbons there is a paramater which controls how many segments are generated between each point, that will control the smoothness
@surreal willow Vector fields as in the stuff for GPU particles or texture vector fields?
@celest birch the GPU vector field (I think)
I want to create a global GPU vector field and then change its shape with a texture
Oh in that case I don't know
@Toku#6777 not something that can be done outside of the box.

Real Time VFX
我的一些unity作品 但是我的英语不是很好所以非常抱歉 Email:156984523@qq.com Some of my unity works, but my English is not so good so I’m very sorry.
@Toku#6777 Possible in general, not possible in stock engine. In any case quite performance heavy.
@bright panther is trying to do something like that, but afaik nowhere near releasable atm
Yeah, I’d like to add 2D to 3D reconstruction vector fields but its still a ways off for us right this second.
Though you can make animated vector fields without using an atlas

Thats 35 vector fields animated over time
@surreal willow
I used our software VectorayGen to generate each animation frame (vector field) and then spawned all 35 in a blueprint with an intensity of 0. On play each vector field would change intensity to 200 one by one with a .2 second delay between each. After each delay the previous frame is set back to 0 intensity. Doing it this way lets you animate freely.
Still a ways off from being interactive. Just depends on what you’re looking to do with that interactivity.
making an interactive installation which is using ar tech to track users
so the vector field needs to be modified realtime as an object moves through it
I know its super expensive but we have a good rig to sim it , however I think nvidia flow grid is probably the best solution but its.quite self contained with its paramaters
unreal docs mention you can animate a global vector field, however the actor isnt in the class list
and also cant used a baked texture atlas/anim
because I would need to use a projection of the collision actor in the vector.field to warp the field texture frame by frame
furthest iv.got so far is using cpu particles with collision, but the dynamics of the particles look bad. for example need to add a sinewave movement to the particles, oh and another issue is even if.I got the field working, gpu particles dont support trail emitters, as they have to have a trail
its basically like simulating beams of light which act like flowing water , that is interactable
Using a baked texture atlas won't give you interactivity. You'll literally have to program some custom stuff to get what you're wanting.
I may add features like that in our upcoming plugin, but it probably won't be in time by the time you need it.
Anyone use PopcornFx in their project?
"New: Added a Channel Mask material parameter, changeable at runtime and returns the selected channel of it's input." hnng
@errant shuttle i DID for a while....but it's really hard to quantify what PopcornFX adds to a project other than a lot of pre-made quality FX in one style + a heavy emphasis on being programmer-friendly INSTEAD of artist friendly
it subtracts a lot of very basic functionality from a project - like particle collision and ease of referencing parameters and materials
Really because I haven't been able to find any programming documentation
Maybe I'm just blind
it's basically a big "arrow to the knee" if you're a real VFX artist, but a delight to a programmer that wants lots of easy FX with no artists involved and minimal functionality with gameplay
really? our VFX artist is the one who requested we support it
i was the VFX artist that mistakenly requested another project support it
then we started hitting limitations that were absurd
what kind of limitations?
particles do NOT collide with anything
any beam data is useless since that needs to be controlled via Blueprints, not their own little C# type stuff
their particle lights are a cruel tease since they don't export
meaning you create particle lights, test it in there, then realize belatedly they aren't working and have to start all over to make them in Unreal
which makes you ask - why was i using this? what feature did it enable me to do?
The example project has colliding particles
oh yes i know 😃
but it also has a static environment collision
those particles will always collide perfectly in THAT environment
just not in any other
it's cute
they literally had to export their whole environment collision INTO popcornFX, then set that as the collision for the particles, then export out the particles with that one singular collision object as reference
it's bizarre
hmmm
I just created a new level and the particles are colliding
ah I see, static collisions
it's not all bad - it does give you a lot of pre-made stuff
if your goal is to take all their demo stuff and just "tweak it 20%" - sure
but honestly a lot of vfx is very modular and i'm not a fan of an "all in one" solution that makes it less obvious where my parameter controls are
siiiiigh, so stupid you cant set "Const Acceleration" to local space
i've wondered why constant acceleration has such limited features
wonder what a good alternative is for my gpu particles
drag plus more velocity it is hehe
yeah pretty much just velocity
can't do velocity over life with gpu, which is annoying
hope that all changes with nia
@bright panther Ok, Thanks man will see what I can do, I think we will have to use CPU particles for now as they have more interactivity
you cant spawn many of those though
yep thats the issue, cpu particles are super expensive, and updating velocity frame by frame is hard
May I ask if anyone knows how to keep 3D Widgets unaffected by Post Process Volumes?
@fossil swan im definitely buying that polygonal VFX pack
is exactly the kind of thing i need and can dissect
I finished it today, need to do the whole screenshot thing and description crappage tonight and submit it.
i buy a good deal of FX packs just to dissect it
same
i then tweak stuff a lot myself
some of my final fx for games end up being parts of multiple packs
I think after I submit this pack I'll go over my old ones and improve em a bit
I have a issue that I've been trying to figure out for a while. I'm fairly new to UE4 and don't have much experience with it. So my question is, how do you set up a plane static mesh to appear as though you are looking through a window? I've seen it done in several games in development but I've not yet been able to figure it out...
Would that be here or would that be in the graphics
channel?
graphics, but no worries. its also a visual effect
https://forums.unrealengine.com/community/work-in-progress/6671-watch-dogs-style-interior-mapping-material
https://simonschreibt.de/gat/windows-ac-row-ininite/
Building something cool? Tell us about it!
Thank you
Hey, does anyone have any experience with this implementation of rain? https://forums.unrealengine.com/community/community-content-tools-and-tutorials/42393-tutorial-let-it-rain-but-not-indoors
This is the place to show, share, and link to your stuff!
I've been working on it and have the system mostly setup, but I cant seem to get the render texture mask to line up properly with the rain particle itself... 🤔
need to add LOD's to 75 systems each with 5-10 emitters in em.. bleerghh
good luck
33 to go. kill me now pl0x
@fossil swan best way to do rain impact particles? eg could you have them in a spawn radius (say, a cube) and make sure they only spawn on a surface with a normal direction of up? is something like that even possible?
jw since I know you're knowledgeable on particles 😃
id either put it in the shader or post processing. no reason to add collision to that
fake it

Streaks on top, a tiling tex, distortion is animated so you can see the influence of the distortion tex on the left. Drops on the bottom, I use a very small but uncompressed tex that holds different UV values per pixel, this is used to distrib...
Likes
452
good point, thanks!
don't listen to him, use collision for EVERYTHING. only poor people have less than 4 video cards these days
going to have to bookmark that twitter link though....
read his comment??
god that's a clever method
i kinda wonder how it holds up at angles though
i think he's got it set to pretty much always shape the droplets at a sort of 3/4th camera view
that would go into UV's somehwere
what you have there is the generic setup for world-position-based UV's - great for tiling things when you don't want to fudge with UV stretching etc
any workaround to get particle trails on gpu sprites?
or is it possible to smooth the collision of particles on surfaces using cpu particles?
morning, I have a challenge ahead of me....trying to spawn multiple instances of the same actor and colour each one according to a property set at time of spawn.
Think blocks coloured per temperature.
What would be a good way to go about this? I'm worried about creating hundreds of materials on the fly which I think would bog down my game.
Was wondering about perhaps having a texture that is a gradient from green to red and shifting the UV coordinates for each actor, or am I overthinking this?
Seems like it could work. How would you determine the shift amount though? Seems like you would still need a dynamic instance to set the shift amount per actor
@jolly moth
@celest birch ...I'm not sure, not sure where to start so I thought I'd ask before going too far down the wrong path. When creating a dynamic material...does that create a new material in memory for each actor at runtime?
@jolly moth I'm not sure but I would assume so
Seeing as their parameters can be changed at runtime, I'd assume dynamic material instances are the most expensive version of materials. I'm probably totally wrong and it doesn't matter though. heh
Yeah perfomance from worst to best would be Dynamic -> Constant -> Normal
Ah cool. Hey, what's Constant? Instance?
Nice. First time I've heard constant. Didnt know what the difference between constant and normal was.
They use the term constant in the doc. Cos the values are constant at runtime 🙂
What's the diff between Constant and Normal?
I'd think setting the material on the mesh once on begin play, or in the constructor, to a constant instance would be the cheapest.
At least cheaper than a dynamic instance.
Constant is just a regular material instance. When I say normal, it just means a regular material that isn't an instance i.e when you open it, it opens the material editor
Ah, gotcha sorry. Weird. I thought it'd be more like Dynamic > Normal > Constant then.
Material instance is more expensive to use than normal but I can't seem to find the thread on performance
Got it. No sweat, I believe you. My assumptions have been corrected. No need to dig it up. Thanks!
Yeah I can't seem to find it 🤔 Basically, using 1000 of the normal material should be faster than using 1000 material instances of the normal material
But once you start introducing other "normal" materials, there's a different cost as well
Difference is probably negligible though. All in all, use instances where you can just to save on compile times
buddy @warm lintel er got niagara working on 4.19
https://twitter.com/ShadowriverUB
it has some very old code here and there but its more stable than 4.18 hehe

It's me and my awesome twitter! UE4 digger, LittleBigAudio YouTube maintainer 猫じゃね!すごい黒猫だよ! 日本語の初心者。私に日本語で話してみてください ^^ https://psnprofiles.com/ShadowriverUB
Tweets
15914
Followers
825
So I have a question for you guys that may seem straight forward but I’m racking my brain over it. I have a movable actor that can be crafted and placed. Once placed the actor can be lit. In relation to the actor scene the light will not move only change intensity. The light component will not be added to the bp actor scene until after it won’t move in game any longer. In this scenario would stationary point light save performance or be treated no differently than a movable point light?
This is a VR game so every perf save I can make matters
I’m assuming a static mesh fire material would be cheaper than particles right?
quite a few factors that would affect that
i think it's safe to say "generally yes"
make the fire 10,000+ triangles and translucent, and multiple shells overlapping...and use tessellation and world offset animation...then NO
sounds legit
this unlit material is lit yo
I’ll share a screenshot of the mat in thanks for the feedback
Maybe a asset download if its popping lol
hey guys, how would you go about blurring a texture sample? I currently have one with values either 0 or 1 (nothing inbetween) and need to make it blurred/smooth to go inbetween those values instead, sort of like a feather operation in photoshop
and for certain reasons cannot use spiral blur (as it uses a texture object)
there is some function on the forums for it, but its expensive af. easiest is justto blur it in photoshop
There was a spiral blur mat function in the engine too
@fossil swan @analog onyx unfortunately neither of those options will work, the texture is created ingame and updated dynamically, so it needs to be something in the material from a texture sample (a render target)
the texture is mapped with world position to the UV's, so i think(?) a texture object is out of the question
You guys ever did anything with hiding foilage if overlapped
Like if something is placed on top of it
During gameplay
only LODs with less geometry, so yeah, manual adjustments
@opal trellis Questions like yours arise from lack of understand what texture sample material expression outputs. Instead of stating that something will not work, you'd better describe, what you are actually intending to achieve. It will usually be more productive for you.
@analog onyx Like I stated I'm trying to blur a texture sample. I actually did get that to work however by using a radial blur node by using a texture object rather then sample, which so far is working
However, I now need to flip the output to correct the mask, but 1-x doesn't seem to be giving me the correct output
I'm not sure why, but 1-x doesn't seem to be doing anything at all actually. It just outputs white, rather than the inverse image 🤔
ended up getting it to work. had to make a custom map to range function, seems that spiral blur only outputs like a max of 0.1 or something strange \
@fossil swan This unlit mat is lit yo lol
Its on the bottom of a sphere mesh but it fakes a fire pretty well from all angles
and it seems to be pretty cheap
looks like one of the math-materials from the procedural math pack thingy
If you wonder how Niagara scripts are powerful. There is not acceleration right now in Niagara.... so i implement it my self with Niagara scripts :p first script sets Acceleration varable from module to particle on spawn, 2nd script apply acce...

hmm there is actully acceration but it a force :>
this script adds acceleration to particule
as varable
@warm lintel the idea is that the solver deals with integrating forces to velocities, and velocities to positions as you'd expect in any regular dynamics framework, and that forces can be applied in different ways (constant acceleration is just one of those possibilities);
of course you can roll your own, as you did, but it's not a requirement ;)
Be sure to watch our GDC tech talk for a deeper dive into the ideas behind it!
Yea i didn't look on all modules didn't noticed acceleration force :p
definitly gonna watch GDC talk ;]
You too @fossil swan right? :p
@fossil swan @analog onyx this is what those questions led to - https://i.imgur.com/OT8SQkN.gif - thanks for help and suggestions
anyone know if the GDC talk will be streamed? and if there is anywhere I can watch them
pretty sure the GDC site/subscription doesn't: stream stuff but adds it to the vault afterwards
@opal trellis Rain occlusion? You'd be far better off using 4-tap hardware PCF for that, instead of spiral blur.
anyone tag me here?
I blame discord bug
ah
@warm lintel Can you spawn particles on a mesh and mask them using a texture mask?
similar to what we can do in pfx: https://wiki.popcornfx.com/images/b/b6/Tuto3_preview_1.jpg


Neat! i'll have to give it a try and see if you can also use texture masks. Would be nice for some effects i have in mind hehe
@analog onyx mmm can you give an example of that? a quick google search does not come up with much in terms of ue4?
(no knowledge on what that is)
the spiral blur is only used on the ground material, but yeah efficiency is always good 😛
i experimented with porting shadertoy into ue4
porting some fire simulation/cloud thing
Ooh that's cool. Is it volumetric?

Are you just using the noise function?
and i mean huge
btw that noise texture is not even needed
just there for ease of porting
custom nodes copypaste code into a function
you can take advantage of the dumb copypasting
by doing something similar to a SQL injection
essentially, you write a custom node with the code:
return 0.0; } float function1(){} float function2() {} etc
and then, in a second node, you can call the functions
to make sure that unreal copypastes the top node before the other node, you need to put them in an add like this
Oh what I thought you meant by porting trick was some efficient way to do 3D noise
But this function trick is interesting. Is it documented anywhere?
The only trick I knew of was chaining custom nodes together but you have to copy the parameters to both nodes
This is brilliant
and it will be "global"
@celest birch this is hacky to a ridiculous degree
and might break if you try to have it portable
That's pretty funny though that you can just overload it essentially 😛
@mental quiver indeed
its becouse the custom node is implemented like this
        //literally copypaste the text box
}```so im doing:
       return 0; }
float myfunction(){
//whatever
} ```this is how much of a massive hack it is
Yeah, cool find though!
You should be able to include a standalone shader file from custom node too.
#include should definitely work
Is Niagara working in 4.19?
I'd like to get started with it, but dunno what exactly needs to be done to create a little flae for example
@sullen forge did that before.... in UE3 ;p and from glslsandbox as shadertoy didn't exist back then
What's a resource efficient way to color my particle systems depending on the material hit? IE: If I hit a yellow wall, I can reliably get the color from that and assign it to a particle parameter.
I've investigated the "Get UV Coord from Hit" stuff and found it to be a bit heavy. I'm currently trying to find a way to average the color of the material hit and use that.
use surface types to pick between various particle systems or particle parameters
with surface types it's pretty routine for wood surfaces to trigger one particle system and stone to trigger another etc
I thought about that, I use surface types already but for instance: I have a tile surface that can be any number of colors. Say I want to use this system for bullet impact effects, this solution wouldn't be tenable.
The day is almost upon us
excited, hope they upload the talk soon after the event
and also nice work @sullen forge didnt know you could create nodes with custom hlsl code, thats great
they said that all the talks will be streamed

@Luos_83 #UE4 #niagara There dynamic inputs :> not sure if you can make one in simple way https://t.co/SvukdFhGSx
Is it just me or UE4 Particle collision doesn't work in Simulation ?>
it often doesn't work in play/simulation due to "max collision distance" not being set high enough
it's a very stupid bug in Unreal 4 that's been around a while. they set the distance really low by default, then falsely demonstrate functional collision in editor...until you hit play, then they actually show what REALLY happens
NOt sure it was already mentioned in here, but these new released assets from paragon also contain many effects it seems: https://www.unrealengine.com/en-US/paragon

(when you click a character, you see that theres a number of fx within the package)
mentioned a few hundred times on this channel alone hehe
xD
we're all pretty excited. right now some mad genius is stripping out all the gameplay except item pickups, removing most of the characters and skills, and re-labelling it as a "survival game"
the first part is already done, so godspeed to this mad genius :p

just loading Paragon Sample, Gagdet is the guy with the blackhole, right? ^^
https://i.gyazo.com/6c69e3bab51e65912ecb4493cbb4693a.gif
https://i.gyazo.com/b2ec9808d74190822c706a8069931395.gif

i'm kinda curious how this stuff will match up to stuff like Riot's LoL vfx contests
which is sort of unfair - since half of those things are totally performance-implausible
but still, they tend to be pretty good
I don't like these vfx, too noise for my toon eyes ;P
and yeah, some of them are incredible heavy
i like the shockwave at the bottom
oh, and some of them are like .5 sec, you can't even see what's going on
the rest does confuse me though, why does that rubble come up vertically rather than kinda stabbing out - is that thing a power up or a damage attack?
regardless, i like how it's tech-heavy
i appreciate that about Epic - always using VFX and shaders that promote the engine tech rather than doing things the easy/obvious way
it's good for inspiring others
been going trough half of it, and its actually all rather simple. besides a few things its all rather straightforward.
once you know what each effect does, its often the easy/most obvious way
cheap but technically clever
i remember learning all i know about material tech by using Unreal Tournament assets in UDK 3
feel bad that current gen ue4 ppl haven't had that stuff to reference
this release will really help get people jumpstarted
It is quite interesting to go through the particle effects of paragon to be fair.
would be crazy not to
As of late I've noticed a few people mentioning Niagara - as if they're using it. Is it in 4.19? What's in 4.19 looks like cascade to me.
nm: i take it people are just talking about it coming in 4.20 sorry
you can use Niagara in 4.19, you just have to enable the plugin. You can then add Niagara Emitters/Scripts etc in the FX category.
but Niagara is still crashy
Alex just told me the vfx for the minions in paragon where made with niagara, so.. well.. you can download em
Hi, I'm working on a firework/confetti particle effect for collecting a coin in an endless runner
When I use burst to spawn the particles, it won't follow the player
I think it's because the emitter spawns the particles at the player's current location and since it's a burst, the particles don't follow the player as he runs forward
Is there any way to overcome this?
(I asked in physics section and I was suggested to ask here instead)
@mint warren You'll want to attach the particle emitter to your character so that it follows their movement.
I did but something like this happens :/ https://gyazo.com/2cdba45ef2fccba1bc4c36f4ea320443

As well your particles will need to use local space
I forgot lol
"local space" is an option in the "required" category of your emitter
another paragon question. I found this https://gyazo.com/0fda7f7f60c1beb96f2711965e433e22
apparently they attached this to the camera
also this mesh is part of it

any reason they didn't use a post process material with a mask?
maybe it was just easier that way
The inner area is cut out. this means those pixels dont have to be calculated. if you use a mask, the pixels are still calculated even though they are 100% transparent.
with a tech like this you save many many calculations in your vertex shader.
that's clever
post process materials operate on the pixel shader though, don't they?
WHERE BEING WATCHED BY A CLASS BOYS
yes, you iterate over ever single pixel on the screen and modify it via post process material
yeah, my question why particle with a mesh vs post process material
the latter would be my first impulse
I am just looking for best practices and found this
because the mesh has a hole where you wouldnt see the 100% translucent particles anyway. it seems to be an optimization
I wish we could preview stuff that uses depth-fade when using the node previewer. anything even thinking about touching depthfade doesnt show up.
here my video on new things in Niagara in 4.19

Sorry for bad mic quality, promise i gonna try to solve it next time
clicking
how do you reorder emitters
ohhh
thanks
that needs to be like a toolbar button or something I didn't think it was possible
was about to export all my emitters, delete then reexport them
yea took me a while to find out about it as well
then again, same with spacebar hehe
whats spacebar do
restarts in level
ya that's pretty useful too, but at least it's on the toolbar
I've been working on making a ribbon effect to trail behind a moving sphere, but no matter what I do there's a gap. so I had to solve it by adding another emitter that just emits a tiny single really short lasting particle to fill the gap
so hacky, probably better ways to deal with this, but it has to get done
that problem seems to be more present in preview than during actual game
color over life (its alpha) and the texture are proper?
ya, it starts at .25
for the alpha
I've been troubleshootign this problem for like 3 days
care to show me material and aol?
you dont need that 0 input one sincethe 0.25 one is identical
uses the soft one, but I've tried it with the hard one too and samei ssue
oh ya thats true
ive only had that issue when I hit stutters in framerate, not sure whats causing it for some ppl
it runs at 60fps
the ball is going pretty fast though, like 800 units for its initial speed
what is the aol?
can you show me the ribbon settings?
alpha over life. but you already showed me that hehe
recalc every frame can sometimes help.
Spawn innitial particle sometimes as well.
but yea, imho if you can hide that part with a small hiding mesh and it works, it works.
ship it :p
ive made balls with ribbons (odd sentence hehe) before, work fine most of the cases.
but I do agree, ribbons can be rather odd
lemme see if I still have the project
loading
hmm
material is a simple horizontal tiling gradient
you'd think you'd need Clip Source Segment off?
@winged nymph you gotta add like 0.5 to one of the UV directions so the texture is more on one side
ah just do this https://i.gyazo.com/045e2d170bfacfa668a90dc139e07c3d.png
the goal here is - you wanna get the texture jammed up mostly on one side
Hi guys, anyone know if there is a flare particle on the MP ?
Like this?
I'll give someone 10$ paypal if they can make me this ^ 
lol i'd feel guilty taking $10 for that
pretty sure that's the default smoke material emitter with the color over life set to like 90, 50, 10, at 0 seconds, then like 9, 5, 0 at 0.25 seconds and 0.5, 0.5, 0.5 at 1 seconds
I suck at particles :\
Just take the $10 ballsproblem!

Simple logo animation. Learn today.
So I made a simple cloaking effect with refraction for a character
But I don't want to just swap the material when the cloak is on
I want to interpolate between materials
but I have no idea how to do so
I see a MatLayerBlend node in the material editor
I bet that's the way to go
I see it has an alpha input, so probably pick the first material for input of 0, and the second for input of 1
and a mix for values inbetween
so probably you can hook that up to a variable parameter that you drive from blueprint
*MatLayerBlend_Standard
I'll try that, thanks
I have a question too 😛 I need a Material node that rotate the input, similar to Rotator, but that it just apply a fixed rotation (not a rotation over time, like Rotator does). How is such node called? :S
nvm, found it. Is CustomRotator
Spawn per unit can only ever be used in local space?
like local to the emitter, if you move the emitter it doesn't count towards the per unit scalar
in a material, how do you obtain the opposite vector for a vector expressed as a color?
I multiplied by -1 but I am somehow getting the wrong answer 🤔
What is the opposite vector for a color? Do you want the complementary color?
No, if my color vector represent the Forward Vector of my mesh, I want it to turn it into the BackVector so to say
the negate of the forward vector
is that the complementary color? I have no idea 😄
Well, for now I solved by adding another vector parameter and using the node NegateVector in blueprint, and passing that
though I would prefer to do it all inside the material, from the color version of the forward vector
Complementary
Adobe Kuler
Create color schemes with the color wheel or browse thousands of color combinations from the Kuler community.
you could use scale color
change it to constant
and input -1 in all values
actually that would be somerthing different I think
A vector, [0.7,0.7,0.1] and its -1, [-0.7,-0.7,-0.1] are opposites. However, the latter doesn't make for much of a color.
that seems like somethign you should make a parameter?
the opposite of red isn't -255 red it's 255 green + 72 Blue
in that wheel you linked, the opposite or red is green... so this probably require some serious math wizardy to be solved. xD I just go with letting the Blueprint node handle it then, don't worry guys 😃
ah, you're right, didn't noticed
I wonder if this color wheel is controlled with CSS
then you could extract the math
Well... though it seems like in that image, if you put a "vertex" on red, green, blue, then rotating is just making the numbers in the colors flow
from one vertex to the other
right?
like if you go from red counterclockwise toward green, what you remove from red goes into green
I think
To be clear:
Positions, directions and colors are not the same thing.
They all can be stored as vectors, but treating them the same way will give the wrong results.
so at 0.5 red and 0.5 green, you got yellow
Negate vector doesn't do anything with color. It literally is just -Vector.
Can confirm. Back vector is literally forward vector * -1
yes but blueprint has the Vector to LinearColor node
ya you can't OneMinus color
Both are structs made up of floats anyway
Complementary colors are not relevant in this discussion. I only mentioned them because there was some ambiguity in Marcus' original question.
oh I only skimmed the original question
Btw OneMinus and multiplying by -1 is not the same thing
oh I didnt realize that
e.g. 1 - 0.5 = 0.5 while 0.5 * -1 = -0.5
I am fairly sure that *-1 of the LinearColor version of the Forward version is not doing the same thing of getting the NegatedVector from blueprint and passing it with the VectorToLinear color transformation. This is because I am swapping them now, and the one from blueprint behaves correctly, while doing the minus one on the linear color version of the forward vector in the material editor, give the wrong behaviour
and I am using them to guide vertex displacement, so the wrong behavious is quite clear 😛
-> Btw OneMinus and multiplying by -1 is not the same thing
oh wait 😐
Need to multiply by -1 not OneMinus
wait wait xD What does OneMinus does?! O_O
OneMinus = (1 - X)
See my example ^
xD
a new pitfall learned
is the Actor Collison module a bit buggy?
I got it working on a stationary Emitter, but when I try to make it work for a moving emitter it doesnt work
and the stationary emitter's collisions don't work when simulated
but they do when not playing or when played in viewport
???
oh wow, it was because the EventReceiver emitter was set to use local space
In the material editor is possible to take a reference to a named parameter o_O?
I just need it to keep order, instead of running 1000 wires out of a single parameter
You should be able to rename it to the same parameter
And if you change the value on one, the others should also change
@surreal bay
nice! Thanks 😃
There is a way to drive the Panner node SpeedX and SpeedY settings trough variables? Would be cool if I could make a texture pan in the direction opposed to the character running direction
Well not only cool, is actually the effect I want to achieve 😄
Ah, I see how it is, that's what the Speed input node is for
Does anyone know how to integrate Nvidia Hairworks with UE4 (Unreal 4.18)
(Note: Please don't provide me the general link for the hairworks, I want to integrate with 4.18 like I said above)
@raoul#5339 The official ue4 hairworks branch should be an good starting point. You'd have to do integration to 4.18 on your own tho as said branch is 4.16.3 at the moment.
anyone in here with a spare moment to help me with a snow particle system ? 😃
the particle system is setup already - but i need to somehow parent it to my actor so it follows the character around
find character blueprint. double click it. open it. find snow particle system in content browser, drag it over to the upper left part of the blueprint somewhere near where it says something like "collison" or "character mesh" or something like that
change from event graph view to viewport tab
click on that snow particle system. drag vertically if needed or whatever to make it appropriately "high" above character
if you want to de-activate the snow or re-activate snow then you'll just drag from particle system into event graph and start doing some blueprint work - whether it's to activate/deactivate from a button click, or some other event
does Niagara support UI/screen space particles?
still struggling with a system I am working on :/
@gray inlet I asked for screen-space location particles, if they added that then yes.
that would be awesome
so many times where I wanted to juice up UI and had to resort to dirty hacks
A question: is there a way to create very simple line trail behind bullet in unreal engine?
Unity had thing called trail renderer
when I used it
Ribbon trail
if its a straight bullet can also use a sprite or mesh
@gray inlet i didnt seen anything like that in 4.19, i think this something that would be needed to be implmented in Slate :> But you can code particles to follow camera
Ribbon trails would do it, if your bullet/projectile actor was an actor, and not a trace sort of solution. Even then, you could probably have the ribbon trail follow the path of the trace with some magick.
again though, mesh or sprite is way cheaper.
I feel like that was a dumb question.
REEEE
lmao
where's the stream?

oh of course lol. Thanks
You snappy s.o.b
They're late, dammit. S'okay though, hopefully they fix audio issues and squash any presentation bugs.
how do I make a reflective particle that can alpha over life
I was about to say that list on the Niagara stream wasn't long enough, then got to "And the list goes on and on...", lol
Oh my. Custom HLSL nodes in Niagara graph? Weeeee
Niagara looks really awesome, but gonna be lots of homework to do
ya Cascade is pretty weak on interfacing
yeah there was a plugin but it was pretty limited to the set particle parameters
woo houdini support
100% importing from Houdini?
dunno probably the baked anims not the nodes
da f<3 was that demo?
they exploded a skeletal mesh, then switched the skeletal mesh and had the explosion play back, basically?
they exploded it by sampling areas of the mesh into colored particles same time it swapped from the mesh to the particle mesh
Im not sure about that flickering though
I missed the first half, is there some kind of ribbon data type for GPU emitters now?
in 4.19 ribbon is particules conencted with ribbon, there ribbon id parameter which i susspected defines which particules are connected with ribbon, but it didn't work, or else i did somethign wrong
ofcorse this might be changed in 4.20
in 4.18 only sprite worked
in cascade cant connect ribbons to gpu particles
only supported on cpu particles
but I saw some demo of some orb which had particles with trails rotating around it, mb they were gpu
it works differently now or well.. soon
you mean diffrent from what i seen in 4.19?
no idea, only did tests in 4.18, but they said that 4.19 is months behind current development
they branched it a while ago and 4.19 is closer to 4.18 niagara than 4.20
thats good
I wonder if there's a way to specify global constants, for consistent color scheming across multiple particle systems without having to set parameters.
Material parameter collections
A global container for material parameters
Someone got lazy:
https://gyazo.com/8bd96d033578fce17d2c60b76a3e150b

@junior matrix I mean for the emitters. I guess with niagra you'd just specify a new data source and pull from gameinstance or whatever.
@charred stream something that wasn't covered in the talk due to lack of time was Niagara parameter collections that allow you to do just that - you can pull any parameter from a collection (e.g. color for all your fire emitters) and then change them all at once by changing the color in the collection
Hope you all liked the talk and what we showed!
@rotund quartz that sounds perfect, thanks! The whole thing looks excellent to be honest.
Was the talk recorded? I missed it 😩

Multistreaming with https://restream.io/ State of Unreal 9:30am - 10:30pm PT Cinematic Lighting in Unreal Engine 11:00am - 12:00pm PT Creating Believable Cha...
link goes directly to the Niagara section
Thank you!
I hope there's a prelim release sooner than 4.20
I just want to get ahead on figuring it out
What's the difference between Size by Life+ and Size by Life? Don't see any difference in the settings.
@fresh harness - The niagara implementation in 4.19 is a bit outdated to what was shown in the GDC talk, and what's slated for the 4.20 preview
Got it. Thanks!
in cascade the + indicated a refrence to another module
so two modules could share identical settings
and by tweaking one, you also tweaked the other
not sure if they keep that in niagara
Check out that hour talk from the GDC stream, and you'll know quite a bit about Niagara 😉
every time i hear "mesh trail" i get a little moist
being able to convert cascade effects somewhat to niagara is hnng.
@fossil swan Niagara VFX pack when? 
4.21 :p

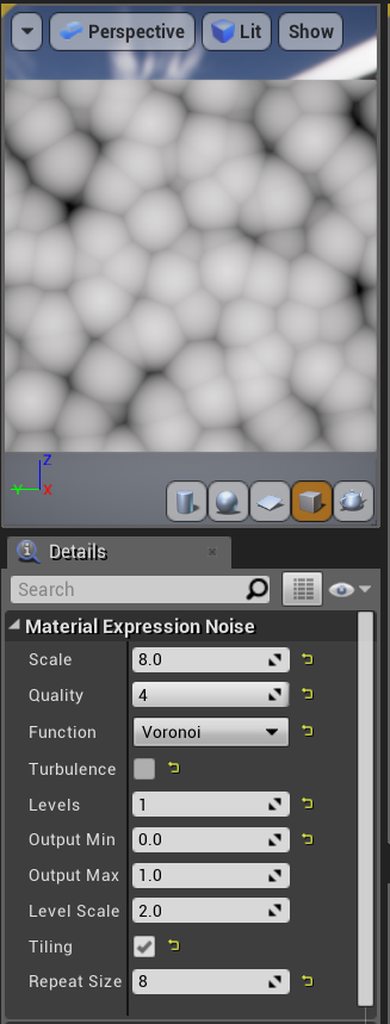
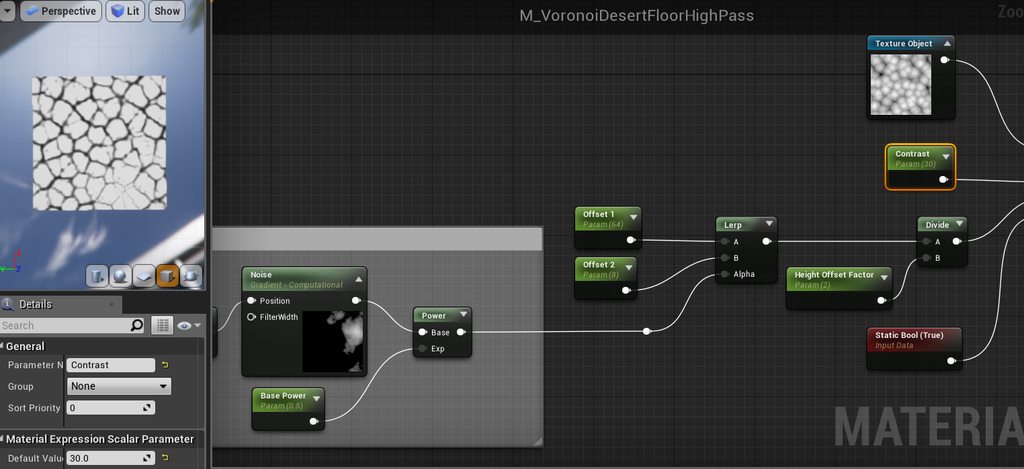
So I've been playing around with this tutorial on baking textures using noise in UE4 https://www.unrealengine.com/en-US/blog/getting-the-most-out-of-noise-in-ue4 and everything's great except for the life of me I can't replicate the caustics texture result. Granted there's not specific guidance on getting to it but I suspect someone here might be familiar with this?

Unreal Engine
UE4 has had material based procedural noise for some time now, but most users have had to limit their usage of it due to its high performance cost. We have addressed these needs in Unreal Engine 4.13, and here's how you can get the most out of it.
Lol, I'm sure it makes perfect sense to the graphics mastermind that is Ryan Brucks
if I use 6 octaves = 6 * 8 = 48
I can get the desired result for cracked desert floor but the caustics seems impossible
it gives me 'something'
did you try recreating it in 4.13?
and also, which type of gradient did you use?
cause ya know, there is 3 gradients actually 😄
@celest jasper one moment and I'll screenshot some results
great docs, like always ;P
a poorly documented side project with stupid scalar parameter names
Yeah the reference param names and what Brucks refers to are entirely different lol
Anyway that produces a good voronoi noise, I haven't quite figured out how to add noise to it without getting some annoying noise inside the "bubbles"
did you recreate the materials yet?
@celest jasper I can do a cheap imitation of the "desert floor crackling" but it lacks the noise added in step 2, still working on getting that right
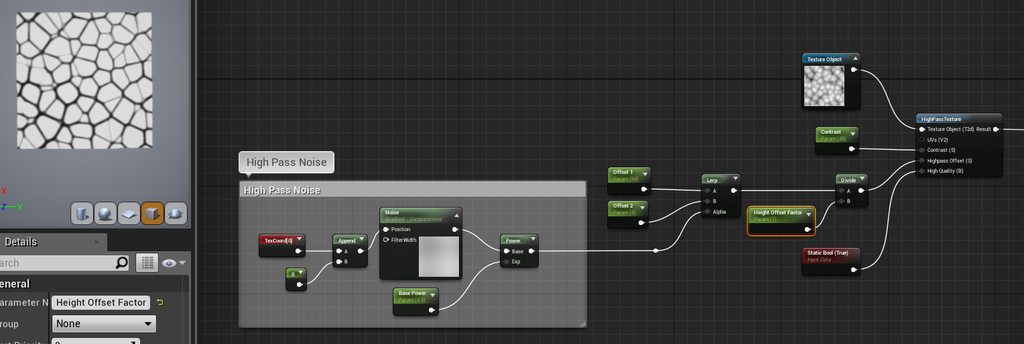
Not entirely sure how Ryan Brucks did the gradient noise step but I assume it's just 1 level
I should note that in 4.18 you don't need to divide the highpass offset by 2048, evidently something changed since the guide was written
brb
crap
how is that gif app called
where it's uploading directly to their site
gyazo

I'm no marble expert
But I think this is going into the right direction, right?
@obtuse seal
@celest jasper it's getting there, good work
After some more number manipulation I think the desert floor crackle effect is looking pretty close to the original, still getting some lines cutting across the tiles which is due to the gradient noise in the high pass, still not sure how to clear that out entirely
@fossil swan so what you think of niagara scripting? :> you think you will be able to handle it? :p
probably not hehe but we'll see
the wizard speaks
i'm absolutely terrified of it
Well it is very similar to tick ;p
when Ryan Brucks steps up and makes a 10 minute "quick and easy" demonstration of how to do some kind of super advanced compound effect with gameplay integration included...i shall watch this video
so far no one has demonstrated anything more complicated than "burst stuff in all directions"
the main awesomeness is its just cascade on steroids, with added benefit of being able to make your own modules, and you have "cascade instances" to say it in somewhat laymen's terms.
only thing people may have trouble understand is parameter maps
Olaf reading this will probably slap me silly but meh :p
like if someone shows how it can do branching, photo-realistic beam-based lightning that can be dynamically cast from a player controller to varying targets of varying lengths that would be kinda impressive. or if it did some projectile-type go-to-target action with adjustible target-loss graphs or something
if it's not making hard problems less hard....i gotta wonder what the point is
I think once you getthe hang of it, and you gain a collection of modules, it should be fairly easy
Luos how about we will do hangout when 4.20 is out? :>
yea for sure
well i hope so, i think i'll probably hang back a smidgen and wait on other people to demonstrate the value
on preview? :p
well, besides it not being stable for at least another few ue4 versions, odds are itll take a while before clients etc really adopt it for games unless they just start out
thats gonna be an annoying transition. one client being cascade, the other niagara.
i wonder when that point comes where I am like FFUUUU CASCADE
Didn they planed conversion tool? :>
i kind of remeber to hear about it long time ago
yea, but eventually
i hope there will be enough modules to get you started so you don't have to build the most basic stuff yourself first
they talked about that yesterday
they said they want to do that for 4.20
majority of work is all the basic modules
ah, cool, havent finished watching the niagara stream yet
i can show you what is in 4.19 but there deffinitly missing a lot
your video is already on my to watch list, just hadnt time yet :/

im finally 3/4th into watching and taking apart all the paragon vfx hehe
this is moduels on spawn
spread is mine, set parameters is moduels to set invidual parameters in parameter map
so oyu can apply simple dynamic inputs etc
this is update https://gyazo.com/9c8e6724312661370dc6af185ee4c1f6

yea lifetime and uncategorized are my stuff :p
hope i will have time to dive in after we shipped our milestone on monday

hehe biggest emitter in paragon. 67
i don't like making particles move, so i render a new one frame by frame for every location i want it to go, all with bursts set with micro-second time variations
just like all normal people do
so what exactly is that emitter doing?
ill record it in a sec
nah, massive explosion
holy shit😱
ah
funny thing is, its only one system out of three probably spawned at same time
that small bright dot is about the size of a player
the weird red lasers seem to be disoriented. they should be chunks getting sucked into the core really fast
not sure whats causing the offset. perhaps since they are for the cores in paragon they are set to their original height? iunno
played a few rounds, but I had the luck to have recieved it for free.
this on other hand is a goldmine
only in my wildest dreams could I imagine taking these effects apart
which is why ive been doing so for the last 4 days hehe
wildest dreams? I thought that's Dragonball FighterZ?
nah, that be naruto. but thats a tier above paragon for me
i kind of hoped that they would release the paragon assets for free, after i found out they gonna kill the game but i thought it would be at least one year from now
and that I know for sure I'd never be able to take apart myself
though the next naruto is on ue4, so who knows. (if the same vfx artists are working on it)
yeah, this games have some amazing VFX

NARUTO SHIPPUDEN: Ultimate Ninja STORM 4 ROAD TO BORUTO - All Ultimate Jutsus/Secret Techniques (No HUD Mod) Every Ultimate Jutsu/Secret Technique with no HU...
think ive watched that one at least 20 times by now
😂
their timing is just
https://giphy.com/gifs/americasgottalent-agt-americas-got-talent-l2SpK9FYJFK5QY78Q

i also liked the bayonetta stuff, even though it was only the first game and it was on ps3 back then
yea for sure. same with the devil may cry stuff
one of the vfx artists who worked on that is actually somewhat active on realtimevfx.com
and if im correct the uncharted vfx person is one of the lead --if not THE lead-- guy running the website
havent visited it for months even though its really cool, just too busy with work >.<
yeah i think he is running it

uh... what?!
rando paragon effect
with and without textures
lul
you'd think its just a sprite and a few sparks hehe
yeah, the mesh movement makes total sense
no idea what's happening
wish I had a proper computer, my cpu is melting when I open Paragon assets
it's kinda funny how blatant the use of basic "cloud noise" is on that little blue impact explosion
k, Riktor, Serath, Sevarog, shinbi, and twinblast to go. ill do those tomorrow
after that I might pick one effect I'd like to recreate and do so
my plan is to recreate some of the "infamous: second son" stuff for some time now, maybe i will try it with niagara and on the coming vacation
yup, that has some sick stuff, stupid ps4 exclusive though, can't play and see the effect while playing myself
loved those effects
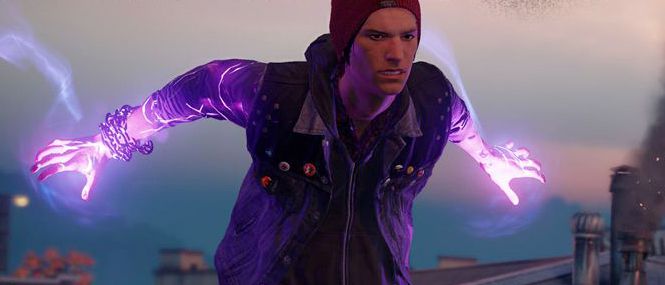
Behind the particle effects in inFAMOUS: Second Son, a new game where the hero conjures up an array of smoke and neon powers.
yeah, the talk is awesome that's where i got the idea
< afk
all those procedural fluid/disintegration stuff, I want to see it happen on my screen when I press a button
they uploading yestoday talks 😃 still dont see niagara thru :p
Join us for a first look at Epic Games' new Unreal Engine VFX editor, Niagara. This new suite of tools is built from the ground up to provide unprecedented p...
gifed

does anyone have an idea why my meshes don't have a material in my scene, but they do in cascade
actually they don't have a material in cascade, but they do in the mesh data's mesh parameter
hmm apparently I never applied my material changes
Is Collision (Scene Depth) supported to Mesh Data types?
Hey guys,
I was wondering:
What's the best practice for spawning particles on a very large scale ? (I'm thinking ambiant air particles on a large open level for exemple)
Set initial location & spawn rate to an exagerrately large range ?
depends on what numbers you are talking about
you can have one large particle system
preferably GPU particles
oder several smaller ones, so they can be culled
or
just attach one of them to the camera
depending on what game you are making
generally best to attach to camera
you can't see a rain drop 50+ yards away and any particle location module that covers several square miles will not be able to cull particles via LOD for you because you're always going to be same distance from emitter
if you could actually cull particles based on particle distance from camera that would be one thing - but you can only cull visibility, which does nothing for efficiency
so you have to cull based on distance from particle system itself instead, which means making your emitter relate to your camera
you could get around this by making a giant grid of weather particle systems via blueprint so you'd constantly be walking in and out of various particle system LOD ranges
that is inadvisable
Thanks a lot guys !
last night I made a coin particle system that spits out dimes, pennies, nickels and quarters as meshes but I couldn't figure out how to get them to land on both sides, just one or the other. since Scene Depth collision doesn't work with meshes I made an event drive system that kills the first particle on collision with world static and spits out an event that creates a new coin where it lands that doesn't move, but has a random mesh rotation on the Z axis, but if I try to make it land heads/tails it can end up 45 degrees and not perpendicular to the ground. What I want is a checkbox that "uses extremes only" for Y axis or for the X axis
is this possible? or is there another solution that exists?
I might just make them nonmesh particles with heads only just so I can use Scene Depth
I'd rather them bounce than have thickness and unique sides
@winged nymph you could try faking it by having particles which pull from a spritesheet 🤔
At least, to enabled scene depth collision
but thats more draw calls then
it uses one material and texture atm
well
hmm
I could make them gpu particles and just give some of them heads and some tails
you could only really tell what side you're looking at when they've landed
this is the texture I made so I guess I could do that
I'd assume it's not something you would look at closely if you're using particle meshes so it might be easier to do something like that
ya thats a good idea
hehe coin emitters. brings back memories
https://www.youtube.com/watch?v=BqKl2i5SsXQ
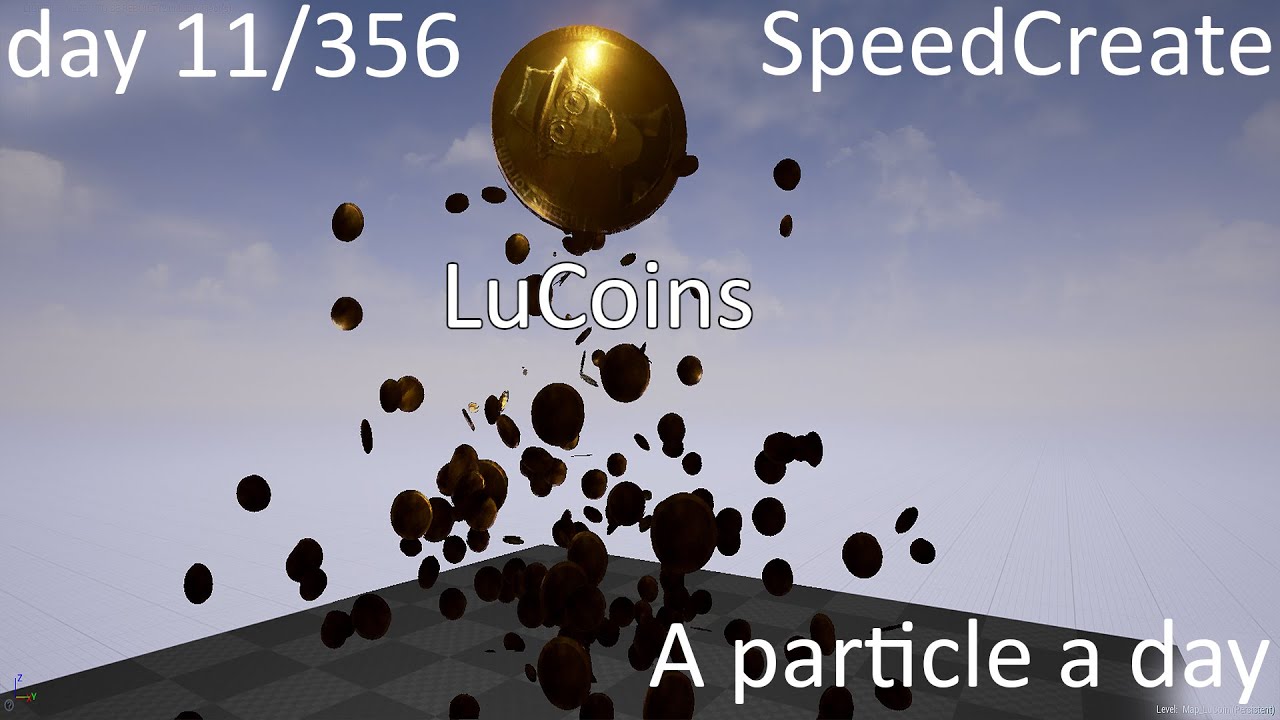
LuCoins - Speedcreate Seriously, duck this thing. Its a fricking cylinder but 3dsmax was like "Gnagnagna, lets crash all the things, it would be a shame if s...
Yeah no kidding

Just a silly commercial I made to show off what my Rigid Body Emitter Script Can do.
One of my first scripting excercises
you arent a vfx artist untill youve done a coin effect XD
nice @fossil swan I was looking at your fireworks kit on marketplace today, might get my company to buy it
I hope it's usefull for them 😃
so I found this super old electro impulse on my hdd, is it even worth it to put it in a portfolio? seems to simple, I'm not sure, hahlp!

would need to make a prop for it and make it cooler
hm... I think I'll throw it away
speed up and you got a good core for an explosion hehe
I think I loved that one, because it was made in a material, and I actually used BP timelines to change the different noise expansions
aw.... if Luos says it's a good core, I think it's worth to finish, thanks mate! actually needed that right now! < 3

So anybody who has been following me spamming #paragon #vfx gifs this last week and would like to have the gifs..
Here is a download with (almost) all the gifs I posted on twitter over the week. (330mb)
https://t.co/EDfwkKE6YA
enjoy! @UnrealEn...
holy smoke
330mb gifs
unzipped
wait, do they use refraction for the background distortion?
yea, a dithered refraction most of the time
I wonder how much it improves refraction, since dithered also comes at a slight cost.
I made a list of questions about the vfx paragon and that was one of the first. once list is complete i'll probabl nudge mr Elek & co
food now.
reading your twitter
there is actually some questions I have
and that was the first post I read 😅
holy smoke, so many responses from epic
@fossil swan the dither is so the effects can have actual lighting and shadow
its not needed if you use forward render
as forward render can use full light pass even on translucent
tho that light pass is expensive as fuck
I'm not sure where to put this... I use this
SceneTextureLookup(UV, 14, false);
in a material custom node, but it appear to scale weirdly if a resize down the game window
does anyone had this bug before ?
SceneTextureLookup expects scene texture UVs, and those might not match viewport UVs.
I use the "ScreenPosition/Viewport UV" as input :/
One of these material expressions allows you to choose which UVs it outputs in the settings. Use scene texture UVs.
I can't find that node... Do you know how it's called ?
hello, I am looking for a way to control the thickness of the lines when using a Wired material.
any tips or suggestions on how to better approach it? The current wired material is very subttle.
Does someone know where I can find material node code in the engine source code ?
@lusty saddle Material expression is called Field of view. Alternatively you can Call GetDefaultSceneTextureUV to get proper UVs in custom node. Source code for for material node can be traced down to HLSLmaterialTranslator.h
@outer fulcrum Give the wire some emissive. It will make them thicker. Alternatively can use something like that: https://forums.unrealengine.com/community/community-content-tools-and-tutorials/1414334-wireframe-material-part1-the-not-so-manly-way
https://image.prntscr.com/image/E8wu3dZ6Q7ul2Y-RbgI3-g.png
There had been quite a lot of questions about wireframe and edge highlighting materials on discord
@sullen forge its still a translucent material, and you wouldnt want refraction to cast shadows so I dont think the dither is being used for actual lighting and shadow.
hello hello newb here.
question, is there a way to distort the uvs of a subuv node when using it in a mesh particle?
same coordinate sys disturbing the uvs with a normal map looks oj on texture sample but not on texturesubiv
Guys can you help me understand why this material isn't displaying properly? -> https://www.parallelcube.com/2017/12/05/outline-effect-part-1/

Learn how to create games using Unreal Engine 4, useful tutorials for beginners, intermediate and experts
it is supposed to be a mesh oultine post-process material
But I am getting this
the yellow flying cube is the post-process effect, not outlining the black cube at all 😄
I've straight copied that setup, as you can see
the only difference I can notice is the ScreenPosition node, which has 2 output pin
and is different from the node in the tutorial
and if I try to connect that custom node directly to the emissive, I get this error
You on 4.19?
[SM5] /Engine/Generated/Material.ush(1413,12-83): error X3004: undeclared identifier 'GetScreenSpaceData'
@celest birch yes
They changed the way you need to get UVs for SceneTextures
So instead of plugging in ScreenPosition into your Custom
I never studied HLSL yet, can you tell me how to get it? ^_^
Try adding this into the custom node at the top:
float2 ScreenPosition = GetDefaultSceneTextureUV(Parameters, 14);
You might have to change that 14 to the index of the CustomStencil buffer
I don't know the index off the top of my head but if you create a SceneTexture and literally count how far down it is in the list minus 1, you'll get the index
I'll try, let's see 🤗
Edited the code to use your variable name
the Custom node HLSL tiny window is hard to work with, there is a way to get a better editing window? :S
You can copy and paste into your own text editor and then repaste back into Custom node after changes
Can also use #includes: https://forums.unrealengine.com/development-discussion/rendering/1409859-custom-hlsl-tips
I'm not that experienced with shader development but needed to get an external shader working in UE4, without using a custom build of the engine. After banging my
But just copy paste for now
so given this as a starting point
float offset_h = SceneTexelSize.r * Thickness;
float offset_v = SceneTexelSize.g * Thickness;
 float2 ScreenPosition = GetDefaultSceneTextureUV(Parameters, 14);

float TL = GetScreenSpaceData(ScreenPosition + float2(-offset_h, -offset_v), false).GBuffer.CustomStencil.r;
float TM = GetScreenSpaceData(ScreenPosition + float2(0, -offset_v), false).GBuffer.CustomStencil.r;
float TR = GetScreenSpaceData(ScreenPosition + float2(offset_h, -offset_v), false).GBuffer.CustomStencil.r;

float ML = GetScreenSpaceData(ScreenPosition + float2(-offset_h, 0), false).GBuffer.CustomStencil.r;
float MR = GetScreenSpaceData(ScreenPosition + float2(offset_h, 0), false).GBuffer.CustomStencil.r;

float BL = GetScreenSpaceData(ScreenPosition + float2(-offset_h, offset_v), false).GBuffer.CustomStencil.r;
float BM = GetScreenSpaceData(ScreenPosition + float2(0, offset_v), false).GBuffer.CustomStencil.r;
float BR = GetScreenSpaceData(ScreenPosition + float2(offset_h, offset_v), false).GBuffer.CustomStencil.r;

return max(TL, max(TM, max(TR, max(ML, max(MR, max(BL, max(BM, BR ) ) ) ) ) ) );
what I should replace with UV?
Just add this at the top:
- with ScreenPosition
float2 ScreenPosition = GetDefaultSceneTextureUV(Parameters, 14);
And remove the ScreenPosition input from your Custom node
even with that though, I still get [SM5] /Engine/Generated/Material.ush(1414,12-83): error X3004: undeclared identifier 'GetScreenSpaceData'
I remove that as well?
No
The tutorial should be using SceneTextureLookup
Gimme a moment, I'll edit the code for you
thanks 🙌
though I really need to learn this stuff, how do I get to become a wizard as well? 🤔
float offset_h = SceneTexelSize.r * Thickness;
float offset_v = SceneTexelSize.g * Thickness;
float2 ScreenPosition = GetDefaultSceneTextureUV(Parameters, 24);

float TL = SceneTextureLookup(ScreenPosition + float2(-offset_h, -offset_v), 24, 0).r;
float TM = SceneTextureLookup(ScreenPosition + float2(0, -offset_v), 24, 0).r;
float TR = SceneTextureLookup(ScreenPosition + float2(offset_h, -offset_v), 24, 0).r;

float ML = SceneTextureLookup(ScreenPosition + float2(-offset_h, 0), 24, 0).r;
float MR = SceneTextureLookup(ScreenPosition + float2(offset_h, 0), 24, 0).r;

float BL = SceneTextureLookup(ScreenPosition + float2(-offset_h, offset_v), 24, 0).r;
float BM = SceneTextureLookup(ScreenPosition + float2(0, offset_v), 24, 0).r;
float BR = SceneTextureLookup(ScreenPosition + float2(offset_h, offset_v), 24, 0).r;

return max(TL, max(TM, max(TR, max(ML, max(MR, max(BL, max(BM, BR ) ) ) ) ) ) );
I feel bad to be using a piece of code that I totally fail to understand why it works x_x
Just try messing around with things and eventually you'll learn
the message changed to this [SM5] /Engine/Generated/Material.ush(1414,12-83): error X3004: undeclared identifier 'SceneTextureLookup'
Oh right, create a new input on your custom node
And connect a SceneTexture node to it and set the texture to anything besides SceneColor
Input name doesn't matter but I usually just name it SceneTexture
This is the more popular resource for outlines btw: http://www.tomlooman.com/multi-color-outline-post-process-in-unreal-engine-4/

Post Process using Custom Stencil and Custom Depth in Unreal Engine 4.9 and above to display a multi-color outline post process effect.