#visual-fx
1 messages · Page 6 of 1
what does sell like hotcakes are lighting systems like Sky Creator and Ultra Dynamic Sky
those really are, "drop this actor in and instantly get beautiful lighting"
but you're still not going to look like a AAA game
I have open world survival project. It has mountains, pine trees, grass etc.
I use HQ textures, anti-alias, but it still looks crapy
lighting
Using Ultra Dynamic SKy from fab
now, art direction. and that's the hard part.
Talking about the visual only.
drop in some screenshots (probably to #lighting ) and get some critiques
visuals are art direction
ok make sense
The default sky system has decent lighting, imo. I might have to switch
here's excellent art direction. but also required years of choices and work that you probably wouldn't want for your own game

lighting artists are a full time job. one guy who does amazing work, for example: https://www.artstation.com/pscionti

he achieves these using mostly off-the-shelf tools. built-in unreal stuff plus a few things like sky creator, ultra volumetrics
but they are just cooking implements in the hands of a master chef, who could also probably make a great meal with whatever tools you give him
you could look up tutorials from lighting artists on youtube. frankly i find most of them to be bad at explaining what they're doing. mostly gut feel
the video i linked above is one of the few that feels like a principled, reproducible approach
These are helpful. Thanks a lot.

Dayummm! Niiice!
Hi All.
Wondering if someone could help please. I notice that my shadows are great while in the centre of the map but the further I move towards the outskirts of the map the lower the quality of the shadows? Is this some setting?
Thanks in advance.
Can anyone recommend a guide, or study material, on creating the muzzle explosion for firearms as a visual effect?
Don't have a recommendation, but depending on what you're doing muzzle flashes can be very simple effects, especially for real handguns or stylized version of them. Sometimes you can get away with just flashing a static sprite, maybe with some sparks and smoke. If you're doing something more si-fi, that's where it gets more interesting.
I bet if you post this in #lighting with some screenshots one of the gods there (probably harlist) will know.
Ok, thanks!
Hi Team! Let me know if I don't have the correct channel
I'm trying to create a uniformed fracture on a marble bust to use in a sequence but I keep getting these shapes jutting out from the mesh when I click fracture. I understand that fractures are typically only used for simple geometry but i'm just wondering if it's possible to create them for more complex meshes without having to simplify the shape further. Before I cave in and just use my ultra simplified version (2nd image)


It looks like its struggling with planar meshes from the hair and trying to boolean the mesh with it. Normally boolean/fracture works best on solid meshes.
Yeah from what I remember Chaos doesn't play nicely with non-manifold (not closed) geometry.
Got it. Guess i was being too hopeful to think i could just turn my actor in to static mesh, cut and apply marble material and boom, that’s a bust.
I’ll tinker with it in blender more before i give up and just use the decimated/remeshed version

Thanks for the info @split crane & @split hawk
Ended up remeshing and decimating the model in Blender, because it wasn't as smooth and geometrically complex I just switched out the marble texture for something that matched the simple design. Still satisfying to work with for an upskilling challenge in the end!
Next time I want to try and blow up something simple but larger with VDB explosives. Too much fun.
OEEEHHH! Stunningg!
is it possible to fade out fractured parts instead of having them scale during removal?
nope
When Chaos was in early development I asked if we could get a fade-out time input for the material editor, then we could define our own removal effects the same way we can for foliage
Got no response, and it never got added so I guess the answer was no
that sucks :\
but it tracks, i was playing through lords of the fallen and saw that their destructables just blink out of existence after a second or so, guess they didn't like the scale either
I just saw a video about benefits of using a custom tonemapper used in hyper realistic games such as Unrecord.
What I want to achieve is a less saturated transition between colors and ligth/darkness. They charge 30$ for information on how to do this which seems a bit steep for just information. Do you have any pointers on how to make such a tonemapper?
https://www.youtube.com/watch?v=j68UW21Nx6g&t=3s&ab_channel=AiAngel

How some game devs are REDEFINING color theory.
Patreon ► https://www.patreon.com/c/AiAngel
Gumroad ► https://aiangel.gumroad.com/l/URTM
The difference can be seen here:

Hey guys. So if you wanted to have a big gaseous nebula behind a space station in a scene, would you use a niagara system with fluid sim or would you use a mesh with a
volumetric material or something else entirely?
presumably it is far in the distance and doesn't move?
a skybox
lots of good ones on fab
anything else will eat performance needlessly and probably not look as good
That's what I would normally do but I need it to be wrapped around and interact with the space station. It doesn't have to be crazy performant because this is just for the title screen of my game. It'll literally be the only thing in the scene.
whatever's on your title screen you want to be pretty lightweight so people aren't dealing with 3 fps before being able to turn their graphics settings down
volumetrics by default don't render on medium or below
the safe approach would be something like translucent cards
boring but after all you're probably only looking at it from one angle anyway
That makes sense. More of a traditional approach with some sub-uv animation
https://www.youtube.com/watch?v=NXPNcDA5G-I
like this is what the menu of a high quality AA game by an established studio looks like and i think it's all flat images

What you get when you fire up The Talos Principle II.
Title Screen Captured on a PS5.
Click Subscribe to get new game title screens right to your feed. It's all we do!
3d scene orginally, sure, but rendering it down lets you keep high visual quality while keeping FPS high until people can get their settings in order
Totally makes sense.
Much appreciated
Now the challenge will be to make the vfx in my scene (to be pre-rendered) looping
Hello, I have 2 post process materials. One is a see through walls and the other is an outline. All actor when set to render custom depth to true show both this effects, but I wanted to set outline for some and see through wall to others. How can I make this?
use stencil buffer to distinguish
can you explain more?
look up stencil buffers. you can give each mesh a stencil ID based on whether you want see-through or an outline or both or neither
I got it working, thank you so much!
The videos full of bullshit claims and misinformation
Im sure theres nothing a bit of colour grading cant do to get her results
has anyone managed to get animated vdb's with variable bound size properly placed into UE5?
I know the main tenants: Move volume to origin from centroid, then apply the inverse of that xForm into a CSV list and reapply in the sequencer, also mult down the scale by voxel size
but I can't seem to get 1 to 1 placement, and it's driving me bonkers
hi not sure how I would go about making ink droplets drip from a squid, I want to make it look like this I'm not sure where to start I haven't been able to find a good video for it


download link:https://www.unrealengine.com/marketplace/en-US/product/water-dripping
water dripping setup video unreal engine 4 : https://youtu.be/UjhdCP03xnY
water drip from high up Unreal Engine: https://youtu.be/TnFsqVjQb30
Water droplets are uniquely designed with high quality incl. You can choose between the speed (drops of water, fast raind...
Are there any Unreal Engine experts?
Probably
Im using a hacky scenecapture method for smoother lighting on my character, and I know scenecaptures arent good for performance, but in this case the resolution is 1x1, as I only need the centre pixel to determine brightness, do you think that would be an issue? not sure how best to compare performance with and without since the different wont be noticeable for me https://gyazo.com/e27bbc18652c2f123c2fe2dc9e7a68b1

but uh, the main concern is this

this thing has to be running nearly every frame, so I imagine this is a horrible idea but again, its only 1x1 resolution, so I dont know how much that chages anything
Yeah that function is bad. It will flush the GPU pipeline. You need to setup a staging texture, copy the 1x1 rendertarget to the staging texture, then read the staging texture a few frames later.
To do it every frame you'll need a few textures in flight. I can't remember the exact details but I'm sure there's some guides online. You need to use RHI commands.
yeah I should have mentioned, I’ll definitely only update it based on how quickly the player is moving
what’s a staging texture though
Doesn't matter. You should never call that Read Pixel function at runtime. It will cause major stuttering.
Staging texture is a texture allowing transfer from cpu to gpu and vice versa.
in that case, since it’s just 1x1 anyway would it actually be at all better to directly use the render target itself and skip picking the pixel? I couldn’t see a way to do that though
and I can only imagine that would be worse but I don’t know
ideally it could kinda somehow just get the brightness on the material itself and skip the scene capture entirely
Unfortunately what you want to do is not simple, due tocpu/gpu interop and pipeline etc.
Yes, if it all stays on gpu it's easy. Reference the RT as a texture in the material, no need to copy.
Scene Capture perf is also bad, but can be optimised somewhat by limiting what actors are rendered, show flags, etc.
oh yeah that literally only renders the single component needed
come to think of it that’s a good point, although wouldn’t it be essentially doing the same thing just in the material instead of the blueprint?
hmm, I guess material would probably let me skip the need for a pixel check thing
Exactly. Reading the RT on cpu is the difficult bit.
oh right yeah I see now
It is perfectly possible, but tricky and requires some in depth knowledge.
oh god I just realised though, how would this even work on enemies in the first place
since the render target is a specific texture
Maybe if you explain what you're trying to do someone can advise a better approach.
just making nicer looking lighting to fit with the cartoony style, left is with my method and right is a regular material (a very bright light to show it clearly)

I can see that I might need to skip enemies though
really all I need is lighting to affect a whole model at once but for years I’ve not been able to find any solution for that, only recently tried this hacky scenecapture method
subsurface seemed like a decent idea but not really any use when lights behind the model make it glow
I see, and you want the characters to respond accurately in shadow etc.
Often, characters have a separate lighting rig that does not affect the world (key/fill/etc via lighting channels). But they are usually constant not tied to location.
I've never tried but I wonder if there's a path somehiw using dynamic reflection probes.
yeah I think I heard of that while searching but I’d have no idea
Try setting up a key and fill light that only affects characters. It might be good enough.
what are those?
Look them up! Basically a couple of spot lights that affect characters only. Softens the lighting, makes them pop a bit, etc.
Classic film lighting technique.
oh right yeah, wow I think I might have actually tried some of that in one of my first ever projects
but the thing is there’s always the problem of just getting closer to the lights
I suppose I could have characters lit by 2 channels and use the 2nd one for fill lights to try to even it out but I don’t think I’ll be able to get it right and it will just really bug me
yeah idk it doesn’t seem very possible
it’s just that now that I’ve seen my idea in action, even if the method to do it was unusable, I’m not gonna be able to let it go
Does anyone have a thought on why a cascade particle's collision works on a packaged build, but not PIE? is it something to do with frames? i have a Meta Quest 2 standalone packaged, in which the particles collide how they are supposed to, but when i PIE, the particles won't collide. PLus, i noticed that the amount of particles spawned in the packaged build are halved, versus in the editor where they are spawning as they are set to, but no collision.
you know what, subsurface material affect honestly achieves the effect I need just fine, but the reason I was looking for another solution was because of this visual problem. I get this is kinda the whole point of subsurface but is there a way to prevent that?


(in case you cant tell I havent moved the player here, just turned him to face the light, view angle affects it)

I want some feedbacks plz
https://youtu.be/CEnfLPiGrVY?si=WvtwN4RLRlcqgvxq
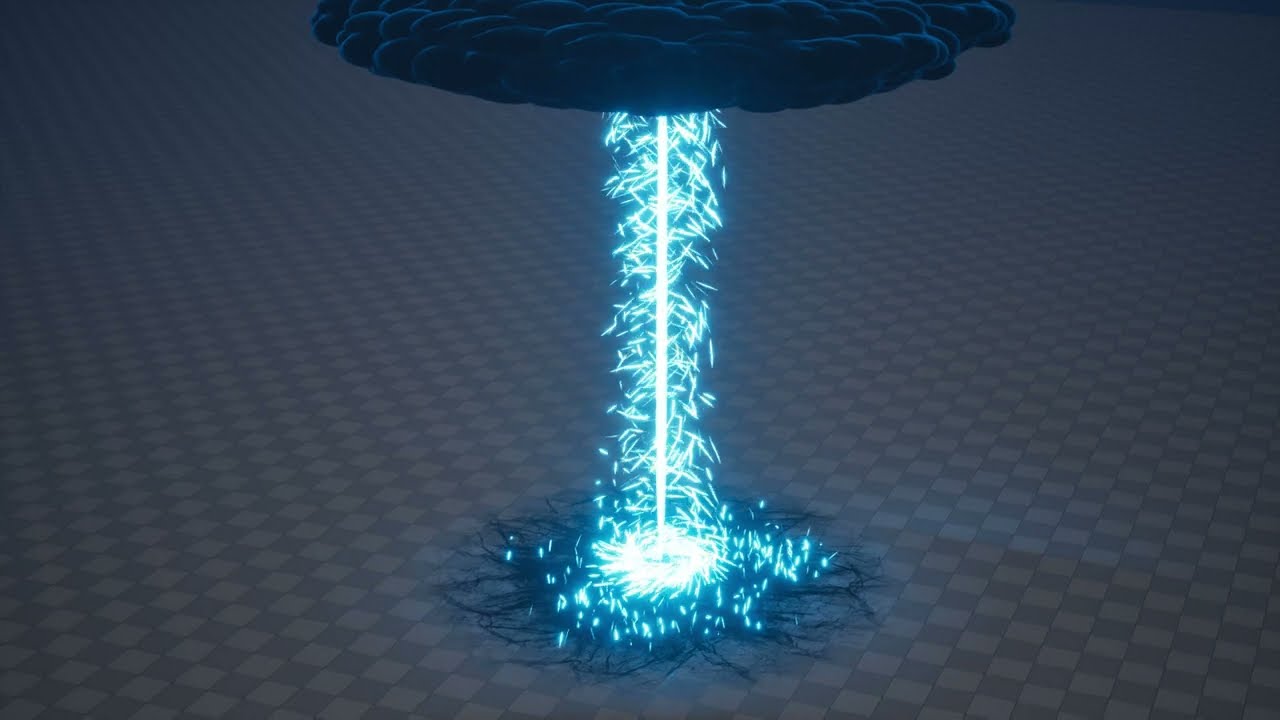
Discover my asset pack on fab : https://www.fab.com/listings/8bb71027-67ff-4883-acc6-058f54477088
Supercharge your game’s combat sequences with this dynamic Lightning VFX pack, designed specifically for Unreal Engine. Packed with high-quality lightning effects, this collection includes a range of electrifying assets, such as lightning strikes, ...
hi, quick question, should I use postprocessing to do a simple outline effect on any mesh?, I tried using this but doesnt work:

this works only on spheres and things like rounded cubes, etc.
otherwise it breaks
seems like that way of using overlay materials breaks on 5.4+
Does anyone have any ideas on how I would go about do impact fractures using chaos, think of spots where the enemy hits the ground and it fractures, I dont want to shoot piece flying just break the ground a bit
Does anyone have a tutorial for how to spawn a vfx aligned to a spline?
I have a character that lays a spline path as it walks and I want there to be a firetrail wherever it went.
what do i have to change the make the spars a continuous jet?

hey everybody
I have a question if someone has already had some experience with this. It's regarding volumetric clouds performance.
(the following measures were done in-editor as you'll see)
I have a (fairly) complex material for volumetric clouds that uses material layering system (because its much easier to author it) and I have noticed a peculiar problem regarding performance.
So, the pattern of Volumetric Clouds performance goes as follows:
- When the sky is overcast, fully filled with clouds, the performance i extremely good. (around 1ms)
- When the sky is EMPTY, no clouds are there, the main coverage map is 0, the performance is THE WORST (around 6.6ms)
- When the sky is cloudy with lots of visible sky, the performance is not great and should be better (from 3 to 5 ms, depending on the amount of clouds)
here are the screenshots of the measurements
Anyone has any idea as to why, and is there a better way to profile it. I already tinkered with different combionation of Conservative Density, but I haven't gotten any good or consistent result, as it is right now, the final cloud structures are going into conservative density and from there to Extinction pin of the material.


Have you tried setting Conservative Density to constant 0? It would give you the potential uplift you could get from it.
I wonder if calculating full extinction and passing it as conservative density makes sense.
Isn't the point of conservative density to avoid running the full material?
It's possible I'm misunderstanding what you mean but that's what I'm getting from https://dev.epicgames.com/documentation/en-us/unreal-engine/volumetric-cloud-component-properties-in-unreal-engine?application_version=5.4#performanceandscalability

Epic Games Developer
Settings and property reference for the Volumetric Clouds Component in Unreal Engine.
I think it is, I've read up on the documentation about it... but I'm still kinda boggled by it due to me not reall understadning the conservative density visualization that I get, and the fact that I'm using a material layering system for the clouds
I wonder if you would get a performance uplift by just disconnecting conservative density
They suggest having a "rough" cloud blob as conservative density R channel, which I tried hacking in, but i still don't really get any different result, on the profiler nor in the visualization (to claryfy, everything's cyan in the visualization)
Don't you run your material twice now ? ( I'm just guessing though )
in what sense?
First Conservative Density is evaluated, and than based on the result the full material is run ( or not )
so, currently, my final calculated density goes into the Conservative Density, and then via the Volumetric Cloud Input, i plug the R channel of that input into Extinction
the suggested path would be to plug the rough cloud shape into the conservative density then via the Vol Cloud Input get the R channel and do erosion on it (one would also imply to have the erosion and large detail noise in the G and B channels of the COnservative Density)
All in all, im still kinda confused on how the conservative density is supposed to be setup and what to expect in the visualization
If half of what you see is the sky so why settle for defaults? This talk takes you from the foundation of setting up Volumetric Clouds through to fully dynamic and procedural skies to demystify volumetrics and help developers face their atmos-fears!
there's this video, but Im not getting the expected result in the visualization...
Ah, I forgot about the fact that you can get conservative density with Volumetric Cloud Input. In my case I was able to approximate conservative density with some math
so I didn't have to access it
sorry for my ignorance, but what do you mean by "approximating conervative density"?
ah, just calculating where the cloud is and where it's not with some math
ShowFlag.VisualizeVolumetricCloudConservativeDensity shows the conservative density provided by the artist from the material graph in red. And the cloud in the other channels. This is what I found through udn
Outputting 0 through Conservative Density should skip more expensive calculations and that was what I focused on.
Ty for the info, I'll look into some solution more tomorrow.
Would need to see the material but this basically sounds like conservative density is not being used effectively, performance being better during overcast situations isn't unusual as the raymarch will be terminated once you've hit the max density, which in overcast situations is most likely going to happen before you hit the max step count
Your conservative density input should be as inexpensive as humanly possible
Some additional advice from my own experience: Sampling high resolution volume textures is expensive and at least when I was last working with volumetric clouds, they didn't automatically select the appropriate mip level for volume textures. You can set the mip level explicitly to save some performance but I found it was usually better to just use a lower resolution volume texture in most cases (as opposed to computing the appropriate mip level during the raymarch step)
I sample one 128^3 SVT three times, where one is set to MIP 1 and the other to MIP 2, and one to MIP 0, you would consider that a too big of a texture rez?
I actually haven't tried with sparse volume textures to be honest, I'm not sure what their performance characteristics are like.
When I was working with regular volume textures though 128 was fine, but going lower was always faster, and it's worth experimenting with lower resolutions and deciding where you think the quality tradeoff isn't worth it anymore. I also found that using fewer samplers was usually a good way to get performance back
Sampling 2D textures is also much faster so if you can avoid sampling a volume texture in the conservative density portion of the graph, that should help a lot
You may be able to get away with using higher resolutions on SVTs, since they are sparse... not sure, you'll have to test it
use spawn rate instead of spawn burst instantaneous
When the sky is cloudy with lots of visible sky, the performance is not great and should be better (from 3 to 5 ms, depending on the amount of clouds)``` There are three directions to follow. First is lowering expectations. You will not get detailed shapes, planet scale view distance performace and image quality at the same time. Only two of those at best. Reducing trace distane is the most impacting factor. For the empty part, you need to make use of conservative density/empty space skipping. One common pitfall artists fall into is using it too granulary. If regions of conservative density are not large enough to shut off a dozen of samples from at least one warp on screen, it will have very limited effect. Lastly, adjusting resolution in time and space to fit what project needs. @silk moonthat can be both fairly acceptable and disasterous, depending on scale at which you are sampling. If this 128 cubed texture covers too little area, it will completely devastate cache
then... there is night and day difference between sampling 3d texture and 3d SVT texture
former is done using efficient hardware fetch and interpolation
latter is done with complex layer of indirection and software filtering
it is ungodly expensive
instead of using SVT, you should use ordinary texture, potentially mip mapped, selecting mip level according to projected size of current material voxel
and use a separate 1 bit texture for conservative density
Not prefiltering volumetric data for volumetric fog and clouds is source of noise. If the data is texture and not a function, it is also a source of poor performance.
After bandwidth problem with texture you have under control, second step would be checking what can be decimated from math, and there is one particular area being absolute world position
Before it was not a factor, but now with large world coordinates, the transforms hidden behind using it alone will hit your raymarching loop
quick question, if I wanted to have a selective black and white effect (most things are black and white spectrum, except some hand chosen elements)
would using post processing a good approach or should I go materials route?
post processing can likely solve this for you all in one go, but it depends on exactly what the effect you want is
and how you want to deal with things like reflections, lighting, or GI that can colorize materials that are otherwise grayscale
in post processing you can include or exclude by stencil value, which is pretty straightforward
but then it might look weird if an object, not subject to the effect, which is gray, picks up blue reflections or light bounces from a blue object that has been included and turned grayscale
@grim briar @analog onyx Managed to incorporate Conservative Density into the material properly, and I've managed to shave off many miliseconds with this. I might look into and experiment with the difference between SVTs and 3D Textures later, since I'm pretty happy with the current performance.
One thing to note is that Emissive input acts interestingly with the Conservative Density. But isn't that important now. I'll also try and implement Empty Space Skipping when I figure out how to actually set it up in the material.
Hey all. I'm using a standard collider with post processing component and a post process material to create underwater effects in my project. I would like to have a water splashing on the camera lens and then flowing off of my lens efect when I submerge/emerge. Is this done with a post processing material as well or something else? I'm just not sure what to even google to get started learning.
this would generally be categorized as a "screen effect"
ok. that got me some instant results. I was searching things like "lens effect" and "post processing material" and it wasn't giving me what I needed
post processing is a sensible way to do something like that. not the only way. you could also do it in world space with particles or a mesh, or as a widget
I'll experiment. In my case I have a dirt mask on my camera because my player is wearing a spacesuit with a helmet so I want them to feel like they are actually in the helmet. So a post-process effect would be good. But I'm beginning to wonder if I should just have the player camera be inside of a helmet that is only visible to the player to give a better feel for being inside of a helmet.
Thank you!
Could anyone with Ultra Dynamic Sky or something similar simulate long exposure photography?
Hey folks. I have a niagara fluid sim based water surface in my game and for some reason it's not showing up in my standalone testing. I see it just fine in PIE but not if I do standalone. Anyone know why that might be happening
Yes I have the plugin enabled.

Fab.com
Slash and attack trails for any melee gameMaterial for weapon aura includedPreview and Integration2x Basic3x Fire1x Water1x Frost1x Blood1x Darkness1x Electric1x Wind1x Sand1x Holy2x MagicType of Emitters: GPU (Best for performance)Number of unique effects: 15Number of unique Materials: 9Number of Material Instances: 39Number of Textures: 78Dis...
ty
How can i get HeterogeneousVolumes to show on Android Vulkan Mobile (Quest 3)
SVTs do not work with the Mobile Renderer.

Epic Games Developer
An asset that stores baked simulation data representing volumetric media in Unreal Engine.
Thanks for letting me know. Is this related to maybe getting it to work someday?

mobile will probably always be missing features on desktop. sometimes it's "we haven't gotten around to it" but maybe more often it's "we don't plan to support this on weaker hardware"
i have no prediction here
is it possible to create a niagara system instance?
https://gyazo.com/e91f65eb71934e4b84571b46d608ce4a
Does anyone know of a possible way to create this sort of 2D glowing effect in Unreal Engine for collectables. I'm pretty sure this is like some sort of 2D billboard sprite that always faces the camera, but you can see here that it also animates to create this shimmer effect, and I'm not really seeing anything online that could lead me in the right direction on how to replicate it in Unreal.

overlapping translucent meshes with opacity dropoff from edges
unlit

Ooops. I feel into a rabbit hole and produced a 3hrs long frankenstein video :D It started as a simple introduction course to volumetric clouds, and then I kinda went off track and went bananas with weather system, vfxs, tools and what not. It's a wild ride :) I hope you'll like it though.
LINKS
Documentation: https://dev.epicgames.com/documen...
So I've got this system in my prototype that makes the vignette increase in intensity based on my player tiredness state. The only issue is that it seems to overwrite all the previous post processing settings as well when I try to do it like this. There is a post processing volume in the scene that I give new post process settings. I'd like to only update the values I defined in the make post process node. (there is only one post processing actor in the scene)


Feel free to ask for additional info if you know how to solve this but I didn't share enough information
Issue is Make Post Process Settings is using blank values everywhere else. You'd need to provide the original values as well.
I would instad recommend adding a Post Process Component to this actor whose job is just managing the vignette settings. Give it a high enough priority to override other PPVs. Or I think you could set the vignette properties on the camera directly.
Yep if you set a post process setting that inside a camera it’ overrides a PPV actors setting so I would just do it in camera
I've got a lot of different post processing stacks planned for this prototype. Will this impact performance if I keep stacking them on top of eachother like that?
You could make a post process manager, build a default post process struct and instance that for all your different use cases.
Then when you come to changing one in world just do a
struct -> break members
Post process class -> set members
And connect them both up. Could even go as far as to set it up on an enum that calls and changes the post process based on the enum called
i would expect it to be trivial. can take one such PPV, ctrl+paste it a bunch of times and check your profiler if you want to be sure
Fair enough, so the workflow would be to add multiple volumes and blend them on top of eachother right? Just like I did with the in camera post effects blending on top of the world volume
Worked like a charm btw, thanks

yes, all a PPV does is modify the inputs to the post processing stage, and it only modifies the inputs for fields that are enabled on that PPV, so a PPV itself is doing very little
so i recommend using as many as helps reduce your cognitive load
and having one per purpose tends to help sanity

also makes it easier to enable/disable one thing at a time
my scenes usually have one each for
- exposure
- color grading
- materials
- lens effects
- DOF
you wouldn't happen to know if scene view extensions get rendered in the mobile previews if mobileHDR isn't on, would you?
I don't exactly know which chat to ask this in - but I am working on a shock-wave attack in my game, where an enemy creates an expanding ring the player has to jump over. My question is..... how do I do this? I see plenty of games made in UE have this, where it is represented by a 2d ring that always remains above the floor, and the player only is hurt if they touch the ring itself.
I assume this would be done in Niagara? But.... I have no idea where to start or how to do any of this - I tried googling and searching youtube, the best I found were videos made 9+ years ago.
any suggestions, direction, or instructions? (and if there is a better chat to ask this, by all means, just point me in the direction QwQ)
I don't know how familiar you are with Niagara, but in case you're not one basic thing worth mentioning is that Niagara isn't well suited for driving gameplay interactions. In other words, when something like a damage ring happens in a game, you can think of it as 2 parts: the gameplay interaction, and the visual. The gameplay interaction typically refers to collision shape or CPU trace logic, and is what actually determines if the player takes damage. This typically runs in blueprints or C++, and is invisible to the player. The visual is what the ring actually looks like, and this is what Niagara is designed for.
Like most things there's more than one way you could make this damage ring, but one way is to make it a blueprint with a collision shape and a Niagara system. The tricky part is getting the collision shape for the ring, but you could make a simple ring mesh and use complex as simple for its collision complexity.
I'm very new to considering VDBs for direct use in engine, and wanted to get people's thoughts on its rough performance. Is it something that can be considered for real-time use in set dressing? I know the files can be huge, but does it kill frame budgets? I'm targeting current gen consoles and mid-/ high-performance PCs, and want to know if it's a pipeline I should learn or if it's not meant for games.
vram is a real, real limitation. a lot of people out there have GTX 970s on 4GB VRAM
i'm currently on my backup GPU, a 2060 with 6GB
i wouldn't rule it out but would hesitate to use vram for set dressing
Thanks! I've done some digging since I posted, but still wasn't sure. I exported a VDB of a small smoke sim from Houdini and it was almost 1GB all told. Not quite what I want to be doing with my resources. Thanks for putting it into context with the 970s. I was looking at 6GB and not wanting to do it. Taking up 1/4 of 4GB total for that would be insane. I know the Valley of the Ancient demo did some cool things with layered smoke techs. I'll rewatch how they did that and see if I can learn a thing or two. I was hoping to reduce the pipeline overhead, but looks like it's still a bit far off for this in particular.
How Can I make a post process like this?


look up lens distortion tutorial
bodycam tutorial to go a bit further
but... post process dont have lens distortion 😦
yes, you make a material for it
hence suggesting a tutorial
so this pale yellowish or greenish effect is because of lens distortion right?
wait thats bodycam effect,I already have that
lens distortion distorts shapes
the yellowishness is either lighting or color grading
I did everthing with color grading. but it didnt work


are the lights yellow
in the original backrooms location pretty sure the wallpaper was yellow too
red floor will dominate over a lot of yellow lighting anyway
basically there's not one trick to getting your lighting or oclors the way you want
like what do you want to change from what you have now? do you want to match the reference exactly?
Well because,thats looks pale and I dont know why,but it's looks good. But i think it's same with mine,It's like that because of lightning I think

the carpet is a very saturated red. opposite of pale
i think your walls albedo is likely darker
Theres a section on vdbs in this video https://youtu.be/d6xu2BQK3Kg?si=ZLM4V3aVDHIBgCLt
Its a very good video
Ooops. I feel into a rabbit hole and produced a 3hrs long frankenstein video :D It started as a simple introduction course to volumetric clouds, and then I kinda went off track and went bananas with weather system, vfxs, tools and what not. It's a wild ride :) I hope you'll like it though.
LINKS
Documentation: https://dev.epicgames.com/documen...
Iirc you use a very low res vdb for the main shape of the cloud and then erode it with noise to make the detail
Oh shit you meant for smoke not clouds
Mb 😔
Ig the same idea could be applied but whoops
Thanks! I'll check it out.
No worries! I'm betting a lot of the techniques are transferable. I appreciate the link!
hello, so i'm trying to replicate a particle effect asset from a game called "guilty gear strive" but while i'm still very knew to particle systems in general. i was hoping if you guys had some ideas of what settings/preset the developers used for the particles. you can see the blue slash particle is the games original particle and the particle somehow is moving and rotating dynamically with the character when i move around the camera, but my custom red fire slash just stays completely still, does anyone have any ideas on how what settings they use on their particle system to make it move and rotate dynamically with the character?
Some form of alignment and facing modes to keep the particle aligned to velocity, but rotating along that axis to face the camera at all times would be my guess. @odd nacelle
i thought it was link to the character or something, i just dont know what the setting is
cuz you can see the blue particle is following the character movement and rotation
oh also is it a necessity to have a velocity module if i want the particle to move at all while moving the camera?
Hello idk in what pannels to post this,
I'm currently struggling to implement gamepad support into my UI, I've seen a coulple of tutorials and all of them have really bad implementation:
the character continues to move while scrolling menus
functions are created that loop indefinetly and can't be turned off etc.
can somebody recommend me a video or other source on how to implement gamepad supported UI in a good way,
Or is this something where I have to bite the bullet and use a plugin?
I'd appreciate any help on this
What game engine and what version?
Unreal 5.3
is there a way to change the size of particle collision? can’t seem to find it
I got some particles that land on the ground then get replaced with actors and it looks seamless other than the collision being big enough to spawn them above the ground slightly
i got a qeird quesrtion
probably not gonna get a clear answer, but does anyone have any idea on how one could pull off this effect?
or a resource to get started?
I have a freeze status effect that I would like to apply an icy VFX to, covering the enemy in ice. I'd like to avoid buying an asset with a lot of other assets of Ice (Such as Ice Cool: https://www.fab.com/listings/837a8be8-15a5-4dcb-b654-7497a0ee4d05), just in order to get the frost effect. Do you guys know any good starting points to look at in order to setup something similar?
My actors can have armor attached aswell so I would need a method that applies to both armor and actor itself, in which case I think a dynamic material instance would be the best idea, and just do it all in a material?
The effect showcased here is really neat, but I think it might be a bit too complicated to start off with - https://www.artstation.com/artwork/4X6QLn
Any help is much appreciated, cheers! ❤️

ArtStation
Freezing effect done in Unreal Engine 5.
Loosely inspired by the Ice Beam from Metroid Prime or Stasis from Destiny 2, I wanted to further expand on an effect I had made in a previous project on Source engine. One demand was, that I wasn't going to rely on a material function and thus limit what targets I could apply the effect to.
It's a sim...
overlay material
translucent
world position offset based on vertex normals, magnified by random amount when pointing downwards
see ben cloward ice video for giving ice depth (it's similar to POM)
i have ice cool and it's a fantastically involved shader
btw there's an improved translucency refraction in the works that's likely to help you, i think nvrtx caustics branch. dylan browne has posted on x with examples
Overlay material sounds wonderful, never heard of it before! Thanks a lot! 🤩
Overlay Material was indeed the way to go, thanks @tough basin!

Fab.com
Slash and attack trails for any melee gameMaterial for weapon aura includedGameplayPreview and Integration---------------------------------------------Update 1.1-----------------------------------------------This pack has been updated with newer particles and materials in additional to already existing ones3x Nature1x Wood1x DeathSupport for pre...
Hey there! Using Chaos destruction and a cache collection. The CC exported with the bone colors -- is there a way to update the material after caching? I like how this sim turned out and would like to avoid having to resimulate/recache. The materials are correct in the static meshes and in the geometry collection.
@tough basin you sir, you've been a lovely help to me in the past. may I bother you with a small conundrum I'm dealing with?
I've got this project that's meant to render like a PSX game, here are the current VFX settings;
-screenpercentage = 30-35% undecided
-AA = 0
-motion blur = 0
-GPPV = boundless, sharpen 2, dither material in array set to 1 and material has priority of -1
problem being, I have lots of very low resolution textures that are unfiltered and the dither isn't able to fully deal with the TV static you get from them when looking around the scene. any ideas?
Hey, I switched to a new monitor and now when I open my game it has volumetric fog on by default when I load into a level. its never done this before, always been toggled off in engine, and its always been off when I played a build or in the viewport with my old display so im really confused how me switching TVs would make volumetric fog turn on when its been off forever.
Hey folks
Does anyone have a guide or tips on how to do shockwaves in general?
My understanding is you do a mesh with a refraction material. But from there I run in to questions often:
Should you use a "Dome" shape or a "Wave" shape? (or something else entirely?)
How do you "fade out" or end the shockwave? In my case I feel it is often a bit sudden ending.
- Unless I scale a dome so much it incapsules the camera I'm viewing from first. However that makes the effect too strong.
I'm working with Isometric perspective if that makes a difference.
Anyone using local fog volume with forward rendering? It doesn't work for me
How come the volumetric clouds shine through the height fog?

Hi guys is there a way to move an emiter on local after rotating it?
Hey guys, what would be your best way to draw the most basic simple dotted line (ideally custom material-based) between actors, starcraft-style?
Surely there's an easy way?
use a mesh?
But then it's non-fixed scale for example.
adjust the scale then
Of course that's easily doable and it was the first approach that came to my mind.
Was just wondering if there's a more elegant option. As I'm pretty sure it's not meshes that we've been seeing in RTSes all those years 😉
wtf is going on man, I got these meshes here, all with the exact same normals, then I import to unreal and it changes the normals, specifically for the right walls, I cannot even imagine why


looked this up and tried every solution I could find, none of it works
its not my blender export settings, I checked by reimporting from the exported fbx and theyre fine in blender
tried Use High Precision Tangent Basis (on both the broken ones and the working ones), nothing happens at all (yes I clicked apply)
nothing wrong with the uvs
no idea what its doing
hey, any idea why my post processing volume material works in the viewport but when i am in play mode everything is black?
Hi guys! I'm wondering where I could go to ask for some advice on my lava lamp movement blueprint?
Something isn't going right and I can't quite figure it out, I'm actually an artist so it's my first time using blueprints ❤️
It would mean a lot! Thanks!
Ty!
-
use dome + a flat sprite or ring.
-
make dome material fade opacity based on camera distance
-
make dome and ring fade from 100-0% over life
-
for extra points, try to spawn a ring of debris that is tossed up just a tiny bit but expands with the dome edges
hey all 🙂
Quick question of opinion.
For tire marks (all the time) you would recommend decals or particles?
Anyone know of a good muzzle flash and bullet trail tut
Hey everyone! How do I extend my water ocean body from the ue5 plugins? I googled and the tile option is nowhere visible for me in the water mesh. Any help really appreciated! Using 5.5!
sure! you can surely extend the water body by adjusting the water mesh settings. Make sure the 'Edit Layer' option is enabled, then check under 'Water Body' details for any tiling or size parameters. Let me know if you need more guides
Thank you very much. Saving this for future use as well.
I'm not sure what to use the flat sprite or ring for.
- Do you mean just another refraction layer? And would it face upwards or face the camera for an isometric perspective you think?
not sure if belongs here, leaving it in case some guru has an idea:
How difficult would it be to make it so when I chaos destroy something light comes from the fissures created by it?
like for a split second
It depends on the situation and how you want it to look ultimately, but there's almost always more than one way to do it. If it's a flat wall for a cinematic it could be pretty simple. If it's for an small irregular object where you don't know the where the camera will be it'll be a bit trickier. You could use an actual light or emissive meshes or a combination of both.
Couldnt find those settings anywhere sadly! Could you maybe be more specific? There is no edit layer option for me in either my waterbodyocean or the waterzone or the watermesh?
Is it possible to get the UV data of a mesh renderer within a niagara system?
I want to use the coordinate data in order to control things like color curves and such and it would be super useful🤧
Does anyone know how to spawn a decal on a moving object and make it stay there whenever the object moves?
Can you describe an example? What do you want this system to look like?
When you say "stay there" do you mean stay attached to the object or stay in the same spot in the world?
Stay attached to the hit object
You can spawn and attach a decal component to the object.
hi, does anyone know why when i put the decal mat on my mesh inside the particle system it just suddenly glow like that? it looks fine in the other previews outside of the particle system😭 😭 😭
Anyone know how to make a long exposure / Afterimage effect in UE5 for the Camera (Not for the character or particles)?
been meaning to do this myself 😄 basically you need a way to calculate the afterimage, preserve it between frames, and decay its intensity over time
the new UserSceneTexture might be able to do this. haven't investigated too closely
I vaguely understand Niagara has some mechanism to copy and preserve the buffer, which the Cinematic Lens Flares asset uses, but don't understand that at all
or if you're only doing cinematics you can just do a scene capture and not worry too much about the performance implication
but basically, the approach i'd take would be
scene color -> subtract a flat amount leaving only the overexposed pixels nonzero -> rescale those -> add to pow(last frame's overexposed pixels, decay constant * ms since last frame) -> write that to a scene texture for next frame -> add to scene color and emit
Thanks, if you actually manage to do this, please ping me because I guarantee I will mess up somewhere and lose patience with it 🤣
I am really shocked tho that Long Exposure isn’t a built in functionality to the cameras like other post process settings.
i will also mess up somewhere but probably not lose patience with it 😅
for the love of god
please someone tell me how to get/ set user parameters in a scratch pad module
I applied the module
Its a simple float
Why isn't this working?😭

You can't add them directly as parameters. You need to use an input parameter, and plug in the user parameter in the module inputs.
this one?

i created it, but idk how to connect my user created parameter into it
I would really appreciate your help
Add a float parameter. The default namespace for parameters is input. Then in the module details in the main Niagara window, plug in your user parameter.

I can't find it : (
is it this on?


ok i created the user parameter
and within the module detail it appear as a float
but how do i connect it to the user parameter,
it has no option as far as i can see?
sorry but if i understood correctly
there should be an option now to input the user parameter, but I don't know why it doesn't show up

Dang sorry for flooding this
Its just that this issue has been going the whole day without any progress

Add a new float parameter in the Map Set node.
That should give you an input in the module details.
Currently not at home
But will try when i get there
Thank you for your help 💐
Oh thank god it worked😭
Just so i'm covered for the future
If i want to set a user variable within scratch pad, how do I go about it?
E.g.
I have a user parameter that increases by 1 every time the particle is spawned
Or is that even possible to update the user variable outside of blueprints?🤔
It's not possible to set a user parameter within Niagara. The purpose of a user parameter is to allow communication between Niagara and your blueprints. If you need to set a variable within Niagara it needs to be in a different namespace.
I understand
You’ve been a massive help dude thanks
hey there
i'm looking for some tips (tutorials or guide) to create a crowd shader for a arena
similar to rocket league
they are not static, the animation is very simple (move up and down)


i'm trying to find the best solution for that without losing that much performance
I can see this being done with a Niagara system.
Hello
I believe there is a checkbox for whether a mesh draws to the main pass. You could try turning that off.
You can animate them in WPO or in the material itself with a panner or sine. Then for the random color you could go for a per instance random or model all of them in one mesh and assign random vertex colors to them.
You have to disable Lumens screen traces for reflections, should be a setting for it in the post process volume
Hello! I'm looking for some insight into a FX/Lighting issue and not sure how to resolve it.
When I place the particle in the level, the FX appears black in a Lit environment and appears as expected in Unlit conditions. I'd like to keep the lighting of the level unchanged - is there anything I can tweak in the FX to appear with the intended color in a Lit environment?
For context, these are the 2 free assets I'm using off the Fab Marketplace:
Dark Ruins Megascans Sample - https://www.fab.com/listings/836ed2f8-e2d6-49be-98d3-59d104bd351e
M5 VFX Vol2. Fire and Flames (Niagara) - https://www.fab.com/listings/c5b0270a-a295-4644-a4be-42cb1e56a197
Any help would be appreciated!


You did something wrong... unchecking the box on the left makes the engine use the default value which is enabled. You have to enable the left checkbox and uncheck the right checkbox
Yes it will impact the visual quality, but there is no way around that to do what you want it to do
So i have a particle system that uses a spritesheet/subuv. Is there a way to control the speed of each sprite or when the next sprite should come out?
It's unclear what you're talking about. Can you show a visual?
UE 5.5 VDBs in VR is broken for anyone?
It's no longer rendering properly in both eyes, but was alright in 5.4
anyone experienced in real time vfx in unreal engine? i can for this project it it worked out well
Maybe add a EyeAdaptationInverse?
Hi guys, is it possible to have volumetric clouds in PT show up over terrain when viewed from above ?

u want to clip the layer from top or below
@spring shore I'd like to have the clouds show up like this :

it works on ray tracing/Lit view. but not on pathtracing
use 3dmax or houdini they have options to make clip clouds . or dense adjustments
you mean it's not possible at all in UE ?
all I need is the volumetric cloud layer to not be hidden by the mountain. The lit view is exactly what I need, but when I turn on PathTracing they disappear behind it
I don't need any fancy VDB cloud or anything
Hey guys, this is probably a really simple thing but its an area I'm not overly confident with yet in Unreal. How would I go about replicating this effect from Elden Ring in UE5?


If this is more of a material question lmk and I'll try asking in there
Hey there, does anyone have any idea on what got messed up on the default VolumetricCloud?
It got like this after I test the Day Sequence plugin, I already remove it, but the default cloud now always looks like this, regardless of if I make a new level.
I guess something change on project settings level, but I can't quite figure out what.
It is not a change on the engine file as if I create a new project it is working just fine.
So something on the project somewhere
lol found this random command on the console: r.VolumetricRenderTarget.Mode 2 no idea what it does but it fixed, I guess I need to find out what this actually change

Epic Games Developer
Real-time cloud rendering using volumetric materials in Unreal Engine.
Hi, anyone experienced with ML deformer here? I am testing nearest neighbour model and constantly getting the same results where after training my "Num Active Morphs" is 100% and index of -1. I guess that means that it cant find nearest point and its constantly using all the data while testing. Im using 5.5.2 and have installed pytorch to run it. Do I need some other plug ins? It doesnt clearly state what you need to make it run wondering if anyone here has figured it out.
Hi, i'm wondering if anybody else has experienced this bizzarre stretching happening during actor movement with a Grid3D_Gas_Master_Emitter effect?

Using a 6 point lighting shader for smoke, it’s Unlit (by design).
Is it possible to cast dynamic shadows with Unlit particles?
when i get near to the center of the Postprocessing volume the fog becames less dense, how can i fix it?
what is creating this fog?
i can't see what you're describing. the fog looks consistent to me. where should we be looking?
near the end of the video you can see that the fog gets less consinstent
How do you make distant background foliages and mountains a little blurry
I knew how to do it using PP. But I forgot
are you making minecraft🤣
Slenderman with Herobrine
depth of field
or
a post process material that invokes a blur as a function of depth
What settings for DoF?
I tried but couldn't get the result
Focal Distance 1 or 0 works but nothing in-between
look up a tutorial. you need to configure a few things
focal distance is in world units
the distance of maximum sharpness
but you will not see much without changing eg camera aperture
Could anyone help me with my texture from my Post Processing effect sliding, only when playing the game?
Let me guess:
- You are using Absolute World Position
- With an LDR blendable location

Epic Developer Community Forums
A solution to calculate a corrected WorldPosition exists! Huge thanks To Dan Gant from the Unreal Slackers discord, and his elegant and clear solution (#graphics message) Here is his solution: Step 1: Create this first material function (I named it MF_CameraToPixelDirection_...
I am using world normal, i fixed the issue before by changing a setting in project settings (Viewport Res, and changing it from manual to by display) but that no longer works
are you sampling the normal via nodes or HLSL?
basically, if you emit world normal directly, can you reproduce the sliding?
the video compression is obscuring some of the material functions you're using
are any of them using either Absolute World Position or Camera Vector?
OR, does disabling anti-aliasing make it go away?
I can take better pics, sorry i am super new to this so i don't really know how to answer


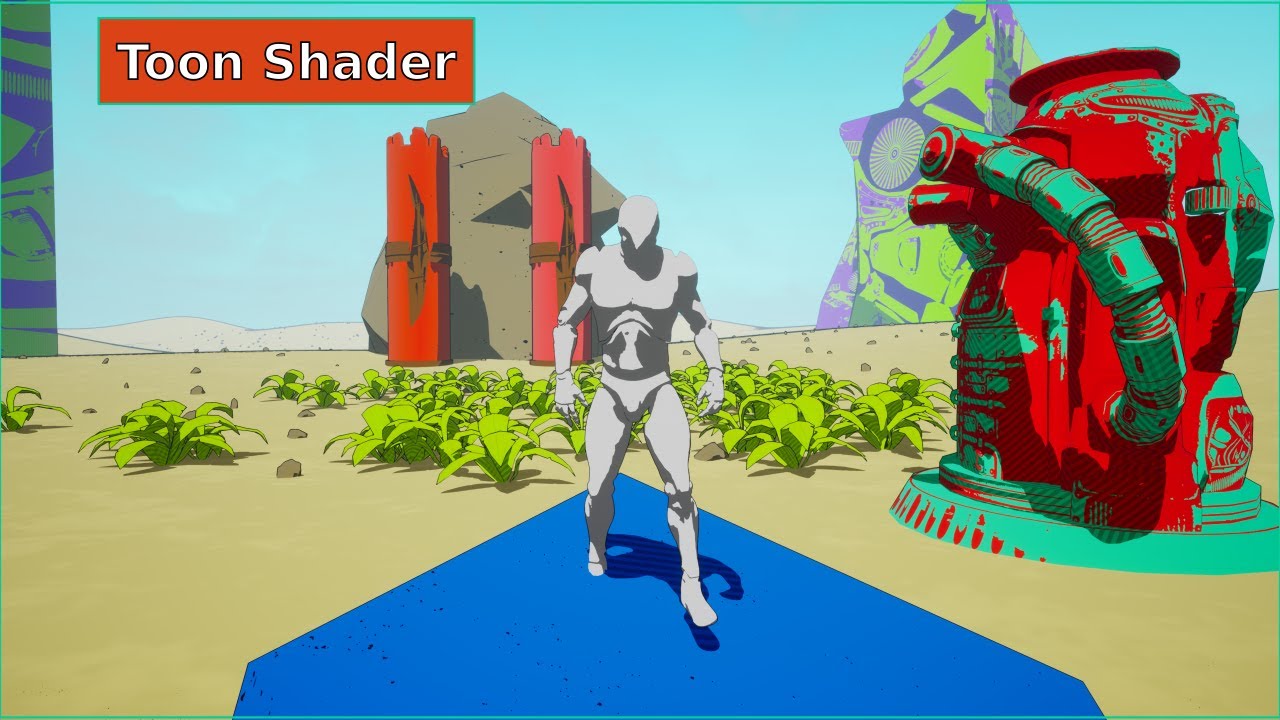
Project files [ UE5.2 Upgraded ]: https://www.patreon.com/posts/38620367
In this tutorial, we will be creating a toon shader, also known as a cel shader, in Unreal Engine 4. A toon shader is a type of shader that gives a scene a hand-drawn or cartoon-like appearance. It does this by using a limited number of colors and by applying a sharp outli...
i followed that video
the WorldAlignedTexture node uses Absolute World Position as the default argument to World Position
try plugging in my fixed world position to the World Position argument there
Sorry but how do you even make these

this is a material function
with a Function Input
two inputs
Function Output
and the green one is a Custom node
ok i got it made, what part do i plug into the WorldPosition (V3)?

Add Camera Position then plug into World Position
i think i am missing how to connect the Material function i just made to this Camera Position


just plugging it in raw does this
Add
The output of the node
To the camera position
The node is returning a value that literally is "world position minus camera position"
So to get the world position, add the camera position
I urge you to think about what's actually happening here so you can reason through this
why would procedurals added into a auto material not show up in the editor but they show up in a stand-alone build from the editor? has anyone had this problem
hi, is it normal das scenecapture2d doesnt capture SSR?
bAlwaysPersistRenderingState = true fixed it
hi there, i'm working on this scene ( it my first time making a vfx ) Does anyone have any advice for me? I was thinking of making a hole in the dark part of the mouth so that I could enter with the camera
question to profs: Is it possible to make good realistic smoke effect In Niagara with masked mode + dither in material?
I have a Post Process Component set to a lets say priority 4 attached to my test actor. While being within in a PP Volume in the level of priority 0, the component correctly overrides the values of that volume, but the override does not work, if that volume in level has priority > 0 (still below the configured prio of the component). Shouln't the component handle hierarchy as described in source code? ```c++
/**
- Priority of this volume. In the case of overlapping volumes the one with the highest priority
- overrides the lower priority ones. The order is undefined if two or more overlapping volumes have the same priority.
*/```
Looks like this could be a bug in the engine, being at 5.5.3.
yes
Thanks, any link to tutor or to material screen, please
dont know
Is there a way to make unreal's depth of view work better for top down games? I'm kinda trying to fake a isometric perspective but would still like some depth of view blur at the edges of my screen
Is this something you have to fake with complicated math or are there some ways to get something going
I'm not looking for something perfect but I can't seem to get it to work well at all
Wondering if someone here has messed around with something like this before
no matter what I try it's basically all or nothing, like the depth isn't accurate enough to detect where to focus in a top down low fov kind of scene

I tried increasing the fov a bit from 16 to 30 but there's still not enough accuracy
this is the kind of scene i'm talking about
maybe one of the old depth of view methods would have worked better but unreal for some baffling reason removed those lol
I'm guessing what I want isn't really possible outside of some complicated shader magic but I figured i'd ask in case anyone has tried this before
I guess i have to choose whether to implement low fov or depth of view
can't have both
unfortunate
the difference in depth from the edge of your screen to the center is just likely not that much and will make the kind of DOF you want finicky and not that strong
you could try to make it work with extreme apertures but yeah i'd recommend making a post process material
if you want blur and don't care about bokeh you can use one of the built-in blur functions, with radius a function of the screen UV
length(viewport uv - 0.5) -> radius
@little scroll
Honestly yeah that seems to be the case. I think that's definitely worth exploring, my main issue with that it wouldn't factor in depth and might not perform the intended effect. I'd like to blur things based on how far away they are from my character, for almost a tilt shift esque vibe. Perhaps this is something I can actually do with a post process blur
Right now this is the closest I have gotten with depth of field which actually was better than I expected. It ignores the bottom of my screen but still not bad
I'll definitely try the blur as a backup plan, even if it's not accurate as long as I don't have any crazy depth/distances I bet it should still look okay. Thank you

DOF is itself post process, though higher quality than what you can easily do in materials
Ah that sounds right
Yeah i'm not confident in a fancy custom solution but a blur around my screen might look fine
you can factor depth into your blur radius. or distance from position, etc. basically you want fine-grained control over your blur radius (or in dof-speak, circle of confusion), and it is just hard to get that with physically modeled camera dof
there are tutorials for simulating tilt-shift
but yes you could use screen position, or take the distance between the world position from the character position and scale it off that
Yeah maybe I can use some variables to help adjust the strength of the blur, so i'd kinda mask out the blur around my screen first. And then adjust the intensity of said blur with some variables hm
i found one that used depth of view actually haha
but yeah I should look some more
here's a simplified circle-of-confusion (blur radius, essentially) calculation

(you can collapse those two multiplies at the end into a single constant)
oh cool i'll save that for later
and here it is if you like grounding it in physical camera properties

While I don't really understand how this works this could come in use later thank you, I could tinker a bit with this to see what does what. I can kinda make some general assumptions but tricky for me
you've definitely given me some useful things to consider
Is there a way to bake vertex colors to a mesh without it affecting every instance of that mesh?

Vertex Painting is per-instance, so why not baking?
This is something I've also wanted for a long time as well, being able to globally bake AO to vertices would be awesome. I assume there are performance considerations that probably make this difficult though, ISMs never worked with vertex paint and I assume this is why
I've found a sort of work around...
baking and then vertex painting locks in that instance's bake, the bake can no longer be updated.
But that means you can have it per instance, it's a little annoying but hey it works:
https://gyazo.com/4394933af46ea47e49bd54e57f997b74

Thats interesting, good to know, will have to experiment with it
Does anyone know where to find info about GPU-based VDB decompression? I know there was a recent update that allowed it, but I can't find the talk anymore, or any info on how to accomplish it. Does it require Zibra? Any info would be appreciated. All my googling is coming up with Zibra and basic VDB tutorials and nothing about compression.
What kind of info you are missing ? Format description is available and that is the only thing you need, gpu or not.
The process of compression of the initial VDB and then however to enable GPU-side decompression. I think Unreal did a talk on it, but I can't find it anymore, and all my searches are resulting in basic VDB and heterogeneous volume info. Nothing compression related.
Enable ? There is no hardware vdb fetch or moreso, decompression
Everything is on you to implement.
Hi guys, im working on some custom fog that must be easily placeable and also follow the shape fo the environment, i was wondering is volumetrics are more optimized or i should go with a raymarching method ?
Majority of volumetrics are going to use raymarching in one way or another, including Unreal's built-in effects, if you're asking if you should use the built-in methods the answer is probably. It depends but certain things are extremely difficult and expensive to do with your own raymarched material such as integrating lighting and getting it to play well with other translucency
An example where rolling your own solution would be better in my opinion would be detailed ground level fog, this type of thing can be done effectively with an additive blend and simple POM style heightfield raymarching
Yea, a "detailed ground level fog" is indeed the best description of what I'm trying to achieve. I'll go with the custom raymarching solution then to allow more customization and also since I don't need precises lighting solution for this effect. Thanks a lot for the answer !
Hi guys, I am in a very pressing situation. If anyone can help it would be a lifesaver for me, it would save me hours of work lost. I am at my wits end with this. Also if this is not the right channel for this question do let me know, thanks.
THE ISSUE: Suddenly all my previously set up heterogenous volumes that I have keyed in the level sequencer refuse to play when I drag the timeline.
It started when I was playing with WINBUSH's vdb material and changed a setting in the material details itself. I quickly reverted it and saved within less than 2 minutes once I reaslied my volumes were not playing anymore.
I tried creating a new WINBUSH VDB material again and setting it up in the scene but that new one refuses to key as well!!
Then I also tried to use the built in sparse volume material, it worked fine previously and was keyable as well but now has the same non keyable issue!!!
The volumes now ALL refuse to play, regardless of level. I can toggle the "play" and "looping" options in the heterogenous volumes' details and it makes them play as per normal, but now no matter what I do to try to key them nothing happens!!
The keys exist in the sequence, everything is saved, they ALL worked before but now its as if the heterogenous volumes specifically are corrupted or something???
I am unable to get any vdbs to play back correctly in 5.5.3.
I have extensive experience using HETvs with VDB import so don't know what is happening.
Can anyone confirm that imported VDB sequences in fact DO work in 5.5.3?
So the issue I am having seems to be with the free Pixellab shader. Dunno why.
One limitation of VDBs is that they currently only seem to work with Directional Lights.
Does anyone know of a way, perhaps a shader hack, to get them to work with Point and Spot lights?
https://www.reddit.com/r/unrealengine/comments/127e450/building_effect_done_only_with_one_blueprint/
How could I achieve the following effect via vertex shader? I know there is a comment in there explaining roughly how that could be achieved, but I am not sure where to start

Reddit
Explore this post and more from the unrealengine community
broadly: world position offset, as a function of camera position
a crude version of this would be, say, (0, 0, 1) * max(0, distance(camera position, absolute world position) - 1000) -> World Position Offset
that should cause the pieces to fall straight down into place as you approach
@tough basin Thanks Dan! One thing though, this would still require each object (say, this bridge) to be decomposed into smaller meshes rather than one single mesh, right? However, the guy in the thread was talking about having one single mesh and dealing with sub-meshes with some IDs or whatever to reference each single one in order to apply transforms to each sub-mesh rather than the whole single mesh.
How could I achieve that?
I don't know. Vertex colors, perhaps.
Hey all, I'm trying to implement a billboard but where the depth (relative to the camera) of the vertices vary. Wondering if I could get some ideas on how to achieve it. The purpose of this is to improve shadows for sprites.

The red rectangle is my current billboard where all the vertices are at the same depth. What I would like is for the right vertices to be pushed back so that they align with point A. Likewise, I would like the left vertices to be pushed forward to align with point B.
The orange horizontal plane is the pre-transformed plane. Two of its edges already touch point A and B. It is positioned exactly between the two points.
The idea is the same as anamorphic paintings where the image only looks correct from one angle. Example:

Anyone has tips on creating "wood Chippings" when a bullet hits the surface?
Hey so I want to do a surging mini game in my game. I was curious best approach for a standing wave. I wass gonna make one big mesh of the wave fae and barrel included and pan textures, do distance field in shader and vfx wager splashes spewwing off back of board and barrel

Not sure what best approavh eoukd be though. It would be a standing wave i.e the wave itself won't move just an endless wave face and barrel

hello, so i have a particle system that uses a sub uv image index for my sprite sheet. is there a way to make a frame shows up abit more later before the other frames shows up? for example i want the first 2 frames to be at normal speed but i want the rest of the frames to be slower than the normal speed
still pretty new unreal engine so any help is appreciated
Is there a reason you're using cascade instead of Niagara?
I had to use 4.25 ue
I believe niagara was made production ready in 4.25 so I would recommend using that instead of cascade. There you can use a curve to define the play speed of a flipbook animation. Unfortunately I don't know cascade so I can't really help with that.
i tried to copy this FX i made everything but i still couldnt understand how did he do that texture movement ( expanding and shrinking ) with the waves , Everything else i made it except the one am asking for if someone could help thank !

i was thinking maybe it is flipbook spritesheet idk
Would the same method be possible to have a spreading effect on a sprite rendered system? for example, one game I'm using as reference to create smoke effect is Squad. In there when u throw the smoke grenade, it start spreading, once spreads out to its 'max' capacity holds the same position for about 20-30 seconds in a loop, and slowly spreads backwards (reverse of the beginning spread). I hope this all makes sense and not confusing lol
Greetings, unreal experts! I have a question regarding Chaos destruction.
I'm trying to initialize anchors for a geometry collection in an actor, but for some reason I don't see the functionality to assign initialization fields specifically in the actor...
Everything works in the scene because I can select the anchor actor, but in the actor I don't understand how to select the anchor.
Has anyone encountered such a problem?


yo guys any one know a tutorials like R I N B A N fx102 ?
like tutorials with this style realistic vfx
Oh i searched the internet for months i went to chinese japanese koreans websites and search engines and let me tell you ( IT IS SUPER HARD ) to find such a thing so i decided to join fx102 there are some in chinese websites but in order to pay for the lessons you have to register and in order to register you need china phone number so its hard complex + fantasy or realistic looking VFX cannot be found you either find an artist and pay for 1 to 1 lessons and tell him what do you want or you work your way out am currently learning this type of VFX but to answer your questions :
there are four websites i found :
https://ke.cgjoy.com/center/courses/detail/337
https://www.aboutcg.org/courseDetails/2495/introduce
fx102
https://coloso.global/en/products/vfxartist-kisonglee2-us ( artist worked on lost ark )
NOTE : i did not register or used any of those websites so careful if you are going to pay or use them
also non of them are in english if your looking for english then your out of luck
ofc there is nothing for free right ? if u know any sites or courses these days for free !
and u said u joined fx how u joined them if u didnt try the sites ?
Hello everyone!
I would like your help with a problem I'm having.
I have 3 post process volumes and I want each of them to affect specific objects in my level. Each volume has its own settings for the color grading I need.
So that each one affects only a specific group. I thought about using a custom stencil.
So what I have is
Post Process volume 01 will affect all objects that do not render in the custom depth pass
Post Process volume 02 will affect the objects that are in stencil 125
Post Process volume 03 will affect the objects that are in stencil 255
What I would like to do is a material that takes all this information from the volume and applies it only to the objects that have the correct value in the stencil.
Can anyone help me find a solution for this?
Here I discuss how to get the HLSL for Unreal's color grading, so you could try to apply it as a per-stencil post process material
websites yes i linked three of them not fx102 you will have to add him on discord
and no nothing is for free except stolen work you want to learn you have to pay sadly thats why i am making a website atm filling it with every technique and information i find and gained along the way about stylized , pixelation , fantasy / realistic but in simple way easy to understand easy english level for everyone and for free as well but still not done i have to fill it
aha ic but prices is to high for me iam feeling lost iam learning from YouTube but its too hard to find the good tutorials i loved the vfx industry so much and rly want to learn but sources is super hard for the realistic vfx or for AAA games vfx so what u r doing is amazing keep doing this site it will be an amazing guide for every one ,and if u have some free content i would appreciate it if u send some cause iam rly tired of searching T_T
Are there any post processing wizards that can help me out? I've been stuck on this all day.
I am wanting to put a colored outline on the static mesh for some of my interactable items.
For ammo I want orange
For loot boxes I want green
To do this, I put a post processing component on my loot actors. On that actor's BeginPlay, I create a Dynamic Material Instance, set the intended color parameter, and attach it to the PP component. I've confirmed via print string's color that the dynamic material parameter is set correctly (screenshot).
The outline works, but the dynamic color does not - so in my case all interactable items are orange (screenshot).
The PP component is a sub-component of the static mesh and Unbound = False.
The item will be outlined with the higher-priority PP color, so it feels like the PP components are overlapping somehow. I've tinkered with the Unbound & various "Radius" parameters on the PP component but these don't appear to do anything.
What am I overlooking?


Hard to tell without seeing the material- but why not use custom stencil values instead of your method?
Yeah this seems like the perfect situation to use custom stencil values. It sounds to me like the PP materials are in fact overlapping here; if they aren't getting masked out somehow to allow the other to be visible, all you can do is make the whole thing more transparent.
Thanks both, attaching screenshot of material here and will research stencils now ♥️
Effect & materials are my weak points. I followed a tutorial and I don't understand 80% of what's going on in this material.

Are SVTs stable enough for shipped games?
yes
Ok. Wiki page says it's experimental
wait
sorry, I am guessing now that you are referring to sparse volume textures, that I don't know
I thought you were referring to streaming virtual textures
acronyms 
Ok
Im having this weird issue with volumetric fog where it automatically turns on for some reason when loading into the map and cant be shut off. its toggled off by default and can only be turned on in settings so its really confusing why its randomly turning on sometimes when you load into a map. if anyone has any ideas or solutions they would be much appreciated.
When you say settings are you talking about the exponential height fog actor setting?
yeah
ive also got a custom settings menu you can toggle it in
but for some reason the volumetric fog option seems completely broke
turning off and on at random
and then not being able to change it in the actual in game settings
its driving me crazy trying to figure out why tf it keeps enabling itself at the start of the game and refusing to be turned off
Why does spawn system at location (niagara) spawn at the correct position in editor, but in VR it doesn’t?
is it scalability settings? volumetric fog gets disabled at medium or below, though i forget which category it's under
Why is this different position in VR than in editor?

effects is set to high when you load in could that be it?
is there any way to attach 1 emitter to another in niagara?
trying to have a lava bubble vfx spawn ontop of a mesh but atm im using 2 seperate emitters wich wouldnt make the lava splash and the bubble spawn at the same place
Does UE5.5 work with VDB files?
The effects & shadow settings were the problem, thanks so much for your help it was driving me crazy🙏
i have a niagara emitter that uses a mesh renderer. The mesh renderer has 5 possible meshes it can choose from. I would like to spawn 1 mesh particle for each mesh defined in the mesh renderer. How can I do that?
I can spawn a random mesh, but I cant work out how to spawn exactly 1 mesh of each
New VFX/Tech Art Newsletter is out!
📃Read online: https://simonschreibt.de/?na=view&id=22
✋Subscribe: https://simonschreibt.de/newsletter/

Hey, guys. I'm trying to make cracks on unbreakable translucent glass from shooting and I'm not quite sure how to achieve this.
At first I thought of doing it with decals, but they don't work with translucent materials (UE4). Then I tried to spawn particle systems and that worked, but if you shoot closer to the edge of the glass wall, the particle system can end up partially in the air (the cracks should be big enough, which make it noticeable). There was an idea to cut off the parts hanging in the air via an inverted depth fade, but this node doesn't work for the intersection of two translucent objects and that's pretty much where I'm stuck.
What other techniques exist to solve a similar problem, provided I would like the player to be able to leave multiple cracks on a single glass object?
What is the name of particles that use textures like this? I'm not sure what to google to find a tutorial on how to use this grid texture. Thank you!

flipbook
the unreal content examples project should have some examples of this
in a particle system? I assume its the old kind
you can make niagara flipbooks
Ohh sick, okay should be good to look that up! Thanks again ^^
there's a subuv system for it
engine also ships with a material function for flipbooks
I was under the impression flipbooks were 2D only xD
the starter content (not to be confused with the example content) has smoke and fire flipbooks you can use
they are 2d billboards but still a useful tool
Always learning with UE
they always face the camera (usually) so if you don't rotate the camera too much relative to them the illusion holds
or you could make doom in unreal 😄
I think I've seen games do that with grass where it only faces the camera
That'd be kinda cool...
very trendy right now to make boomer shooters with flipbook animations (this one is Father Forgive Me 2)

The art is stunning
yeah I love this style, pixel art can get kinda boring but I love handdrawn comicy style and combining that with sprites is interesting
not sure if this is the place to ask for this, but camera shake doesn't seem to work with Orthographic Camera, does anybody know a work around for this?
Hey how can i make watch dog 2 hacking space like view ? In my game
New VFX/Tech Art Newsletter is out!
📃Read online: https://simonschreibt.de/?na=view&id=23
✋Subscribe: https://simonschreibt.de/newsletter/

Hey all, just a general question, has anyone ever tried using an image sequence to make caustics? I just thought of it, and I can't find anyone doing it online, is it like extremely performance intense to be loading image sequences in shaders?
I am going to do a test to measure the performance, but I figured I'd ask, before I spend a day on this 😄 Maybe someone can just tell me "No don't do it it's too slow" and save me the day
Too high memory usage for the result, easily outplayed by one image, procedurally distorted. But yes, you can do that.
pretty sure the default caustics for the unreal's water plugin samples are using a tileable flipbook generated with a tool thats in the same sample content
if you just want one to mess with
Thanks, figured it'd be something like that, still was fun to try it
Oh nice I'll check it otu
I notice everytime I duplicate a particle system the spawn modules gets turn to default on the duplicated particle system, is there a way to make it not do that?
I feel like im losing my mind, how can i set this ribbon to trail the other direction from the central disc?

I didnt setup this system initially
nvm i did it
you guys have any tips on how to recreate the sort of spinning plasma effect youd see in a Tokamak/fusion reactor? need an effect like that for a space project im working on.
https://www.youtube.com/watch?v=VqpnGhbo2UY an example of what im going for.

ive been trying to google around for videos or forum posts on this but havent gotten any hits lol. plenty of actual info on fusion reactors though.
Question : anyone knows if you can bring alembic particles into unreal? Or particles have to be exported as for example spheres before that?
Hi!


So, evidently, I'm not really a shaders guy, but I tried adapting a SSGI shader I've found as a Forward Shading post process.
Couple things I wonder is... Is that what SSGI without denoising just looks like? And what are these rectangles if I set my samples too high? Does Unreal just give up at rendering those pixels if it gets too many instructions?

I'd probably make a model that goes around that thing, unwrapped as a cylinder, so it can have a looping texture for the noise on it.
Set a material to additive, grab the depth difference between scene depth and pixel depth to simulate the fog having thickness by finding the distance from the surface of the effect mesh to the reactor's core, plug the distance into "beer's law", then multiply that by a colour, pop that stuff into the emissive out and play with the parameters
are you actually getting normal values this way? i would expect screen space normals are unavailable in forward rendering
Never mind, saw that you're getting it via DDX/Y on world position, nice
does show bones color from chaos destruction is broken in 5.5 ? because i can't see the bones color when i enable it
The idea next is to somehow guide the bounces toward the lights, by feeding the light location through MPCs, but not sure how I'm gonna do that yet :/
Hopefully, that'll rely less on random bounces and be less noisy without denoising
I've got an actor which draws a mask to a RVT. This mask is then used in my landscape to blend between two materials.
Mask is a radial gradient which radius is controlled via a timeline on spawn.
It works fine in edit mode if i move around the actor. But if i test it, the radial increase on the landscape updates in an insufficient way.
https://cdn.discordapp.com/attachments/904064051993268275/1356448174503493753/2025-04-01_03-15-40.mp4?ex=67ec9a4e&is=67eb48ce&hm=bebefe5ad52676043bcd0f5fbe671dec0677583ee803017ba65007caaecde64b&
https://cdn.discordapp.com/attachments/904064051993268275/1356448176143601764/image.png?ex=67ec9a4e&is=67eb48ce&hm=5f80058b80aa3b82bccb43e513f10af8b2e138162bffc0992f9d80dd5544d2ee&
https://cdn.discordapp.com/attachments/904064051993268275/1356448175530971337/2025-04-01_03-59-54.mp4?ex=67ec9a4e&is=67eb48ce&hm=b1939eea9db10a5c23923ce07b90fff732737686623d7aea221aba2d68e46a99&

Does anyone know how I can add a projectile vfx to an npc animation in UE5? I want to add a downloaded arrow shooting animation from Fab and apply it to my archer npc, but I can't figure it out
heeeeelp,I've been trying for hours to get an after image effect like this working in unreal using mesh duplication 😭😭😭
, but I can't find anything.
All of the solutions I find are either in unity only or use an alternate method, like using a bunch of sprites to create the silhouette of the mesh (which i can't make use of because it doesn't fit the style of the game)
I'd love any help on this

The first thing that comes to mind is spawning a Niagara System that it's tied to the Skeletal Mesh so it samples location and the animation
anyone know how to import my houdini simulation with all its colouring on the models into UE5 as a HDA? right now when i import it into UE5, it's just the default colour...

How can i increase the mass of debris in chaos destruction?
I feel like every destruction simulation done in unreal is so floaty
@timid notch increasing mass achieves nothing with respect to floaty simulations.
Then how do i fix it and make the debris heavier?
does anyone have inside info on the vfx methods used here?
https://www.youtube.com/watch?v=3yV39gwgFJ0

Assetto Corsa with Custom Shaders Patch creates the nicest smoke I've seen in a game. (GT7 smoke is also looking pretty good from what I've seen, can't wait to try it!)
Can anyone here help me activate a niagara effect in the sequencer. The effect is tied to a blueprint and therfore it's not as straight forward as dropping it into the timeline.
looks like a gas sim using a sprite renderer
Add the actor that has the niagara effect into the Sequencer, add a trigger event, double click the key it generates and you will get a reference to that actor. From there grab the niagara component and activate
so im trying to make a post process effect that adds a heatwave effect on the players screen and i got the heatwave effect but the problem is whenever the player goes outside of the volume it instantly snaps to normal and i'd like it to be a smooth fade... would anyone have any idea on how to do it?
this is what i currently have

pass the bunds of the post process material in as parameters, then fade the intensity based on proximity of the camera position to the bounds
could u explain this to me as if im 5
i would prefer to answer specific questions
could you explain it in more detail please
im not too great with materials
like im alright with em but nothing too advanced
especialy post process materials
It is not a gas sim. Whenever you are seeing a well done realistic realtime effect, you can be almost sure it is not a sim. They are territory of offline rendering and showoff but carry very little value for realtime. There are exceptions, but in this case, that is just good use of particle system, not a fancy sim.
he means use a dynamic material instance to pass the bounds to the material. Then just figure out the math for position distance to bounds, normalize it from 0-1, and lerp the UV between distorted and original based on that value uv = lerp(screenuv, modifieduv, normalizedDistanceToBounds). https://dev.epicgames.com/community/learning/tutorials/dD6/unreal-engine-dynamic-material-instances-part-1-tweaking-materials-at-runtime

Epic Games Developer
Dynamic Material Instances allow for the same functionality of a constant Material Instance at runtime. Dynamic Material Instances will enable us to cha...
is there any way to do it without a blueprint?
you can manually specify the bounds in your material if you want to instead
like create parameters then manually populate them there or in a material instance
wdym by bounds?
Hello anyone know how to be able to replicate the heat particle aura effects from the Yakuza games
Specifically this one from this boss

Special thanks to Hannya Tier members: eks2009, MiyuRon, xtr33mreaper, Nathan Johnston, Satoshi Yagami, Raine, sniper712, Rufus, Godfather Grizz, axeo seilez, Kaizer Redgrave, when idiots play games together, Speedwagon1809, Waifu Merchant, Kei Naoyuki and MadDogMajima7, Lisa Medcalf and Marta Valentine.
Support the channel by becoming a member...
Spoilers for Yakuza 5 final boss just in case
👋 recently released a VFX plugin on github:
https://x.com/eanticev/status/1910066507545248206
💥 Niagara Destruction Driver - Turn CHAOS destructibles (Geometry Collection assets) into very performant GPU simulated destructible static meshes driven by Niagara particles.
Some internal implementation details are up on the README but hope to write more soon.
maybe I'll make it into @drowsy lynx newsletter 🤔
I re-wrote some tech from my time as CTO at Counterplay Games. First up: 💥 Niagara Destruction Driver - turn #ue5 chaos assets into fast GPU simulated destructible meshes driven by #niagara particles.
More in 🧵

looks coool! i took a note ❤️
Any hints why these atmosphere effects stop half way? I got it from the marketplace ages ago.

Hi guys, how can i apply a vfx to a mesh? i have a spawn brust system and it works perfectly, however i want to apply it to start not from one point of the mesh b ut for the entire surface of the mesh
hi guys i have a small issue that you perhaps find silly.
I changed my camera from perspective to orthographic. Now my niagara system do not show up anymore.
I have a ribbon renderer. I tried setting its facing mode to custom under the renderer but i dont know further

any idea guys? 😄
hey how do i get post process materials to work on a Scene Capture 2D Component? doesnt seem to want to work for me.
actually, none of the post process effects work for some reason
there's a checkbox on the capture to enable post processing
like on the camera itself, or the Render Target Texture? on the camera theres a checkbox for Post Process, but its already ticked.
on the scene capture component
if it's already ticked i don't know
IIRC there are a few other options which speak to specific elements of post processing that may need to be individually ticked but i don't recall
i DO remember getting equivalent results to an ordinary camera to be annoying, so i'll say it's not just you
yeah something's busted. this should be working. i know i can slap the post process material into a post process volume, and that works fine, but cameras just dont want to work. might be UE5 deciding to be completely broken as usual.
figured out how to get the Post Process to show up in the scene capture component. for future reference, you have to click on the scene capture component, and in the details, where it says "Capture Source" you have to set it to "Final Color". figured id share that here.
New VFX/Tech Art Newsletter is out!
📃Read online: https://simonschreibt.de/?na=view&id=28
✋Subscribe: https://simonschreibt.de/newsletter/

Anyone seen an Text to particle Ai system?
Worked on one.
How can I make this "layered meat" shader?
Could you share link.
Threshold a gradient with some added noise from the characters feet to head using blue channel from preskinned local position node. If using 5.5 the node is gone, I think just use the local position node, im not sure if it works with skeletal meshes. Actually in the video, the gradient is artist authored since it goes around the eyes last, thats more accurate but might be a little hard to do.
Threshold it twice, once for the masked opacity and one to blend between your meat and skin texure.
Can someone explain why is this not being straight. The left is UV and right is a plane.
I am confused why it is not looking straight.
https://blog.bitbebop.com/spritekit-trail-vfx/
I got this texture from here and just doing it for practice

Create a common Game VFX with SpriteKit, useful for trailing effects like projectiles and magic. Based on the less used components SKCropNode, SKEffectNode, and...
I am currently creating a wind vfx with a volume I have set a box location and volume but the wind mesh still seems to only generate in a line and not throughout the volume any ideas of what I have missed ?
Got it sorted i used sphere instead of box /plane bit weird box didn't allow for the volume to be filled
I'm tryna let my camera see through foliage that gets too close and all i can find are material tutorials - I really don't wanna go back and redo materials... is there a post process material i can just slap on a plane infront of my camera or something?
post process is like photoshop. you can't erase foreground and get background, because there is no background
once something is occluded in rendering, that's it. it's gone forever
so yes, you need to do it in the material
the good news is you could likely make a material function that takes material attributes as a parameter
switch your materials to have a material attributes pin
and just stick that function in at the end
Dang, fair fair. Material it is. Thanks Dan!
Hi Guys! I'm new here! I'm trying to create a Niagara System that Spawns a skeletal/animated mesh and follow a spline. I did some tutorials but i'm not getting the desire result... ( I have a FBX/animated Bunny and I want to create like a family of rabbits spawning below one bush and crossing the road like randomly spawning and randomly emiting (rabbits)... Can you help me?
hi, i have a custom post process fog but i have trouble with translucency, especially as i want to exclude the fog from the sky sphere. what can i do about it?
you can see in the distance the barriers are not affected by the fog because they are in front of the skysphere

to clarify: the fog material is a translucent material on the sky sphere?
the fog material is a post process material, currently set to domain "Scene Color After DOF". I lerp the final fog color with "PostProcessInput0". i have to set all my transparent materials in the world to "Before DOF" so they are affected by the fog
what material type are the barriers?
why do you say they are unaffected by the fog because they are in front of the sky sphere?
i am just confused because i do not know why anything would not be in front of the sky sphere, or why being in front of the sky sphere would affect anything
the barriers are all translucent. when a statis mesh is behind them it looks correct. sc i can make a screenshto of the graph
ahhh, i see what you're saying

you're masking fog on depth, so any translucent materials backgrounded by sky will have ~infinite depth and thus not get fogged
yessss
yeah that's a pickle
you could write custom depth or stencil buffer from the translucent materials and mask those into the fog
but frankly that doesn't solve your general problem of fogging translucent materials with correct depth
you could put the fog logic into a material function, do your general fogging BEFORE your translucency, and apply fog directly to your translucent materials
i'll put the ✅ "This is probably the best solution" stamp here because you solve both the sky masking problem and accurately fogging things that would receive incorrect depth otherwise
yeah, i already fog the skysphere and clouds with this function, perhaps i have to do the fogging on transparent meshes as well.
thank you
Hey! So I'm making bullet traces for my hitscan weapon. I'm just wondering how you guys go about doing something repeating like this?
I don't belive spawning a new niagara system for each shot is good practice so I wonder how I can re-trigger a system without removing the old particles? Is that possible?
You can re trigger a system by calling reset on it.
hello, Im trying to create an effect where particles are being pulled into a skel mesh over time, not spawn on the mesh itself but get pulled and land on on the skel mesh. Does anyone have any thoughts or tutorials on how to do this?
Use skel mesh as spawn pos in particle spawn. Offset afterwards. In particle update lerp or move a-b or set velocity to aim towards initial particle position. Since their initial spawn pos was the skele mesh. If that doesn't work than you can just plop your sekle mesh position instead of initial pos
any ideas how to remove fog from tunnels when looking from outside? from the inside you can simply set the fog start distance to the distance between player to exit but the other way around i have no idea. i saw that gta 5 simply snaps to the distance from player to exit on screen as soon the player enters a tunnel but that produces popping. but being inside a tunnel and exiting the tunnel is perfectly smooth then.
for volumetric fog you can mask it from within the material. ultra volumetrics has a fog painting mode that does this
for non-volumetric height fog, yeah, you're basically limited to tweening the fog settings based on camera/player location
Hey! I have a couple of spots left for the VFX with Unreal course - with the industry pro Cesar Augusto. Small group, all live, strong mentoring.
I don't want to spam with pics and links - so dm me if interested 🙂
Starts next Monday
Hello ! i'm trying to import some openVDB sequences but always got a failed import, any idea ? it failed when in sequence. the same vdb, if i take juste one frame, it work fine. the outputlog doesnt help me

This is "FX Showreel" by Ali Khan on Vimeo, the home for high quality videos and the people who love them.
does anyone know how to make an image trailing effect, like in horror games such as scp and amnesia? Ive tried it with a scene capture component and stuff but i cant get it to work properly
i cant find a good screenshot but its that effect where every like second frame fades away and overlaps on top of the current one
simply render scene texture to canvas render target. do that with eg. 3 rtt's. rerender them like a ring buffer. do the rerendering in eg.200ms intervalls. fade each of them out over time, eg. within 600ms. overlay all of them in the final post process material.
use eg. froyoks render target tutorial for a slate render, which doesnt allocate buffers with each render.
idk how the ffect looks like in amnesia, just what i get from your description.
simply render scene texture to canvas render target
is there a way to do this without C++ right now?
the only mechanisms i know of:
- UserSceneTextures can't be accessed out of order and thus can't be used in a ring buffer
- Niagara fluids can capture the gbuffer but only before translucency and also not in a ring buffer
i have no beef with C++ but it's much easier to make things for fab without it
blueprint nodes reallocate always if they havent changed it. so it will kill your perf anyways more or less, depending on the resolution.
with ring buffer i mean when you are done with the third render target you start with the first again.
just the concept of it
reallocate always?
reallocate what?
yeah, and as far as i can tell neither UserSceneTextures (which require directed graph of dependency) nor Niagara Fluids (which just seem to stop working any time I try for reasons I haven't discerned) support that
yeah, badly want a way to just write an existing gbuffer to a RT without the excessive hand-holding of the currently available methods
i use it for my onscreen rain, works pretty nice without a noticable performance loss
but i render at half the screen resolution
but multiple times, a mask and a normal map, the normal map generation is more expoensive then the rendertarget xD
also i bake down specific materials at runtime for customizable pawns, is also very quick
without the slate hack the fastest you can get is with FastUpdateResource() afaik
recently someone showed render target with niagara has one flaw, i cannot recall what it was. does it miss transparency?
Hi scammer
Any VFX anime fanatics out there? pls use theseeeee
https://youtu.be/JsSIlzxF0hY

High-energy motion capture inspired by Naruto — made for cinematic sequences, VFX, and anime-style edits. 100% free to use.
Free Download here --- https://patreon.com/rapamotion
This is a small but powerful set of motion capture animations crafted with love for the shinobi world. Inspired by the iconic fight choreography, dramatic stances, a...
Hello. Does anyone know how to make it so a smoke trail does not disappear when the smoke emitting source is not in view using Cascade?
New VFX/Tech Art Newsletter is out!
📃Read online: https://simonschreibt.de/?na=view&id=30
✋Subscribe: https://simonschreibt.de/newsletter/

I try to RenderTarget on a camera who is top down attached to the character, it allow me to walk on grass, cut wheat and stuff but because its attached, the mask is adapting his position on runtime based on the character position, and it make the edge of the mask flickering any idea how to solve that?
I everyone, I'm trying to do a vfx (material + niagara) that should rapresent a disorsion, to accentuate an explosion. I'm stuck with something like you see in the photo, I've got 2 main problems: 1) it does not rotate to always face the camera (it's velocity aligned, but I don't think I can change this), and this is a problem because in my game we have a top down camera; 2) in the niagara it scales over time, but the effect is very poor...
In short, I'm a complete VFX noob, but I still would like to make a cool distortion to add some flare to an explosion, if you have any ideas or questions let me know ❤️

You want it to always face the camera? Go to the Sprite Renderer in your emitter, and set the facing mode to automatic ( or whatever you desire).
For future reference. I would highly recommend looking at the templates/learning materials Epic Provides when you are making a niagara system.
These @narrow crane


Thank you! My problem is that I was following a tutorial and it said to put the alignment to velocity, otherwise the sprite does not show. So I'm not sure how to continue from here :p
When you turn off align to velocity,w ha thappens?
what happens*
So... I've done a couple of test end it ends up that if i don't connect the texture to the normal and set align to velocity, it disappears, but if i do, then I can get to face the camera perfectly!

Hi,
I'm doing a Maya to Unreal workflow utilizing alembics, but I can't seem to get the motion blur to look proper.
My sequence is on 24 FPS and motion blur settings in my cine cam are set to 0.5 to achieve the 180 degree shutter look. However, the motion blur seems to just turn into a constant "linear blur", if you will, while this character is walking. I think the camera movement (which is essentially tracking her in terms of movement, not rotation) on top of the alembic moving may be causing issues?
I've tried toying with every motion blur setting as well as various CVars. Normal objects work as intended with the motion blur, it's just the alembic causing issues. I've tried all 3 of the motion vector import options as well.
Increasing temporal samples did not help.
Any other ideas?

Movie Render Queue in Unreal Engine has been around for years now, so I have compiled the latest and greatest information to give you the best possible understanding of how things work, and the best renders.
Get EasyMapper, EasyFog, and EasySnow here on FAB: https://www.fab.com/sellers/William Faucher
Sale ends Friday, February 21st 2025.
FR...
You probably watched this video right? He hits on exactly what you are talking about @livid flax

I'm using a similar setup he showed in the video and I feel like the results are ok.
New VFX/Tech Art Newsletter is out!
📃Read online: https://simonschreibt.de/?na=view&id=31
✋Subscribe: https://simonschreibt.de/newsletter/

hey is there anyone who can make me a scene with animated elements or static horror type in the form of materials or VFX? I need it for a subject at university and I would be very grateful for any help, I totally don't know this program it is new to me. Elements to pay attention to are: lighting, composition, materials, colors. if it is a static scene a high resolution screenshot will be enough, however if it contains animated elements or VFX it will be enough to render without camera animation.
hey guys, how do i overlay post processing materials, like just trigger them and they will overlap until a timer runs out or they are turned off
you can have any number of post process materials at a time. they will render in the order of
- blendable location
- blendable priority
you can add them via blueprints. create an actor with a post process component, then add blendables (a blendable is a post process material and a 0-1 weight, which really just means "off" or "on") and update the weights as needed
for a player character should they have a post process node on them for triggerable pp effects, or should it be done from something else? i just tried to update blendables for a post process node on my player and unreal crashed💀
The post process actor or component can be anywhere
Awesome stuff, thanks for you great work. I only two days ago discovered your GDC talk about how to "not" create textures. Just joined here, and pop! you are here with the newsletter :D
Hehe, yes, it's a small community 🥳
I feel like I'm going crazy, can anyone help me out? is there something I'm not realized for why changing a particle system to a masked material instead of additive is crashing my project??
The only thing that came to mind is I think the project is is forward shading rather than deferred, but it should still be okay with masked right? Am I missing something?
Make it translucent and additive?
Have you tried reproducing this in another empty test project?
https://store.steampowered.com/app/1796470/Haste/
does anyone here know how someone generally would go about creating this streaky blur around the edge of camera. its a hard thing to research as most discussion online about motion blur is about an entirely different thing and it muddies up the search.


warping your UVs
I appreciate the reply, was hoping to make it masked because of some VR akwardness with translucency sort order but if I really can't figure out why that's probably where I'll land
convert screen UV from [0, 1] to [-1, 1] (so 0 is the middle of the screen)
get a radial distance sqrt(u^2 + v^2) / sqrt(2)
get a polar coordinate atan2(v, u)
multiply that polar coordinate by some frequency, then take the sin of that coordinate
multiply your [-1, 1] screen UV by 1 + sin(polar) * radial distance
sample postprocessinput0 using that value
i'm talking entirely post processs
ahh okay , that makes sense, i figured itd be a post process effect. thanks for the direction!
sure thing. basically it's lens distortion but with some radial periodic changes in scale
ohh, that actually makes way more sense
Thanks for the suggestion, gave it a go on empty test project, still crashes (using 5.5) with masked material so I suppose it's not any project specific settings.
I'm pretty sure I've made masked material particle systems before, I guess I could go digging for an old project where I did 
Maybe it's a 5.5 thing? Or the fact I try to start with the fountain template?
in general scaling lens distortion/fov with speed enhances the perception of speed
I can't reproduce the crash with a minimal test case. It might be worthwhile to start from barebones and add back features until you find what's actually causing the crash.


what type of reflections are these in the derelict corridor fab environment? it looks like a low-resolution version of the environment thats projected onto surfaces along with some ssr

(this is a wall in the reflection viewmode btw)
also turning off lumen reflections makes them disappear but idk how it relates to lumen, its clearly some sort of low res models in the reflection and doesnt look like tracing
are there reflection captures in the level?
does the skylight have a cubemap attached?
no captures and the skylight has nothing attached
these cant be captures either because they have perspective and no resolution
like everything is 3d in the reflections
also turning off lumen reflections makes them disappear
yes this is lumen reflections then
sorry i misread you, thought this was what you saw when you turn lumen reflections off
oh, how does this work and why is it part of lumen?
lumen reflections
because bouncing a ray to bounce light is roughly the same as boucning a ray to determine a reflection
it doesnt look like it uses rays at all though it looks more like a lower res planar reflection
theres also no artifacts and its displayed instantly unlike light bounces
if it was using rays i have no idea how im running it or why the reflection would be using lower lod models and materials
yes, they are not always full-quality, depending on your settings
what does "no idea how i'm running it" mean?
from my experience ray tracing enough to get a reflection like that on my system would take like a minute but i have 40fps
and as i said theres also no artifacts i can see or anything
New VFX/Tech Art Newsletter is out!
📃Read online: https://simonschreibt.de/?na=view&id=33
✋Subscribe: https://simonschreibt.de/newsletter

Why are you VFX artists better than me at programming
Tone it down a little; I also need to put bread on the table
Im gonna fight you one day, dan, it's personal
i'm a long-time programmer and only recently maker of visual things
picked up unreal just about 2 years ago. last time i made gamey stuff before that was 22 years earlier
Any idea how to exclude Niagara particles from a camera motion blur?
translucent materials can have Translucency Pass set to "After Motion Blur"
I saw people talking about it but couldn't find where it is in my materials.
UE 4.27
no idea if it's in 4.27

Yeah, it's the same picture I found but I couldn't find it in my materials.
I'll check again.
how long?
22 years?

opposite end of the spectrum here, long time artist learning to program 🥴
made games in high school, graduated college, tried to get a job in the video game industry, and mercifully failed
sounds like me rn
so you quit game development when i was 1 year old
okay im not even mad anymore, you should be better than me at programming even if it wasnt your life's work
props ol timer

i did not feel confident as a programmer until i was ~30
bashing head against wall long enough inevitably leads to skill
#1 trait for programming is persistence. seriously
i was like yeah node js, easy work
and i had no fucking idea what it even was
a lil google searching and i was workin
yea
what's funny is that i suck at logic when it comes to math
but programming logic just kinda clicks
i still find it difficult to start any program
but once i get things going, it just flows
like 30% of my time spent making blueprints is just figuring out what to do at the beginning
dunno if that's normal or if im just slow
very normal. a blank page is always intimidating
that's good to know
hi, lil question. i am currently into the topic creating a thunderbolt/lightning strike. i watched a few unreal engine tutorials, all using either a cheap texture or niagara, but nothing really convinces me. it looks either stupid or is limited in its capabilites, with each lightning branch hardcoded. so i thought about something like the random L system, but for that i have to generate vertices at runtime. theoretically not a problem, but i know the PMC in ue4 days had very bad performance and i must create a few hundred triangles within a frame. any ideas how to render quick and easy such a mesh procedurally? or is there another way with niagara to do such a task, which is not covered in niagara tutorials?
ouh, does geometry script provide me this functionality?
Looks like it's not available in UE 4.27
If anyone knows how to disable Motion blur for Niagara particles in UE 4.27 please let me know
when i use UDynamicMeshComponent, how can i submit an array of triangles (or quads) with uv's and color, like it worked in the UProceduralMeshComponent?

Hello I have a question
I have a scene where my character shoots at someone ( the bullet are niagara system vfx)
How can I spawn bullets into the sequence and not have them in the level and the add then into sequencer and turn off and on thier visibility?
i did it now with the procedural mesh component. i have no idea wether i can do that with niagara, will check it out later.
still needs some tweaking, perhaps some noise texture as well

Anyone?
create a pool of a generic bullet object. then spawn all bullets when the game starts and hide them in this pool. whenever you get something from the pool simply unhide it, set the bullet transform and your desired properties. when your bullet is complete with whatever it does return it to the pool. the pool hides it.
the pool is also responsible for finding a free bullet in its pool that you can grab with whatever wants it.
you expose just 2 functions from the pool. "get bullet" eg. for your weapon and "return bullet" that can be called from the bullet itself when it hit something.
Well I was for a way to do the exact opposite
Not having the bullets on the level
But instead spawning then in sequencer when needed
I saw I can trigger event from the sequencer but if I spawn the bullet from and event the spawned bullets will not be added to the sequencer and won't be shown
New VFX/Tech Art Newsletter is out!
📃Read online: https://simonschreibt.de/?na=view&id=34
✋Subscribe: https://simonschreibt.de/newsletter

hello all! I was wondering if it was possible in 5.5.6 to interpolate Heterogeneous volume VDB frames using the provided velocity field. I'm trying to get subframe interpolation for accurate motion blur in a cinematic 🙂 Any help would be greatly appreciated 🙂
Can anyone point me to an example of using a video for a sky sphere?
ie Animated sky elements clouds stars etc are actually a media plate actor.
Hi, Simply The Best
I am looking for a visual effects editor to help bring animation into an artwork I have in high res PNG format.
Contact me if you can help Paid
no but also the approach seems prohibitively expensive. You need 4k-8k for good skybox resolution and then turning that into video would eat all your vram
if you wanted animation you'd usually layer a few textures, like one for stars, then procedurally twinkle them, and one for a cloud layer that rotates around z or pans
flowmaps for local cloud movement are another option
don't mind me just spectating
Dumb question. First time using chaos section in UE.
I have a deer type object running through a wall and wanted to sample it in gameplay if overlap box event set off FS_MasterField but for some reason its not triggering it. all of the videos are showing based off of projectile but not doing this since this is an animal.
is there a way to do this if I am overlapping a box ?
@tough basin
I was able to separate the Niagara effect by rendering it in Scene Capture and then place the new Render Texture as a post process material on the camera.
That seems to work but my problem now is that the Niagara effect sometimes flickers with bright values. 😫
Does anyone have any idea how to fix this?
i have a problem with the water plugin of UE5 and the sequencer, i want buoancy in the animation im makeing, for more information, dm me
Hi!
Does anyone know how can i invert the clouds in this volumetric cloud?
I want them to be at the bottom (my game is top down view)
Viewport and material in pictures


I tried with rotating the volumetric cloud actor 180* but it seems to be rooted in the material
yes, only the material matters. you'd need to transform the world position being used in the material
first thing i'd consider (without thinking about it for more than 5 seconds) would be to transform world position to local space which should capture the actor's rotation
I changed the skysphere reference point to "center of transform component" instead of absolute
and put the z to something like -25000000
and the clouds are below now

Hi all, can someone tell me or point me somewhere how to properly set a sprite texture (grayscale) for niagara vfxs? I would gladly read some advices or watch a tutorial on that. There's not much info on the topic in Ue docs ofc.
Like:
Do the mipmaps even matter?
What is the (usually) optimal size for those (128? 256? 512?)?
How many bits? (8, right?)
What compression should I use?
Should I set a texture group or its just for searching purposes (like tags)?
Should I always feeed them to GPU?
sRGB or ?
Is alpha even needed there?
Is using a few sprites on a tex and then always using an SD in vfxs a good idea for optimisation?
What the settings should I use/do you use in Krita/photoshop to save the images for textures like that?
Should I create an alpha based on a shape and then blur the image to prevent artifacts on the edges? (I used to do so in another engine a while back).
I have this diamond png tex generated in Inkscape, but when I save it to png, its edges are jagged - how can I prevent that?
When I use my texes in a vfx material (texture sample/parameter node), I have warnings the tex isn't grayscale. When I set it to grayscale, matterials just throw errors at me. What am I missing?

having the same issue on my end. Already implemented in the material to manually add in the tonemapper so render texture is really close 1 to 1 with player camera but for some reason fx is where it struggles with
There's a lot here so I'll give you short answers to each of your questions in order, but feel free to ask for more detail.
Do the mipmaps even matter? - Yes (this doesn't mean you should always use them)
What is the (usually) optimal size for those (128? 256? 512?)? - As small as you can get away with
How many bits? (8, right?) - Yes, 8
What compression should I use? - Alpha
Should I set a texture group or its just for searching purposes (like tags)? - Texture group affects mip generation
Should I always feeed them to GPU? - Not sure what you mean by this.
sRGB or ? - No
Is alpha even needed there? - If you mean an alpha channel on the source texture, no.
Is using a few sprites on a tex and then always using an SD in vfxs a good idea for optimisation? - What does "SD" stand for?
What the settings should I use/do you use in Krita/photoshop to save the images for textures like that? - 8bpc or 8bpp greyscale equivalent
Should I create an alpha based on a shape and then blur the image to prevent artifacts on the edges? (I used to do so in another engine a while back). - If the edges are a problem in actual practice, sure.
I have this diamond png tex generated in Inkscape, but when I save it to png, its edges are jagged - how can I prevent that? - using higher resolution and anti-aliasing techniques
When I use my texes in a vfx material (texture sample/parameter node), I have warnings the tex isn't grayscale. When I set it to grayscale, matterials just throw errors at me. What am I missing? - drag the texture into the material. the sampler will automatically use the correct compression setting.
May be there is a way to retrieve parameters FROM material to Niagara?
i want to make sparks that always flush away from nearest surface.
we have avoid distance field surfaces GPU, but i donw know how to add velocity existing velocity made by avoidance
Hi everyone. How can I align meshes in the emitter so they will all face center? All the options in Initial Mesh Orientation module are allighning all meshes at once to the same coordinates, but I need every mesh to calculate its rotation independentgly

Should I always feeed them to GPU? - Not sure what you mean by this.
There's a field in texture details, see screenshot attached.
Is using a few sprites on a tex and then always using an SD in vfxs a good idea for optimisation? - What does "SD" stand for?
I mean using subdivisions, like for optimisation purposes (if there are any gains of course :d)


Thank you for answering❤️ . It sometimes feels as if GD was invented a year or two back and not in the age of the common access to internet, or as if that was a secret or even so common knowledge no one was ever interested writing such things down 😅
Does anyone here have solid understanding of the Unreal water system? I need a few pointers. I've created a waves asset and overridden the core functions but it doesn't appear to be transmitting the data to the material function via RT.
Thanks for clarifying. I wouldn't change the Availability setting unless you have a very specific reason to. Those textures are usually called subUV or flipbook textures, and they're used often. It can be a good idea to combine related images into a single subUV texture, since it allows you to make a variety of particle shapes with a single texture and material. However, you will be loading the entire texture even if you only need one frame of it. I wouldn't say you should always do this; it's a useful technique that has benefits and drawbacks.
https://www.youtube.com/watch?v=VvBu0NciuEI anyone have any idea how i can create morphing effect like this???

That's is some good thing done. i will try it. but if you know custom module script then you can do it. by getting the data from skeletal meshes.
The last morping is same but one emitter renderers are disabled.
i am confused with the ribbon fx how mesh is stretching into other mesh @warm lichen
the second morphing?
if you slow down the video to 0.25x speed you will see that the particles are spawned on the two character bone meshes and then by moving or rotating those meshes to the final big character location, before reaching the big character location those particles are destroyed.
how can I get a niagara particle to be placed around a static mesh when spawning the particle through blueprints?
Like this person wants. #visual-fx message
nah
basically I have a building object when its placed i want to spawn an emitter at the static mesh location, the emitter is a bunch of individual little smoke particles, i want them to spawn based on the static mesh

trying to use this but cant get it to work

any ideas?
you will need to use the spawn system at location with this setting enabled on emitter

yes I have that setup I have no problem with spawning the emitter but I need it to spawn with the static mesh as a source


then it would get static mesh at runtime and set that user parameter but its not working :C
idk if im even doin it correct
basicalyl instead of the spawn location being a sphere or a box i want it to be based off of a static mesh
Does it work in niagara viewport without runtime
ye i just see 1 little particle spawn tho since it has no static mesh assigned
don't use set niagara static mesh component node, use this below node and write the userparaameter vairable name exactly like how you wrote in niagara


what woudl the variable name be?
idk where I wrote it

is it just "Static Mesh"
(sorry i'm a noob with fx)
click on user parameter options it will open user parameters window there when you created the variable you will have name of it add that exact name to the node in blueprint. in your case it is Static Mesh Make sure to put the spaces correctly
hmm did that still same thing
Shouldn't I use this node?

(that resulted in same thing as well)
i have not used this but the other one works with any kind of object no hustle and bustle
i see
maybe it's something wrong with the initialize particle part? does everything look correct?

for position mode i just have it as simulation position
ah I am getting an error in the BP

try adding the spawn system at location node again and recompile

the spawn system at location node isn't what's giving the error its the set niagara variable objec
you will need to create variable of type object not static mesh
?
create such variable then compile the blueprint and then select the static mesh in the details of this object and then plug in this variable to the object pin of set niagara variable object node and again recompile

TAA looks kinda blurry. TSR looks nice but can cause performance issues. But with anti aliasing off My game looks awful. Does anyone know why the game looks so pixelated with no anti aliasing? My monitor is 1080p

foliage is full of subpixel detail. without a method of rendering subpixel detail (which TAA and TSR do) this is what you get
your only other options for subpixel detail are:
- Forward rendering + MSAA
- DLSS / DLAA / FSR / XeSS (which also have temporal artifacts)
if you are vehemently opposed to all temporal anti aliasing, and do not want to use forward rendering, the best you can do is:
- subscribe to reddit.com/r/fucktaa and meet your new family
- at least enable FXAA
- get Dmitry Karpukhin's CMAA2 plugin
- use chunkier foliage
well now I'm having a new issue
I have FSR in my project
and have had it there for a while
and for the longest time it just wortked
but if my game is packaged as a development build
and I turn on FSR
i get hit with this

in a shipping built its just fine
and in editor its just fine
any ideas @tough basin
nope. i'd crack open the unreal source and see what that assertion is
ugh
how do i do that again? lol
then just find the file and see what the assertion is.
assertions are great, they're usually like
assert(cow goes moo) and then you know the problem is your cow isn't mooing
it might make it into your crash log. i assumed you checked that already but perhaps not
[2025.06.04-03.18.48:381][535]r.FidelityFX.FSR3.Enabled = "1"
[2025.06.04-03.18.48:415][535]LogRenderer: Forcing update for all mesh draw commands: SkyLight change
[2025.06.04-03.18.48:445][535]LogRenderer: Forcing update for all mesh draw commands: SkyLight change
[2025.06.04-03.18.48:513][535]LogRenderer: Forcing update for all mesh draw commands: SkyLight change
[2025.06.04-03.18.48:547][536]LogRenderer: Forcing update for all mesh draw commands: SkyLight change
[2025.06.04-03.18.48:642][536]LogWindows: Error: appError called: Assertion failed: Resource [File:D:\build++UE5\Sync\Engine\Source\Runtime\RenderCore\Private\RenderGraphValidation.cpp] [Line: 549]
yep time to check source
This is what happens as soon as I set it to be ennabled
or otherwise try to find that issue online
it's not this line. the source has changed since your version was compiled. i'd look in the history for a revision around whenever your version was compiled
and you're looking for an assert( line
it may not be far from where you are now
go to https://github.com/EpicGames/UnrealEngine
click tags
see the tag for 5.5.4
go do this for practice then click here https://github.com/EpicGames/UnrealEngine/commit/2d53fcab0066b1f16dd956b227720841cad0f6f7
-> browse files
then go and check the cpp file
what?
that last one is mac

Yeah but it just says this
then find your file

top right. browse files
oh
seems about right. time to work backwards and see what Resource is and why it might be -- i'm going out on a guess about what check() does -- null
Dude
I have no clue
What you are even saying
I've never done something like this ever
well give it a shot, or try to find someone else with the same issue
Well I mean likle
how do i even work backwards I dont know how to work backwards on this
Resource came from somewhere, presumably in lines of code before
my project is blueprint
you're in a foreign country trying to make sense of the signs
what?
i am saying you should try, best you can, to figure out what is going on, even if you are not used to reading code, or C++, or this engine specifically
or find this issue elsewhere online
otherwise you will just not know and your problem will go unsolved
lemme try rebuilding the solution for my project
Mines a hybrid project cuz of the advanced sessions plugin
@tough basinI'm not entirely sure what folders I need to delete before rebuilding it do youremembner?
eh ill just rebuld
and it fails
dude
I don't even know at this point
The build keeps running errors
even though I have the stuff i dunno
@tough basin I might just remove it from my game
It wasn't really doing a whole lot anyways
just an extra option
I'm not sure why it isn't working anymore in development builds but
I'm 1 person and I dont' have the time to figure this out you know what I mean?
Hey, when you create materials for VFXs, do you even care how much space or how complicated it is? I'm wondering if I'm overthinking things and try to overoptimize wasting my time 😅
Unfortunatey, I haven't seen any tutorial/vid on that aspect, heh.
Optimizing is always good to do during development and not in the end when you don't remember the functions. But then of course you need to decide for yourself when it is enough.
I wouldn't optimize small easy materials, but i would do it on the onces with complicated functionality.
Sooo I've been avoiding and going around one problem ever since I started using Unreal few years back, and I still haven't found any actual solution to this problem. Maybe someone knows whatsup?
Whenever an actor that has attached niagara system gets destroyed, it's particles disappear immediatelly. Even if I detach the system from component or/and make the particles "finish emitters before killing system". When making games I went around this bug, but now when I am making just vfx this is just inconvenient and annoying.
Detaching the system component from the owning actor should work, but I don't know if this a best way to go about do it. The most straightforward way would be the wait until the system is finished to kill the actor.
Why do you consider that a bug?
"finish emitters before killing system"
Killing system and killing the component are not the same thing though. You can bind a func, that calls destroy comp, to the system finish event.
I'm only guessing that's the confusion here
Hi! I am trying to transform(move and scale) a chaos cache, but it gets reset back to its original form (even though the actor transform values do not change).
I am playing back the simulated cache through chaos cache manager.
Any idea on how I can get to transform the cache?
The cache is a geometry collection actor that is directly played back through recorded chaos cache manager
That is how i went about it... Just it seems like uneccesary if "detach" function exists.
Another question for ya'll - What is the best process to display and record Your VFX work for publishing? I have 5-7 Niagara systems set up in sockets of the character animations and I've been trying to use sequencer, take recorder etc but all of them have limitations (Some do not show spawned actors, and even if they do - without attached vfx; Some just don't play out their events while recording or don't record spawning)
Even lossless OBS recordings are terribly low quality compared to viewport quality in Unreal;
How do pros do it?
Im completely new to houdini, but when i go to the render view, its just stuck on generating scene, anyone have any advice or what may be the problem?
New VFX/Tech Art Newsletter is out!
📃Read online: https://simonschreibt.de/?na=view&id=35
✋Subscribe: https://simonschreibt.de/newsletter

Anyone have any resources to share on ui shaders? Getting started with a simple wave distortion effect.
I have a question, in unreal engine lumen render can I do vdb render passes separately like smoke, fire and flame etc
Hi guys i wanted to make a smoke pouf effect using a sprite material that be launched in the blue arrow direction (like a smoke pouf from a cannon when shoot a cannon ball in some games) my problem is i dont know which module use to make the smoke effect have the shape of the statue

i ttried iwith shape location and plane but it seems it doesnt cover the entire static mesh plus i'm not good with vfx 😦
welcome hacker by creating new way of confusing people.
Heyy all , ive been troubleshooting some performance issues im having with a particle effect that exists across a very large area, its just little green specs that float up.
I thought just setting it gpu sim would fix it but it creates performance issues on the gpu now , mainly with running out of video memory, im curious what the best way to handle a an environmental effect across a large area like this