#cinematics
1 messages · Page 27 of 1
Oh how did I notice that. Thank you.
The level sequence works if a put it in the level, but I think I might be using sub-levels and they might not be set to always loaded... I'm using an 8K heightmap in a level made with the 'Empty Open World' template. The template uses World Partition, but I have no experience using WP. Is there something I need to activate? I really appreciate your help by the way, thank you.
I don't know how terrain and world partition work together. Get the sequence working as expected just through regular PIE (Play in Editor) and then worry about MRQ afterwards
how are we supposed to use props in sequencer if the Attach functions are still broken after so many years?
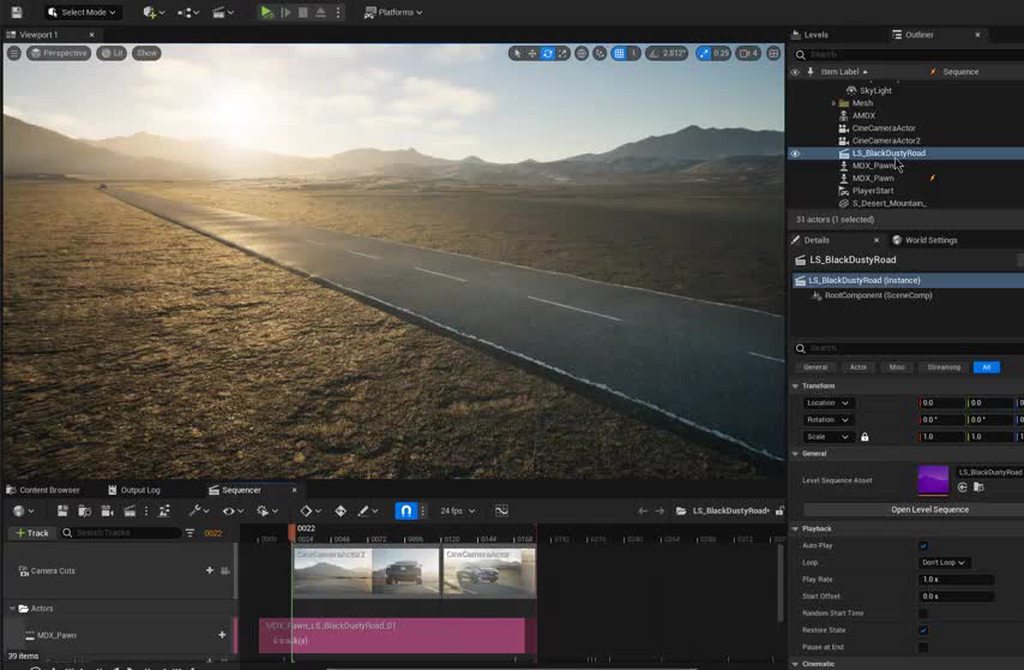
It plays fine through PIE, bu the problem persists... When rendering, the camera gets spawned into the default position at the center of the level.
pathtrace render crashed due to Fatal error: [File:D:\build++UE5\Sync\Engine\Source\Runtime\RenderCore\Private\RenderingThread.cpp] [Line: 934]
Rendering thread exception:
Assertion failed: IsInitialized() [File:D:\build++UE5\Sync\Engine\Source\Runtime\RenderCore\Private\VertexFactory.cpp] [Line: 173]
0x00007ffb814ab05a UnrealEditor-RenderCore.dll!UnknownFunction []
0x00007ffb2bcc29ea UnrealEditor-Renderer.dll!UnknownFunction []
0x00007ffb2bd3f5d5 UnrealEditor-Renderer.dll!UnknownFunction []
0x00007ffb2c0980ed UnrealEditor-Renderer.dll!UnknownFunction []
0x00007ffb2bff4615 UnrealEditor-Renderer.dll!UnknownFunction []
0x00007ffb2bf053b0 UnrealEditor-Renderer.dll!UnknownFunction []
0x00007ffb2bf36426 UnrealEditor-Renderer.dll!UnknownFunction []
0x00007ffb2bf389ac UnrealEditor-Renderer.dll!UnknownFunction []
0x00007ffb2bf4fd81 UnrealEditor-Renderer.dll!UnknownFunction []
0x00007ffb43f1e398 UnrealEditor-Core.dll!UnknownFunction []
0x00007ffb43f02a78 UnrealEditor-Core.dll!UnknownFunction []
0x00007ffb43f3ea02 UnrealEditor-Core.dll!UnknownFunction []
0x00007ffb43f0f4d0 UnrealEditor-Core.dll!UnknownFunction []
0x00007ffb44073d25 UnrealEditor-Core.dll!UnknownFunction []
0x00007ffb446083ab UnrealEditor-Core.dll!UnknownFunction []
0x00007ffb446013b0 UnrealEditor-Core.dll!UnknownFunction []
0x00007ffba43d7034 KERNEL32.DLL!UnknownFunction []
0x00007ffba5142651 ntdll.dll!UnknownFunction []
can someone translate please?
i have 64gb ram and i was at like 38
is it because i am trying to pathtrace in the City Scene ?
i keep getting this crash. what is causing it?!?!
i see other people are pathtracing in the city sample and mine crashes every time
I don't think I am, we are rendering out variations for the editors. I will give an example
Core Sequence for Shot A and B
Shot A in Level 1
animated cars and people in the a night time scene with lights animated off and on.
Shot B In Level 2
(Same Sequence as A ) Daytime with no lights animated, sub level added with different people animated, using a different level (daytime level) Most of the elements are the same but some are not.
I want to make iterations on the main sequence camera and car and other things but use the sequence for both levels. When I do this the actor reference will break because I load it in Level 1 work on it then go to Movie render Que and render Level 1 and Level 2
Why not use spawnables for the things that are in both shots, then they'll have stable references?
hey mate, i'm assuming you're familiar with level visibility tracks? they're used for a sublevel workflow in sequencer. if you use visibility tracks you shouldn't have issues with references being broken as all the tracks do is hide/unhide the actors within the sublevel and nothing more.
well that is a thought, I am not sure I have ever done that maybe I will look into that, I still wish I could just run the fix actor ref for safety
Thanks for your thoughts and reply
hey Nerf, yea I may need to structure what we are doing better with sublevels , we have a about 8 sublevels for various thing like cameras and different set pieces. One annoyance is my sequencer gets bigger and bigger and I am using folders but its pretty cumbersome by the end of the project.
Fix Actor Refs is really "the sequence got borked and we need help plz try" rather than "intended feature reliably swapping between two levels" 🙂
Do you know about sub-sequences, that's usually how people organize
One shot section per camera cut, then within that folders, or sub-sequences for lighting, animation, fx, etc. Depends how many people you have working on things at once
give this video a watch, it may prove useful https://www.youtube.com/watch?v=i-gpzW-kfkQ
what i like about the sublevel vs spawnable workflow is that with sublevels you can very easily copy over lighting setups from one shot onto another, and you also don't have to micromanage attach tracks like you do with spawnables (assuming you're attaching meshes together, i do quite often)

I often mis-click things so for me it's definetly up there as something that slows me down. Here's a quick look at how you can set up your levels to avoid it and be more productive overall!
▬ Chapters ▬▬▬▬▬▬▬▬▬▬
0:00 My problem with UE
0:18 Layers vs Levels
0:48 Quixel Example
1:15 Setting up Sublevels
3:00 Common Problems and Fixes
3:43 Easi...
oh and yeah, subsequences are awesome too for organization
Thanks I will check this out, one thing that needs a lot of rules to fallow has be how the constraints work between sublevels and sequences when turned off. I'll have to check this out. Thanks
nerf thank you this is great
Is there a way to expose ControlRig variables to sequencer?
like i need to disable IK controls for when i am using animations, so i dont want control rig effecting it
the control rig has a dedicated window that links with sequencer
has IF and FK toggles
Hi people, I've made a small scene with a flickering light. But it only works when my scene is simulating. So whenever I make my camera move forward through my scene the light isn't doing anything. Any fixes on how my camera still records the light flickering without the simulating?

Control Rig Sequences can be used to animate properties and drive Control Rig animation through keyframes within the Sequencer tool.
even in render?
It says Exit PIE to start, but if I exit it my light stops flickering, since it's a blueprint I guess.

Renders are PIE sessions though
That's why you can't start a render while simulating/pie-ing
That's strange, whenever I did the render the light wasn't flickering.
Let me try again.
Ok thanks Matt, This is how I will go forward. I guess I was doing something wrong :), Sublevels are great but they are not great with XR and D3 which is the software that projects out to the led stage. However I think I can make a non sub-level version for the xr stage and a sub level version for non xr rendering.
Yeah i have that much. The issue i am having is i want to be able to turn on and off the use of control rig.
However when i add the Control Rig to the SkelMesh in Sequencer it no longer uses the animBP for the character and changes it to a ControlRig_AnimBP. Therefore i can no longer access variables in the Original AnimBP
now this wouldnt be an issue if i could figure out how to change the Variables within the ControlRig. Not the controls, those are all there. The variables however are not showing


Hi folks, I have a blueprint actor that causes a simple animation. It runs fine in the PIE but when trying to trigger the BP actor from the sequencer, the animation never runs. I've tried creating a custom event and binding the keyframe in the event trigger to it but no luck. Any tips?
good visual aid btw.
can you not choose your desired variables in some area of the BP and "expose to cinematics"?
then add them to the relevant section in sequencer?
as for IK , i need to find the window i was talking about, it was originally for metahumans where i used in in 5.0Early access 1
hope they didnt depricate that. it really was a great window for hand animating , gave a great toggle control for IK/FK
is it an animation asset or animation blueprint?
may need to change that in the skeletal mesh and add the specific animation into the sequencer timeline depending
I am not running it through blueprints. They are skeletal meshes alone. 😄
I guess i could try that and see i can do it that way
i am not too familar with animation blueprints myself so i am glad your only use skel mesh because i know that
let me hunt for the tool for ya. hold on
find this tool, i am working on my own project now but this may help a lot

MHI_CR_Picker i think it is called

This quick 1 minute video shows how to display and use the Metahuman Control Picker Tool in Unreal Engine.
yeah im looking at that. 😄
However the problem here is, its a beast
4 legged thing.
but it might have an answer.
are you not using sequencer? maybe i misinterpreted
Oh i am, but what i mean is, i need the control within sequencer itself. That tool is used for just animation with sequencer. I am trying to merge animations with controlrig at the same time
and flip between them
So you can see here. The legs and whatnot are locked. As they should be when using IKs.
However, the problem is when I play animations like the one thats playing, the legs need to move freely
which means the IKs have to turn off. Thats the part i need to figure out
that is really cool
Thanks, but yeah, thats my problem. I know there has to be a way to do this properly
you may want to ask in #animation , that is where most of this is dealt with
does anyone else have the problem that Unreal Engine keeps freezing every few seconds when you add a media track to sequencer and scrub through the sequencer timeline

Are you using video media track?
I use media tracks but with pngsequences and not videos. (Just tried it with Unreal 5, since I'm normally using Unreal 4.27 and Unreal 5 just straight up freezes as soon as I add media track and choose the png sequence)
Try to lower resolution of the PNG sequences
will try that! I'm also noticing that UE4 goes from using 1GB of ram to 22GB of ram in a span of every 3 seconds... is that normal?
So interesting problem. In order to have sequencer playback sync up for niagara effects it looks like you need to convert them to spawnable.
However, one of my effects required a reference to an actor for spline navigation.
If I convert it spawnable and try to save the sequence it complains that it can't save because "Graph is linked to object Spline_2 in eternal map"
So is there a way to spawn and have it set the ref so I can maybe clear that and hopefully get it to save?
Should I use the cine camera or the post process volume for depth of field?
I think they both do the same thing, just different places to control it
The post process volume can apply globally to all cameras though
tanks!1!1!
So I use logic to move something which goes against the timelines position, but after the logic is done running, the object snaps back to the position the timeline thinks it should be at. How do I get the timeline to stop respecting the transform for said object at a certain point in time?
Oh think the docs cover this one https://docs.unrealengine.com/4.26/en-US/AnimatingObjects/Sequencer/HowTo/WhenFinished/

Describes how to keep any changes made through Sequencer when it has completed or restore changes back to their original state.
Nice at least that was easy
Hi everyone. Hope you're good. I posted this Q early but unfortunately got no responses so thought I'd try again.
Has anyone had a similar problem to this:
I'm creating a cinematic for a music video and when I use more than 1 image sequence in the project it goes super buggy. Is this a well known issue? Anyone have any tips or work around please? Using UE5 on a pc.
Thank you for reading and any advice would be really appreciated. 🙏
dont use unreal as an image sequencer?
i prefer blender for compiling images and videos and stitching them together into a video.
i use unreal to film frames
What do you mean by "super buggy"?
Hi!!! Anyone here who can tutor me (paid)?
hi, I was wondering if you could kindly help me with this question? Playing my animation sequence in UE4 I sadly get frames running at about 14 to 16 fps.. when in editor I'm looking at my scene and getting over 60fps... anyway, QUESTION: I'm wanting to render a movie via movie render queue at 24 fps output. With the frames I'm getting when I press play being around 15fps would this cause a stutter when I come to rendering the project via RQ? Do I need to hit 24fps to get a smooth export? Thanks.
do low fps affect the end result of an exported sequence? thanks
No, MRQ doesn’t need to render in real-time and will be unaffected by long frame times. It will step through sequentially.
Hey! How can I do this camera glitch in Unreal 5, like at the Train Model?
Hi all, I was trying to render out a cinematic using MRQ and ran into some issues. The subject of the cinematic is a large landscape (16x16 km). I tried to render it in both UE4 and UE5. In UE4 I used World Composition for the landscape and in UE5 I used World Partition. In UE4 the landscape disappears completely when rendering using MRQ, although the landscape is loaded and fully visible in the viewport. In UE5, parts of the landscape are missing when playing the sequence in the editor. Does anyone know what is going on and how to solve this? Any help is much appreciated, thank you!
hello , I want to create conversation sequences in level sequence. I want to switch the cameras from the dialoque panel. Is that possible to manage level sequencer by a UI and it can be used for a conversation. you know we will press next and the cam will be switched and the other dialoque line willbe shown. I made a research on google but since it is quite complicated feature i couldnt find . would you please help me with that because i am not sure how to search this. thank you
Using the img sequence player in UE. I.e. render out image sequences and play them within an unreal scene
ah gotcha
I want to be able to use about 4 separate clips with a map. Each of these clips are in separate sequences. Sometimes it works other times the screen is just white. Like UE doesn't see the files. Also, sometimes it says the image sequence files can't be read and other times it's ok. Not sure what to do!?! Thank you
im having similar issues with cloth physics
hi guys, i have an mp4 cutscene i need to implement in a game, is this possible at all?
If you're in 4.27 or newer, consider using Bink instead.
thank you 🙂
So I'm having some trouble with the movie render queue. In the ViewPortPathtracing image i have the result from the view port that i was expecting. How ever when I render with the MRQ I get this over exposed image. Both in jpg and exr files. What am I missing?


Oke, so a couple hours later i found that my sky light is being the bad guy here
also check out if you have auto exposure on
hi there, old trick, i'm rendering highest resolution and resizing in Comp to get nice AA.
Is it the way to do?
Or do you use AA method?
If it's prerendered, supersampling is the best way to go. Unless you want to have machinima look
so I'm trying rewind/replay a sequence but the animations that get told to play back from the animation blueprints won't restart from the beginning if they are set to not loop. They are stuck at the end from their first play through and I need them to reset.
I guess I'll loop them and make sure to cut them off before they cycle again
Would you explain how you supersamples? Is it a AA method/algo? Is it by screen%?
Is it by multi pass?
Just rendering at higher resolution and downscale it to desired resolution (either screen percentage > 100% or downscale in post). You don't need to add another AA if you use supersampling, as the jagged edges will be smoothed out by the downscaling to make up the subpixel
that’s assuming that you are downscaling though right?
also i’m confused, are you saying that you can render at a high resolution and lower the screen percentage in order to supersample/downscale all at once?
Sorry, I mean using the same target resolution but with higher screen percentage
so say i want to render at 4k and downscale to 1080p. would i set the screen resolution to 200% and the render resolution to 1080p?
Yes.
thanks friend, definitely gonna use that
So AA method to None, right?
Yes
The moment you downscale the image, the jagged edged will be shrunk down to subpixels, smoothing them out in the process, artifact free
Thx, i was doing that the old ways but this internal screen% command will be more gentle with my disk space.
Hi does anyone knwo if i can record a cinematic and export it in a build? (So no linger in the editor to be clear)
weird peculiar bug 4.26
When trying to add a custom event trigger to the sequencer, and binding to the class function, the sequencer searches the wrong class. It only shows functions derived from a different blueprint - which is not in the scene AT ALL.
Other properties are able to be keyed and called in other blueprints just fine. Specifically it is this blueprint that the sequencer is not referencing correctly and somehow switches to search another class.
Alyssa v 2 C is NOT a child nor parent of Alyssa Clean
What I've tried*
Bringing in a new actor of the correct class into the scene and sequencer (still references wrong class)
deleting derived datacache, binaries, saved, etc folders
OPen to suggestions.
*Side note, it works correctly in another branch so somehow its different (except they aren't - going to try remerging with the source branch to see if it fixes the errors))


you certainly can. WHat specificalyl have you tried that isn't working?
Hi! Is there a way to start all the simulation when I record the sequencer? I know I can simulate physics for specific components like skeletal mesh, but this method does not work with water plugin for example. I made ripples which start working only in simulate mode and can't figure out how to make it work in sequencer.
have you made th eblueprint fully aviaalble to cinematics and instance editable?
I'm pretty new on unreal, can you share a link how to make a blueprint available for cinematics and instance editable? I just copied and modified two blueprints from water plugin examples and it works fine in simulation mode, but not in sequencer.
Will do shortly. Trying to fix a weird bug at moment
Don't have a link per se (could make a video down the road but no time right now)
Hope this helps.


why my level begins suddenly from cinematic camera instead of player start playercamera
Its probably set to "activate automatically" in the details panel
Havent changed anything
can you share screenshots of level blueprint, and the player start camera and of the sequencer?
Wow bro thanks a lot! I lost almost a full day to figure it out and you helped me with just a few screenshots. There is a lack of information for making cinematics with unreal, can you advise some useful sources for newbies?
Hmmm 🤔🧐 dissecting existing projects is how I learned initially. Ie the subway sequencer project is a good start to seeing what you can do with them. And passion projects.
There's also some courses on the Learn site, one about first hour in Sequencer or somethin
Sorry, I'm in a bit of a rush. It would be amazing if somebody coudl help me out!
My animations aren't being applied to my character for some reason, despite putting them in the sequencer?

I know that it's all working because I've had animations playing outside of the sequencer
Hi, I'm trying to render a level sequence animation but part of the way through the render it switches to my player character instead of finishing the render. How do i stop the render from possessing the character's camera and stick to the Cine Camera?
I have tried:
- Removing the player character
- Removing the Player start
- Setting the Default Game mode to none
Thanks! 😉
camera cut track...?
It's either not long enough, or the camera it's trying to control is unspawned/etc.
was the camera cut track, thanks!
Does anyone use the Anamorphic DoF plugin from the marketplace? I am unable to get the anamorphic focus distance to show in my final render from MRQ.
what have i done in level sequence
when i start the level after cinematic it shows the camera view stuck in one place
Hello @tight stone I couldn't sleep until fixing the sequencer, that wasn't the Sequencer as always it was me, hehehe, for future references and because you are very active helping people in the channel, what I realise was my first problem of the camera staying in place and do nothing, the animation hapenned in realtime and my camera wasn't moving because in the Render Movie Settings from the Sequencer I had the Delay Every Frame set like to 120 seconds, and then the second problem after moving some values wrongly, was that I had the** Warm Up Frame Count** too high and my Camera was in free falling, hope you can help others with this explanation.
You should probably switch over to MRQ, which removes Delay Every Frame (that setting is... problematic, because it makes motion blur not work. MRQ has better ways to get large pathtracing sample counts without breaking motion blur)
Thanks for the advice Matt, since the first time you told me that MRQ is better I switched to it changing my blueprints and my workflow. I just wanted to give it a solution to my Sequencer problem. 🤣
IS there a way to tie in the sequencer with actors? Like make a cine camera that the cinematic sequencer can control?
Can you provide some more context to this one? The way this question is phrased seems like you're asking if Sequencer can do the main thing it's designed for, so I'm a little confused.
Sorry I left accidentally. I want to control the camera through blueprints but run it through the sequencer
Hi everyone, I'm working with the City Sample project and i'm editing some part of the map (moving buildings and adding some to match a layout) to being rendered with the sequencer.
The problem is that as soon as i start rendering the sequence, all the deleted buildings suddenly reappear.
I think that this could be related to some settings from the data layer or world partition, does anyone have any hints on how to solve this? Thanks
Add the camera to Sequencer as a possessable, add a Camera Cut track and point it to the camera, and then delete the transform track from the camera so Blueprints can control its position
Ok, is there a way to spawn the player using the sequencer and set the view target and enable input?
So like after it does its whole position change, it should spawn the player and set the view target from the cine camera to the player and enable input
Wait
I did all that but I see no option for blueprints, what do I do?
Event tracks maybe?
Any idea how to make the camera's rotation lerp inside an event track?
OR at least let the sequence control the camera in real time since the event tracks only play code once?
Trying to render a scene via MRQ. Scene has a water system and some **ripples **which I triggered with a blueprint. It looks OK with the default sequencer render, but with MRQ it looks terrible - much faster and not so deep. Any ideas?
Getting back to this question, i really need to fix this.
i've a widget that is used as a component of an actor that spawns when damage is applyed. It's just a floating text block.
When i use legacy render it all goes as intended:

but if i use Movie render queue the widget is not rendered
i don't know why and cant figure it out for a while now, anyone has any idea why this might be happening?
widget has default settings and is rendered in screen space. If i set it to world space it renders but brings other problems

find a reason, it's related to Temporal sampling, water trying simulate every frame
Try the legacy sequencer exporter.
MRQ doesn't include Slate/UMG stuff, but the legacy exporter does.
how do i do that?
you mean this?

there must be a way to fix it >.<
Hi everybody, is anyone who can help me to "extrude" a mesh on a spline with sequencer ? 😀👍
Hello, I'm trying to play an animation on an actor in the sequencer but it doesn't play correctly. I can see the that the bones are moving but the mesh stays in default pose. Anyone know what's wrong?
could it be not rigged properly?
Got a question guys, I am making a spongebob horror game and when the player gets caught, I want an animation of Patrick bashing the player with a flashlight, should I have the mesh loaded in out of bounds and then tell the sequencer to play that animation when the player gets caught?
Or is there a way to spawn in Patrick when I need him?
i'd keep him hidden, or you can use spawnable actor. The thing is that if you move it in really fast, it might get blurred a bit.
Alright, if I keep him out of bounds, is there a way to tell the cine camera actor to not render the background, just him?
I want to make it look like he's actually there, not just look like you've been teleported somewhere
The animation works fine outside the sequencer if I put use animation asset on the character. It's just not working in the sequencer.
Is there a control rig track too? Can you make a screen shot or we go on the guessing game? )
Yes, there's a control rig also, the character's a metahuman.

control rig overrides any animation tracks
you can remove it or make gaps where animation is.
or RMB fill with animation frames
if you want to change animation with rig
Got it, thank you very much 🙂
yw
How can I set my camera manager to use a CineCameraActor rather than a regular Camera actor?

Hi I have this glitch, after a certain amount of time, sequencer just stops showing skeletal animation data. Usually like 2 hours in, and then it just plays reference pose for the animation until I restart editor, does this happen to anyone else?
Got a dumb question potentially, we are building cutscenes where characters pickup objects which means we need to attach objects to their hands etc.
The problem I'm running into is that I can't make them "Spawnable" in sequencer. What is the best practice for getting rid of everything after the scene is finished?
Do I just delete them in Blueprints once Sequencer finished cutscene?
Hey I want to record some gameplay of a top down character running around with the take recorder. However I it does not pickup the cursor FX that is spawned on mouse location. How can I make it to record the FX aswell?
Using the default top down character for reference
Potentially a dumb answer but, haveyou right clicked them and "convert to spawnable?"
Yeah, that's the problem is that any object that's spawnable can't have objects attached during the cutscene. Everytime it starts over they become detached, but maybe I'm missing something.
I'll keep playing around with it.
Does anyone know why my cinecamera is greyed out and "unloaded"??? I have no idea how to turn it back on
Hey everyone ! Does anyone have a guide or tutorial on a proper cinematics workflow? I'm always doing it "my way" but I'm working on a short film with a team and I want to make sure we're doing it properly
what are you doing for the cinematics? Are you setting up cameras, and blueprints? what's your current workflow?
Right now I'm doing everything in Sequencer, with a master sequence and nested shots, dragging actors from the level (using a single level)
But since this is longer I'm wondering if I shouldn't be using multiple master sequences, with spawned actors so that they don't clutter the level when not in play mode, stuff like that
For the moment just using CineCamera actors without any specific BPs aside from camera shake
I'm having an interesting issue I can't seem to solve. I have a level sequence with camera cuts and a pawn actor track, everything looks good when playing back in editor, however when I render (using movie render queue) and/or Simulate in editor, the vehicle (Chaos sim recorded with Take Recorder to the Level Sequence) spawns at the end location of it's animation and plays the anim fixed at that location. https://i.imgur.com/Rlnb0ua.mp4
Hey, there's very little documentation for the sequencer regarding events and things. I just want a simple button that will go back to frame 1 and stop there
anyone know how I would implement this into the level blueprint for example?
seems ridiculously over complicated to me
anyone?
I thought it would be a really normal thing to want to be able to start the animation sequence again without the sequence looping over n over
in real time, just hit a button to restart
they've removed the 'jump to (frame)' node altogether for some reason
Or, add a keyframe to timeline and press arrow keys next to add keyframe button on track. Arrows snap to the next/previous keyframe
Hi @short nexus That's not quite what I was hoping for. I have a live event that will play a sequence animation once until the end. It will stop at the end with a screen fade. All I want is to be able to bind a key that will restart the sequence from the beginning point
I've had a look through the entire history of this channel and multiple people asked for the same thing but got zero response so thank you for atleast getting back to me
For sure. You ever run into the issue I'm having? #cinematics message
Honestly I haven't got any idea. I know that if you have a cuts track it will interfere with any other camera in the scene. So if I had autoposess on a pawn, the cuts track will try to take over and offset from that position and lock you in place.
But it won't show exactly what the cuts track camera is showing
it's weird

'Jump' makes it, well, jump the eval back. And 'Position Type: Frame" says "use the value in the frame property", you can also set it to Time if you want to use seconds.
For anyone curious, I solved the issue I described above by baking the recorded chaos simulation pawn animation into an Animation Sequence (root motion set to false). I then had to replace my pawn actor in sequencer with the vehicle's skeletal mesh, and set the Animation track to my anim sequence (also had to set location transform to 0,0,0)
Thank you. Why does it have to be this convoluted...
The new PlayTo api lets you actually play to a specific frame from wherever it currently is which is nice, so you can build a system to play sub-sections of a sequence. I don't think the old api let you do that
I see
well that's cool, I haven't seen anything about it anywhere online or any examples really so I didn't know
the documentation on a lot of the sequencer stuff is still thin
I agree it's hard to find though, it took me a little bit of typing "jump" "play" "pause" etc until I found the node
haha well I'm glad you did, I've saved your screenshot and I really appreciate it 🙂
Pretty sure it's a combination of these two buttons, though their icons may have changed a little bit (this is from 5)

It says kell all but not auto key
is there a way i can despawn actors in a scene when i begin a sequence recording? i need to record myself moving around in my scene but there are a lot of objects and such in my way.
i have a question
im not sure if it has anything to do with cinematics, since i have used cinematics before and i wouldnt know how to do it like this

the player accesses a booth that disables player control
and plays a mini scene
where the player can no longer control the character until said animation is over
i have no idea how i would begin to try creating this
what is wrong with cine camera or sequence. Whenever the level starts it playes cinematic but when its over the camera is locked to the viewport
How do I make the editor viewport to reflect the camera aspect ratio? It's currently showing full screen
from this:

to this:

Anyone knows how output two different levels load in master sequencer? I'm working in two types of scenes with different assets
Check "Constrain Aspect Ratio" on the Cine Camera
Huh?
"I am trying to ‘merge’ level sequences from different maps in one master sequence.
I doesn’t work for me - only the level sequence which ‘belongs’ to currently opened map shows decent movie.
The other level sequence (the map of which is not loaded right now) shows some rubbish - the cameras move as they should but in the wrong map "
There's probably no good way to do this. You probably need to make a new master sequence, and add both sequences as sub-sequences, and then in your map add the other levels as sub-levels, and then try to fixup all the bindings
Sequences in general are tied to a map (if using Possessables), though sometimes the wrench icon -> Fixup Actor References can fix it
So uhh.. Coming from Blender
How do you animate characters in a level sequence in UE?
I'm trying to essentially make a short film and make a character move around and interact with stuff
All i've found after hours of scrolling trough tutorials about this, is "play an ugly looping walking animation and move the character's position"
And i hope it's not just me, but that's EXTREMELY goofy and horrible-looking
I've tried adding in the skeleton of the character into my scene, making a level sequence, and adding the character to the level sequence
but i can't seem to select any bones
I've also switched to the animation mode and the UI just confuses me
so i uhh figured it out..?
I just had to add a control rig
but now i can't figure out how to automatically set a keyframe every time i change something
i tried the record button but it records in realtime
also my character just teleported on the ground face-first LMAO
@next ember Yes, control rig is the relatively new way to do it. Historically you didn't really author animations in-engine, you'd do them in Blender and bring them in and place them on the timeline as pre-authored clips. I'd look on the learn.unrealengine.com website to see if there's some Control Rig tutorials, it's designed for actually authoring animation in-engine, though it's still relatively new so all the efficient workflows you're used in Blender to aren't really there
I'mmm wondering if i should just stick to Blender now XD
Why not both?
using both Blender and Unreal is not an outlandish idea, it's been done for years.
(at least until Autodesk fanboys sipping into this channel)
how would that work?
Make animations, models, and stuff in Blender, then bring it over to Unreal.
At least that's what we game developers do for years.
yeah ik
It'd just be very annoying
Having to bring an entire fully animated scene into Unreal just to get better graphics lmao
I may aswell just use cycles
I was thinking of using UE to animate stuff because I've already seen an incredibly impressive animation made in UE
Well, those are typically made externally with DCC tools
And since I've already had experience with UI animation in UE i figured it'd be easy enough to animate characters
It did say it was made in Unreal Engine
It means it's rendered with UE.
Does not mean the entire thing was built from scratch entirely in UE
damn
Don't worry if it still sounds outlandish to you
Hi Guys !!! Do you know any tutorial that teach to make a realistic fog on unreal 5?
Hi, is there a way to get an animation to play from the local position of the previous animation ? (or should I just be keeping all animations in place and moving the location/rotations manually for the group)
okay... nvm I found a UE youtube video showing the process I'm describing... looks like the way to do it is to have all animations as In Place and then manually adjust the transform
Look at ‘keep state’ and ‘additive transform sections’
Is there a way to make the Camera Rig Rail move along a landscape spline (which is used to create a road)? Currently I'm designing a spline for the Camera Rig Rail and eyeballing to match the landscape spline, but seems it would be easier if I could just map it to the landscape spline so it would match perfectly....
Quick question...
I have a blueprint actor in a sequence, with animated transforms.
No I have that sequence in a master sequence as a shot and added the same blueprint to animate some other parameters.
Everything works fine in viewport, but when I render through movie render queue, the blueprint looses its transform animation.
Any idea whats happening here?
make the sequence in sequencer, use trigger volume to start it and set player controller to cinematic mode.
use movement along spline, but add line trace to check landscape mesh and align to it.
Alright, I give up.
If anybody knows how to use multiple instances of the same level sequence in a master sequence and then have an event track on top that triggers custom events that change on the instances, feel free to ping me.
I spent too much time and money trying to automate this, I´m going back to "brute forcing" it.
how do i use camera tracking for a cube inside a blueprint? the cube follows an animation but the cine camera cant see the cube in the blueprint and i cant track the blueprint directly due to origin issues
I have a few questions about MRQ but i will start with the most impactful one right now. I am trying to do a render and its very dark. Its inside and normally its well lit. In PIE in cinematic mode it looks fine. The render is very dark

that same scene while in editor

is very dark in the render
it was some exposure settings causing the issues
okay, so now next on the list. Why is soft cloth/hair physics going crazy?
Are you using temporal sampling?
It doesn't work together with it right now unfortunately. There's a really ugly workaround if you really need it
Hi, does anyone know how to pause gameplay with playing cinematic?
I have been using Temporal 8 samples. yeah
Should it be spatial?
what do you mean by this? pause the game while a cinematic plays or pause the game inside the cinematic?
For pre-rendering cinematics with MRQ, I recommend not using the gamey anti aliasing, and just supersample from higher screen percentage/resolution
thanks for the suggestion, I found if the animations are on the same track, if you right click on the second animation and select "Match with this bone in previous track" > Pelvis, it will snap into the correct place
Oh you were talking about skeletal animation. Glad you got it sorted.
That is one option for cloth/hair right now, but you lose the nice high quality motion blur
So i found this online. Changing your cameras to have MotionBlur=1 and setting 4 Temporal and 4 Spatial passes produces a really nice quality
and so far, its been pretty clean
You can also do that, but it doubles the length of your motion blur which some people don't like
ive just done a few this morning.
The reason it freaks out is MRQ jumps over the "shutter closed" time of the camera which generates one frame with a really high delta time compared to the rest
You know i would have thought that as well, but so far the motion blur seems to be better not worse. idk if there is another factor here going on though.
I'd be interested in learning what this "ugly" workaround is if you don't mind sharing
Set the Motion Blur Amount to 1.0 (which doubles your motion blur length), then double the framerate of your sequence (24->48) which will halve the length of the motion blur, putting you back to the same motion blur, then you run a script in post that throws away every other frame.
Thank you I'll have to try it out!
You can use the "Custom Output Framerate" setting in the Output tab to double your framerate at render time without having to change the underlying sequence.
Okay last issue I seem to be having.
If it turn off AA and then set the temporal samples to 4 or higher a few of the VFX are not rendering
Hi, how do I use a cinematic sequence that I create?
In runtime?
Hello. Question. Is it possible to Override Camera in Shot when it's placed inside another sequence? (different camera, same shot) Or I need to make 2 different copies of the sequence with multiple cameras attached? (it has some downsides, as some cameras need to be attached to actors inside the shot.
Oh. I think I got it. You need to place a Camera Cut Track with subsequence and it will override the camera in it.
Well, it has a limitation, you can't have a camera cut inside the subsequence.
As UE cant override one with another.
Hi, I'm pretty new in Unreal. I have this scene, and I would like to increase the illumination in this area that comes from the skybox, but without altering the color of the skybox texture itself, is there a way to do this?

What's the difference between a level sequence and a level sequence actor
What is the fix for when my camera spins 360 degrees when I don't want it to?
as in on of the keys is being forced to be a negative number I think? and it's causing the camera to spin 360 degrees when I don't want it to
When using auto keyframe this can happen
Set it to linear or go into curve editor (little curve button) and manually adjust it
I can't seem to fix it this way?
one is an asset, the other is an actor in the world that can play the asset
right click on the transform of the actor, then go to Edit Section and go down to Rotation and click on 'use Quaternian rotation'
so how to trigger a cinematic sequence in the middle of running the level?
Create Level Sequence Player node
Hello guys. Is it possible to setup alembic character blue print same way as with skeletal mesh?
So i can reuse it in different scenes/shots, without assigning materials/hair etc every time i import new animation cache?
I am looking to something similar to Maya's Reference editor. Is it possible? If so, how?
Thanks!
Hi,
I wonder why my characters aren't moving when viewing playback.
If I start the "game" they move but when using the play button in the sequencer I get static characters and animated camera. Any advice would be very much appreciated 🙂
I’ll look into that
Hello, i dont have any experience in Movie render queue, but im following the tutorial on the UE website about High quality renders using movie render queue, and im enabling pathtracing and adding it to the render settings, yet when i start the png renders, seems like the pngs that are exported do not have pathtracing on them. These are pictures of how it shows in editor with pathtracing and after rendering


Hi, super noob question: I don't know what I did but my frames are now black. My scene is also black when I press play or simulate so I think I have to load my scene, but how?
It looks like you're rendering the wrong pass, that looks like the roughness pass
Do I have to add all the actors in my level to a Data layer? (I'm using world partition)
Did you delete the Deferred Render pass
Say that I have a Spawnable trophy object in my Sequencer, and the trophy has a variable that changes its appearance from Gold/Silver/Bronze, how can I set this variable before executing the Sequencer so that the correct trophy shows up in my cutscene?
No i kept the deferred render pass, i also turned down the roighness to 0 looked a little better but still didnt look like the pathtracing in editor @potent moss
It looks like you put the Reflection pass instead of the Path Tracer pass
And if you have multiple passes it's going to write out multiple files per frame (assuming your'e using jpeg/etc and not exr)
I tried exr too got the same result, currently using png, but if i would want to check the passes where can i see if i have pathtracing or reflection pass?
How can I fix this weird ghosting effect on my movie render queue?
When rendering out the frames, it seems that it happens so quickly that the light from the emissive material doesn't propagate properly resulting in these weird render frames.
So how can I make a delay of a few seconds for each frame when rendering out in the movie render queue.
heya people, I may be being silly, but can I not change the aspect ratio of a cine cam in a level sequence?
Yeah, I was being silly. I'm still waking up it's literally the first setting
found the fix was to set override the anti-aliasing and set the anti-aliasing method to none and bump up the temporal sample count.
heya all, Does anyone know why my movie renders are coming out ith a totally different exposure? to the cinematic view in editor?


auto exposure maybe.
nope
that was the first thing I checked. I've done all of the above from someone who seemed to have the same issue but no luck still

anyone know why virtual heightfield mesh isnt appearing in mrq renders?
Hey all. Anyone know why matrix demo cars dont render ground contact shadow when using ray tracing vs lumen? Look at the tire on the bottom right of this image. I made sure all lights are casting shadow and i even put a light directly on top of it so idk wtf is goin in lol.

What does your render settings window look like for the job
Step 1) Isolate the problematic render feature (it's probably Lumen)
Step 2) See if there's cvars you can adjust or setting sin the Post Process volume to make quicker updateS
Step 3) Increase the temporal sample count so the 'wrong' frames have less weight in the final image
You can't do a wait-num-seconds like the legacy renderer because it totally breaks motion blur
You're probably not fully looking through the camera - and the camera may have "Apply Physical Exposure" or whatever it is checked, which makes the aperture affect the exposure, and some ways of looking through the CineCamera in the editor don't apply the aperture
Heya o/
Might be a bit of a question with no easy answer as it's profiling-centric.
Been profiling a cinematic and there are some areas where the frames average +-40ms for a few seconds. From what I can see this is because of InitViews taking +-30ms. It seems the Occlusion Culling is struggling quite a bit.
These are likely all shots where multiple high poly characters are on screen so I was wondering if there might be some areas I could look into to help with this aside from reducing the amount of characters on screen?
Believe the characters might be an issue based on my limited understanding that vertex count affects HZB (STAT_HZBResults seems to be what's taking the Occlusion Culling and in turn InitViews so long)
Not a graphics programmer though so a push in the right direction or any advice is greatly appreciated!
I had thought adding preroll might also help here but this doesn't seem to have improved things a whole lot (some texture popping is gone now though which is nice 👌 at least).
Did this test a while back
does anyone know how to change the frame rate in take recorder?

is it matched to the level sequence you have open?
Is there a parameter in the camera to make the bright spots of the bokeh brighter?

i'm not talking about changing the amount of DOF, the level of focus and DOF is what we want. We just want the bright spots of the bokeh to pop much more
like this

or this

Decrease the aperture, perhaps
all that does is make the DOF shallower. has no impact on that brightness.
You can go as low as f/1.0
You probably need to make the lights creating those brighter, it's physically based.
copy that. thought that might be the case.
is there any way to create bokeh fringe? in older versions of the editor you could use a bokeh texture
Or you can render in linear and do your DoF/Bokeh in post and then you have more artistic control
right
i believe so. i right clicked on the level sequence in my content browser and clicked "open in take recorder". the level sequence is set to 24fps but it appears the take recorder is set to 60 for some odd reason... and the timecode isn't working either.
(i'm on 4.23 if that makes any difference, perhaps it could be a bug?)
423 is... ancient D:
Not that ancient as 4.18 or earlier
Almost 3 years, it released in Sept of 2019. And Take Recorder/Virtual Production/In Camera VFX has seen a lot of development since then
For all I know, it's the context of part of a game project, for making trailers or cutscenes.
In preferences you can set the default fps for take recorder too
this is kinda a basic question but does anyone know how to do screen replacement

like with this scene can I change the material on the screens to a video?
I already have done that with a rickroll... Xd
I didnt change the material i just put a plane in front of the monitor
And the plane had the video on it
If you want to know how to make a video just watch that https://youtu.be/UoKLfaJ5In4
Does anyone know how do I make Movie Render Queue respect dynamically spawned actors? In the editor it works just fine but at runtime (in the packaged build) those dynamically spawned actors are not visible...
I was debugging MoviePipeline code and it seems like Scene Rendering is disabled when MRQ is active. Does that mean Dynamic components will never ever be seen in MRQ?
@frank palm make the executor instance yourself, set the "use current level" flag on it, and then use RenderQueueWIthExecutorInstance, instead of RenderQueueWithExecutor
Thanks but how will it help in my case?
Is there a difference between Executor and Executor instance that affects dynamically spawned actors in the packaged application?
if you dont' set the 'Use current level" flag before calling Execute then it reloads the level
Ah, 'use current level' flag is already set in my case...
show picture of your bp graph?


I'm seeing a ton of videos explaining how to use Live Link to take a Maya camera and sync it to Unreal. We want to do the opposite and take a camera animated and built within Unreal and sync it to Maya. Does anyone have workflow recs or documentation for this?
I have a light blueprint with its intensity set from 0 to 50k in the timeline as shown here, its set to expose to cinematics inside the blueprint too but the values dont take any effect at all playing or scrubbing through can someone help?

You need to get the queue from the MoviePipelineQueueEngineSubsystem instead of constructing your own (if you're going to use Subsystem->RenderQueueWithExecutorInstance)
Thanks, I will try!
hi there guys. I'm just doing a quick render test in ue5 but I can see in my render window that the landscape never quite builds... it appears to be terraced and never snaps out of that but the camera still happily animates its way around the scene... please advise. thanks


hey everyone, i have a camera in my scene that i recorded using a virtual camera. curiously, it seems as though the transform track on the camera is simply additive/relative(?), meaning if i move the camera around in the level then hit play on my sequencer, the camera doesn't reset to where it's supposed to be. is there a way to disable this?
i tried changing the blend type in the transform track properties but none of them worked
i'm betting this is related to a similar issue i have, where if i try changing the camera from spawnable to possessable, it teleports to a completely different part of the level
anyone else having issues with UE5 landscape when they try and render a quick movie? my terrain is all staggered like its in LOD_193... is this a world partition thing? Do I need to tell it that the camera is at this location and so the landscape needs to render at its highest?! Please help.
are these settings ok? I still get the stepping in the landscape. I have to hand this video over today and I've not slept please help

is this a new bug or has anyone one else come across this?! my landscape is stuck on the lowest setting when I use Render Movie Settings.... I don't have the time to use render queue.. I did try but it just crashed my PC.. I have a 3090 and the 12th gen intel. How do people get anything rendered on UE5 or UE4 is incredible.

I had the same issues and until now I don't know how to fix it.
Hi, my Camera Cuts track isn't working in viewport---when I play Sequencer the viewport only displays whatever camera is active in this dropdown despite having two camera cut shots.
UPDATE: I feel pretty silly, the solution was simply to make the Camera Cuts track active by pressing the camera icon to the right of the plus sign.

How can I get playback of my edited sequence?
This was the fix

thanks for your reply. I ended up just recording my screen and handing that to the client.
Does this landscape use virtual textures? (ie: virtual height maps)?
Hello all. I was wondering if someone could point me to the relevant information that would maybe help me solve my problem. I am tasked with recording a rather long shot in sequencer using a camera rig rail. I charted out the path with the rail no issues. The camera follows fine, timing is good, etc. But I need to be able to have the camera 'look at track' at different things over the course of the shot. I cannot get this to work. I am able to key frame the camera to 'look at' one object, but as soon as I try to assign a different one it overrides to first. I hope that makes sense.
don't think so.. I use MAWI his landscape texture. It works in the viewport when I press play but not when I try and render..
A good starting point might be to swap to a default material to see if it's the mateiral or the landscape
You can also try adding the Anti-Aliasing setting, and setting "Engine Warm Up Count" to something like 128, and then also enable the "Render Warm up Frames" boolean.
I set it to a much higher value warm up it didn't work.. I just kept increasing it thinking it needed to warm up but didn't seem to work. I could try another landscape material but that would undo all my landscape painting work. Took me a long time to get it looking like I wont it. But that would be an idea.. He has a demo level with that same texture I could see if that renders.
Ah, I didn't know that about landscape painting. Definitely back up your project before making any changes. Did you have the "Render Warm Up Frames" checked when you increased the Engine warm Up Count? If you don't, it doesn't actually render the world (just ticks the engine) which if it uses something like virtual texturing, it won't have any effect
let me get my settings up. I had to go with the much faster older render queue as it spits out avi files so quickly. I did try with the new renderer but it froze and then crashed my PC.. I was having similar issues in ue4.27 so just went with the old trusted version... shame they're getting rid of it.. that used to work..
Default settings on the new one should be pretty similar to the default settings of the old one.
yeah I thought it would be but it crashed it.. does it do avi files now?
hope this is easy to see. thanks for your help by the way

The new one does ProRes or AvidDnX, but it can also just use ffmpeg to encode straight to h264/mp4.
So you're using the old "Render Movie" renderer, and the landscape doesn't work there?
Because the old Render Movie feature is just a PIE session and it grabs a copy of the texture that's being sent to the Window for display, so it should be really close to a regular Play in Editor. Only thing I can think of is that it sets Cinematic level scalability, and enables Cinematic Mode on the player pawn. You could try unchecking those two checkboxes in the settings list.
and it crashed the newer one. Let me try that new one again. what settings would you recommend to try and replicate a 4k avi render that I was happy with from the old version?!

Well I'd just start with the default settings and seeing if that renders at all
I wondered if the landscape needed to know that the camera was like a "player" and if it knew to be rendering at its highest when the camera was near?! I also tried variations of the cinematic and cinematic mode. also setting the landscape LOD to 0 instead of -1. didn't change anything. Final render had a stepped landscape. I bet this is all down to on box needing to be clicked. Have you seen this issue in World Partition before?
I've seen an ugly looking landscape before (not sure if it was the exact same behavior) and in that case it was caused by using Virtual Textures and it just needed more warmup time (so that the first frames would be correct)
I don't know World Partition and Landscape work together, I thought that wasn't supported yet?
what? sorry I don't understand. its such a big change from 4.27. I thought you'd have to use world partition if you wanted to create large open worlds? So many of my historical reconstructions have horizons that go on for miles. I used real world hight detail to create my landscapes. Am I doing this all wrong?
UE5 has just crashed trying to render that film.. ffs
You can ignore me, documentation and the sample OpenWorld level use landscape
Do you have the log or the callstack from the crash
no, nothing pops up like it used to in 4.27 and earlier versions. It just shuts down.. quite often my PC just crashes and then reboots. I have a good PC it shouldn't be doing this but it sadly does. Where would the crash reports go if it doesn't show that popup window? Would it be in a folder some place?
YOURPROJECT/Saved/Crashes/
wow........ so many folders.
this is what is inside the folder? what would help us here?

Ya can you attach the CrashContext.runtime-xml
It may not tell us anything without having the Debug Symbols installed from the Epic Games Launcher, so you might have to install those, then go crash again for more info.
Ran out of memory allocating... I have a 3090 and quite a basic level. I have task manager on and I had loads of VRAM and 32GB of the latest RAM installed...
I believe that error message only relates to system ram (and not vram). When you're in a regular PIE session (not trying to render) what does Task Manager say your RAM usage is at
what I don't have a lot of is disk space. I have 156GB could this be the cause?
8147584 bytes is only ~8mb of data so that's odd, that's a pretty small allocation.
I'll open it back up again
goes from 7GB o

that what it looks like just before, during and finally opened.
And going into regular PIE?
ah

"Available: 3.4mb" Well... the error message wasn't wrong haha
I'm surprised it doesn't crash just running around in PIE. I personally upgraded from 32gb -> 96gb and feel like that's just improved my dev machine significantly even outside of Unreal
Looks like you have two slots free too, so it sounds like you can just add some more RAM to your machine without having to replace what's already in there. I'd certainly recommend it if you can afford it.

so this explains why I can't use (and hate) the new renderer... doesn't explain why the old version doesn't render the map correctly.
here is the video I sent the client.. I'm not happy with it but at least I didn't miss my deadline. I screen recorded me playing back the film from the view port. https://youtu.be/OqPX3hVVYUw

Yeah I'm not sure, the old renderer really is just a PIE session. I'd try isolating it out - is it the material, is it landscape painting you've done, is it landscapes in general, etc. Does the material graph you're using require any special setup like changes to a blueprint that modify a Material Parameter Collection or something?
probably landscapes.. I have 81, 2017x2017 landscape tiles. That was in case the camera caught any of the horizon in shot... I blur lots out. Helps in this example as the LiDAR data still has houses and streets in the valley next to this one. I was advised to use LOTS of smaller landscape tiles as I used to just use 8k landscapes. Apparently its better for and less taxing on the PC... I thought I'd try it out on this project. There just isn't enough documentation or tutorials on large open worlds. What to do and NOT to do. I think the NOT to do is quite important. saves everyone from even trying it and so saves everyone a lot of pain and time. I like what the new World Partition clamed it offers. sounds awesome. Just need to know how to use it better. I often get asked to recreate the same landscape but from different times of the year so being able to swap out props and other things easily to illustrate, say winter, would be cool. I saw something like it in this demo vid, go to 23 mins in. https://www.youtube.com/watch?v=ZxJ5DG8Ytog this looks really cool. I just need loads more info on how to do that.

Check out the new features and tools that make it easier to work on large open worlds in Unreal Engine 5. With a bird’s-eye overview of World Partition, One File Per Actor, and more, you’ll have everything you need to start creating your own open world games.
thanks for your help though. Much appreciated.

Keep in mind it's also brand new
I've been trying to join the virtualproduction facebook group for days but haven't had any success
i believe i've figured out what's causing this
normally a camera's CameraComponent is zero'd out, but the camera i recorded using my virtual camera has a transform track for the CameraComponent, not for the SceneComponent. you seem to have pretty good knowledge on this front @tight stone, do you have any idea why this is happening? for a bit of context these are the properties i ticked on in the take recorder for my camera. i guess i may have made a mistake ticking on transform for the CameraComponent, but as you can see i also have it ticked on for the camera itself (GH_Camera).


I wonder if both are recording the positions (in world space) and then both are getting converted to relative movements, thus doubling it up
I definitely wouldn't record the camera component unless you're actually moving the camera component and not hte actor
yeah in the future i’m just not gonna record the CameraComponent and see how it goes. unfortunately it doesn’t look like there’s a way i can salvage my recording (convert the camera to possessable) without the transform getting completely screwed up.
Does the camera component have its own transform track in sequencer? Can you just mute that transform track?
yup the CameraComponent has a transform track but there's no option to mute it, only have it active/inactive. here's what my timeline looks like.

what i find most odd is that in take recorder i had the transform tracks for both the camera itself (which i assume(?) would create a transform track for the SceneComponent as there is literally no option for a transform track under the actual SceneComponent section) and the CameraComponent ticked on, but it only decided to record the transform for the latter 😕
If you add a cinecamera to a new sequence you can see how it expects to be setup, the component is just a child of the actor, transform should normally be on the actor not the actual camera component. You can just copy and paste the transform track, or delete the keys if needed to rearrange.
@barren lagoon try just copying that transform track, then click on the cinecamera track and paste. See if it creates one for you. Then just delete the components track entirely.
i tried this before and unfortunately it doesn't work. if i paste the transform track onto a fresh camera actor it teleports it somewhere else on the level entirely, presumably because i'm copying the transform from a CameraComponent onto the transform of an actual camera actor (hopefully that makes sense)
What’s your end goal? You don’t want it to move? The fact it does means the values are correctly being transferred, you just need to figure out what needs zeroing out.
Currently your seeing the final position of the camera as the addition of the component location and the actor (assuming you don’t have any attaching going on). Ideally the component transform should be 0. Look at the raw values on the keys to debug what you need, check the component values vs the actor values after pasting and compare them. Transforms are a bit confusing in sequencer as there’s a hierarchy of inheritance. If you DONT have a transform track it will fall back to the actor location in the world. If you DO have a transform track, this normally overrides it with the sequencer location whilst a sequence is open or being evaluated (in absolute mode). Feel free to send my the .uasset if you want a second pair of eyes. It sounds like a mistake when take-recording, but certainly not un-fixable.
Using the MRQ can I render every nth frame?

Enchanted Is a First Person Magical Arena Shooter running on Unreal Engine 4, and developed in Core Games by just two highly motivated designers
Players will harness the power of Enchantments to manipulate the elements, Combat in diverse fantastical arenas, and choose between competitive and casual modes
Enchanted is currently planned to relea...
thoughts?
I don't know what to think, after I recommend you to post this to #work-in-progress instead.
oh
What is the best way to design 🗾 map, and building design use blender or UE5 engine is fine? Any suggestions
<@&213101288538374145> crosspost to 4 channels
Please see rule 7, don't cross post
Hi, I have a question regarding recording a plane that is being simulated by a WindSource.
I have tried recording it with Take Recorder, but the plane does not get recorded with the wind animating trough it. I need it for a cinematic to be waving but I can't figure it out. Any tips?

Normal

when it's simulated.
I would like to record the simulated to an image sequence.
Take Recorder doesn't have a way to record that, as there's no solution for caching/playback of cloth. You should probably use the regular sequencer renderer to produce an image sequence - the renderer is just a PIE session so it would simulate in real time.
can someone help me with some green screen footage?

Every time I open my UE5 Project, I always get this issue.
"the object bound to this track is missing" within the sequencer panel and the whole scene is also empty
How do I prevent this from happening? Is there a binding process I should be doing every time I save and close my project?

Is there no one who can offer some advice on this issue? Trying to have multiple "look at" targets on a single track...
never done that, maybe there is a smarter solution, but having multiple cameras, each with its one look at and then change camera in the camera cut track ?
Thanks for the response. I was hoping there is a single camera solution as the client wants it to be a single shot. The entire clip is a 5 minute flight around a geographic area. The "look at" targets are 3D callouts of particular buildings that will be in view for the entire clip. I will have to see if I can splice multiple shots together seamlessly. Is it possible to assign a start and finish point on a long camera rig rail? That way the multiple cameras can run on the same rail?
gotcha. so you need full control of the blending inbetween ?
so a really soft transition
Actually the client wants no visible transition
"no visible transition" = hard cut, right ?
Why not make the target and empty actor and animate it’s location in sequencer?
exactly, was thinking the same. more visual control
without transition is easily doable in sequencer
Thanks for the suggestion. Even with a focal length set at 12 the camera is still not capturing everything in the scene. I need to be able to rotate the camera to look at a point of interest, smoothly.
Not sure I understand, animating the look-at target is exactly how you would do that.
I am trying to upload an image to better illustrate but for some reason I am getting blocked by a bot
What is going on? Everytime I try and upload the image it gets blocked as explicit. I just made it in photoshop, it is a line drawing?
That is my question really. How can I best animate the camera along a flight path in a single cut to look at multiple objects.

Google Docs
Maybe it will allow viewing this way?
And still, it cuts off part of the image, strange
as daryl said, you take your camera on the path. instead of looking at the blue points, you create an empty actor that moves from point to point. this way you have more control about the transition from blue dot to dot.
as an example "look target (the new empty actor) stays in position for frame 0 - 300. then it moves to the next dot from 300 - 400, stays in place from 401- 700 and so on. if your buildings / look at targets are staying in place, this is the easiest way with the biggest amount of control
Okay, that helps me better understand. I apologize for not getting it the first time.
Thank you both very much. You have been most helpful.
sure, you are more then welcome 🙂
tbh i just added "how to blend between to moving look at objects" on my research list thanks to you
What's the easiest way to migrate a sequence and all of it's associated components from one project to another? I heard using the migrate feature doesn't work properly?
You don't have the right map open for that level sequence, open the right map
@rocky escarp @burnt valley Just wanted to say, your solution is working perfectly. Thank you so much!
Whenever I try to render out a sequence with Movie Render Queue, the render window opens up and stays blank for a long time (sometimes several minutes) before actually starting to render out the frames. Once it starts, it renders fast, but sometimes the render window stays blank for longer than it takes to actually render the whole scene…
Is this normal? Is there a way to improve that time before it starts the actual render?
when you click "start simulating the game", does it take long before it starts ?
It's probably compiling shaders, in UE5 it now pops up a window showing as such, but in UE4 it only prints to the log I think
No, it starts almost immediatly
I wait for the shaders to compile before trying to render out the sequence, but it still takes a long time in the blank frame window. Does it compile again every time you try to render out the sequence?
Should only be shaders that have changed. Launch the editor with -log so you get the separate pop-up log window and you can read the log as the window waits to see what it's doing (potentially)
Hi all,
So I have a character animation that I'm trying to import as an alembic. I have followed the proper export steps with UV write, face sets, and imported the animation as an Alembic skeletal mesh with no compression.
My textures are all UDIM's, when I apply on top of the skeletal mesh, I have very slight distortion.
Following an fbx workflow this minor distortion was resolved by enabling "Enable full precision UV's"
But I could not find the same option for Alembic. Is there a similar workaround for Alembic?
Can anyone point me to how you set the screen percentage when rendering out a sequence using MRQ?
i can't find screen percentage in the post process volume in ue5
so not sure where i set that other than the editor viewport option
What Kind of game overwrites or cvars are you using? Simple debug would be disabling everything and then testing, enabling the first, Test, and so on.
It's probably textures or forced lod 0
If you find one, please ping me. Have the same issue
It's just the archviz blank project scene with some simple static meshes animated in the sequencer and a camera. I don't understand what you suggest I should disable to test
In the mrq render settings
I'm not using any game overrides
nor console variables
its just the deferred render with a simple output
r.screenpercentage 200
hey, can't find a way to have my images sequence sync with my wav audio output in movie render queue. 30 fps set in both sequencer and mrq. 2min lenght video render and 14 min of audio... any solution for this issue ?
Yep, in the Project Settings you can pick the scene to load when the Editor starts 😉
already made a search about it. Not useful for me as I need to record weather effects of my scene in real time, can't add it after rendering image sequence
Or just do the sound design entirely in post
I can't. Sounds are made with ultra dynamic sky in UE5.
So adding those sound in post and to have at least convincing foley assembly is not an option, like, at all?
There would be a way but it would take too much time, rain and wind would be easy, thunder would not as it occurs a lot and I intend to make something like a 10 minutes render
Just make it convincing enough.
If it doesn't happen in front of your eyes in noticeable fashion, timing accuracy doesn't really matter
Don't overthink it.
But I want to make things as perfect as it can be
why spending time learning ue5 and have poor audio output ?
Are people going to notice it? I highly doubt it.
||For context I worked as a video editor before.||
I found this as a solution, there must be something to do to not waste post process time : " Download Audacity, set it to use Windows WASAPI with your default output (speakers or headphones), and then hit record. Then in UE4/5 hit play in your viewport (make sure your sequencer file is set to auto play) and Audacity will record all of the audio that comes through your system (i.e. make sure you turn off Steam, and anything that’s gonna give you a notification). Then all you need to do is cut the blank section from the beginning of the recording, export it as a wav file and everything should line up perfectly inside your video editing software. "
Way ahead of you.
#audio message
yes but still, I don't find lot of interest in spending time in post process when I could work on something else, for having result that's not as good as real source audio
even if I understand your point
I want to be able to get real audio when I'll really need it
I'm trying to render out a sequence but I'm getting some visual artifacts like this jagged lighting:
Anyone knows how to avoid this, or why this is happening?

overall the scene lighting is not jagged, like here it's pretty smooth and looks the way I intended

kinda looks like the light is leaking through the side where it shouldn't
Lumen?
yes
the weird thing is, on the viewport this doesn't happen. In the viewport the GI looks noisy, but there is no jagged lighting

Do you think there's a better option?
Path Tracer would be the best option.
I tried path tracer but it takes too long and looked bad (like a lot of flickering blobs in the shadows / GI)
So, in the end I changed from lumen to ray tracing (deprecated) and the glitches were gone
It also renders faster now, although the GI looks darker. Maybe I need more bounces
are you using the old movie renderer that renders audio in two passes, or MRQ which does it at the same time as the output frames
@earnest crow is that text, how is that being done with multiple materials and still saves/works
With the take recorder, is it possible to record a camera movement and then save it as a template to add to another scene?
im interested in the take recorder myself
Yes, you could create a blueprint that has a cinecamera actor in it (set up so you can control it during gameplay) in your level, add it to the Take Recorder panel for recording. After recording it'll get saved as a Level Sequence, which you could then add to another scene with a subsequence track
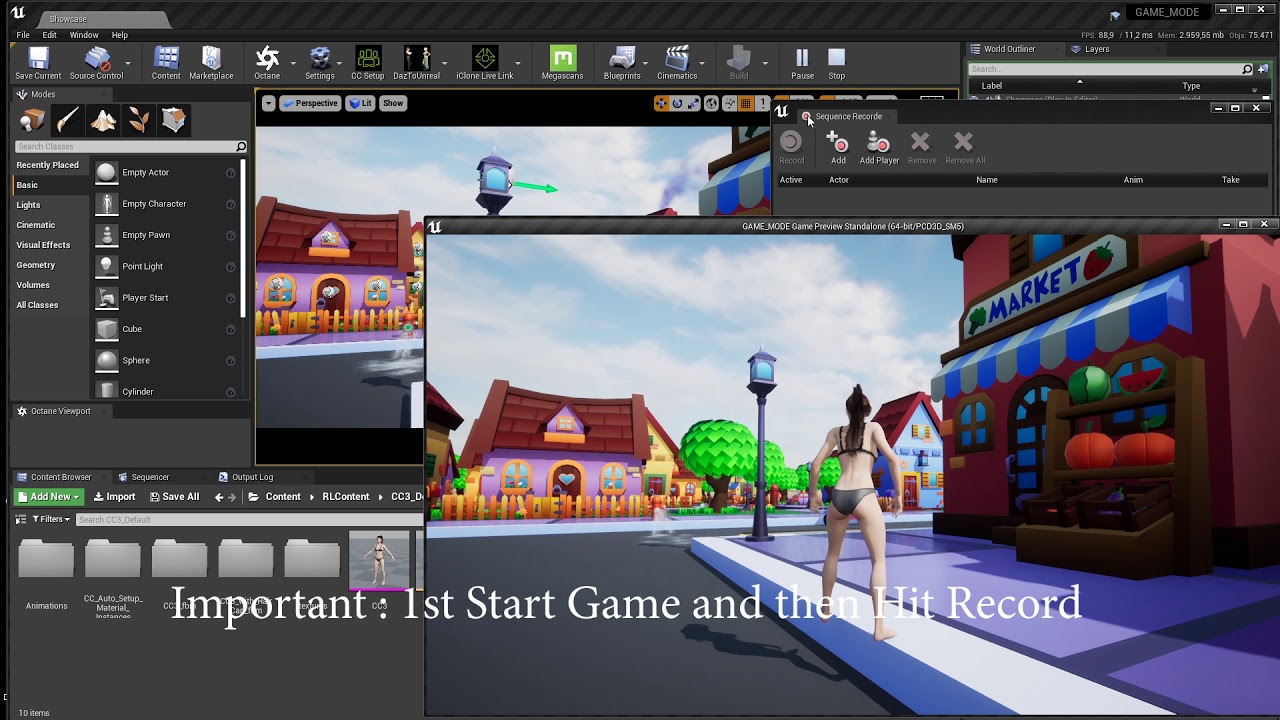
Hi there! Is possible to record full gameplay via take recorder? I try and I get more issues 😦 The animation of the player does not start, the root is in 0.0.0 point, lost connections (links) tools to hands bones, etc. All the parameters exist in player BP and anim player BP.
I know that I can grab it via NVidia recorder or OBS but I'd like to smooth/correct the moves with sequencer and then render via queue renderered. Did you know any manual/tutorial etc?
Haven't actually tested this, but this might be a lead.
https://youtu.be/A5pBO3f082I
Hair Physics looks terrible , will adjust it.
I watched this. But it's not working for me because I have issues with linked tools and the position of the player (and animation generated by BP_anim). This film is a simple (no BP) character. And without any tools on hands 😦
cartoon delis and bikins running around half naked outside in public hahaha
oops... still waiting for alemarcati
Amazing, thank you!!
Why does my CineCameraActor detach from my CameraOrbitController detach when start rendering movie?

So, is MRQ Runtime can only use level sequence premade in editor, and not replays?
No. Take Recorder only captures what Sequencer can play back.
Correct. You might be able to fake it by making an empty level sequence that is the length you want to render, and also triggering replay playback at the same time. I am not sure how MRQ wanting to control time will play with replays, it may be ok.
It's just static meshes created in blender. Each letter is a separate static mesh. The faces that light up just have a different material slot assigned to them in blender, so inside unreal it has the two materials.
I don't understand what you mean by "and still saves/works".
@earnest crow oh thanks. theres a 3D text plugin for unreal that ships with it, its listed as beta and it loses the materials randomly - wont film at all.
your method sounds a lot better cause i think i can do it letter by letter instead of word (the plugin has advanced text positioning and blender text does not iirc)
@earnest crow how is it just 1 face per side ? mine get like 150 faces per side ):
Hiii... No matter what I do, my renders (legacy... I am using it because I need it for a niagara system that only renders properly with it) are ALWAYS 31 seconds.
Whether I change it to 5,20,60..
This is a sudden problem...
Any ideas?
Thanks in advance
Hello Everyone , I am working on a cinematic using the UE5 matrix city sample. Everything looks Ok, until hitting the render button. The actors are visible in the sequencer editor, but in the final render far objects disappears, I put simple box objects one far from the camera and another one close to camera, far box is not visible in the final render. Please check the first box and not show in in the final render images.


Box close to camera .


If anyone knows how to fix this issue I will be very happy. Thanks!
if you don't have hlods built they won't show up in PIE
You can increase the loaded range of cells with wp.Runtime.OverrideRuntimeSpatialHashLoadingRange -grid=0 -range=X, but that'll take significant amounts of RAM (as it's loading the actual contents of the cell), better to build the hlods
I am on it, It will take some time. Thanks for the answer👍

This isn't MRQ specific fwiw, PIE in general just shows nothing if hlods aren't built for WP
You made my day, Thanks @tight stone 🙏 🙏

👍 glad you got it sorted
What do you mean? The wireframes look like this. It's not actually text in blender, I created the text in illustrator, converted to curves, imported in blender as SVG, extruded it and then still had to clean up the topology so the front faces weren't a bunch of random triangles

https://twitter.com/MarcatiAle/status/1537586657767018496?s=20&t=SH4M4TdGXBCx-vDS15JW0g
This is the result

m o t i o n
Animado e renderizado no Unreal Engine 5 com Ray tracing em tempo real.
#motiongraphics #3D #unrealengine #UE5 #raytracing #realtimeVFX
Disable autoplay in it’s details panel
Hey Guys, I am trying to render out a shot from the level sequencer in 5.0.2.
I am using a single Camera Cut. Nothing too long (120 - 1000 frames).
It starts the processing window. The preview is black. And after a while it crashes.
This is the relevant bit of the log:
Unhandled Exception: EXCEPTION_ACCESS_VIOLATION reading address 0x0000009900000005
... (STACKTRACE)
[2022.06.17-07.30.02:569][344]LogWindows: Error: === Critical error: ===
[2022.06.17-07.30.02:569][344]LogWindows: Error:
**[2022.06.17-07.30.02:569][344]LogWindows: Error: Assertion failed: (GIsCriticalError || !NumMarks) [File:D:\build++UE5\Sync\Engine\Source\Runtime\Core\Public\Misc\MemStack.h] [Line: 102] **
[2022.06.17-07.30.02:569][344]LogWindows: Error:
[2022.06.17-07.30.02:569][344]LogWindows: Error:
[2022.06.17-07.30.02:569][344]LogWindows: Error:
[2022.06.17-07.30.02:569][344]LogWindows: Error:
[2022.06.17-07.30.02:641][344]LogThreadingWindows: Error: Runnable thread StallDetectorThread crashed.
Full Stack Trace
I am not sure but it looks like a memory problem, did you try reducing your output size and render again.
Does a window pop up saying the graphics card crashed?
If so, it's probably related to VRAM. Like dereli said, try rendering in lower resolution and check if it works.
No, no window pops up. But thanks for the idea. I will try that out and report back to you any new findings 😋
So I rendered with output 20x10 just to check if it is memory.
I also made a screenshot of the rendering window, before the crash.
Something is off. And I think I missing something very essential

Very weird
Are you using lumen/ray tracing?
Yes, that seems to by my specialty.
By the way it worked with the normal Movie Capture
so it seems to be related to the render queue and this project specifically.
Try changing the file format it's saving. If it's jpg change to png or something. Just to check if it has something to do with the format encoding
Also you can try changing the output path to another drive if you have a second one available to see if it has something to do with the drive
I wouldn't bet it's either of those things, but testing won't hurt
Yup, thanks guys. I just wanted to eliminate any obvious blind spot. I will try out different settings next as you suggested.


You sure it’s not the collision mesh from a default spawned pawn?
it was my player start i replaced the root with a empty static mesh
hi When I click on the camera, I want to enter the camera. What is camera keyboard shortcut?
Well you have to wait.
For the frames to build. It takes a while if ur doing 700 frames. Trust me
What do you mean? It should show the preview while it's rendering, not a black window.
No it doesn’t. It shows a black screen because it’s getting it’s frames.. I had that issue today. Just waited 5-10 mins and it started working
Was this when you rendered ur sequence at the start?. From what I experienced today I had the same thing. I just waited a couple minutes.
You have to click on ‘Perspective’ in your viewport (top-left corner) and then select your camera (camera01), then set the Cinematic View
What would be the best way to render separate layers via Movie Render Queue when you have Nanite meshes populated in world? Nanite doesn't support stencil so stencil layers, object ID etc doesn't work (means they just render black).
So, I recently started to work on some VFX for videos and thought "I can make all this cool stuff in UE5!!", I watched a video on enabling the alpha export option and when I did the EXR format I was shocked that there was no alpha layer. I thought "maybe I missed a checkbox!" cause that is a common thing lol.... however, I put in a cube into the scene and did the render and walla... cube had an alpha.
So, all this to say, can anybody else confirm that the alpha layer option does not work for VFX (Niagara)
my next approach is to just put a greenscreen behind the VFX, but would hate to have to filter that everytime


This is the EXR file
Same scene, no change just added a cube

Also, before somebody comes at me "This is an experimental feature!", I know, I am asking if anybody else can confirm or tell me a way around the current limitation. Thanks in advance
Hi. Any idea to change current focus on editor utility widget ? thx

im trying to render a simple turntable but i dont know why it doesnt render the correct camera, it appears just for a couple of seconds in the middle. does anyone know why?
I’m trying to use Chaos Destruction in sequencer to trigger Chaos at some specific point of time. I created a Chaos Cache Manager, recorded Chaos Destruction, placed the manager in a sequence, added Start Time track and set key frames at the start and the end time.
It worked exactly as I wanted when I played the sequence in the editor and the object I wanted to destroy began to be broken in pieces at the timing I set the start key frame. But when I rendered the same sequence through MRQ, the object began to be broken apart at the first frame of the sequence and it had already been destroyed before the start key frame I set.
So how can I trigger Chaos Destruction at a specific timing in a sequencer when I render the sequence with MRQ? And how can I preview the sequence being rendered through MRQ in the editor when I use Chaos Destruction? Thank you.
hey everyone, i currently have a virtual camera setup using an iPad and uRemote. all the correct plugins have been enabled and i have the game mode set to “VirtualCameraGameMode”.
i’ve positioned a camera in my scene with various settings and dragged the camera into Take Recorder so I could record using that specific camera. however, when i go into PIE, a new CineCamera spawns into the scene and Take Recorder, and my iPad takes control of that new camera instead of the one I already set up in my scene. how can I make it so my iPad connects to my pre-existing camera rather than the new one that spawns in when i hit play?
Hey so I followed a video and it claims it works but nothing happened idk if its missing something but does anyone have a recomendation or let me know where I can find one?
I wanna do a small cinematic
It just will not show the animation in game
Can you be more specific? What have you tried so far? Did you make a level sequence and it has a camera and a camera cut track?
Yes
I shows it when I click play on the level sequence
but I cant seem to have the sequence activate when u load into it
load into the lvl
If you drag the sequence into your level from the Content Browser, you should see something like this in the details panel, simply check Auto Play

Hey, I'm getting into rendering a sequence in Unreal. I have a dog with a set of idle animations. When I use normal play mode the animations are active, but when I render out the scene it is still and not animating. Any idea why?
any1 knows how to control the flipbook nodes timing like when which frame comes where and when?
Hi everyone!
How can one get a HUD to show up in a cinematic render?
With Movie Render Queue, add UI Renderer pass.
OMG YOU'RE THE BEST
I am working on a set for a virtual production which is an interior with a garden view and I am struggling a bit with the correct lighting for the foliage/grass. I am using GPU lightmass with an hdri backdrop for the overall/interior lighting but I have to fake a lot with additional emissive planes to get the correct brightness. Usually I would work without the planes and bring up the hdri intensity, but this way the grass gets way to bright...
Is there any way to do this more "correct"?

Anyway to render a sequence as the wireframe?
Don't think so, though if you can find a console command that works in the viewport, it might work at MRQ time
Widgets can show up on cine camera actors, right? Just wanna make sure I'm not wasting my time trying to make something impossible work
Yes
hmm alright thanks
hello anyone know why i'm getting these green colors on my render movie sequence? its not there in ue5 viewport


Go into regular PIE and see if they show up there @upper spade if so it's some sort of gameplay code causing it
How do I use camera lag in an animation sequence?
When my scene is viewed through the camera and in the viewport in the scene, it looks correct but the renders look washed out and very desaturated when rendered from sequencer as .png images. i am using 64 samples and deferred rendering. Any one know what is causing this?
its still there.. but weird enough if i have the same assets far away from that place, it looks normal..
i dont have any code tho... should it give me any error if a code is causing that?
nvm thanks.. its the sphere reflection problem =.="
when i try to render this scene with MRQ....some of the objects are missing(marked with red circle) from the rendered frames but they are visible in the editor and even in play mode why is this happening..?


Is the rest of the scene supposed to be dark or is that a difference too? Are you using world partition or data layers or sub-levels or anything of that nature?
If no, add the "Game Overrides" setting and try unchecking the boxes. It applies by default if not added, so it's automatically setting Cinematic Scalability and overriding view distances to be higher.
->no it's not actually dark(open the original image) for some reason it's showing dark here...
->not using world partition, data layers or any sub level.
-> yes after manually unticking lod0, Hlod boxes in gameoverrides the closeup ground lamps came back but not the distant one about the buildings
Do you have alpha-through-tonemapper enabled and using convolution bloom? I bet the png channel of the alpha is partially transparent and that's why it shows up dark here.
I don't know why Force LOD 0 would cause issues unless there's something wrong with the content setup, not sure what else to suggest, sorry. Not something I've seen before.

i just downloaded this image on my phone and it looks perfectly fine...then i uploaded the same image again and it goes black...i have no idea why is it like so...and yes m using convolution bloom and alpha through tonemapper is off and also using a dirt texture for lens
I looked at the alpha channel, it's as expected too, very weird.
i went through stat RHI and there is around 3.5M tris only when force all LOD0...and from my experience i can say it's not too muh
the bright image is taken via high res screenshot tool and the darker one is .exr rendered via MRQ, the original exr has same brightness as the screenshot version but once uploaded it is showing dark
How are you converting exr->png? Exrs store their data linearly, while png stores with a sRGB curve applied to it
when i use legacy sequencer to render video everything shows fine... it's just MRQ giving weird result
converting it with gimp with all settings on default... converted png is fine too same as exr
Yeah it looks like if I take the PNG and tell Nuke that the data in the png is in Linear (instead of sRGB) that makes it much closer to the viewport.

Also is the framing difference intended? ie: did you just snag a similar camera angle in the viewport, or are they supposed to match
just randomly tried to make it looks similar...not supposed to match 100%
those red light are sphere with inverted normals with additive unlit material with some depth computation...is there any limitations on how much of these can be visible at a time...i guess no
Hmmn, additive meaning transparent. You unchecked "Cinematic Scalability" in the setting too right
the spheres inside green circle are same as the other invisible ones
tried both... checked and unchecked no difference
have tried MRQ before with similar things in ue4 never faced such problem...it seems sort of bug in ue5
The only big differences I can think of for MRQ vs Editor/PIE:
- Technically MRQ is rendering to an off-screen texture instead of the player viewport, though this isn't intended to cause problems
- It switches your gamemode to UMoviePipelineGameModeBase by default
- Sub-levels set to Blueprint Loaded may be visible in the editor (if you used the UI to toggle them on) but won't be in game unless you have a Sequencer Visibility track turning them on (or some other gameplay code)
So I'm not entirely sure why it'd be different. Maybe try pinning it down - is it the material? the mesh? the distance/location? Try swapping different bits of it to see if you can isolate which part is casuing issues
if it was material then the red light on central building should also be invisible.
if it was for distance then left building light should be visible as it is closer than the centre one,
for some reason initially the entire left building was invisible in first 10 frames in first try, but in further renders it was always visible (no changes to any settings).
You can try adding "Engine Warm Up Frame Count: 120" and then also checking "Render Warm Up Frames" under the Anti-Aliasing setting
sure I'll do that... anyway what does warmup frames do..?
It's complicated™️
"Render Warm Up Frame Count" sends a bunch of requests to the GPU right before render. That way TAA has some image history to use so you get anti-aliasing on the first frame.
"Engine Warm Up Frame Count" ticks the actual engine, so it evaluates frame 0 of the sequence, pauses the sequence, and then just runs the engine for the specified number of frames. This is so things like cloth can settle, or cpu particles have time to emit.
"Render Warm Up Frames" is an override to make the Engine Warm Up Frames actually render - normally they don't for performance reasons, but with gpu-based effects (gpu particles, nanite, virtual texturing, etc.) they actually need to be drawn on screen to generate the work to do to get them ready.
"Use Camera Cut for Warm Up" takes the excess camera cut track (ie: how many frames before the Playback Range start does it go) and acts like engine warm up frames running the engine, except this actually evaluates the sequence leading up to the initial frame. This can be useful when doing cloth simulation if the first frame of your animation is too different than the reference pose, the bones would teleport and you could end up with cloth on the wrong side of bones. So this at least lets you blend from the reference pose into the first frame of the animation over a few frames.
ohhh nice so warmup frames actually stands up to it's name...btw thanks for the help... I'll update here if i get any solution
Does anyone know how to get a Spline to keep the transforms like the Camera Rail? I have a spawnable Spline inside a Blueprint and it doesn't save the amount of points I create and their transforms.
Is it me or Movie render queue produces a different render color look from the viewport? lIke it doesn't renders out a different contrast, saturation et.c from what you have in your ppv ot cam settings? Is this a gpu issue or ?
Do you have a Post Processing Material
Yes but they are set at zero.
Hmmn, shouldn't have an effect if it's zero but try removing it. When a Post Process Material is set to "After Tonemapper" when rendered in the viewport the incoming data is srgb, and when rendered in MRQ it's linear, so sometimes people's PPM's do the wrong thing
This is the issue. Notice how vibrant/saturated the green is on the left, while MRQ render on the right looks less saturated and less contrasted. I removed the ppv material and it still looks the same. Maybe the samples from MRQ kinda dims the color and removes some of the subtle shadows?

Its Nanite grass with masked material. Ue5.1
The antialiasing is removed but the rich green color seems lost in the process
If you turn off TSR/TAA some of the other rendering features don't work as well (they rely on the temporal history TSR/TAA has for denoisers, etc.)
I'd try just a standard render with default settings (which leaves TSR on)
I used TAA and the color issue is still there. I am using 5.1 from github so maybe this is a bug? I tried using the old sequencer but it keeps rendering the frames out as black.
hii, is there a way to add camera cut in actor sequence? it only appears as an option in level sequence
hello
I am in URGENT need of help
I am noob in using the SEQUENCER
I managed to bind the camera to a path
keyframing works on the path
but the rotation of the camera doesn't work
it keeps the same all the frames
I record the key in the camera rotation but it doesn't work
please help!
Hey guys. I tried searching on the server but I didn't find the proper answer (probably didn't use proper keywords). I want to make little cutscenes like Genshin Impact does (see .gif) but I'm not sure where to start. I never touched a sequencer and most of tutorials I saw are mostly for normal cutscenes (camera keyframes are in World Location instead of relative location)

got a really weird issue with cloth with movie render queue. No wind but my cloth shakes and deform. I searched for issue in clothing parameters but in the end it only glitch when anti aliasing in movie render queue is active. If I deactivate aa it works as it's supposed to, but I need it for my final render 🙄


Describes how to create Level Sequences with Actors that have dynamic world transforms that can be changed at run time.
Temporal Sub-Samples and cloth don't work right now, but you can use a workaround (assuming you're using the default 0.5 motion blur)
Thank you so much ! Really appreciated
Would anyone know a workaround for MRQ having issues with a AA high temporal sample count and simulating cloth physics? Anytime I try to render with 32 samples or more the cloth physics runs for a bit then just stops. Any help is appreciated
Two messages above 🙂
Hi I have an issue. I try to render out one sequence but when I try to do it a new camera spawns, and cine camera stops working. Would appreciate some help 🙂


your camera cut track doesn't actually look like it's pointed at a camera
@loud bramble Right click on the big grey section and assign it to the Cine Camera Actor
thanks a lot! works now 🙂
Trying to get Depth of Field going and can't seem to get it right. I've added the cinematic camera actor. Have the lighting mostly how I want but no matter what parameters I put into the fields on the right, I get no response. Feels like I'm missing something simple...


had deselected the camera, but these are the stats I've been messing with
Are you actually looking through the camera in the viewport via the button in Sequencer?
Also I'd reset the DoF to standard settings and set the focal length and focus distance on the main CineCamera (and not in the PPV), and the Apeture I think, those will be your main drivers of out-of-focus-ness
I am looking through the cam view in my general view window. Do I need to be in Sequencer for this to take effect?
I think they're the same thing, but I'm not totally convinced
ah ok. I also removed the Post processing filter just in case. It just seems like no matter what settings I adjust on the cinecam, I get nothing.
Another good option would be to grab a sample project - like the Archvis interior, and look at its cameras. But they're based on real cameras, so you need to set settings for sensor size, focal length (how zoomed in it is), focal distance (where the sharp point is), aperature (how much blurred it is) before you'll get valid results
oh, that's a good idea, thank you. I'll try that tomorrow. Right now I'm dealing with friggin Epic's city demo downloading assets to my C: drive when I specifically installed and pointed ALL directories to my E: drive.
Gets old dealing with rudimentary bs
Hey guys, anyone got any ideas for whats going on here, in editor the trees render fine:

But when I render frames out the leaves on the trees disappear:

tried foliage LOD in render console
but the trunks showing makes me think its something else?
Hello guys) Is there any way to quickly move object from one place to another one where i put my mouse? (in editor)
Having more of a play I think it is mipmaps combined with opacity, I've removed some of the mipmaps for a test. I thought unreal revmoved mipmaps at render but maybe not
You snap selected objects to view
How?
Oh.. i got it. but its kinda not what i wanted. Its snapping to the view place, but can i somehow snap to the mouse position?
Mmm not sure about that, I snap it to view and press F to zoom to extents to move it
If anyone has any ideas about the above that would be amazing
Is the Current Position on Rail of the camera rail affected by the position of the spline points? Or is just just the total length of the rail? For example will a rail with 5 equally spaced points and a rail with 4 points close together at the start; perform the same when moving the current position over time?
Hey peeps,
Quick question, is it possible to render out the view of a cine camera to a target render 2D texture like you can with capture component2d cameras?
No, but at the same time cine cameras are just normal camera components but with abstracted settings
OK. I just need to render out a camera view onto a plane so a target render 2d will do the job. Thank you 🙂
Update on my issue, any ideas? Is there a render limit for foliage?
Looks like when there are only a few trees on the screen they render correctly with leaves but once it pans up and more come on they disappear
hi, quick one... how can i lock a cinecam? even when i posses it i dont wat to able to move it.... i there a lock option?
You can actually lock transforms of actors (it's hidden in the context menu or actor menu I think) but it's not used very often, you can probably still accidentally key it in Sequencer and override the position
Is this UE5? If so try playing with the alpha coverage settings in the texture settings. Mipmaps are always used in rendering as they're essential to avoid grainy looking textures.
This is UE5 yeah, I've had a good play around with the alphas but I'll revisit them, thanks
when rendering i get this weird blocky island on my renders why is this?

Try enabling "Render Warm Up Frames" and then set "Engine Warm Up Count" to 128 in Anti-Aliasing settings
oh alright ill try that out too
but suddenly movie render queue doesn't make my pc crash anymore so im trying that right now
is it normal that the renders take so long?
4 hours for 400 frames

4 hours for 14,368 frames*, 3592 frames per hour, 59 frames per minute, 1 frame per second.

Oh you're using the old renderer
add some sort of warmup frames, I've seen block environments if you're using virtual textures/virtual heightmaps in your environment, it needs to render a few times so it can get to the desired mip level usually
yeah the landscape is generated using a height map so i guess thats the cause
ive only had troubles using that..
yeah im trying to experiment with both rn because movie render queue didn't work up till now (but rn render times are way too long for me)
one other question, will there be a big difference between no anti ailising 8-16-32? because im guessing thats causing the longer render times
depends on where you're putting those numbers 🙂

You're going to get much better motion blur at 32 than at 1. If you don't care about that and just want fast renders then just leave Spatial Sample Count 1, Temporal Sample Count 1, and don't check Override Anti Aliasing
but the renders will still look a bit better than the older render queue right?
No, default settings will be pretty close to the old renderer
i just don't want the minecraft landscape happening hehe
but thank you so much for your advice youve helped me out quite a bit already
You can't have both - nice looking renders and fast render times, the reason they're nice is that it renders many more real images and adds them together before producing the output file
you're definetly not wrong about that but i suppose i wanted both clean looking and fast rendering
what should the render warm up count be?
You'll probably get a faster render writing out exr files instead of jpeg/png because of a bug in 4.27, but then you have to convert it to png afterwards
8's a good starting point if you want to replicate the level of AA given by TAA
really but aren't exr files more heavy?
in what way
@severe widget here u can make the question
Is there a way to move selected keys, a certain fixed number of frames in the sequencer?
The box selection in the graph curves, doesn't give you any feedback about how much you moved, which is a big miss I feel.
Got it! CTRL + M
Although doesn't work in "sequencer Curves" window, where it actually is easiest to make global changes to the key frames
Can you elaborate on this? Do you just mean you can't see the number of frames moved numerically and it's only a visually based on how far you dragged it?
yes exactly
Hi guys, I am using UE5.02 version,I am using volumetric fog and I am experiencing ghosting in my character volumetric fog
Hi. I have a question not directly related to Unreal Engine but rather the about Bink encoder for Unreal... I'm trying to set specific keyframes using the encoder, but I'm not sure what the correct syntax is for the "hint entry window" for specifying this. Is anyone good at using the Bink encoder who would know the proper syntax?
anyone know how to get rid of this weird shadowy vignette along the borders? i have the vignette settings set to zero, not sure why it's happening... using a regular cinecamera

Do you perhaps have a post processing material on the camera/volume in the level that doesn't compile? Usually you get checkerboards but I've never seen that.
How to get rid of that between two frames movement in the sequencer while scrubbing?

It doesn't help in animation, no animator wants to go in between the frames, we want that snap to frame
Push the magnet button 😀
its' not that, the magnet snap is already pressed

yes

thanks! Snap to interval did it. 🙂
👍🏻
Am trying to do a simple orbit shot that looks correct in the sequence but when I render via render queue it appears to place the camera at 0,0,0?
I created a camera and made it a child of an orbit object (actor)

Then dragged those two in the sequence and edited

Then I right click on camera 'Convert to spawnable' followed by track>attatch to actor to the camera
Managed to fix it by avoiding that convert to spawnable part
Another question. If I create a camera and view through that I lose all my post effects? How can I make my new camera closer to what I see in perspective view?


hey, what are these little hot pixels im getting when rendering my LS?

seeing a number of them, they kinda hang out then fade away
ah, fixed, was temporal AA
fix the camera cut section to point to the camera again after conversion
are your post processing volumes in the level set to "Unbounded" so the location of the camera doesn't matter? The CineCamera only overrides PP settings you've checked the checkbox on in its settings.
Ok, so I'm trying to make a seamless loop with either Legacy Render or MRQ.
Legacy has some strange lighting artifacts in the first few frames.
MRQ has what seems to be brighter lighting (not solved by automating exposure compensation) in the first few frames..
My beginning and end keys are EXACTLY the same.
Any ideas on how to fix this?
Thanks in advance
Anyone used MRQ with data layers? Seems that MRQ ignores unloaded flags and just renders everything...
ah figured it out, you need to set the "Is Runtime" flag on the data layers
You should use definitely use manual exposure if you're not already and possibly disable local exposure. Anything that adjusts itself over time
Thanks so much Matt!! Was already doing the first but didn't think about the second!!
Sorry... You or anyone: I've been looking for local exposure, online etc, and I can't find it..
It's probably self evident and I've misunderstood!
Thx in advance!
It's only in ue5
I'd probably use the show flag system to turn off various rendering features until you find the one that is causing the value to look slightly different at the start vs end
What do you think is the best way to add greenscreenfootage to unreal engine? Just put the video in there, or make a png sequence or key the green stuff away in a video editing software and export a video which saves alpha or is there any easy way in general? I have the feeling that using greenscreen footage in unreal engine is just very complicated and messy.
I feel like that there are many tutorials on how to get your subjects in the scene, but they all looked kinda off although their greenscreen footage was quite good. Is there any tutorial which goes more in depth to see how to make it look more real (like that reflections work correctly or it interacts with bloom and all those little things whatever is possible to make it more authentic)
thanks that helped
Hi, Id like to create a sort of an "arrest animation", spawning 2 NPC characters around player and moving the camera. Its possible to play a sequencer in the location of the player?
Describes how to create Level Sequences with Actors that have dynamic world transforms that can be changed at run time.
Hey ppl, Im having an issue with sequencer where when im editing it, it works with the camera settings that ive setted up, but when I play the sequence back during gameplay, it seems like its using the player camera, and not the camera settings of the sequence. Anyone knows how to fix that? Thanks.
Does your sequence have a camera cut track binded to your sequence's camera actor? How are you activating the level sequence in your game?

Thats how im staring the sequence

Thats the camera cut and camera actor. Im not sure if they are binded together, but it seems so at least at sequencer when im editing the sequence.
Looks correct to me in terms of creating the sequence at run time and having it play. What's missing would be a Set View Target with Blend node so that the camera in the sequence becomes the player's new view
Does anyone know if there is a quick way to access properties of an event within sequencer without having to right click the keyframe-properties? I am updating a lot of values through here, so it would be nice if I didn't have to right click on each event key frame - go to properties, and edit my value there.
edit: its actually not a bad process having to right click - properties edit. I'm just spoiled with hotkeys xD I doubt there is any such function anyways, thought id check though

I'm having an odd issue where take recorder is not recording any of my animations, as if its ignoring my AnimBP.
Anyone else run into anything like this before?
I believe it may have something to do with my characters models/animBP being initialized on construction script. Other than that, I don't know why it wouldn't be recording what i'm seeing in PIE. I've recorded many times using take recorder, so i'm unsure why its not working now
Anyone know how to record physics with take recorder?
edit: nvm, physics work when rendered. Just can't see it playback in sequencer!
Hi my friends. Im having trouble to render a sequence in ue4.27 I have a media texture /video playing in the scene and it works fine however whenever I try to render my sequence the media texture doesnt play. I am triggering the media texture in the blueprint (event play -> open source). Anyone ran into this issue before? pls help ❤️
Hi all, does anyone here have a solution by any chance on how to render far objects in a world partition scene with movie render queue? As the render intitiates play, far off objects are culled. Should I just create a streaming actor and max out the loading distance?
Try using image sequence instead
I have this color variation between viewport / render. I checked my post process volume and same in cine camera used in sequencer and I didn't notice anything. Any idea about source of this?
even with deleting post process volume, color is still different. Issue seems to be with hdri backdrop.
Okay it's solved, deleted and replaced hdri backdrop solved this
Is there a way to make it so that sequence cameras do not cull or cull at a different distance?

as you can see, lots of stuff missing from this image
but then if i exit camera and get closer where the player is i get this

as it should be. Do cameras have a cull distance?
Max draw distance does not seem to effect this as its got a current draw distance override that is greyed out
I LOVE YOU !!!!! ty so much, it worked wow. i was struggling with this for so long
this is by far my very very fav discord server ❤️
MRQ overrides some things by default - add the "Game Overrides" setting and uncheck boxes if you want it to stop overriding things. But in general it multiplies the draw distance by a lot and disables LODs and stuff to try and get best quality out of the box
As for MRQ for world partition, temporary workaround was to find each objects that was being culled, and uncheck "Is Spatially Loaded", probably a better way but adding a World Partition Streaming component to the cina camera actor and maxing out streaming distance didn't help so if anyone has to do with this, here's a dirty way to make far object work.
Edit: For additional areas that have culling due to World Partition, throw in an actor add slap a WorldPartitionStreamingSource on it, that way you can avoid the "Is Spatially Loaded" checking and just use that Actor for loading everything in an area. For some reason attaching this to the Sequencer's loaded CineCamera actor doesn't work but this approach does. I'm likely making this work in the most jank way, if anyone has ever dealt with this, any feedback is super appreciated.
Are films using UE5 usually animated like this. One project for one scene. And the export?
Why not having multiple scene/sequences in one project?
That can work? The camera can switch to one angle in one frame?
Well yes, just change the camera cut or even change the shot sequence if you have sequence containing those.
It's basically non-linear timeline editor
Ooo! I understand now! Sorry to bother
I am currently working on a project, 5 month research before I carry on the project of a silent hill fan made film with budget of $5,000. We have a 3D model scan (single Dslr) of the actors and animate it with mocap
Hopefully this is possible with the current technology we have
Hey guys i have a quick question (I'm not sure if i should ask it here or in #lighting so if i should ask it there just let me know)
I'm using ue5, and a while ago i was following a tutorial on how to make the lighting of scenes better ehich it was great and all and it workd perfectly fine
But then 2 days ago i made a new scene to practice the lighting even more but now no matter what the exposure id not changing at all, no matter if i change the intensity or the type of it or even change my scene in the same project... The exposure refuses to work
What should i do?
I fikgured it out. we had some culling volumes incorrectly setup
Hey, i have issue while Rendering out a Level sequence that the Manual focal point is not applied.
Here is a test animation which works as expected in editor:
But the render looks like this:
seems to be related to this:
https://forums.unrealengine.com/t/why-camera-focal-lenght-is-not-transfered-to-renderer/362261
Also, if this question is better asked in the forum, please tell me so, quite new to unreal and its community 👍 
are you using mrq or the legacy renderer, cine camera or regular camera actor, does it work in PIE (as opposed to just the editor), which variable did you animate in sequencer
So we know that cloth physics is broken when using what seems to be more than 20-30+ temporal samples in AA for MRQ.. Which seems like a massive issue... How does anyone actually render cinematics out that contains cloth and needs motion blur/lots of samples to reduce noise? I know you had a janky workaround Matt, but is that the only solution currently? any lower temp samples just creates too much noise in my scene
Unless you want to make code changes yes that's the only fix right now
Man that's rough, thanks for your help
There's a code change in 5.1 which should help, though no idea if it'll fix-fix
Okay that's good to hear, will have to do testing when that hits
It says on your workaround that we need a script in post, is that to remove all the extra frames? wouldn't happen to have a link to script/info to do this?
You would want a script to remove every other frame (just because most software won't recognize "0000" "0002" "0004" "0006" as a coherent stream. No real script but not a bad beginner's python script to figure out
get a list of the files in the folder, sort them, split the list into two, delete each file from one list, rename each file from the other to turn "0002" into "0001" and "0004" into "0002", etc.
Awesome, thank you so much Matt for your help mate, appreciate it 🙂
When recording video, static meshes that were completely occluded on the previous frame are invisible this frame. How can I resolve this so they are visible on the first frame?
Also, if necessary, I am fine with them being rendered persistently even when fully occluded, if that would solve it. Render time is irrelevant for me.
Edit: Semi-resolved by increasing Bounds Scale on all meshes
Hello
I've asked this question in a lot of places without getting an answer.. Is it possible to animate a car along a path in Sequencer, like you would in any 3DCC? With the wheels turning and physics.. Many thanks in advance to my savior(s).
do virtual shadow maps work in the movie render queue?
Has anyone used uDraper before?
I am currently at a crossroads trying to get a clothing file from marvelous designer into UE using this plugin (udraper.com) and I got the clothing to simulate, however I cannot import custom textures to it
Weird UV mapping issue

no reason they wouldn't
Yes and no, you could try building a car in a game and use the physics engine, then record that to a fixed path (and then have to disable the physics from trying to apply when rendering again), but it's not going to quite like hitting Simulate in other packages.
Hey guys, when importing my .avi animation to After Effects the quality gets lost quite a lot. Anyone ever had this problem? Would be really grateful for answers. TIA! 😄

Don't export as AVI, export as image sequence.
Any idea why I don't see the camera settings in the PIE?

I have a manual focus distance set:

and it's visible when I render it out, but I can't see it in the preview even though I'm piloting the CineCameraActor
nvm, Auto Activate has to be on
Thanks. That's something they should implement if they want to push non games animation
Hi guys. I'm having problem with composure when entering player viewport. The play mode windows loses all the flare and reflection from the sun compare to the camera. Does anyone know how to fix this?

I want to use Root Motion animation in gameplay with Level Sequences.
What I did:
- Created a Character class with a ABP with "Root Motion from Montages only". The Anim Graph has the Default Slot linked to the Final pose.
- Put one Character into the Level Sequence Track and added a Animation track that is playing a Root Motion enabled Animation Sequence with the slot set to "DefaultSlot".
When I hit simulate and play the Level Sequence the character doesn't move forward. What did I miss? In this video https://youtu.be/05QwkKoC5jg?t=588 you can see it's possible.

How to set up an AI character to use root motion in UE4's Level Sequencer.
Video also covers some gravity manipulation scripting tricks if you are interested.
I struggled with getting this to work. So I made a video to hopefully help other people out if they are trying this as well.
I am having an issue where the focal length of the camera changes between viewport and "play"
when I click "play level" the CineCameraActor focal length changes
Is this intended or am I doing something wrong ?
This issue may be due to difference between viewport and preview resolution.
Post processing effects like bloom or lens flare can sometime look very different in the editor viewport from what they look like in a game or standalone viewport.
Do you think it'll fix it if I scale down the standalone viewport (right now its at 1080p) to the same resolution as the editor viewport?
Hey so I am rendering out my most ambitious project yet. And I am close to capping my 3090s 24gb
Does unreal or MRQ support resizable bar by chance?
Or ssd overflow?
You can use the 'High Res Tiling' feature but it comes with a bunch of caveats: the big one right now is it doesn't support anything that requires per-view history, so no Lumen or TAA/TSR, auto-exposure, and some others. But the only thing it saves you memory on is your backbuffer, so it's probably not going to be that significant of a savings
Another one you could do is re-enable texture streaming (MRQ turns it off by default), but it has issues where you'll see blurry textures in final frames, there's an engine edit you can make if you compile from source to fix this. Virtual textures could help, but also struggle with blurry patches resolving into higher resolution over time. @still prism
But no it doesn't support stuff a traditional offline package would do.
Thanks for tagging me for the notification:)
I have texture streaming
I dont like high res tiling tbh
I think I actually forced my nvidia driver to get unreal working with resizable bar
My vram had shown 24715mb
When usually.crashes around 239XXmb
So I am hopefully I got it working with my driver tweaking
I've only used offfline
What's the feature for online?
Do I subscribe or something?
Sorry, "offline rendering" being anything Blender or Arnold or VRay would do for low memory situation
(as opposed to 'realtime' rendering. No I don't know why they're named like that)
Resizable bar looks interesting, I hadn't heard about it. But it looks like there's only a specific list of games that can support it right now 😦
It doesn't look like it's designed to increase your overall vram though?
It creates a vram overflow. So it is not as fast as vram. But can take 24gb vram + 40gb ram (project uses 24gb out of my total 64)
But I honestly believe I got it working
Ya I am familiar with those render engines being offline.
In MRQ. It offers offline or online rendering
Have never used the online option before
In MRQ. It offers offline or online rendering
"Remote" is just "in a separate process" by default (which actually increases your ram since you'll still have the editor open). But it's meant that the UI button can be replaced with a local render farm implementation if you're a studio who wants to build one
Does anyone know how to get a bink video to playback in game full screen? I understand startup movies but i want a video to play when i press a key in game but as a full screen video
Hey guys! This is a short cinematic that I made using UE5. If you want you can check it out and tell me what do you think about it. Hope you like it! 🙂
https://www.youtube.com/watch?v=6RYWJAWjf90

Hey there! This is a short cinematic that I made using UE5. The cinematic was made in one day. Hope you like it! :)
#unrealengine #cinematic #dinosaur
https://youtu.be/7OEbO353_GM
Like this? But fullscreen?

In this Unreal Engine 4 (UE4.16) tutorial I show how to use the MediaPlayer component to render a MediaTexture onto a static mesh and play an mp4 video file.
To do this you have to add the mp4 to a folder called Movies in your content of the UE4 project, then add a file media source for the mp4. After that you can use a MediaPlayer component fo...
https://youtu.be/dKYvwK8nE74
This looks like a good tutorial
There is another one on using a widget to play a video, and I'm guessing you can modify it to be fullscreen

Video players can be a great addition to any level, whether VR or standard desktop, they provide an excellent source of ambience for upcoming jumpscares or even as a source for players to collectively gather. In this tutorial I will show you how to setup this video player for your own levels, all in Unreal Engine.
// SAMPLE VIDEO
https://docs.u...
Thanks for the feedback, a bit of tweaking was needed to make it work with bink files but success non the less!
Glad to hear! Bink is finicky. Especially for .wav
thought i would post the solution here and not in ue5General channel, as you all may appreciate it as well.
r.HairStrands.DOFDepth = 2 or greater solved the alembic hair groom edge halo artifact issue with moving grooms. Mine also has small physics simulation as well.
it does not make the edges sharp, but it is insanely better than that lensing halo effect
i am going to do 1 more test with the cvar set to 4, as set to 2 still has minor halo artifacts, but 4 may make the edges entirely blurry and 2 may be a good median

Guys, a job opportunity has shown up for me and I have no idea of how much i should charge, how much is an average price for a scene composition?
they already have all the assets, I will only make the composition
Hi when I activate a cinematic in game it starts from reverse, anyone know what is the paramater causing it?
What method are you using to activate it?
I've screwed myself under charging. Even with a quote I've messed this up and ruined the cost it would take to actually produce it.
Get very very Very real about how much time it would take. Including all the debugging and random crap you cannot predict
Have your client be extremely clear about their budget as well. Set expectations extremely clear of what you will and will not do within their budget
thx
This blueprint @still prism

"PlayTo" with the default arguments means you're asking it to play to zero. Pretty sure you just want Play?
Hey everyone, Been working in unreal for a while now on an short film and figured the time has come to begin sharing some of my RnD, the first of which is Night Drive. I like to call these mood tests, where I work on building the project environments, and find these useful when testing scenes and finding the right mood. The road is a fully looping road, using a procedural road and forest population using blueprints, quite happy with how it’s all working. happy to hear your comments! https://www.youtube.com/watch?v=GQ0sWSk-vJo

Been working in unreal for a while now on an upcoming project, and figured the time has come to begin sharing some of my RnD, the first of which is Night Drive. I like to call these mood tests, where I work on building the project environments, and find these useful when testing scenes and finding the right mood.
The road is a fully looping ro...
Nice, I like the camerawork!
Hi im trying to apply this variable (wait 10 seconds before each shot in a cinematic queue is recorded), do you know how I can properly use this please?

A solution to my problem would be to render all shots in one go, but what is the name of the output variable i need to use to get seq1, seq2 and seq3?

hi All. I'm having an issue with using a blueprint with a control rig on multiple level sequences.
When I have the same actor added to both sequences, one of them complains about the ControlRigTrack having a private object.
Anyone had this issue before?
thanks! one of my favourites things is to set up a nice flow of cameras to evoke a mood.
Is there any way to add morph targets to sequencer without painstakingly adding each one in either control rig or the animBP?
Sorry for double posting from graphics, but maybe this fits as well...:
Hey there, is there a way to make a material into a matte object? So it renders black, obscuring other objects etc, but it doesn´t show up in the alpha channel?
Hm, nevermind, maybe stencil layers is the way to go after all.
Looks like the stencil objects are removed from the alpha, so I can probably do it like this. Would have preferred a material solution, but if this works its ok...
hi there everyone, not sure if this is the right channel, but I was wondering if it was possible to use an HMD (e.g. the oculus one) to record camera movement using the headset as a tracker to make a first person "go-pro like" shot. I was looking at openxr and livelink, but I am not sure if that is the right toolset
fellow scholars, how do i get rid of this shimmer in the wheel rim reflections?
i have a render i have yet stitched together that cleaned up the DOF, and thought that would clean up the rim flicker,
but seems to not do so as i thought,
any ideas?
explicit audio
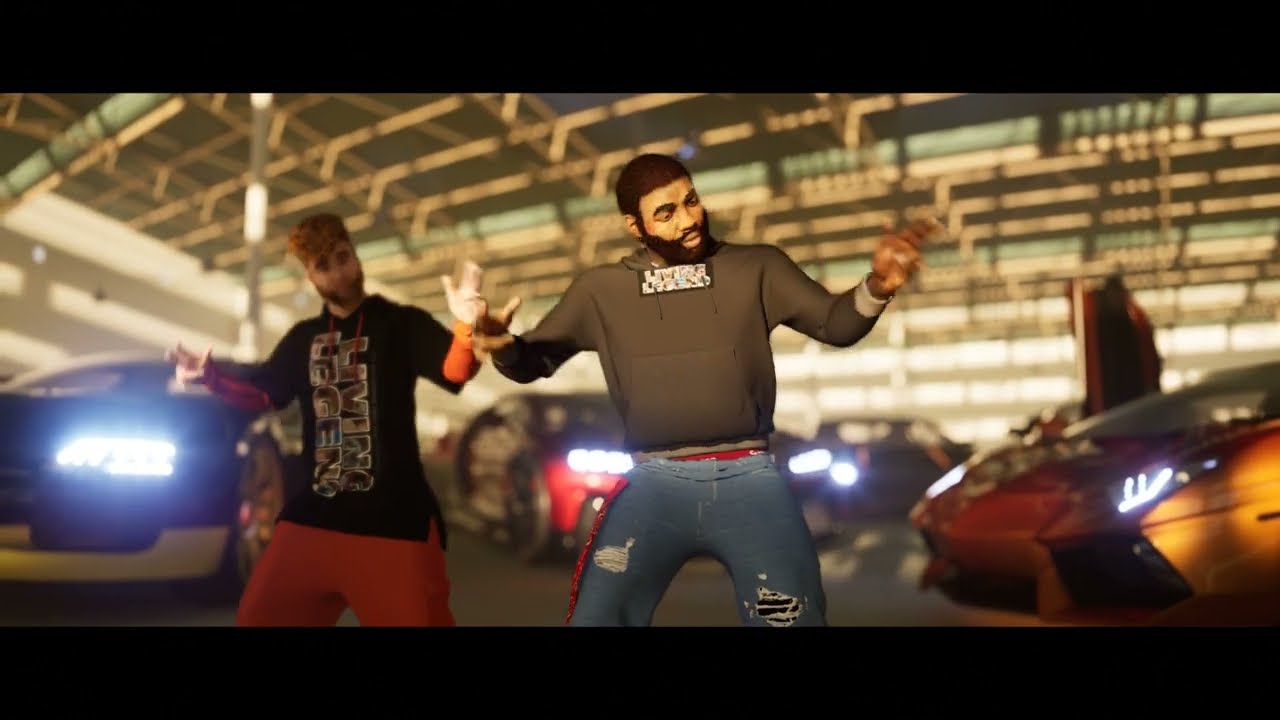
To Do: Depth Of Field tuning, Fix Reflection Shimmer
set reflection capture resolution from 512 to 1024, seeing is that makes a difference
Hi Guys, Does anyone know how to animate skeletal mesh position on x and y using CSV data? so i can make sequences
Don't use DelayBeforeWarmup, there's a reason it wasn't brought over to the new system. It prevents motion blur from working. Either use "Engine Warm Up Frame Count" (under anti-aliasing) with "render Warm Up Frames" checked, or if you're trying to use the path tracer, just add a lot of spatial samples.
Hey guys let me know what you think of this https://twitter.com/stefanomahfuz/status/1546630272925442054?s=21&t=JvS8LzJ5uDgWmN2IkAy8aQ

Hey guys, how can I record my screen in a nice way to create a video out of it? Take Recorder seems to record my character movement but skips all the enviromental physics objects, they are not simulated in the video 😦
how can I record screen in UE5?
for example I cannot rectod such video with a take recorder
use something like Open Broadcasting Software (OBS)
#work-in-progress
ah my bad sorry
Hi! I have multiple shots i'm rendering out.
In my sequencer I made level sequencer per shot.
Each shot has its own alembic cache in them.
I am running into the issue that when i go to render, all the alembic cache files are seen still in the render.
Do i have to go in and manually turn all visibility off and cast shadows off per alembic file, and only keep the one I want on when render? Or is there a faster way to accomplish this
Usually people use Spawnables in sequencer so the object only spawns when the shot is evaluating
Yeah i just found what I needed! I can just add them into the sequence, +Track then give it a actor hidden in game
Hi, I'm trying to render something, but my actor get pixelated on the edges..
Texture in the back seem fine. Any idea how to fix that?

morning
I'm using the Movie Render Queue with a png sequence and I'm getting "redundant" frames. It's a 60fps sequence, but if I render e.g. from frames 720 to 780, I get 120 png files instead of 60. Each file is different from the last so I guess it's interpolating extra frames, but I don't want them. I'm not using Time Dilation as far as I know. Anyone know what might be happening?
Did you override anything in the Output setting on the MRQ job?

Sequencer is set to 60 like so, I dunno if there's somewhere else I should've set it:

I see the "advanced options" in the 60 fps dropdown there shows this:

(this is 4.26, it's an older project and I'm scared to update but I can if I have to)
Hmmn, I don't even remember if 4.26 supports time dilation anyways. What happens if you uncheck "Use Custom Playback Range" and just set the Playback Start/End in the sequence itself?
also: If I output the files with all the different frame number types, I can see that frame_number and frame_number_shot are from 720 to 780, while frame_number_rel and frame_number_shot_rel are from 0 to 119
Same deal as before, 120 frames output when sequence is set to 720 to 780 and Custom Playback is turned off
_rel is always going to be from zero (and when you use time dilation it forces that on, at least in recent versions)
The preview also shows that it will go to 119 frames

if frame_number_shot is giving you only the 60, but the _rel is giving you 120, it really does sound like you have time dilation in there somewhere
Either through a Time Dilation track in Sequencer, or through time dilation via a blueprint node
I don't see it in sequencer, I'll check BPs

🤦

Crap, I hope this doesn't totally throw everything off. This is a render I did months ago and wanted to re-export in 4k. Maybe I'll just leave time dilation as is since I used it before. At least now I know why I get extra frames rendered. Thanks for helping!
I can't recall how time dilation affects motion blur, it might be half as long in the 0.5x scaled one
Any filmmakers here who have decent experience cutting together dialogue scenes? I've got a multitude of different shot angles, but have never done this before, and wanted to see if anyone who has would wanna jump into a discord sometime and look thru it with me, give tips and opinions sometime
Hey, I did this in UE4, I took a camera with transforms and exported the animation to a "camera animation asset" that I then used for other cameras throughout the cinematic. I made a simple bucket of cameras that would slow dolly-in and dolly-out etc. But I can't seem to see how to do this in UE5. When I do the same process as I did in UE4, the "export animation to camera anim asset" doesn't do anything.
Does anyone know if this is defunct? Or if I can still make camera moves in UE5 to apply to other cinematic cameras throughout the game? Appreciate the help.

Those were old Matinee assets and Matinee is gone in 5, the UI element is an accidental leftover I think
Make Camera Animation Sequences assets instead
Reuse animation data created in sequencer with Template Sequences.
I'm using the MovieRenderQueue plugin to export my cinematics, and I'm trying to export a .png sequence that I'm then feeding through ffmpeg to make a video out of it - but for some reason all exported .pngs are just black. Anyone else had this problem before?

It works fine with .jpegs, but I'd rather use pngs for lossless