#animation
1 messages · Page 177 of 1
I'm using the Right Turn animation with the female in a red blouse and black pants
Once the animation is finished it snaps back into the idle pose which is facing a different direction
So what's the trick here? As other games have done this before, like most PS1 PS2 games
Is there just a lot of math going on the match the character turning with the animation turn to prevent the clicking to the idle animation? The camera clearly shows the actual "character capsule" is turning, otherwise the camera would match the pauses inbetween the feet movement.
ok so me and a friend are making an fps horror game and are having trouble with the fps animations
when we for example shoot the gun and play the shooting animation then play the idle animation after that the animations do not blend
While using the Grux paragon model for some testing I ran into a problem with the animations sometime firing and ending instantly. This causes the notifies in the animation to fire as well. The animations do still play normally most of the time. Any idea what could be causing this?
Is it not possible to add frames to an animation in the animation editor? I tried it with the append button but it just crashes
Ah it seems it crashed because I had set a key beforehand
Is there a way to get the control rig to work in the game or in the sequencer? When I adjust the controls nothing happens
Put the Control Rig into the animBP and make sure you use exposed variables in the CR
Ah it seems that because I had a Post Anim BP it didn't show anymore :/
Aha, make sure your post anim BP has Input Pose node.
ok, thanks
Having some trouble with Aim Offset, im using mesh space, when it's applied it deforms the animation
You can see the problem here, The aim offset works fine until I set the base pose, same one used in the game.
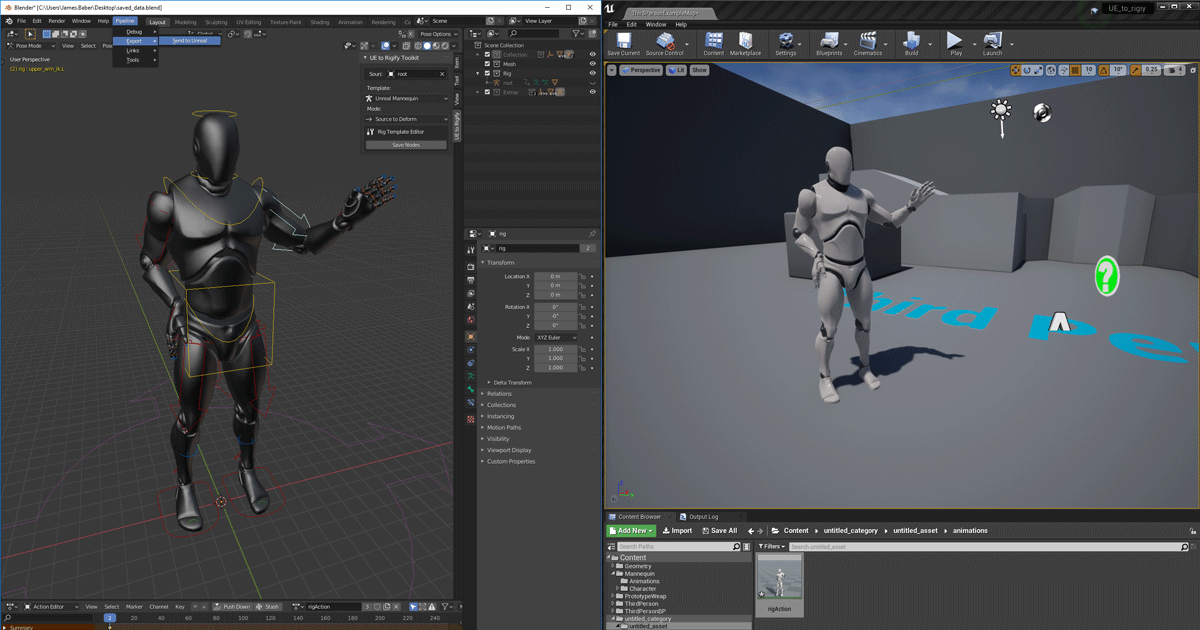
Is there any way I can export Skeletal Mesh into blender with animations, change it a little then export?
It only exports armature not the mesh
try checkboxing export preview mesh
@red ferry Thanks that works
@cyan solstice i always regret using blender when it comes to animations and unreal, so many issue and weird hacks
scaling issues, root bone issues, armature stuff, leaf bones, orientation
If part of my clothing will have cloth simulation on it, should I remove the weight painting on it?
Does anybody have any software recommendations for creating vertex animation textures / materials? I've been attempting to use blender for them but the 'Unreal Tools' plugin im using to handle it seems to be really buggy.


now he very smol.

ah ok
changing scene scaling appears to make him quite small, is it safe to scale up again in unreal?
Of course goes without saying, you have to scale the mesh up 100x and apply it.
ah
well im glad ya said it 😄
another question - is it an issue if all my L's are R's and R's are L's ? I noticed that in tutorials people refer to left/right differently - will this potentially make any "automatic detection" of stuff in unreal break?
Not really, but with the side suffix swapped, it could throw yourself off in the process
alright thanks 👍
I'm new to animation, when switching between an idle and walk animation will I need to make a transition animation or is there a way unreal can handle it for me?
I have tiny foot
If you want to go procedural route, then yes.
this is my first attempt at rigging - could someone advise on getting the scale right? 🤔

Yes for which
Have you applied the scale in Blender?
Try deleting the skeleton and skeletal mesh, then import it again. Usually that helps
is there a way to know the correct primary axis also? xD i tried flipping all the vals too, im not sure which is right

might also just be unable to tell because of the aforementioned scaling thing hmm
i deleted everything and reimported yeh
Me neither, tbh. I have since used Auto Rig Pro, all the axis are right from the get go
I exported the animation into blender with preview mesh and edited the animation then exported the animation into UE and the whole mesh is deform

How do I get the montages to override the skeleton's pos? Right now it barely even flinches
Hi, i'm having an issue where I want this apple animation to work but if the apple is outside the viewport, the animation doesn't start. How do I make it so the apple renders even if i'm not looking at it?

I just realize that the T-pose is superior to any other neutral pose
Because babies naturally T-pose
The T-pose is the natural expression of the human body in its purest form
And in a way, a new 3D model is like a baby
And so it should T-pose
For animating player movement (WASD) is it better to change animation based on movement direction, or change animation based on keys pressed?
I tried on keys pressed but it makes the animations funky when multiple keys are held etc. I feel like changing animation depending on velocity/movement would be much more logical.
However I have never done this before so maybe there is a better way.
Hand scale gets messed up with retarget, what's the problem.
Otherwise the retarget would be perfect.
When i disable copy pose by fk, the scale turns back to normal.

Is it part of a skeletal mesh animation? Or sequencer? Or simulated physics?
it is a skeletal mesh which drops an apple, made in blender. I assume there is a better way to animate this but i'm quite new :((
Any way to avoid blender screwing up bone orientations when doing a unreal -> blender -> unreal fbx import?
For retargeting it doesn't matter but for an already set up control rig it screws everything up completely :/
how do i add an animation from animstarterpack to a dif characte?
animation retargeting, there is documentation for it in the documentation for whatever engine version youre using
4.7
I'm confused on animation. I don't want help actually making the animations but I don't know what to type to find what I am looking for online.
From what I gather there is animation in the literal sense where you make animations for walking forwards, backwards, left and right. Make an animation for idling and jumping. Then you put them all together in Unreal so they transition into each other.
However there is another kind of "animation" where you have a rigged playermodel and it automatically animates. For example if you walk the feet move along the ground and your legs rotate and position themselves to make it look like you are walking. For turning you turn your body and when you waist cannot turn anymore it rotates your legs.
I want to try my hand at making the second type of animation, but I don't know what it is called to find a tutorial on it. I figured it would maybe be called "dynamic animation" but that doesn't really show much.
Any help?
It’s too long for a message for a start
You have to send messages in bits
Not in essays
learn to read
I have a tank controlled character, but I'm having issues with the turning animation, as the Mixamo animation has the character physically turning (otherwise I don't think it would be able to turn)
https://www.mixamo.com/#/?page=1&query=turn
I'm using the Right Turn animation with the female in a red blouse and black pants
Once the animation is finished it snaps back into the idle pose which is facing a different direction
So what's the trick here? As other games have done this before, like most PS1 PS2 games
Is there just a lot of math going on the match the character turning with the animation turn to prevent the clicking to the idle animation? The camera clearly shows the actual "character capsule" is turning, otherwise the camera would match the pauses inbetween the feet movement.
Example
No
procedural animation?
yep, that's exactly what I am looking for. Thanks!
gladly!
Hey guys ive got a question so im doing an animation in maya and I want to transport that into unreal ive already imported my character and some cameras but i cant seem to import my objects with controllers being used to do the animations is there a way i can get around this?
warping
Don't use corrective bone orientation in Blender.
Procedural animations, and in 4.26 onwards you can make them easier with Control Rig
ye im looking at a video for it and it seems really useful. Is there anything bad about it? I feel like I rarely see people use this for animations
I think it largely depends on the visual style of the game more than performance concerns. Anim instance + control rig is pretty cheap.
There is an Optimization setting for SkeletalMesh - make sure it is set to Always Tick Pose ( can be set to not tick when not rendered)
I see, I am guessing I would want to use custom animations for stuff like reloading/throwing grenades (first person shooter) and I could use procedural animations to control everything below the waist (walking, jumping etc)
Some games fully use it, some games partly use it, some games might not use it at all.
or can I use procedural for weapon handling / grenades too?
Doesn't sound like a bad idea. Typically you want more authored animations on the first person view (but you can still throw in procedural/additive animation for something like ADS)
hrm. I am just new to UE5 and it seems really hard to do all the animation stuff. I have made basic animations in Blender before but making a character seamlessly transition from moving forwards/left/right/backwards along with looking around, jumping, crouching etc is very complex.
I kinda get started on it but then my BPs and State Machines get extremely bloated really quickly. I figured with procedural it would remove the bloat on that part and make it more natural
Also having different animations playing at the same time. So when I run around and shoot/knife/throw it all uses the same walking animation and just changes the upper body animation
If you animate this in blender, consider giving it root motion.
T-pose is only superior because it's for asserting dominance.
In UE4, you can certainly use a layered blend per bone, so that way you can give both upper body and lower body their own tasks
Interesting, you wouldn't happen to know a super in-depth long guide for all this stuff you are mentioning would you? When I look for an animation guide I usually get simpler shorter guides which explain how to animate basic stuff like idle to walking transition.
Then when I open a separate guide for the next step from a different channel I get confused because they have stuff setup differently.
I am trying to enable root motion for my jump animation but it's not working. anyone know why?
anyone know if theres some way to have interialization node controlled by a bool?
the node itself doesn't support it 😭
may be a stupid question but does your animation have root motion? sometimes one can forget the simplest things, its happened to me lmao
How do I make sure it has root motion?
check that your root bone has keyframes
Is there a way to merger 2 animations into one?
For example, i have two walking animations, i want to replace everything from spine_01 upwards from the first animation with my second animation. I know you can do this with layerd blend per bone in the anim graph but is there a way to make a new single anim montage with a similar result?
I've got this issue where physics simulated bones completely freeze and detach after they come to a complete rest. Anyone know why it would stop simulating permanently after stopping? I can "fix it" by re-enabling the simulation. https://i.gyazo.com/9521fdbc6c897616a5de1ac79e8314c8.mp4
When making walk cycle is it best to do it 24 frames long ??
I aim to take into cassedure from blender ?
Depends on the walk speed you settle with in UE4
well I think 300 to 450 is best walk speed
Not to mention other factors too
then sprint/run would be like 550 or 600
Move the character that far in 30th frame. Then make the walk cycle from it
At least that's my method of making walk animations
how you mean move charactor that far
So if the walk speed is, say 300 cm/s, then on 30th frame, move the character 300 cm forward
And for comparison, 1 Unreal unit equates to 1 cm, and the walk speed variable is in cm/s
hmmm I'm doing walk in one spot though like not moving. Would it be best I do it so I just set anim to play on spot in unreal would you say
So it's just walking in place like marching or exercising?
it would be walking in place in engine, so in Blender never really made a walk cycle where i move root so many units forward
Well, I'd still move it forward in blender for reference.
also I'm not being stupid 0.3 m in blender would be 300 cm ?? charactor dosen't move as much as I would have though thats all
You can then disable the root motion once you're done with it.
Well, scale with third person camera is peculiar.
??
One room that appear normal in first person view might felt too small in third person camera
so camera is third person for now like in UE5
How do I keyframe WindDirectionalSource inside Sequencer?
Question:
I'm trying to render out a cinematic with a wind gust going trough some curtains.
But I cannot manage to get the wind to simulate inside sequencer.
I'm trying different Call Events, I tried Take recorder, but nothing seems to work. What am I doing wrong? I need the effect for a cinematic and the timing has to be right. Thanks for any tips.


Are the curtains use realtime cloth sim?
Yeas it works when i Simulate the game
Ah, yes, then cloth sim won't work in editor mode.
Though rendering out the sequence will use the runtime mode
So it's only visible after render?
Do I still need to call these events? Or can i just keyframe it with the Strentgh and Speed controls
You can just keyframe the strength/speed.
And yes, only visible after render, though maybe exception if you use control rig in sequencer
Okay thanks. Is it also not possible to maybe bake the simulation from ue?
No. For prebake cloth sim, might as well do it in DCC tool.
Alright good to know, wasted 2 nights on this 😄 Thanks!
@ashen junco so that method of moving it forwards by 3m (300cm) with the walk cycle dosen't work. It seems there alot of foot sliding, as the 30 frames walk cycle dosen't match up with the 30 frame move forwards
How's your framerate in Blender?
By default it's 24 FPS, and it's easy to miss
24 fps
if I wanted to do walk cycle over 40 frames what would I want to choose as my FPS option like which would be best ??
following tutorial thats all where the guy is doing it over 40 frames
Yeah, figured.
30 FPS is the sweet spot
You could try with 60 FPS, but it can cause issues when imported to unreal, so I recommend settling with 30 FPS
Besides Unreal will interpolate in between frames
a bit confused here, not sure whats going on, but i have some animations that dont seem to be working for my character, i know its something in the anim graph, i looked and compared it to an older build where it was working and the only difference i can see is the older one is "activated"? not sure what that means or how to activate this

left is current right is old
hello, newcomer here, is there a way to change the blending speed between turning the player? (im in third person)

i hold A and my character heads left.

but, tapping D, which should point me to the right, only slightly moves me, until i hold it for longer
can i make it so this blending happens instantly, or it keeps going until it reaches the direction ive inputted (say, for a joystick at like 20* degrees angle)
does anyone know?
Yeah but its not an animation issue. thats turn in place.
ok, so how do i use that
Setting up turn in place isn't a straightforward task.
Hey guys can someone tell me how to fix this with the rigify rig in ue?

moving the root bone doesn't move the full body but only one part
Also Rigify is crap
what should I change?
I already made all my animations with this rig so i can't use a new rig
yeah but idk what I am supposed to look at to find why this is happening
am i stupid or doesn't unreal show bone tracks in the animation sequencer?

Uefy 2.0 addon for blender lets you export any rigify rig to game engines like UE4 with an optimized and efficient bone hierarchy. The final version has a single root and all extraneous bones are removed. In this video we review some of the rules and conventions we need to follow to successfully build rigs with the addon.
website: https://www.r...
You need to enable it in the animation tab i believe
well, i have no idea where (UE5 btw.)
it shows me the curves, but not bones
guess i'll edit them in blender -.-
Almost want to say something, but I misremember it with morph target
Hey guys! Long time. Hope y'all doing great in these tough times! Anyway... Question regarding blender and unreal anims (never done that before). When I do anims for guns (for instance, reload anims etc) do I key frame only the animated part/bone and also do I keyframe all locations/rot/scale or only location? 😅
they control the morphs
But yeah, apart from additive tracks, no pre keyframed bone anims
i mean if your having an issue with that you can always do an animation blend take bones for upper body and head for breathing
the animation works fine tho, i just want to remove some bone tracks and cut the sequence
Ohhhhhh
as it has different loops stitched together
i can do that in blender tho, but would have preferred to just cut it in unreal
let me open ue
well yea, i want to see the keyframes so that i cut at the correct position 😄
the curves don't help that much
Layered blend per bone?
end of day it will just be additive, as just two of the animations have a slightly head nod
most of the animation is done in morphs

yea have that enabled, but still doesn't show me keys for bones
That's quite far...
lol i was not waiting 30 seconds for el gato to load
hey fellas got one more issue
I mean, I thought you're staying on the animation sequence viewer
i had a system to blend animations but, how do i play a montage and basically override everything else, while it plays?

the montage in question is in the Wholebody slot
the 2nd layered blend is 0 and root
Whole body should be after the left layered blend per bone.
wanna know something fed up? you cant chance the root animation, from an animation sequence in keys after you use it with a control rig 😦
The whole body slot should directly use the left layered blend per bone output, you don't need to cache upper body slot again
i removed use cached pose upperbody, now my character is A pose
the only animation that will play now is the montage

Try replacing the right layered blend per bone with the whole body slot
thats how i do it at least.
Any animation prior to the slot node should go through if no montage used it

Yes, that's what the source input pin is for.
my upperbody slot only plays montages, this is how i set it up.
After I add virtual bones to skeleton editor crashes after I try to open some animations.

How can it be solved?
What's the crash callstack had to say about it?
(Use pastebin if you want to post the log)

No scale keys
when i add an additive key for a bone, it shows up
Engine level assertion failure, still not giving clue
Though granted I never use VBs
the question is, how do i get the imported ones to be treated as additive?
additive animations are weird in ue5.
Sorry to butting into the convo, just ignore me, someone else might read it later and might help. 😅
To explain the idea. I have a base idle pose, bascially just keyframed loc/rot/scale on all bones.
In state machine i wanted to use the base pose and apply as additive or something like that of other anims that only have location keyframes on bones I want to move. Dunno if that works that way even. So the gun has idle, the rail for instance has a forward backward motion that only has the Y keyframe on that bone, magazine has only Z keyframes for reload (mag out/mag in motion). The goal being, after I fired the gun, the rail is in a backward forward motion, so while that is going on, I want to be able to reload (mag in/out motion) independently from the rails motion, hense my idea of such approach. Hope it makes sense. My first attempt failed at making all the keyframes on all bones and trying to blend those anims together, dunno if this new approach I'm trying works/makes any sense. 😅
Oh, btw, it's in UE5, dunno but feel like I did something like this for some characters in UE4 and seems like somethings weird going on in UE5, might just be me. Been a while.

just rig it with controlrig and animate it in ue5. blender is almost useless now for that
Disagree, but to each their own.
At most, you get some FBX footprints, but that's it.
Sounds like something accomplishable with good ol slotted montages and layered blend per bone.
Though there is also Control Rig, and you can have it directly move the bones in it.
If the animation is simple enough CR is the way to go
everyone is entitled to there own opinion 🙂 I just hate blenders mechanics.
But for more involving mechanical animations, I'd still prefer doing it externally.
Lesson only taught by being poor/broke 😉
lol
yeah i just skin my bones in 3ds max now, import right to ue and animate with cr xD
And I'd rather use Blender than pirating 3ds Max and Maya
Learned my lessons.
i use student 😦 if i ever release my game i have to buy full version, and pay back the back months.
Never used it yet so kinda anxious. Also, already made some sweet anims in blender and feels a waste to redo in CR now. You're most probably right tho. xD
best thing about cr, you can load your premade animation and edit it from where you left off 😉
Control Rig is overpowered, and for making simple poses with just the graph, it does the job well
But also for future references, I was just wondering what keys are important and when to use which. Mostly the scale keyframing. Like, is it important to the engine or not. ¯_(ツ)_/¯
I'll definitely look into CR soon enough. Thanks! 😁
Are the pose editing tools now defunct in UE5 except for within the rig retargeting tool?
I definitely had something janky going on before with ue5 and a animation for a weapon. Bascially, I made a single animation with all the actions happening (fire, reload etc) When I wanted to cut them up - duplicate anim with all stuff going on and remove the parts I don't need, whenever i tried to delete the frames after the playhead it would keep the anims and shorten/speed up the animation instead. ¯_(ツ)_/¯ Might be bad anim, might be something else, dunno.
I'm just trying to edit a skeleton to match a more standard A pose before retargeting some anims via the IK retargeter but I cant get the pose to stick.
are you guys creating a CR for the guns too and playing both at runtime?
i did this perfectly #work-in-progress message
Maaan! All I can say is.... I could have been a normal dude and have drinking in pubs as a hobby... But naaaaah... I had to be a masochist S&M freak and fiddle with UE as a hobby instead. xDDDD
Anyone else feel this way? xD
naw, just sick of good games with bad devs. need to make me own.
Yeeeeep, exactly. Was a long lasting dream of mine.... Oh well.
Hope you luck!!!!
i will make an amazing competitive shooter 🙂
if it takes me 8 months to 2 more years, this is all i do in life now, and the only thing i look forwards too now a days xD
drinking beer, and deving
I use CR mainly for runtime (procedural) adjustments.
Animations that have to be authored are still made in Blender
Btw, I hate the fact that the transition in state machine has a default blend of 0.2, wish it was 0. -.-
I account for those in animation stage so blending in engine is secondary and rare.
Again, probably might be just me. xD
Btw, it was bugging me for a while and couldn't find any sort of answer googling. I'm triggering animations mostly via bools inside the Anim BP which is rather annoying as I need to add anim notify's to toggle the bool triggers back to false since it's do once for single fire guns. Is there like a event method or something like that to trigger a transition?
Transition in Anim Graph:

Event Graph:

gimme like 20 making food.
i know how to do this
hi all! Guys, i wanna ask you: which conditions are must have to retarget animations from one skeleton to another (P.S.: i know about rigging characters, but there so many difficult things for me, like joint rolls etc) please answer like that: 1) ... 2) ... 3) ... and if they`re true, you can make retargeting . Thanks in advance 🙂
I have a skeletal mesh component with these assets from the store. My animation refuses to play on the mesh but it plays when I view it

Were you able to figure it out? I am doing it like this as well and its drivin me crazy lol
Sorry, just saw msg, nope, didn't really work in that yet. Setting up some animations tbh.
Guess atomik's food was poisoned, cuz he gone... xDDDDD
Quick question, for fighting games, is it better to add multiple reaction animations to each punch if you're adding a stat level up option or do you just change the physics according to the stats?
I am importing a new skeletal mesh with animations. However, it does not import the animations i made. it created a single animation that i did not create. I was messing with the skeleton in blender before exporting. but the animations worked in blender. Any idea for a fix?
Okay so when i try and import animations i got from Mixamo It throws a error saying
Mesh contains root bone as root but animation doesn't contain the root track. Import Failed.
What am i doing wrong?
Literally what it says. Mixamo's root motion anims are not straight compatible with unreal. UE depends on root for root motion, mixamo's are hip based (I think hip is like root or some bone around the ass xD). You'll have to google how to make them work for UE. There should be plenty of youtube videos regarding that. I think there was even a plugin as well but dunno if it still exists/was free or what not. You can also do it by hand but good luck with that. xD
Sorry if I can't help more. Been a while. ¯_(ツ)_/¯
I think I figured it out. Need to import it first without assigning it to a skeleton so it uses the Mixamo skeleton setup then once it is in UE you can retarget it to the Skeleton that comes with UE. I think bout to try it
lmao, that made me laugh more then it should.
Welp, my approach that I was talking about earlier worked. xD
Dunno if it's good or not but seems efficient and simple enough. Might try figure out how to trigger transitions by events now rather then tons of bools.
https://streamable.com/cmab6m

maybe now someone is around who can tell me how to get the bonetracks of an animation sequence to the additive part of the animation so that they show up in sequencer?!
(animation is set to additive in local space with ref pose as base pose type)
So for animation blueprints if I wanted to make it so that the player had a certain idle for when they were hostile say holding a sword but then sheathing it after a few seconds it would all be the same animation blueprint but different states?
yes
depending on how much of a difference holding the sword makes, you could also set up a generic overlay state which gets blended with your current animation
that way you can have items tell the animation blueprint which overlay animation they need, and you don't need to setup a specific state for each item in your state machine
so i have 4 different secondary breath animations, how would one blend through them (they are controlled by a float for intensity/speed)
state machine or multi blend?
nvm, ended up with a blend space^
Last night I had dreams about IK nodes that could do everything super easily
first time that's happened lol
Yes.
Also you would do the countdown in the actor BP/C++.
thank you
any idea why an animation bp might just slide around in idle?
I made sure to set up the state machine and entries up correctly
hey friends i have made a 2 piece sliding door in blender (single mesh with 2 .. pieces? inside), i have it imported to ue5 and i have 2 static animations (ie animations with a single set of key frames). i have made a blendspace between open and closed and it previews fine, but im not sure how to set it up in the animation blueprint to play the blendspace. at the moment, my door blueprint uses a timeline to drive the old setup (which was 2 static meshes) and i was going to use that timeline to drive the blendspace
:triangular_flag_on_post: Micaaah#7375 received strike 1. As a result, they were muted for 10 minutes.
Why not directly drive the bone in animBP (or Control Rig)?
[context needed]
because i dont know a single shit about what im doing lmao
Now you know what the shit to do.
do i gotta give you revshare now?
Hi guys, I'm an absolute beginner with unreal but I'm an experienced 3D artist. I'm using UE5 for cinematics: I imported a character from City Sample Crowd and it works fine with animation assets but what I need to do is just to pose the character. When I drag the character in the sequencer and select the MetaHuman_ControlRig the animation controls appear in the viewport and I can move them, but the character doesn't follow... Is this the wrong approach? I just want to pose the character in the scene
edit: i think I figured it out: I needed to assign the actor

guys i got a character and some animations from mixamo to make it an AI but when it turns to my location while chasing me it snaps its rotation towards me instead of slowly turning. how would i fix that
What's a good way to export / import a mesh with skeleton so that I can use or easily place the controls in Control Rig?
I tried adding them as bones but I'm not really sure if it's a good idea (I'm using Houdini for export)
where the assign skeleton? i dont have dementia but i think ue4 had that

Maybe it only exists on Skeletal Meshes?
I want to know what this "thing" is but I don't know how best to describe it. When you have a full body animation and you want to play a torso only animation over it and it keeps the lower half of the full body animation.
For example sprinting moves every bone, but throwing a grenade only uses my torso/arm bones. I want to keep my leg bones sprinting and only change my torso/arm bones
What is that called so I can search for guides on it
so I would have 8 directional movement animation, but only 1 grenade throw animation. As opposed to having 8 grenade throw animations for each direction of movement
Additive anims?
Yep, that's exactly what I was looking for. Thanks
where's the retargeting manager in ue5?

In this video we take a look at how we can share animations between two Skeletal Meshes that are using different Skeleton assets. We go through the setup and retargeting process and pass an animation between two different Skeleton assets.
(00:05) - Recap
(01:14) - Creating & Animating a Rig
(07:21) - Changing the Character's Pose
Im trying to follow this
The hard retargeting system got overhauled in UE5.
no, aniamtions too
i have animations without skeleton
Hey, how would u animate wearing clothing? If i have character and a sweater shirt top of the characters mesh, with cloth physics simulated and i want character to take it off or wear it.. surely its easy to animate hand movement but what about the shirts movement? is it even possible to create it on UE4 or should i somehow create cinematic scene on blender and play it on UE4 when needed?
take it off or wear it
Oof... That'd require a ginormous effort to pull off, considering this was and still is bane of many animators existence. If you can hide it with clever camera angle/shots, do so, so that your character simply tries to pull off the cloth.
i honestly have never seen a game that did this. You got to write a tech blog and share it with us when you pull it off😆
I think Naughty Dog still fake it with well placed shots in Last of Us 2
||That game is super hard to do clean room reverse engineering for the animation||
I can only think of using alembic animation lol
I mean, for what it's worth, faking it with clever camera shots saves lots of effort. But assuming one shot is absolutely necessary, you would have a prebake cloth sim of it taken off or being worn on, in form of alembic data, then once the cloth fully settled, you swap the alembic presim cloth with the gameplay rig of the cloth. And good luck maintaing continuity.

In this tutorial, I'll show you how I brought over a cloth simulation from Cinema 4d into Unreal Engine 5
My Unreal Engine for Motion Graphics course is now out!
➜ Creating the Unreal Course: http://www.mograph.com/creatingtheunreal
Buy Winbush a Coffee 😉
➜ Ko-Fi: https://ko-fi.com/winbush
WINBUS...
Yep
So TL;DR: Fake it.
Unless you managed to pull off wearing/taking off cloth animation even in DCC tool with baked simulation in one shot, then I salute you, sir.
Thanks guys, i'll take a look.
Can we crop an animation in UE ?
i must ask again... can we not edit bone tracks on animation sequences unless they are additive? (UE5)
My relatively simple Full Body IK for the Arm never reaches the control and it also stretches the bone, how can I find out how to solve it? (Allow stretch is turned off)
I thought that the IK would try to reach the control? But even with only one single bone it seems to attempt to get away from it?
Can I have an animation blueprint and a blendspace share a skeleton but work with different skeletal meshes which also share the same skeleton?
Yes.
Hello, where tutorial can I follow for UE5 character animation step by step workflow like walking to idle and running? I'm gonna use it for animatics rendering. Thank you!
In this video, Zach Reinhardt shows how to animate a robot walk cycle in Blender, make it loop perfectly and let the robot walk along a path.
⇨ Cubic Worlds course: https://bit.ly/cubic-worlds-8
⇨ Project Files (email required): https://bit.ly/cgboost-resources-12
LINKS
⇨ Latest Blender Builds: https://builder.blender.org/
⇨ Blender Launch Pad ...
Or maybe this instead for less lengthy video
https://www.youtube.com/watch?v=zajp2n7oplQ

In this video I teach you about animation in blender 2.9 using my space man character. I show you how to create a looping character walking cycle that can be used for animated shorts or games.
if you have any video suggestions please leave a comment below.
I just need a fast workflow. I have the animation presets but I just don't know how to control them inside the unreal
I don't need the scratch one 😦
if you don't plan to make a game i would create the animation in another application and just import them to UE
Meanwhile me doing the exact opposite lol
For the original game project, I make the anims in Blender, but for machinimas, I make them in UE4 editor w/ Control Rig
I have the exact same question 😄 I've been looking for a "this is how to do procedural walking animation in UE" but haven't found anything clear yet.
hi all. is it possible to have animations from mixamo bipeds retargeted for non-generic humanoids ? or another way to animate easy with mixamo's animations a non-generic humanoid in unreal/ blender ?
you can upload your rig to mixamo and hope for the best
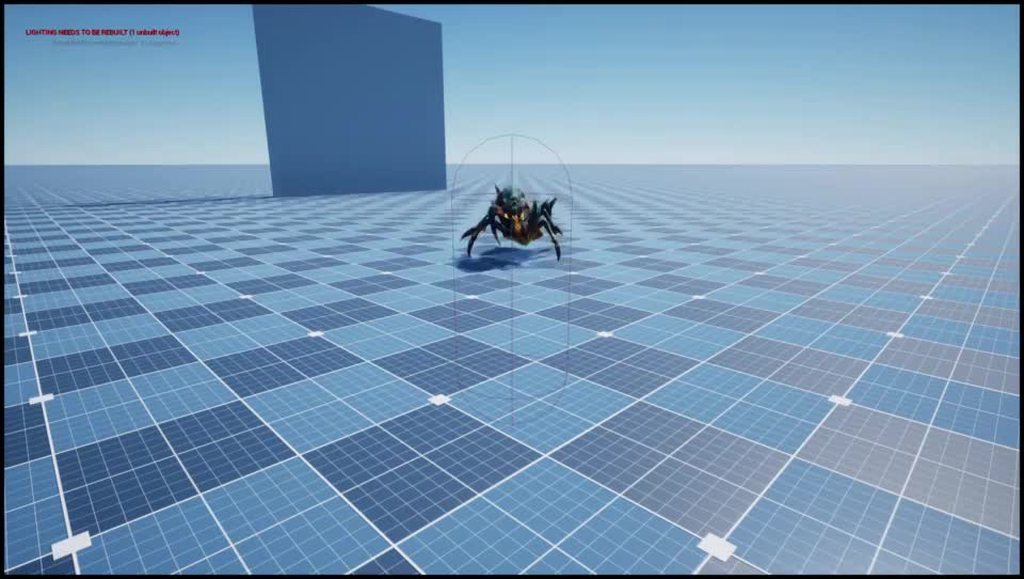
If I wanted to make a dynamic walking animation for a quadraped in unreal, how could i do that? My goal is to have a robot creature meandering around the environment, fluidly
the robot character doesn't have a strict direction (eg. a dog or a crab) but can just adjust and start walking in any new direction without stopping to pivot
I would love your input. I've been at a loss for a week on this 💀
did that but is not ok

where did my keyframes go? the animation still plays but i cant see or edit them here
i think i right clicked something
go into pose mode on the rig, and press a to select all bones
maybe they show up then
oh.. yeah
ty
how do i delete actions btw? the X button just 'unlinks' them which i dont think deletes them
it does somehow, save the blend file, and reopen it
for some reason they aren't discarded before
also this is unreal animation channel, not blender 😛
Can anyone help me with this? In the video I retargeted some anims, and I couldn't retarget the IK because it would push the character down and raise the shoulders. So I disabled the IK retargeting. Is there a way to easily put the IK bones where they should go or do I have to manually key every frame for the IK bones on every animation?
hi is it possible to copy those ik chains from a skeleton to another one which have the same bones names?

no you need to do it manually.
Exclude bone from solve does not work...
copy that let me check on it
Hi all, quick question. I have a flashlight animation that works on the right hand. Am I able to flip it so it animates for the left side?
I'm basically trying to figure out how I can have my flashlight in my right hand, and when I pick up an item, the flashlight moves to the left hand and the new item is held in the right hand. Hopefully that makes sense lol, thanks guys!!!
@here I downloaded this 90 degree turn from Mixamo, the problem is the character animation turns 90 degrees physically, so when I turn, both the programmed turn and the animation turn play at the same time, completely screwing with the animation.
Seeing as it is impossible to stop the animation from rotating, I was thinking should I socket an arrow component to her chest, and rotate the capsule in relation to which way the arrow is pointing? That way when we stop rotating, she will face the correct direction
I'm using the right turn animation with a female in a red blouse and black pants.
https://cdn.discordapp.com/attachments/221798806713401345/964623815596466216/PlayStationTMNow_2022-04-07_20-21-41.mp4 Trying to get something like this
Here is my blueprint for turning

Is it possible to use the UE5 locomotion animations (that use the newer skeleton) with the old UE4 skeleton, or there is no convenient way to retarget those backwards?
someone said up there that it was replaced... but how does retargeting work in ue5 now?
like, how do I follow this tutorial from epic now? https://youtu.be/xy9aLbZLdeA
In this video we take a look at how we can share animations between two Skeletal Meshes that are using different Skeleton assets. We go through the setup and retargeting process and pass an animation between two different Skeleton assets.
(00:05) - Recap
(01:14) - Creating & Animating a Rig
(07:21) - Changing the Character's Pose
Why might this attack animation montage not be blended into properly? Changing the Blend In time doesn't seem to have any affect.
https://imgur.com/a/IcnOXvV
What do people use to export animations from Blender 3.x to Unreal 5? Anything out yet?
The usual FBX?
with wrong scale?
No, at least not without some hacky solutions
The usual 0.01 unit scale?
I don't feel like things changed in that regard even in UE5
Workflow should be exactly the same with Blender 2.8+ and UE4.
Is there way to import animations that don’t use bones/skeleton into unreal (no skeletal mesh). Example would be spaceship with doors and hatches opening. Skeletal meshes are very expensive and want to avoid using them.
No
And I highly doubt skeletal meshes is THAT expensive.
Compared to static there much more expensive

Do you really going to have 216 spaceship at any given time?
Yes. Even if I did not it does not matter because it still be wasting performance that can be allocated to other systems. Even 30-50 ships be a big deal.
I'd say synthetic tests is kind of bollocks, you'd have to actually profile the performance yourself in context of YOUR game.
But I digress.
Feel free to use poseable mesh components, or static meshes arranged in BP.
But if I had one life lesson to say, is that to gauge the performance in the context of your own game.
I guess. techniques like this does not depend on game. Better performance on all games / situations. That’s like saying only use LOD if you need to. I to distress. Thanks for your time and replies.
For what it's really worth, I'd rather just do my own tests in the context of my project and write down the stats. Synthetic tests are often not made in practical context, hence why I don't really cling into them.
So for example, your project would have starships. Test it with both the space ship as static mesh and skeletal mesh, and compare the performances with the amount that you're most likely have in your game. That way you'll have more definitive data in the context of your project.
But I guess if that's too much effort for you to take, then I won't judge.
||Also flies should be particles, but I jest||
Bare with me but Is there such a thing as blend spaces for textures like if I had an aging system and the character textures got progressively wrinkled or switched out to elder ones as they aged?
Not in the sense of blend space, but you can use scalar parameters for those.
I've heard that if your AnimInstance is setup incorrectly, it will run on on the game thread instead of worker threads. Is there a profiling command to check whether or not it's running in the correct thread?
Perfect!! All I needed to know! Thank you for the reply!!! ☺️
I downloaded this 90 degree turn from Mixamo, the problem is the character animation turns 90 degrees physically, so when I turn, both the programmed turn and the animation turn play at the same time, completely screwing with the animation.
Seeing as it is impossible to stop the animation from rotating, I was thinking should I socket an arrow component to her chest, and rotate the capsule in relation to which way the arrow is pointing? That way when we stop rotating, she will face the correct direction
https://www.mixamo.com/#/?page=1&query=turn
I'm using the right turn animation with a female in a red blouse and black pants.
https://cdn.discordapp.com/attachments/221798806713401345/964623815596466216/PlayStationTMNow_2022-04-07_20-21-41.mp4 Trying to get something like this
Here is my blueprint for turning

Okay seem to have a issue. When i press the key to trigger my dive roll the animation plays and the character moves in the correct direction but the character turn around and faces the camera when doing the animation yet the feet stay locked in the correct direction. What am I doing wrong and how do i fix it?
This is what I mean

Hey guys, in today's video, I'm going to be showing you how to set up and create an animation blueprint and blendspace for your characters in your game. In this we will set up; idle, walk, run, jump loop and a walking jump.
Sorry for the long video, I wanted to go over this in more detail then last time to help you understand it more and learn ...
This is the tutorial I watched and individually each animation works
So how is running 200 something simple tests that show big performance difference Syntehtic when its a universally applied to all games? Bones are expensive and get more expensive the more vertex’s you have in mesh being affected by bones. Skeletal meshes can’t be instanced easily if not at all. It’s not that its to much effort its that I already know the end result. It’s a universal result. I was asking if its possible to animate without skeletal meshes at all, not if I should consider using skeletal meshes. I found this as a solution to animating static meshes and works good for mechanical things like ships and guns like shown in video. Yes I would love 100’s - 1000’s ships total of various meshes. For character skeletal mesh my computer can only handle around 40-60 before becoming really slow (Not very strong computer but good enough for now). So yha having skeletal meshes for ships would be awful.

When you need to animate an object in your Unreal project, chances are you jump towards a skeletal mesh, but using vertex based animation on static meshes can save significant performance. (This example asset alone cost 0.5-1.0 ms total less when using vertex animations)
Vertex animation and crowds: https://medium.com/xrlo-extended-reality-lowdo...
is it possible to create an anim montage and edit the animation in the montage ?
i don't even know what to say about using skeletal mesh for something like doors....
Not using doors is the solution
It is the worst thing mankind ever invented besides nuclear bombs
Can only imagine how many developers committed seppuku because of doors...
hey guys
how do i make the actual player, camera, and the capsule move along with this animation?
see, the player just reverts to where he was before the attack. do i have to disable rootmotion?
how can I import a single animation for an existing skeletal mesh without reimporting all existing ones too?
Anyone know why even though is Blender Root is start of bones it's seems to have made it's own root which when I enable root motion it dosen't lock to center ??
Found issue it's made a startin bone, anyway to get rid of that. It's not in the blender scene etc

No.
There should be an option to extract root motion in the animation sequence itself.
No.
With MRQ, all you have is image sequence, which is significantly better than using AVI or MP4.
If you want to make a video, best to stitch them in your video editing tool of choice
ok
i try that
thx and have a nice day
damn
unreal engine is freaking fast in comparison to blender!
took 5 minutes to put together
I am making my player model in Blender and using IK to help make the animations. I also want to use IK in UE (help with character using stairs etc).
Do I need to do anything special in Blender to have this feature in UE, or is having the bones setup with IK in Blender sufficient?
You basically have to recreate the IK setup in Control Rig or just plain animBP. IK/constraint properties are not transferred into FBX.
I see, also by constraint do you mean like how the model is attached to the skeleton?
or is that transferred into FBX. For example which parts of my model are attached to which bones
Constraints as in limiting bone rotations or binding a bone transform to another without making it a child of the other bone
I see, ty
Hi
I have an issue with my fps character animations, when moving forward the character animations are fine, when moving left, right and backwards it seems to jump to the position and jitter about when moving
Idle is fine too
Array index out of bounds: 2099 from an array of size 71
god damnit why is UE5 so cooked 😐 how is it landing on finding index 2099?!?!?!
literally explicitly defining a bone in an ik node
it also doesn't even happen reliably, just randomly when changing a value in the animbp
I'm trying to import an FBX animation for an existing skeletalmesh in UE4 but when I try to select the in-use skeleton on import, I get "does not contain any valid animation takes". I have "All actions" unticked in Blender because I just want to import the one currently selected animation
I don't really want to re-import the entire mesh and all its animations as I'd have to set up the blendspaces and such again
Are there any limitations with using Control Rig when packaging for mobile? I've set up a rig and on desktop it looks good but on mobile it's all degenerated somehow
Hi all, I'm sure this has been asked a bunch, but I'm not sure why this keeps happening.
Why do my preview animations appear normal but when I press play the mannequin's back is stretched.
I know UE5 has more spines now than UE4, so I'm suspecting that's why we're getting this. Is there any way to fix this?

Is there a way to move a character using a level sequence such that it would animate according to its anim bp? Eg. play its regular walk animation or such appropriately
this might help https://docs.unrealengine.com/4.27/en-US/AnimatingObjects/Sequencer/Overview/SequenceRecorder/

Overview of the Sequence Recorder tool and recording options to capture gameplay.
Thanks, I'll check it out
The way I did it was extract animation curves from animation and use that to move character (I got custom C++ to do it but there are plugins on marketplace for such). You can use “Get Curve Value” node nside animation blueprint to get curve values
You also have to go inside animation and make sure you lock root.

Unreal Engine
Extract root motion data and transfer it to in-place animation.
@peak mesa Like I said you could just use root motion as well but its not good for multiplayer games and such.
Hi
I have an issue with my fps character animations, when moving forward the character animations are fine, when moving left, right and backwards it seems to jump to the position and jitter about when moving
using rootmotion animation, there are a lot of great tutorials on this
nvm he just responded to you lol
are you on blender?
yes
when exporting, under the animation tab (on the right) uncheck "all actions"
oh
i didn't read your other message sorry
do you have "animated time" selected when importing the animation in ue? @worn lichen
It seems like I've got it working now
when retargeting, exclude from solve not working for anyone else aswell? ....
Okay seem to have a issue. When i press the key to trigger my dive roll the animation plays and the character moves in the correct direction but the character turn around and faces the camera when doing the animation yet the feet stay locked in the correct direction. What am I doing wrong and how do i fix it?
Any general tips to avoid clipping/interpenetration when retargeting animations? I have tried a variety of the re-targeting options and the arms always seem to poke inside the body
so if a 3rd person game has an extensive character creator (vastly different body sizes/proportions, non-human creatures, etc), how would you handle the skeletons/anims? my guess is that there would be a few different "base" skeletons (big humanoid, small humanoid, centaur, lamia, etc) and different anim sets for each? what do you think?
ue5? You should be able to add offset manually to avoid those artifacts using ik retargerter
oh very interesting. I am currently in UE4...but that looks very promising and worth diving into UE5 for that feature alone. Thanks for the tip!
im trying to connect some animations to my skeletal mesh and for some reason 1 set is working perfectly but another set isnt applying to the mesh. can somebody check out my code in chat for like 2 min plz? its driving me bonkers that i cant find the issue
this is what i want it to look like

but this is what im getting for the new set

retargeting foot ik works but not for hands, what could be the issue?
im doing the same thing for multiple guns and every time i apply a new anim bp to the mesh it sets to the default hand positions (second pic) instead of showing the anim from the bp view
My animation doesnt transititon
it just stays locked into whichever one is playing
forever
What does the anim graph/state machine looked like?
um
the transition part
or the whole anim graph

why does retargetting an animation from ue4 mannequin to ue5 mannequin seem to product entirely different results?
Hey
How can I remove the weapon/camera swaying that happens because of the idle animation?
Is there way to make the cam seperate from the head?
I'm having the same issue. Did you figure it out?
So it stuck on Sprint state?
worst
i tried replacing the animation
it jsut doesnt work
im so confused
lol
my animations just dont start their stuck in frame 1
my AO offset looking works
but nothing else
Not sure if those Pose ignored warning is relevant 🤔
I'm trying to make my character inside the car bounce as the car bounces. Any advice? I tried using the Rigid Body node but he doesn't seem to be inheriting the motion from the parent
So control rig replace skeletons?
I need mechanical movement, not soft body
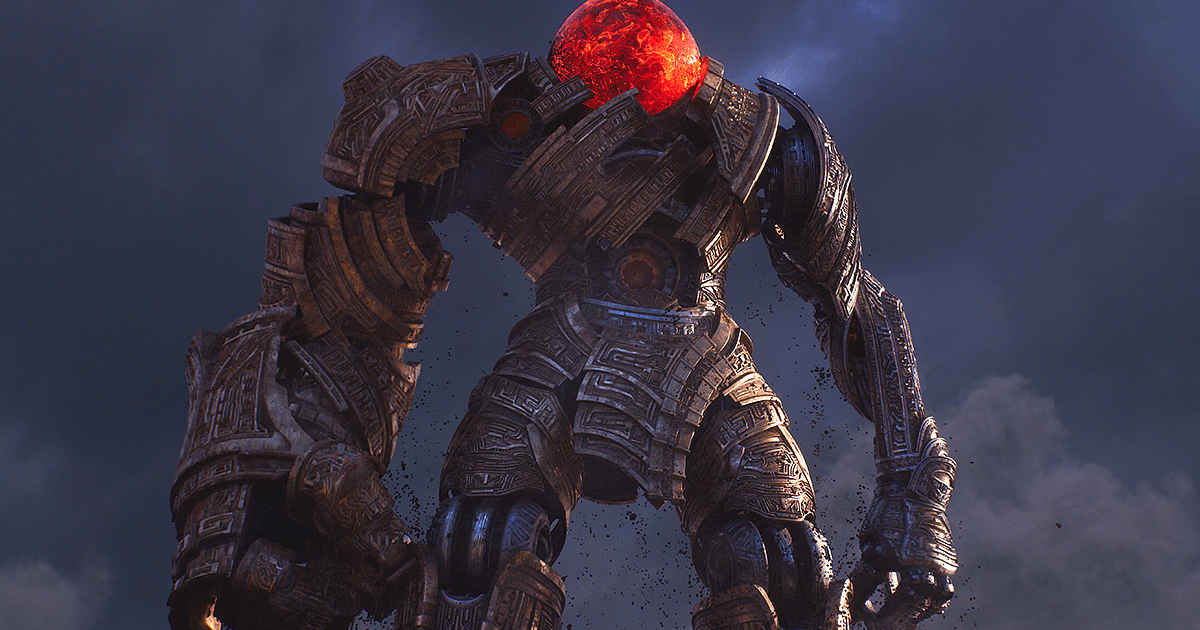
I think Valley of the Ancients demo did that
The skeleton was just a control rig
Since it was made out of nanite
there is still a skeleton, and control rig controls the skeleton. The static mesh is attach to the skeleton piece by piece i think
Hi, when my character jumps, it stops on land losing all momentum, is it possible to have it keep momentum and not stopping completely?
Right but I can't import a skeleton without a mesh attached to it
Looks like they just had a cube on the skeleton
Hmm
Do I even need a skeleton?
If I have control rig?
Like can I use control rig as a component and then attach things to the bones I create
anyone know how to copy a control rig across different skeletal meshes? Characters a different sizes but they are all using skeletons based of the ue4 manniquin
Control Rig still controls the skeleton
By no means it's a replacement of it.
But you can add bones to a control rig without a sekeleton
I might be wrong, but that bone is weighted to nothing
fixed it just had the incorrect character reference in my anim BP
But this is a blendspace issue right?
I think I am going to try als retarget soon
root motion is enabled when it should not be on the walk anim
Does anyone know how to enable root motion in livelink so that the player capsule moves with livelink? Since there is no animation sequence afaik
So the use normalized root motion should be unchecked just making sure as none of the animations in my Run2Walk blendspace have EnableRootMotion checked.

¯_(ツ)_/¯ try it
any experienced blender users?
Hey, anyone here that would be able to give me an advice on a locomotion system and additive anims? Would really appreciate 🙂 Thanks
Like how to make one? Try using ALS
Nah, something little more complicated. Having some issues with global movement system and weapon specific additive/ layer blend anims.
Control Rig doesn't require a skeleton - Control Rig Component can enable you to read any control value and do something with it. The caveat is that Animation Sequences require skeletons/skeletal meshes. The robot in the Valley of the Ancient uses an 'empty' skelmesh so the animation can be stored on bones that the AnimBP can use during gameplay
Since you're on that topic, benefits/drawbacks on choosing one or then other if both options would be available. Also, are the cars in city example done like that too? Sadly, can't open the city example vehicles for some reason. Hangs on loading at ~40%
Also, how is root motion now in UE5 and multiplayer? Did get some love for a bit more out the box work or does it still fall onto devs? Again, regarding multiplayer which is a bit of a pain with root motion.
check your animation your landing animation probably forces its entire animation to finish before blending into the basic movement
haulting movement completely
So should i decrease the animation playrate?
no the play rate but the transitioal rules
in the transititon from land animation to walk if youre using a state machine for this
the circle on the string will say what has to happen for you to translate to walking
like if speed is 0, or the animation is > left of the animation playing, or if how many of the animation left to play is greater than etc
Anyone familiar with Control Rig?
trying to make this node work...but tutorial seems outdated https://docs.unrealengine.com/4.27/en-US/AnimatingObjects/SkeletalMeshAnimation/AnimHowTo/ControlRigAnimBPNode/
Describes how you can use the Control Rig Animation Blueprint node to incorporate Control Rig content within an Animation Blueprint enabling you to blend to or use Rig content directly in your animations.
Thanks for the clarification. We’re doing hard surface mechanical objects (and trying to use nanite) so no need for skin weights in our case. Didn’t know if it was better to create a control rig from the Skeleton and have that be the root, and attach Mesh Components to the bones of that. Or if using a tradition skeleton is the way to go. The real problem we have is we can’t import a skeleton with no mesh. It has to have something on it.
There is no way to reference ControlRigHierarchy as it described in the tutorial
Looks like the VofA example has the components mirror the skeleton location instead of actually attaching to it?
Unreal Engine
Technical Product Manager Jeremiah Grant explains how the massive robot in Unreal Engine 5 project "Valley of the Ancient" was rigged and animated.
“was skinned to a simple cube to generate a skeletal mesh in Unreal”
Ok so we have to have the mesh in there, got it
Try to paint cloth physics on my hair but it droops like this
Anyone know how to add constraints?

With no cloth simulation looks like this

ok, figured out
Animations playing slo mo in preview editor? Montages, blendspaces, etc
There's none.
Try using bones instead to animate the hairs.
@spare krakenWhen you apply the cloth sim, make sure you also select the physics asset you want to influence the hair. That's the "constraint" + other cloth settings. Also make sure you keep the hair rooted/don't paint with 100 all the way to the base.
If I want to blend from idle to run, idle to jump, run to jump, and idle to jump is there any easier way to do this other than blend spaces?
I plan to add even more animations and I have tons of blend spaces added up
Does anyone use iClone for mocap cleanup? Just wondering if it is worth taking time to learn it, if it actually saves a lot of time or not on the mocap clean up
getting some weird results with the IK retargeter (retargeting a gideon animbp to a ue4 skeleton character), when I land the character... explodes. where do I even start debugging this?
I've tracked it down to a single node I can exclude to get rid of the behavior, but the animation and the cached pose both look fine when I pass them through directly to the output and I don't see why Apply Additive would be making this mess

maybe the answer is I just retarget the animations (which look fine individually) and build the animbp back up from scratch
how can I force an animation to play even if it's already playing, in a state machine? I can't create a transition rule from one state to itself so it just doesn't trigger the animation again
Why play it again when you can use loop?
because it can be retriggered before the animation has finished
Gotya
From what I know, it'll need to go back to the last state, then it can do a transition back again.
I don't think there is a direct way to just enter the transition again without going back a state
what do you mean by the last state?

So it'll need to go back to the last state for a frame then re enter the state to enter
I see, thank you
No worries hope that fixes it

Is there a way to assign these blend values through blueprints?
Similarly to how the bool is setup?
State machines. You don't use blend spaces for that.
If there's no option to expose as pin, then no.
Usually structs can't be exposed as pin in anim graph.
Interesting, I feel like there must be a way since this is very common
I can always make a timeline float, but I feel like its best not to
There's a Custom Curve input there, if you want to use that
When I import my animations I cannot see my model unless I enable root motion. However I don't want to use root motion. Any ideas?
Also for some reason when I import my skeleton into Unreal it adds a bunch of extra bones
What DCC tool are you using?
Sorry I am unfamiliar with what a DCC is
Blender? Maya? Cascadeur?
Oh, I am using Blender
The waist moves during the animation, and in Blender the Waist is my root so my guess is Unreal sees that as a root motion, because the root moves?
Blender...
What's the scene's unit scale?
I am not sure where to check that but I left it all default. When I import into Unreal I set the import scale to 0.1. When I drag the skeleton into the scene it is the perfect size.
Felt like that's the wrong way.
In Blender, set the unit scaling to 0.01 and scale everything up 100x
That's in order to compensate for unit scale differences.
With static meshes, it's fine to left it at 1.0, but skelmeshes is where the unit scaling set to 0.01 matters
I see, for Blender unit scaling I assume I just do it on output and for unreal do it on input?
It's in the scene itself
I see, I just did it on import and I see my model but there are some issues
let me try the scene itself assuming you mean the blender scene
when you scale everything up by 100x do you mean like in my blender I should scale up the objects, or scale on import or even export?
Scale them up in Blender
whats the proper way to do that? I tried pressing S on my armature and typing 100 but I think its way way too big
unless thats right
That's right. Scale up 100x and zoom out to fit
Do you know how to solve the "fog" issue? When I try to zoom out my model is covered in the blender background color
the red is where the leg should be, but it gets covered at this scale

Adjust the far clip plane (mine is set to 1 km)
Also make sure the grid is visible for scale comparison
when I Set the far clip plane to 1000m my model glitches and and its still not far out enough

I was messing around with the settings and upping the clip start seemed to fix it
How big is your model?
In the Item side tab, you should have the dimension of the model in measurement units.

Holy shit
also its still tiny in the animation on unreal
You're not applying the scale, that's why.
Also just scale it to around 100 should be enough already
oh when you said scale you meant the scale of the object should be 100, not increase the scale by 100x?
lmao
I thought you're having default scale in 1x with unit scaling in 1.0
its still turbo tiny in the animation viewer tho

Okay, let me rephrase the entire thing from start.
First, Blender unit scale set to 0.01 to compensate for Unreal unit. Second, zoom out to scale of the grid. If the model is too small, scale up 100x and apply the scale. Once that's done, export as FBX and bring it to Unreal.
Not gonna lie you should probably make a video dedicated to this problem😆 if there isnt one already
Unfortunately my potato isn't up to the task for recording with OBS in the back lol
Im not really sure what to do, I set the scene to 0.01 and scaled my model so it fits properly into Unreal, yet the animation preview is still awful

it says the approx size is 53x53x213 which means 2.13 meters right?
Have you applied the model scale?
Time to use the power of automation https://www.unrealengine.com/en-US/blog/download-our-new-blender-addons
Unreal Engine
We’ve released two new, free addons that greatly streamline the workflow between Blender and Unreal Engine.
Easy to forget that, even myself.
what do you mean by model scale?
Apply Transforms?
oh in blender export
Not in export
i dont think i did no cus it has a warning sign
That thing is broken
Apply it in the Blender scene
With all objects selected:
Ctrl + A (Apply Transform) -> Scale


Damn, the way you set up your model is rather peculiar, to say the least.
I thought all the locations are already applied at the center, along with the skeleton.
i think its easy to tell i have basically no idea what im doing
i just piece together different tutorials
lol
the bones seem fine just the models, can I recover this?

How can i set my animation to 4 fps so it looks like a comic animation
I don't know how though, considering the weird setup
I did it just to see if it fixes anything, should the animation preview be this small?

You'd still have the framerate in Blender (or your DCC tool of choice) in 30 FPS, except on every pose you use constant/stepped interpolation. You can also disable in between frame interp in UE.
No, you zoomed out way further.
hrm, do I need to apply the transform scale? What does it do?
because it didnt fix the issue and it broke my model
It might more than that, because I saw the meshes have location pivots all over the place
want me to screenshot the collection?
how I have it is as separate objects parented to the skeletons bones
That's what makes it weird to me, because usually you have the pivot is in the center, of the scene, along with the skeleton
Sorry i didnt get that, so i cant set my regular anime to 4 fps directly in unreal? Or a trick to get that comic style?
No, usually anything other than 30 FPS will cause issues with the animation
Any blueprint trick to like pause the animation and skip some frame and play?
This is my scene

But you can still animate in Blender in 30 FPS, with constant interpolation

“The first 500 people who click the link will get 2 free months of Skillshare Premium: https://skl.sh/southernshotty2"
"This video was sponsored by Skillshare"
Clay Shader: https://youtu.be/wTu3Xssw67Q
Instagram: https://www.instagram.com...
Thanks could be time consuming for multiple animations but would do it if its not possible directly inside the engine
I have a logic in my head to devide the animation length to an integer then get the result to be added each second to switch poses inside the single animation but not sure if thats possible
Sounds like an overcomplication
Assuming you made the animations yourself.
No i just grab mixamos and store animations , so i prefered to make a single function to just connect any animation to that does the job
Since i am doing this for game cutscenes only i think the easier trick is to do it in video editing instead thanks alot
@ashen junco when I create a cube in blender doesn't it set the size depending on the scale of the scene?
and then you said to scale objects up x100, so my armature should be the size of that cube scaled up 100
see its the right size when I leave my scale alone, its just I need to enable root motion

but its wrong when i place it
Hey anyone know what's going with my control rig for my character? So I'm exporting these from blender using auto-rig pro. I'm not going to lie, I copy & pasted the control rig from the ue5 manny to link, then I resized the shapes. The control rig seems to run fine but it looks like the thighs and callfs are what are messed up. I wanna make control rigs for other characters too but I don't wanna make one for each one. They all will have the same skeleton


I have a question about an AnimationBP. While trying to connect "Try Get Pawn Owner" return value to "Calculate Direction" target, I get an error "pawn object reference is not compatible with anim instance" What could be the issue?

My idle animation doesn't play if additive animation is set to "no additive"

also my character hovers over the ground even though in blender the full animation is connected to the ground

its something to do with my root bone, when I delete my root bone and target my waist instead it works, any ideas? flipping the root bone 180 seems to have fixed it
Lyra sample is not using blendspaces for movement, anyone knows why?
I don't use UE5, but I suspect they use Control Rigs in lieu of blend spaces
It's exactly what it says.
How do you like euphoria (rockstar)? I would like to know if it is possible to do this in Unreal Engine 5, having the budget to hire a team of people from Russia, what do you need to know? Who is better to hire for this job? Where can we see more information about how it all works?
My goal: to find people who will be involved in creating a tool for procedurally physical (muscle stimulation, etc., etc.) animation with active ragdolamm (generally like euphoria, but a little worse since the budget is not rubber).
- Euphoria, for what it's really worth, is Rockstar exclusive. The original developers stopped licensing it elsewhere for a long time.
- As for UE4/UE5, technical animation stuff is mostly what you need to know, and technical animators would be what you're looking to hire.
- UE4 and UE5 have physical animation system, and also Control Rig system that can ease your tech anim work a bit. Plenty of resources on the former.
Is it better?
Yes. Even in UE4 I used it pretty much replacing blend spaces.
It is for IK, right?
I'm at a loss, some of my animations just dont import right and I have no idea why. They all work perfectly fine in Blender. I have the scaling set correctly and I made sure to apply all my transformations. I have a separate root bone.

This looks like magic ... strange
But what does it do? do you create animations by code or somehow use existing animations?
In my case, I use control rig for:
- Animating inside the editor (machinima project only)
- Making static additive blend spaces programmatically
- Body IK in runtime powering most of procedural animations, coupled with a bit of C++ stuff on actor level
- Twist bone adjustments
- Dynamic aim / look at system for upper body and head
- Other adaptive stuff
Personally I'm looking into more stuff that I can apply to control rig, like vehicles, quadrupeds (e.g. cats), arachnids, and whatnot. Even in 4.27 CR is pretty much in usable state.
Me?
no, @ashen junco.
Oh my bad lol
Not yet
I'll send to one of my buddies for gameplay recording once I had it good enough
For what reason? I typically don't accept DMs unless friends or urgent reasons.
If it's related to UE issues or troubleshooting, best to post it here instead so others can fill in while I'm away.
I just want to ask if using ControlRig is the right way to do something like this: https://www.youtube.com/watch?v=xeLWNoAEuzA
I have experience on Unity but 0 on unreal

Check out Curse of the Dead Gods here: https://bit.ly/328muFo
Big thanks to Focus Home Interactive for sponsoring this video.
Curse of the Dead Gods
You seek untold riches, eternal life, divine powers - it leads to this accursed temple, a seemingly-infinite labyrinth of bottomless pits, deadly traps, and monsters.
Use weapons, the environment,...
It does not needs IK on legs or anything like this
is ControlRig overkill?
Video too long, what's the TL;DW from this?
Looks simple enough, you can use CR if you want to.
Doesn't have to aim for GTA 4 like animations to use CR
Try disconnect parts of your rig graph to see which nodes are causing the trouble
Hi, I want to retarget Mixamo animations to UE5 mannequin using this new IK Rig system but the retargeted animations lack root motion, how should I set up the bone chains and stuff for the root motion to work?
By having Mixamo animations in place to begin with.
Having "root motion" in Mixamo is like asking for jank
Hey guys, I am working on a rpg combat system and when my attack animation plays it makes the player stop moving and I was wondering how to allow movement to make it smooth combat
Usually you don't allow movement when executing melee attacks
how do games do it then because i never notice the player not being able to move when attacking
Simple, the character moves forward to the animation a bit when moving, and also responding to the direction input you give by the next attack.
Usually with root motion or with animation curves inside the sequence/montage
can you give any further help Im not sure what to do with that
H3Y Boys, No one would like to help me on my project sometime in the future?
Realtime Procedural Animation Using whole body physics (muscles, muscles and so on) + active ragdoll For unreal engine 5, the work is paid monthly.
If You want skyrim-like combat you can also blend animations in anim blueprint, but yeah, if something like Souls-like games, then root motion is the answer
I like blend spaces because if my character is moving slower than full speed the animation is slower, but is it possible to make the animation faster if they are moving faster than their max speed (i.e they get a speed boost)
or should I use a separate running/sprinting animation for that
In blend space you can set the play rate of every point of the blendspace, you can put the same anim further on your "speed" axis and set the play rate to something more than 1.0 I think
If you don't want anything else than animation playing faster then I think it can be the answer
I see, I think I am just going to have a single running animation then that increases/decreases with speed as I am making a more lowpoly cartoony game so 1 run cycle looks nice
See #instructions on how to post to job board channels
I'm using Basic IK and blueprints to manipulate a controller attached to a hand bone (hand_l) and I am able to translate the desired movement just fine. How do I get the control's rotation to automatically point in the same direction as the forearm? As you can see, it always points in it''s default direction.

I did find some success in blueprint with getting a mid-point of the chest and doing a find look at rotation to a scene component that determines the control location in teh control rig. Looks janky, so I would like to do something similar but insead of from a mid-point in the chest, do it from the elbow joint. That is what the "elbow location" vector being set is. I'm not sure how to pass this information back to AnimBP and I cannot get bone location from bp unless it is a poseable mesh (which I believe is now defunct). Any tips would be a huge help
I've got a bit of an issue and I can't figure out what's causing it.
Basically, I have two animations, one Anim A and Anim B where B is set as additive with the reference anim being A.
Now when I apply B as additive to A, and Curves set in A get overriden by values in B, despite the curve not being set at all in the additive animation, is there any way to fix this? Or do I have to set the curve value in both A and B to make sure it doesn't take it as additive.

Anyone knows how to activate the collision in the rigid body node like epic's example? https://docs.unrealengine.com/5.0/en-US/animation-blueprint-rigid-body-in-unreal-engine/

Describes the Rigid Body node and how it can be used as a lightweight physics simulation inside Animation Blueprints.
Is there anyone who can help me out with this, or direct me to a tutorial that explains iK in a way that for a TPS allows for the hand position to adjust based on the weapon type that is equipped?
Didn't get any response in the blueprints channel, so maybe this is an animation question? I was tidying up my project files and moved my character animations into a character folder I created inside the contents one. I had to relink a few of the animations to get them to work again, but they seem to be fine now. However, now my character isn't 'grounded'. His feet are in line with the terrain, but instead of his chest moving up and down when he breathes, he slides forwards and backwards a bit across the ground as if the mesh no longer responds to gravity. It was working fine until I moved the animation files. Does anyone know how to fix this? Googling just comes up with a lot of 'my character is two inches above the ground' questions, which isn't the issue.


Looking for a bit of guidance from someone with the time. Im a college student screwing around with some stuff and I cant seem to get my model and animations to export from blender to unreal properly. The animations show up in unreal but they are pretty broken. Any time is appreciated

could anyone explain the difference between local-space and mesh-space blending for additive animations?
For simple click and animate objects is it best to use sequencer or an outside program and import it
How To Set Up Collision
How to make feet follow the animation? I'm playing a sword swing montage but the feet don't lock to the ground and move with the animation. I'm using ALS system
:triangular_flag_on_post: EPIC Martina#6648 received strike 1. As a result, they were muted for 10 minutes.
Is is there anywhere in the animation editor or preview window in any of the tabs where I can modify a skeleton's specific is specific time dilation
Or is custom time dilation for a skeleton only editable in blueprints
I'm trying to get my head around IK. Can someone explain what the difference is between a IKRig and a ControlRig? In tutorials I can see people using only Control Rigs but the ABP Manny from the third person template also has an IK Rig but I can't find where it is used. Also people use Controls instead of IK bones but the Control Rig used by the template doesn't have any controls but only ik bones. When do I use ik bones instead of controls? And do I have to add the the ik bones to my skeleton aswell? My main problem is that I'm trying to get the FootTrace working on my own skeleton by using controls instead of ik bones but the control keeps falling through the ground instead of staying where the collision happens. Cause I think the transform of a control works different to an ik bone somehow.
Has anyone bought the MovementAnimsetPro animations? If yo did did anyone else have any problems with the IK not retargeting correctly?
Can anyone tell me why, when I try to blend my aim offset to my movement blendspace my torso shrinks?
Does your aim offset on its own do anything to the torso?
also what bone are you blending at?
My aim offset is what allows me to look up and down when aiming
and that part works just fine, it's when I try to blend it with the layered blend per bone this happens

and i'm blending the aiming part at the spine and then trying to blend the shooting part at the clavicle
spine_01 specifically
this works perfectly for just having the aim part work with the movement but I think I need another way of blending in the firing part

wait I think I got it

it's not the most pretty but it's something
idk why the spine doesn't work
Anyone have the time to explain blender export to UE5 with animations?
what's the problem
I cant seem to get the animations to export properly. Its pretty clear Im just misunderstanding part of the process but half the time the animations dont export at all, the other half they do export but are busted (AKA do not play correctly inside unreal)
Unreal Engine
We’ve released two new, free addons that greatly streamline the workflow between Blender and Unreal Engine.
i wasn't even able to download this ** plugin
Is it still up to date at all?
last commit was 6 days ago. should be
The link inside that page just leads to a 404 error on github
Guess the account link was being slow, got it
link is broken for me since yesterday. account linked. so stupid. well atleast i don't need it anymore
Ty, I had to mess with the physics bodies of my character
cape is working beautifully now
For what it's really worth, the Send to Unreal plugin requires very specific workflow in Blender, which for more seasoned users with established workflow, is a deal breaker.
honestly, I tried using the send to unreal plugin, but in the end I found it better to just set up some export profiles in blender
could be even better with some python scripting to batch export stuff
Welp, the UE to Rigify thing is tossing an error when I try to enable it
So idk, is there not a simple way to just export a file with animations and import it without a million things breaking? Id think that two of the most well known softwares would work a bit easier together
Personally I avoid Rigify at all cost due to how PITA it is to deal with. At least Auto Rig Pro is better in comparison.
So if not rigify, should I just use the standard stuff? Does that export to unreal well?
If I am not mistaken there are some issues if your animation is under 30 frames as the lowest FPS is 30 and Unreal has issues with importing sub 1 second animations.
So if I want a shorter animation is my only option to speed it up in Unreal?
There's a Blender plugin made by Epic Games that is made for exporting meshes, skeletons and animations from Blender to Unreal called "send2ue". I had a bunch of issues importing my skeleton with animations but when I tried that it literally fixed everything.
The animation are set to 30 fps and believe the shortest may be 25 frames but I will keep that in mind. Also do I need to use rigify as well or can I just a regular armature and then use send2ue
I used a regular armature, to get the send2ue plugin you need to connect your github account to your Epic Games account and then check your email. They will request for you to "join their team". Once you join you will see a "Blender Tools" project under the Epic Games account. It also has a quick start guide (it's very simple)
But once it's setup you just press one button in Blender and it automatically sends everything to your Unreal project and you can just drag it into your game
Ill give it a go and see how it works, do you think I could use the auto generated armature from rigify and just... not rigify it to speed things up?
No idea, never used Rigify, you can try it though
Well, more things to test. I appreciate your suggestion!
what fps should the animations I improt be?
so like when I ask my animator to send me animations what fps should I tell him to have it
he asked me if it should be 30 fps or 48 fps
beginner question, not even sure if this is the right channel but, i added a weapon to my character's hand socket, and now when i try moving the character it jitters all over instead of my previously working movement? is it colliding with the weapon or something?
Should my punch windup and attack be separate animations that flow into each other?
Or can I just make 1 animation that winds up the punch and also executes it
You can do both, depends in what you want, however separating animations like that is a high level thing, animations in games usually go from idle pose to wind up, punch then back to idle.
How smooth do you want it to be? more frames will equal more computing power, normal rate is 30 frames and i think you would have a better time developing going with 30 frames.
guys how can i make a zombie attack using its arms while running at the same time ? both are separate animations and i created an animation montage
right now i can detect if a player is in close enough range to attack but how do i play a montage from C++
im using behaviour trees btw
Slots and layered blend per bone in animBP.
No, slot is enough for the montage to go through.
so i dont need to play the montage from behaviour tree?
It doesn't matter much where you call it from, you can call it from the Character class itself and as long as reference is valid and the slots are good, it'll play fine.
Though personally I'd rather have an event to do the attack and play the montage in the Character class, so BT Task boils down to just execute the attack event.
I felt like that's the more modular setup where you don't need to be the AI to attack.
i did this and its kindof working, now after the montage finishes playing my mesh returns to a t pose
am i missing something here?

I'm using an anim montage to recover from a ragdoll, the animation starts with my character on the ground and he pushes himself back up. However the anim montage starts from the rest pose which is with the character standing. I can kinda make it look better by setting the blend time to 0 but its still visible for a few frames.
How can I change the initial pose for this montage so he starts fully on the ground?
I managed to figure out why its this way but I am not fully sure on the solution, I have a state machine to handle my movement. This connects to the anim montage which connects to the output pose. So whenever it runs the montage it is blending into it from my state machine which is in idle pose
make a layered blend by bool with a variable if the character is moving?
I will give it a shot, thanks
Just the upper half or the entire body?
(sorry for the exclamation mark, didn't notice the typo until it's late)
Thx u
Trying to retarget an animation from mixamo. I'm following a tutorial and got to a point where I need to right click the animation and select "retarget anim asset" and then select the UE 4 mannequin. But it's not there?

This is the tutorial I was looking at: https://www.youtube.com/watch?v=92rag3qStI4
Hello guys welcome back to another video in the Unreal Engine 4 Complete Beginners guide. In this tutorial we will go over what Mixamo is, how to download animations, and re-target them for any character you have.
Mixamo Retargeting Cheat Sheet:
https://imgur.com/a/5A554mc
Hi! Looking for help with root motion
So i retargeted root motion animation and the root stays in place and character moves. But it should be the other way around if i enable root motion on the animation. That does not happen for me. Why
Likely the "root" bone isn't really a root bone, as in the topmost hierarchy

The character moves like root motion but gets teleported back to the origin after it's finished.
Have you enable extract root motion?
Before retargeting i enabled root motion on every animation and made a root chain
I did not enable globally scaled translation on the root tho

Today we're learning how to animate a root motion animation. Root motion is best used for montages such as attacking, climbing, and any other action that requires very specific movement of the character including their collision capsule. By animating the Root bone of our skeleton, we're able to control where the character ends up without any cod...
This fix did not work for me
So I'm trying to make my life easy by having a good import workflow for animations from blender to unreal.
I've set my scene size in blender to 0.01. My rig is at 1,1,1 scale.
I import everything to unreal. Everything fine so far.
But now when I try to bring in new animations, and at import select the original rig that I want the animations to use, the new animations in UE are scaled 100 times bigger than they are supposed to. Any idea what's causing this behaviour?
set blender scales to 1 and import 0.01
Have you override any scale param in import settings?
I am trying to make a widget appear above the enemy head when they are attacking so the player can know its time to block... how can i do this with a anim notify state unless theres another way beacuase when i tried it wasnt letting me get the widget in the notify state and change the visibily

Unreal engine 4 version 4.25.1
*I forget to tell you guys that I press "E" to enter combat mode. If you don't, you will not see HP bar.
*Actually, I also tried to add hit reaction system to this video and end the serie, but it was too long so I recorded again and sure, I'll do it in the next episode. Gonna look into those animations if there ar...
Ive done that tutorial a while ago i thought he only shows it on a input
i need it to automatic do it in the animtion for the enemy attack
he adds attack rotation in episode 4
You could do some casting and call an event in the anim notify
so cast to the bp containing the widget then set visibility?
Ah! I had this at 100 for some reason! Changing it to 1 fixed this, thanks for pointing to the correct direction
We all had it happen at some point xD
Pretty much that.
yea thats what i tried orignially
and i got error saying it couldnt find my widget
but i had my widget in the enemy bp set to not visible
Still struggling with this. Anybody know how to set it up so when moving a control with basic IK, the hand orients itself correctly with the forearm rather than just pointing in the same direction irrespective of where the arm is facing?
using the Manny/Quinn skeleton with mixamo animations is proving difficult for me. Root motion is consistenly a problem.
before retargeting

after

always snapping back, even with root motion on
i used the retargeter that came with UE5
maybe add a set transform node after basic ik to set the local transform of the hand bone to identity transform?
Is there an easy way to retarget to essentially the same skeleton? I've added an animation asset pack and the animations are rigged to a UE4 skeleton within the same folder. I want to use the included UE4 to 5 mannequin retargeter but it won't work
Or an easy way to duplicate the IK_UE4_Mannequin for the UE4 mannequin included in the package which the animations use
Hi, I got this basic keyframe animation that I made in 3DS Max, I exported it as .fbx with the bake animation option checked, but when I import it in UE5 the animation doesn't play, am I doing something wrong?
Does it have bones? Looks like its just a sim. For skeletal animation you need an actual skeleton. Might need to look in alembic / vertex based for something like that.
Yeah, it was a cloth sim that i converted to a keyframe animation, I still need bones for that?
It depends on what your end goal is. For this I would use alembic or something vertex based. More of a complex export. Wouldnt come in as a skeletal mesh though.
Hmm ok, I will look into that, thanks!
did you retarget root bone? before you retarget root animation i think you have to enable root motion on the base animation aswell
i dont think i would have done that. its been almost a day and i'm a goldfish
i ended up rebuilding my character into the UE4 skeleton
oh sorry i didnt look at the date lol. but i just had the same problem today and fixed it
i will give it a shot, i really WANT to be using the UE5 skeleton
that makes my character wobble around on its hips
set root animation enabled on every animation with root motion. then make a chain for root aswell. you can also set fk translation of the root to globally scaled. it should work correctly
"you can also set fk translation of the root to globally scaled" that i def didnt do
Hi, I have an animation with root motion. In the montage I would like to turn it off
You can disable root motion for the animation and it will apply to the montage. Or you can make a function through blueprint
Trying to retarget an animation from mixamo. I'm following a tutorial and got to a point where I need to right click the animation and select "retarget anim asset" and then select the UE 4 mannequin. But it's not there?

This is the tutorial I was looking at: https://www.youtube.com/watch?v=92rag3qStI4
Hello guys welcome back to another video in the Unreal Engine 4 Complete Beginners guide. In this tutorial we will go over what Mixamo is, how to download animations, and re-target them for any character you have.
Mixamo Retargeting Cheat Sheet:
https://imgur.com/a/5A554mc
check the bones hierachy, does match?
I figured it out. I just forgot to click one thing... Simple little mistakes lol
I came up with a solution that feels over-engineered where I have a socket on the mesh at the elbow area and it's forward vector is aligned with the forearm. I get the rotation of this and the hand follows the orientation correctly. However, I now have a problem with getting the fingers to follow correct orientation . I could do the same solution for each finger and thumb but is it ok to have so many sockets? In the screenshot what is plugghed into the set rotation node is not a working solution, it is currently what I have in place - this exhibits similar incorrect behaviour. This is also done after the basic IK node.

whoops apologies for disgruntled comment box in view!
What type of variable is the blue rotator pin in control rig?
Have anyone used Live Link Face app on iPhone?
Quaternion
I have an issue with it. And it seems like a bug, either in App or in Apple's API
It doesn't appear to have a variable type that I can create a reference to. I assume it works out the same if I use a rotator variable and do to quarternion
I'm baffled that it appears to be so difficult in contro lrig just getting the hands on a Basic IK to follow the orientation of the forearms
Actually I think propagating basic IK to children might be the source of my problems here
It's unclear from the bone naming, but usually the sequence goes like this:
Bone A - start point
Bone B - middle point
Effector - end point
Yeah that is how I have it. Upper arm > lower arm > hand (where a control point is). Disabling propagate to children and setting an empty rotation node has fixed it so the hand follows the arm properly. Now I just need to figure out how to get the finger bones to rotate correctly
I'm not sure If I should post this in "animation or "audio" but I work on a Project to drive Animation over Audio input (Microphone) I got a lot running like sound/Mic driven Niagara, but my target for now is control a Skull over Microphone input (some stuff still not working out mostly probably because I use UE5 and most tutorials I used where UE4 where some stuff was different to 5) 🤔 anyone know some Guides or Tutorials in that direction ? thanks for any Information
Ah got it. I was pulling my hair out trying numbers of different options but I could not get the fingers to bend correctly (they were always off axis). I'm guessing propagate to children on basic IK was doing.... something, because now just a simple set relative transform is working it's magic. smh
If lip accuracy doesn't matter, you might able to get the loudness from the mic and use that to drive intensity of an animation of blabbering mouth or anything, really.
As on how to get the mic loudness part, I'll leave that to #audio
I wouldn't know where to begin with specifics but I'm currently getting to grips with control rig which you could use to drive animations from blueprint - which is no doubt what you'll want to do if you want animation to react to music. Here's a video I used to help get me started: https://www.youtube.com/watch?v=His0g5fd2B0&t=7s
USP Skeletal mesh (FREE) download: https://lmgnstudios.gumroad.com/l/asWnsX
A tutorial covering some basics of control rig to create procedural animations. It may seem complex or overly convoluted at first, but has a wide range of applications that aren't possible through keyframed animations. Most people who have a basic understanding of UE4 o...
You can probably do it without control rig using AnimBP and imported animations though
At least I'm assuming it's a "lip sync" goal. In some games like GTA Online, accuracy doesn't matter, so speaking anything or make loud noises over the comm would make the character have his/her mouth blabber
Thanks, and the loudness part is something I already got from trying it on Niagara particles just slight adjustment needed ^^
Well, except that with anim graph, it's not exactly the same with how you do things in Niagara. It's more in line with generic UObject BP
for Now Lip sync is not need ... as I animate a Skull so not much sync needed as it mostly will move its Jaw
thanks ^^ I once saw Control Rig on Unreal Youtube but most where about how to use it so this will help
how can i add height on animation like this my all animation touching ground when it performing animation it knee get bend and stuck

anyone know why there is some glitch in my animation, even i use time dilation to slow it down, it wont have any effect

I have a bit complex question for combat animations and was wondering if anyone would have the time to answer my questions over pm so i dont spamm this channel?
hi. i want more explain for this option. what exactly is this.

just use sync markers and make sure that your locomotion node in anim graph doesnt have "always reset on entry"
Hi thats for creating a transition rule you can share between different states, like take for account
- you have your character go from run state to idle state when your speed is 0.
- and you have your character go from walk state to idle state when your speed is 0.
As you can see both rules are identical, so you can create a shared transition rule clicking that option and every time you need the rule Speed=0 you can use that shared transition selecting it from the list
https://youtu.be/wNlN4uDgIUM <- for anyone interested in animation sharing and live retarget. I no longer retarget animations.. like ever.

I wanted to show you how easy it is to retarget animation at runtime without any pre-retarget for characters not bound to a mannequin skeleton.
This time I learned how to set bone settings and what they should be for the best results! Ik rig and IK retarget are the way to go with unreal engine 5!
Working with Synty Studio Polygon assets. I'm in ...
Hello guys I was wondering if its better for multiple characters with different heights, to have a single skeleton shared, or to have multiple skeleton and retarget animations.
single skeleton and retarget options in the skeleton as in the end you will have EXACTLY same effect- except 3 duplicates of assets on your HDD and instalation files for the final game.
https://youtu.be/nWbDy8dQKHc UE5 Stride Warping explained in 10 minutes anyone? 🙂

Speed warping, stride warping or velocity matching - call it how you like - but it has been promised years ago when Epic showed it in paragon videos, and finally, they delivered! it's not part of unreal engine native plugins along with other "warping" techniques. Works surprisingly well on default settings.
My test character is using also 2 ret...
someone can explain inertialization blend? i cant understand it
thank you so much. your explain was what i needed
https://www.youtube.com/watch?v=BYyv4KTegJI&t=614s&ab_channel=GDC Check that video

In this 2018 GDC session, Microsoft's David Bollo presents a new high-performance approach to animation transitions that the Microsoft team developed for Gears of War 4.
Join the GDC mailing list: http://www.gdconf.com/subscribe
Follow GDC on Twitter: https://twitter.com/Official_GDC
GDC talks cover a range of developmental topics including ...
it explains what inertialization is
Hello, everyone. I have a question that is (hopefully) simple to answer. I am trying to import and export models, since the model I imported came with completely screwed up animations, I looked up online and found out about animation retargeting. I could follow the tutorial just fine but when its time to finally do the actual retargeting, my skeleton does not appear in the list on the left side. Why did this happen? The skeleton is clearly inside the game's content folder.

uncheck show only compatible skeletons
That was quick, thanks man!
👍🏽
so hard to get response
yes i use sync marker, but i dont think it has something to do with transition, because even though i remove the transition it still occured
what does 'click to toggle visibility' in the anim graph here do (Lyra ABP_Mannequin_Base); nothing seems to happen clicking it other than the eye opening and closing (I thought it would expand or make it a public variable or something):

does anyone know how to get root motion working on the paragon characters?
paragon character doesnt have root motion
is it possible to give it root motion?
I purchased an animation pack from the market place hoping to use it with another purchased character, but when I drop my character into sequencer, only its animations are showing. None of my animation pack animations are there.
How do I use the animation packs animation with my character?
Question
Is there a way to edit multiple actors/elements at the same time inside Sequencer? If i select hem all, i still cant edit them at the same time, same goes if i group them.
So far i can only find this on the subject and it's from 2017
, any tips are very welcome! 🙂

Five years later, this reasonable request is still nowhere to being implemented.
Just goes to show how bloated this software is, they probably can't implement it because if they do everything else will break.
😥
That's too bad, guess I just have to do it the hard way 🦾
Well, there shouldn't be a hard way at all.
The more I work with sequencer ( forced to by work ) the more I hate it.
haha I can understand that
Unreal is heading down a bad path, where it's so overcomplicated and bloated that nobody will want to use it nor have the brain capacity to use it in 10 years.
Just like how all amazing softwares become abandonware eventually, from packing too much into a little package.
can you give an example of what do you wanna do, like show me your character blueprint or how does the character looks in-game, that way we may be able to help.
i think there are some tutorials on youtube, i never done it so i dont know
Technically yes, you can export the animation out of unreal, and animate the root in something like blender and the reimport them back
Though you need to learn how to use blender to do that
@potent thunder any idea why my pivot animation like that
i think it has something to do with first "if"

if i remove that it wont have any glitch, but the animation is wrong
i need to distancematch the animation if i change direction
sorry I'm not a programmer, don't know a bit of cpp first I thought it was a transition error (like going through a neutral run/ idle state before going to the other pivot) but then I saw you're doing distance match and that's way out my league 😬
Anyone experience with take recorder?
plz dm or tag me
i have sent the question 2 times already in #ue5-general i do not wanna get banned
there's a very small chance u'll get any answers, i've been here for a year and nobody's been able to help me lol
😭
GOD
It has been 3 months of HELL in this chat for me tbh so many problems I have had to spend literally weeks on lol
IDK HOW TO FIX THIS STUPID DRONE

it's a better use of ur time to pay for a real 1 on 1 mentor
u'll get things done much faster
Painful.
then go make some cash
BRO
NOT THAT EASY
LOL
cant believe someone just told me go make some cash
like telling a homeless person GO GET A HOUSE!
that actually happened