
#animation
1 messages · Page 172 of 1
hi

i see always light
aaalways xD
not on that but i mean like
every map
night time is same is daytime
how do we change it ?
Apparently I'm going to need more help than that. I can create the library, but can't figure out how to add my static meshes to it...sigh. There's just so much info.
Emm what do you see once you open the library? Should be obvious where you can add ur mesh

but still in layout and any other modes the tornado is just a brick box lol
I have all the standard gizmos in my control rig editor, but the "defaultGizmoLibrary" is a blank. Tried building another gizmo library, but it's blank as well. I clicked that button again, didn't I?
Yep... Details window helps. Maybe I can figure it out now. 🙂
Oh i just realized, yeah details panel should be opened for u automatically
bump
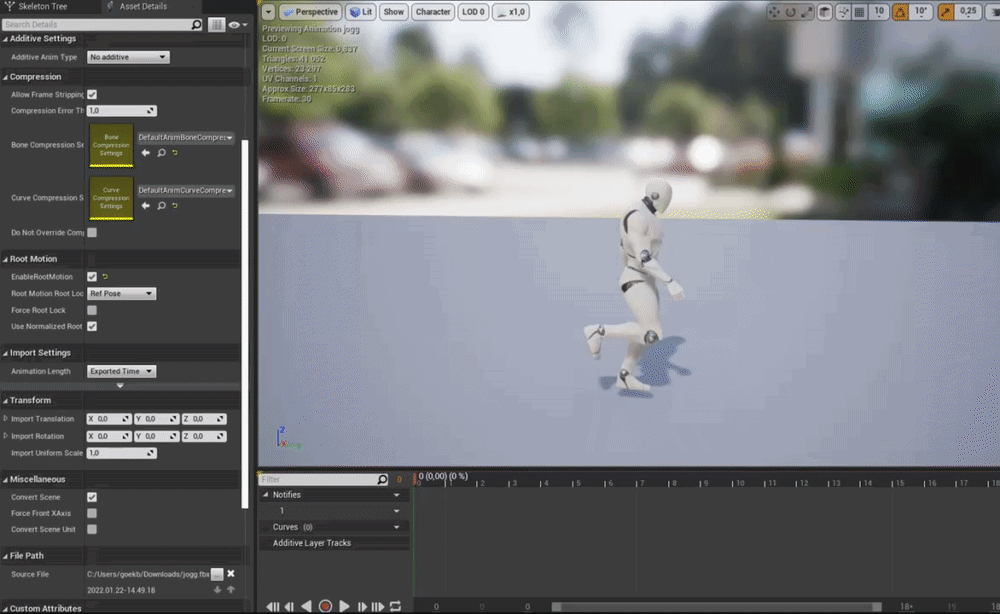
Here i have an idle pose I made in blender. Im using a procedural IK system and It works flawlessly here. All the rolls and overshoots are being procedurally added on top of the base idle animation
Here I have an animation I made in control rig. Same skeleton same mesh same anim bp. Also using the procedural IK for aiming but this one doesnt work as intended. Does control rig do something different to baked animations?
After digging deeper. the virtual bones im using to drive my procedural IK are not moving with the bones with my control rig animation. they stay in rest position. Does anyone know of any cases like this where virtual bones dont work with control rig animation?
Is there any reason why my model's feet would be stationary in Blender, but once imported into UE4 they appear wobbly? It's like the ends of the limbs wobble around as the rest of the bones in the limb move. The foot or hand which is supposed to be stationary appears to have it's position effected.
Wrong unit scaling could be the reason.
My settings.

Are you using the unit scale from the start, and compensate everything for it?
I'm not sure what you mean. 😅
bump
ah i remember this frustration. its the difference between the transitions, so you can try to play with blend amounts for them or make more anims 🙂
thanks
I had an issue like that where one of my animations started on the wrong foot. Each animation was left foot first aside from one that was right foot. Mirroring the animation to start on the left foot fixed it.
as i think on it, it could also be the phase of the anim. Like if one of them starts on the left foot while another starts on the right. I dont remember which you want, but since they are blending ....
The solution to this is funny as hell. Control rig was baking animation data on my virtual bones (even though I added no keys there) so my procedural IK was getting overridden by the base idle pose.. This shit took me 5 hours to solve so hope this can save someone time in the future
You cant have virtual bones already present in your skeleton when creating your control rig. You need to add them after you create the control rig else all those bones will get baked keys
Interesting. I thought it has something to do with name mismatch. I know Virtual bones have spaces in its name “VB SomeBone” while Control Rig does not like spaces
Yea man it was buggin me but I’m determined to use control rig as my main animation tool. I almost quit today too glad I didn’t
After several hours of tweaking control rig and doing an animation in sequencer (UE5), my control rig character has just disappeared... All of his keyframes are there, the camera actor is still there. The scenery is still there. I've reloaded the sequence. I've restarted the engine. I've tried copying and pasting the keyframes to another instance of him and the same thing. He just doesn't show up. Anyone seen this before?
How can i convert root motion animations to static/inplace? I know there's force root lock but my animations have the characters body move up and down with their stride and using root lock just affixes their head/body in place and their feet kind of just walk on thin air (as a string was tied to their head, moving them above the ground while they "walked")
When i create a duplicate of an animation sequence asset by clicking and dragging or through drop down, any change to the copy also changes the original asset. how do i make them separate?
really, you sure? duplicate should make its own independent class
no changes are applied to the original too 😦
like when i rotate a bone or delete animation frames
your character should be in the level before you open the sequence right? By default sequencer does not spawn actors for you. It just bind to existing ones.
How can I get my blendspace vertical like this guys?

Mine looks like this

I'm in UE 5
Hmm, it looks like I just straight up don't have a vertical axis
Ah, needs to be non 1D, nvm 😄
He was in there. I had animated a sequence and rendered it. Then made adjustments in the graph editor and when I went back to sequencer he was gone. His controllers/morphs were still in the sequence list and the key frames were still there. He had a single control widget in the viewport at the root location for any control I clicked on. Weird stuff. I just called it a loss and started a new sequence. Can you go back and grab autosaves?
Heyy, Is there a simple way in Unreal Engine for looping those idle animations in a better way? 😂 I’m a noob I started using Unreal only in November 🙏
Can you remux the video into smaller file size? I have trouble viewing large video file in Discord client.
Is this a montage playback?
Nope it's just an animation, I don't know how to use the montage really, I'm checking it out right now
Is there a way in the montage to make it loop? With additive something or idk?
Are you using this Play Montage node in your character BP?

I solved it this way! Added a sequence, added a character that uses that animation, added an animation track, added a couple of the same animations, blended between them, baked down sequence to new animation
Thanks to @exotic plover for the support 🙏
where would you guys reccomend learning to import new animations using the ue4 skeleton?
🙂

@gusty inlet hey 😄 👍
I rotated the arm bones and I would like to make this the default skeleton pose, how can I do that?


"walk cycle animation"
i made a walk animation in which the character actually moves (does not stay in same place):
https://i.gyazo.com/aa7feaeaf377c62780723d553dd3ed33.gif
then i import that into unreal and want to make use of "root animation"
but somehow the mesh still does move away from the root
did i make something wrong?
https://i.gyazo.com/d25144d45d3956ef80722604dc5eda04.gif

Does anyone have any ideas about how you would go about making a game like toribash? My guess is every joint needs a lerp from one animation state to another and toggling the joint will determine what direction the animation is lerping.
I guess I'd need to run the character as a ragdoll at that point? I'm more confused about how the stiffness of the joints during the animation lerping would work
Are you actually keyframing the root bone?
i actually dont know 😅
i used cascadeur and keyframed the "black dots" not the bones per se
Hi, is this a known issue that blendspace binding don't work ?
If i pin the variable RootYawOffsetInverse to the blendspace it works fine (the yaw is applied to the aim offset in game), if i bind it it's not the case

repro :
Also, this is weird cause this only applies to BlendSpace, my bind on Rotate Root Bone is working well.

Hello, is it possible to retarget a control rig asset? Or should I just use the rig assigned to create the animations and retarget to another skeleton?
Does anyone know how to make it so the sequencer doesnt add keys to virtual bones?
Another dumb question... Is it possible for the audio to scrub in Sequencer?
If the skeletons have the same bone names, you can use Copy Pose from Mesh in an animBP or Set Master Pose Component in your actor BP
Still having Groom to Control Rig character issues in UE5... Grooms will "Attach to" bones and move with the character, but whenever I save the sequence, or try to export it (video/image sequence) the grooms don't move. Can you attach grooms to the skeletal mesh so they're already attached to the character when you apply the skeletal mesh to the control rig? Or what am I doing wrong here?
Update, it scrubs when I have viewport set to "Unlit", which is fine because my machine is a bit weak, but still...
So I'm playing with the additional layer tracks and saving my animations changes but it isn't showing me these changes when hitting play, it's like it's using an old cached animation or something, am I doing something wrong?
How much of a performance hit is it to slave something to an existing skeleton?
I don't think this variable is picking up if my character is in air

When I jump no animation plays
Can a groom be permanently attached to a character? I'm doing something wrong here.
many people asking me about how to retarget Mixamo animations into UE4 MetaHuman
here is how:
https://www.youtube.com/watch?v=ia8VRRhwjCY

this is how you can retarget Mixamo animation into unreal engine Meta Human
marketplace:
https://www.unrealengine.com/marketplace/en-US/product/9d259b25751544f39866975002636836
Hey, this might be a weird/dumb question, but I was wondering if anyone knew if it was possible to, and if so how to create a foot ik system that acts like the one seen in games like LittleBigPlanet (Gif for Reference) every foot ik system I've come across online either only works for the default ue4 character or doesnt work like this (eg. doesnt rotate the characters body as well, just the foot), if this question is dumb just ignore me and thanks to anyone who reads this.

Still looking for hint on fixing Revenants Shoulderpads and Jacket on Animation Retargeting


Looks crappy
looking it up !
but it got me looking into a direction, that could do sth.
currently i am here:
https://www.youtube.com/watch?v=cwm-ACqzMwA
And yes - it has cloth information, but as a programmer, i first need to find out, whats happening anyway

UE4 Cloth Simulation Tutorial
Join our discord: https://discord.gg/Gr9sPP2
Free assets: https://itsmebro.net
Donate: https://itsmebro.net/donate
Patreon: https://www.patreon.com/ItsMeBro
This should lead to the right direction.
it has both of my problems in it

no, the shoulder is sth. other, but i'll first see, what's happening here
can someone help me with this?

just messing around with replacing the default animations
i know about "reset selected bone transform", but don't know if it helps you out
okay thank you i'll try that
you mean in blender or ue4?
yeah but i'll try in ue4
how do i set it as a keyframe in ue4?
epic that worked , thank you !!
for me it's not working ...
maybe i need to skip this character, which is a pity ...
i have an walking animation (exported from Mixamo, my own 3d model) and i have a slight inclined ramp that i want the robot to walk on, but i cant figure out how to get it to walk on the ramp. Is there a way i could attach a spline to show where i want the robot to walk?
fml friends. is there any way to print string values from control rig? ; /
No.
And I'd consider that overkill for something that isn't going to appear in Shipping build.
Ah, just wanna do things like print values from nodes like

print that Z float so I can see what it's outputting
i guess to rootbone is staying in place means it wasnt keyframed:
https://i.gyazo.com/13faba28e5e9bba4f4323110c28c5ab6.gif

Are there any good tuts payed or free to learn ue4 animation systems? I'm hoping it will cover the blueprint side of things along with blend spaces
Hey everyone check this out
it's not motion matching but better, allows for some pretty cool animations. I tried to replicate the paper by installing all the software, but they don't provide all the animations and it seems they have an Unreal Project that they don't provide for copyright issues. Shame. Wonder if there is a way to implement this in the future
is there a way to change where a montage is (like setting it to be at 2.5 seconds) at runtime?
not talking about starting positions, but just in general
really what i need to do is find a way to smooth the transition from one animation in this montage to another, if there's a simple way for that to happen i'd be better off just doing that
There are transitions that you can adjust for each montage. To your earlier notion, you can play montages at specufic sections you just need to make them in the montage and name them
for the transitions, do i animate the inbetween? or is there something i'm missing
Everything that youre asking for can be handled from the montage asset
gotcha, thanks
For anim Blueprints, if you were looking at allowing a few different weapon types, what's the easiest way? Type would mostly alter the upper body stuff, like the way it's held when being moved and all.
Ideally would have the lower body seperated away from the upper body/ weapon stuff
Anyone here familiar with animation workflows that would like to teach me ? I am willing to pay 🙂
Anyone retarget Mixamo animations onto a Metahuman? I want insight into other workflows
I got it near perfect. But heavy side to side rotation in the neck and sometimes the fingers, need manual adjustment by rotating bones per-animation. Honestly a realistic approach to getting a fully animated metahuman without any mocap
Is there some setting thats doing compression on animations I bake from the level sequence. Anims look perfect in the sequencer and when baked its as if some of the keys are missing or skipped. Makes the animation look cheap
Anyone using the bone matching features in Sequencer? Anyone noticing that the mesh tends to freak out at the cut point even if the skeleton matching is fine?

talking about this feature


nvm i just cut the end
but i am curious why the root motion seems so blocked up here

Still pondering if it's possible to do what is outlined in this reddit post
reddit
12 votes and 1 comment so far on Reddit
Im a conspiracy theorist right now! I dont think its possible...
twist bones are used a lot, lowerarm and shin you really need to make a hand or foot twist nice
just twist ur own hand left and right and u can see, cant do that w/o movin the part of ur arm connected to it
You ask someone to move their own body for reference? That's heresy 😠
looks like 1 of those guides.... i deleted half my stuff and now its faster
I want to make my character go from its idle state animation into a sit down and then sit animation (where he should stay) if the player does not move for a while. Can I do this in the idle animation or a montage or how would you pros do it? 🤔
Transition to a different idle state using boolean, and some events.
Normally you don't want the player character to immediately snap back to standing and walk like nothing happened
Indeed, an unskippable short "standing up" animation would be nice.
You wouldn't have any sort of tutorial handy for this sort of thing, would you?
Is there a way to turn off Blend Space Blending, so my animations can be snappy?
Hey friends, I have a noob animation question here, regarding Houdini and Niagara. I want to export a simple tube with 2 bones in each end. What's the fastest way to do it?
I believe there's the setting on the side.
I think I found a solution by unsnapping the blend space anims, then setting the min and max numbers to 1, so it's got a very small amount to blend between, and it works pretty well
hi guys
i have a problem like that
when my animations are playing
my character is looks like flying xD
can somebody help me pls ?
can you set a specific bone rotation from a BP node?
Yes, but it has to be Poseable Mesh Component, which (AFAIK) can't have anim instance.
Otherwise you'd need to have the anim BP cache the values at all times
thanks, I found the Poseable Mesh but it's still problematic.. best I can do is get it to rotate the entire mesh, but the weights are painted and bound appropriately in blender..
so it deforms there in blender but it's either all or nothing in UE :/
it works with or without binding to Bone Envelopes in blender, but no apparent change in UE
I bet it's annoyed I only have one bone in there
seems to be happier with two bones but still not getting my weights
don't tell me the stupid thing needs another bone.. hmm
bah it's gotta be the export or import settings
ah, I was bein a n00b and only giving a single vertex group, so it had no way to play the influence from one bone against the other I guess
Anyone know if Sphere Trace is broken in 4.27.2 UE4 in Control Rig? I'm drawing a transform at the hitlocation but the transform is at the root when it should be along the the Z axis under the foot as you can see from the draw line


Unreal Engine Forums
I also had the same problem in 4.26. Thanks for pointing out that the sphere trace of the control rig only works with world static objects. Atleast I got it working now and maybe epic could fix that later and make it work with other collision presets.
Hey all! So I managed to fix one issue with my animation import (from Blender to Unreal Engine 4), but I've run into another issue.
The mesh itself, after a certain amount of frames, distorts in a way that doesn't appear in Blender. Is there a setting in either the skeletal mesh properties or the animation itself to correct the mesh distortion? Can give more info necessary to resolve this issue I'm experiencing
Heya, I'm having, what are probably similar 4.27.2 Sphere Trace issues as you in Control Rig : /
How can I make Slots work independently of one another when using montages ?
So I had a simple walk run climb and fall system setup , everything worked fine
until I messed with the animgraph to add blended animations, so like walking and equipping a weapon
this is the culprit it seems, when i put it to 1 instead of 4 to blend my other animations work to climb and such

But idk how or if you can just use two differnt slots and get them interacting independnt of one another
this is what it used to look like

for walking, climbing rolling etc.
Hi all, I have a question!
Preconditions: default third person character
Steps: 1. open characher animation 2. dublicate "ThirdPersonIdle" file 3. Open new animation sequence
Problem: The new animation has Idle moves
Question: How can I remove Idle moves OR how can I create a new animation sequence without duplicating the "ThirdPersonIdle" file in T or A pose?
You create the animations in your DCC tool (Blender, Maya, etc.)
Alternatively you can set up Control Rig for animating in editor.
If, however, you're referring to not applying any animation in the character BP (not the anim BP), simply select the skeletal mesh component and clear the used anim BP reference.
Hmm... This is all new to me, I need to figure it out... What's the easiest and fastest way? DCC tool or Control Rig?
I need an animation. I want to create an animation, but idle motions mix with the motions I created get a bad result
Just search in youtube "unreal engine 4 animation montage blend"
Ok, I'm new in animations
I am building an animation that involves a rigged motorcycle driving down a road - Is it best practice to have the motorcycle imported into unreal (from blender) as a single objects with seperated weight groups? Or should I bring each element of the big (wheels, handlebar, etc) into unreal seperately, then combine them?
Most vehicular games have them as a single skeletal mesh. But you can have separate parts if you want it to be destructible (not just bent by collision)
Thanks
Hey everyone a high level question here. Lately with UE5 animation content I see a shift away from using blend spaces and instead using layered state machines. Any exact reason/ advantage to this method?
Wait, they do?
I'm sticking with UE4, so no idea the actual advancement with the anim stuff in UE5
Between Echo, some youtube tutorials and the new stack of bot it seems that way
Can only assume Control Rig do the hard work more recently but I can't see how it supposed to replace pose based blend space
when u think of what a blendspace is, u could not make a blendspace asset and do the logic elsewhere if u like
i run UE5 echo demo at 20% render res and it still hardly runs so havent looked at it much
something like an upperbody aim blendspace shouldnt be to hard in control rig either
ahh sry not for u
im not sure whats goin on in ur vid, but that graph looks nice and modular and u should try piece by piece
if u dont know the exact problem narrow it down as much as u can
you can keep the anim graph open and show value on a few of the parameters that might be the problem
back again :p how do I shrink all the keyframes to be all closer together at once?

has anyone managed to fix the broken toes in the metahuman controlrig?

If i backward solve and forward solve they straighten out. But the problem persists when baking from ctrl rig to anim sequence
if anyone else runs into this. here is the solution:

in Control Rig 4.27.2, does anyone know in cpp how to make a custom function node pure?
Hey has anyone here used UE 2 Rigify at all? Struggling with adding the default animations for the mannequin... Any help would be super appreciated!
I found how to create an animation in the default pose without idle movements. Create asset > Create animation > Reference Pose

Hi, is there a way to get notified when an anim montage is cancelled ? My animation stop correctly but i would like to stop a FX aswell
Ok thanks !
im working in ue5 and every time i try reatarget the als to Metahuman ue5 crash. Anyone know a solution?
is there some way to copy a curve from an animation sequence to an curve asset?
copy/pasting the keys seems not to work
nvm copy/paste works once a empty key was added (or the track is hovered...)
I am working on a revolver animation and I was wondering how I could effectively do a more detailed reload which would involve having a fired casing be pulled out of the cylinder and then having a bullet placed in, would this involve having two seperate bullet meshes for both the shot casing and preshot bullet? I was wondering because the primer cap would be struck on the casing and obviously the bullet part missing which I would assume uses seperate textures. Any suggestions?
Hello everyone!
I make a game prototype with topdown camera, WASD movements and cursor orientation.
I have a question.
Does anyone have any idea how to realize turn root motion animation when my cursor crosses the character actor and rotates him?
hello everyone, I try to replace the character in the control rig sample, that you can get for free in the marketplace, it works almost, but how can I realign the body??

I solved by using a paragon character instead of a Mixamo char
Hey all, so I have this in my idle state right, however when I crouch in play mode, the crouching animation doesn't play,
any ideas?

why when i change something in the animation, like rotate, it doesn't update in the game?

i rotated it, but still the same thing in the game
Hi, Anim BP has a "Transform (Modify) Bone" node (https://docs.unrealengine.com/4.27/en-US/AnimatingObjects/SkeletalMeshAnimation/NodeReference/SkeletalControls/TransformBone/), but how can I get the actual Transform Bone value in Anim BP?
metahuman is working great , but unlike default 3rd person char , it can't look up or down, does that require additional adjustments or did I use wrong settings somewhere
Hey gang, been hunting for a bit but have had no luck so far. I'm looking for a particular tutorial about getting my player character to climb a rope as if it was strung horizontally (say between two buildings). I would think it's similar to a tightrope scenario, but the character is hanging below the rope instead of walking on top of it. (yes I did search those terms as well as I just thought about it while writing this.) Any leads?
Heya! How to set default pose on control rig?
GetSocketTransform (at least that works on the SkeletalMesh)
Do you guys know of any method to drive a control in one rig by another control in a different rig. For example a reload animation where you have a weapon rig and a character rig. How can you drive the control for the magazine with the control of the hand in the character mesh?
still kinda struggling with understadning layered animations
here is my animgraph

I just setup sheathing and unsheathing and layered animations so he can draw his weapon while maintaing the run animation
I set the draw animation to a new slot called "body"
But now my roll animation which is set to default slot isnt playing
how can I get both slots working here?

if i set my roll animation to "body" slot. it seems to play but this happens

so the weapon sheathing works ine but my roll animation looks like a zombie attack xD
Im assuming its to do with the back that the body "slot" is ignoring the lower body
But idk how to make it work if thats the case
if anyone know that would be awesome
your roll animation is a montage?
yeah it is
and it needs to be a montage? i would've thought you handle rolling like walking, or along those same lines
It doesnt need to be I guess. Im just follwing some tutorials and thats how they handle them
The roll can be montage, but you may have incorrect slot @south dragon
what i was thinking was to handle rolling within the locomotion rather than montage - you can use a layered blend per bone within the animation state like where your idle/walk/run blendspace is used
if your roll montage plays the character rolls in the direction without input influence then thats difference since the above method would allow you to still control player movement just like when they walk. If this is the effect you want, where they roll in that direction and you have no way to change direction until it finishes, you to blend different "teirs" of animations. You have the cached animation for the layered blend per bone, and you have Body which is your upper body (spine_03) for sheathing/unsheathing, but roll is full body (pelvis) and that means a different slot is needed because you need to override the animation from a different bone hierarchy
Hmmm, yeah that seems to be what im looking for . DO you know of any tutorials that cover this locomotion type animation ? All I can find are people using montages to blend x)
i dont know, maybe at one time i found one, but i really dont remember - it's a simple setup though, instead of doing a layered blend per bone at the root of the anim graph, you do it in the node that contains your idle/walk/run blendspace. Use the blendspace as the base with the roll as the blend. You'll need to set a bool to toggle between the two states which can control the weight value (bool to float will be read as 0 or 1)
okay I'll see if I cant do that , thanks for the input !
maybe with public variables? Get gun transform somewhere and feed it into the public variable of the hand
iirc you cant change the anim data there. When you are chAnging the pose in anim preview window, it is just for preview purpose. You might want to look up sequencer workflows for modifying animation in engine.
default pose is inherited from the rest pose of the skeletalmesh. I remember ther is a way to change it in the skeletal mesh editor. For new controls and other rig elements created in control rig editor you can use setup mode to define their initial position
Hmm.. Thank you!
I retargeted a mixamo character to the mannequin, but after retargeting it seems wierd


these are the bone maps
I won't hope much from Mixamo rig, it's unorthodox to the UE mannequin standard.
https://www.youtube.com/watch?v=Io76DagpS-8&ab_channel=RyanLaley I was following this

This video was voted for Patrons and YouTube Members. For those who voted, thank you!
Learn how to use the retargeting manager to copy the animations of one skeleton to another one. A common use for this is in conjunction with Mixamo assets. Learn how to retarget a Mixamo asset to the UE4 skeleton.
Support me on Patreon and get access to video...
In general for mixamo animations do you use 30fps or 60fps?
(Though I use 30 for making animations from scratch, not using Mixamo)
Hey there, is there a way I can get a variable from my character bp to my anim bp
because for the love of all that is holy I can't figure out how to do it
I just want my bIsSliding variable in my anim bp
If you look at the third person template, you can see how Event Blueprint Initialize Animation is used to get pawn owner to set reference to the player character
Anyone know off hand why my metahuyma > ue4, won't rotate an look UP or down on z ? Madening, but everything else works fine.
metahuman
Interesting. I wonder if that will work in sequencer. I feel like Im going to have to make a blueprint for my weapon because I cant wrap my head around plugging that data in in the sequencer
OK for anyone else wondering, found online, guess earlier my search was inadequate- ticking ' use pawn control rotation' gets me look up/down ;))) whew
Hi all! I have imported a Daz 3D avatar through the unreal bridge and retargeted to the unreal mannequin. All ok bar the hand and an arm? Anyone able to fix quickly for a bit of cash?

Daz 3D? Ouch, you're going to have a hell of a time resolving it. I heard many horror stories with retargeting UE animations to Daz models.
OH NOOO!! 😢
So I think you meant this ?

yeah

instead of a transition out of idle run to roll, hop into that node and do layered blend per bone
uhh
i set this up in the roll state
thats inside idle run?
oh
hmm
seeing that, i dont think this will work given the current animation
from what it sounds like, its an animation of the stand pose that goes into a roll.... and then back to stand?
yeah just like that
but it cuts off right when its fully standing

hmmmmmmmm
i think i would handle this as a montage then, not to go back and forth so much
if it was just rolling i think itd be easier to manage as a transition between the idle/run animations
this seems better suited, the way the animation is, as a one-off event animation - therefore montage
I can trim the animation though.
Because I just cat wrap my head around the bone blending stuff..
I had the animations on different slots and i blended the slots in the aimgraph
but only the sheathing worked
the roll stopped working
functionality-wise, how does a roll happen? does the player press roll and then it gets played? do they hold the roll button and can they steer the rolling?
Yeah bascially it just rolls forward , no directionality
Just trying to get something somewhat functional x)
lol right right
i havent had to play around with this amount of slots (yet) so i think its tricky to just make sure the right slot is weighted at the right time...
i would think this would work

cached is base, attackslot (fullbody) is blend 0 and upperbody is blend 1
then it blends to whichever slot is set
you'd have to control blend weights at that point though
maybe?

somehow you have to make sure to turn the weight to 1 for the desired slot and turn the rest to 0
Did you set the mesh to use that AnimBP?
that was it,thanks
Can I make all of my Animations within Unreal itself?
suppose its possible
I have a basic MakeHuman file with a skeleton. Trying to just streamline the workflow as much as possible
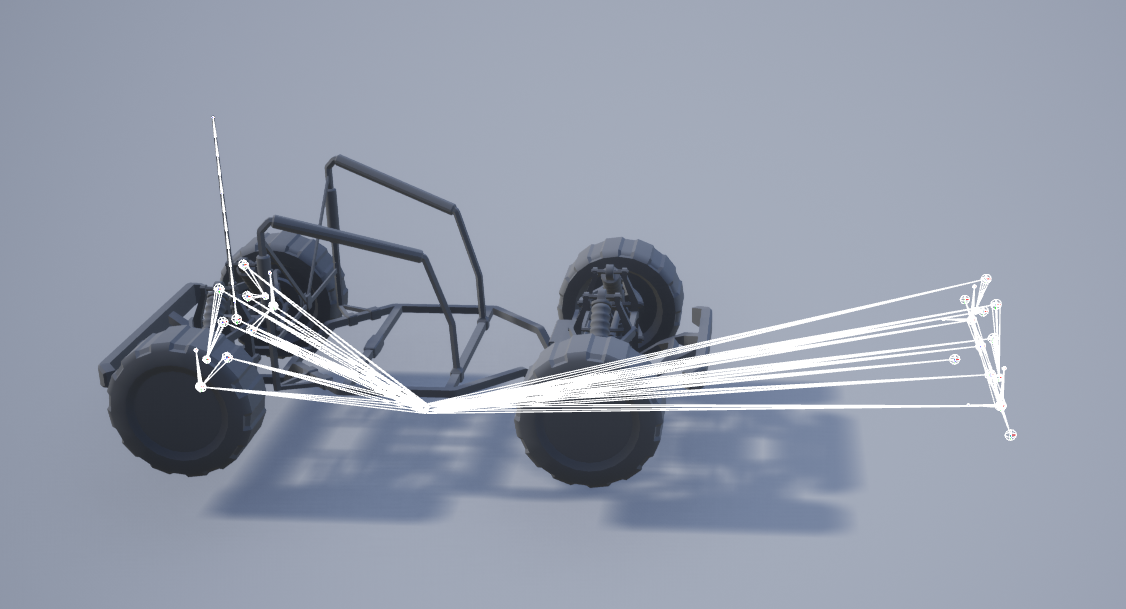
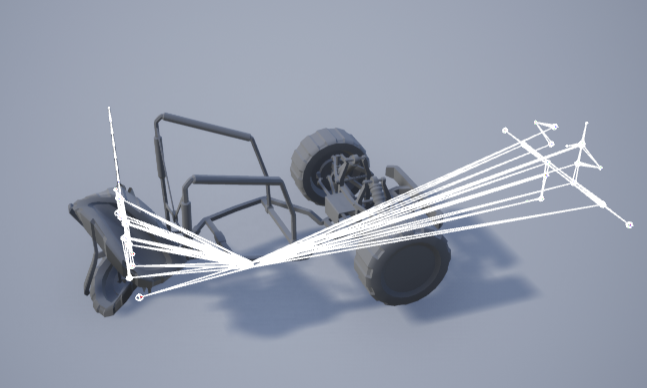
Hey guys, anyone here has experience with Unreal Advanced Vehicle Template?
I am trying to figure out how to modify the skeleton and what is the pipeline.
Is there any video going through few examples?
One issue I would have is even if I export vehicle from Unreal, to Blender or Houdini, when it gets imported back into Unreal, the orientation of bones would get messed up.
For start I have just tried to move front wheels and bones forward (outside of Unreal, and import back). But when Animation Blueprint is applied some of the bones would get rotated:
https://i.imgur.com/6RyWjfc.png
https://i.imgur.com/yOjNYgd.png
I'm looking for some pointers, thanks.
@rustic plume I found the exact video for blending those two slots with anim montages

Hello guys, welcome back to another tutorial. In this video I wanted to show you how to blend between two different animation montages. One that is setup to blend from the hip bone up, and another that is setup to blend from the root bone up. This is very useful if you are trying to play root motion animations, while also playing animations only...
worked like a charm
Anyone got any idea why my control rig i made for this mesh isn't showing up when I try to bake this animation to a control rig?

Well... I noticed the same behavior on a rig where the reverse stuff was missing from the rig...
Importing a skeletal mesh to UE4 from blender: is there any method to bones have transform in quartenion instead if euler in control rig i need to avoid gimbal lock?
I have a confusing problem. I updated an animation sequence that I had retargeted to my character in order to move her left hand to hold the rifle correctly and reach for the magazine correctly. The animation sequence looks fine, but when I add it to a montage it shows the old animation. Here's the Montage view compared to the Sequence view:


at frame 14, sequence vs montage:


Has anyone removed bones from a metahuman and reimported the new skeleton from maya to ue4 4.26
I experienced this once and just went the route of saving the sequence under a new name and deleted the old, then added the corrected one back... i feel like UE is getting confused sometimes with its cache or sth like that....
I got pointed to a workaround: https://www.reddit.com/r/unrealengine/comments/otooj2/trying_to_edit_the_animations_in_ue5_where_is_the/hceolfl/
reddit
9 votes and 10 comments so far on Reddit
It works!
Deleting and re-creating in UE5 didn't work
oh ooookay...good to know!
any idea on this anyone?:/
how do I stop my camera pitch effecting the speed of my player character
if I look down on him he slows down
Does anyone have any ideas why I'm not seeing any results with control rig? I'm on UE5, and in tutorials it "just works"
Seems like nothing I do in the Rig graph has any effect, no matter how simple.
Edit: Hold on, I may have goofed on something big.
Edit 2: No, I have not, it's skinned properly 🤔
Use a drawhierarchy node to see if the bones move.
Does the preview mesh fit?
Be aware the hierarchy in CR isn’t a reference but imported. So if you changed it meanwhile you need to refresh. Sometimes it helps to delete and import again.
@umbral radish Interesting, yes it seems the bones do move, but the mesh does not! Hm. This example is on a fresh control rig, with no changes done to the skeleton in the meanwhile. The preview mesh is the same as the one I made the control rig from
So that looks for me like a skinning problem. Did the skin follow in your DCC?
Does the mesh actually weighted in your DCC tool?
That's what I thought too, until I double checked that it has correctly imported the skin weights
So in your Control Rig, are you adding the mesh as additional preview skelmesh and not the main preview skelmesh?
Hmm I'm not quite sure how to check what is the main and additional? What I've done is right click on the skeletal mesh and selected "Create control rig"
I've noticed it says "Previewing reference pose". Is that what it's supposed to be?
I have not added it to the "Additional Meshes" property (and that also didn't change anything)
Do a right click on the skeletal mesh and create a control rig from there and check if that works.
Yeah that's the way I've been going about this unfortunately
What UE5 version are you running?
Try again withs new one. Just to eleminate that something with your rig is broken.
The current one from the launcher, 5.0.0
That's Early Access 2
Consider trying in UE4 for sanity check if all else fails
Yeah the above video was on the completely up-to-date one, I haven't changed or reimported anything in the meantime
I would make a new one. And what @ashen junco said. Try your mesh in 4. something is fishy there.
Yeah that's the one. I have considered downloading UE4 to test, but also to test other rigs
Thanks for the assistance though, I'll try either of those!
Or make briefly a new project and import the mesh there again and make a rig.
My gut feeling is something went wrong on importing the mesh
I'm about to test the WindwalkerEcho project, if that character works in control rig
Yeah possibly
@umbral radish @ashen junco Yeah, it's def not the UE5 version, because the Echo rig works 😄 I'll compare my rig with that one, and hopefully figure out the missing pieces
Good luck.
For simple upper body IK, used to aim weapons, how much does something like that impact general performance?
Barely significant.
having a weird issue when i re-import any animation and its longer than the previous one. The timeline doesn't adjust
oh nvm all good
blender users, can you tell me why the volume isnt being preserved on my imported animations ?

its also moving my mesh on the z axis at odd times for some reason
looks fine in blender

in ue4,

I think its the pevlis? Am I not allowed to use the pelvis when animating or something ??
it seems to be driving the weird z tranform happening in UE4
Hey guys, I might be missing something. I'm doing some sequencer auto renders of some different animations. I've made a simple blueprint that updates the animation each time the one before has finished, however I'm seeing an issue. The animation blueprints/skeletal meshes first update the frame after a new animation and explicit time has been set, causing my loopable sections not to work.
It's a simple setup. heres the code for setting the animation:

and inside my anim blueprint:

Just an example(unable to show pictures of the project, NDA):
Frame 210 animation A finishes
Frame 211 animation B is applied and explicit time set to 0, this should be the first frame of the new section. However animation A is still active once this frame is rendered
Frame 212 The second frame of the new section, animation B is now shown
Unreal can't do dual quaternion skinning, which is what "preserve volume" is. This is why game models often have twist bones for the limbs.
Hmm thanks for the reply , thats unfortunate. So I'd have to add twist bones to the ue4 skeleton in blender ? Not sure what that is
Also any idea why the anim is shifting up and down when the pelvis is moved ? Not sure how I'd animate without being able to shift the pelvis
Hey guys, I really need your help 😦
I wanna get this animation:
I bought SwordAnimsetPro, but I’m not sure if it’s using ALS or not. Can anyone please tell if it’s using it or not ?
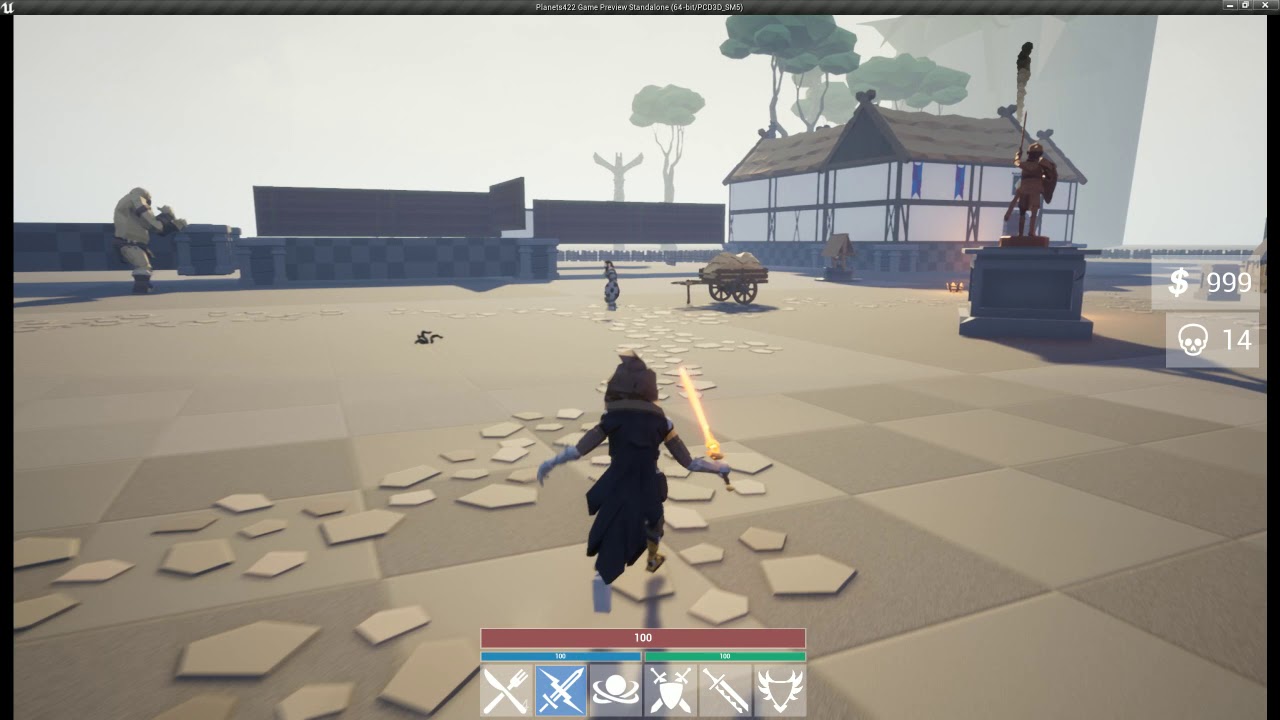
Experimenting roughly with a town scene and some basic NPC Patrol AI that follows a given route.
Do consider subscribing if you are interested in seeing more of these.
@ashen junco @umbral radish I managed to track down the issue. It was absolutely brutal. If you have bones named like this: ORG-hips, with a dash, UE5 doesn't have an issue with that - until you import it into control rig, and it stealthily renames it to ORG_hips with an underscore, because control rig doesn't take dashes. And thus the names don't match anymore and, while it updates the "rig", it doesn't update the mesh. So Blender Rigify rigs need to rename the ORG bones
Hello 👋
Does anybody know if it's possible to somehow modify a socket only for the duration of a specific animation/montage?
**Context: **
I have a Socket attached to my characters right hand which is where my weapons get attached to. However, when playing some animations, since they're not specifically designed for the weapon attached, the weapons rotation is sometimes a little off during the animation. I would like to add relative rotational offset to this socket to correct it, but only for specific animations
how do i get full body motion on an anim montage
if it is even possible
rn i only have upper body
Layered blend per bone affects all bones down the chain of the one specified. Use pelvis to affect all bones.
wait nvm
the anim montage has the full body motion
its when i play it that only upper body motion works
wait
i dont even want lower body motion itll fuck everything up
Does anyone know if you can reset the accumulated time node in control rig?
how do i find the animation assret of an animation montage
select the green bar sections in the timeline, it will show up in the details
Ok, I really need some serious help understanding what's going on here.....
Why does the one on the right work but the one on the left doesn't?
What am I missing here? 'Set Vector (by ref)' It seems pretty straight forward....it worked in another project...why not this one?
Any insight into this would be pretty helpful

Never Mind I wasn't setting them to be Passed by Ref...
Does anyone here use Blender in conjunction with Unreal Engine?
there are quite a few so if its a question related go ahead and ask. I do not use blender.
This is the issue I’ve been having and was wondering if there’s anyone who uses Blender and Unreal that’s able to take a look at the project files to help out with the issue I’m having?
i imported a alembic file that has an animation, can i make the preview of it in an socket bone be static? it keeps looping the animation
Good catch. I will see that it gets noticed.
Find a Bug about control rig https://youtu.be/GN2-13kPnLs

because the name "L-Foot", after Control rig import, become "L_Foot", so can not match the name。
about the name of the bones
Hello, I would like to know how to implement camera movement and screen shake when the player presses a button and it does the move (like in fighting games) I want to implement that in this animation specifically. Do I need to have a level sequence and camera shake blueprint to do that, if so how in UE4 or I can do it in this animation sequence? Thank you


reference:
https://youtu.be/hcR8nqp03A0

A video of all of Akuma's Ultra Combos.
You can use Level Sequence and then have the camera movements relative if necessary
How can I do that? If you don't mind me asking
Especially for implementing the level sequence to the animation
Just run the sequence together with running the animation montage.
Ooooooh, let me try that. Thank you!
I am trying to snap the left hand to the weapon but its not working


I am learning from this video https://www.youtube.com/watch?v=YIAts7XaWRw&ab_channel=CyberLOD

This is a tutorial series where i will show you guys how to setup a true FPS character with the following features:
- Camera system.
- Locomotion setup.
- Turn in place mechanic.
- Hand IK system.
- Weapon ADS (Aim down sights) system.
- Weapon sway mechanic.
Link for the TrueFPS_Asset: https://drive.google.com/file/d/1oPU___i1wyp9bGWxu-eiiA0e...
The left hand is just snapping to the right hand
Anyone have a good TPP dash animation for a 3D FPS I'm making?
Any recommendations would help as well
Hi, How in Shooter Example , Code nows when Animation is Looped or not ? im swap animation on Fire Anim and one play is as loop and other not.hmmm...
i followed along with this tutorial
https://www.youtube.com/watch?v=bU95pf5hTkI&t=318s
but i cant get the animation montage to play, anyone any ideas?

Hey guys, in today's video, I'm going to be showing you how to use upper body montages in your game, as well as being able to blend between both upper and full body so that you can utilise both.
Punching And Fighting Tutorial: https://youtu.be/1jxElVA7g3c
#Ue4 #UnrealEngine4 #Ue4Tutorial
________________________________________________________...
this is probably a pretty simple question, but how would i go about having an anim montage play repeatedly whil im holding down the button
I want my character to do a spinning slash on repeat until i release the key
Does anyone have a good reference for a master class on Control Rig and Animation Keyframing in general Unreal Engine? ... Paying is fine as well. Thx!
You didn't do something right. Without seeing your setup, no one can tell. A common miss that people do is use the correct slot group.
How come after I moved my pivot, the rotation still rotates around the object last known pivot?
Heya folks, curious if somebody could tell me the difference, I'm looking to make this blendspace node:

creating a blendspace in the anim BP gives me a distinctly different node though

ah, it's a blendspace 1D and it appears control rig has a special display layout for blend spaces that was different from my project making me think it was a different node. 👍
Does anyone know why this happens? I keep importing animation fbx but its always corrupted 😦

What DCC tool are you using?

Then I have no idea.
😢
I mainly use Blender so yeah

Gumroad
This model is free to use non commercially (since this is fan art). Feel free to play around with the model and animate it as you like. All I ask is that you credit me if possible. I'd also be very happy to see what you make so don't hesitate to share it with me when you're done :)Character was designed by Alexis Pflaum: https://twitter.com/Alex...
I’m using this one
Is the skeleton matches that of Unreal Engine mannequin?
OH no I'm using the skeleton from this model
Let me rephrase that
Is the skeleton of that specific model has bone structure and names that match with the mannequin's bone structure and names?
There are bones but I'm not sure of the names match with mannequins skeleton
I'll check hold on
sounds like you havent if you just imported this model into engine and expected it to work
if it has its own skeleton, you should see it in there and it should come in skinned properly
so then i might wonder if the exporting from maya is flawed
the imported skeleton is there :/

so what are you doing for export?
I tried Export(fbx)/Game Exporter Animation Clip/Send to Unreal
Tried all of those but the results are same
so it looks and deforms just fine in maya?
you've tested how the bones move to see skinning effects?
yeah its totally fine :/


the pose should be looking like that yes, and there's no animation movement but the controls are keyframed
you should test the joints and move them around to see if the skinning is correct or not
Alright lemme see
Would y'all recommend rigging in unreal or in the modelling application (blender in this case)
So do it in the modelling application
if control rig gets to a point where animations can be made to the same quality and with comparable ease as the dcc tool, then i would use unreal, but until then..
Not like you can make rig/skeleton from scratch in Unreal anyway
Yeah
I just thought I'd ask, seems like one of those topics most people ask about
And my last animation question for now... T or A pose?
thats up to you
Is A pose better and a more modernized version of T like some have said
i think manny is a pose
ue4 mannequin
Manny = mannequin
Ah
It's the unofficial nickname for him
You learn something new
a pose is fine for animations where arms dont typically raise up much
I mean what I've heard about apose makes sense
Though we haven't settled the name for the female counterpart...
t pose is better for full sweep of anims
Yeah
What I've heard is that a pose is better because "it's a more natural position"
And in practice when modeling I see what they mean, but I could just be modeling wrong
Too many/not enough loops you get it
Usually A-pose has relaxed finger position, so it's better for CCDIK / finger IK setup
thats where its preference, in some cases you have to model to account for full range of motion and that means clustered loops at the armpits
Nitpick, but I found it weird that the large magical hands are part of the main rig.
not to mention skinning and unwrapping
Yeah tbh I need to do more modeling I'm still new to everything
Okay sorry for so much confusion but it seems like there were a group of hidden Old meshes and it turned out looking fine when I deleted them


I'm guessing the old meshes were showing up when they were imported and the skinning gets corrupted somehow when its in ue
i lauv her
well what matters is what you select when you export
same ❤️
specifically all bones that the mesh is skinned to and the sk mesh/es
such a cool concept
I might've been missing some bones that were hidden somewhere else (when I exported)oof


is there a way to use multiple fabrik?
I placed the left arm on the rifle guard using fabrik and I want to place the right hand at the trigger aswell
nvm, got it to work
Is there any piece of documentation regarding .dna files? What are these files used for? What information do they contain?
having issue importing animation in to unreal from blender. it only importing the t-pose and ignore the other animation

look like bone size is too small but resizing character and skeleton doesnt fix it
hey guys, I'm having some troubles with my AnimBP, my blending skills are virtually none, I was wondering if anybody knows how I can fix this:
https://streamable.com/ei39o3

this is the anibp:

the "Targeting" state machine does the "hands up" animation
the upper body is turning but the lower part is staying in place
yea i rename it because it kept saying i had multiple roots
i rename it to lowpolyskeleton

should i have not done that?
okay ill take a look at the video
i have them all mark as fake user
with different action and name
only have two

yeap those are check and only the tpose get imported

those are the setting i use
ive deleted and imported it multiple times butt i still get the error saying the bones are too small
i see the warning in unreal and none of the animation get imported
yeah not sure what i did wrong ima watch that video and redo the skeletal mesh
probably renaming it screw it up
o/ any source of important tips for animations setup?
like core basics you have to know not to having redo animations and setup, learned the hard way 😛
test incrementally. before you decide to do time-heavy tasks, run your design through the entire pipeline to see how it will get handled by the engine and that the intended animations work for its given topology.
If you have a control rig character in UE4 sequencer, can you import an animation file and apply it to that character? I guess I'm trying to figure out how to edit a motion captured animation with Control Rig.
thanks, by entire pipeline what do You exactly mean ?
Model, unwrap, rig/skin, animate, export/import
Do it quick and dirty before putting in the quality
Hello all, I was hoping to get help figuring out what this warning is all about... When I Run my project from my IDE, the Editor Log is entirely clean, except for this one warning, and I'm not sure what it means, or how to track it down.
Warning LogAnimation Animation Blueprint ____path____ has nodes with invalid node guids that have been regenerated. This blueprint will not cook deterministically until it is resaved.
I see two nodes in the docs: "Transform (Modify) Bone" and "Set Bone Transform". I can find neither in UE5. Any ideas why? Pls ping if you know :)
Reposting since it got burried in the comments, maybe somebody can point me to the solution
Control rig nodes? They are renamed to modify bone and set transform.
your rig will need a backward solve graph that tells ue how to conform the rig to the pose. In sequencer there is an option to bake to control rig, which just goes through each frame of the animation and fit the rig to the pose. Take a look at metahuman rigs may be helpful.
there is also option to additive apply control rig to mocap animation if you just want to make minor adjustment
Hello, anyone had similar problems with morph targets in ue5 ?
My problem is definitely in the Backwards Solve. But I'm not sure how to go about making changes to it. The issues are with the controls for the pelvis, spine01 and the right foot and right ball (toe). How can I adjust those in the backwards solve without messing up the forwards solve?

I'm about to lose my mind. I've been trying to apply my physics constraint profile to my skeletal mesh and no matter what I do, the profile is not used during simulation. When I test the profile in the physics asset editor it works fine. I've followed this documentation exactly, as well as a ton of small variations to it, with no success https://docs.unrealengine.com/4.27/en-US/InteractiveExperiences/Physics/PhysicsAssetEditor/HowTo/ApplyConstraintProfile/
Is there some way to troubleshoot this?

This how-to will show you how to apply a Physics Constraint Profile to a Skeletal Mesh Component using Blueprints.

or maybe someway to just bypass the entire blue print and just use the physics asset in a more basic way? I dont need to be able to control the object I just need to keyframe it for a cinematic and want some physical interaction
I fixed it. Duplicated my rig, adjusted controls in Backwards Solve and it worked. I feel dumb and smart at the same time.
Is it “set transform by bone name”?
If you have an animation where the character moves forward, but the root stays in place.
Is it possible to move the root or do you have to set the new position of the new position of the character at the end of the animation to avoid teleporting.
how do I preview the values being passed into an animation blueprint
at runtime
for a specific character
sup. First message here. Anyone knows how (if possible) to create constant motion in sequencer? like a sinewave.. without having to create a billion keyframes. there's gotta be a way, right?
btw i'm mainly a unity user so talk to me like im 6, or your aunt please
hello maybe you can help me, trying to solve the problem for a month
my character slides down in 1st frame of animation, all animations are in montage and animation itself doesn't has any movements up or down, so it's perfect and I do not use IK. slide disappears when blend in is 0, but it is not an option
any ideas? thanks
if I play animation without montage everything is ok
I'm using the CopyPoseFromMesh node but it isn't working, any idea why?


You don't have to connect anything to Source Mesh Component
In the node details, just tick Use Parent Component (or whatever it says)
But the mesh to copy lives on another character
So you're not using this for modular character?
No, I want to copy the pose of a character to other character
Oh wait, something's fishy here.
Gotta repro that later for sanity check
Sounds like you kind of answered it though. By handling these related animations in one montage all of the logic is in one place and not by bp. You also have vfx and sfx that can be added to the montage for each shell reloaded, as well as other notifies that are specific to the anim (guessable by code). It is allowing you all the customizable effects in one place and not by coding it.
I'm having difficulty retargeting an animation. both skeletons have been mapped and their reference poses match. the arms are coming out completely wrong on the retargeted animation though. what would be going wrong?
How "wrong" is it?
What was your fix?
Did you find a fix?
several ninety degrees wrong
I've found the per-bone retargeting options and nothing is really improving it
Screenshot.


second one is the right one
maybe it's the spine that's wrong. the retargeted animation only has one spine bone
nah it's not the spine. it definitely begins with the clavicle
this is a rig you made and you are retargetting to the ue4 rig?
ah, but it is a custom rig
is it possible that the joint orients arent the same?
correct, they are not the same
I tried aligning them in the reference pose, didn't really improve it
then i think that's why the arm is like that
I would have thought the animation relative mode would fix it, but that stretches the spine through the roof
if ue4 rig clavicle points down X (or which ever it is) but this rig points down z (or something) then it's going to be bent no?
it's not something I can alter
im not sure then
this is a tough one
ive not had to correct orientation before in engine
i get what you mean about anim relative mode though, that would've been my suggestion
it's not possible to set just clavicles to anim relative?
did you change the settings in the skeleton tree?
root and pelvis to animation and the rest to skeleton?

Yeah
Okay, I thought it was bone axis issues with rigs made in Blender.
you need to R mouse the skeleton you want to retarget too, not the skel mesh
and select > create rig
now use that rig in skel retarget manager instead of default humanoid retarget
I have a layered blend on my character to allow for mixing lower and upper body animations. However, some animations break because of this. Is it possible to add an exception to this blend for some animations?
We wouldn't even be having this conversation if I hadn't done that
show ur retarget manager
fullscreen with mapped retarget rig selected
i ask again. Is there a way to create constant motion (like a sinewave) in sequencer? thank you.
Just make the wave in Sequencer, easy peasy lemon squeezy.
looping? that sounds like it might be what i need. But how? can you point me to a tutorial or unreal reference or anything? i haven't found it
But i need it to be constant, without loop i'd need to copypaste a billion nodes. And if i suddenly decide that i want a different shaped wave, i gotta edit all of those instead of simply changing a value in my sinewave function
Just have the play sequence node to loop.
Not sure what's your intention/context with that setup so much so that "billion nodes" is apparently mandatory.
you can add a sequence inside ur sequence and have that loop
so u can have 1 sequence of lights bounce trough the level and 1 for ur characters
If the context is animating in code, one can simply use timeline nodes.
a billion nodes is not mandatory.
What i need is to simply apply constant movement to a certain animation inside the sequencer. I undertand how i could have the same animation clip looping in the "master" sequence, but inside those animation clips, in the part with all the keyframes. There's where i want the looping moving function
hell u can make a loopin sequence to move platforms in a jumper
that could be of use, yes. Any information on how to do that?
i started using unreal two weeks ago only. I swear im not this dumb on unity
Explain in-game context on what you're trying to achieve.
i have a dinosaur walking moved by a camera rig and i wanna apply a rocking up-and-down sway, in fixed intervals. I have a take inside a main animation sequence/shot. I'd need the looping thing to happen inside that one animation, on the keyframes with blue tracks kinda part of the.. interface. You know what i mean right? Ideally i'd add an aditive track with that constant sinewave motion and forget about it. But i haven't found out how.
the sway is not for the camera but the dino, btw
I cannot make sense on how you're supposed to base the movement on the camera (the common way would be the other way around) but in the case of camera sway, you can use Camera Shake instead.
https://docs.unrealengine.com/4.27/en-US/AnimatingObjects/Sequencer/Cameras/CameraShakes/
Create camera shake effects in Unreal Engine.
you can add an additive section
im trying to move the dino, forget about the camera so we don't make things more complicated to understand.
The camera rig is used to move the dinosaur along a spline, and that's not my call to make in case it's wrong to do that or whatever, i'm just supposed to animate the dinosaur.
yeah i did, but how do i make that section loop?
that's my whole point. I want an additive section that loops for whatever time i want. But with keyframes (and no way to apply constant functions) i'd have to do that by hand for the whole duration of the clip
ok here it comes 😛
you make a new level sequence
you add the actor u want to normal seq + sine
remove all tracks
make a new additive section
do the sine
now open the original sequece, add track
new subsequence
add the additive sequence u just made
drag it as long as u like to make it loop
hmm so on the part with the red bars with the animation clips. There's where i should stack the sine animation, which i can drag to make loop, and the normal animation?

Is it possible to turn off blend in certain situations?
@clever acorn you have to Rmouse the subscene >properties>can loop checked
As in state machine transitions?
I'm using layered blend to combine lower and upper body animations, but this breaks some animations. So I'm trying to disable blending for those specific animations.
There is Blend Pose by Bool node, if that's what you're looking for.
I tried that, but it seems to blend when using it as I get the correct result when linking the pose directly to output pose, but not when linking it through Blend by bool.
ill look that up! hopefully i can achieve what i wanted without hardcoding the sway myself. That'd be cumbersome. I'll let you know how it goes
hey everyone, I'm on 4.26 and for some reason I don't see the floor in the animation player

I didn't pay much attention to it but now I found out that some animations have a broken root (they make the character go too low and so the feet end up clipping in the floor)
I need to have a proper floor in the animation player to not have to place every animation in the level to test it
Can't for the life of me figure out how to select which animation poses to blend. Its either blend or no blend.
I'm trying to rotate a single bone based on mouse input, how can I do this in UE5? It seems like some nodes from UE4 have been removed.
Tried using a new setup with Blend Poses by bool. When triggering True Pose it acts as though False Pose is still in effect.
edit Found out that what was wrong. An uncompleted exec node caused the attacking? variable to not set.

what's the most efficient way for making animations for an fps game?
do people really animate a bunch of animations and poses for every gun
and every reload?
then the gun gets parented to the hands in engine?
I was thinking another way might be to animate the guns only
then have the hands follow the guns using ik
you can grab a pack of animations for the character
and then usually yea, the gun model is attached to the player model which is playing animations
there are some really good youtube videos that will walk you through a whole template in less than an hour
I personally make animations for both the hand and the gun, simultaneously animated with constraints in Blender.
do you have any links to such videos?
do you import them together? like
running pistol
reload pistol
and both if those animations contain both the arms and pistol combined
Yes, I import them together. Usually with FPS it's arm only, so I don't have much concern with scaling stuff.
this guy has a pretty complete set of tutorials: https://www.youtube.com/c/CodeLikeMe/playlists

search youtube for anything like 'ue4 tps tutorial' or 'ue4 animation blending' etc
and just pick someone whose voice you like, haha
CodeLikeMe vids have terrible pacing tho
i don't disagree.. but they have covered so much material, it's a good starting place i think
ok thanks guys!
I've been trying to find more efficient methods
because I really do not want to make animations for like every action
I was hoping ik rigs would kinda caryy
yeah you end up making "blendspaces"
you could look at mixamo.com too, it's a very good set of starter animations
any tips for foliage issues on a massive forest animation - client has requested a 7 mile radius for a potential development in a wooded area...need to fly up to 1300 feet to capture main massing (think wind turbine from a drone type shot) - using these nordic firs pack

tried William F's foliage tips but I think the sheer amount of trees we have is too much for the game override LOD settings...
getting less then ideal shadows and sometimes the textures bug out and we are left with just a bunch of tree stumps with no leaves
Sounds more like #graphics issue to me more than actually something to do with animation assets.
how so? Im running on a 3090 jacked up machine btw probably should have mentioned lol
I'm wondering if there is maybe a way to camera cull just what the camera sees in the animation so I dont have to load everything in but all the camera cull settings I have found dont seem to quite cut it
how can i setup this? So i want to have 2 type of gameplay. I want to put 2 bind for different things, For exemple a left mouse button to jump but when inside a trigger box i want it to attack. How do i do it?
Wrong channel, this doesnt have to do with animation
if I have two characters that have a skeletal mesh component in common, how do I copy the pose from one character to the other?
I tried "Copy pose from mesh" node in an animation blueprint but that didn't work
Apparently there is "Save Pose Snapshot" but I don't know how to get the snapshot from one character anim bp to another


It's nothing as basic as that
the axes on the source are just wrong
it looks like it's JUST the clavicle breaking. no retarget option will fix those two bones, so I'll get the animators to fix it
ok yeah this is what's wrong with the source

near zero-length bone as the source is not going to map well
because when it does additive, or additive scaled, it blows the animation right out, which is why with those two the result is stretched into the sky
and with the wrong axes it can't do skeleton retarget mode
i kinda wondered, as a bandaid over the real problem, if there would be a way to override with code the rotations of the problem joints or seomthing
Currently I handle all the functions related to animation on my character blueprint. I'd like to switch these over to the animation blueprint but I'm missing some pretty major parts. For example I have animation functions that I need to trigger without anim notifies. How can I reach the animation blueprint's event graph from my character? The most I can get is the class of blueprint
Unreal Engine Forums
I'm quite new to the Unreal Engine 4 and I ran into a problem in my VR project. I want to trigger an animation with the trigger button on the right touch controller. I've made a blendspace where the horizontal axis goes from 0 up to 1(float). Since I couldn't get the input event into the event graph of the animation blueprint I've tried to edit ...
the links here are dead
ohhhhhhhhhhh it's anim instance not anim blueprint

I... I'd already done this
lol
thanks
Because it is not related to skeletal animations whasoever and has more to do with #graphics
Do you know if any creative workarounds or fixes?
Ask it in #graphics, there would be people more knowledgeable about it. 🙂
I see what your saying - got it
Anyone know if having 50 meshes with each individual skin bind is more expensive than a combined mesh with 1 skin bind when exported from Maya as an FBX into Unreal?
still need help with this
Anyone know how to find where an anim notify is coming from?
as in the events that you setup to fire in montages?
Yeah, or animation sequences
right right
so in terms of where they come from... did you make one and now are trying to call it or...?
I'm using ALS, it comes with a ton of animations and some notifies built-in. I can watch the notify event get triggered in the anim BP, but I can't find a single animation that uses this notify
oh i see, you want to know which anim asset is using that notify
Right
I'd really love a list of anim assets that use that notify, but I'd settle for knowing which specific anim asset is using that notify at the time I can see it happening
in the search of your content browser, use AnimNotifyList=
then add the name of the notify you want to look for
That seems promising, but these stupid notifies have weird names ("->N Stop R" for example), trying to see if I can wrangle the query syntax to accept it...
Hm, tried it with a simpler notify that's getting triggered ("Pivot"), doesn't seem to work
I'm not crazy right? This event on the anim BP's event graph is generated from a skeleton notify triggered by some animation?

It's especially weird because this is the only notify listed for that skeleton...

you search in your content browser and make sure you have the right folder (or content folder) selected so it can show up. Its not a search in the bp, its in your content browser @oak zodiac
AnimNotifyList=Pivot
Yep, I can get the search to work for that BMAnimNotifyCameraShake notify, but not for Pivot


(partial notify name does seem to work btw)
dunno, havent used ALS. I hears it a mess though 😄 maybe that notify is an extended class or something. I tried again and partial names work for me 🙂 but im noticing that its only montages showing up - then again, i dont put notifies in anims, just montages
After staring at ALS for a while it's starting to make sense, but this issue of tracking down notifies isn't really ALS-specific
yes, i mentioned that
I'll look into your theory about some kind of extended class
AnimNotifyList= may not return custom classes
its a hunch
or maybe they are anims and AnimNotifyList= only returns montages
oh wait, i guess not because in that bottom picture has a green bar instead of blue montage bar
Right that's a sequence
Aha, apparently these are "custom blueprint events" raised by states in anim BP state machines
good, because i had an ugly solution 😄
Thanks for the help! That AnimNotifyList query will be helpful in other ways
When picking animations is there such a thing as to to many ? Does Unreal have a cut off for to many ?
The only thing that have saying on being "too many" running simultaneously is your own CPU.
can someone please tell me why my robot looks so weird when i apply full body ik on it?


what is the best way to adjust hand placement on weapons right now? IK or Control Rig? Please advise any guide
Depends on which one you're most comfortable with, because with the former, you're referring to animBP, and both it and CR have IK functions.
are there any examples of implementing the LeftHandIK system through CR?
Hey guys I just joined this server, I was wondering what my best approach for having an animation play for an enemy spawner. (Like crawling in from a window or jumping down from the roof). Im kinda new to UE4 with animations . My initial thought was to play anim montage at spawn location then turn on the animBP but its not doing what I want Any suggestions? or links to a tutorial?
You don't need to "turn on the anim BP", you just need to play the montage with root motion on the slot that affects the entire body, and call it a day.
ty! I will give this a try
If you're on UE5 (or planning to migrate to UE5 after it's stable), you can also preparing to use Motion Warping to shift the root motion anim at given point in the animation.
My enemy AI is zombies, I just want them to play certain animations on overlap of certain areas and on intro . Im guessing its the same idea
Yeah, it's the same idea.
ty for your time!!
I'm using Chaos vehicle. Anyone knows how to make wheels to rotate when they are not touching the ground?
i have a problem. when i walk backwards it plays the walk sideways anim how do you fix it?


all other directions work perfectly

yeah sure, they are gonna tell me #animation cause they are rotating by anim blueprint
anyone know?
does anyone know how to set the camera during the animation?
I'm doing a first-person game and during the roll I want to attach the camera to my head
maybe add a socket to the head bone and set the socket of the camera to the head


Any quick way to set an animation to not move around in the area, and remain on 0? The attack animation has character stepping forward and doing a spin attack. Enabling RootMotion kills the rotation and looks awkward
Thanks that worked but is all weird, yeah I'll just re-export
yeah, you maybe want to make a second camera there, and switch between cameras during the roll
or you could move the camera from one socket to another during the roll
how can i do this?
I bought an animation asset (https://www.youtube.com/watch?v=kH2pYY680rY)
and I would like to use it with my a different model (https://www.unrealengine.com/marketplace/en-US/product/c456f4551dc9416cb9370707450f980e).
When I change the mesh in my character blueprint, it seems that I cannot use the animations from the asset package. I lack some fundamentals in UE4 because I switch to this software since a month ago. Where I can read more about this / watch tutorial?
using control rig to make a motorcycle and rider - should I import the motorcycle and rider seperately and build control rigs for each of them, then somehow attach them together in the editor/sequencer? or import both objects together, and build one control rig that controls everything?
Theres retargetting skeletons which i suggest to try first. Or else retargetting animations which is a bit messier.
it's probably easier to keep the motorcycle and rider assets separate to keep materials separate
and then it's pretty easy to attach two skeletal meshes together via sockets in a character, but there may be even easier routes
Thanks, I'll take a look!
Thanks - so I would be able to attach the controls (say the hands of the rider) to the controls (the handlbar/front fork) of the other control rig via sockets?
there's more than one approach, i think it will matter a little how your animations are set up also
if you're just doing one animation, like a video, actually maybe one skeleton is easiest, why bother joining them in ue4
but if you're trying to do more dynamic movement, you can wire things up however
you would have to break your animations into two skeletons though, one for the bike and one for the rider
I'm not sure this is what I'm looking for. The animations are rigged for the Epic Mannequin skeleton, and the model I downloaded are rigged the same way.
Edit: Nevermind, I missed the last step.
Yeah, I'll probably end up trying things both ways. The biggest thing Im nervous for is IK. I want to be able to have the riders hands locked to the handle bars, and keyframe the movement of his shoulders (like when hes leaning into a turn) and have the arms react realistically. I feel like that'll be a weird setup, because the pelvis will be locked to the seat base, and the seats locked to the handlebars, but the shoulders will need to be able to move freely
i think you'll be good, that's just like blending locomotion animations
i would definitely animate the humanoid separately from the bike
make like a socket on the bike skeleton, and one on the rider skeleton, and you can attach them in ue4
you might not even need a skeleton for the bike tbh, it could just be an origin offset from a socket on the rider skeleton
Super helpful, thanks - last question. I can put sockets on bones right?
yes 🙂
Does using the graph editor in sequencer (UE4.27) with control rig crash for everyone?
Nope.
Least not immediately, but sometimes it cause D3D device crashes.
Hey, so I'm trying to import an alembic file with animation into unreal 4.25.1, and for some reason there are a few pieces of it that are just totally off. Most of the model is fine and the animation is intact but these little skulls are in the wrong place.

this is what it looks like in unreal

this is what it looks like in 3dsmax, these buttons are missing when i import it
well actually they arent missing, they're stuck under the base for some reason

does anyone have any idea why this is happening and how to fix it? Importing the alembic into max or blender works fine, its just unreal that has an issue with it.
also if this is the wrong chat to ask in lemme know i dont come in here often
i presume its a skeletal mesh?
yes
did you assign bones to the skulls
Hi, I have the problem here
Any idea why any additive keys added in an animation doesn't work in 1d blend space? (Unreal engine 5)
a temporary fix would be to assign bones to them, and move those 2 skulls up above
remove them from any other bones
thats just temporary though
try exporting as different fbx version
might work
if u dont want to to the bones
can't do fbx, the model has a bunch of stuff it doesnt support
and then entire thing breaks if i try
whatever youre using
if theres different version
try those
like fbx has multiple versions idk how they differ im not that experienced
but its helped me in the past
tried the different version of alembic and it didn't work
tried exporting from blender as an alembic and it didn't work, there it had a different problem, the pivot was in a different place and the skulls were near it, same with the last model so it looks like they're just being pulled to the origin and rotate for some reason
i tried converting them into editable polies instead of editable meshes since the necklace is an editable poly and it works fine, but that didnt work either
Why is it have to be alembic?
because i have deformations on the geometry that fbx doesnt support
What deformation?
and when i try and export as an fbx it gives me a bunch of errors and flips the model in weird ways
like i rigged it with a skin modefier and then went back and added an edit poly so i could adjust some things that the skinning couldnt fix
i only need it for an idle pose so it didn't need to be a super robust rig
Sounds like you're overcomplicating things here, and sounds like something that's definitely doable with bones and generic FBX asset.
the thing that's weird is that it imports fine into blender, its just unreal that it doesn't like
yes but that would require basically re-retoping, rigging, skinning, and animating the entire thing, and I dont want to do that
I don't use 3ds Max, so I'm not pretending I know anything specific to that DCC tool
Are you trying to have preserve volume on folding areas?
I don't know how fricking retopo even put into consideration out of nowhere.
i think so, idk the terminology basically when the fingers curled they were too square and i wanted to round them out
but that wasnt the only issue fbx had with it, it said there were nonorthagonal meshes and idk how to fix that
Can you show me the issue in question?
i want the fingers to look like this

but they look like this with just the skin

no combination of weights works
and again there are other problems preventing me from using fbx
there's no logical reason the alembic shouldn't work im just trying to figure out why those very specific peices are broken
Aha.
You can remedy this with just one bone on each folding point, weight parts of the fold to it, and procedurally rotate it in animBP.
No need for retopoing bullshit, just the matter of another bone helping to preserve the volume.
i could, but that doesn't let me use fbx still
You could, and still use FBX
I don't know how wrong your setup in BP is, but at least in Blender it's the matter of adding another bone and weight the folding part, rinse and repeat.
what's bp?
Sorry, I meant 3ds Max
so i have a character, and what i wanna do is make it squash and stretch with my animations from mixamo that i gave a root bone to, what is the simplest way of doing so without having to redo all the animations myself?
maybe some blended physics?
wouldn't that just make the character ragdoll on part of the body?

what i want is something like that, but in 3d
well you dont have to do full strength
that's kinda what animators do though... 12 principles and all that, so i mean making your own is always best 😄
true, thanks for the help!
might give you some ideas
https://www.youtube.com/watch?v=N1tDjbFXeOo
I'm developing a Third Person game using an animation package that comes with idle, start walking, walking animations and stop walking. It actually comes with more animations like turn to right / left. The basic movement likes quite similar to NieR: Automata / Replicant.
Is there any place where I can read more about connecting this animations? I think blendspace isn't what I'm looking for.
Is it possible to set children skeletal meshes to inherit the animation BP of their parent?
Both on the same skeleton, would like the pants to inherit the anim BP of whatever the top mesh has

Hey everyone, I've encountered an issue with AnimationSequenceComponent. Triggers (events) that you put on Sequencer timeline in some cases (especially when time dialation is faster than 1x) are not working. It seems like Sequencer is skipping frame so the trigger key on given frame is not fired.
has anybody used Mixamo animations for Unreal recently?
Seems that the Mixamo platform has been updated and no longer exports with mesh, so they can't be downloaded/used in Unreal anymore ?
Yes, it's possible. Either:
-
Use Set Master Pose Component on the children skelmesh with the parent skelmesh as the master pose. This has cheaper runtime cost, but at the expense of overriding any kind of anim instance the children skelmesh have. Alternatively,
-
Give the children skelmesh an anim BP with just Copy Pose From Mesh node in the anim graph (not event graph), and in the node details, have it use the parent skelmesh anim instance. This doesn't override anim instance, so children skelmesh can have anim dynamics or any other anim BP post processes, but at the expense of slightly more expensive runtime cost.
FWIW Adobe already abandoned Mixamo and Fuse, so it's not worth the effort to use it with Unreal. Not to mention Mixamo rig itself is unorthodox to UE4 biped rig standards.
Adobe always had weird relationship with 3D tools.
Unfortunately the character system I am working with uses Mixamo rig. It actually seems that some animations do export with mesh while others dont.
But thats good to know thanks!
Is there a way to handle 100+ instances of an animated character to add some offset to the animation loop or disable their loop entirely? I have a character that's in an animation loop, duplicated about 1,000 times as an audience. The room is dark and you only see the back of their head so I'm not too concerned about them all being the same. Their animation loop is about 5-6 seconds long though and they are all moving in sync. Is there a way to stagger or modify their timing/speed easily?
Is there anyway to get an event on end play from a sequencer? Even if its on a loop?
Want to avoid adding events to the sequencer to trigger, just want to know when the sequencer is finished
well nvm
I guess a timer event is only solution if you have a sequencer with a loop, no events for restart
Magic nodes if you need to do something similar

How to add notifs like dust particles at the feet on procedural animations?
What's an easy fix if i made some adjustments to my sequence before 0 on the timeline?
There toomany keyframes and layers for me to select and move over.
The image sequence numbers them from -300 up to 0 and then 1,2,3...
How can i set my 0 time to be numbered on export?
hello! what space is the offset transform Rig Graph node working in?

i think just set up an event or some kind of hook on the animation and then emit a particle at the bone?
im guessing these procedural animations do not have montage/animation assets associated?
Autodesk have now taken over the Maya part of the Unreal Live Link and updated the plugin -
Exploring the 'new' Unreal Maya Live Link plugin from Autodesk
Part 1 - https://youtu.be/5iTbnk5Zmak
Part 2 - https://youtu.be/gPnGbtAWAl0

Stream data from Maya to Unreal in real-time with Autodesk new Unreal Live Link plug-in for Maya.
The Unreal Live Link plug-in makes it possible to stream object, lights, camera, animation and timecode data from Maya to Unreal in real time. And is the result of a close collaboration between the Maya development team at Autodesk and the Unreal t...
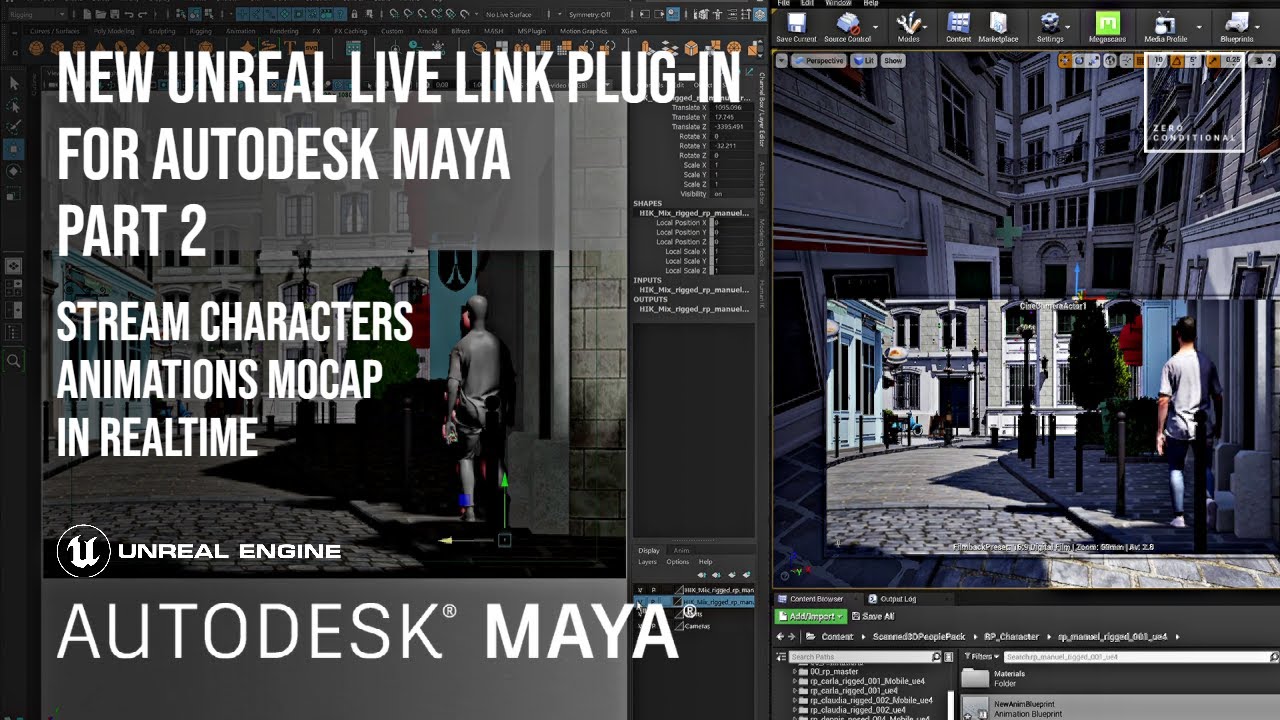
The Unreal Live Link plug-in makes it possible to stream object, lights, camera, animation and timecode data from Maya to Unreal in real time.
This video is Part 2 of 2 videos explaining the basics of using the plugin to stream data between Maya and Unreal. In this video we will cover the following topics
- Initial Setup
- Establish a Live Con...
hey guys, I have a sword model, an idle animation to it, and a swing animation(only sword no arm or anything), so if I would like to make the swing animation occur How would you suggest it happening? Animation Blueprint?
hi I have a problem I need to disable root motion in some animations and enable it in others I try to use AnimNotifyState_DisableRootMotion but I don't find how works this
In the animation screen, under the "Asset Details" there is a root motion tab that from there you can disable it

it that's what you meant
sorry its my mistake i am refer to Set Root Motion Mode
but during my search i see the AnimNotifyState_DisableRootMotion but no have idea how works

perfect, thanks very much 👍
guys I have an issue
I want to simulate hair movement for this character

I made a custom skeleton for it

but in the physical asset I only have like, 10% of my original bones and the simulation is broken

how can I add ALL my bones to the physical assets? or maybe I'm using the wrong tool and I should go for cloth simulation for it?
Hmm, I am maybe wrong and so Wrong but did you try create a custom AnimNotify and from there create an event to disable rootMotion instead of using preset ones?
yea just now i'm doing that, but don't know how use the default notify state 🤔
Now I only have the existential doubt about what utility can be given to the one that is by default😅
You have to manually add the physics bodies for each bones, if you use physics assets.
Alternatively you can use fake physics with anim dynamics (or Kawaii Physics for easier setup), which can propagate across bones.
Upon importing my animations into unreal from blender, they are incredibly small.. but the mesh itself is fine
Any fixes?
What's the unit scale in your Blender scene?
Metric, meters
Saw someone said in here to set the export scale to 100, that 100% didn't work lmao

I'm talking about this


That's the problem.
Reduce it down to 0.01, and scale everything up 100x to compensate for the new unit scaling.
Ahh, let me try that..
Mesh is fine now, anims are not

Well, you're kinda SOL then.
The anims had to be done after you compensate for it, not the other way around
Wdym?
is kawaii physics a plugin?
Yes, it's on GitHub.
It's exactly what it says on the tin.
Scale everything up, then make the animation.
Hmmm? But why? None of my animations are broken or anything
If it has to do with the scale of bones, keyframes, ect, i can probably fix it
Chances are you're keying Location and Rotation, so when you scale everything up, the Location keyframes didn't compensating for it.
My root bone has no keyframes though
Also inside unreal everything is working accordingly.. besides.. the scale
I'd say it doesn't matter if it's root bone or not.
Also don't forget to apply the scales in Blender 😉
Hmm.. didn't seem to work
@ashen junco @wary valve idk if you guys care but i figure out my issue, if I import the alembic into 3dsmax and then reset Xform on THAT then it doesnt mess with the animation and it keeps the skull buttons in the right place
how do you animate the eyes with control rig
no, I just sphere trace and use the location for my control rig
Then i dont think there's a point to use anim notifies. They work well for montages which is the benefit of montages. Youd be figuring out each footstep based on how your procedural animation is set up. I dont know how you setup your proc anim, but id guess itd be able to return that kind of info since a footstep may occur on flat ground, slopes, or steps.
I'm making a look at using U and V offset on the texture of the eyes instead of rotating the eye mesh
I tried it ! it works like magic ! Thanks à lot !! I just wonder how does this impact game performances .. but I guess I will figure out.
Yes, it's possible, by adding two "curves" in the skeleton with the same name as scalar parameters that control the texture offset.
You can then drive them using Control Rig.
That is what I did when making Idolmaster Million Live machinimas, as the eyes are not rotated by bone, but shifting the textures instead.
I connected a vector as a variable in the anim blueprint to control rig and set that to the character's leg's bone's control's position but the bone doesn't follow it
hey guys how you doing i have a problem and i am sure where to post it but i really need help
i used blender for the skeleton
after i finished and import it to the engine this is how its look
i doing retarget proccess


hey, does anyone know how to find which animations are using a specific curve?
Hey guys, I have a sword actor which has its own animations blueprint, when ever I click left mouse button the animation blueprint checking is the player is in "is attacking state" then transfers from the idle animation of the sword to the swing animation of the sword. But there is an when I spam mouse button the animation doesn't fully play it sometimes moves like one cm instead of playing the full animation. In order for it to play the full animation I have to wait. in this video every time I will click left mouse button an "Attack!" text will appear on top left of the screen so you can tell when I am attacking. Also there are screenshots of the blueprints


what's the question
What's your retarget settings?
"when I spam mouse button the animation doesn't fully play", how can I make it so i can spam the attack and the animation will play along with it
why not instead of a 0.2 second delay, you set the is attacking to false when the animation montage stops
i did a skeleton from blender using rigify , change the manican skeleton to humanoid and then in my custom character i choose humanoid too and in the manican aninmation in the targetting windows i didn't change anything and press change what bring me new animations for the character what you see in the picture
sorry if i did not explain myself very well my english poor and its hard for me to explain
the same settings i used

will try
How to wait for montage to finish? I want to use inside a function?
The scale here initially looks off, but in fact the camera is different. Is there a way to adjust this, just to remove the anxiety I get every time I see it 😄

@azure onyx often you dont want to use the default humanoid for retarget but a custom retarget rig
Hey Guys, I just have a small question if someone can direct me in a good direction to look for answers.
Im using the metahuman to animate with in sequencer. I dont own maya so cant use a software like that. So i continued using the control rig to animate. I want to ask is there any way that i can call or attach a object to a certain bone During a period of time and then remove it later on. (Without blueprints) Or if anyone knows how to animate with metahumans in blender and then export the anims out.
It's just like how you attach an actor to another actor, except Sequencer has a dedicated Attach track for it.

awesome thanks so much! Ill try this out :D So i would basically use that method and just select a bone to attach it too?
Yes.
Your amazing thank you 
Hello. can someone help me with a animation problem in privat chat ? I can't solve the problem for days, i must send someone my project.
Why not just put the exhibit of the issue here?
Directly and clearly specify what's the issue, along with the video (or image) capture of the issue in action
The Textures and Models are not from me...
If I show that, I'll get a ban on the Discord right?
Only if it's NSFW, yes.
Ahh ok on a another discord get a ban for textures and models are not from me
Just make sure it's not NSFW.
wait a second make a video
https://youtu.be/fChATvccNbM The Problem is my Enemy walk and idle but he play not my attack animation. If you need anything else let me know, I just want the problem solved

Hi!
BLENDER QUESTION: Is there a way to use EMPTY axis component in blender as origin for different separate meshes on export in UE4
Is there a way for me to "scrub" through the playback of an anim montage on a skeletal mesh during gameplay?
I'm trying to play an animation where I can stop the animation at any point and then play it in reverse from the point where it was stopped.
hello, i need help. how do i set up a animation transition. for exemple i pressed left mouse button to start dancing and when i realease it will back to idle. But i want to only back to idle after the animation played (not while is playing) because i pressed left mouse to shoot for exemple and if i realeased mid animation it will just back to idle without completing the animation. Anyone know how to fix?
are you using a animation blueprint, or just playing through the normal blueprit?
blueprint*
ok


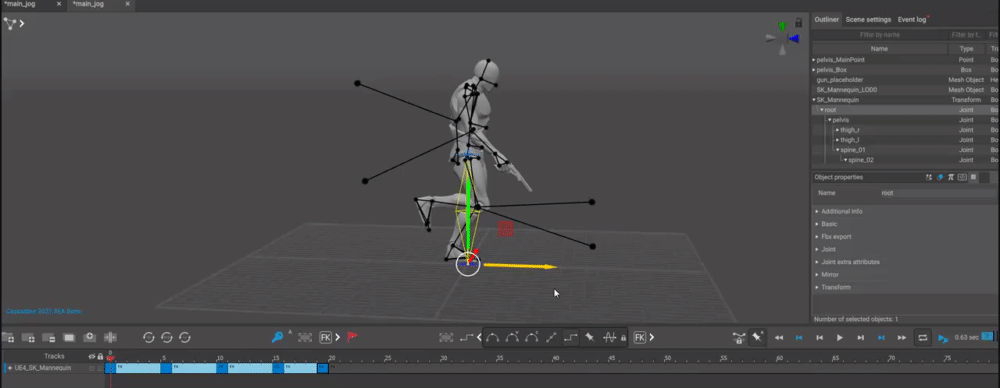
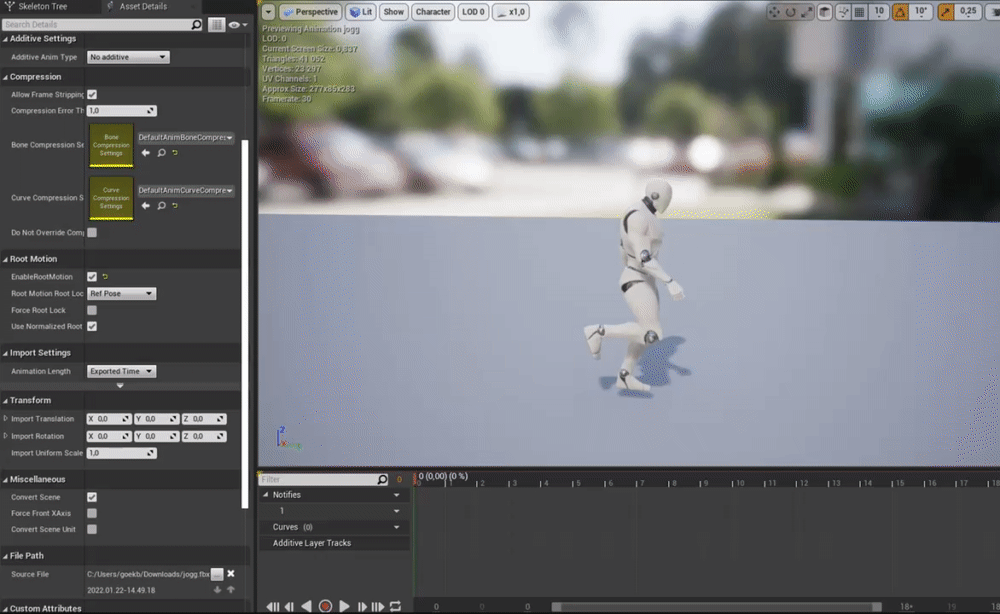
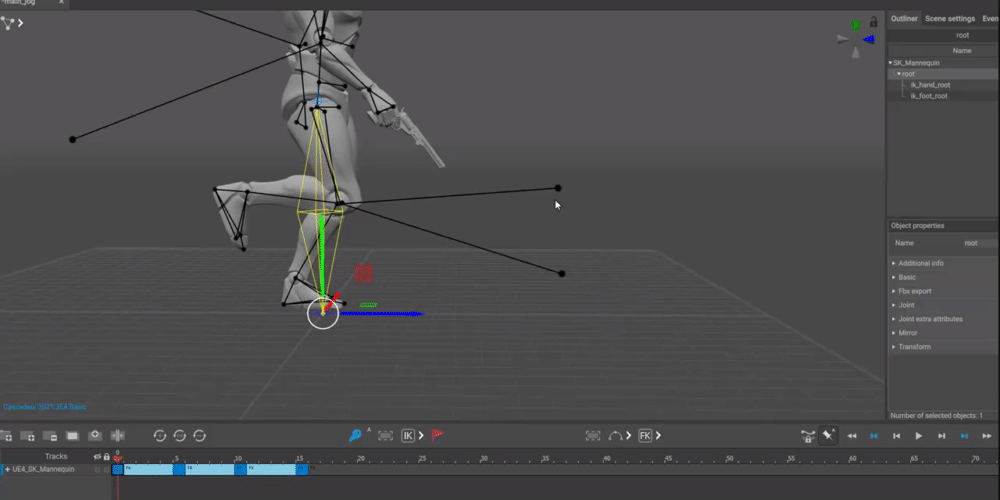
this was what i set up
set up an variable (for example "isDancing") and in the transition back to idle, specify that the variable must be false to go back to the idle animation
ok i will try
I’m not exactly sure where to post this but I’m having an issue where I have an animated sequence but the dynamic shadows don’t update as the objects move. The objects will cast shadows but the shadow persists after the object moves away.

It’s a stack of discs that explodes so it looks like this:
Then it explodes:

Then here you see the persistent shadows:

Another thing, if I move the camera away from the objects then bring the camera back, all the shadows reset.
does anyone know how to set the camera during the animation?
I'm doing a first-person game and during the roll I want to attach the camera to my head
Why not attacking with a montage?
hey I'm new to animating in unreal, I was just wondering if I wanted to create a jump scare should I do that in blender?
Can be done in any DCC tool.
Jump scare is entirely visual concept, the code is not distinguished from any other events like attack or game over.
As far as the game code is concerned, it could be as simple as playing animation when enemy attacks. Jumpscares working or not depends more on how it visually (and in extent audibly) executed, as opposed to the technical side of things.
I see