#animation
1 messages · Page 165 of 1
Ok, it works now. Trick was getting rid of the bone space connection. Not sure why that did it, but it actually works now, which is pretty sweet
I am in the middle of optimizing my anim bp and I am going through all of my state machine transitions making sure that they are using fast path only
Does anybody have any benchmark data on how much of a perf gain this can yield?
It is a lot of work and I don't want to do it unless I know it will be worth it
This crap is still broken. Might force me to redo the combo system with multiple Montages instead. Not a veeery big deal, but stupid nonetheless
Actually
Seems like when a NotifyState that is branching point touches the next, non-linked, section, it just goes into the next section
So the branching point state is at fault
Hi, to shoot a projectile at a specific time of a fire weapon animation, is the best way to do this with animation notifies?
anyone knows how i can make the force from the root motion be framerate indepentant as if i have unlocked fps i have varying forces,while if i lock it to 60 it works fine
hey guys, anyone here good on the control rig system? I simply cant put together a rig that works with ue´s control rig, my joints end up completely distorted. anyone know a good place to get some tips/tutorial?
@quartz garnet whatt do you mean by distorted?
well
this is a model from blender fx

this is how it looks when i draw hierarchy, maybe thats the reason?

and this is the exact same model but rigged in c4d


Hey, is it somehow possible to set the branch filter values at runtime ?

I basically only want to change the Bone Name here at runtime tho
Check the joint orientations. Primary axis and secondary axis probably differ from the default values set in the node.

thanks
however I have the feeling i might not create the rig right. are there any measures besides joints axis orientation I should be aware of?
How we can create animations for mannequinn and fps mannequinn rigs? (for maya)
And how we can create our own mesh for those rigs?
https://streamable.com/sk7rbz
Did I miss something? On the right is the Root Motion animation with Root Motion disabled, works as it should but won't move the capsule obviously.
On the left is EnableRootMotion ticked, rotation is wrong and also weirdly moves in some direction. I thought it was because the Root bone wasn't at 0, fixed it and still the same issue.

hey I have a question
Should "set master pose component" target have same skeleton asset of parent mesh?
or just target should have same skeleton hierarchy? which?
joint orientation is usually the culprit when the limbs turn into spaghetti. So I would just try that first.
how do you IK a leg that has more than 3 bones? since Basic IK only supports 3, like horse leg or T-Rex leg
i tried Basic FABRIK, but it doesn't distribute it correctly and also it doesn't have pole vector like Basic IK has
can control rig be used to make animations for game like walk run strafe etc?
@lapis prairie yup
is this good way of making animations as solo dev or should i just learn blender?
use level sequencer along with control rig and once your animation is done bake/link it down to anim file
depends on your rig and what you want to do with it
for now i need just base animations and i'm getting mad on any other i have
if you have something procedural you might need to have control rig in UE
hmmm... both way works perfectly
just UE is more convenient
since there is no export/import involved
it is, i kinda like the blender viewport interactions better tho
the whole screenspace transforming stuff is pretty horrible 😛
one thing i like about UE rigging workflow, is that you can make link animation, and once you change the level sequencer animation it will update the final animation automatically
creature study finally done
so I'm trying to use Vinterp to move a Ik bone
but if the Vinterp is 'to slow' (honistly I don't know what the range is) it just stops half way?
moving right Vinterp speed set to 10
https://i.gyazo.com/96fe30bb7408f85bec5614a90d86ba4b.mp4
Moving left Vinterp speed set to 50
https://i.gyazo.com/224572a037a5c0ca12a3db1291ac80c7.mp4
Does anybody have any experience with retargeting animations from the ue4 mannequin to a meta human skeleton? I’ve got it to work but came across a bug with it I’m not sure how to address
When my character is running the feet sometimes go out of sync with the legs, and if I jump it’ll usually correct but then sometimes go out of sync again.
Ok guys, I have been trying to get my new character retargeted and everything looks/works perfectly, except the fingers. any thought? I have tried
Reimporting
Googling
YouTube
Looked on UE4/5 Forums + Others
Different Animations (To make sure it wasn't that one animation)
As you can see in the image, I already set the root and pelvis to "animation" and the rest to "skeleton". I have also tried setting the others to different settings like animation scale, etc. same thing except the fingers end up going a different direction.
Any Help on this?

i have an animation that is a fractured wall and i am trying to make it simulate physics after it breaks. are there any resources that can show me how to set this up in blueprint?
So I spent like 4 hours converting all of my state machine transitions to cpp so that everything was fast path but it seems like it didn't have any impact on perf at all. My "AnimTickTime" as reported by the console command "stat anim" didn't go down at all Shrug Not really sure what to make of this. Maybe my character's anim graph isn't complicated enough or maybe the fact that there is only one character means the performance impact is just tiny.
Alright, so I have a gun, and it's parented to the player's camera.
This works, and I'm pretty happy with it. The reloading animation is stored with the gun, so I am doing IK to make the left hand follow a bone on the gun to the magazine, then down offscreen. This kinda works.
However, the hand "floats" around near the intended location. The tutorials to fix this reference locking the left hand to the right hand, but they assume that the gun is locked to the right hand, which it is not in my case. Any solutions?
I'm trying to export a walk loop from Blender to UE4 and for some reason the first frame of animation is missing keyframes. The first frame will have the correct pose, but a few bones don't start moving until the second frame. The error causes a hitch during the animation loop which does not appear in Blender.
Has anyone had this issue?
did you set the export to keyframe all bones?

hmm, maybe also check your import options in unreal, iirc theres some thresholds that you can set, maybe it just ignores the bones due to low motion
I solved it!
The IK and constraints were messing with the export. Selecting all bones and choosing to bake the animation produces a clean FBX that Unreal can handle.
nice, also one way to check if the export is messed up is to reimport the fbx into blender
can anyone help me i need to export t pose and animation from blender to unreal
i dont knw the proper pipeline to export animation and the tpose for unreal
Anyone has an idea of how this works?

when blending 2 pose layers
I removed uperarm_l and it works the same, I'm lost
do they define a range or something?
no idea
I've actually just read about it yesterday, might help you if you read the first answer
https://answers.unrealengine.com/questions/336798/how-to-use-blend-depth-in-layered-blend-per-bone-n.html
Or well, that's only about the Blend Depth 😅
does anyone know how to do quadruped rig with constrain pole vector?
Hi. I cant replace the death animation, why is that?

I tried to copy the animation where current animation is, didnt work
ok, checking now
the animation i was trying to use is an animation sequence, current animation is montage
I meant like the base type of the variable Death Anim
gotcha
I'm not sure if this works out, but as far as i can see UAnimSequenceBase can hold both types
is possible conversion from animation sequence to montage?
That's the part where i'm not sure how it works since i never tried it 😅
ok 🙂
not sure if this will be useful info, but im using a paragon character that i try to adapt to shooter game demo
Hi guys, I was trying to setup a full body IK with control rig. Is there some way to add an effector for moving just the elbows? can't orient them properly with just a hand control 😅
Else maybe I should add an Aim node? I'm not sure how to go about it
How to see the values of a collection in Control Rig?
Hello all, I recently switched to Unreal Engine 5, and now I am having trouble with Animation Modifiers. For the life of me, I can't find "Add Animation Notify Track" anywhere, and I don't even see "Animation Blueprint Library" as a section under the context menu. What plugin is associated with that? I've been trying to cross-reference UE4 projects and cannot figure out what I'm missing.
And yeah, I have unticked Context Sensitive
So an update... I can Migrate a modifier from UE4 to UE5 and it has the Animation Blueprint Library node... but the existing one still doesn't. Same class of BP and everything. I am BAFFLED
Ended up achieving it. Needed a basic IK after the FBIK, I wasn't setting the bones+effector correctly previously (:
Trying to set the default mannequin's skeleton to the default humanoid rig but it keeps saying I have to "save" it. It's already saved. Any ideas? I have no clue what to do.

anyone know how one would go about creating procedural animation for a sandworm or snake? Do i use physics constraints or IK?
Dragon IK has stuff for snakes.
I think Power IK might too and it's free, but I prefer Dragon.
Forgive me crude drawing skills, but does anyone know how to fix this?

In Blender the feet stay perfectly still. In Unreal the bones wobble around between frames. For each actual frame they end up where they're supposed to, but between frames they wobble around as the rest of the leg moves.
Anyone know how much it’d cost just to get someone to make some animations for a mixamo character? Idk which channel to ask this question on.
Setting the animation to step interpolation eliminates the problem, but then I lose the smooth interpolation between frames.
Look to spend in the triple digits for decent animations.
Aight I see. Which channel do I post a request on?
The job boards.
How to change Control Rig Variable on runtime? I have exposed the variable to Blueprint and changed it from there, but only the initial value takes effect and it doesn't get updated
Ok guys, I have been trying to get my new character retargeted and everything looks/works perfectly, except the fingers. any thought? I have tried
Reimporting
Googling
YouTube
Looked on UE4/5 Forums + Others
Different Animations (To make sure it wasn't that one animation)
As you can see in the image, I already set the root and pelvis to "animation" and the rest to "skeleton". I have also tried setting the others to different settings like animation scale, etc. same thing except the fingers end up going a different direction.
Any Help on this?

Anyone pose searching yet?
Is there a way you can play random animation sequences that are sent from the BP to the AnimBP as references?
I got different idle animations which i set up as array of AnimSequences in my BP.
Now in my AnimGraph i'd like to randomly play one animation from the array.
The "Random Sequence Player" won't do the trick since I can't assign an array there (or expose a pin) - and my AnimBP is agnostic to what sequences are used
How would one approach this?
Hey friends, I'm at my wits end, so please help me, you're my only hope! In a nutshell, I'm making a cinematic in sequencer, and attempting to use root motion animations to move characters in the most realistic way possible throughout the sequence. However, despite there being root bone movement that propels the characters, (I checked all the options on the animation and blueprint for root motion) the animations reset the character's location when they finish or transition. In other words, the translation is not cumulative, and I cannot figure out why. Attempting to match the location data manually is too janky and looks just plain bad. I've been through every guide, documentation, and tutorial. I was hoping to mix multiple animations together to create the realistic movement I want. Any help is appreciated.
Hello Unreal Devs pls help i have got a problem so i make a revolver and i animated it when i shot it spin the rotator but after we shot it they go back to idle the problem is they spin 2 times first when i shot it second they rotate back to idle animation if anyone know how to fix this pls reply back THank you 🙂
Hello, I am trying to make a control rig for a hand mesh but the thumb_03 is not aligned with thumb_02. Does someone knows what could be happening?

the problem is when its done shooting they move back to idle which rotating the rotator
hey guys, may i ask how do i loop my level sequencer?
btw guys, my level sequence doesn't run at all when i play preview
you need to add a play logic to a level BP or to any actor that will trigger it to play
does anyone know why when I change frame rate to 60 in blender, it still stays at 24? works fine on new projects
i got it fix, thx anyway
Is there a way to apply a generic animation 'transform' to an Animation Blueprint? (E.g. Final anim result, + (10,0,0))?
I would like to translate my whole character up because the animations I'm using have the incorrect root location
I guess you can use a transform node and move the root bone in the anim graph. But better to just fix your animations.
Do you know how to change the skeleton of an animation for that of my character?
I have the animation package: PoseAnimation, in it, has a huge amount of animations that I have to incorporate into 5 characters, but it takes a long time to duplicate each animation and place it in each folder. I just want to copy the entire folder and tell him to change the skeleton he has for that of my character. I can delete the character and so the option to search for skeleton and select the one of my character appears but I am looking for a simpler method.

Does anyone know how to configure Update Rate Optimization logic? By default we can only turn it on or off, but Id like to change the ticks to 15 per minute
I figured it out GetMesh()->AnimUpdateRateParams->... in character
what's the way to go to have swapable animations in AnimationBP? Store all of them in a variable of the AnimBP, or is there some more organized way?
e.g. different walkstyles which are picked depending on the character type
yea that's what i have for now
but they broke pin references on animation nodes somehow
so it doesn't work anymore in current ue5 main -.-
guess that was unintended, but for now it is what it is 😄
ok, apparently it's not the reference that is the issue, but the fact that i do a find on an map, which disables fast path execution -.-
as normal variables seem to work fine
@ember field you do it like that, i guess?

guess i'll have to restruct my stuff, so that it can utilize fast path
yea
you switch to different states depending on the enum?
thank you
yea, you shouldn't be affected by the problem that i face now
specially as your way uses fast path (which the lighting icon indicates)
yea, it can run fully in Animation VM
and so it can use multi threading
my way blocks the main thread
for the animation lookup
What's the benefit of using root motion?
Lots of animations, especially 'attacking' ones where the character moves with feet 'planted' are much easier with RM
Animations where your character moves with them, basically. Check the intro documentation
traveled distance matches the animation
so like with rootmotion it would stop the legs from not moving while doing attack animation is that what you're saying?
I'm trying to sync two blendspaces playing on two different animBPs using different SkelMesh's. Struggling to get a current blendspace animation 'time' out of one to drive the other, anyone know any good solutions?

If you play an animation on a skeletal mesh, the pawn stays in place. Root motion extracts the movement data of the 'root' of the pawn and moves the pawn accordingly
ah right so lets say an attack that makes the character lunge forward you would want root motion for it?
You can use RM for it, but that's a technical design decision. You don't have to
right just tested it out so the animation i'm using has no actual character movement so root motion keeps the character still when the animation plays I get it now thanks for the help 🙂
i'll have to get the animations guy to look at that, is it easy enough to make root motion animations?
Not sure, depends how they've been made (maximo vs. hand-crafted etc.)
is there way to override a pose reference for an animation blueprint (without creating a AnimBP child and defining pose override there, and without using a variable reference)
Anyone get stride warping node (not motion symphony/strider)to work yet? Doesn't seem to be working for me.
You can also have one state machine for all guns (or at least all guns that are similar) and then just swap out the animations that are used by the state machine internally.
Is there a better workflow into fixing some bones after retargeting animations?
It's just minor bone transforms that are misplaced but so far my workflow has been.
Open animation/transform the bones into their correct position/add a key to the Additive Layer/Create Asset/Animation/Current Animation/Preview Mesh , repeat for the next animation
That's fine for like 1 or 2 animations but I retargeted 50+ animations and doing it over and over again gets repetitive really fast.
did you try changing the bone retargeting settings first?
From the pose?
in the skeleton, the bones have settings to follow animation etc
You're talking about that?

yes, you can maybe apply a correction there for all the animations
Ok, I'll see if it'll do anything, thank you 🙂
you can right click and recursively set the bones, maybe try animationscaled/relative options
Hmm didn't seem to work for both animation scaled and relative
It's always the same position as well, which is strange

okay, well if you're feeling brave make an editor utility blueprint, use the editor scripting functions to load asset, cast to anim sequence, add bone track etc, save asset]
Honestly at that point, I might as well lol
that's the general workflow
I'm pretty sure you can script it with the tools
I've not used it on animation sequences personally yet
like that
so i create my first forward, backward and strafe animations. does anyone have a resources are how to create the diagonal walks.
Would you guys say that ALS is too unstable to be in the finalised game? My char glitchedout of terrain four times today
Hello everyone,
I want to make a game but i want really good animations
How i can do that please i wanna know
i'd say for single player,its a very good base but for multiplayer,its a hard no
that said,for single player too i'd recommend redoing all the calculation in c++ because performance for production game would be bad if its in BP
i'd recommend you to buy moveit from the marketplace or doing your own solution
you can look at ValleyOfTheAncient,Action RPG demo on how epic does their locomotion or use ALS as your guide to what you ought to do
hope this helps
there's an c++ version of ALS
i used c++ als a while back and i'd still give it a hard no
its legit unusable and you would see yourself fight against the system most of the time
Thanks, yeah I am considering ALS for singleplayer, not much animation outside of whats already there, but its pretty hard nut to crack. Not many tutoprials out there compared to different pipeline
Either by yourself or you pay a studio/freelancer to do it.
If you're doing it by yourself there are countless tutorials on Blender, Maya, 3DS MAX, etc... to show you how to animate 3D models. How to actually get good at it, is with patience, practice and knowing your tools.
@hushed granite Ok I'm a dumbass... I forgot to set up the Translation Retargeting options on the target skeleton as well, I only did it on the source skeleton... It actually works properly now!

yeah, the target... 🙂 That's the quickest way to fix a lot of minor issues working with one set of anims I think
Yeah, tiny little issue with the feet going through the landscape a bit but that's minor details
you can fix that with foot ik
Yeah exactly
Hey, I am pretty new to unreal and I am trying to insert a looping animation to sequencer. My problem is that no matter how I try to blend the beginning and the end of the duplicated anim, the feet don't quite match. I don't know enough to even know what I should be googling. Would anyone be able to tell me what is going on here? If more info is needed I'm happy to give more. Thanks so much.
hmm, I think just put them on the same layer and then they can crossfade blend
Same issue is occurring sadly. Could it have to do with the start/end frames of the anim? I just downloaded it from ActorCore so I assume it's been set up correctly and I just messed something up. Thanks for the suggestion though 🙂
you want the first frame and last frame to match
both feet should be inline with root at those fames
but at least you have them blending together now
it would not be required if the animations match
looks like maybe framers got chopped off one of those
got it, I see what you mean. Looks like the beginning is off by about 2 frames. Should I just trim the clip within sequencer or can I edit the actual anim asset?
figure out what's wrong with the source assets
possibly an export option set wrong
will do, thank you so much
update: I am now even more confused lmao
if I want to record a cinematic, would it make sense to create a blend space and control the character in a take recorder, then just use cameras to record the action? or should I just chain several animations in sequencer and hope they work together?
edit: I added a looping interpolation to the anim asset which sort of makes the blending smoother
how do i attach an animation to a .glb file? after it's exported in a t-pose


ok thx
#animation is my best guess where this belongs. Does anyone know of a good tutorial series that goes over exporting a character, importing it to Blender, rigging it with the UE4 Mannequin Skeleton and bringing it back in to UE4? I've found a lot that cover pieces, but nothing that covers it all and the ones that cover pieces seem to all do things slightly different, and my results have been pretty bad.
hey someone please help me
I'm making aim offset system with modify bone (spine)
but it doesn't work
how can I fix it?


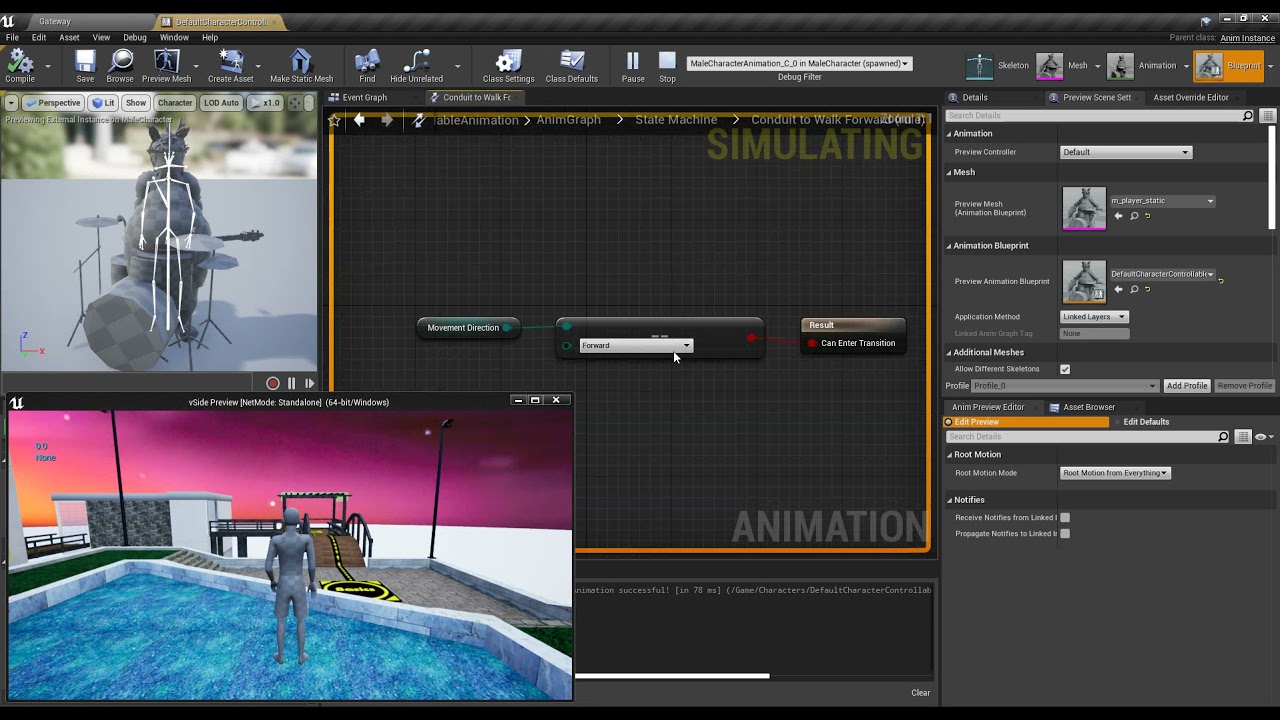
What am i suppose to put inside a Conduit?
im not sure what does that condition checks with
since the condition to go into that state is already at the transition
and the result that the conduit "conducts" to are also on the transitions between the conduit and the end results
is it like the condition to check for the next states?
Depends on how you've done it but double check the mode setting. Is it sett to add to existing or replace? I used add to existing myself.
Conduits are like states but they don't play an animation. That's what I know about them at least.
Ladies and gentlemen, my basic attack! btw idk how to fix it
@regal orchid that i understand, however im not sure on what to put on that node. usually on a state you put an animation but here there is a bool check
Check the settings for additive animations perhaps. Hard to tell.
I don't use them very often myself. But for larger systems I use them as a bridge to keep things organized.

I meant additive settings inside the animation asset itself
make sure it is correct. But again hard to know what the problem is without knowing all the details.
no idea where to check that
?
i changed from the other mesh to this mesh and it works

space*
add to existing
Well, judging from the vibrating it seems like some other animation is forcing it to straighten out the spine again. So I would check your anim graph and make sure things are blending properly. You should add the aim offset on top at the very end.


that's all
I don't use any other "Modify" nodes other than this
how come blending strafe + forward animation looks correct going 45 degree but incorrect -45

can you enable your names?

ah so you made the 135 and 45 degree animations as well
yeah, just its just im doing custom animation myself and havent found an easy way to animate those direction
still learning
o.k.
Can I get next help?
I also add "Modify" nodes at the end, but also won't work...
well I changed connected pins and it works!
but still jittering....
how can I fix it?

ah I just change interp speed to "144" and it works perfectly!
thanks!
By end, do you put them right at the end before the output node? Since it looks like you are doing it inside of a state machine state?
ah alright good that you fixed it
didnt see 😛
Is there a way to make the characters feet flush with the ground their on? I seem to have a problem where the characters foot will hover if the terrain is uneven
Foot IK is the way to fix that.

Inverse Kinematic systems allow for reactive animation, such as foot placement on non-planar terrain.
Thanks I’ll give that a look over appreciate it
I love UE, so this isn't me trying to start an argument. I'm truly curious though, what makes Unity animations so much more universal than UE animations. I don't understand either system well enough to guess why. I just know that in UE I have to either have the exact same skeleton or I have to retarget to use an animation. In Unity it seems like any humanoid animation works on any humanoid model. Is it just that everything for Unity uses the same skeleton/rig?
Hey guys looking to flesh out my FPS game soon. Im using the first person arms skeleton for my first person camera. Does that mean I will have to make a “just arms” model for all my characters in order to see their arms in first person or is their a shortcut in UE around how to do this?
Guys if someone is interested in next generation rig system inside of UE you are wellcome on channel of Gabriele Pellegrini, he have most explained and most updated materials about control rig on entire youtube. I highly reccomend it to riggers and animators too. https://www.youtube.com/watch?v=VqIo8Augbt4&list=PLrFI57UwffuFn-DYYbiPhvUDHOmWgBmWi

In this first video of the series I try to introduce control rig by using my rigging experience from other DCC applications (in this case maya because I am better at it). I am going to try to translate what is what.
Anyone here had luck importing Mograph animations from C4D into Unreal? But not as sequencer?
They released this video here : https://youtu.be/9g0UX1xGGgs
But it imports as a sequencer file with datasmith.

Explore how to create motion graphics for broadcast using Unreal Engine and Cinema 4D.
We’ll cover:
- Maxon Cinema 4D file import
- GPU Lightmass Global Illumination
- Look development for broadcast
- Control Rig set up
Make sure to watch until the end as we’ve added bonus content: a demo of how to build the control rig!
Timecodes:
00:00 Int...
I'm working with control rig but don't quite understand what the node "inverse" is doing to my transforms. Typically I would expect it to change my local space to world space and vice versa, but it seemingly doesn't behave this way. I used forwards solve and it seems to be doing the rotation first and then the translation second. Meaning a transform of POS(0,0,20) with ROT(0,20,0) becomes something like POS (-6.8, 0, -18) with ROT(0,-20,0)... I'm on 4.26.2 is this how it's supposed to work?
It kind of seems redundant to use inverse transform to convert something to it's own local space if I can just get "get transform" with the local space option selected too...
So I have retargeted twin blades animation to use with another mesh that is also using the ue4 skeleton but when I play the retargeted animation the neck is deformed can someone help?
Did someone see the jump animation, do you have any training videos? With cpp programming.
that's not really how inverse transform works.. to get from local to world you need to multiply by the world transform of your parent. from world to local you multiply by the inverse transform of the parent bone.
Ah I see, so how does it work?
So I'm not really sure about the correct way to approach animating something like a robot arm. Where there is no bending and each element of the skeleton is essentially its own static mesh. I think you can attach a static mesh to a bone in blender but I'm not sure if ue will import it correctly. Should I animate all the bones without a skeletal mesh then attach the static mesh parts to sockets? It seems absurdly ineffectient to have a skeletal mesh for an object which is not being warping
For a reference if I was animating this

transforms get multiplied to be added together. math behind it is not simple enough for a message explanation. so if you wanna add up 2 transform you multiply your original (start) buy how much you want to add to it. if you want to remove from it (-) you multiply the inverse of what you want to remove by your original transform. bit confusing i know. Quats are same thing too
Hello all! Can someone point me in the right direction? I want to dynamically translate the position of a pivot point (widget) on a box mesh. Default position is in the center (0,0,0). I want it to move around in relation to a sphere's position. I don't need the solution, just a hint of where to find it!!
Ah okay, I'll try searching up some of the math for it and see if I can get anywhere... I'm trying to figure it out because I saw this one guy use a combination of inverse transform -> transform direction and he got an offset to use for his pelvis during foot IK.... He doesn't really explain it but it works somehow 🤷♂️, thanks btw
you can in theory do everything with math if the pivot points of the static meshes are where they connect with previous piece.. but that's what bone do anyways and it is alot easier to do that stuff with control rig.. just adding a bone and weight painting it to control just that 1 piece is really easy and simple to do and it will migrate to unreal right, take a look at this piece of the stream done by epic https://youtu.be/UyCziUcnqxM?t=6179

Let's explore the latest animation features available in Control Rig for Unreal Engine 4.26! The team will cover updates to the Control Rig Mannequin Sample that's available on the Marketplace, rig sharing with Control Rig Components and Setup Graphs, attaching multiple Control Rigs for animation authoring, Slope Warping breakdown with post-proc...
if you can show me the snippet of code i can try to explain what it's doing

Use the key combo of ALT + Middle Mouse Button to move the Pivot Point on either a BSP or a Static Mesh. To make the change permanent right-click on the shape and choose Pivot - Set as Pivot Offset (UE4.10.4, MacOSX).
So you're saying that the correct solution is to use a skeletal mesh with each body part mesh weighted 100% to a single bone?
Hi Kai, this video does not show how to dynamically change the pivot point, only manually. I tried Rotating Movement Component, no luck.
my bad didn't read it thorough enough. am not sure i understand what you want to do if the pivot point itself cannot be change at runtime then parenting a small sphere or a scene component where you want your pivot to be to your mesh then rotating that would have the same effect
Can the pivot point be changed at runtime? If it can't then there must be another way to change the center of rotation of a mesh. It eludes me...
if am being graded if it's the right answer or not am not sure  but yes you can do that and you will get the same result as in the video
by making a child to another object at the pivot and rotating that that's the way
The rotation I can get, it's the pivot point's translation I don't get.
i can't even imagine what you are trying to accomplish so i don't know how to help
Specifically, I'm trying to recreate RTX roll-a-ball demo. https://www.youtube.com/watch?v=NgcYLIvlp_k when the ball rolls on the platform, the pivot point is always under the ball. So the pivot point's location moves in real time, always having the center of rotation under the ball. IDK, may be too much to explain...
NVIDIA Marbles at Night RTX is a fully playable physics-based game. It is entirely ray traced with NVIDIA DLSS integrated.
It is powered by NVIDIA's Omniverse and showcases photorealistic real-time graphics.
This playable demo has hundreds of dynamic ray-traced lights and over one hundred million polygons, running smoothly at 1440p on a single...
My platform has the pivot point at 0,0,-.05, so on the edges, the ball lifts too high.
Anyway, thanks for trying.
OK cool thanks for the help. That actually seems way easier
that math is wonky to begin with .. should be using add offset there and it should give same result. then again i believe if he just negates the float value he wouldn't need to use the inverse. because that transform direction it will rotate that direction buy the Quat that is in the transform. so essentially that tells you which axis is the world z axis in relation to the bone itself , in this case it was the x vector (since it has its own rotation). and again if he used set world transform in global space he wouldn't need to do that either. try it. instead of setting the pelvis transform use add offset in world space and plug that into float into the z. if it's a positive value negate it. (as a bonus) get world translation of root - world translation of pelvis and multiply that by your float that gives better results specially in animation where your pelvis is significantly behind or in front of your root (like stop animation)) i hope i didn't make a mistake explaining it am getting tired time to go to bed.
Thanks for your help! You're like the only one in here trying. 👏
i got some time to spare. many try when they can but thank you 🙏
hey I have a question
"Set master pose component" cause this
How can I fix it??

hey folks, does anyone know what would be the best way to make a death animation akin to The Evil Within? I mean, sync of animations and play a sequence per enemy
I have changed my default Top Down character with a model of my own and added some blend spaces so he can run etc. Everything seems to be set up but when i click he does not rotate to face direction of travel. any idea on what im missing? thankyou
Does anyone know root motion issue my root motion only works with montage when I enable root motion mode for everything my character wont moves. Plz help I am stuck and have tried every thing bu still no luck.
Or is there any way to blend root motions with non root motions like state machines with montage
How does one handle Reload Animations when you have one per State?
E.g. Standing, Crouching, Laying. If it would be just one I would use some combination of Montage and UpperBody Blending Slot.
But that wouldn't work here if the player starts in Laying and stands up to Crouch, even if I limit it to the upper body. Unless I restrict movement during specific Montages.
Would handling Reload via StateMachine (together with locomotion) be the better solution?
Or do I just play all Montages at once, on a different slot each, and then filter via the Slots in the Anim Graph? o.o
Skeletal animation isn't that expensive. If you are planning on having tonnes of them at once then yeah but if you keep the skeleton relatively simple, i.e. one joint for each link in the robot arm. Then it will most likely be fine. And it will be way easier to animate since you can use stuff like IK and just animate the end position of the arm and the rest will follow as expected.
Hey so I recently got one of the humble bundle asset packs that I've been playing with and I have run into a snag that I don't 100% know how to solve or google properly. Basically one of the characters that came with the pack has 2 sets of animations, 1 for walking/running and 1 for how to hold the different weapons it came with. The problem is that I don't know how to use them properly. I can get the character set up holding a weapon but then the walking animations are goofy because they are all setup for the "unarmed" skeleton. How would I go about basically using the legs from one animation and the arms from another?
if anyone ends up needing the same video, this is exactly what I was looking for
https://www.youtube.com/watch?v=y7iLItzwGTM
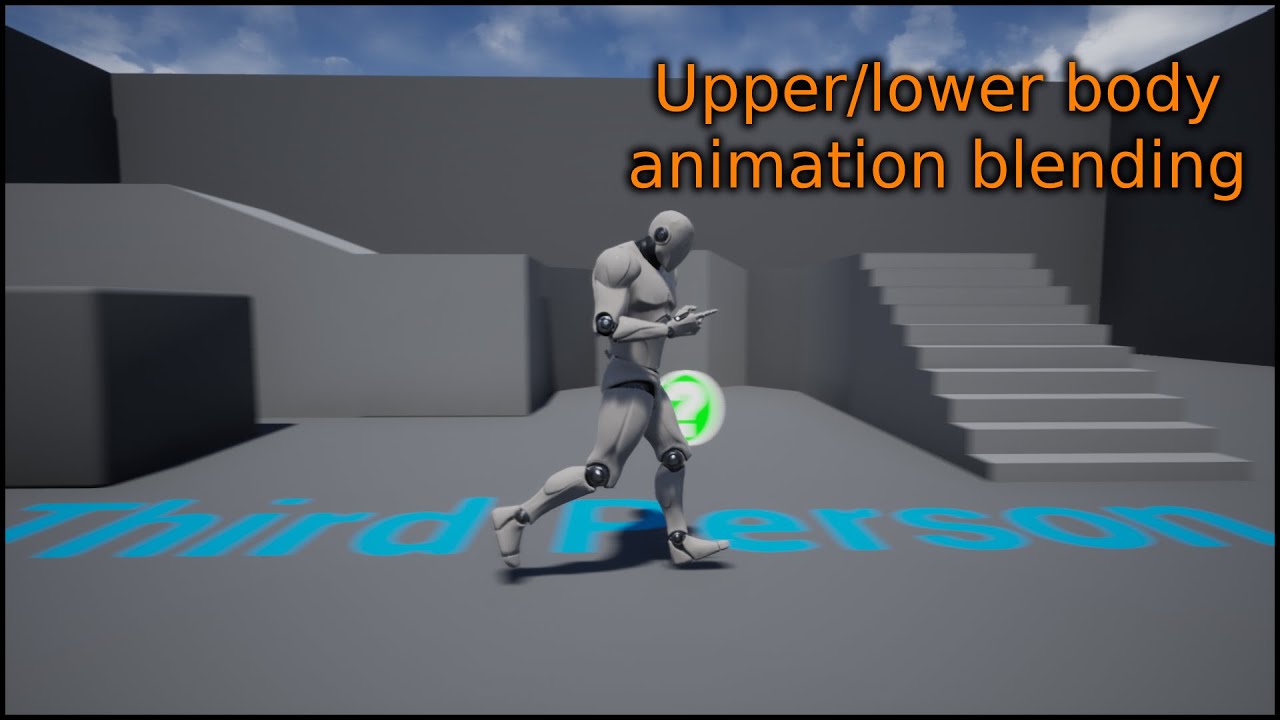
This is a short video showing how you can create a upper/lower body blend between animations.
Previous video where we setup the blendspaces: https://www.youtube.com/watch?v=2oSLwDulEMg
Does anyone know if there's a way to paint out blend shape/morph target weights for/in UE4? As in I have two blend shape meshes with different bind poses, I want to make use of just the facial morph targets on the heads and let the bones drive the body. I've painted the body out in Maya but it doesn't seem to pull through into UE4. Any suggestions would be incredibly appreciated thanks 🙂
Are there any recomended plugins for vive puck full body tracking in ue4?
how do you add an animation to an existing montage in unreal 4.26?
Yo! I recently ran into a problem :
I discovered that you could do the whole socket thing with the skeletal mesh to attach something to a hand, but I can't seem to make it appear inside the actual editor ; only in the skeletal mesh preview section or whatnot
I'm not used to this stuff, so if someone could help me understand what's missing that'd be great!

This is for a cinematic* Not a BP character

as seen in the 2nd, there is something in his hand I want to be there in the actual editor
Hello everyone, I am new to unreal but I have good experience in other 3D domains,
I need your help on character integration pipeline for a multiplayer mobile game i'm planning to work on.
My requirement is:
- I have to use animations from mixamo.
- character rigging that i have to take care of (here i would like to use multiple skins, change props on the character).
- Is there any particular way to rig characters ? If so do i have to rig weapons along with it ?
- can i apply mixamo animation to a custom rig made in blender/maya ?
- what is the general pipeline/ procedure for this ?
- how to work if a character has single mesh, single material, single texture set !!
- what would be the ideal polycount limit for it ?
- Is there any standard Topology(best suitable one for mixamo) for fitting the mixamo animation on my charcter mesh ?
- what would be the ideal texture resolution for mobile game character ? (1k,2k,4k)!!
- Also I would like to know the rigging, character specifics that are suitable for using Locomotion packs available online.
Please suggest me with all your indepth knowledge, it would be a great help for me into my future journey.
Hoping to hear some great suggestions. Thanks a lot in advance, It is a great help from you guys, means a lot to me.
if i want to use mixamo animations i make a separate skeletal mesh with mixamo rig
for running , jumping etc
then for animations like for conversation when it has to move lips and eyes i do it in blender myself with a rigify rig
basicly its the same mesh with 2 skeletons , or its better to say its 2 skeletons with the same mesh
i just switch them in BP when its needed
Cool, Thanks for the reply.
I want to jump with a non rootmotion animation out of a running rootmotion animation and preserve the Velocity from the rootmotion animation.
I want that my Character is jumping forward when I ran -> jump. How do I do that?
Right now the Character stops in the beginning of the Jump.
Note the [preview only] next to the mesh you added to the hand. It is only visible in Persona and not in game or cinematics. If you want the character to hold it, turn it into a blueprint and attach it to the hand. Easiest way to do it. It doesn't need to be a full character blueprint, just an actor blueprint with a skeletal mesh, and a static mesh for the prop that is attached to the hand.
Hey guys! Does anyone know if it's possible to change the pivot point of a Skeletal Mesh while it's performing a certain animation? For example, I have a character's animation in which the character steps its right foot and turns the whole body and I want to rotate that character while it's performing that animation, but as the Skeletal Mesh has its pivot in the center it doesn't look right, as it should rotate from the right foot instead of from its center, which is where the pivot of the mesh is. Any clue on how could I solve it?
The animation I have is something similar to this one: https://www.youtube.com/watch?v=g1r7TsQYmLk

Rig - Sam - Gabriel Salas -
https://gumroad.com/gabrielsalas?recommended_by=discover
Do Check out my behance Profile for more animation works
https://www.behance.net/nikhilnshetty
Also Follow ME in Linkedin for Updates regarding my work
https://www.linkedin.com/in/nikhilnshetty/
Anyone here has tried baking an animation via control rig with the ik_hand_r bone keyed (of the mannequin) ? It seems it keys and plays fine in CR and level sequences but once you bake to an animation sequence the data seems lost ?
@regal orchid thanks ill try it
Hey all, I have a question about re recording animations in the animation blueprint.
so, I have a character with some pre recorded mocap data, but I've since updated the character to have hair physics. What I'm trying to to is re record the animations in the animation blueprint so that the hair physics are taken into account, which is working! so here's my problem, the recording automatically stops at 60 seconds, is there any way to prolong that or do I just have to work around that 60 second cap?
Ok found the issue ...
Had to set Translation Retargeting it to Animation (or anything else) instead of Skeleton 🙂
hey does anyone have 2 mins to talk about blend spaces?
i have 2 blend spaces which i am switching between in game. in each one i want my character to be holding a different weapon. do i add this within the blendspace itself?
Ok awesome thanks that's good to know
Guys, I have problem with physics in walk in animation, characters physics explode on a first frame, mostly because character teleport from the capsule and walk in frame.
Do you have any idea how to turn off physics in first frame for example?
There is an setting for Clothing which works this way

"Reset After Teleport"
But I need this option for Physics
does anyone know how to use animation assets
like they're using some random mannequin skeleton
but i need it to use my character's mannequin skeleton

not sure how to change it
skeleton is greyed out
I can't reimport either
so idk
Guys, I'd like to start a discussion about pose space corrective shapes vs. corrective joints (bones). Shapes provide easier workflow and can be sculpted to look natural within reasonable time span, but I have doubts about performance hit on AAA quality models. A reasonable amount of corrective bones, on the other hand, requires model to be skinned with 8 influencex/vertex, which isn't very light either. How much correctives do you use in production (not cinematics, gameplay characters only)?
Hi all, new here I have an issue with my anim graphs were I’m switching between systems and my character twitches in place. Is this the right place to ask for help? 🙂
is it possible to access the active time of a state? particularly, from inside said state

What do you mean by "systems"? Switching out an entire anim bp for another at runtime?
Basically I have my core character anime and then a check to see if the character is holding an item to trigger a new set of anima each one works on their own but when trying to have both integrated the character twitches and twists in place. Is it ok to post a BP shot here? It’s as if it’s partly switching on event tick then trying to go back to the regular isle state.
You can post pictures here. Also if it is the same character just holding different weapons/items it is better to just switch out the animations or state machine depending on your setup.
instead of swapping the entire animation blueprint
I'm sorry if this is a stupid question.
In Unity they have Rotation Constraint components to limit joint rotation. It's super simple, you just select the bone you want to add the component to and the source (see ss).
Does UE4 have something similar? My googling got me nothing.

Hi. I have FPS animations like holding a rifle and using a produceral weapon sway that uses transformbones on the left hand for it to attach to a socket on the weapon. I would like to ask how do we go about using or blending FPS animations that have gestures like thumbs up or waving on the left hand but has no weapon related animation on the right hand.
To sum it up how do I blend two first person animations so that I can still hold the weapon on the right hand and use the other animation on the left hand? should I use blend by bone and just indicate what clavicle R or L? thanks
I imported a custom character and replaced the default character with it but the animations don't work

These are the nodes causing issues, if they are disconnected my main character functions fine but when holding a light actor the body is twisted. If they are connected the Light Actor anims are fine but my main character is a bit twisted a twitches in place. Any insight would be useful as to why its messing that up :/

Hard to tell what the problem is. Would be better if you recorded a small clip of the issue to go with it.
debug the aim offset values
to make sure they are correct, for starters
I have a problem with the animation timing. I want it to go off as soon as i press the spell button but there seems to be a delay
nvm i guess there no more delay?...
what
All of the state transition conditions are nearly identical in logic and when I print the values it expects to the screen, they match.. but only those 3 states (idle/jump/fall) work out of the 6 
https://www.youtube.com/watch?v=BkfIMgn1x9o
The video is kinda fast so you may need to slow it down or pause at the steps. I basically just show what the conditions are, what's printed on the screen, and what's not working (you can see the state machine debug visualizer doesn't hit any of the movement ones.
so i exported my model with animations into unreal but when i play an animation it just does this

You should probably prioritize certain states etc for starters. Assuming you haven't already.
If there's a special setting to do that, I could take a look, but in general I already have them 'prioritized' through some simple logical expressions (if jumping, else if strafing left, else if strafing right). The blocks are indeed triggering in the correct order, just for some reason dying after the first 2. I'll look into it more
Click the transition arrows. There is a priority setting. It can make your life easier even if you try and prioritize outside of the anim graph itself.
Thanks. I will look into that for sure.
my animation montage refuses to show anything

The event fires properly and prints the string
It uses the upperbodygroup, and the preview plays in the animation montage but ingame nothing
I don't understand why it's not working
is it because I don't directly control the character? I'm casting to it from my camerapawn
but the event fires fine
it just doesn't play an animation edit: nvm finally found the cause
Hey guys
has anyone here used the "force front x axis" when importing a mesh?
ive been using this to import skeletal meshes which are cars, but for this one particular model, its forcing the axis to be up
does anybody know how i can make an eye tarket in ue5 control rig by this i mean when i translate a control it rotates my eye bones
Anyone ever tried to stream animation data from the network ? Like serialize anim data, send it across a network, deserialize on the other side and play the anim on a skeleton. For use in a packaged game, not in the editor
Ok so apparently there's UE LiveLink but it's for the editor
You could use EOS Title/Player Storage (I think)
Depends on your use case
I'm still finding the implementation of these services a bit confusing personally
HI Guys i need some help here... I try to get a movable object to get via linetrace the top indepent from its own position, so just the up from the World. Then i have a timeline where it floats up. its like when you drop something it starts to float a little up and shows his position
why are my animations so small but the model i used is the correct scale

Will any UE_Skeleton based animations work with ALS4, or is it a whole animation system of its own?
I have a very broad question. I’m very new to unreal but I’m familiar in vfx programs like Adobe After Effects and Blender. I want to make a game to where you play as a stone character that slowly crumbles after every step you take. And I want to make it look realistic. You would also be able to look down at yourself and see yourself realistically crumbling away as you walk. How would I make something like this?
yes you can use them as overlays
@random hatch Thanks
I've been messing with it for a couple of hours now and the takeaway is it's an amazing system to dig through and see how he did things. It's not a great base to start from. Which, to be fare, is exactly what he says a lot. There's way more here than I can take in, but I did learn how he handles poses, which is way better than what I have been doing.
Hello,
Did someone know how to fix this bug
the anim asset is not showing any preview (wich is boring when trying to add notifies)
I did not touch the settings
its just an anim from paragon asset that i retargeted on an other anim
the other anim i have not related to paragon works fine
this is UE5 but the bug already exist when i was working on this project on UE 4.25

hey so i need help with new model version import, cuz in blender i've added a new mesh piece to my character model as seen here

but on my pre-existing model before i made the new belt piece, it wont show up here

how can i make a simple anim graph hat uses upper body animation when the animstion slot is set to upper body bones and full body animations using full body bones. i have it blending with the upper body and lower body but i need to make it work for say jumping when the animation is full body
I'm gonna be animating a character for film purposes. I was wondering if it's possible to bake the animation to the geometry (basically turning it into an animated prop) and import that into Unreal to avoid troubleshooting skeleton compatibility? And if it's possible, would that cause any issues down the line?
hey guys, i am currently switching between two blendspaces with a button press. with the goal for different weapons used on each. Where abouts should i be adding in the weapons? If i add in a weapon onto the mesh in one BS it ends up on all my animations. Thanks
Even when you make it a child of your cloth mesh?
Broad question:
When creating animations I'm used to work with the rig generated by rigify.
Now say I've made animations based on that rig and I'd like to make them compatible to the Epic skeleton, how would I go about it in general terms?
AFAIK a skeleton is just a collection of bones and specifically how the bones are named.
TL;DR Is there a write-up of how to convert animations made for a rigify rig to the epic skeleton?

so im trying to import an animation i made and its not working im following tutorials and my animation isnt importing
but im getting the model and bones imported

im thinking its maybe because im using a rig to make the animation and not just a rigless bones persay?
is there a tut out for the pose search plugin?
Hey, quick question, right now I got a montage for a cast animation, and on blend out I change a boolean, which triggers the idle animation in an anim BP.
For example I have a montage for grabbing a grenade, and in the anim BP I have a idle animation for holding it before throwing, is that "best practice"? Or how else would you handle a looping animation followed after a montage?
I saw a couple of assets in the market place related to fish, whales and snakes using splines for animations. Does anyone know if this is a ue4 thing or a maya or blender thing?
I want to read up on it but dunno where to start
i have a small problem
i edited an animation and when i convertered to a montage it doesn't change?
can you import bone only data animations into Unreal without needing a model or is a model required on import even if you have a separate skeleton .fbx?
@misty dagger interesting i will have to rnd it a bit more ty
Is this here really the best way UE offers to "cut" an animation ?

Like i just want to use the frames 30 - 45 from the whole animation
Maybe i'm doing something wrong or i understand it incorrectly, but it seems like this way is broken
Like here, that's 0,6 seconds in the animation, but once i try to delete every frame afterwards with this here


The whole animation will last 0,97 seconds and not 0,6 seconds
Yeah, i've actually just used it wrong here 🤦♀️
Could someone help me? trying to add Media Track to sequencer. but I dont see media track for a track option.

the alternative way doesnt work either
does anybody know how I can set some variables on the character via custom anim notify state

?
yea
just do a cast to player
where the variables are
then you should be able to drag out variables
i probably have example somewhere sec

does this help?
then from your character you should be able to set them
does anyone ever encounter anim curves not being called?
It works perfectly with the code you provided. Thank you
i can now set there any variable i have on character, much appreciated
sweet! thats good
Anyone used Facecap iphone app for face capture?
I know unreal can do it too but I am trying to get somebody remote to record their face
Control Rig can be used for Player Characters too right?
Yes
Hello, I'm trying to scale a character using a post process animbp with a Transform Bone node on the root bone. The issue I'm facing is that bones that are physic simulated get scaled, but their locations get messed up. How could I fix that?

Dank u
can I make an animation a variable in my animation blueprint?
so I know how to use the tools in unreal to set the character pose/animations and things like that. But im running into issues actually getting the pose that I want. Anyone have any good references/videos on how to do this? Its kinda breaking my brain trying to figure out what bones I should move and how I should move them to get the model into the pose I want and looking semi natural
Is alembic Geometry Cache worth it performance-wise for cloth and waving flags, etc?
I'm only getting into animation myself recently, but from what I've gathered so far is that ue is actually not meant to make poses/animations from scratch but rather to blend between them, tie them into gameplay and make them interact with the environment, etc.
So if you intend to make animations and poses yourself you probably want to look into external 3D software that has actual animation tools (e.g. Blender, Maya, Houdini).
For me this video was a good starting point https://youtu.be/r0z51oSS48E?list=PLUi8nuTUEtTvTb8Wk6cBfvw8IEFAPZYqd

Today we're learning how to use Mr Mannequin Tools 1.4 in Blender to create a walking animation for your project in Unreal Engine (or any engine, for that matter). We talk about how to pose your animation and then fill in the gaps to create a believable walk cycle that you can be proud of. Everything we learn in this video can be applied to runn...
Is it possible to rotate root motion direction ? I have a enemy character animated with some root motions. Even tough enemy is always facing player, root motions are occuring at a bit off angles. For example a dodge animation, when you preview the animation it makes a step directly backwards. But during gameplay enemy almost like sidesteps as during animation it is facing in different direction that normally
and after animation then it rotates back
im uploading video for reference
id like to make it step backwards instead of sideways
did anyone have a problem using the control rig (legs' IK) that character legs were glued to the floor all the time?
i'm use sphere trace and if got hit location i'm set location for my control (for that leg) and use accumulated lerp for location to avoid to legs always been on floor , glued
What is animation bone compression settings and what is animation curve compression settings. I NEED HELP!!!


Hey, does anybody know how to sync the playback of two blendspaces on two different animBPs? (A rider and a horse in my case). I tried using the same variables with the same logic but it always de-syncs. I saw a 'blendspace evaluation' node but it doesn't seem to fire AnimNotifys so that doesn't work well


Well for starters, are the animations the same length? And do they have the same play rate?
Hey, thanks for the reply. Yes, they do. Everything is identical (once they are out of sync, they maintain their 'de-sync'ed-ness')
So the animations desync and then stay out of sync the same amount? Since if they are looping animations the desync would be cyclical I reckon.
Yes, that's correct
Well in that case the issue may lie in the variables then. That local velocity parameter, have you made 100% sure that they are identical? Printing them to screen while running the game. Since if they are out of sync at a consistent rate it could be something in the logic as opposed to the assets.
Yes, they are being updated on the 'Update Animation' tick function with identical formulae. What I suspect is happening is that the more complicated AnimBP may be taking a little longer to calculate it, which casuses one to 'start' infront of the other
I was hoping their may be some sort of way to drive the animation using the current frame/time of the other. I also checked out sync groups but they're skeleton specific
How much out of sync are we talking here exactly? Since if it is a very large desync I can't imagine that being the problem. But if it is very small then maybe. Have you tried running the game at different frame rates to see if the "desync gap" changes. Just to verify that it could indeed be something like that causing the problem. I've never had to sync two skeletal meshes like this. Hopefully someone else can help you more.
Thanks. I've messed around and suspect it's about ~0.6s or so, but I could try checking framerates and see what's going on. The project is multiplayer so I was hoping for some sort of solution that is reliable on clients
does anyone know why my AI's are all walking in sync? https://youtu.be/i6_6tHXQ-gc

Funny seeing a desync problem and then an "in sync" problem right after. 😛 My guess is that you start the game and all the AI start walking at the same time, thus ending up in perfect sync. You can add some variation to your AI so the idle state or whatever has some variance so they all start walking at different points in time. You can also add some variation to the playrate and movement speed of each zombie.
I set them to have a random delay, hoping if they start walking at a different time they would desync 😅

I have moved the wait to before find location since i took that screenshot as well but they still end up syncing 😂
Weird. Are they somehow using the exact same animation blueprint instance or something?
Are there any docs on best practices for animating? I'm currently using an animation BP with a state machine that goes between idle, walking, and some specific animations like throwing or picking up.
However I'm seeing also talk about using montages for those sorts of animations like pickup, throw, and such that you just run "one off" and then resume other animations, and not quite sure how all of this is really intended to be put together
You got it right. (imo at least) Montages for one off actions (generally) and states for looping things such as locomotion.
That is by far the best practice, it's pretty much the matter of perfecting it.
Yeah, I'm having to wire up a lot of events and such in the anim bp to deal with notifications relating to when those one off states are done, so it seems that montages having that functionality builtin would probably make it a bit simpler
hey guys im having trouble setting up weapons for my character when he changes blend spaces, can anyone help?
How would you do IK when using animation montages? I've just got some real basic one where my pickup animation state has a simple IK setup to move it towards the item being picked up, but not quite sure how you'd do that if you used a montage for it since it doesn't have its own state in this sense 🤔
Hmm, I guess I can just do the IK in the anim graph same way as it would have been in the state
Heyo. I am coming from a proprietary engine, and have a question about unreal. on overwatch we had these things called geosets. I could export mcree as 1 mesh asset, and mark his cigar and hat as geosets. Geosets would allow me to turn those elements on and off with animation. What is this called in unreal? Closest thing i've seen so far is the modular character. e.g. I have a character with different heads, skinned to the same bones, and want to swap between heads.
Describes the different methods you can use to create modular characters comprised of multiple Skeletal Meshes.
Hi Control Rig folks! Finally hopping into it, and I am super excited. I have a pole vector question. I am translating the knee pole vector from side to side, however, as you will see, it has some odd behaviour. Does anyone have an idea?
Here it is centered:


And in the second photo you see that I move the pole vector to the side. I was expecting the knee to point towards it, but both bones become rotated in that weird direction
You could set up some notifies inside the montage that act as triggers for the IK. On frame X, enable IK on the left hand, on frame X+Y disable. And when you know it is enabled you can then also run some logic to figure out the point to reach for etc.
There are probably better solutions but in a project I work on we just fade out the material of the part we want to hide.
Is there a way to expose the vehicle wheel data array to blueprints?
From the vehicle movement component
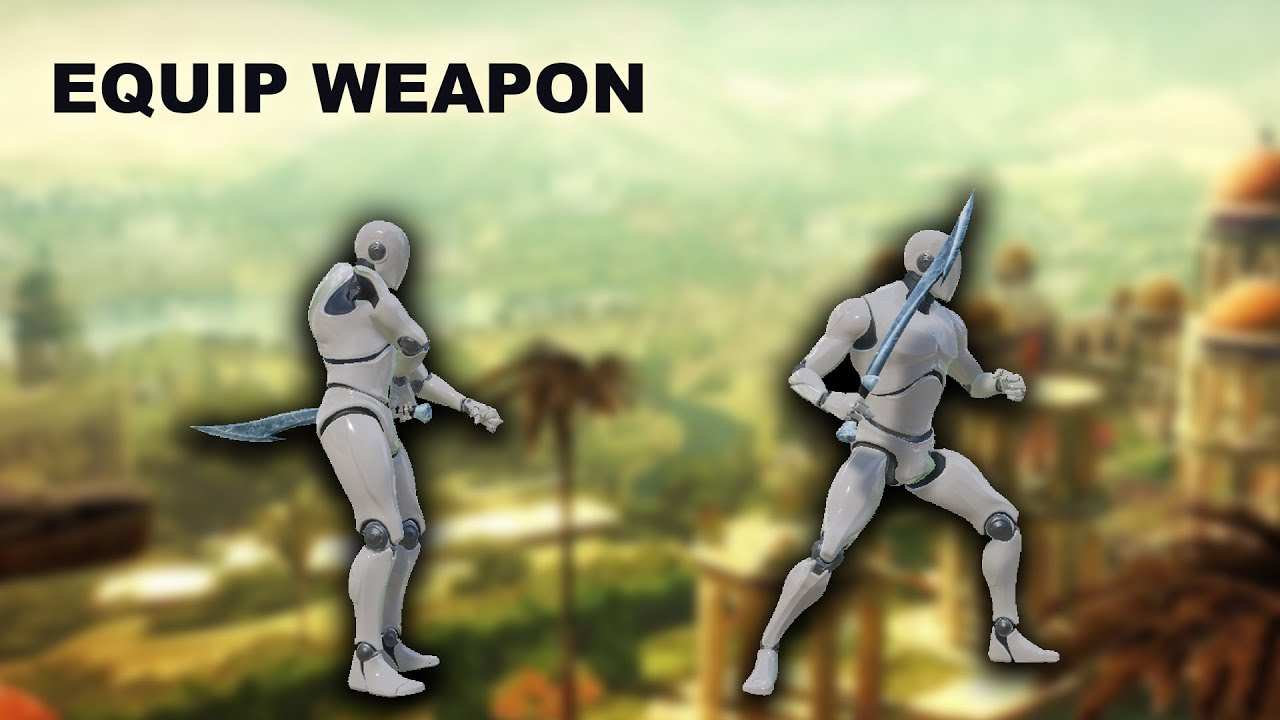
Project Files : https://www.patreon.com/posts/40526859
In this episode of the unreal engine side scroller project I am working on, I am going to add a melee weapon blueprint to the character, The character can equip the sword when I press the attack button if it is not already equipped. Initially, the weapon would be hanging by the hip of the ch...
Ah that's a good idea :) thanks
can anyone help me with this pls?
or some tutorial or demo project where simple basic IK for legs is done?
almost every control rig tutorial is too much zoomed out or irrelevant....
Advanced Locomotion in the marketplace - its free. It has a really nice foot IK system
@abstract wigeon is it done via control rig?
no
you just do some linetracing, do some math and then tell the ik bones where to go. Then you use the transform/IK nodes in the anim graph to tell your feet where to go in relation to the IK bones.
But you need to have the IK bones animated OR use copy bone nodes to have the IK bones follow the feel before the extra data is addd
Get the free project and trawll it
Youll see what im talking about
no, I did it via control rig, I did there line tracing in control rig and try set control transform (that is transform where some bone attached) on it, but for example on flat floor result hit is always on floor so my legs attached on floor constantly
i'm using lerp between old and new control positions
but old and new is laways on same place on falt floor so i think problem is in lerp
I've already doenloaded and look at Advanced Locomotion, there is IK without control rig'
Your IK needs to have copy bone nodes for the feet IK bones if the animations dont have IK bone animation, or the feet wont move and be stuck to the floor
I had the same trouble way back
Try it - or dont - up to you man. Im just here to see if anyone can answer my question about getting wheel data exposed to BP
But the server seems to be full of noobs still asking basic ass questions you could google
hello, when i play from code a death montage, the animation looks wrong, checked that the character has the right skeleton, checked the animation, both look fine, why can this be happening? Thanks guys
is it an animation or montage? - if its a montage, make sure the slot is corret
it is an animation sequence converted to montage
if its playing all wonky, maybe the animation didnt line up with skeleton on import
thus translating that to the motage
Retargeting can also be a problem
but when i doble click in pie the montage it plays fine
Check to see if any other animation is playing alongside it
im using a paragon character with his animations, i didnt retarget
Idk man, its hard to tell - you just have to do a process of elimination
ok
otherwise you could be here all day sending screenshots and code etc
ok
good luck
thx
as i've already said, I' googled it and almost every control rig tutorial is too much zoomed out or irrelevant. yes i'm noob and also I'm here to find answers, and by the way helps other users to find some their answers. but in any case tnx on your answers.
Forget control rig for the IK if all you want is for feet
Adding extra stuff you dont understand will just make it harder
ofc is not all what i want from control rig feet IK, should do and some aiming and other things, control rig is relatively new and still is BETA. my meshes and skeletons is pretty complicated and control rig will help me to reduce number animatins in future...so i need control rig, also is not my decission to use it
Look, foot ik is simple. You ju just need the IK bones animated, or use copy bone nodes for your feet beffore you add the transform data. Youve obviously got the math done, its just about adding that transform data and having the node settings correct. Also a virtual bone on each leg will give you a target the knee can aim for so the legs dont go spastic when drastically bent or extended
The control rig is irrelevant

Thats all it takes
i know is simple but i'm currently stuck, and have already done IK as on your sc

and as i say is not my decission to use it
The copy bone nodes should unstick the feet from the ground
Past that, idk how i can give you any more info unless your linetrace data is wrong or not setting
hello, i have a problem with a animation, in blender everything looks good but in ue4 the animation is flickering, why ?
@abstract wigeon ok thanks man
No worries
Not too sure about that animation Gamer - it could be an import problem to do withe skeleton you assign the animation - or could be a wonky export. Hard to pin point either way
You will have to double check it all and maybe import it as its own skeleton to see if that helps
Apart from that - im not too sure what else to suggest
you mean to import the mesh with his own skeleton ?
just if someone has similar problems with control rig, there is Windwalker Echo project on marketplace, and there is IK and many other useful things done via control rig...so go ahed and download it (1.5GB)
yep
well, i imported the mesh with the skeleton at the same time
from what i see this thing is happening only with the arms 😦
Idk then man
Make another animation and see how that one imports
If the arms go wonky again then and nothing else then you know where to start doing some process of elimination work
ok im out for now - good luck guys
i got it working by recreating the bones
sorry for the slow response! not entirely sure, they all use the same behaviour tree, and they each have their own animBP except we copied and pasted them to each variation of zombie, so that may be where the issue lies, however I wouldn't know what i'd have to change on each of them
By default they should all be separate instances, as in they shouldn't be sharing anything that could cause them to end up in sync. If one starts walking 1 second after the other, it will be 1 second out of sync. So I am honestly quite unsure what could be the cause.
it's strange isn't, I was just unsure if i'd missed something obvious. Off the top of your head, do you have any ideas where I could start looking for the bug?
Well since your AI seems to have some randomization in it already. Check the animation blueprints and make sure they are indeed separate. Print some data that the animbp uses while running (such as states or whatever) and make sure that an AI that is walking is not outputting identical data to one that is doing something else. Beyond that I can't say without having access to the project.
I could send you a dm with the drive link to the project file if you'd be willing to take a look?
I'm afraid I don't have the time to help out in such a capacity. But you can give it a try and debug the animations and make sure they aren't all accessing the same instance etc. (not even sure how that would happen by accident though).
Try that and see how it goes and ask here again and people will do their best to help once you have narrowed down the issue.
no worries, i understand! thank you for all your help though!
Could I just ask what exactly you mean by the 'same instance'? just in case it's not what im thinking 😂
most objects you place (blueprints, actors, you name it) are an instance. So your zombies are instances of your zombie blueprint (or cpp) class. They are identical but operate independently. If one zombie takes damage, all zombies are not affected. Because they are separate. But in your case it seems like the mesh that the zombies use, somehow all access the same animation blueprint instance and thus end up syncing up. But I am honestly just speculating since I have never had this issue myself. So it could be something else entirely.
One simple way to check is to access the animation blueprint inside each zombie and print the name of the instance.
https://docs.unrealengine.com/4.26/en-US/BlueprintAPI/Components/SkeletalMesh/GetAnimInstance/ use that node inside your zombie bp and then print the name of the object it returns. If they are all identical then that is your problem.
Get Anim Instance
thank you
Hi Everyone, I rigged a simple asset in blender a few different ways but in control rig I am unable to move part of the asset other then the Root but in the skeleton menu I am able to move each piece fine... does anyone know what going wrong?
this is the skeleton menu

this is the root being moved in control rig

I cant move any other bone

This is what I am using to move the bones

Does anyone know if its possible to play an animation on a skeletal mesh but have it only modify a certain bone?
Yes, use animation slots.
do you mean like those in montages? if so im familiar with slots but how do you make it effect only a certain bone?
Can anyone help me how can i blend a firing animation with my walk animation
what's causing this problem?
Is alembic Geometry Cache worth it performance-wise for hanging cloth and waving flags, etc?
Performance wise, yes, but not flexible. It's good if your scene is not moving much, and has no interaction with it.
What do you mean not flexible? and what's a scene that's "not moving much"?
I guess it wasn't obvious enough, so put it this way:
The cloth can be a pre-simulated alembic anim. However, because it's not animated in real time, nothing in the game will be able to influence its movement, like winds or in game collision. This is fine if you don't have any sort of winds or any other real-time physics to influence it, or it's used for a fixed animation / scripted cutscene.
Hope that's clear enough.
That's clear enough, thanks !
Hi i hope i am writing to the right place. i wondering would it be possible to attach a static mesh to a skeletal mesh in two points, for example like my character holding a shotgun with both hands. I tried to look up in google, but surprisingly couldn't find any info about it. if i try to attach the static mesh in my blueprint using attach component to component the bp only doing the last node.
Hard to tell. Is the animation made for Manny or is it retargeted? Alternatively, if you animated it yourself, does it look fine in your DCC?
Attach your gun to the dominant hand and then make the other hand follow using IK. That way it will look like the character is holding the gun with both hands.
Also typically weapons are skeletal meshes on their own, allowing for using socket/bone as a location.
Thank You for all the replyes ... my problem with the hand ik is that i am using a daz character which has an extra bone in hes hands and leggs so two bone ik is not working for me and if i use ik chain i dont know how to block the extra bone rotation
So i tried to import an animation for my 3d model unto ue4. But for some reason when i see the icon . It does not show the picture of the animation.
The 3d model is down there.

I imported the animation with the model's skeleton. But nothing shows.

Then here is what the error says. Its the same rig tho.

I tried to delete the extra bones and add a simple leg ik to my model but as soon i connect the basic ik node to my character the whole leg is going spiral.. does anybody have any ide what could cause this??

Check the primary and secondary axes on the joints and make sure the parameters match on the Basic IK node
Thank You for your answer.. i have to admit i am quite new to control rig in UE i used to do it in maya.. could you please tell me how could i do that ??
On the Basic IK node, expand the Primary's Axis node, and adjust the values accordingly (could be either -1, 0, or 1)
Same goes with the secondary axis node.
Check which axis points in the direction of the bone when you follow the chain. That's your primary axis, the secondary one is one of the other two.
Hey Guys, im Importing an Rigged Pose in Unreal Engine, just 1 Frame as Pose,
this is the result -> https://puu.sh/IeOsY/7ceec1e9f8.png, but in C4D everything looking perfect, any ideas why this is? its just 1 Frame

Thank You it did fixed it.. now i only need to handle the one extra bones.. is there a way to block one bone rotation so two bone moves like it would be one.. if that makes a sense :))
You could make the extra bone follow the bone you consider primary perhaps. Not sure what your skeleton looks like.
I want to attach a gun using a bone in my rigged mesh. I'm using Blender to do the animations. When using a bone as a socket point in Unreal, does it (using blender terms here) use the head, tail or body of the bone as the position? I just want to have it setup identical in both environments.
how fix this ?
i made manual rotation Y and Z to 0, and visual its stay vertical, but after saving its doesn't fix

i need make it vertical.... but manual rotation doesn't work

You have to add keyframes in order to modify the animation permanently
Hello, its possible to migrate a animation from other bone to the unreal default mannequin bone on blender or other program?
I literally just saw you in voice chat, could nobody there help you retarget?
example: if a i have a conter strike source animation with a bone, and i want to ¨migrate¨ it to the mannequin bone
me?
my microphone its very broken now and I don't know if I can speak english fluently without typing
I can try, but typing is better for me
It's just the head.
I think the whole head/tail bone is original to Blender.
Thank you for that.
I believe you need to Key the change (this will create an additive animation track you should see in the timeline)

yes, its work !
additional question:
how trim an animation sequence duration?
i mean that my animation sequence has 1 second duration, as you see at the bottom
but how trim that duration to 50 ms, for example ?

?
change the animation setting from imported range, to specified range

have you explored the retargeting manager?
Is Blend In Time / Blend Out Time in actual seconds?
for montages
Example, 0.25 is the default. Is that a quarter of a second, or 25% of the montage length?
Kinda pulling my hair out over this one. Play Montage isn't playing my anim montage. Using default 3rd person template character, using the provided ThirdPerson_AnimBP, altered it to look like this:

The anim montage I'm trying to play has its slot set to fullbody. Will not play with that anim_bp applied to my character and I cannot figure out why 
I made an empty ABP with just this and it plays my anim montage normally. Just don't why the template one doesn't work

Apparently getting rid of the Layered Blend per bone node and just going directly from slot to output works (for now)
I don't even know what this is, when I saw it seemed more like adapting a model to the skeleton of the mannequin and not adapting the mannequin to the skeleton of the model if you know what I mean
but basically i have this animated skeleton of other game and i want to put this in the ¨mannequin default bone¨

I still don't know if this is possible...
someone?
there is a retarget manager tab in the skeleton asset. In that retarget manager section you can 'setup a rig' to map between skeletons that have different names. in there that will let you say This bone matches up to that bone. Step A would be defining this mapping. Step B would be right clicking on an animation and say retarget to another skeleton.

WOW this seems extremely practical
let me get this straight, do i change the bone name (custom) to the bone name of the unreal skeleton? example: valve_biped_pelvis (custom) to pelvis (unreal)
But then I would have to put both of them in T-pose to position correctly, right?
Btw, I'll try this method, if I succeed, I'll write here
Speaking of the retargeting manager...
I am trying to use it to retarget animations from T-pose UE4 mannequin to one using A-pose
the tutorials I've seen mention clicking on View Pose and then Modify Pose. When I click view/modify, the pose doesn't change like it does for other UE4 mannequins imported from other UE marketplace content
I don't know why
does that mean I am just screwed? I can't retarget the animations?
Meaning, it just stays in T-Pose and doesn't give me the option to change it to A-pose
it was because of quaternions. warping from -1 to 1. wuah.
Hey guys, anyone Know how to have 1 Skeleton with different Meshes, and using for each Mesh an Morph Target?
Nvm reimport helped
I really want to do this in a way that doesn't break any discord rules.

Blender Community
The bone rolls or orientation of Blender armatures are very different to skelet…
Any UE4 blender users can you please upvote this request for UE4 default skeletal support in blender.
Moderators can you please not ding me as this is and has been an issue for a while and will drastically improve QOL for UE4 Blender community members
Hi everybody... just a quick question about control rig. i have a control rig asset for my character.. and i am wondering is it possible to put it in a blueprint ?i tried to google it but couldn't find any info about it .. in a blueprint there's such component called control rig but if i add that with the control rig class selected it doesn't show in the scene not even in the blueprint preview
How can I create a new input/variable for control rig? Couldn't find the menu
Found it, I had to open My Blueprint window, which is not enabled by default
Why is it not possible to make keyframes on sockets ?
Hello! I'm not sure if this goes here (I read the rules and all, but still not sure) but I'm toying with the Control Rig plugin and I was wondering if any of you know how to do a rotation constraint... for context, I'm trying to limit the hands rotation, I'm using VR and the hands follow the controllers, but if the player drops the controller or just rotates it in "impossible" angles, for a human, it looks awful... thanks!
Sockets arent real joints, they are just a point in the space of the joint they are attached to. I'm sure they could add support for it but I dont think it is a thing right now at least. Maybe Im wrong.
Yeah, you probably wouldn't want sockets to be able to have keys. You want keys on a thing, make it a bone.
You'd be blurring the properties of things that are different for a reason.
Not sure how to solve it (not very familiar with CR) but if the hands only break when you drop the controllers etc, is it really a problem that needs solving? As long as it looks good while holding the controllers properly it should be fine. I've seen lots of VR games that don't bother with fixing it.
I guess the reason why i want it is cuz i'm doing it totally wrong xD
Like i'm having several sword attacking animations where the default socket alone doesn't seem to work great in every animation.
So i thought it would be cool to modify the sockets transform in some animations so that it does look good rather than weird as in how the player holds the sword in the animation
Your best bet is weapon bones that are a part of the character. That way you can animate the weapons in the hands properly.
Can you show us screenshots where it fucks up?
Because there might be a cheap solution for this.
Sure, this here is the socket with a preview mesh on it.
Here it does look okayish enough, but once it would be used on this animation here it's just a yikes xD


I agree with you, but it is more of a requirement than for fun 😅 something that I was thinking is to use a physics asset for that, but I don't know it will collide with the CR
Ah, so yeah, Brown Sugar is right, you're gonna need an animated weapon bone or it's not gonna work.
Position the socket while previewing the animation you need it for, for starters I guess. And the other hand will probably need IK to stay in place depending on whether you have additive stuff.
but yeah, long term solution is weapon bones
Ah well in that case I guess you can't just leave it. 😬 But yeah control rig questions end up here too so you're in the right place at least.
So i really have to export my current skeletal mesh into e.g. Blender where i add this new bone and then import it back ? 😅
Well it looks like you are using manny (at the moment at least), he already has weapon bones under his hands doesn't he? I don't quite remember.
Yeah, he usually does.
This ones ?

Should be next to the fingers in the hierarchy.
Can't seem to see it here 😅

Huh
oh right he doesnt, I just usually add them myself
bit annoying but it is easy to do provided you are familiar with rigging
(bit of an ask there : ) )
slap them on there and make sure they are influencing the mesh (but with 0 in weights so they dont actually pull any verts) and badabing
😶
Any chance that one of you has a tutorial i could follow ? 😅
Not off the top of my head sadly. I use Maya though. You mentioned blender I think?
Yeah, i'm only somewhat familiar with blender
Well, unfortunately it's not trivial. It's not simply a matter of adding a bone and exporting a mesh.
You have to do that, then, in every animation, you have to animate the weapon to make sure it's properly in the characters hand.
Now, the weapon will, mostly, follow the hand bone, but it will need to be placed properly in the hand and grip.
That does actually sound trivial to me 😄
But i guess the chance is high that i'm gonna regret this words from above 😹
Depends on how many animations you have.
The problem is that it already works well. Even with Control Rig.
Surely a few, guess the bigger problem will be that i'm going to have many different states.
As in the player is able to wear a sword in the left hand and a spell in the right hand. Either could be also a shield, or it could be a two handed weapon, a bow, a throw weapon... 😅
Good luck.
Likely gonna need it :blobsweat:
Thanks
👍
yeah best to get weapon bones in as early as possible
Already looking into those 👍
well, thanks anyway 🙂 I guess I'll have to keep looking or testing stuff hehe if anyone else knows a little more about constraints with Control Rig, I will appreciate the help and information
how do i change the lip bones of a character to move?
*as in like speaking. say i play an audio file and i want the mouth to open. (not necessarily lip sync.)
Guys on ALS v4 how I get the floating Direction?

There's a few ways.
-
Use a procedural facial animation generator like FaceFX that takes audio files and creates reasonably good facial animation.
-
Build your own procedural facial animation system, possibly being extremely simple and just built on, say, the volume of voice sound. (I've seen people use this on puppet-like characters, and it works pretty well).
-
Mocap your facial animations, such as by using an Iphone and an ARKit recorder like FaceRig.
-
Just animate it. In an animation package. Like blender.
Yeah, I've already done number 4 and animated it in blender, I just don't know how to implement it along on top of, like, a walking animation. XD like it is a layering thing or something?
Depends on how you've structured your character. If your head and body are the same mesh, you can use a LayeredBlendPerBone node in the animation blueprint to blend in the facial animation bones over the body.
Ah, that sounds like the thing I'm looking for! Thank you, I'll try it out! :) (Apologies for the stupid questions, I'm very new to UE4 and just need to know the direction to look sometimes. XD) Thanks! :)
👍
Good luck!
When I socketed a mesh I could move it around before an it would move in the main view port
but now its not
do I need to enable osmething?
Is there a way to easily double the speed an animation plays at?
Thank you! :)
Could be three things.
- the socket might not be child of the hand or the weapon bone
- if the weapon is following the weapon bone, the animation might have the weapon bone stay stationary for some reason (check the animation to make sure it's moving)
- if both of the previous are true, the inventory code that is swapping the weapons may be triggering a 'detach from component' or similar when the animation starts and not at the right time
Then it's probably the inventory system.
So does your character have all their items attached to their character all the time?
It looks like you're just hiding and showing stuff.
Hmm
OK, so here's a test to run, try plugging the upperbody slot into the output graph directly. This is going to break the 'walking while swapping weapons' feature, but it will let you see what the animation looks like running without any blends.
If this works - then you know the problem is the blends.
Because based on that structure, it kinda can't be the inventory.
And if the animation itself looks fine.
The problem is probably the blends.
Hmm
It seems weird that the Layered Blend would be causing a problem.
Maybe try reducing the 'BlendDepth' option to zero?
Hmm
Well, if it plays properly without the blend, and hovers in space with the blend, then the problem is the blend.
The only thing I can think of is that the hand bone isn't the derivative child of the spine_01 bone?
That it's somehow not included in that blend.
Yes, though you have to click on the blendspace node in the animgraph, and expose the playrate - I think.
Not exposed by default.
Ah, I see, thank you I'll check it out. :)
Wait I'm sorry how do I expose this? XD I've been clicking it and looked it up but I'm not sure.
When you click on a blendspace node, in the details there will be a list of properties. Play Rate should be there. If you click on the drop down box beside it, you should be able to either choose to bind it to a variable or "Expose As Pin" which will make it show up in the graph.
Ah ha, got it! Thank you! :)
👍
Any fans of control rig here? Im passing a simple world position to the control rig (imagine a handle position or something in my case) and im using fullbody IK to drive the hand to that position. When I use From World to get the rig space from world space it jitters all around the target. Anyone experienced with control rig that can offer some insight?
Control Rig, yes, but not yet touching Full Body IK.
Aw, it's been super fun but its like yet another game inside the game of Unreal that I need to learn 😄
If it's jittering and stuttering, you're probably dealing with some kind of feedback loop.
Make sure you're not reading something that you're then changing based on the previous frame's data. That seldom works well.
Yup that was my first thought. It seems it wasn't control rigs fault but it was because i had attached the actor to my pawn, go figure
thanks everyone :))
Hi all, i have an animation retargeting issue.
Here's what I need to do.
I have a skeleton (Let's call it A) that has a bunch of animations (2000+) that I want to retarget to multiple separate skeletons (eg. B, C, D).
A (Source animation skeleton) has the bare minimum of bones that are animated. (eg. Root->Hip->Feet)
The target skeletons (B, C, D) also share the same bone structure as the source skeleton but the difference is that they (The Targets) have some extra bones for decoration.
If I were to retarget every animation with "Duplicate and retarget" I would have thousands of animations and it would take too long.
So, is there a way to do this easily?
Thanks.
You could soft retarget them with Control Rig, but the catch is that the skeleton names had to be different (and kind of hacky)
If your characters are designed to be modular, you have the advantage of not bothering with retargets.
I'm making a jumping animation in blender to import into unreal. Do I need to have the model actually move upwards in blender? or can I handle all that height/jump stuff in unreal.
hello
I was wondering if someone can help me with importing an asset from mixamo to unreal
I keep getting an error when I import the fbx


these are the options I had when downloaded the fbx from mixamo
for those who dont know mixamo is where you can download animations with skeletons and stuff
its completely free
Can handle in unreal

when I import an animation it doesnt show the skeletal mesh option
like this

sorry its blurry
Idk Mike when I import from Mixamo I always include the skin so not sure if that has anything to do with it
Of course not. When importing animation only, you only have to choose which skeleton you want the animation to be assigned on.
so ill download one with skin and one without?
Up to you. If you already have the skelmesh, then just import the additional animation. Otherwise, bring in the skelmesh as well.
whats up fellas. i have a question which may be obvious, but i'm unsure.
i've downloaded some assets from the marketplace which all use different rigs but are all, for the most part, easily retargeted to the ue4 mannequin rig. the problem is that some of these rigs have weapon bones and some of them don't.
i guess my question is, how do i make all of these rigs work together? like, one of the rigs is meant for swords (and the sword has bones), but then another rig is for bows (and the bow has bones). is it possible to use the same skeleton with different rigs or something? or am i SOL and i have to just use one rig?
Should be easy with some IK algos for the hand alignment, though it's better if you're able to make them more consistent.
so i make them consistent with one rig? (it's the way i'm doing it now)
Is changing animation blueprints at runtime a common thing, or is there a better way to give a character a different set of animations at runtime?
ALS V4 does this by layering poses.
https://youtu.be/ru1--3wP-F8
Layering is still available in vanilla animBP, so you could make one yourself if you found ALS daunting.
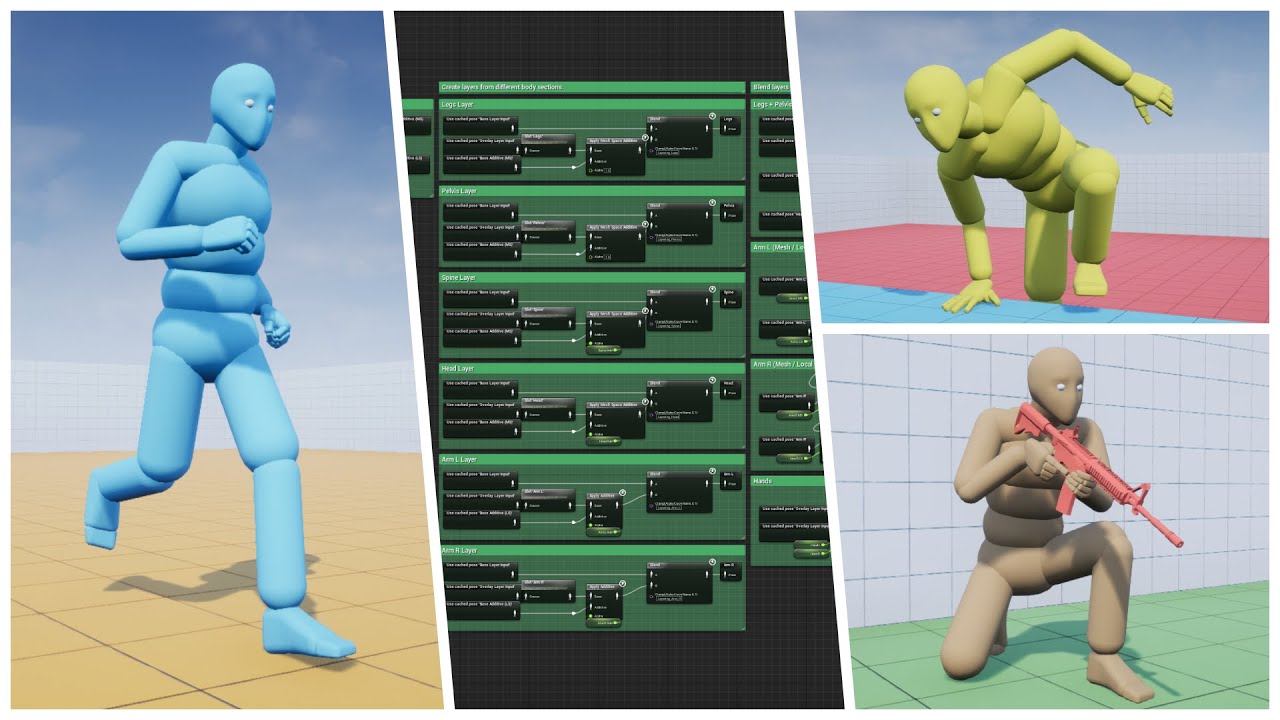
Well, as the saying goes, "If you love something, set it free"...So I did. Please enjoy the biggest update yet :)
Store Page - https://www.unrealengine.com/marketplace/advanced-locomotion-system-v1
Discord - https://discord.gg/wYYMHFu

@ashen junco Thank you. I thought it would be cleaner to setup an animbp for each weapon, but it isn't. I DO find ALS daunting, but I have started doing something similar with more basic blending.
What's the problem? That's a simple == operator checking for foot location.
Seem to be messing even this up. I'm watching the enum value change to Mage Weapon, but the animation graph never moves from Unarmed.

By "watching the enum value change" I mean I'm printing it to screen and seeing the value change in-game.

Got it 🙂
how would you guys approach doing an aim down sights for an fps game?
?? both the values are 0 and it's saying the == operator is false?
I can't trust this tool to do simple debug things
and don't even get me started on this mess

Hi. any pros and cons of using one over the other: animation based ADS/aiming vs procedural ADS/aiming (using a socket) thank you
The former allows you to have ADS that are specific to certain weapon, but largely inefficient.
The latter is more efficient and can be generalised to all weapons, but the technical tweaks it needs to get right might scare you away (or makes you want to hire a technical animator)
Anyone a mocap suit user? Was looking to get a used Hello Rokoko and was wondering what would be the best quick and dirty way to check it's usability

Thank you
What is the standard way to handle an animation that causes a weapon to clip through the model? I'm thinking of using a curve and changing the bone transform, but curious if there is a better way.
This is a quick fix. My max speed when sprinting is 800, so I cranked the scale up to 2400 so that I blend toward it, but never play the problematic animation at full scale. It works, but I would prefer to adjust the hand and use the full scale animation.

Ignore all that. DOH! I didn't know that you could actually adjust an animation directly. UE is so nice.
I'm not seeing any additional steps needed after setting the key frames and saving the animation. Even if I close the animation and re-open it the changes are saved, but if I apply it to my character it doesn't seem to use the modifications.

Can someone please provide pointers or just help me generally on how to achieve smooth transitions from normal animations to a played montage?
Currently, when I play a montage it is abrupt and really janky, is there a way to blend the transition smoothly?
how do I have one a couple of bones specifically move in a skeletal mesh?
what is a good fps speed for animations in Unreal, 24 fps, 30fps, 60 fps etc?
Hi all, my rigger just created a sweet control rig in Maya. Is there any way to do some kind of auto-generation within UE4 from the maya control rig, such as a UE control rig?

I have very, very little knowledge in the rig/animation domain. I am mostly a coding guy
and am trying to offload as much work from the rigger onto myself to put less on his plate
as you can see there are controls, IK, pole vectors, etc. in the maya rig that I am wondering if it can be cleanly exported into UE4
@sharp gyro Hopefully someone more knowledgeable can help you, but just from my experience a montage will generally blend pretty well. If you have jerky starts or finishes it may be more how your state machines or other parts of your animation process are working. Also worth checking if it's being interrupted. Again, I'm pretty new myself, so hopefully someone better can help.
I'm not reading anywhere that I need to do anything special after adding keyframes and saving the animation, but I obviously do. It looks perfect in the animation editor and it's just playing the unedited animation in game.
Does anyone know about a similar tool being developed for Unreal? https://www.youtube.com/watch?v=7c6oQP1u2eQ would be a major game changer.
Animating characters is a difficult task when it comes to interacting with objects and the environment. What if we used computer brains instead? In this research, we present the Neural State Machine, a data-driven deep learning framework that can handle such animations. The system is able to learn character-scene interactions from motion capture...
Thanks for the reply. I'll check the state machines
You'll have to make a separate control rig inside of unreal if you want similar functionality. The controls in maya are only for use outside of the engine. (And I doubt they can even be ported between different modeling tools but dont quote me on that) The maya rig will be good for animating inside of maya, and a hypothetical control rig for in engine use could be used for runtime procedural stuff. But ultimately they are separate and the only thing they share is the mesh and skeleton.
Thank you so much! I had no idea.
A big unknown right now is how much of the mech's movement will be baked animation or how much will be procedural. As such, I am still figuring out how much to invest (time & money) in building things outside-of-engine (such as Maya) or within engine.
Is my assumption correct that for a forward-walk animation cycle with feet that adjust to uneven terrain, it would require the rigging process to be done outside-of-engine (for the animation), and then repeated again in engine (for the dynamic placement in response to the terrain)?
Since you have a proper rig in Maya you don't need control rig as much. The animation graph can do stuff like feet alignment just as well.
Control rig can be used in lieu of Maya but I personally don't like it for that. But it can be used for procedural stuff that you can layer on top. But like I mentioned, a lot of stuff can be achieved with the animation graph too.
Ultimately there are lots of ways to do these things. Up to you which approach you prefer.
Thanks a ton
Apologies if this is the wrong category but been having trouble finding the required settings to get fbx exports from unreal to match in blender? Any advice appreciated!

Any particular issue with it? I don't see one.
the bone positions seem different / unconnected?
This thing is driving me crazy. Is there a name for editing animations using keyframes in the UE4 animation editor? May help me search.
Is it matter? Bone tails are Blender's thing, and I think it's alien elsewhere.
The thing that matters are the bone heads.
idk if its possible but is there like a way to add an event (like a firing event from a ctrl rigged gun) in control rig?
im just asking so that i dont have to use 2 seperate things
No - that's more of animBP's job.
i see
Consider that Forward Solve runs in order, every frame.
No. Simply put, in runtime, Control Rig complements AnimBP, not a standalone system.
Can someone please tell me what exactly this node does in Anim Bp

It applies custom logic to your animation curve and modify its value during runtime.
Important part is that u need to add curve pin, otherwise it does nothing.
Ah.. I see. It overrides the curve value with whatever you set for that pose. Then if you use that curve at that that instance, it returns the override value
Describes the Modify Curve node which can be used to modify animation curves with arbitrary logic inside Animation Graphs.
thanks
hey does anybody know a way to approach a aim down sights transition currently im using blend poses by bool but i want to have a transition between the idle pose and ads pose and transition from the ads pose to the idle pose, how can i achieve this?
Hello !
I have a character asset from the marketplace that I added to my project, but I wanted to create some more animations with Mixamo.
I ended up exporting from .uasset to .fbx the mesh with the UE, but when downloading my animation from mixamo and importing it in the project (with the parameters bellow), I get the following error.
Any clues about that ? I have no idea from where it'd come :/


Hey lovely slackers. Does someone knows about animation in the sequencer. My animation (location) is always reset when I press the play or render button. The Animation and position is correct in the normal real time viewport..
hi! is there some free DS like 'rolling' animation for ue4?
Probably not.
@charred iron Free animations outside of Mixamo aren't common.
Is it possible to edit retargeted animations by adding keyframes/curves like this? It definitely seems to be working in the editor.
This is the first time I've run in to something like this in UE. Feels like I'm in Unity again, working around engine bugs.
Error: lacking sufficient context.
Sorry. Still trying to figure out why I edit this animation but the character animation is unaffected.
Animation sequence has been saved, and I've even restarted UE4 and the changes are persistent, but the character seems to be using the original animation without the edits.

Everything I read, and every tutorial I find is just 1. edit transforms 2. add keyframes 3. save
Is this a non-standard thing? Should I just add a curve to the animation and adjust the transforms in bp with that curve?
New angle. Maybe what I'm trying to do is just stupid. If you guys have an animation like this, where the weapons are clipping through the character, how would you adjust it without exporting it to something like Blender?
The way you describe, you seem to have the process wrong somehow. 1 picture of a curve value is not enough context.
Basically, all I'm doing is opening an Animation Sequence, moving to a frame I want to edit, modifying the transforms, adding a keyframe, and then saving the animation.
yes, hand r rotation, thats should be about it, the key should now be on an additive track, right?

and it doesn't work in game, but the anim is corrected when played in anim browser?
correct
have you tried applying the anim directly to the mesh?
In game or if I apply the animation asset directly to the character it doesn't work
🙂 ^
in a test level
Not in a level. I've applied it to the mesh directly on the character.
well, I would suggest IK problem or something with animBP, but if it doesn't work directly I'd say that sounds odd to me
Thank you! It's good to at least know it SHOULD work that way. I'm not just a dumb*ss at least.
yes, maybe someone else can confirm, but that's how I remember it working for me last I used it
thank you
np
I've bumped in to a couple of things with the Synty assets, so it's possible some setting is non-default
at this point I would suggest just doing in Blender tbh
I need to just learn how to do things in Blender
you could also try making a control rig that supports backward solving
by copying metahumans
lol. already don't even know what backward solving is
that will allow you to animate in the editor with controlrig
which is how I do everthing these days
it's probably a better investment of your time
thanks
ohhhhh. Control Rig. I've looked at this. I'll check it out
I thought you just meant some kind of rig
if your lucky maybe someone's already sharing something for synty stuff, considering how much it's used
Hey folks, I'm a big dummy. What is the simplest way to map mocap data from a kinect onto a rig in maya?
I just need to map the kinect's hip bone, hands, and feet. Everything else is taken care of with IK
Hey guys, does anyone knows how to replicate the child of constraint from blender to unreal too? I want to parent my left hand to the right hand and move the right hand and the left hand will follow. Thank you!
You have to set up constraints in engine for that. Only the mesh and skeleton make it into the game engine when you import a skeletal mesh. Anything beyond that you have to replicate inside Unreal. You can set up a simple two bone IK in the anim graph that makes the left hand follow the right hand.
@regal orchid Yes i wanted to know how to replicate that inside unreal. Thank you for the response first of all, i just wanted to know if you can elaborate more with that IK solution, if you have the time. I have already used the FABRIK node inside unreal to control the right hand but i want the left arm to follow the right arm too now :D. I will give it a try but if you have a more specific approach i would love to hear. Thank you again!
i got this problem and animation is not working well for me when i import cc3 model with unreal rigging export settings

Imported back after exporting from unreal to blender to make some materials. Now have name of a file as a bone or smth? Or is this new Mixamo sceleton

Unless you really need it I would suggest not using FABRIK. Unless Im mistaken it is much more expensive. I would suggest using this instead:
https://docs.unrealengine.com/4.27/en-US/AnimatingObjects/SkeletalMeshAnimation/NodeReference/SkeletalControls/TwoBoneIK/ You can have one on the right hand if you need it and then you can just put down a second one after and have it follow the right hand. It is quite straight forward.
Describes how the Two Bone IK control can be used to apply IK to a 3-joint chain.
Joost — Today at 08:28
When I've loaded an FBX skeleton including animations, and then add a new animation to the FBX, how can I reimport in Unreal in such a way that the newly added animation also appears in Unreal?
Humunlucus -- I am interested in this one too, as my workaround for this was re-importing my FBX with a new name and then renaming the new animations to my main model...
if i want to use just to lower body for an animation would enter -1 for the blend depth on the layered blend per bone?
would i*
Hello


I was told I could find help here possible
I have been trying to make a character creation system
*possibly
For a while now I have been trying to get VROID characters working as modular parts
Separating the meshes in Blender was easy enough and exporting that to FBX for Unreal
I hope this is the right section to ask in
When I move a bone the body deforms fine this is progress aslong as bones are there. Can this be fixed in UE4 per retargting? Or do I still need to do some work in Blender? Cuz I am now aware my previous bone issue was an exporting issue. Even though I did export as .fbx to UE4. Is it because I did not move the VROID model to the APOSE of the Unreal Skeleton
My previous Issue I was able to solve

Using the MR.MANNEQUIN BLENDER PLUGIN
@regal orchid Nice, ok i will give it a try, thank you.
@regal orchid Thanks for the suggestion
does anyone here know how to do a lower body only animation
See on blending layers and using slots for montages
i did it for the upper body but lower body wont work..do i set the blend depth to -1? on the spine
Is it possible to import animated points from an alembic, fbx or csv, to use in niagara? (UE5)
how can i swap the first half and second half of an animation?
AM I ok deleting these bones from Mixamo rig?

Not selected but the ones that look weird on a screencap


Is Montage Pause ok to use? Like does it have any gotchas?
why is my animation scales 100 times when i import my animation?

I bet you're using Blender.
General rule of thumb with Blender to UE:
Set the unit scale to 0.01
i did
i legit did that

when i export the animation i export only the armature not the mesh
so i use selected objects
the original mesh looks fine
but the animation looks scaled up
Hi I hope I am writing to the right place, since my problem is kind a physics related. So I have a skeletal mesh with a custom physics asset, I use physical animation and a rig to move my character in game. everything collides perfectly with my skeletal mesh.. but it just wont collide with it self ... I tried to look up for such settings as self collide but couldn't find any info about it. I wonder if anybody had the same issue or know any solution for it.
You'll have to set that up in the physics asset. You can define which physics bodies collide with which.
How do I 'save the skeleton'?
Everytime I open up my project now I get a message saying 'The Skeleton [Skeleton_Name], is missing bones that [Skeletal_Mesh_Name] needs! They will be added now. Please save the Skeleton!'
So then I regenerate the bones, save the skeleton, reset all my animations on my BPs, etc, save it all, etc, then when I open the project later on it says that message again and I have to do it all again.
So, I assume I'm not saving the skeleton properly?
Wait nevermind I figured it out. I think it was because I had two different skeletal meshes referencing the same skeleton, so each time I'd make changes and opened it up again it'd say the other one was now missing the bones.
Curious I often got the same message and wonder if that is why
Because i have multiple skeletal meshes referencing the same skeleton
The bone hierarchy can be added new bones, but the bone names can't be moved around the hierarchy
Yeah it could be that. I'd recommend checking the error message though and seeing if the skeleton/skeletal mesh it refers to changes each time you get the message. I assume it did with mine and I simply wasn't paying attention and thought it was saying the same one each time.
Look up something called "Mr. Mannequins Tools" by Jim Kroovy. It's a free addon for Blender that adds the UE mannequins and arms at correct scale to Blender, completely rigged up for easy animation that also works well as an exporter if you're having trouble. Highly recommend it.
https://www.youtube.com/watch?v=k1xvBivIRsk&ab_channel=PrismaticaDev
Mr Mannequin is a Blender add-on that makes Rigging, Animating and Exporting for UE4 an absolute BREEZE! It released last night and I just HAD to tell you all about it. I've been using Mr Mannequin 1.3 for Blender since I started doing animation - it's saved me so much time and helped me achieve great results!
The new version 1.4 is available f...
nvm my import options in ue4 were wrong, i had my import uniform scale set to 100 for some reason
n i c e
by the way i don't suggest recommending that to anybody the plugin only works for the ue4 mannequin and you can't use your own models
Wrong.
It'll work fine as long as your model armature adheres to Manny skeleton standard.
what's manny?
Well, don't tell that to whatever version I have installed then. I've had great success exporting weapon and drone meshes and skeletons without much of a hiccup.
The UE Mannequin.
never saw an option to import your own mesh
If your own armature adheres to Manny's bone hierarchy, it'll work once you retarget them in UE4.
No i mean in blender never saw an option
to import your own mesh
if there is, i would def use that option tho
I use it as an exporter, so I'll model and rig something up in Blender, if it's a weapon I'll pop a mannequin in so I can animate them together, and then select everything I want exported, and bam. No fuss exporting to UE4.
That's the thing - animate with Manny's rig, and expect it to work across meshes that uses game engine standard skeleton.
yeah that's the thing you need it to adhere and work with the ue4 mannequin skeleton, that is a limitation of the plugin i said that
Hope that's clear enough - I can rephrase it again if you still have no picture of the workflow.
Making Manny animation in Blender
⬇️
Retarget animation to custom model in UE4
Is that clear?
YES, but to retarget the bones and stuff should match properly if you don't have a "upperarm" for example then it won't work
You should have a visual representation of your own model when animating
The only exception for that case with humanoid model is that you're using MMD models.
Also, hard retargeting the bones don't have to be exactly the same.
🤔 📤
Hate to say it, but if your meshes aren't using mannequin skeletons (or the mannequin arm skeleton) in UE you're shooting yourself in the foot, especially if you're trying to do it solo, as that means you can't as easily use marketplace animation assets or community made assets. Also you can directly set which bones are correlated to what in retargeting, it's just a bit tedious.
for example you are making a alien rig, it has no upper arm just lower arm, how do you expect to animate it without know how it looks in blender? you would have to picture how it would look with the ue4 mannequin mesh in blender that would be difficult
if you are making your own rigs you have no need to retarget them, and you do not need marketplace assets for animation, you can make that yourself too
If your alien rig is nowhere close to humanoid model, then might as well setup your own rig.
Manny is Humanoid.
plus marketplace asset animations have been so widely used that it's kind of dumb to start using them they feel overrated now
Same thing with applying cat animations to a human characters.
yeah i mean it in that scenario
And most of the cases it's used to animate humanoid models.
Case closed.
im just stating the limitation of the plugin that's it
by the way we are just having a normal conversation what's the need of arguing?
uuuh, that's called importing just the skeleton of the UE Manny, and rigging your custom model with it in Blender. Also, as a developer who is working solo, the goal is to save yourself as much time as possible, because it's just you. I still make custom upper body animations for my custom guns, but I don't feel the need to create custom walk cycles or other stuff.
It's not my problem if someone missed over the head that Manny is obviously a humanoid, and implied that they intent to use it to make cat animations.
what if you are commissioning somebody to animate for you? then you can sit back and relax and not worry too much about something like that
okay wait what? i never implied that, stop assuming im impling that from the begin you can clearly see the animation i made was for fps arms
I call this conversation closed. No further replies about this shall be posted.
Any argument can be continued over on private message.
🛑
well my message was before yours so
The argument kinda kicked off when you said by the way i don't suggest recommending that to anybody the plugin only works for the ue4 mannequin and you can't use your own models.
You misunderstood the usefulness I was trying to explain in the fact that mr. mannequin is great for exporting to UE4. The statement you made was inflammatory in nature.
It was my mistake for not realizing that you can retarget the animation to a model that works with the ue4 skeleton, it was my mistake i apologize, it was a misunderstanding alright. you guys didn't have to kill me over it, it is just game development calm the hell down
I am calm, just wanted to point that out and potentially offer a tool to help anyone who may have had similar issues. Emotion does not convey well over text.
in my scenario, i was using makehuman and it kind of made me feel off that i had to use that plugin for a rig that isn't actually compatible with ue4 skeleton, that's why i said that for people who are using rigs that aren't retargeted or aren't compatible.
How can I export one action (animation) at a time from Blender to UE4?
I can't export FBX with all anims at once anymore because the animations have varying length but Blender exports all animations based on the length set in the timeline.
I thought Blender exports all animations by the last keyframe, by default 🤔
I have a skeletal mesh component where I cant seem to cast to its animation blueprint? Any ideas what might be wrong?