
#animation
1 messages · Page 163 of 1
@static falcon I use that node, often with an interface
I tried to create a new animation blueprint to try some new options and all the references are now no good
How should i fix this warning

I feel like what I am trying to do is a probably a pretty common thing, and I am just asking about it the wrong way.
I am trying to take my character (rigged to humanoid, and modular) and a weapon (with a skeletal mesh with only 4 bones) and combine them using a Master Pose Component.
This is mainly so that I can use the RigidBody node in the AnimBP to drive the constraints that exist on the weapon.
If I go about this the much simpler way of just attaching the weapon to a socket, I lose all ability to affect the skeleton of that object.
I am happy to export to blender, make changes there, and reimport, but haven't got much traction on figuring out how to merge the two armatures and make the seperated mesh skinned to the combined skeleton.
Is there an easier way? could I use Virtual Bones to do this? Do both skeletons need virtual bones? or just one? If just one, should I add VBs to the characte mesh for the bone skeleton, or the bone heirarchy from the main skeleton to the sword one?
AHHH HELP! If there is any literature I should read or tutorials out there or even online courses to take for this sort of stuff
@upbeat topaz are they the "Leaf Bones" which blender adds when exporting the fbx unless you uncheck?
Should i uncheck the leaf bone in blender
yeah, I've no idea what they're for or why it's on by default but defo turn it off!
Thanks for the help Gabe
I'm getting crashes importing FBX into UE, animations are pretty dense, lots of bones, I'm experiemnting with Custom Sample Rate as per a video I found. does anyone know how the Custom Sample Rate affects the anim? Should higher values be faster? or slower?!
You don't need to turn them off... Be aware of the difference between errors and warnings
Some warnings are just notifications more or less
Leaf bones will cause some troubles in UE, especially with IKs.
By any chance, anyone know how to get the normalized time of an animation beeing played within a blend space of an AnimInstance (in C++)?
Probably not directly from the actor class, but you could pass through values from anim BP to the actor class.
(Also, if you're looking for absolutely no BP solutions, it would be impractical and hacky. Though I'm not surprised if #cpp folks found a way)
Im having a problem with a Modify Bone thing that Im using for aiming, it rotates in the wrong direction, how do I fix that? https://gyazo.com/fc4d6c243f8d35754f99b91cfa1d91f0

I just need it forwards not tilting like that
I want to be able to have proper rootmotion on Blend Space,
I'm trying to look at that video: https://www.youtube.com/watch?v=YtWbl50Jwwc&ab_channel=CodeLikeMe
but i'm about to fall asleep listening to it

project files : https://www.patreon.com/posts/38932489
Usually, the character movement in unreal is handled by adding movement inputs. The problem in this approach is, we have to match the animation speeds manually to actual movement speed of the character. Today, I am going to show you a way to completely drive the character locomotion with a 2...
Best ASMR ever 😄
oh did I interrupt
there are quicker videos on how to do this https://youtu.be/OSWX3vEgRcE

Hey guys, in today's video, I'm going to be showing you how to set up directional movement with 8 different directions. Forwards, backwards, left, right and diagonally in each direction too. In a future episode we will set up turning in place too to make it look better.
Retargeted Animations: https://drive.google.com/file/d/1cOgaYQ24SZoTCH8g3mN...
if you really want
i want to be able to use root motion on that
lmao
CodeLikeMe is IMO bad at presenting the material in his videos.
its a part 3 video, can't barely stay focus on the first 5min of the part 1
I don't think the video you linked use root motion
Root motion isn't supported by blend space as far as I know
oh, what is it youre doing different
unlike a walk, this animation stops in the middle
So movement speed should also stop
oooohh yeah I didnt think about that

some animations have the pause built into it so that the capsule keeps moving but the animation makes it look like the player stays in place
but thats not as good that way I guess
we tried
but the blend over the IDLE don't work
and my animator cursed me to do it 😄
For a bad result at the end lol
Rootmotion is only supported with Montage
does anyone know about this
it seems to rotate relative to the bones rotation but I need it forward in the way hes facing
Ive tried all the different options in the modify bone
this is it

I'd be surprised... since you usually will set the effector relative to the bone before the end bone, and the end bone isn't weighted
but maybe just haven't seen it yet
lol actually I was wrong, it's not 3 parts...but 6

about 3 hours of tutorial 😄
oh shit
probably to see that it's not what I'm even looking
I hate watching long tutorials, even if I need to it just feels harder to follow
yeah that too, you dont know if its gonna work or not
yeah and especially when sometimes, 3 lines of text can replace it
yeah lmao
so any idea how to get the timing of a blend space animation?
I found that in the Doc. https://docs.unrealengine.com/4.26/en-US/API/Runtime/AnimGraphRuntime/AnimNodes/FAnimNode_BlendSpaceEvaluator/
Evaluates a point in a blendspace, using a specific time input rather than advancing time internally.
but it doesnt say much
and google don't know much about it 😄

Thanks good to know. I think I am a bit generous since my game is single player
almost got it
but the thing behind, it's black magic
ok got it now 😄
blend space with root motion! 🤡
is there a good mocap or animation library which is open source for unreal?
mixamo
kk need to check it out
indeed
working on a simulation
but you will need to do your own at a certain point
can still contact them https://cyborn.be/
but that won't be cheap
have you worked with them?
hum, it's not custom
what are you working on, fps?
there is a mocap library
its from some university
Search through the CMU Graphics Lab online motion capture database to find free mocap data for your research needs.
but havent looked at it yet
Anyone know how to fix invalid additive animation type?
can someone point me in the right direction for adding Rootmotion to an in place animation?
Is it possible to pin constrain (skeletal mesh/physics object) to the vertex of a different static mesh?
hey guys i have a custom skeletal mesh but when i ragdoll it it just flops into a pile of mush
doesn't look solid
i assume i have to add some rigidity to it
You're looking for the constraints.
hhhmmm, So I tried using physics animations but the mesh still goes through the walls and other actors. 
is there anyway to stop your character limbs going through its own body during animation
So i created a Destructible Mesh and added it to my Actor, so that it could spawn with my platform, but the "Simulate Physics" check box is grayed out, my character passes through the mesh and never breaks it, how can i add it to an actor bp and make it break? any help would be awesome 🙂

can you suggest me any source for fps arms retargetting?
@sour hazel I bet codelikeme has it
I couldn't find it...
@sour hazel when you say retargeting do you mean transferring animations or getting the arms to point at a specific location?
Best way is to just adjust your animations so that they don't clip through. If they clip while aiming up/down etc for instance you would then modify your blend space animations to move the clipping body parts out of the way.
If your death animation has root motion then the capsule will move with the character as it dies. And if it hits a wall it will stop the mesh from clipping too much. Or you can manually move the mesh when you detect a wall so it doesn't clip.
Otherwise you can blend from your death animation into your ragdoll at a certain frame where it is still falling. Letting ragdoll take over after a while.
I dont wana manually edit it bec i Dont know to edit animations and its a danceing animation so its difficult to edit anyway. Problem occurs after retargetting to another skeleton. I was thinking if there is a way to block it from going inside through collision or something
Not in any way that is feasible to do. You can edit animations inside the engine as well. Can easily add a few keys to move the arms out of the way during the parts where it intersects.
Tried that , it messes other parts when i edit it
As long as you only modify it during parts where it intersects then I dont see how it could mess with other parts.
Quick question - Anyone know how I can bring up Anim Notifies in Blueprints with UE4 4.25?
only in animation blueprints, as far as i know
i was just about to ask a question about notifies as well coincidentally. I have a bunch of animations that have notifies set in the actual animation asset, but i'm playing those animations via montages, and they (the notifies) don't appear to be accessible in the anim BP. is that because the notifies have to be defined in the montage itself - ie, does it ignore all notifies in the actual animation assets when played through a montage?
or am i just doing something funky
not looking forward to adding notifies to all the montages if it's the first thing 😐
nevermind, i am dumb. i was trying to add a notify event in the state machine graph accidentally
What is the difference between Skeletal Mesh and Skeletal Mesh Component?
I am trying to get the Skeletal Mesh Component in Animblueprint, but it isn't there? I can only get Skeletal Mesh.
So what would I need to do?
Add skeletal mesh to the actor, and then work on the blueprint inside that actor?
Lets say I want to blend some procedural animation with physics on the skeletal mesh. So i can add some random movement in blueprint, and then let physics take over.
Simple object, like 6 bones. Animation would include a simple bone rotation from time to time.
Yea ı mean using other arm animations on fps template. And i mean changing the default mesh
@kindred swift did you find the answer? 😮
All the information I found seems outdated xD
about your question on notifies? as far as i know you can only access anim notifies from the animimation blueprint
(if you mean my question, i didn't actually find the answer, but i was screwing something up on my end so i think they do, infact, fire anim notifies from the montage but i be 100% sure because i didnt really test it once i figured out where my main issue was)
@hazy magnet I think we're both looking for the same answer possibily? I'm following a outdated guide - But I cannot get the anim notify to appear in third person blueprints like this video 😮

(I think you pinged the wrong person) anim notifies are usually pretty straightforward - you set the notify on the animation itself or in the montage, and they will be accessible via the animation blueprint (as long as it's using the same skeleton as the animation)
You won't be able to access the notify events in the character BPs, only in the animation BP. So you have to call the character BP in whatever way makes sense (interfaces are my preferred way, but casting to your BP will work as well)
Oh my mistake - Thank you xD I'm pretty new to this part of UE4 lol
Question: Any good Maya to Unreal Animation tutorials that you would recommend?
The anim graph is complaining about things using blueprints making it slow , even though its just using variables declared in CPP
It was a false positive , I copied all nodes to a new BP and it stopped complaining
(FAILED TO MERGE BONES:
This could happen if significant hierarchical changes have been made
e.g. inserting a bone between nodes.
Would you like to regenerate the Skeleton from this mesh?
WARNING: THIS MAY INVALIDATE OR REQUIRE RECOMPRESSION OF ANIMATION DATA. )
I am getting this warning wat shld i do can anyone help me
What are the benefits and draw backs to having an animation broken into pieces for example jump has start, airborne and, landing compared to just jump doing the entire process?
Please ping me if someone can tell mr in a sentence or tell me the term id need to search to figure this out myself when relative to unreal engine
The airborne part may or may not run for the same duration depending on how high you jump or fall from
hence its a separate part so you can loop or run it for only as long as you need
Because it's much easier to implement - you don't have to have a set airborne duration, but your character have to actually jump/move upwards.
Can you post a video of it happening?
can someone explain me how to fix the animation rotating around the pelvis?
I imported the animation from mixamo
Hi everyone. So recently I have finished most coding on one of my solo projects and want to get some animations but the tutorials dont really make sense to me. Can anyone point to me a good tutorial or something to learn the basics of animation?
Ive just ordered some animations to be made on fiverr for somethinn im doing in Unreal - never ordered animations before and dont know what format I should request to receive them in, does anyone here know? - The maker has sent a draft to me in a Maya format...is fbx enough, or should I request something else?
Probably has to do with Enable Root Motion had that issue myself recently
tick the box on the left menu
Hello unreal hivemind! i have a technical rigging challenge here. Im working on this characters who has these thick tubes. I want to simulate them, but i dont want them to collapse like they are now (cloth sim), but i also cant add any joints, since im using the unreal mannequin skeleton, and if i alter the hierarchy its not going to work with the animations i have in the engine.
https://gyazo.com/3481daead5ac1c57f307aa6561a29d0e

this is what the tubes are supposed to look like
@tender copper I believe ADDING joints is not a problem. You only have an issue if you remove the joints or change the names or parenting of the bones.
I have no idea why Epic champions their skeleton like it's the greek god of skeletons. If you aren't using marketplace items there isn't much reason to force yourself to use the mannequin skeleton. I just use whatever rigify gives me because it works and I don't have disparities between blender and unreal.
But either way, adding joints to the UE4 mannequin shouldn't break existing animations - those animations only manipulate the original bones.
hey, does anyone know a good movement/locomotion animation pack?
I need one without much head movement, I have a full body first person view and I need an animation pack where the head doesn't bounce up and down
I tried that, and unfortunately it is a problem! The reason im using the mannequin skeleton is so that i can use marketplace animation data as a placeholder for showing our investors (we will hire an animator when we get funding). But i had a talk with our tech artist, and we agreed that a vertex shader is the best solution. Thanks lot for your time and help though!
Understood. What was the issue that you had? I'm fairly certain a lot of people have extended the mannequin skeleton before?
Check out the "Rules for Sharing Skeleton Assets" and "Additional Limbs"
https://docs.unrealengine.com/4.26/en-US/AnimatingObjects/SkeletalMeshAnimation/Skeleton/
Also just want to mention I love your creature model.

An overview of the Skeleton asset and how it applies to animation in UE4.
When i imported it into unreal i got a popup that said that the skeleton had been altered and was no longer compatible with the animations
And thank you!
The maya format is ideal if you have maya yourself. Even if you don't, make sure to get the Maya files. Much easier for you to change the animations in the future if you do. FBX is fine for when you want to dump them into unreal but you can export those yourself from Maya. (but again, that assumes you have it)
Adding leaf joints (i.e. end of the chain) shouldn't be a problem at all. But if you add them in the middle of the hierarchy it can cause problems.
You can maybe try Anim Dynamics? (This needs additional bones though, but you should be able to add them without breaking your animations) https://docs.unrealengine.com/4.26/en-US/AnimatingObjects/SkeletalMeshAnimation/NodeReference/SkeletalControls/AnimDynamics/
Lastly, the epic skeleton is really weird to be honest. And I see so many games use it (along with some of Manny's animations) and I instantly recognize that weird hunched over stance. Not a good skeleton for proper humans in my opinion. The skeleton generated by MakeHuman is alright but has its flaws too, but still better than Manny's.
@regal orchid agree
copy pasta from UE5 made it available 😄

lets see if it works ^^
Hum damn it... it doesnt
thanks for the suggestion! I am working in maya 😄

It uses the new element TObjectPtr from UE5... Don't know if I have the time to downgrade it :/
i havent been able to add bones without breaking my rig even though ive tried multiple ways (constrains, parenting, loose bones etc.)
completely agree with this, and the animations will be switched out. I do know how to rig, and i prefer making my own control rigs from the bottom up in maya, but this is a placeholder solution to get ready for an investor pitch fast
Ah, fair enough. But yeah you can try and add a chain of bones out from the torso and just make sure that the last joint in the chain remains static. (assuming you can do that, havent used anim dynamics a lot myself to be honest)
ill try that! thanks!
Probably gonna be a pain in the ass to back-port stuff from ue5. There are motion warping plugins for ue4 but they are paid plugins. Either that or upgrade to ue5 I guess, but I personally think that is a bad idea at the moment since it is still very early.
I already maintain both versions of my game between UE4 and Ue5, But right now I need to have my character going down a ladder :)
And motion matching seems to be the right move
Does anyone use UE4's socket feature? I avoided using it for the longest time and am trying to use it now but there doesn't seem to be a way to attach a static mesh to a skeletal mesh? AttachActorToComponent seems to freak out when I try to attach a static mesh to a skeletal mesh
motion matching or warping? Since they are very different.
Sorry warping
Try actor to actor instead. I think that is what I use for my guns at least since they are self contained actors. Then you can specify which socket to snap to.
sec, gonna double check
@regal orchid Problem is this is for first person and I need to attach to the first person mesh which cannot be the character's mesh (because you cant parent the character's mesh to a camera) so I needed to use attachactortocomponent
Seems like I use attach to component myself too. So my gun is an actor and then I attach it to the mesh component of my player. But I don't use the socket system for that. I have a weapon bone in the skeleton. And well, seems like you are trying to attach a static component to a dynamic one.
So check that the actor you are trying to attach is not set to static. Since static actors are.. well. Static.
But I havent really had to mess with actors being static before. So not sure why that happens.
well static mesh is different from a static actor.
or well, should be
adding a static mesh shouldnt be a problem

set it to moveable if it is a raw static mesh component
that should fix it
I basically need to have the character that finishes an animation on the ladder (to enter or exit a ladder). The demo they shown in UE5 seems to be what I need
Oh I see - the sword still thinks it cant move even with the player
Can't help you with that I'm afraid. But backporting will probably be a pain in the ass at least.
Yeah, exactly.
I'm considering moving the main pipeline to ue5. But still questioning it
I would suggest sticking with one at least. Maintaining two versions of the project sounds like hell to be honest. If you go with ue5 just keep in mind that it is unfinished and all that, and it could bite you in the ass at some point.
That's exactly why I still question it
Overall maintain both is to make sure we don't do stuffs that don't work under ue5
So far, absolutely no issue
Well, can you make do with what ue4 has until 5 is ready? And all ue4 projects from 4.26 (or .25 dont remember) are ue5 ready.
So no real reason to worry about compatibility when moving to ue5
I'll try. I basically need to add some kind of a feature similar to it then
@regal orchid Works now, thanks. Still not sure what the advantage is over just creating a child component but whatever 🙂
Depends on what you are going for. If you know it never changes then you can just attach it like you did now. But if you always want a sword in hand, but the sword can change. It wouldn't be a bad idea to have it as a component and just swap out the mesh etc. Or separate actors like I do (since they have their own logic running) Endless ways of doing it.
Yea...unreal engine likes to offer a hundred different set ways to do something rather than a pure DIY or my-way-or-the-highway. Sometimes its frustrating, but so is Unity's DIY method sometimes.
Much like normal programming, it is very open ended.
I am having the exact same issue, did you have any luck with this?
Looks like the root is the pelvis. I haven't used mixamo a lot but when I downloaded one of their characters it did not have a root point. So I added one myself.
ok so I just need to add a root point and it should animate correctly?
is the root something that needs to be animated manually or can I just add a root point
The root can be animated, often used for root motion. But the root is otherwise generally just a joint set at ground level, acting as the skeleton's point of origin.

that point between the feet is the root. When I downloaded the mesh it did not have a root and that is probably true for all mixamo chararacters. Usually only needed in games (to my knowledge) so that is probably why mixamo doesn't have them included and just uses the hips as the root.
you need to add the joint in a DCC (blender, maya etc) and make it the parent of the entire hierarchy and make sure that it is not weighted. So it doesn't pull any vertices with it.
Unless you want that for some reason.
yea I tried getting this going in blender but I get all these extra random armatures in blender after exporting my character from unreal engine. Not sure if they're extra or just misplaced but the workflow is slow and hard to maneuver at this point.

I'm only familiar with Maya so I can't help you with blender issues. But maybe someone else can. But you should try and open the character as you downloaded it from mixamo, not the one imported into unreal. Just to be sure that unreal doesn't do anything weird.
Assuming that is a mixamo character.
its from the unreal marketplace
think those 2 big bones are IK bones
so you think its importing correctly then?
ye sorta
Ah, yeah then it is probably correct. The scale doesn't really matter.
could be IK joints like owninator said
unreal to blender for skeletons is a bit funky
okay, maybe I go unreal export the character to mixamo, import the character with the animations from mixamo to blender, add my root, then export to unreal engine with mixamo converter
if the model doesnt have leaf bones its impossible to get a 100% correct rig from unreal i think
yeah blender is a bit peculiar so you're gonna have to look up how that works
the fewer steps touching the skeleton the better. Not more.
FBX doesnt store bonetip locations
ohhhhh, export as obj maybe then?
Obj does not support skeletons
damn, running in circles here lol
gltf is basically a copy of fbx
FBX is generally the way to go. The skeleton is most likely fine but like I said Im not familiar with blender.
There is gltf too, but never used that myself.
There are a lot of blender to ue4 tutorials out there so there has to be something to go on out there.
hmm i never used mayA, i have no idea what a mannequin looks like when exported to maya as fbx
Lucky you. Maya is awful. 😛 But the mannequin works very well in Maya since Epic uses Maya internally too.
right on, yea I've watched a ton of tutorials but the problem is no one takes characters form the marketplace and then animates them with mixamo so I'm having some trouble filling in the gaps
Ah, yeah that can be a bit of a challenge the first time around. But for starters you can just go unreal -> blender -> unreal and see if nothing breaks. That is step one I suppose.
See if the skeleton breaks
most people just show you how to use mixamo characters in your game which I do not want. I'm doing social media videos and conceptual stories related to my next record so its important I'm not using something thats so stock... a little stock is fine tho lol
ah I like that
when you import in blender with auto allign bones checked the rig will look normal(not the tip bones)
sadly there is no real standard for coordinate spaces etc so you have to make sure nothing gets flipped around. But unreal is generally pretty smart about fixing it.
and if you reparent to the default setup with envelope weights its stuck to the other skel again
thats how i do it
dope, I'll try that
mayB you wunna try the blender unreal plugin by epic
there are a few reasons i do it like this, if you dont know what ur doin ur gunna break ur rig 100s of times 😛
yea just noticed that trying to import from blender
Rigging is fun. 🥲
Yeah, fair enough. But I still dislike it, mostly the weight painting which I hate. 😛
dunno maya weight stuff, but if you place ur bones and twist bones well in blender auto weight can do a pretty decent job
Yeah it is fine as a base, but generally I have to tweak it manually and it sucks.
blender can weight per bone
I'm pretty sure all tools do. Either way, weight painting is a big 🙅🏿♂️ from me. 😛
And I stand by it!
can anyone help me with his hairs...

Anyone know how I can use control rig to keep the existing animation but offset it? Like a leg walking but raise the foot? Currently it locks the leg to point at the effector so I lose the animation
Make sure the material blend mode is Masked and NOT Translucent
is it worth skipping control rig and just using the old school IK nodes for simple stuff
or is control rig just something that i should be using because its newer and more efficient and better or something
im lookin to step up my animation skills
FAILED TO MERGE BONES:
(This could happen if significant hierarchical changes have been made
e.g. inserting a bone between nodes.
Would you like to regenerate the Skeleton from this mesh?
WARNING: THIS MAY INVALIDATE OR REQUIRE RECOMPRESSION OF ANIMATION DATA.)
i am getting warning when i am adding a animation to a skeleton can anyone help me what should i do
masking i sdegrading its quality
well, no.

is there any other setting that i am missing?
Use Dither Temporal AA node right before the Opacity masked input.
Also consider developing a proper hair materials with that in mind.
You can use Paragon characters assets, which is free on the Marketplace, to get a reference point on how to develop a proper hair material.
Also I forgot that this was #animation and not #graphics. I should've redirect you there 
Yes this video fixed it for me https://youtu.be/SbC9rIRgu-A

Part 4 of the Let's Create: The Legend of Zelda Breath of the Wild Series! In this section we will learn to download animations from Mixamo and retarget them to the UE4 Mannequin, so we can use any animation we want!
Check out the website! https://cobbdev.com/
DOWNLOAD THE RESOURCES: https://cobbdev.com/courses/breath-of-the-wild/botw-resources...
Well, i think this could be the right place to ask, can i create a 3d model of a character in blender and then put the armature of UE4 mannequin and the animatoons of mannqeuin as well
Yes, you can skin it to the same skeleton. But the mannequin skeleton isn't very good to be honest.
The official female mannequin is the one that has closer to human proportions.
i like the paragon rigs
Still the same base skeleton though, right? Or is it different. Don't remember.
paragon have more twist bones
If I have a tank, and I want to animate the barrel recoiling whenever it fires, how would I go about doing that?
Everything I look at for animation involves skeletal meshes, but I just have a bunch of parented static meshes
I fee like I'm missing something. I'm following a tutorial from GameDevAcademy and it's showing how to create an animation transition graph, but it seems like a ton of manual work even for a single animation.
I feel like there would be a quicker method than creating a huge web and manually linking all the nodes.
Also, is there a good tutorial specifically for learning the basics of blending animation transitions? As funny as it look, I don't want my mage to be hoverboarding around while casting.
You can animate without it but you will have to manually keyframe stuff using sequencer and whatnot (similar to how some use sequencer to animate doors etc). But I'm not even sure if you can run those animations while the object is moving and attached to something else. And even then, that it will be a pain in the ass to maintain. You are much better off taking your tank mesh and giving it some joints and animating it like you would any other skeletal mesh.
Don't know of any tutorials off the top of my head but the documentation is usually a good start for the very basics at least.
It is the far superior long term solution in my opinion.
Question. I feel like this should be super simple. Can you remove specific rotation or transform keys from an imported fbx skeleton animation? In Unity you can edit an animation clip as much as you need. Cant seem to get the keys to show in the animation viewer. Thank you!
Hello, I had an animation sequence in the sequencer but when I made a copy of the level with a different name all the objects with a keyframe gone invisible, anyone know how to solve this ?
Sequencers are usually tied to the level its self. You can mark them as spawnable for them to just pop up.
Try and right click on each asset in the new level sequence and try and re-link them,
oh, I see doing them manually Is kinda sad tho, thanks for the answer
I'm having a problem using animation retargeting with the Paragon sparrow animations. I used the orion rig that came with it, and I was able to retarget the animations for the UE4 mannequin. But the "idle" animation for example, Sparrow's right hand is usually drawing the arrow back. But with the UE4 mannequin and retargeted animation, his right hand is behind his head in a weird position.
Is that because in the Orion rig, "weapon_l" is mapped to None? And if so, how could I fix that so it works right with the UE4 mannequin?
Have you had any luck with root motion? My walking animations loop, but when I add root motion it stays in one place and the feet fall through the ground when walking.
thank you so much for that, it helped a lot
I tried mixamo_converter for blender but it doesnt seem to do what I want
does having more bones in my armature/skeleton decrease rendering performance? I'm trying to make a stadium crowd so I need lots of performance
i'm wondering if I need to make a low bone count armature to maximize performance or if I can just use the skeleton I have already
Probably best to have a special simple skeleton for the crowd as opposed to a fully complex one that is used for main characters etc.
And the bystanders that are really far away could probably work as simple billboards too
ok ty for the info
Ah! I got it. Using Mixamo_Converter and this tutorial:

Nerds Playhouse recommended this video covering Rootbone animation for UE4 using a Blender plugin. The files are located in my GoogleDrive for your convenience.
https://drive.google.com/drive/folders/1jU28EEJZaH2eF_y4PaQg5zlIU8nZUOWG
After the video was done, I noticed some issues with import. The corrected settings are here:
https://drive.goog...
Is there a more event-based way to play animations with an AnimBP? So far, booleans have been inefficient for me as I want most of my animations to simply play on-event (not necessarily on-input) rather than while a boolean is active. Currently I am using an AnimBP for animations such as Idles, and then for event based animations I am simply playing Montages through the DefaultSlot with C++. Is there a better way to set this up, or is this a good usage of Montages?
hey, does anyone know how I can make a relative direction to a global direction vector in control rig?
I'm trying to stabilise the head bone on my character, I pass in the previous VB head transform as LastHeadTransform and the camera transform as CameraTransform and I have a tolerance on how much the head bone basically lag as the Tolerance.
the tolerance is given in how much the head bone can "lag" relative to the camera, so if the tolerance.x is 0 it means that it shouldn't lag in the x axis at all, relative to the camera.

not sure if it's very clear, I just have a virtual bone called VB head attached to the root->head bones
not sure if i got this completely wrong, since it seems to work sometimes but the rotating the old VB head - new VB head with the camera rotation and then inverse rotating it seems to cause issues since the values don't match, sometimes it varies by +- 1
glad to hear!
now my feet are falling through the ground... grrrrrr lol

crawl animation. Back to google

Pretty good! Working on recoil myself incidentally. I would say it shakes a little too much when you hold it down for longer. Especially around 4-5 seconds in the clip. It suddenly goes a bit wild there.
can anyone with a little maya knowledge tell me how to control multiple meshes with one blendshape
or is this the wrong place for that
That could just be the animation itself being a bit misaligned with the floor. Or due to blending etc. It isn't very hard to fix. If all feet go through the ground then you can simply offset the entire mesh. If only some limbs go through then you should try and offset them in blender with IK. (Or in engine if you want)
What do you mean exactly?
alright i have a human model with a face but also lower and upper jaw
i want one expression blendshape to open the mouth but move the jaws too
so it doesn't show the gums and look strange
from what i can see blendshapes can only apply to one mesh at a time but i have one in blender that controls jaw and face simultaneously so i know it can be done
i've watched 10 tuts read a bunch of guides and i don't know how
also i'm doing the movements via IK rig
Ah, my bad I misread it as blendspaces for some reason. Sadly I don't know much about blendshapes. But hopefully someone else can help you out.
alright
Is someone able to help me with something? I just posted my question in the General Unreal-Engine chat before I saw this one, sorry
google is your best friend
What's the question
I made my own custom character and animations in blender, I made an idle, walk, jump and a falling animation. I'm trying to implement the jump mechanic. I want to Jump then fall, and if I don't jump I just want it to fall because the Jump animation doesn't fit.
I actually was able to get it working

I did have one other issue though, In blender my bone controls i used aren't deforming the character, but after I imported it into unreal, It's deforming the mesh


@vivid trench take a look at the third person example character... this is a good use of a state machine
The starter third person character had a Jump fall for its falling animation, so it confused me but looking at it did definitely help!
I see
In that example project, jumping is set via spacebar key
So if you don't press it, it will not jump
So you can just draw a link to the falling from idle/run/walk
And "is falling" is a function built in to the character component
So you can use that to help those transitions

jump loop is essentially falling in their demo
well the problem I was running into, was the Is falling, just tells me if the player is off the ground or not so I had to figure out a way to differentiate between going up and down
Are you sure? I thought "is falling" meant falling
Ah okay
I made my own falling detection before by doing a tick sequence where I set the z height last frame and the z height of the previous frame... then I said if current < previous
oh thats smart
And before that a branch to see if the character is falling
(or is in air) or whatever
so that it doesn't think you're falling when you're running down stairs for example
Aright im back again, retargeting issue? All the other bones are working fine I'm wondering if im setting the forarm twist wrong maybe? Setting it to hand as directed in the tutorial I watched for retargeting. Its getting this weird crossover tho where the mesh is warped and the bones look weird

upper arm twist, I set it to forearm
removed the upper/lower arm twist and it fixed that. Still getting weird retargeting issues tho I'll keep googling
I have a new sympathy for people who design first person melee animations. It's really hard to make it look good with like 10 frames
Sounds like your looking for a pose asset. Check out this doc and read where it talks about corrective blendshapes. https://docs.unrealengine.com/4.26/en-US/SharingAndReleasing/XRDevelopment/AR/HandheldAR/FaceARSample/

A sample showcasing Apple's ARKit facial tracking capabilities within Unreal Engine.
Hello everyone, tell me how to connect animation, in the new version of the engine there is no get current montage function. Can't call the function.

Version 4.26 has this function, but it is called as a non-pure function. How to make a function in Unreal Engine pure a function?

By making a pure function of it.
No joke, that's literally what you need to do.
Also, it seems like you're flipping things up a bit. Pure functions are the ones that don't have the exec pins
The fact of the matter is that this function was not written by me, it is built into the engine, so you cannot change it when you click on it, the Visual Studio editor opens
@thorny magnet
You don't address this so I assume you did flip things up. (Even then it's just one checkbox different)
Make a new function. Put the pure function node inside of it. Hook the output nodes to the Return Node. Done.
What's the holdup then? Even in C++ functions are equally treated. The "pureness" of the functions practically and largely just for BP housekeeping.
The function Get current montage pure cannot be called from anywhere, only non-pure Get current montage is called
Actually no, scratch that
How about this?

It doesn't even open the function, but how do you know what is included in the get current montage function, if it is a function of the engine?


Then the animation does not play.
the developers needed to open the function, so that it was possible to edit the internal functions themselves, it turns out that they are closed, the functions in the Visual Studio do not open.
What 
All it does is practically fetching the currently playing montage.
Actually, you can edit engine functions. 😏
All you need is the engine source code, NOT BINARY BUILDS from the launcher
Also patience because in most cases modifying engine functions rebuilds the whole engine.
in general it should be like this, but the function is not from the parent class Character ref
I think you're getting the wrong idea here.
this is unrealistic after 10 attempts and reinstallation of windows with clearing data from the hard drive, the building did not help, I have more than 50 error messages, even the development work, I don’t know what the problem is.
Maybe someone will explain for the money?
Hey guys I am a newbie and currently using Mixamo animations. Im having this weird glitch when after collision with objects in the scene direction of animations change - it bescomes off by certain angles. What could be the problem?
Is it possible to import collisions for an SKM asset from houdini for instance? or maya?
anyone know how I can zerofiy the scale of a bone in my animation? It seems importing an FBX with zero scale fails with this error

Do I need to do that in-engine? The idea of setting it to an almost-zero scale like 0.0001 is viable but feels disgusting :D
Guys, does anyone know how to expose this option as a variable. Or a way to cast to the animgraph, get layered blend per pose and expose it?

Hey - I don't think I've ever posted in here before but I'm finally stumped on how to approach this in-engine... but this is clearly something that animators would have faced:
When animating a root motion combo sequence, how do you smoothly pivot the character between animations in a Third Person Action RPG?
Is there a way to lerp the root motion direction maybe?
Is it possible to slow down and speed up a single animation? Like to start off the anim slowly then speed it up later on? Obviously the play rate is static and effects the whole thing I’m just wondering if I can change that play rate multiple times within a single montage
Add a curve for Anim Speed, or you can use AnimNotifies to change the playrate
personally I think curves are the way to go
How to use single root motion animation for jump?
use a montage
Well that depends on how you want to do it
if you want to have root motion everywhere you can activate for everything
but by default root motion is only applied to montage
Anyone know how i can force the entry from a animation montage to a specific Anmation Node?
Atm, everytime I play a ladder enter animation and need to go in the ladder state, it enter into the move node before going to the ladder

that result in a poping after the enter animation play as you can see bellow on the video.
the last frame of the going down the ladder and the ladder enter are the same, however it transition back to move and go back to ladder.
Here you can see it goes briefly just before the montage to the ladder (time 0:04)... then the montage play and then it stats again to the Move
Once you bake a control rig anim to an anim sequence it becomes completely separated from the rig, right?
Meaning you can have a not so performant rig to create anims offline in the editor, but then bake out optimized anims for gameplay
So the rig would never be used by end players but can be used as a tool to author anims in the editor just like a DCC
Yeah, you can also use it at runtime to do runtime adjustments.
Thanks!
In my case I'm just looking to keep anims as performant as possible
but get the flexibility to author them in engine
Though admittedly the curve editor is kinda flimsy to work with. Not to mention the lack of tweening and constraint adjustments.
Hello, i had a question im looking to have a humanoid dragon and im attempt to have a dynamic tail based off live mocap data. Ive been looking for some videos on it but the ones i have found have been outdated. Any direction you could point me, thanks.
Are there tuts on this? Not quite sure what a curve means in relation to anims tbh
I’ll google it when I’m home ty

Just expose the PlayRate as a Pin and then link it to a curve
In the AnimBP
If you are playing it from a Blueprint, you can do it like this:

Just make sure the Curve Name matches the Curve Object you made
Not sure if that will work for you and there are probably better ways of doing this but the way i do it is set the transition rules variables in the middle of the montage, so by the time the montage ends it blends towards the new state. like so for example:

I’ve never seen this, but I can’t imagine you would want that - if the capsule/root left the ground then physics would mess up your animation.
If you need a z-based collision tied to the character, maybe you could use a sphere collider attached to the head/hand bone?
If you want to use physics however, the launch or add impulse nodes should do the trick
Is there a way to retarget mocap data live to a different skeleton? My mocap data is not using the real space of my mocap due to the actors size i think.
Can you map it to the Humanoid rig?
The biggest problem is different bone-naming conventions
I tried retargeting my rig to the humaniod on and ran it to the mannquien but with the same result
As long as it has a similar structure you should be fine
Well ghe legs for rig i have are shorter were im pretty sure the problem comes from
I can screen shot to show yall

This is the offset im getting with the UE4 mannequin and my custom rig(to the left)
Both are recieving the same data
Through Xsens and Live Link

Anyone know why Mr Mannequins root is offset on import?

Hello, I have a question how to handle this type of animation (read comment): https://www.reddit.com/r/unrealengine/comments/p2sev1/how_would_i_achieve_something_like_this_read/

reddit
0 votes and 1 comment so far on Reddit
How is the latest version of blender for rigging + animating for UE4?
I remember when I last did it a few years ago there were some problems with the import process with UE
But now that they have received a lot of funding and updates, is it pretty much on par with Maya in terms of a bug free import?
2.8 onwards is fine.
Much less hassle compared to prior versions.
Great thanks!
Can we attach multiple meshes of different shapes to single socket, without any problem??
As in like attaching weapon meshes?
Yes
Even Fortnite do just that, so take that what you will.
Here i am attaching a wine glass, and beer glass. I couldn't attach them properly to the single socket
Both props have different Pivots
what am I doing wrong here trying to bake a short animation to control rig?
is this channel exclusively for unreal's animation tool or can we talk about the pipeline from other softwares to unreal as well?
No idea about the "official" stance but people ask plenty of questions regarding the pipeline from maya/blender etc into unreal as well.
And to me that is totally fine at least
Does he actually have a dedicated root joint? Seems like the pelvis is the root in this case.
Okay thanks
does anybody have pointers for the general pipeline for animating for games? in particular in my case, I have a human character with a rig made using blender's rigify, and a sword that's not rigged, and I'd like to make a set of sword fighting animation but still import the human char and the sword separately in engine
hey guys, in unreal engine 5, will shape keys be supported with the new animation thing
You can add a weapon bone to the character that the weapon attaches to in engine. That is what I do for my guns. That way the gun is positioned 1:1 in maya and unreal.
Sounds like it could work, though I imagine that'd cause problem with things like switching which hand holds the weapon, or attaching it somewhere else on the body during the animation
well you would need animations for both hands (or mirroring)
and you can just remove the mesh and do whatever you want with it at any time
in case you want it to stick to the back or whatever
when unequipped
and when you want to hold it, you attach it to the weapon bone
Okay, thanks
Okay, so I just thought of something that might have been wildly obvious to everyone but me. When animating an ability, do you animate the character’s motions on one layer and then do the vfx on another? In which case how do I do I animate a complex vfx. Like a water stream that swirls around the player and goes off into the distance?
I might be wrong but I think this is what Ability system is for. A simpler way is to use Anim Notifies to time particle systems with animation.

Hello everybody, have you ever experienced rotation offsets on animations automatically added to animations? I'll explain: We've had our charcter skeletal mesh in game for months, and we've reimported the maya rig's updates over and over it for months. Today we have experienced some offsets in the anim in unreal not matching the authored animation in maya. i.e: a hand held steady to the belt in maya was instead intersecting the belt in unreal.
We than have imported a new skeletal mesh, retargeted the whole anim BP and anims on the newly imported skeletal mesh, and that fixed the animation issue. Ofc we than had to rewire the whole animBP but at least we removed the weird offset behaviour.
Is there in your opinion a better way to fixing these issues without reatrgeting and rewiring a whole animBP?
Thank you v much. That’s super helpful!
What's the benefit of a dedicated weapon bone vs attaching the weapon to a hand socket?
The hand socket only exists inside unreal. The weapon bone can be animated properly. Say you want your character to spin his gun around in his hand or whatever. Much easier to do with a dedicated weapon bone.
hey all, set up a live link with Rokoko to ue4 for recording animations with takes, any advice for cleaning up the mocap? ideally looking for a way to replace the legs with a clean walk cycle for sections of the takes, but keep the rest of the skeleton untouched? or something like this! the drift and sometimes lag can really make it a long process cleaning everything additively
(side note any ideas to "smooth" animations?)
Ah, I never considered that. Makes sense. What bone do you typically parent your weapon bone to?
The hand bone. One for each hand is what I generally do. (but I usually only need one on the right hand)
I have an skel mesh, which goes in rag doll mode by default, how can i stop that?
Yeah, the rig is identical to the Mannequin that comes with UE
Weird. Are you importing the mesh from outside the engine? You could just copy it over from another project directly instead.
Nah, I'm importing the animation and setting the skeleton to the third person mannequin.
I managed to fix it by importing the skeleton it came with then retargeting the bones to the Mannequin and converting the animation
Ah, weird that it would act up like that. But if you managed to fix it then hopefully that is the end of it.
@static falcon So I just took some time to look at all the stuff the gameplay ability system is able to set up. It helps with the actual ability bit, but I still don't understand how to actually put in the animation into the game if that makes sense? Like I understand how to make the character itself move, but not the effects around it if that makes sense.
like there are plenty of tutorials on projectiles and aoes, but not any I can find on scripted movements of particles/effects
or am I just being stupid?
How to replace Advanced Locomotion system mesh? Is there some sort of documentation on setting it up?
Anyone know how I could blend two animations together? I'm currently blending my Animgraph by enum. So I'm unsure how this setup should look for my current situation xD
My Animgraph ;

Tutorial ;

Guys, I've been trying to solve root motion animations the whole day. The last problem I have is that inside unreal the root bone goes crazy, moving all around the place. Any ideas on how to fix this?

Okay I'll ask here lol, say I want to attach a character with a looping animation to a big robot, making it look like he's controlling it. How do I set that up with a static mesh, if possible at all?
This static mesh is being used as an enemy, floats around and pursues the player character
Is the robot just static meshes?
Yep, it
*it's a pretty simple enemy type

Basically just want to plop the character into the cockpit and have its rotation and orientation and location locked to the mesh
Why not make it a skeletal mesh as well? Much easier to handle for such purposes.
I did but for some reason the animation isn't displaying after socketing to the bone I added specifically for that
Unless there's something else I'm missing here, probably, I'm quite new to this
If I get this right, it's a flying turret, right?
Though looking at the Valley of the Ancient demo, they did stuff toghether skeletal meshes with static Nanite meshes attached all over.
Essentially yeah

See I can get the t-pose mesh in there but actually getting the animation applied is a whole other thing
So here's my idea:
- Make the turret a skeletal mesh, with three bones after the root bone: two for each end of the guns, and one for the driver
- In your BP, make the driver skelmesh a child component of the turret's skelmesh, with its parent socket pointing to the turret's driver bone.
Can anyone recommend me a video for hit reaction for individual body parts?
Hello anyone know if this is a bug, i retarget my Anim bp and all my animation, but now the anim bp didn't read the curve value on the second layer of animation, only on the first one that I play, anyone knows something?
Hey, a bit of a weird one.
Does anyone know why WantedLetter variable doesnt work as input for the animation StartPosition?In a sense that, I'm setting WantedLetter, HandRotation, EffectorTarget and ElbowTarget exactly at the same time in cpp. The only one that doesnt reflect any change is WantedLetter. If i replace it with Random Float node, works.

Hi, Could anyone tell me why the animation montages are playing at different angles here please?
The first frontal swing whilst running looks ok but the second swing is all wrong and when standing idle and swinging the sword it swings up in the air instead of directly in front of him, Many thanks.
Is there a way to export an animation with mesh including the post process anim blueprint?
The left is with the post process on, and the right is what it looks like when exported (post process missing).

Probably since the animation is designed to be played on the entire body. So when you blend (and thus mask) the lower half of the body. It won't be able to place itself correctly.
So you're gonna have to adjust the animation most likely.
@regal orchid ok thanks!!
Hey all, I was wondering if anyone with experience with control rig could help me out. So we have our performance capture recorded and coming in fine with both body and face animations working correctly. But, when I bake the control rig the facial animations go away entirely but the body animations remain, has anyone else run into this issue?
Anybody know why some properties are exposed in the Timeline Editor for animation and others aren't? I'm trying to expose the SpringArmComponent's TargetArmLength property for animation but am not sure how (or if it's possible)
When I import a skeletal mesh without assigning a skeleton to it , then retarget it , it gets some problems
But when i choose the skeleton when importing and assign it , it has no problems
Any idea what’s happening?
Have a quick question guys. i have animation bp (its retargeted one) with my model, if i change base pose in skeleton of my mesh, is anyway to see changes in animation BP? or i have to retarget animation everytime?
im very new to ue4, like 3 days ago new and uh..
i dont know whats going on

does anyone know how to make it not hover when i press play? thanks:)
this could be anything really but maybe check your colliders @cerulean turret
hey does anyone know how I can make this Control Rig node in the Animation Blueprint do a backwards solve instead of just a forward solve? I'm doing an animation from a sequencer but it doesn't play because of the control rig

I have a desk fan I want to rig up. Would you use bones for this or just have the blade a separate Geo and rotate it? If bones, I def don't want an anim BP just for a fan, so would I use a montage?
Hopefully there's an easier way @shell cypress , but you can have a section in your Control Rig BP that sets the position of the controls to the bone's position before doing any of the following logic
Actually maybe it's more complicated than that, because you might lose the control rig function if you do that... argh
I assume the example project is setup to do what you are describing though.
@static falcon thanks for the answer. There is a special event at the start of control rig called Forward Solve, and another called Backward solve. they are separated exactly for that reason you mentioned, that otherwise you would lose the forward function if the rig was reset every time. But I don't know how to trigger the backwards solve in the sequencer. Perhaps it's not meant for that...? I'll check out the example project, I haven't seen that.
Regarding your fan, I would say it sounds the easiest to give it an animBP and rotate it with math, this way the spinning is separate from all your other scripts/things. I wouldn't know how to make a separate geo and rotate it without some kind of similar script or component. Also, montages seem wack to me.
If I just separated the geo in my DCC, threw them all into a BP, and used a rotation component (I think there's one?) that could work too though
Seems simpler to have only 1 bp for such a basic asset
or maybe the anim bp is fine
can unreal not import non skeletal animations? like in blender, if I were to animate a modifier property, I can't convert that to a shape key and get that unreal or something?
Describes how to get custom user-defined attributes into Unreal through FBX, and how to work with them in the Unreal Editor using Blueprints and Python.
This might help
I thought blendshape keys did come in though... you can also store data in bones as a hack if need be
is there a way to move capsule along with rootmotion montage?
like I have a animation where player moves up and forward and when animation ends, the player teleports back to where he started.
That means it's actually not using root motion. You'll have to check the documentation and compare it with your setup, it requires some very specific steps
ahhh
When enabling root motion on the animation why does it disables character movement upwards?
like now it moves on x and y axis in animation, by z axis movement is disabled.
IIRC correctly you need to set the movement mode to flying or something that allows Z axis movement
I have a problem where whenever I save an animation it disappears
awesome, seems like that fixed it.
Thanks alot mate
oh that worked? good stuff, i was going off what I remembered from last time I had to mess with it in our project
it's very confusing to say the least
It looks like your collision box on the terrain or your player is off
Anyone know of any good animation packs on the store that have an off-hand grenade throw?
I wish I did, I'm actually trying to hire an animator to just create the stuff I need because there isn't enough animation there
Hello guys. I'm confused on what the rigidbody node does, because I found that I don't even need the rigidbody node at all for hair bones on my character to simulate physics. I noticed all I need is for the hair body in the physics asset to be set to "simulated" and then the hair reacts to physics even without the rigidbody anim node.
So what would be the point of that node?
Never even see a node called "rigidbody" 
big oof
Roflmfao
I don't even use that node for anim dynamics
Yeah. I heard it was 2x faster than anim dynamics so trying it out

hi, is it possible to animate a skeleton without a mesh attached to it to a specific framerate no matter what the actual framerate is, so that gameplay related stuff on it (ie hitboxes) work consistently, while also having another skeleton copy that skeleton but at the actual rendering framerate?
Hello, how would you guys implement something like a chase cannon (see gif) https://qph.fs.quoracdn.net/main-qimg-b59c4c37aa3f775b06af51966d24136d, I've tried animating the spin but it obviously always starts from the same spot, can I do something with additive animations or maybe spin it through the animBP? Looking for suggestions here
Yeah, I'm having the issue where I might see an animation I like, but it feels bad to purchase 50$ pack for just 1-3 animations
I guess its still cheaper though
It doesn't help that most animation packs are mostly just walk/run cycles + handful of "actual" animations
Can't you just play it as an additive? As that will just add the rotations (ergo spinning the canon)
yeah i'm trying to get it working as addtive
but no success so far
and the animation itself

ugh I guess I need to learn how additives work first
the base animation is basically the cannon in its referece pose
also vfx is very wip XD
In your anim-graph you need to add an additive slot
and than play the additive animation in that slot
hmmmmmm
Hi, Is there anyone who can point to some good information on how to "correctly" blend animations in UE please? , I keep trying to get this animation correct but as the guy is standing idle his upper body spins and his legs dont move at all, and when the second swing happens he kind of slides along, Seems buying marketyplace animations isnt a great idea when you dont know how to use them 😦, He also has some kind of weird motion for his legs when running and using the sword. Kind of feels like unless the animations are "designed" specifically for a certain model its really hard to make them work.
Think I mentioned it last time. But I believe the biggest issue is that these animations were meant to be played on the whole body, while the character is standing still. So the torso's twisting etc is all designed to look right with a lower body that is also following along. Stripping that part out makes the animation look completely off.
As for the blending, you should generally try and keep the number of animations adding to a joint to as a few as possible. Otherwise you'll get unpredictable behavior unless you are careful. Which probably explains the weird legs.
It is mixing running and the full body sword animation. Causing the weird behavior.
@regal orchid Thanks for the replies, I have found a video of something I would like to try and replicate but I am so lost with how to even start with it. https://www.youtube.com/watch?v=c7S7HfeafvA

The ENENRA Demo is available!
Link to demo:
https://zahidalijeelani.itch.io/dd
Like / Subscribe for more updates!
Music - ALovers Wrath by Somepoint Sound
https://youtu.be/6IZKBoSmsUg
https://somepointsound.com/
Made in Unreal Engine 4
Follow me:
Instagram: https://www.instagram.com/zahidgames/?hl=en
Twitter: https://twitter.com/ENENRA...
The animations look so smooth there.
You need animations that are specifically made for full body and animations that are meant to be put on top (i.e. blended)
When you say "full body" is that like to RM animations(Root Motion) ones or the In Place ones?
for example that flip the character does is designed for the full body, you cant blend away part of it without it looking all kinds of wrong. There are plenty of cases where you can use part of fullbody animations. But the animation needs to be made with that in mind generally.
By full body I just mean that it affects the entire character. Like doing a back flip or something similar to that video.
regardless of root motion
Ahh ok
so you probably want some sword swinging animations that are designed to be put on top of your locomotion
since the ones you are using are pretty extreme and twist the entire body into a distinctive pose
so removing elements from said pose will make it look off
Ah that makes sense. so you have to be very careful when getting animations off of the Marketplace then as you cant just "blend" them and they will work.
Hello, does anyone know is it easy to convert Unity character rigs to Unreal character rigs?
So the animations I am using are best to use a "disable movement" and then "play the attack" and then reenable movement rather than trying to blend them together because of the extreme movements and poses./
Pretty much. If there was a more neutral looking sword swing you could get rid of the legs and it would be fine. But those you are using in particular are very distinct.
Yeah, exactly. If you look at the video you linked the character attacks with his whole body there as well.
If the game has any running while attacking animations then they would most likely need unique ones.
Also I guess I should <@&213101288538374145>
🙂 I guess I will need to see if i can find a sword swinging animation that only affects the top half of a body.
You can try animating with control rig or similar. Havent used that much myself since I use Maya but it seems useful if you arent familiar with traditional DCCs.
I think I understand better now that when looking at animations I should look at an animation and ask myself "can i perform this whilst the legs are moving independantly without making it look all kinds of weird"
Depends on what you mean by rig. A skeleton is just a skeleton. Shouldnt matter where you got it from provided it is properly made.
I guess that is a start, yeah. Those animations you got are definitely designed for standing in place. You could reduce the twisting by blending further up the spine potentially but it may still look weird. Or only blending the two arms and ignoring the spine.
I have a few epic marketplace animations that work with the Epic skeleton, and the 3D artist I'm working with uses Unity-compatible rigs. I know there is a way in Unreal to map bones to a different skeleton. I forget what thats called now
I'm also wondering how realistic it is to use that feature. Like is it actually realistic to do in a production game, or is it a hacky finnicky thing. (I tried it once in the past with no luck)
Oh I am thinking of retargeting.
yes you are
😛
But if you are just talking about retargeting animations from one skeleton to another then that should work. But they usually need tweaking after. Depending on how different the skeletons are.
Ah okay thanks. The tweaking/cleanup process is what I'm afraid of!
Best way to know is to just try it with an animation and see what happens..
Would it be better to just rig the model for the epic skeleton before importing it?
I guess I'm wondering like... how much work is it to use the Unity rig vs. creating a new rig
so just to be clear, when you say rig you mean the skeleton, right?
Yeah, I think so. haha
Sorry I am new to 3D art/animation in general. Mostly worked on 2d games
Since there is nothing inherently specific about skeletons in unreal or unity.
No worries.
A character will work in either engine. I would say that a custom skeleton is always better than the one epic provides but entirely up to you what to use.
In your case retargeting is probably best unless you really want the unreal mannequin skeleton for some reason. (Which is a bad skeleton imo)
ah okay gotcha. Why do you say a custom skeleton is always better?
I am guessing its easier to animate with a custom skeleton rather than a boilerplate?
More that the unreal mannequin skeleton is designed for that character. Proportions and all. So taking a different character it will be "forced" into the same mould as the mannequin. That is why you see so many unreal 4 games with hunched over characters that look totally unnatural. Because they use the same skeleton as the mannequin.
same skeleton and animations often
If you have a unique character, chances are it will need a unique skeleton to fit it
oh okay, yeah that makes sense. so regardless of the engine I'll want whatever the skeleton the 3D artist uses so it fits the character style
yeah, pretty much
a small character will get really stretched out if you use it on the ue4 mannequin for instance since Manny is designed to be ~180cm
for example
thanks for all your help! 😊
No problem!
Anyone know where i can post for help that isn't here or the UE forums? Does unreal have a stack overflow like blender does or something?
@regal orchid Thanks for the help !: ) I forgot to say thanks got distracted making my child;s dinner lol
No worries. 😛 You're welcome.
Anyone have any examples of rotating animations? basically what I need is my cannon to rotate 120 degrees and shoot then the next time it shoots it should continue from where it left off.
Any kind of working examples will help me.
anyone help please
I have montage animation that in Blender the root moves forward etc. In unreal when Root motion ticked on the AI plays montage and the bot in this case moves forward but capsule stays put ??
Root motion Enables

Root Motion not enabled and bot moves how it's animated

Bot plays Montage but Capsule stays put

With RootMotion on Bot plays animation but stays in place dosen't move forward

Enterprise solution for all your Social Q&A needs.
thank you
I have some animations FBX made in maya, and some of them when I import to unreal the timeline is playing but the animation isn't. Has anyone ever had this problem? Any fixes?
i would have something to say about animation but I still can't figure out the best way to put bones in a car to simulate suspension, rotation, and turning in blender 2.9
What do people usually set their twist bones to for the translation retargeting? Is it treated the same as IK bones and set to "animation"?
In my setup, I want the neck rotation of ABP_A to set neck rotation of ABP_B.
What is the proper way to cast from one AnimBP to another AnimBP with support for calling these variables in Editor?
Do I need to utilize Control Rig for access to these joint rotators outside runtime?
Here's a question, say you have a character with fully established animation logic in the animation blueprint, say a full set of generic animations, is there a way to blend a pose additively to that animation logic, to give a model some unique character? Can you add something with control rig, to adjust a character additvely?
trying to import a humanoid character with a simple animation and the character & skeletons import just fine (except for the auto generated physics asset being pretty bad) but the animation is completely broken, any idea what could be the cause?
using the send to unreal plugin btw
When I have a mesh that has the same skeletal hierarchy but extra bones, and I re-target it to my existing skeleton it asks if I want to add the bones to the skeleton. Will that create issues for my current assets, or can the skeleton have the extra bones and the other meshes won't care?
Hey guys have any one of you faced with static mesh,i made sure bone hierarchy is correct,double checked it's using the correct skeleton,only packed necessary files,i rigged the mesh from scratch for 3 times but model is becoming static in game,what might cause this.
I'm far from an expert, but do you mean when you import it, it becomes static, or when you spawn it in game it becomes static? If the first, did you set it as a skeletal mesh when you ran the import wizard, if the second have you set an animation to it?
i import my fbx to model's shared skeleton without any problem,but in game when i spawn it it becomes static and stucks at A pose
im sure bone hierarchy is correct,no zero weigts
Are you just dragging the mesh into the editor window and hitting play? Make sure wherever you have put it that you put an animation on it, you can set it in the highlighted field from this screenshot:
In this case I've just drug the UE4 Mannequin into the editor, and since it has no animation it A-Poses when I run.

Thank you,fixed it problem was shared skeleton's location
trying to enable root motion on my animation blueprint and the option is nowhere to be seen
it's supposed to be in the details panel but there's just nothing there
How do third person games (although it can be any game) usually handle actions like reloading weapons, for different pitch/yaw rotations? Is it the same reload animation in different angle variations, put together in a mesh space additive blendspace?
most games first orient the torso toward what you're aiming using IK or other stuff, then run the reload animation over that
so how do they resolve cases where hands need to reach say, the pelvis for the ammo belt?
Wouldn't rotating the reload animation together with the torso cause the hand to get an offset?
either the animation is made in engine using IK and other types of constraints instead of baked animation imported from other software, or they don't actually solve the problem and instead either put the torso back to a forward orientation, or don't even do that and hope the average player doesn't notice the weird animation
Gotcha, thanks for this 👍 I think the most reasonable compromise for lower budget might be to orient the animation forwards with a little IK support where needed
as you said
yeah
that or make an animation that doesn't rely on part of the rigs that might have other animations running on them & whatnot
also I found the root motion option so disregard my question pls
Hello! i am new to unreal engine! and currently trying to learning animation handler in engine and looking for best resources! which one you suggest me as old unity game dev?
In UE4.26 there was an anim component called Wheel controller, or something along those lines, has it been renamed in UE5 or does it not exist yet?
This is an image for context on where i used it in the chain, without it the anim does not work as intended

Hiho i have a regular question about animations, Skeletons and sockets.
I have a ThirdPersonCharacter as Character_Parent and i have different Character_Childs (Mage, Warrior, Hunter) as male and Female. If I set all Animations, Sockets and so on to the Parent Character and i will Change the Child Character to an other Character Mesh the new Child Character will get normaly his own Skeleton. Can i give a different Character the same Skeleton to usw the Skeleton settings like Weapon and Armor Sockets, Special Moves like Jump, Role, Dash?
This is an example

all the settings are in the Right Third Person Character but the childs (middle and left) should usw that settings like weaponslots, Do a role and so on in the gameplay.
Do i have to create and setup all the settings for each new character also male and female?
How do we make transform bone work in 360 rotating gosh darn it? It only works up to 180 degrees, then it ignores the half turn. Any tips?

Is there a good, built-in way to bind to anim notifies directly from cpp, or is that still unsupported?
anyone know the proper way to get a custom mesh on the ue4 mannequin
retarget requires a proper skeletal mesh
but I cant find anything about it
Some ideas?
https://docs.unrealengine.com/4.26/en-US/AnimatingObjects/SkeletalMeshAnimation/AnimBlueprints/ Could give child animation blueprints a look. But if they have different skeletons you may have to make entirely separate animation blueprints on a per skeleton basis. Not entirely sure how that works with child blueprints.
Animation Blueprints are visual scripts that are used for the creation and control of complex animation behaviors.
Oh Thank you!
Anyone familiar with root motion? I'm following a guide currently - but stuck at this part. I have to blend by bool , however I don't know how that'd look with my setup.
my blendby enum set-up

The tutorial

This might sound like a strange question, but does anyone know how to make animations in UE4 more choppy? Kinda like DBFZ or Into the Spider-Verse?
Yeah, the way to do it is to ensure your curves become more stepped, this can create a choppy animation feel to it, animators also use that to quickly block out animation shots, to get the timing right, and then refine the curves.
so the key frames would become less curved, and more stepped, as in straight lines vs curved. not 100% sure how to do this in unreal but probably possible to edit animation curves, look at how to do that maybe, and see if you can edit the curves to becomes stepped/straight vs curved.
Thanks!
Does anyone knows how to get the character stop "flying" when I retarget it? When I open both skeletons they kind of seem at same position

@shadow birch when importing make sure Convert Scene unit option checkbox is true
Hi!
I made a AnimBP with an AnimGraph to use as a base class for locomotion of all characters.
The idea is to add additional animations and functionality for specific characters in a Child AnimBP that inherits from the base AnimBP.
So far, this works - I can add additional logic in the Event graph and everything from the base works too.
The child class doesn't have an AnimGraph though... Is there a way to extend the base AnimGraph in a Child AnimBP?
Hi everyone,
I am trying to create modular First Person Controller System, but i have issue with inverse kinematic with Two Bone IK.
so my two bone ik is lagging one frame behind.
Here's how i did it:
- Effector location is set by world location from the gun socket
- the gun is rotated with camera
I've tried:
- Changing the tick group of Mesh (inheritd) component to post update work, but no luck, the ik is still lagging.
But i've also tested that if i am not using mesh inheritd, but by adding new mesh component and set the tick group to post update work then the lag is gone.
So this issue is only appear when only using mesh inheritd.
However, i can't add mesh component either, because if i using non inheritd mesh component then root motion won't gonna work.
does anybody here have solutions for this? i am stuck with this for like 2 weeks
Hi. When do we use the usual FABRIK over the usual two bone IK? I read that it is a bit similar. So far I am seeing more options for FABRIK, I assumed you can tweak more out of it. I reckon it would be better for certain animations but how about for FPS type animations? I am currently using the usual IK for weapon sway and left hand placement. Thank you
Just want to re-iterate this issue so it isnt lost #animation message
If your IK has to rely on other objects then chances are there will always be a delay. The only way (to my knowledge) to ensure that the IK does not lag behind without messing with tick groups. Is to make sure that all the data that the IK needs is within the skeleton it is affecting. I had a lot of problems myself with IK for my two handed guns, where the left hand would lag behind. The solution was to add IK joints to my skeleton.
I have two ik joints that come from the root (with the left hand ik one being a child of the right hand ik joint). These two joints are animated to follow their respective hand joint in Maya. So they are always where they should be.

So when I use IK on my left hand, I can use that joint in the picture as the target, and I know it will always be accurate since it is in the exact same spot as the hand originally was, even if the left hand itself drifts due to aim offset animations or whatever.
The added benefit of this is also that I can use this to create dynamic recoil. I just push the right hand back and then lerp it back to the position of the hand_r_ik joint that I have which is always correct.
@regal orchid
Awesome, thanks for the reply.
yes no matter what i do i can't fix the problem.
but it only works when using new Mesh (non inherited) and then set the tick group to post update.
however this doesn't allow me to do root motion.
is there's a way to do root motion without using the default inherited mesh from Character Class?
e.g getting the root motion vector from the skeletal mesh? anyway?
I'm not experienced with root motion so I can't help you with that. But I know that my approach uses a regular skeletal mesh component, so root motion features shouldn't be impacted.
But if you want your IK to not lag behind then that is the best solution that I know of. Epic's Manny has weapon bones too but for some reason Epic didn't use them when animating him.
Thank you for your suggestion, really appreciate it.
i will try.
Hey everyone. I want to enable an animation/skill during certain frames of a separate animation/Anim Montage. Would Anim Notifies be a decent option to achieve this?
I have an animation blueprint set up with locomotion, plus an attack montage blended in when my player is attacking. However, I want to make it where, when the character is at idle, the animation plays on every bone. Currently the animation only plays at the top-half of the skeleton (as I want it when the character is in motion)
Exporting an animation with root motion from Blender to Unreal looks okay in Unreal's animation preview. But when actually clicking enable root motion it flips the animation on it's back. Is there a way to fix this?
Is the mesh oriented correctly in blender and did you apply location and rotation?
Hiho is there a way to Change the downloaded animations for a new character?


I was importing the animations for the skeleton of this character but the result is that -.-
i've been using add mapped skeletal mesh to map skeleton to rig in blueprints - does anyone know why adding another add mapped skeletal mesh node in sequence with the same skeleton but a different rig does not work?
in metahumans use, there's a control rig for face and one for neck - i can't seem to be using both on the same mesh
Are the animations made for that skeleton or are you retargeting them? Could be a problem with joint orientations, among other things.
well never mind i've joined the control rigs
The Animations are from Maxoma/maximo? this webside with characters and animations xD
And the characters are maximo characters from sketchfab
So I take it that you didnt retarget them. If so I would suggest double checking your import settings.
What do you mean with retarget?
i can only set the skelton to the NPC 01- NPC05 or Character 01-03

Im afraid it is hard to tell what the problem is from here.
oh thnaks thats perfect so i can use all animations für different characters xD
thats ok
after retargeting maybe the animations are not smooth like before ^^
Thank you!
Anyone with experience on IK Hands lagging? Left hand is lagging when implementing recoil force on right clavicle when firing gun
Incidentally someone asked about this issue today. Scroll up a bit and you'll see my answer.
forgot you can link #animation message
Thanks. Will have a look into that
It looks correct. I had to create a root bone, parent it to the hip, and transfer hip location data to it.
Looks like the model you are using is missing twist bones for the arms and legs.
Is it possible to make a keyframe hold for a random duration between two values before continuing an animation? If so how would I go about doing that
Yes i know, its not perfekt but better than the first try XD

Ok but some of this Animations are not working xD

You could probably clip it together in a montage and have the engine handle the logic.
Hey, guys. I’ve done some researching since my last questions. I wanted to know if y’all could help me some more with the vfx of my skill! This is the one I’m trying to implement. And as far as it goes in ue4, I believe I need to create a spline path for the ball of water to follow. And then spawn a projectile that travels in an arc after it leaves his hands. Is that correct?
Oh that didn’t upload the video correctly :(
This is a 2 version of the skill I’m wanting to make. Sorry for the bad quality, but it’s just a demonstration of what it’s supposed to do
What is the best way to mirror animation inside the same skeleton... i have an animation for one hand,, like Left Grab... i want to use the same animation and do the right grab.. both should be independent of each other ?
Hi do you know if MH male and female have different or same skeletons?
Hey all,
I'm having this issue with getting MetaHuman male and female meshes to play animations. These animations that I'm working with has been animated using a male MetaHuman skeleton, so when I go to use a female MetaHuman onto the animations, the proportions seem off as seen in the picture. The animations play just fine, it's just the proportions that are not to scale it seems.
I'm not sure where I'd start looking to try and fix this issue, if anyone knows where I can at least start looking to solve this issue that would be great. Thanks!

To add a bit more information on top of that, the female MetaHuman skeleton is shorter than the male MetaHuman skeleton, just for a bit more context as to what might be at play here. Thanks once again to anyone that can help 🙂
Is there a way to export material animations? To fbx or something?
For example foliage with material animations
Export from unreal to fbx or any other format
Hiho someone know the Rig Function of Mixamo? I try to create a Rig for my little Reaper but the Rig function will destroy the Reaper ^^
Look at his arms 😦

at Start he was a friendly small reaper ^^

someone have any idea? ^^
That tool works best when the character is very simple... yours looks like it would cause alot of issues
You can try stripping out some of the accessories and see if it works...

Looks like your character has no feet too? @leaden flint
can you import animated meshes into unreal? I have a mesh with a ton of different moving parts, when I import it it gives me a few hundred skeletal meshes etc.
Honestly, I went that route for a while. It causes more trouble than it's worth if you're using it for anything other than rapid prototyping.
You might be able to get around those issues by applying cloth physics to the robe around the arms and putting a capsule in the physics asset where the actual arm is.
Thats correct the character havnt feet.
Ah ok nice. Would be there an other way to give this character a rig without this webside?
It would help hide the imperfections with that specific mesh you've already rigged through mixamo.
Other than that you could rig it yourself in Blender.
I can trybut i dont know ^^
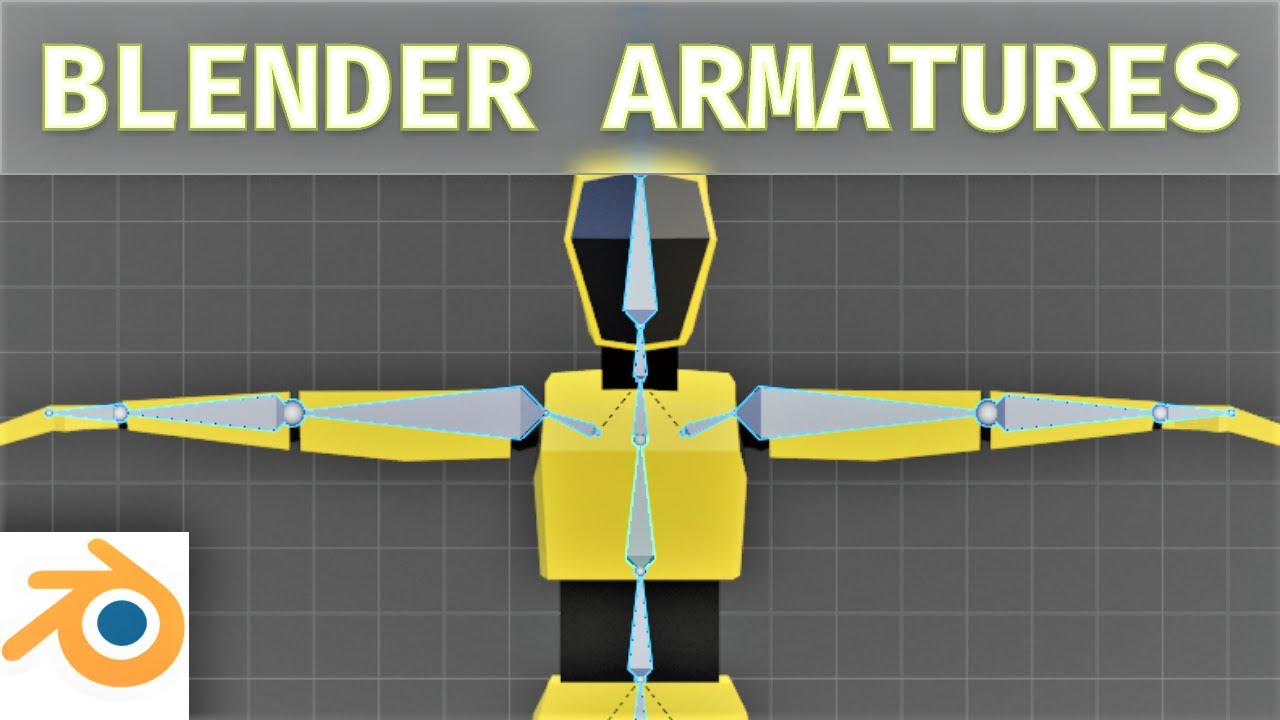
This video demonstrates how to create a basic armature/skeleton for your character in blender. This is the first in a blender mini-series on how to animate a character and bring it into blender.
► Next Video: https://youtu.be/6WqGmxioSdE (Skinning)
*** Share this video ***
https://youtu.be/uK7TTDn1rZ8
*** Subscribe ***
...
Thank you !
No problem! That guy has good tutorials for a recent version of Blender. I personally find it harder to follow along with older videos.
Its different some older version are more detailed that newer onece^^
Hey, does UE4 support squash and stretch in animation ? With custom rig imported.
is there a way to decrease the amount of root motion in an animation without taking it outside of unreal engine? looking to halve it, goes a bit too far.
whenever I import models with "automatically scale bones" turned on in the Send to Unreal plugin for Blender, my character looks fine in tpose but animations look like this
If I don't turn it on, it looks fine but anything I attach to the mesh's sockets gets scaled x100
any idea how I can solve this?
Hey everyone, have a question about morphtargets/blendshapes: Is it possible to have the blendshapes for a given skeletal mesh spread out over a bunch of different fbx files for organization purposes?
And then import them into the unreal into the same skeletal mesh
I found how to fix my issue but I have to manually rescale the movement on every single keyframes of all of my animations, great
and it involves turning off a warning on an official Unreal Engine plugin for blender because that's how good plugins are made
Hey everyone, hope you have a great day. I'm currently trying to import a model with its animation into UE4. But the mesh in unreal appears to be broken. However the animation has no problem. I searched for like 1 hour and I still didn't find anything about this. Does anyone would know how to fix this ?
I guess it has a really weird bind pose for some reason
Here its is bone hierarchy, i'm not sure it's really conventionnal, I'm not really an animator 😓

Not so much the bone structure, just where the bones are when no animation is affecting the bones.
like Manny stands in an A-pose when no animation is applied.
Has the Maya rigging toolkit been deprecated?
Your trampoline's "A-pose" could be that weird jumble
i can't find the plugin and half the documentation is down
You mean the A.R.T. plugin?
yeah
I think so, the guy who made it left epic years ago
oh, weird
how were the driven bones set up for metahumans then?
was that a different plugin?
they said its availabe
metahumans is completely separate and the characters are made by epic
so don't think it applies

Ok, so I changed the weight on 1 bone and it changed the appearance of the mesh 🤔

So i fixed the problem, it was comming from the dummies i used to control the bones. I scaled them and that was a terrible error 💀


reseting their xform fixed the problem
thanks for the help !
No problem. But you should be able to scale them, just make sure not to include them in the fbx you export from your program. Only select the mesh itself and the skeleton when exporting. Your control rig should stay in whatever program you used. (And make sure that the scaling you do on your controls do not affect the joints they control)
Is there any point in using ALS and control rig? Whats the difference between the two?
control rig looks ultra customizable in terms of IK, anim charts, etc. ALS seems more like just an advanced animation machine that gives a lot of movement options
but control rig looks ultra complicated... idk.. thoghts?
Hi there! How can I make an animation freeze on the last frame after playing once?
Its for a death animation. It keeps looping the animation over and over
just make 2 animations. cut the frames of the first one to just a single frame
nice
or u could add a key frame to the end
then just make it go for however much longer u want
idk if that makes it longer tho.. havent done it before
Hey guys, can I ask for some help?
My animations in state machine are looping even after I exit them
example
- I enter an animation - length 100 frames
- I exit it at frame 52
- When i enter it again it starts playing back from frame 52 instead of frame 0
Hiho i need help xD
My ThirdPerson Character animation is broken...
Normally the ThirdPersonCharacter can Jump and will run automaticly but my character have 2 errors and will not use the Jump,Walk and Run animation xD
I dont know why. Yesterday all animations were working
This are the JumpStart to JumpLoop (Rule)
JumpEnd to Idle (Rule)

what kind of code is this little thing ^^
There also was a problem with the Thirdperson Materials, so i have to set the textures again. Its spuky ^^
The Char is now Ideling but broken xD

Control rig is a built in rigging and animation tool. ALS is just a character with animations and associated animation blueprint etc.
They are not mutually exclusive
Every time I reimport an animation I have to delete the montage, create a new montage, adjust the settings again, and rehook it into my code. Is there a way to avoid this?
Hey noob question. I have retargetted mocap animations for my character imported into UE5. everything is working fine , just wondering if there was some type of setting , blueprint or physics trick i can apply in order to prevent my characters arms from passing through his shirt or his other arm. Looking for a way for the arms to just collide with his body instead of pass / clip through


anyone can help me with this skeleton issue?
what is the best way to make character fat?
should i need to scale each bone individually?
Hello. When viewing an animation montage, how can I have a particular socket be displayed while the montage is playing?
I want to view how it is transforming
Found it. Nevermind
Years ago, I used to use MakeHuman for.. making humans in blender. Is that an acceptable way, or is there something that's preferred that is comparable?
Anyone here know why a character might get stuck in T-pose in Standalone mode, but works normally with PIE?
I'm using the default mannequin.
does anybody know how to make the bones not do that when you add basic ik

in retarget manager under set up rig--->select rig...we only get humanoid as default....is there a way to create one in engine for a Dog or cat...or a place to download some more that can be assigned in this drop down?
Im trying to retarget a few animal animations but since their is no epic standard naming convention for 4 legged animals, literally every model has the same exact bones named completely differently and without a rig file i cant retarget anything at all
Anyone know what I need to do to get AnimBP + Sequencer to work together? I want to use Anim BP to have a head look-at
I guess this would be a better use of control rig... but for now
Hey, quick question. I've got a ticking clock animation using a sequencer but I cant figure out how to trigger it. I tried dragging it into the level bp but that didn't do anything. I want it to loop from the beginning of the game
trying to buy an animset on the marketplace but they havent been updated to the latest engine since 4.23
I imagine its not a problem since they're just anims, right?

Bit stupid that they require a specific engine. But you can most likely just download 4.23 and then click export or migrate on the animations. And they will work just fine unless the maker did something really weird.
You can make an animation play node and then expose the animation as a pin.

which turns it into a node that looks like this

is it possible to animate inside ue4? If the base model and rig are already set up yata yata? or an easy way to edit animations for the model that are already in?
Control Rig
Anyone know how to fix this?
these bones don't seem to move at all, only rotate in-place


when u play it u can set it to loop
depending on how u play it
like from bp Play Montage node has a loop var I thinik
or in case you have multiple section you can select checkbox in rightside to loop next section

Yup it was just a simple checkbox thanks
can anyone tell me how to remove the numbers that is being displayed in the left

is this the right place to ask this question or is there any other channel?
Quick question, I changed the movement speed walk and crouch but now the slowed animation doesn't fire the anim notifies and I don't understand why, where should I look? (found that changing the anim notify mode to all animations kinda fixes but spams the notifies) Second question; where can I find the animated mesh component?
this is more a general question, not animation related
probably #blueprint related?
Hey y'all:
I've got this wonderful data from a Live Link performance capture in blendshape curves.
Anyone know if there's a way to export these curves from Unreal into an .fbx for retargeting / cleanup in Maya?

hey peeps, I need some advice on mirroring skeletal animations. I've been using a marketplace RMAMirrorAnimation plugin. Works great, but i'd like to get away from using the plugin
do you think there is a benefit to me creating a mirrored animation set in Maya or is there any other alternative?
Looking to keep things as optimized as possible
Curious what an AAA game would opt for
reimport with scale of -X
So export the anims from UE4 (assuming I don't have the originals in Maya) then scale -x in maya and import the new scaled ones?
Seems a lil too easy but if it works : P?
import option in unreal has scale
i explained it a bit up too WhippyTrout
seems like an easy solution
cuz im a freakin genious 😛
and i dont do many forum posts
you should find it if you use the search in this channel
i usually do it in blender but with import options should be fine
come to think of it the import options screen unreal has a transform section and u can scale it -1 in there, it wil flip the anim and set that as 1.1.1 it should be perfect
that was my final answer and was accepted as correct 😛
never tried myself tho
you can do it ineditor aswell, but than sockets would also be -1 and you might or mightnot want that
so better no do that cuz if you forget or other person doesnt know its -1 it can become hard to debug

stranslation x-1
translation would just move the mesh
not mirror anything
what u talkin about for realz? : )
let me open the editor
I have a SKM mesh and animations for it, and have recently decided to add a new bone into the hierarchy, the bone itself isnt animated, it just sits in a position and thats it. I reimported the SKM mesh and the bone is in the correct location, and I expected the other animations to just leave the bone alone as it isnt in the animation data, but instead it has moved the transform of the bone, so the old animations just dont work with regards to that 1 bone. Does anybody know if theres a way to fix this, an option perhaps?? Thanks!
@reef agate

dats what i want ya
mayB the animation scale on import got removed?
on root bone in the anim?
if that's what u mean that has bad side effects for me like inverting normals
ya that's a terrible idea for me i almost certain
i not looking for hacks. need a solid solution
my game is VR, full body IK blah blah : )
wondering what a AAA workflow would be for this
scaling the rig and apply the scale is fine
you switch left or right hand dominant in the game that's why i need mirrored anims
reversing sockets is a definite deal breaker
well thats what the reimport was for, it applies the scale and sets -1x as 1
there is no non uniform scale on import as i mentioned : /
@opal jackal said it worked tho
so mayB it got removed?
@reef agate the VR template pre 4.27 does something similar too
2 hands 1 skel mesh with flipped scale
So does control rig give you the ability to create your own animations without using 3ds max / maya / blender?
I've been hearing conflicting information
yes it can
Cool
I found it confusing when I tried to use it in UE5 with no prior experience with it. I know how to make controls and use different solvers in 3ds MAX, but when it came time to actually create an animation in control rig with UE5, I felt lost. Nothing jumped out at me to click to open up the animation editor (if that exists)
marketplace has a control rig example free from epic
I'm not sure to understand this :

Does the slot override the state machine ?
(And do you have any resources about anim graphs etc .. ?)
It mirrored the animations for my I just had to import and set the rotation and the negative value so it would be right side up. I wound up not using it because if sockets being backwards, I finally found the maya bonus tools on Autodesk website which adds the mirror tool to maya. Then I mirrored the anims in maya
So im trying to add shield and sword moving/idle animations. I have the code for the idle and movement for crouch and walking aswell as running and I have the animations for attacking and putting my sword on my back/in my hand. Im trying to make it so If I put the sword in my hand Ill get a different idle animation.


hey guys, I want to add some small animations to my project like door opening, drawer opening, etc. I'm still a learning the engine so I'm not sure if it's something that should be done through blueprints/CPP (setting the rotation/position over time) or if you can create keyframe animation clips in the editor and trigger those.
@slender saddle make some transition rules in your state machine
how ?
im kinda new to ue4 thats my jump crouch nodes

@static falcon
sorry for mention :-:
Easiest way would be create a boolean variable called crouching and set it to true when crouching
Then in the jump, use a branch node
Actually sorry, that's backwards from what you asked
I don't know what that means
dm
I had this question the other day too Huffdog
My feeling is it's probably easier to just do it with a timeline and two separate pieces for something like a drawer opening
I had a fan that I wanted to rig, and making animation clips and an animation blueprint felt like overkill
You could rig it with a skeleton and do it that way too though, but not really sure why go through the effort, unless anyone else has a good reason I am not aware of
Great thanks @static falcon , I went with timeline node option, using a float value to drive position and/or rotation. Seems to work well handy that it has play reverse functionality too.
It also has the added advantage of the desk being able to be static and therefore light baked, where as the skeletal mesh probably wouldn't
I'm not sure exactly what the issue is but maybe you could make two different locomotion state machines that you swap to based on a boolean?
I lowered the crouch speed in the char movement component and now the crouch animation seems like slow motion? What and where do I need to change?
can you show the anim blueprints
It's kinda big, anything specific?
the crouching state


Yeah I figured, because you're using a blendspace the animation is trying to match the blend
just increase the playrate of your animation, or change your velocity stuff to match the animaiton properly
these values?

I'd recommend fixing your parameters if you're gonna use a blendspace. But yes you can just alternatively speed up the animation
Where it says rate scale
increase it to 1.5 or 2.0
to see a nice change
or whatever you want
looks like it's only necessary for crouch forward
Velocity is sensitive cause I already have notifies rigged to the animation and changing it not a good idea. Will try now changing those rates.

Weird, changed to 10 all that say fwd and it only changes the strafing crouch.
yeah sorry, it's not my project so I don't know which animation name is which
but whatever animation is looking slow mo, jsut increase the rate scale on it
to match the desired effect
It's fine, maybe I will try find the "playrate of the animation" I saw that somewhere yesterday
yeah iirc you do that on the specific animation, rather than the blendspace
Sigh still doesn't do

Should work fine on the blendspace, otherwise the option wouldn't be there. Perhaps there's something else
Or are they just a preview tool
got it
changed these values "strafe" and "forward" to half

That's what I was recommending in the beginning, glad it worked
"I'd recommend fixing your parameters if you're gonna use a blendspace."
sorry fi I worded that confusingly
You were mentioning the rate scale, not those 😅
Ah yeah the wording. No worry glad it's all solved. Thank you so much for your time 🙂
Hi all. I have a blueprint coding related animation question... I think :0 Not sure which channel to post this in. (2D) I have an animation where the player is moved off of the ground during the anim, and ends having moved in both the Z and X dimensions. E.g. you carry a box with you and the animation is you putting the box down in front of you and then climbing up onto it. So it ends with you standing on the box. Should I be moving the pivot point every frame of that animation to always centre on the player character? Up until now I had been playing the animation through the AnimBP and then teleporting the player to the end position of the animation when the animation is finished. So far this has worked okay but it has obvious issues - e.g. the camera is attached to the player, so it snaps (or suddenly lags) over to the end position once the anim is finished depending upon lag settings. So i've just been experimenting with what I see as the other way of doing it (hopefully there are better ways!)... so I move the pivot point throughout the animation, (and having turned gravity scale to 0), I then teleport the player roughly towards the end point of the animation. This kinda works but doesn't match correctly even with VInterp etc. I guess to do that right I'd have to move the specifically needed distance per frame of the animation (i.e. a different amount of X and Z for every single frame of the animation. That is possible but is going to take ages... am i doing this wrong? Is there a better way? Advice welcome!
I don't really work with 2D in unreal, but, if you changed the animation to use root motion, wouldn't that take care of it, since the capsule is moving, the camera's centering should continue to work?
Hi Geei - thanks. I have no idea. I've heard that term before over the years. I don't know if it is applicable to Pixel2D or not offhand. The animations are just a series of sprites played as a flipbook.
Each sprite has a positional pivot point
ahhh, yeah, then basically you would have the positional pivot change on each frame, that is a pretty good analogy for what a root motion animation is in 3d
General workflow question:
If I have animations that are designed for one skeleton (think unreal marketplace) and want to migrate them toa similar skeleton (same bone structure, different proportions). Would it be best to:
- retarget the animations in Unreal, export, and then modify the animations in Unreal via keyframe edits
or - retarget the animations in Unreal, export, and then modify the animations in another program (blender, cascadeur, etc), then import
or
something else
A "high level" exmaple would be adjusting animations so that a shorter-armed character (woman, child/teen) could use a 2 handed weapon well.
Thoughts?
Hey guys, I have a character customization feature where the face mesh changes based on user selection of scales. I was wondering, how do people integrate animations when the mesh changes? i know some games have very big character customization options and still manage to animate the player character during cut scenes to display face emotions, so how is that done?
guys is the look good ?