#animation
1 messages · Page 156 of 1
@uneven wigeon Sure, there's a notify event, something time dilation, for that. If you want more control you can create a notification and use the node time dilation to slow the time.
@static falcon I think its used with basic locomotion when you're doing procedural ik movement.
Anyone know what exact space "get bone pose for frame" is in?
is it relative to the parent bone or the reference frame?
Does someone knows a way to import a Physics Assets into Unreal?
The idea is that I export my skeletal mesh from Houdini with an FBX and I want to precisely import the collision geometry as well.
Does someone knows how to do it or a similar Physics Asset import?
is there a way to get local bone position in an animation blueprint?
Does the animation actually move the player capsule? So I wouldn't use the movement component, just play the animation to propel?
Believe so.. Haven't done it personally


How can I get the "Is aiming" variable to also be available in the animation blueprint?
I believe you would call Get player pawn, cast it to your character class, and then access the variable
^
oh it worked! Thanks!
Hey maybe someone can help me, is there a way to use the mixamo animations with metahuman rig?
Pretty sure I saw a YouTube video named that exact thing
Really?
Can you send me the video, cuz I have been looking and couldn't find anything
I was just looking for it, but I can't seem to find it again.
I'll let you know if I do
Can you tag me? cuz I may not see it
Yeah
I have been looking, and it seems that what most ppl do, is using only the head of metahumans and implement it in the mixamo animation rig
I have no idea how to do it but this is what I found https://www.youtube.com/watch?v=7NTiWqewQak
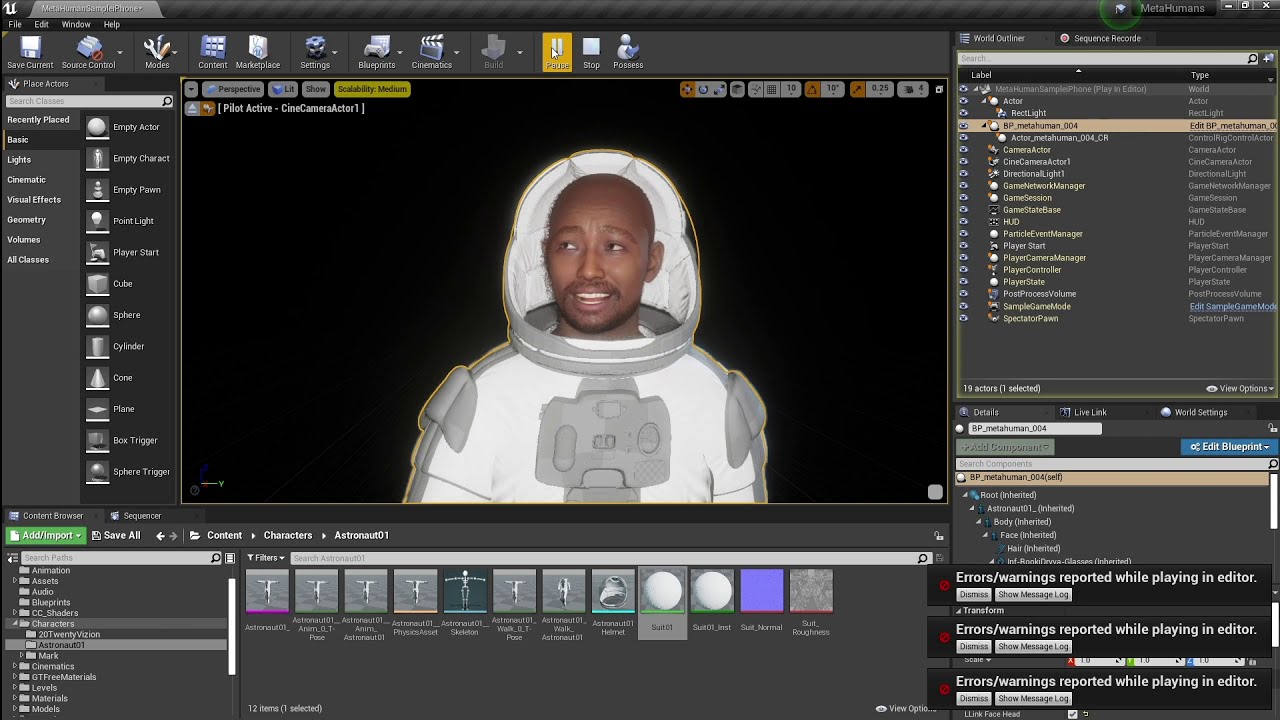
Continuing my tests using iPhone's Live Link Face app, and a modified version of a character from the MetaHuman demo released by EPIC Games. This time, combining it with a body/suit from DAZ, and an animation from Mixamo. More to come soon.
I get the idea but I lack the skill to do it
Yeah I haven't touched the metahumans yet
Hey so, just wondering. If you're going to be animating in Blender, how would you suggest swapping out faces during parts of animations?

I have this here and, as the voxel model is much too low detail to include easily animatable details like eyebrows, tongue, etc, I'd like to impliment a system where faces are swapped out during parts of animations. How would I go about doing that?
Hey all!
This is from my character's anim BP. He has a pointer to a 'coop area' actor in the game. That actor holds a number of animation sequences as variables.
How do I get that animation sequence from the 'coop area', and have it plug into the output animation pose?
For reference, the same animation sequence is below and obviously that can be hooked up fine, as usual... but when it's in the variable state like this, is there a way to convert it into the playable animation sequence?

Disregard, I found the solution!
Hi everyone! I want to reset an animation when a character gets hit. I'm currently using animation states for all of this. The transition rules are the same as it needs to reset the animation. Any help you can give me? Thanks!
unfortunately this is not very straightforward, here are a few ideas you can use https://soldirix.wordpress.com/2019/08/07/ue4-animating-2d-eyes-on-a-3d-character/
Also https://twitter.com/BillieBustUp/status/1202393931499155457
(If you find a better way to do it lmk btw, planning to do the same kind of stuff at some point and these are the best refs I found during preliminary research)
Anyone know hot to use a MetaHuman with 3rd person blueprints? My trouble is that all the skeletal meshes are separate per body parts....
I have a character that uses a skeleton almost identical to the Epic Skeleton. It has an extra jaw bone
I want this character to use the Epic Skeleton, discarding his jaw bone.
How can I do this?
Assigning the Epic Skeleton to his mesh won't work because of that extra jaw bone. I don't want that bone being added to my Epic Skeleton
I have a question out of curiosity for anyone that knows anything about Morph targets. I know most games/animations use shape keys or corrective bones in their animations to fix some of the weird bends in their animations. if those correction bones were needed, would they be better done with bones to save performance? Like if I were trying to cleanup some kinks in my animation that weight painting doesn't seem to solve, would it be better to use bones or morph targets?
I'm not really having problems with that right now but I'm just wondering what most animators for games do.
Hello, has anyone had luck getting Metahuman working through Blender or do you know if its possible?
@strong flame you can export to Maya for sure, so idk why it wouldn't work in blender
Hi, I have a character with a ton of complicated animation, and I need to substitute a different character/mesh. Is there a way to swap out the mesh in Unreal, and have the new mesh use the existing animation? I want to avoid having to individually retarget all the animations by hand. Thanks in advance for your help.
@fervent plinth The fastest way it's to assign the skeleton from the animations to the target mesh. If the model it's compatible then you just have to change the mesh in the BP and everything it'll work fine. My experience with marketplace models it's mixed, there are many meshes that simply doesn't allow to change the skeleton to work out of the box. If that's the case you'll have to retarget all animations. The AnimBP can be retargeted as a whole, if you have individual play animations then you'll have to change it. It's a good opportunity to expose that animations to the main BP and then you'll have just to swap the animations in the main BP.
@cosmic delta thanks for your help. The structure of the old and new skeletons are identical, but the naming convention isn't. Does that create a problem if I'm assigning the old skeleton to the new mesh? How do I assign the animated skeleton to the new mesh? Do I replace the old mesh in the old character? Or is it some kind of export/migration from the old character that is assigned in the new character?
@fervent plinth you'll have to remap the bone names. I don't know if you can rename to assign a new skeleton, but if you need to retarget you'll need to do it anyway. Search in google how to remap between skeletons and try it. To assign a new skeleton just right button in the mesh and select assign skeleton.
Hi, I like the new Control Rig system, but I try to use them in a Third Person Controller and failed but I dont know how make that, Any idea?
Try to use "Control Rig Mannequin"
Guys, can I pause animation (or montage) at some point and then play it back a little?
Like, I want to play reversed animation in case my character hits something
can anyone suggest any info on how I can have a character hang by a limb? I assume physics handles but any more info would be appreciated
@cosmic delta
To assign a new skeleton just right button in the mesh and select assign skeleton.
Could you explain this in more detail, please? I've Googled this, and can't find any reference to an "assign skeleton" command. I'm not quite sure where to look. Do I open the mesh editor?
Thanks.

@fervent plinth in that picture you can see the option. Remap the bones and try it.
I would, but i don't know where to find that menu.
It says "from any internal mesh." I don't know what makes a mesh internal, so i don't know where to look.
Any clues? Thanks.
Any skeleton mesh it'll show that menu and option. But I think you'll end retargeting the animations aniway so maybe this it's the moment you should understand all aoput retargeting.
I saw from a Fortnite presentation that Epic uses Copy Pose From Mesh for all their character parts, so skins with different skeletons can source their animations from another skeleton. And they use the "Orient and Scale" retargeting setting to maintain the meshes original proportions, and that works as you would expect. But I don't get how these two are combined, because when you use Copy Pose From Mesh it copies the proportions from the copy pose target. So if you have werewolf character with a different hierarchy, like in the presentation, how does the werewolf maintain its (bigger) proportions when it's copying the pose from a human character?
Hey guys, anyone around to ask a few questions regarding genesis 8 models and UE?
Maybe I will just drop my question and I thank any and everyone in advance for helping out 🙂
I am using Genesis 8 models from Daz, I am able to retarget them and get them to work in UE no problem.
My question is, how do I get the Genesis 8 model out of Unreal Engine with the Unreal Skeleton attached so that I may begin rigging my clothing meshes?
Hi everyone! I'm looking for a way to do rapid animation prototyping. Any recommendation? I guess I can play around with the Unreal mannequin inside UE4?
I'm just trying to prototype some abilities.
@hidden oasis export?
right clic on the skeletal mesh (or the animation sequence if you have retargeted one) asset actions, export, select the place where you wanna save it, then it will show you a window, select there export preview mesh to make sure you get your mesh in your project and not only the skeleton (if you want) and then hit export and it's done.
I don't get what you mean by animation prototyping, but you can easily start with any unreal template closer to what you wanna make (maybe import a paragon character that usually has better animations than the ue4 templates) or the advanced locomotion system which is free in the store all those are easy to modify and add your own animation and functionality over a existng controller (the advance locomotion system is a little harder to modify)
i done a blue print animation with a blenderspace that works but in the preview the character blends from idle to running fine and i set it so max speed is 1200 and character in game uses 800, and in preview for blending it looks as expected but ingame it uses full running animation regardless of what speed i use, what can i been doing wrong?
@potent thunder Thank you my friend!
Hey guys I remember there was a rule on the transitions on the ABP to automatically play the next sequence when ended
can any of you point me to where I can find this
get time remaining or something like that, and the condition is when the remaining time is equal to 0
Hey thank you but I didn't mean this one, the one you pointed out is inside of the condition the one I was describing is outside "Automatic Rule Based on Sequence Player"
https://www.youtube.com/watch?v=lUzi0oNLcNg
I have the issue that the player mesh is going under the floor for the other players when proning. It does not happend for the player himself... Any ideas why? I already offest the mesh but it does get overwritten and snaps back?
maybe your capsule is moving/changing size too fast when changing between positions. My team had the same problem when the character crouched and stood up the capsule made the character lift a little up from the floor (it was so bad that we could actually climb small obstacles xD) though I can't tell you how to fix it, because it was our programmer who did not me.
Thanks anyway! I actually found the problem but no fix.. because of network smoothing the other players mesh always trys to go back to original position because the offset for smoothing is only recorded once at the beginning.. only solution seems to be to set offset via tick or to disable network smoothing.. If you programmer had a better solution would be great to hear 🙂
Hello everyone, so I was trying to retarget mixamo animations on my model but for some reason the retarget animation is messed up (twisted legs and stuff). I re-checked the bones can't find any issue there. Anyone ever faced problem similar to this? Thanks 🙂
here, somewhat like this...

I'm pretty new to IK Foot placement (IK in general).
I had a look at Paragons Wukong ABP and saw that setup:

I googled and watched some videos about Leg IK and noticed that other resources do this:
- Call the Leg IK node twice for each leg
- Populate the Alpha and calculate the alpha with line traces checking for ground
- In the Leg IK Legs Definition they set the IKFoot Bone to the calf bone
Does the Leg IK node in the Wukong ABP has any use?
Why is the Alpha always 1.0? Why is it using ik_foot as the IKFoot Bone? For what are those ik_foot bones anyway when most of the ressources I found uses the calf bone as the IK foot bone?
I would be very grateful for every help 🙇
Hi, im new using the unreal animation tools, and I cant find how to edit an animation sequence time range.
@toxic night There could be a few problems, check if you properly set the character pose on both so that they are very similar. Second I recommend getting the blender addon Mixamo Root baker! It can batch convert your animations and character skeleton to be much easier to work with in UE4. There are some 5 minute tutorials on this. DM if you need help converting it 🙂
hey guys I have a animation state that is triggering a start and end attacking sequence but for some reason it fires of both almost at once has anyone had this and fixed it?

Haha Nvm for some reason when I did this tired I called my attack function twice :p
in another area so I didn't see it lol
Oh that's amazing, I will checkout the blender addon, I'll let you know if the problem is fixed. Thanks a lot! 🙂
you're welcome! 🙂
is the lookat node's interpolation function broken?
bone seems to instantly turn no matter my interp time value
Hello, is there any way to make use of curves in my animation sequence from the outer montage? I am getting an exception (curve.Evaluate(t)) if the curve isn't defined at the montage level (but I'd prefer to define it in the sequence, so it is more reusable)
Got an issue with the locomotion state machine. It seems that playing a montage is somehow causing this to happen (Floor jumps to idle). As you can see there is no link between them to even cause this by a change of states

Our guess is that playing a montage resets the state machine, causing it to check the current state from the entry point
if we stopped playing the montage at that moment it works as expected
ALS3 and ALS4 actually have awesome animations. Even without the animation BP and ALS Char BP, the packs are worth downloading for the animations alone.
I'm having trouble doing a simple cloth simulation. I just want a tarp or like a bed cover style where you can pick it up and it just falls and hits the ground like real cloth does.
The problem is importing the basic skeletal mesh doesn't seem like it's doing anything with 3 bones. and it's going through static meshes.
There's plenty of tutorials with like flags and stuff. but I want just the cloth itself.
As soon as I apply the painted weight, it just doesn't work as expected.
Unless i'm exporting something incorrectly from blender.

Hey guys I'm currently using the FPS Template from the marketplace and I'm pretty new to unreal I've been learning and working on the project for a couple weeks now. but I'm having issues learning how to re target animations per weapon is anyone familiar with the template?
ugh. seems like cloth simulation doesn't collide with other things in the word really as expected.
Hi everyone! I've been stuck for days with this one. When my character gets damaged, a damage animation gets played (currently on an animation state). The problem that I'm having is that if I get damaged again, I want to reset the current animation. Any help with this? I've tried so many stuff but I can't get it working 😰
You should probably use a montage for a damage anim
Then you can just use "play montage" in BP
don't forget to update your state machine with the slot node or it won't work though

Also when creating the montage with your anim remember that the default blend in and out times aren't null so you may want to zero them out if necessary
Does anyone know a method(s) on how I can modify the bones in the animations to fit a firearm mesh? As you can see from the screenshots the character is obviously not holding it properly. I know that I can edit the animation but I want to know if there is a way I can edit the animation with the model in plain view. Am I able to bring the mesh into the animation sequence or is there another way? Any help is appreciated.


@delicate junco Wow! My issue all the time was the blend time that it was set to the default values 😭 Thanks so much!
hey lads, got an issue where my animation only shows when post processing is turned off
@raven oxide you'll have to use IK. For that kind of weapons it's great, and very easy.
Can you elaborate? Or do you know of any tutorials you can link to me?
https://docs.unrealengine.com/en-US/AnimatingObjects/SkeletalMeshAnimation/IKSetups/index.html https://www.google.com/amp/s/zaggoth.wordpress.com/2019/01/26/ue4-tutorial-the-right-way-to-do-left-hand-weapon-ik/amp/
Inverse Kinematic systems allow for reactive animation, such as foot placement on non-planar terrain.
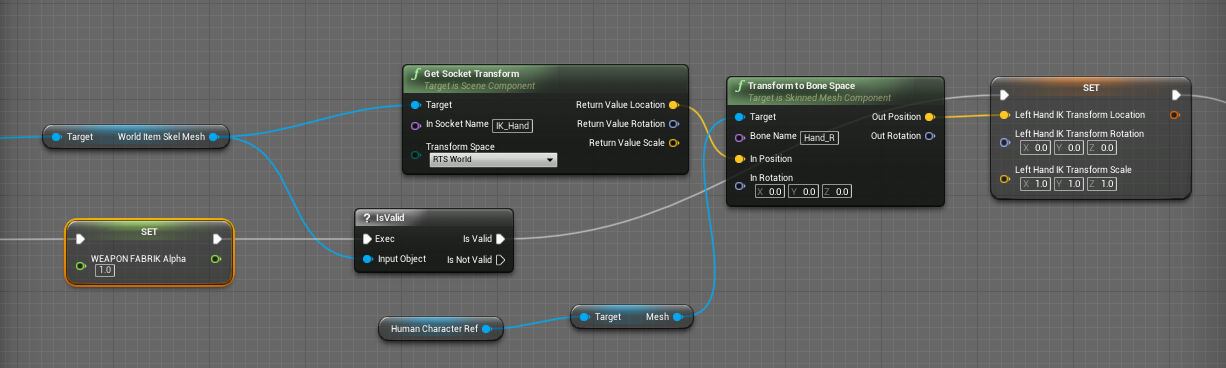
Everyone else on the internet is wrong. (Okay, not quite — though I spent a good many hours going through tutorials and not getting the results I wanted for left-hand IK. There are a LOT of t…
Thank you. I will look into this
Is there an alternative to transform modify bone for transform bones? We use it for the character customisation and we think it will cost a lot of performance in game.
I'm looking into smoothing out AI controlled pawn's rotation so they don't just instantly snap into new directions as they follow pathfinding - Is the way to go with this to decouple the pawn's rotation from control rotation and manually interp its rotation, or are there any better alternatives?
Try checking "orient rotation to movement" in the CMC
I tried that but it doesn't actually work entirely as desired - characters who aren't moving and are trying to face a certain direction stop facing it, as it's no longer following the control rotation
But I noticed there is a second option "use controller desired rotation" which actually behaves pretty well for this :) Thanks, didn't realize those options were in there
Hehe nice
if you ever need to manually interpolate one day though FaceRotation is the function you want to override, had to do that for some root motion based movement anims for my enemies
Something like this
void ABaseEnemy::FaceRotation(FRotator NewControlRotation, float DeltaTime)
{
    if(!bHasEnemyRootMotionMoveTo)
        return Super::FaceRotation(NewControlRotation, DeltaTime);
    else
    {
        FRotator OverrideRotation = FMath::RInterpConstantTo(GetActorRotation(), NewControlRotation, DeltaTime, EnemyRootMotionMoveToInterpSpeed);
        return Super::FaceRotation(OverrideRotation, DeltaTime);
    }
}```Thanks, that's good to know
is there anyway to change the flipbook play rate or frames per second
Hello! Apologies if this question is posted in the wrong place - just seemed the most relevant channel - let me know if there's a more ideal spot for it: When re-importing a skeletal mesh, old material IDs that had a material assigned to them are retained even if they no longer exist in the new skeletal mesh, but can't be removed. This is causing issues, how do I fix this?
Hey
Someone know why when root motion is activated
the animation gets all distorted
and in game it not only does not work but it tilts the capsule from my character sideways
and stays this way
You can't delete them in the model inspector
?
Nope, seems you can only do that to manually added material IDs - but not imported (or past imported) ones
Guess you can reimport the character in a new location and then swap it in the blueprint though it's a pain in the ass
Can't quite do that either unfortunately. I think a fix is to delete the file, check in that change, then reimport and check that in - but that will break the entire game for everyone and loose any socketing work done
Must be some way to deal with this?
I wonder if you re-applied the materials with the same names, then reimported, cleared materials from being assigned to those IDs, then removed them and reimported X_X
Anyone has some good guides to work with the rigid body node?
I wanna do something similar to this

but i'm unsure on how to setup my physics assets and constraints..
Hi people, what is in general best practice to replicate montages? sync client and server playing.
I found this on unreal forums:
Via Blueprint:

1. Create a Blueprint struct to hold a montage and its relevant info (Play rate, section etc).
2. Add this as a variable to your character that replicates via a rep notify.
3. On the client, make sure the rep notifier for the variable plays the montage using the replicated information.
4. On the server, ensure you fill in this replicated montage variable when you play an animation and call ForceNetUpdate.
but it's one old post from 2016. I already do sync for locomotion (target, speed...etc) using multicast, so i want to avoid using more multicast.
Hiho animation Guys ^^
I try to create an animation BP for a creature that can walk, run and fly.
My idea to implement this is the following:
Ground Blendspace max Walk / run Speed 300
Flying Blendspace max Fly Speed 450
But i dont know how to work with Movement Modes ^^
Does anyone have experience with that?

Raikun, you need to set the movement mode in the Character BP (not anim) and then set a variable (i.e. flying) and cast that to the anim BP
@leaden flint
Send me a message if you'd like
Does anyone know of any courses that teach ue4 Animation techniques like CGMA or Domestika does for other things?
Ideally one that is taught by an industry professional
I've watched loads of Codelikeme videos but I don't like his style or methods much
Hi, i have 2 identical skeletons in ue4 that use the same names, but when i use one of them with an animation blueprint, only the animations that came with the skeleton are available as assets. The same happens for the second skeleton. Is there a way I can have all animations show up for 1 of these skeletons?

Hey guys! Is someone farmiliar with Control Rig Backwards Solving?
I have a problem where it doesn't backwards solve the first few frames of an animation. The result starts at like frame 5
Hello, I have this problem where I rigged a character in Mixamo and exported some animations from there, like walking, idle etc. Then, I decided to implement a dive roll my character could perform, like in Dark Souls. The animation contains root motion. When I created the montage and implemented it, the root motion was really weird and the character somehow tilted sideways everytime I pressed the button.

this is the character in the animation, ROOT MOTION NOT ENABLED (he would perform a roll)
this is how it behaves once root motion is enabled (seems like he is not moving nor rotating, but the animation of the roll is still playing)

I should also say that, with root motion NOT ENABLED, the animation flows correctly, the character performs the roll, and once the animation ends, it goes back to the capsule where it belongs
It seems like activating root motion disabled the roll movement and rotation, and the character performs all the animation frames in one spot, not rotating
he should have behaved like this in the image 2, in the middle of the roll, rotating and moving a little forward

yeah I will try to upload a video showing how the animation behaves with root motion enabled
see
this is with the root motion enabled
but look how it behaves ingame
this is how it behaves in game
u can see it leaves the character tilted
i see
i was using these animations from mixamo for the purpose of testing so later I could grab myself some with better quality
you mean make the animations myself?
oh ok i know what u mean
thanks anyway
I could also try to code the rolling movement and use an in place animation too
Hi, I need an opinion, I am currently working on an animation project. We are animating in maya and rendering it out in unreal. Just wondering what workflow I should be using.
My job is to get the animation files and render them out in unreal to edit in premiere. All the animations are tied to the same skeleton/mesh.
Is it better to get the animations baked with the character or can I make do with only the animation file from the sequence editor ?
Is AM_ the common prefix for animation montages ?
@fleet willow https://github.com/Allar/ue4-style-guide

GitHub
An attempt to make Unreal Engine 4 projects more consistent - Allar/ue4-style-guide
Thanks ^^
Is there a way to utilize blend spaces similarly to a montage to play one-shot animations? I have an attack that has pitch based variability that I want to implement, but it seems the minute you want to use blend spaces, the montage pipeline that is typically the pathway for implementing one shots for attacks and such is all useless.
put your blendspace on a separate state and just disable loop on the blendspace, then it will play the animation according to the values just once
anybody knows why my character is floating? xD it happens after I implemented IK foot on him, moving him around doesn't fixed the problem

Is only like that in the blueprint, on the game he stands on the floor and walks with the ik without problem
bake the weapon animation in blender, and export it
in-engine, then, assuming your weapon is attached to the hand, enable the force root motion (or whatever it was called) in the weapon's anim sequence
hey, I'm trying to clean up some mocap data in ue4 and I was wondering if there's an easy way to composite animations in the editor. I want to directly combine them bc I'm gonna export and retarget them, so using an animation blueprint seems weird. is this doable?
for example, here's an animation, you see the hands are messed up

but I have some poses like so

can I just like...paste it on somehow
vs doing it at runtime with a blueprint
I've been having an usual issue with an animation in UE4, and hoping someone may have some insight. When I bring the animated asset into UE4 from Blender the bone or armature appears to be scaled up by roughly .004% resulting in the part of the mesh that is tied to the only moving bone to not align properly. Any idea what might cause this or how it could be addressed? I'm working with .01 world scale in blender and using all the proper FBX export settings, and everything else (including collision) is working perfect. The bones, armature, and mesh in Blender all have a scale of 1. I've spent a few weeks searching google with no luck so I figured I would try here!
Complete shot in the dark (I have only recently started working with Blender and Unreal), but I was experiencing an issue that sounds sort of similar where an animation I exported from Blender had subtle small differences in Unreal. I eventually noticed the same issues could be observed if I imported into something else (Maya, in this case). I switch to using the "Better FBX Exporter" plugin for blender and the problem vanished.
Hiya! Anyone have any good resources / ideas for a melee combat system like Mordhau / Chivalry? I mean in the very basics (not the extended parry / riposte / chamber / glance system) but I mean both the physics and the animation.
It would be nice if I could animate the offset of a weapon from a player node, and then use IK to animate the arms. This way I have very fine control over the weapon's movement - I'd also like it to collide at multiple moments so it "stops" on impacting a wall, and keeps slicing when impacting something soft.
Would that be animation montages combined with per-frame raytracing / collision checking?

Buy Mordhau Steam key from the webshop (developers get more money): https://mordhau.com/shop/
Buy Mordhau on Steam: https://store.steampowered.com/app/629760/MORDHAU/
Get Mordhau Merch: https://mordhau.com/shop
6 minutes video footage from the Mordhau Pre-Alpha version, showing off the melee combat in duels and smaller skirmishes.
Mordhau is ...
I use an Stealth Execute Animation Montage on the enemy and when the Animation is finished the AI is dead which then triggers the Character Mesh to simulate physics for rag doll movement.
My problem is that the ragdoll character mesh "jumps" away right when ragdoll is activated. Where does the velocity come from? I just want the Enemy body to hold the position he was left off.
Hey.. so I'm extremely new to 3D graphics and animation. I'm planning to make a few simple 3D characters for my game. If I create an animation for one, can I use it for the others, even if their skeletons are slightly different? What if I use mixamo for the animtations?
Also, are there any good, basic resources to use for char creation/animation? Thanks!
hi so basically im trying to learn ue4 and i need help, basically i downloaded a crouching animation and made it so you can crouch and crouch walk but it does not seem to be working. if anyone is willing to help out, that would be great.
What would cause Morph Targets to not do the same thing as they do in Maya? In Unreal, when I check my Morph Target in Skeletal Mesh, it looks nothing like in Maya
im got it to work... but not in the way i wanted to
@halcyon pier what does it do?
when i shift it goes down to the position but it still moves in the idle position its not changes positions unless i press shift again while moving
its hard to explain wanna hop into a call?
so you want your crouch on a Flip Flop?
And you got that set up?
yep
well thats what a flip flop does, you need to press to disable
or program run to disable crouch
sure, put screenshot in here


Hello. Newb here. I'm planning the best course of action for an interactive presentation. The subject is technical installation, and the product will be a presentation of step-by-step procedures. I'll be animating translation and visibility of a bunch of objects, and need to segment and trigger these via a simple menu system. What should I look into?
- Keyframing in another app and import as skeletal meshes in Unreal? Seems cumbersome..
- Animating in Unreal?
- A bunch of lerping logic strung together?
Would really appreciate it if someone could point me in the right direction.
@halcyon pier The compiler result is telling you the issue
Read the result, there is no transition rule
you need to let it know of when to allow the animation
"when crouched = enter"
"When crouched and walking = enter this one instead"
i understand what ur saying so thank you
but im a bit conffused on how to fix it
yep
It will show you an example of the logic required
Wait, I can't cache poses inside state machines?!
Hi everyone! I've imported some FBX characters from the internet in order to get familiar with UE4. According to the author, the characters are already animated. However, I've been unsuccessful in finding/playing these animations anywhere in the program. Am I importing incorrectly?
Each character came with the following assets once imported:

Nop only outside in the animation blueprint.
animation graph*
Thanks, and I have another question that's driving me mad

How am I supposed to be creating my transition rules, if even a CPP defined function gives me a blueprint performance warning?
Do I have to start caching bools for every enum now? :/
well i don't actually have much knogledge about advance programming, but when I have an enum first I set an enum type variable

and then i use this node called blend pose by enum

or the equal enum for conditions

Yes, I suppose using that using that blend by enum node is doable
BUT
Then, what is the purpose of state machines? I thought the idea was to easily encapsulate certain animation logic
So that the animation graph doesn't become visually complex
(which would definitely be my case were I to use Blend By Enum)

So this got me thinking: okay, I'll just do what you did here:
this kind of transition rules
But that gives me a blueprint usage performance warning
well I never gotten a performance issue in the anim bp
I just wish a ue4 developer could be a part of this channel and answer questions, I feel like I'm going mad
Thanks for your help @potent thunder
well you can technically ask on #blueprint
as the animation bp ... IS a blueprint
and there may be more programmers than here
Yeah, I'll do just that
Yo idk what is happening, but whenever i put the first person camera to head socket, it just warps away from the character

but when i do manage to get it back, its just doesnt work, my person hsa idle animation, so the camera is extremely wavy
I don't know if this is more an animation or a programming question but I wonder what's your guy's opinion in root motion, (or distance matching) setups, like the ones where the animations drive the character capsule, is it overly used? or gets discouraged in things like the Ik lock on the advanced locomotion system and other solutions?
Does anyone here know how to get an animation state machines weight on client? I am running a dedi server and the state weight node only seems to update on the server. Is there a way to tell it to replicate?
This is the same node in the same ABP one on server(left) and one on client

Im using the community version of ALSV4 CPP plugin
On client also, it is obviously in that state, but the weight node reports zero
I also just tested in stand alone and the values dont change in standalone, they only change on the server when running dedicated
and ONLY on dedicated server, listen server the values also dont update
Does anyone happen to know how to fix this strange issue? I imported this character to Mixamo, but every running animation results in this noodle-leg problem. The position of the feet never change in UE. It's like the feet are stuck to the ground but the rest of the character is running just fine

If it helps at all, this is the skeleton view in Mixamo. I assume those two bones stuck at the bottom are the feet?

So I have this character and the mainbody isnt connected to the rig, but in my animation it all of a sudden is ?
(I dont want the body to move)

hey i'm new to ue4 and i have question . is it possible to make 1 character that can pick up different weapons with their animation (skills/combat) and the animation is different based on the weapon you have equipped . i feel that i worded it in weird way sry
Well first try to apply all transform (your meshes in the same.position, but the pivot on your world origin) and then when importing to unreal search for a tick called preserved local transform or something like that, it helps with scaled and stretched geometry and fixes some errors on bone positions
Welcome, it is possible though it's a little complex, you can make an enum with each weapon you have, and make different states machines or linked anim layers (a new feature on 4.26) then use a node called blend poses by enum, and connect each state machine for each weapon to each enum pin, then you just have to create a socket on your character and swap the mesh of the weapon as you change animations this is done with a node called attach mesh to socket (or something like that).
But as Is said it may be difficult if you just begun, maybe try to do first a single weapon and then add more as you learn.
But if you wanna try, you'll have to investigate about sockets, enumerators, state machines/anim layers and those nodes I mentioned.
is there any way to retarget animations without the source mesh?
what do you mean without the source mesh? retargetting is skeleton based, and animation assets can't exist without an skeleton
i've got a bunch of BVH files, but can't import fbx/bvh without a mesh or existing skeleton
but now i've kinda worked around for it by using the mannequin mesh with automatic weightpaint, works for me as i don't care about a messed up preview
Don't know about the bvh but doesn't fbx give you an option to create an skeletal mesh when imported?
well i was going to suggest just that, if the skeleton on your files is similar and you need a mesh attached to your skeleton for it to work, you can open one of the files on blender or a similar software, put cubes or cylinders in the hands, arms and stuff, and do an automatic weight parenting as you don't care import that file into unreal and it will create an skeleton and a skeletal mesh, then select all the other files and import them too (to a separate folder so it is more organized) and when importing uncheck import mesh, and in the blue square select the skeleton of the first file we imported
then every animation will be assigned to that first skeletal mesh we imported, and you can do retargetting from that skeletal mesh
yea thats kinda what i did
but i needed any "dummy" mesh, as retargeting also requires a preview mesh for whatever reason
noob question here. ive been learning animating the 3rd person character, to make him swim in the new 4.26.2 water, ive mostly gotten it to work thru a few tutorials but still a bit messy lol. What im curious about at present is placement of the movement mode anim blueprint, the tutorials suggested to place it in each water body instance in the outliner, but I see there is a WaterMeshActor that im guessing is all of them combined? Would that be a better place to place the event BP for switching to swimming animation? As it is now placing the BP setup in each waterbody separately, results in being thrown out of swimming anim, if swimming from one water body into another connected one, like a lake into a river, or river into ocean etc.
well the answer is probably nope. lol... the water completely disappears if I add the bp at the watermeshactor level. Ok, so I guess I need some sort of check to know if going from one water to another, so not to fire the ActorEndOverlap which toggles back to walking, I think thats whats causing the issue.
How would I add a walking animation to my ai?
The exact same way it is added to your player character
Your character should animate the same whether it is driven by a player or an AI controller
I just used the built in animations for my character
Morning folks, I'm new here so forgive me if this is a common question: If I have a character selected and an animation loaded here in this section, shouldn't the animation start playing in the viewport without having to actually "play" the game? The animation works either playing the game or in the animation tab in the asset window, so I'm not sure what I'm missing

Something like the guy does in this video (timestamped) https://youtu.be/EXPb2AwgRf4?t=431
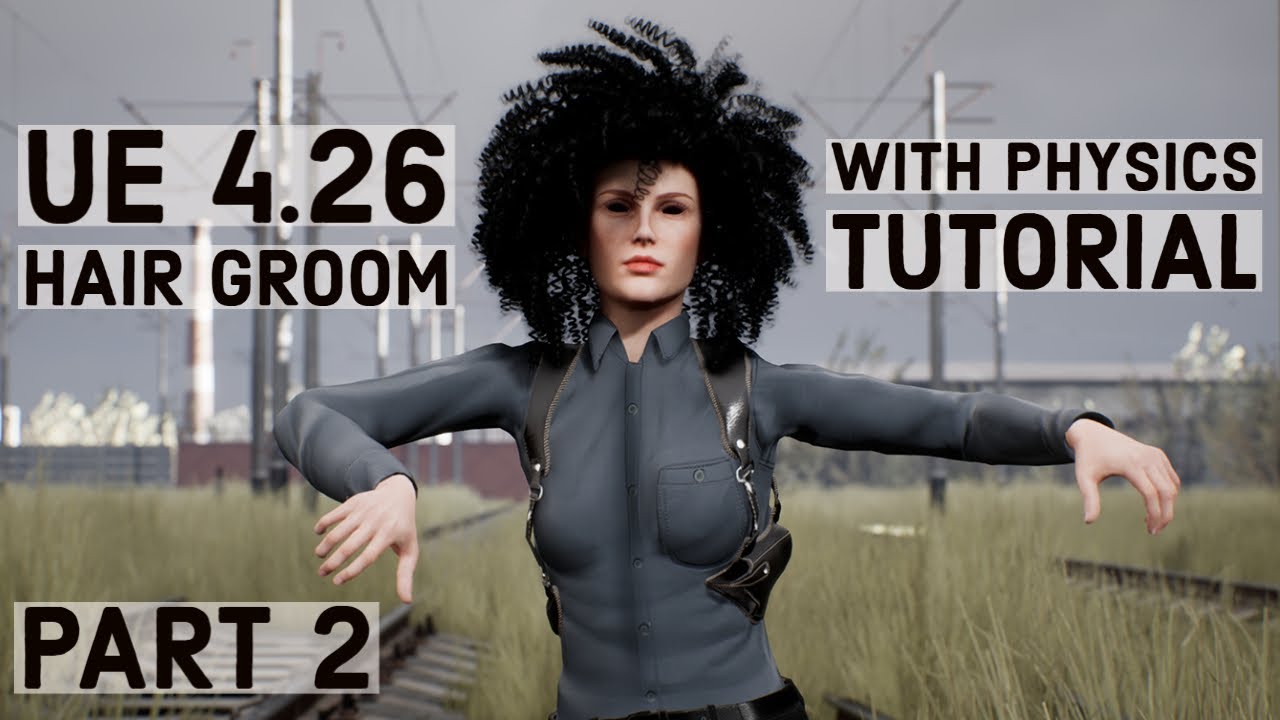
Unreal Engine 4.26 Groom Tutorial,Unreal Engine 4.26 Groom Tutorial,ue4 4.26 groom tutorial,ue4 4.26 groom,unreal engine,unreal engine 4.26,ue4 4.26 whats new,unreal engine 4.26 tutorial,unreal engine 4 beginner tutorial,unreal engine 4.26 hair,unreal engine 4.26 physics,4.26 groom,ue4 4.26 gpu lightmass,ue4 4.26 tutorial,unreal engine groom,unr...
he loads an animation in the "anim to play" box and it works
Was able to make a workaround by creating a level sequence
Thank you
why is my character tilted so weird?

Is there a way for me to move my player character to where his last animation completed?
Just a guess, but maybe its the look at part? Or those transforms need tweaking.
https://youtu.be/vsqxVJQla2Y?t=1768
Hello. Does anyone know some tutorial how to do it (in blender2.8) what this guy is doing in this video in about 30 min?

Learn how to create an interactive digital showroom using the real-time car configurator sample for Unreal Engine.
We’ll cover:
- Importing data to the sample
- Setting up variants
- Tips and tricks for look development and performance optimizations
Download the real-time car configurator sample: https://unrealengine.com/marketplace/en-US/lea...
How do i change jump speed of my character?
Its that the jump duration seems unrealistic
Hey guys, anyone having trouble using livelink face app from Iphone on 4.26.2? It works fine on 4.25 but on 4.26.2 the device just doesn't show up
Anyone knows what could be causing the anim to be grayed out like this?

Is there some simple way I can just force a skeletal mesh into a specific pose such as one from a pose asset?
It seems there's at least some anim bp way to do it but I can't quite figure it out
How do i change jump speed of my character?
Its that the jump duration seems unrealistic
nvm looks like you can create an animation from the pose and just assign that as the animation asset
Hello,
I have a single animation blueprint for controlling a skeletal mesh leg. My character has 4 of these legs, and each leg has its own property called leg_1_position, leg_2_position, leg_3_position and leg_4_position.
I need to use the property leg_X_position in the animation blueprint of the corresponding leg to control the IK effector location.
Inside the animation blueprint, I can access the owner pawn. The issue is, how would I tell the animation blueprint to receive the leg_X_position that corresponds to the leg that it is assigned to? Because currently, the same anim bp is assigned to all of the legs, and I have to code which leg position to request from the owner pawn.
people say root motion is not good for multiplayer. what's "the Ik lock on the advanced locomotion system"?
when you stop it locks the feet into the postition they were when the animation ended, and then interpolates them to idle using a kinda "shake" animation where the character lifts and plant each foot in idle, removing all foot sliding, only thing is that you can't have a hard stop from running and that you can break the ik limb if you hit a directional key too fast as the feet locks every timethe speed is 0 (though it is much less noticeable with a controller)
you can check the foot ik functions inside the animation bp, the anls stops and transitions, and the stop cycles inside the base layer for seeing better how it works
sorry, i'm dumb, but in case of the root motion, you wouldn't need that if you have stop anims, so how would it discourage people?
Well, I too feel the same, but thing is many programmers have told me that they have gotten in trouble from me moving and rotating the capsule from the anim bp, like its really difficult to program into the character blueprint if the location and rotation of your character is changing in another place, though I'm only been on a couple of teams, I have not that extensive experience
ah okay. i didn't ever worked with another people so i didn't know about that kind of trouble. but root motion is pretty cool i think. i think char bp is almost trivial with root motion, because all the movement is from the anim, so maybe those programmers you mention, they are just jealous you stealing their job :))
btw as far I'm concerned, I just want more cool root motion anims for so I can make interesting animbps
(Let me know if this is the wrong channel)
Does anyone know what would be the approximate cost for custom attack animations
(third person sword animations 1-5 seconds long each)? Just curious on what people's opinions would be in cost
Is there a way to make more lines here? i want to add more smoother animations for my player model

in the left side there's two options called horizontal and vertical axis, inside of them there's many options, but the one your looking for is called number of axes
hey folks! i've created an animation for a rock in blender. I want to use root motion for the rock but its not a character so it doesnt seem to work. what is the best way to apply root motion to a non character?
well it doesn't has to be a character, in theory you only need a root bone that is a parent of every bone in the armature, and that has animation from where the root motion will be extracted, then you only have to enable root motion in your animation, left side nearly at the bottom enable root motion, and inside your anim bp, at the end, theres a couple root motion options, i don't remember well but theres one like use root motion for everything
thanks for your response! i did do that. my rock only has one root bone that im animating. However when i select enable root motion, the object doesnt do root motion when i spawn it. ( if i preview the root motion in the anim view i can see it moving)
you need sth which uses the extracted root track to move your rock. character movement component does that, not sure if there are other components which can do

i cant set up vertical axis for some reason
maybe you created a 1d blendspace instead of a normal one
How do i change the fall speed of my character?
Never used metahumans yet but looks like the face rig is a separate rig
thanks @static falcon I think you might be right about that
Man that'sa lotta face bones
Are those for animation or for customizing the shape? Or both?
Is it possible to execute an action inside of an animation blueprint transition rule? I have an anim graph state machine set up like so

Inside the transition rule, I want to set the value of a boolean variable.

but I can't seem to find a way of doing this.. is this even possible ?
Actually, figured it out. I'm supposed to use notifications in the detail panel of the transition rule.

Does anyone know hot to get an animation that is off the ground to be on the ground without root motion?

Hi, I'm having a problem in the Sequencer, getting a root motion animation to loop properly without jumping back to the start. This is for cinematics, not game play.
I've successfully attached the animation to the mannequin, and enabled root motion. In the Animation Sequence, the preview shows it looping properly, and it just keeps walking. In the sequencer, when it reaches the loop point, the mesh disappears and reappears at the start point.
How can I get this animation to loop smoothly from the sequencer? Thanks for your help.

how do i disable this first person camera clipping thru objects?

good morning
Edit it in Blender?
I have a rigged character i would like to use an as avatar. I had a buddy use blender for the rigging but they are not familiar with UE4. I want to have it imported and shaded so i can stream with it using the ios app? Anyone available for a dm who can help or discuss further?
You can dm me ray
I am new to the animation in ue4, but is there no way to do it in engine?
Not sure, I would imagine there is. I think there's a way you can make these little blueprints that edit animations too. I forget the name.
Sorry to be not so helpful
Not a problem, thank you for taking the time to try and help me :)
this guy explains it very well in this video
If you are interested in Exporting character (or rigged/skeletal meshes) from Blender 2.8 or 2.9 to a Game Engine, I think you'll find this ongoing series interesting. You'll learn principles that apply to any engine, whether it's UE4 or Unity. I'll also cover concrete workflows for more popular engines.
This series will be FREE but it will go...
Yeah, that should make for a good start, thanks!
Double check the heirarchy matches and if it does try adding a single keyframe to the root bone.
@tough falcon
I need some advice in terms of animation. I'm making an fps, and want to make some fancy animations for each gun, what is a better approach - to have one .fbx file with hands and a weapon to animate in blender for each weapon, or to have just weapon models in blender and attach them to hands in ue4? Does it actually matter? Any pros and cons?
having issue playing an animation can someone help?
It's a simple animation that has to be played when reciving a hit ( a dumb stun animation )
- I did converted the animation from mixamo to unity fbx
- I did a montage ( aware of the fact that i could have simply used "play animation")
- Did the player interface to comunicate the damage with the Player
- --- The animation doesn't play when the damage is dealt --- it somehow try to plays it but instead it acts super weird
how can I select the whole skeletal mesh of an animation to add a keyframe that moves all the mesh
Any experience importing animations? Even in still poses, my character is getting imported with the right half of the torso/face and arm yeeting itself into the air, the hand positions (which were closed fists) are fully extended. Not sure if it's something wrong with the rig that Unreal doesn't like, or something I'm doing wrong on import. Help would be greatly appreciated ❤️


Multiple areas where things clip, where they do not while animating in Maya
Hey guys, I'm using the Rotate Root Bone node to lock my character in place until a threshold is reached, my turn in place mechanic. I have noticed that simulated proxies twitch until that threshold is reached. Autonomous proxies don't twitch. Currently I don't interp my results because turning that on makes my character do a whacky flip at the 180 degree mark. Could anyone explain what causes the twitch for simulated proxies?
On top of the issues listed above, the character's weapon imports as a separate animation asset, and only a small piece of it actually imports in place. The right side, majority of the weapon, is in its t-pose position on import

@matty did you add a slot in the anim bp? Need to do this to use montages
@lusty nacelle
@hot spade anything weird on the Maya rig? Blend shapes, physics, deformers anything like that?
There's blendshapes on the face only; no deformers or physics (there's dynamics on one part but those are turned off and unused)
Trying an option under Bake Simulation to Smart Bake and unroll bone rotations; read something that seems like it might contribute, though it's a toss-up. I'll post if it works
Nope, baking animation didn't help. Also removed the face mesh on import
Yeah not too sure sorry. Does it look normal in bind pose in ue4? If you export the mesh then the animation then import into both into (update animation) Maya does it do anything screwey?
It's normal in the a-pose, it's just the animation asset that's screwed up
Could nulls have something to do with it?
My rigger used nulls to zero out bone transforms; he also said something about areas that have more than 4 influences in skinning but I doubt that's the issue
How to disable certain bones... mesh to clip thru the walls, so that this doesn't happen.
Any referances will be appriciated! (its when you're crouching)

you can't key all the bones at once, so instead just key the root bone or the pelvis which are the parents of all the chain, though if you tell me why do you wanna move the whole mesh I may be of more help
how will disabling bones help you with that? hmm I'll recommend instead going into your crouch animation, pause at frame 0, grab your spine or head bone, rotate it so it is a little lower to pass under your wall withouth clipping, and then hit the key button (it's in the tool bar above the animation) and then the apply key next to it then your character will crouch lower, or you can just lift that block xD but I suppose you don´t wanna do that
thats not the problem 😄 it just clips thru any wall
but yeah ill note it
also i didnt mean 'disable bones', i meant disable the certain bones to clip thru the objects
Is it an stretch rig? sometimes when I import an stretch rig to unreal, it doesn't translate well unless I check the preserve local transform tick when importing

anyone know why the metahuman is doing this on importing fbx into maya?https://gyazo.com/6f747b617168d9e60c400bbf5acabf9e
oh I thought your problem was that you tried to crouch under that block xD, well you can make a bigger collision, still don't get what do you mean by disabling certain bones, then your case isn't simple a bone or animation problem, is your collision what limits the clipping, so make your capsule bigger so it covers the whole character, I've seen some people used tracing+IK to avoid clipping if you wanna to investigate on that, but that's quite advanced
yeah exaclty IK with crouching is my best guess
since if ill make the capsule bigger, i can literall crouch on thin air while walking off of a cliff
If I use that importer it imports everything super small; the file > import into level importer keeps my scale correct. Also tried that anyway and it stretches the animation asset, though differently than before.
well usually that's why crouch animations, usually are animated to keep the head inside the capsule (ocupping the same space that the body ) so I think modifying your animation is the better choice like your character is too inclined to the front, even just from a pose standpoint, without thinking on if it will clip or not, is a little weird

When I import with local transforms it does fix the stretching, but the rig is still broken. Give me a sec to assign materials and take a screenshot
yes you can, just go into your animation asset, select your bone(1) rotate it or move it (2) add a keyframe (preferable in frame 0 3) apply it (4) then in 5 you'll have an additive curve that will fix your bone in that new position, and then if you're happy with that save it (6)

The stretching is largely fixed, but the hips are jank, the wristlet is flipped the opposite direction, a lot of normals seem to be flipped (despite importing the normals/tangents), and many things like the leg frills, socks, etc are clipping, as well as the hat's tongue being detached.

@potent thunder finally getting an error code after not for a long time now
Not sure what "Use T0 as ref pose" is or where to find it
thats in the same window where you activated the local transform
is one of the first ticks in animation
Alright, let me delete all of these assets and start from the beginning then, doesn't like me ticking that and trying to reimport
I don't see it where local transform is

there, is already checked

Yes I'm talking about T0
mine is in mesh options

Ah, thank you!
I also increased the import scale by 100 so the right click importer should in theory import in meters instead of centimeters
Now we pray
also hit import morph targets, if you have blendshapes
that might be some of the clipping
Can't get that importer to work correctly, seems to only import part of the mesh, or imports the entire mesh but at the incorrect scale
and also getting a ton of this, which shouldn't happen since everything is named

And this Multiple roots are found in the bone hierarchy. We only support single root bone., yet there's only one root.
that one is important, take a look of your skeleton tree

I mean when the skeleton gets imported
It's not importing anything now
It just removes everything and imports a blank FBX scene ._.
wha...

Ok, I'm officially out of ideas xD the only thing that comes to my mind, is importing first the skeletal mesh alone, and then the animation. Import your file withouth animation (untick import animatiosn on the fbx importer window) and in a t or a pose, option, then when the mesh is correctly imported (hoping it was xD ) then create a folder and import your animation, untick on the fbx importer window import mesh and select import animation, and the skeleton where you want it to be imported.
that sometimes helps
Now it's just crashing Unreal trying to import; I'm going to go back to a previous increment of the rig that didn't import weirdly and see if I can import an animation with it, then maybe import in increments until I figure out which version of the rig screwed everything up
I'm trying to do a hovering animation
and it's networked, I tried moving the skeletal mesh but other clients don't see the local character hovering
Okay! I got it working. Mostly. There's a few issues still, but if I can solve these, we're good. The biggest issue turned out to be that I had to go into the FBX export settings and manually change the export size from meters to centimeters, which makes Unreal stop importing my things 100 times too small. It was crashing on import because I had it trying to manually upscale the imports by 100x.
The issues now are nontrivial but less than what was happening before. the stretching, weird bones, and clipping are all gone - now my only issues are a couple spots where a few pieces like the Axe and the wristlet both have weird normals. They work fine when I import the mesh as static and have been working fine for weeks where the model has sat in Unreal pending a rig. Not sure what could be causing it.

And some eyebrow skinning is veering off somewhere unknown. Might be a skinning issue I need to investigate in Maya though.

Also it seems the teeth/tongue are missing and the blendshapes didn't import, but I might need to recheck that I had those checked to import.

^ this is what it's supposed to look like
There's also a single face on the thigh that's got its normal direction flipped somehow. Again, this isn't an issue when imported as a static mesh

Is there someone here that understands ControlRig?. Whenever i set the Alpha to 1 (enabling the ControlRig in AnimBP) the existing animations basically stop working. Char goes into A pose with little movement here and there
theres a tick in the animation tab to import blendshapes, It's called import morph targets
Yep that's checked
Teeth and tongue are part of the same mesh as the face so I'm not sure why those would be getting deleted, and the blendshapes not importing despite importing them
Is it better to animate in Engine, or am I better off animating in something like maya or blender then exporting it into UE4
Depends on your workflow.
If you're bothered with FBX file footprints all over your HD, animating in engine is the option.
Otherwise, you can animate your rig in your DCC software of choice.
I don't necessarily have a workflow yet. I have been at school learning the basics of everything and haven't had much time to dabble and dive in the deep end of anything really
I am trying to work towards being a character modeler, but I would also like to know enough about animation to animate said characters
Again, it really depends on your workflow.
Animating in engine can reduce FBX file footprints and also allows you to control the morph targets (shape keys in Blender) and material parameters with one Control Rig. You can have "One Control Rig to rule them all" if you make modular characters that shares the same skeleton. You can also make your rig interact with the object if you want to, because it's WYSIWYG. The only drawback is that it takes a bit more effort to create Control Rig, but Unreal has few tutorials on YouTube already.
Animating in DCC is also an option, because you can make changes to your mesh before exporting as FBX. The drawbacks are that you will have a lot of FBX files to import/export, and I mean, a lot of them. Not to mention that it can be daunting to work with modular characters, especially if you want some characters to have different anim set.
On another note, do the rigs on character models from meta human creator break if I scale them up or down in size?
I'm trying to do dynamic bone setup for necklace. Essentially it has 3 parts. First is main rope and pendant on neck and the rest are just two rope pieces hanging. these two ropes are parented to Necklace_4 bone.
So I was able to setup Anim Dynamics for the last two, but it doesn't work for the the main one for some reason. And it doesn't display any error, so I'm not even sure what I'm doing wrong?
I want to make a chain from Necklace_2 to Necklace_6 (that way Necklace_1 and Necklace_7 will remain statiс and will be pretty much "holding" chain)

Not sure about Anim Dynamics, since I used Kawaii Physics as a replacement for fake physics.
(despite the name, Kawaii Physics can be used for non-anime models, and it's easier to setup and more consistent than Anim Dynamics)
Actually I managed to make it work, I think I reversed the order of bones, but not exactly what I expected.
And I also used Kawaii Physics, but it doesn't give expected result as well. Even though I specified the bones to be excluded from chain it still animates it thus it is not hanging on neck properly.
https://gyazo.com/e591744a473f66b2edd1df25c754c7e8

Am I right in thinking that the "Send to Unreal" Blender extension won't help me use Rigify rigs? I'm aware that the "Unreal to Rigify" one can import Unreal rigged characters into Blender and map their bones to allow them to be controlled and animated by Rigify, but I was hoping to be able to model, rig, and animate a character all within Blender, then import the results into Unreal. But nothing I've tried so far works -- the animation just looks like a vertical line of bones, with an extremely large (in the billions of units) bounding box.
Send to Unreal alone disregards Rigify specifications. You have to exclude non deform bones from getting exported.
But then, at times the Rigify has few ORG_* bones that, for some reason, marked as Deform, and can cause more than one root bone to be exported.
If I exclude the control bones, then what do I animate?
The key is you bake the animation upon exporting. This will map the animation you made with control bones to the deform bones.
Best thing is, you don't have to think about it once you have both Only Deform Bones and Bake Animations enabled in the export FBX dialog.
Hello there, I need to create an animation where someone is sitting at a table and writes some notes,... is it a good idea to take a rigged arm and animate that, or should I rather record a real person writing (greenscreen) and adding that in post? What could you recommend, maybe what assets in particular?
Here's a (rough!) sketch.

any way to avoid this?

If you want to do it in engine, use sockets that are added to your arm rig. It's like attaching weapons to a character's hands, but scaled down to the fingers.
How different is Matinee from older version of animation ? The tutorial i am following tell me to add a matinee but i dont have that option. Only options i have are these:

I am on 4.26
Sequencer is the more streamlined version of Matinee.
Matinee has been discontinued sometime around 4.18
If the tutorial you follow uses Matinee, it's been outdated already.
I swear I don't have pleasant experience with Matinee, even back in UDK days lol
Ok, i'll try to do it with more recent tech
bump
Question unclear, please describe the problem.
hes sitting on thin air
Kawaii physics is a life saver 😄
I need to try this one too at some point https://github.com/SPARK-inc/SPCRJointDynamicsUE4
I'm getting a bit stumped with the retargeting process.
Have some mocap data where the skeleton has a slightly different base pose than my character.
But for some reason I can't figure out how to modify that in such a way where it is applied correctly.
Mocap reference pose:

Character reference pose:

Mocap anim frame 0:

Character retargeted anim frame 0:

The models in their retargeting reference pose look as I'd expect. But somehow it's breaking my characters backbone 😅
hi,
When i m exporting fbx from blend file pieces attached to my rig by constraint (child of) are "floating" around once imported to unreal.
They are not strictly attach to the weapon making weird effect.
Do i miss something special during export process or do this require something special?
PS: Everything looks good in blender
You probably need to have your own constraint setup in UE4 through AnimBP
@sharp linden i think not cause when i m baking animations this is suppose to make the animation with bones in correct loc and rot i just get an offset or something like that this is really weird
Then import back to Blender in clean file and see if it works
yeah i will check
google "ue4 retarget different skeleton", usually you would set root to "animation", pelvis to "animation scaled" and the rest of the bones to "skeleton"
What would be the best way to animate a combo like in mortal kombat
Right now I have it switch between different animations based on a combo counter integer
But the animations get really wonky if you spam the keys
Thanks for the answer! I've been trying with lots of different reference poses and combinations of translation retargetting for different bones.
But none seem to have any effect whatsoever.
Here's a recent batch of attempts.

The first one in the row has these settings

(rest is also skeleton)
The others in the row are various attempts with the different settings for the rest of the bones.
But more than anything I'm confused about why it never changes!?
Or does this need to be set exactly the same way on both the source and the target skeleton to apply?
Edit: Nevermind. Same results. No change.
Any pointers are more than welcome.
Otherwise I'll be looking at doing all the regargetting outside of Unreal over the next days. Possible backup but would've enjoyed to skip building up that additional content pipeline.
montages https://www.youtube.com/watch?v=5DR7pxGouWE this tutorial is kinda old though... you may need to search one for 4.26
(00:05) - Intro and Punching Montage
(01:37) - Punch Start
(04:54) - Curves & Notifies
(06:19) - Defining Sections in the Animation Montage
(09:47) - Looping the punching sequence
(11:30) - Notify Events
(13:33) - Changing the animation speed
(14:37) - Slots and wrap up
not sure whats the problem, but if it were me, I'd try 2 things
- try to import with the preserve local transform tick pressed (its under the animation tab in the fbx import window
- Import first a tpose or a pose, of your model without animation (untick the import animations option), then create a new folder, import your animations, untick import mesh on the top and in the blue square select your skeleton from the archive you just imported, this sometimes fixes your base pose being replaced with another pose (you can also tick the use t0 pose as reference, but this gives me better results)
Thanks! Will try the first one!
The second one I've already checked in an external 3D tool but both skeletons base pose is actually exactly what they are supposed to be.
They simply are a little different because the export of the mocap system is just not the same as the default mannequin skeleton.
(We've been using our own skeletons but exported via uefy from blender. So it's the default mannequin naming convention and bone structure)
My savior!
Local transform was messing it up!
Importance of another UE4 checkbox learned!
Thank you so much! ❤️
It usually is xD if you are moving,stretching or scaling bones, you have to tick that option always.
Yeah. Now that I know this checkbox exists it makes perfect sense that it needs to be enabled! 😂
But knowing about it is the tricky part!
From here on out it's smooth sailing!

Does anyone know why the rotation is not working? the "X Rotation" var is going between 0 to 360, but the bone is not moving...

well, i don't know, but usually "root" is the bone on top of the hierarchy. you have "armature" then root then pelvis. maybe in your retargeting parameters you need to use "armature" as root?
Thanks for the concern! It was already solved.
The problem was caused by a lack of "preserve local transforms" when importing the animations.
These settings weren't relevant at that point since I was converting between very different skeletons. Right now I'm getting to the things you mentioned (and they are still helpful to have!) to share animations between our same bone hierarchies and get rid of some bloat that would otherwise be created on the disk 🙂
Thanks again for your help!
Why the cast is failing?! I can't get it... It worked so far and suddenly got broken..

@mortal chasm can you just print out the display name of the "try get pawn owner"?
Simply create a print string node and directly plug in the output of "Try get pawn owner"
It is FirstPersonCharacter... 😦
Are you sure the cast is failing then?
nope.. i have no idea what's the problem 😦
Why do you believe it is failing?
The XRot var from the FirstPersonCharacter is setting numbers from 0 to 360, and working fine.
I think that something is not working well in the AnimBP itself. the Event Blueprint Update Animation print strings appear only once, and not on any update...
That's why I though it's the cast that failed
If the number is set correctly in the animBP then this part seems to work fine. Or am I misunderstanding something here?
@mortal chasm
The number is set currectly on the FirstPersonCharacter Blueprint, but the update of the AnimBP is only happening once... something really weird.
Was being an idiot. For me it prints properly every frame.
Have you tried printing "failed" and "successful" after your cast?
Maybe you artificially reduced your anim tick rate or something along those lines? You can do that for lods / distant animations.
yeah, it says "successful" only once... I think it has something to do with my Skeleton mesh disconnecting from it's AnimBP... Even a simple animation in the animbp is not working
Even these nodes are not working

Oh, yeah. You can set what anim to play via code. Which would override whatever you set in the editor.
Maybe you did that somewhere?
Well, i found it finally. Silly me - I left a node that replaces the AnimBP, and forgot to update it to a new AnimBP i created.
Thanks for the support though! I appreciate it alot!
Haha. Classic mistake.
No way similar things cost me hours of my life before!
No sir!
Glad I could help you think it through!
Haha, If I could earn a penny for every minute iv'e spent on fixing my dumb mistakes, I could make an AAA game lol
hey all, sorry if this is a super basic question. I've been using UE for just over a week and I'm trying to make some really basic key frame animations, but the timeline range is locked at .03 seconds. Am i missing something here?

Bottom right. The thing you hover.
"Playback Range Stop Time"
Increase that 😉
Its locked or something, thats why I'm hovering over it. Figured it would be as simple as that
The outer right one?
Oh. Indeed. Weird.
But you can also just drag the red bar.
Set the most inner, right option to something high (so you see more of the timeline than 0.5 seconds) and drag the red limiter outward
Dragging the limiter only works on the timeline at the top. Not the keyframe space.
It won't let me drag the limiter out either, and I'm dragging from the timeline
There?

Yeah, it just makes the timeline position jump when I try to drag it
Whelp. Then this editor is newer than the ones I've worked with in the past and does things differently.
But from another quick glance. Maybe this is the place to change it?

if you right click on the bar where the slider sits, there is an options "append at the end" which lets you add frames. but I'm not sure if animating in this thing is even possible, it's just for preview I blieve
Yes! Thank you that worked great. And I can key changes and i'm just doing something really simple so it should work fine
ah okay, i forgot about those
Ah, just managed to manually export and import one, thanks for your help!
Hi people, one question... is there any similar method for BrainComponnet like StopLogic and StartLogic but without erasing all my cooldowns (SetTagCooldown)?
I have sprint or rush attack, rm animation with kick from run, and I want to pause logic behind until finish that montage and resume on end montage.
I'em using that on stagger also and there is ok because i don;t ask for cooldown on begin
this kick should be very rare (big cooldown) but using this StopLogic and StartLogic(or RestartLogic) I get that kick non-stop. Ideally should use some PauseLogic andResumeLogic but that is not exposed so i suppose that I'm doing something on wrong way because I need something what is not exposed 🙂
Well, I managed to make necklace work with just a signle bone being dynamic and then two ropes as a chains. Not exactly what I was looking for but I guess it works too
Seems to work nicely

I basically did the same with the ponytail and using kawaii physics pretty nice.
I don't know if this is the place to ask but my characters use UV so to blink I would have to move the UV same with moving the mouth how would I do that
check this #animation message
Will it work for me it's one big texture? I don't have separate eye textures
This is what it looks like

@misty dagger You'd have to set up a UVCoord node in the material for the character and then drive it through an animation blueprint to get the blinking working. I think there's several tutorials out there for 2D blinking eyes.
hi everyone, im trying to get a fallback animation to play when my character is damaged and so far im able to get to the play montage part, my the montage itself is immediatley interupted. Would the anim BP cause that to happen?
And it there a way I can force it to play then return back to the original state once its done?
I think AndiDev's Control Rig presentation in UE's official YT channel talked about something like this.
I'm still in 4.25 and I feel like I'm in hell with Control Rig, does anyone have any red flags they hit working with CR?
A few questions! How many slots do you have in your ABP? Which slot is your montage playing on? Do you have any additive sources? How are you driving your fallback animation? When you say damaged, what do you mean by that?
Control Rig is refined more in 4.26, so yeah
4.25's Control Rig was a lot fragile, so the best bet is going 4.26. Although I can't guarantee with 100% success rate if you can backport the plugin from 4.26 to 4.25.
Control Rig in 4.26 is closer to being production ready, and only minor glitches popup even in 4.26.0
Word
Super confused peeps wondering if anyone can help meee
The next thing you will want to do is inside your DCC, bake out your poses to an FBX sequence and import the FBX into UE4. This will give you an Animation Sequence containing each of the curves at their min/max blend values.

Can't find information on how to do export an animation with these curves & names, I didn't even know that was a feature of .fbx
Any resources on how to create an animation like this in Maya instead of using traditional baked keys?
Those are blendshapes, they are vertex animations you interpolate the position of your vertex between two poses, they are commonly used for facial animation, to use them in unreal first you wanna create blendshapes driven by bones (it's not necesary but is easier to animate) then you import your fbx tick import morph targets under the animation tab then you will create those curves. So search for blend shapes tutorials, sadly if you use maya I can't point you to any tutorial or course because I'm a blender user
Are you sure that's what this is? @potent thunder I was under the impression this pose asset workflow was for using bones, not blendshapes
because the idea is to apply them to different faces, which may not use the same topology but do use the same facial skeleton
Yes, the bones are only to make it easier for you to control them on maya, but when they're inside unreal, you can transfer them between characters that have the same blendshape name
Quick Question guys.
Trying to spawn an Actor ( in this case an area ). It has to be centered in the screen.
However it doesn't work

Can someone help me ?
centerd in the screen but with a setted distance from the camera
I believe UE4 import attributes on the root bone as curves.But actually I think you don't really need it for this case. As I understand it, you have to make same list of face poses (like jaw_open etc.) for each of your characters and export them as a normal animations, one pose by frame. Then in ue you make a pose asset from this anim which will split it frame by frame and create a pose for each frame. Then you rename those poses (by default they are called Pose_0, Pose_1,...) to the names you want. Those poses can be different for different characters, but the names should be the same. For each pose name UE4 will create a curve. Then you can use "pose asset node" to play those in your anim bp
@potent thunder I don't think you're correct, there is some documentation here where pose assets are clearly bone based
Describes the Animation Pose Asset which can be used to drive animation through weighted curve data.
btw ue4 poses are just frames, they can contain both bone transforms and curve values.
well I do talk from experience, that's how I make facial animation, though as I said I come from blender, maybe the forkflow it's different
pose asset is just like an array of named frames
Oh right so is it possible the documentation may have missed these steps? It implies that you can bring an .fbx in from maya which already has these poses and names inside the fbx
but it's more like, you export an fbx containing an animation sequence, and then build your pose asset manually
quick question:
If i can override individual bones with new animations using "Layered blend per bone" like this
https://cdn.discordapp.com/attachments/225448446956404738/836578089667788880/unknown.png

then what is the point of making these montage animation slots?
why do i need a montage animation slot that limits itself to upper body - if i can just override it using this node?

aka these things

Because you can't play montages on the anim graph, you need to use the play montage node on your event graph or your character blueprint, so you use layered blend per bone on your slot on the anim graph, and then assign a slot to your montage, so when it plays it doesn't override all your body animation but the part you want, for example if it's a shooting recoil animation you only want it on the upper body.
my brain hurts
Ok. So i got the anim graph, which i can only play state machines in.
right?
And in those state machines, i can play montages.
wait no
oh right i can play montages in the event graph
ok so i can play animations in the state machines which i can play in the anim graph
Which in turn means - i can only use Layered per Bone when i'm masking out state machines
And if i want to play a montage - which i want to do incase i need to time an animation / cut it up non destructively-
I use montage animation slots to mask that
correct?
Exactly you mask that montage slot the same way you mask state machines, then you assign that slot to your montage, and then your play your montage from event graph or your character blueprint, and it will play only in your desired part of the character, being your upper, lower body or individual limbs
okay...
so my next question would be - how do i mask montage slots?
i can't find it...
i can add slots
but how do i define what bone they start masking on?
and all the tutorials i'm looking up just go "let's for simplicity use the upper body default" and i'm like nooo don't skip this!! 
same way you masked state machines layered blend per bone.
- disconect your out pose
- drag from the last node before your out pose
- write "cache", and it will create something like saved pose+ number, you can change the name in the details panel if you clic the saved pose node
- right clic and search for the name that your saved posed has and you will have a saved pose node which is the same that your whole anim unitl you saved it
- connect that node to the base pose on layered blend per bone
- duplicate the saved pose node, drag from it and write "slot" and create a slot node (you can clic that slot node and choose in the details panel from the slots you've created)
- connect the layered blend per bone to your out pose
- done


yep something like this when I need to mask them

unreal 4 is complicated

so if i want to play a montage in my event graph - the animGraph will always override the event graph - but i can mask out the animGraph using the Slots & Layered blend per bone, so it won't override the masked bones?
wait nvm... if i make a slot in my montage, the animGraph doesn't recognize it...
not quite, the anim graph is playing always, you always will be in a state, like idle or walking or something. Your montages are for 1 time animations, like a punch, a roll, a recoil, damage, etc. so you link them to an event from your character so you create an event that activates when you press the fire key or when your character is hit. and connect the play montage to play when you hit that event, then your montage will override your anim bp,
you need to choose the slot from the details panel


ooh ok i see
ok sure, but i have made a slot called "OnlyLegs"
let's say i want only the legs to do a part of a montage
So i put my idle animation into the slot, that i define as "OnlyLegs"
then i input the "OnlyLegs" slot into a blendperbone
there i setup the 2 legs

like this
yes
and now, if i press F in my main event graph, i change out a boolean to true - which i cast to my Animation event graph - and that plays some montage
for testing i just used the default jump loop
so this is the idle twice, once in the 'OnlyLegs' Slot

ooooh okay
And then i set the montage to the "OnlyLegs" slot too
and it works
omg
talk about overcomplicating things

it finally clicked
xD glad it helped
thank you so much for helping me, you're absolutely awesome 
i would've been stumbling around for hours
has this ever happened to you? What should i do to fix it?
the docs are kinda confusing. there are 2 different kinds of anims, one contains the definitions of poses and another is to animate the face using those poses. so for example, you have 2 poses "mouth_open", "eyes_closed" and 2 different characters, first for each char you create an anim with 2 frames: frame 1 mouth open and frame 2 eyes closed. then you import those anims in ue4 and create 2 pose assets, in each pose asset you rename pose 1 to mouth_open and pose 2 to eyes_closed. next step, you have an anim with the character speaking and blinking, this one should contains only curve values (for example mouth_open going to 1 then 0 then 1 again etc), so you import it in ue, make sure to remove all bone tracks then you can use it to animate via "pose asset" node in animbp
-1 play rate
maybe play montage and set rate to -1.
Alright thanks for this, certainly doesn't seem too intuitive but I will get on it and learn the system, hehe
doesn't matter just go directly to your anim asset and set the rate scale to -1 (duplicate it if you want to keep the normal one)

When i export an animation from blender to ue4 what should i change in the export settings
in the transform settings

Hi, you should export only armature and mesh, in armature disable add leaf bones and enable only deform bones, and in geometry change smoothing from normals only to face


i cant find use space transform
thats from blender 2.9 didn't existed before. though it shouldn't be a problem
almost forgot 2 things, first ue4 doesn't like if you call Armature to your armature and thats the default blender name (I know it sounds stupid but is real, sometimes it gives an error when that happens)
and 2 you may want to increase your scale to 100 in transform if you are not using meters
what should i change? Where are these settings? In what category

how should i change armature
that just the name not in the exporter but your file, it can be whatever but armature

and if you have metric on that tab, and your character is at least 1 meter tall, you don't need to change the scale

Yeah...

so, my character is proning here, and i need to change the collision for the prone, how is that done?
Just add another capsule collision, ad hoc.
Disable the default vertical one, then enable the horizontal.
I think i understand what you mean but the scaling is not a problem. The only problem i have is that whenever i import the exported animation
it rotates 90degress

it is facing -y


check the orientation of your root bone
i dont have a root bone
when i animate a "jump" animation, do i always animate it withouth the mesh moving forward?
Then of your parent bone of the whole chain pelvis?
thats what dictates the orientation of your whole character
ah i see. Well i have not changed anything from when i downloaded it from mixamo so i guess the parent bone is hips
though if it's from mixamo it should import fine if you have not changed
anything from the rig
problem is that when i clicked in place it didd't play the animation in place so i deleted all the coords from y and z in blender, that way the animation plays on spot
only thign remaining is exporting it from blender to ue4
maybe then just delete the location ones and not the rotation ones
mhm thats what i did 😄
i just need to export it and i dont know how to make it work with the rotation
cuz this aint right

lol
can you send me the file ?
ok
the file i just exported from blender with wrong rotation or the one straight from mixamo
wait just thinking of it,
have you tried to import the file
straight from mixamo?
is wrong also
the orentation is correct
Got any clue what the problem might be?
then you will see the problem


your skeleton object is rotated, not your bones
you need to select your skeleton on object mode and hit ctrl + A and apply the rotation
also you may want to apply your scale and location
how do i pop that window so i can see the rotations
N key


if you set it to 0 it will be like when you import it to unreal
you need to apply the rotation
so it should be 0 and then i have to apply it?
nop, with your rotation as is 90, select your skeleton, hit ctrl+A and select rotation

then your rotation will be 0 but the skeleton will be still standing

and then it will be straight when imported into ue4


yes, only thing to change in that is select the only deform bones, and deselect the add leaf bones
weird how?
still don't get it, like? choppy? floaty? the character changes position?
its choppy. Its a bit obv when the animation restarts
yeah i think its the aniamtion
i want to assingn my mesh to the Adbanced locomotion character, this means that my mesh is too small or what?

that means that your naming convention is not the same than the unreal one
so unreal is searching your bones by the ue4 names and didn't find them
do i need to rename the bones?
either that or retarget the anim bp from the als to your character
This gap only appears when AnimBP is active/applied to characterBP - there is no gap in the modular model but for some reason there is one shown when animated. Any ideas? Skin Weights and Skeleton are all matching, I just took a whole character and split it into a modular piece

can someon hlp me with a crouch animation pls?
@lean surge you need to dupe the verts on the split
or copy the weights
or you could not split it, and have 2 rigs drive it and put a seam, unreal wil split on the seam
well i think u can rig 2 skels to it, never tried that so im not sure
So by damage I mean just HP, I have an apply hit damage and a health system setup. I have it so that when it detects melee, it will play the anim, and it looks like the zombie just kinda glides back wards instead of playing the anim correctly, it looks like it’s almost conflicting with the AI and the anims that are already playing
@bronze osprey Weights were copied from the same source (duplicated model pre-cut)
what do you mean duplicate verts though?
IF anyone could help me with my anim montage to pull out my gun i see if you dont wanna do it since you get nothing but yeah' (So like the gun gets in my hand and starts playing the animations for my gun if i run etc) (Cant find any good videos on youtube)
As long as your rig looks fine, so no weird rotations, no polygons sticking out. etc. etc. then its almost always the animation itself. You can use a default test animation to test your chars. like a dance. 😄
if i play in editor viewport is ok but i have aproblem in standalone game
is like lagging idk
help me pls
can someone come on ovice call to help me pls?
@lean surge weights are per vert, so top vert needs exact same weight as bot vert
thats not the case here
if you do rip it should dupe the verts
when u split the mesh it has more verts so dunno how copy handles that
@bronze osprey Thanks, I will look into this more!
@lean surge u can click the bot vert and copy the weight too the top1 manually
that should fix it, u can try with a few
Skin > Copy Vertex Weight (Top) then Paste Vertex Weights (bottom) in Maya.
Sounds like it should do the trick, cheers
Possibly equivalent to Extract Face? but really not sure, thats how I created my modular pieces anyway. Highlight faces and then separate them from rest
no thats not it
if u duplicate 1 part and duplucate part 2, and both have the vert line in the middle it should work also
Sorry to bother you guys, need to ask some questions relating too importing mixamo anims and targeting to the advanced locomotion character, where and what would be the best way to ask? new to discord and ue4
never used mixamo myself but if you google it, you prolly find a lot
Was using terribilis converter, when it started throwing "unhandled exception in application" errors, so wont convert anymore, the blender add on doesnt seem to work out for me no matter what guide i use, and now the terribilis one isnt working for me, anyone any ideas? tried redownloading, moving it, enabling some program files that have something to do with unhandled exceptions"
i would prolly just create a retarget rig in unreal but never done for mixamo
Probably best to Copy Skin Weights
got that solved, now ive been following this

Unreal engine 4 version 4.25.1
Join ALS discord server: https://discord.gg/wYYMHFu
Base project: Advance Locomotion System V4 (Free)
Link: https://www.unrealengine.com/marketplace/en-US/product/advanced-locomotion-system-v1?sessionInvalidated=true
Animations from Sword Animset Pro by Kubold
link: https://www.unrealengine.com/marketplace/en-US...
I followed everything perfect but my blendspace isnt working in game, the preview does, but mines just idles and run directly toward the direction input (wasd) rather than strafing, anyone any ideas?
Quick question, bought a char off marketplace, it's rigged to UE mannequin with a few extra facial bones. When I retarget it to the UE skeleton then click on the mesh it says "such and such bones are required, add them now?" so I click on OK and everything works fine. But it breaks the AI characters because they are using the UE skeleton, so when I click on the AI meshes it says "Such and such bones are missing, add them now?" so I click on OK and the AI works but it breaks the player char again.
Can I just duplicate the UE skeleton and have each one use a diff UE skeleton?
Anyone encountered the situation when in sequencer the animation with dynamic bones is working fine, but once you render it out to a movie the dynamic bones are super jumpy?
Does the animated materials seem to be sped up in render?
hi there, is there a way to copy and reverse keyframes on a ue4 sequencer?
Does any one know how to do a line trace on an animated object? - in this case imported alembic with skeletal
you can do traces in your player controller and use reference transforms of bones to specify where you're tracing with a bit of vector math
Has anyone seen this, it looks super cool https://youtu.be/wNqpSk4FhSw

Thesis Fast Forward presentation at SIGGRAPH 2020 about my Ph.D. research on deep learning for character animation and control at the University of Edinburgh. The work was done in collaboration with Adobe Systems and Electronic Arts. No humans or animals were harmed during motion capture.
Project Page: https://github.com/sebastianstarke/AI4Anim...
Hi there, i did not found a way to modify the axis around which the "Swing limits" in a constraints for a physics asset are limited. Can anyone help please?
Hi, I'm a bit stuck. made an animationbp that shows character walk animations, (using a 2d blendspace). in the animator it is showing all the animations correctly, but when i connect it in the playerBP, i just get the t-pose. anyone have an idea what I'm doing wrong?
What do you mean by connect it? You should set the mesh animinstance to be the animBP

here, right?
in the player controller
i guess i used the wrong wording here. i think it set it up
in the animation BP you can see the correct pose, but I just noticed there is something wrong with my isvalid check. maybe that's the issue

not sure why it would not be valid though
hi,
I have a pawn blueprint, which has a vehicle as the main skeletal mesh. Also in this pawn I'd like to have a character bound to it who is driving it. I have the character with the animation I need, but the nested meshes under the second skeletal mesh are not getting animated for some reason.

okay I found it, so it doesn't matter if I move them udner SkeletalMesh as children, I had to connect them to it

it's working fine now 😄
that happens when you have an animation in your input directory which cant be converted, get rid of that one and go with the others
if it happens to all of your animations get sure that you got them for the right character, maybe you forgot to upload their mannequin to mixamo as target skeleton?!
No idea
Anybody know of actual concrete example assets/code that Epic (or anyone else) has released which demonstrate this "speed warping" effect? https://youtu.be/1UOY-FMm-xo?t=3101 (link is timestamped)

Announcement Post: https://forums.unrealengine.com/showthread.php?97151
Laurent Delayen and Ray Arnett came on the stream to show how they are implementing character animations into Paragon. They pulled back the curtain and opened up their Anim Blueprints to show the details of how everything works behind the scenes.
Also, we introduced Jess ...
Live link face app question, if anyone can help me! Just a simple connection issue https://discordapp.com/channels/187217643009212416/225448446956404738/837014769470406676
Do you make animations in unreal engine or use a different software?
I animate on blender, with autorig-pro then export to ue4
Hey guys my live link works in all of my projects except for one. Live link shows up in the details window but I cant select a device. Both projects have the same plugins and are working with metahuman models. Any insight would be great
I doscovered that there is some essential files inside the input folder, so when i was removing all old anims, it wiped those files
New query, im trying to add a sword to char, setting it up with the skeleton, go to the charbp, and when i asssign it to the socket, its in a completely random place, anyone help?

if Im using unreal skeleton, is it even possible to add iks to it for animating in blender? its that weird skeleton with disconnected bones so Im not sure it even is
well I guess not
but I really would like to make my own animations but cant without iks and that weird skeleton
what do you mean by iks?
inverse kinematics
you know when you move the foot bone and the legs moves properly with it
I have an animation and whenever I edit it to the way that I want it to be inside ue4, nothing happens ingame, and if I close the animation and open it again, it resets by it self
I can help to explain this if you wanna dm me
sure, dj to dj lol
Rofl! Didn't even notice
Hey, I'm not sure if I'm posting this in the right area but; I'm a bit stuck, I'm trying to use the animation blueprint and I'm getting this warning when I want to go from idle to walking https://i.imgur.com/XRbg7Fq.png
This is the warning that it gives me too https://i.imgur.com/eKYrAWH.png

Might be wrong but not sure you can do that in a state machine @wintry walrus
I'd do it in the anim graph and set a variable then use the variable in the state machine
That's how it's done in the example files like third person template
how can I edit animations inside ue4, whenever I try to do so, nothing really happens in game, and if I close and reopen the animation, it resets
hmmm, i'm trying to play an animation on a unit when that unit is created using an animation montage; however, half the time, i get a frame of the unit in its stand animation, and the other half the unit is just in its stand animation and never plays its spawn/birth animation
any suggestions?
@static falcon I'm confused where you mean to place it
@noble swan , can you give a little bit more detail regarding that? The issue I am having is the line trace does not hit anything of the alembic geo...
i figured out half the problem, and i diagnosed the other half to that my spawn animation doesn't play half the time. is there something obvious that could be causing an animation montage to not play seemingly randomly half the time?
Not sure how alembic works, maybe you need to think about collision?
before I retarget a char i got from the market, the only diff. from him and the UE4 skeleton is he don't have spine 03, what should I set Spine 03 to?
is there a way to directly edit animations in ue4
I'm not sure which channel to ask this but i thought someone here might know. I have a sword which has a skeleton generated but the editor, and it has 1 skeletal bone joint or whatever you call it. When i equip this weapon it grabs where the skeletal bone is, Do i need to build a new skeleton in blender so that the rootbone is on the handle instead of the blade? or is there a solution i don't see in the editor? can someone help, i would appreciate it. To summarize I just wish to have the player pawn pickup the weapon and have the socket in the hand attach to the handle.


anyone know why live link face app would not connect to livelink under sources? i tried with ue4 remote and it connects successfully on the face app it struggles to even find my pc at all
did you add a socket to the player skeletons hand?
@real atlas Yes, I need to add a bone or something to the handle
did you add preview mesh and set it to the sword and then position it properly there?
Can you do that on the import?
I simply imported an OBJ and had it become a skeletal mesh, then on the import it created a skeletal mesh
do what he said, rightclic your socket, add preview mesh, select your sword, and move your socket to your desired position, then it should spawn it on the position you set the socket to

when climbing a rope with a character do you guys just rely on root motion to do the work or do you actually use code?
Hey guys, what is the best replacement for Matinee ?
Nevermind, just realized i will need to figure out the sequencer since the tutorial uses matinée which i dont have access to and i dont have the content since its part of a more recent tutorial.
does anyone know why my anim bp (apply additive) makes it change location/scale... (2) is where its supposed to be (1) is when i select the animbp for the mesh
heres the code on the anim bp


Hey all. I had a question about animating multiple meshes in tandem. Lets say I've recorded a scene with 3 characters in a capture volume. In previous tech solutions I've been able to call the animation on all involved actors and pass in a reference location those animations will play in relation to. That way the actors relationships to one another for inter actor interactions is preserved without to much mucking around in an editor with the actor start positions. All we really needed to do was align one central "start" position with the environment. How would I go about achieving something similar in ue? I've used this for basically everything, combat animations, environment interactions, etc.
Hi all, is it possible to bake a rigid body simulation to keyframes in UE4?
I dont understand, whenever i hold ctrl (walking), and move, its normal, but when i stand still, the animation is still playing. why?

^ This is from walking to idle-jog ^
so is walking is false, and then speed is less than or equal to zero?
false AND true = false
if you want the transition to fire if walking is true or speed is less than or equal to zero then you need to use the OR operator instead of AND
or what is the goal here?
I need coffee
if you want to transition from idle to jog why are you saying that speed should be less or equal to zero? 🤔
don't you want greater than 0?
also I probably would just get rid of the walking check if possible and instead have the walking and jogging animations in the same blend space and blend between them by using character speed
does anyone know why my anim bp (apply additive) makes it change location/scale... (2) is where its supposed to be (1) is when i select the animbp for the mesh


Help please, trying to add a sword to my character, ive placed it in correct place in preview, but when i go into viewport to assign the static mesh to the parent socket, it ends up in a completely random place, anyone know what to do? im just following a guide, its based on ALS, and the 'sheath' is based off the pelvis, is it some kind of root motion mix up?
Heres the problem, when i let go of the ctrl key, the animation keeps playing
what animation?
walking
NO i meant W key
so when im standing still, it keeps playing


btw you don't need to compare the boolean to "true" in the upper one
just plug it into and
what is the state of Walking? when you let go of W?
btw heres the walking script in character bb

I need it to be the same behaviour when player is idle-run
but only if the player is holding down ctrl
Hi guys, i could use help to understand how to use sequencer to move mesh on a path, something in the style of an elevator that goes up for a short then goes left a bit.
Ok so basically animation wont stop playing until i let go of W key (move forward)
can your speed be negative?
because you're checking if speed is less than zero there
well it didnt fix it
^^

I'd start putting down breakpoints and see what the debugger says
and make sure that the variables are properly set in the anim event update
Ok i think i understand
Is there a way i can put an event when the key is released?
you mean for something to happen when you release the key ?
so the animation basically plays when i hold down the ctrl key (walking), and it wont stop until i release the W key. Meaning it will detect if im walking or not, or if the ctrl key is released.
I need the animation to stop playing WHEN i release the ctrl key
There should be an animation stop node, but i could be wrong
So "LOD" is Level of Detail, which means each level represents a different level of detail for the same mesh (character)
now when rigging/skinning is done, how do i handle the different types of LOD_meshes? (will use UNREAL-Engine is that makes a difference)
Hey, guys! Recently, I tried tweaking the running animation but prefer the original default. How can I change the animation back?
If you added and applief keys inside of unreal you should have additive curves below in your timeline, just select and delete them and your animation should be back to normal

print your walking? maybe you have it backwards like you're trying to see if , try to see if the animation keeps going because you didn't released the ctrl key before releasing the w
also try to change your speed less than 0 to less or equal to 0
mostly because less tan 0 is a negative value

Personal 3D avatars for games and VR from a single selfie.
Just found this... some really neat free rigged customizable models
Open straight into Blender

Please focus On the walking part. When i toggle walking (holding C key), the character will be in a animation regardless of the speed.

This is what i have set up atm (walking to idle)
Look at third person blueprint, they use blendspace 1D for idle/walk/run
Actaully
thanks

maybe montages
yeah but i want to keep it inside animation blueprint but great idea tho
Noticed how jerky the default walking animation loop is. Is there any way to import and change that animation? And what are some good wa lking animations?
that looks kinda neat, sadly subdivision doesn't work out of the box on some of the hair meshs 😭
well you can fire the montages in the event graph in the animation blueprint... you can do something like save your locomotion to a cached pose and do another state machine where you use that saved pose to jump, or use a blend by bool node with your locomotion state machine and your jump animation
i feel lost ^^
in third-person-character blueprint class there is that:

i now added a new "Input" -> "Crouch":

now, how do i get to "function Crouch?"

i know there is crouch function, but how is that defined what it should play for animation?
Have you imported a crouch animation
that works differently than the jump, you need to set a crouch variable, and then create a crouch state in the animation blueprint

In this video I go over how to set up crouching with animations in Unreal Engine 4 in 4 minutes, we will use the built crouch component in the third person character to do this.
Download Crouching Animations : https://uisco.itch.io/crouching-animations
Check Out My Website For a FREE 3D Model and more of my content: https://www.uisco.dev/
Check this video out
oh thanks alot!
yes i importat a crouch animation
This will definitely help 😄
will check it out and come back
that video is awesome (and he is damn fast xD )
now i realized i need something like the jump
my "crouch" is actually "sliding"
so i need "slide_start", "slide", "slide_end" -> pack that into a state...my only question is that:
in the "JumpStart" ----(rule)-----> jumpLoop"
there is that:


what is that "ThirPersonJump_Start Asset" (Ratio(?)) ?
That's the remaining time of the ThirdPersonJump animation
if you hit right clic and start to write remaining, you'll have a time remaining= in seconds or time remaining (ratio) = 0 to 1 node per animation and state
though it only works on non looping animations

you can disable looping over here with your animation/blendspace selected

how do I select the root bone to create a key frame
or a specific bone, it's hard with so many
managed to find how
well I just selected the pelvis 🤷♂️
Hello anyone knows any common troubleshootings with the "rigid body" node?
I have a cape which isn't moving even though the physics asset is set up correctly
and physics mode set to simulated
is there some way to archive animation inertialization outside of animation blueprint (e.g.: level sequencer or animation montage)
You using cloth painter?
Does anyone know any good punching animations?
How do I set the time an animation lasts for in seconds?

No, just rigid body it's an approach similar to fortnite https://youtu.be/YjQRBHvltOk?t=2046
This talk covers Fortnite’s use of animation Blueprints including the use of Blueprints for gluing together character parts after retargeting, dynamic solutions for low LODs, and faking dynamics in higher LODs with procedural animation techniques.
Learn more at http://www.unrealengine.com
@misty dagger you could make the animation one second then set the play rate to .5
and how would I set it to one second?
That looks like cloth painter to me
Well I think theres a play rate in the clip details so maybe could adjust it, just double click the anim and look for play rate or speed or something
alright I'm just gonna get the duration of the animation and get the play rate at the speed I need and set it, didn't find speed nor rate
why is it so inconvenient to set the duration of an animation
How do I speed up my animation?
Most people do it in their DCC I guess

Also what you're asking @barren widget
just set it to 1.5 for example
Is it possible to use a standing pose additive animation together with a crouch pose? With my current setup i simply use the apply additive node, but when i use this with a crouch pose, the feet hover a bit above the ground and are not fixed anymore
So in other words, how do i take a crouch pose and combine in an additive (breathing) anim on top of the crouch anim?
Hello. I am trying to pass a percentage of bone rotation to another bone, while removing it from the bone that is passing it. I can easily make another bone rotate a percentage of another bone, but what i cannot figure out how to do is remove the percent i passed from the original bone. I am hoping this is even possible in the confine of UE4. Otherwise, i am just 'adding' rotation which will make the whole thing be in the incorrect position. Examples: pelvis to hip, or thigh bone to thigh twist bone. Thank you
There may be a better way to do this, but the way I would know how would be to mask the legs only from the animation and play it while keeping the upper body the same for the breathing. This would be done with Animation Slots. You'd make a slot for UpperBody. Not sure if there's a better way to do what you're saying though. This method is how you would also do things like aiming while crouching, holding weapons, etc.
why is my GetPawnOwner null?

Does it work when you run it?
@misty dagger I think that's what it means at the top (will not be in persona).

Persona is the animation editor's former name
so even if a string is being printed when the cast fails it is not relevant or is the cast actually failing?
oddly yes... that seems to be the case
just tried it on the default 3rd person blueprint template and it is printing fail

confused!
printing fail and works
aha!
it's because the editor was still open
when I closed it now it's working... so yes that's the issue

I've been in the engine for a long time, and I've never found a use case for "Bidirectional transitions". When would you use one?

Does anyone know why whenever I click on 'expose all' properties on the third linked layer node, the first two nodes also change...? https://gfycat.com/BouncyWelloffAuklet

weird
alright anyone here pro with animating textures?
Trying to get a image texture to scale from middle to edges and rotate at the same time.
Ive got the rotate part down
heres what I want to do
oof hang on its too big
are you sure this isn't UMG related?
whats UMG? (Im relatively new to UE)
depends on if you're doing shader stuff or UI stuff.
afaik #animation is for things with bones in them
oh. yeah that makes sense. I keep forgetting about 3D animation lol
thanks for the tip ill go there
bye pikachu
I need to know what bidirectional does, I'm going to lose my mind. I'll let you guys know what I find.