
#animation
1 messages · Page 74 of 1
thank you i will try that also, for now i managed to get it close to perfect with only BS
Google Docs
Additionally, you may try Offset Root Bone node.
It'd need some automation, but it actually does a cool thing where it would find the difference between the root motion and character speed and do the interpolation between the difference. For both translation and the rotation separately.
Foot Placement node would allow you to lock the feet when it's not moving and interpolate back when it does. Does the feet planting/ground alignment as well.
Both of these nodes are used in GASP (although, in 5.7 iteration they did a Control Rig version of Foot Placement node), if you need like a real usage example.
Thanks so much for the Info, you are the best!
anyone know how to get default slot working on it's own
I've got an anim montage that I want to play full body on it's own so I don't need another slot
but the issue is it's just not playing the anim
Could you show your anim graph and how you trigger the montage?
it's triggered on an overlap using play montage and this is the anim graph. I don't want to blend with it being a full body, just want it to play the montage

You don’t have any logic for layered blending, it’ll just play the animation.
Could you show your montage?

And what’s your blend settings?

If you don’t want to have any blending, you have to set the Blend In Time and Blend Out time to zero.
But you say it just doesn’t play, right?
yeah it doesn't play with blend times @ 0
wait no nvm
so it was not triggering the anim due to previous checks in the bp node before the play
issue is now the notify inside isn't firing
Have you checked that with the breakpoint/print string?
I don’t see any additional sections in your montage.
it was the montage node
for some reason it was just being dumb as hell and not firing the notify
so I had to handle it in the anim bp
Was it a custom animnotify class or a skeleton notify?
Hi, I have some basic knowledge of Unreal Engine, especially cinematics. Lately I have been experimenting with Unreal by combining GASP and a custom FPS animation workflow to build a realistic shooter style project.
I had a couple of questions:
1.How can I integrate a custom MetaHuman or any custom character and replace the default GASP character without using the UI setup method?
2.Is there a good way to create a demo like this one? I followed the Infigma Games tutorial, but they are using a custom rig that feels very different from GASP. Do you have any advice or tutorials that could help me achieve a similar result using GASP?
Here is the demo video:
https://youtu.be/MHbRrJmqqwg?si=CpCt6hokywJY9xn4
And here is the Infigma Games tutorial rig video:
https://youtu.be/o2aKQKpEVc0?si=Nv-BoiqxclOsg3AA Any advice would be awesome, thanks!

Just an update of my progress.
I added the Realistic Assault Rifle Template by Infima Games to my True FPS personal project. I'm glad I was able to overcome the challenge of adding the body to the animated arms. What you see here are two separate skeletal meshes, the high-quality FPS arms and a body that is using motion matching to help keep th...
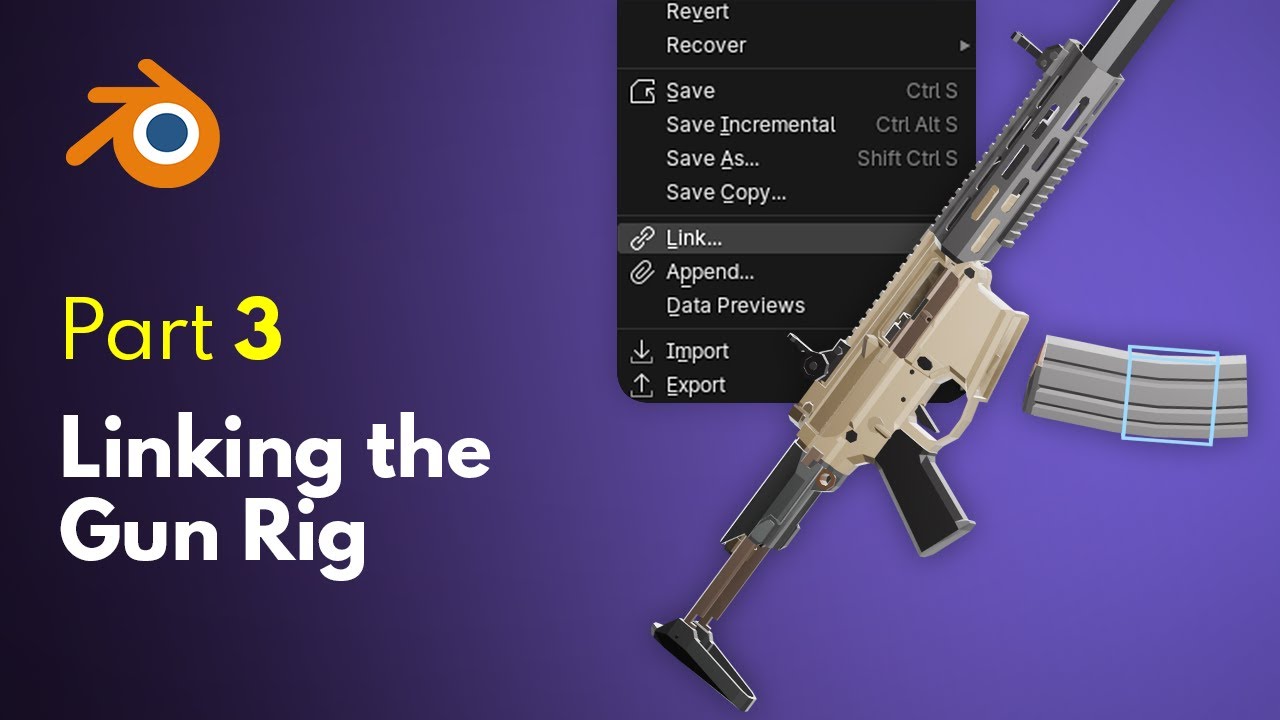
Blender Starter Files: https://products.infimagames.com/g/fps-tutorial-blender-starter-files
Source Files (Finished Complete Project): https://products.infimagames.com/g/fps-tutorial-source-files
Check out our other work here: https://www.fab.com/sellers/Infima Games
Find all of our links here: https://linktr.ee/infimagames
Created by David...
hey everyone, so i transfered a couple stuff from Third person template to my game which is first person and now the blendspace or something is having troubles because the walk/run thing wont work and i tested it in the blendspace and it looks like it works but it doesnt within game, any idea??
Those are complex and broad questions, that it would take quite a while to answer, especially the second one.
GASP is built completely around UEFN character.
To make the animations work, you'd have to either adapt your character to be similar to UEFN skeleton (having the traversal joint), then retarget all the animations and rebuild the MM assets with the retargeted assets in mind.
Or build your character BP that would have UEFN mesh is ticking the animations but hidden, MH mesh is visible and just copies the animation from UEFN mesh.
How much have you debugged the ABP already?
What do you mean "having troubles"?
this code is originally from the third person UE5 template and for some reason the "Should move" variable isnt becoming true and i dont know why

Check if the Ground Speed and Acceleration is outputting the values.
how do i see that?
Start PIE, switch to ABP window, select your PIE instance in the top-right corner drop-down menu, right-click at the desired node connector pins and select Watch this value.
Ground Speed is a declared variable so it could also be seen updating in the Anim Preview Editor tab, when Edit Selected Instance selected
So I tried to follow what u said an i got confused after the watch pins
Thanks for the info! Is the UEFN skeleton different from the UE5 manny rig?
Pretty much the same except the auxiliary joints.
What’s confusing?
Not sure like I dont see anything change i think?
Does the connection lines glow red after the character validity node?
Have you switched to PIE afterwards and tried to move around while watching the ABP window?

its an ai enemy but they move too
Yes and the ground speed and velocity changes too!

If it’s AI, you need to turn on “Use Acceleration for Paths” in BP’s movement component settings.
ITS WORKING!!
its now using the walking anims!
thank you DanDiamond!
Hello, I am preparing the groundwork for a project and I have a question. My goal is to replicate the mechanics of the shield from the latest Doom, including throwing, blocking, parrying, and reflection. My question is whether to use the first-person or third-person template from Unreal because of the animations, as I have only found full-body animations and I am not sure how complicated it will be to adapt them to the first-person.
Playing the 3P animations from 1P perspective shouldn't be much of a problem, but of course the framing of this animations might not be very good, so manual tweaking to make them look better from 1P view might be required.
i've been thinking about retargeting them the fps arms or changing the skelmesh and hide the torso bones
Anyone used this node before? The slot returns active when I check it with "Is slot active" using the same anim instance reference, but the node doesnt seem to do anything. Im trying to cancel either a right or left hand layered animation when player send a different input. Clearing out the "slot node name" field cancels everything, similarly to having "should stop all montages" checked on the initial play montage node. Been looking for a solution for about and hour and found this discord

The slot node is inside the main graph, not inside the sub-layer or the linked anim instance, right?
yes, this is in the AnimGraph for the player

Weird, just did a quick test on my end - works as expected.
brother you may have saved me, im trying to call stop slot from my player blueprint with a ref to the anim bp lemme redo this
cool anim btw
what is this dynamic montage node you're using? still having no effect for me but im calling play montage from the character BP

It packs the animation asset to the transient montage asset and pushes it to the slot.
Shouldn't be related to the problem.
i was looking in visual studio at the function and "stopSlotAnimation" only works if the montage is transient, does that change anything?
essentially if it isnt transient stop slot will fail
I'm checking the sources.
Looks odd, shouldn't work that way.
Yeah, it doesn't work if the actual montage asset is pushed.
lmao that is infuriating
Alternatively, you can put your slots in their own groups and use "Montage Stop Group by Name".

But in that case, the montages would play independently of each other.
So if you don't need auto-cancelling previous montage when you trigger one of them, that should work.
Let me try that and see, thank you for the help man
Or just use "Montage Stop" function and feed in the same montage asset.
@velvet jasper setting the groups did the trick, that busted node was giving me a headache for 4 hours. Thank you so much 🙂
so i am using Behavior tree and is there a way to make montages loop until told to stop, im trying to create a stunned thing where a monster is stunned and cant move, i am just struggling on the stunned loop thing!
yeah you have to set the animation to loop in two places
1 sec
could also do it through the animBP for the character but if just for play montage you check here and here

Assuming you have Stun Start and Stun Loop animations, you can add both of them to the single montage, create a new montage section between the anim clips, then set this new section to transition to itself.
It would make this section to loop until you either play another montage (e.g. Stun Stop) or just stop the montage itself.

hello, i want to make AAA series animation, can someone suggest sources?
What kind of sources and what do you mean under “AAA Series animation”?
Hi, noob question: I have recorded face and body animations. On the body animation there is an audio track. I used a clap and mouth pop for time sink.
I can obviously trim the processed body and face animations in sequencer, but how do I create a new sound object for the trimmed audio track?
New sound object?
Maybe wrong choice of words, but I know I cannot export the trimmed the audio in the sequencer, so I’m looking for an easy way to do so.
I the end I want my trimmed animations (which I export as separate Animations sequence objects) in sync with the audio I trigger with it.
Or would it be better to trim everything in a video editing tool before bringing it to Unreal?
You can't destructively edit audio in Sequencer.
For that you'd have to either use external audio editor or turn on "Waveform Editor" plugin that would add trimming functionality to Sound Wave viewer.


#audio might be a better fit for this topic.
Waveform Editor can also save the changes to a separate asset though.

@velvet jasper thanks for the info, I think I will trim both the source video footage and audio externally first and then convert it to motion capture animations and add the matching audio.
It would be a nice feature though, even non-destructive, to be able to match the cuts and trimming of the animations with the corresponding audio in sequencer and be able to store it in some way when exporting the edited animations to new animation sequence files
Well, another way would be to render the sequence to the audio file 🙂
But I understand that something much more quicker would be convenient.

Also an interesting option, thanks!
Hi all, this is about animation compression (I think), I import a long camera move as an animated box in fbx format and child a camera to that.
I sometimes find that the camera move is a little 'twitchy' and when trying to diagnose why is would not be smooth in UE, I'm thinking this may be animation compression.
How can I effectively disable this?
I went a little too gung-ho changing a bunch of indexes to ACF NONE, and corrupted my 5.1 engine and needed to re-verify the whole build.
So now I'm trying to be a little more sensible about what settings I should change!
Am following and will provide screenshots to help diagnose my issue - thanks!
Could you show what you mean as “twitchy”?
A camera move that should be smooth seems to have slight temporal jitter, similar to misinterpreted frame rates (like 30 fps to 24 fps), but the frame rate is set across the programs at 30 fps.
I'll clip an mp4 shortly.
Here's a preview At 5 seconds, if you look at the (currently black) hills in the distance, they slightly stutter. Like it's just my hardware struggling...
This might be pedantic? I'm going to add 3d labels in post and they will respect the original camera move so they'll have smooth motion on top of the rendered frames.
Are these stutters constant? If you nudge through the frames in sequencer (left-right arrow keys), do you see these keyframe inconsistencies?
Yes they are throughout the video, I'll check frame by frame if they trully are rendered into the sequence or just hardware stutters during preview and playback...
I have fixed larger stutters by changing anim compression settings in the past, but am still not confident with those settings.
Have you tried importing the camera animation data directly?
Like exporting the actual DCC camera to FBX, then right-click on the sequencer camera binding in UE and select "Import..."?
Thanks I will look into that too, I must not be able to do that or I'm dumb for using a childed cube as a needless interim object.
I've been working like this for about 5 years and it's just an increasing annoyance as I become more and more familiar with everything.
To elaborate on the second question - most vehicles will have multiple suspension options that affect the height and track width. If the skeleton can be swapped while using the same actor and movement component, I’d prefer to go that route
regarding the control arms, a few trucks will use both twin I-beam suspension and leaf springs


Example of the Control Rig setup for the suspension could be seen in the OffroadCar assets from Vehicle game template.
And yes, Control Rig could work dynamically.
If you call “Import Skeleton” during Construction Event instead of using “Import Hierarchy” button in the editor, you’d get the actual list of joints from the assigned mesh.
Then it’s up to you to make the logic adapt to these changes.
Or you also could do a Control Rig and AnimBP setup for each mesh and just change the anim instance along with the mesh when you swap the suspension.
hello, sorry i didn't get the notification. I'm creating a model in Zbrush, then i want to make good cinematic trailer or a series for adventure (Kinda arcane or LoL cinematic) im architect i mostly understand the design rules and base points but i don't know animation and VFX, i have tried to solve this with Houdini but it was so hard for me, so i decided to switch to unreal engine 5.
Thanks for replying.
The thing is, there's no magic button that would make your project AAA.
So it's a really broad question you're asking. The whole internet might be your source - there are plenty of rigging tutorials, animation tutorials, in-engine sequencer setup tutorials etc.
Maybe worth just to find a specialist that would take care of rigging and animation instead.
actually i need this answer "yes ue5 can handle both animation and VFX" i believe ue5 can, but i want to main a software, is UE5 top for this?
I'd say this is subjective. Yes, you can do VFX in Unreal and yes, you can animate inside Unreal.
People been using it in production (not related to game development) for quite a while.
How convenient and “top” that would be is up to you.
Thank you friends, ill do my best
Is it possible to disable only rotation for root motion with Mover, but still keep location?
Root motion from Montages?
yep
I have some attack animations which have the character trust forward a bit, and if I chain them together, I want the character's rotation to auto correct itself towards its locked on target. Right now I'm setting the characters orientation intent in the Produce Input function override to get my character to rotate, but it doesn't work when playing a montage with root motion.
Have you tried adding Motion Warping?
Actually didn't know it was a thing until now, will try to look into it. I know it says experimental, but how stable is it right now?
Is it still marked as experimental?
It exists since early versions of UE5 and I personally used it in the production.
Hii
I need some help on how to attach the hands to the handle location
You would need to do the IK setup for your character's hands and feed in the world location of where the hands supposed to be.
There are plenty of tutorials online how to make the character interact with the world objects with IK.
like this ?

i was actually adoing ik before the ik node that why it didn't work in the first try
i'm now facing an other problem
its start twitching and jittering when its attached
Facial mocap and lighting MHC 🥰
Hi, hello
Can someone help me with Retarget Animations?
I'm trying to use some animations from GameAnimationSample but idk why my skeleton disappears while playing the animation.
I guess is something about the root, but dont know for sure


I created a ABP template for battle units. I wanted them to have a generic Notify for inflicting damage. Since now skeleton is assigend, you cannot pick them in the node browser.
So I just copied it over from another ABP ... and it works.
But does this bear any risks?
What kind of risks you imagine?
AnimNotifies do not need to be bound to Skeleton, as you can also create a custom AnimNotify BP class and do a needed logic there. That might be count as "generic".
Is your character exported from Blender?
If so, make sure it's exported correctly and the root bone doesn't have a 100 or 0.01 value scale.
it just felt like a weird hack.
In that case, make a custom notify class and use it on your animations, independently of character's skeleton.
thanks.
Retargeting Problem
Btw it worked thanks for the help
Hello (I hope I can ask this here. If not, I am sorry)
I want to start learning animations in UE (never animated before). What are the best resources to watch how to animate in UE?
Have you did a search on that topic yourself yet?
yeah, I looked at some videos o youtube and some udemy courses, but I want something that I can follow and (for now) not jump from video to video when I am looking for something specific
Hi, I have a car animation sequencer that has x and y transform key frames. I wanted to get the Z value based on the roads/terrain. The cars have physics enabled, and in the sequence, they have the static mesh component simulate physics. I was hoping on hitting play, the cars would get to z value based on collision with the road and continue moving along, but that is not happening. They hit the road and bounce a bit and stop. How can I fix this?
What is "something specific" in your case?
Hello, does anyone know how to apply breathing from idle to another animation while preserving some bones position? I have a pilot pose that I want to give some life by using existing idle animation, but its hands would slide away from the controller, so I would like to have them there.
IK would be the way to go, but I don't see an entry point for me to start any logic for that since the animation I want to get the hand position from is an additive one, so I don't think that I can save its original hands position to then IK it back after additive
I don't know, animating some angles or specific body parts, I am not sure, that's why I am asking
Hi, I bought the asset with animations, but when imported animations have "empty keyframes"... I mean animation has 270 frames duration but the last keyframe of proper animation is in ex 95 frame. How can I get easliy rid of the rest of frames?
You sure you want to use physics to solve that task?
You could try to do a line trace and adjust the mesh position based on the hit result.
Rotation could be acquired from the hit normal, but that wouldn't work good with the single trace for the car.
Simple uphill/downhill adjustment could be achieved from two traces from the front side and the rear side, if your terrain is not that complex
Here's the example math logic setup.
Otherwise, you'd probably have to do four traces from the wheel locations, make a trigonometry plane and adjust the mesh based on the math calculation.
LLM might give you a better explanation for that.

And how it actually might work.
You could utilize Layered Blending node for that.
Cache your Idle anim, plug the cache to the base input, plug the cache with the additive node to the blend pose input.
If you set your joint settings as "root - depth 0, ik_hand_root - depth -1", it would passthrough your IK targets from the base pose, so they won't be affected by the additive.
It is a super large level map with complex road structure and I already have data of x,y, rotations based on roads. I have z too but it’s not exactly matching the roads so I wanted to try to match z based on time of collision.
Cache your Idle anim, plug the cache to the base input
You're referring to breathing idle, right?
So something like this?

Correct.
Oh, wait.
However, that makes the IK bones stay where they are in breathing, but I would like to have them to be where they are in the sitting animation


Create a duplicate of your sitting pose, make it non-additive, pass the IK targets only.
Will try
Or, make your breathing to be additive and the sitting pose to be the base.
That makes more sense to me, to be honest.
Hm, it feels like duplicating the breathing would be better considering that I would like to re-use it for multiple animations
However, what would be the additive settings on my breathing? LocalSpace, FrameFromThisAnimation 0?
For example, yeah.
I think it probably would be better to contact the seller and tell him that the assets are incorrect.
Otherwise, if you right-click at the upper side of the timeline in the animation preview window, you'll be able to trim the animation.
The timings would vary based on your cursor position.

Brilliant, that worked, thank you very much once again 😄
UPD: I also had to isolate fingers in the LayeredBlendPerBone for them not to move on the controller

Epic Developer Community Forums
I am trying to make a pig riding mechanism that looks something like the one of the right. 🏇 🐷 This is how im programming my mounting event. I’ve added a Play Montage but it might not be necessary, I added it in a desperate attempt just in case… after having many failed attempts with the default animation asset detail. ✏ Here...
Does anyone know how to fix this?
hi, does anyone know the transition rules for left, right, backwards movement? cuz i am totally stuck, i have the idle to forward transition rules.


So when changing the animation slot for a montage, for some reason the animation is stuck in an a-pose for any other slot other than the one it was originally created with. Any particular reason why this is happening?

This is an old preview bug, the slot is actually changing.
If you reopen your asset, it’ll work again.
Vector consists of 3 axes values, you could break it into elements (either by right-clicking the output pin or connecting it to Break Vector node) and use its X and Y values, that could be positive or negative.
If you unrotate your velocity by the actor’s rotation, you’ll get a local velocity vector.
Thanks, I also apparently found another workaround by deleting the animation in the track and using ctrl-z lmao
In any case, only the preview is affected. If you trigger the montage, it’d work correctly.
The fix would be to retarget your sitting animation to your custom mesh.
Right now you’re bruteforcing the animation made for Mannequin to be played on your custom character that’s probably have different joint orientations and positions, resulting in broken pose, as the joints would use transforms from Manny skeleton.
Hello, does anyone know whether it's possible to transform bones using anim modifier? I want to scale down a bone on a certain set of animations, and I don't really want to place those curves by hand. I also could make a normal curve, and then scale in ABP, but I'd like not to do that
Yeah, absolutely.
If you want it to be a non-destructive change - you can create an additive transform track for this joint and add keys there.
Alternatively, you can overwrite the bone track keys.

This also might be useful when you do the changes to the bone tracks.
You can cache the pelvis in the world space, apply the changes to the root bone track, then apply the cached pelvis transforms relative to the new root animation.
That way you'll preserve the original character movement.

Thank you, that works
Interesting
Hi, I need help with my ladder system in Unreal Engine (Blueprint).
Problem:
When I press E near the ladder, the character starts climbing automatically
and keeps moving up/down without pressing W or S.
What I want:
- E only to enter/exit ladder mode.
- W to go up, S to go down.
- No automatic movement when entering the ladder.
Here is my current Blueprint (screenshot attached).
What is the correct logic to handle this?


I think that's more question for#blueprint, unless you have an animation-related question regarding your logic.
Yes, I posted my question in the #blueprint channel.
I wrote here as well because I also have an animation issue:
the climbing animation doesn’t work correctly when entering the ladder.
So the problem is not only Blueprint logic,
but also how the movement is linked with the Animation Blueprint / State Machine.
Thx u
It's really hard to say without seeing the issue in the context.
Plus, the screenshots do not focus much on the animation part.
For the people who've been struggling with the "Bone Driven Controller" node, I've recorded a video showing how to set it up to work.
one more thing to ask, should i still add floats or naw?
Add floats for what?
Actually, wouldn’t it be easier if you use the blendspace?
Hey guys, have you ever had to deal with Offset Root Bone node when using a custom gravity vector on the player? I found out that if the param "Max Rotation Error" has a value > 0, starts to behave weirdly, as you can see in the first video, it seemes that the root bone rotates in uncontrolled way.
In the second video i set the rotation error to 0, and fixes the problem, but of course i don't have root offset anymore
Do you have any ideas? Even changing the source code of the node
Just for context: in the video the player is walking on a vertical wall; if walking on the ground everything works fine
question, if my rig doesn't have a pelvis, will that be an issue for retargeting?
Yeah, there's an error with how the node computes the offset when it's clamped.
Could be fixed just by swapping the rotation order, but you have to edit the source code:

Could you give a bit more context here?
Why your character doesn't have a pelvis and what kind of animations you want to retarget?
I am very new to animations and am trying to get a basic understanding of both the absolute basics (literally how to play an animation on button press) and some of the best practices to be following when setting things up for eventual harder stuff (state machine handling, blend spaces, insert thing I probably don't know exists)
Would anyone be willing to go over that with me? or alternatively, does anyone know a great guide for it?
so more so i've made my own skeleton in blender that was just spine 1 to 3, it still is humanoid having a thigh and shin for example, and even a root bone, but i've noticed the manny skeleton has a few more bones than i thought
i want to retarget some anims that were on manny to my rig
So, technically, you do have a pelvis and two spine joints, right?
In theory, the retargeting still possible, but the result fidelity would be limited.
As the skeleton structure is unique, Unreal might have an issue to do auto-retargeting, so you'd have to build a retargeting assets manually.
So, technically, you do have a pelvis and two spine joints, right?
yup
As the skeleton structure is unique, Unreal might have an issue to do auto-retargeting, so you'd have to build a retargeting assets manually.
Yeah. I tried IK rigs for both but it didn't seemed to work
bending the arms to match manny resulted in broken elbows and some weird wobble
so i chalked it up to my models being built too different
especially since the neck manny had also was two bones for some reason
i had deleted both ik rigs but this was what i meant
Retargeting Op Stack would have to be adjusted as well.
Seems like the Pelvis Motion op is missing the pelvis joint assigned, that's why it glued to the air.
strange cause it didn't give that warning when i assigned source to pelvis and target to spine_001
for pelvis settings on the retarget asset
Could you send me your FBX file for testing?
sure will take a bit
can someone help me figure out why my alembic file breaks in unreal only when it has textures on it
the one thats just a Grey mesh displays the animation fine but as soon as I put texture files on in maya and bring it to unreal, it turns into this weird jacked up cube thing
- trying to pause an animation on a specific frame from a gun blueprint
- every YT result is about animated pause menus
Found a SetPosition node - is that what I need?
you might want to use Montage_Pause but I'm not sure why it pauses in your case (my question here is if it pauses every single time or of it's based on gameplay state etc)
you could also just reduce the playrate to some very small value and return it to normal after a bit
It’s an open bolt SMG - right now it just has a single cycling animation, but if the trigger is held after it’s empty then the bolt should stay closed
that honestly sounds more like a montage section would be beneficial here
you could have a montage section for the bolt going front to back and then you could just set the next section to that
I’m guessing it splits an existing animation into steps?
yep, and each section can decide how to move to another section. It's generally nice to only need 1 asset to represent the chain of states here but you could definitely get away with just having separate ones too
Good to know
this is pretty open ended I guess. You could probably just move the bolt bone around with math if you really wanted to etc
That’s actually what I tried at first - couldn’t get vinterp to work properly in an anim blueprint
But I have the animation now, and if a montage will work then that’s what I’ll do
Logically, staying closed bolt sounds like a state of the gun rather than action.
So it’d be reasonable to have some sort of state switching as a base, then override it with the fire animation (in other words, have a montage slot after the state logic).
It could be a state machine setup or simple blend by bool, where you switch between the ref pose and the sequence evaluator with the closed bolt frame inputted .
Procedural solution also would work.
It worked!! Thank you!
Do you by any change a fix for the Steering and Foot Placement node too? Cause i'm having some issues with that too
What kind of issues?
The steering node is causing me this
For the Foot Placement I probably have to add a parameter for the ground normal
Hm, what's your setting for both Steering and Offset Root Bone here?
If you turn the Sterring node, the issue is gone, right?
If I remove the Steering node, i still have the first issue you see in the video, which is "fixed" by rotating the player around Yaw.
But the second one, where the palyer's body translates forward while walking and looking down, is gone removing the Steering node
These are the settings for Root Bone, Rotation mode and Max Rotation Error are set at runtime, but you can consider "Accumulate" and "60 degrees"

The settings for Steering nodes are basically the same as the ones in GASP
Ok I noticed that it actually happens when I look down while walking
[FOR HIRE] 3D Animator | Blender & Unreal Engine
Skills: Character Animation, Rigging, Hard Surface/Mechanical Animation.
Engine: Full integration with Unreal Engine (In-engine sequences).
Style: Realism, Stylized, Game-ready assets.
Showreel?
Interesting, so it’s like rotates root pitch when the stop animation plays.
Probably another case of the rotation order.
So do you think the issue is in the Steering code? What should I change?
Haven’t looked at the source code yet.
Okk got it. If you have any updates, tag me please. Thanks for the help! 🙏
I have a strand groom (test) with a cull mesh over it. Is there a way to get the mesh to animate like the hair? Using the hair skeleton, or some kind of deformer etc? I'm new to UE5 so I don't even know if it's possible in the first place - and what other options do I have in that case? Thanks for any answers.


I'm trying to figure out how to make looping animation smoother. I keep on having this slight pause at the end of each loop. I've changed starting and ending keyframes to use cycle for their pre and post infinity curve options. I've also tried using loop interpolation option in a baked animation asset. Neither one helped. How can I fix this?
In the attached video, I'm animating body, upperarm_r and upperarm_l for now. Arm curves are a bit flatter, but I exaggerated the body curve a bit while testing things with this loop issue. You can see how body rotation pauses at the end of each loop and it's pretty obvious (it's also very obvious with arms).
Is it just a matter of the curves being relatively flat ?
The hand has keys at the same height, which would stop them from moving.
The body does have a curve, but it is somewhat in the same range for a while, so might not be noticeable
Could you try increasing the value to see if it's an animation or a looping issue ?

I think that was it! Thank you.
heyy guys, how can i fix control rig for legs if i use modular rig? if i connect this control rig now my animations are not working anymore

Hiya. I have a question regarding GASP, and how it uses the attach bone for traversal anims: I'm currently trying to make a swing anim, and looking at getting the root motion animation for testing. I'm getting this result, despite the attach bone being adjusted to snap to where the hands are. Added a video to show how the root bone is actually being adjusted, but it's not being reflected in the animation when it's playing. Am I missing some bit of info?
Modular Rig in common are not supposed to work in realtime, please look at the Leg IK solution from Third Person example as a guide.
Ok thanks
I need to create another control rig?
Either edit the one I’ve mentioned above (or just use it, if your character has matching UE5 skeleton) or create your own solution that adjusts the IK targets based on line tracing and applies Full Body IK to the character.
I just copied the ue5 character foot ik to my skeleton and all fixed, thanks again🙂
Got it working. So, the positioning was wrong, so changing it in the logic to remove the capsule height, makes it work just fine. I'm guessing it's setting the root position instead of the attach bone to the warp target position
@velvet jasper exist some option to add smooth to this control rig? Because when i walk upstairs or downstairs, my character is moving up and down too fast, looks like a jump, instead of smooth step
That would be mean that you would have to learn Control Rig 🙂
There’s plenty of info and documentation online.
You probably would want to apply spring interpolation or simple kalman filter to the resulted pelvis offset.
Ok
Alternatively, you might look into Foot Placement anim node, that also takes care of ground feet adjustment with pelvis correction.
Ok thanks 🙂
Missed your message. Yeah, motion warping in the traversal animations is using the attach joint as the guide for the root bone warping.
Can anyone tell me what I should be looking at to fix this issue?
I'm using the default mannequin animations and the standard UE skeleton on a test character with different proportions, but the animations are strangely scrunching parts of the body. I did my best to weight paint the bones similar to how the Mannequins are done and the mesh seems to deform well enough normally, just not with the standard animations.

This is because the animation is authored for Mannequin mesh, so the joints are being translated where they were originally in the animation.
So if the proportions are different, you have to change the Translation Retargeting settings for your skeleton.
If you open the Skeleton Tree tab and click the gear icon, you’ll be able to turn on “Show Retargeting Options” checkbox.
Then, if you right click on your pelvis, you’ll bee able to recursively set everything to “Animation Scaled” mode.
That's a solution I found earlier, but it doesn't seem to fix it. I have all the translation retargetting set to "animation scaled" on the skeleton tree.
edit: animation relative seems to mostly fix it, but I'm not sure why
Alternatively, pelvis could be set to the scaled option, rest could be set to “Skeleton” - that would ignore the translation completely, which is mostly fine as the pelvis would be the only joint that translates.
But if the Relative works you, that’s fine.
I will try it out. Thank you for the help!
No worries, but thanks for confirming that
I’m trying to make a sword that is attached to a character’s hand, then gets thrown, flies independently, and is caught again in gameplay (not Sequencer-only cinematics).
I understand that Unreal can only bake animations from bone-driven motion, not from constraints or actor transforms.
My confusion is:
– what is the minimal correct setup for the sword (static mesh vs skeletal mesh)?
– does the sword need its own Actor Blueprint?
– how do you convert constrained motion (when attached to the hand) into a bakeable animation?
I’ve tried animating while constrained, but nothing is considered “animated” and there’s nothing to bake.
What is the correct Unreal workflow here?
- If your sword doesn't contain any moving parts, then it could be added as the static mesh.
- Pivot point of the mesh should be correct.
- Character mesh's skeleton ideally contains the weapon joint (or, at least, the socket added in-engine) that would represent the weapon's pivot point relative to the palm.
- Weapon mesh component attached to the character mesh component via weapon joint/socket.
The throwing sword might be "faked" by spawning a separate projectile BP that would have a sword mesh that constantly spins and the actual sword in hands simply hidden.
EDIT: Haven't noticed that I didn't select the user above for the reply. Sorry, Lory.
I'm not sure what you mean under "converting constrained motion".
In a nutshell, if your character has the weapon joint, in your DCC you'd parent constrain the sword mesh one-to-one to that joint for preview and pose the joint as desired.
Then, you'd repeat the same process in-engine. The character's joint would contain all the needed information where the sword should be.
Replied to the wrong person, here's the answer above.
Thank you for the detailed reply! That sounded simpler than what I expected.
I meant that when a static mesh (sword) is constrained to the wrist for example and I move the arm to swing the sword, then how to bake that animation of the sword. But I think you gave solid advice there.
No problem!
I just created a walk cycle and it's not very smooth. So, I'm trying to figure out how to smooth things out. One weird thing that I noticed on some of the bones is that some of my curves have sharp tangets and I can't seem to smooth them out (tried smart, cubic, etc). Is that just a visual bug or would that actually contribute to the stiffness/jitter that I'm seeing?
Btw. looking for tips on how to smoth things out as well.


My animation looks like claymation at the moment, lol Not the effect I'm going for.
You’re showing the curve going from -0.003 to 0 - I’m not sure this is a valid comparison here.
Yeah, both roll and yaw curves ended up these oscillating tiny values.
Removing these curves didn't appear to alter anything, so they were inconsequential.
After much tweaking. Not perfect, but much better than before.
I would find some reference to look at for a walk and try to focus solely on the body to begin with, if you look closely at the hips you have sort of a sharp drop right as he steps, and I believe some sharp rotations, this does two things:
- makes the legs pop since they'll be straight when landing, bent when the body drops then straighten up again in a short time frame.
- affects everything up the hierarchy too, so having a sharp motion on the hips makes that sharp motion continue up the spine and to ex. the head.
Try to smooth out the motion of the core of the character first, the classic way to imagine a regular walk is that the hips go in a smooth sideways "8" path, once you have a smooth core motion you'll find the rest becomes easier
Those are good tips, thank you. I'll play with that.
Smoothing out curves definitely helped with knees popping.
Does anyone know what Animation Modifier Epic used to generate the contact_l and contact_r curves for the GASP animations?
I can't find anything default in any of the custom Modifiers. None of the default epic ones provide anything like this.

If you've got one single bone (a weapon bone) on your custom skeleton and you want it to follow exactly to the hand_r bone on the mannequin in the IK retargeter, how do you do that? Do you just add it into a right arm solver for the whole bone chain or can you do a single offset retarget?
Pin Bones op in Op Stack.
What does the modulation modifier do?
Foley stuff
https://www.youtube.com/live/i27eY7LbRzc?si=0tn5XooHedZI4qM-
Timecode is 1:25:50

We've got some of the folks behind the Game Animation Sample Project coming on this week to chat all about the latest updates to the project (like the additi...
anyone?
Do you have another UE5 process accidentally opened at the background?
What does the Output Log say?
This is AMAZING! Great memory, thanks Dan
...Although, the typical epic response is really frustrating to hear...
we just has like an internal script that ran, analysed the anims to place these. We would like to ship this one day... Something Dan has been working on. How to analyse Anims in batches...
..
...New internal tools that aren't in the project now, but someday will be ... Contact curves generated with this ...
😒
Well, one of the ideas how it could be replicated - you can do the curve expression in reverse, the feet speed could be kinda converted to the contact curve.
If the speed is lower of the threshold, it’s probably a contact, so we set 1, else it’s 0.
Yeah; I'll have to cook something up and I'll ask a junior to go through them.
I'm only using a subset of the 1k anims, so not impossible, just would have been nice to have that clearly working tool or otherwise with the anim
nope, still happens even when I restarted PC
and happens when I copy the files too, not js moving them
Any additional info in the Output Log?
I found a solution

said it's a common unreal bug
I occasionally get that for lots of other uassets when file is read-only and my perforce ticket has expired. Would double check basic things like that first, or whether another app has it opened.
it worked with me when I used the first solution
Not a good practice as it doesn’t solve the redirectors but if it works for you and you haven’t encountered any potential errors, that’s fine.
hi there.. small question about Retargeting animations.:
I export a Model from Blender, using Auto Rig pro, to Unreal.
The Rig in Blender looks fine, has the UE5 preset set (correct amount of spine and neck bones), also applied UE5-Manny A-Pose as Rest Pose.
Import also worked fine, Mesh looks great in the Editor, too.
Now i am retargeting the mesh to the default UE5 Manny Skeleton, as Retarget Source and Compatible Skeleton... so i can use most of the Fab Animations from my Library.
Skeleton retargeting options are also set as described in many YT Videos..
But, when playing the Animation, the Character always looks like he is staring into the sky..
Can someone explain, why this happens?


this also happens with every of my other characters..
collective staring into the sun..
Probably because the joint orientations are slightly different from UE5 Mannequin.
Compatible skeleton feature and Translation Retargeting are useful only in the case where your skeletons are actually compatible - it’s the same joints everywhere, plus proportional differences if any.
If the skeleton has been created separately and just follow the same naming conventions, that won’t be enough. Joint orientation similarity plays a big role here.
So in this case, the better way would be to do the actual retargeting.
Or maybe you have something running on top of the animations in your ABP? Like some sort of LookAt or something?
The ABP is just running the Idle Animation as State machine result - nothing more..
The Armature produced by Auto Rig Pro, should be exactly the one of UE5 Manny/Quinn..
I currently more guess, the animation itself is off... (Generic NPC Animation Pack)...
Well, how do the animations suppose to look?
checked with other animations now - they are fine.. so i guess it is the animation pack that has a problem with the UE5 Skeleton
I am really sorry, I didn't understand what this meant.
In the Retargeter asset, there's an Op Stack - list of operators that evaluates the retargeting.
One of the operators you could use is the "Pin Bones" that allow you to map and constrain the joints (e.g. make the IK target joints follow corresponded FK limbs) either within the source or the target skeleton, or between them.
IK Rig solvers don't have that functionality.
Hiya. I'm having an issue with GASP and I'm not sure what's causing this. As you can see, the animation plays out before snapping to the final position. Can somebody help me pin down why it's happening? I had this issue before, but it magically got fixed without me knowing what happened, and now it's back
Collision?
That could be it for this specific anim, but it feels more like it's starting the montage at 0, despite the start time working. Are there any curves GASP is using for movement besides just relocating the root location? If so, could those be involved somehow?
IIRC, the start time is defined by the motion match function. In any case, after that it's a standard motion warping.
You can try "a.MotionWarping.Debug 2" and "a.MotionWarping.Debug.Target 2" to see how it works.
Awesome, thank you very much. I'm still a bit unaware of a lot of the debug tools for animation, so knowing of these functions helps
Hello, I have an issue with my vehicle rig. I have a controller to affect the body rotation, but if I rotate root with all children bones, it'll affect wheels as well, but I only want to affect the vehicle cabin and its internals.
Right now I'm trying to rotate the root bone and the steering wheel, but applying same control rotation that I apply to the root bone to wheel has a different rotation: changing control pitch affect steering wheel yaw.
In the skeletal mesh editor it's rotating correctly, however, in control rig it's behaving differently.
Can anyone give some pointers on how to go about it? I don't deal with control rigs that often, so I'm pretty bad at it
Technically, you can insert a parent joint that would have all the cabin joints and control it that way.
Do you mean to have a middle bone that affects everything but wheels?
- Root
---- Body
------ SteeringWheel
------ etc....
---- Wheel_FL
---- etc...
Yeah, makes sense, I would need to ask my animator to do that. However, is there a quick way to do that without altering the skeleton?
I'd say maybe rotate the root, then set the wheel joints to the initial transforms.
That sounds feasible, but how do I reset wheel joint transforms in control rig?
If you look at the Get Transform function, you'll see "Initial" checkbox.
That would return the initial transforms of that joint.
Oh, yeah, let me try that
Is that a Chaos vehicle?
If so, resetting to initials might affect the Wheel Handler, so that node should be placed after your Control Rig.
It's not used in an actual gameplay, it's only for a cut scene, so no, it's not a chaos vehicle
That worked, thank you. I just need to do that for the remaining wheels

I'm sure this is a knowledge issue, but I'm having trouble figuring it out. This code is firing but visually nothing happens. Am I doing something obviously stupid or am I gonna need to look elsewhere?

Do you have MontageSlot node in your Anim Graph?
Yup. That was it. This is not the only montage I'm using, but it is the first one I'm generating. Totally forgot I had to do that.
Thanks!
Heya, does anyone have a good idea as to why Epic always doubles up the traversal logic on pressing the Jump key? It works jsut fine with 1 instance on Started, so I'm curious why they made this redundancy

To make the traversal work when you hold the Jump key as well.
Definitely not that, cause it works just as well with only the Started instance
In that case, the Triggered probably a redundant leftover, as the Started event has a corrected ongoing logic.
I actually think it might be the other way around, where the Triggered event on is the correct, and the Started is mainly used for setting up the Jump Just Pressed bool and input updates, as the traversal action will only play once when it's started, so this would be the proper functionality overall, without any duplicated code

Just a human error, that happens.
Yeah, I was just curious, since I saw this setup since GASP 5.4, and thought there might be something more that I wasn't aware of. The comment box makes no mention of it. In any case, maybe it's helpful for someone trying to cut out some processing fat in their project
Any Blender users here? How do you properly export geo with animation into Unreal?
Haven't had any luck so far after repeated attempts.
hello anyone know what thinsg rings command call to make it open

anyone know the command
What is the purpose of the ControlRig node in anim graphs?
Actually no that's such a noob question, I definitely need more fundamental knowledge. Does anyone have a good tutorial on specifically the Anim Graph? I've been working on learning the Rigging process separately, and that's going well, but I do not understand the graph itself. Nothing I've found on YouTube goes into the detail I need.
Look for a.animnode.OffsetRootBone.Debug console command.
Well, Anim Graph allows you to build your animation logic.
You can look at the ThirdPerson example project as a basic example of AnimBP setup.
That's the thing though. I have a basic setup, but I'd like to go into more detail.
This is kinda vague question, like what is the “more detail” for you?
Do you have some sort a problem that you interested in solving?
Not in particular. I just want to get better at using them. I know it's vague, that's why I'm looking for resources more than answers.
Alright, why would you want to be better with Anim Graphs?
Because I don't feel like I have a good understanding of what order in which things should occur whenever I'm trying to do something with it.
And what are you trying to do with it?
Multiple things but I'll pick one example I guess.
Make hands catch a thrown object. This kind of does that, and I've been working on improving my control rig to get better results, but I have no idea what's actually happening here, which makes it hard to turn this into transferable knowledge. What role does the Control Rig node play in the chain of events? Why do I need to use local-to-component? What's the use cases for tweaking those alpha values? Stuff like that.

Another example. How would this interact with a montage slot? Should that be placed before or after this?
Good questions.
I’ll get back to you soon.
What role does the Control Rig node is playing is up to your setup.
It might contain the whole IK logic just inside the Control Rig that you would control with your AnimBP, as you can expose as pins your controls/exposed variables.
Local to Component conversion is important because by default the anim graph works in Local Space - every child bone is relevant to it's parent, so are their transforms.
When we switch to Component Pose (also named as Mesh Space, in UE terminology), every bone's transforms calculated relative to the mesh component origin (basically, zero coordinates).
Now we know where would be the IK target relative to the floor. In this case, we can solve the inverse kinematics as we're able to independently place the end effector, without relying on any of the existing joints.
Alpha just responds to the how much this node should affect the input pose.
It also could be used for optimization - if you set the Control Rig node's alpha to zero, it would stop evaluating completely. Although, same optimization functionality could be implemented into the Control Rig logic itself.
Montage Slot, if the animation is not additive, would override the input pose with the injected animation.
So if you want your procedural animation to also affect your animation montage, it should be placed before the procedural nodes.
Hey Dan, sorry bothering you, do you by any chance had time to watch this issue?
Does GetMontageSlotNames exist? online it says that its a node but I cant find it
Little question about animation blueprint nodes
Im wondering if any nodes passed with alpha of 0 are optimized out effectively?
or is it preferred to guard the inactive paths with blend by bool/enums?
I’m currently occupied with work and family errands, so I haven’t had a chance to look at it yet.
yes

but it appears to be in an editor module
what does that mean? c++ only?
no, I mean it might only be available to call from an editor utility
it even says blueprint library in the picture
oh so its only for editor stuff and not runtime
I don't see anything that indicates the property doesn't exist in a cooked game though
so you could make a quick c++ getter thing I guess
FREE TOOLS
- BlendPoseModifier: Applies a pose directly to the animation, using the equivalent of
LayeredBlendPerBoneand optionallyApplyAdditiveAnim Graph nodes. Useful for adjusting the pose to hold a weapon, carry an object, etc. - BlendTransformModifier: Applies an
FTransformdirectly to the animation asset, also with support for blend profiles. Useful for adjusting the orientation/etc. a weapon is held at.
Modifying animations to suit specific weapons in animation software is a time consuming and tedious process. I made this to help. It also gives me a better/consistent baseline to modify animations from if I do need to export to animation software.
Its part of the free SimpleAnimation plugin which has many useful tools for animation: https://github.com/Vaei/SimpleAnimation
I pre-compiled this similar to a plugin you get from Fab if you don't want to compile it yourself - download and add to your project or engine's plugins folder: https://github.com/Vaei/SimpleAnimation/releases/tag/release
No problem, ty!
Hello, does anyone know how to reference a cached pose from main anim graph in an animation layer? I can pass it it as an input, but I wonder whether it's possible to get it without that step
Animation Layer is a separate independent anim graph, you need to passthrough your pose as input in order to process it.
Why would you want an alternative way?
I was just using animation layers as a way to split up my main anim graph into minor chunks, sometimes I want to retrieve multiple cached poses from other contexts without adding inputs.
It's not a big deal if it's not possible 😄
How do you guys go about transitioning stances when it comes to lower body? Upper body seems straightforward -- if there's a transition, just override it with whatever is in the related montage slot.
However, for lower body it's not as straightforward. If you're walking, crouching or jumping, you don't want to affect that with the montage.
I don't see how you can elegantly go about it. The way I'm structuring my ABP right now is me computing the base locomotion state machine that blends between staying in place and moving (standing and crouching), which I then optionally blend in with weapon idle using MakeDynamicAdditive and ApplyMeshSpaceAdditive which is driven by a bound function to the alpha ShouldUseItemLowerBody which checks for item animations presence, for character being crouched or moved, so that it wouldn't try to play lower body for the weapon when I have no weapon animations (which are dispatched like 0.2s after the transition starts to avoid it snapping before anim instance actually starts playing the montage), I'm crouched or moving.
Theoretically I could integrate my transitions using another MakeDynamicAdditive and ApplyMeshSpaceAdditive with similar condition, but it would check for some curve only transition animations have.
However, I wonder whether there's easier ways to go about it. I was looking into Lyra, and it has nothing like this since their leg positioning is the same across rifle, shotgun and pistol.
guhzéjgjzéghzéjgjhzehéebjkléejéekhejilnde"jkldjklklkl"fjlfklme"f,ke"fjkle"fklm"r,klm,feklc,rlcjcdnjkià
$ê"foà)e"
$dc=
Well, compute the bool output and plug it to your transition rule.
Am I doing it wrong? I'm trying to use a aim offset, I added two poses for looking up and down but when I move the preview, he doesn't change the direction he's looking.

Thank you for all this, btw. This was very helpful.
I'm not as experienced with animation as programming, so please be gentle with me.
Hard to say without seeing it in motion. Like what kind of poses you have, and what’s your AO samples setup.
I think I may have it again. Sorry, new to aim offsets.
Could you elaborate on your approach regarding AO workflow?
Like what would be the difficulty for you currently?
I mean I resolved the issue. I'm just testing it now to make sure hands are still aligned when holding the gun.
Hey guys, Has anyone worked with chooser soft references?
can someone please help me? I made a slightly updated version of a character rig, and the retargeting isn't working for it at all

What kind of issue you’re having with it?
I just don't know how to 
My character bp is now referencing both unarmed and weapon animations, which I guess isn't good practice. Sorry for the vague question.
Looks like you have a bad Blender export, based on the characters scale difference.
I’d suggest to fix the exporting first, then take a look at the skeleton tree and see if the skeleton is correct. Then, check the IK Rig and Retargeting assets setup.
The warnings are pretty self explanatory here.
How much animations you’re referencing?
30mb
about 60-70 anims for each set
I was initially gonna go with anim layers
but they have an issue with sync groups not working across layers
Anyone knows why the character legs behave weirdly after it turns, when it runs. This is GASP integrated into my project:
can someone help me please? I'm trying to paste flip the keyframes, but when I do, most of the bones seem to work fine, but the feet are just moving to the center axis, and not even moving in their mirror positions


why is that?
Hello, does anyone know how to deal with blueprints nested categories when it comes to AnimPreviewEditor EditSelectedInstance?
It looks correct in Edit Default, but not in Edit Selected Instance specifically. Properties and Call In Editor functions defined in C++ work perfectly in terms of categories, but BP-defined ones specifically are bothering me


hi! sry to ask... but im getting a really weird deformation on my modular mesh after import. Any other modular pieces i import, they all follow the anim perfectly, but somehow the elbows here get deformed??? why is that happening? 🙁
Hopefully someone here might know what it could be, cause im completly in the dark here.
Super quick question, but I'd really appreciate it if someone could tell me how to make the "Fit" feature actually work the way you would think it would? As in, scale the horizontal and vertical gridlines to fill the available space instead of . . . this.

Select the keys you're interested in, hit F
That was it, thank you.
It's there in the graph section, obviously.
When do infinities start applying? I have the opacity of a widget attached to a curve that infinities at 0 before it's started and at 1 when it's finished. These values do get maintained as expected after the animation is played forwards or backwards, but the widget always starts visible until the animation is played at least once.
Looks like the pole vectors get screwed in the feet IK.
Hard to say why, need to have more context on how you additionally affect the pose. You can try turning off the foot placement, see if it “fixes” the legs.
Skin weights issue.
Because you’re flipping the translation on all the axes - what was at the left side, now at the right side.
If you flip the X axis value (if I understand your axes correctly) back, you’d get a correct placement.
Hiya. Is there a way to make the Mover 2.0 component not feel floaty when jumping? All of a sudden, my character's jumps are really floaty
Have you tweaked the falling movement mode options?
Yeah, but the issue is the movement upwards and hang time at the apex, and I don't see the settings for that. Only the jump upwards speed
Right, so got my settings wrong. Thought falling deceleration only means the rate of accumulation of speed falling vertically, but it was what was causing the floaty feeling at the apex
Can you make anim sequence assets directly in Unreal, or do they have to be imported. I can see a ton of ways to edit them but if you have a rig, can you make them from scratch?
Not sure if this is the right channel to ask, but has anyone got a good combat ability activation tutorial/guide?
As in number 1 on the keyboard actives this, number 2 activates that ability and so on
https://dev.epicgames.com/documentation/en-us/unreal-engine/enhanced-input-in-unreal-engine
Start here.

Epic Games Developer
An overview of the Enhanced Input Plugin in Unreal Engine
Yes.
Animate in Sequencer, then bake to Animation Sequence.
Awesome.
Actually, there’s a feature called Linked Animation Sequence, where your AnimSeq asset is tied to the Level Sequence asset, so any changes you do inside the Sequencer automatically gets pushed to the animation asset, so you don’t need to rebake the animation everytime you do additional changes.
Legend, thanks
How often would I want that? I don't think I want to be damaging existing animation data I didn't make. If I did that I'd rather save it as its own thing.
That applies mostly to the animations you create yourself with the Sequencer or when you’ve tried to edit the existing ones through the “Edit in Sequencer” option in Anim Previwe window.
I see.
There also would be a sub-option to Unlink the Sequence.
lil question, i feel very dumb now but it is what it is....i have a few weapons where i have a socket called "muzzleflash". this thing is sometimes attached to a recoiling part, sometimes a folding part, sometimes the weapons root bone. so i thought i could use the so called "mesh sockets" which are unique per skeletal mesh but fiddlesticks, they are on the skeleton and thus all other meshes. am i doing something wrong?

Epic Games Developer
Create attachment points within your Skeletal Mesh using Sockets.

that doesnt seem to be true anymore apparently!?
good point you correct
the sockets exist on all skeletal meshes
Why is there no subgraph option? I'm following this https://dev.epicgames.com/documentation/en-us/unreal-engine/using-sub-anim-instances-in-unreal-engine


Epic Games Developer
Showcases how you can use Sub Animation Blueprint Instances within other Animation Blueprints.
This is outdated information, Epics probably still keep it for the archive purposes.
Here’s the up-to-date documentation on the anim graph linking.

Epic Games Developer
Modularize your Animation Blueprint logic by using Animation Blueprint Linking and Templates.
Thanks!
So, you’re saying that when you create a mesh socket, it can still be observed in other meshes?
I just tested creating a mesh socket on my end, and I could only see it in the mesh it was created for.
yes, i am on ue 5.7, let me show you
@velvet jasper the skeletal mesh

the skeleton

so i cannot have these sockets at different locations in the bonehierarchy on other weapons
thats what i need, not a different transform but a different level in the hierarchy
All of your weapon meshes are bound to "skeleton_handgun", correct?
not yet
but i would like to have a single shared skeleton
@velvet jasper eg. on this weapon the sockets are at different levels in the hierarchy, but i cannot share the skeleton between them because of that.

But do you really need mesh sockets here if you want to share the setup?
If you’re planning to unify the skeleton between the meshes, why won’t you just have a joint that would represent e.g. muzzleflash placement that would vary from mesh to mesh?
GetSocketTransform function works for bones as well.
i only want to share the bone hierarchy but no the mesh sockets. and i cannot simply transform the mesh sockets because they are sometimes attached to animated parts, deeply nested into various branches of the bone hierarchy
Mesh sockets are locked to the mesh you’ve added them.
In this screenshot, you have opened skeleton asset with the same mesh opened as a preview mesh.
That’s why you see the mesh sockets there.
If you pick a different mesh within same skeleton, you won’t see any mesh sockets.
they do, i already tested that. and i cannot share the skeleton, then unreal fails regenerating the skeleton because of the sockets being in different places of the hierarchy 🙁
just in case, when i remove the mesh preview in the skeleton asset it still displays the sockets, if you mean that.

Weird.
and i tested also this:
- creating a socket in unreal on the weapon
- importing the SOCKET from a thirdparty app.
Looks like the preview is bugged.
If you open the actual different skeletal mesh asset, there won't be any sockets.

okay, that works somehow. i wonder why that doesnt work with importing a mesh, where the socket is already in the fbx file that gets imported
i must test further
Would someone be willing to give me a rundown on what these do/their use cases?

Does ANYONE know what on Earth this structure type is and where to get it? I cannot find anything about it online and there doesn't seem to be any nodes that have it as an output.

These are the only non-wildcard nodes that have this as an output, and there are 0 non-wildcard nodes that return any of those.

FAnimationCurveIdentifier
Is it possible to get it out of something? What are they used for?
Unreal's documentation for that is about as useless as the rest of their Struct documentation.
Don't look up documentation on the website, just view the source code
I don't have 300 spare gigabytes. Is it really that obscure?
It's used to identify the curve, as the name implies. With UAnimationCurveIdentifierExtensions::SetCurveIdentifier()
This seems extremely useful but all the usages are input pins.
Its closer to 150, but it's the best documentation you can get
You create a curve identifier, then apply the curve you want to identify with the function i mentioned above, and then plug the struct.
FAnimationCurveIdentifier CurveIdentifier {};
FRichCurveKey RichKey        { Time,CurveValue };
UAnimationCurveIdentifierExtensions::SetCurveIdentifier(CurveIdentifier,Curve,ERawCurveTrackTypes::RCT_Float);
AnimationSequence->GetController().SetCurveKey(CurveIdentifier,RichKey);
So . . . it's a runtime-only thing? You can't get the id of an existing one?

I'd bet you can, but might need to do a bit of digging in the source code.
Hello, does anyone know how to get state machine weight of a state outside the context of the graph containing the said state machine?
I need to have a function that tells me how much weight a certain state of a certain state machine currently have to do some blending
I've created a bunch of animation sequences and I want to confirm that they work well with various attached items. Some animations are for specific item types. What I'm having to do right now is go to the skeleton and change preview items, then go back to animation sequences and confirm. Then back to skeleton, change preview items, and back to animations, and so on.... Is there a way to specify attached previews on bones/sockets per animation sequence or is doing it through skeleton and skeletal mesh editors the only way?
I should note that I also have level sequences for each of these animation sequences, so I can change attachments in those very easily, but I'm trying to figure out if there's a way to do per-animation-sequence attachment preview.
I am having a problem with getting a montage to play. This is for an RTS and the skeletons are varied. I have a blank Animation Blueprint with Default Slot and a simple state machine. The montage looks fine in the editor, but the node will not play. The OnCompleted is firing at the right delay for the montage duration.


Here is the blueprint node

Under what circumstances will the Set Start/End Time command work? I have yet to get it to do anything. Similarly, hovering the mouse over the red and green bars turns it into the side scroll arrow, but that also never seems to actually do anything.

The only way I can ever seem to change start and end times is with those blue bars.

I swear every time I open this dang window I find something new I don't understand.
Do you guys also deal in physics animations?
Probably you would need to get it from your AnimInstanceProxy, need to take a better look.
Unfortunately, there's no built-in mapping for preview meshes to the animations.
Though it's possible to make a custom AnimNotifyState class, that would spawn and attach the temporary mesh during the notify duration.
Then, a custom Anim Modifier could be used to add these notify states in a bulk with needed parameters.
Check the assigned slot in your Montage, maybe it's not a default one.
Those are used to define the start frame and the end frame of the sequence, but you're working with UMG Sequencer, so there might be difference in functionality.
Yeah, in UMG the end frame is marked by the last keyframe on any track.
may I know the reason as to why this setup fails to make the root motion work when playing it in-game?
I have root motion enabled to play on montages inside the animation blueprint, and the character would not move, even if I have the movement set to none, even disabling the character movement component


the source skeleton is a mixamo skeleton and I managed to retarget all the mixamo animations into the unreal engine skeleton
the red line in the second screenshot is the root bone
also I am not sure what the motion spline means in the second screenshot
"managed to retarget all the mixamo animations into the unreal engine skeleton"
Inside UE, you mean?
yes
I used the ik rig and ik retargeter
But Mixamo skeleton doesn't have a root bone, you won't get any root motion from the animations until you externally process them.
then how come the root bone comes processed after exporting the animations for the ue5 skeleton from the ik retargeter?
Could you show what you mean?
root motion disabled

root motion enabled

the green lines are the default children like the ik sockets
Why do you have the Root Lock mode set to Zero?
it was said most developers use that
it wouldn't matter on this case as none of the three options work
Wait, so on this screenshot, does the character move or not?
the red line means the character is moving ahead when root motion is off
And when it's on?
it stays in place
but the children like the center of mass, ik sockets and interaction sockets move behind (the green line)
not sure if that means anything
Root Motion preview mode is not set to Ignore, right?

everything is left as default

Well, in this case, seems like the root motion extraction is broken.
I'd suggest to look up for Mixamo Converter tool, process your animation, then do the retargeting.
never heard of that, I'll give it a try
I actually need their launcher to get that tool?
Probably.
I personally never used that as I'm not working with Mixamo much and when I did, I had my own toolset.
well, I need to test my stuff and I need animations for em
guess I got no choice then
Or add the root bone yourself with the Skeletal Editor, then code your own Animation Modifier that would "cut and paste" the XY keyframes from the pelvis to the root.
and do that per animation? no thanks 😅
Animation Modifiers could be applied in a bulk.
alright ok, now I see what I have to see in the animation asset window if the root bone animation is valid

now to find out if it works in-game
works like a charm now 👍
character moves with root motion enabled
and as a cherry on top, even the fingers are animated, something I avoided doing using the ik rig assets 😄
I'm having issues with retargeting aswell
my root motion attack animation looks correct: In Animation Sequence preview, In Sequencer and when Mesh = “Use Animation Asset” when PIE
But looks wrong in runtime when:
Using AnimBP
Playing via Montage or Dynamic Montage
I've ruled out
Animation asset itself
-Looks correct in Sequencer on the same mesh
-Looks correct when played directly (Use Animation Asset)
-Root bone is ground-level
-Pelvis variation is normal
-Capsule / Z movement issues
-Capsule Z stays stable during attack
-Mesh Z moves (normal root motion behavior)
** ABP graph issues**
-Fresh AnimBP created with only:
-Slot(DefaultSlot) → Output Pose
Montage asset settings
-Blend In = 0
-Blend Out = 0
Also tested Dynamic Montage (Play Slot Animation as Dynamic Montage)
Same result
Aim / camera input
-Disconnected Aim() executes entirely
Modular mesh leader pose
-Using SetLeaderPoseComponent
-Tested follower tick pose settings
only real discovery
Actor Pitch was reaching 18°
Roll 0
Light Yaw changes during animation
Clamping actor Pitch/Roll to 0 improved the issue significantly but still looks no where near Animation Sequence preview, In Sequencer
or When Mesh = “Use Animation Asset” when PIE
Could you do a quick screen recording and show what you have?
That would be easier to see what's going on. Win+Shift+R.
yea ill show different states one minute
mesh has mild nudity so marked nsfw
animation preview for reference
played in sequencer on same skel mesh showing correct behavior
pie no clamping
pie with Pitch/Roll 0 clamp
guess i could have had something socketed to make it more clear but it leans super up on the pitch without the clamp, then when clamped is just slightly leaning..
I never thought of testing like this before with sequencer and i'm not sure if it's a red herring but if it's playing correctly there it has to be a bug somewhere on my end and not the animation/montage right?
let me know if thats enough
oh another thing i forgot to mention, when you first open the animation previewer it shows the anim rising during it's first preview then adjusts for loops afterwards to look correct

How did you get the root motion? Generated from pelvis?

No, I mean the animation of the root.
oh sorry i'm new to animations i'm assuming yes?

Is that a retargeted animation?
If so, is it from Mixamo?
yes, i tried both manually doing it and adjusting pelvis legs, feet etc
using the old auto retarget and using the new auto retarget chain within the retargeter
yes lol
In that case, follow the advice I gave the person above.
let me go read through and try before i waste more of your time
The root motion UE retargeter generates from the pelvis joint is a no-go.
i swear the third party/plugin knowledge gap is a larger mountain than the engine it's self
thank you very much
the amount of time i spent on this thinking it was a bug in my ABP is unreal
if you dont mind me asking @velvet jasper, probably a silly question but why is this issue not visible played on a skel mesh in pie or sequencer that doesn't have an abp assigned?
Because sequencer doesn’t try to apply the root motion to the capsule.
Your root animation is incorrect, as it’s just the movement of imaginary object attached to the pelvis and copying its rotation.
Ideally, the root motion is animated with independent control or at least just follows the XY movement of the pelvis, no rotation when it’s not needed. It’s a technical animation, not artistic.
In your case, the root is going places, rotates on pitch and roll - now imagine telling the CMC to drive the capsule that way.
root asigned to pelvis, pelvis spin, cmc go brrr?

the launcher is easy to bypass.. the software works great and can even do mass conversion @ancient marsh
ther is also a blender plugin in if you want to go that route
thanks again Dan 
I used the launcher like an hour ago and I got everything working 😄
yep, it's alot easier than I thought it would be
That’s a node settings, I’m talking about the montage asset
No, root is not assigned to pelvis, it just has a broken animation.
is that something you could tell by looking at it or just common knowledge about mixamo?
after conversion i can't tell the difference in the skeleton but i'm also insanely new
Look at how root gizmo in your anim sequence preview moves.
Then, for example, open any of the GASP/Lyra animations and look at the root animation there.
im comparing directly from mixamo direct import and the converted one
i see now
such a funny little thing to miss
i just picked up ue like 3 days ago so it's constant


Yeah, it would be problematic to drive the capsule with the movement from second example.
Flying movement mode with no collision might work, definitely not the walking mode.
i tried flying during troubleshooting and it was still insanely bad
My bad.

It is set as the default group. The odd thing is that this was working. I think before I changed to 5.6. Previously, I did not have a state engine. Also, I am not sure that I mentioned that this is for a template animation blueprint. When I remove the state engine, I get the message "Source was visible but ignored"
Im editing my physics assests body for my mesh and i added these constrains, and been messing around with it, but either it litteraly dosent work or im missing something small and crucial. Cuz i legit added these angles and it never actually rotates on these angles, its a completely different angle its rotating along?

What’s your montage anim length and what its blend times?
Hard to tell without the screen recording.
The state machine should not be a problem.
Any animation (if it’s not additive) you inject into the montage slot would override the input pose.
Here is a video, as you can see the angle where the arm can rotate does corelate with where the arm can be pulled.
Another thing, is i changed all the capsules to simulated physics type, yet they all automatically switch to kinematic?
I'd probably advise you to right-click on that constraint and select "Reset", then "Snap" to completely reset it to default setitngs, then tweak the limits once again.
If you want to offset the limits (which you probably want to do for the elbows), hold Alt during constraint rotation.
@worldly anvil Oh, look what 5.8 will have.
Currently on Main branch.

Other bones temporary being set to Kinematic automatically, when you use "Simulate Selected" option.
They've heard me 🥳
Hopefully they'll improve it to make it possible to have profiles of some sorts, I don't really want to select head bone in that menu every time I open the ABP

But be aware that if you're using Inertialization for blending, the state would always give either 1 or 0.
Interesting, thank you very much, that should work 😄
Wait, I did it "old-school", I think it could be done a bit lighter.
Yeah, right, ThreadSafeUpdate should be enough.
edit: Nighty brainfart - it should be:
const int32 StateIndex = StateMachine->GetStateIndex(StateNameToCache); StateIndex != INDEX_NONE

Oh so no proxy needed?
Also is the StateMachineName literally the state machine name, or is it the node tag?
ThreadSafeUpdate function was created mostly to abandon custom proxy creation, so yeah.
Literal name of the node.
Alright, I'll give it a shot to see whether I get it to work
Perfect, it works, thank you 😄
I wonder whether it's possible to go by tag? In case you have multiple state machine that are called in a similar way
I see that Tag is stored in UAnimGraphNode_Base, but we operate upon FAnimNode's
I see that it assigns UAnimGraphNode's StateMachineIndexInClass to the FAnimNode counterpart, so I guess it would be possible to use that to find out the U counterpart?
There's the "AnimNodeReference" node that you can call if you have any tagged nodes.
I see that it parses through the Anim Blueprint itself.
Hm, I see that it binds the two objects, but I don't see how you would access it
In any case, nothing stops you to give unique names to your nodes 🙂
Yeah, I know, I was just wondering how I could go about it in case that would've been a problem
Alternative way might be to have some sort of "setup" BP function that would accept Anim Node Reference as input.
Doesn't it have to be literally the node I'm looking for though?
For instance, if I have a state machine that I want to keep track of remotely, I would need to have a node on it like OnRelevant that would cached AnimNodeReference the first time it becomes relevant to use it in the future.
It doesn't really sound good, but I might have missed what you're saying
Well, it's pretty limited in context of State Machine and States.
For SM, it would only output the state name.

No, I mean to save that reference to then use it in C++ since there's way more functions
In that case, it should be the Anim Node Function, that you'd bind to the node's OnUpdate slot.
Yeah, but that all that sounds lame 😔
There should be an easier way to get the UObject counterpart of a node
Actually, there's a subsystem for that.
I'll do a quick test and get back.

UAnimInstance::GetLinkedAnimGraphInstanceByTag or LinkAnimGraphByTag for reference.
Brilliant, I see, so I theoretically can do this
float UMyAnimInstance::GetStateMachineStateWeight_Tag(FName StateMachineTag, FName StateName) const
{
    const IAnimClassInterface* AnimBlueprintClass = IAnimClassInterface::GetFromClass(GetClass());
    if (AnimBlueprintClass)
    {
        const auto* TagSubsystem = AnimBlueprintClass->FindSubsystem<FAnimSubsystem_Tag>();
        if (TagSubsystem)
        {
            const auto* StateMachine = TagSubsystem->FindNodeByTag<FAnimNode_StateMachine>(StateMachineTag, this);
            if (StateMachine)
            {
                const int32 StateIndex = StateMachine->GetStateIndex(StateName);
                if (StateIndex != INDEX_NONE)
                {
                    const float ReturnValue = StateMachine->GetStateWeight(StateIndex);
                    return ReturnValue;
                }
            }
        }
    }

    return -1.f;
}
right?
Yup.
Perfect, thank you once again 😄
Curious if anyone else has an issue with animation retargeter not overwriting animation sequence files when explicitly asked to in 5.6? Tried va right click in browser and inside an IK Retargeter asset but it keeps creating new files and appending incremental numbers to them.


Last time I checked that functionality on 5.7, it worked correctly, so it might be a bug on this engine version.
Ok, thanks Dan.
Was there some default starter animation pack, for FPS or something? I was thinking maybe I could try retargeting it to my rig.
When I do retargeting can I add 90 degree yaw? I aligned my skeleton before import so it faces actual forward.
DO most people not do the 90 rotation to face X+, for their pojects? I assumed it standard.
If you mean, rotating the mesh beforehand to use inside the BP class - no, there’s no reason to break the initial correct orientation.
Ok.
Is there any updated version of this? https://www.fab.com/listings/98ff449d-79db-4f54-9303-75486c4fb9d9

Fab.com
Epic’s Animation Starter Pack contains 62 animations that can be used with the classic Mannequin as well as upcoming Marketplace releases. This animation set is a fantastic resource for prototyping your next project or getting your next mod up and running.UE-Only Content - Licensed for Use Only with Unreal Engine-based Products
I didn't know what was standard practice for most, with animating.
Updated in which way?
That works on 5.7, will let me add it in the launcher.
You can still add it, you just have to pick the latest 5.2 version when asked.
Does anyone work with Blender too? Is it best to have bone primary and secondary as X+ and Y-?
huge! thank you
Hey, how can I add multiple poses in a single pose asset and update them later on?
The method I have found so far is INSANELY convoluted and janky, so I'm really hoping I'm missing something here (I have a few individual pose assets that I have to turn each into a single frame animation sequence, that I add into an animation composite asset sequentially, that I use to create a level sequence which allows me to bake all of those in a single animation sequence that I add to a pose asset as a "Source Animation" and press the "Update Source" to bring all those poses in a single pose asset... this can't be the way, right?)
What are you trying to achieve this way?
A single pose asset that contains multiple poses that I can easily modify

Hi,
I have some recorded Metahuman animations that have root motion. But when I tried to fix some bone positions using an additive layer with an Metahuman ControlRig and then bake the adjusted animation, the Root motion is no longer in the animation.
Is there something I'm not doing right? Or how can I make sure I keep the root motion in my animation?
I also tried a custom IK retargetter, which works on my imported and retargeted animations, but it doesn't on my reworked animations.
Well, from the first glance it does work this janky way.
Pose Assets support single animation asset only, so you need to work with single animation sequence that contains all your needed poses.
Do you produce the animations in DCC or Unreal?
If the latter, having a Linked Anim Sequence, in theory, should be enough.
You change your poses on each frame in the Sequencer, the changes gets automatically pushed to the sequence asset, Pose Asset could be updated afterwards.
Hard to say as it depends on the rig you use to apply the changes.
Like, does the rig have the root animation support at all?
"Depends on the rig" triggered me to check the actual rig, as I have 4 Metahuman_ControlRig files. I examine these first.
As I didn’t add those, I assumed they would be the same. Apparently not.
Could someone help me understand this please? The description of what they do sounds like the opposite of the example given.

Smaller the number, slower the blending.
That’s pretty much it.
So the description is correct.
How on earth does a non-zero value make you not jump directly between states though?
From what I've experimented with it seems to do the exact opposite.
Because we’re not interpolating the blend space axis value, we’re interpolating the final pose.
The speed here is the rate value, how fast the sample interpolation happens.
I make the poses in unreal, I was expecting the ability to just... merge multiple pose assets, or at least be able to import a pose asset into another pose asset, because that would make sense
Personally I’d say that the way it works seems logical to me.
I guess it depends on how you want to use it.
Is there a way to rotate my IK source 90 degrees to face some forward as my skeleton?

But it’s your skeleton faced incorrectly 🙂
True, but I'd hate to have rotate it for instance in first person. I guess I should, I need to look into how skeletons attach to each other too for weapons. XP
It's just odd to me that UE5 uses X+ forward but nothing else does, if you get me.
Can I get away with skeletons for things like weapons facing X+?
it's the Unreal skeleton facing the wrong way :D
Either way. Is what it is.
I think I have it close actually, it just may be missing a chain.

Meshes could be attached to each other multiple ways - you can define a rule for each transform element (location, rotation and scale), should it maintain the offset or snap to the target joint.
If your character has a weapon joint and you authored your animations that way, that this weapon joint has the same rotation as your weapon’s root bone - it’d snap to the correct place when you attach it in-game with no issues.
Right. I think I just need to finish retargeting by correcting the IK bones there.
I think otherwise that was close enough.
On the screenshot above, the custom mesh is the only one that faces the wrong direction.
You work within the engine context, with the rules and standards it has.
What’s happening outside of that context has no importance.
Making the content that counters those standards might lead to the issues later down the road - as an example, much more complicated retargeting than it could be.
You wouldn’t lay on the bed sideways if it’s not physically facing north, right?
Like I said I think I almost got it. Just need more IK chains I think.
And I’m not uber-protecting Unreal here - the need of offsetting your mesh when you work the character class is surely weird, as later on e.g. it messes up with the root motion extraction when you work with the sequencer,
You always have to take that relative rotation into account when you do the animation logic computations.
That’s kinda inconvenient, for sure.
Yeah. Maybe I'd be better making it face Y+ or whatever it waas in Blender after all. I think I could otherwise use X+ for things like skeletal meshes for non humans, too.
I just wonder if retargeting would work better. Animating is probably my weakest skill in development. XP
You work with the standard coordinates for your software.
What’s front side for your DCC, would be the front side for Unreal, and that’s enough.
IIRC X+ facing required only for the vehicles due to the way the physics engine works.
Ok. Well. If everybody else does it and that's what makes retargeting easier, it may be for the best. I hope I can layer animations ok onto the ones in the starter pack, for what I make for my own weapons.
I changed it to face Y+, but now he looks like this.

How does the skeleton look like?
At a first glance, seems like it failed to create a spine chain, the retargeting assets would show what’s going on.
Like this?

I guess “Waist” joint confuses the engine.
I’d suggest to follow the mannequin’s naming convention, that should make the auto retargeter life easier.
I also would note that you have a double root here, which is not good, as you won’t be able to have the root motion.
If you use Blender and export with the built in tools, the armature node should stay named “Armature”, the engine would automatically strip it down during import.
But that still might leave you with the root bone scale issue, where it scales to 100 instead of 1 - that would lead to an issue with physics.
I’m not a Blender user, so I won’t give you the actual workflow how to fix all of that, but I’ve heard there’s a third party addons that do a better job on exporting the content specifically for Unreal.
There was an official addon from Epic, but currently the only actual version is the fork of that addon, as it got abandoned.
Alright.
I'm not sure I can use their movement either anyways, because of how long the rifle is they may need to turn their waist to hold it properly. I've never animated a walk cycle though
why does this montage skip frames when playing in game? looks completely fine in the editor
https://gyazo.com/ac295e0a64095275e0e526428bd06b3f
https://gyazo.com/a09f6898a285e15d924902b05f97647d


Ive had this with a frontflip animation in another project too
Interesting.
What if you set the blend in time to zero?
oh wow, that actually fixes it, thanks I thought Id already tried that lol
I have an AS with separate poses on each frames. When changing the explicit frame , the change is instant.Is there some way to make it blend without having to use a blend by X node.

Use Explicit Time and FInterp.
The target value would be your desired frame * 1/FrameRate (e.g. 1/30 FPS = 0,33).
Or make a blendspace directly in Anim Graph and use sample interpolation.
I need a bit of help, ive got a locomotion blueprint, but it didnt have this included or has been changed. Im trying to use ehnahcned input but not sure where to add it to

ive created an input action, as well as mapping context
it does print string, when added, but does nothing if adding an animation montage
The screenshot above doesn't explain anything.
Could you give me more context on this?
Most of the guides show the screenshot blueprint, saying how you can add your custom mapping content from the enchanted input local player subsystem
That's a question for #enhanced-input-system
Ah damn, didn't even notice the channel haha, thanks
see #instructions for job posting stuff (I'm not a mod, I just have a pink name)
Oh thank you
all good
Anyone know how to make rigid body physics work for multiplayer?
as in a tain for example
the listen serves messes it up for some reason
As such
How do you setup the simulation? After the physics asset is done I mean.

I just do this simple post process
Yeah, it is.
Interesting, I guess PP AnimBP is not replicated for clients.
I’m not behind my PC, so can’t test that but what if turning on “Component Replicates” in the mesh component settings would fix the issue.
Why can montages not be played in functions?!
They can, you trigger the montage with the function as well.
Then what does it mean by this?


Because Skel Mesh Component's "Play Montage" node is a Latent Action. Those can only operate in the main graph.
Alternative way would be to get the anim instance of the mesh, then call "Play Anim Montage" function.
How does that differ?
Simply put, the former is an advanced function that actively tracks it's context and has multiple event outputs.
These actions create another virtual machine inside the main VM when BP is compiled and executed, so that's why they cannot be called from the functions, as you can't provide the full context of the object that way.
The latter is a simple function that just returns a value, it doesn't affect the further execution.
Delay node is an example of Latent Action.
Gotcha.
my retarget used to work but it somehow broke after moving data around in the project..
any idea what might caused this?

Looks like the additive animation issue
yeah that was it 😄
I've only had experience with blend spaces where there is a limited number of animation sequences involved (one of idle, one of walk and one of run). I created a bunch of idle, walk, run and attack animation sequences with various weapon types (unarmed, sword, sword with shield, staff, etc). Do I need to create a blend space for each combination of those ([idle unarmed] to [walk unarmed] to [run armed], [sword idle] to [sword walk] to [sword run]) or is there a better approach with some sort of blending, where bottom half uses the [idle] to [walk] to [run] blend space and top uses an appropriate animation based on equipment type?
Oh, looks like I can blend output pose of a blend space with another pose in animation blueprints.
You can blend between multiple BS assets with Blend By Int or Enum nodes.
You can Set new asset with Inertial Blending inside Blendspace Player node using Anim Node Function.
You can create a Blendspace graph inside your Anim Graph where each sample is a graph on its own, so you can do asset picking and blending per state.
State Machine could be utilized instead of Blendspace.
Fighting Game Motion Capture Animation
"Depends on the rig" triggered me to
Could it be that you have two meshes assigned to the same skeleton and your skeleton asset (and ABP) still uses old mesh as a preview asset?
What was that free plugin or something for UE5 for facial mocap? Did it work with morph keys or whatever they are?
It worked with just a video, does anyone else remember it? Or am I just crazy?
Live Link Face app?
That's it, probably. Is there a version of it for Windows?
Is this what I use to record from my desktop webcam instead of a phone?

I'm currently using a root motion attack combo anim with 2 hits to create a combo chain of attack1 to attack 2, but as you can see the attack 1 does not have recovery frames since it's they are the end of the anim on attack 2 so when it doesn't combo attack 1 just snaps to idle ofc
where's a good place to start to learn how to make a simple recovery anim for attack 1?
I don't want to spend a lot of time getting too far into animations right now and just need some baseline guides or information.
dealing with root motion anims seems like a lot of workload.

Not sure what you mean under "seems like a lot of workload".
If you're asking about how the animation could be produced, look at how the animations could be created inside Unreal using Sequencer, that would be the initial starting point.
Of course, understanding basic principles of animation would be good to have.
I'd probably just put the attack and the idle animation into the sequencer, bake them to the built-in FK Control Rig, then get the last pose of the attack and the starting pose of the idle, put them together at some distance, add some additional keyframes for proper upperbody transition, bake it down to the animation sequence.
Although, editing Root Motion this way would be hard.
If you have a proper Control Rig with Backwards Solve support and controller for root bone, editing the animation would be much easier.
is it impossible to have reusable montage notifies to avoid typing the names of the notifies again and again in each anim montage?
cause I'm not seeing the options that could allow that
there's only for the regular notifies
Create a custom Blueprint that derive from AnimNotify (or AnimNotifyState if you need a notify with duration) class, if I understand your request correctly.
I just need to be able to add reusable montage notifies into every anim montages so I don't have to type the specific names over and over
if I can make a blueprint for it, then that's great
You create your own AnimNotify with needed logic then add it to your montages.
great 👍
ty for the tips, ill give it a try.
the custom notify blueprint HAS to be a montage notify type, right?
I assume with your in-engine tips I shouldn't mess with root much and focus more on upper body and just try to make the recovery where the root ends up instead?
I thought about doing something similar and just keying pelvis / hips, spines, clav arms but the endframe of the attack1 is pretty dramatically different than idle
i'll give it a shot anyway, worth the learning experience
Just AnimNotify.
There's no specific class strictly for montages.
I see
thing is.....
I wanna be able to call out the Notify Name in the Play Montage node still....
I also can't seem to find proper documentation about it either
this means it's impossible to reuse montage notifies without retyping the same name over and over
maybe I do need custom anim notify to work more flexibily
alright, now I understand with custom anim notifiers
I gotta stop restricting myself on stuff
now I'm at the problem where notifies don't respond as soon as the animation starts to play
and if the animation is very short, not even the later notifiers will fire
even setting the montage tick type to Branching Point wouldn't fix it
In that case, you can create a custom notify class that derives from AnimNotify_PlayMontageNotify and pre-define Notify Name variable.
Would anim notify states help with this problem?
Or the problem would be the same
I am using your initial suggestion with custom anim notify bluperints now
But now I am facing the notify latency problem
What kind of logic you're triggering?
Received Notify
I mean, what's the code is doing.
Sending the value of the notify into a interface node inside the actor's component
And sometimes it triggers and sometimes not?
It has a delayed response
This issue happens even with montage notifiers
And moving them further away from the starting point of the animation would usually fix it
But since I also have very short animations
The notifiers are more likely to not fire at all
Cause having them too close to the start will make the engine ignore them
Even if the blending in value is at 0
How short is your animation?
Less than a second
20 frames? 10 frames?
Hm, just tested on my end, works fine.
What about in-game?
Came back to my pc, before getting a stupid unexpected power outage...
And just like on your end, the print string is fired by the notifiers at a really early position in the timeline within the animation asset or anim blueprint
So the simulation got an issue
guess I'll go old school style where I look at the animation to figure out when an action happens...
fun
Is Lyra animation system worth using for a FPS? Or is it meant for third person? Would Lyra animation be better to run on sim proxies? I am trying to learn all the differences of what you would do for AI, player, sim proxies and how the animation would be treated differently.
Guys, I have the issue where my character flies off the screen when I enable root motion on my animation. I've been working on it for days with no luck. Does anyone have experience with this?
Sounds like your animation might not have an actual root motion.
If you could show your animation sequence with the skeleton tab opened and root bone selected, that would give more context.
A little more context: I downloaded a Mixamo character (Maria_J_J_Ong). Imported into Blender. Added a root bone. Parented the hip bone to it. "Apply Transform" as well. Exported. Uploaded to Mixamo. Downloaded animations with the new "rooted" model. I've verified in Blender and Unreal that the updated models and animations both have a root bone. I can manipulate the scaling (0.01) in Unreal and the root motion works, but is extremely small if root motion is off. If I don't manipulate the scaling, without root motion it looks fine, with root motion it flies off the screen. I think some type of multiplication is occuring, but I don't know where. Does this help at all?
Mixamo by default doesn't produce root motion.
You have to use the Mixamo Converter to process the animations for Unreal.
As for the scaling, third-party plugins have to be used for a proper Unreal export.
Root bone scale greater or smaller than 1 is no-go in any case.
Alternatively, you can try disabling "Use Normalized Root Motion Scale" in Root Motion options.
But I'd suggest to fix the scaling as is, that would be better way in a long term.
Is there a Mixamo Converter for Blender 5? I'm only seeing older versions. Has the name changed for Blender 5? I see and "Import Mixamo - Root Motion" in add-ons.

It's a standalone application.
terribilisstudio.fr
<p>Animations generated by Adobe's Mixamo.com are not fully compatible with Unreal Engine 4 and 5, most notably when it comes to IK or root motion extraction. Mixamo Converter software is a mini-app that processes FBX files downloaded from Mixamo and adapts them to Unreal's conventions.
Yes.
Hello, I'm trying to correct animations for carrying players around.
I have two poses, one for the carrier and another one for the carried player. The carrier pose gets blended with locomotion and AO, whereas the carried player is statically laying there (with some additive breathing).
Right now I simply attach the carried player to the capsule, which obviously doesn't account any leg IK which makes the carrier mesh go lower/higher, and doesn't look up for its breathing combined with AO.
I thought about creating a VB on the mesh root which I would use to compute the carried player mesh position based on left and right arm position, which is always synchronised, e.g. there's no case where one arm goes lower without the other one. They only get affected by their parent bones like pelvis, spine etc.
I'm thinking about finding out a mid point between the hand_l and hand_r to modify transform bone on the VB bone to then use that to move by attached character.
However, I don't see how I can find that mid point within at some point in the anim graph. How could I get the transforms of the bones mid-pipeline?
Hm, if I understand you correctly, you want to get the bone transforms from the pose in the middle of anim graph?


Well, if it works, then all good.
However, that didn't fix it all. The carried character is now following the hand movement, but it's rotated sideways because of hands world rotation. A transform modify bone with a -45 rotation offset after fixed that.
That's almost it, now I only have issues with sliding hands. I feel like the pipeline sounds correct so far, and I only need to IK my hands after that

Solving IK on the hands themselves feels wrong considering that the carried player mesh gets affected by new VB transform only after the animations, during physics, because it's a separate mesh that's only attached to a scene component that's attached to the VB bone of the carrier mesh
Also, I'm not sure whether it could be improved by taking multiple arm bones into the equation. Instead of just using hand_l and hand_r, maybe it would be better if I would include upperarm and lowerarm
Maybe Control Rig would be a better option for controlling the attachment joint.
How would you go about it? I don't deal with control rigs so often, I don't know what I would look into as a starter
The thing is, for such feature, ideally, I'd have the animations authored either for both characters, or the hands would be static so the carried character would just be attached to the chest space.
Well, am I right that the animations were done in context with the second character?
Yes, the animations were made together to be used in pair

or the hands would be static so the carried character would just be attached to the chest space.
The thing is that the themselves arms are already static, it's the spine that affect their transforms making them slide
I believe that there's only a little bit of breathing on them, but it's not the thing that causes them to slide. Perhaps that's AO that makes it even worse? I will try isolating AO on the arms same way we did that for reloading a month ago
I believe it got slightly better
Per this, https://dev.epicgames.com/documentation/en-us/unreal-engine/animation-blueprint-linking-in-unreal-engine#prerequisites can I set the linked animation instance somehow? Like make the linked there have an input pin for the instance to set it as?

Epic Games Developer
Modularize your Animation Blueprint logic by using Animation Blueprint Linking and Templates.
You either set the Anim Class directly as a default value of the node, or you set the tag for your anim node and call "Link Anim Graph by Tag",
Tag eh? First I'm hearing of it.
That'll let me change what instance is referenced at runtime though, for one specific mesh at a time? Right?
That would link an anim Instance class to the tagged node inside your mesh's main anim graph.

Nowhere. You need to use the Linked Anim Graph anim node.
How do I use it to change what graph it's linked to at runtime then?
Plug it in, set the tag, then call the function I've mentioned above when it's needed.
I don't call the Link Anim Graph by Tag in the animation instance, right?
You might wanna do that during initialization or begin play.
I need to change the linked anim instances during runtime at set points, like when the weapon they're holding changes. That's the most relevant use right now
I may not have asked the right question or phrased it right earlier.
Else maybe I'd be better off simply setting the sequences to be used since I know how to do that already.
I don’t know how you handle weapons and such, but this function should be able to swap your linked anim graphs.
I tried to find docs or tutorials with google. Not much came up. Thanks anyways.
If the question is how to call that function outside the AnimBP, you get the anim instance reference from your mesh and call the function from there.
Is there anything that’s still confusing?
I don't get it at all. I'm just going to set sequences instead. Thanks anyways.
anim instances are extremely expensive to swap out at runtime in some cases
They are? Huh.
anim instances being linked basically reinitializes their entire anim graph which can be fairly cheap but with things like control rig etc it can be expensive enough to avoid doing
That's how I planned to handle weapon swapping and such.
anim linking is more useful if the other anim instance has UNIQUE NODES on it. If you just want to swap out animations and montages use a simple struct or something that is just in a data asset or something
anim linking just to override some sequences is turbo overkill despite it being nice to do in the editor
I'm trying to setup a constraint profile for my character when it's carried around.
I only want to simulate physics on joints like calf, but for some reason enabling physics simulation just on the calf makes it try to become as straight as possible. I tried to use UE4 mannequin physics asset, and it works fine.
I believe I copied its physics asset over my character a while ago, but it's clearly behaving differently.
I'm pretty bad at phys assets, and I can't find what affects it. Does anyone know what parameters I could look into to try fixing it?
Yeah. Alright. Turns out the sequences as variables is the better idea then.
yeah as lame as it is it really is just massively faster and more simple here
I would say try to make it so you can tweak them in the preview of the anim bp just to see them all in action easily etc
check the rack and pinion settings on both and diff them by text
Alright. No problem. Thanks for the feedback. I'll just change sequences then.
Funny it turns out that's the more economic way anyways.
the more interesting part would be if a weapon had a special extra blend node or even some extra bones etc that would need to be handled in some unique way
Dunno what that'd be.
the downside to having 1 holy anim graph is that it's very prone to be locked in source control by artists which can make working together frustrating
I can't find any of it in body nor constraints
Well. It's just me, so that's not an issue.
if it helps you can absolutely have linked anim graphs to split things up and just link them once and it would be considerably less questionable. Anim graph execution does incur a cost on the main thread on the anim tick but it should be small unless you waste a ton of time on mainthread bp calls
But, even when unncessary, I do like to optimize pre-emptively.
fwiw weapon swapping is something unlikely to happen multiple times a frame so it's not horrible I guess
but I would say I still think anim linking is much much more complicated than it is portrayed as
It would be interesting I think if you could just have sort of like two linked anim instances and toggle between them without triggering the full initialization flow
but that would be simple to do with a blend by bool too
There's this little wiki that talks about that
https://github.com/Vaei/LocoTips/wiki/Anim-Layers
https://github.com/Vaei/LocoTips/wiki/Anim-Data-Assets
yeah I'm the one who told him to write that lol (the majority is his experience though)
the thing that pushes it over the edge into way too pricey in my experience is control rig init
No problem. I can just do sequence variables swapping.
It probably is easier. I just hope I don't miss anything for special cases or something.
It's of course up to you to make a little container that describes every animation that can be swapped out etc
doesn't need to be super fancy but it might be worth considering having some of it be "dynamic" where they can ask the active weapon what it should do if it can be different depending on runtime situations etc
or the active weapon can just overwrite it pre-anim tick
Ok. I don't know much about animation blueprints, though
animation blueprints are kind of two different kinds of blueprint at the same time
you can keep it simple and use the main thread anim update to set values before the anim graph executes
Well. I was going to change variables from outside to what they should be based on condition changes. Like when the new gun is picked up and equipped, they set the new sequences
montage slots might be easier for some parts of it if they are started from external gameplay code
I never heard of montage slots before.
if you are not sure what a montage is you should really look up some montage basics
you can have more than one montage slot to be able to run multiple montages at once
Hello! I am trying to give my character fyling up and down animations but it's not really working and i can't find any good tutorials. The existing working movement is forward brake/backwards left and right with animations the problem now is to assign Space bar and Left Ctrl with a Blend Space to the existing movement using the Z axis. My current thought is to combine the idle and movement into one blend space to somehow get the second state to be i guess Up and Down blendspace
Hey, I need some serious help with some stuff regarding exporting.
For whatever reason, when I try to export a skeletal mesh from blender to unreal, the root bone of the SKM has a scale of 100 it needs to have the real size of the mesh.
How am I supposed to fix that on export...? It makes collision shapes slotted into the skeleton's sockets massively large
You can turn the lean poses into additives, then make two Blendspace assets, where the first one is responsible for XY axes movement, and the second one just for single Z axis.
Then you add them in a row to your anim graph, and hook your variable logic (e.g. local velocity).
Have you already searched the info on how to export from Blender to Unreal?
This is a pretty common issue.
Yes, in several ways and places
I have found a handful of workarounds, solutions
The most common one is setting character size to 100, apply, set unit scale to 0.01, export
The downside for it is that depending on what kind of rig you run you just... Have a LOT of confusing work on you.
The other solution I found was based on plugins
Have you tried this?

GitHub
Blender addons that improve the game development workflow between Blender and Unreal. - poly-hammer/BlenderTools
Some work better or worse, but the bigger issue with these is that then you rely on that plugin getting updated based on where it's gone
Yeah I used it
I love it, 10/10, but I am concerned it might stop getting updates
Since the original version had exactly that happen to it
Well, if that fork would stop updating, another one would show up.
There always would be a demand.
I guess it's the upside of Epic just releasing the files for it
so... a little silly discovery I made
I didn't paid attention to the starting point value of the play montage node....
for some reason, I had it set to 0.15
which explains why the early notifiers wouldn't trigger....
idk why I set it to 0.15, but that no longer matters
it's always the next day that I find out why something doesn't work....
but funny enough, I actually looked through the internet like crazy and never saw a single word that pointed out to the starting point value
Out of interest when I'm doing my animations where say player climbs onto a ledge, obvs I'd give it root motion but would I animate the root bone in the Up/Down or just in X ? In engine I'd be using motion warping obvs
Ideally, you'd animate both up and forward movement, so the animation would work even without the motion warping.
Plus, you probably would warp to a specific region, but your character might do some more movement afterward.
but then when I enable motion warping wouldn't the up/down mess up the warp, only saying this cause in past I normaly animated Up and forward
Default Motion Warping provider overrides the root motion.
trying to set up a really basic control rig so I can clean up some animations and does anyone know what's causing this? the bones that i've passed in are sequential in the parent tree so it shouldn't be jumping the geometry to a different bone location or anything

aside from this slight chicanery the IK is mostly working so I think it should be a simple error, I just don't know where to look for it
Which IK node you're using?
basic Ik. looks like this

Have you tweaked axes?

Looks -Y and -Z to me.
i thought the primary axis was supposed to be the direction to the root bone and secondary axis was direction to pole vector? but will give -Y and -Z a go
ok yeah that fixed it, how do you work out the axis directions then?
Primary axis is the forward vector, Secondary axis is the up vector.
ok that makes sense. thanks
Ok following up from this, the purpose of building this control rig was because I've got some mocap animations which are good but not perfect. positioning of things like hands is sometimes a little bit off, that sort of thing, so I wanted to use an IK control rig to just touch up the animations in engine, but when I bake the animation to the control rig, all the keyframes are there but the character just T-Poses through the animation. Not sure what I'm doing wrong here?

nvm think i've found a video on the topic
Yeah, you have to implement Backwards Solving for your rig.
of course, i should have caught that. Thanks very much
so my control rig is set up to do basic IK on reverse solve for the arms and legs (arms pictured here, legs below) I have seen this works in the editor by setting it to preview backwards solve and wiggling his arms. I have two poorly named animations on a skeletal mesh inside a sequencer. I bake to the control rig, i get a bunch of keyframes set to the control points default positions, and the animation has failed so he just t-poses in place still. I'm not sure how to google for this problem, but I think it must be something to do with the control rig because if i bake it to the default "FK control rig" the animation bakes fine, but I don't have the IK stuff that I want to make the animating easier


do you maybe know a tutorial for this?
Nope, but I can answer questions.
Yeah, that’s incorrect setup. You have to plug your joints to your controls, that’s pretty much it.
what do you mean by joints to controls? Inside the control rig?
During forward solve, your controls set the joints transforms.
During backwards solve, it is opposite.
You don’t need to do IK solving during backward solve, because there’s no point for that, it doesn’t manipulate your controls.
Your main goal is to get the data from your joints applied to your controls, then the sequencer would key these controls based on their new transforms.
Ok so I want to do this sort of thing on backwards solve?

Yup.
cool, thanks I'll give that a go
Tbh I am asking this for a friend, would you be open to call with him for the questions? If not maybe over dms?
I’d prefer to keep the conversation here, so it could be available for public, but DMs might work.
hey dan im max the guy from corry with the questions thank u again for your time so yea uhm i have to go rn to my school just to get everything sorted but still like u say and offer id be happy to ask questions and u awnser when u got the time ofc for time i think the latest ill be back will be in 3 to 4 hours
Post your questions, I’ll answer when I have time.
ok this is mostly working my one problem is I can't figure out how to correctly translate the pole vectors on the reverse solve? If I don't do anything I can see they're in the default T-Pose location, but if I try and map them to their corresponding bone with an offset they end up all over the place (the sphere on his chest is the pole vector for his right knee)

Your lowerarm joint is your pole vector control.
Oh right ok, so remove the pv controls and just use the joint locations as the pole vectors?
No, you set the transform of the pole vector control from your lowerarm.
sorry took me a while to figure that one out because I'd misread your message and was still passing in the wrong joint. that's quite trick, I guess that's because the lower joint has the pole vector assigned on forward solve?
no nevermind i've misunderstood what's going on here. second screenshot is on backwards solve so I'm misunderstanding something but I'm not sure what? Is it possible to query the pole vector from the lower joint? also attached screenshot of what I'm doing


sorry if I'm being slow, I've not done much with the animation system before so I'm trying to learn the basics while knowing what I ultimately want to achieve it's very frustrating for me
(have also just seen and fixed the local/global difference between two of those nodes)
Ehm, why are you using the hand joint for the pole vector?
This is the lowerarm

Ok right i had misunderstood. I'd initially done that, but with the offset because I thought it needed the offset (i guess the offset is just for visibility purposes and doesn't actually impact the maths of what the PV does?) so then when that didn't work I just got myself all twisted in knots about it.
looks like that's worked. Will need to add some more controls for the fingers and head, but I think I understand now and can get this working. Thank you for your help
I captures some gameplay in GASP5.6 with the Take Recorder, and for some reason the Camera doesn't get the rotation.
I see there is a camera recorded that has the all information, I see the icon and motionpath in the scene, but for the life of me I can't get it to look through that camera.
What do I need to do ?


There’s a Camera button at the right side where the binding is, but seems like the recorder actor by default refers to the unused camera.
If it’s possible to delete that component - do it, otherwise try to deactivate it.
@velvet jasper I tried it, but still getting the same result, I'm missing a button here I feel to pilot the cam:

Hey, everyone
In the sequence evaluator, in "On Update" function I swap sequences with "Set Sequence With Inertial Blending"
However, it seems like sequence is changed instantly, without any blending
Has anyone encountered this? Can this happen because of distance matching (used in the same sequence evaluator)?
You need to have the Inertialization/Dead Blending node in your Anim Graph.
Otherwise, the anim node doesn't know where it should send the inertialization requests.
Yep, I have inertialization node right after sequence evaluator
There's no Pilot button because the cameras are part of the Character BP, not the separate component.
You may only "pilot" the character itself.
Maybe a good idea would be to cleanup the BP from unused camera and re-record your take.
Is the evaluator inside the state machine?
Yes
I'm just not sure the Inertialization can work inside the State Machine, try moving it to Main Anim Graph.
Okay, I will give it a try
Right now it looks kinda like this

Yeah, I don't think that would work.
could I add another camera and copy paste all the curves on to it ?
If you have access to the keys, I think so.
Interestingly enough, it works even when Inertialization node **is inside ** state machine
So, is the issue resolved now?
Not really
I quickly made a prototype ABP to test what you said, and it works
However, it still doesn't work inside my actual ABP 🤔
So I'm gonna look again, maybe I've made some mistake
@velvet jasper @sand orbit
I managed to copy the keys into a new CineCamera and it works, it's just that the keys are extremely offset.
So now I need to figure out the offset, and I also think the keys are made in such a way that it expects the camera to be parented to the player
Yup, that's correct thought.
Sorry, never worked with Take Recorder
Creating a new Camera actor, removing existing transform track and pasting the transform track from OutputCameraComponent, then adding Attach track and manually setting "GameplayCamera" as the Attach Component in Attach section worked for me.

@velvet jasper joooow, that worked 🎉
final quirk, when I hit play, suddenly my black bars get offset, I wonder if this will also show up in the final render 😬

follow up, I did quick and it looks fine during render, so we are all good!! 🔥 thnx @velvet jasper
It turned out that you can't call SetSequenceWithInertialBlending if the sequence is the same
That was the issue in my case

If you need self-transitions, the Blend Stack would be the option.
Looking for: Animator to make 3 simple animations for a fps character in Unreal engine 5.7
Price: 100$
Timeline: its a very simple job it should take no less than 1 week to make
Contact:Dms available!
hello guys i have one problem where i have a one weapon bone and it was in the root so when i was running and jumpping and even attacking it was just folting around so is there and built it function from UE5.5 so from that i can solve this problem
What kind of function you’re thinking?
like may it snap or something like this but currently i was doing like not attaching to weapon specific bone but rather than i made socket in hand r and the place weapon in it but i have some QT where both hand are aligned and based on the weapon bone and for this i was here putting notifyer and switching socket so i was looking for some good solution for this
Is this weapon joint animated? Like, is there animations that has been utilizing that joint?
yes weapon bone was animated and that why and when fight anim monatges was playing that weapon bone litraly flying when trying to blend
Ideally, the parenting should be fixed in the character rig and animations have to be reexported.
ohk
Hey! I have a problem with a very simple rig of a cow. It has a root joint at 0 and then a pelvis after that. When I simulate this cow, even just the physics asset by itself, it moves as if the pelvis is the root and it snaps the pelvis (together with the cow) down to the root. I'm just importing it with default settings. I've been bashing at this for two days now.
Is the mesh exported from Blender?
If so, what’s the scale of root bone in Unreal?
Yes! The scale in Blender is 1 but the scale in Unreal is 100
In that case, the export is done incorrectly.
This is a common issue, there’s plenty on info on that online.
Ah okay, I've had a crazy time trying to locate answers. So I'm trying to end up with no scaling on the root once it's imported?
Does anyone know if there is a built in node for blend poses by gameplay tag?
There's none.
Really? That sucks 
What would be the use case for you that couldn't be covered by controlling already existing blend nodes by reading the gameplay tags info?
We use gameplay tags for specifying weapon types instead of enum in an indie project, we didn't cover blend poses for weapons and didn't think of it would be an issue until I typed "Blend Poses by Gameplay Tag" and nothing showed up 😅 Idk much about abp but maybe I can try writing a custom node for handling this.
iirc Lyra using Anim Layers when there is a weapon equip happens, maybe we should use that workflow instead 😄
oh, thanks for letting me know 😄
Hey all, I'm working on a flashlight animation that procedurally rotates the hand to point the flashlight at the camera forward vector (red sphere). I'm using two-bone IK and modify bone nodes for this.
This works fine when the character is standing still. Once the character starts moving and rotating, the look at rotation seems to overcompensate. Once the rotation stops, the rotation will stabilize and interps back to the target correctly.
I'm pretty sure this is due to stale transforms on the hand bones and flashlight, but I'm not sure how to fix that. I'm looking at overriding the "Thread Safe Update Animation" function and moving logic there, but getting transforms isn't thread safe. I'm also wondering if it's due to how I'm doing the look at calculation in world space. Any advice on this?
anyone else encountered crashes when enabling bone visualization in viewport in 5.7?
The issue is that you do unclamped calculations in the world space.
Would be better to do it in the chest space and apply interpolated rotation delta if you need an overlapping feeling.
@velvet jasper now that I have a working camera, is there any way I can bake all the animation channels to another object cleanly without the attachment ?
I'm hoping to remove the kinks from the camera path, and perhaps also do minor correction to some angles to make the whole thing more cinematic

Should be doable using built in constraints/spaces features in the Sequencer.
Haven’t tested that but in theory that might work.
Hello, does anyone know how i can in "Layered Blend Per Bone", expose branch filter, and store it in variable. So for example i want to make in Character BP, when i press 1 that Bone Name in it is set to example "spine_01", when i press 2 it's to something else, and so on...
@velvet jasper you are right, I tried it.
but it just offsets the camera in space somewhere.
even when playing with all the different offset types this behaviour happens.
perhaps it's because the camera I'm trying to capture has the **attach **added to it's component ?
Yup. Maybe the constrain with the offset should be used instead of the attach track.
Unfortunately, that won’t be possible as the branch filter is not bindable.
You’d have to modify the node source code in C++, but I have a suspicion it might be done for a reason.
Yeah, Thanks, do you know any other way to do so, Blend Masks don't work well for me...
Caching might give you a needed result.
Create a bunch of caches of using layered blend node with different settings, switch between the result caches through Blend By Int, for example.
Thanks!
Thanks for your reply, would using a "to bone space" node be the best way to convert the rotator?
I’d say, having a virtual bone or pre-defined socket that’s a child of the chest that would represent the IK target would be the starting point.
Additional motion could be added on top.
Thanks!
hey, I am wondering just out of curiosity.
if I have something like a fan which needs to have a 360 looped rotating animation.
What is more performant:
a) making it a skeletal mesh and rotating the blades with animation
b) making it a static mesh and in blueprint updating its transform every tick
I’d suggest to make it as a static mesh and do such basic animation through the material.
That way you’d delegate the movement to GPU, which is cheaper.
Hello, does anyone know how to read current curve value in an animation graph at a given node? GetCurveValue returns last final pose curve value, but I want to read/save the current curve value before, let's say, LayeredBlendPerBone
E.g. if I do this, Test curve after LayeredBlendPerBone will be 0.5 due to normalization based on weight, but I want to save that 1.0 before it gets affected by blending

Could it be useful?
