
#animation
1 messages · Page 58 of 1
Just encounterd this . Not sure whY this works if I hard code the bone or socket names but creating a function and passing in ther values does not? , this in in an animation BP


can i use motion matching like montage working?
i have a lot of parry animations, but with different direction, can i use motion matching system?
Did anybody manage how to change motion matching speed? I know the enums in the animbp of walk and speed, and the walk run speed of the bp char doesnt change anything
Evalute Curve and Set Curve in Control Rig are buggy, they dont save the selected Curve
the bug is happening in 5.4, not in 5.3
I reported to Unreal, in 5.5 is saving the selected curve but in Details, the preview on the "Event graph" of the Forward Solve doesnt changes
So i'm just about done rebuilding the entire Lyra locomotion from scratch and holy cow, this feels like absolutely unnecessary bloat.
All of these blueprint functions, even when being called in thread safe anim update, there's no way this can be performant at scale.
I'll eventually reduct & rebuild the logic in C++, but I don't see how the function spam is necessary??
My motion warping is not working. When ı play my root motion animation, it plays as if there is no motion warping information at all. What should I do?


Hi, all. In the Unreal Fest in Seattle, some folks demonstrated an amazing mesh deformer you can animate in 5.5. Has any body tried this out? I haven’t been able to find any info on how to set it up.
Related to that, has anyone found a concise tutorial on setting up the modular control rigs? They were new to me, but I guess they have been in 5.4, too. Thanks in advance!
Hi, I have issue with UE I setup play montage for shoot action but when press button it doesn't do anything, btw I setup slot and I setup it in animation graph also I don't know what is the issue.


There are a few control rig driven deformers implemented in a plugin shipped with 5.5 called “animator kit”
Excellent! Thanks! Have you been able to figure out how to use them?
I think you just add the deformer rig to your skeletal mesh in sequencer like any other rig
Yeah, that is what I thought, as well, but I don’t see any options to add them (even with the Animator plug-in enabled).
Did you enable show plugin content?
I was following this https://youtu.be/s1qdbJtjUI0?t=14429

Presentation Schedule: Day 1, Tuesday Oct. 1st, 2024
00:00 The Evolution of Mobile and the Rise of Alternative Mobile Stores
1:19:22 Future Features in Unreal Engine: 5.5 and Beyond
3:32:36 Sneak Peek at Unreal Engine 5.5
5:12:24 Visualizing The Kingdom of the Planet of the Apes
Livestream 2: https://youtube.com/live/12UmNnjUGPE?feature=share
...
Thanks for your help! I will look into that.
This is the default retargeter from the Game Animation Sample Project. Does anyone know how to fix the fingers? its even worse with the live retargeter at runtime. (Easy Pose didnt help)

Hey, @merry loom ! That video link cleared it up. Thanks for the link! It is pretty hidden, but could be really cool.
...
Just a quick question about motion matching. If I want to use the motion matching ABP from example on my UE5 Manny-like character, I should retarget ALL animations and recreate the ABP for UE5 skeleton, right?
Otherwise I would use the real-time retargetter which is waste of resources, good for the demo but not for prod?
why the warp animation, move to weird postion before the warp position


someone have a clue why the other axis doesn't work? even if I put a number( update: only the pitch doesn't work)


Imagine if Steve Jobs was able to see into the future once more. We bring Steve Jobs back to the stage for one more historic occasion in this incredibly realistic 3D animation: the launch of the iPhone 16. Created by Null Station, this video is a tribute to the visionary who changed the world with his relentless pursuit of innovation.
We've capt...
Hi guys would love to have some feedback
Gimbal lock probably?
where to look for it?
I heard the retargeter is really fast. Maybe do some profiling before you commit to remake the abp? Animation evaluation runs in parallel to the game thread also so it might not even be a bottleneck
Oh it is just a concept. You can look it up. Just guessing tho
Thanks, let's say I wanted to add a weapon fire animation, those would have to be for UEFN skeleton which would then be retargetted right?
All my animations are for UE5 skeleton atm and converting them to UEFN would be pain.
I think Any skeleton can be retargeted to any skeleton as long as you spend time tweaking the retarget settings XD. There is a talk in unreal fest that talked able using stack o bot’ mesh as uefn npc mesh, so it gets all npc animation as well. Stack o bot is not ue5 skeleton nor uefn skeleton
Right, but it's either retarget existing UE5 skeleton anims to UEFN or retarget the UEFN anims (and remake ABP) to UE5. I cannot mix, right?
I think so yeah, but i only know surface level concepts so there might be workarounds in practice.
And my animation is showing in the abp manny but not whule playing


you have to compile the blueprint
you likely made a change that stopped manny from walking wich updated in the game but not in the animation blueprint
I have compiled it but no use
then i dont know either
Do i need to update animation but how
In ABP, when you are running the character
top center
there is All World, And Preview Instance
Change Preview instance to the character that is active, they should sync up
Thanks
So I have my UE character, rigged to UE skeleton. Base body don't have tail, tail is separate SM with tail bones. I'm using Anim Dynamics for my tail. so Issue is, Anim Dynamic is not working if in BP I parent Tail Skeletal mesh to Body skeletal mesh. It olnly works if Tail is parent. Is there a way to make it work without adding tail bones also to body mesh?


couple of questions, A. should I even worry about this? B. If so, is there a way I can do this off the animation tick, cause I really only want to calculate it when I am actually aiming

I'm trying to create my own layered animations via an in-game editor (handled with c++) and then play them back in normal gameplay
What's a good way to do this? I've been looking into ControlRig and RigVM but I'm not sure if that's the way to go
can someone help me to understand how to assign to different sockets if i want to Modular rig the Honey Bee? Please
what is the right way when you want to animate character when i need to put person on the moving platform.. should i parent it in OUtliner or should i parent Root control to using Animation tab? ..
cuz i notices sometimes parenting using animation constrain super glitchy and i loosing animation quite often.
Is anyone testing out modular rigging? I'm using the finger module and the bone rolls get messed up when applied. Outside of the modular rig the finger bones rotate exactly how they are supposed to. Looks like the module is rolling each finger bone by like 25 degrees.

anyone know what is causing this when i use my flight system that enables my dynamic flying system
hey, so im trying to animate this door object, but instead of it animating on the pivot it rotates from the center, how can i fix this?
take the model into blender and change the origin to the side; i dont know if you can do this from unreal, but if you set the origin to the side, it might work
i just made a cube the parent in unreal and animated it as a pivot
but now idk how to make the animation play since i moved it into the blueprint for the door instead of being a level sequence
ok i tried to get it to work but now instead of playing the animation sequence the mesh dissapears
im trying to make a reload animation in unreal for a weapon, i have the magazine and rifle as seperate static and skeletal meshes respectively, but i dont know how to make it so the magazine moves with the arms
i have a socket on the rifle where the magazine is attached in the blueprint, but i dont know how to attach the hand to the magazine in an animation
Anyone know how to resolve this issue, I have a rigify skeleton which obvs have multiple root bones screenshot provided. I am trying to get this character into UE but it's not really liking it. Anyone have any ideas please ??

I'm thinking is there a way to maybe just export the bones under root which prob actually matter but I'm not sure
hi, having some trouble with retargetting

it says im missing these bones, which dont exist in the synty pack on the left, i upgraded to 5.4 cuz uni and it worked normally in 5.2 and 5.3
so i'm having a right issue with Anim Instance, when I have an animation play and blend into say bones from spine 04 up it doesn't seem to work
bassically what I'm trying to do it your normal bottom half does the locomotion stuff whilst top half if needed can do other things


thats it not blending anything ontop[
what happens when I try to blend in on top another animation


in this case a simple weapon holding animation
thats what I expect to see on top half but I don't

so solved the above issue now have a new issue. Anyone know why the camera alteration don't seem to be applying ??

Autokeyer in my level sequencer doesn't work. Anyone got an idea why this might be?
anyone able to help cause I'm getting really stuck on this
join the club Ryan. ive seen others get their answer while im still waiting for that one to know my golden answer
I can't work out how to order my things in terms of I have base loco stuff then on top I had it with camera offset stuff and then I tried putting on top of that weapon equipped animations
however if I do that well it breaks the camera looking thing
if I switch around the order so it's base loco, weapon equipped anims, camera offset stuff it then breaks the camera offset
wish i could help but alas i cannot
hey could somone help me w my door object, rn when the player hits the trigger the animation dosnt play, instead the mesh dissapears. i want it to be when the player hits the trigger the animation plays allowing them to walk throuhg hitting the other trigger thats a warp, warping them to a spawn object i have set up, the teleporting was working fine but now the animation has broken it completely lol
So I have a ton of assets that are Y+ facing. I have been able to export them and then re-import them the static meshes are easy enough, but the skeletal meshes rotate, but when playing the animations, they are snapping to the Y+ facing before playing the animation, is there an easy way to fix this?
Matt Aspland covered mulitple ways to open a door, perhaps a preview of how he did it can help to interface with your portal mechanic.
https://www.youtube.com/watch?v=Eakt2hBd3YY&pp=ygUcb3BlbiBkb29yIHdpdGggYmx1ZXByaW50IHVlNQ%3D%3D

Hey guys, in today's tutorial I'm going to be showing you how to efficiently open and close a door in Unreal Engine 5. This will also be a very customisable method to change it to how you want for your game.
Please note that this video does not include an animation for the player, however I can look into this for a future video if people want i...
#animation message does anyone know how i can fix this
When you unpossess, what is happening to the character when you 'fly' I presume it looks like they are scaling up? or the camera is doing some were transform.
press play, then press I believe its f8 by default to unposess and look around while it's playing.
so when i retarget the animation blueprint to my UE5 skeleton it does that. but if i use the original one from EU4 it works fine
do you have your own bp, or using a store asset like the hammerhead flight bp?
im using hammerheads dynamic flight system
Anyone able to help with my issue please cause I'm super confused
it's a good one 😛 I have it as well, lemme make a project rq and see if I can't replicate, I haven't played with it in a while.
what is your project version?
5.4.4
also, you may have luck reaching out on the discord for the asset, they are pretty responsive in most cases.
i wish hammerhead had a discord lol
yeah, lol
the good old email system is so slow lol
how did people wait for days when it was just the mail guy to talk to eachother lmao
so out of the box for 5.4.4 its working when I press play, so it is gonna be an interfacing thing, which i can only help as much as documentation that they have, you know how to find it right?
they also have this notice in the documentation: PLEASE NOTE: UE5 is currently very buggy in regards to retargeting additive animations. If
you test the game at this point and find that your character bends in unnatural ways while
flying, please close and restart the editor. In my experience, some data on retargeted additive
animations is incorrect until the editor is restarted. Have you turned it on and off again?
yeah i have and its the additive annimations i think is my problem
sounds like it, again I haven't played with this in awhile, and then I just switched out skeletal meshes that were targeted to UE5 skeleton, so I didnt see anything wrong at the time.
yeah if all i did was replace his skeleton mesh with the EU5 one it works fine. its when i try to follow his steps that it breaks with the additive animations
I will have to try to find the project, but I brought his wall running into the flight to mess around a bit to demonstrate to someone the kits.
https://www.youtube.com/watch?v=A7VU7CTV1Cc

Flight Mechanics w/ Wall running implemented.
ok thats just cool and now i have to do it lol
lol
@wary otter out of interest have you ever done FPS before with aim offset done by logic then animations ??
Sec, lemme see what I have for notes.
having a bit of a mare with anim instance and getting it working right
can you give me a bit more context on what you are looking to accomplish, not directly ripping off of course, but mimicing a game mechanic to start helps get 'in the area'.
what shooter is closest to what you are trying to accomplish?
so it's FPS and I'm trying to have it where the weapon equipped anim is modified in terms of when player looks down and up the bones are modified so weapon is roughly still pointing right
Gotcha, so you look up, and the gun goes up with it?
bassically

👨🏫 My Patreon link:
https://www.patreon.com/kekdot
Download Project Files | Premium Tutorials | Courses
🕹️ Get our Game on Steam | The Anomaly Project:
https://store.steampowered.com/app/2960770/The_Anomaly_Project/
In this tutorial I explain how you can setup Aim Offset for your Unreal Engine 5 or 4 game.
I show you the required change...
one of my bookmarked tutorials, short sweet and to the point.
does it use anims though ?
like it has one with the player completely facing down and up, and then it blends from center as needed?
its an 8 min watch, humor me 😛
mine is the left his the right. i think i found the problem. it didnt move any of the additive anim type settings with it. lets cross my fingers im right lol


like I can get that

it's always walking back through it a 50th time 😄
wait until you get into c++ and have to find that one ; that is messing up the code, and that's not the error you are getting, but it's the cause, lol.
i tried adding c++ to my blueprint project. Completly fubared that one up and took me 4 days to get my project openable again lol
im a Conan modder trying to do my own thing instead of doing something for someone else lol. Still learning everything
all signs point to you are trying to setup a typical aim offset in fps shooters, nothing fancy so some time searching that up on youtube will prolly get you the answer. I say this because I have over 10+ creators on YT bookmarked and each have 100s of videos to search through on these topics of getting started. Ryan Layley, Game Dev Cave, There is a good handful if you search, they will get you on the way. I only know so much through about 4+ yrs of watching videos and replicating then, just messing around to figure it out.
so what i'm starting to see is the tutorial you've presented to me and others I've come across use animations for the aim offset
it's the common approach.
so unless you have a dire need to try to squeeze the [] in the O .... I try to just get something on paper, you can always tweak or mess when you have something working.
doesn't seem to be working how it should or they have it in the video

So i'm not sure what I can do here to get this working


so the issue is when I'm holding a weapon the upper part of the body doesn't do whats expected
this is really hurting my brain not gonna lie
the issue there which I have is they aren't using layered blend at all so for them it's plug and play but I'm using layered blend to blend in stuff for upper part of the body so that tutorial is great but gets to point it don't work for my use case
The issue I'm facing is when player looks down I have to rotate body down, so their eye line roughly matches with where they are looking
At the moment that bit I kind of can get working but when I add in the ability of player holding a weapon things then break down and I can't get stuff in right way for things to work
Like should I for example not be doing a bool blend to blend in the weapon holding and would I be better doing that else where ?


oh yeah dont mind the map. im still working on that lol.
now to reimpliment all my systems to my thirdperson since i had to reinstall it
i still cant get itto work
anyone know why my rootmotion animations in ue5.4 continue to move forward with rootmotion enabled, and also dont show up in motion matching pose search database?
Also retargeting isnt an option
Im using a custom rig for a creature
I am trying to retarget motion matching animations to UE5 skeleton (Manny_Simple), but root and IK bones are not retargetted well. (Stay at world origin). I used the RTG_UEFN_to_UE5_Mannequin retargetter.
Any idea what I did wrong?


hi, i am writing an animation modifier, i am stepping over each frame looking at the position of a bone, foot_(l_r) problem is the position never seems to move, but i can see the position is moving in the animation, i must be doing something wrong, should i be getting the bone or something else?
anyone able to help me out before I tear my hair out please 🙂
i really am struggling here
You'll see in the screenshots I have my anim instance for player however I'm struggling to get the ordering correct for when player has a weapon equipped for example


Anyway to make new lipsinc real time? Prolly not.. metahuman performer contained
Hello, i am in need of some help with a furniture interaction blueprint i made here (https://blueprintue.com/blueprint/0p247ar9/).
So basically what happens is when i press E looking at this actor my character moves to a specific location and plays a sit down and sitting loop animation. The problem is that during any of these animations i can't fully look around, i can rotate the camera just how i want to but i don't know how to make it so the characters head also rotates following the camera.
If it is of any help i am using the GAS template character but setup for first person. In the video you can see that the characters head keeps on looking in the direction where the animation montage tells it to
Does anyone know why changing the capsule height during a motion warp would cause the motion warp to be higher than the target location? This is despite it set to ignore z. If I don't update the capsule height it works as I would expect so I'm a little confused by it.
Edit: disabling ignore z seems to fix it so I probably don't understand what it's actually for lol.
does anybody get some extreme lag when animating with Sequencer?
It wasn't happening before. Just started lagging today lol.
is there a way to attach a socket on the player character mesh to a socket on another
bassically I want to attach the hand of the player character to the lever handle until the lever has finished it's movement
Does somone know how to make procedural animations in unreal ?
Anyone know what I'm meant to do here ??

I'm trying to do motion warping for certain things in world player can interact it, however I can't remeber what I need to do here so the montage plays on the whole mesh of the character
at the moment it seems the upper half doesn't seem to be doing what I expect
Via control rig mostly
You need to use IK. I think this was a decent video demonstrating it https://www.youtube.com/watch?v=vfdYp43PIJM
Project Files : https://www.patreon.com/posts/56839056
This is the 21st episode of the "Unreal Engine Adventure" tutorial series I am doing. This series is inspired by games like Heavy Rain or Detroit Become human. These are more like interactive stories where the player choices of player will have a permanent impact on the gameplay.
In this e...
well i was planning on doing that like but I have a base animation in their the IK I would use on top of it but I can't seem to get it to work like the base animation where the play reaches to the lever and releases it
thats what I'm getting at the moment
Thats the montage I'm playing as well when it does that lever thing but I don't seem to be getting that
okay so i fixed it by doing that

but when I put the defualt slot into the layered blend it seems to break and I'm not sure why
I would say there are 2 options, one is to warp the user to specific location so the anim aligns with the lever location or using IK.
so thats what i'm doing the warp works fine, it's getting the montage to play on the whole body of the character
as when doing this, for some reason the montage doesn't play on upper half

do I need to completely blend out the layered ?? cause if I do I don't remeber ever having to do that
That could be a lot of stuff, did you set your bone correctly?


I disabled the Telemetry plugin for UE 5.4 and the lag seemed to have been gone for a minute. But then it came back with a vengeance. Anybody have ideas for how to fix 5.4's extreme lag?
@stoic kiln what would you thinking be on why the layered Blend thing isn't working ?
Sorry I know almost nothing about anims, just getting into them myself. If the bone is correct, I would probably do it using a state machine, something like handle_start, pulling_handle, exit_handle_anim with enum.
That would be on the upper body. I don't see how you play the montage in your setup
well i'm implementing a way to where the anim instance can just bypass everything when it's a full body montage
Is there a straightforward way to set a sockets mesh from an animation sequence, like by using notifies?
Hello dear People 🙂
I am currently trying to import a object with a simple bone structure into Unreal Engine.

on Import it is telling me "Multiple roots are found in the bone hierarchy we only support single root bone"
Do you guys know what could cause that issue ?
I can only see one root in the amatures
these are my import settings

If a bone doesn't have a parent I believe that also counts as a root
So AFAIK only one bone can be "parentless"
mhm I see 🤔
Do you see a parentless Bone in my amature ?
In my view they are all parented to the "ORG_root", arent they ? :3
Im confused haha
Not from the screenshot no, was just pointing out an error I myself have ran into before ^^
haha dang
Ill try to make a new amature and see if that fixes it
Anyone know when using the Two Bone Ik and Fabrik nodes how to keep the rotation from the animation ??
So i have to setup conrol rig on the charater or creature first 🤔
Here is an example of procedural animation using rig from UE talk https://youtu.be/miZFpMVYnB4?si=XAeSii3Iq6hB9iay&t=1009

This session will explore the latest additions to Unreal Engine’s rigging toolset. Using Control Rig and the brand new Skeletal Editor, we’ll show you how to utilize techniques such as creating skeletons directly in the engine and adding dynamic motion rigs to bring your animations to life.
We’re excited to bring you sessions from Unreal Fest 2...
Anyone know how to when using ik two bone and fabric ik set rotation of the bone being effected
I'm not able to and only seem to be able to set the location of it
Actually scrap that, is there a way to have the rotation be not changed at all so it retains the rotation from the animation
At the moment it's taking rotation from the fabric node which I don't want
I am sorry if this is not clear I am trying to learn animations and such in unreal Does anyone know why the the new state machine node is not displayed when I right click in the AnimGraph I have an Outpost node but when I right click to call up a node called new state it does not show I would need to create a new state machine node to make my animations work

So I got it I finally got it I typed it state then new and then it showed up so must be a revision difference between the 5.1 and 5.4
Hello, I need help knowing what to put in this string here. When I write UpperBody it doesn't detect upper body animations, I tried DefaultGroup.UpperBody, Slot UpperBody, DefaultGroup and a bunch of other stuff but it can't seem to detect the slot for some reason.

When using the control rig in the sequencer to create animations, is there a way to mirror/flip the poses so everything on the left happens on the right side and visa versa?
Im looking at switching to the modular control rig system and wonder if anyone know how I could make the body control move up and down with the head control up down while keeping the default offset . so when I move the head control down the character squats.
Anyone know when doing IK interaction how I can add on top the IK Hand loc and if I choose rotation ?? At the moment i'm using fabrik node to have left hand be IK when i need it to however I don't want rotation affected and want rotation to be from the underlining montage thats playing. Any ideas how I'd do this at all please
Anyone at all know why this wouldn't trigger correctly ?

I have is pressed as a variable
Looks like you need to create a control rig pose asset and use that to mirror. There is a “poses” button in the top row of tool bar when u enter animation mode
Do poses work across multiple frames? So say frames 10 - 50 that need to be mirrored, I can select them, save them as a pose and then apply the pose checking the mirror option?
That i dont think so… makybe bake to anim sequence and then mirror that somehow and bake the mirrored anim sequence back to control rig?
Back back to the control rig? As in take an animation and have it recreate the relevant keys for the various controls?
Yes, it is what backwards solve event in control rig is for. Rigs shipped by epic typically have that implemented. Like metahuman rig
That's probably what I need then lol.
Is there any documentation on it?
Oh shit this is old feature. I saw if from some old control rig livestream back in the days. Quick google give me some youtube tutorials, maybe you can start there. But it should be simple. Like you just mostly do set control transform based on bone transform
Anyone know how I can resolve that problem ??
to get the montage to work on the full body I've had to do this in the anim instance

however it has the affect of the hand IK that is happening seems to be offset to the right of where the socket actually is that the hand IK is tracking
spent like 4 days on this now so would love some help 🙂
You'll see on the button On montage there is no rotation of the hand to where it should end up to the right of the socket or below it
if I do that it works fine as in the hand correctly tracks the ik point

my issue is I need this defualt slot in place as without it the montage doesn't play so the player slides as it warps into place rather then doing the montage animation
I would reallly like some help on this cause I'm not sure what to do
I am clueless when it comes to ABP, maybe try to use rewind debugger or pose watch to debug? I just know that these features help debugging but i personally havent used them 😦
i know whats causing issue, it's the default slot, i just don't know how I can have it still in but it not mess up left hand IK placement
without the default slot in there the full body montage don't play
please please please can someone help me, I am getting super confused here. I literally can't tell what I'm doing wring
*wrong
in the video above you can see how I've animated things and then when actually playing in runtime you can see how the hand for some reason rather then tracking where the socket is it's tracking to the right of the socket on the lever
please can someone help me as I'm so confused why it's just not working how I expect it to
thats the code i'm doing to get the hand ik location which i got from a youtube vid I followed

and thats the layered blend I'm doing to blend IK ontop of the montage being played

and thats the Fabrik node and it's settings

pleaseeeeeeeeee help me
Your ik probably need to be after the left arm montage slot or it'll just override it.
is it not after the left arm montage slot ?
No. You do your IK stuff and then you're plugging those changes into the montage slot.
cause thats what i'm doing

so what node would you say need changing if your don't mind cause dont I need the arm slot ?
Try this.

Nope it still seems to be the hand ends up to the right of the IK loc
I made the changes as well before testing

Try clearing the effector target on the FABRIC node with you using the transfrom instead.
still don't seem to be working how I would expect
@timber summit one thing I have noticed is this
if on the base pose cache I bypass the default slot, the Ik works fine

the issue then though is the montage which is meant to play obvs doesn't
If you're using the default slot then the IK would need to be done after the slot or it'll be override, same as the other slot.
what about that


in that situation i'm doing the default slot on the main inital locomotion coming through and then the IK slot thingy after it on the entry to the Hand IK stuff
so that didn't seem to work, I now no longer get any ik hand stuff
that seems to work ish


so with this kind of working, would upper only montages still work as they should ?
hi, i am debating if its sensible to define a walkcycle state and a run cycle state
Is anyone aware of this weird issue using full body IK and hands in the control rig? It only happens when walking.
Edit: I think i might have solve it back having it run on the backwards solve instead of the forward solve.
Edit 2: backwards solve only runs ones (from what I can tell) so doesn't seem to be what I was looking for. :/

Backwards is mostly for baking only (or layered workflow post 5.4
What are you trying to do ;)?
Currently trying to have the hands move up or down slightly when sitting so the hands don't float or intersect the thighs.
I use full body to adjust the legs/feet when I move the pelvis up or down slightly so trying to have the hands adjust as well.
Ah ok, so not a sequencer use case ? Yeah probably need to workout the right setting for ur fullbodyik node i guess.
I think i might have been using the wrong IK bones. o.O
Maybe not, I just don't understand the hand IK stuff.
I am still a beginner with animation but I am working on a battlechess type project to learn. I have an actor which is a skeletal mesh, not a pawn or character, for my Pawn piece. I only want it to walk forward. I have animations I want it to use as it crosses the board. It is currently set to Use Animation Asset. I can make it stand in several random idle animations from Begin Play blueprint logic and an array of animations. When I call the event to move it, the piece is selected and it is ordered to move to another square via a timeline and LERP. Without any animation it moves fine. However, when I try to add the Play Animation node or, Play Montage, logic just before the timeline it moves but it also graphically stutters for the duration of the timeline like its trying to both do the idle anim and walking anim. I cant seem to find the right way to do this, and I know this has been done a zillion times before. Can someone please point me to the right direction?
Hello, I'm having a problem with my character sliding when moving when I start my project. I have an ABP setup but still not sure why this is happening as I've been following a tutorial exactly.


This is my ABP with BS hooked into it
I'm using the AnimationStarterPack
Looking online it says maybe the max speed is too much in my BS, but when I reduce it I get an error:

So I'm pretty sure the min/max values need to be 0/500
Any ideas?
Can anyone knowledgeable in deformer graphs or HLSL explain why this code results in the character T posing? From what I can see, it's reading the current skinned positions of the mesh, then writing those same positions to the mesh, which should result in no change. Instead the character stops animating and goes into T pose.

Nvm. That code results in T pose because it's giving me the vertex positions of the mesh without any skinning math applied. If I want it to output the vertex positions of the animated character, I need to include some type of skinning logic, like linear blend skinning, in HLSL
Hi everyone! I'm trying to add loose straps to my backpack rig (the straps have 4 bones each) and don't know which controller to use in the ABP. Could I get a little direction please?

If I have slide animation how can I make it so that the collision capsule moves with the character.
I enabled rootmotion but the capsule is at the same place as before. It doesn't move at all
The character plays the sliding animation tho
What am I missing? My CR's right hand has no properties for rotation/scale, the other hand is fine.

The poses thing was the key for mirroring. I just created a post with all my controls selected, updated pose and then pasted pose with mirror checked. You can then just scrub to the next section, update pose again and rinse and repeat. It took about a 20 seconds to mirror the bits I needed so now I can clean some of the blends up. 🙂
So I'm struggling to get some hand IK working where it traces the environment and adjusts the hand so it doesn't go through the mesh. I'm attempting to do in via the control rig. Does anyone know any examples I can look at? Everything I've tried either doesn't seem to work or just causes the arms to glitch all over the place. :/
hello fellow devs , i am using ALS v4 and i have some combat going on , but when the attack finishes it goes to idle directly it wont do the cool transition it does when it plays an action montage like rolling for example you see when the character finishes the roll it moves the feet afterwards to go back to proper idle, i dont have much knowlage about als , so i need some directions and tips , like what the animation need to have so it works that way or is there some events to call and so on , thanks in advance
Can any Unreal Animation gurus explain to me why my character seems to be colliding with her staff in this clip, or how I can fix it?
If you did the same thing IRL, the staff would pass through you as well. Either the staff isn't orientated in the hand correctly or you need to adjust the hand rotations in the animation.
Hi Patty, thanks for the reply. The issue is once the weapon is equipped, the character moves sideways when I try to move forward. It's colliding with the character and prevents it from moving in the correct direction. I'm not concerned with the polish of it just yet, I just want basics so that the character moves correctly. I'll deal with clipping and other issues when I customize the animations to better suit the character, etc. 🙂
Ahh ok, you're issue has nothing to do with animation. You just need to disable the collision on your staff actor/mesh.
Thanks. I thought I had changed the collision settings, but I clearly didn't set it properly. I'll have to take a closer look at how Unreal's collisions work. Recovering Unity dev 😉 For now it's working, until I need collisions 🤣
Im working with modular rigs and wanted to know why it is when I duplicate the spine module its instantly throwing up this error? in the CONSTR Spine Graph

Hello!
Is there a way in Sequencer to copy a pose (selected controls/keys etc.) and paste it back mirrored?
Okay apparently with the copy pose tool. Now to figure out why my mirrored pose is totally screwed
Can someone please help me with this? I've got the Unreal Engine 4 Mannequin retargeting to a character with everything setup properly, looks perfect in the retargeting viewer but after I export the animation it distorts some of the face rig. I'm very confused why this is happening, I've tried removing all of the face bones from the IK RIG, disabling them in the solver, adding stiffness settings, ect. If anyone could help, I'd be very grateful.
Additionally, the UE4 mannequin is the only one this happens on. I've tried it on the UE5 Mannequin, and other characters; it retargets properly.
quick question, in my anim graph I have an animation squence that play on loop, I wanted to have it change with a variables. but when using an anim sequnce variable it doesnt work. is there any way to play animations from a variable in the anim graph
Look at Lyra, it uses set sequence and set sequence with inertial blending in the update function. On phone so answer is a bit messy sorry
Im having so much of a headache rn, im asking for any help i can get regarding this, im playing this montage that will transition an anim graph, however sometimes it will just randomly stop playing the montage, and will only play if i slightly turn the camera to the sides:

found out set visibility was the problem, changing it to ^set owner no see^ solved for some reason
I have a question I can't find an answer too, when using a modular control rig, and having created exposed values like so that will be driven by world transform's. How do i send these transform's to the modules to control there respective controllers ???


So It looks like it might be in the details panel of each module in the hierarchy, bit Im still unsure of How I control IK parts in module from my Value.

So I had thought that the cost of anims was directly proportional to how many verts each bones influences, with nanite skeletal meshes how does this work?
I don't think there's much information on how it'll work yet but, it's probably the same but also based on distance. If it's closer, it'll have more verts it'll have to move, the further away, it'll have less.
Makes sense though even so if you have a very detailed like 1M tri mesh that requires a lot of geo even at distance, I guess performance just drops in that case
will be interesting to see how they do it
Can we bring real-time retargeting like shown in Animation Sample Pack to a project that is based on State machines and not MM
any people in here today ??
I was asking if this is possible who tf reacted on it 💀
Do you guys know why always reset on entry isnt switched on by default
don't know exactly what chat to ask this in but - I'm making a character in Blender using the Quin skeleton and they are planned to walk around on their tip toes (a very dramatic heel design), my question is... uh... how do I go about doing this? From my understanding, I shouldn't alter the rotation of the bones, and even then, I don't know if the skeleton will "understand" it's meant to have heels. Should I just rotate the foot bones, or make the model on their tip toes even if it doesn't line up with the rig? Or is there something entirely different that I am suppose to do?
sorry, I mostly work with custom skeletons and this is my first time using the default Unreal rigs. (also, I'm asking this here due to this revolving around the UE5 skeleton and how it will translate to premade animations and how the model will behave, again I'm not entirely certain if this is the best channel but I figured it's what most closely relates to my issue)
can someone help me understand what this is ? (the arrow near the output)
and how do I replicate this ?


Is there a way to compare two different skeletons? Like a tool or something to be used. We rigged our character to the UE5 Quinn skeleton but I cant seem to import it as there are merge conflicts and it fails. We only added additional bones under child bones. The parent bones that were added did not break the order, only slips a few additional in, which should be allowed, right?
Need an answer here. how can I control this head module with one of these transform's.

Might someone see from the behavior of the foot control, why the mirroring the pose does not work for the foot?
It's a basic leg IK setup that works really robust and without snapping when setting up and posing, but for some reason mirroring a pose with it does not work as intended. (all other controls such as arms, spines, cog, etc. mirror perfectly fine).
EDIT: I did try every single combination of Mirror Axis and Axis to flip. The result is always the same.
It's like it does not mirror the Y Location of controls accordingly
Hey guys does anyone know if it is possible to set the "bone to modify" in this node from a variable? This seems like there has to be a way to do this but I can't find how to anywhere :/


The behaviour is a bit better to see from this angle.
I had to rotate the foot bone in the skeleton by 180 degree and then it worked. It is strange though because in Manny the bone is not rotated like that and I used it as reference. So I got it all to work, I just don't understand why yet.
I'm setting the alpha(color) of this control for my control rig, but the controller mesh remains fully solid in color. whats up?
With transform bone, is there no way to specify the bone name with a variable?

Or is the only way creating a chain like this?

anyone have any idea why this dosnt work? (I tried using out actor the way ur supposed to and it didnt work either)

I'm working through a tutorial right now, and I'm running into this weird issue where the animation I make doesn't match what actually happens ingame :o
Does anyone know what might be going on here?


how are you supposed to hide the controls in a control rig in ue5 since the rig is in the animation outliner and not the regular outliner. You cant drag the controls into the Layers window for selective visibility..
Hi! im trying to get deeper in animating in UE5, would anyone like to recommend me learning resource for the most efficient way to learn character animation or animation in general to create cinematics?
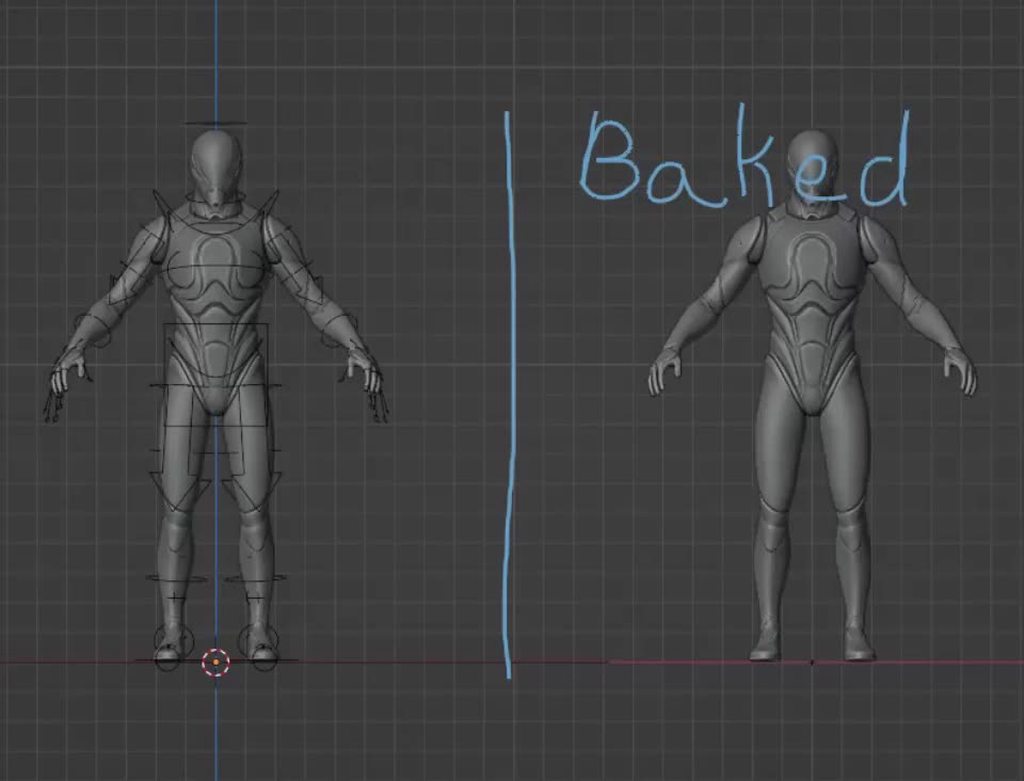
Has anyone had trouble baking animations from rigify where there baked animations slide and wobble after baking?
Ive got this test anim where the hands are solid
but after baking its wobbling everywhere
seems like others haver had an identical issue
https://imgur.com/a/Udp0Wwi
I made an anim modifier the other day to mirror an anim sequence based on a mirrordatatable, not sure if that will help you or not
Hey! has anyone ran into the issue when adding an animation where your player does the animation the camera moves as if its doing the animation. but the mesh is not. I've been banging my head at wall, tried changing the skeletons. I have changed from the original first person to a metahuman and think i may have got lost along the way with retargetting. appreicate any help!
Hey
Yeh
I’m currently modeling a character
But when I get to the rigging part how do I rig it in a way that there’s no weird warping or bones being out of place? Cuz last time I imported an animation to h real it was a disaster
hey guys please am looking for how to add a root bone to my sksletal mesh
am using motion warping and i noticed if the skeleton does not have a root bone the character wunt warp to the target direction
Hello everyone, I'm wondering how can I save a sequencer as a backup? I have never been able to recover sequencer animations using the auto-save files.
I have a character that can change clothing, equipment etc. and I'm using the "Copy Pose From Mesh" node in the clothing's anim BP to transfer the animation from the main skeleton.
On fast movements I can see a delay, like the clothing is 1 frame behind the main driving skeleton so the body mesh pokes through the clothing.
Has anyone seen this before and know a solution?
i changed the skeleton of my player blueprint to my new model, but the animations i have from mixamo, im not sure how to set up in place of the default ue5 ones, how can i do that?


Guys I am a beginner(pls dont make fun) how do you make a charcter inside blender can anyone tell me like a good YouTube tutorial or smth
Question : I need to move bones manually while physics are disabled (or else I can't force them). But the weight shapes on them don't follow (obviously), which breaks collisions. Any fix here?
how can i fix the animations doing this?
hi all, i have seen some older videos using nvidia omniverse, livelink, and audio2face. but the whole workflow is a little cumbersome. now i'm seeing this ACE thing where there is a starter project and you just upload the audio file right into the UE project loaded with your metahuman. problem is i'm not seeing this outside concept and in any live projects. the whole omniverse setup running is just way too much for this little aspect and rather it all be contained. my understanding is it uses an API call
Hey everyone! super newbiew question but I don´t usually do animations, I imported a 90 frame one but In unreal is set to 238 frames, how do I change the ends? (I´m trying to animate this thing)

just wanna reduce it from 238 to 90 frames

Hey guys, hoping to get some feedback on a body mechanics piece i've been working on!
2024-10-15
This is il before

After i connect

The character became so tiny with the idle animation XD how can i fix it?
i cant let my protagonist became mini mario when move xD
anyone had my same problem?
Cause i'm really struggling finding some tips on internet
you can check your import settings and change it from "exported time" to "set range" and set the range to 90 frames :)
check if your animation is doing anything to the scale of the character, or potentially if it’s additive?
actually when i export it from blender to unreal, the skeletal mesh is correct but the animation its TINY
i fixed the issue making the scale of the animation 35 time bigger and seems ok now, but im wonder if there is a better solution..
yeah you might want to see if you can reset the scale or remove the scale keys entirely if they’re effecting your animation
Sorry but what you mean? it's my first time making a character on blender, you talking about blender right?
yes, in blender you should check if scale is being set in the anim
i did alt + s to see if i can reset scale but it did nothing
so i think its correct or am i wrong?
Epic has an official blender addon, maybe give it a try? https://www.unrealengine.com/en-US/blog/download-our-new-blender-addons
Unreal Engine
We’ve released two new, free addons that greatly streamline the workflow between Blender and Unreal Engine.
Hello! I've got some questions about the motion matching sample project. I have created an enemy ai that is set up and works fine connected to a copy of the sandbox character's abp. When i create an ai that uses its skeleton and abp everything works well.
When i try to create a child and connect a mesh inside of it the way the retargeted character controllers are set up, the character only animates if the whole parent mesh is shown as well. I have retargeted everything and set it up the same way as my retargeted character controller.
If anyone has experience with the motion matching project or using motion matching in their own projects please reach out or reply to this and @ me!


When I animate a jump, should the final animation have the Z offset or should it happen 'flat on the ground' and let the height be purely dictated by the player character?
That's outdated btw. Epic isn't updating them anymore iirc. Here is a Community Fork that is up-to-date.
https://github.com/poly-hammer/BlenderTools

GitHub
Blender addons that improve the game development workflow between Blender and Unreal. - poly-hammer/BlenderTools
Has anyone here toyd around with Motion Warping? It seems like as soon as one plays a Montage with a Motion Warping Target that doesn't exist, it locks up the Root Motion Modifier as "Disabled" and nothing really re-enables it.
So when playing the Montage again, this time with the specified Motion Warping Target available, it doesn't apply the Warping due to the Modifier being Disabled.
    /** The modifier will remain in the list (as long as the window is active) but will not modify the root motion */
    Disabled
(as long as the window is active)
Yeah that's not true. Probably a bug then. Guess I gotta modify the Engine a bit.
    // Mark for removal if the animation already passed the warping window
    if (PreviousPosition >= EndTime)
    {
        UE_LOG(LogMotionWarping, Verbose, TEXT("MotionWarping: Marking RootMotionModifier for removal. Reason: Window has ended. Char: %s Animation: %s [%f %f] [%f %f]"),
            *GetNameSafe(ActorOwner), *GetNameSafe(Animation.Get()), StartTime, EndTime, PreviousPosition, CurrentPosition);

        SetState(ERootMotionModifierState::MarkedForRemoval);
        return;
    }
Preeetty sure that's not gonna work, cause EndTime doesn't take the BlendOut time into account. A RootMotion Montage will not even continue processing RootMotion past the BlendOut time as far as I understood.
Which means this will never happen anyway.
Even if one sets the BlendOut time to 0.0, this still breaks, cause the PreviousPosition will never reach the EndTime :D sigh
I would need to tick the Motion Warping one extra frame for that to happen.
Anyone Know What I can do to prevent my control rig doing this? when I set a control to use a world trasnfrom . I want to keep the controlrig character looking correct in the BP and such but all world transfroms go to origin. as they are not currently set I guess. how can I keep it in place until its active

I am so lost in a control rig. I have a very simple "point to" control rig that should make one of the arms point to some world coordinate.
It works unless it's combined with the UEFN character ABP from Motion Matching project, where it's get rotated/affected by the player camera rotation.
Since rotating camera also rotates the actor, I assume I am messing up local/world space somewhere in the rig.
I tried setting the TargetSpace on the Aim node to many different things but nothing.

hey im just learning control rig and im wondering if im supposed to have 1 control rig for each "animation" i want to make. so i might have 1 for a wave and 1 for some other emote? ive noticed that the ue5 mannequin has a big control rig that sets up some bones?
While you can make multiple Control Rigs, I would suggest only making them for parts of the body of your character if it makes sense.
The more traditional thing to do is to create one Control Rig for the whole Character. After all the Rig is supposed to fully control your Character to allow you to pose it, etc.
Making one for Waving and one for some other emote wouldn't make any sense.
The "per body part" is also only an optional thing. There are some tutorials from Epic by Andreas where he used a second Rig for the Wings of the Dragon iirc, but only to apply so floppiness to it.
interesting
im watching this series right now https://www.youtube.com/watch?v=hhcpSXJ2zak

In this Unreal Engine Blueprint Tutorial series we are going to help you break down the learning curve for all things Control Rig. We start by taking an intro look at what Control Rig is and creating your first control.
🎓 Why Control Rig
🎓 Control Rig Intro and tour
🎓 Control Creation
🎓 Understanding control visuals
Truly thankful for supporti...
he hasnt touched on how to actually make use of the control rig yet. if i understood what you are saying i should be able to use the provided mannequinn control rig to make my own animations and not have to make my own rig
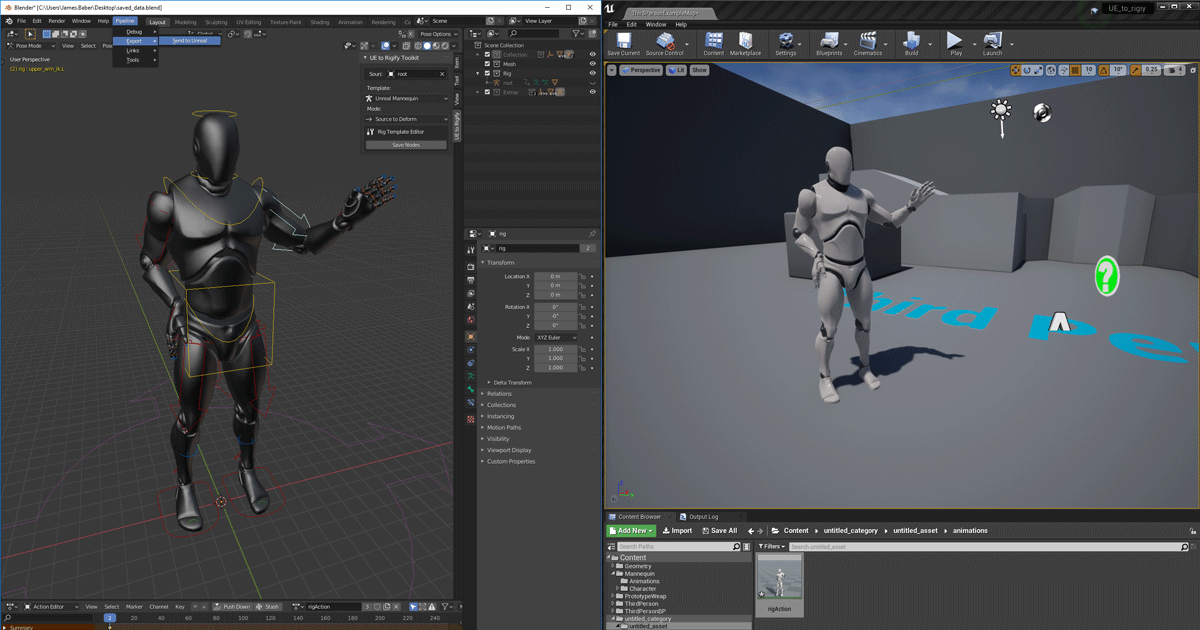
I'm glad I know spotted this, send to UE is extremely useful. I didn't even realize they weren't maintaining it anymore. Thank god for the community though.
I currently have two. The foot ik one and then another for sitting which also adjusts the hits sitting location and hand placements when sitting. I probally wouldn't have one for each animation. It can take long enough to set just one up lol.
Yeah my goto combination currently is Send2UE and Game Rig Tools. Helps converting Rigify/MetaRigs and exporting them.
Ye I think what Cedric said makes a lot of sense. Have one for the body and then you use animbp or blueprints to move it around I guess? I haven't learnt that far yet
guys anybody know about vertex animation for character can i use them as npc on mobile game?
You can bake your own, there is a tool for that in UE
yes but its cost more less than skeletal mesh character animation right?
for mobile
Depends on the complexity of the animation and how you optimize each one. Also it depends if have 1000 characters or just 2. You need to profile your case
but in genrally is it better use skeletal mesh or vertex anim for better performance
If you don't have specific reasons why use vertex anims, use skeletal anims. Performance depends on your usecase
sketal mesh makes some fps drops on mobile
if its cost more less with vertex char anims i can have lot character on game ?
with animations
With limitations, with vertex anims you don't have large vertex budget. It might be useful for 2-X LODs. And for closer characters you can use skeletal anims.
What is causing the fps drop in your case? Is it rendering? Updating the bones? Collision?
actually not sure but its about skeletal meshs also when i put more skeltal mesh drops gonna be higher so i thought with vertex character animations i can put how much character i want without drops am i right?
also this

What is the poly count of the model?
character is 1k
With animating in UE5 is there an easy way to lock some bones into a specific position when animating the rest of the body? for example I have a character holding a great sword with his right hand and I want his body to twist and fist pump with his left hand but I dont want his right arm or hand to move so it feels like the sword is resting on the same point on the ground due to the weight?
If Your character rig have IK hand controls, it should be straight forward?
hey, im trying to get my vroid model to work in my UE 5.4
i followed some tutorial but its not working correct when i try to rig it

how can i fix this?
im using the VRM4U plugin
and followed their instruction

You may have to take some of the bones out of body space and put them into world space, and then key frame their positions where you want them.
I want to make the ue4 manniquine an animation in the sequencer but there is no option to adjust his rigging like the ue5 one. Why is that?

Trying to create a test animation in unreal off of ue4 manniquines. Followed a video and it's not working correctly.
Issue is that it isnt letting me pose existing animations from the anim weapon back.
https://youtu.be/tnZv7KQPai0

👉Get Access To All My Unreal Engine Courses At : https://www.unreal-university.com/courses
👉Get My Free Unreal Engine Beginner Course : https://bit.ly/46mUWMr
In this video I go over how to Make Animations For The Unreal Engine 5 Mannequin
#Animations #UnrealEngine5 #Uisco
If I add a bone to a skeleton using unreals new skeleton editing plugin, how can I then add that bone to my skinned meshes that are using that skeleton? (I only got it added for the first skinned mesh that I used to add the bone, but now I want all the other skinned meshes to also recognize that new bone)
Are you able to add procedural foot placement into a premade animation? Say for a spider to place its leg on the closest surface, but the rest of the animation to stay the same?
Does a flat line in a ABP mean that:
The connected nodes behind it are inactive and sitting in memory
OR
That the connected nodes are running their calculations but just not being applied to the final output pose?

i believe its the former-- i don't believe its computing poses that are unused
does anyone know how the game “the isle”devs have made it so that the dinosaurs can grow from a tiny baby to an adult while gaining new features seamlessly, i am working on a game similar and just can’t really figure out a way to do it
Question for animation experts.
When exporting a Animation Sequence as FBX (I am using it for collision in another DCC), is there some way of changing the playback or animation speed?
is there like a way to extract curve value from the I guess you call animation pipeline in the blueprint? Basically, there is animation within it that holds the curve value for controlling say Two Bone IK alpha. I don't want to resort to Control Rig because the complexity it adds to the blueprint just for a simple IKs
I am aware and using the get curve value from anim instance node although that gives me the curve value of past frame, not the currently processing one
hey, quick question: is it somehow possible to change the "Position Space" and "Rotation Space" of IK goals of an IK Rig on runtime? for example, exposing those variables somehow?

I believe if it doesn't have a bind option then it is not possible
try changing that manual input

the other options from that drop down menu are "Bone" and "ActorComponent". I guess that will set the IK Goal to their location directly? But that is not what i want

So i have exported my animation which has route motion however it seems even though I've ticked enabled root motion tick box in the anim it doesn't seem to be working
anyone have any idea
I've checked and my root bone is animated correctly
You can see here the root motion which seems to be there but when it's ticked it seems the root still moves away from being in place
https://www.reddit.com/r/unrealengine/comments/1g5r1ji/unable_to_make_an_animation_ue5/
Any help with setting up an animation? I've been stuck on this for 3 days.
Reddit
Explore this post and more from the unrealengine community
Can I pilot my character's movement component while sequencer records the animation happening?
Essentially Play in Editor while recording end result animation.
Can anyone help with this please

the end loc for the motion warp is there
however it seems it keep warping the player on top of the vent not within it
just beofre the move I'm setting the capsule half height to 35 and to flying mode and not collision on player
yet it still doesn't seem to want to work
Question for animation experts.
When exporting a Animation Sequence as FBX (I am using it for collision in another DCC), is there some way of changing the playback or animation speed?
I've tried changing the Rate Scale before exporting..
But after exporting as FBX and then reimporting elsewhere, this value resets for some reason.

I got this weird snappning issue, in the physics asset editor. whenever I simulate, some bones just snap to the origin of the root. does this look familiar to anyone?

the problem is apparently known already:
https://forums.unrealengine.com/t/some-simulated-bones-snapping-to-root-bone/135379/10
Does anyone know of a way to export a Geometry Cache as FBX or Alembic from Unreal?
Someone else had the same question
https://forums.unrealengine.com/t/exporting-geometry-cache-from-unreal-engine/1599420
Epic Developer Community Forums
Hi everyone. I’d like to export a Geometry Cache from Unreal Engine, as an alembic or fbx file. Is that possible? If not, are there any plans to make it possible? Thanks!
Hey guys just wondering if anyone knows how to remove a mesh from a "master pose" setup at runtime? (should i ask this in bp?) EDIT: for anyone in the same situation you need to use preset skeleton component refs as children to your master skeleton, instead of spawning empty sk slots and setting those.
For anim layers, how do you actually use / take advantage of inputs? I.e. I can't find any way to access or set something to this data inside my anim interface function

Seems like the passed in parameters only work for Linked graphs and don't actually do anything for Linked Layers (although raises the question why the interface lets you specify them then). For anyone else searching and hitting this - a workaround that functions is to implement ThreadSafeUpdate override in the content BP doing the interface override, and set your variables from the main BP
hi! I have a huge amount of animations where I would like to rotate the weapon bone and save the animation. Does unreal have any sort of batcher that can do this, similar to how the retarget batch process thing works?
Is there a way to get these two nodes to work from outside of AnimationBlendStackGraph? The screenshot is from 500+ Game Animation Sample project.

why is my animbp affecting all characters? I made a blendspace that my character gives values from CharacterBP but the enemies do the same.
Do the enemies use the same animBP?
yes
but then again they have some stuff there that are not affecting, like walking and so on.
It would depend how it's setup. If they use the same animBP then they'll function the same. Hows are you using the blendspace?
I have a general overlay state and before output animation pose, i put a blendspace player with my ao.
Sometimes it's best to show it than tell it. 🙂

So yea, the aim offset will still be used by everything that uses the animBP. I'm not sure what ALSBase is though but the animBP will attempt to get a value from it regardless, if it's not found (invalid) it'll probally just use 0.
yes this is the base char bp alsbase
so how can I apply the Aimoffset for "owner"
like player will do whatever he does and enemies are not affected, and also if one enemy does it other enemies will not?P
would be shit to make animbp for every enemy
What is ALSBase? is it a component on the character BP?
als base is the character bp
Ahh ok, how does that value get updated that you're fetching? (UDAxis?)
for now its just a variable in alsbase that is hard coded to 50 to test
als base has children of ME (player) and enemy child
so i could fetch info from player, but what to do from different enemies?
You'll need to have some logic that will update the value accordingly regardless of if its player controlled or AI controlled. What does the value represent? The pitch?
yeah pitch
but like if it is ai controlled how can i control on what individual enemy will do?
For now, just check if the character is locally controlled, if not, set the value to 0. This value however would most likely be the pitch between the AI character and the target (what they plan to shoot at) but how you want to define that can vary, especially if you're using perception components.
what you mean locally controlled?
none of this makes sense 😮
I dont understand why everything works for individual characters but when i slap aimoffset it starts to affect everything.
ahh, sorry, my bad. I was not doing cast on get pawn owner.
There's a node called 'IsLocallyControlled'. It just states if it's controlled by the player.
yeah all were controlled in orderly fashion, problem was an skipped owner cast on animbp init
Does anyone have any ideas on how best to do a foot plant type thing? Where when actived the feet stay where they are. I currently have a control rig setup so I can provide it with a transform but I'm not sure on how best to get it to it. I was thinking an anim notify state so I can define in a montage when it should plant but I'm not sure on the best way to get it from the notify state to the animBP. :/
What's the data calculation pipeline for animation curves? So if a face is running an anim sequence that has 10 curves, does this "run" the curve mapping anim asset 10 times per tick?
There is a mapping pose asset, but I'm not sure how it plays in here.
hello, i am looking at lyra, i am trying to understand what node is, is node the same as the function parameter? i've been trying to recreate this but i can't get my animations to play and i think its related to what my node is

i am looking for someone to help me rig, and create procedural animations for a dragon
Follow the outcast game dev locomotion tutorial. Warning - lyra is very convoluted and annoying.
I've made myself a simple version of it, but what I am trying to do is get animation layers working, I put logic to start animations in the layer but I can't get it to play so I was studying lyra
Question about weapon animations in the marketplace: does Epic want my weapon animations handled in an Animation Blueprint or is that optional?
I'm currently trying to implement a turning animation for a stationary enemy, and i don't exactly know where to start. I've looked around, and the only thing i've been able to find is a turning animation for a moving player.
the reason it's giving me trouble is because i want the enemy's legs to step once he rotates past a certain point, and i want him to be able to rotate fully around in incremental steps. if anyone knows how to do this, or needs more details, ping me! :)
oh, also another thing. the enemy has to be able to act while turning. that's the big thing.
thanks in advance btw, and if this is the wrong channel lmk
guys, how do I make walking animations in motion matching use the root bone speed?
is there a way to remove unnecessary keyframes? this animation has 57 float curves used by material, most of which in many of the animations for the character stays the same throughout the animation. This animation alone weighs 2.5 MB

what I mean by removing is by automatic means, I know I can remove them manually
I have logic setup to check for the closest interactable object. However when my animation plays via animgraph it seems to disable all the overlap and collision detection. Anyone know how i can prevent this?
guys, My idle animation is playing at high speeds, but nothing is set to do that. I'm using Motion Matching to set up animations
I made a free python tool to auto-weight fingers for Maya if it helps anyone
https://github.com/Vaei/AutoFingerWeight/
Fuck yeah python
I'm glad someone likes python but I truly detest it -- it's just that the other option, MEL, is so much worse 
??
Ever play around with Python in UE? They release skel mesh editing tools in 5.3 and theyre kinda fun to play around with.
Is there any reason why would additive anim montage play at half the strength or so?
Combining the base and additive anim in ABP works as expected.


Ah, it was the blend-in and blend-out on the montage
Yes, but it always ends the same way. I go back to C++ because python doesn't have what I need exposed. So its faster to just start in C++.
The skeletal mesh editing tools are great, its clear they are going to replace Maya. I did actually extend ue5-main to implement a transfer attributes between poly groups at one point, but seems 5.5 will have something like that anyway
hello everyone, I need some help :(. I have my old model with animations that I made in Blender. I realised that I forgot about making few animations and I tried doing them in Blender and importing them to UE with selecting the same model old model. Unfortunately for some reason UE won't let me do it because UE says these are not the same rigs. I didn't change anything in model or it's rig so they are the same. I tried doing control rig for this old model but for my understanding I can't use animations made with control rig with my old animations from blender? Any tips how can I add/make new animations for my old model? My deadline is getting really close (it's for my studies) and I'm stuck with this problem :(
hey i have this model i rigged in blender, but im not sure how to import it with the animations i made, when importing the fbx file it says theres multiple root bones,


can you show your bone hierarchy?

all the bones have to be connected in some way to the first bone
like that

spine is my main bone that every other bone is under it
in your case you have Bone, Bone.007 and Bone.008
instead of 1 main bone
so make one of them a main bone and put the rest of them under it?
yup
like this then?

i think it should help
when i imported to unreal the animation sequences it made are blank
in blender they are fine?
yea
when re importing and trying to make an animation blueprint from the animation it says result was visible but ignored

i got it to show but theres no tracks

I also have problems with importing animations right now and even texted here before your message so right now I can only guess what is the problem
my animations from blender also have no tracks
but in my case they play fine
i can get this one to play, but not in a blueprint
when setting it up in a blueprint to playe the animation it all is no longer visible
I forgot how I did my blueprints but I used this tutorial series

In this series of videos we will be covering the animation blueprint in depth so you can master your animations and make some moving characters for your games.
In Part 1 we take an introductory look at the animation blueprint asset and how it works and its state machines.
SUPPORT ME
Patreon I https://www.patreon.com/ryanlaley
Buy Me a Coffee I...
sorry for not being able to give better answer but maybe this tutorial will help
i have done that for my character already this i just wna preview my animation on the mesh inside unreal
w the post processing n everthing my game has already
Theyre kinda mid. They wont replace maya anytime soon imo
Not any time soon, no, but eventually (I welcome that)
Can someone help me? My character starts in the running animation instead of the walking animation, but once the running animation is toggled it goes to the walking animation, which is fine. I guess it's just the start?
Will delete if not allowed. 🙂
I managed to figure it out somewhat. I needed to change the input modes for the walking animation specifically. 🙂
anyone know what the solution is for this problem? My preview is showing differently from what is playing in real-time. I am playing an animation montage created from a sequence that is retargeted (from an animation from the marketplace) towards this mesh. I am using the unreal 5 skeleton.

hi there - is there a way to force root lock on an animation blueprint?
i'm using a quest headset to control the head rotation but turning off root motion doesn't seem to stop the head from following me around
i am also using the third person character anim bp and third person character bp
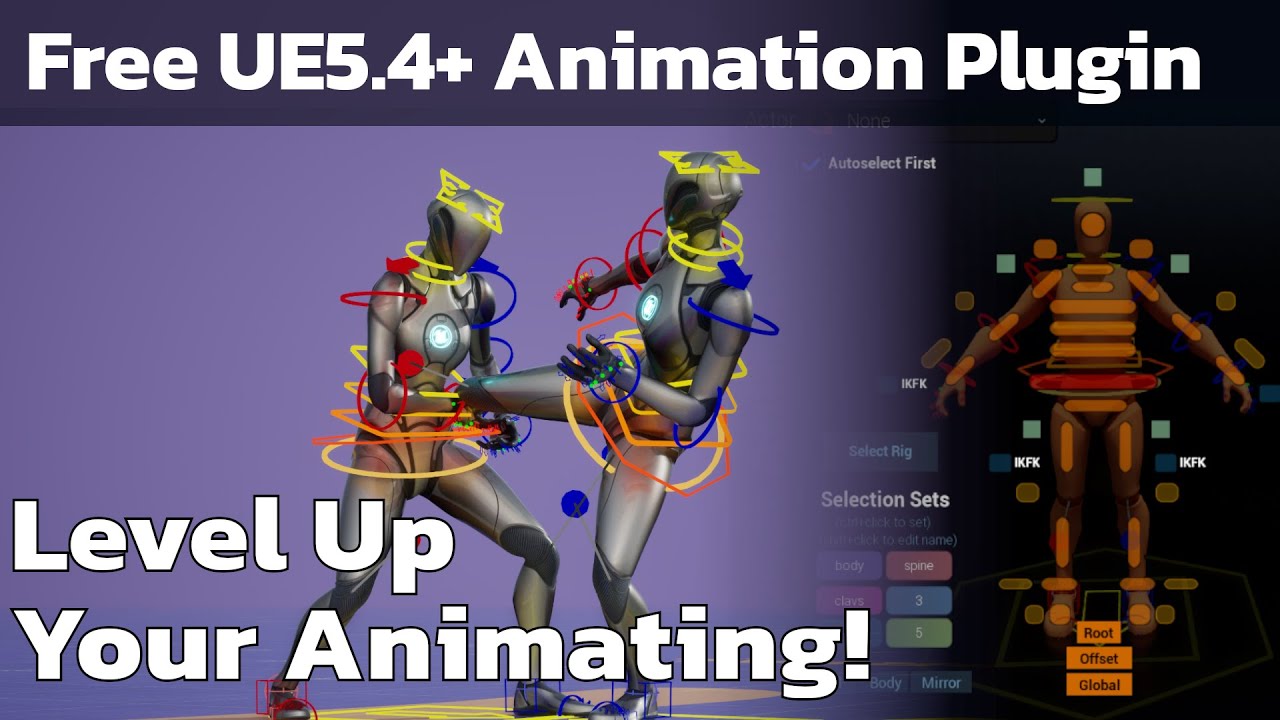
Free unreal 5.4+ plugin - Anyone can animate!
Threepeat Anim Tools (Tatools) github repo: https://github.com/threepeatgames/ThreepeatAnimTools
parkour roll vault tutorial: https://www.youtube.com/watch?v=SKGYWBJRfqo
standing precision jump tutorial: https://www.youtube.com/watch?v=k3BsZL6P510
free weekly animation announcement video: https:...
anybody know why all of my animations being imported into UE are capped at 39 frames? I've verified that each animation was exported via Blender with the correct number of frames for each specific animation. In UE5, when I double click the animation asset and it opens up the animation window, the Asset Details panel does have a Number of Sampled Frames value of 39, but it's greyed out and I can't adjusted it. No idea if that is what's causing it or what but it seems possible since it's the same number?
can you check in your import settings if you are importing a set range of frames instead of the full animation?
I've tried both "exported time" and "imported time". I guess I could try to set the range according to each animation I'm importing. Just a bit of a hassle.
Eh that didn't work either.
When I double click the animation asset and this timeline shows up here, I am able to se the numbers to the left and right, but this center one I can't change. It's the playback range stop time. So it makes sense that it would be cutting off short, but why I can't set it correctly.. idk.

If you have not already looked at https://github.com/poly-hammer/BlenderTools I would check it out. For some reason it's helped me a lot with any of my animation import issues 🤷♂️
GitHub
Blender addons that improve the game development workflow between Blender and Unreal. - poly-hammer/BlenderTools
I'm trying to get the reference of the ai controller that is set inside the character child blueprint inside the animation blueprint because I have a check for when the "is Jumping" variable is true or false
the Cast To node returns true, but the weird part is that the Print String does not show the name of the ai controller after "Found AI", and ending the simulation brings errors about the is Jumping variable, saying the promoted variable called "AI Test AI Ctrl" is null
whats the proper way to get and reference the ai controller from the referenced character blueprint inside the animation blueprint?

I tried with "Get ai Controller" from the promoted character blueprint variable, and casted it to AI Test AiCtrl node and it was returning Cast Failed
hmm
did some look up, and it appears its an issue
ai controllers can't get referenced in animation blueprint?
interesting....
HI, Im using Lyra project and I'm trying to make character lean firing logic for montages. I have weapon fire montage that's playing on FullBodyAdditivePreAnim and I have managed to make Lean + ads to blend together but whenever I fire a bullet from lean animation, it will play default animation (not leaning) and will override the lean_ads animation. Is there any way of doing additive animation stack?
I tried of making another slot only for lean (blend only for spline_04) and when I play it's same thing. What would be best way of doing this? Thanks in advance
do you have to have 5.5 to get audio import option for metahuman performance? i'm following 2 videos and they show to change data source to 'audio' and it doesnt show for me
Hey I found a bug in the Game Animation Sample Pack where stationary mantles don't actually adjust their height to the proper location. Has anyone taken a look into this? Been trying to debug for a while now. I'm pretty sure the bug involves anim clip and/or anim montage setup for these specific animations. Video demo:
https://www.youtube.com/watch?v=DM6bOBTai90
Would be super grateful if anyone had some insight

Does Unreal Engine have more complex animation assets built-in engine after Unreal Engine 5.4 and locomotion system upgrade?
I'd look into the new Motion Matching setup https://dev.epicgames.com/documentation/en-us/unreal-engine/motion-matching-in-unreal-engine
Epic Games Developer
Use Motion Matching to create responsive animation systems, that select animation poses from a database, to match a dynamic system query at runtime in U...
hi there - im using a Quest Pro to animate parts of my body in Unreal Engine. One thing I'm having trouble with is turning off root motion from the animation. Setting the Root Motion mode off in the animation blueprint seems to have zero affect. Has anyone dealt with this before?
Are conduit and Aliases useful or they are just for "reorganizing" purposes in the AnimGraph ?
Question. Example is from an art blast for Outlaws.
The animation from 5 to 15 seconds involves a few decorative meshes drawing themselves into space. What is the best way to achieve this effect? The only way I currently know is to do an alpha texture that animates from one side to the other, but it feels a bit clumsy and I wasn't sure if this was the correct solution to the problem.
Also, is there a technical term for this for more successful googling?
So, I´ve had to reimport some rigs so they work with modular control rig and now I´m getting tons of crashes that seem to be related to animation assets or blueprints referencing the old skeleton.
I can´t even open the folder containing them to delete them, before it crashes.
I´ve dealt with this before by simply deleting the assets from the explorer, but then I had other crashes due to object redirectors missing etc.
So...is there a setting somewhere that stops unreal from trying to validate deleted asset references or something?
Where can I find this setting in project settings? I need to set "keep state" as default

If anyone needs it too. In DefaultEngine.ini you need to add
[/Script/LevelSequence.LevelSequence]
DefaultCompletionMode=KeepState
hey, how could i recreate this water effect and animation, i wna be able to either have it as an object i can add into levels and scale to fit, or have it be an animation i can apply to any water object mesh is there a way to do that?
Water planes are mostly scrolling textures in shader, that'd be the realm of #graphics
kk
in the control rig, whats the best way to account for the left/right rotational differences? I have a world transform that I'm using to move the hand. It looks fine for the left hand but for the right hand, it gets flipped upside and twisted.
Hey folks, do animation sequences to be used with motion matching require the curve data for foot speed and the like, as is found in GASP? If I were to use some animations from the market place which do not have this curve data, but which do have root motion, would things still mostly work? I can't seem to find clear docs on this in the motion matching documentation. Also, do folks know which programs / tools might be able to generate this data? I'm familiar with Blender & Cascadeur, but neither seem to have such a capability.
I'm hoping someone else in here has done this before and can help me figure out why mine is not working. So, the goal here is to have my AnimationBlueprintTemplate be usable as the core animation blueprint for 60 different characters in my game. These 60 characters all have the same animations (i.e. Attack, Special Attack, idle, Walk, etc) but all are obviously implemented differently as each character is quite different physically. What and when the animations are triggered is the same though, so one blueprint template should work. I used the Animation Layer Interface to define all of the animation layers, then in the Animation Blueprint Template's Animation Graph, I set the states to the layer instead of directly to the sequence player. And finally, in the child animation blueprint, the one that is specific to each character, all I have to do is override the interface layers with the correct animation sequence. Or so I thought. It seems that the overriding is not working and the animation set on the Animation Blueprint Template's interfaces is what is actually playing. Does anyone know how I can fix this issue?


I should also mention, in the provided image of the child blueprint, you may notice I have two sequence players, one is the incorrect one that is hooked up, this is intentional for debugging as this is how I first discovered that it was playing the animation from the base blueprint template instead of the child class.
I have been animating in UE5 with the animation sequencer using a characterBP but after I updated the skeletalmesh that was being used in that blueprint I can no longer see the option to "Bake the Animation Sequence" ?? anyone run into this before?


hey im working on setting up my idle animations for my character, im using ones from mixamo, ik i can set up random ones, but i was wondering, is there a way to make one of the ilde animations play a sequence of animatins? like i have one of the player yawning, and one of the player going from standing to laying down, im trying to slightly recreate how in mario 3d games if u leave him idle long enough he goes to sleep till u move the contoller again, is this possible?
I'm new to creating animations or honestly anything to do with unreal 5. I need to make an animation of a tornado and I do have ideas of the video I want to make. However, because I am new I'm not sure where to start and all the videos on youtube seem to specific for making shooting games. Are there any tips on where I should start when trying to teach myself the program more making an animation of a tornado in a mid west town? Something prefferably free or cheap. This is for a class in school so I don't want to spend a lot of money on courses.
seems like it would be a better idea to start with Niagara
Okay, I'll have to look into it, I have never heard of it before. Thankyou for the suggestion
Niagara is Unreal Engine's Visual effects system. There are probably guides on create tornadoes or similar systems
Yes Im having An issue with rigging,When Placing Rig Down The Fingers reset (On the Orange Mech) And the red Mech Is Fine I cant make animations with the rig mostly becuase it jams the fingers when using rig,any fix or setting im missing?


Notice the red one is bigger but thats fine lol,But Notice its fingers are actually there.
the rig version (Orange One) Has the messed up fingers
The Rig Itself looks fine in viewport when placed and make an animation fingers are jammed just confused

Hi everyone
My animation dont launch at all with the montage

if I play animation only ( no montage ) its working
and my printstring is working
I would like to find why my anim montage like this doesnt work before doing the montage itself to desync legs and arms
I think the slot are only for blending for desying arms and legs for exemple, no?
because in my tutorial, he is able to launch the animation, wich is buggy, but working, without adding a slot?
otherwise im lost
pretty sure slots are required to play montages


Hello guys, in this quick and simple tutorial we are going to learn how to blend attack animations with your walking animations (Locomotion) from a specific bone in Unreal Engine 5.
Follow me on Twitter: https://twitter.com/GorkaGames
Subscribe to the channel: https://www.youtube.com/channel/UCv_n9oioNF6OpzR2dt6E4xg?sub_confirmation=1
unreal e...
did you watch the entire video you linked, they are using the default mannequin ABP which has one and it even shows it
Ohhh the defaut mannequin has already one pff okay i didnt get it lol thank you i probably gonna find solution from that
Still have a problem because I dont understand how can I adapt the tutorial from UE mannequin to mine because they are using different things
im not sure what kind of things should i look for
the basics should be the same, we dont know what or why yours is different
Because my problem right now is not to desync the legs to the arms
but to be able to launch the animation montage, even buggy
then your aninbp should match the same basics of the one in the video and in the templates. we dont know what you have


why use the blend if you are just trying to test the anim montage?
also does your montage have a slot?
Because I try to follow a tutorial because im a big noob but im not sure to understand how to do
I want this :
When I press RMB = Launch the animation punch AND desync legs and arms

but im to able to recreate the situation in the tutorial

have you gotten the montage to work? if not you should work on that first

plugging in a slot directly into the output pose and test it

the slot node outputs whatever is currently playing on that slot, so you plug that right into the output pose and if you play your montage using that slot it should play
or its already the case and not working, or i dont understand 😦
this is from my main character bp

this is from the montage itself, with the slot default

this is my ABP

Oh i think i got it now
gimme a minute please
when i do this

nothing work
BUT
when i do this yes

so i tried this instead, now im able to punch, but of course i didnt desync legs and arms yet
i gonna try

progress
but weirdly, in the tytorial, its in the other way
Okay I made it working, thanks for make me notice my missing info
And Can I edit an animation about 1 bone rotating?
In my animation, there is no " Spine " on this skeleton, so the arm is related to the pelvis directly, and when I Punch, the whole body rotate a little bit, I would like to keep the same animation but removing the rotation movement from the pelvis? is that possible?
The animation
How its looking
you can use the skeletal mesh tools in the editor, expor it back out to fix it, you could use layered blends in the anin bp to only apply the punch animation to certain bones
Looks good,The feet need fixed though

i tried to not make the pelvis moving with the blend, but then it stop the whole animation
By selectinc calf instead of thigh
Looks better immobil but have to adjust for walking lol
the tool " Blend depht " fix the problem kind of
Why is this happening in maya
Hello! Has anyone experimented with or think it could be a good idea to use motion matching for non standard traversal, like rope swinging? I know it's typically used for character locomotion and even traversal, but I'm curious if it could work well for a swinging mechanic? Anyone have any thoughts? Thanks!
Hi there. anyone knows where Locomotion is for the Idle/walk/run in ALsv4?
hi when i import my keyframed animations from blender into unreal they make the mesh go invisable instead of playing, how can i fix that?
you seem to be grabbing the bone directly, not the controls set by the rigger. If there were no controls, grabbing the hip would bring all the other bones with it, sure, but when controls with complicated connections and hierarchies are made, you need to use those controls to pose the character, not the joints/bones.
Has anyone ran into an issue with a linked anim layer running BEFORE you even set LinkAnimClassLayers in the Anim BP where the linked anim layer is used in the graph? (5.4.2)
Every tut on them I've seen has them not firing until you execute that function but mine is showing the animation running in the editor when it shouldn't be
Oh hi there 😀
(Lyra aim offset is bugging, used a layered blend per bone to remove root/pelvis rotation influence. Not sure why, settings are perfect)

All the Lyra unarmed aim offset animation poses have the Root bone rotated 90deg. But no other animations in the set. So annoying
We have a couple of sockets that seem to get initialize in the wrong location some times... it's not all the time only sometimes, but the way it presents is that all the sudden the weapons will be down at the root of the mesh. I can't seem to figure out how they are getting moved down there, any ideas on what could cause that?
In Deformer Graph there is possibility of using Atomic operations for Int arrays. However by default the array is on every dispatch set to 0 which makes it not good if wanting to use AtomicMin as the value would never change unless using negative numbers .. it works fine for AtomicMax but it would be nice to have option to set the initial value when using Atomic is allowed.
Any thoughts on that?
Hello guys im using root motion animation with skeletal mesh that i make my self and it work well especialy with motion warping super cool but i have a problem currently, one of my interaction with my character and npc use a root motion animation mutiple time and in one specific case it dont work when it always work as expected on other case, for it to work correctly in that specific problematic case i have to set the movement component of the ai using it as flying and i suspect the problem to be about gravity enable or not cause when in flying mode its no longer affected by gravity, and by using a show collision command i saw that the capsule component of the npc doesn't follow the root motion animation just in that specific case, fyi i also disable capsule component collision during the animation cause im using motion warping and it work better that way but it should absolutely not get the capsule to not follow and my anim blueprint is correctly set
its an issue for me cause even if it work by using the flying mode for the npc there is still something weird happening where the npc walk on something when the problematic animation occur to reach the motion wxarping target and the only real weird thing about all of this is that capsule component not moving with the mesh or the skelet
Is there a way to share notify events? For example, if I make a notify on an animation and call it IdleFace, even though all the characters have different idle animations, they each use a notify called IdleFace. I'd like to then create the logic handling that notify event in my shared Animation Blueprint Template so that I don't have to do it for all of my characters. Is this possible?
hey all, how do i share an animbp across multiple characters? i want all of the same animgraph but different animations per state. i've made reparented animbp and duplicate animbp but the reparent does not show me any nodes to replace and the duplicate one isn't great because then for any changes i have to redo every single duplicate.
how have you guys handled this before?

eh, i guess i could bind it to a property on the character
well I can see this channel wont get me anywhere...
anyone know what this error is about? i'm trying to assign a montage to a field on a blueprint and it's not letting me for some reason

im curious how do u call ur animation and how is it setup overall ? ur mesh are splitted and they have different rig ? and u call the animation from ur sequencer ? how is that setup ?
i dont do sequence thing so idk how it work but i do real time for game so im assuming u can put the mesh tied to ur space ship and then call an animation on it when needed (im clueless but curious) ? Right now u have an anim asset tied to ur ship ? i dont understand
u can make an anim notify bp idk if its what u want ? with ur own logic each time the notify is trigger ?
yea I figured it out. Thanks.
any ideas on how i can fix this? importing from mixamo works fine but not from blender
plzz help: animation sequence asset glitch (advanced animation)
Hello,
THE ISSUE (front gear example): https://imgur.com/a/9KqvPTM
I am having weird glitching in my sequencer for my 'Animation Sequence' assets. In the attached v example (one of many) the front landing gear keeping glitching to open and close, you can also see the front wing glitch quickly in the beginning. The animation sequence asset is an animation going from open to closed. I have already changed the properties of the track to "keep state". It is almost like the engine is not keeping track of where the animation should be while it is not directly playing. To fix it in my viewport, I am having to scroll through my sequencer timeline backwards to "reset" everything. But the issue is showing up in my renders too! Nothing online shows something similar. Any tips??
Little bit info on the set up: The ship's textures are very high-res and unfortunitley it is very high-poly. So, due to hardware limitations, I had to section off the moving pieces (gears, wings,.etcc) from the body of th ship. The sectioned off pieces where then rigged and animated in blender and imported as a skeletal mesh with an animation sequence to UE. The re the attached to the body of the ship for overall transformation.
Any guidance is appreciated. Thanks so much.
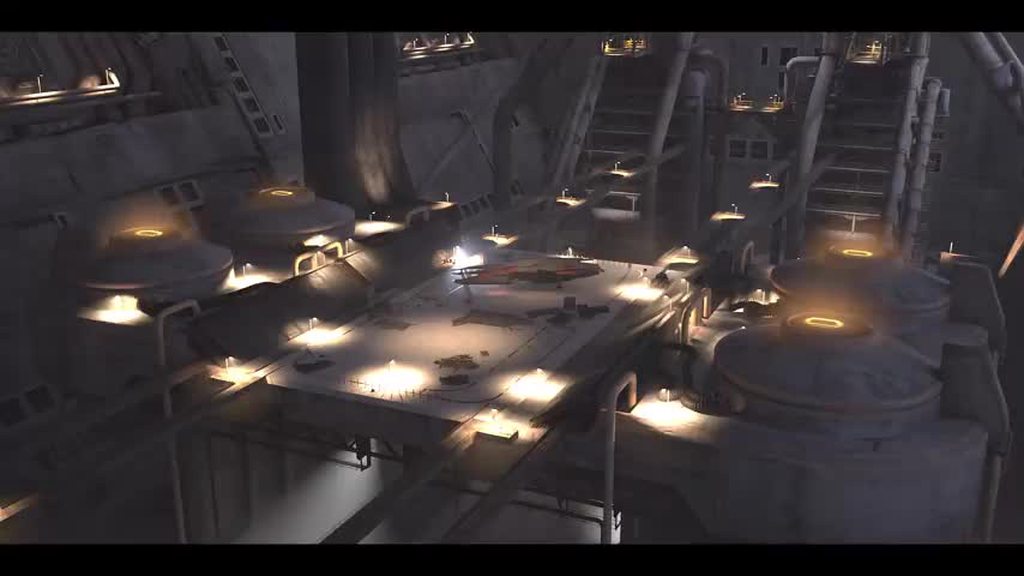
hey i asked u more info u dont want help ?
ofcourse
any insight is super helpful, ask away
how do u call ur animation in the sequence ?
so for example, the front landing gear is a skeletal mesh on its own, the animation is made in blender, and then imported into UE as a skeletel mesh and an animation sequence
from there it’s the normal process off tracking the skeletel mesh and adding the animation to the sequence
what do u mean by tracking the skeletal mesh and adding the animation ?
same thing for the front wings and the door
in the sequencer? just regular + TRACK
so u have ur front landing gear as a skm attached to ur ship and when its time for it to move u call the animation on it ?
thats correct
it’s a child of the ship as well
so when i do transform animations on the ship it all moves correctly
the animation is set up correctly it plays correctly
it just renders with these glitches
and they have independant skeleton ?
yes, the gears and wings do, theyre completely separate objects, the body of the ship is a static mesh
had to break it up cz of the highpoly and high res textures were using
sure i mean that should not pose any problem u can even have all ur piece separated and tied to the same skeleton
right
it’s definitely glitching i just cant figure out why
i was gonna export a much longer animation from blender (as long as the sequencer) where most of it has not movement, on the gear for example. That way it covers the whole track and doesn’t have to “reset”
but i would rather find the actual problem 😭
so no clue either?🤣
and this bug occur only on the render or in the editor too ?
sometimes in the editor if u click around the timeline. it’s like it needs to play through the animation in the viewport to update the poses
if tht makes sense
can u explain
u duplicate ur animation asset and u cut to have only one frame of each and u call them before and after ur animation of retract thing
and u make it loop
that’s clever
thats probably not a good solution lmao but maybe it will work
sounds similar in concept to this^
i do that for thing when u have to override abp behaviour and ai behaviour
not sure if i need to be in here or #blueprint but im working on an enemy, i want to make it fly around the player and randomly stop and drop an egg, but im not sure how id set up the animations for that, i have this flying in place animation rn
u will have more answer in bp
kk ty
wats tht
its in my game i have an anim bp for my npc and its also running with a behaviour tree and i had to do this on one case
what i suggest should be easier than doing a whole animation for the whole sequence
i see
but ur thing is realy weird ngl maybe there is another problem
i’m making a movie, very little bp in my animation outside of shooting lasers lol
no relevant console commands or properties u can think of that’s relevant?
yeah that seem normal, also idk how it behave once u have call ur animation cause the mesh is playing the retract thing but after that it come back to his normal pose i m assuming that would have never work that way ?
its realy ur setup to call the animation and keep the current frame correct that have a problem at the start
ya we just see ur retract and take off
ya😭😭
im glad to hear im not tweaking though
i used sequence once to do a fun thing and i didnt had to call different animation etc so i m not an expert at all but it make sense that ur front landing come back to his form when no animation are running or maybe it should remain from the last frame that's still a but clunky to not set it urself try the first frame last frame
ya i think the engine is just having memory issues or smthn, cause it’s a very vram heavy scene and the ship (unfortunately) is very high poly
those animation sequences are not keyframes so i was thinking its just too many references for it
they are not keyframe ?
maybe theres a console comand i can run in my render settings that increases refresh rate or smthn
how u animate it ?
not the animation sequences, not regular keys in the sequencer
animation sequences is like when u download a animation from mixamo or smthn like tht
i just made them myself
they’re baked
from blender
i do all of this dw, but there is keyframe on the rig u have in blender ? cause u can animate in the engine with bp or even material
ya in blender its keyframes
its like this purple track in ue, uk?

is there a way to “bake transform” but for that animation track?
i think if i can get those key frames into the sequencer it will recognize the state easier
whats the state ?
like the position of the animationn
it just starts twitching between open and close at points where the animation track isnt playing
then when the animation is there it works
you see the front wings glitching in the first second for example
it’s rly weird
can u stream it to me so i can understand better ? no voice just image
yeah
one sec
Hi there, I'm wondering if anyone has come across this issue when baking a mixamo animation to a control rig. I'm in Ue5 and the skeleton was created with AutoRig Pro using the Manny Quinn skeleton.
Retargeting the animation goes very well and it plays perfectly, but when baking it to control rig the body_ctrl piece stays in place causing the arms to start behaving very wierdly. The first image is of the animation playing back and the second shows the arm stretching and the part of the rig that doesn't move.
Any help would be super apreciated.


Hello new question here. Im using UE4 Skeleton, but I want to use Metahuman face assets. Am I doomed or is there a tool I could merge the skeleton with? I posted some more info here with pics
https://forums.unrealengine.com/t/is-it-possible-to-use-metahuman-heads-on-ue4-skeleton/2083439/2

Epic Developer Community Forums
Here’s some more pics.
Has anyone ran into an issue with a linked anim layer running BEFORE you even set LinkAnimClassLayers in the Anim BP where the linked anim layer is used in the graph? (5.4.2) This is driving me nuts because it shouldn't be doing this from what I've seen
Every tut on them I've seen has them not firing until you execute that function but mine is showing the animation for that layer running in the editor when it shouldn't be, it behaves the same ingame, executing it before I even run that Linking function
Even checked Lyra and other examples and none of them have this problem doing the exact same thing I'm doing
Wondering if it's a bug or something
Google it and you will find many solutions.
I would like to use the Control Shapes visible in the Control Rig settings during runtime to adjust the character's pose. Is this possible? Which nodes should I use in Blueprint to achieve this?


I am developing a game where players dress up characters.
In the game, there’s a process where users can dress up the characters. To make this process feel different from traditional dress-up mechanics, I want to allow users to adjust the character’s pose freely and then dress them.
What I am curious about is how to implement a method to let users change the character's pose dynamically during runtime.
The idea I’ve come up with is to provide a UI that allows users to directly manipulate the character’s bones. Could you give me some guidance on how to implement this using Blueprints? Even if it’s just an overview, I would appreciate it.
Alternatively, is there a way to make the Control Rig UI accessible during gameplay?
I confirmed that it’s possible to move bones using Control Rig in Blueprints, as shown in the image below. However, the issue is that the UI feels too inconvenient. I want to create something similar to the UI used in Unreal Editor.

Can ANyone explain to me how to "create" an animation directly from UE ?
Or at least edit one
I tried to edit one but it keep a movement and so its not nice
I figured you guys know the most about skeletons in this server so:
A while ago, I accidentally imported skeletal meshes called feather-pen and suit and applied the manny skeleton to them without them being rigged so they each got a bone and it stuck to the manny skeleton since then. I didn't notice it right after or I would have reversed it, obviously.

Can I even remove these bones now?
they are nor skinned to the skin nor do they have any purpose
they were a pure mistake
and neither the feather pen nor suit utilize them. They were re-imported
Is there any unreal tool can convert a mesh animation to a VAT?
control rig is running too fast, is there any way to make it run smoother?
is anyone able to assist with idle/run animation questions?
within the control rig you may use some ways of making it smooth by making the FABRIK alpha slowly rise to 1 such as spring interp or some other ways that I may not be aware of, if spring interp can keep track of time so can you too I believe
the animation thread is kind of detached from the main execution thread. I don't understand it that much but it has to do something with multithread since calling some certains functions from the anim graph caused thread unsafe warnings
when i make a change in my blend space it doesnt seem to update to my character
any ideas why?
are you sure the connections are right within the ABP?
yah. when i deleted it in my state machine and readded it it updated
not sure if thats a bug or i setitup wrong or something
is there a ControlRig function to limit the rotation rate of a quaternion?
Hey everyone! I'm working on a game jam project featuring a tank-y rover, and I need some help with rigging in Blender. I want the wheels to rotate with the body, and the tracks to rotate with the wheels. Most tutorials I've found are either Blender-specific or focus on pre-existing skeletal meshes in Unreal Engine.
Also, my rover's wheels decrease in size toward the back, which makes the tracks narrower. Should I keep the wheels the same size for better track rotation, or is there a way to manage that? Any tips or guidance would be super appreciated. Thanks!

hello guys, does anyone know how to retarget skeletons for a bow? So I can play some animations for the mesh that I want it's skeleton to be retargeted
Can I do that from ue or should this be made on blender? Not very familiar with skeletons and such as you see lol
Does anyone know if something changed with Root Motion in 5.4 that would prevent it from working correctly or prevent Motion Warping from working? I'm having trouble with some root motion animations, a paired action that I want to motion warp to the correct positions.
I have retargeted the anims from UE4 Manny to my character, I used the auto rig setup, but with the root chain Translation Mode set to "Globally Scaled".
I see the root moving correctly with the red line. I checked
Enable Root Motion, the model continues to move forward but with the
root following below, which I believe is correct for UE 5.4 (but is
different than older versions of UE).
The characters seem to move correctly, but then motion is applied to
the model after the animation. Video Clip: https://youtu.be/XgX7zAixjOw-
Can anyone help?
There is also a node called alpha interp that may help
Yup, same here. I spent like many hours figuring out why .... deleting and adding the BS back fixed it.
Do notify event trigger if playing a standard anim sequence from the animBP or does it have to be a montage?
I've been following along with a tutorial to get some basics down and found this weird bug where the animation works for a while and then they break, if someone know what the cause might be then i'd be happy to share additional information about the setup. It's just that I don't know which information might be relevant to the issue.
https://streamable.com/wb040o


Turns out there is a setting to loop the animation that was off by default
how do you go about importing an animation sequence that only has one frame? I get an error saying my fbx has no valid animation takes unless I add a second frame to it.. highly annoying.
Animations are interpolations between keyframes, so you need at least 2
Hey everyone! I'm working with Cascadeur, and noticed with some poses these IK bones were by the feet (left) instead of how it normally looks (right). That's bad right?


If you use the IK bones then yes, they could cause an issue.
how to trim animation ?

Any idea why a Skeletal Mesh that is merged using Skeletal Merging works incorrect on Android when an APK is built?
right click on the timeline and hit "remove frames"
timeline being the top bit
thanks for the tip
Hey, I have a base skeleton with animations, and I have a sort of cape mesh with bones I want to use spring controllers on. However when I try adding spring controllers to the main animation blueprint, nothing happens
I'm using set master pose component
heyo, i was messing around with the modular control rig for a custom character that uses the ue skeleton and came across the issue below. Is this a problem with my skeleton or do i need to remake/redo with a regular control rig?

I feel like I'm missing something obvious... I have a character, skeletal mesh is set up, control rig set up in anim BP. I have some dynamics set up in control rig for my bones (spring interpolations) to wiggle things when the skeleton moves. However I haven't found the magic combination of checkboxes to get everything talking the same language
- Use Controller Rotation on the Pawn allows everything to point and move in the direction I'm telling it to, but the bones' dynamics aren't running (presumably because it's the pawn being rotated, not the control rig's control transform)
- Turning off Use Controller Rotation and passing the ControlRotation into the Control Rig via anim BP allows the bone dynamics to work, but I assume since the imported FBX is rotated -90 degrees all of the rotations are the wrong axis and pointing the wrong direction. I can do some manual math adjustment to the rotator in the anim BP, but the other drawback is things on the BP like the collision capsule aren't rotating with the rig
- Using control rig component had similar rotation offset issues, and I didn't really try super hard to fix them since it felt like I could accomplish what I need just with the anim bp
I guess I'm mainly wondering if there's a way to allow the control rig to be aware of the pawn's motion without applying the rotation to both (ie, bullet point 1 but the springs react to pawn rotation)
Anyone know why a character is intermittently moving forward at snails base, and other times hes moving fine?
any time i use apply additive in my anim bp it makes the animation huge and grow and deform but if i use either of animations by themselves its fine any ideas?
Check what it is additive in reference to
i got it now thanks
Finally figured this out... Had to do To world -> adjustment -> From world -> Set Transform
Was a pain but I got it, separate yaw/pitch bones for turret tracking
I have a cloth/hair physics asset for my model. It works when placing the model in the level in the reference pose. However, as soon as I use an animation blueprint, the hair stops having physics, it's just static.
What can I do to have hair physics with animations?
in control rig there is a node called “toworld” that takes a component space transform basically gives you the its world space transform, give it a try?
Ah just saw that you figured it out, nvm 🙂
Hey everyone I have a character and an animation pack I'm just not too sure how to start or when and to keep movements if I like them
And where do I start the animation
In an existing project or new
Is anyone available to help me
I fixed the problem myself: I just placed the "Rigid Body" node before the final pose in the anim graph and now the hair is simulating as well as the clothes (before only the clothes would use the physics asset). Here is the official documentation on how it's down (already linked several times in this Discord, too) https://dev.epicgames.com/documentation/en-us/unreal-engine/animation-blueprint-rigid-body-in-unreal-engine?application_version=5.0
Epic Games Developer
Describes the RigidBody node and how it can be used as a lightweight physics simulation inside Animation Blueprints.
Furthermore, these two options helped preventing the hair from wriggling around too much:

Did you eventually figure this out? I'm trying to come up with a lip sync solution that binds to streamed audio (VOIP, it's a multiplayer coop game). All the solutions I find offer only offline or audio file-based pipelines (Audio2Face, Ynnk, OVR), none of them allow for VOIP integration.
Would anyone be able to help me? I want to have a locomotion system with an interchangeable animation set for the player. For example the player can choose different walking animations, different idles, different jumps etc.
What would be the best way to accomplish something like this? I was thinking of maybe using a data table to store the different animations but I have no idea how to set up a BP to update the animBP with this datatable. Im not a beginner but im also not super experienced with stuff like this either.
Is there a simple tutorial someone could help me with to change an idle for example? Then i could use that same process for everything else I want like jumps, walks, combat stuff maybe too so players can choose fighting styles
I havent been able to find anything on this so help would be greatly appreciated. Also im not sure if it matters or not but I still havent decided if I want to use GASP or the third person template as a base. Im not sure if that would affect how this should be set up
no, i had to give it a brake, i am still looking
a good place to start is linked anim layers. you can set these up to essentially hot swap between animation sets and is heavily used in Lyra to handle the animation sets for the individual weapons. I'd recommend starting there.
Ill look into it. Never heard of linked anim layers before. As I said before Im not super experienced with stuff like this. Do you have any recommended documentation or tutorials that would help me best understand and implement my goals?
There's some documentation and a livestream talking about the implementation in Lyra. https://dev.epicgames.com/documentation/en-us/unreal-engine/using-animation-blueprint-linking-in-unreal-engine
https://www.youtube.com/live/5O-nTNMB19Y?si=nLxNegyv6lpQsb1Z
Looking through the Lyra sample can be dense but it's a good example.
Epic Games Developer
Illustrates how you can dynamically switch between subsections of an Animation Graph.

This week we’ll be sitting down with two of our own incredible animators who helped shape the Lyra Starter Game as we know it, and walk through the process o...
Anyone have experience using Riggify (blender) and root motion? It keeps generating an extra bone making it impossible to apply root motion.
They say that I should change the name of the armature to "armature" but if I do that it popups an error saying that I can't have multiple root bones.
Blender makes it particularly challenging for root motion. I'd recommend checking out this video if you haven't already: https://www.youtube.com/watch?v=YbWfoyf4MqI
When it comes to the multiple root bone issue, my guess would be your hierarchy is not nested under the root bone you're exporting which will result in that error. Do you have a screenshot of your blender hierarchy?

In this video I will show you how to correctly export a character from Blender to Unreal Engine 5.
Common mistakes include issues with the scale of the root, joint orientations and differences between bones and joints. In this video I will talk about everything you need to know to correctly export rigged characters that follow Unreal Engine sta...
Thanks for the reply. I'll quickly watch the video.
Here's a screenshot with the hierarchy.

In this case it will depend what is being exported to the engine. If the export contains all the bones, not just the deform bones under the "root" hierarchy, then unreal will interpret any other bone at the same level as the root to be a secondary root.
Basically, I need to put all these bones under the root?

I understand why that happens but I can't find anywhere how to do that. Is it maybe in the video you shared?
I would think rather you dont want to export those bones at all. The Eye_control and Mouth_control seem to be custom ones you have made, but the MCH bones you certainly don't want to export since those are for the Blender rig not the animated skeleton.
I'm not exactly sure what should I export then. I'm kind of new to blender.
You'll want to make sure you have Only Deform Bones checked because the way Rigify works is that you have deform skeleton which is what your mesh is skinned to, and the rigify toolset creates a bunch of controls and helpers. These controls and helpers are all considered bones in blender, but you dont want them exported with your skeleton because the engine expects a single clean hierarchy of bones.
You can technically have non-skinned deform bones, an example of which is IK bones in the engine but i think dont worry about that for now if you're just trying to get a character into the engine.

And turn off Add Leaf Bones, they are also unnecessary. There's a section about leaf joints in the previously linked video
I tried selecting only the bones root and the controls which should be under the root bone, but even then they're still in the same level of root.


I believe selecting the objects like this isn't actually working?

You'll want to rename your armature object from rig to Armature because that will add an extra node above the root.


IIRC exporting Selected Objects applies only to Objects in Blender, meaning your Armature object and your Mesh object. If you want to isolate particular bones you will need to ensure that you have Only Deform Bones checked, and then any bone which is intended to deform needs to have Deform disabled. I believe rigify should handle this for MCH bones, but you might need to check your custom bones.

My custom bones had that option checked and now they're gone from UE, which is good.
My only problem keeps being the two root bones (image 1). If I name the armature object as "Armature" an error popsup.


The MCH bone there is likely the culprit, since it's at the same level as the root. It looks like there is skinning information assigned to that bone, which shouldnt be the case, since all the skinning should be on the DEF (deform) bones which rigify generates. The solid bone icon shows there is skinning information on this bone, an outlined bone icon means the bone exists but there is no skinning information.
How can we change a sequence total frames? Insert frame before/after does nothing and can't find in the docs a way to do it. Thank you!


Blender or maya
yeah 😦 Thats what I'm working on right now.
Thanks!
I have animated with a control rig - I then bake it out as an animation asset to put on skeletal meshes. In my sequence where I first animated it, it loops, but in the animation asset it does not. All default settings on the bake. Any ideas?
Hi all! I'm launching today AdvancedPickerFX for Unreal Engine 5 Character Animation, free and open source Editor Utility Tool, download at https://github.com/DarknessFX/AdvancedPickerFX

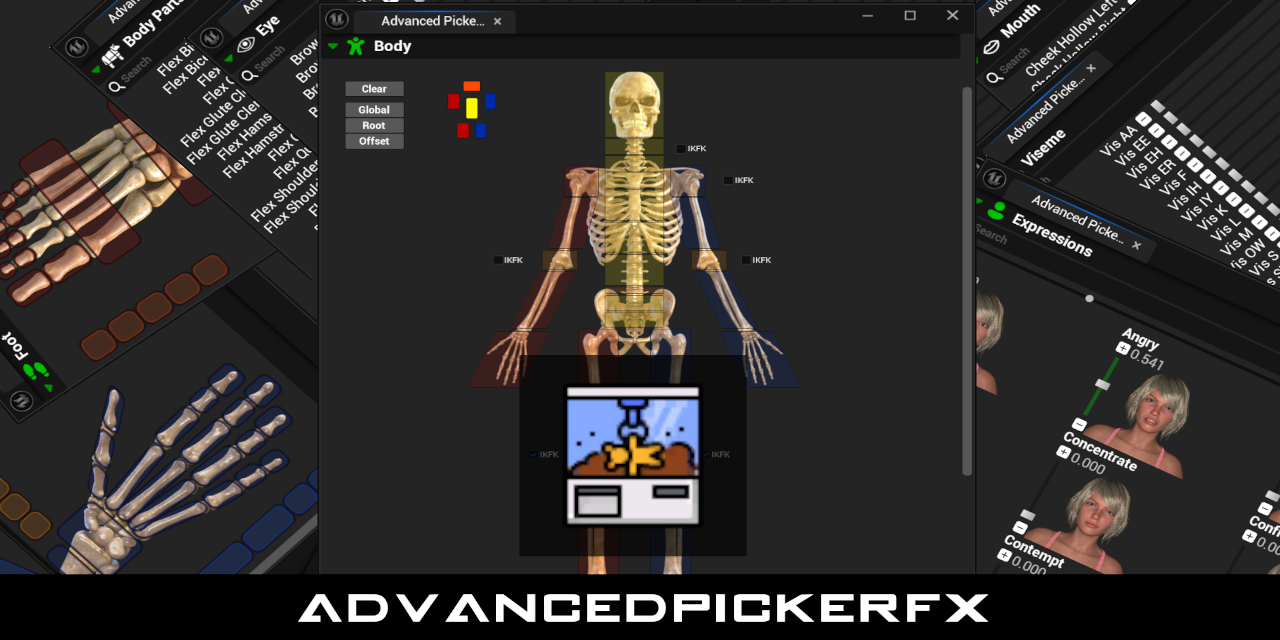
GitHub
UE5 Editor Utility Tool for faster character animation workflow. - DarknessFX/AdvancedPickerFX
Thankyou for posting this, was exactly what I needed to sync two different animbps together
Is it possible to make control rig not normalize rotations? I have a spline that I want to be twisted, but control rig seems to be normalizing the rotations?.. It's not an issue in the level editor.
Hello Guys please i need help with this animation issue. I tried blending animations form 2 different source. One is Ue5 the other ue4. Any idea on how to fix it? UE5.3
glad it helped!!
But it seems i cant choose the previous animation cause it doesnt work, it play the last animation
You can look at the node you suspect is normalising in the source code to see what math it actually uses , it's generally called RigUnit_x
are there any good crash courses on basic animation? im trying to animate a door moving upwards and dont even know where to start
Hello guys, any idea why an additive keyframe for foot location transform would not affect the character but the rotations would work?

Hello guys. Has anyone had success in the motion warp pipeline using the warp point anim provider and assigning specific bones instead of working from root? I cant find a singel tutorial for it, and googling-fu only returns people unable to solve it on forums. I guess warping root and using control rig for IK will give decent results, just frustrating when epic leaves features hanging.
is control rigs modify transforms node in override global mode expensive performance-wise? I have some 3rd party animations where 2 handed tools are used, but alas one hand positioning is always off so I was thinking about putting a socket on a tools static mesh and then, during an animation. just use this control rigs FABRIK alternative to glue the hand at the socket, but I wonder if this is considered a bad approach for performance reasons... 🤔
Is there reason why in control rig GetCurveValue has correct Value but wrong Valid (should be true but it's false)?
Hi, I am trying to create logic so that during the grab animation, the hand moves according to the offset. The problem arises when on Begin Play I give the player the transform of other actor at the level where the player is to turn, but the player keeps looking (from the waist up) at the point 0,0,0. I made sure that the given location goes to the input of the Control Rig node in the animation blueprint. Do you have any ideas?


In Control Rig View animation applies to GoalTarget offset and it looks fine


Weird question where I'm not entirely sure if I'm even asking a useful question, because I'm starting from nothing.
Wanting to start trying to learn how to make low poly models. Is there anything I need to know/look into/keep in mind before I start learning how to make something that looks right in Blender or whatever, to make sure whatever I make can then be rigged up and play nice with unreal?
Or can I just operate on the assumption that if I figure out how to make a humanoid that's roughly the right shape that I can get it to play with the unreal skeletons (easily or not)?
Can anyone help me? I've got a crouch walking blend space 1, at keyframe 0 I have the crouch idle, and at keyframe 300 I've got the crouch walking animation... Whenever I test it out, the feet move (as if doing crouch walking) even though it is supposed to start off as crouch idle. Anyone know how to fix this?
Hey, currently i have a problem with Blender Animation exports, Everytime i import one the Target Frame Rate gets set to 60 000 fps. And i cant find a way to change this. Does anyone else have this issue ?
- Export and Reimport of the animation doesnt fix it
- lowering the framerate in blender only lowers the platform Target Frame Rate

I want certain skeletal meshes to update at a lower framerate when far from the camera. So I ticked the Animation Update Rate Optimisation checkbox on the SkeletalMeshComponent. That works, but how can I tweak at what distance it happens? Right now I only get full animation framerate when the SkeletalMesh is as big as the screen.
Learning unreal for architecture vis, If i want to make a kinetic surface that responds to something i.e time of day. like this (Al Bahr Towers) in unreal, how would I best go about the workflow for it?

I think I'd make this bit as a separate model with skeletal animation for the opening/closing. I would personally do that in Blender. Then place a bunch of those on the building in Unreal and control their animation state through Blueprint.

Or, alternatively: make the entire building in Blender as one giant model and again control animation of that in Unreal through Blueprint.
Any chance you have a youtube tutorial on how to do this for complete beginners cause i have no clue how to use blender
A single youtube tutorial probably won't cut it for this, since this requires knowledge of modelling, textures, rigging, animating and exporting to Unreal. That's quite advanced Blender knowledge already. It can be done in any 3D tools by the way, maybe even with Unreal's newest modelling/rigging tooling (haven't used that myself). So if you happen to know another 3D tool other than Blender, you can use that instead. As long as it supports rigging and animating.
I think this can be even made economic with Vertex Animation Textures
Please forgive me if I am posting in the wrong section as I am not sure were to ask this. I have a character that has its tentacles animated via a texture. I would like to capture it by making a static mesh. When I do this, I get the body as expected; however the tentacle revert back to their "default" (modeled) position. I was wondering if there is a way to...capture, or freeze, them for just a single frame. I am sure I am not describing this corretly. Any hints would be appreciated.
is FABRIK node still relevant in UE 5.x? I mean does control rig has tools that are better/intended to replace the FABRIK node?
Is there a way to create a morph target without leaving UE? I could make it in Blender and reimport but the FBX isn't playing the nicest with Blender and would just be easier to create the one morph target in engine. I'm not seeing it in the Skeletal Mesh Editor tools but maybe there's another way
Try and make your setup in a sequencer
Is it possible to dynamically at runtime set EnableRootMotion?
So if it is enabled, the character moves forward, but if a player is close to a AI and facing it, I don't want this to happen, because then the player will move past the AI.
This might be useful to you for controlling the update rate of your skeletal mesh if you're not using C++: https://www.fab.com/listings/67102b1e-b955-4ad3-927e-240b4c2b8101

Fab.com
This plugin will allow you to control the animation update rate of Skinned Meshes, whether you want to have distant characters skip an animation update frame or ten, or even disable the interpolation of animation to optimise your animation update. This technique could be employed to get dynamic stepped animation on 2s, 3s, to acquire a stop-moti...

Another Big Finish audio recreation developed by me and this time with major adjustments.
This project was a test to ensure that I could retain similar quality with my previous 4K renders but slice the time down significantly, with this amazing learning curve I have enhanced my skills and ability to create high quality renders in a shorter time ...
so I have about 30 locomotion animations in total for different states (walking/jogging/sprinting) and for different weapons. I don't want to manually put anim notifies for footsteps on each of 30+ animations, are there any other options? Currently I'm thinking about solving this by putting small box volumes on characters feet, setting it to overlap only world static objects, and playing sound on OnBeginOverlap if speed is > threshold
That's very helpful, thank you!
Hey so i have the issue that the fingers are not being retargeted correctly. Picture 2 is the original animation the third is the retargeted aniamtion and the first is the retarget from the uefn character what can i do to fix this issue


guys im having a issue with exporting animation from unreal to blender, im trying to export the new UEFN animation but when they go to blender the scale is 0.10 istead of 1.00 and when i try to link animation my character scale goes to 0.10, any help?
So i have an issue where as the vehcile goes round that, the bogies underneath seem to do a 360 and I can't work out why

Thats what I'm doing setting wise

If you import this character as a new skeleton you could double check that the bones are exported correctly. It's not always clear that the export has everything you need and nothing you don't. SO if you bring the character in as a separate skeleton you could compare more accurately.
i've been working on getting my animations into UE 5.4 from Maya and finally have my alembics in, but now I can't get them parented correclty to the car. Would someone be willing to help me troubleshoot it? I'm an experienced Maya/c4d animator/mographer but this is my first major project in UE.
You can set root motion translation scale when you call play montage
for crawling zombies on the ground, do you suggest using rootmotion so that the movement is much more realistic and it will drive the distance?
is there a way to perform slerp interpolation in control rig? I have a rig where you can interpolate between FK and IK control but the interpolate node seem to use lerp even for quaternions making the bone interpolate between the two controls by rotating more than it needs, basically caused the gimbal lock scenerio
let me guess, control rig doesn't support a proper must all animation system have slerp interpolation?
Is there an easy way to edit an animation that 'isolates' the upper motion of the body and 'freezes' the motion below the body? E.g. like using a 'blend by bone' from a spine bone in an AnimBP graph.
I would like to try and do it in-engine if possible!
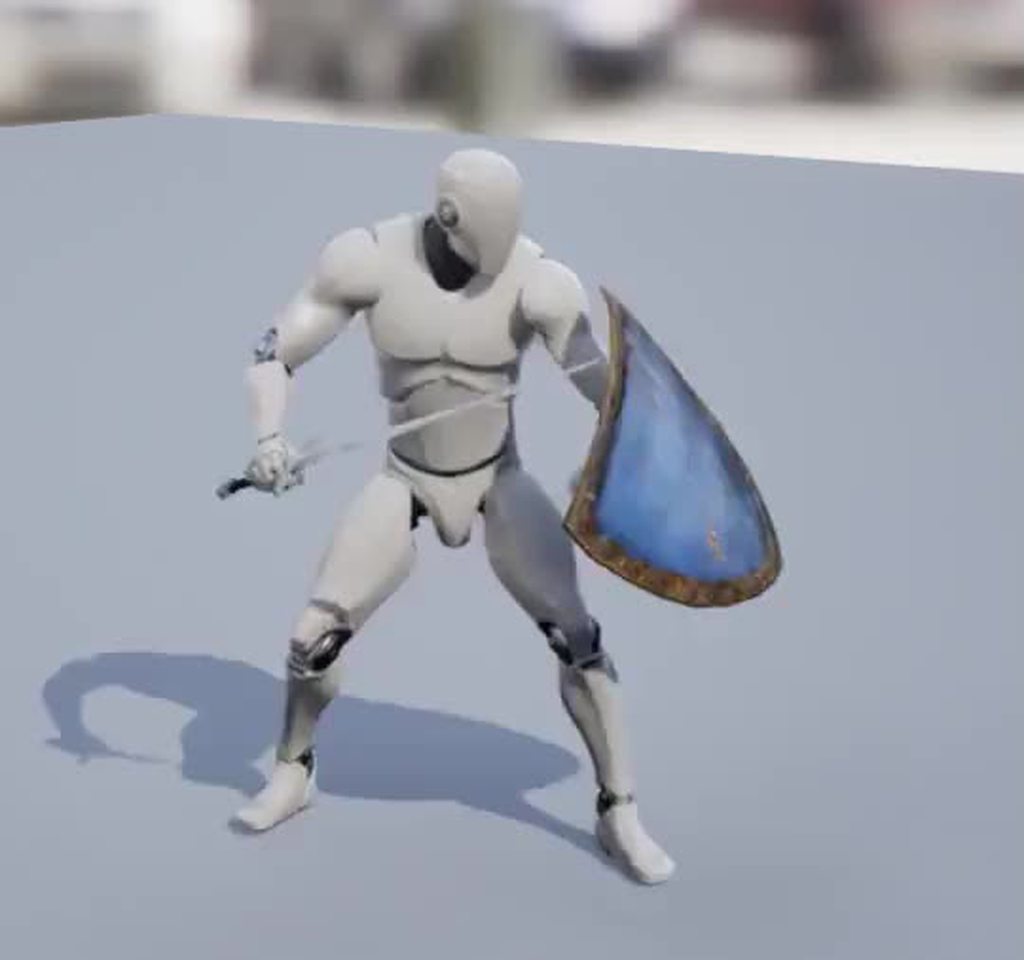
E.g. in the example above, I just want the upper body motion (from Spine01), I dont want the legs to move
one way to do it is you could set up the abp in the way you describe with a layered blend, and then record the result to a new asset.
guys if i have an anim montage played in my character, how i set up back the normal animation?
Those warning seems to be unrelated to this car? But yeah i don have good suggestions other than start with moving a cube and validate what works and what doesn’t.
That would work well, how do you 'record' the result from an AnimBP?
if you are using IK retargeter, you can make adjustment in the base pose so hand poses matches closer
hmm the issue is that i tried retargeting a mannequin aniamtion to uefn and thtan back
there should be a red record icon next to play/pause
Is it possible to create full animations inside of the engine? And is it worth doing or would it be better to do inside of blender? I have no experience with blender but I do have a decent amount in unreal. Just never touched animations other than already existing ones and blendspaces
It's possible. Setting up a control rig makes it a little more natural and easy. I think all of lego fortnight made anims in engine
Just finish one character of the last project I'm working on using control rig, If you have any feedback to help me improve, I'd love to hear it❤️
https://www.artstation.com/artwork/Bkar38

ArtStation
This is my game-ready Stormtrooper model created for a Star Wars fan project. I managed the entire workflow from modeling, retopology, and texturing to rigging with NGskinTool and integration in Unreal Engine. Using Unreal’s naming conventions to setup the model working seamlessly with the Control Rig based on Manny.
So i have a skeleton mesh sitting position that is static but I want to add an idle sway sort of thing to that. I have the base UE5 mannequin idle that I like and I want to merge it into the sitting position. I tried layering the animations directly on top of one another which kinda does what i want and then i can adjust weights between them but the lets say 'absolute position' or standing position of the idle pulls my character a bit up out of the sitting position. How can i take the 'relative motion' aspect from the idle animation and not affect the actual core pose from the first animation? I dont think layered blend per bone will help since I want the idle animation to affect all bones. Thoughts anyone?
Help, I cannot select any Anim Graph as an instance for a Linked Anim Graph, how can I get the graphs to show up here?


Sounds like an additive animation is what you want in this case. If you make the idle animation additive, relative to the first frame of the animation the motion that is applied will be the delta from the first frame.
Ah it seems the linked blendspace needs to be based on the same skeleton as the main.
I’ll look into it. Thanks
Is anyone here experienced with Modular Control Rigs?
hi guys! i importing Alembic cache and it is short.. and i want last frame will be like a last freeze frame.. instead it is just disappears. how to achieve it.. thank you. i talking about sequencer.
Does anyone know if there's a way to split one bone into a chain of bones and have it follow like a curve or something?
I basically want a character to be able to throw a super long punch, and in the process of doing so extend their forearm. As part of that extension process, the way I'm doing things currently, I get this unrealistic absolute column of a forearm, with no wiggle or bend at all. What I want instead is for that forearm to basically be able to be split into bone segments that can kind of be bent or curved to create a more naturally wiggly or chain/rope like effect as the fist flies further away from my character.
I feel like one of my options could be to go back to blender, and add however many bones to this particular segment that I can stand, to remain smashed/moved together when the arms aren't extended, and then have them grow and bend them or pose them along a curve when the arms extend, but I'm wondering if there's a better way to do that to somehow "split" the single bone into segments at runtime, as many as would be needed to pose the forearm appropriately along a curve as the fist moves.
hey guys, ue5 newbie here, I'm trying to implement this attack animation that i did.
I animated this in maya, my weapon had a constraint system to my hands, considering the weapon and the character are both animated, I can't use the normal hand socket in ue5
is there a way to attach both meshes and play both animations synced perfectly to achieve the same effect as it is shown inside maya?
https://www.youtube.com/watch?v=3abjC1tjEY0

This method is normally used for clothing, but I think it should work for your case too?.. same skeleton, separate meshes, playing animation together in sync
https://youtu.be/CeaSv7eiWo8
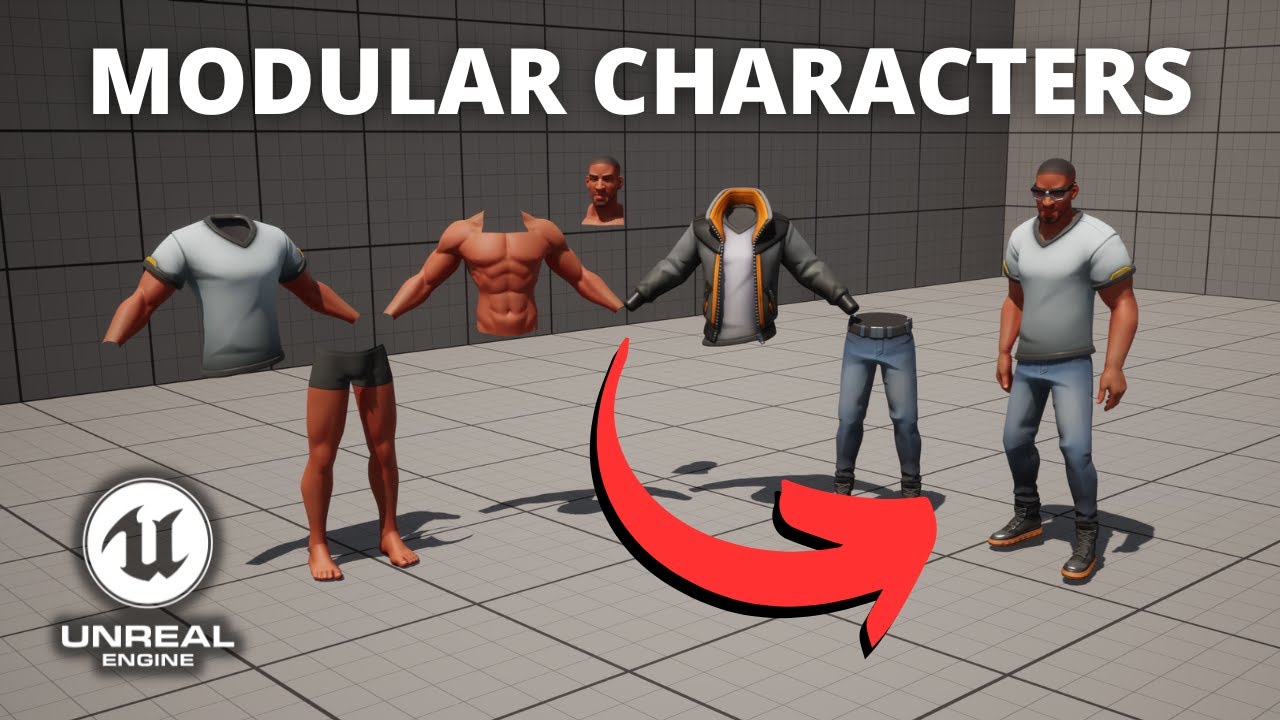
Hello guys, in this quick and simple tutorial we are going to learn how to make modular characters with different body parts in Unreal Engine 5!
↪️Join my Discord Server, NOW: https://bit.ly/GorkaGamesYouTubeDiscordServer
Free Moduar Character Pack 🔥 https://www.unrealengine.com/marketplace/en-US/product/stylized-male-character-kit-casual
Chec...
Have anyone managed to send in a Blend Mask Asset into Layered Blend Per Bone - node in ABP?
I'm trying to have a ABP template that could take an asset, (as it seems like they've changed it so you can have some asset?) in a child ABP and blend it properly using the template. Anyone knows how this works?
It seems like Epic does not expose Blend Mask to be set from outside/child, so I guess this is a no go?
Hi Folks! I have a question regarding the usage of Thread Safe Animation Updates, and GAS.
I'm struggling to find the "recommended" way of accessing the currently active Gameplay Tags whilst also making use of the thread-safe anim update methods of an Anim Blueprint.
In my project, a lot of character state that would have previously been driven by an Enumeration (or potentially boolean values) contained within the main Actor class is now being replaced by GAS. Just as a basic example: Aiming down sights is now an ability with an associated gameplay tag.
What is the suggested way of querying these tags in an ABP whilst also making use of thread-safe animation updates? There is very little information about this online - I found that in the Lyra example project there is a LyraAnimInstance class which makes use of a property called a "FGameplayTagBlueprintPropertyMap" - but this structure appears to be incompatible with blueprints.
Additionally, whilst it appears that I can use the existing query methods (E.g "Has Matching Gameplay Tag") within the standard ABP event graph update, these are not accessible within the thread-safe updates.
So far, the only "Solution" I have found is to have a series of booleans on my main character blueprint (One for each of the required tags) that I manually update, and then read via property access nodes. Whilst this "works", it seems (for lack of a better term) "stupid".
Would appreciate any advice on this one - thanks!
Disregard the crappy textures, I have an import problem. When I import this skeletal mesh there are white tris on it, it looks like a white emissive, even though there is no such thing in my material. When I try to isolate this material it looks like those triangles are still affected by the proper material. I'm really not sure how to fix it, I tried reimporting and all, changing uvs, etc. Nothing seems to work. Not sure if this is the proper channel to ask but since it only does that with a skeletal mesh


if you hold ctrl while moving across the blendspace does it work correctly?
it's idling in the anim bp
yes 🙂

there must be a reason why he is not entering idle
can you show the transition conditions?


sorry can you explain what behaviour you are currently seeing one more time?
sure
my suspicion is currently on the acceleration != 0 condition
ah ! yerah might be but i've re checked the tuto and it seems to be the same
okay had to check in how the cmc works, I don't like using it
acceleration seems fine
ah ok amazing thanks for tha
i do'nt know waht it could be
because he is not even idling at the begin play
let's start debugging, print the ground speed
tahnks
it should be 0 when standing still, I do not see how it wouldn't be, but best to make sure

damn !!
i tried on not valid and its not printing
omg
i got it
im sostupid
very sorry for making u loose your time !
i just didn't set the animp bp in the blueprint
btw, I think this entire setup could be nicer if you just went with this

then as a transition condition check whether speed is 0
I do not see the point in also getting the acceleration
I assume the point is to idle when the pawn is moving without any input, but I think in most cases you want to still play the walk cycle, it looks better
if you want to keep that or need any other data you can 'get component by class' for the cmc (actually proper way would be threadsafe function override and property access get movement component cast to cmc)
it doesn't matter too much, of course, just recommendations to make things cleaner and more flexible


hm... simple enough
aha
blendspace is 0 to 600
yesh
sorry if I sounded like I had it, it was more of a "there is not much to go off of here" haha
oh wait a second
so you are getting proper idle and when you move it plays the run animation on the right of your blendspace?
sounds just like a matter of cmc walk speed if so
does anyone know how i would bake an animation in maya and export out just the mesh from a single frame of that animation -- with the proper deforms from the anim to import into ue5?
i have something animating but for what im doing i just need one specific frame from the animation
is there anyway to make an animation sequence loop back and forth?
and then I can just plug it straight into animBP?
nvm im the goat

hey Guys, i have i Issue,
for context, im trying to make a IK Hand, but, has this wierd Glitch when im rotating off or lost the collision point, like the video(ignore the screen flicks), i believe the reason is the way i Reset the position, but, how change? i already make it Lerp but same result.


Looks like it's reaching towards world origin (0,0,0). When line trace does not detect anything, don't reset the position. It should remain at the last found location while you lerp the alpha.
I tried This, but same result 😦

this is a function and, this is where i called it

What I meant is, outside of the function... When there is no hit, do not set IK hand location to anything.
So branch on Has Hit Wall:
true -> Set IK Left/Right Hand Location
false -> (skip it)
When you don't set it to anything, it stays at whatever it was last time.
(and that's what you want, so it does not become zero)

Question - I have a Metahuman with a custom animation of him walking holding a bag (from Mixamo). But I want to make adjustments to angle the head down a little. I'm thinking I need to keep the Metahuman ConfigRig on and change the head position there. Is that accurate? Or should I adjust the head somewhere else?

Red arrow is Animation. Green is Metahuman Control.
Anyone know of a good asset pack of First Person Shooter hand and gun animations? Or a kit with a good Pawn class with FPS animations already? Even that would be cool so I could atleast use it as reference.
Hello. I am studying control rigs leg IK of default Manny skeleton. Does anyone know how is CR_Mannequin_BasicFootIk able to debug draw those red square foot traces? I don't see any draw debug functions being used in the control rig blueprint

The Arms skeletons for first person characters are exactly the same as the regular manny skeletons right?
The only difference is that they only have the mesh for the arms?
Guys I dont get how the conduit works, I mean imagine I have a idle then walk that can be walk normally, walk injured, walk someother way. I just use a conduit but where do I put the conditions?
Like would I put the "isWalking" check inside the conduit condition or in the transition lines? I don't get the difference between the two conditions
Is there any issue with moving around the preview mesh in control rig editor? It's not any sort of persistent data that could get saved into anywhere right?