#animation
1 messages · Page 52 of 1
So I don't know much about your project. Do you have body animation as well as facial animation, or just facial animation?

Interesting. OK, so you know that ARKit is morph targets right?
So those tracking markers there, do they translate into ARKit curves?
how can I check
I've never used that metahuman facial animation system there.
It would be in the animation sequence files.
If you click on those, they should show a list of the curves they're modifying.
And show any bone movements.

OK, neat! I have no idea how any of that works.
me too
can yu tell more about this
you know i dont know muc about unreal
Do you have animation files?
Like, are you saving the results of the mocap anywhere?
Are you doing mocap?
Remember - I know nothing about what you're doing.
eee
So I asked my uncles son
to record videos
and he sent me videos using livelink iphone
i keep them in desktop
I figured that I had to have all seperate different body parts, and be extremely presice on weight painting
yeah kinda mocap
thank you tho
Im using iphone livelink to transfer the motion data to unreal
also found a tutorial from 2020 that worked
You're probably better off not weight painting but actually setting the vertex weight values.
Nice!

As a result of the system you're using - do you end up with animation sequences in Unreal?

yeah
look
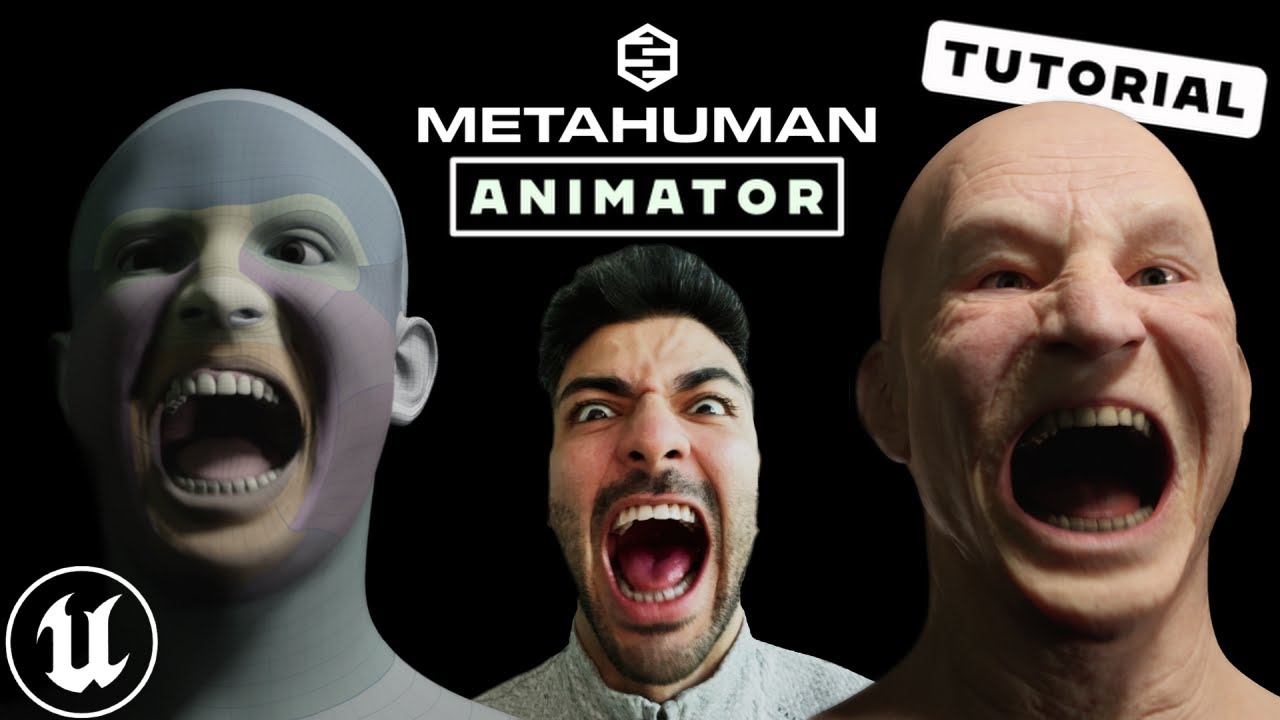
Step by step guide for Unreal Engine's MetaHuman Animator, the latest update for high fidelity facial motion capture. In this video, we are going to show you how to setup your iphone with the LiveLink app to capture your facial motion, then bring the footage into Unreal Engine 5 to Calibrate, Process and then transfer that facial animation to yo...
im following this tutorial
I can't see anything in that image, I'm afriad.
All right.
take a quick look in the video please
I'm in the middle of something else I'm afraid.
you will know if what your talking about is there
i did what the guy exactly did so far
okay
if you wanna do later and when you do let me know
im currently waiting for this

i just hope it works
Hello guys, how are you doing? Question, I stopped receiving notifications from montages and OnCompleted also does not run, I have the notifications fine, what could be causing OnNotifyBegin and OnCompleted to no longer work? Thank you


The last time someone had trouble with this, the problem ended up being that the main thread code was ending the ability, and thus shutting down the graph. Are you using the ability system?
when i did this it created 3 skeletal meshes
if i choose either of them the animation works
but when i choose the one with textures it still doesnt work
@nimble torrentdo you know how to import a skeletal mesh
to another skeletal mesh
but textures stay the same
You can't do that, but you can assign the materials from one mesh to another.
If you open the mesh, and look in Details, you should see the list of materials.
If you find the materials that the head with the textures are using, you can reference the same ones.
No I'm not using GAS
OK!
If it were me, with that problem, I would start by creating a new test actor, with my skeletal mesh and a new simple animation BP, then test to see if I could get the notifies to work there.
If I could, I would know that the problem is somewhere in my code.
If it doesn't work, I would know that the problem might be in the animation data or in some kind of bug.
I have several types of characters with the UE5 meshes, they all use the same function in a component and I stopped working, everything was working fine. That "OnCompleted" doesn't work either surprised me. thanks I'll try it
The fact that everything has stopped working strongly implies a loss of the evaluation context. Maybe the component is being deleted, or shut down, or reset.
Ya volvio a funcionar, puse un "playMontage" en la instancia del personaje para ver si ejecutaba las notificaciones y el final de la animación, como vi que funcionaba lo eliminación y ya me funciona todo normal en el componente. Creo que es más que un problema en el código un error de irreal.

do all bones need to be connected in blender to create a animation
By 'connected' do you mean all part of the same armature or all 'linked'?
Because they do not need to be linked, but they do need to all be part of the same armature.
Looks like Linked Animation Layer (Anim Layer Interface) is an interface for AnimBPs. For example, playing different Emotes.

So you can have 10+ AnimBPs, each playing their specific animation sequences. For example, Emote_1

Then in your main AnimBP, you can connect the Anim Layer Interface with your other stuff.

Then in your character blueprint, you can trigger which ABP to use. It will play the specific Emote.

But this got me thinking... isn't this exactly like an Anim Montage?
I press a button, it triggers an animation.
In fact.. couldn't the dive_down be done as an animation montage? Since the actual movement of the diving is done in blueprint anyways?
For example:
- Play anim montage
float_up - Play anim montage
hover
3a. Play anim montagedive_down(in place)
3b. Find location to player
3c. Some sort of timeline to move boss to player - Stop anim montage when reached at destination
thank you
they are part of same armature but not linked so it should work
@nimble torrentyes
so unfortunately
blender crashed 3 times when I changed that
have no idea why
how can I
Turn level sequence (metahuman) to animation sequence

In this episode I'll show you how to add keyframes for morph targets with Unreal Engine's animation tools. In this example I'm using an animation I've imported from Daz Studio earlier, and my character has been exported with morphs enabled.
Watch the full series here: https://www.youtube.com/watch?v=bIfMFawYtwU&list=PLPcx_LSSGfZf3aoIf4Z99OOGBHQ...
i wanna do this
I don't know why blender would crash. I was suggesting you change the material in unreal.
It's not really like an Anim Montage at all. Animation montages do not have blending graphs, they don't have evaluation graphs either. They play an animation into an existing graph. That's it.
You hypothetically could use a montage to do what you're trying to do, and feel free to do it that way if you'd like.
The fun thing and also the frustrating thing about game development is that there isn't a 'correct' way to do anything. There are lots of incorrect ways of doing things, but no correct ways.
sorry i mistyped
my mind is out of place
i meant to say unreal crashed 3 times
Interesting!
yeah
i tried many times again
it just freezes
ive waited for 30 min it was the same
ram usage stays the same and no cpu gpu disk usage at all
so no respond
Anyone knows a good tutorial for implementing custom animation like block or attack to alsv4?
i think its called layered animation
You probably want to do it at runtime.
Look up a node called 'Layered Blend Per Bone', which should do what you're looking for.
pretty much anything
you set up the output to be whatever you need
Aim Offset, Seq, Montage, Blendspace.
Correct
Mesh Deformation is not the same as in Blender


Yeah, that's very different. Is it possible that you have vertices that have weights that add up to more than 1?
You can do that in blender if you have 'auto normalize' off.
Unreal will always normalize weights.
What weights, I created my character from a bone modifier with subdivision surface modifier and they’re applied when exported to Unreal engine
Your mesh was parented to the armature though, right?
If you click on your mesh, and you go to vertex groups - you see a list of bones?
Hey peps, my animations does not work in packaged game, but works fine inside editor. It recognises animBP, it gets values, but does not update skeleton mesh. It is chaos vehicle
Solved, make sure that Wheel controller node is at the beginning of animBP
I have a question.
I think I’ll use this to set up a rig for first person arms. I assume I don’t need as many controls? Since I’m not using a full body, only arms.

Learn how to use Control Rig in Unreal Engine 5 (UE5) to rig and animate a character in engine with this tutorial that works as a complete introduction guide to Control Rig in Unreal Engine 5 (UE5). By the end of this Control Rig Tutorial you'll learn how to create animation sequences for any skeletal mesh using Control Rig in Unreal Engine 5 (U...
Where to get free prone anims for ue5 manniquen no weapons
ok im back and I did some digging
apparently metahuman has that Post process animation bp set up very well, the joints work very nice there (shoulders, knees, etc)
But what I didnt find is a way to transfer all that to my own character (it isnt metahuman, its using the default epic skeleton (with some extra added bones, but im sure that doesnt influence anything)
I have been looking at layer blend per bone but I don't understand what is blend weight and blend depth? Also how does it know that it needs to blend the part above the bone and not below the bone?


i am using the inbuilt crouch function of unreal and my character is going inside the ground. and there is no problem with animation


Hello guy, Who wants how configure the rifle animation in Game Animation Sample follow below my channel https://www.youtube.com/watch?v=xnTuwVbkO7g

Boa tarde Pessoal,
Estamos de volta agora com o vídeo de como equipar arma no nov sistema de animação da Unreal Engine 5.4, não sei se é a melhor forma de se fazer, pode ter outras maneiras mas o resultado está ai.
Instagran: @brasilgameaction
Hurrah! Nice job!
I'd be interested in seeing what this animation looked like with the bones display on.
bones display on?
if i don't use the crouch and unrouch then it works fine, but im curious whats with crouch and uncrouch

Blend weight is the amount of the BlendPose that is blended into the Base Pose.
The Blend Depth is a little weird. It represents a gradient of effect blending in the Blend Pose down a hierarchy.
So, if you chose say, Spine1 as your bone to start blending, and then put in a 'Blend Depth' of 3, it would start blending in the pose at Spine1, and by the time it got to Spine4 the pose would be fully blended in.

Yeah, in the display in the animation sequence viewer, there are options to show the bone hierarchy.
I'd love to see what that animation looks like when it's displaying the bones.
I don't think that you can easily directly copy their system. I recommended you look at the system as a way of learning their techniques, so you could use their techniques for your own characters.
like this?

Yeah!
OK, so the root is on the floor. That's good. Your IK legs are not following, but that's OK.
so bones gud right?
From this one image, they look OK. No obvious issues.
ig there is something in my palyer character that is messing with the builtin crouch function
If you drag a skeletal mesh into your scene, and play this animation on the skeletal mesh, do they sink into the floor?
i actually found a better way, im just editing the metahuman skeletal mesh in blender to suit my needs; made minor adjustments and then imported back, everything worked flawless (as long as I put the metahuman post process anim inside the skeletal mesh window)
i mean its not "better" its just easier
OK! Good luck!
❤️
I do recommend learning those techniques though. They're good techniques to know how to use.
how to play animation on it?
also the other hands looks uh weird

That does look strange. I don't know why those other hands are there.
It looks like you put your pawn in the scene.
I wasn't recommending you do that, I was recommending that you take the mannequin's skeletal mesh and put that in the scene.
If you drag the skeletal mesh from the content browser into the scene, you'll get a skeletal mesh actor.
I have a weird problem with animation blueprint. When it transition from one animation to another it slightly moves to the left and when I stop it it glitchs
i have it now but how to play animation on it?

In the details panel, there should be a slot where you could put in either an animation sequence or an animation blueprint.
When you stop the animation blueprint?
no, when the character stops moving
looking good

I am converting the video to gif wait a min'
OK, cool! Definitely seems like the problem isn't the animation then.
yup, thanks for help
Sorry for not finding a solution. It's been a while since I messed with a character who could crouch. My next place to test (having confirmed that the animation is fine) would be to check to see if the skeletal mesh component was being moved by the character movement component somehow.
That's where I'd look next.

ouh
How do I fix this?
Also if I am gonna use root motion for character movement should I unplug the IA_move from the bp_third_person?
There are two problems one thats its moving to the right a bit while transitioning and the other is when character stops its zooms out or something. I have there root motions forced lock
Well, hard to say what's going on here. Based on what you've said, you're using a retargeted version of the third person sample character?
I am using lyra's animation that has been reassigned to another skeleton. I didn't retarget instead assigned.
It had no skeleton before
OK, where did you get the mesh from?
from a friend
Generally speaking, reassigning animations often creates problem.
It really depends on the layout of your skeleton. If they're an exact match in terms of names and hierarchy, it should be OK to consider them the same skeleton.
If they're not exactly the same, then it could cause problems.
I don't know how your friend setup this character, so I can't say for sure which is the better option.
the skeleton I am using for the mesh is its own. The lyra's animations when I got was skeleton less. So I assgined it to its skeleton.
Animations in Unreal are always assigned to a skeleton of some kind.
Unless something truly bizarre has happened.
But I would expect Unreal to crash in that case.
when exporting metahuman to blender, editing it abit, then importing it back, my verts look like this. what am i missing ?

I once saw a youtuber opening a panel for resiting the retargeted animation. How do I open that
might be wrong channel
Then what about the last part why is it zooming out?
I don't know what 'resiting' means.
Retargeting something involves creating an IKRig for both skeletons, and then creating a retargeter object.
Did you use Blenders sculpting system for your changes?
yes, its why i brought it there
OK, did you use dynamic topology?
Because it looks like you used dynamic topology.
Dynamic topology rebuilds the topology of the mesh with each brush stroke.
Generally speaking, it's not something you use on final game meshes, and is instead useful for creating high polygon sculptures that are then retopologized into game meshes.
I don't know if it's zooming out there. I think the character might be moving away from the pawn.
so I should use again without dynamic topology ?
but it should be playing an animation there
Unfortunately, your situation has at least six or seven possible places where errors could be coming from.
Probably.
is it possible to make a hand ik that is able to close the hand on an object that is being grabbed? it seems to me like you cant use the finger bones because they move (obviously), and an IK bone would have to follow the bones in order to keep true relative positions, rendering them as not useful for the task too, right?
ok, last question. If I am gonna use root motion for character movement do I unplug the IA_move in the BP_Third_Person?
IA_move is an input?
Oh that! OK, sorry. Got confused. In short: no.
IA_Move is the directional controls.
So even if you're trying to use root motion, you will need a way of informing your character what the player is trying to do.
ok, thanks!
I would strip down my animation blueprint to a single animation and just see if I get that kind of start and stop issue with just one animation plugged into the output pose (a walk maybe).
If I got those issues, with just one animation, then I know that the problem is in my character.
If I don't get those issues, I would know that the problem is in the animation setup somewhere.
OR in the animations themselves.
Which would be my next place to check.
ok, I am gonna try reimported and retargeted it again. Afterwards I will try this.
Thank you!
anyone?
Generally - people tend to use animations for that. So you have a hand animation for each weapon.
Rather than running a lot of expensive IK calculations to place fingers.
ok fair enough
i want to modify the fingers in the animation to properly wrap around the gun barrel, how would i do that with control rig? my issue is that in order for things to be accurate id have to stick the hand to the gun somehow like i do with ik in real time, no?

and then display it on the control rig to be able to modify fingers accordingly
So the typical way to attach a hand to a gun, is to use a structure like the one that the mannequins have.
Which is that you have a ik_gun or ik_weapon bone, and two ik_hand bones.
The two ik_hand bones are assigned to always follow the hand bones in the animation data, and the ik_gun bone is either animated to place the gun in the correct position, or follows a gun bone that is the child of one of the hands.
(it's going to be project specific exactly which)
Then you attach your gun to the ik_gun bone, and the hands you ik to the ik_hand bones.
This means that your hands play their animations in 'gun space'.
They are always relative to the gun.
So if you rotate or translate the ik_gun bone, the hands move with it, and you can do things like reload, while looking up.
It's a very useful technique.
so you attach one hand ik bone to each hand,
and you attach a gun mesh to a gun ik bone
which is then what? attached to the right hand for instance?
whats the benefit of this? because it seems like i can do the same with a socket no?
Like I said, the benefit is, if you then, at runtime IK your arms onto the IK_hand bones - all your animations will now play 'in gun space' relative to the gun.
So if you move the gun, through procedural movement, or blending, or whatever - the hand animations will still play perfectly.
You cannot do that with a socket.
Hello, I have a question that I've puzzled on and off for probably a few years now, tangentially related to the above.
If I have a bolt-action rifle that I want to animate with the right hand, what's best practice there? Which joint do I parent it to?
Same answer, just use the ik_gun bone?
You can use the Skeletal tools. Create a root bone in the handle and a bolt action bone.
Then use curves to animate the bolt action bone
You can create an anim clip of the rifle animation
Then plug that rifle animation into your montage or state machine
I have my animation data already set up in DCC, I don't need to animate it in-editor. I'm just after how to attach it to the character without socketing it to the right hand and then doing some weird curve-based space-switching thing, is all.
Yes, you can alos use IK for the pull back on the bolt
But if you don't want to do that, then you can create a blupeprint of just the rifle and put it at the same position as the character root
The rifle blueprint will be a seperate blueprint
Sinc the character animation with the rifle bolt action animation
You might be able to put the skeletal mesh rifle in the character blueprint as well
just to clarify you are looking a solution to not how to animate but where to socket the rifle because the animation requires the right hand to move independently ?
This is correct.
If my socket is a child of the right hand, I can't then use that hand in the bolt-cycling animation.
I probably didn't ask very clearly - my apologies.
that's a very good question , I'm also trying to make as shooter and iv only done handguns so far so I don't know if any of my ideas will work but I think iv come up with something or at least how I might approach it if I started on the rifles today
That's what I would use, then you can animate both hands relative to the weapon.
well that trumps any answer i had come up with
i kept trying to use the gun ik bone in weird aim offset things thinking thats what it was for
So I wanna go with this approach, I'm just wondering if there any specific considerations regarding stuff like aim spaces, you'd need a specific location for the IK bone to go when you author your poses, right? 🤔
Aimspaces are tricky with a translating bone like the IK_gun bone that the mannequins use.
i found that out the hard way
Yeah that's where I trip up when I try and think my way through the setup.
I'm imagining authoring your aimspaces with some sort of proxy weapon mesh and then hoping it all lines up with your actual weapons
So there's a few ways of doing it. The first is that you just don't use an aimspace, and instead you use a time controlled animation.
So you have an animation with your character doing a weapon sweep, and you map the time of that animation to the angle of the gun.
The other option is that you have a gunbone that is the child of your your hand, and a floating gunbone (in your DCC, they are aligned with each other). You do the aimspace pose construction in one part of your graph, grab the position of the hand's weapon bone, and then pipe that into the floating weapon bone in another part of the graph, and do your gun animations relative to that.
Ooh that latter option sounds really neat actually.
Yeah, I have used that way. It's less complicated than it sounds.
Yeah it sounds really slick.
Many thanks indeed, I'll keep your approach in mind when I get there.
How does motion capture suits work for unreal engine? Can I just use any model with ease or do I need to rig models to a certain skeleton or etc?
You can use retargeting either in-editor or in DCC (i.e., Motion Builder) to apply your mocap data to a skeleton of your choosing.
You are probably not going to mocap directly into Unreal. You can but Unreal isn't really designed for that. You would normally mocap into your mocap software of choice, typically the one that comes with your suit, then you would import the files from there into Unreal.
And like Dodger said, you'd probably retarget that data onto your character in Unreal as Unreal has really nice retarget tools.
Yea, I’ve been using AI mocap so far and was wondering if there’s anyway to streamline the process so I didn’t have to retarget the animation every time
Any tutorials for this? So far been having a friend do re targeting for me
This is a pretty good little tutorial.

Hey guys, in today's video I'm going to be showing you how to use the new animation retargeting system in Unreal Engine 5. This is using the IK rigs and retargeting. The example in this video is using a Mixamo character and animation, however this will work for any character, skeleton, and animation you want to use.
Mixamo To UE5: https://youtu...
It's a bit out of date, but it'll do you for most things.
There are post processing tools now, that this video doesn't go into, that are worth exploring - but they're mostly self explanatory after you've gone through that.
Hey, so I'm trying to save a pose of fist clenched (for the first time) and i selected all the control rings for the fingers but when I try to save a pose it says path invalid
Anyone knows whats up
dose any one know how to get a third person character to actually point the gun at the cross hair ? aim offset animations only go so far
Iv tried two bone Ik , fabrik and iv tried some control rig stuff that didn't work and apparently the Aim node likely wont do what i want without some complex trig but its possible unless some one has any other better ways ?
have you tried saving it as an animation ? then saving the pose from the animation ?
Save the fingers as animation? or the sequencer i'm working on?
if by any chance you can help me out? we can join VC
Silent study is free
Thoughts on the free animation sample pack thing and replacing the animations with custom ones?
no, i'm making a new animation in sequencer
I want to save 2 poses, fist open and fist close
not refering to your stuff^
this is a me question haha
lol sorry
I want to use the animation sample character controller but add new animtions to suite my character but also have no idea how to do that since the retargeted bones out of Blender are seperated and make animating impossible
so just wondering how I go about animating new ones? is it even posible to use the in engine animtion tools?
i cant get on vc as im in the middle of something else but you might have to bake the animation ( opening and closeing fist ) witch would include the whole skeleton in the animation not just the fingers i guess , and from that animation asset you can save poses by frame
Nevermind, Figured it out
I go intrigued by Cascaduer, and was hoping maybe I could use that. but than not sure the animations would align
or if they export correctly into unreal
it is possible to make new animations in unreal itself yes , you can even edit pre existing animations in unreal but other tools are better equiped for somethings
casscadur is great for everything but fingers (unless you pay money for some reason)
I'll have to go deeper into this after work and see what I can do. also have a question about clothes and equiping different things onto the character
I'm following this tutorial about a procedural animation and I can't get it to work well:
https://youtu.be/vKiqs_h1WXM?t=564
in my case, the forward vector of bones are Y, the top vector is Z, the side one is X, I have no clue what is wrong here... Any help would be higly appreciated

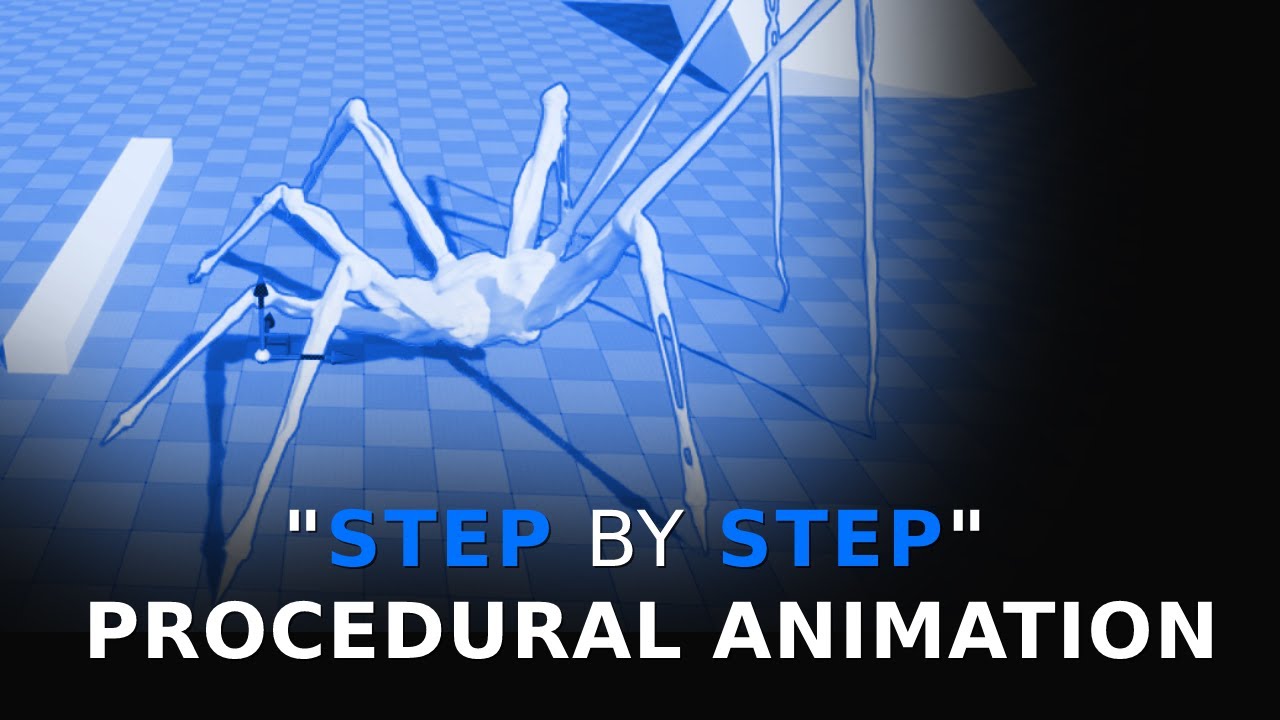
Full length course on procedural animation for human characters: https://www.udemy.com/course/procedural-animation/?referralCode=F8D7BF87E66A29B4942D
Discord server centred around procedural animation: https://discord.gg/YaEQ8DZWuv
Free download of the spider model: https://twitter.com/LincolnMargison
More coming soon, subscribe, follow, all ...
Would I create the clothes, rig them to the origianalSK but then add extra bones for physics sims? would it just hook up correctly to the parent if I make it a child
I had to add the hair for example in a socket. but I assume that won't work for pants/torso stuff
this sounds more or less correct, this should work if you add bones to your hierarchy for sim!
physics sim can get expensive so i'd suggest skinning the majority of the clothing and only simulating for things like cloaks/flowy fabric/pant legs for example
If clothe "A" has idk bones for dnalgy bits, and clothe "B" has different bones, I don't have to add all the bones to the original SK do I?
uhh i'm not quite sure what you mean sorry
as in, if you have different clothing bones for B?
are you doing swappable clothing?
yeah like appending new bones to new clothes, so different SK but same original bones for the main character. or could I only export the bones that directly effect the clothes. so excluding the arm bones and torso etc if I have just pants
I would imagine having say 5 SK with entire rig being expensive
is your clothing swappable?
yeah, I want the character to equip new clothes
usually for game characters you would rig the entire outfit in one go?
i'm not sure about that then sorry
Only reason I ask is because Echo's hair shares the original SK which mimics the animations when made a child but my hair doesn't
and I can't for the life of me figure out why
only reason I can think of is they share the same rig. but a weird thing happens when I place echos hair on my SK it works with the animations. so I don't think it's a sharing rig thing but something else
but I don't know what
Does anyone know a way to add logic with new animation controls in a modular rig? I want to add an animation control to hide third-person bones when creating first-person animations, but I can't find anywhere to hook into the solver. When I was using a standard control rig, I could just do this in the Forwards Solve Graph. Is it not possible with modular rigs?
Sadly you are correct - modular rigs are black boxes.
Unreal has the concept of 'compatible skeletons'.
A compatible skeleton is one that shares at least some of the hierarchy and naming convention between them.
Hey there, Im planning out a rigging workflow that uses unconnected bones for the limbs, so that the upper leg is the parent of the lower leg, and that is the parent of the foot, but they are floating and thus disconnected.
Would this cause any issues with IK based foot placement?
So one of the ways of doing clothing is to create a 'simple' version of your characters skeleton as your animation skeleton, and then create compatible skeletons for the clothing that have additional dynamic bones for deformation.
Any ideas? documentation? videos? plugins?
You can then either use your compatible animations on them directly - or, as is more common, use the 'Copy Pose From Mesh' node in an animation blueprint to copy the pose from their parent body mesh.
You're talking about from a blender perspective? Where the bones are still parented, but are not 'connected'?
Yes, exactly.
It seems like you're feeding your foot_1_l bone in twice?
Ah, is it a non factor in Unreal?
Yeah, Unreal doesn't have the concept of 'connection' in the way that Blender does.
From the way you ask it it might just be...
It only has parenting.
uhh, I don't think so
Great, then there's a chance my idea might work...
.

For reference, it's a split hierarchy system.
There's Leg 1, Leg 2 and Leg 3 which control the location, but don't have deformation.
yea, it's for getting the location, the video also does that

Each one is the parent of the next, and their exclusive Def bone with the same name, which allows for non uniform scaling, as well as using parameters to offset the location of the next leg bone to emulate the displacement of the children bone that comes with scaling.
Of, if it involves non-uniform scaling - you might want to pump the breaks.
Non-uniform scaling in unreal is frankly bizarre.
It involves non uniform scaling of childless bones
It does not work like it does in Blender or in any other 3D package.
That hypothetically might work, but I would fully expect a raft of problems even attempting to use them.
As far as the hierachy goes, my tests returned 1:1 results of anim tests from blender to Unreal
Unreal and non-uniform scale is, generally, a 'just don't' kind of situation.
But good luck!
Neat!
but it doesn't work like the video tho lol
As far as my testing goes it seems to work... Since I'm scaling only one bone at a time, and constraints treat the scale data in a vacuum when exporting the keyframes
I can't imagine that would be useful, but I haven't watched the tutorial.
I'm aware this is a risky workflow, but I've researching as much as I could manage into this
Since you seems pretty good and these, and I just want to be able to use procedural animations like a spider walking... Do you know somewhere that I could learn this? (since the video doesn't work for me)
The only concern I have with it is how the IK system can behave with it... Assuming the IK placement can only add rotation values to the bones, in theory it should work, but probably not without some tweaks.
What does it do instead of work?
Is it unviewable?
I found this tutorial pretty easy to follow, though it's a bit old at this point:

The Full Body Inverse Kinematic (FBIK) feature in Unreal Engine 5 allows you to construct IK in Control Rig with a high degree of control and flexibility. In this feature video, we show you how to create a 100% procedural animated character with a highly modular setup.
this...

yea, I'm watching it rn
it should be on the ground, but it's completly deformed
There certainly seems to be an issue there. Unfortunately the control rig doesn't have good node feedback to explain what's going on.
My guess is, your vectors are probably wrong, and the setup seem very strange to me.
I would normally expect an IK effector to not be the same node as the end of the leg?
Because if it is, the IK would not normally do anything.
Because you'd be solving for the position it's already in.
That seems very strange to me.
I don't know about effector and all these names, and I can't find documentation about it as well... I'm just putting random number to make it work like the video showed..
I doubt random numbers will work very well.
Did you get the mesh from the video?
Or did you use your own mesh?
it's my custom mesh
That's probably your problem.
So, it's a bit unclear what the primary axis and the secondary axis mean. I'm still a little hazy on it myself.
the Z faces the top, the Y forward, the X on the side, that's good as it should, the size are correctly imported (1,1,1) and everything else seems correct
So, yeah. I see two probably places where there's an issue:
- You're putting the foot in as the effector. That's strange. Maybe you've moved the foot elsewhere?
- Your primary and secondary vectors are unlikely to be the same as the video.
You'll probably also need a pole vector, which is used to create the third point on the ik triangle, the one for the knee.
Z for the pole vector is set to 10000 which should make it work
I don't think that's necessarily the case.
If your pole vector is set to direction, there is no difference between 10000 and 1.
"You're putting the foot in as the effector. That's strange. Maybe you've moved the foot elsewhere?", I have no clue what I should be doing
If it's set to position, then there's no difference between 1000 and the height of your characters thigh.
That seems like something you should figure out maybe?
Documentation about that doesn't exist lol
About what you're trying to do?
OK, so an IK system is designed to move the leg to a position.
So you need a position that you're aiming for.
That's normally what you'd put in as the 'effector'.
Sometimes that's just a transform value, if you're getting the value from somewhere else in the game.
Like if you were, for example, correcting a leg position relative to the floor.
You might use the raycast intersection point (with an offset) to place your characters foot.
But you need that point - that position in the world.
In order to do anything meaningful with IK.
with a Trace..
For adding Procedural Animations to my Control Rig, do I have to code manually from scratch with math the animation? (linear interpolation)
@nimble torrent
I recommend watching that dinosaur video.
Because they do basically that.
It's not too bad.
mh
I just feel like the dragon is really not well animated (im my opinion)
Generally speaking, procedural animations tend to look fairly mechanical.
I want something like this tho:
https://www.youtube.com/watch?v=2S3Uf_iFNMA
Twitter: https://twitter.com/CodeerDev
Short update video on my unity game
seems so advanced, thx, I'll check it out
Is there a way to invert / reverse my keyframes in Sequencer? I'm trying to turn a forward walk cycle into a backwards walk cycle

Hmm - tricky one.
You can play a Sequencer sequence reversed easily enough.
But I don't think it exports reversed if you export it.
yeah that doesn't do it. I guess I'll just drag the keyframes around like a chump 🙂
You could hypothetically put the animation on a skeletal mesh actor, play it backwards using a dummy animation BP, and record that into sequencer.
That might work!
...or just animate it in Maya and import the fbx
I'm impressed with the skeleton / skinning / rigging improvements inside of UE though
Maybe python scriptable
You could also do it with an Animation Modifier blueprint.
Prolly much easier that way lol
But there is basically zero documentation on that feature.
Of course there isnt!
Hello, does anyone know how I would go about adding custom clothes to my rig (using the animation sample pack) trying to do custom SK (but only the lower parts
Like I have the legs seperated into another rig with extra bones for cloth sims, but I want to copy the leg animations from the parent
For example I have a loin cloth that I want to copy the animations of the parent but exclude the physicisy parts


I was using blendspace 2d to create animation. I have top, right and left animation, but not top-right or top-left, So the animation its creating for top-right by itself it right but the one for top-left is not right, so it their anyway, I can extract the top-right animation from blendspace and mirror it to put it there?
Alright, so I managed to mirror my animation but another problem is that its also mirroring the motion direction, there is an option in the mirror table that says Mirror root motion I turned it off but its not doing anything. What should I do?
Hello! I've got this little animation, the barrel is a skeletal mesh with an animation
The coil around it is a geometry Cache starting its animation at the same moment, but there is some aligment issues, I guess because the parent of the geometry cache is the root of the the barrel (the skeletal mesh) and not the bone that is making the movement upwards. Does anyone have a suggestion on how to fix this?
If anyone cares I fixed it by using a bone socket 😅
Is it possible to make the AnimState changes activate a niagara object in a character BP?

hi everyone. i have an ABP which i want to use for both player controlled and ai controlled characters. i want some kind of value which i can use for blendspace from idle to walking. in all tutorials i find they are using the actor velocity, however what i want is actually like the attempted velocity. like some kind of 'movement vector' from the character movement component. does such a value exist ?
Yes! On the state, there should be a section in details called 'Notifies', you can use those to create events in your Anim BP graph, which can then either call a function on the character BP, or activate an event dispatcher which your character BP can react too.
Not sure what you mean here. Is it that you want your character to react to controller input instead of the characters actual state?
That sounds like the right thing to do, though I think you could have just parented it to the bone.
@nimble torrent Almost got it. The On Update works. Now, just need to know how to get the BP_Character that owns the AnimBP.

I think it's either 'Get Owning Actor' or 'Get Pawn Owner' or something.
As a general architectural note, it's usually a good idea to avoid direct bindings like this.
Right now, your animation BP will directly rely on the character being that specific BP, and as a general rule - those kind of bindings tend to create issues over time.
basically yes, altho also supporting AI controlled entities. i basically want the attempted movement vector
OK, but there isn't such a thing as an 'attempted movement vector'.
What do you mean by 'attempted'?
Hey, just a warning to everyone. If you're contacted by someone called 'Kilyqueen' - they're a scammer running the 'check out my game' scam.
Do not interact.
im imagining whatever this node is doing for example, like the direction/velocity that the movement component is generating in order to move itself

OK, so you want the direction of movement. Can't you get it from that World Direction pin?
Why not store that?
yea. i guess what i want is particular. its like when a character is trying to move somewhere but its blocked so its like running on the spot lol. but also for AI.
You are right that i could simply be storing the input of this node. this example is for the player controller but i was hoping for some way that was like agnostic of what is controlling it. but maybe ill just replicate that in the ai controller too
thank you
I set giant capsule collision to ignore pawn, but how to make my player to walk over the giant feet and other parts of the body?
Please tell me I dont have to set manually a capsule for each part and I can use the PhysicsAsset of the giant

@nimble torrent I've watched the video of yesterday twice and the guy is doing a custom setup from scratch with components for the legs
And?
you told me to not do it from scratch and follow the video but that'S literally what he is doing... I'll try to do that too
I... sorry, I don't understand.
I'll let you know if it works, wtv
yes, you can do exactly that 
Is there a way I can get a goal to follow its parent bone? my goal seems to be doing its own thing relative to its parent bone's parent bone AFAIK 😦
Hi , is it possible to transfer animation of some body parts only to those parts? For suppose if I cut out hands of a character, is it possible to transfer animation to these hands from the original animation?
I think it is a little too advanced for me. I tested just a simple Play Animation with the animation sequence and I think I can work with this.
Thank you though for telling me how professionals do it with the Linked Animation Layer. If I need more complex blending behavior I can probably use that. But I think for a dive_down I can probably just use Play Animation.
Hi guys I’m following a locomotion tutorial and he created a blend space with the animations of the Lyra starter pack and enabled the root motion and the lock but in ue5.4 the animation doesn’t stay still like his and then he putted the animations into a blend space and created a direction blueprint in the abp_manny and swapped the walk and run blend space of the third person template with the one that he created and disabled in the character movement the orient direction… but for me when I play the character takes mini steps and doesn’t move to the direction and moves only facing front why?
any idea why niagra vfx attached to mesh in animation sequencer (level animation) is teleported far away?
only niagra vfx, if i attach ststic mesh itd good
Does anyone know how to set the bone roll (primary/secondary axis) when you Spawn Bone in the control rig? 😅

I think just setting the rotation would do it.
I'd be very careful with Play Animation, so good luck!
When you say 'transfer' do you mean offline, or do you mean during runtime?
It's easy to do at runtime with the Layered Blend Per Bone.
This is in an Ikrig retarget setup?
that sets the initial rotation, not the bone roll.
How is bone role different from rotation?
In Unreal.
you can have 2 bones, with zero rotation but their primary and secondary axies are different. s when you select a bone the rotation gizmo axies will reflect that and y, or z could be the primary rotation. So when you setup your IK this will have a huge effect
Does anyone know how to set up the control rig for hind legs? I tried the spring solver but it didn't help much. In Maya the rig works without any problems but after importing into Unreal the hind legs don't work at all.
But they're zero rotation relative to their parent right?
What do they do instead of work?
not sure I understand. Rotation and roll are 2 separate things 😕 . I'll keep searching, thanks!
I haven't found that to be true.
In a 3d hierarchy, you have a child transform that is relative to it's parent.
Part of that transform is it's rotation.
The concept of 'roll' exists in some 3d packages as a control abstraction for changing the rotation of bones relative to their parents without modifying the placement of their children.
It is not a fundamental part of 3D mathematics though.
Very careful with Play Animation? Is there a reason?
Play Animation removes the animation blueprint from your mesh.
It replaces it with a single sequence.
So there's no blending of any kind, and when the animation ends, the character stops animating.
It's intended for mechanisms or one-off animations in the environment.
It's not really designed to be used with characters.
I see, that does make a lot of sense, the character after Play Animation gets "stuck" in the same pose after or reverts to a T-pose
I tried Play Anim Montage and I think that works though
Thank you for the clarification
Yeah! Montages are the tool for one-off animations within a character.
the second leg bone rotates 180 degrees on its own axis
OK, cool. You probably just need to modify the primary and secondary axis for the two-bone IK nodes.
They don't have very good debug displays for those, so it can take a bit of trial and error.
i tried IKTwoBone but i had the same issue, i tried changing the primary and secondary axis but it didnt give me the right rotation
It does take a lot of fiddling.
are there values for the axes that i can start from to narrow it down easier?
It's not easy, they don't explain it very well.
So I went and dug up the code on this, and it's also not particularly clear in the code exactly what the primary and secondary axis are.
yeah i was just going to ask about what the difference between primary and secondary axis is
So, this is the code that is running the IK:

So, the primary axis is rotated by the transform of the first bone you put in, like the upper-arm, and then it's compared to the delta between the upper-arm and the elbow.
So I think the primary axis is the vector of the skeleton bones that point down the limb.
So if your, say, z-axis of the upperarm bone points towards the lowerarm bone - then you put in [0,0,1]
I think.
And if the z-axis points away then you put in [0,0,-1]
ok so imagining them both as vectors, they describe the vector space formed by the two bones together i hope im right, as you say the primary axis is the one along the limb, the secondary axis is the vector orthogonal to the primary axis?
Possibly? I find it very hard to read their code, because they just don't explain what anything is for.
Like, the only note in the whole function is the one about the elbow, but it's not clear if the section after that or before that is dealing with it.

Aha! That's handy!
no matter how i change the twoboneik axis values it still doesnt work, here i see that twoboneik is not being used

I believe BasicIK is the name that the TwoBoneIK has in the graph.
What's the best way to implement variable distance push back in an animation?
Player gets hit, they play an Impact_Hit animation.
That animation has root motion. It pushes the player back exactly 1 meter within exactly 0.27 seconds.
Everything works perfectly.
However, I want the push back distance to be variable. Maybe 0.5 meters, or 5 meters. I know it's not possible to modify the curve of the root motion animation during runtime.
So I've tested various other movements with Blueprints.
Launch Character, Add Movement Input, Add Impulse, and Add Actor Local Offset. The first three don't give exact distances. The last one doesn't have physics collision.
So I was wondering... what's the best way to do this.
I'm thinking about just having like 20+ animations of various push back distances... Impact_Hit_1m, Impact_Hit_2m, Impact_Hit_3m, etc.. Definitely not clean and very tedious but I can't think of anything else that works.

i tried both with BasicIK and with TwoBoneIK nodes
I'm trying to figure out when to use BasicIK and Full Body IK since I don't understand them completely (in fact, 1 of them doesn't work for me):
- I use the FullBodyIK currently on a body that shouldn't be IK entirerly but only the legs but this node works
- I wanted to use BasicIK for each leg but that never worked since I didn't know what to plug where, and I'm not understanding that node very well, oppositely to the FullBodyIK node... (everytime I put some inputs into the node, the legs are never where they should be, they are deformed)
Here's what I'm doing, let me know which one I should be using and maybe explain me how to use the node correctly:
- I have a character, all the legs must be using IK but the HeadMesh shouldn't, it should just rotate normally...
or should I just put the head in the 'ExcludedBones' in the FullBodyIK node?
how do i mirror the control rig movement in sequencer (so if i move one leg, the other leg mirrors it)
Why does my FullBodyIK doesn't grip correctly on shapes that are rotated a bit?
Hey does anyone have a clue on how to add an IKrig'd model to animation?
story: I added a IK-rig on my model so i could easier animate him, but in trying to use the "level editor" to animate, i dont seem to be able to import the IK-rig only the pure model.
Anyone got a clue?
as in, it’s set up as an ik rig in unreal?
and you’re trying to get the ik rig controls to show up in sequencer?
yes in my folder i have the PHYS, SKEL and SM, and i created a IKRig
when i try to do the sequencer to do the animations it only uses one of those 3 (not the IKRig) and uses a pre-set control rig

sorry i’m getting a bit mixed up. i was thinking of a control rig inside the sequencer instead of the IK rig: https://dev.epicgames.com/documentation/en-us/unreal-engine/ik-rig-in-unreal-engine
Epic Games Developer
Create your custom IK Rig using goals, solvers, and settings.
have you read through this documentation?
No I have not but ill get a quick look through
i think you may want to look into editing or creating a control rig to animate with in sequencer? you can set up IK controls in control rig to help with animation
yes I have completely rigged my character, the only issue is that when i try to make animations, the IKRig clearly is not in the model and it does not let me import it
rigged with IK*
i might have to try to setup a control rig and add the IK that way, would be a shame though
do you think its possible to simply make a IK rig? the model seems to already come with complete rigging
the IK control setup is fairly straightforward for control rig, it’s just a different system i think? IK rig is used for retargeting animations in unreal’s retargeter, as well as for run time IK adjustments iirc
whereas the control rig allows you to actually animate in sequences
issue has been fixed thank you
I’m pretty new to animating so excuse me if this is a dumb question.
So I’m trying to make a leaping animation for a model of mine. I already animated it so it leaps forward in the world rather than it just staying still. Is there a way I can now freeze the animation in place so I can properly implement it into my game?
Do you mean root motion when you say it leaps forward?
Yes, I move the Y and Z of the root to make it leap, while moving the bones accordingly
You mean like remove root motion? You can uncheck the root motion checkbox in your animation sequence?

A: would that still keep the animations (IE: the bones moving as if it was leaping) but keep it still/in place?
B: is that in the level sequence editor, or in the actual animations editor
It would be in-place
It is when you open up the animation sequence, animation editor
I duplicated an animation sequence and tried to change its skeleton orientation but the changes are showing in the previous animation sequence as well.
can someone tell me why my hand and weapon disappear when i crouched


body is visible in anim BP

if skeleton in both animation is same then yes
How do I fix it?
I want to change the animation.
then create one from scratch ig
I just want the body above the pelvis to be rotated by 90 degree.
its 1 frame animation
is there any way I can rotate an animation within blendspace?
maybe
or u can use layerd blend per bone too
u can have 2 different animation on 2 different parts

no idea
You can go to the animation asset, select the root, rotate it desired rotation then hit s to set a keyframe
I thought IK is for placing somethine on the groud (like a feet) but it's actually more like legs or arms that you can move in good and smoot looking way
HI,In Unreal Engine 5, I have animations with a "camera bone" that extends from the root. I also have a movement animation with shakes for the "camera bone". However, when enabling "Use Pawn Control Rotation", the shakes stop working. How can this issue be resolved? Thanks in advance!
Once again I'm faced with trying to make first person animations. I've never had any luck making them. No default control rig for the FP_Arms, and animating on the 3rd person manny and baking over has never worked for me...
You can create animations in UE5 by taking the skeleton from the starter template and rigging it automatically using a plugin. Alternatively, try to find a project that already has a rig. I would share mine, but unfortunately, I can't give it out right now.
I just discovered "Modular Rigs" and setup a rig for the FP arms in like... 1min
cool
why i can't fined the matehuman that i made (Hana) when i did add the mate human it give me this


how can i fix it
Why is it that the FP Arms face +Y at default, But when I apply the animBP it faces +X ?
Hurrah!!
That sounds like you have a difference in rotation between the animations and your skeleton!
no this is on the default epic FP Arms mannequin
Hard to tell without audio, but it seems fine!
Is everything default?
yup\
So you just opened a new project with the default arms - and the animations are flipping the arms?
yea ive not yet put in the audio
No. With the default character that comes with the First Person project. If I set the anim mode to custom or clear the animBP, the arms face +Y. But all the animations rotate the skeleton to face +X
I even just created a pose asset from one of the idle anims, and if I set the pose weight to 0, its facing Y,
Then that sounds like Epic has an issue with having the skeleton and the animations disagree about the forward orientation.
Yeah. Cause if I dont rotate it in MY animations, its going to rotate the wrong way when mixed with the default anims and cause a whole mess of problems
That sounds like you should rotate it in your animations then.
Wierd. I'm making my animations in a seperate project so that all the sequence anims and such dont make the main project messy. I made a rifle Unequip anim based off the idle pose, and it looks decent in the anim project. Rifle lifts/aims up and to the left a little, then drops off to side. Migrate it to main project, make into montage and play it on the rifle unequip button. Rifle aims WAY up and to the right, then like... wiggles its way down....
source project it lifts up and to the left, target project it lifts up to the right. Same skeleton, weapon socket set up the same...
@nimble torrent i dont know if you remember but i was struggling terribly with a root bone issue from mixamo, and ended up giving up completely. However, I just found one single check box that fixed everything lol
I do remember you, and I hope that that fixes any problems you are still having.
I would not expect it to fix all problems from mixamo not having a proper root object.
But if it works - that's the important thing!
yeah, seems like a bandaid but it does solve the main issue so
Have anyone seen an issue when clothing doesn't follow the proper bone hierarchy? I've never seen this issue before
I don't have much experience with animating character and I am not good at it. The control rig system is Ue5 looks a lot easier than in blender or other 3d software. And I want to make some simple animations for my game like throwing , crawling animations. Can I use control rig to make animations for my game?
Please help me with this.. my character clips through ground after jump ends..
Anyone please??
I guess there is a problem with the animation sequence. Maybe there is a motion for the root bone and you haven't enabled root motion? Can you show us your jump anim sequence?
I prefer Cascadeur to make animations because it is very easy than animating in the UE5 sequencer using control rig. I suggest you to use Control Rig only when you want to make or modify animations 'procedurally' . Anyway , that's just my opinion and I am no Expert.
I have short question. I want to use real size measurements like a box (mesh) which is 10cm x 6cm x 2 cm.... but when I create Skeletal Mesh and I want to use the bones in Skeletal Rig Editor the bones are very big 😦 How do you go about his?
Are you sure when you imported your mesh that it imported at the right size?
So they're not just going through the floor, they're scaling down too.
What does your landing animation look like when you look at it in the anim sequence viewer?
You can, though you will need to create a control rig for your character before you can do so.
Cascadeur is cool, but it also costs 100$.
sup, anybody here already migrated the Motion Matching Project into his own?
It didnt import the motion matching database correctly and its just T-Posing while the project i migrated it from works fine. Does anybody know how i can set those database animations?

anyone know how this node work?
it never return true
is the slot node name had anything special to write?


for something like a bolt action rifle bolt cycle, is it better to create a baked animation, or to use IK and attach it to the bolt on the rifle animation?
Thanks for your kind help. I mean like the bones are so large for small meshes. Is there some other way to fix this? I'm trying to open / test like small book that you can open and close.

Oh! I think in the display options you can change the size of the bones.
The bones themselves don't have a size, that's just how they're drawn.
There's not really a best practice for this kind of thing. Some people animate the gun, some people add bones to the character skeleton - whatever way you do it will have positives and negatives.
Ok, good to know! Thanks for the insight!!
Have you tried not including the group name in front? That's my first thought.
yes test manything
Hmm
OK, I can't find anyone on the internet using or speaking about that function.
Looking at the code in the github depot - it's old.
It's like 10 years old.
So that's mid 4.0 era.
So it's been around.
it weird there are a node that can return group name
but no return slot name
A lot of the montage / slot stuff is very weird.
I personally think that the slots should just be accessible as variables.
And it's weird that they aren't.
if I can check the specific slot is playing will be very useful
but can't find how to correct the name
It might be useful, but I don't know if I would use it.
Based on the code, it looks like this is relatively expensive function.
So even if you can get it to work - I wouldn't call it every frame.
I want to call it in notify
to check if I want to mirror that animation
and do the mirror thing on other
my game has some Left Right weapon That use same animation flip
don't want to duplicate and flip all of it
All right! You know your game best.
This is the code of the function that you're calling.

It goes through all the MontageInstances, then checks if they're active and playing, then checks if it has a track for the SlotNodeName.
Weirdly, it only passes if the track exists, and it has a single AnimSegment.
And I don't know why it would check for the Anim Segments.
There are a number of possibilities, but the first thing I would check would be if the AnimBP is even assigned to the mesh.
thanks still don't know what is the correct name that actually use
anyways I just give up and use some interface notify instead
thanks for your time
Sorry I couldn't be more help~!
any chance anyone could give me insight on why my character would suddenly be falling much faster, to the point jumping while going up a slope does nothing after changing the jumping animations? im sure its something simple im missing haha
I'm guessing it's the Character Movement Component

My characters idle animation is doing this odd thing where the feet are bobbing up and down when they aren't supposed to, in Blender it looks fine but here it does this, anyone know whats going on?
Dumb question but how do update the firstpersonarms folder? I updated my project to 5.3 so I can use the newer first person arms/rig but it didn’t update at all. I tried to update it by force by putting the files I needed into the folder (rig, mesh, etc.) either I did it wrong or that also didn’t work. Can anyone help me out?
is your root moving?
nope
or I should say it has key frames but doesn't move
the other animations seem fine
it gets sent on this channel a lot but check this video: https://youtu.be/YbWfoyf4MqI?si=PVVNWNmPA5ECuZAL

In this video I will show you how to correctly export a character from Blender to Unreal Engine 5.
Common mistakes include issues with the scale of the root, joint orientations and differences between bones and joints. In this video I will talk about everything you need to know to correctly export rigged characters that follow Unreal Engine sta...
Alrighty so, I went through it, I did everything except for joint orientation but I doubt that is the issue here just based on what was said
how to i make a blendspace transition to a different blendspabe when the player stops?
can I use a whole ABP in sequencer to do animations? I have some nodes that do some procedural aim corrections and want to bake them out, but I'm not sure how
if you select your root and view the animation, it's definitely not moving?
Stiff as a board
this is what it should look like
that is strange! i see what you mean. i'm not the most experienced with exporting from blender, but do you have any modifiers or anything to help with animating that maybe aren't being applied/baked on export?
if you open the animation that you've exported in blender, does it look correct or is it also drifting?
the only modifier was the armature, all the other animations are fine
you can handle this with a state machine in the ABP. Each state can contain a different BlendSpace
are you setting any scale keys by chance?
Scale keys? I don’t think I’m familiar
You can pull your ABP into your level and add it to your sequencer from which you can control variables to get certain playback from your ABP. You will need to make sure any variables you want to control are "Exposed to Cinematics".

Epic Games Developer
Shows how to animate variables on anim instances through possessables
like are you animating the scale of the bones?
That was my only real guess 😅 have you tried importing your animation with Preserve Local Transform enabled
I have not, is that a setting during exporting in blender?
Wait brain fart
Importing would be while unreal
amazing
yeah it's part of the import options in unreal
I’ll try that
So... Instead of using live retargeting, I tried replacing the UEFN sandbox character and animation blueprints with a CC4 skeleton. I also replaced everything in the schemas/databases... And this resulted in crashes and my CC4 character turned into a homunculus-type thing. Terrifying. I was hoping to not use live retargeting in the GAS project, and slowly go through and replace the animations with ones that fit my character more while still keeping the logic and structure. Any ideas on how to fix this?

What's the effect of "Two way blend" node ?
I am trying to create a fight scene in unreal, I want to freeze the character as it does when I use the scrub, but when it plays the character rotates 90 degrees? could anyone help me out please?
Trying to make a sword attack, Got a sword attached to my rig, and it seems like its trying to fight rotations the whole time. Instead of being a nice clean swing, the tip is bobbing up and down, then on the return its trying to spin in very wierd directions... any advice?
Hello, i was fallowing this tut ( https://youtu.be/Dajv-OYjRd4?list=LL&t=325 ) on how to make Creating An Animal AI and i was wondering how to setup Turn Left and Turn Right Animations for smoother turning.
I have a blend space with the turn animation and i don't know how to plug them in since in the video he only put them in a blendspace
also in the video he put 1 idle animation, what if i want variation in idle animation?

Hey guys, in today's video, I'm going to be creating the basic movement of our animal AI. We will set up, random roam and running away, as well as the animal animation blueprint and blendspace. Plus starting on the code for deciding which action to execute next.
Series Playlist: https://www.youtube.com/playlist?list=PLQN3U_-lMANNZtjAcKP8-VA7I8n...
I've never heard of that node! Can you show it in use?
This is probably caused by one of two reasons:
- the bone you've attached the sword too has the unusual animation data that you're seeing
- you've attached the sword to the character in a strange way
How did you attach the sword and to what?
Drag and drop in the outliner, onto socket GripPoint. I did get it fixed tho. I was bending the arm unnaturally and it just didnt like it
Ended up looking pretty decent. But went to test the weapon in the actual game and ran into.... millions of issues...
not with the animation, just everything else
Can you use a time dilation track for this? I believe that if you don't have a track on a character in sequencer, then the engine is going to do some undefined behavior to it.
That is how games do!
Glad you fixed your sword issue!
atleast the animation part of it! 😄
hello how can i make the points but without that fade effect so that it jumps from one point value to the next

Can you not set two keys right next to each other and then change the values in a single frame?
Still have to make some enums and such so I'm using the correct idle animation depending on the type of weapon, get the weapon switching set up right... etc etc etc...
when im press the plus button it makes automatic the fades
To pick random idles, you can use the 'Random Sequence Player' in your Idle State to pick from a list of possible idles. I don't think the sequence player can be networked so you would need a more elaborate solution if your game is multiplayer.
As for turning animations for quadrupeds... yeeesh - they almost always look bad.
I believe you can set the values by clicking on the R, G, B, or A numbers on their tracks.
I might recommend looking into Linked Anim Layers for that.
You could have a separate Anim Layer BP per weapon type.
Does anyone know, if it is possible to mix two animation, as it is done in a blend space and save that animation? Couldnt find smth usefull so far...
jep but always with the fade effect for the value
That's why I recommended setting the values right next to each other on the timeline, so even though there's a fade, the fade lasts only a single frame.
So it's invisible!
hmm ok thanks
You could, hypothetically, play the blendspace and record it with the animation recorder.
But I imagine this could be inexact.
I dont think I need anything that fancy. All the attacks will be montages (as part of the GAS system) Just a simple switch on Enum or different states for the few types there will be
I'm new to animation blueprints. What's the easiest way to make sure an animation state can't trigger until an animation is fully done blending to another state?
Thx for that Idea, unfortunately, what i could have tried earlier, these two animation dont work pretty well together xD
Does somebody know a reason my RootMotion animation doesnt work when I rotated the root bone 45 degrees?
(I checked the enable root motion marker, and everything works fine with the original root motion animations...)
Its a Dodge Animation, but it doesnt move me around
Possibly "GetRelevantAnimTimeRemaining" its under Animation- states with other options
So do I use that, guessing have a booleon to see if its == 0, in a transition rule?
yeah, if its <= 0 and hook the result to the output
Hey, does anyone know why this blueprint doesn't work if you plug a cached pose into an aim offset node, but works fine if you plug the pose itself straight into it?


Dose any one have any advice for making custom animations for aim offsets ? My forward center and right center are pretty much perfect but every other direction looks a little wonky , just so when I do my next draft of animations I know better
So the root just doesn't move, or it moves in the wrong direction?
You can use the notifies in a state machine to control a variable which locks entrance and exits from the state machine.
This is, often, not a great idea though.
This is definitely not normal behavior. What does it do instead of work?
It acts like Pitch Offset has nothing plugged into its "Base Pose" input
Interesting! If you plug the pose into the Output pose - does that work?
Hm, would it be bad to store the idle animation reference on my weapons? Then I could specify which idle anim to use per weapon...
Which pose?
The locomotion pose. Like - if you set it up the way you had it, but avoided the Pitch offset - what happens?
Obviously the pitch wont' work, but does the rest of it?
Yes it does
So this is an interesting question. Superficially the answer is 'this is fine' but there is a wrinkle - which is if you're ever going to have anyone else able to use the weapon (like enemies) then the answer changes.
Very strange!
No plans to. right now I think most enemies will just have built in weapons/attacks
Then it's fine!
yay! Just need to figure out how to play the anim off a variable...
...that was easy
Two montages:
Hit Montage (HitReactionSlot), move character 100m back, 0.5 second duration
Attack Montage (DefaultSlot), move character 500m forward, 3 seconds
Both have root motion
- Play Attack montage
- Character starts moving forward as expected
- Play Hit montage
- Character moves back 100m in 0.5 seconds
- But Attack montage continues playing but is stuck in place. As if the root motion for it has been ignored
Does anyone know why this is?
I'd want the Attack montage root motion to continue moving forward after the Hit montage

anyone have advice on on to make the hand look more realistic this close to the camera?
it not the asset either, just wanna know if there is an easier way rather then making the animation further away from the cam
it might just be the angle of the hand honestly, maybe tilting it so that you can see more of the fingers by bringing the palm rotation in a bit?
is the character holding a torch? it might be good to pick up an object IRL and use it as reference, it feels slightly disconnected at the moment because the torch isn't necessarily resting on any part of the hand
yes
Hello guys. Noob question here:
Is it the Animator that is supposed to make transition from walk to run?
Or the dev?
Walk to run is usually done with a blend space. For going from idle to walk/run, you can also use a blend space. But some games also have their animators create specific "start" animations that play when transitioning from idle to walk (look at Lyra for how to do this). This looks a lot more realistic and lets you create more complex animations, but most games don't bother to do this, since blend spaces look good too.
unless your Animator doesnt know how to use the Animation blueprints and set up things like blendspaces, it'd be the dev I guess. or the "technical artist" I think its called if your team is big enough. But the animator would probably have a better eye for setting up the blendspace and related stuff if its just an animator/dev question
@marsh schooner @eternal ivy thanks for clearing that up. Alas, the Animator doesn't know anything about UE. He just makes motion files
I suppose it'll be down to the "technical artist"
is it possible to change the size of the controls generated from using the auto generated controls in a modular control rig? I'm having issues where some of the controls are too small and inside of the mesh and it's very obnoxious to work with.
I have been putting off learning animation forever I hate it
It's used in Lyra for Aim Offsets
Whats the hotkey to reset a control back to default position/rotation?
hm, shift+ctrl+g resets everything, but thats no good.
I am trying to animate a virtual bone via control rig and i set it up like this, it works all great when it's on level sequence but when I bake the animation to an animation sequence the virtual bone is not moving. Anyone know what I am doing wrong?

unfortunately it just doesnt move
Does it move in the anim sequence viewer? Like - if you double click on the animation sequence in the content browser, do you see the root moving?
I flew above it in the sequencer, and it doesnt seem like it moves
So, unfortunately - sequencer and 'the anim sequence viewer' are different things.
Epic is very bad at naming things.
Well well, but i was in the anim sequence viewer pretty sure 😄
The anim sequence viewer is what opens when you double click on an anim sequence file in the content browser.
Do you have root motion on for that animation?
Yes, these are the Root Motion settings

Hmm, OK.
What do you see when you turn on the bone display?
Also - this animation existed before and moved before but you used some technique to modify the direction?
What technique was that?
I did activate the bone display. Root just stays the same.
I duplicated the animation, to not mess a thing up.
Rotated the root 45 ° and set a key, saved the file.
After that I created a new animation out of it: create asset -> create animation ->current animation -> preview mesh
OK, was the root moving before?
Or was it stationary before?
Like - you should still have the source file in that case, right?
What does the original file look like?
The Original is stationary as well, the root bone stays the same position in the anim squence viewer
Yes, I still have the source files, i just tried to modifie the animation for 8-Directional roll/dodge movement
Well... there's your explanation.
what xd
If you want the character to move when you play that animation file - you have to move the pawn with code.
The animations won't do it.
but it does in the orignal animations xd
In Unreal, you need either to move the pawn with code, or to use the Root Motion system which requires animations that have root motions.
You just said here that it stays stationary.
So... no root motion.
well it looks like, but it moves ingame, cause i didnt make any movement code, only play montage
When you did this:
Where were you doing it?
My suspicion is that the original animation has root motion and your modified version removed it somehow.
That's my suspicion.
I would guess that adding a keyframe there deleted the rest of the root motion track.
That would be my guess.
You could try opening your original file and looking at the root motion options.
My guess would be, that it has Root Motion Lock engaged.
Which is why it doesn't look like it has root motion in the viewer.
Root Motion Root Lock you mean?
Yes
Well it is Ref Pose in the original, and Anim first frame in the 45° ones
but if I do it to ref pose, it rotates my char back to normal
That's unsurprising, because the way you did what you did to make those other animations is very unusual.
I've never heard of anyone doing that successfully.
And I wouldn't expect it to work.
Good luck!
Thx!
Aight, I am now rotating my char with a lerp and a timeline, and use only forward and backward roll animation from the original.
Does the job for a Prototype, just need to learn or buy 8-Directional Roll Animations one day haha
Select also Force Root Lock
Idk if this falls under animation or not. I would like to have some effects for when the cards get destroyed and when they are being placed in the center to display results. I've never animated anything before and i'm just looking for good videos or articles explaining the best way to do this. thanks in advance!
Does anyone know how Lyra's IK works without having any kind of sockets or transforms, and just using virtual bones?

anyone have any tips for overlapping character animations? ive tried to use motion warping and Set transform together and separately, unfortunately nothing is working, Simply enough im using the Mixamo Takedowns to mount and have built and Idle animation for mount top and bottom, i can get the characters to the position and new state just cant get them to overlap and stay connected in the correct position. For example if the takedown is not on center it will stay in the spot it lands and when set transform plays again it stays in the same broken positions. ive turned off collisions as well.
I have a lantern in unreal that i need the handle to slip in the user's hand so it generally should follow gravity;
i wanted to add a physics contraint so it would work, but i cant seem to get a bone added with no verticies, i tried a virtual bone, and physics handles...
i just really want to add a bone with no verticies that i can add a constraint to, but if my bone has no verticies, unreal wont let me see it in the physics asset. (but it is visible in the skeletal mesh)
any ideas?


sorry i should mention this is in vr - using the default vr template
Do they not show up even when you use this option?

When you say 'overlapping' do you mean 'synchronized'? Like two characters are doing a paired animation that should sync up?
If you want sparkles and fire and things - that would be #visual-fx . If you want the characters to do actions - that's animation.
Anyone happen to know why my mesh's spine bones aren't rotating? This chain here is for each spine bone to rotate along with the camera so that the player can "bend" up and down kinda like in Phasmophobia.

What do they do instead of rotate?
well it just plays the animation normally. What should happen here is that the model's upper body should A-pose, while the legs keep their animation.
Hmm so I'm having an issue with my aim offsets where the server will appear to flick between two rotations(right), but will work fine for the local instance(left). Clearly theres some sort of rotation setting conflict but im unsure of where its at. any ideas?

https://youtu.be/UOo_3zShhHA?list=PLY2663dNRL_jFiYskUboWxAP1TgkgXZTd
I've been following this tutorial here, but he's using a metahuman, not a mixamo rig like I am, so im not sure if that has anything to do with it

In this tutorial, which is Part 2.2 of my How To Make A True First-Person Shooter series, I'll show you how to use the camera/mouse input to rotate your character's spine bones to make them look up and down.
Patreon: https://patreon.com/MizzoFrizzo
Subreddit: https://www.reddit.com/r/MizzoFrizzo_Tutorials/
Facebook: https://www.facebook.com/gro...
You have to put a pose into the Layered Blend to do that. So your Layered Blend right now only has the one input. If you want them to A-pose use the 'Local Reference Pose' node.
Is the spine rotating?
it is not. The animations are playing fine and everything, but I don't want them to be at the moment lol. Just the legs
It's possible. An unmodified mixamo rig tends to cause considerable trouble in unreal because they don't have a root bone on the floor.
Instead, they just have the pelvis bone as the root.
Which Unreal's systems are not built to work with.
Unreal's systems tend to assume you have an independent root bone that will usually sit on the floor between the characters legs.
yeah I've been having tons of trouble with root bones since I started.
That'll be why.
Would having the cards rotate or move be considered animation?
That's going to be a #multiplayer replication problem rather than an animation problem I suspect.
Depends on what they are. If they're meshes then yes, if they're widgets, then you're probably looking at #umg

Neat!
omfg thanks! I see it now, i'm trying to see if thats enough for me to add a constraint now - fingers crossed.

👍
Yes to a point for this case synchronized is the goal i have worked out the transforms using a scene component,but either the character goes well past the target or on the end position the rotation would be random (is currently working though for the end just not the start). also for example if i started a takedown into lifting the enemy what would be the best approach to just connect that character to the player until they are ready to slam is the next goal. and thank you for the reply and your time! any and all input is helpful been struggling with it for a while lol
OK, so... I say this a lot, but it is especially true about something like this. There is no correct way of doing this, but there are lots of incorrect ways.
And there are lots of incorrect ways of doing paired animations. Lots.
This requires synchronization not just of the animations, but of the AI as well.
It is complicated to do this.
One of the ways that I have used to make sure that the two characters in a paired animation remain properly relative to each other is that I often have a bone in my characters skeleton called 'enemy' or 'pair_root'. This bone is constrained, in the animation, to the root bone of the opposite character.
Then, the primary character - often the initiator of the move - will trigger the secondary character to align themselves to the position of that 'enemy' bone.
This way, both characters start the animation in exactly the same relative position as they had when the animation was being authored.
It can also help to see whether it is valid to be able to start the animation (because you can read the position of the 'enemy' bone, and test whether that is a valid location for your paired partner to reach).
However you do this, it is likely to be the most complicated and buggy part of whatever system it's used in.
Sweet thanks! its working. I'm still trying to figure out the rest but at least now i can have a faux bone and a constraint to work with!

Hurrah~!
i appreciate the tips! i have read about doing it that way i was wondering if you dont mind explaining what is difference in using a added bone for each character rather than say a cube,component,arrow ect? I can understand i think why im just not fully grasping it. and also could it be done using a socket or virtual bone?
Because it's an animated bone, it can be in different positions in different animations.
If you want to do a single move - sure, you could use a static object.
But if you want your characters to be able to do more than one paired animation - you would need a separate component for each move.
understood so you need that bone to be dynamic for the entire animation based off the different positions
That helps, definitely.
But also - if you have four different throws, a handshake, and a kiss - they can all use the same paired animation system.
Rather than all requiring custom attachment / detachment systems.
In addition to keeping the characters aligned before and during the animation, it has the added benefit of being reusable.
that is a tonnnn of help thank you so much!!
👍
Best of luck! If you run into any trouble, give me a boop. Paired animations are tricky!
Done! its finally working! took me days to get to this point but thanks to you I finally have the lantern moving as i want!
hey, im trying to make an animation of the player gripping a steering wheel.. if my steering wheel has 2 sockets i ultimately want to attach each hand to, how would i find the offset location and rotation to that socket after i have keyframed the hands gripping the wheel?
i guess i just need to get the offset of the hands IK control to the steering wheel so i can make the 2 sockets those transforms
so it will look exactly like my animation when i IK snap to it.. but i cant see an easy way to do that without custom editor code
I was checking lyra unarmed jog and walk animations and their are no diagonal animations there. I tried making a blendspace thinking that it might be able to fix those on its own but its bad. How do lyra project tackles this itself?
A typical way of doing this would be to use a set of three additional bones in your character's skeleton.
root
ik_item
ik_hand_l
ik_hand_r
This is a similar construction to how guns are often animated.
In your animation software, you align the ik_item bone to the item in choice, in your case a steering wheel, and you constrain the ik_hand bones to their respective hands.
Doing this correctly will give you the characters hand animations relative to the wheel.
Then, in engine, you can reverse the operation, you can constrain the ik_item bone to the steering wheel object, and the arms to the ik_hand bones using two-bone ik.
ohhhh that makes way more sense than how i was trying to do it lol I dont even need to use sockets when doing it this way huh
if i make ik_item be at the steering wheel's 0,0,0 location at least
does anyone know why my character skirt won't collide with the physics object like at all? It does collide with static mesh primitives tho
Yup! That's the way to do it!
Heyop! Not sure if this should go to AI or Animation, but here goes; I have a simple animation blueprint I'm using with my enemies which use the Move To node in a behavior tree. This node, by default doesn't appear to change the acceleration of the of the character; so I'm only transitioning to Walk / Run if the ground speed is non-zero. This works all fine and dandy otherwise, but whenever I move from one AI MoveTo to another, it transitions to idle and back really fast, resulting in a very janky looking warp.
I reckon that the way around this would be to somehow not transition between the states instantly by not going to idle state between MoveTos but I'm not sure what the best way to handle this is.
I reckon this is a solved problem and I'm looking for best practices rather than try to hack around it. 😬


i'm posting this question here because i figured animation blueprints is where these get the most use, but has anyone experimented with Chooser Tables for things other that animation selection? I'm trying to use one for Foley sound selection and i'm just getting hard crashes trying to use it
I have the Chooser Table set to read bound variables from my animation blueprint and output an object result (in my case, a Metasound Source). The type of movement is filtered by a gameplay tag which selects a nested chooser, then from there a Metasound object is selected by matching to a Physical Material variable.
it SHOULD work like this i think, but as soon as i plug in the Evaluate Chooser table node, i get a hard crash
here are my Table Settings

the first initial set of Nested Choosers selected by GameplayTag

and one of the nested choosers with the relevant Metasound Sources, chosen by Physical Material

trying to evaluate this Chooser spits out this error on crash:
Exception 0xc0000005 encountered at address 0x7ffd17f4227b: Access violation reading location 0x00065624
how do I summon the Chooser Table gods?
I'm having a small animation issue. When in first person, and I play an animation montage, the first person camera is not following, even though it's parented to the skeletal mesh. Any ideas? The spring arm has 'use pawn controller rotation' ticked as well.
I'm about to implement an 8-way dodge using the GAS ability system and wanted to know what might be the most effective way to trigger and manage the dash animations.
Should I use the play montage and do it based on chord inputs and using the Root Motion Launch Node or is it better to implement the dodges as a state in the ABP? State Tree? Blend space? Other? I'm starting with a fresh blank project and just going for a feeling of instant response and free form dash movement in any direction that is highly cancelable and I'm really interested to know what might be considered an effective and clean approach.
Has anyone had an issue in Blender, when I'm trying to press M to merge by distance but it shows as "move to collections" instead. When I press A to select all in edit mode it only selects the armature. Has anyone been able to fix this?
Hey, could somebody help with changing root in skeletal mesh?
I have flying dragon, but his root is sort of on the ground, I need to achieve static place on one part of his body for seating - so the animations sort of play from that place around it, how would I go about achieving that? I dont see option to change root in skeletal mesh or option to apply retargeter.
Or whatever is good way to go around this
ill paypal 20$ if somebody know and can help me fix it rn
I am not 100% sure, but I think you can change the root to the bone you want to retarget in the chain mapping tab. I usually do the pelvis or lower spine as my root.
I tried that, but does not seem to work or I did set it up wrong.
Would you be able to help step by step?
I can try, though I don't know much. Can you show your armature?
Need the selected bone to be new root of the animations:

And when you made it the root, It was in the ground?

Oh. I think you need to root [spine03] by itself. It's going into the ground because you are trying to make all of those bones into one root.
yeah, but how do I set the new root. xD
Its ok if you dont know, just trying my luck if somebody here does.
I'm just trying to remember how I did it when I went through it lol
I had to reroot too
The only way I know is that there should be an option that says "make new root" otherwise I have no clue
ok... so I'd like to use modular control rigs for my non-humanoid assets; how the heck do I make custom control rig modules and how do I set up my models to play nice in the modular control rig editor (i.e. be appropriately scaled and facing forward)? (pointers to a tutorial would be awesome)
That I do not know how to do. If you don't get an answer from anyone, I'd recommend look in #1054845249945616404 . I only know about the IK Rig stuff
As far as exporting things at the correct scale, I recommend this video:
In this video I will show you how to correctly export a character from Blender to Unreal Engine 5.
Common mistakes include issues with the scale of the root, joint orientations and differences between bones and joints. In this video I will talk about everything you need to know to correctly export rigged characters that follow Unreal Engine sta...
As far as making the modular control rig work for you... I would hesitate to do that personally. I think if you're making a game with a lot of different kinds of critters, you might have a better time making a blueprint library of functions to create things like limb rigs and switches and stuff, rather than using the modular system.
The modular system locks everything behind the modules, and they don't talk to each other particularly well.
So even if you can get it to work - you probably don't want too, because it's so much more rigid than creating a library and making custom rigs for each character.
It's not that I have so many different critters, as a lot of very similar critters which are extremely not humanoid
(lots of insects, basically)
The modular rig appears to be an investor-facing product.
I'm in here most days, and in the last three months - absolutely nobody has come in here to talk about how cool the modular control rig is, and how easy it is to use.
huh
because in a lot of ways it seems like exactly what I'm looking for, r.e. saving time rigging generally similar characters with different skeletons
It's possible that at some point in the future it will be expanded to be more flexible and more useful, but right now - it's very rigid about things like orientation of bones, and bone hierarchy layout, and all of the individual modules are black boxes that do not communicate.
If you decide to use it, and you get it working for you - please come back and tell me how you did it!
I mean for the legs of a bug that our 3d modeller has standardized pretty well, I just need a basic IK node + a rigid foot, I really don't want to have to set that up by hand every time... tbh drag-and-drop black boxes sound pretty good
Good luck then!
do you have any tutorials/guidance for this?
Well, in their control rig example project - epic has their own blueprint library of functions that show how they do it. Their functions are quite elaborate, and so could be confusing to someone new to control rig.
There are a lot of pretty good control rig tutorials on youtube, but not many of them deal with creating a blueprint library, as they tend to be beginner-to-intermediate and focused on specific projects.
If you're new to Control Rig, I recommend 'Ask A Dev's multipart control rig series. It's quite long, and they go through a whole lot of useful stuff.
thanks!
You don't want to change the root of the dragon. In your flying animations, you can move the root anywhere you like to make things easier - but if the character can ever be on the ground, you want to keep the separate root. Unreal expects it, and will generally break and not work properly if you have a root that is off the ground for ground movement.
If you want to attach other characters and things to the dragon, you can either attach them to bones in the skeleton by parenting them to the mesh, OR you can create sockets on the mesh that are children of the bones, and parent things to those.
You don't want to mess around with the root.
It's where it should be.
I need sort of static place on the dragon so dragon can be atached to the seating, since the seating is actor defining movement - its for UEFN.
So in this case I do need the static root be the spine bone
I don't think that's the case.
For one - animated characters don't have 'static places'. They can animate.
So any place, can go anywhere.
I am aware, but I need to atach the dragon to the seating, cant do the other way around. So I just need to solve how to change the root bone / root of the animation so the static part is spine 3 and animation moves around it.
That's not a good idea.
Instead of doing that, you could create an animation that moved the root bone to where you wanted it to be.
The advantage of having a root bone that is not part of the skeleton is that you can move it, and not change what the character looks like or how it acts.
Look right now if I atach the dragon to the chair, his neck will move up and down away from the seating, I need to create illusion of the seating be atached to his spine.
I either dont understand what you are trying to tell me or you dont understand the problem, can we dm?
It seems like you're not attaching the dragon to the seating, it seems more like you're trying to attach the seating to the dragon.
Or you want it to appear that you've done this, but you aren't doing it correctly.
I need the seating to stay like this even when the animation is happening. I cannot atach the seating to the bone in UEFN.

So, to clarify, you can't reparent the seating, and you can't make the seating move?
It needs to be fully stationary, and the dragon moves?
yes
OK, there's probably not many ways of making that look good.
Does the character walk, or just fly, or just pose?
Player sits in the seating and is stationary - the seating is the defining actor of the movement/flight - by putting dragon prop under it in hierarchy I make the dragon fly with it.
OK, but if you can't make the seating move - you're going to struggle to create anything that feels... good?
not really, its already ok, just issue is its neck and body moves ups and down through chair while flying.
Right, which is why it's going to feel bad when you have to remove that movement.
only think I need really is what I initially asked for
Because you're going to have to remove that movement.
In order to have the mesh of the character match a fully stationary arbitrary attachment point.
So the character can't move, which is going to look bad.
the neck would still move a bit, I just need the animation to happen around that specific spine 3 point.
I don't think that that will be sufficient, but if you want to do that, you need to change the animation - not the hierarchy and the root.
That's irrelevant.
As you can't attach the seating to the character, it doesn't matter where the root is or what it's doing, because everything is fully disconnected from each other.
You just need to make an animation where the spine3 bone doesn't move.
Which you can do - but I imagine it will be a challenge to make it look good.
This is a winged character, and you are trying to keep the place where the wings connect to the body from moving - that's going to be a tough sell.
Well this is a new one. I thought I set up the bones correctly on blender. Anyone got a solution?

https://www.youtube.com/watch?v=YbWfoyf4MqI&t bringing it back again, this video is very helpful for exports
In this video I will show you how to correctly export a character from Blender to Unreal Engine 5.
Common mistakes include issues with the scale of the root, joint orientations and differences between bones and joints. In this video I will talk about everything you need to know to correctly export rigged characters that follow Unreal Engine sta...
your error messages are telling you what's up - you have multiple root bones
I've seen the video, but it doesn't solve my issue. I noticed I somehow made all of the bones roots, but how do I go from having multiple to one?
So, I have no idea how this fixed it. I watched another tutorial and I guess all I had to do was change the name of the root itself. Then it worked!
We figured out the Chooser Table issues:
- The GameplayTags column needs to take a GameplayTagsContainer variable reference, not a GameplayTag.
- The Object column uses a generic GetAssets implementation, which makes it incompatible with a SurfaceMaterial which always returns a null asset soft reference. Our solution was to just replace it with the PhysicalMaterial Enum and a get/set instead of testing the material itself in the table.
Hope that helps someone else!
Ah! I thought it might be something related to how the assets were loaded. That is good to know!
anyone know a way to modify this value here based on the up/down movement of the player camera?

I posted this the other day, I would like to learn how to get the cards to rotate and move. Does anyone have a favorite video for a tutorial to learn this?
question, what do the little dots next to bones mean? im not entirely sure on the purpose/use of these weapon bones

Can someone help me out here a issue I'm having? I'm trying to figuring out why my animation for a spear is off from my animations that I have set for a metahuman?
What are some ways I can troubleshoot to get things to line up?

