#animation
1 messages · Page 51 of 1
i found this tutorial on the epic forum https://dev.epicgames.com/community/learning/tutorials/nOJx/unreal-engine-implementing-character-turn-in-place-animation
but he use this math expression and i dont know what is it what you think? the final result looks good


Epic Games Developer
At first glance, turn in-place seems an easy task. This isn’t exactly true. The problem is, speed of stick or mouse, used to control character rotation,...
That math expression is just a slightly faster way of doing a few more math nodes. You can build a system that way - he's using some kind of time controlled animation.
I would just not do it personally, but that might work.
yes too difficult not gonna do it what is better remove the body and you can see only the arms or do it with the body without the animation?
Personally - I would do the arms without the body, and then in specific animations, if you really need a non-arms bodypart (like legs for a kick) then spawn a temporary mesh just for that.
yes thanks for the help
Hi, are there any good videos on how to control an IK rig using blueprints?
an IK rig or a control rig?
They are the same thing, right?
nada
how do I make an pargon greystone attack montage work on unreal engine third person character?

--
When it comes to replication of information used in animations, I need to have my anim instance access those variables from somewhere else that is replicated (e.g., a character component that is replicated), is that right?
Is there a preference on how to access these?
For instance, lets say I have some stateful information that isn't changing every frame (e.g., some kind of offset value use for procedural aim down sights). What is the ideal way to ensure that my ABP is appropriately setup?
Do I have a replicated function that sets those variables on the ABP, or am I better off updating it every time I need to access them, or what?
I researched the difference between them, and I understand it now. Sorry, I came from the Unity engine, and I meant the control rig.
no problem at all, here is a good video: https://www.youtube.com/watch?v=uuFWqFExlW4
This guy also has some really awesome udemy videos, highly recommend
Learn more like this: https://www.udemy.com/course/procedural-animation/?referralCode=F8D7BF87E66A29B4942D
Discord community for UE dev/procedural animation: https://discord.com/invite/YaEQ8DZWuv
Quaternion multiplication in depth: https://youtu.be/CRiR2eY5R_s
thx
I'm sure there are more free videos out there that give you what you are looking for, but yeah
how do I make an pargon greystone attack montage work on unreal engine third person character?

So, by 'pargon greystone' you mean the character Greystone from the Paragon assets?
yes
All right.
im trying to get the third person character to do his attack montage
For a montage to work you need:
- a montage assigned to the skeleton of the character ( I don't think the Paragon assets are on the UE5 skeleton )
- a montage slot node in the animation BP
- to call the 'Play Montage' or similar function on the character
So the first thing you need to do is make sure that the animation can play on the UE5 skeleton.
how do i check that
looks like it works when I use greystone anim bp on thirdPersonCharacter
That's a pretty good way of confirming it. You wouldn't be able to assign the character to the third person character if they weren't on the same skeleton.
So now you need to make sure that your animation BP has a slot node for that montage's slot in their animation graph.
If you open the montage, you should be able to find which Slot the montage is associated with.
this is in my manny anim bp

Generally, I would read any values I need from my character BP every frame. I'd only set up event-based stuff if I absolutely had to for optimization.
Cool! So you have a 'DefaultSlot' node in there.
That will work for Montages designed to play in the Default Slot.
But if your montage is assigned to a different slot - you will also need a node for that slot.
You can create a slot node for another slot by taking a DefaultSlot node and changing the target slot in the Details panel.
it worked! i changed it to upper body and it worked. why didnt default slot work?
how do i see what slot a montage is assigned to?
Nice! If you want to change which slot a Montage is associated with, you can open the montage and in the track section there will be a drop down for it.

ohhhhhhhhhhh okay, thank you so much
how do i slow down the animation? i cant seem to find rate scale

In the Play Montage node.
"Rate Scale" is play rate.
thanks! i was trying to find it on the anim sequence
awesome, that makes sense - I suppose it's not that expensive to do so, since the rest of the ABP is doing that all the time anyway.
Thank you!!
👍
Is there any reason not to use multithreading in the ABP?
Not that I know of.
sweet, thanks again!
I'm trying to transform a bone that has no verts assigned to it to use it as a target for an IK solver. The goal here is to be able to easily position the IK solver target relative to another bone.
The issue I'm having is that the "transform (modify) bone" node's "bone to modify" drop down doesn't seem to contain the bone with no verts.
Is this a limitation of this node, or have I config'd something wrong somehow?
OK, my animation BP was targetting the wrong skeleton. The solution was to change the skeelton in the animation BP's class settings (gear icon in the top bar).
Didn't know there was a settings button there! Learned something
Anybody have a good example on the usage of anim instance proxies? I am trying to wrap my head around them but can't find any resources
I love you.
yup, and I have to switch from editor preview to the CR under "Object to debug" for them to match.

I think it must be a display bug with the Control Rig VM Editor Preview. Because it's constantly switching back to Editor Preview when i hit compile (which contains the weird rotations)
guys how to attach ik_hand_gun in the correct position without Copy Bone Node

omg i not used UE5 for 3 days and my aim offset is destroyed, do they made some updates of the engine guys?
why the head is rotating faster than other bones? wtf?😂 i not touched my project for 3 days, before was all ok😵💫

Doesn't make sense that your project would change behavior without anything else changing. I'd recommend a direct binding in your graph for that variable instead of using the blueprint style pin drag lines
what you mean pin drag lines?
you mean better to use C++ instead of blueprints?
The top of the direct binding in your graph. The bottom is dragging the variables onto the graph and connecting with lines. The binding is thread safe, and looks cleaner

can anyone help with exporting from auto rig pro, and using correct smart rig settings?
ive been stuck on this for 2 days

I keep getting this message
oh ok
but whats the difference? my head is still rotating faster than other bones
The bone hierarchy of auto rig pro doesn't EXACTLY match the skeleton you're trying to assign (I assume UE4 Mannequin or UE5 Manny/Quinn)

Thread safety, looks cleaner, but really not much else I think? Using the direct bindings is the way Epic is moving forward as the standard. My hunch is the way you have it now it's being evaluated multiple times and that's why each bone is multiplying and causing your AO or BS to look amplified
Depends on your goal? If it's blank it'll create one for you I think
Im trying to generate a ue4 manniquin skeleton with arp, then have my character imported to the engine, in order to use it with als refactored
because i have 4 bones to control, i made a function for aim offset and divided to 4 so before all was ok, i don't know what is happened in these 3 days and why my aim offset now is not working anymore like before
That's what doesn't make sense. If you didn't change your project, and didn't change engine version then nothing should have changed
might be a source control thing too, do you use source control?
nope
Wait guys im idiot haha i forgot to connect two bone IK hands nodes, alll is ok😂
just a little bug here, i don't know why my hands are looking like that in viewport window

in game all is ok
now i have to think how to attach the ik hand gun to correct location without copy bone
this is without Copy Bone Node😂

so i got it working to some extent, but know the mesh looks wierd


Huh! Strange! I'll keep an eye out to see if mine does that too.
tried messing with a bunch of stuff, still not working
fixed the origin for example
I´m not sure if this is a blueprint or a sequencer issue, but I can´t get my morph targets to render anymore.
I have a skeletal mesh set up with an animation blueprint, exposed a variable for the morph target, put the skeletal mesh in the sequencer, switched to the blueprint animation class, exposed the variable and animated it.
Works fine in PIE and when playing the sequencer, but when I render, it doesn´t update anymore.
This is one of several problems I have with rendering sequences, I´m wondering if they broke some stuff with the new sequencer updates in 5.4?
Anyone else experience these kinds of issues, of variables animated in sequencer not updaing when rendering with MRQ?
I also tried switching to remote render instead of local, with no effect.
Hm, now it works.
Only thing I changed was setting the blueprint class in the level, not just in sequencer.
Unfortunately, that didn't help. Whatever I change in compression settings, it looks the same. Any other ideas?
Double check the actual keys maybe? Do you see the same issue when you play the sequence in the sequence viewer?
I dunno, have never used sequence viewer. But I can see the same issue in the actual level. The same animation sequence works fine in 5.3
That's what makes me think it's some kind of compression issue. The only other time someone had that problem, where something worked in a previous version but had that kind of problem in 5.4 it was a compression issue.
Oh, wait. I tried all of the different curve compression codecs, and now I tried a couple more bone compression settings. With this it seems to work:
Or maybe it's just the fact that I pressed 'Compress' again. Bit confusing...

It is, yeah, but I'm glad you got it working!
Thanks mate! 🙂
I have a question, I added a bone onto skeleton mesh (on head as a parent - camera_bone) but when I set socket to that bone, and start the game, camera ends up in the floor, because bone is not valid. Also tested with GetMesh()->DoesSocketExists("camera_bone"); and it's printing false. Does anyone know why this bone is not valid even tho, I added it?
P.S. Tried adding a new bone in the blender as well and import it in the engine, but same thing, it's visible there, but can't attach anything on the runtime on it.
Is something different with blendspaces in UE5.4? I switched to 5.4 for the new animation translation, which went really smoothly, but now I'm trying to setup a very easy blendspace and the walk and run animations are stuttering in the blend. To me it looks like the two animations aren't lining up by bones, but they should, since they're from the same animation source, same skeleton, etc. so I don't know what's wrong. Can anyone help?
i'm having weird behavior with trying to use a blendspace too, I'm trying to recreate the ABP from the Motion Matching sample and if i use a blendspace or blendspace 1D, my character gets all kinds of broken and I can't figure out what i'm doing wrong.
this is the section that's killing me. if i bypass, the issue goes away.

has anyone come across this issue yet?
Does anyone know how to fix this animation error? The animation is not playing properly
Has anyone encountered anything like this? The animations seem fine, but it definitely seems to have something to do with the animations themselves; I tried the same setup with different anims and the blend works fine. I'm not sure what to look for in the animations that could be the source of this. Anyone have any ideas of what to check?
Could IK bones be messing these up?
are your animations in the blend space all starting with the same foot?
it looks to me like the animations are blending awkwardly because some of the animations in the blend space may be stepping with the left foot first instead of the right?
That was my first thought, but is not the case, they start on the same foot and are actually extremely well matched (like the feet cycle is nearly identical between two of them), which has me quite confused.
hmm interesting! and it’s only happening for certain animations?
could you check if the additive settings on the animations are different from the ones that are working?
Seems to only be happening with this expressive walk pack, which is what I'd like to use to setup my npc movement
Ok, I'll check
it seems like you might be having additive issues as well, can you check the scale in your animations as well as the additive settings?
yours is a bit more funky since they’re scaling so weirdly 🤔
Additive is set to "no additive" for both these and the ones which are working
So no additive, I tried removing the IK bones and re-converted the animations, and it still has the issue.
@lusty venture could you help me with an animation error?
what animations are you trying to add to the blend space? like what are they doing
and what have you set as your default/neutral
It's a blend of stylized walks: casual, looking around, and power walk
this is very vague 🤔
The original anims exhibit the behavior on the UE4 skeleton, so it's not the conversion process, or my character
right so you have different speeds/types of walks being blended, and all the animations in the blend space are from the same animation pack
correct, and I don't currently have an idle in the blend, just the walks, since I was having issues I tried to isolate it.
Here is the starting frame of each


hmm ok bit of a weird one but are all of the animations at the same frame rate?
this may be causing issues because ideally you’d want them to have a more similar or same starting pose
there’s a lot of different rotations happening on the hips/spine/arms
Good question, where do I check the framerate?
yeah, the upper body is quite different, but the legs are similar, and there is a lot of stutter in the feed, but I suppose that could be caused by hips maybe
should be in the animation details or settings i forget which one, or when you mouse over the sequence it should tell you in the info that pops up
found it, just a sec
They all differ slightly, 29.167, 29.916, 29.76 Is that enough to cause this issue?
it is weird that it’s not consistent 🤔
it is strange. I thought this was a professionally produced pack
it could be, since like you said the other animations work fine on your character and the ue mannequin
that’s showing to me that the way you’ve set everything up is fine but the animations are most likely the problem here
but i can’t say for sure that it’s the framerate. it could also be because of those starting poses or something else entirely
They're from this pack: MCO Mocap Basics

Unreal Engine
20 Mocap Animations - Variety of Idles and Movement from MCO
it's free if you want to take a look
I think I'm going to re-download into a new project and see if they got corrupted along the way somehow. And if they still exhibit the issue, then maybe I'll reach out to MoCap. Do you know a good way to standardize the framerate, if I want to explore that?
maybe see if you’re able to reimport them at 30 fps? are the fbx files included with the pack?
I'll have to look
Doesn't look like they provide the fbx files
damn. i’m not sure how to set a consistent frame rate sorry, if you’re retargeting the animations you may be able to do it that way?
I am retargetting, so I'll see if there are settings for that. I'm going to try the reimport real quick, but then I have to go; and I'll pick this up later.
The animation won't play properly
I've retargeted the animation but it still does not work
They have those odd framerates on a fresh import sigh
Thanks for the help, I appreciate the ideas.
sorry i couldn’t be of more help!! hope you can find a solution
Hi all. Hope everyone is okay. 🙂
Question: what is happening and how do I fix this?

Background:
I successfully 😄 import a Mixamo animation onto 5.3, onto the SK_manniquin but I get that.
And I do not know what that is called so I do not know how to fix it or what to research to fix it.
thank you.
PS: this is odd. #animation was not available to me until @somber briar give me a, ah, link(?). anwyay thanks mate
You want to double check your animation sequences. Chances are, your mixamo animations did not retarget the root object properly, which is why your character is running away from their own pawn.
You need to check settings for Loop Animation & Root Motion.
my legs dont work as in they are always in the same spot and how do i add a dodge/roll animation with a keybind
how can I make a change to many animations? For example I want to fix the hands here but they are like this in hundreds of animations.

@nimble torrent & @naive mountain
Many thanks. Sorry, still kinda new at this. I'm better at creating landscapes then visual scripting lol .. ty ty take care 🙂
No trouble! You are far from the first person who has had issues with retargeting mixamo animations.
There's a few ways of doing this. One is to fix it at runtime using a Layered Blend Per Bone in your animation blueprint.
The other is to use what's called an 'Animation Modifier', which lets you write a blueprint script to change the keys inside an animation. This is not easy but it would change the actual animation data itself.
Well, hopefully, I am in the right place. Some other discords that I've joined aren't as, well, understanding.
I know I'm stupid but I want to learn. Anyway. How are you? 🙂
I'm OK, I don't think you're stupid though. This is some complicated software, and everyone starts at the beginning when they're learning.
would this affect performance though?
A very small amount, sure - but Unreal is pretty good at what it does, and one blend is unlikely to break the bank.
You're probably going to end up with anywhere from several dozen to several hundred blends in your graph.
Yeah. Ha! "Complicated software" is probably the most underrated thing anybody can say about Unreal Engine. Learn Game Development, with zero experience, no background they say. It's easy they say. Rrriiggghhhtttt.
Blender, heck, probably even Houdini3D is way easier than this. haha
Seen any good movies/tv shows recently? 🙂
ok thanks ill give this a go
If your legs aren't moving, I'm going to guess you're using retargeted animations combined with the UE5 mannequin characters. Am I correct?
It's not so bad. Everything new seems overwhelming until it doesn't.
yeah
So, what's happening is - your retargeted animations don't have the 'lk_foot_l' and 'ik_foot_r' following the feet. The Unreal mannequin characters use those bones to adjust the foot position. Because your retargeted animations don't have animation on those bones - the feet don't move.
If you redo your retarget and include transform goals for the ik feet bones in your IKRig, targeting the foot positions of the retarget character, you should be able to get it working.
Well, that's true. I don't know. Maybe it's just me.
I just feel compared to other 3d-related softwares from Blender, Nuke, Houdini3D, etc - as complicated as they look - they are, in the end, just a, ah, really good software for creating a Form of Visualizer -shrugs-
Well, Unreal Engine is like this beast of a thing where you really have to learn how to make it work from... you know everything that includes optimization, texture streaming, "budget", etc.
Seen: https://www.youtube.com/watch?v=wKk5VAK1GZQ&t=1s ???
Good mvoie. Surpringly tense

He seems nice…
Daisy Edgar-Jones and Sebastian Stan star in Mimi Cave’s #FreshMovie.
Streaming March 4 only on Hulu.
SUBSCRIBE TO HULU’S YOUTUBE CHANNEL
Click the link to subscribe to our channel for the latest shows & updates: http://www.youtube.com/hulu?sub_confirmation=1
START YOUR FREE TRIAL
http://hulu.com/start
FOLLOW US ON SOCIAL
In...

The blurring?

Can't really say. I mean - it's probably the motion blur system doing the blurring, but I don't know why it would be so visible on your character like that.
Aaahh... more details please
is it because im layering another non keyed animation ?
That seems unlikely.
Are you moving very fast?
How have you attached your camera to your character?
These are all the details XD
No
Your camera isn't connected to your character?
No XD
Your camera is connected to your character?

To the skeletal mesh ? no
i just connected it
lemme try
Still
OK, useful to know that it's not attached to the skeletal mesh. Are you using a spring arm? Did you create this character from scratch?
What happens if you look at this character in the animation blueprint preview - do you see the blurring happening there?
Do you have a post processing volume with blur settings in your scene?
You could try disabling motion blur entirely (Project Settings - Engine - Rendering - Motion Blur).
Yes there is a spring arm, no the character is from synty assets, the character is fine in the blueprint this only happens when i move right and left and backwards in the level
What about if you make them move right left or backwards in the animation blueprint preview window?
alr give me a bit
The character moves fine
Its not blurring like in the level
Interesting.
Does it have something to do with the 8th directional movement ?
Seems unlikely.
So, if it were me debugging this, I would disable the animation entirely and see if I still got the blur when I moved left and right / backwards.
ow
That would let me know if there were an issue with the movement through space, and not the animation itself.
still blurring lol
Ye
well my legs move but my character is too fast for my camera and i cant slow it down
Hey guys, do you have any recommendation on how I can get rid of the rapid movement of the left arm here? It was originally an animation meant for rootmotion, but I'm trying to make it fit as a stab for a layered animation setup. Alas, the hand that added impulse to the old animation looks really out of place in this animation 😅
Hi everyone, My goal is to make a tree in blender to use it as an asset in Unreal engine. Now i want it to move around as the wind blew it. Ive seen videos using material graph on unreal for the leaves to wave.
But can i do a different thing instead such as animate a loop animation of the tree and leaves waving in blender and then export that to unreal as a looped animation. is this applicable? if it is, is it good as game assets?
You can do that, but it would only really work if you had animations for multiple directions of wind, and probably would never look as integrated into the world as a procedural solution.
What do you mean by 'the hand that added impulse'?
It's going to be hard to make a weapon strike look good if your character is holding the object that high. They can't get good leverage.
Also - just in general, it's very hard to sell an attack without moving the full body.
thanks! i’ll check this out!
Oh yeah, I forgot to mention it’s a first person project with optional third person.
I meant the left hand, which as the player stabs with his right, the left goes backwards like a rapier stab. Essentially trying to find a way to lock that left arm in a position while the right stabs 🤔 Keyframing it sounds like a hassle 😅
Sure, you should look up the 'Layered Blend Per Bone' node. You can blend the left and right arms together separately.
Right! I’ll give that a try 👍 Silly, I’ve only used that for the upper body blend
Thank you 👏
hello guys can you help me?
How would one create animations for the first person template? Since there's no IK/control rig like with the third person template, I'm getting ugly stretching of the mesh using fk control rig. Any tips/tutorial recommendations appreciated.
Skeletal Tools: Is it possible to place a joint in the middle of a eyeball sphere?
Hi everyone, I'm trying to do some foot contact clean up with animation layers on a metahuman - Adding an additive layer isn't helpful as it doesn't totally overwrite the original foot IK.
However if I add an absolute animation layer, it hijacks the entire control rig. What do I need to do here to make this work the way I want to?

If you're doing cleanup, don't you want it to not overwrite the original foot IK?
Like - you want it to be additive, right?
Yes, but not automatically.
You can create a bone for the eye, and put it in the right place.
But there isn't an automatic 'center this bone to this part of the mesh' tool, to my knowledge.
I would create a control rig, and animate with that.
Hi!
Maybe. What's your trouble?
Not for things like floor contact, I want that to be absolute and locked in place
Then why not edit the keys directly?
you guys know a way to use livelink on other than metahuman models?
I have a pretty decent face rig
Like - bake your sequence onto the control rig, and then edit the keys?
Because that defeats the entire purpose of animation layers lmao
and every part of the face is seperated
OK.
can I use it on this model possibly?

livelink stuff
without turning her to metahuman
because she doesnt look like herself anymore when turned
Sure, but you will need at least a little blender knowledge. Do you have that?
All right.
because ive heard this livelink stuff works on metahumans
because its server stuff etc
but i think there must be a way
Livelinks works on metahumans, but it can also work with any character setup with the ARKit morphs.
You can create them manually for your character, or you could use the FaceIt plugin in blender, which makes the process considerably easier.

Blender Market
Faceit - With Faceit you can ready your character model for high quality Animation in minutes! Safe weeks of work!
I've FaceIt professionally - it is a good tool.
mine character already has arkit morphs
Cool, then you're a step ahead.
I assume you've read this page?
Epic Games Developer
Use the Live Link Face app, ARKit, and Live Link to capture facial animations and apply them to characters in Unreal Engine.
OK, well I've never heard of that.
so it uses livelink too

Cool.
this?
should i read
but i dont have apple so
Probably not. It is for the IOS system.
you know audio2face can do everything apple does
Then maybe read that page. It might prove useful then.
but idk do we really need an apple for this now
i took a little peek
its all a tutorial for metahumans yknow
I don't believe that to be the case.
The example character is the ARKit test character.
The boy with the floppy hair.
Not a metahuman.
This guy:

He predates metahumans by a few years.
okay
nice
well ok
tomorrow im gonna borrow iphone12 from friend and try this
audio2face can do evrything apple does but i guess not supported here
It might be.
I've never used it though, so I can't help you with that.
youve helped enough

i think were good on this part
wait
how can I know if it imports into unreal engine 5.2 properly
how can I check in unreal
i dont know unreal at all
When you say 'it' do you mean the morph target?
that's what I was afraid of 😅
But how do you place the bone in the center of the eye? So the eye rotates correctly.
With difficulty, I imagine! I've never done a full skeleton inside unreal's new skeleton creation tools, but I imagine lining that up properly would be really nasty.
Agreed, I will not continue with skeletal tools for this test. Thank you
what about the optimization? which one would be more optimized, performance and storage wise?
Hi guys
When I retarget animation via Right Click -> Retarget Animation
I can't find a button to edit the pose of the retargeted animation's mesh
Is there any other way to edit pose?
I don't do the IK rig thing
i was doing this before, what i m trying to say is, if the player's montage is not finished and player still fires then enable the spray.
Now i have move the animation inside animation blueprint, cuz i want to manage them seprately
but now i m having delay in animation and also i have no idea how to set the enable spray true in this case

fishy
@cloud lodge @austere frost sending steam gift cards
They banned thanks


like blend shapes and stuff
Assertion failed: (Index >= 0) & (Index < ArrayNum) [File:D:\build++UE5\Sync\Engine\Source\Runtime\Core\Public\Containers\Array.h] [Line: 758] Array index out of bounds: 0 into an array of size 0 its a error when i tried replace skeleton of animation how can i fix?
Does anyone know how to prevent physics bodies from uniformly scaling when bones scale non-uniformly? I have these two arm bones scaling in just one axis, but the bodies are scaling in all directions as you can see
Storage-wise no. You'd need a bunch of animations that you don't need with a procedural solution. Optimization it's a toss-up. A lot of procedural foliage solutions use vertex shaders and are remarkably performant because they can degrade gracefully at higher LODs. It's a toss-up, you might get a little better performance in a few situations.
Anything to do with non uniform scale in unreal is exceedingly wonky. It does not work the way it does in other packages, and tends to mess everything up.
I strongly recommend attempting to get your effect without using scaling. It is such a mess.
yeahhhh that definitely is ringing true here
tbh I'll just attach my own primitive components for the arms
works perfectly 😌
Hurrah!
would this be the channel for help regarding rigging a model? since to animate a model you need to rig it??
guys anybody had issue about retarget on Unreal 5.4 about scale of characters not match
anyboyd knows about that?
So apparently the BlendSpace issue I was experiencing is caused by the animations being of different length/cycle. The fix is to add sync markers to all the animations involved in the blendspace and that allows then to correctly sync up and eliminates the stutter.
woohoo glad you solved it!!
Hello! I'm working on wind affecting foliage and I've seen lots of examples of people just grabbing megascan assets that come ready to go with wind out of the box. I have a few assets that I imported from blender that I'd like to set up with the same system. Is this as simple as inheriting from a material or is it much more complicated than that?
Animation curve value in animation sequence is not following the curve, its acts really weird, but it works fine in animation montage
is this bug or something?
this bug is fixed in 5.3+ ?
https://www.youtube.com/watch?v=x3_BNyIgrzk

Let's remove the forward motion in a character animation! There's a bug in Unreal Engine 5 that does NOT LOCK root motion on Retargeted character animations for some reason, so today, we're going to strip it out using Blender. It's not actually that scary, and takes only a moment to do. You'll be walking in place before you know it!
i am still facing it in 5.3
I don't think this is a bug necessarily, I think that they just didn't create a Goal in their IKRig for the root.
You can retarget root motion.
How is a curve not following a curve? That doesn't make any sense. What do you mean?
I think the foliage wind stuff is just the materials, so you should be good, if you have those setup.
If you're having trouble with scale, often the trouble is related to importing things from Blender. Did you import your character from Blender?
Kind of! We don't have a 'Control Rig' channel yet, so this is the place by default.
naw its a bug, because the engine takes the root in the hierarchy and disable motions for it even if it has already no motions, in my case the second bone in the hierarchy is the real root bone and i should now edit engine code to take the bone name manually to make it work properly.
i thought they noticed it and fixed it in 5.4 , but still not fixed, people had this issue in 5.4, inet is full of reports on different forums.
there is how they can fix this bug
-->> Allow users to manually put the bone name which they want to disable root motion for
Sorry, I don't understand. You want to treat a different bone as your root?
yeah
There are number of mathematical issues with that.
Like - you would have to rewrite how the hierarchy is evaluated.
That's seems like probably not the best idea.
the second option is to use blender, it will take ton of time for me
i have like 300 animations
I think there might be another option - which is modifying your IKRig to retarget the root correctly.
Did you make your IKRig yourself or are you using an automatically generated one?
Also - is mixamo involved in your process anywhere?
if i changed the skeleton, it will need to retarget all the animations
That's true, yes.
i tried it, and unreal just breaked the animations
character is very thin now
long legs
Anyone with a good idea on how to play an anim montage on another pawn?
Well, it sounds like there's probably an issue going on with that.
What exactly are you trying to do?
yeah, this is why just disabling root motion on them will be a good to go
play a montage on a different actor that i am currently not possesssing
just need to give it bone name manually
I would be astonished if that ever happened.
Really. Like absolutely amazed.
I prepare to be amazed then.
I really do think you could probably use the retargeting system to retarget your root bone correctly.
Ok
yes from blender but almost 100 times i exported and import again whats can be problem still,? problem is when i use 5.4 retarget tool my Target character gonna be so smaller cant find even viewport and animations has weird root animation but main anim looks works
root bone is correctly working, it just has another root bone on the top of the actual root bone
When you look at the root of your characters skeleton, what is the scale on the root?
It seems like removing that bone would be probably the better option.
i did it, and then animations are looking for this bone
fails to import
i tried every possible thing to make it work
all fails
There are many ways of doing this, but in what context are you attempting to play another montage? Like - are the character synchronized (like they're shaking hands)? Is the other character reacting to an environmental situation like fire? The correct way to do it depends entirely on what is going on.
now its time to edit the editor
i havent check wanna check now how can i check this?
Good luck!
Open the skeleton for your character, and click on the root bone. In the details panel, you should see a value for the scale.

Well, there's your problem!
its looks lil bit much?
It's supposed to be 1.
i didnt play with scale of root bone
The problem is that Blender and Unreal disagree strongly about what the numbers mean.
Let me get you a video that walks you through the process of fixing this.
One second.
thanks a lot friend
This is the video I usually link.

In this video I will show you how to correctly export a character from Blender to Unreal Engine 5.
Common mistakes include issues with the scale of the root, joint orientations and differences between bones and joints. In this video I will talk about everything you need to know to correctly export rigged characters that follow Unreal Engine sta...
I've found it very useful.
Make sure to double check that your character has a scale of 1,1,1 once you're done.
thanks
?
FName Root = MySkeletalMeshComponent->GetBoneName(0);
if (ActiveAnimation)
{
    FSmartName GenericSmartBoneName(Root);
    FAnimSequenceBase* AnimSequenceBase = ActiveAnimation->GetSkeletonRaw()->FindSmartNamePose(GenericSmartBoneName);
    if (AnimSequenceBase)
    {
        FAnimSequenceBase* RootBonePose = AnimSequenceBase;
        RootBonePose->Modify();
        RootBonePose->EmptyAnimationData();
    }
}

if (ActiveAnimation)
{
    ActiveAnimation->MarkPackageDirty();
}
this is how they are doing it, directly looking for the bone name at index 0, which is in my case should be index 1 😄
I'm not surprised.
I think you might be using code to solve a data problem, which is... not always the best choice.
i now just have to expose a uint8 to the editor, and make it read from that exposed variable
when i change to value of scale with 1 its gonna be change laso

then it will be like : FName Root = MySkeletalMeshComponent->GetBoneName(ManualBoneName);
What's laso?
I don't imagine there are a large number of scenarios where this would be anything but unhelpful.
Having any keys on your double root is going to make everything exceptionally bizarre.
And again - you can just fix the data.
Still don't understand. Like I said, you're going to reimport it from blender, after re-exporting your fbx file with new settings.
i have no energy to go through all 300 animations in blender and fix them one by one
it is very boring 😄
okay i thought maybe i can change sclae of root bone inside of unreal
You can't, not permanently, or in a way that would be useful.
I don't believe that's necessary to do.
Here's how I'd do it.
- remove the extra root bone from my character in blender
- export a new skeleton file and import it into Unreal as a new skeleton not onto the old skeleton
- create an IKRig for this new skeleton that has a Transform goal for the root bone
- create a retargeting solution between the two versions of my character where I target the secondary root of the old version with the real root of the new version
- run the retarget
I would expect that to result in having a character with a single functioning root bone.
i will try it
currently it late, i already edited engine code now its compliling 😄
trying to open a door
OK, you're probably going to have an easier time getting help if you're a little more open about what's going on.
Are they an AI character? Is this a cinematic? Do they have to open multiple doors?
If this character is AI, is your problem specifically that you don't know how to activate a montage from the behavior tree - or is it that you don't know how to get AI's to take actions?
Etc. etc.
Without context, people can't help you.
So what is controlling the player character if the player is not controlling the player character?
Because you said we're not currently possessing the pawn when you want this to happen?
the door is not
The door is not what?
not posessed
So... when you said:
gameplay
player
In response to my question about what kind of character it was - you didn't mean to imply that the character you were having difficulty controlling was the player, in gameplay - you meant it was the door?
Can you see how your conversational style might make assisting you a challenge?
Thanks alot
i have fixed
problem
Hurray!

i had just one more problem idk if u know about replace to skeleton? i have 2 same skeleton and i trying change skeletons it was works always before but now idk why maybe about 5.4 when i try replace animation'skeletons its gave crash
I don't really know. Given how messed up the scale was on your character, I would, personally, reimport the character into an empty folder and not replace anything.
i cant lie...
Just make all new assets.
just say you dont know how to cross interact
I do though. I know dozens of ways.
First, you need to access the door actor. This will depend on how your character interacts with the world.
How does your character interact with the world? Are you maybe a top down game where you click on objects with the mouse? A third person game, where you use directional colliders? A first person game where you use raycasts?
actually its noty about scale or character when i just click to find skeleton of animation anim small anim pic gonna be vlack

before

how can i open this animations without crash?
Like I said, I wouldn't import the characters skeleton over top of another characters skeleton.
I would import it independently and then use the retargeter.
That's what I would do.
when i try to open i select to sk_manny its use unreal skeleton already i try open with thatr and when i select to skeleton anim gonna diassapear and same error


Does anyone know how I can fix the root location so it follows the mesh? I want to use root motion for this anim!
It seems like you've maybe deleted a skeleton?
I'm not sure what you've done to get into that state.
see but it is original unreal's Sk_manny skeleton
Sure, but I don't know what you've done or how you did it, but it seems like something has been deleted or damaged.
actaully other animations works
with this skeleton
Neat!
how can i get this?
Did you create this animation yourself?
Did you retarget it?
No, someone created it for me but he's busy with his own stuff atm.
Get what? In that post I am just describing how I do not understand what's going on or what you've done - and that I can't help you.
OK, was this created on the same skeleton as the one you're currently working on?
The character in the clip? yes!
Cool, OK. Was this imported from a program outside of unreal?
Right, that's - that FBX was made by another program, so yes.
OK. So probably the easiest way of doing this would be to open the file in Cascade and make the root follow in there. It's likely your animator could do it in five minutes.
yeah got u i was try to ask how can get to what damaged or what the problem of crash
I don't know, sorry.
if u will be free can i show you the problem in this server's channel? with sharing my project screen.?
There are two other ways of doing this. The first is to open your animation file in the Sequencer and use the FK Control rig to add animation to the root.
The advantage to this is that it is fairly simple, but relatively time consuming.
The alternative, if you want to stay inside Unreal, is to use an Animation Modifier, which is a blueprint script you would have to write to process the animation.
If you're comfortable in Blueprints, this might also be an option.
This is what the animators brother said but im not sure how to do what he is saying.

Their "Option A" is the FK Control rig one I was talking about.
Do you know anything about option B? Is it easy?
It's not free. The mocap tools plugin is 50$ or so last time I checked.
Okay, ill look into the FK solution then. Thanks a lot!
OK! Good luck!
?
Unfortunately, I have to go to sleep. I don't think I can help you on this one.
oh well thanks
So what do you all think of motion matching and the sample that Epic provided?
I said animation curve value not following the curve, Not a curve not a following a curve
What i mean is, lets say you have created a curve with name “TestCurve” then in the animation sequence you are editing that curve value
You’ve set two constant keyframes
0 value at 0 second
And
1 value at 0.1 second
When i start the animation in run-time and call “GetCurveValue” and pass the curve name, it returns something less than 1, until the last keyframe of the animation, it returns something like 0.7
Thats why i said its weird behavior, it should return 1 after 0.1 second
Though in animation montage it works as expected
Its game changer.. literally
Though it has a few issues like root motion montages doesn’t affect the trajectory generation
And if player jumps into a wall the generated trajectory is a buggy
Its really good in its current state, but yet its not finished
Im 100% sure that they are going to dump CMC and use mover 2.0 in 5.5 update
They will fix all the issue, implement correct networked movement and traversal systems
hello guys, where would I start learning how to fix my joint issues (these are just examples); both are marketplace assets with the UE manequin; I would really like to have much better representation of joints (not just knees, but they seem to be the biggest issue)


Hello! I'm looking to make a small souls like project, for now, just a prototype. Does anyone has a good recommendation for some animations ? I'm interested in something with sword, and some kung fu ones. I've looked at the Paragon ones already but they are not that many good ones for sword and hand to hand combat there. I would want the price to be as low as possible ofc, but any recommendation is welcomed! Thanks 😄
thank you, wait, i think i remember you! you helped me with my door opening and closing system!!
Oh yeah! I remember that!
There are a variety of ways of improving deformation on a character, but they all require you to be comfortable in another software like Blender or Maya, and the solutions can get somewhat involved. They often involve things like 'twist bones' which are dynamic bones driven by your animation skeleton that are used specifically to improve deformation, or morph targets, which are stored vertex data specifically sculpted for particular scenarios.
Often people use some combination of the two, or in the case of knees, sometimes even more elaborate systems. The knee joint in humans is interesting because it translates as it rotates, making a mathematical joint a bad approximation, often requiring unusual solutions.
Do twist bones work in unreal? I saw a while ago Something about bendy bones? But they don't work in unreal
Bendy bones do not (as they are a blender specific feature), but 'twist bones' are not a specific architectural feature of any software. Instead they are a method.

In this Unreal Engine Blueprint Tutorial series we are going to help you break down the learning curve for all things Control Rig. We start by taking an intro look at what Control Rig is and creating your first control.
🎓 Why Control Rig
🎓 Control Rig Intro and tour
🎓 Control Creation
🎓 Understanding control visuals
Truly thankful for supporti...
I found this but before diving into it I need to know this is what I'm searching for
Cause it's a long course
A control rig is unlikely to improve deformation. It can be used to run twist bones and other dynamic deformation improvements, but it is not on it's own going to do anything.
You need to add the deformation bones to your skeleton, and modify your vertex weight painting data to include them.
Ah so using the default skeleton is a big no then
Kind of! Often the default skeleton is used as the animation skeleton for a character system. People will then add mesh specific skeletons that follow the naming convention and hierarchy of the animation skeleton but with additional bones, and then use the 'Copy Pose From Mesh' node in an animation BP to copy the animation data from the animation skeleton, while running additional deformation related things on top.
You can see this in the templates. Manny and Quinn have lots of additional deformation bones, but they follow the structure of the 'simple' mannequin skeleton.
Could you recommend a place where I can start learning this? I'm not new to unreal at all but I know close to nothing about animations
Or skeletal meshes
Even payed of, doesn't have to be free
Ofc
Hmm - I don't know. Sorry, it's a bit of a wide topic. I haven't seen any like 'character deformation improvement' courses. I'm not saying they don't exist, but I haven't seen any.
Does a rig like this exist on sale somewhere?
Honestly - the Quinn and Manny characters are not bad examples.
They use entirely twist and deformation bones - they don't use morphs.
But their setup is effective, and you could do much worse than copy how they do it.
They use twist bones and deformation bones controlled by pose drivers.
Quinn in particular is really well done in that regard.
👍
If you don't mind
Sure thing! I'm around!
Oooh! OK! That's interesting. My immediate thought is that this might be a blending related issue. If the same animation data is giving you different results based on where in the graph they're coming from - it seems like it's probably a graph issue.
The first thing I would test is what values I get out of the GetCurveValue method if I plug the sequence directly into the output node.
Like - unplug the rest of my graph, and just plug in that sequence, so there is no blending.
Yall am I wrong for not even considering people with few to no messages in chat when looking at peoples resumes for my freelance post?
Like I'm not saying all of them are scammers but it's just that I dont even feel like doing a background check and there are a handful of scammers so it's just easier to deny all of them
this did not work.. new version maybe 5.4
maybe yeah, I didn't think of that and that makes sense
I didn't know Curve respects blending nodes too
Probably thats why it works in animation montage normally
has anyone actually gotten the mldeformer plugin to work
the maya part of it
epic's plugin seems to just spit out some errors and not load
just the right forearm shaking so badly do you guys know why?
also what is this lmao please help
last 5 sec it rotates wierdly
Can you share the errors?
Did you make these animations and are having trouble exporting them, or did you buy them? Did you retarget these?

as far as i can tell it's something relating to maya's ui system
Do you have shiboken installed?
You'll need that, that's what's causing the error.
Do you know how pip works and python?
not a clue
Darn.
so basically
this is a massive prerequisite
that epic doesnt mention at all for installing the plugin
:|
Apparently not!
nice
On the other hand - if you know python, it is something you can fix in about ten seconds.
The problem is setting that up, and knowledge...
So this is a page on how to use pip with maya's version of python:
Pip is the package manager for python, and handles installing things from the python package ecosystem.
This page has the pip instruction for shiboken2, which is the package you need:

thanks man
It's just:
pip install shiboken2
But for maya it would be, I think, :
mayapy -m pip install shiboken2
i gotta pop out rn but ill look at this later and see if i can get it working
👍
i didntn retarget them cause im using the animations in the same skeleton
they are from mixamo
Interesting. OK. Using Mixamo animations directly in unreal can cause problems because unreal tends to expect that you have a root bone in your skeleton that is on the floor, and that the pelvis is child of that bone.
Mixamo doesn't have that root, and so there are often troubles if you try to use those animations directly.
but if i make a root in blender i lose all of the materials
You can reassign them though.
Yes, I believe so.
y
it worked actually but i dont wanna make all of my animations again do you know a shortcut
.
You can use the retargeter! You could retarget your old animations onto your new skeleton.
does it implements my settings like bone rotation or smth
Sorry, I don't understand what you mean.

Interesting. I honestly don't know!
Also - I wouldn't maybe do it that way.
Have you considered using the control rig and sequencer to do your edits?
I suspect you might have an easier time of it.
hello i need so feedback of this because my friend needs help
unfortunetely i don not have the project and all i know is that he only used blueprints
actually i dont know how to do it
i started with this i know its not the ture way but i cant see any tutorial to learn
Well it's not an entirely frictionless process.
You need a control rig (so you have to look up how to create one) and then you need to load your character into Sequencer and animate with that.
It is much easier once you have it up and running though, and they're useful things to know how to do!
i should look it for
thank you
Hi stupid question is there any way to match the size of the ue5 manny and metahumans while live targeting because when i reload my right hand is messed up.
any possibility to collapse these three nodes to a macro?


:|
literally copied and pasted from the website lol
2025
i have 2015 too and it doesnt even know what pip is vOv
Could you try:
mayapy -m pip install --upgrade pip
Maybe your pip is really outdated.
i cant believe epic made what looks like an excellent deformer and left everyone at the mercy of this nonsense
and i already updated it lol
OK.
I mean - the python ecosystem is considered one of the most robust in the world.
So it's not like this is a fly by night system or something.
yeah but it's literally just a random pose generator
no good reason this can't be part of the engine
Well, I suppose that would be true, if the whole point wasn't that the deformer was contained inside another package.
So if your deformer is inside maya, it obviously must be inside maya.
the deformer isnt contained in maya
maya is literally just there to hold this plugin lol
and all it does is generate random poses
no that really is the case lol
I don't think so.
This workflow example uses the Epic Games developed Maya Plugin to generate random poses for our character. However, these generated random poses could come from any DCC.
You export a point cloud that contains your high cost deformations from maya, houdini, or blender.
You use that point cloud and the accompanying bone animation file to generate the ML deformer.
yeah but you can do it from anywhere
So - you do need a high quality deforming version of the character in whatever source package you're using.
i already have the rig with corrections of the regular skinning
Neat.
I wouldn't necessarily give up yet.
You're pretty close, you just need to figure out why mayapy can't find a sudoken version it can use.
I don't have maya right now, so I can't test it myself, but I can confirm that shiboken does work with pip.
Entirely possible!
Hmm

Like - I know it's not useful, but it is out there.
Because that error 'Cound not find a version that satisfies' etc. That's the error when you've asked for a package that is spelled wrong.

how hard would it be to animate something like this for Arma 3 https://www.cgtrader.com/3d-models/military/gun/ohio-ordinance-works-reapr and how much would it cost. Bonus credit if you can make me a mod.

CGTrader
Model available for download in Autodesk FBX format. Visit CGTrader and browse more than 1 million 3D models, including 3D print and real-time assets
yeah i really dont know
like ive used command lines plenty of times before for similar stuff
Me, I would try other packages. Like - I'd try installing that requests package to see if it installed and it was just shiboken2 that didn't work.
lol i think ill just table it for now and hope that epic puts this feature in engine or releases the script for other dccs
thanks for all the help man
Not sure if this is the right place for this. Arma 3 isn't made in the Unreal engine. It's a 'Real Virtuality 4' game.
They do have a robust modding scene though.
So I'm sure someone on a Arma 3 discord could probably help.
Do Conduits in state machines not run functions (become relevant, update, etc)?
word ill look into it thank you
It doesn't seem like they do but maybe im doing something wrong
I don't think so, but if you find a way, let me know! It would be handy.
Ok
Like - you could make a sub state machine, but I think that would be more awkward than having the transition states in the main part of the graph.
I don't think conduits ever become relevant or update - they're more like transition rules than states, so while I can't say for sure that they don't - I wouldn't be surprised if they didn't work.
Hey, So I have an animation question about IK and FK if someone can help me
When I work in IK or FK and then switch to the other, my progress (in this case arms) go back to their initial positions. Is there a way to seamlessly switch between IK and FK? I'm in sequencer btw
i have no find any solution to it, and i don't want to extend the editor , this is how my graph looks like now
Neat!
uh...
Not sure if that was an answer to my question
It wasn't! Sorry! I replied to the wrong message!~
haha ok
But I do have an answer, but it is a little frustrating.
don't tell me i have to manually do it again
Because keeping IK and FK aligned is a matter of control rig design, and not a tool or option.
Unfortunately that means it's likely not going to be easy to fix. I haven't used the modular control rig a lot, and it surprises me that they don't have that setup properly!
The cool thing about control rig is that it's event based, so you can just update the position of the objects based on the state, so you don't need an elaborate snapping system, you just place the objects in the correct position if the ik or fk system is active.
That's really weird that they wouldn't build that into the modular rig!
Like - this is the core piece of technology with the control rig. It's what makes it cool.
I understand. One thing that frustrates me is that since I got this character from unreal engine market, I need to create a control rig in Maya which i never did before. and even if i make a modular rig from UE5, i cant export it in maya
Which means I'm stuck doing animations in Unreal Engine Sequencer
Yeah, sadly 3D software disagrees about too many things to make rigs transferable. There were a few attempts to make that happen in the early 2010's, but none of them ever took off.
its just sad.
You could make a custom control rig in Unreal!
Which would do exactly what you want.
That takes some time, but there are some good resources out there.
Like, this one by Ask A Dev has a whole chapter on IK/FK switching and snapping.

YouTube
It's a really good resource.
It's extremely long, it's like 10 hours of videos.
But at the end - you will know Control Rig better than 99% of people.
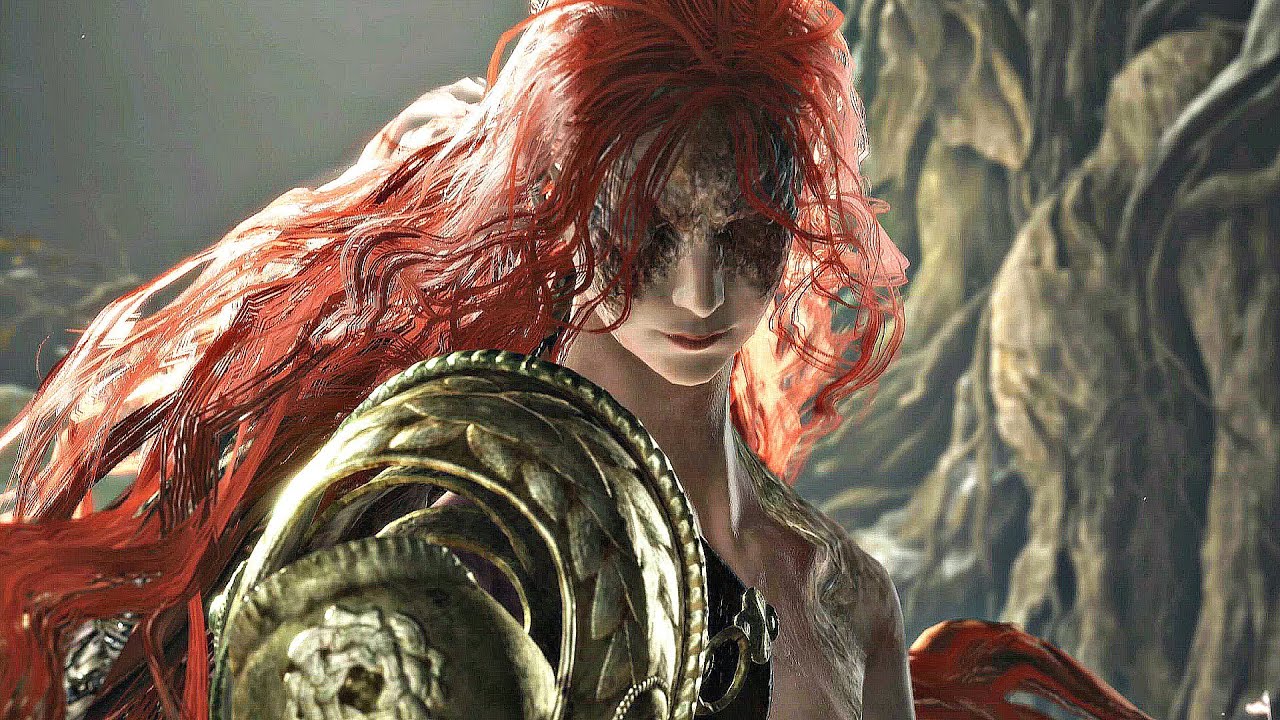
How is "floating up, then diving down at the player's location" done?
Exactly like Elden Ring's Malenia here:
https://youtu.be/D_iqjI2p7F4?t=346
It's a common type of boss attack.
The boss jumps straight up. Waits a bit. Then dives straight down at the player's location.
Creating the fixed animations are simple. Three animations: jump_up, floating, dive_down
However, the "dive at player's location" part is tricky. The dive_down animation would need to somehow be modified during runtime to go to where the player's location is
I did some research and found one very similar implementation, but it's done using spline, timeline, and inside the character blueprint:
https://forums.unrealengine.com/t/launch-character-to-a-target-location/479050/4
What's the best way to implement this? Inside character blueprint or perhaps maybe Anim Graph somehow?
Elden Ring Gameplay Walkthrough PS5 PC Xbox Series X PS4 PRO No Commentary 2160p 60fps HD let's play playthrough review guide
Showcasing all cutscenes movie edition, all boss fights / boss fights, side missions, upgrades, outfits / costumes, all characters, best moments, final boss and true ending, secret ending.
Subscribe for more!
Shirrako S...

Epic Developer Community Forums
I’ve added a couple of bells & whistles, some much needed control, limiters to keep things in check and variables to parametrise it: The general idea: we generate a spline between us and the click location with the mid point elevated we use a timeline to project a point along the spline over the timeline duration we adjust player velocity s...
The 'diving towards the player location' behavior is probably done with the pawn movement and not with an animation.
So she's animating inside her pawn, and her pawn is turned and aimed towards the player.
And then particles and hurt volumes etc. are layered over top.
Hm, so then jump_up, and then floating are just simple anim montages you can just play normally..
Then inside the boss' character blueprint, we will get the player location, then use like movement to make the boss go to the player's location
During that.. I guess we'll have to find a way to switch the mesh to playing the dive_down animation? Maybe in AnimGraph?
Does that sound right?
This is probably a state machine thing for the animation graph, but yeah - basically.
And there are probably cutoff points when the boss stops tracking the player (to allow for dodging) and a lot of subtlety in how and when things happen - but those are the broad strokes.
This is from ABP_Manny
I want to use another type of input in the Control Rig
How can I achieve this?

Sorry if someone already had this problem/fix, but I just followed Gorka Games' animation tutorial, and the animation did end up working for my character, however, it seems the animation was outpacing the player movement speed, so the actual mesh of the character would run past the follow camera, then teleport back on the opposite side.
Also, when stopping/starting movement abruptly, the model kinda spazzes out and teleports a bit. The animations are ripped from Mixamo. Anyone have advice?
I'm going to have to make a youtube video explaining this one...
So good news! You are far from the only person with this issue.
Mixamo characters do not have a proper root for their skeleton. The top of their skeleton is the pelvis.
Unreal doesn't like this, and if you retarget from a mixamo character onto an unreal character, chances are - the movement of the pelvis wasn't properly transferred to the root object while you were retargeting.
So your character is (probably) just up and walking away from their own pawn.
how do i reset this

its a greystone attack animation and I just want to set the manny static mesh to it and reset the stretched limbs and stuff
OK, so 'greystone' is a Paragon character?
yes
Does it play properly on him?
yes
Cool, OK. One sec.
i just dont know why the torso gets stretched like that. I set the skeleton to be manny. Sure I can manually do it but itll be imperfect
I believe it is because the character of greystone doesn't have... something (can't remember what) defined for it.
Like I said, one sec. I'm looking it up.
Aha!
Dang, that took a long time to dig up.
OK!
You need to make sure that Greystone has a 'Retarget Source Asset' in this list.
It's available by clicking the 'Retarget Manager' in the skeleton viewer.

If one of those exists, then you have one more step, if one of those doesn't exist for Greystone, you have a few more steps.
If one exists, open your greystone animation files and in the 'Asset Details' panel there should be a 'Retarget Source Asset' option that is probably blank.

If you select Greystone's mesh - it should work.
But that's only if there is a Retarget Source Asset for Greystone's mesh in the list in the skeleton.
@pale cipher
does this look right? the animation looks horrible lol

It doesn't, no.
also, dont hate on the character pls i did my best
Note that red line between the ground and the pelvis?
That shows that you don't have a proper root bone on the floor.
So your character is being translated up.
And will not interact with Unreal's animation system correctly.
You need a root bone for your character.
can that only be done in Blender?
No, it can be done in lots of programs, including Unreal, but if your source data is in Blender, it's probably better to do it in Blender.
how do i pull up asset details?


OK, so as you can see there, you don't have a Retarget Source Asset for Greystone.
So that's unfortunate, but not unexpected.
You're going to have to create one.
You should be able to add a new Retarget source for the Greystone mesh simply by clicking 'Add New' under Manage Retarget Sources and choosing his mesh.
That should work.
Then, for the animations, you just need to open the Asset Details window from the window menu.

In your control rig, create a new variable and click the little Eye icon to the right to expose it to the graph.

In the animation graph, you should see the option under 'Input' to expose it as a pin.

okay thank you so much for the help. Im gonna work through all the stuff you sent me!
how's this? the root is at 0,0,0

if i then upload that to mixamo, does mixamo utilize that, despite the auto-rig?
Hard... to say without being able to see the rest of the skeleton?
I don't know!
Thanks! I'll try that
Most of the time, when I talk to people using mixamo animations, they've taken a normal mixamo character and integrated it into their project and done the retargeting in Unreal.
I'm not sure what it will do to your little goblin guy.
the animations themselves actually look really good with him. It's just when you start integrating other systems like movement, it seems to start to break
everytime i try to open an animation it crashes 💀 . I get this error: Assertion failed: (Index >= 0) & (Index < ArrayNum) [File:D:\build++UE5\Sync\Engine\Source\Runtime\Core\Public\Containers\Array.h] [Line: 758] Array index out of bounds: 69 into an array of size 69
That's an interesting one!
When did that start?
There was an array index problem before, but I thought the 5.4.2 fixed that mostly.
just now it seems
Interesting!
can i mass edit all animation sequences to retarget source asset?
That'll be the root not moving.
I believe so, but I suspect that attempting to do so when you have an error like yours will also result in a crash.
only one way to find out
Good luck!
it seems the crash only happens in the animations folder for greystone
Sounds like there might be a problem with those animations.
Are you absolutely certain that Greystone was designed to work with the UE5 skeleton?
That sounds... unlikely to me.
i honestly have no clue
however by moving the animations seq and montages to my thirdperson folder the animations work flawlessly 🙂
workaround found
I wouldn't be happy with a workaround myself, personally.
Due to the likelihood of further problems down the line.
yeah i agree but im just happy its working for now
ill push the headache to a later date
Out of interest, I went and tried to do this myself.
I found that I was able to get it to work relatively easily, and without crashes, by adding Greystone to the 'Compatible Skeletons' list rather than the 'Retarget Sources' list.
any ideas lol?
so i should then remove him from retarget list?
I'm not really sure. You might end up getting better results doing an offline retarget, then an automatic retarget like this.
Because I'm noticing that Quin and Manny do not seem to like how his arm is setup.
And so result in some unusual deformations.

Not ideal.
yep, im trying to modify the animation right now but cant even seem to get it to play when starting a new level sequnce in animation mode
As before, it seems like the animation has not ended up on the characters root properly.
And so he continues to walk away from his own pawn.
But that's only a guess. What do you see when you open the animation sequence and look at the bone?
Is he walking away from the root?
Or is the root moving?
oh i guess he is moving away

oh so, could i take the model that Mixamo generated, into blender, add a root bone, then export it and set the animations to use the new skeleton instead? is that what is meant by "retargeting"?
Well, not really.
Unfortunately it looks like you have an even worse scenario where he still doesn't have a root.
His pelvis is still the top of the hierarchy somehow.
Or possibly his pelvis and his root are in the same spot?
Hard to say, but both are not great.
i forgot how to lock the limbs into place during animation. like i dont want my finger to stretch ridiculously long, i want it to be locked to its current length if that makes any sense
is there anyway to apply this straight hand throughout the entire animation without doing it manually per frame?


Well, if you delete the other keys, you can use only one key for the pose.
No, I'm afraid not. Retargeting is a name for a general process of taking the animation for one character and transferring it onto a new character, often using inverse kinematics and other processes to retain the animation but modify the skeleton and the character proportions.
Unreal has several tools for how to do this.
In your case, I'm not sure if your attempt to create a secondary root worked.
Did it? In Unreal, do you see the other root in the skeleton?
I've been working on this since then lol

Neat!
not sure if that would work with mixamo animations or not
but at least it's got a root
You could probably retarget mixamo animations onto them, even if mixamo itself can't do that for you.
The IK retarget tools in Unreal are quite robust.
This is a pretty good example of how to use the retargeting tools.

Hey guys, in today's video I'm going to be showing you how to use the new animation retargeting system in Unreal Engine 5. This is using the IK rigs and retargeting. The example in this video is using a Mixamo character and animation, however this will work for any character, skeleton, and animation you want to use.
Mixamo To UE5: https://youtu...
It's a little outdated, so it doesn't include the very useful Post Processing step for Retargeting, which is a major help in doing things like recovering the root motion that you're having a little trouble with.
You can set it up to regenerate the root motion from the pelvis movement like this:

Whether you want 'Rotate with Pelvis' on is going to be dependent on your specific animation, but usually you want it off.
i just finished modifying the greystone attack sequence, however when I save it i dont see my changes applying to the actual animation sequence. All i did was open the left hand

Did you only save the sequence or did you export the animation?
i only saved the sequence
Gotta do that second step!

It is!
i appreciate the help today, i will be back tomorrow! 
I get the basic idea of state machines in the anim graph
Like for Locomotion and Jump. You start at Entry then transition depending on conditions controlled in the Event Graph.
I mostly understand.
But I have two questions...
- How does it get to "To Falling" state? It's not connected... However, I CAN confirm it does go there when I jump
- If I want to make a state for
dive_down, I can probably make a boolean flag in Event Graph. Then in my character BP set the boolean flag in the AnimBP, similar to Jumping. Does that sound alright?

So, "To Falling" is a 'State Alias' which is a new piece of tech in 5.something and is both strange and kind of breaks the state machine display.
Like, I get why they made them - State Alias do have a purpose, they can simplify the graph, but they also act as invisible connections which can make your graph impossible to read!
So... definitely a compromise choice from a design perspective!
You can read about them here:
Epic Games Developer
Create logic-based branching animation by using State Machines.
They're a bit hard to wrap your brain around, but they kind of act as a method of connecting multiple states to other states without creating a ton of wires everywhere.
kind of getting somewhere... what do i do about this

So in Manny and Quinn, the 'To Falling' alias, has two transitions, one to 'Jump' and one to 'Falling', and it connects both 'Locomotion' and 'Land' to both of those.
So without the Alias, both Locomotion and Land would have to have connections to Jump and Fall.
And the 'To Land' alias connects Jump and Fall to the 'Land' state.
So this saves you a bunch of redundant transitions.
All of the transitions to jump or fall will be the same, but you would need to define them separately.
The Aliases make the graph less busy, but honestly... a little harder to read.
If you click on "To Falling", you can see the states that it acts as an alias for. They're the ones that are checked off.

Hmm... I see, thanks for the clarification
I'll definitely give this a read

Hard to say, I don't know what's happening or in what context.
Could be an import problem, could be a retarget problem - no idea.
Sorry, I'd need a lot more context.
well, got a blender converter to add a root bone, "output" from the converter gives me this fbx that contains the root bone, but adding him into animations that I pulled from mixamo makes him sideways in the animation


I would not expect animations created without a root bone to work without additional processing on a character with a root bone.
I would be really surprised if that worked.
You probably need to do a retarget to do this.
Also - didn't you create your old animations with a mixamo created skeleton?
So your new skeleton probably has entirely different rotations for many things.
So I would expect most of that to fail.
well I did, but i thought the problem was that the root bone was just missing for some reason, so root motion wasnt possible
It's not 'missing for some reason' - mixamo just doesn't have them.
As for the dive_down, do you think it's good to make a new state and transition, for example off Locomotion with a boolean flag transition for the dive_down animation?
Then in the character blueprint, I'll set that boolean flag to true when I'm diving down

Oh good heavens. Um.
Well, personally, I would probably not put my attack animations into my locomotion state machine.
I would, personally, use a linked animation layer for my attack animations, or, if I couldn't do that, I would use an attack specific state machine.
Accessed probably through a 'Blend Pose By Enum'.
Hmm... I'll have to get back to you on this
Do some learning on "linked animation layer", "specific state machine", and "Blend Pose By Enum"
A 'specific state machine' isn't a kind of thing. It means I would make a new state machine, and I would use it specifically for an individual attack.
So if you're doing a 'Scarlet Aeonia' kind of attack, I would have a 'Scarlet Aeonia' state machine.
Or, more probably, a linked animation layer.
Oh, like Locomotion and Main States

Yes, like that.
Then, if you create an 'Enumeration', you can blend poses based on a variable of that type.
So you can create a structure that looks like this:

So by changing the 'Current Attack' variable, you can change which state machine is active.


You said there's two different options: the separate State Machine and the "Linked Animation Layer"
And you recommend using Linked Animation Layer, right?
I don't know if I recommend it. It's what I'd use personally. I don't know your game, so I can't say if it's better.
And the screenshots you posted, is that for the Linked Animation Layer or the separate State Machine?
Those would be separate state machines.
Okay gotcha, I'll do research on Linked Animation Layer and get back to you
Thank you!
Hello, short little question: I've got an enemy controlled by AI that moves into attack range to the player (via AIMoveTo). Once its there, it does fire an attack with a correlating animation, but somehow the enemy gets stuck at the end of an animation and does not proceed to the next attack. Could someone help me out to fix that?
Hi! I have a bunch of expression animations which go from neutral face to specific (eg, neutral to smile, neutral to afraid and so on). I want to create animbp with random expression playing. I use random sequence player, but transitions are not smooth. What’s the best way to implement random expression playing with smooth transition?
whats the right approach to attach the hand to the gun? creating a proper animation asset, or creating a control rig to hold the gun?

i have a mechanism in my animation wher the root yaw is being offset to negate the turn, and after a certain thershold, i play an appropriate turning animation, then based on the animation i reduce from the yaw offset. this is in place to help me turn in place, but it is making it that when i add the gun and move around, the sockets that are defined on the gun mesh try going to where the mesh would be found had i not used the root yaw offset - and then they go back to the location they should be considering the root yaw offset. is there any way around it? it feels like the root yaw offset isnt reliable
but i must be doing something wrong..
vs when i turn the root yaw offset off
so initially me interacting was always possible i was just missing a damn ABP for the vehicle itself hahahaha

In this video, I delve into the development process of my Vehicle Interaction System, utilizing the Motion Matching System. The animations for entering and exiting the vehicles are nearly complete. Now, I'm focusing on seamlessly integrating the mechanics of possessing or entering the vehicle and controlling it. Additionally, I discuss the chall...
hello hello, I have a root motion question: Does root motion need to be played on the "Mesh" component of a character blueprint rather than it's children?
you can use chooser instead to create your state machine
if you new to it, learn this instead
and if you want to say its used for motion matching only that aint true
I want to create a blocky model and animations that I can then import into ue5. the closest comparison I can think of is the animation style of minecraft or early roblox
I have blender but I have tried the usual way but it does not work with the style I want
What is Chooser? I can't really find much about it..
unreal engine content examples project
How do I set bone length for arms and legs for my character customization?
if you are using blender use the scale tool
this is what I have right now:
yeah, but it also scales the children bones too
I only want certain bones to scale and not affected other child bones
you should be able to scale them as you plaec them in
what?
Is it possible to have blend for animation segments inside montage?
Looks like it allows you to choose which animation to play?
Choosers can be used to select any kind of object, but are often used in Motion Matching to choose which motion matching database to use for a given state.
In your use-case, they're not what I would use.
Hi peoples! I need your helps!
[2024.07.02-13.30.15:611][ 12]AnimBlueprintLog: Warning: SLOTNODE: 'DefaultSlot' in animation instance class ABP_base_C already exists. Remove duplicates from the animation graph for this class.

What do you mean by 'blend for'?
You can't have two of the same slot node in an animation graph.
You can only use one at a time.
But you can cache the resulting pose.
And use that in multiple places.
Non uniform scaling of anything in Unreal gets super weird. If you want your limbs to change length, you're better of translating the hands and feet than trying to use scale.
Is there an example on this issue? Thank you
a little example
What does it do instead of work? I can't see any immediate reason why a blocky character couldn't work in Blender.
I'm not sure what you mean. If you want an example of the problem - you have one.
Do you mean an example of using cached poses?
Could you show your whole animation graph first?
It's not only one slot, it's one of each slot. You can have a DefaultSlot and an UpperBody slot node, and that's fine.
What you can't have is two DefaultSlot nodes.


blend between animation segments in montage editor
Ah! Then no. If you want to blend montage related things, you need to do it in the animation graph, and not within a single montage.
huh I didn't think to do that
Oh gosh, sorry - that was responding to the wrong person!
In your case, it seems like you could just remove the DefaultSlot node that is connected to the mainState State machine.
To answer your question - yes. The root motion needs to be on the main skeletal mesh.
Can i use a new slot?

Possibly - if you really need a montage slot for that specific part of the graph.
Only you can say if it's necessary to have one there.
ok thx! )
That what did, I wanted to know if there’s a better solution for what I have rn
Not that I know of - though however you do it, it's likely to be fussy to author meshes for!
What does author meshes mean?
Create new meshes!
Oh
The rubber hose style you're going with will make that easier though!
@nimble torrenthello
Hello!


Cool!
What does it do instead of work?
it doesnt work on that
Neat! No body animation or no face animation?
