#animation
1 messages · Page 38 of 1
Thank you, will do. 💪
That worked, thank you. May I ask another question, is there a way to weight the blend of the animation to the IK? In other words, the FK has the arms swinging at the waist. The Control Rig "IK" has the hands straight up above the head. I can see the blend of the FK and IK. Is there a way to weight the animation so there is no blend and I only see the IK?
When the blend of the FK and IK is happening, the arms are swinging in the air
I think there's a track for that?
Can I weight the animation so there is no blend and the arms do not swing above the head?
I don't know the name, but I think somewhere in there, there's a 'switch' or 'alpha' value for the IK arm.

It should be under 'metahuman control rig'
There should be a curve or control there called 'IK_arm_something'
And that should control the switch between them.


Sure! Try playing with those!
The switches, the boolean tracks.
The ones you pointed out here: #animation message
Hmm? There does not seem to be a way of doing a boolean track with those IK arm switches. Maybe I'm doing it wrong.
I would like the "Blend" of the FK arms to stop swinging when the IK arms are keyframed at frame 59. I wish the arms to stop swing after frame 59.
This is a test, I hoped to have the functionality to just have the IK arms just stick out straight without the FK animation Clip blending after frame 59.
incase someone wondering where their space is going using motion matching although relocating the folders, this is where!

Wow!
The fact that you can't find those boolean tracks that you pointed out is quite strange! I am surprised by that!
That's what they're for!
It's definitely possible.
With those switches, I can turn on the FK or the IK controls.
OK, yeah.
However, those switches do not control the blending that happens between the FK and IK
OK, here's a question - did you bake to the control rig, or are you using an additive control rig track?
Because I believe those controls are designed to do that.
They are supposed to switch between the two control methods.
So something else is likely going on.
in this case I add the animation clips to the anim track them used "layered" control rig.
Sorry unrelated, but is this on 5.4?
The sequencer UI looks much better
So yeah, try baking to the control rig.
I did a previouse where I baked the Seuence, but that didn't give any blending controls, either
OK so there probably aren't 'blending controls'. What's happening now, I think, is that you are using an additive layer, which is always going to add on top of the existing animation data.
So that's, I think, why the arms are not fully respecting the IK system, even when the IK system is on.
I think that's what's going on.
So, I think, if you want to do what you're trying to do - you're going to have to bake to the control rig.
Could be wrong! I don't have a lot of experience with the new control rig layers in sequencer.
Hold on.

Yeah, like that.
this just merges all tracks to an FK Control Rig
No. IK weight controls when I "Switch" to the IK arm controls
It basically bakes out a new FBX clip
Again, I don't believe there are 'weight controls'.
I think those booleans are probably what controls the IK/FK system.
And it's not creating a new FBX file, it's baking the animations sequence data onto your control rig.
There has to be a way of eliminated the FK anim clip from blending to the IK.
OK, but... there is. It's the switches!
This is what happens after I bake to the sequence

That's very weird!
I wouldn't recommend baking your bad data from your additive animation into a sequence.
I would recommend, taking your original data, putting that in the sequencer, then baking that data to a control rig!
if you get a chance to play with Metahuman, drag on an FK MOCAP animation clip. Then turn on the layered Control Rig. place keyframes on the IK Control Rig. Then bake to sequence
I won't.
Because that wouldn't work.
Which is why I'm not suggesting you do that.
I believe that is what I did.
And I think that was a mistake.
Is ther a YouTube video that shows the correct way. I might be doing it wrong
Ther has to be a good way to edit Mocap
There is!
💪
Here are the steps:
- Remove all tracks from the sequencer.
- Click on the 'Track' plus sign next to the control rig in the sequencer. Choose 'Animation' and find the animation you want to modify.
- Right click on the Control Rig in the sequencer. Select 'Bake to Control Rig'. Choose the control rig you want to work with.
- Find the IK/FK switch control for the limb you want to modify. It will probably be keyed off. Remove all keys from that track.
- Turn the IK switch to "IK", so you can use the IK controls.
- Edit your animation.
- Bake your animation to a new sequence.
That is what I did. and got the wiggly arms
That's seems odd and unlikely.
The only way I could see that happening are:
- You have damaged your original animation. So the original animation now has wiggly arms.
- You did not actually remove all tracks from the sequencer, so you baked an additive track onto the new control rig track.
- Your control is broken or damaged, and doesn't bake properly.
This is the metahuman control rig generated from Quixel
OK?
Gimme a sec and I'll show you
I'd recommend trying it again.
In fact, I'd recommend making a new level sequence, and trying in there.
And confirming, when you load the animation sequence alone - that the arms are fine.
That will eliminate the first possible failure point - that the original animation data has been damaged.
The new sequence will eliminate the second, that you forgot to remove all the existing tracks from the sequence.
If you still have a problem, the only possibility is the third - that the control rig does not bake properly.
This is a new test, with the MOCAP on the metahuman. The Mocap looks ok on the metahuman.
Neat! So that appears to be a confirmation that the data has not been damaged.
I will now RMB and create the layered Control Rig
What happens when you use a new sequence to run the rest of the test?
Do not do this.
Bake to a control rig instead!
O Bake it?
Yes.
With this?

Yes!
With these default settings?

Yeah!
Done, the sequencer tracks look like this, now.

Cool! Are the arms fucked up?
O good lord.
I'll make a capture to show you
This is what it looks like
Notice how the origin of the animation also get offset back from where the Mocap started in the first capture. I have no idea why the Bake on the legs came out wrong, either.
And that happened as soon as you baked it?
yep
OK, so that's option 3 then!
Your control rig is broken!
A properly formed control rig should be able to bake animation from a sequence.
So you have discovered the problem!
This is not my control rig, it is the Quixel metahuman Contro Rig
Then the quixel metahuman control rig is broken!
The method we just did is the old way, I beleive
The new way is to use the "Layerd" control Rig

They're different use-cases.
It's not a case of 'old' and 'new'.
They're for different things.
And regardless - if it doesn't bake properly, something is wrong.
The Layered bake looks good. But I'm still trying to find out where I can control the weighting of the "Arm" IK, so there is not Blend of the previous Mocap arms. I hope to find a way to stop the asrms from wiggling when the IK arms are stretched out in front of the body. I hope to find a wayt to keep the IK arm stretched out without the wiggle.
Layering doesn't involve baking though.
It's additive.
test
All right. Good luck!
Hey, does anyone now why ue adds those extra bones? And how to fix it. Because its kind of annoying to animate with. (One photo is how it looks in blender)


When you exported from blender, did you have this option on?

You probably want it to be off.
Have it turned off, still the same
Surprising!
Seems like ue creates a bone for the start of each bone in blender and for the end too
That's traditionally how it interprets Leaf Bones.
With one at the start and one at the end.
So that's why it's surprising that it's still doing that without that checked off.
There should be a substantial difference.

OK.
I would try to import it with a different name, so it imports 'clean', not over top of the existing file.
And I would triple check that my FBX has been updated with the re-export with the 'Add Leaf Bones' off.
Because exporting with that checkmark on or off should have a substantial effect.
So my suspicion is that it still is the culprit, and there may be a problem with your test.
Exported it with a different name and triple checked, still the same
i will, thanks 🙂
Hey Guys anyone knows if we can cut animations, remove frames inside the engine editing the sequence
Yeah. If you open the sequence in the sequence viewer, and set the time bar to the point where you want to remove frames, then right click, you should be given the option to trim.
Be careful though, it's a destructive action, you can't get that data back without reimporting it.
it gives me random frames
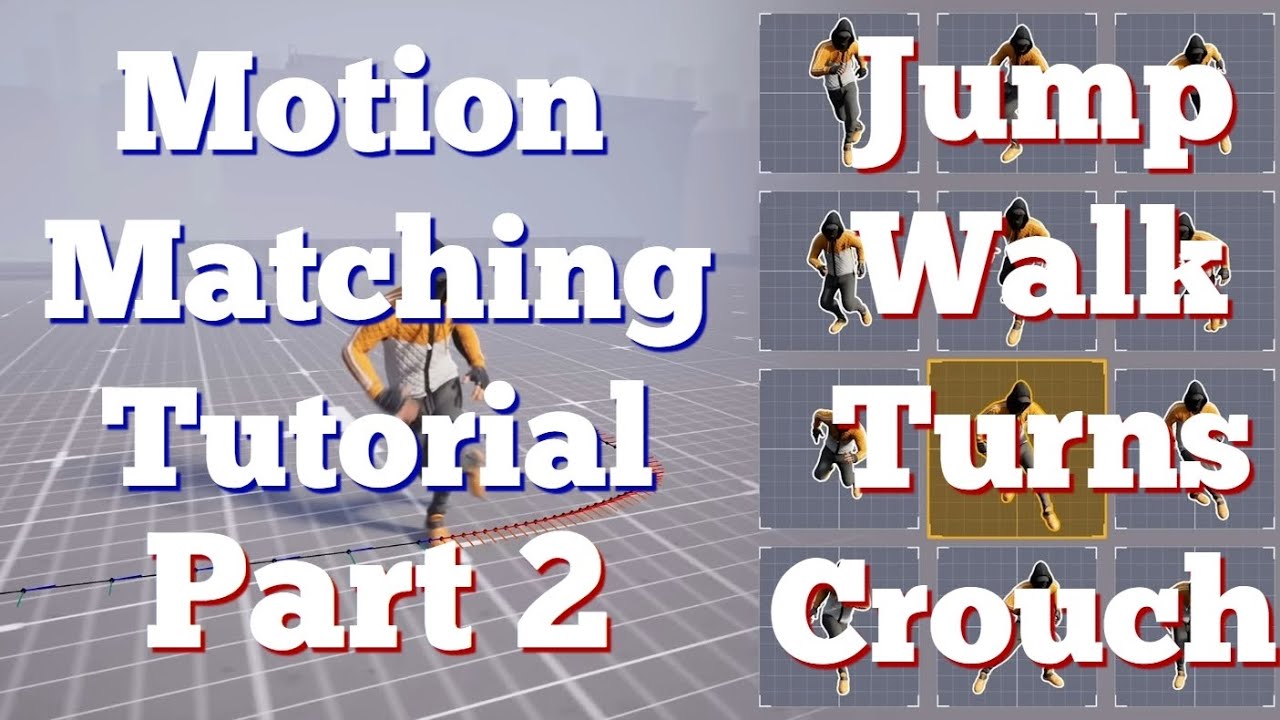
Part 2 for Motion Matching system. Learn how to add Jumps, Walks, Turns and Crouch to your Motion System in Unreal Engine 5.4
First Video: https://youtu.be/UlNqYWuXcTw
Second Channel new content soon: https://www.youtube.com/@UChEtrPb9VrzA3QsuIjdZa_w
TimeLine:
00:00 into
00:15 Sorry
00:20 Pivots and stops
00:35 Walk
01:30 Fix Rotations
01:52...
It shouldn't be giving you random frames. It should be giving you options to trim from where you right click, forward and backward.
Right clicking at frame 15 gives you the option to remove all frames before or after frame 15.

(this is definitely behavior that could be improved, it would be nice if you could drag the active area and not delete the frames)
👍
For more control i would use a level sequencer bake to FK or CTRl Rig and cut keys then trim the animation and bake it?
So I have a couple animations im trying to blend for a third person grappling hook character. I have a GrappleShoot anim that has no transformations applied to the lower half. I also have a GrappleSwing anim that has the character airborne.
I want to have the GrappleShoot animation only affect the upper half of the body so when the player is on ground their feet don't move from idle to the default pose, and when the player grapples midair their feet continue the GrappleSwing animation
That could do it!
@nimble torrent Have you played around with Retargetting in 5.4 yet?
Its super powerful, but still quite unstable.
I haven't played around with it much, but that's what I hear.
Lol the engine cant handle the power! 💪
Sounds about right!
Ok so I was able to figure it out with use of Blend Poses by Boll and by Bone however the animation loops instead of playing once. I have already tried turning off loop animation and that caused the animation to only play once since this is in the anim BP and not inside of the state machine

Could I theoretically make a state machine just for the grapple shoot animation?
Sure - or you could play it using a montage. Do you know how montages work?
I kinda have a grasp, I was using a montage debug toggle in the character BP but after disabling that nothing changed with the animation.
I'm not the programmer of the BP so I'm not 100% sure where the cause of the animations playing is
I have an idea though, let me ss really quick
I tried adding a play montage to this section of the code and it didn't work

For a montage to play, you need both code that tells the animation BP to play a montage, and a 'montage slot' node in the animation graph.
You have one in that graph you posted, the 'UpperBodyOnly' node is a montage slot node.
yeah so I need to plug it into the animationg BP?
the tutorial I was following the guy used a button degug in the CharacterMovementBP so I just followed that
Kind of! One sec!
So Montages are designed for one-off animations. If you need a character to wave to someone, scratch their nose, or open a door - chances are that's where you'd use a montage.
A Montage is a kind of asset in Unreal that is separate from Animation Sequences.
You can create them like you create other assets, by right clicking in content browser:

When you do, you get a timeline where you can add animation sequences. The important part in terms of organization is the 'slot' on the left here.

See the 'DefaultGroup.DefaultSlot'?
That's the node that this montage is going to try to play in, if you call "Play Montage" and pass this montage.
You can change it to one of the other slots you've defined in your project by clicking on the arrow beside it.

When you call "Play Montage", the animation runtime checks which slot the montage wants to play in, then checks your animation blueprint for Slot Nodes that match.
If it finds a match, it plays the animation into that node in the animation graph. Otherwise, Slot Nodes do nothing.
Following so far?
Yup
I've already added a new slot and called it UpperBodyOnly. I've set that as the Default group
Neat!
Now you need a montage set to that slot, containing your animation.
When you have that, you probably want to reformat your blend tree a little.
You can simplify it to be something basically just like this:

Because Slot Nodes don't do anything unless you've specifically called 'Play Montage', this will, normally, blend the upper and lower body of the same pose together (effectively doing nothing) but when a Montage is placed in the UpperBody slot, it will play that animation on the upper body.
So how do I place that montage in the upper body slot?
By using "Play Montage" at the correct moment.
Calling "Play Montage" starts the animation of the specified montage playing in the matching Slot Nodes.
So in my Event Graph in the Anim BP I need to play montage when bool isGrappling is true?
If that's how you've setup your game - sure!
When you want the character to play the animation - call Play Montage.
So it looks like its playing kinda (hard to tell because I think its blending too much)
You can change the blend time in the montage's asset details.
Under 'Blend in' and 'Blend out'.
They're pretty generous at 0.25 seconds start and end, so if your montage is very short, that might be causing a problem.
Otherwise, double check your layered blend node to make sure you're not doing anything weird.
Sup chaps, need some help with something. When Importing an animation from Blender the hand doesn't align properly. The reason I found out is because of "Preserve Local Transform" in the import settings messes with the skeletal mesh's bones a lot and turning it off does the trick; the hand aligns properly however, I need Preserve Local Transform because while it does fix the animation's scaling and location, the mesh goes all pixelated and has weird stretches. Any ideas?

My 'scale is fucking this up somehow' senses are tingling.
Do you have non-uniform scale going on anywhere in your rig?
Maybe, maybe not, elaborate how do I check?
but if it's about the Blender to Unreal x100 scale like the Cm to M thing, I already did it...
That's good to know, 'cause that was my second guess.
But scale is a vector. So you can scale x, y and z separately.
You can do that if you want absolutely everything to break.
Especially in unreal.
Because unreal treats non-uniform scale differently than basically every other 3D program on the planet.
So, to check... you just have to look at every bone's scale value at the moment where you're having a problem, and see if the scale is weird!
oh... I don't scale bones...
That's good! You shouldn't!
But... maybe scale crept in somehow!
I would check my hierarchy for that arm, to see if there's anything weird with the scale.
Well, that's progress, there is... The DEF bones have constraints like Stretch To, which does mess with the scaling. That said though... I don't really know how this helps (?) or how I can do anything with this (?)...
Because even with the constraint on, everything still works in Blender and turning off Preserve Local Transforms does work but it also makes a mess of other stuff...
Yeah, stretch-to that's a doozy.
Unreal just straight up does not handle non-uniform scale in a way comparable to blender or anyone else.
I'll real quick take a Screenshot of what happens if I turn it off...
Their method for doing so is frankly bizarre, and I have no idea why they do it that way, but they do.
I can tell you how I'd fix this, but it's fussy as hell and I don't know how comfortable you are with messing around with stuff.
Here's how I would fix a stretch-to constraint.
I would create an 'export' skeleton that was constrained to the animation skeleton, but didn't use stretch-to constraints, instead, it would allow the bones to translate rather than rescale.
So the wrists would physically pull away from the elbows, rather than the forearm bone scaling.
That's how I'd do it.
Right so if I turn off Preserve Local Transform this happens, ignore the Mesh literally melting I'll get to that in a sec but at least the scaling problem is gone sort of perhaps maybe mayhaps perchance...

But turning off Preserve local transform also does... this. Nightmare Fuel level stuff...


Maybe? The docs for Preserve Local Transform suggest that they do calculate scale differently on import when you use that option, but I would expect their solution to be fragile.
I'm building a visual aid to explain why.
OK, so - two boxes in blender.

Two boxes in unreal.

The upper box is child of the lower box.
What happens if we apply a non-uniform scale to the parent box?
Like, what happens if we scale the parent box vertically?
Blender:


Unreal.
See the difference?
Every single other piece of 3D software does it like Blender.
Unreal is unique in this decision, and it break everything with non-uniform scale from other packages.
They just fundamentally disagree about what it means.
basically... nuts...
Yeah, the Unreal version is really really strange.
Who made your character?
Yours truly...
Well... you can't use anything with non uniform scale.
So that means stretch-to is out.
The Rigging is done by AccuRig
You have to rebuild the rig to not use that.
Right then... Stress test time...
wait does that mean I need to remake my animations?
Maybe?
Oh are you trying to do stretching from Blender to Unreal?
Depends on how dependent on the stretching constraints your rig is.
You could try doing it the way I suggested.
Where you keep your rig the way it is, but you create a secondary export skeleton top of it.
And that skeleton translates rather than scales.
I've got some experience with that.
Oh also, there's also Copy Transforms in the bones... The Stretch To I think perhaps I can get out and plus rebuilding animations won't be too much of a hassle but what about it?
(Copy Transforms should be fine, provided they're not copying something with a non-uniform scale)
And also yeah do tell, because I'll be writing this down afterwards for Documentation...
We'll see, nothing like the ol' College Try...
It was a few years ago now so it might be a bit out of date, but i'm familiar with that Preserve Local Transform issue.
I got around the bones behaving strangely by locking/copying the scale of another bone and applying it to the offending bones.
It would mean you cant stretch EVERYTHING because you will have points on your skeleton with "Locked" scale to prevent errors. But here's the thread i made a while back: https://forums.unrealengine.com/t/solved-blender-to-ue4-squash-and-stretch-bone-heirarchy-scaling/72193/3

Epic Developer Community Forums
So after working on this on and off for many months now I have some some promising results. I have tried to emulate the default Unreal Engine Mannequin Skeleton to keep some consistency across the assets I am making. I created a deform skeleton and a control rig inside Blender, containing one squash and stretch bone in the torso. This was the re...
rather than constraint nodes, you could just as well use a control rig to enforce a scale on the bones, like your hands there
Oh... Yeah, I've seen this...
While researching on my problem I also saw your post...
That does kind of end up with a runtime version of what I was suggesting with the export hierarchy.
Where you're translating the bones rather than scaling them.
Ah yep. In blender this is all using the stretch to constraints
Hoo boy alright, this is slowly microwaving my brain...
So to recap, my options are either to make a new version of my rig WITHOUT the Stretch To, or the Export Skeleton thingamajig sorry if I don't understand that Squishy Suggested...
Or possibly battz runtime version, but that one makes me anxious because I would expect that to cause shenanigans of one variety or another in the future.
😅
Did you ever use that for a full game or character?
my solution certainly ISNT battle tested
no lol just for fun
That said it's quick to try and if it doesnt work for every case, which i'm almost certain you're correct when you say it wont e.g. i did not try any layering or additives
I think I'll just try remaking the Rig without Stretch to and see where to go from there, plus I am doing a patch on my Rig because of some... Weight Painting Problems... so that's also welcome...
👍
Hey guys im no animator by any means so ive come to this page seeking help/advice with animating a player character with 4 legs
Good luck!
jeez that forum post is so old now 🧓
Oh yeah I forgot to say Thanks, the insight and Hypothesis is greatly appreciated...
Just curious is there a way to take the mantle montage from UE 4 manny and map it to my custom model?
a programmer of mine uses the UE 4 mantle montage to move the player in game but no actual animaitons play, would I have to call the specific slot for the mantle to occur?
In the control rig list is there a way to expand all selected controls?
Hey guys im looking for some help on animating a character
Shift click the arrow, that what you mean?
Yeah but for like multiple controls with nested controls
Like is there like a expand all selected feature
I don't think so
But you can always shift click their common root to expand all of the children recursively
Hmm I see
Does anyone have an idea whether there are any performance considerations for using "Layered Blend Per Bone" multiple times instead of layering everything in a single node?
For example if you had Upper/Lower body and wanted to layer the arms on top of upper body?
i watched UEs animation thing they being using blend stack

Get an in-depth look into how we rigged and animated LEGO® Fortnite in Unreal Engine, and how we reinvented Fortnite Battle Royale’s locomotion with Motion Matching. This talk will show the tools we’ve developed and share details on the content we’ve built, including the transition to Motion Matching on a live title, how we landed on the animati...
Doesn't look like what I asked for, I mean specifically using LBPB multiple times vs. once with multiple pose pins
I am using an edited metahuman (thanks to Metareforge plugin) and I am having this situaton where foot start to go forward or up before it has to.
this behaviour is not intended


hello, im working on character movement however whenever i jump the actual jump animation starts whilst shes in in the air
When I import my animations ( gtlf ) with "Use Source Name for Asset" it adds "_Anim" at the end, when i disable it the animation names are as is. Is this a bug?
Good lord Synty character models are a pain to work with.
foot ik bones misplaced

red is where they at prolly,
you would have to edit the rig in blender
MODULAR CTRL RIG
Hey, everyone!
• Custom character (but I tried to replicate basic unreal naming convention for bones)
• Spine module generates shoulder (and thigh) sockets outside of hierarchy (basically root level). Anything I should add to my skeleton to comply with the new modules? (With unreal chars the shoulder socket generates at upperArm bone.)
• When I create custom sockets for a shoulder module (at upperArm bone) it doesn't work properly (90 degree off and just doesn't seem to work properly in general).

• Also noticed something that seems like an invalid input in the blueprint where the sockets are being generated. Name: Left/Right Side Suffix in *Get Module Name Metadata *

I'm very much a beginner when it comes to animating so I hope this is not too stupid of a question:
Sometimes when I animate the rotation of my character's hands the interpolation between two keys will suddenly kind of "unrotate" them 360° to get to the next key pose. Or sometimes what looks like two very simple keyframes with different rotations will interpolate with kind of a "bounce" around one axis between them. Any hint what I might be doing wrong? Or is that expected with "dumb" interpolation and I should just key the desired rotations in between?
Using ControlRig in UE5 sequencer by the way.
can it be that anim notify states are being triggered inconsistently during animation playing? I have an attack animation that has 2 notify tracks. One of those tracks has chained anim notify states that notify combat component that an attack has changed its active phase from wind up to release to recover, but for some reason sometimes I see all 3 notifies triggering instantly (at least according to vislog) 🤔 is there any catch when chaining anim notify states?
They tend to be pretty consistent, but there are edge cases with blending where they can do some odd things.
Playing all their animation notifies in one go is something I haven't heard of before. That's new!
RE: 'unrotation': Are you pasting poses when you encounter this error? The sequencer does appear to support rotation values above 360 when entered manually.
RE: 'bouncing' this is probably caused by 'gimbal lock' which is a mathematical error caused by euler angles aligning.
Gimbal lock is the loss of one degree of freedom in a multi-dimensional mechanism at certain alignments of the axes. In a three-dimensional three-gimbal mechanism, gimbal lock occurs when the axes of two of the gimbals are driven into a parallel configuration, "locking" the system into rotation in a degenerate two-dimensional space.
The term gim...
It can be frustrating to work around, but you can often get it to work by changing the rotation order on the control.

Today I had a case that happened after copy-pasting yeah. Should I try to keep my control rotations between 0-360 by "looping" them in CR?
As for gimbal lock, my details panel for the control doesn't list that 😮

Maybe 5.4?
Yeah, 5.4.
This has been happening to quite a few people. The modular rigs are not as universal as Epic has been showing them to be. They seem quite specific about which skeletons they will work with.
For some reason all their rigs have that 'Get Module Metadata' error? It's quite strange. It seems like their rig modules aren't reading their metadata correctly or something.
Okay, I'll have another try after upgrading. Thank you!
My understanding of how the control rig works is that it's not the parent rig that defines the existence of the child rigs. The child rigs define are what look for parent sockets. So the Spine isn't saying "There should be shoulders here" the shoulder rig is saying "Aha! I can attach to this!"
That's gonna happen if you have your state machine setup to only allow you to enter the falling state through the jump animation. You usually need a state connector directly between walking and falling in order to avoid this kind of error.
Hey. Random noob question. The Lyra animation blueprints seem to be basing their property access nodes on the character class, is there a way to change that to another class? I can't seem to find a setting...
When you say 'property access nodes' do you mean things like getting the characters velocity to determine how fast they're moving, or asking the character if they're on the ground?
Correct
So there isn't a setting.
This stuff.

So those binding are kind of new. They bind to functions.
So you would have modify the functions.
If you wanted to switch out which character class the animation blueprint used.
Ah so it's functions added in the anim bp itself?
I don't have lyra on my computer, but I believe if you look in the list of functions for 'GetMovementComponent', for example, you should find a function with that name.
👍
Hello can someone help me? I try to make a wheel rotation through an animation blueprint.
I can make rotate on the X axis to show the direction where we go but i don't know how to make them rotate on theirself.
Any idea what am doing wrong? i know that Speed is correctly set but it doesn't want to make the rotation and i don't know why

What does it do instead of work?
nothing
It doesn't even change direction based on Wheel Orientation?
yes that part works
but to make the wheel turn on themself
it doesn't work
in fact that one works

but the rotation occurs only 1 time
OK, that makes sense. Get Time Seconds is probably not what you want to use.
I think that gets the time in Linux Epoch seconds.
which function could i use?
Anyway, Get Delta Time, and then store a current rotation value.
And you probably don't want to accumulate indefinitely, so use the 'mod' function to restrict it to between 0-360.
The code would be:
current_rotation_y = mod(current_rotation_y + (speed * delta_time), 360)
that looks like cpp
It's actually pseudocode!
but the simple delta * speed doesn't work
No, not at all.
That will do nothing.
You need an accumulator variable.
A float value that you add to every frame.
so i need a delta comming from outside?
No.
You need an accumulator variable.
Make a new variable next to speed. Set it to float.
that you calculate outside the animGraph that's what i mean
Yes, you do.
ok i got it
Thanks It works perfectly also with your pseudo code i stay between 0 and 360
thanks
Does anyone know why in 5.4 all of my imported animations are upside down when enabling root motion. If I try the same thing in a clean 5.3.2 project, I don't have this issue. In-game they look fine, so they are only flipped in the editor previews, but it's very difficult to edit animations this way. I am using a Mixamo-rigged character and of course ran the rootbaker plugin for Blender. Is there any quick fix?
When we create an Animation Blueprint Template
the Update fonction is not looping?

it's display only 1 time
Works for me on 5.3 😮
Though I'm replacing my template with a plain ABP, templates are kinda sucky right now

It seems likely that your print string is being blocked from later in your graph. Can you show more of the graph?
Does the root bone in your skeleton have a rotation on it?
Unreal has a system to compensate for odd values on the first frame, but it is not fully robust, and can create issues.

I store an array of key value pairs mapping the bones to its corresponding fk controls in the constructor event. Then I iterate through every bone/fk control pair setting the fk transform to its bone.
I originally followed this tutorial https://www.youtube.com/watch?v=tY7IXwzw1u0 which used one array of bones and another array of controls and then set the transform of each bone to each matching control by iterating through both arrays at the same time. But that setup required the order of bones and controls to be exact which I felt would not be too flexible when making edits to the rig.

Master every step of Control Rig with this 1st part ! From the basics to a full FK Controls system using Forwards Solve and Construction Event.
Let's gooooo !
🎁 Support my caffeine addiction fund and ensure I stay awake enough to keep creating content :
https://patreon.com/ProjProd?
🧤Our courses :
https://www.projprod.com/courses-1
♥️ Follow...
OK? So what's the trouble?
I wonder if there's a simpler way to do this.
Probably not! I mean, maps are great!
When I watched this video I definitely wondered why he didn't set it up that way.
Though I am surprised that you had to use strings.
Could you not have stored references?
(I wouldn't be surprised if those broke)
But you can change what the key and the value are, right?
You could have the key be a bone, and the value be a control.
Yeah I couldn't store a bone ref into the value for some reason
There is a bone ref pair though
My guess they're very transient.
Hmm I see
Oh that's interesting. You can't make maps in Control Rig!
Weird!
They're just not there.

Yup that was why I had to make an array of pairs. I asked this question here earlier and someone showed me the source code indicating that this was intentional
Yeah I do wonder why control rig doesn't support maps though
They tend to be slow.
Not super slow, but compared to array access, much slower.
And the Control Rig has it's own bytecode language.
So they may just have decided that it wasn't worth it to support maps in the bytecode.
I thought maps just sacrifice memory for speed
But I read that control rig is not a typical blueprint or something maybe that has to do with it
No, not really. Every type that you can use as a key needs a 'hashable' function, so to look up something in a map you hash the object then look up the hash. This is considerably more expensive then just using a pointer offset to get something from an array.
Yeah, control rigs are their own custom bytecode.
That is separate from blueprints.
Thanks for responding!
'They seem quite specific about which skeletons they will work with.'
Yeah, it seems they are VERY picky. It was the upper case _L and _R that caused the issue. Made the naming exclusively lower case, now the sockets are being placed properly.

I have not used this at all but it surprises me that they don't have options for that.
You could do it like this:

Epic Developer Community
How to Spawn Controls in the Construction Event and use Metadata to access those new Controls
Using Metadata!
Yeah, the string they look for (for all these 4 bones) is hardcoded.
That seems... bad.
Yeah. Hope they polish that a bit. In my older projects I had to create the rig control after control and that was a real pain. These modules can be very useful.
Personally... I don't think the modular control rig was a good idea?
I think they would have been considerably better off making more flexible prefab functions for normal control rigs?
So rather than having a 'modular control rig spine' that you have to interact with in a very specific way, you have a set of functions for 'Create Control Rig Spine', 'Evaluate Control Rig Spine' and 'Evaluate Control Rig Spine Backwards'.
Personally, it feels like the Modular Control Rigs were mostly created for investors and videos, and not for... people actually using the software.
I see what you're saying and I welcome any way to make the rigs easier to make in general (including your idea or what they added now). With this, I can now create the ctrl rig within 5 minutes (if everything works how it should). Whereas before it took me 2 hours and constantly peeking into my older projects how I did it before since the documentation in this department seems to be lacking.
The 'if everything works' is doing a lot of heavy lifting though.
Yes it does since I've never used unreal skeletons for anything (always custom skeletons) so I get into a lot of annoying issues (like the one today) a lot and it always drains me too much than it should. But in general Unreal is very focused on their pipeline and gives you trouble when you want to do something your way so I'm used to that at this point.

That's an entirely different kind of graph.
Also your print string isn't... visible?
So...
Obviously the problem isn't there!

OK, and that doesn't work? What happens when you use the debugger? The event just never even starts?
that doesn't loop that print only 1 time
on the other graph that loop but not here
OK, but what about the debugger? You tried that?
before it was not a template, here i try to create a template
I've never used templates. I didn't know they were a thing.
Maybe... don't use them?
Oh! That's cool!
I did not know these existed!
yes it's happend only 1 time
I didn't know templates existed until about five minutes ago, but it says they require a child blueprint. Did you make the child blueprint?
Are you testing with the child blueprint?
Also - again, what happens when you use the debugger?
Heya! Looks like there is a way to make fully skeleton agnostic blend trees!
Who knew!
Good to know! I'll be researching more into this for sure!
I'd recommend not using templates if you make heavy use of linked anim layers since you can't provide a sensible default implementation in the template.
And the child ABP cannot override the templates functions...
Oh really? You can't override the functions?
That's unfortunate.
It's less of a child ABP and more of a simple copy of the template. So copies of the functions are already there (but hidden) hence no override
Huh... I wonder what happens if you make a child of the child?
i enter to the event only one time.
Interesting. I can't replicate your results. I just made a test template.
That is something I am not willing to know 30 minutes after I replaced my template with a plain ABP...

And in my implementation instance of the template:

It seems to call the function fine?
Uhh...
and u just use the animation template into your bp

Oh the functions yeah, sorry that was my error
I meant anim layers
Oh! OK
what do you have into your animegraphe?
I mean. I probably wouldn't... use this for things where I needed to replace that much of the graph?

I created it like this?

Did you make your child instance the same way?
Oh!
Your blendspace might be fucking it up.
no
Maybe try it then?
i create an anime, anf there i put create template


yes like that
But it seems that the template blueprint doesn't prevent you from adding animations.
See the warning?
"Templates cannot have direct references to animation assets placed inside of their animation graphs"?
That warning exists - but it doesn't stop you from doing it.
So my guess is, your Blendspace counts as an 'animation asset' and that might be breaking everything.
I attempted to use it in place of my main ABP because I want to be lazy with additional skeletons
But managing linked layers when you can't provide a default kinda sucks
If you happen to find a workaround let me know, I'll switch back to templates after I stop crying 😢
mmm
I never really used linked layers myself. I never really saw the point?
You do everything via state machines?
Lotta cached poses too.
I have remove the blendspace to see if it can loop but no
and you u put the animation into the blueprint

like that
Hehe
You need to create a child animation bp that links to your specific skeleton.
Like this:
ok i will try
Do linked layers provide some kind of missing functionality?
but the idea was to avoid to put a skeleton
Unfortunately, your plan has failed.
You pretty much always have to specify the skeleton.
because all the skeletal mesh has the same skeletal tree
it was to create 1 animation that work for all of them
if i have to specify manually the skeleton... it's not so cool 😄
If they have the same hierarchy then you can import them as having the same skeleton.
When you import your FBX file you can specify the skeleton.
So that they share!
i got the idea
but in that case the template is uselss because it will work with the normal way
no?
Yep!
That's true!
so the template should work like that otherwise 😄
because i notice you have ot manually enter the name of the bones
Templates are useful if you have characters with different animations and different skeletons, that you want to have similar animation graphs.
Nothing you couldn't model with state machines, no.
I just have a state machine already and don't want to recreate it in ABP as well. So I just link from my existing SM.

You have a free floating state machine that is not part of an animation BP?
I didn't know you could do that! That's neat!
StateTree 🙂
And you can bring that into an animation graph as a linked layer?
Interesting!
Well, not directly, you can grab the anim instance within the state tree and link an ABP
Roundabout way of not having to duplicate that in ABPs
Not sure I follow! Don't State Trees lack animations?
I thought they were generic state machines!
Yeah but you can add any parameter to any state, so you can just go and configure an ABP for each state where you want to link it, then execute a StateTreeTask to link that ABP on enter and to unlink on exit
I also play my anim montages that way
Might be crazy tho, not sure how far that'll scale
I mean - if it works for you, go nuts, but wow - definitely an odd way of doing it!
I have baked anmiation in a blender (without rig!), I don’t understand how I can transfer it to UE
Am I a complete idiot? or were you stupid too? Moreover, I google it, but everything there is on skeletons
But this is not possible?
(and this is not shape kay)..


I wouldn't know how else to do it, I mean you need to make some kind of decision on what montage to play when, right?
How do other projects do it I wonder?
I wasnt aware of templates, that's very cool
my thinking exactly, previously i'd handled that with child abps which became a little unwieldy
Yeah, you could do this with just child abps and a 'root only' parent skeleton.
But that's maybe more prone to error then this.
I'm also not understanding this haha although I've only used anim layers in very simple ways
yeah and it somewhat limits the type of character you can accomodate, we were always limiting our character artists being like "this is really cool but can it adhere to our biped skeleton 🙏"
we got a good amount of variety but this approach seems like you could be more flexible
oh state trees are an ai behaviour thing right? but you're using that to drive your abp?
Metadata sounds interesting but also I didn't know there was a spawn control function. I'm def gonna use that lol
When importing animations with "Use Source Name for Asset" why does it add "_Anim" to the name?
Not sure. I mean... if you just import normally, doesn't it take the filename?
Isn't that... good?
Does blueprints have a built in clear array or do I have to do it with a for loop manually?
just realized that's better asked in blueprints
yeep

Apparently in control rig the clear function is called reset
Hmm seems the spawn control function settings have changed:


Mine is the left one
Can't figure out what goes into settings
I got it just had to right click initial value and choose transform
👍
why a frame appears that is not of the next animation montage I played. I used a notify montage to trigger Play the next anim montage early, but when I did that, a frame from the animation blueprint appeared, that frame was not part of the animation montage I wanted to play.

thank you for helps
Does this control rig node search up the current bone's ancestors recursively and returns those as an array?

Went ahead and tested it, it appears that's what it does

StateTrees are generic state machines but mostly advertised for AI
And I currently drive any state related thing with it: animations, GAS abilities, gameplay effects...
This unfortunately does not work 😦
Even in the grandchild you get no option to override the anim layer functions
Hey y'all, I am encountering a technical issue where, upon transitioning the character from walking to flying — triggered by the flight component — there is an unintended deformation affecting the female character's breast area.
I have attempted several troubleshooting steps, including detaching any animations from the clavicle bone from the superhero flight animations & in the animation blueprint, but the problem persists with the breasts becoming visually distorted, if anyone knows how to correct this, I apprecite the assist.
The character is a Daz 3D model


How would one do a "bounce" curve in sequencer?
In blender there is a bounce interpolation mode which overexaggerates a pose and kind of bounces it into the key like a spring. I used that a lot to give some animations that sense of speed and inertia.
Any way to create custom interpolation modes for that? Or would that have to be done "by hand" by keyframing it?
Considering that the interpolation types are an enum I suppose there is no way to extend it with custom ones :/
UENUM()
enum class EMovieSceneKeyInterpolation : uint8
{
    /** Auto. */
    Auto UMETA(DisplayName="Auto"),

    /** User. */
    User UMETA(DisplayName="User"),

    /** Break. */
    Break UMETA(DisplayName="Break"),

    /** Linear. */
    Linear UMETA(DisplayName="Linear"),

    /** Constant. */
    Constant UMETA(DisplayName="Constant"),

    /** Smart Auto. */
    SmartAuto UMETA(DisplayName = "Smart Auto"),
};
I think you're going to be stuck hand animating that.
You have to figure out what system is controlling her breast movement. If you don't do that, nobody can help you.
The breast movement is controlled by the DTL plugin seen here ( https://virtuality.space/ ) -- however, with the superhero flight asset pack, there is nothing in it that controls the clavicle / pec bones...
I've contacted the DTL creator he suggested that I alter the control rig or remove animations that interfere with the clavical bones, that didnt work.. 😢
OK, well... why not get rid of that?
And, are you certain that it's a custom coded constraint that is doing that?
Or could it be that the DTL plugin might be setting up some unreal technology under the hood?
I'd suggest using Anim Dynamics or Kawaii Physics to handle jiggle physics if you know how to override its influence from the breast bones
@nimble torrent the DTL plugin controls the JCMs of the Daz character to allow for more realtisic human movement, in the joints so that it looks natural..
the conversion is done through maya, and then export and import into ue...
plus the DTL also controls the physics for breasts and glutes..
Right, but the "JCMs" appear to be just... poses?
Like they're just morph targets.
yes
They're using unreal technology under the hood.
So, for the dynamics... could they be using something else?
Like a ragdoll?
im unncertain
I'll look into that, and its just when i switch to flight mode they get all twisted
The reason I suspect it might be a physics related issue, and that the physics system is probably built on unreal's, is that the transition from flight to non-flight probably involves switching physics objects, and it looks like the bones that control her breasts are being held inside her body by physics.
If the characters physics objects were fighting a ragdoll, you might see similar behavior.
You need to look into your character to figure out how it works. If you don't do that, working with it is going to continue to be quite a challenge.
i tried removing physics from the superhero flight asset to see if that was conflicting but that didnt change anything
When you change states, what do you do to your character?
you mean when i switch from walk to fly ?
Yeah, the thing that's causing you trouble.
well, she can fly round, exit flight mode etc.. I'll post a video
That's not what I mean.
I mean, mechanically, what happens?
Like:
- I switch a boolean that says 'Can fly' to false.
- I change her 'locomotion state' mode to walking
- I play the 'superhero landing montage'
- I trigger a particle effect
Etc.
What do you do?

I created car rig suspension in Unreal Engine 5
Car control rig and BP function
Woo!
now add an antenna on it
@nimble torrent so this is the process

OK, so what happens if you don't switch animation blueprint?
Like, just keep the walking one while she flies.
Does she mess up then?
if i dont activate flight mode, she'll just walk normal, and the jiggle physics works as it should.
Cool.
Well, switching your animation blueprint is something that can often cause shenanigans.
I would recommend not separating them.
Having the flight animations and the walking animations in the same BP is... totally fine.
And would solve this problem.
If you want to have separate modular logic, you can look into animBP layers
Or you can just use a Blend by Bool blend node, and... you save yourself some complexity.
the way i have its set up is just to swap between the anim_bps on button press. so i guess thats not the best way
Yeah, that way is creating a problem for you.
Switching your entire animation blueprint is usually something you want to avoid.
A good solution would be to have bespoke blend pose by bool, and the animBP read a value from the character, as a way to switch between two pose input/state machine
You gain nothing by having them be separate.
Not claiming the best solution, but that'd be a better start
bespoke blend pose by bool?
Bespoke?
Any better word choice? English isn't my first language
Ah, OK! No trouble. I'm quite tired. It's very late for me.
alrightt so you meant blend pose by bool, yes ?
Yes
Then you can use a bool variable that you toggle when you switch to flying and vice versa
You could also use a state machine! As is often the case, there are many options, none of them are 'correct', but many are incorrect.
yo that's me
@ashen junco Alright so which be should i make the change to, the flight one, or the DTL one, since its the one with the physics?
lol
Wait - I'm confused. You have two animation blueprints. One called 'Quinn Walk' and one called 'Flight Anim'.
yes
Put the animations from 'Flight Anim' into 'Quinn Walk' and blend them by a boolean value.
Would anyone know how to approach Left foot or right foot forward idles depending on which foot is forward when stopping?
Switch that boolean value rather than reassigning the whole animation blueprint.
Technically, you can just read the position of both feet when you transition to stop, and choose the one that is further forward.
But if you're concerned about foot placement, you probably have to track foot down animation notify states anyway, so you could use those.
the quinn walk is the dtl stuff essentially, and the flight anim has its own flight component
No, the character blueprint has a flight component.
The flight animation blueprint has animations in it.
Combine the two animation blueprints. The ground animation and the flying animations.
Doesn't matter which one you decide to keep, because you want to keep the setup for both of them.
You should be able to copy and paste them.
Animation sync markers should work, no?
Yea i was just about to ask about Sync Markers.
When I was working on a system where we cared about that kind of thing, I used notify states. That gives you a range for the foot being down.
this is the flight anim graph, many various states in it

Doing the annotation is tedious though.
Neat.
so just select and copy paste
I imagine that there may be some trouble copying and pasting if you have variables to control the various parts of the animation blueprint.
Notify states and Sync markers? Or just the notify states
This is something that you're going to have to figure out.
I think we just used notify states. Sync markers are weird.
K cool, thanks again!

I do think you should look up sync groups though. I think I was doing a bunch of weird stuff, so we ended up fighting the system a lot.
Ah interesting, sync markers and sync groups have always been my best friend lol
@ashen junco so I created a new anim bp, I connected the walk BP to the false pose in the blend poses by bool, and I'm trying to connect flight bp to true pose and for some reason the BP doesn't show up in the list for select.. only "Cast to" is showing up 🤷🏾😭

Does your flight ABP use an "Input Pose" node as the first node? That's a requirement for LinkedAnimGraphs
unfortunately not, can that be changed and it still work ?

Well this is where you hit a limitation of linked anim graphs and state machines as you cannot pass an input pose to those and have it evaluate.
Can you not put the "Blend Poses by bool" node into your flight ABP instead?
I set it up the blend poses by bool but it won't let me add the other BP to link it
im going to ask a really stupid question here lol. How difficult is animation to get into as a beginner, for example would it be outside the realm of possibility for someone like me with very little animation experience to make a basic run + jump and climb animation in Unreal Engine for use in a game idea.
You can use the starter character for that
But climb is prob a little more difficult
Anything is possible with patience and perseverance
You can use the control rig ik to place the hands for climbing
having a degree in Games Design while largely avoiding animation like the plague because i assumed it would never be something i would have to deal with 😄
oh how wrong i was xD
It just doesn't show on the linked graph node?
No
Thats weird... Are they using the same skeleton?
No
Oh
Huh
That might be the issue then, I believe you can only link ABPs that have the same skeleton assigned
do they have the same hierarchy? you can try compatable skeletons
in the skeleton, at the top open asset details, and link the other skeleton
Oh right
There is a checkbox
"Allow incompatible skeletons"
Where you select the ABP to link
Not sure what the result will be tho!
Allow different skeletons is checked
Hm


There is a setting allow custom animbp override
I added the other skeleton in the asset details
Ok that changed things
Changed but not fixed? lol
hey guys, working in UE 5.4.1, basically I have duplicated the FirstPerson ABP and used my own assets, however when I jump, the initial jump animations loops and it seemingly doesn't exit that animation state.
I do not have the loop checkbox checked in the jump animation.
Anybody knows a fix?
check ur animgraph
there's nothing wrong with it
it's the same as the FP anim graph
I have doublechecked too
found a fix
thank you!
loop animation was checked in the animgraph
however now I have another issue, when falling, it's stuck to the falling animation, and that is not looped
ah I think I connected some pins incorrectly
Yea sometimes the Anim Graph and Animation Sequence can be deceiving
yep
the actual issue was that I needed to change some code in the animgraph too
"there's nothing wrong with it"
Nice, Sync Marker was the key! Thanks all.

Didnt even need to add Stop transitions 😅
Hey guys! Don't know if this is the right place to ask for it. I'm implementing NPCs that may execute many different actions, such as sit, eat on a table, take a food plate from a freezer, drink soda, dance with each other, talk to each other, etc. How would you guys approach these actions? I'm currently using level sequence + animations, as on level sequence I can bind the actors in runtime and use the level sequence's flexibility to spawn actors, attach objects to the NPCs mesh, hide, show, animate a given object's transform, and etc. However, it really feels that I'm work on the edge of the level sequence for this. For instance, to make a action which the NPC will leave a holding object onto a table make me feel that the animation should be really precise to the make me concerned to where I will detach the object, and it may still float on the table (without gravity) or detach inside the table. At the same time, using animations/anim montage purely seems to not give me enough flexibility to approach attachment/dettachment, spawn, etc...
There are a bunch of techniques to achieve what you intend to do, some of them you can do in Sequencer, others I would refrain from using sequencer for.
It depends what you're trying to create, is it a videogame, simulation, film...?
A game, yes. I'm currently implement "the sims-like" npcs, I got the whole needs/advertisment working, I just can't get the actions to feel quite right and sustainable to designers implement new actions (currently, they would only need to setup a level sequence with the action happening, while configuring some properties on a component)
For instance, I got this prototype of "change object from location", which kinda works (ignore that I'm using place-holders animations), but it really feels it could easily break when attaching the object or detaching it (by "break" I mean the object jump to the hand/end location, or end up inside another object)
Hey that looks pretty good!
From what I see in that video I think some procedural work might be useful to your designers in certain scenarios that they can toggle on/off or blend?
Looks like motion warping might be an option for this, though I am not familiar with it whatsoever. Here's a link to it: https://www.youtube.com/watch?v=SM_AR-oZ-1k

Full-Body IK (FBIK) provides you with the tools to create reactive, dynamic characters, and Motion Warping is a new Experimental feature which allows you to manipulate root motion animations to adapt them to the world with fewer custom assets. Join us as we explore Unreal Engine 5’s new animation features!
ANNOUNCEMENT POST
https://forums.unrea...
An alternative would be control rig and doing some IK magic to precisely place the object on the table for example.
Hmmm got it, will dive into this and see that I can find. Thanks!
good morning, yes lol... however i gotta run got some appointments ill be back later

someone can help?
I made animation with control rig and imported them into another project, after importing the animation is in higher location than in the project in which I animated it
previous project:

how can i fix it?

I don't know if I fixed it correctly, but I changed Pelvis from Animation to Skeletol
Hello there.
Related to Motion Matching, let's say i have two different set of animations, one for "In Combat" and one for "At Ease" each one have a propper Idle - Walk - Run animation. Someone know how can i ask for it to select which set of animations it need to be used?
Thank you!
Any pointers for updating a static mesh in a level with animated abc version of itself?
(full layout will need updating so looking for a clean way of linking/updating)
Anyone know how we'd go about setting up the IK foot prediction se up with a Modular Control Rig? There doesn't seem to be an event graph associated with it like there is the regular Control Rig.
I am not sure but the more I hear about control rig the more I feel like the answer to many problems is "Use regular control rig"
Or use both!
Is there a way to get a particular rig key element, similar to Get Children? I know the bone names of the specific elements I want, so I don't want to loop through 100 other elements just to store the rig key elements... Also I can make a new rig key element but I'm not sure if that's correctly connected to my rig? I'm going to apply IK to it.

This is in control rig btw ^^
hi/
the mesh skeleton has a morph target, I set the values (screenshot)
and... how can I fix this pose and put my skeleton in the scene?
I press create pose asset current pose I get the default pose without a changeable morph, why is everything so counterintuitive
THXX

I used a slightly modified UE5 mesh for my animations etc in the project. I would like to use a different mesh, but unfortunately assigning a different skeleton doesn'tä work, nor does retargeting. can you simply assign the skeleton to other meshes?
The answer to that is 'kind of'.
In unreal meshes and skeletons are usually connected together.
Here's my understanding of your situation:
You have a character using one of the standard unreal skeletons with a bunch of animations on them.
You built or found a new mesh that you'd like to use.
You can't get the new mesh to play the old meshes animations.
You'd like to know how to do that.
Yeah, but its Not exactly the standard skeleton:)
I was using the Cloner Actor tool in the Motion Design section, it puts something else instead of creating a cube, how can I solve this?

I don't understand your issues. You seem to have three of them.
Why do you want to store 'RigElementKeys'? What is your goal?
Why can't you use 'Get Bone' or 'Get Control' if you already have the name?
When you create a new rig element, it should show up in the hierarchy. Does it not do that for you?
OK, but 'You have a character with a bunch of animations' and 'You have a new mesh that doesn't match the skeleton' are true?
Yes:)
Hi All im working on a project where you can play as any animal in the map. Im stuck on how to handle animations. I need some help.
I have 90 degree turn animations and I have put them in my blendspace. But the character doesn’t use them when I turn they spin like a top to the direction I need to go than then start walking.
I’d like to be able to use the turn animation because it obviously looks more realistic than spinning.
I don’t mind jumping on VC if anyone minds guiding me through it a smidge.

I am also confused by your problems.
Skeletons do not have morph targets. Only meshes do.
If your mesh doesn't have a skeleton when you imported it, something has gone wrong. You need to check your export process to make sure you're selecting your armature.
OK, you have two options.
-
You can change the new mesh to use the old skeleton. You would do this in something like Blender or Maya. It will require you to rebuild the weight information for the skeleton.
-
You can retarget the old skeletons animations onto your new skeleton. This will require a retarget process and will also probably require you to rebuild your animation blueprint.
Both of these require a not-inconsiderable amount of work.
This one is tricky. How much of the character did you build yourself? Did you decide pawn movement instead of root motion?
Adding features to the modular control rig requires you to create a new module. You can create a copy of an existing module and add too it, but modifying behavior without creating a copy is not what the modular controlrig is for. It's meant to be sort of a plug-and-play system.
This really depends on what you mean by 'updating'.
Are you doing this at runtime? Like, are you swapping out a static version of the object, so it can animate after the player does something?
This is interesting. Try loading the animation into sequencer and looking at the pelvis track. Are they the same values? It certainly seems like there has been an offset. Did you export your sequence as an FBX and reimport it or did you grab the animsequence file itself?
Im using all the In-Place Animations instead of root motion although im not sure of the difference to be honest. The parent class is set to Character. Idle, walk, trot, run, and sprint all seem to work albeit with a little jitter or stutter but i firgure thats something else to work on a little further down the road.

Rather than including both states in the same motion matching system, you're probably better off building two of them, and then blending them in your animation blueprint.
So I'm guessing this is an asset you bought, and not animations you authored yourself. What about the character? Is it yours?
I'm asking, because the mismatch between your pawn movement and your desired animations is something that probably would have come up otherwise.
Hey! Nice job!
Yes this is an asset I bought that came with the animations. The Character is something i created based off the third person template and can control it with a gamepad.
thank you
yes I exported as FBX and then import to second project
OK, neat. So you're hitting a very old and venerable animation and gameplay challenge, which is the trade-off between immediate responsiveness and animation fidelity.
Creatures in the real world need to anticipate their actions, and move their bodies into position to begin to do an action. This takes a considerable amount of time. It also takes time and effort to slow down after a movement has been initiated.
To make characters move in a believable way, you have to include that kind of anticipation and follow-through.
The problem is, that inherently takes control away from the player. Generally, action games tend to err on the side of gameplay for player characters, creating maximum responsiveness at the cost of animation fidelity.
Right now, you have a very abstract style of character rotation. The pawn pivots on the spot. In order to make the movement appear more natural, you have to either slow it down, or fake it, or somewhere on the spectrum in between.
Quadrupeds are particularly challenging, especially for rotations like this, because foot sliding is very obvious on the back legs.
What happens if you load that FBX into something like Blender?
Do you see the vertical offset?
If you haven't looked up "Smart Objects". They're designed to do this kind of thing. Level sequences probably won't scale particularly well.
Hey, pretty new to animating or rigging in Unreal but I have this snake that needs animating at the moment. Nothing fancy, it'd be enough to make her go through a spline? How would I go about something like that? or would it be better to animate it in Blender and then export an Alembic for example? thanks for any pointers!!
That depends on what you're using the character for. A snake that exists in a cinematic is different then a snake enemy or a snake player.
That part I understand. The part thats not working for me is I want the turn 90 degrees left or right animation to play when i input it on the controls. The turn animation is in the blendspace but doesnt activate. Right now it just pivots and points in that direction.
Right, pivoting isn't an animation. It's your pawn rotating.
Your animation blueprint exists inside the pawn. When the pawn moves, the whole animation blueprint also moves.
It also, probably, does so extremely fast.
Much faster than your turning animations.
So even if you could trigger the turning animations, they probably would still look strange because they would be playing when the turn action is already complete.
The way the turning system for the third person character works, you can turn very quickly and continuously. So the turning animations would be activated many many times.
there is no 'Get Bone' function in control rig
but I could do it like this

hey quick question... can I make an IK rig using control rig, and use a target for where each hand/foot is gonna be, then move around those targets in the blueprint to create procedural animations?
Yes.
Yes that is possible. I've seen people do it.
This seems unnecessarily complex.
I don't understand anything, when I import fbx morph from Blender I create a Skeleton Mesh. Next, I create the bones by hand in UE and the skin.
-
Now I want to place my skeleton mesh in the scene in a Morphed pose of 0.7 (for example), is this possible?
(screen 1 off morph view skelet, screen 2 on morph - how to add)
p.s. I know how to change a pose using a skeleton and create an animation in one frame and put it in a scene in a new pose, but I need a “morph pose”, not a skeleton -
In the future I want to get blending from skeletal animation and morphing animation at the same time, is this possible?
thank you very much, these questions may sound stupid, but right now it's causing a lot of confusion


Wow, OK. Why create bones in unreal and not in a DCC?
Like - are you testing out the new rigging tools in unreal?
Yes, you can play both morphs and skeletal animations at the same time.
isn't that better than finding each joint for every single IK in blueprint?
it's not really complex
just make an IK rig to make the character behave like you want it using the controls
then animate the controls to make animations using blueprints
I am making a procedural animation system
I guess it's going to be complex regardless
hmm nevermind, that defeats the idea of making it dynamic, as I would have to make an IK rig for every character
I meant your stack of parents there.
it's not unessecary

I'm looping through a list of bones (which are the character's feet, could be 2 or 8 or that matter), and getting the parents to determine which bone is going to be used for the IK dynamically
and it's just 2 nodes...
well, how would you do it?
because then I would have to make an IK function for every single leg...

I would just specify the bones I want to use.
You can just put the bones in there.
yh but if I have 8 legs I need to run 8 ik nodes
and it's not dynamic at all
You are going to be running 8 ik nodes anyway.
nope
Does your character have an infinite number of legs?
it can have
OK. Have fun.


I'm making a dynamic procedural animation system, which means it would work on all different types of characters
even a centipede
I just specify the different feet bones and axis values in the animbp instead of the control rig
All right. Sounds like an interesting project.
sure is, gonna be a difficult one tho
Yep.
If you know the bone names why not just pipe the bone name into the Make node?
Oh that's what you're doing, nevermind!
I have very simple bones (screenshot only fan) for my meshes (I don't create characters), so adding bones to UE is not a problem.
a. what is the standard method for working with morphs in UE?
I create BP, Custom event + add Set Morph Target? Yes?
b. my grand final task is to increase and decrease the mesh around the bones. Bones should never change their size; they neither shrink nor grow. But the movement of the bones sets the mesh in motion.
for me blue - adding/reducing mesh is the morph key
c. I also looked towards geometry cash (instead of morph), but I didn’t understand if I could connect them with the skeleton
I am ready for any other ways to solve the problem, if you tell me I will be very grateful 🫂

There are two main ways you use morph targets in unreal.
The first is for facial morphs. You control those using an animation, traditionally made in maya or blender.
The second is for deformation morphs, for things like elbows and shoulders. Those are typically controlled by code, using the "Set Curve Value" function.
is there any way to slow down the turning to my moose doesnt look like an olympic level figure skater?
Yes? But, I'm hesitant to walk you through that because it won't really fix things?
Making a convincing, believable, quadruped character that does not have a lot of foot sliding is quite challenging.
Like, this is pokemon:
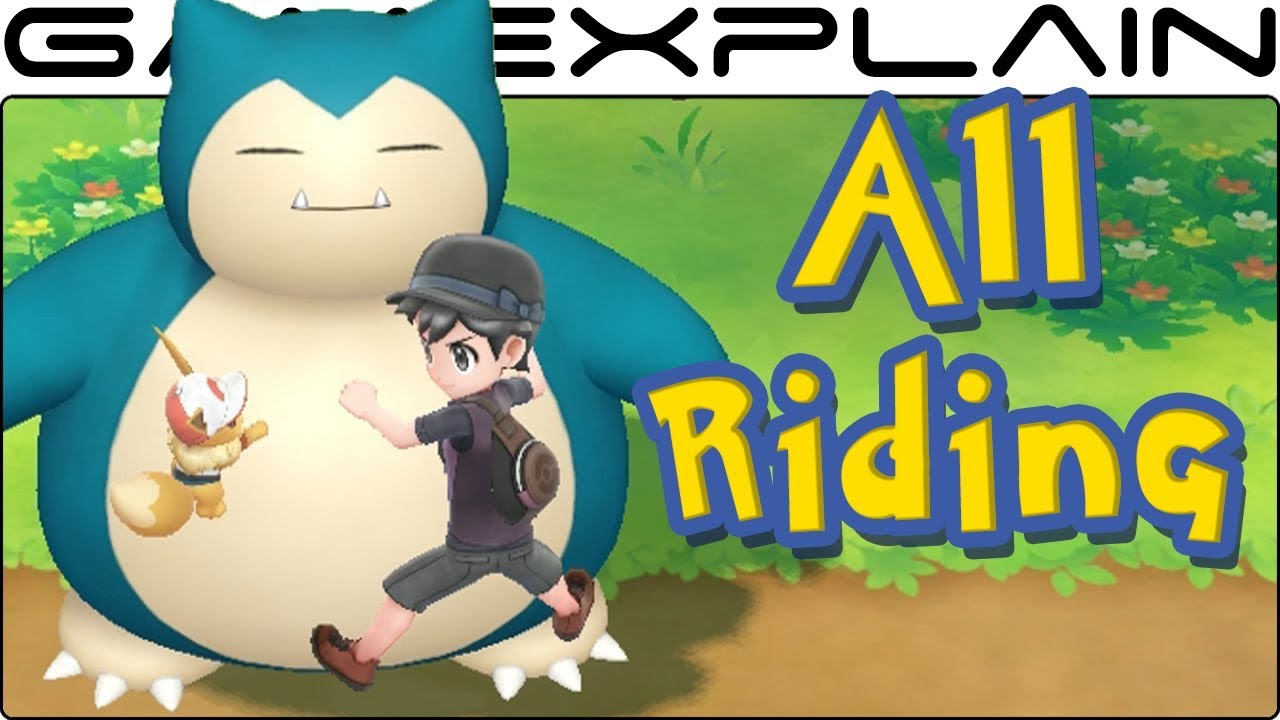
Having Pokémon follow behind your Trainer returns with Pokémon Let's Go Pikachu & Eevee, but 18 of them can be ridden! We go for a ride and show off all of their hilarious animations here in this compilation! Which rideable Pokémon is your favorite?
➤ Want More? Check out every Pokemon's Walking Animation here:
https://www.youtube.com/watch?v=...
They have more money than god.
Their horselike mount (don't know their name) rotates instantly.
No Rapidash, turn your upper body, your head at least!
FABRIK can handle that.
alright thanks
Its crazy to me that this is something so elusive to do. Its drives me nuts that there is even an animation for it. Like why even include it if its going to be useless in a sense.
Probably because they don't expect that model to be used for a player character.
If all their animations have root motion, you could build a version of that character that runs entirely off of root motion, as like - a creature you hunt.
Because in that case, you know where the character is trying to go (they won't mash the controls), and you don't care about responsiveness.
That would still be a non-trivial task to create, but it would be vastly less work than a player controlled quadruped.
I believe the fabrik system can also be imposed angular limits too, which is pretty impressive
@nimble torrent Thanks 😄
I'm trying to make a full body montage work but for some reason, the upper body slot is completely ignored. This is in 5.3 and I'm using this animBP setup

the anim montage animation track is set to use the default slot, I am not sure what I am missing here
You're overriding your UpperBody slot with the FullBody/DefaultSlot!
Playing slot montages always overrides whatever pose comes into the node
Unless there is no montage playing in that slot at the time
Are you by chance attempting to play both UpperBody and FullBody anim montages?
@old falcon I was under the impression that whatever animation slot is last in the thread is the one that takes precedence over the other slots regardless
I basically have the lowerbody (default) and upper body (upperbody) slots to split the attack animation and the movement
however, I also want to do a full body montage at some ppoint. How would I arrange the slots so that the layered split is ignored?
I could make the blendweight = 0 but I'm pretty sure you can do it without doing that at all
You got me a bit confused now!
Your first statement is correct. Assuming that a montage is playing in each slot, the last slot wins.
Your current setup would work like this:
A. You have a base pose that comes out of your state machine "MainStatesCache"
B. If a montage is playing in the UpperBody slot, then it is layered on top of that base pose. If no montage is playing, only the base pose is effective.
C. If a montage is playing in the DefaultSlot slot, then that montage overrides everything that came before it, else the previous layered blend is used.
Is this not the behavior you want?
taht is exactly what I want however when I play a default slot montage, the upperbody slot doesn't seem to let it go even if no montage is played for that slot
maybe my montage is wrong?

this is a defaultslot only montage
I don't want any upper body
this is an upperbody only

and it works as intended, the bottom half will use the default slot locomotion
while the upperbody gets overwritten
And playing the DefaultSlot montage simply won't play anything at all?
I'll ask again just to be sure: Are you by chance playing both UpperBody and DefaultSlot montages at the same time?
oh my god, I'm a moron, I have a few ABPs based on different situations, I was looking at the wrong one
Because in that case what will happen is: Whichever montage comes last will cancel the previous montage.
it all works fine
🥳
and yes, you're right and we were saying the same stuff
the old ABP basically didn't have the defualt slot afterwards
ty
Rubberducking works 🦆
I've been looking all around for more motion matching info. Suprised they released it with so very little documention or examples. Right now most of what people have figured out is basic locomotion and jumping.
I've been using Lyra animations and they work well in isolation, but they dont play nicely with others (like mixamo animations). I believe it's because Lyra has properly setup distance graphs but I can't set up proper ones in custom anims for say like, Diagonal movement. I can put on the DistanceCurveModifier but still doesn't show like I'd want.
Anyone else bruteforcing their way through MM lmk lol
There have been a few people who are looking into it, but so far only one person claims to understand it.
My perception of it, from using other motion matching tech in other engines, is that using traditional game animations to try to do motion matching is unlikely to produce good results.
I'm wondering what the technical differences are. Bone orientation, root motion, distance curves, notifies, etc. I assume it would be tedious, but possible to fit custom animations into a PSD. We're missing all the other Epic animations to test out the capabilities at the moment.
I don't think there are technical difficulties, I think the problems people are having are mostly coverage.
People are doing things like rotating 'run forward' animations to try to 'cover' diagonal movement, when that's not how it works.
You need curves, running in circle movements, a single run forward, plant and turns, starts and stops etc.
Spot on. I added a bunch of running arcs, turns, and diagonal strafes. They just don't seem to want to fire properly. My a.CharacterTrajectory.Debug function stopped displaying for whatever reason, but before It did I noticed even diagnal movements were registering as curves. I've seen the diagonals get called briefly but they only last for a brief moment before going back to the forward animation. Probably something with the weights (?)
hey 🙂
so i did the blend poses by bool suggested by @ashen junco and @nimble torrent , i created a new BP and linked the two anims together,...
since im dealing with two different skeletons
Daz Converted via DTL for Unreal... and the epic's skeleton, the breast issue still persists but in the newly created BP, am i supposed to remap any bones?
Wait, so your animation BPs were not for the same skeleton?

Huh.
OK, so, as they 'Well there's your problem!'
By assigning an animation BP to a different skeleton, any bones not in the new animation BP's skeletons list would stop evaluating.
So you need to pick one skeleton and use that.
Frankly I'm astonished that it worked at all.
You could possibly retarget the animation to the desired skeleton.
I think they'll have too.
the dtl plugin converts the skeleton for epic and preps the bones for physics and proper rotation and orientation to the epic standard thats why it works even though the breasts get twisted
OK, but if your animation BP does stuff with those bones, if you don't have those bones in the skeleton that the animation BP is for - it won't work.
well then that will be the retargetting of the superhero flight animations then to the DTL skeleton
On the plus side, you don't have to retarget.
Because it sounds like the Daz skeleton is a derivative of the unreal skeleton.
It has more bones, but the animation bones match.
So you should be able to change the animation BP to target your DAZ skeleton, and it should work.
all the bones necessary are there and renamed to epics naming
Right, but your animation BP manipulates those bones, so it has to target the DAZ skeleton.
Change which skeleton the animation BP targets.
its actually not targetting DAZ, its targetting the DTL skeleton, but i hear ya, once the conversion is completed the DAZ skeleton isnt used.
OK fine.
so retarget the flight anims then
No don't do that.
Just... just change which skeleton the animation BP targets.
Change it to the 'DTL' one.
Right now, it sounds like it's targeting the unreal one.
That one is missing bones.
Change it to the DTL one.
through here ?

How do I split a name var in control rig?
I think so? Been a while since I did that.
and then get the split strings back into a name
ok done.. 🙂
and this happened,

Neat!

If you drag the pin from the string to the name field - that doesn't automatically create a 'To Name' function?
Nope

Interesting!
You would think it should right
Yes, I would.
And it would do so in normal blueprints.
Maybe they don't have that cast in Control Rig.
Seems like an oversight.
I just wanna get the bones corresponding fk controls. I have it set up so that they are identical to the bone name but with a fk_ prefix
I'm definitely getting the feeling that they intend that kind of association to be maintained through metadata.
Look for 'From String'

Control Rig - Hierarchy discrepancy for bone 'thigh_l' - different parents on Control Rig vs SkeletalMesh. -- and there are a few others listed, but the names are the same so would i need to recreate the control rig ?
legend
the DTL author suggested this " I would suggest that you try editing the pectoral joints superhero flight animation (i.e. remove any pectoral animation). There's an old-but-still-good tutorial for editing animations in UE"
here: https://www.youtube.com/watch?v=04EPprP2OVg&ab_channel=SmartPoly
would this be the correct direction, you think?
Hello guys welcome back to another video! Today I want to show you how you can edit animations inside of Unreal Engine, using Control Rig! You can follow this tutorial in Unreal Engine 4 or 5, as long as you enable the control rig plugin, or add the marketplace control rig character to your project! Let me know if you have any questions in the c...
I don't know! I mean - to fix that specific issue? No. That will do nothing. It's a hierarchy problem in a control rig referenced in your animation blueprint.
My guess is, you have a control rig node that is also referencing the wrong skeleton.
In addition - unreal gets confused sometimes when you swap which skeleton an animation BP points at. I would recommend closing and reopening the engine.
This is not an operation that is done very often.
ya the moment i click "control rig" the skeleton on the left hand of the screen changes to the flight one.. and in the CR, logic its only referencing the feet via "foot trace"
sorry if it feels like im bothering you (if i am).. but u know more than me 🙂
Anyone know why there are negative values on the sliders in pose assets and if there’s a way to use those?
Interestingly, going through the pose selection debugger, we can see the weights for the custom ones always seem pretty high. And weirder, it seems to pull from Lyra "Jog_Bwd" to move forward.

Can a pose asset even use the negative values? I want to move left with positive and right with negative, do I really need two poses for that?
Surely they must have a purpose or it would be 0-1 right?
There's some really good info shared in their latest livestream, and they mentioned the sample will be released in June 👀 https://www.youtube.com/live/RuYHfVKfrMM?si=juqapU6AhPk_cD70&t=2796

We'll be sitting down with some of the team this week to discuss & breakdown some of the key features in the latest 5.4 update. From rigging, to rendering, t...
Can someone help me understand how to use Animation Blueprint Templates? I get generally how to set them up, and I understand how to create children of them, but are these only good if you want to trigger the same animations but using different event graph logic? Seems weird that you can't override the anim graph from the children unless I'm misunderstanding something?
Hey, yeah. I watched that one. I'm looking forward to playing around with the sample files.
I cant wait. Frothing.
I think the idea is you don't use direct sequence refs. Instead you use variables.
Then you can override those.
Looking for a little help here and hope im in the right spot. Im trying to set up an Anim BP for a gun in a project im working on, but cant seem to get the gun's BP casted to the Anim BP even thought im using 'Cast To' on the begin play event, does anyone know how to maintain a cast to continually reference the child actor's variablers?
ooooh yea ok that makes a lot more sense. lol
Have you stored the result of your cast into a variable so you can reference it as you need throughout the ABP?
The gun BP and the guns anim BP are different things.
You can't cast between them.
Yup, i immediately get a null reference when trying to get the variables
so how do i get variables from the BP to the ABP?
Oh you'd do a cast from Get Owner
right? 😅
Yeah, the owner of the anim BP is either the pawn or the skeletal mesh.
One of those