#animation
1 messages · Page 35 of 1
i need a little bit of help with my crouching animations
this is what i have and it works well but i do not know how to make it go smoothly

maybe check paragon assets?
are you trying to get it to rotate? click on root during animation to see if there is any rotation applied to the root versus just translation?
Good afternoon! I had a quick question on an animation issue that I can't seem to resolve. I've done research and by all accounts should be resolved but its not :(.
TL:DR- My animation has a root bone, root motion enabled, and in the blendspace 2d works just fine. But when the character moves in game, it plays the animation and then resets back to where the collider/capsule is actually at and keeps doing that. (I do apologize if this is not the right place to ask, I appreciate your time/thoughts!)
so are animation FSMs necessary to learn still or should I just wait until 5.4 ships so I can play with all the cool new toys
What new toys do you think are replacing FSMs in 5.4?
motion matching probably
That's not a replacement to FSM
they have a decent amount of overlap in use cases but not 100% yeah
does anyone know if it's possible at all to constrain spring interp rotations in control rigs in a way that doesn't break the physics maths behind them?
as in not just clamp the output, actually apply correction to the forces used
plus the whole "do the rig in unreal" thing, like, do I need to learn how to rig in blender anymore or can I just make a model outside, slap it into unreal, and map it to a rig?
unless you're planning to stick to unreal forever it's probably useful to learn how to rig in blender regardless
that kinda skill mostly transfers between softwares anyway
Animation question incoming. For my game, we have 6 selectable characters, no matter what we do, it seems like we just can't get the characters to hold the firearms correctly. So it always looks so clearly attached. One of the bigger issues is the finger placement.
How do other games typically handle this kind of stuff? Do they really author a slight animation pose for each firearm? Do they use IK somehow to wrap the fingers around the weapon properly? Do they enforce strict character size limits (like hands can't be bigger than X, etc...)?
3rd person OTS btw
IK, design handles to fit some default hand position, or very detailed animation editing
Well, not that i know for sure - i'm just an indie dev
I'm not talkin' about rifles, as an FYI. I'm talking about handguns.
The grip of a 1911 for example, doesn't really change
Right on, same idea me thinks right?
just have the gun attached in the appropriate socket and move the fingers** in place
Would I have an additive animation then?
For each gun? that's a neat idea
you know, maybe i dont know how they do that at a major studio - please disregard my input, I am actualy curious to see other answers
I've tried to work out how to even set up the IK for the fingers for each character for each weapon. Haven't succeeded yet.
I've thought about doing the ridiculous task of authoring an animation for each character for each weapon. But f**k that
Seems super wrong
I found a thread by someone who worked on Rogue Company and they said they animate each character with the weapon. That just seems crazy laborious.
At least - that's how I understood their comment
I definitely find that when all is said and done, vfx, sfx, animation, and UI are the hardest parts of game dev
I initially thought it'd all be about the programming for AI, abilities, etc, but it turns out that's not that bad
but animation and stuff is crazy
certain other softwares speed things up
I've been using Cascadeur and it's been an incredible time saver
Yeah, I've used Cascadeur as well
Learning the difference between IK and FK but an important question remains. When would you use one over another?
trying to use a retargetted animation from mixamo and when i enable force root lock on the retargetted animation it does not work
Apologies for the naive spounding questions but just learning.
For a current personal project I want to animate a Metahuman character walking and stepping over large rocks, ie rough terrain.
It is for a cinematic but optionally want the animation to work in real-time.
I assume IK would be the correct choice?
Would the entire walk cycle be animated manually or would there be some way of automating it?
Lastly, is there some way of combining 'canned' animation say from Actor Core or Mixamo with custom IK based animation on the same character?
Probably a noob question, but how come when I import a model into Unreal, it sometimes creates these huge gaps in the geometry where there aren't any in Blender? (Normals are fine, I checked those first.)


Not an answer, as I get this on occasion too. I suspect it might have something to do with the topo but I could be completely incorrect. Do lmk if you get it resolved!
You might need to merge vertices and clean up non manifold geometry
I can also see the model isn’t quads or triangles
Yes you need to make a control rig for the character. Then in sequencer, you can make your own animations. You can also drag the mixamo clips into the sequencer

Hey!
Any help would be much appreciated.
I'm rendering a sequence using Movie Render Queue.
Everything looks great in viewport when scrubbing along.
But when i render, a bunch of the animated objects shift position ever so slightly.
I've tried so many things to try and debug and fix the issue, but its driving me nuts.
I've made sure frame rates are matching in sequence and output. But some objects are in correct position still.
Has anyone had this before?
Or any potential causes or solutions???
oh I see.... they renamed it to Leader Pose now
for idle character animations there seems to be two camps- idle in its own state, or idle in the walk/run blendspace when velocity is zero. anybody have any ideas on what the pros and cons of each might be? i know it probably comes down to personal preference but curious if there are any opinions on the rationale of choosing one over the other
Corrupt scene, duplicated scene fixed it
Ok, since I didn´t get any attention in blueprint...
Trying to set the animation for several skeletal meshes in a blueprint, so I can then control it in sequencer.
So, instead of adding all skeletal meshes one by one and adding a skeletal mesh component and then adding the animation: Do the same but for ALL of them at once.
Can´t get it to work...
Any pointers?
Pls ping!
has anyone done any vaulting animations yet and set it up
Thanks. In addition to a rig would I need a custom Animation BP?
yes if you're going to use it as a game character.
Hi guys, is there a rig with controls that can be used in maya? I've been looking around the internet and can't seem to find someone that has rigged the mannequin character, but since people have been creating animations since forever I thought someone might have. If someone can help me out I would appreciate it.
Note: I know about the advanced skeleton plugin but 750$ is not feesible and I'm trying to find a solution that doesn't involve me rigging it manually
Anyone ever experience this, and if so did you find a fix?

This video shows an issue when importing an FBX from iClone - although in iClone the feet are locked, in Unreal there seems to be a full pivot around the forward-facing axis through the pelvis
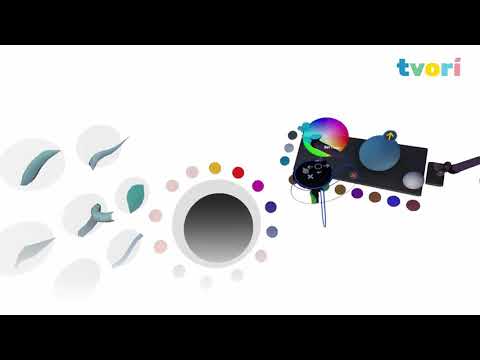
Does anybody know any softwares like Tvori (https://www.youtube.com/watch?v=RMDwnyCq0N4) but that is more affordable than $1500 a year?
I'm an indie dev, but being able to animate in VR like this seems like it would be WILDLY more efficient than what I'm doing now
Create story prototypes such as animatics & previs, prototype VR and AR apps, and make complete animated films.
Don't compromise on building a good prototype within innovative company's targets. A good prototype can save you tremendous resources on development. Thus, it might become the key selling point when you're justifying budget or communi...
This reminds me a lot of Playstation Dreams. https://www.playstation.com/en-ca/games/dreams/
I don't know if you can export that stuff to any other platform though.

PlayStation
Explore the adventure game Dreams for console from the official PlayStation website. View features, game modes, videos & more. Buy on the PlayStation store now.
thats interesting. Having the two controllers I think would be really important though - being able to hold a part still while moving another part seems incredible
Maybe I'll just have to fork out the money someday
I am having this same issue.
In UE4 I was able to pass in values from Animation Blueprint to be used in the Control Rig's Construction Event via exposing the Control Rig variables in the AnimGraph...
but since upgrading to UE5, this no longer appears to work.
This is too bad, as I would love to have a more generic Control Rig that can (for example) be used on various limbs, depending on the string values I pass to the Control Rig from the Animation Blueprint. Now, instead of the generic "limb", I have to make separate "limb_setup_arm" and "limb_setup_leg" setups... into infinity, or put them in the Forward Solve to have them tick every frame??
Anyone else have any ideas?
Hi folks, I have just started experimenting with Motion Matching. I got basic locomotion going. I used the Echo anim set for the database. I am using 5.3.2. It looks occasionally great and occasionally wonky. I have 2 questions:
1 - How do you handle Jumping? Can the trajectory channel be configured to support jump? Currently when I jump, none of my jump animations from the anim set play. As anyone got that working?
2 - If I sprint, I simply increase the Max Walk Speed on the Character Component. This change seems to be unnoticed by the Trajectory Channel. To summarize, changing via blueprint Max Walk Speed has no effect on my character's velocity when using motion matching. Does anyone have a clue? PS: I am using the default values for the trajectory channel.
regarding VisibilityBasedAnimTickOption whats does "tick pose" mean? does that fire anim notifies? I assume refresh bones mean to actually do the bone movement
my game server only needs to move bones during montages. has anyone done something similar before?
essentially: "tick pose and refresh bones during montages only"
Hey everyone I am struggling a bit with an animation playing back and I am wondering if someone can offer some guidance on what I am doing wrong
I am trying to create an animation to play out in my level with a MetaHuman skeleton. This is for the enemy AI, so not animation via locomotion of any kind, but just play back an animation of them swinging a knife.
What I am trying to do is upon an overlap event, the camera jumps to a new location, where an animation plays and the player is stabbed be a metahuman character. I have the camera move worked out, but I am struggling with the animation.
I am working out of 5.3.2. I created a new MetaHuman and brought that into my project. I added them to the level and animated them in sequencer. I attached a knife prop to their right hand (“hand_r”), and an angry face pose, and then save it as an animation.
To test that the animation is playing correctly I set up an overlap trigger, to spawn the enemy from a class and play an animation. However when the character appears, they are missing the knife prop and the facial pose I set within the Sequencer.
I am not sure where the breakdown is, if there is a problem with the metahuman skeleton vs the regular mannequin skeleton etc.
I've Googled this a lot but haven't been able to find a clear answer. Is there any way to import additional morphs onto an existing skeletal mesh? Thanks
Export the mesh, add new morph targets or shapekeys in your 3d suite, reimport the mesh, and check "import morph targets" in the import settings, this is disabled by default iirc
The sphere trace in control rigs are excluding hits with itself by design i reckon? no way to trace against self?
Although I haven't tried it (which I have no good excuse for since I have all the stuff) you should be able to use two Move controllers along with the PSVR headset to manipulate objects in 3D space. I'ma give it a try this week if I can find the time.
Yeah, that won't work in this instance. I already have all of the morphs on the one Fbx file and UE is crashing on import.. Too many morphs and too high a polycount for UE to import in one hit it seems. So I was hoping to split them up into smaller "chunks" and try to import them separately.
thats rough. reimport takes ages for me too, i hope i dont cross the crashing border any-time soon.
only think that comes to mind is to check whether your morphs touch too many unecessary vertices. maybe that helps
or maybe separate/modularize the mesh
like one for torso, one for arms, one for legs
Thanks @small portal The morphs themselves are super optimised (spent ages working that out in Houdini). Most of the morphs, when viewed on their own are around shifting around 100-200 verts. All other verts are culled. The strange thing is that the actual Fbx file isn't all that large. Only around 140mb. It's almost like UE is rebuilding/unpacking the complete mesh for each morph on import. Then presumably, if it can get past that, it optimises them down again in it's own internal format. Not sure though. Splitting up the character is an option I hadn't considered. Could be a last resort.
yeah i havent checked the fbx import pipeline, its similar for my mesh, albeit not nearly as optimized. i have around 30-40 morph targets with an average of 15k verts each. filesize is small, but import takes up to 2 minutes T_T (which is fun since baking and exporting from blender also takes ages)
I don't know if unreal has an internal morph target limit either, so modules is all i can suggest at this point
that'd be awesome, thank you!!!
Sorry for the re-post of this question. Hello, when “animating” the metahuman IK/FK switch in Sequencer, my metahuman arms pop when switching between the IK and FK. Is there a snap to Pose feature so I do not get any popping?
When testing the IK/FK on a single key frame the IK/Fk ‘will not’ show any issues.
However, when animating the IK/FK switch in Sequencer, the switch from IK to FK will reveal a pop. The pose for the FK is different from the pose of the IK.
May I ask, is there a feature similar to the HIK rig in Maya? In Maya’s HIK rig, when I switch between the IK and FK, the poses of the rig match, there is no popping of the poses seen when switch IK/FK, when animating.
In UE, is there a workflow that I need to use in Sequencer so the IK to FK switch does not pop when animating between poses? For example, how would I do a hand stand flip using IK/FK switch?
anyone know why is this happening? the root is way off, makes the retarget animation to look like flying

The root looks good in maya or houdini, where i did the rig
but in unreal, is way down than it sohuld be
Are control rig constraints and spaces just way too inconvenient, inconsistent and unreliable to use at this point (5.4)? i constantly run into jittering movements, constraints being off, or controls behaving irrationally.
Hey, are there any recomendations or guidelines on how to implement animations with the Mass Entity (ECS) system?
Does anyone have any tutorials or guides about using bones such as ik_hand_gun to attach a gun to instead of hand_r? I can't get it to work properly where hand_r uses IK to move and is not actually connected to the gun
not sure if this is the right channel
Basically trying to export custom collision ( red cube ) for a skeleton mesh ( Sphere and Cube ) - but UCX_MeshName doesn't seem to work and I can't really find any documentation thats not related to static meshes


Is there a way to save the IK feet bone animation data when editing an IK control rig that you baked from a linked animation sequence? The mesh's feet bone data saves correctly, just not the IK bones.
what does Component Use Fixed Skel Bounds do?
Does anyone know why props that are "Parent Constrained" in the view port or "Attached" in the Sequencer disappear? Is there a fix so props will not disappear?
pls note the problem is with my hands mesh, the montage is player on the character mesh only other players see
Late response (checking mentions)- No solution yet. I'm convinced the Morph_Cloth deformer graph works as intended; it's just meant to allow cloth sim on clothing that has morph targets, it's not intended to make the morphs actually function. Which, I'm not quite sure what the use case would be for that, since if you plan on doing cloth sim you could just delete all the morph targets from the mesh anyway
hi there - does anyone know how to make a rigged hip bag move with the body similar to the windwalker echo asset?
Hey guys. I´ve created a lyra-style locomotion system with seperate animation layers for different aninmation sets (unarmed, sword, etc) . In my demo scen I have one enemy and my character using the "sword"-animation layer. Now I noticed in the animation debugger that this layer is spawned multiple times per actor (in my case 12 times) . Is this correct? Seems very strange to me. I also noticed that adding more of the same enemies really knocks down the fps dramatically. Thanksful for any ideas or comments.

did you figure this out? 5.3 api has a function unreal.SkinWeightModifier().enforceMaxInfluences(int), but I dont know where to check if the skeletal mesh is still "using" the more performance intensive way.
Hey guys, any news about the animation pack they promised during the 5.4 showcase ?
Hey everyone, for some reason my metahuman facial poses that i'm pasting in the Sequencer editor are showing up on the Facial RIG GUI on the right of the metahuman, but not on the metahuman character itself. Any thoughts why this might be happening?
guys
I need help so much

So basically what happens in here is, I press F and flashlight animation plays. When it ended normal AnimBP starts to work again

But what happens is, after animation ends. AnimBp stays same, the variable doesnt change locomotion
why?
okay I fixed it. With a different system
its not coming with 5.4, but later this year. the motion matching machinery will be included empty
Hello all,
I am wondering what the best way is to have these little brick debris to be slowly floating around as if they are in space?? would this be an animation thing (using maya btw) or a niagara thing? just cant figure it out

If any animation people wanna go show some love to someone in the #multiplayer chat, they're wondering if there is a better tool/method for dealing with events mid animation other than timing/etc and what to do if anim events fail under bad lag.
Does anyone know what causes the right clavicle in Manny to pop when baking out animations? in the level sequencer and preview its fine but once it bakes into animation sequence it sticks out.

If you just take an animation, bake it to control rig. and bake that out to an animation sequence. the results are different from the original lol

Hey everyone! I’m having an issue on UE5.3.2 where every time I try to bake an animation to the control rig of a custom character, the engine crashes. It’s driving me crazy and I can’t figure out the reasons. Has anyone faced similar issues?
hey guys, I'm having problem with converting a mannequin animation. over to the metahuman skeleton. when I process it, it comes out all jittery, and the hands don't look right at all. Like the hips are jerky. and I don't know how to fix it.
I'm pretty new to the engine, and am still figuring out how to do things, so forgive me if I don't understand a couple things. and if i forgotten a couple steps.
Mainly I want to fix the jerkiness and make it look more natural and more like the initial animation. could someone help please?
is it possible to make blendshapes from a rigged face in unreal
Hi, what is the best practice to start an animation montage when a function in the character class (c++) is called?
Should i play the animation montages in the character class or the animation instance / animation bp?
If i should play it in the anim instance, should i use a delegate to broadcast from the character, or should i put a pointer to the anim instance in the character class and use it to call the function directly?
I feel like it would be stupid to play a montage directly in the character class, since is the anim instance the one taking care of the rest of the animations.
(Please ping me if you answer)
question, im having an issue with an anim notify only firing maybe 60-70% of the time on the server. basically i have an RPC that sets a bool to false on the anim graph, this will trigger an unequip in my state machine which transitions the state to the Unequip state. in the animation driving that state i have a notify. even if i put this notify at the middle of the animation, it seems the server for whatever reason only seems to trigger it maybe 60-70% of the time. i set the Visibility Based Anim Tick Option to Always Tick Pose as well to ensure and same result. not quite sure whats going on. happens with both a listen and dedicated server including when the listen server is literally looking at the player


Make sure the notify is set for “branching point” instead of “queued”
I assume those are equivalent to “unreliable and fast” vs “reliable and slow”
hey guys, I'm getting these 2 errors and I dont know how to fix them (i've spend the whole day yesterday and couldnt find an answer) :


the "jump" animation isnt set to loop, nor is the landing animation

and what it does is this :
the only lead I found was here, but I dont know what they are talking about : https://www.reddit.com/r/unrealengine/comments/uvw6qv/i_have_a_scaling_issue_on_my_landing_animation_in/
Reddit
Explore this post and more from the unrealengine community
it looks exactly like my problem
can someone help me out please
if the reddit solution is correct, start looking through your animations, looking for the additive toggles I guess https://dev.epicgames.com/documentation/en-us/unreal-engine/animation-pose-assets-in-unreal-engine
I cant find the issue, because the anim BP was automatically made with 5.4; everything looks exactly like the default manny animation bp, its identical
aaah
i found the difference
this didnt get changed when I used the auto retargeter

now i dont get any more errors
So, I´m not sure how to do this the best way.
I´m working on a blueprint for cinematic renderings that has several skeletal meshes using the same skeleton, each with their own morph targets and I want to be able to have...
- A slot for the basic animation or default pose that applies to all of them
- A slot for each separate skeletal mesh that contains a morph target animation.
What I did so far:
- Create an animation sequence for the default pose by recording it without any input.
- Create a morph target animation by duplicating the default pose animation and adding curves for the animation of the morph target.
I found something on the forums that explains how to use animation montages.
https://forums.unrealengine.com/t/how-to-use-additive-animation-with-a-character-that-has-an-a-pose/426342
What I´m uncertain of though is:
As I used the default pose as a base for the morph target animation...do the bone transforms of that animation sequence also get added as additive on the end result?
Lets say I recorded the t pose as default pose and added curves for the morph target animation and then I want to apply that as additive on another animation sequence that has the character in an apose, would the poses then blend or would only the morph target animation get added?
Is there a better way to create a morph target animation for that purpose?
same result unfortunately. i have no idea at this point it just seems random. tried out of curiosity of testing with no packetlag (0) and same result. not sure where else to look
Animation Budget Allocator works decent with MetaHumans
The default settings are bad tho. With more tweaking i'm gonna get lotta performance out of this one
Hello guys, I have two very similar characters with the mesh and the rig is the same, I want to use the abp that I already made for one and create a child for the other but the skeletons that it should have for it to be compatible are not compatible? thank you so much

is there any good example anywhere of a control rig with head aiming at a target with clamped rotation? I can't for the life of me figure out how to get anything to aim at a target (whether it be with aim constraint or aim at) with a min/max rotation angle to prevent complete 180s
even the content examples cheat by having the target be on a 2D plane
eeeerm the jumping > falling animation. is the elevation on the Z supposed to be AN ANIMATION or the animation is supposed to be on ground level and then add the movement location within unreal ?
Hey folks, so i have a question about animations, im having some trouble figuring out-
- sometimes if my imported animation has Blendshapes/MorphTarget keys, when i open the animSequence, i cant acces the keys for the actual skeleton anymore, despite them playing normally. It only shows the curves for my 52 ARKkit face keys. So I was wondering if theres a tab i need to switch to get those back and editable.
and 2) I was wondering what the basic setup is for importing just non-skeletal mesh animations. For instance when I do things In Unity, I'll usually import humanoid "body" animations separately, and then import FaceMesh + EyeMeshes as their own animation, that just uses the Blendshape/MorphTarget keys, and the Pos/Rot keys for the eye objects.
Since Unreal's whole Actor hierachy stuff is so different, I'm struggling to just do a simple "Face + Eyes ONLY" import. I can import the combine Face + Body Skeleton" animations as one sequence, but it doesnt retain the non-skinned/SkeletalMesh eye keys, and I'm struggling to figure out the best way to combine them all into an AnimSequence.
The goal would be to just combine them using a LevelSequence, just as layered tracks, but I can't seem to import the Face+Eyes animation on its own, it seems to require SOME skeletal keyframes, which don't blend with the other Body-Only animation, obviously.
Morphs become anim curves i think
Is there a preferred method for setting up animations in a FPS? Is more procedural better? Or whats the best way to go about it?
All I'm trying to do is get my character to blink. If I change the default param of the texture it works, but for some reason, the ABP isn't communicating with it. Idk why.


turns out there was an extra ABP that was acidentally being used, but I still haven't gotten it up and running quite yet
Nope, nothing. Even after replacing the ABP, it still refuses to communicate with the texture param
Hey guys, so I've made a simple animation in Blender with just one key for each bone (a true first person animation of holding a gun) for my custom character.
However, when I export it to FBX and only check armature so it does only export animations, at first it shows me that it can import the file, but when I press "Import all", it fails and gives me these errors. Does anyone have a clue?

can I use more than one control rig for procedural animation?
if so are there any disadvantages in doing so?
like, maybe it affects the performance?
the file contains no animation data
make sure you're exporting the animations
I am

you don't need NLA Strips enabled
I tried both enabled and disabled
also make sure that all actions have keyframes set in em
it didn't work
for now it's only one action and it's a pose

I'm watching a video rn and I may have missed some steps
like stashing
stashing is used to store the actions into nla and edit the actions inside the nla tracks
try following these settings


also make sure the armature is prepared in unreal first before exporting any animation
it is
alright
when I try to import the animation, it does recognize it as an animation
but when I press import all it fails
I'll try rn
just tried and it gives me the same errors

can you show the fbx importer window with the settings you're using?


importer
I set smoothing to Face cause else it messes up my model
from unreal
then I have showed it in this video
have you tried simply dragging the fbx file into unreal directly?
and then select the Armature while also unchecking "Import Mesh"?
yep
honestly I'm so lost
I also find myself extremely uncomfy in blender
I tried animating in Unreal and it was also a mess
I would animate in Blockbench but it doesn't support rigs yet
exporting animations from any 3d software into unreal is very simple and easy to do
I find myself uncomfy with everything in blender
and I did that always perfectly until now
I might revert to simple Minecraft looking models since I can animate them in blockbench atp
you say you've done this many times before without issues
in another program
not in blender
I did export stuff in blender and import it in unreal
but never done that with animations
it's also my first time I animate in blender
you've clicked "Import All" every time?
I have just tried to export the whole model and now I get this

yes
have you tried with just "Import" since its only one animation?
yes
how do you prepare the armature in unreal?
wdym
I have a model
I have a rig
I export the model
I import it

I even made a control rig to try out animating in unreal
do you want me to try it out and see if I have the same outcome with the animation?
that would be very appreciated yeah :P
lets do this in dm then
sure thing, sending you the stuff rq
sent
Using sequencer to create custom animation in unreal.
Is there a way to insert key frame for multiple bones.
I add a keyframe for one, but it resets all the other bone's transforms.
with is really unwanted functionality
i dont suppose its possible to change the bone name programmatically for a branch filter in "Layered blend per bone"? trying to use it in a template animation blueprint
does anyone know a solve to this when creating IK solvers?

Can anyone recommend a good tutorial for setting up FPS IK/procedural animations?
What is the correct workflow/practice for importing/setting up FP animations regarding axis direction. UE is +X forward but the Mannequin is +Y forward. We've used the mannequin as the skeleton for the FP arms, and set our anims to +X forward in Blender but they still import in the +Y axis. I tried giving this a google and theres a lot of Reddit threads about it, mentioning how its just a long standing annoyance in the way UE is set up that has never been changed and that people just deal with it, so my question really is what is the best way to deal with it? Do you just import your animations with a -90 yaw so that they face +X forward? What about your skeletal mesh, should you import that with a -90 yaw on import for the same reason. Just a bit unsure what the best way to do it is, I've seen people saying that the correct way to deal with it is to rotate the character (although this dosent actually fix the forward axis issue), I've seen people say that importing animations with a transform on the yaw is correct too, and I've seen others mention that they've found ways to get anims to face +X forward from Blender using plugins. Can anyone chime in here with some advice on the matter?
are those other bones used for smoother twist? or cartoonish bending?
Hey folks anyone around to help me with a quick general question?
On using sequencer?
I am rigging a model for the first time in blender, but the end game is to pose it and render it in unreal. What do I need to do to make the rig useable with Control Rig? Like should I just parent an armature to my model and import it to unreal like that, or should I actually generate a rig in blender and bring it over?
There isn’t anything special you have to do for your rig to work with control rig. Just rig the character normally in Blender
Do I have to rig it though? Or can I just add an armature, and do the rest with control rig
I think so but if you have to do rig just use your 3D model with accurig. It will rig your character in 20 seconds and it’s free
I will check it out! Thank you guys
I have absolutely no clue, its the deform bones generated from the rigify metarig in blender
Guys I have a problem when mixing this with another part of the body, it turns out that these bones by default do not have strength, how do I solve it?

Is there a usable workflow to get a ue rig into blender and animate then export back into ue?

it is not recommended to add an ik system into rigify rig
cause the main bones are parented to the twist bones
How am i supposed to animate in blender without an ik rig then?
and that creates a bone chain bigger than 2
you can change the parenting of the twist bones
have the arm and forearm chained the default way
and the twist bones parented to the ones that control the whole part of the limb
arm twist bone to arm bone and forearm twist bone to forearm bone
Ok so it is a parenting issue then?
yep

Uefy 2.0 is an addon for Blender that provides tools to make Rigify rigs suitable for game engines like Unreal Engine. Supports UE5 from Uefy v2.5 and above
Product Page: https://www.rakiz.com/uefy
The default output of Blender's rigify addon causes issues with Unreal Engine 4/5. Using using Uefy 2.0 will fix rigify rigs so they just work. Ue...
this tutorial should work ok with ue5 aswell
Ah ok i watched that 1 but didnt seem to work with my rig well, will have to start from scratch i guess
if you simply change the parenting of those twist bones, then you wouldn't need to start over
Hey everyone~ I need some help :<
So here's the scenario:
I have two montages, both have root motion and each of them is divided into Preparation, Action and Return sections. The first one plays and somewhere after the Action section, the second montage starts, interrupting the first one and starting a blend. Normally all would be good because root motions can blend. Unfortunately not in my scenario because of how Unreal approaches animation networking. So I have two animations where the first one's Return root motion does not match the secondnd one's Preparation root motion.
My question is: I don't want to change anything about how root motion gets handled. How can I alter the 1st one's pose dynamically to match the root motion of the 2nd montage?
Because right now my character's legs are sliding during the animation blend because of either too small or too large root motion from the 2nd montage.
Heya! Trying to modify the actual properties of my cloth, but everything is locked and it's not allowing me to do anything. How would I go about unlocking these/solving this issue?

(Cloth simulates fine, but it's too floppy and loose, so I wanna adjust the parameters, but all of those seem to just be locked with no way to edit the values)
EDIT: I can edit them, but the maximum setting for stiffness seems.. awfully low? There's zero discernible difference between 0 and 1.
alright, this problem is lost on me. why do my scaled animations (from blender) to here do this? and only the ends of the arms like the mid and upper arms are also scaled but do not exhibit this behviour, they are virtually all the same. scaling down ofcourse fixes this problem but i need this scaling fro this animation, what is the solution here?
Hi Guys, I am new to animation and dont know what the problem is. The two pics show the same animation one in the engine and the other in the game i dont know why its doing this the other animations are working fine


Can anyone understand, on what im asking for

I'm having some troubles importing an animation to UE5.3 and getting it to work with an unreal skeleton. I have an animation that is only bones without a mesh, and when i try to import it and select the SK_Manequin skeleton, i get this error. Does anyone know what i should do to fix this?

I was told by the one who made the animation that i should retarget the root bone to the bone called HIPS in the animation, but i don't know how to do that, especially since i can't even import the animation
Not sure if this is the correct place to ask, but when editing a physics asset, why can I not weld certain physics bodies? The option is just greyed out with no explanation?
can anyone explain how to make the control rig snap to the ground and follow collision instead of endlessly following the "control"?


Ive been following a few tutorials on "Swimming" Id say everything works from that tutorial but the blendspace animation swims in idle for a few seconds then freezes until I get back up from the water, now I got no idea as to where the problem might lie if anyone has a clue to relieve me this headache xD
And apperently the character cant touch the surface without being pushed down below water (might have to do with capsule half height (fully submerged? )
Hey everyone, I was wondering if anyone could point me to a good tutorial on how to get Maxiom mocap onto the control rig for editing. I've found some on anim retargeting which are great but I get stuck when trying to get that retarget onto the control rig in 5.4. Any help would be greatly appreciated
The Blendspace Node for swimming in the Anim Graph. Is it set to loop?
I followed a tutorial which enabled looping for the “in water” (blueprint for character) other than that the blend space node that’s in anim graph is connected to output along with blocking and upper body nodes, hard to explain 😅
As I’m a noob 😂
I can send you a screenshot once I get home from work on how it looks
I’ve made some changes but it’s tech the same as the one that’s currently running on my anim graph
@craggy knoll
Swimming worked “properly” before but I reconnected it now after adding all the other and it won’t swim as before
click on the Swimming_SK_Mannequin_BS Blendspace Player. In the details panel you should be able to set it to loop @rotund musk
And the animation sequences that BS is made from? Do I set them to loop or they do it automatically when blend is set to loop?
And I leave the root motion and the other one unchecked?
In the Animation assets you can just set the default value if they should loop. The Blendspace / Sequence Player can overwrite this, so in the end it needs to be set correctly within the anim Blendspace / Sequence players
that's another story
I want it to go from idle swimming to swim forward so the root motions and the one under it don’t matter?😅
Should only “loop” if idle otherwise char should move (forward swimming) if I understood it correctly
I can't really follow you and root motion is a complicated topic.
Right now your only issue is that the swimming animation doesn't loop right? Has this been resolved?
You are thinking too complicated. If you want your animation to loop and not freeze in the end, loop it. That's it
Can’t resolve (test it) until I get home 😅 but I’ll try and be in touch if it gets messy
Is there a tutorial/guide on when root motion and etc is needed? Just in case 😅
You want root motion enabled for animation sequences if you want to drive your Character motion from Animation. If you only need "simple capsule movement" it's not needed. More about Root Motion here: https://dev.epicgames.com/documentation/en-us/unreal-engine/root-motion-in-unreal-engine
why does my animations scale the character i have set all retargetting bones to be skeleton and still it happens
any idea why the IK Rig node for animation blueprints is now stuck on additive and grayed out? did they disable using other types of spaces in ue 5.4?

weird... either its bugged out or they removed it
Hey guys!
I followed Lincoln Margison's step by step procedural spider walking tutorial and while functionally most things work, the legs sink down and move a good distance closer to the body as opposed to trying to keep mostly at their idle position. is this a range issue?
They also sink slightly into the floor which I would assume is due to the bones not coming across at their true length. I've tried adjusting the z axis height for all steps but nothing seems to really change anything for the better. Any suggestions are appreciated!
**There is also an additive animation going that just bobs the middle up and down

If it helps I do have pointers for the feet that could mark the default position
Is there a Uefy for Blender 4.1?
sent you a dm, to not clutter the chat ^^
you gonna have to wait for the dev to update it
Hey,
I try to blend in some weapon arms animation over the usual character movement animations. I got the arms working as expected.
However I'm using the ik_hand_r as the socket for the weapon. This bone is not animated in the character walk animation. This results into the weapon beeing less animated then the arms which move more to the left and right while the character is walking.
Any idea how to solve this?
does anyone know how i can export camera animations from blender to ue5 ?
USD will work for blender cameras
Hey, brain fart if anyone can help.
I made a blend of 3 animations in an Animation Blueprint but I need the resulting animation for use in my Blendspace instead. Anyway I can save it off as a new sequence or something?

hey, anyone try to follow Epic's documentation on Motion Matching? I just tried and had no issues, but the animations don't play when I test it out. Wouldn't mind stealing someone's assistance for a bit lol
USD ?
Is retargetting viable for precise animations? I made a hard landing animation with the hand to the ground, but retargetted onto a metahuman the hand hovers way above the ground.


This is following the official documentation for retargetting Manny/Quinn onto metahuman
I guess the way is to not use runtime retargetting, and then retarget only locomotion animations onto metahuman, and then animate the metahuman skeleton directly instead.
Hi, I'm using the ik_hand_gun bone for weapons, but I've run into an issue where the root bone and therefore also the ik_hand_root bone and ik_hand_gun bone get displaced in Z when stepping onto an item with collision. Does anyone know why this could be happening? So far I haven't been able to find the issue.
Do u have pelvis offset logic
The official doc for retargeting onto metahuman still produces non perfect results. Try a few of the marketplace solutions. I love the UAN media plugin for retargeting as its near perfect every time.
Also might just be a settings thing
Any guru knows why Lyra uses "Inertialization" node, but it's state machine does not use invertialization as blending method?:

Hi, is there a way to scale Root Motion Scale in runtime?
E.g. I have a jump animation I want to modify the length of, based on character level
Something like Character::SetAnimRootMotionTranslationScale but for the specific animation
you would simply need to change the play rate of the animation
Don't get it. Play rate doesn't affect the overall root motion. It's not a loop
actually it should as the root bone is also animated
so if the play rate is higher, the root bone should move faster
ah I see
you could use additive animation
create a new animation with root motion movement which is the maximum height the player would be able to jump at max level
the Apply Additive node from the anim graph is built with an Alpha input
Character::SetAnimRootMotionTranslationScale works fine but it affects all the root motions at a time. Imagine I can attack+jump at the same time. Both animations have a slight root motion (attack moves you forward a bit, jump has a parabolic one). And I need to do basically Character::SetAnimRootMotionTranslationScale but for jump only
Will it affect other bones?
Sound like a blendspace from pose to motion which I don't need
only if you pose them in the animation
if the animation is only the root bone moving around, you'll be good
is your skeleton complex?
Wdym, almost default unreal
then yeah, you'll be fine by animating only the root bone for the additive animation
But I need my animation to look like an animation, not like a root bone motion
Just an animation with scaled root bone motion
additive animation is self explanatory, it simply adds up into the bone's transform
Then I don't get how it could help me
so if you made a jump animation with the root bone animated for the purpose of having a scripted jump system
then you can create a new animation with the root bone doing the same movement except it reaches a higher altitude
and when you use that new animation as additive, the character will jump much higher while maintaining the base animation
I do not think there's any other way to scale up the jump height with root motion enabled
Isnt it just easier to use an 1D blendspace if doing it that way?
And just blend between the animation without root motion and with root motion
there's layered blend per bone also which you can put a Blend Mask on it
it has no additive feature
it just blends two animations together
I see
Tried, couldn't blend by channel two animations, one with root motion (max jump height) with the other one with disabled root motion (zero jump height). Root motion just doesnt work. Root Motion Root Lock and Force Root Lock didnt help
Additive layer track with root bone scale didn't work either
Interestingly, it also happens when retargetting to itself..

So its retargeting settings
Turning "Blend to Source" from 0 to 1 in the IK for the hand fixes it for Manny. Gonna try with the MetaHuman retarget
Gl
It does fix it, but it also makes the relaxed pose more strained looking
Without and with


Guess I'll have to change it at runtime, just for one animation..
Could reduce arm flare with basic anim curve key
I am trying to play specific animations on the upper body of the character. this seems very simple but all guides I read are using a variable set in the character class to determine if the animation should use the blended animation or the default one. is there a way to do this entirely on the anim graph? so if there are montages running with the "UpperBody" group it uses the blend, otherwise it defaults to the false branch?

I tried doing this but I am receiving this error:
Blueprint Runtime Error: "Accessed None trying to read property CallFunc_GetCurrentActiveMontage_ReturnValue". Node: Blend Poses by bool Graph: AnimGraph Function: Execute Ubergraph ABP Manny Blueprint: ABP_Manny
I am not sure how to validate that there is a montage running before trying to access this node

Hello, I have in "locomotion" Run, walk and idle animation and those also rotate Left Hand. I would want to have pose animation for left hand where I can "Add to existing" So I could easily modify left hand pose for weapon. How do I do that? I mean like add top of "locomotion"

With Layered blend per bone it fully replaces rotation of that bone
Anyone know why this is happening and how to correct it?
The image has her Left IK off and her Right IK on for comparison.

Hey! I would like to play animation on the eyes (from an animation sequence), but in the same time keeping the rotation of the head, that seam impossible ..
Hi guys. I'm having trouble transferring my new skeletal mesh to a CTRL rig I'm working on. When I tried to transfer my new skeletal mesh to an already established character CTRL rig, the proportions inflated. I checked the Physics Asset and I realized that the auto-generated rigidbodies (second screenshot) matched the ballooned proportions. However, when I tried to manually recreate the Physics Asset of the new skeletal mesh, the changes don't seem to register for the CTRL rig file. I'm currently recreating the Physics Rig (third screenshot), but any suggestions on how to fix it?


Alright got the Physics Asset set up. For some reason the CTRL rig mesh is still dummy thicc despite my changes (post above). How do I fix the skeletal mesh?

hey guys, im following this tutorial sadly its from UE4 and this node from the control rig doesnt seem to be in UE 5 does anyone know the alternative to it?

I'm trying to add some secondary dynamic animation to a character using the Anim Dynamics node, but so far its not making a lot of sense to me.
It seems the only way to change it's behavior is by changing the Box Extends settings? I wanted a springy bouncy joint chain on a characters head (Its a big leaf that needs to bounce) but turning on the Angular Spring Constraint make no difference. I've set it from -50 to 1000000 and there was no change.
Trying to set the Angular Min and Max settings just makes the joint chain fall over so I've had to leave them all at 0
However, the most annoying part is the results are completely different depending on if I play a animation sequence or render it. When rendering the animation with the Movie Render Queue, the joints are a lot stiffer than when I simply press play in the sequencer window.
Can anyone shed some light on the settings and how to get a stiff bouncy chain working?
Or, perhaps this isn't the way to go and I should be looking at another way to add dynamics to my animation?
Hey guys, I am trying to import and play my animation from blender in Unreal. For some reason the mesh in the animation is much much bigger and i am not able to play it. Because the mesh is bigger, the animation doesnt play right, so the mesh doesnt move as far as it should. Does anyone know why?
I’m using a plane not a character if that helps
How do I use the IK Solver in the Animation Blueprint? The interweb says (see picture) but that node doesn't seem to exist in UE5.3

Why? Just why?

Why if i set min/max rotation lock on all but one axis rotation in control rig i cannot rotate that one axis freely, it prevents rotation more than ~100° each way, its starts to jump/stutter, at least in the preview, is this a bug or something?
Also when i rotate it keeps setting absurd degrees in the current values of locked axis...
That sounds like gimbal lock, have you tried switching to euler's and making your unlocked axis first in rotation order?
Why what?
A little contex: I trying to make a modular rig, but the base is bigger than the model itself
What I am suppose to do?
My question is!
Why is scale handled so strangely in control rig? When you scale an object, the scale appears to be applied once to it's children, and then their rotations ignore the scaled space they're supposed to be operating in, resulting in some very weird behavior!
Is there some way of getting them to update in the way one would expect them to update in a normal hierarchy? There are several fun rigging techniques that rely heavily on skew.
Did you import your character from Blender? Check the root node, does it have a really weird scale on it?
Like 100?
In the details panel in the control rig when you click on your root bone.
You can also see it in the Skeletal Mesh viewer by clicking on the root bone as well.

Looks like it, yeah.
'ARM' I guess, for 'Armature'.
(you want to check the 'Details' tab)
I guess so

Is in italian, cuz I'm italian
I've heard that happens.
When you're born in Italy.
This video will help:

In this video I will show you how to correctly export a character from Blender to Unreal Engine 5.
Common mistakes include issues with the scale of the root, joint orientations and differences between bones and joints. In this video I will talk about everything you need to know to correctly export rigged characters that follow Unreal Engine sta...
Auto-transation and stuff, maybe
👍
You should be able to fix this by 'refreshing' your control rig by right clicking on your root bone and selecting 'Refresh'.

You also have this problem. Unreal and Blender disagree about what a unit is, so you have to change how you export it. See the video I linked for pixelAZ above.
Alright thanks!
@nimble torrent Now is right scaled


But now I have this problem:

Do you still have this checked on?

Blender is weird!
Yes, I know -_-
It's actually really easy. If your face rig uses bones, you want to use the 'Layered Blend Per Bone' node in your animBP.
If you're using morph targets, then you just need to control the animation curve.
Turn it off. It's adding extra bones you don't need.
I think that is named 'GET' now, and shows up in the list as 'Get (a reference)'.
Look up 'Make Dynamic Additive'. You put in a base pose, and you get out an additive pose that you can then use 'Apply Additive' to modify your animations.
You can also export an Additive animation, but it's more fussy then doing it at runtime.
I still have the problem
You modified the hierarchy of your skeletal mesh. Try refreshing your control rig, like this:
It looks like your skeleton has a bunch of missing bones in the finger hierarchies. Those bones are likely what is causing your issue. You can technically compensate for that inside of control rig, using the 'Set Relative Transform' nodes, but it's probably better to export a clean hierarchy.
euler is default and rotator, whatever i change it to, its the same anyway, only not locking anything works
its looks like some kind of bug or a thing i have no clue about, but the mouse controls in preview do seems broken sometimes
its basically defaults testing
anyone, any clue?
Strictly speaking, a montage node should pass through it's input pose without modifying it if no montage is currently playing in it's slot. So hypothetically, if you just want to be able to play montages on the upper body, you would use a structure like this:

yeah that works if all montages are on the upper body, but I have montages that are on the upper body (like weapon sheathing) and some that are full body (like skill animations)
Use two separate slots.
I am still learning the anim graph, how would that work there? I thought I was already doing this approach by reading both from the UpperBody and DefaultSlot slots then blending them by a bool
Hmm - can't replicate your problem, can you show your min and max values?
Well, it really depends on how you're controlling them.
I'm not sure I understand why you want to avoid reading a value from your pawn?
That seems like the most obvious way to do it.
But if you don't, if you just want to play montages randomly or something, then you can just put both of them in a sequence.

Like that.
So it's always blending the upper and lower body, but if there's nothing playing in the 'Upper Body' track - it just blends the locomotion pose with itself, effectively doing nothing.;
Then, if something is playing in the 'Fullbody' track, it plays that.
its mostly because it looks like something that is easily breakable, you always need to remember to set the bool in the pawn before playing a montage
I kinda mitigated this issue by creating my own PlayMontage node on cpp that reads the montage file and toggles the bool on the pawn depending on the slot there, but I feel like if I suddenly switch to another montage that does not use this node (maybe from a different game system) then it could break
That should not be necessary. Montage nodes are designed to basically already do that kind of functionality.
You use a bool (or a float) to control blending when you're changing between states, not doing a specific action (most of the time).
Like, you would use a float/bool if you wanted to blend in a 'Holding a box' state ontop of a locomotion system, so the character raises their arms to show them holding the box.
But if you wanted them to wave, or something - you don't need that. You can just use a montage node in line.
its 0 for those locked, its on the video
They're made for an entirely different engine.
Oooh. OK. This is interesting.
I'm using the 5.4 preview.
And they have these options.

Looks like I must "re-rig" the models
So I think it is gimbal lock, and there is definitely an issue with it, and it's going to be fixed in the next editor version.
I mean, I wouldn't go that far. Modify them, certainly.
Maybe...
isn't it the same as the rotator in transform settings u can also change to Eulers and other?
Also this is the basic default setup, so i dont know why its happening, besides no matter what option i choose its the same
ok that makes a lot of sense, I think your last example should work for what I am trying to do. I will give it a try once I am home, thank you
No, under the hood rotators are Quaternions.
can it be something broken with the skeletal mesh, bones?
I don't believe so, no.
I think it's a gimbal lock / rotation order problem.
If you can change it to euler, and specify the rotation order - then you're good, but I don't see those options in your version. So you might be pooched until you can update at the end of April.
I could very easily could be wrong - but that's what I think.
well thats impossible for something that simple to be broken or not working, only to have a fix in 5.4, how did ppl make games the last 10 years 🙂 ?
i dont know what it is but there must be a solution and reason
hmm ok, thanks i will investigaate it later
I mean, it's not really impossible for stuff to be broken!
Stuff is broken all the time!
Have you tried limiting the other axis? Like, say, X?
yeah, sure, but this is stable 5.3.2, no one would notice...
Or tried creating a custom control in another control rig, and applied your limits to that?
My hierarchy is set correctly. I’ve checked that several times.
the vid is from the second test only rig and its the same
Not a lot of people using the control rig, and fewer of those would be using the rotation limits specifically on the Z channel.
Then why is it missing bones in the hierarchy?
ahh, so it is very much possible then
It’s showing the source hierarchy. Not the target.
OK, but having greyed out bones like this means these bones are present in the skeleton but not present in the current mesh.

This is likely to be the source of your problems.
As your control rig breaks at those points.
but even then something is not right with this, why the other axis changes to like gazillion of degrees in the current values, when i only rotate one axis in the preview, makes no sense at all
oh well, that is for today
¯_(ツ)_/¯
¯_(ツ)_/¯
next gen engine
My recommendation would be trying 5.4, and seeing if changing the preferred rotation order fixes it.
Or, before that, creating an empty control rig, and trying to apply that constraint to a control in there.
Without any baggage from the skeleton.
u know what i didn't want to download it, but i might, just to know if it works ha ha
Oh, and also seeing if you could properly constrain the X axis, rather than the Z axis.
If you can, you can always put a rotated node one step down the hierarchy, and use it that way.
The game developers said I should not add twist bones. I added the metacarpals, but I named them “Meta_(Side)(Finger)”
Is it possible that I need to manually set comparisons? I’m not sure on the terminology.
You also have your hand assigned to your left arm bone?
Oh, not the bone. Sorry - been a while since I did any retargeting stuff in unreal.
I could very easily be wrong!
But having missing bones like that, in exactly the place it looks like your rig is breaking, seems like the place I would start investigating.
Are there any good tutorials/videos for building a fairly complete locomotion setup/anim graph?
That's really going to depend on what kind of game your game is.
But so far, I haven't seen any for any kind of game. They're all very surface level.
Yeah, I'd consider anything at this point 🙂
Will look at Lyra if I don't find anything else.
In unrelated news, it looks like Unreal completely avoid transformation skew in all it's hierarchies.
So weird.
How do I draw comparisons or link the bones with the source?
Not sure what you mean, sorry.
I’m not missing the bones, but it appears that they are not referencing to the source. Do you know how I can do that? If not, I can just look it up when I have a moment.
Sorry, not sure what you mean by 'referencing to the source'!
Hey everyone, Does anyone know why this is happening?
The Land animation is doing unnecessary rotation even if the Land anim sequence looks correct.
The land animation root bone prolly has the wrong rotation compared to the rest of your anims
Its probablu imported differently or from a different set of anima
this worked perfectly, thank you 
This was retargeted in unreal with one source Mannequin.
I tried exporting and checking the fbx file but it looked correct as well.
Idk check root settings in the anim asser
Hurrah!
so a solution to my issue was resolved by discovering a glitch?
i want to fix this issue

so i open edit weights...but then... the vertices get yanked to 0,0,0

normalizing the vertices results in this unwanted outcome

but if i press Average > UNDO > Normalize

it fixes it 🤣
but i doubt i could script this in python :'(
lol this average > undo > normalize trick is working like magic for every single thing
Anybody using motion matching yet? I haven't started much ABP work so I'd like to know if it's worth using yet before I go the normal way. Anybody do a deep dive?
thanks!
Does anyone know what's the best way to pass "information" between two skeletal meshes?
I got a blueprint that has skeletal mesh animation whos information I need to pass to another skeletal mesh that has control rig
it's for a simple backpack rig I want to sample the "human" animation and pass it to backpack and do a slight offset 
Any direction or ideas are appreciated

The traditional way of doing this is to use the "Copy Pose From Mesh" node in the animation blueprint for the backpack, and pass a reference to the character mesh.
In your DCC (like blender), you add the subset of the characters bones you need to copy - for a backpack that's usually the spine, hips, and root (and maybe the shoulders). Then, when you pass in 'Copy Pose' those bones will take the position of the referenced mesh.
If your backpack is very cartoony, and is just sort of floating there, you could also do this with sockets - but Copy Pose From Mesh is probably still better, as it's a more flexible method.
is there easy or relatively easy way to copy blend profiles from one Skeleton asset to another that is very similar?
Thank you so much this will help me a lot ❤️
Best of luck~!
Hello 👋
I wan't to apply root motion on up axis (Z axis), everything is looking good as I am watching my animation (in montage and in sequence) in unreal editor, but even if I put my movement mode on Flying mode it's not working, it seems that the motion on Z axis is applied on Y axis instead, does anyone have an idea to help me pleaaaase ?
The most recent unreal engine GDC video shows a nice motion matching setup using very few animations. There is a youtube video I saw once that walked me through it. Getting a fluid & simple motion matching setup is the next step after my current goal.

Get a first look at the innovative new functionality of Unreal Engine 5.4! Join us for a presentation highlighting the top new features coming to game developers.
https://www.youtube.com/watch?v=UlNqYWuXcTw
this guy might help. he uses a large library of animations but i'm sure you can make it simple. I plan on just using simple locomotion alongside some start and stop/pivot type movements.

Learn how to use Motion Matching to connect between your Character and animation in just 5 min.
Motion Matching is a system that meant to replace the current state machines. The special thing about it, is that it continue to select the best frame of animation to play out of big a animation pool using 3d trajectory prediction and it can be used ...
What do I search for to get the input axis and disable movement node?


'Disable Movements' is a boolean variable. That was added to the class you're referencing. It's custom, not an engine feature.
The InputAxis nodes are part of the old input system. They've been replaced by the 'Enhanced Input' system you can read about here:

Epic Developer Community
An overview of the Enhanced Input Plugin in Unreal Engine
The problem I'm facing rn is when I look up or down I slow down and when going up the stairs while looking up, I just stop like there's an invisible wall
OK, you'd want to look for something that is setting that boolean then.
This is my current node setup

Oh... OK. Are you rotating your whole actor when you look up and down?
from the internet
Because that would change the vectors you get, and make them less effective while moving.
how do I check that? I'm a beginner

OK, so it looks like you're rotating your whole pawn.
That's probably not the best way of doing it. So what's happening is, when you rotate your camera, your whole pawn is rotating upward. So the 'forward' vector of the pawn is pointing up. When you tell your character controller 'move forward', it's trying to walk into the air - but the character controller respects gravity, so it stays on the floor, but slows you down.
Rather than rotating your whole pawn up and down, you want to rotate the camera component instead.
And only rotate your pawn left and right.
how?
You have a camera component on your pawn, right?
Rather than using 'Add Controller Pitch Input' on the pawn, use the Y-value to rotate the camera.
wdym? is this a node?
I'm trying to find you a video about basic transform controls in blueprints and they're all insane.
Hmm - this is more complicated than I thought. I think the pitch input stuff might be handled by something called the Player Camera Manager component. I don't really have time to dig into this, this morning. Sorry!
I see. Thanks anyways
Over the last 3 months, I poured my heart into crafting a mesmerizing music video that I'm thrilled to unveil today – I couldn't be more excited to share it with you!
Made with Unreal Engine 5.3, Marvelous Designer, Move A.I, and DaVinci Resolve
To immerse yourself in the entire project: https://youtu.be/mcBHVCjeTf0
Hi everyone, I'm trying to use ControlRig to IK my character's hands to a prop that he's carrying. It works, but it seems the IK always lags behind 1 frame, making the arms jitter on low framerates or whenever the character moves with the prop. I get the effector's target transform in my BlueprintThreadSafeUpdateAnimation and feed that into a control rig node, not sure if that's relevant.
Using the FABRIK node in my ABP seems to work without lag. So does setting my SkeletalMeshComponent's tick group to "Post Physics". But I am not sure if these solutions are really best practices, especially the latter.
Does anyone know why this is the case? And how to deal with with issue correctly?
Hey guys, I was wondering how I can "attach" my camera to my animation because right now the animation plays but the camera doesnt follow.

What is happening here? I have tried many different axis. in the primary and secondary axis values, but cant seem to get the leg IK to work right. What am I doing wrong?

^ping with response please
From the screenshot it looks to me like your Foot_IK_L bone is not actually part of the chain. Don't think BasicIK can solve that for you. Try putting Foot_L as effector item instead?
Hey folks, need some help with some physics in an animation - i currently have two skelly meshes in one blueprint (one is holding the other) however once i have an animation play, the physics character just flops down.
am i setting up the animated character wrong since it "drops" the ragdoll?

Is there a benefit of moving animgraph logic to another animation blueprint?
Like the main ABP has a lot going on, and then it makes a called to a Linked Anim Graph. Inside of this ABP has some simple logic of adjusting a couple bones.
Mostly organization
But with Linked Anim Graph/Layer you also get the ability to link a different Graph/Layer at runtime
Stores the pose in a cache so you can use the same pose in multiple places

Epic Developer Community
Animation Blueprints are visual scripts that are used for the creation and control of complex animation behaviors.
Does anyone know how to fix this? This is my current setup of my Plane BP (Problem is in the message i replied to)

No luck. really dont know whats goin on here
nooo! now my average > undo > normalize strategy is crashing me and returning "Array index out of bounds: -1 from an array of size 12"
😭
I cant do anything too complex with this skin weight editor or the program just starts having a stroke
i use to beable to Average > undo > normalize the entire Metahuman mesh. now i can only get away with doing small sections, so fkn weird as im never saving or modifying my project. im opening it fresh, trying things, and closing
Unless your plane has your current camera on it, that's just going to play the animation on the plane. It won't do anything to the camera.
i give up with the weight painting. it just doesnt work yet, plain and simple. i cant keep hurdling over bugs every 5 seconds to do the simplest tasks
I feel like im rediscovering how to make it through the lost woods again as a kid, but with no audio & the layout changes every other try
So i just need to add my camera to the animation?
Not exactly, no. This video will help. You have to export an fbx file for your camera animation.

Hey everyone, Cliff from Round Table Studios here. Here’s a quick tutorial on how to get your Blender camera animation into Unreal Engine 5!
Check out the Combat Animator Starter Kit ⚔️ -
rebrand.ly/combatstarterkit
MY KEY LINKS
🌍 My website - https://www.roundtableanimation.com/
📸 Instagram - https://www.instagram.com/roundtablest...
There are other ways of doing this, but if you're specifically creating an animation or cinematic - this is the best way.
So i can use the blender camera while the animation and after that it will switch back to my camera from the bp?
Kind of? It really depends entirely on how you set this up.
If this is a cinematic, then it's best to do it as a level sequence.
If this is a gameplay transition of some kind, then there are other things you'll need to do.
All answers are thoroughly context dependent when it comes to cameras.
Its a plane (that you can start and land) And when you press a button to do that, the takeoff or landing animation should play
When you say "you can start and land" do you mean the player, or a player character who is walking around near the plane? What is happening before and after the plane takes off?
Nothing its a mobile idle game. So you press launch, the plane start, you make money during the time you fly, you land after a set duration and after flights you upgrade your plane, no chracter, no direct control of the plane except for landing and starting
OK, so you mean just the player. The player is watching the plane on the ground. They click something, the plane takes off, it flies for a period of time, then it lands again.
yes, if i think about it its sort of just a cinematic
But, with a period in the middle that can be longer or shorter.
yeah
If this were me, I would do the following. I do not claim that this is the best way of doing it, this is just how I'd do it:
Add a bone called 'camera' to the skeleton of the plane.
Constrain that bone to the camera in blender, so when the camera moves, the bone moves.
Re-export the animations for the plane. Unreal will complain that you're adding a bone. Let it complain. It's fine. Import anyways.
Add a camera component to the BP of the plane.
Attach the camera component to the camera bone socket.
Create an animation BP for the plane. Have three states, taking off, landing, and flying.
Use gameplay code to switch the plane between states.
Alright thanks, I will try!
just an update on the control rig thing
it was in fact something with the bones on the model itself
i did test epic control rig sample models with the same setup, works no issues
now i noticed the root bone is red in skeletal editor and on top of that connect to the other bone in some absurd way
so its a mesh or importing issue, it is an external mesh i downloaded from sketchfab
i doubt there is anything wrong with the control rig in ue after all, it was too simple thing to not work
Cool! Good to know!
Always good to add 'Test this on something else' to your debugging toolkit. : )
With "constrain" you mean just parent or really constrain?
Constrain. I don't think you can parent bones outside of the armature in blender, and you wouldn't want too, because you're exporting the armature to Unreal.
You might have to bake that bone. I don't know if blenders fbx exporter does that automatically for constrained bones.
Ive got it setup like this now, but when i import the armature, mesh and camera ue only creates one bone which is the plane_low_poly bone, except it shouldnt be a bone if you know what i mean. The two bones should be root and camera

Don't import the camera, just import the plane and the armature.
The 'plane low poly bone' thing means you didn't successfully export the armature.
What is the bone orientation of your Foot_L bone? Is it really aligned along -Y?
Alright, fixed it by renaming the armature to "root", dont know why ue needs it so specific but alr
That's very odd. That's not how I've ever seen it work before. I would expect that to probably be some kind of bug or error, and likely to lead to more of those in the future.
Good luck!
Thanks for your help I got it to work! 😄
yeah from what I can tell from the skeleton. However I am redoing the whole thing and simplifiing the original armature anyway, so oh well lol
Thank you
I wonder is it possible to add "animation" for Camera? like for Accurate and Smooth Head Shake
Okay, new problems lol. This is my model in blender with the armature

this is it in ue5 (skeletal mesh view)

where did the bones go
same problem with the "toes"

Check the actual hierarchy names. I think they're all still there. Remember, the ends of a bone in Blender don't really matter. They're just there for visual display, and for helping you build the skeleton.
The part that matters is the transform, and I think they're all still there.
They just look different.
The toes are a bit odder, it looks like they're not parented to the heel for some reason.

This is possible, but it is entirely dependent on how you have your camera setup for your game, so there is no easy plug-and-play setup for this.
thats how it is for the toes
I guess the transforms are still there. Will this affect control rig? this just sketches me out lol

Oooh, that line coming down in front of the toes is the root.
OK.
Sorry, I thought that was the toes.
no thats the root lol, sorry. bad pic
It will not fuck anything up. It's just that the two programs display bones differently.
It's still the same skeleton and the same rig, it just looks different.
okay, great thank you for the clarification. Why cant it all be easy man lol
Hey, is there a way to smoothly transition between two cameras ( in the same bp), like the camera is just moving instead of switching?
Can someone point me to some guidance on how to create a very simple character rig in Maya that is compatible with the Manny Skeleton (ue5)?
Look up 'lerp transform'.
It will let you move the camera between two transforms over time.
There are no simple maya rigs.
ooh okey thanksss
how excatly can i integrate that node into the switching process? Sorry but i cant think of smth
You have your camera in one place, you want your camera to be in another place. You don't want your camera to pop between places.
- Put the transform for where your camera starts into the first part of that node.
- Put the transform you want your camera to end up, in the second part of that node.
- Choose a speed for this movement. I recommend making this a variable.
- Make another float variable called 'Current Camera Transition Value'. Make a boolean variable called 'Moving Camera'.
- When you want to trigger the camera to move between locations. Set 'Current Camera Transition Value' to 0, and set 'Moving Camera' to true.
- Plug 'Current Camera Transition Value' into the Alpha.
- In your tick update, have a branch that only triggers when 'Moving Camera' is true. In that branch, run the Lerp. Use deltatime multiplied by your speed value to increase the value of 'Current Camera Transition Value'.
- Apply the lerped transform to the camera transform. This will cause the camera to move between transforms.
- After applying the lerped transform, check the value of 'Current Camera Transition Value'. If it is equal to or greater than 1, set 'Moving Camera' to false. Your camera is now in it's new position.
Thanks, so first something like this? And what should i plug in as context?

Yeah, that's about what I was thinking.
Though you could make the two transforms variables, so you can do multiple camera transitions with the same code.
For delta time, drag the pin off Event Tick.
'Delta seconds'.

Don't plug it into 'context', plug it directly into the multiply.
ah sorry xD
It works now thanks! Just one quick question. How do you know so much? Since when do you use ue
I'm an animation technical director. I used it professionally for several years.
Ah that explains it pretty well 😄 Alr thanks again
I don't wanna be spammy and if this is out of line, please let me know - but I'm struggling with Niagara previews in Animation Montages "playing instantly" - I posted the description along with video here. Is this intentional or is there a better workflow for tihs? #niagara message
I see what you are demonstrating but why does it matter
Try playing it in editor with console command "slomo .25"
Is there a way to preserve volume of my mesh when using my controls in control rig? For example when I rotate the tongue of my character with the control gizmo I set up. the tongue shrinks the mor I rotate. Is there a way to fix this issue?
I cant go back, there has to be a way to fix this issue
The jaw shrinks too when I rotate it
The answer to that is a whole discipline of game development.
So, technically yes, but you have turned over what you thought was a normal rock and the sheer variety of creepy crawlies that will crawl out will surprise you.
So, what you're saying is. Yes, but no.
Can you show me what's happening? I don't want to give you the wrong information.
I assume its something I would have had to have prior knowledge of before I brought this to unreal. Like shape keys and corrective shape keys and yada yada.
Yeah Ill show ya
normal (no rotation)

with rotation

the jaw gets super tiny
So like, the fuck was the point of all this lol
OK, so in your case, I'm guessing you used 'automatic weights' when you parented this guy to the armature?

perhaps
I did do a bit of weight paint tweaks and stuff. especially to the mouth and jaw
cause it wasnt right with the automatic weights
but I fixed it, so idk
Welp.
If you fixed it, that probably wouldn't be happening.
I say probably, because there are a variety of possibly causes to this.
If you rotate the jaw bone in blender - does it do that?
Ah. I had preserve volume selected, and wasnt aware, or rather just didnt think about it not working in unreal engine. I assume if I use corrective shape keys, I can just reimport the thing and use the same control rig? Is there a a catch to importing shapekeys to ue5 from blender?
Why would unreal not have a preserve volume thingy?
For a bone like that, you kind of don't really need preserve volumes if you skin it to the jaw bone properly.
That said, I think Unreal does have dual quat skinning. One sec.
I don't use it, because it's slow...
And the reason it has historically not had dual quaternion skinning is speed. Linear skinning is much faster.
thats how I weight painted the jaw

I'm surprised it compresses like you've shown, if you skinned it like that.
yeah, Idk man
The only thing I can think is that somehow you have a scale inside your skeleton and it's compressing one of the bones maybe?
I don't actually think it happens in unreal though, unreal does transforms strangely.
Does the bones scale change when you rotate it in unreal?
like when I rotate the jaw if the jaw bone shrinks in control rig, or the skeleton editor window
That's the question, yeah.
Because hypothetically, if you have something solidly skinned to a bone - if you rotate it, it should not shrink.
in the skeletal editor. This is the lower jaw bone. Which we talked about earlier. for somereason the lower jaw in ue5 is just a little transform ball or whatever lol

That's what bones look like in unreal.
I just dont understand why it isnt a line like all the other bones
doesnt make sense
to me at least
Because it has no children.
ahhhhhh
It is a bit concerning that the tongue bones don't appear to be lining up with the tongue properly.
okay
oh woops, thats cause i rotated it, and didnt undo that before sending the pic
they do line up
its just the same volume preserving issue that causes that

That's very strange.
I would expect to see that if there were substantial weights on those vertices that were not to the jaw or the tongue.
Like, if it were also skinned to the head.
Or to the root or spine or something.
Then you might see that kind of behavior.

the head bone is supposed to control all that lol
That's not how skinning works I'm afraid.
oh beans
I mean, on the plus side, you know the problem now!
so weight painting isnt hierarchical?
It is not, no.
so I dont understand. I want the head bone to control the whole head as one, but I cant do that?
It's not like that.
The head controls the jaw bone.
So when the head rotates, the jaw bone rotates.
Anything skinning only to the jaw, will rotate with the jaw, which rotates with the head.
ohhhhh rightt
so weight painting isnt heirarchical because the whole armature already is
Yep!
goofy me smh. Okay so would be my next steps. Obviously fix the weight painting, and then just reimport into ue5? Would I ahve to redo the control rig or will I basically just be able to replace the badly skinned mesh with the better one?
You'll be able to replace them, provided you don't muck around with the bone hierarchy, which you shouldn't need to do.
Once you've fixed your weights, re-export your FBX file, then you can right click on the skeletal mesh and choose 'Reimport'.
Then, in the control rig, right click on the root bone and choose 'Refresh', it will ask you for a skeletal mesh, and point it to your reimported skeletal mesh.
Then you should be good.
Also - to be clear, that was not a goofy thing to think! It is entirely reasonable to think that skinning works that way. Weight painting is weird and even people explaining how to do it seldom explain how it works.
Awesome, you saved me hours of pain lol. Thank you very much squishy, you are a fuckin champion

No trouble! Best of luck!
It works! Thank you again very much. Not many people spend that much time helping someone, so thank you!

Hurrah!
You're welcome! I'm glad you got it working!
me too!
Aligning it to the animation is tougher. With cascade you can freeze frame and move it so finding the position and angle feels way more convenient.
It is not the worst thing in the world but could be better.
I am making animations for my fps game, and I want to export my camera animations (shake,jump,etc), how would I do that ? (im using blender and ue5)
Generally, you would have a camera bone in your first person character rig, and you'd attach your camera to that.
Not sure I'd necessarily recommend doing it that way though. Attaching a camera to your character in a first person game can be a source of trouble.
It's often better to have your camera drive your arm rig, and not the other way around.
Hi, I'm making animations with the mannequins and sequencer in UE5. I just drag and drop the SKM_Quinn in and create a sequencer than use the attached control rig to animate the character. Is there an easy way to add a weapon to the SKM_Quinn?
OK, if you just want the weapon to be there as a visual while you're animating, you can drop the weapon static mesh in the scene where you're making the sequence, and just parent it to Quinn's skeletal mesh. When you do that, it will ask you what bone you want to parent it too, and you can pick the appropriate hand.
But that will only work for that specific scene. If you want to add the weapon on a more persistent basis, you'll have to add it to her blueprint, and/or create an inventory system.
When I do this and move the arm, the weapon stays in place.

Yep. That's a character. Did it give you the list of bones to attach too? Remember, you have to parent to the mesh not to the actor.
It did give me the list and I attached the Axe blueprint to the socket I've created.
Is your socket moving properly when you move the arm?
Hey everyone, I'm encountering an issue with root motion animations on my character. The problem is that root motion animations rotate the character during the animation, which is fine, but once the animation finishes, it reverts back to its initial rotation before the animation played. After some research, I found that the problem lies in root motion animations not changing the control rotation of the possess character, only the actor rotation setting. As a result, after the animation finishes, it returns to the same rotation. How can I fix this so that the control rotation changes with root motion animation?
Ah apparently not haha
These things. They happen!
Do they not move because they are greyed out?

I can't say for sure. I know that unreal tends to aggressively optimize it's skeletons, so if nothing is skinned to the bone - I think they tend to not be evaluated.
I wouldn't say definitively, because I haven't gone in depth on that in ue5.
Thanks for your help anyway! I'll try to figure it out haha
👍
How do I set crouch height? I need the desk to be covering me. I've been messing with these settings and nothing changes.


Uh... your 'branch' node there has no evaluation pin.
It's not being called by anything.
So... yeah, it won't do anything like that.
Oh, dont mind that. I could actually delete that.
can I change it here?

I mean, that does look like something that would make you crouch. What happens when you hit C? Does it work?
(almost always best not to hard code your control values like that, you want to use the input action system, so people can remap their controls)
It works. It just doesn't crouch low enough.
Have you tried changing the 'half height' lerp values?
Specifically the lower one?
nothign changes
Neat!
When you say "doesn't crouch low enough" what do you mean? Do you mean the capsule is too large, and so your enemies vision code is seeing the player.
Or do you mean 'the camera doesn't lower far enough, so you an still see over the obstacle'?
second one
also why does this doork break when I go through it? The other door seems to be fine

Not touching that. Doors are the devil.
How does your camera work? In your code there, we see it modify the height of the capsule, and the rotation of the camera - but it doesn't appear to set the translation of the camera.
Does the camera lower at all?
Or does it always stay the same height?
Also - why would you want it to affect the rotation of the camera? Wouldn't that take control away from the player?
From the tutorial, it's just to add a few animations to crouching to make it smoother
how do I see that
When you hit crouch, does it go down?
Or do you stay the same height?
OK, so the camera does move down.
Do you know how that is happening?
Is it an animation?
Is the camera being manipulated somewhere else?
Is the camera attached to the capsule somehow?

OK, but do you know how it's moving?
That just a hierarchy and doesn't answer the question.
It suggests that it might be controlled by an animation.
Is that what is controlling the camera?
Because, if it's an animation - you change the height of the camera by editing the animation.
Is the animation the timeline?
No. I mean, an animation on the character mesh.
Does your character mesh have an animation blueprint?
Does the animation blueprint include a crouch animation?

That doesn't answer my question.
You can tell which animation blueprint your character mesh has by clicking on the character mesh in your BP class. It should show the animation blueprint, if it has one.
I'm a beginner, idk what terms you're referring to

OK, so you don't have animation blueprint. That's interesting.
Interesting choice.
To clarify again, I know this might be redundant, but the camera does currently move down when you press C, right?
It just doesn't do it enough?
yeah
i want to create a subtle head bobbing like in apex or titanfall, i managed to do the bone stuff but im not able to perfect my animation. any tips ? should i opt for the camera shake in ue5 ? any reference videos or stuff would be appreciated
Personally, I would use curves to control the head bob, and not an animation on a skeleton. Using curves gives you a lot of control over how the head bob works - but it doesn't give you the limitations on how your character works that parenting your camera to your character creates.
It also lets you put how much the head bobs on a slider, and let your players choose how much head bob they get.
Some people can't handle it much. Makes 'em nauseous!
wait
i can use curves for camera shakes ?
Sure.
i thought i couldnt do that in UE5, so i used the graph editor in blender
is there something similar in UE5 ?
I don't have UE5 open right now, but you can make a curve as an object in the create asset menu. I think they're 'Misc'?
That gives you a curve object you can define, and then evaluate wherever you want.
You can use the curve in a blueprint to change the camera's transform values over time, simulating a head-bob.
hmm
Using the new Retargeter in 5.4 to retarget a simple ActorCore walking animation to m_med_nrw_body (Metahuman)
Something obviously wrong in lower back. Can anyone suggest cause and solution?
is there any ik logic enabled
how to i make the hip bag not clip through the legs when i move? can this be achived with animdynamics or would i need to set up physics

Hello guys, a question I want to use the logic {EventGraph} of a parent abp but the locomotion of the character {anim graph} in the daughter instance of the class, I am creating an abp with the parent of the class that I want to obtain the logic but I cannot use the animations from the animgraph yes or yes from the asset override. Does anyone know how I can implement it?

You don't need to do a full physics setup for something like that, but you probably do need some bones for it.
I would use probably two. Something like this:
- hips
- book_avoid
- book_spring
- book_avoid
Skin the book to book_spring.
The spring bone itself is easy, just use a Spring controller in the animBP.
There are a couple of ways of making the book avoid the leg, but probably the easiest is to use a pose driver. Make a bunch of poses of the leg with the book out of the way, and you can just plug in a Pose Driver node, and it will do what you want with only a little tweaking, and no need to go into dot products or anything.
thanks i’ll look into that! fortunately it’s already rigged though i’m not positive it has a spring bone. the issue with pose drivers is that we are using the rig in a live setting with motion capture
When you say 'already rigged' do you mean that you absolutely cannot modify the skeleton or mesh?
You could always remove the book from the character mesh and add it back into the blueprint as secondary mesh.
And why would pose drivers matter for a live mocap? They run in realtime. They're a lot cheaper then running a ragdoll.
oh no i mean the book is already rigged in that it has joints
oh wait so i could use a pose driver to adjust the book based on the general direction of my leg movement
Yeah!
And then you have a spring bone to make it jiggle a bit, so it doesn't look mechanical.
oh that’s rad so if my leg moves in the general direction of a pose it will tell my book to behave a certain way?
Yeah, basically you set up a variety of poses of the leg and book together. So like - one with the leg out sideways, one out front, one out back, one crossing over the other etc. maybe with a few more for additional details.
Then, when the leg approaches the position it had in the pose, the book will take the appropriate position.
that’s perfect thank you so much!!
It's very handy for exactly this kind of thing, pauldrons, pouches, etc.
yeah super handy wow i appreciate it!
Best of luck!
Not sure I quite understand your question here Lucas!
Here's what I think I understand:
- you have two animation BP's, a parent and child.
- you want the child's to be different somehow
I'm not sure how you want the child graphs to be different though. Do you just want to swap out the animations (you should be able to do that in the exact place you screenshotted)?
Do you want to change the blend graph?
mind if i ask, where do you work as an anim tech director?
Sorry, keeping that close to my chest.
okay, no problem. It's been great to see your posts here
👍
Are you in Matt Lake's tech anim discord? he recently published the tech anim in video games book
I am not, no. I hadn't heard of that one.
It's quite active, i havent read the book myself 😅 but i hear it's a great resource similarly to the discord if you're working in tech anim
I'll have to check it out, thanks for telling me.
np 🙂
What would you use for the spring effect? I've typically aimed a bone at a control target and used a verlet spring on the aim target.
I'd probably just use the basic spring controller for something like the book because you really don't want it to draw attention to itself. You want just a little wiggle to avoid the mechanical feeling you get from pose drivers sometimes.
Hey Guys, I have a strange Problem where my Skeletal Mesh of a gun gets scaled up while using the Animation of another gun.
I Imported it from Blender with some adjustment to the Scale.
Do you have any idea why this is happening?
This is probably where the problem comes from:
I Imported it from Blender with some adjustment to the Scale.
In your original animation - is there any scale on the root object maybe?
Imports from Blender often have scale problems in unreal.
Ah yeah true. I think the spring controller is quite performant too. The solution i mentioned i typically build in control rig, not necessarily expensive but can be haha 😅
Yeah, I don't think the control rig has a spring controller, but doing it that way would definitely give you more control.
thanks @nimble torrent , i gonna take a look into it 🙂
Found the solution, it was an export problem with blender where i forgot to apply the scales.
Aha! Nice!
Not exactly a spring controller but there are a few spring simulation nodes. I notice the tool tip for the verlet node recommends using the spring interp as it's more accurate. Kinda checks out coz at times the verlet node tends to accumulate extreme values if performance ever hitches 😅

Hey guys, did someone ever encountered a problem when trying to import a character with a Rig to Unreal and received the following message:
"Could not find the bind pose. It will use time 0 as bind pose.”
How problematic is it? Can it be ignored? And if not, how do you fix it?
The 'bind pose' refers to the default pose for the purposes of skinning. You get the error when you import an animation alongside a skeletal mesh. Typically, you import a skeletal mesh and untick the 'import animation' box when you initially defining a skeleton.
It's not a problem unless your file has animation data on the first frame. In that case, it can completely fuck your skinning.
Cool! I've seen those but I haven't played around with them much. I'll have to take a closer look one of these days.
So I should just move all my animations in my action editor to be above frame 0?
You're better off exporting an fbx without animation, with your character in their original default pose - the one you did your weight painting in.
And importing that one first.
Then export your animation file however you like.
Uefy works with Bender 4.1 too
At 0.0s,
Player character starts playing blocking animation (duration = 1.0s)

At 0.3s,
Enemy attacks player

At 0.6s,
Enemy attacks player

At 0.9s,
Enemy attacks player

At 1.0s,
Player character stops blocking animation, and returns to idle
I want to make it so the player plays a "recoil animation" if they are hit by an attack. So at 0.3s, 0.6s, and 0.9s.
However, if I were to Play AnimMontage or Play Montage, then the original blocking animation will be interrupted/cancelled.
Is there a way to play the recoil animation and then resume the blocking animation afterwards?
Yeah! Totally! Play them in different slots!
Create a slot called, like "Combat Reactions" and put that in your animation blueprint after the slot for the block.
So the block will play, and then the reaction will play over top of it, and then when the reaction finishes, the block will still be playing.
hey guys! beginner's question:
I successfully imported a character into Unreal, inserted animations, created 1D Space blend of 3 animations (Idle, Walking, Running)
then created a basic BP_animation...
But when I try to replace the mesh of UNREAL'S deafult character, my character gets distorted.
What did I do wrong?
P.S.
My character has unrealistic proportions (chibi, big head, big legs, etc.) Could it be causing the issue? if yes how do I fix this?

Did you create those animations for this character specifically, or did you get them from somewhere else?
Because if they're originally created for another skeleton (with different proportions) you need to retarget them onto your chibi character.
Hello. Why can my Motion Warp setup ignore Z warping? No matter how i setup it, it doesn't work.


So i finished my python script that deletes nearly every corrective bone in each metahuman LOD. It works and i'm wondering if this will actually affect crowd performance?
anyone have experience optimizing skeletal mesh or animations?
Looking for any level of advice.
Heya guys, I'm a complete beginner and I'm running into a problem with the animation montage timeline context menu...
Mine is very reduced...
So I'm missing among others the whole "Sequence Editing" part... The second screenshot is what I would expect it to look like...
Any idea how I can get the full menu?


I perform this context action every day. It's always been weird about when to show up. Try clicking in the timeline area where you place montages or above where the bookmarker for the play time is at. If it's too close to the beginning or end of the animation it will also refuse to show up. Try moving mouse to hover over different frames in the timelines to get it to appear.
Got it working now, thx mate ^^
I have multiple animation assets from different content packs and most of them have different animation frame rate. I feel like some animations with high frame rate play kinda weird on character, so is it possible to somehow limit animation frame rate without rebaking it in 3d software?
reimport the selected animation assets
select import frame range of choice
and it should reapply to all of its current references in code
ive had bad luck when trying to change the frame rate of my animations, hope you dont crash often
I decided to learn "unreal", but it turned out to be not friendly for me. I want to repeat Select Dota 2, but I don’t understand how.

youre gonna need to follow a few tutorials for RTS game genre and not give up after 1 week
set a delay which checks for 2 clicks within small window of time
and then if 2 clicks happen within a certain time fire custom event
custom event creates the visual effect and whatever action you want the game to take
https://youtu.be/tfuZkVqkCy4?si=45NGy-T4KN-J1eQX&t=7
I looked and followed these tutorials, of course I didn’t understand a lot of things, but I couldn’t make an animated circle that narrows

Project Files: https://www.patreon.com/posts/78494069 .
Welcome to Part 2 of our series on implementing a controller for strategy games in Unreal Engine 5. In our previous video, we covered how to pan, zoom in and out, and rotate the camera in a top-down view, similar to popular strategy games like Age of Empires and Anno.
Today, we will dive ...
codeLikeMe has good, very straight forward tutorials. sometimes you need to follow tutorials over and over until you find a piece of the puzzle you missed.
is this still the general workflow to bring my maya animations into unreal engine?
USD Unreal Live Link
https://www.youtube.com/watch?v=Ddu7TAICAXw

Explore how to create stylized character-based animation using Unreal Engine and Maya.
You’ll learn how to:
- Exchange character animation effects between Maya and Unreal Engine using open standards
- Use MASH with Blueprints for procedural animation
- Create realistic character effects in Maya
- Develop the look using tools in Unreal Engine
...
I think I've seen this technique used before.. something like "RightArm" slot that only plays the right arm of the animations while using "Layered blend per bone"
Is this what you're talking about?
Yep! Each slot can play separately !
It's been a while since I've done a setup like that - but I don't think so. I think they can play simultaneously without interrupting each other provided they are on separate slots.
Hi i got a quick question is there any way to integrate lyra locomotion with ai without it being so complicated even for UE standards.
We have to use Layered blend per bone?
Cause most of the tutorials I'm looking at have like walking + montage, and have them blend in the pelvis or spine_01
No, you shouldn't.
If your reaction animations are full body, then you don't need to do a layered blend.
You can just put multiple Slot nodes in sequence.
In the order you want them to overwrite each other.
So you would want the 'Block' slot to be before the 'Flinch Reaction' slot.
In the animation graph.
So what happens is that the Block slot plays, then the Flinch Reaction plays over top of it, replacing it.
Like this?

Sure? Does it work?
So I have two AnimMontages:
AM_Block using BlockSlot
and
AM_Flinch using FlinchSlot


Then in the ThirdPersonCharacter BP, I have this:

I press 1, wait a moment, then press 2
I don't think it works, OnInterupted of the Block is called
And also it doesn't return to Block after flinching
I don't think you're specifying the slot there.
So they're both probably playing in Default.
Use "Play Slot Animation as Dynamic Montage".
That will let you specify which slot to send the montage too.
Sorry, I'm not quite sure how to use it
I tried this but it doesn't play any animation when I press 1
Is this right?

It's looks mostly correct. What does it do instead of play the animation?
Have you used a breakpoint to confirm that both nodes are actually being hit?
Just stands still, does nothing
OK, have you done the breakpoint thing?
Yeah, I added print and it does show "Hello"

Oh!
You haven't specified the slots!
In the blend graph!
Or... maybe you have, hold on.
Hmm
OK, so this should work, based on what I'm seeing, so that means you have to run your debugging checklist.
We've confirmed that you're calling the node. So that's good.
Things to confirm:
- try to make sure that the animation blueprint is actually applied to the visual mesh, you're not calling an animation on a mesh you can't see or something like that
- try to make sure that the problem isn't the slot name, make sure there's no space at the end, try using the 'DefaultSlot' and see if you can get it to play in that slot, etc.
- try to use the existing debugging tools, by putting the debugging flag on one of the slots, you should see whether or not the montage is playing
- try to confirm that the event is not being stopped or called multiple times causing it to cancel itself
- try putting the animation in as a sequence, and confirm that the animation will play as a non-slot animation
- inspect the montage object you get as a result of the Play Slot Animation node, see if there's anything weird with that.
Unfortunately, slot animations are frustratingly tricky to debug in Unreal. I wish they had a proper visualizer of what each slot was doing, but they don't!
Okay, I'll take a look
Thanks.
But just to clarify about the expected results: I can use Play Montage to play Block animation.
Then use Play Montage again to play Recoil animation.
Doing the second Play Montage will not call OnInterupted on the first Play Montage.
Is that correct?
I believe that to be the case, yes.
Oh!
You need to have your slots in separate slot groups if you want them to activate simultaneously.
Right now, you have them all in the default group, and they will conflict.
But if you set them into separate groups, you can play multiple animations at once.
I don't know if you know about them, but using the 'ShowDebug ANIMATION' flag should show you some useful information to see if things are turning on.
Ah, that was it! It works. Calling a second Play Montage (Flinch) doesn't call OnInterrupted of the first Play Montage (Block)
Amazing
Thank you very much!

Hurrah!
does this work? for locomotion?
So let me explain this more clearly. This might be different from what you're used to seeing in this program. I don't want to assume that you're new to it, so I won't. For the past two months, I've been trying to figure out how to do something. A lot of the videos, are not helpful, I've watched some of them don't answer my questions!. Here's what I mean: when you're working on an animation, like a weapon, for example, you need to have another local motion, like a state machine, for when you switch to a different animation, like putting your weapon away while you're still moving, drawing the weapon while the animations are smoothie.
You're trying to figure out how to play animations over top of other animations?
For example: Your character is running around, doing locomotion, but you want to switch which weapon they are holding. You want their arms to play a 'weapon switch' animation, but their legs should keep walking?
nope wrong
will share
👍
https://www.youtube.com/watch?v=IDVyoZAvN5o something like this but not with a gun, with a sword.

In this video we go over the process of adding in a customer character and their animations. Most importantly we learn how to switch between animations states with the touch of ONE BUTTON!!! This was a tutorial suggested from one of my Subcribers!!! Thanks for tuning in hope yall learn something from this!
So you want to switch the whole locomotion system between different versions for different weapons?
Where exactly are you having trouble with this?
animations
Creating the animations, or getting them to play in game?
Or swapping out the animations for a new set?
have you watch the video
I'm not going to watch a 30 minute video to answer a question.
okay
seems you won't get a answer until you watch it
All right. Best of luck with your issue then.
Does anyone know, why may Motion Warp ignore warping on Z?
yoooooo
anyone here experienced with using blendspaces with a player character using enhanced input
i wanna make a 4 way blendspace but i can't find any tutorials
if anyone has the time to help me, please ping me
There shouldnt be much difference between how the previous input system would be used with Blendspaces and enhanced input. Is your issue with how to use enhanced input or with the blend space itself?
hey, could anyone help me here please ? #ue5-general message
I see two possibilities:
- The retarget process has broken the constraints in blender. To fix it, you just have to re-apply the existing constraints from the IK bones to the wrists.
- The constraints still exist, but you don't have 'Bake Animation' checked in your FBX export options, so they are not being baked during the FBX export.
Answering my own question here: In my specific case the problem was that my MovementComponent was ticking after my SkeletalMeshComponent. So my SkelMesh kept pulling transforms from the previous frame. The solution was to just add a tick prerequisite to the SkelMeshComp.
i’m very not savvy with ue5 after using ue4 for so long, but tbh i’ve never made a 4 way blendspace type of thing anyway
since the character’s direction is locked to always face the direction of the camera, i want there to be a decent looking strafe animation, for left, right, diagonal, etc.