#animation
1 messages · Page 30 of 1
Reducing max walk speed has no effect on animation speed. Anim notify states are handled in animations themselves and have no bearing on ABPs.
Alternatively you could procedurally lock the feet in position using the control rig when it is < X units from the ground.
In this kind of blending notifiers are not problematic either?

https://docs.unrealengine.com/4.27/en-US/AnimatingObjects/SkeletalMeshAnimation/Sequences/Notifies/#:~:text=Anim Notify States (Notify%20States,comes%20up%20in%20the%20animation.

Notifies are a system for setting up and receiving events in Animation Sequences to perform external actions.
I found about blendspaces: https://forums.unrealengine.com/t/blend-space-notification/1244/4 looks like you can prioritize only one

Epic Developer Community Forums
If you’re blending animations, the notifies from all the contributing animations can be triggered. So if you blend a walk and a run which have notifies for footsteps, you may find that each footstep notify gets triggered twice. There is a solution in the properties of the blendspace: set “Notify Trigger Mode” to “Highest Weighted Animation”. See...
@foggy nexus Is there a way I can solve this by changing the source animatino somehow in blender?
I can't see how blendspace notification will help as they're only triggered when one animation transitions into another. Your problem exists in one single animation so read up on anim notify states to see how you could affect the max walk speed variable in one animation.
As it's mainly a velocity issue, or in other words, a programming issue, I don't think editing the animation will help.
I do think control rig solutions would be cleaner but if you haven't used them before, they can be pretty overwhelming. So it depends how much time you want to dedicate to the problem.
I am using AI to move the actor, but for some reason the turning Yaw returns 0, why ?

Can you show the rest of the code?
And what are the concerns about replication in term of using a anim notify to speed down and up a character? Or its something stable to do
Are you sure you should post this in the Animation channel?
sorry not sure, can't find any blender / texturing channel?
Materials channel
oh I see ty
No concerns
I would create 2 variables, LastYaw and CurrentYaw. Set CurrentYaw, compare current and last (, do something if diff != 0), then set last yaw
Thank you a lot for the info! Have a great day!
Could anyone help me with this?
I'm trying to retarget the ALS animations to work with the mannequin,
and this is happening:

Basically, the animation is normal, but as I'm trying to solve the foot ik issue,
when I edit the animation with the control rig inside of my sequencer, the
right shoulder gets messed up
can someone suggest me a good video for rootmotion animation?
where all the movement is done with rootmotion
In the animation itself. The transform of the root of the character follows the mesh and that data is baked into the animation file.
right time to get this grab thing working once and for all


thats my code at moment and I just can't understand how if I attach and then detach even setting player location just before detach my player ends up off in abyss
i tried, but it works like normal anim graph
So I've debugged

some how when the player is lifted the red sphere
green is just before the detach
purple is after the detach
so it's seem to be my issue may not be detach node but the attach node
Are you attaching the player to its own mesh?
Also you're setting the location to its current location i.e. doing nothing
nope
I have no idea what you're talking about bud
I'm lost for words i've defo done something wrong cause I've noticed the following
When it does this bit the player seems to go off into middle of no where
Image 1
Then when it does this but the player actually returns to location of where it was when launched and is actually launched
Image 2
Image 1

image 2

In your image, the parent of the attach node is "mesh", which, if you're doing this in the player BP, is its own mesh
Or are you setting that variable somewhere
so the code you see is in the BP_Guide
guard
so the enemy
the blue lines coming off screen is the player thats been passed in
that should help to clear up any confusion sorry would have been useful information
No worries, it's a convoluted BP. Hard to capture everything
Turn off the player collision, not enemy then
You don't want the enemy to sink into the ground
You can just turn collision off at the actor root instead of individual components FYI
well I did try that as well cause I normally use that
then grab every component and turn off collision
Thats what i did use before actor enable collision thing

For debugging, perhaps try to make a simple BP actor with a sphere static mesh, and attach it to your enemy with the above logi
hmmm I didn't think of that
Play about with the attach rules in this scenario and see what the behaviour looks like
If I was next to my pc, I could help you much more easily, but all we can do is simplify everything to isolate the problem
Look what i've found haha

the sphere is attached with same location
You can see there it's like way off into the sky

And with keep world rules?
so with keep world it's in front of the enemy
issue is I don't think it's move with the Enemy
You don't think?
So now just plug the player character in and keep it simple. Start with just the attach, make sure you get the same behaviour, then move on to the next stage
So got it to work it's a bit wierd still something still off slightly but I think I know what that is. How would a solve this though

obvs when play leaves the hand of the enemy thats there rotation so i'm guessing I'll need to reset their rotation to 0,0,0 like so their stood back up ?
You'd only need to reset the pitch and roll, but probs best to lerp rather than snap either using tick or a timeline
another timeline haha
So detach, launch, switch collision back on, rotate.
tbf this is what games end up being anyway so
would you say rotation be a quick lerp or bit eased in ?
This is why I use animations keeping the root rotation the same, because you can handle these cases in states (picked up, carried, thrown, get up) and return to the base root rotation
Play with the timeline time float and see what looks best. Very easy to test.
yeah I'm just bit not into doing that way, just cause I've never done it before so bit like feel its to deep in I'll get lost haha
Fair, this has been enough of a headache
I'm thinking this

seems like it would work for, wouldn't think there will be any issues
well tbf if I'd used a debug actor sooner to relise it was the attachment function being my issue, would have moved onto next thing by now haha
How can you ever learn if you don't spend hours headbutting a brick wall 🙂
seems theres bit of a thing going on
Looks fine. As I said, I'd maintain the yaw throughout otherwise you'll always end up facing the same absolute direction
hang on I have idea there
so you'll see when it throws the player rotation spacis out and then back
out of interest I use tick to force to 0 ?
Yaw that is
I have to shoot off but you'll want to expand your a and b in the rotate lerp, plug all actor rotation values into a, then just your yaw into b and keep the other axes at 0.
Timeline uses tick internally
Looking pretty good though. Congrats
thank you 🙂
ohh okay so you would say I can just do this on the timeline I have already after the launch is donw
*done
thank you for the help as well very much appreciated
Hi, you can tell me how you can do it. Give me a hint
the key thing that was messing me up was on the attach function you want location on Keep World and same for Detach
The student becomes the master...
and then obvs disable collision on the actor being thrown
the step would be following
Can you send me a tutorial on how to do this or show me
Play Montage -> on notify X == X-> move player to location & Rotation needed -> Disable collision on player (one being thrown) -> Attach player to component on Enemy (the Hand socket)
There is a video
then when it comes time to throw you do the reverse in a way so OnNotify X == Y -> Detach Player -> Launch player (Direction is how you need it) -> Re-enable collisions on player -> Lerp the player actor roation so it lerps from current to as Sean said rotation zero except for Yaw. Take the current Yaw into b
there isn't no but the above is kind of step by step without doing a video going into each step
I'll be honest I have most of the stuff there, with the great people above it was the issue I was having that I solved
most stuff they'll be video on YT for already just when you have issues thats where you have to delve into whats causing issue etc
Can you recommend a YouTube channel
not really i'd say youtube what your trying to do they'll pretty much be video there
And where can I learn everything new
not sure what you mean ?
I mean everything new in henriale
Hi guys, I wanted to ask a question about QTE(Quick Time Events), I'm doing it using Animation Blueprint, it was simple to do, the problem is that I need another skeletal mesh on the player pawn(As a component) so okay, but the real problem comes when I need to do it on all the enemies in the game, or almost all, is there a better way to do a QTE using AnimBlueprints???????
a demonstration of what I'm doing, at least in player pawn
Theoretically, I would put all of them or those I would QTE, and organize them in this ChildActor, but the problem is that the AnimBP is not the same as the player's, they are separate, this also applies to the arkon for other creatures
still bit confused what you mean
wouldn't unreal documentation help you ?
I just didn't fully understand
@crimson sorrel sounds like you need to start from the beginning. Ryan Langley on YouTube is a good place to start.
thank you very much
anyone ever worked or working with makehuman and control rig?
Anyone have any idea best way of doing this
I have this where if your injured it uses different blend space however I'm also doing this to rotate the player spline so the aim offset is there.


My issue is I can't really switch off the blend offset else well player camera will end up looking around with the offset going along with it
and I can't not turn of offset as way I've done it is the arms are tweaked so the gun when one being held is going towards centre of the screen to fake the aim is being done from there when it's not obvs
So this might be a weird question. Back in UE4 when adding a new animation to the basic UE4 mannequin you just retargeted some skeletons. Put in the animation in anim BP and done. But with the new one, since the new mannequin uses IK, is this still the way to do it? So let's say I have a swinging animation from Mixamo. Would I still put it in the third person template anim bp. Or will this be troubling, so I should rather use a unique model without IK? Hope this makes sense.
So I guess my question is, if I want to add animations from the asset store, should I use the UE5 mannequin as a base to retarget my models and add animations to. Or use the UE4 mannequin? 🙂 (Im planning to use Synty characters if that matters :))
IK targets are optional. The only thing that's changed is how you set up the assets in engine: one ik rig per skeleton and one retargeter. Other than that, your workflow should be very similar.
As a side note, if you're retargetting from mixamo, use Mixamo Converter. Free to use and a pretty fantastic piece of software.
Okey, so it is possible to use the upper/lower body split to have feet work with IK and then play a swing animation on top for example? 🙂 And if this is the case, any tip for how to get started with this? Also thanks for the tip and response 😄
It sounds like you want to combine two animations with the retargeter, which is not possible. Can you explain what you want to achieve in more detail?
So I know in Unreal you could make an animation play based on the upper and lower body. So for example if you have a swing animation. You could swing while walking by only playing the swing animation on the upper body. And keeping the walk on the lower body. Does this no longer exist? So if I have a swing animation that I want to use while walking, how should I do(third person) ? 🙂
Yes but this has nothing to do with retargetting. The way this works remains unchanged from ue4 to 5: blend by bone in the animation blueprint.
Hi how exactly would a ai animbp look like?
because i tried to make it like my normal anim bp but changed the animations and blendspaces out but it doesn't seem to work.


after like 2 days i've finally got to a place where the grab and throw is in place I can move onto my next stuff
I think you would have to make a whole different animation blueprint for your AI. In the event graph, you would get whatever values from your AI Character blueprint that might influence the choice of animation you want to use.
so I wouldn't say thats good
you Should Move bool isn't saying whether it can transition to other state
I would rename it to is moving
then you would do is moving for going to walk/run and for the reverse put in a is moving not
that would make more sense to me
also your AI ABP would be same as any other AnimBP
think of the AnimBP as your abitlity to control the animation aspect
rather then being linked with AI
"it doesn't seem to work" gives us nothing to go on. Explain the problem you're having.
Do you guys rig your own skeleton or use a auto rigging software?
Yea its the animbp is stuck on the idle instead of go to walk, run, attack and etc
And your ai character is actually moving?
Yes.
You don't need to get acceleration. Just assign the result of Speed > 0 to your bIsMoving bool
If that doesn't work, print out your pawn before getting speed to make sure it is valid and is the character you want
I assume you've assigned the correct abp to your ai character mesh
How do transition smoothly from anim montage to animbp?
Is there anyway to blend it? You play anim montage via blueprint when it ends animbp state machine kicks in.

anyone know why control rig gives this error?
I cant figure out for the life of me why its happening
If I was to plug straight from the "from world" node into all the set control locations location it would work
But if I use LERPs or try to do any calculations on the vector it throws these out of bounds errors
even changing it to something like this throws an error

I'm re-targeting mocap in UE5 and have an issue. The retargeting works well, but the target character retains visible transform lines that I'd like to hide or do away with. Can anyone help explain why this is the case and what to do?


What does the root translation look like when viewing the retargeted animation? Is it not what you want?
All looks good. But when playing I'd like to hide the translation lines.
It's a view-only visualisation. You can switch them off somewhere in the top left of the screen. In game you won't see them.
Is there a way to output a specific sequence of ... sequences in an anim graph state? I know there's the Random Sequence Player node with weighs, but I don't want it to be random, I want something like [Sequence1] -> [Sequence2] (looped 2 times) -> back to beginning
Seems like Shuffle mode while counterintuitively named, does the trick 😄
I'm trying to create an animation blueprint for my retargeted mesh. But a problem arises: the “Used Attached Parent” setting option does not show up in the settings for “Retarget Pose From Mesh”. Can anyone suggest a solution?
hi guys, apologies in advance if not the right channel. I am trying to add footsteps with notifies in animations, my issue is that the length of the notify is too short for the sound and not sure if there is any way to increase it please?
Not sure how you're approaching this. Give us some screenshots of your ABP event graph.
Anim notifies are perfect for fire-and-forget because unlike anim notify states, they don't have a length. If you play a sound, the length doesn't matter so if you don't hear anything, the issue is something else. Show us your anim notify logic and we'll try to fix it.
thanks for your help, not sure what could gone wrong :/

could it be the fact I am using a cue with different footsteps randomly?
Hello, I am trying to make a control rig from scratch but currently I am struggling with making some of my controls work like "an aim constraint" like I would with maya. As well as having IK twisting on itself. Any ideas on how to do this?


Show us the notify and cue event graphs
is this the notify right?


This is the cue, which looks fine. Presumably you're playing the sound in an anim notify? Where is that happening?
yes here

those in purple are supposed to be (second screenshot just before the previous screenshot)
This is a screenshot of an anim notify being called in an animation sequence. I want to see the event graph of your anim notify object.
Something like this

Have you made an anim notify?
I guess you're trying to use the out of the box notify play sounds. I suggest making your own so you have more control over the cue settings.
Easier to debug
no sorry I didn't do , I am just going to the animation itself and add the sound using the notify
So, the target mesh is the SK_Manny_Simple. The retargeting w solvers is successful. I created the Anim BP and the only skeleton options were as attached. One is the source, not the target, so I chose the SK_Mannequin. Also attached, the event graph and details panel.


does anyone know how to make a loop with delay in control rig?
Hey all -- I have a Roll blend space which blends my Roll Forward, Left, Right, and Back animations.
When my character rolls, I thought I could simply play a roll montage, but I can't seem to create a montage from a blend space. Does this mean I must use an Animation Blueprint state instead of a montage?
Thanks!
If you've already retargeted your animations, then you can use them directly in your ABP. If you don't know how to set one up, check YouTube or unreal docs for setup.
You play montages from the character class, make sure the montage has a slot assigned, and feed your base state machine through that slot into your output pose in the abp. This is a very google-able problem.
Are you saying I'd have a montage for each of my roll directions, and then pick the one to play from the character class?
If so, how does that handle rolling in a direction between the animations? That's what the blend space is doing, and it's not clear to me how that would function with multiple montages I am selecting from.
Can you explain what you mean when you say you want to play a roll montage while rolling?
I have an animation sequence for each roll direction. When I perform a roll, I would like to play the roll animation one time.
I have a blend space created that smoothly animates for any roll direction. I am hoping to use that rather than selecting an individual sequence based on direction.
Since I am trying to play an animation once based on triggering a roll, a montage seemed appropriate. However I can't find a way to use a blend space in a montage, so I am wondering if the only option is to put the blend space in an animation blueprint as a state, or selecting one of the premade direction sequences rather than using a blend space.
My confusion is you seem to be saying you want to play a roll on top of a roll ("when I perform a roll, I would like to play a roll"). I think what you mean is when you trigger a roll (state), you want to play a roll animation. If so, blendspace or montages will work. Blendspaces blend better but you can also play montages with blend in and out. Blendspaces also have the advantage of keeping your states clearly discrete. When you play a montage and have included the slot, it effectively pauses your ABP, switches control to the montage, then switches back when the montage is done.
Thanks! Your interpretation is correct on my overloaded wording. When a character performs a roll ability, I would like to play a roll animation.
I do have montage slots set up, and that's what I'm using for other abilities. Again, it seemed like a good fit for the roll, because the behavior you mention is exactly what I'm trying to do, and it works well for my other abilities.
However, since I'd like to use a blend space for the roll animation, it seems this ability should rely on the animation blueprint rather than triggering a montage.
Or I may take the montage approach again and just select the proper sequence to play, because it may look fine without the full blend space blending.
Triggering the state is pretty easy, I'd imagine. You set a Boolean bIsRolling and a direction (enum or simply just an int), access both variables in your ABP and use them to drive your roll state.
I think either approach will work, it's really just about what seems most in line with how you've set up your project.
Thanks for your input!
No probs, gl
Hi all,
I've got an actor that I need to animate that isn't a pawn. was looking for direction on how to set the reference since all I can find inside the ABP is "get pawn owner"
You can't find the node "get owning actor"?
Why the retargeting works fine but the export looks messed up?
Seems like a root bone issue
Shouldnt it be broken before export in that case?
What does the 'Inertialization' node do in an AnimBP AnimGraph?

It doesn't seem to have any custom settings, and there is no helpful descriptor
Hey im using the foot ik from the third person template. and I retargeted the anim starter pack animations and werid foot sliding happens. (I want to keep the foot ik)
Seems like the animations are not switching properly, not sure but might have issues in the animation blueprint
Btw.. I found out that my mesh didnt even have a root bone to start with. So it was a root bone issue. Now gotta figure out how to add a root bone ig
I dont think that is the problem because it is fine when i take away the control rig/foot ik.
Hi.
Anyone knows what happened to this in 5.3 ?
https://docs.unrealengine.com/5.2/en-US/BlueprintAPI/MotionTrajectory/FlattenTrajectory2D/

Flatten Trajectory 2D
Does anyone here know a good workflow for rigging a character in blender for Unreal Engine?
or can link one?
im trying to animate ue5 manny to do a kick, i made the animation in cascaduer and imported it. but at the end of the animation he teleports back due to the pelvis moving, normally to get around this i animate movement with the root bone and then enable root motion in ue5. but to my knowledge you cant animate the root bone on the manny template in casc. does anyone have a fix for this?
by Rig, do you mean make a skeleton for and weight it, or make a rig to control the skeleton that exists already for animation purposes?
I suppose if Cascadeur cannot do it (i don't know for sure), you could go the long way (annoyingly) and do the root bone in Blender
i figured it out, casc has the root bone but its shown as a crosshair instead of a bone for some reason
Awesome! good to know
well, I assume it's easier in the long run to use the existing UE5 manny rig. So I'd want something that takes the manny rig and uses it for a new model
other than manually, i only know of paid plugins to help. well, actually, he will give you Game Rig Tools for free. It is donation based
https://cgdive.itch.io/game-rig-tools and then there is the paid https://blendermarket.com/products/auto-rig-pro

itch.io
game-ready rigs in seconds

In UE5.2 root motion is working in montages but not in animation bp? is there a work around to this. Trying to do a start anim root motion from my state machine
In a timeline can i set a keyframe value to an variable?
thanks man.
You're welcome. did one of them work for you?
I'll have to let you know tommorow. But I'll ping you with the result
cool deal
hello , how can i add a new animations to the als death for examble all what i see onlineis ragdolling only not a montage .
I want to add drivers that correct the mesh deformations of my character.
-
Is it fairly easy to export them from blender to unreal?
-
Do I need to set them up and export them for each and every mesh? (each clothes piece etc I have already made in the past)
Hey guys. How can I play one Montage of the player attacking on the upperbody, and at any time during that animation, run a second animation montage on the lowerbody (legs) of the player dashing? I set the two different slots, Upperbody and Lowerbody, and the montages play on the right parts, but they still cancel eachother out
I duplicated an animation and assigned it another skeleton. In the preview, the skeleton is rotated by -90 degrees, and the animation is not working even though no errors are appearing.

Is there some kind of tutorial or docs how to set up an animation rig/blueprint which would have secondary animation driven by collision/capsule physics on the bones?
For example, a tail of a character which doesn't clip, but rather bounces or rests on other colliders?
Heyo. Having the oddest time trying to retarget this ue4 skeleton to my Ascent Combat Framework skeleton. I can see that the mesh is working but the retargeting is odd. My workflow was from Blender (using Mixamo to Quick Rig with the UE4 Legacy option and UE4 Name schemes) and then imported to UE5. Would anyone know how to fix this?
Hello, I have been having a difficult time finding the best method to create gun handling animations that use the direction the character is aiming. (Ex. chambering, reloading, charging, etc.) I want to be able to play animations but make them still face in the direction my character is aiming. I want to make it so when I pump the shotgun the character still aims in the correct location. Any advice would be greatly appreciated. I have been stuck on this for a while now. Thanks.
I have heard that IK is something I can use for this but I am only familiar with setting up IK for static attachments like the left hand grabbing the shotgun forearm. Not sure how to make the left hand IK move with the animation.
Anyone know how to fix this ?


you can see how the look at vector and the ball isn't matching as in where the ball should be looking at
is there a way with Leader pose to hide a part on the main mesh but not on targets?
instead of overriding even this node and spending a lot of days in cursing god while re-writing in c++ the whole node maybe? ^^"
Hello, I have a question about adjusting to game engine speeds. So originally, I thought that I could get away with 1.79 m/s over 30 frames in Blender for a walk cycle. In the game engine, I didn't realize how slow it was. I instead want to use a game engine speed of 3 or 4m/s as the walk speed. How would I adjust my Blender animation to accommodate that speed? Would I need to add less frames in my animation or more? I do feel like when I try to turn on my root motion to adjust feet position, it's as if I should basically be running (which in real world settings, make sense, but how do games make 6 m/s look like it's walking?) All the frame rates in both the engine and blender are set to 30 FPS btw. I'm trying to basically get speeds/animations like in this video: https://www.youtube.com/watch?v=AaWs-Fy3DY4&t=1076s

📚You'll learn how to:
- Setup Actor blueprint.
- Setup Timelines.
- Setup Animation Blueprint.
✅ Download the tutorial project files:
https://www.patreon.com/posts/88461023
👇Follow me on social media:
Discord Server: https://discord.gg/ZB7SMbbxQz
Twitter: https://twitter.com/LocoDev7701
Instagram: https://www.instagram.com/devloco
For any ...
I am using the ue5 to metahuman RTG, added the ik bones to metahuman skeleton, added the chains to the ik rigs yet the ik bones still do not want to map to the retarget. Any suggestions ?
Hello guys,
I'm trying to create realistic fight scenes in UE, any study material can you suggest?
Thanks.. ( I will design my character by myself )
Is there a way to make a blueprint subclass of AnimInstance without turning it into a proper AnimBP? I know it's doable in C++, but I'd much rather be working with a BP Thread Safe Update for the parent class to all my different AnimBP's.
I am making an animation blueprint for a turret (just 2 bones). I have a "Transform (modify) Bone" node with rotation in world space with the Roll set on the node itself. This works as expected and changing that value updates the rotation.
But as soon as I promote the Roll value to a variable the rotation breaks (starts rotating on other axis).
Why? The value and the type are the same. Why isn't the behaviour?
How can I simulate an antenna on a vehicle?
Is there a foolproof way to simplify the UE5 manny skeleton for lower poly models? For instance, if I don't need finger bones.
I'm mainly wanting to know at which step (before pairing with mesh, during weight painting, after importing to unreal) do I remove the bones I don't need without any further issues
anyone know the best way to set up (modular) character with changable skeleton size?
like how do you combine different sized skeletons onto the same base skeletons for:
-long arms
-short arms
-long body
-etc
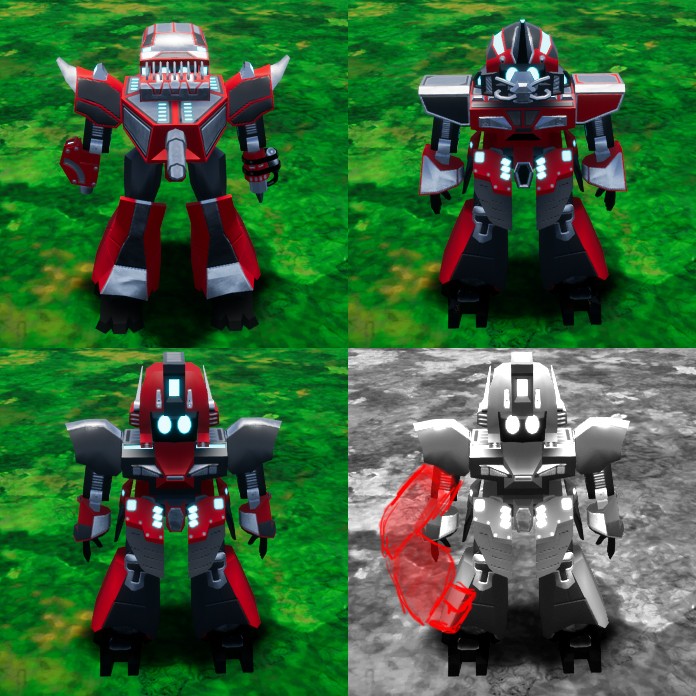
Epic Developer Community Forums
Basically the first three images show how my character is set up now. they all share the same skeleton and animations. however i would like to implement some limbs which are larger than others as shown in the forth image. Im struggling a bit to figure out how i should set this up. My thoughts of how to do this are: Should i somehow set it u...

@mental bronze It seems that the solution described in this document meets your requirements: https://docs.unrealengine.com/5.3/en-US/retarget-manager-in-unreal-engine/
Breaks down the Retarget Manager options within the Skeleton Editor.
almost, i'm looking for a solution that can handle combining skeletons of different shapes in a hierarchy of modular parts, i can't imagine that the answer is to make a skeleton for each possible combination:

like how would i get the skeleton higher in the hierarchy to define the new attachment points?

@mental bronze As your description I think you can make a standard skeleton like UE Mannequin, and make another skeleton with wing arms. You can't merge the standard skeleton with the wing arm skeleton because their hierarchy are too different(according to this - sharing skeleton: https://docs.unrealengine.com/5.3/en-US/skeletons-in-unreal-engine/). But you can share animations between the long body character and the short body character(according to this: https://docs.unrealengine.com/5.3/en-US/animation-retargeting-in-unreal-engine/)
If you have common animations (like locomotions) I think you can use use IK Retargeting(https://docs.unrealengine.com/5.3/en-US/ik-rig-animation-retargeting-in-unreal-engine/) to share these animations between the standard skeleton character and the wing arms skeleton characters.

Share and transfer animation between characters of any size using IK Rigs and IK Retargeting.
if i add just two more variations, then the possible combinations are exponential, would each one require it's own custom skeleton? I can't imagine this is the best approach

as the positioning of some of the variations can change depending on how low in the hierarchy they are
I just thought of another solution. You can create a skeleton that includes all possible structures(bones hierarchy), so that only the bones relevant to a particular Animation Sequence are active
Let's say I have a skeleton similar to the Mannequin but with an additional wing bones. This skeleton can be merged with the Mannequin's skeleton. When playing a ground locomotion animation, the wing bones is not active, and it has no impact. When I need to play an animation related to the wings, the wing bones can be used.
Need a quick answer.
Is there any common pitfalls in manually pairing an unreal skeleton to a character mesh in blender and re-importing it to Unreal?
Wondering if there's any unforseen issues that could occur here that people have run into.
i'm not sure that's a good solution either, as not only would that create a monster of a skeletal mesh over time, but each mesh lower in the hierarchy that has a different position due to higher hierarchy position changes would require duplicates to be placed correctly, resulting in exponential duplicated meshes for each variation:

I think the issue with tall and short characters is similar to this. As for characters with two heads, I think they can share the same skeleton as characters with one head

it's not a character with two heads, it's a character with one head but two different possible positions
yes. your BODY 2 can share the BODY 1 + 2's skeleton right?
You can still use the one head skeletal mesh with the BODY 1+2 skeleton. The HEAD1a bone are inactive
right but why do i need a head1a and head1b mesh, it should just call from a single head1 mesh and place it at the position of head1a or head1b depending on the previously selected body type, otherwise i'll have 1000+ duplicated of the same mesh for each possible combination
OK i think i understand what your are talking about. It's about modular character

But even though you are build a modular character, you still need the extra bones to animate the extra body parts right?
same thing this guy was asking:
https://forums.unrealengine.com/t/best-way-to-set-up-modular-character-with-changable-skeleton-size/407046
Epic Developer Community Forums
Basically the first three images show how my character is set up now. they all share the same skeleton and animations. however i would like to implement some limbs which are larger than others as shown in the forth image. Im struggling a bit to figure out how i should set this up. My thoughts of how to do this are: Should i somehow set it u...
I'm sorry it's too late I have to go to bed

sure each part will need it's own anims but it should move depending on where that part should be placed, otherwise on top of creating a skeleton for each possible animation i'd need to animate them all, which really isn't feasible
Hello! So I'm trying to animate a metahuman using cascadeur. It works great in cascadeur, but when exporting and importing into unreal the scaling and model seem off. I use the same table and chair model in both cascadeur and unreal, with the same scaling, but in Unreal when using this animation the metahuman floats above the chair and table. Am I missing something? Does anyone have a suggestion on what can cause this? 🤔 Any help is appreciated


What body size is the metahuman?
I don't mind the DM but it's better to chat in public so other people can learn too. As you said in DM, it might be a good idea to try and import the metahuman into the animation cascadeur or whatever and see if that helps resolve any potential differences in body size. you can check the body size on the metahuman by looking at the assets
Fair enough😁 your reply is very much appreciated
Hey I'm looking for some help/directions on Control Rig. So I want to do an UpperTorso boss, where the main weapon it uses is slamming its arms at the player's location. And I want to use IK for this so it actually reaches for the player, and is not a premade animation. Anyone that can give me some direction for how to do this 🙂

Ill let you know if i get it working, cheers!
Thanks yeah check back in I am curious if that would be it. Might not be...
Hey so I my animation doesnt play. In the player character blueprint(first image) I set a bool. In my animation blueprint event graph(second image) I set the variable from character to the bp itself and then from idle to shooting state(last image) if that variable is true, the animation would play. It doesnt work for some reason. Any suggestions? Edit: on left mouse button released, it is set to false, I just forgot to uncheck it. Still doesnt work. Another thing, in player character there is child actor and so the actor that I created has skeletal mesh with the animation blueprint.


Okay well I fixed this thing up there, but I discovered that if the animation plays fast it is different that when it plays slower. Why's that?

Animation nodes that blend multiple animations together based on a set of criteria.
You think this might affect it?

Yes. Medium is shorter than the ue5 mannequin
It looks like the metahuman is positioned by the neck or head bone so that lines up but not much else does because the body is shorter
Ah I see, so do I need to use a different mannequin or a different body type for my Metahuman?
Like so?

That would actually work, yes, for the male body. female metahuman tall is still shorter than the ue5 "quinn" mannequin
Good to know, cheers! Very much appreciated!
But you mentioned possible importing the metahuman into your cascadeur and animating directly on the metahuman?
that might be better so you can use a variety of body types
Yea that did not work 😦
Or atleast, I didnt know which one to import
right because metahumans are not one single skeletal mesh hmm
I think there is a way to get the metahuman as one thing for export to like maya and stuff
not sure
but try with the tall one first, see if that does solve it then you know if that was the problem
Oh wait, I think I got it
Ity's not great cuz it doesn't have a mesh, but you can animate it

interesting. I wonder if the skeleton truly is smaller
can you compare the two? if so then you are golden
yeah it probbaly is
now that I think of it
Good question lemme check
I use Lyra which like retargerts the full size skeleton onto the smaller ones but I think you do have it. It would be nice to attach some more body parts for easy of animation tho I'm sure lmao
Yea definitely seems like the metahuman medium (on the left) is shorter

Barely, but still
so that would probably be the root of the issue. Now just solve the workflow issue of how to get a mesh there for easier animating
I bet the pelvis bone is supposed to be up more not at the crotch height so yeah
hand height shoulder height head height
Yea, honestly for what Im going for a tall metahuman would be better, I didnt even notice the medium thing first. But still good to check out for other characters
right on yeah you should switch to tall for now until you sort out a better workflow. THen you can use what you did already. Tall male is a 1:1 match with the mannequins iirc
Aight, thanks for the help! 👌
np
How do I get the new metahuman in my project though. Doesnt seem like I can update it
It says all changes saved in the creator, but quixl doesnt seem to notice an update
Thanks dude, couldn't find it when searching!
I tried changing it to short and then measure it and nothing changes, it keeps being about 177 cm 
Do I also need to reimport it to the viewport? Seems counterintuitive
did you look here in the local part?

Well I mean its still there, but it doesnt seem to update or something

the orange i means it needs updating
can you right click and update or something?
Ooooohh 😄 sorry I just started with this today 😅

no worries man it's confusing af
you may have to save the assets too after you update, or it won't like save
My jaw has been on the floor many times today though, so its worth it 😄 Metahuman is insane
✅
I duplicated an animation and assigned it another skeleton. In the preview, the skeleton is rotated by -90 degrees, and the animation is not working even though no errors are appearing.

Need Assistance any one can assist me?
so, I have a character with multiple clothing options, inluding flat shoes and high heels. When I view an animation with the high heels. they obviously are treated as if they aren't there. That isn't a surprise. What I want to know. What should I be doing to set it up so the high heels are accounted for?
what kind of uh softwhere/app do u guys recomend using.
To author animations?
- Cascadeur is free and has auto-posing with machine learning and physics/dynamics sim, this is usually my go-to nowadays, its incredible
- Akeytsu is free after the company closed down, but its a fantastic piece of software with great UX and I still use it religiously
I was initially a tech artist specializing in creature rigging for film before becoming a gameplay programmer, and I still wouldn't touch Maya with a 10 ft pole for animating with those two options out there.
ty sm
Allright so if anyone needs the info about cascadeur. I have used the sample Manny inside of Cascadeur, then imported that with the skeleton of Manny into UE then retargeted it to a tall metahuman. Now it looks good

@obsidian sigil Hmm, at first sight it looked okay, but if I overlay both of them then its still off 😩

Interesting. I thought the tall male was the same as mannequin. I guess not. Sorry. But you’re getting closer and at least we know the root of the problem.
@obsidian sigil If I compare the rigs then you're both right and wrong 😅

Overal height is the same, but the joints are on different spots it seems
Is there a way to export a skeletal mesh with morphs from UE Editor to Blender?
I selected the export morphs option, but I get no morphs in Blender.
Anyone know something regarding my issue?
Can someone explain the difference between Transform modify bone in Component space vs bone space?
Switching between the two seems to yield almost the same result for me, minus the fact that maybe in some cases tho component rotations seem just a tiny bit less animated.
Why are these almost the same in my case and when would they actually be different?
bone space is relative to the parent bone, component space is ... relative to the component
with the PlayAnimMontage function, is there a way to call it once to play one montage, and then call it again while the first is still active to play a second montage without interupting the first montage? I have an arm swing motion set to play above spine_01 and a pivot motion set to go below this. I just want them both to be able to be played at the same time
i think that would require another slot for the montage to play on
How do i turn on collision on a dynamic mesh component? going crasy over here
if the swing montage is on an upperbody slot and the pivot montage is on a lowerbody slot separated by spine_01 they still interupt eachother though
is there a way to stop two bone ik moving the upperarm location


it seems to rotate it then slide it backwards for some reason
Im trying to Draw Transform in control rig, at the head bone of the mannequin as a point at a scale of 10, but nothing appears to be drawn, then tried to spawn a control, but no shape is actually being shown either.
Is all of this broken within control rig atm ?


It works in 5.3.2. Something else must be going wrong on your end.
Hm... I'll keep looking thanks
Yeah it took me a while to find it again, but I remembered reading about it. Inertial blending and a bunch of other stuff is also covered in the Content Examples under Animation.
Are you using IK on the meta human? It doesn’t look like it is in the correct A pose. The hands of the meta human and manny should line up exactly, as I remember it.
or add a constraint to the bone movement?
Question regarding IK, I'm confuse and need help... I have 6 different character who where built if the UE5 skeleton. I re-assign the skeleton to the UE5 one with no issue so that they could use the same animation. It all works fine except for a couple of main animation where the IK For the foot and hand don't seem to be attach properly or following the right position. But the issue is different for 3 out of 6 for the feet and the hand for all 6
Hey! Does anyone know why when triggering this animation the feet aren't working?

Hello, often in my multiplayer game the player's character freezes in the current animation frame instead of simulating physics when he dies, anyone knows why?
how come my skeletal mesh is importing like this in unreal?

there's an entire bone missing:

and what are these big circles
Can you explain why you shouldn't use root motion for multiplayer?
so looking around at stuff to rig then export to ue5. I have some questions. so 1st I have been using accurig but then when I retarget UEstore animations to my accurigged character. everything is off. head facing wrong direction, body position a bit awkward. So I assume it is a problem with accurig.
What other methods should I try to rig for ue5
I have found Game Rig Tools, UEFY 2 and of course autorig pro
or is it a problem with accuriog. maybe I am missing a key detail that makes these animations wonky
hmm. yeah I don;t think it is my rig
I just tried it with manny


What are you trying to retarget? UE4 Skele to UE5?
Because the default Third Person Template has UE4 to UE5 retarget rig setup
yeah I think I was using the wrong retargeter or something. i don;t know what I did. I tried again and now everything is fine
Autorig pro is really nice if you have it. It's easy to use.
You basically mark the spots on your char, then select what skeleton you want and it rigs for you..
so replaced the mixamo jump animations I was using with new ones and now I get this
and move animation
In your animation there's a section called "Root Motion" category in that category you can enable "root lock" and "EnableRootMotion"
With the landing you need to create a Apply Additive and plug in your Standing/Walking locomotion cache and add the landing as an additive..
the new animations are uestore and manny's default jump
Then do this: #animation message and ignore what i said about mixamo
it fixed the walking and jumping. but not landing and there is also a weird jitter when I switch facing or stop movement.
Did you do this: https://prnt.sc/IPqYny5oHq-0
I mean if you're using their animations and just retargeting you can basically copy their stuff over just replace the animations with your character animations

no. I didn't
this is how I set it up originally with automatic rule based. so just for future reference. why is it that this method worked before but now with the default jump it doesn;t work the same way

If you didn't change anything then I don't know why it doesn't work..
You changed something somewhere..
switched back to the older animations. changing nothing
Nice.
yeah I guess I will just use the older animation and now have to figure out the weird janking turning
If you move the slider slowy when you start to run/walk it plays the animation like theres no root motion so something is going on.
yeah although i havn't enabled a walk state in terms of input. I do have it in blend
why. why does this happen. I make an anim montage of one of my fancy new attack animations. replace one of my functioning combo kicks with it. now I can't attack more then once. which is something I addressed when I 1st made the combo


right. I forgot about animation notify. my bad
Hey guys i have a problem i changed the skeleton and the animation but used the exact same workflow to make animation layered (basic layer per bone upper body ) and it dont work, i also noticed that the first time i made it work i had to change the bone and pick* the upper one is that normal that the animation doesn't show depending of the bone ? does it should not blend in all the case and work ?
my logic bp and everything work find around it and the anim montage fire correctly i even have the hair of the character moving like it take into account the upper body swap but not the character body that does'nt change at all
i figured it out my squeleton had no hierarchy -_-
So starting to explore UEs control rig and I was curious if it had the capability to make something like a reverse foot lock.
I have two sequences, the first one moves an object up, and the second sequence moves it down, however inside the sequence editor it looks completely fine, but when I play them in game, the first sequence works perfectly fine, but the second was, the object only goes around halfway back down compared to how it looks in the editor, they play at completely different times, the first sequence has "Pause at end" enabled which is causing the issue, but I cant have it disabled or else the object wont stay after the sequence is over
Long story short, character movement is generally replicated using the movement component. There is no such thing as a root motion component and the ABP cannot communicate root motion movement to the movement component. It has been a long-requested feature but as of my latest information, there are no plans to implement it. Some have claimed to get it working, and some have claimed that montage RM replicates if set up right. Personally, I've neevr found a stable method.
Here's a more in-depth discussion, if anybody wants to read more: https://forums.unrealengine.com/t/root-motion-over-network-how-its-done/75059/25
Epic Developer Community Forums
[Sorry for taking so long to respond.] As far as replicating root motion over network with Unreal, it absolutely is supported and can be done. To understand how it works, first consider the problem of just synchronizing animations. Lets say we have a walk/run/blend animation. The blend factor is based on a variable called speed. The Animati...
Hey, im trying to make a retargeter from UE5 Manny to a Sketchfab Skeleton i found of a Terrorist from CSGO..
im coming across an issue where in the retargeter the animation looks to translate decently (its not perfect but acceptable for me) but after i retarget anything it becomes Very weird because the hip doesnt move. anyone knows what could be the reason for that?
this is my retargeter chain mapping

and this is the ik rig for the skeleton i found

you need to remap the pelvis as root for both of them
wouldnt that break other animations?
my fix would be to add a root bone somehow or set pelvis as root on ue5 right?
I've been trying to retarget some mixamo animations to the ue5 manny skeleton and it goes fine for the most part, except that I cannot enable root motion in the retargeted animation. The cause for that is that the motion seems to be baked into the bones of the retargeted animation rather than the root. Mixamo's root moves with the animation (which would allow for it to be extracted with root motion enabled), but UE's stays in place. How can I resolve this?
Does anyone know why an animation that works fine wouldn’t have the feet working when triggering its animation montage?
how do i make animation ot play in place? the character moves away from the root as the animation plays
enable root motion in the animation
hey so im trying to use 2 bone IK to snap my hands to a gun i have parented to the camera, but the IK always seems to be 1 frame behind or something and its a bit jarring when the gun remains absolutely still.. the least delayed i've been able to get it is to use the pawn's Control Rotation to calculate the IK positions, but thats still slightly delayed.. is there any way to make it not delayed?
Been playing around with animation blueprints lately and wanted to add custom anims, but I need to disable this side to side sway first, any ideas?
I meant this kind of switching to left/right animations when moving. I don't see anything in the BS_MF_UnarmedWalkRun
anyone?
are you importing from somewhere?
The animation could have root motion, which causes the charcter to move
its a retarget
from the default manny walking animation that comes with third person template
basically retargeting a UE5 manny native animation to my custom model i downloaded online
that lets me know its not the animation that is wrong, because the manny one is rooted in place
but i dont have much control over the retargeting do i? maybe i have to set something up in the retargeter?
Wouldn't it be easier to just set up the unreal rig on your charcter? You wouldn't have to worry about retargeting that way. There's this cool addon for Blender called "Game Rig Tools" or something like that, it's on Gumroad
I'll look it up tho
In the meantime, if someone has the answer to this, feel free
wdym by setting up unreal rig to my character? i havent done much animation work in my short experience with unreal
Get yourself blender, the addon (https://toshicg.gumroad.com/l/game_rig_tools), import your character, remove the rig that comes with it and set the unreal one instead, auto-weight paint and you should be good to go working with unreal animations
oh i think i just did that the manual way, i edited it in unreal, restractured bones to have a root & weighted bones with a brush
ill look into it though
Cool
See this one maybe, could apply to your situation:
https://www.reddit.com/r/unrealengine/comments/i3ycms/question_about_animation_root_motion_after/
Reddit
Explore this post and more from the unrealengine community
I can't seem to be able to reproduce it, weird
What's the model you're using?
the fix doesnt help
some terrorist model from csgo i found on sketchfab
its called tm_phoenix_v2 i think
@nova olive does it matter if the root is "root" or "Root" with an upper R?
it shouldn't, no idea though
am not that well versed in unreal, just started my jounrey with it not that long ago
I just had an idea, in your retargeter, check if all chains are correctly set up with the unreal chains
Cause sometimes, even when names are correct or the same Unreal screws up which chain is which
And it leads to funky movement
Also, did you set the retarget root for your rig?
this is my retarget

chain mapping
and this is how i chained the skeleton of the downloaded model

the retarget root is the pelvis

looks right no? @nova olive
Does it move correctly in the retargeter preview, like it does on mine? @sage sierra
Don't have targets, just chains, but it shouldn't affect it, i believe
This, anyone?
yes, while i feel yours is a bit more natural
ill show one sec
mines like a diva or something haha
btw thanks for trying to help, i appreciate it.. hopefuly we can nail it
Does the character also move away when you use the animations in-game?
in game after placing a character that has its animation set to be for instance the retargeted fwd walking, it does exactly whats in the retargeted animation
oh as an asset?
ill check
it walks away yes
The anim looks funky, but that doesn't matter. I can't seem to be able to reproduce it
i had that
its because the root isnt there
u need to have the pelvis linked to the root
if u do that, then it fixes the being weird and makes it walk away
ya give it a root, the hip starts working and the terrorist skiddadles
here
i'm just kinda curious, does anything happen if you go under root settings > translation alpha and turn it to 0?
In the retargeter
how do i get to root settings

ok so if i do this on the top right where i click enable root -> off, i get the animation to not walk forward, but now he waddles like a duck lol, sort of like before adding the root bone. when i turn it on and instead i turn the alpha to 0 it does the same i assume (since it shows him waddling in the preview)


Anyone?
No idea, pelvis/leg location adds to root's?
Genueinely no idea
Go test it, see if it works
if not, we'll figure something else out
it seems it works on an asset, im trying to check if it works on an animation blueprint
it works! you are amazing man
very nice troubleshooting
I'm having a hard time figuring out how to do an IK rig for my very simple turret
I'm trying to have it yaw and pitch to aim at my IK goal but it doesnt work, says that I don't have enough bones but two are enough for my use case.
Tried the full body ik solver and moving the ik bone doesnt do anything

I just added a root bone but that does not make a difference
Try changing the solver type @zenith mirage
You sent the old video, I think, does it actually work?
Oh yeah lol
It does work
Ill send one tommorow i stopped working on it
Really, big thanks
i think it was my fault and didn't configure things properly
my ik bone was free and not parented to anything so it never found any bone chain behind it
yup, that was it
Do you know how to calculate angles from vectors (notably, forward, right and velocity)?
In short, get the dot product of the fwd and normalised velocity, then of the right and normalised velocity. Then plug these results into the atan2 node. The result should give you move direction in degrees with 0 being fwd, 0-180 on the right hemisphere, 0-(minus)180 on the left. Use these values to drive your locomotion blendspace or state switching.
NB. The order of the dot products passed into atan2 matters. I forget which is needed first so have a play.
NBB. There may be a node that calculates this for you these days. If anyone knows, feel free to drop it below.
Hi. I set up an Animation BP following a couple tutorials, but ran into a simple issue with one of the animations.
The character can jump. I have a Jump Up, Jump Idle, and Jump Land animation.
I am using "IsFalling" to determine when to transition from Jump Idle to Jump Land.
IsFalling triggers correctly when the character hits the ground, but Jump Idle does not transition to Jump Land for a full second or more afterward.
The Jump Idle animation is little more than a single keyframe pose, so I would not expect it to be an issue of it running on too long.
What can cause this?
Anybody know why my fps arms microstutters when changing move direction while walking? This only happens after I added spring arm to lag the fps arms rotation
I did know that, thanks anyway, if anyone ever needs this, it's nice that it's here
I just needed to switch a setting in the Character Movement
only happens when camera rotation lag active
Here is a video example of my "what causes this" question above:
In other game engines I've used this would typically be caused by the character controller not detecting when it's on the ground correctly, the animation not being stopped at the correct time (an event that should be triggered when the controller is on the ground), or the animation not being configured to stop, and just running through the full length before transitioning.
The "isFalling" method of detecting controller grounded state is being used, which fires correctly when the controller hits the ground, so it's not an issue of not detecting the controller state.
The anim BP/Blend-space (legacy) is set up to transition when "IsFalling" is no longer true, and there's very little complexity there, so I have no indication it's a problem with the BP itself.
The animation in question (Jump Idle) is a single frame pose, so it's not an issue of a long animation.
I have the transitions in my AnimBP set up according to some very simple tutorials. I've looked for properties that affect anim time/length, event detection, etc, but can find nothing.
I appreciate any advice you can give! 🙏
Hey! New here so sorry if this is the wrong place. I've been trying to export rigged arms for a FPS and losing my mind haha. I've made a placeholder animation (static pose holding a gun) to test exporting one over to Unreal from Blender, and it works all fine and plays in Blender but doesn't in Unreal. I've searched online and watched a ton of videos trying all different export+import settings, renaming the rig, animations moving the bones directly vs. IKs, importing the mesh and anims separately, and nothing seems to work and at a roadblock.
I've put the blender file and screenshots of my export+import settings in this link: https://drive.google.com/drive/u/0/mobile/folders/1Ml3Gh1KRd0BeP5VOt40ENvqcaoPTjzrb?usp=sharing&pli=1
Does anyone know what the issue could be? Thanks for any help in advance!
What's the usual animation-making workflow if you're using the unreal skeleton? Should I animate in-engine? The imported animations ten to not translate well. Should I maybe create an animation with a custom skeleton and then retarget to UE's? What's your workflow?
any idea why a soft reference to a montage wont work on play montage?
Your first step is to learn how to debug state machine 😉
- PIE
- Open your anim BP and select the pawn in the debug filter
- Possibly record a video like I'm doing now that includes the PIE window + anim BP, so you can review it using the time slider, since it might be hard to see when you're actively moving around in the game
- Possibly use
slomo .2command so you can see the transitions occur much slower (this can catch states that are only active for a brief moment)
This way you can see if its stuck in the falling state
It is possible it is stuck in falling state, or its possible the falling state flag isn't set correctly, or its possible but unlikely that CMC isn't correctly changing away from MOVE_Falling, this is the first step to figure out where to look for the problem
Happy New Year everyone.
Has anyone found an issue where multiple actors seem to share the same 'calculate direction' variable. I haven't seen this before, but maybe I am missing something super obvious.
I have a RABBIT actor that works great when it's just a single actor. However, when I create multiple instances of it, it's like they all share the same 'Calculate Direction' node and they all sorta 'arc' in their movements as though they are connected. Anyone have any ideas why this might be?

Where's root motion in the BlendSpace tools in 5.3.2? I'm trying to fix a Crouching animation, and it needs "Force Root Lock" enabled, but I can't find it or any of the Root Motion tools anywhere in the Asset Details Sidebar.
It doesn't even show up in a search

Hey im learning how to do retargeting but for some reason when im retargeting asset. The main blueprint look janky not like how it look in the retargetter. My model is smaller than the default mannequin

Looks fine in the other animation

Hey buddy - I am pretty sure that all Root Motion options are in only the individual Animation Sequences.

Not quite sure, buddy. It seems like you are triggering a 'slide' animation someplace in your movement logic.
Not sure if this is the issue, but make sure that your target is in the same pose as the manniquen. You can adjust the pose by clicking on the three dots next to RUNNING RETARGET and select EDIT RETARGET POSE. The UE Manniquen is in an A pose and your character should be in that same pose.

Is it possible to add a couple of bones to an already existing skeleton in ue5, then re-import it and keep all previous sockets etc from the old skeleton?
it was rppt motion problem I fix it btw tysm for responding ❤️
is there a source to get good animations to work with?
a pack on marketplace or something?
i find that the biggest limiting factor to learning how to create animated characters is the lack of animations
Anyone who can help me with some IK setup? So I want to have an upper torso boss, like in the picture. I want to use IK to move the hand towards where the player is standing, within a bounding range. Does anyone knows where I can start with this? 🙂

man I guess you never heard of mixamo lol
Hey for both your questions @sage sierra @fickle umbra I finally broke down and bought iClone 8. They have a TON of tutorials on how to work with it. It has a free trial. I use that in combination with move.ai which can do motion capture from an iPhone.
Is there a standard way in Unreal Engine to procedurally change an animation's angle at runtime? For example a horizontal melee swing in a anim montage (right to left movement) into a diagonal vertical (also right to left movement) one?
I would prefere to use the unreal IK 🙂
i have a motion blendspace that takes me from running in any direction to idle. it works when im unarmed and standing, but how would i handle other scenarios effectively?
would i need to make a blendspace for every combination? standing armed, standing unarmed, crouched armed, crouched unarmed? that seems complicated and that there should be a better solution right?
you could use layered blend per bone to blend standing armed/unarmed and crouching armed/unarmed states respectively
for example right now I have a blend at the spine_01 to allow upper and lower body animation blending for having a sword out and wallking/sprinting or being unarmed and sprinting/walking etc
If I recall this video got me started: https://www.youtube.com/watch?v=y7iLItzwGTM
This is a short video showing how you can create a upper/lower body blend between animations.
Previous video where we setup the blendspaces: https://www.youtube.com/watch?v=2oSLwDulEMg
Join the Discord server here: https://discord.gg/zBeebU7uv3
Support the work of LeafBranchGames on Patreon here: https://www.patreon.com/LeafBranchGames
so basically let the crouch stand blend the bottom bones and the armed unarmed affect upper bones
yeah that'd probably be a good start - might need to tinker with it a bit for the results you want
oki, another question, how do i make my character smoothly transition between different rotation? lets say my character walks forward, stops, then starts moving opposite direction?
Is there any other tricks to retargeting for compatible but smaller skeletons? I have animation scaled set but for pistol animations the hands cross like the scaling isn't really helping. The poses seem perfect so it seems to be a scaling issue somewhere
i have a blendspace from going from idle to walking to run, how do i make it so it doesnt snap back from run to idle when it stops moving?
right now it just pops into idle position
if you're using a blendspace for ground speed don't put idle in it, it should be it's own state. Then it will blend back to idle based on your state blend settings / transition rule

In this series of videos we will be covering the animation blueprint in depth so you can master your animations and make some moving characters for your games.
In Part 1 we take an introductory look at the animation blueprint asset and how it works and its state machines.
SUPPORT ME
Patreon I https://www.patreon.com/ryanlaley
Buy Me a Coffee I...
try this to unjankify it?
Hello! Two questions:
The first is we noticed our animation for our walking unit does not match the speed at which is walks (the blend graph is fine, it's the animation itself). Is there a fast way to get these speeds to match? Or is it just good old trial and error via making adjustments to the animation speed itself and then testing?
Second question: When we import our skeletal mesh, for some reason it's getting scaled by 100. It was made in Blender and being exported with the same settings our static meshes are, but the static meshes are the correct size. What are we doing wrong? Everything in Blender looks correct
oh okay makes sense
Here's our root bone when looking at the skeleton:
We did not manually set those values to 100 - they just spawned that way and if we change them to 1, bad things happen (it grows huge some and breaks everythign)

I am looking for any guides on setting up custom models to work with the CR_Mannequin and adjusting for differences. I have a rather unique model that can work with it, but there are some adjustments that clearly need to be made in the arms and legs. I'm using the default mannequin setup but my proportions are very different. If anyone can help with a link or two appreciated
im having trouble facing my Y Axis the same way as my Left Leg. how am i to fix this so that my Y axis is to face the front?

Should I use advanced locomotive system or set up my character manually
that is what i did but it still snaps to place
https://www.youtube.com/watch?v=FlpCAWgMwRs&ab_channel=Aryan
If I make a trade that way, will the rotation work the same way in Unreal??

Buy my Tank Modelling Book on Amazon: https://shorturl.at/dzBW3
I make detailed modeling lessons on Patreon:
https://shorturl.at/hlQ69
Join my Discord to learn new tips and exchange advice!
https://discord.gg/VT36WHaqwh
Sprocket Modeling: 0:14
Wheel Modeling: 3:15
Rigging & Constraints: 5:55
Want to download this model? Available on ArtStati...
Hello guys, does any of you animation falks know how to achieve this type of growing plants effect? It is done in houdini, so wondering how I can bring it into unreal engine. Skeltal mesh does not work in this case...

anyone know why I'm getting this error?


I collapsed some nodes to a function in my control rig

hey, does anyone know why my anim sequence is marked dirty, I only added a virtual bone to my skeletal asset, then everytime I open a anim sequence, they are marked dirty and I need to save
this is messing with version control, and there is nothing changed except the order of these items (the screenshot is from when I right click on the asset->revision control->diff against depot
Anybody here experimented with the new Physics Control component that they presented at GDC ? I'm trying to use it but am running into some issues.
I got my legs to work, the body reacts when I move around the platform, but the legs shift a lot when I start previewing.
I did set them to Kinematics so they would be fixed in place but no difference


Hi everyone. I found this post about removing bones from the MetaHuman skeleton to improve game thread performance:
https://www.reddit.com/r/unrealengine/comments/s0wqfv/metahuman_animation_bottleneck_fix_saved_5ms_on/
I'm trying to do the same thing, except I'm noticing that every bone I remove, even the finger bones, serverly deforms the skeletal mesh. Does anyone have any idea what I could be missing that would cause this to happen?

Reddit
Explore this post and more from the unrealengine community
Hi Guys, Im with some questions, about AimOffsets, I have a Simple Locomotion, and i have a toggle for a "Flashlight", i Have a Anim Montage that Plays in the UpperBody Slot, picking up of the pocket and Pointing in the Middle, and, i havel a AimOffset to Up and Down that follows the player Camera Angle, In Parts, Works, But... Its not smoothly, i already try to increase the blend time , the mode, but its all the same.
The AnimBlueprint that "Works" But not blend smoothly

really dont know what can be
?
ANyone has UE4 to UE4 retargeter for UE5?
Is it possible to add a couple of bones to an already existing skeleton in ue5, then re-import it and keep all previous sockets etc from the old skeleton?
What am I doing wrong here? I'm trying to follow a control rig tutorial but when setting up Basic IK my character's leg twists out of control... I don't know why... Help is much appreciated

I am currently using Unreal Engine 4, but I encountered a problem. My characters were created based on ue4 mannequin skeleton, but some characters were wearing skirts and some were wearing high heels, so I added extra bones to those characters and imported them. When a new skeleton is generated. Then I encountered that I couldn't use the animation of ue4 mannequin. The bone level and bone name were obviously the same. I saw the skeleton-compatible function in Unreal 5, which solved my problem very well. But I don’t want to upgrade my project to Unreal Engine 5. Is there any way to port this function to Unreal Engine 4?🙂
Hey guys, any1 know how i can change the transform height for a specific animation only? or any better solution?
Currently having this problem where the walk animation is at the right height but the running animation make my character floating.


I think* U should be able to do that by using moving the root bone up
its called root motion animation
but instead of dragging it forwards, u drag it vertically up
Hi, i try to use that node Transform (Modify) Bones.
With the selected bones. but when i add a rotation of the bones, nothing happend. Can i preview the rotation?


mmm looks like i need to compile to see the result

but when i make it roate, it doesn't move...
Hi, I'm having trouble with a character rig. I've followed some tutorials and it seems my rig looks completely fine in blender. When I import into Ue5, replacing the default mannequin with my character, the upper body movement is fine but the legs are twisting for some reason and I have no idea why. When previewing an animation with the mesh, the rig seems to work fine. Is it something to do with me replacing the default character with the new character?


Don't suppose anyone has or knows where I can get a high five animation? Wanted to do some motion warping testing
Did you select your 'Bone to modify' in the details panel? I always forget to do that.

Hey buddy - there is an adjuster (not sure what it's properly called) that you have to move to straighten the legs out.
WHY DO THEY SLIDE! I have the most simple setup but my guys insist on sliding. Anyone have any suggestions?


Yes but for strange reason it works now
Don’t know why
Hello, so I made a running animation in blender and when I import it into blender at 5m/s speeds, the feet slide a lot. Any ideas on how to match move speed to feet placement?
You could look into stride warping, Lyra example project has it implemented https://docs.unrealengine.com/5.3/en-US/pose-warping-in-unreal-engine/
Otherwise, you can do it manually changing playback rate or speed to match. Or I think there's some math you can do to time it right based on the speed you want kind of like this https://www.reddit.com/r/unrealengine/comments/jp399u/easy_way_to_match_walking_animation_with_movement/
How can I rename an IK chane name?
When I change it, then I re-open it goes back to previous name
For example, I want to change from root to Root
Oooooo okay, I shall look into pose warping! It looks like something I want! Thanks!
Your smoothing time is set to one second, meaning that the blend space will take one second to reach the desired position based on the inputs you have plugged in. Try reducing this value so the blend space will be more accurate to the speed and direction inputs you have: https://docs.unrealengine.com/5.0/en-US/blend-spaces-in-unreal-engine/


Blend Spaces are graphs where you can plot any number of animations to be blended between based on the values of multiple inputs.
Is it possible to make a pure function in control rig vm? Or is code required for something like that?
What's the right approach to sync feet between a blend space and a montage, for turning animations and that kind of thing? I've tried with sync markers but can't seem to get it to do anything when a montage is involved
Hello. When I try to open an AnimBP that I was working on, UE says The Anim Blueprint could not be loaded because it is corrupt.. How can I solve this problem?
Great suggestion - I played around with all kinds of settings (including 0) but they still slide. Gonna keep plugging away.
Any ideas are welcome!
If they're still sliding, and the smoothing is zero, it could be something to do with your speed variable. Also what is in your second row of samples in the blend space?
Thanks for responding. Yeah - I thought maybe the Speed was falling below 0, but it never did. I was tracking it and most of the time the slide occurs, it is at full speed (which is a modest 150 for walking... like a rabbit.)
The second row (the horizontal axis) is the blend space is 'Direction.' Again, I have been watching that variable, and havne't noticed anything. (I even tried removing that variable all together by creating a full 1D blendspace and that didn't even work.)
I thought this was going to be something super obvious - like "oh dude - you haven't ticked the DONT FREAKIN' SLIDE checkbox" but it doesn't appear to be so simple.
Oh I was meaning what is this row of samples. Presumably 0 is idle and 250 is the run?

Does anyone here have pretty good knowledge on Anim Montages? I have a sword attack animation sequence that I play in my animation montage. The preview of the montage plays just normally however when I play the montage in game my character's feet move all goofy looking.
I can play the animation sequence on loop directly from the Animation blueprint and the feet move normally.
When I play the montage while moving (blending the attack animation to the character from spine_02 and up) it plays just fine. Its only when I stop moving and try to play the animation, the feet then do wack stuff.
Ultimately my intention is to allow the character to use my locomotion movement for the feet when attacking and moving by blending those 2, but when the character does not move I want to switch over to the normal attack animation. Any thoughts on what I should try to check?
Edit: In case anyone comes back and reads this I figured out my problem (chat GPT is pretty great). IKTrace was throwing the feet off. They kept trying to adjust instead of just following the animations.
Oh - That was my walk animation. I put it just above zero in the hopes that they would no longer slide. In reality, it looks fairly natural since rabbits either hope or note hope. They don't hope slowly.
I'm struggling to find any information on this node inside control rigs. Anyone know where I can find an example or something that uses it? I'm trying to make footstep sounds in a procedural animation.

From what you said in your edit, were the IK bones not animated in your attack animation sequence?
I'm not exactly sure tbh. I am using the top down template and the last node that is called before the output in my animBP is a IKTrace, when I removed that entirely the animation began to play a little more correctly. I am still messing around with it but it gave me a direction to pursue
Not sure if I should post in this channel, but thought it was most relevant. I am struggling to understand how to implement AnimGraph/AnimationBlueprints to manipulate a skeletal mesh's bones based on transforms that are read-in externally.
EG: If my code has a position and rotation vector, how would it update a skeletal mesh's hip bone positions to reflect those values?
You could pass the explicit values through control rig by transforming a control to a desired world space position or a transform/modify bone node: https://docs.unrealengine.com/5.2/en-US/animation-blueprint-transform-bone-in-unreal-engine/

Describes the Transform (Modify) Bone skeletal control node which can be used to modify the transform of a specified bone.
so I saw that fn and was hoping to use it, but I was confused how to pass something into the AnimGraph?
Sorry do you mean this (https://docs.unrealengine.com/5.0/en-US/control-rig-in-unreal-engine/)
Instead of the Animgraph?

Rig and Animate characters in real-time using Control Rig.
Something like this??
https://docs.unrealengine.com/5.0/en-US/control-rig-in-animation-blueprints-in-unreal-engine/

Procedurally affect your Control Rig by using it in Animation Blueprints.
Control rig works with the Anim Graph, to have a functional control rig it needs to be added to the anim graph with a control rig node.
You can pass variables into the anim graph, typically you might do this with a blueprint interface and pass different variables and data into the anim graph to be used to manipulate animation.
ahhhh i conceptually get it (if I'm understanding the above thumbnail correctly that hopefully summarizes the first part of what you're saying)
But do you mind clarifying the "passing variables into the anim graph?" What node would that be or how would I do that? I saw regular functions in the animation blueprint, but not animgraph
Any variables that you set in the animation blueprint are also available in the anim graph. Think of the animation blueprint/event graph as the animation logic and the animation graph is the pose logic.
So for instance you could calculate the speed of your character as a float in the animation blueprint/event graph and then use that speed variable in your animation graph to drive something like a blend space for your characters locomotion.
You could also get data and variable information from other blueprints and set that in your animation blueprint.
Again with speed, you will likely need to reference the character movement component which exists on the character blueprint, not simply in the animation blueprint. So you will need to get that information out of your character blueprint and into your animation blueprint, either by casting (pls don't cast on tick 🙏) or using an interface of some sort.
yea I think it would be this situation - I have another blueprint that technically gets the new transforms of certain bones via an event.
In it I guess I would call the ..animation blueprint?
wait what do you mean "don't cast on tick" O_O
It's something that I've seen a lot 😅 casting is an expensive operation and doing it on tick/every frame is not advised lol
ack shoot - what should be done instead then?
sorry im such a n00b
You can cast once when you initialise or begin play, and then store the reference to the blueprint you are casting to. That way you cast once and can call the blueprint as you need it.
Casting isn't the only way to communicate between blueprints and depending on what your use case is, you may want to look at other alternatives.
Yeah you would want to communicate with your other blueprint and set that data in your animation blueprint to be used to control you animation.
this is a dumb follow-up Q, but let's say frame 1, the event fires and the hip bone is set to transform A. Then in frame 4, the event fires and the hip bone is set to transform B.
What should I do between frames 1 and 4? Is there a way to handle lerping or this kind of delay since the transforms are received via an event?
ALSO THANK YOU FOR RESPONDING AND HELPING ME OUT
🙏 I really appreciate it
You'd want to interpolate those values in some way. If you abp is handling all the motion then you could interpolate the variable inside the abp before it is applied to the anim graph.
What's your use case?
so ... in order to simplify my query initially, i said the input was via a file-read in...
Actually the real set-up is that I have a kinect that is sending its data via OSC (BP_KinectOSCClass). Here on the BundleReceived event, the messages are parsed, stored into arrays for that class.
Currently it just puts spheres where the joints are.
What I actually want to do is control the skeletal mesh's via these transforms.
I got a rudimentary control rig up...so now I just need to use the animationbp/animgraph to serve as the middleman right?


If I put two Skeletal Meshes in a single Character BP. Give them the same AnimBP.. Play animMontage on them. The second plays he anim montages stragnely. It's snappy not smooth
When making an FPS game, do you guys export the hands and weapons at centerpoint (0, 0, 0) in the modelling program, and then match them up in unreal?
Or do you export them matched up in physical space before exporting
These kinds of questions have me in a bind
If you're able to get values for where to place those spheres you mentioned, then it should be fairly easy to have your control rig objects follow those same positions through the anim graph yes.
i baked an animation in sequencer that has transform motion. it doesn't bake the transform motion into root motion for the animation though?
Modular characters are typically done using the LeaderPoseComponent. https://docs.unrealengine.com/5.0/en-US/modular-characters-in-unreal-engine/
You're definitely not doing it right
Tried exporting 3ds max sub selection animations with no solution. Both Datasmith and FBX won't recognise the animation within the certain mesh. I guess I gotta divide every single moving object into one. I got the morpher modifier to work a bit, but it janks the geometry up in unreal
How do I receive this event? There's no information on it anywhere...

Uhm... why my curves window doesn't look the the one in the docs?
What did I do wrong? 🥲


Ok, it's no longer in the skeleton window but it's now in the mesh window, cool
Guys, how i can reset current animation in AnimBP calling some function?
hmm, did you create these in the editor or import them with your skeleton?
Guys I'm wondering about an issue I have on a 8 way movement system. When the character is moving backwards and changes between left or right it does a weird jitter. I'm assuming that it happens due to the way my blendspace is implemented (The blend goes from one side to the other).
I'm thinking about having 2 blendspaces, one for forward movement and another for backward movement.
Has anyone ever implemented such thing?

Yes, this absolutely a valid approach for Strafe Locomotion. It's something I've implemented a few times on projects and is my preferred approach for Strafe Locomotion.
There's a good example of this kind of setup here (timestamped): https://youtu.be/4rnsph1eg4s?si=TTnl8_swNJW8bXIo&t=3126
Although you dont necessarily need to have the two blendspaces intersect on a diagonal axis like this example, you can certainly have a 180 degree split for forward and backward. The reason the Volition team had this 45 degree split is to reduce the amount that the hips need to orient/rotate when flipping between Forward Locomotion and Backward Locomotion.
The thing which is important or rather makes this approach worthwhile is animating your legs crossing in different directions, which is the main problem the Volition team were trying to solve.
Sr Animator Mike Jungbluth, Technical Animator Evan Cox, and Sr Programmers Rob Rypka and Isaac Vanier do a deep dive into the animation systems of Agents of Mayhem, and everything that goes into animating an Agent!
Join us every Thursday @ 2pm PT/5pm ET/22:00 BST for our weekly stream!
http://twitch.tv/dsvolition
That's awesome, I'll give it a watch.
But I'm also wondering what's the easiest way to create a POC of 8 way movement system (without fancy stuff for now) using this approach. I did a google search and couldn't find any info related to this.
imported
A proof of concept?
The way I would approach it is have your two blend spaces hooked up to a Blend by Bool node since you can flip a Backpedal bool true or false depending on input direction and the blend node gives you a blend time which will allow the two blend spaces to blend together.
Could it be that the curves had no data?
That's what I was thinking about. And in this case one of my blend spaces would need to include the 90 degrees left and right locomotion right?
Meaning I'd have a forward blend space with: Forward, ForwardLeft45, ForwardRight45, Right90 and Left 90.
The backwards blend space would have: Backward, BackwardLeft45 and BackwardRight45.
Yes, your Backward Blend Space would also need to include Right90 and Left90. Depending on how your Locomotion is animated you may need Forward and Backward versions for you Left/Right90 samples. It comes down to which leg is crossing in front of which as to whether the animation will blend well together.
In my case a lot of the time I find I dont need the 45 degree samples and I can make it work with Forward, ForwardRight90, ForwardLeft90, Backward, BackwardRight90, BackwardLeft90. But again depends on the way it's animated. If the 90 degree samples are more of a sidestep then you will likely need some 45's in there.
Interesting. I'm using an asset from the market place that includes all 8 directions, so I plan on using the 45 degrees animations instead of blending 2 together.
Anyway, you clarified a lot of stuff for me, thanks a lot!!
If you have em might as well use em, i'm just lazy 😅
Np happy to help!
anyone know why this happens when i add additive animation?
please anyone how do i stop this?
do you have some assets set to mesh space additive and other set to local space additive?
no
it's just one animation set to local
the attack one
the others are no additive
And how is that additive applied in your ABP?
i didn't add it there
oh so it's a montage?
yeah
does your montage slot pipe through an additive node?
abp

no
montages can't be added to animation graphs
The slot you have there is the point in the anim graph where the montage is played, you'll be able to see the DefaultSlot in the Montage asset
So your Montage slot will need to be piped through an Additive Node ⬅️ THIS IS INCORRECT FOR ANYONE LOOKING FROM THE FUTURE ⚠️
how would i do that?
You'll want something like this Apply Additive Node: https://docs.unrealengine.com/5.3/en-US/animation-blueprint-blend-nodes-in-unreal-engine/#applyadditive
Animation nodes that blend multiple animations together based on a set of criteria.
yeah i know this but it's kinda useless since it doesn't use montage
also the same thing happens

I think i'm wrong anyway.
If you're not using a montage what are you using?
i am using montage for attacking animation
hmmm

yeah and that montage is played through this node:

yes
so i think go back to your original abp.
What are your additive settings?
the default i didn't touch them
can you screenshot the additive settings in your attack anim sequence?

thanks, looks correct
i dont have the engine open, i cant remember if the montage also needs to have additive settings applied
this is what the montage looks like after the additive, it shouldn't look like this the arms are wrong

That's the result of the additive, becasue it calculates the delta from your reference pose.
There's a thread which discusses this, and montages should support additives no problem.

Maybe try putting one of your locomotion assets in the preview base pose slot and see what the result is
locomotion asset?
the animation's you're using for movement
i have idle and running
Are all of these animations set to be additive? Looks like there's errors

just the first one is additive
I think that's the issue.
Pretty sure you cant mix and match additives and non-additives in the same montage. Try setting them all to Local Space additive and see what happens
thank you so much it works now
thank youuuuuuuuuuuuuuuuuuuuuuuuuuuuuuuuuuu
Does a blendspace 2d really offer significantly worse performance compared to 1d?
I think significant might be an overstatement. 2D is presumably more expensive as you're evaluating two axes and more animation samples.
That said I can't imagine the performance hit being particularly noticeable.
it might be for 100 characters in a scene utilizing it?
In that case, the 100 characters is likely the cause of the performance issues. Lots of unique skeletal mesh characters on screen is always going to be heavy.
In a case like that you may want to look at the Animation Sharing Plugin.
I am having an odd issue where my equipped items (using Leader Pose in the construction script and attached at spawn to the root bone) are not using the root motion of the animation.
I dont know where, if any place, where I can fix this.... so any suggestion or direction might be appreciated
ANIMBP is setup like this:

And I have setup enable root motion on the actual animation:

This is the construction script where we attached and set the mesh to leader pose

Hello, can someone help me with this? When I hold W, it only goes in one direction no matter which way I'm facing. Same for S, A, and D (all different directions though) and obviously my animation setup is messed up. I'm new to this and was following a tutorial. Can someone help me out?
are you using root motion animations, look slike you might be
I am
since your glitching back, it seems liek this is the case

An overview Root Motion Animations in Unreal Engine.
Im reading on this, right now, for my issue 😛
The tutorial I was using used root motion too though?
Although, my issue is not exactly yours, it is different, but this page has all the information you need on it
there is nothing wrong with that
but make sure you set the tick, in the animation, to say, use root motion
doesnt like like you are, so it is glitching backward to where it was BEFORE the root animation

This is a GIF from that page, and it looks just like your running issue
Hmmm
Let me see if I can find this lol
Wait so where do I enable root motion again?
on the actual animation
in the ASSET DETAILS panel, there will be an option for root motion settings
tick EnableRootMotion as on
So, you need to check your animBP and make sure the class settings are set to enable root motion
Do I need to turn on Force Root Lock?
no, force root lock will not help you
Ok

on the Right, where it says details, click class defaults and look for the setting called root motion. Set it to, root motion for everything, and see if that fixes your issue
My guy is now eternally walking
lol
well then, I guess... there is something else going on that I dont know. Wish I could help. I am learning about this root animation stuff for locomotion now.... maybe in a few hours when I get done I can help you further
I too, am having issues with root motion and children actors
Lol ok thank you man
Anytime, hopefully we can figure it out
I wish the best of luck to you
https://www.youtube.com/watch?v=YtWbl50Jwwc&list=PLNTm9yU0zou4iShvGKq4HUr9t_0M0g282 - dont know what tutorial you are watching, but this guy has some good quality ones, and he has one on this topic directly. UE4 though 😦

project files : https://www.patreon.com/posts/38932489
Usually, the character movement in unreal is handled by adding movement inputs. The problem in this approach is, we have to match the animation speeds manually to actual movement speed of the character. Today, I am going to show you a way to completely drive the character locomotion with a 2...
https://youtu.be/PtuT6R4WM6Q?si=l8EKIifSEmHrcMct This is what I was following

In this episode, we finish setting up the character and animations for basic locomotion.
Content:
0:00 Intro
1:05 Animation Layers
2:30 Directional Blendspace
6:06 Setup Base Pose
13:48 Idle state machine, turn in place, stop
24:24 Test (+bonus cat sounds)
30:01 fixing blends and anim states
33:43 Sum up and outro
Disclaimer - this is a part o...
ill watch that one in a second, he is in 4.0 as well, so that is interesting
Yeah but almost all the settings are about the same
I figured it out
Amazing! glad to hear
So my animations were root motion which is bad for simple locomotion
So I swapped the animations for inplace animations and it works fine
hello Anyone here used the ContextualScene(Experimental) Asset to make sync two actors animation Like car and character
Example can be found in the CitySample Project ? there are no mention of it for a very long time/
I have one problem I placed the gun right in my characters hands and in the in the skeleton socket I added it and I am following tutorial series on YouTube and I have to use the ue4 animestarter pack mannequin and despite doing that it's like I have 2 mannequins one is the one I'm supposed to set as default pawn class it's not holding a gun but the blendspace animation I did with the mannequin is working he holds the gun perfectly he runs jogs sprints but what will happen with the one I'm supposed to set as default pawn class
Why isn't that one showing the same result holding the gun like every other one
anyone have any experience with meshes becoming MASSIVE when added into a blendspace? My lean (and other) animations are sized fine but once i addem to a blend it's godzilla out here
Can someone please help
I've seen this happen when you're trying to mess with additive animations in the BS.
Where do I handle this event?

Does this not work with Virtual Bones? My wheel caliper still rotates with the wheel

I am having a heck of a time learning the animation tools in UE5 (Coming from Unity3D) I am trying to just do simple IK Retargeting of animations from the Mannequin to the Synthy Modular Character asset. The problem I am having is that the Mannequin is in an arms down neutral pose and the target Synthy one is in a T Pose...
I have created a new pose in the Source Retarget Pose called TPose but I can't find how to change it to actually be in that pose
Can anyone help me out with this
YES! THATS IT!! I can remove it but then.. well there goes my animation blending.... can you recall what others did?
This can happen if you have a mesh space additive applied as a local space additive, or if you mix and match additive types in one blend space.
Someone yesterday was having the same issue.
tada! Dragon animated in Maya
bless, fam. wish me luck i'm gonna dig in and try not to break stuff
I'm not sure i understand the issue entirely.
Do you have two character blueprints, one with a gun one without a gun?
cancel that they're already mesh spaces 😢
If they're mesh space, which makes sense for leans, then you'll need to make sure you're applying them through an Aim Offset as opposed to a blend space. Or pipe your blend space through a Apply Mesh Space Additive node.
h'oh boy, i've been following Gorka's RPG tutorial - what you're saying doesn't NOT make sense but i'm certainly in the learning phases
Find someone else. Gorka is terrible
I watch boy virtus
Fair, though i genuinely do not want to start from scratch again - it's been a few weeks

An Aim Offset is a type of Blend Space that uses additive poses, typically for creating aim-spaces.
Anyone know of someone with a darn good rpg tutorial series who also provides their files? I'd much rather go back and watch someones tutorials to understand their code than starting from scratch again
Continuing with someone who teaches you awfully is a waste of time.
i definitely can't disagree
The people who are worth following to make an RPG tutorial aren't making them because they're actually making games
Think about what you want in an RPG, break it down, search for those specific things
My blendspace has the gun in it but when I click on the ue4 player that the video says to use as default pawn character he has another gun that I messed around with
That'd involve going back to the drawing board (i'm visual) but honestly that could be a good idea. What exactly AM i creating?
are you using a preview mesh attatched to the hands?
Yeah
In the blendspace it's done right but the actual mannequin for ue4animaestarter which I supposed to use has the wrong gun
I'm having an issue where my regular animations with root motion don't seem to work for stride warping, but retargeted Lyra animations work fine. My animations have all the same settings as the retargeted Lyra ones so it's a bit hard to understand why stride warping isn't changing the feet bone positions. Ik bones are moving fine in my animation too. If I put in the retargeted Lyra animation it works, mine from scratch doesn't. Anyone know anything that might be easy to miss?
Linking anim layer to ABP, when using anim graph it sets all variables inside anim graph layer just fine, but when i try to use anim layer interface with the same method the variables are not being set. Anyone knows why?

Hey guys any1 know what is the proper way of importing character with scaling so it doesnt mess up with item attach to its socket?
I have imported my character with scaling and when i inspect the skeleton rig it have the scale of 45 which is the size i set. Issue is that when i attach any normal size object to a socket, it also get scale.
Is it better to keep the import scale to 1 then manually scale my character mesh when using it?
Struggling with this control rig I'm working on for a set of FPS arms, anyone got any ideas?
https://i.gyazo.com/e8eceb99edc01993401b7f4bfc61b634.gif
Hi, when using an Anim Curve to drive something in code, is there a way to prevent it slipping right back to 0 when blending out? clever/hacky or proper, either idea is ok.
I'm currently driving the position of a pawn using an anim curve on its recoil animation, but when the state that the animseq is playing from blends out it shifts the position of the pawn back to where it started because the curve data returns to 0 as it blends out. I have a Notify State that "enables" this anim curve movement, but it's still true during the blend out.
Oh maybe I can put a Blend Out event in the state machine that sets the move via anim curve bool to false...
why not end it up being zero?
hmm...i'd have to rejig the system i guess. right now i just use an anim data modifier to rip the XY position of the root bone that normally drives root motion, then force lock it, then use that ripped XY position local offset to drive the position of the pawn
so like the movement function tells the pawn to "move this much in your forward axis direction"

if you dont want it to revert to original, mb you can use it as an cumulative value, setting it while it changes. so when animation ends it wont change the value any more
i think 1d is deprecated
but you dont have to use 2nd axis
the value goes back down slightly as you can see in the curve. how would i differentiate between that and the slip from 90 back down to 0 at the blend out?
nvm this works perfectly fine lol


just close the gate during Start Transition
i've no idea what's the best solution here, but you can leave some frames at the animation end for blend out, and stop changing the curve before that
sorry it's hard to explain in english for me
yeah i was doing that but the transition wasn't as snappy/quick as i was hoping to get it
nah i get what you mean
i recal in Lyra they have just that
i think just closing the gate to utilize anim curve x y for movement during transition start is the best solution here. thanks for helping me brainstorm though!!

yeah im using it for turning in place too
i'm still learning this myself
it's powerful and much better to control than root motion!
it's easier to use anim notify or curves than gates imo
yeah true i wonder if i had used a second curve that is just set to 1 and whenever that dips below 1 (so 0.9999) stop moving the char would have worked just as well
like the TurnYawWeight is doing there
so as soon as the blend out happens that curve will dip below 1 and prevent the movement
I do something very similar for Attack states, since my attack animations have a "wind up", "attack", and "recover" state that affect damage multiplier and also trigger the hit box
if i'm not mistaken the curve blends to 0 exacly for that reason, if you use X-[curve] and save result to another Variable, once curve is close to 0 it stops changing
yeah you can clamp curve at some point
if we wanted to
after some tryouts i intend to copy Lyra solution for now and make changes later if need be
although it kinda works fine with what i made but glitches at some point bc of actorRotation jumping from 180 to 0
just wrong math i guess
Lyra is far better then anything i can produce rn lol
should have started learning from it from the start
i still havent looked at it haha. just the loading screen thing really, and that was via someone else's help in #cpp
Can you share what you came up with ?
but the anim stuff is probably really helpful to look at
oh dear i dont know if i can pinpoint where/how i fixed it or how it would apply to your problem
yeah it might be a bit intimidating with the level of complexity is has, but it gives really good examples
i can have a quick look at my TurnInPlace tick function and see how I'm doing it and if anything stands out
i just realised today that i've been using whole Anim layer interface wrong lol )
I did it awhile back
yeah cpp is my weak point too sadly ) can barely wright something simple
this is the actual rotation setting code that happens on tick.
    //Interp to new tracking rotation (for FaceMovement or if we're tracking a location and moving)
    RDesiredRotation = FMath::RInterpConstantTo(AIPawn->GetActorRotation(), DesiredRotator, DeltaTime, AIPawn->fTrackingSpeed);
    RDesiredRotation.Pitch = AIPawn->GetActorRotation().Pitch;
    AIPawn->SetActorRotation(RDesiredRotation);
this happens right before that.
    //Reopen the rotation match do-once after turning in place is complete:
    if (AIPawn->LocomotionState != ENPCLocomotionState::TurnInPlace) {
        if (bRotationMatchDone && AIPawn->fMoveAnimationSpeed <= 0.f) {
            //Re-open Do Once
            bRotationMatchDone = false;
        }
    }
    if (bAnimCurveRotation) {
        RotateToAnimCurve(DeltaTime);
        return;
    }
This is RotateToAnimCurve. bAnimCurveRotation is just a gate like i discussed earlier
https://pastebin.com/f7Y6DHi0
Pastebin
Pastebin.com is the number one paste tool since 2002. Pastebin is a website where you can store text online for a set period of time.
idk if any of that will help you but that's the essentials of my TurnInPlace code
the key to it, i believe i learned somewhere, is that bRotationMatchDone bit of code right before calling RotateToAnimCurve
whenever a turn in place occurs, I reset that to the current actor Yaw
saving it as a snapshot
and the curve is just a 0 to 90 ripped from the root bone, which is ForceLocked (again why i use the gate method because it's not 1 to 0 alpha like i maybe should have done lol)

oh just rereading my code, i probably bypass that first block i pasted when using this RotateToAnimCurve function because it appears i set the actor rotation directly in that function 😛
yeah that should fix it
yeah it constantly recontextualizes and localizes the rotation offset
that way im never going over 180 🙂
cool ty
i forget where i learned that
aside from this part it seems about the same that i do more or less
i can drop some unneeded calculation and just reset this after turn
I need help with this if someone can help
its unreadable with this quality
@neat dock you try something like this?

should work this way probably, idk if it fits your idea, but hope it helps
Will try it
controlls are parented to Null so it can move freely

idk if it's really nessesery but it works
btw controlls are too far from it's proper possition range, that's why hand wont end up the same spot as conroller
but it tries it's best )
i guess you can just open the control rig that comes with unreal sample projects for a better example of setting this up
could you expand what controls your setting here?
i just made two so that the chain can take their transform
basicaly there's some controls that we take transform from, i gave them initial transfrom from bones so that it wont be at 0 from the start
and the full body IK is rly simple to use
you give it root and bones parented under it, so it's clavicle and lower arm and hand
you give it some transforms to solve and it does that
@hushed anchor https://i.gyazo.com/410cfee613a4bb665151ede32c8eea6a.gif

I did that and this

if i cant read your code i cant see what might be the problem


seems correct
if it's not wroking as it should i've no idea why
i've to go. Hope you'll figure this out
Me too
Is there a simple/easy trick to make an animation look like stop motion? (Like if it was animated in twos)
Without actually editing the fbx 😅
Maybe some abp trickery?
Hey folks, recently retargeted my player and blah blah - now when i complete an attack - i get this error about my traces. I also now see no traces in engine - not exactly sure what happened and i've no other errors (unless it deals with the bpc attack system). I uhh.... i've no idea what's wrong as my attack system casts to player, and that's succesful. so not sure why... player bp isn't..? Any ideas? Below is one of the manymany errors i get as soon as i swing a sword
Blueprint Runtime Error: "Accessed None". Node: Sphere Trace By Channel Graph: EventGraph Function: Execute Ubergraph BPC Attack System Blueprint: BPC_Attack_System
Blueprint Runtime Error: "Accessed None trying to read property Player BP". Node: Sphere Trace By Channel Graph: EventGraph Function: Execute Ubergraph BPC Attack System Blueprint: BPC_Attack_System
it appears this error has extended to my notify functions that cast to player... man oh man
I tried to self reference during a cast and it says that my player does not inherit my trace loop... so the cast will always fail
Someone had a similar query a while back. My response ☝️
Typically first person animations are made separately from the third person versions. First person is for what the user sees on their screen, the third person anims are for what other players see (if the game is multi-player).
First person animations are often done without the head and any camera animation is also done independently of the body, or you have a bone which is intended for the camera to be animated with. You can include legs but it's not uncommon for first person character rigs to only be arms and a weapon.
I'm making a true first person game, so it's like this.
When you say true first person, what do you mean exactly?
It's a game that use third person animations for first person perspective. Like DayZ.
There's a way to snapshot pose, you can do it with timer i suppose
You can adjust the clipping plane of your camera to help keep your character visible
Try Mesh bounds x3
yeah that's worked, thanks bro
I know what i want but idk the keyword lol.
How can I get the location of a control in a BP from a control rig?
Set it from rig for sure, idk what else works
Not sure I understand
What is the difference between a mapped element and a user defined element in a control rig
hwo to make the climb anim is not affect with slot.i use in layered because i have aniamtion to separate that

Do I need locomotive system to be able to program all of the different animations or can I watch YouTube videos and program it manually once I learn it
Like can I still use every animation feature
Or it's limited
did this to trigger a level sequence to play from game start, doesn't play

Howdy, still struggling with this problem
Howdy folks - I seem to have the worst time with ROOT MOTION. Here is my issue - no matter what I tick, my rabbits still return to their original orientation. Anything obvious I am not doing?

Do you have your Default Slot node before the Output Pose?

anyone knows when you end a sequence that transforms an actor to a different place, how do you make it hold that position cause it just goes back by default
I had a bit of a look through the discussion you were having. Is it necessary to be using fullbody ik when these are just arms? I think a two bone ik solution would be simpler and give more predictable results
I am having a weird issue I converted some animations using IK Retargeting and then exported them but now they seem to suddenly have root motion and its totally messing up my game code which is not designed to have root motion factored in
I am using a 1D blendspace with a speed var currently with 0 as idle, 250 as walk, and 500 as run
Which IK? Basic IK?
Oh yeah it's called basic ik. The solver which is a simple 3 bone chain solver.

Depends what you're trying to accomplish 😅
Does your animation have root motion which rotates the root 90 degrees?
Not sure what'd I'd change
kinda need a mediator between our animator and our 3D modeler
The primary and secondary axis there. If you open your skeleton and look at the bones of your arms, notice the little axis transform at the head of each bone. The primary axis will be the one oriented along the length of the bone. The secondary axis will be the axis pointing to the left or right.
Can you screenshot your skeleton hierarchy? < nvm i can see it in one of your gifs
thanks but no, not gonna hire someone to talk to someone
just need clarity on the expectations

Yes
Not my model since I can't model
And your approx size is also really big.
That's fine, it might be that you need to uniformly scale the whole model to ue4 size before rigging.
How would I do that?
I would start by exporting a default cube from unreal and importing that into blender to get a reference for how big things are supposed to be.
Then unbind your rig, scale the model to an appropriate size, if you have done this in object mode you will need to apply the transforms so the scale is 1 again. Then do the same for your rig, and rebind your skinning.
Getting scale right between blender and unreal, especially for rigged characters is tricky. So definitely look up some info on it, there are a few blender to ue4 videos on the epic channel that have some good info for rigged characters.
hey there
is there is way to transitions in the blend space or use transitions with it
as you see in the screenshot i have 8 way directional movement
i tried to reduce the gab to get better results but still i see flickering when as example i go from walking right to left or from forward to back left
btw the movement is based on root motion
also i did try to apply motion matching but i found no resources to help fixing all the flickering and other issues so i would appreciate any advise on that too

btw for motion matching i have a full set of ai generated animations ready to be used already fixed and configured for UE
If you're implementing motion matching then you shouldn't need a blend space as the motion matching should generate the pose based on your velocity.
There was a discussion about 8 direction blend spaces and the use of two blend spaces separated between forward and backward locomotion: #animation message
By flickering you mean the legs don't solve nicely and do a sort of hop/jump motion?
nope the buddy would instant go from left to right i did apply weight speed and smoothed it a bit and looks fine now but still the character when moving from left to right it would flick to back then go right
i will look into it
i know i didn't use blend spaces with it
i add some animations but the character would keep switching between different once and sometimes would just stuck in place
hey guys
how do i lower an animation with root motion enabled ?
its floating atm :/
i making a game where theres gunna be a lot of enemies at once and i was wondering if its better to make animation with movecomponent node than a animation asset because i need performance

that the issue i have now you would see it at the end the character would rotate when moving left and right
Is there a way to "seek" animation blueprints for a skeletal mesh?
I want to play animations in sync for a multiplayer game, so I need some way to have a global time variable in the anim blueprint that drives all animation loops.
is it more performant to use MoveComponentTo to animate my models than using a animation asset? (im only translating and rotating them nothing with deformations)
Yeah - I double checked in Blender, just to make sure.
@viscid willow would adding keyframes help them here for the turn?
Are you referring to the rabbits?
hello i added a new sliding animation to als i go to sliding from grounded or falling or thats what i want to do it doesnt go to sliding and when it does it never goes back unless i jumped first iam lost on what to do

If you are using a variable for jump start/loop/end, how do you use TimeRemainingRatio?
are they character class? root motion is handled with capsule and movement component as far as i know and works with character out of the box
TimeRemaining is used to get the time remaining on a certain state and begin transitioning when that time is met. So you might have that as your transition rule for coming out of your landing animation.
You can't do that to a animation stored in a variable
What do you mean by animation stored in a variable?
I have 3 anim sequence variables for jumps in my character.
I want to use a "Random Bool" node in my Animation state transition rule, however it gives me the following warning: Node Result uses potentially thread-unsafe call Random Bool . Disable threaded update or use a thread-safe call. Function may need BlueprintThreadSafe metadata adding.
Should I be concerned by this and use a different approach or is it ok to go on?
Would anyone happen to know if we can use anim notifies to trigger inputs in a metasound source asset? Or would I need to create an anim notify and use the event in the event graph to then trigger the input in the metasound?
Get mesh -> get anim instance
In the sequence, you can lower the pelvis translation, set a key then save.
Tick the automatic rule based transition and empty the transition graph logic (set to false). This automates time remaining logic assuming your state node is correctly set up.
You can't do any operations in (most of) the ABP because it is being run on a separate thread. If you absolutely need it, you can set it to disable multi-threading though this is not recommended. If it's about which animation to play, you can use the random sequence player. If it's about which state to transition to, you'll have to figure how to perform the logic in your character class and feed that into your ABP
Im using a level sequencer for anims and while editing my control rig keeps resetting to default before I have time to finish my adjustments, anybody know how to stop this auto reset?
Ah got it! Thanks!
Thanks for the response. We did try going to the last keyframe and deleting it - just in case it was causing the problem but same issue persists.
It is from the Character class, which is why it's so frustrating. I have a new theory that the issue might be someplace in my Behavior Tree. If my character is idle then it turns and stays put as expected.
Does anyone know why when I put shuffle mode on my random sequence player, it plays the same animation at the start every time?
I only have 3 anims on it so there is always a chance im jsut getting unlucky but that doestn seem to be the case
would be super greatful for the help :)
An idle animation is edited to create a new reload animation through Animation Layer Editing.
how do i optimize a skeletal mesh/animation?
You'll want to look at compression for animation sequences: https://docs.unrealengine.com/5.2/en-US/animation-compression-in-unreal-engine/
For skeletal meshes, the number of bones and the number of bone influences per vertex makes a big difference.
The setup of your ABP also makes a difference in runtime playback. The Lyra example for ABPs is a good way of only loading the animation assets you need, although it is a bit advanced.
Use Animation Compression to reduce the memory impact of your project's animation data.