#animation
1 messages · Page 25 of 1
bump
I Have an Issue with my control rig which is basically A fullbody IK node . Its preventing the spawning of my player character mesh in certian areas and maps Im not sure why this is happening. But after testing It always comes back the the full body IK node in control rig
Help. I have VR CHARACTER using a fullbody IK node In control rig. and that node seems to be causing issues with my characters mesh not spawning in certain maps or areas of maps on start. If I place the character In the level and simulate you can see the issue THAT THE MESH HAS NOT SPAWNED , But if I move the camera It can trigger it to do so. Also In VR you can see how my VR character mesh is not spawning But the Other character is still there. How could Fullbody IK node cause this Example vid https://youtu.be/O04UNhCO3iY

I'm making a 3d platformer. What would be a better workflow for moving parts? Rig and animate the parts in blender or animate them in unreal using blueprint?
I'm using the retarget system to transfer some older ue4 animations onto the ue5 manny - here is the chain setup vs the final result. I've played around with different bones with no success; any advice?


bump
i mean montages not animations or im wrong and can i also blend anim montages?
Is there any benefit enabling fast path for state transitions? Seems kinda silly having a massive function for calculating the rules
animation in control rig vs animation directly applied to the output of anim blueprint


can someone help me with an animation issue? imported my animations for my rig but they are invisible, like the skel and mesh is just gone when using an anim, and all my anims are like that. i've been doing this for years now and never had thios problem, the scale of the anims seem fine too
I fixed the issue, for anyone having a similar issue name your armature "root" without quotations in blender and it just magically fixes. never ever had to do that before
This is a pro-tip and it’s a pain in the ass for a number of reasons not least of which is import into UE will not have a root node if you don’t rename the armature OR add an explicit root node to your skeleton.
There was an earlier bug that actually caused two root nodes in the past, but, now the export options default to making the armature node null to avoid the double root!
ANYONE KNOW how I can move the pelvis bone on Z with the head bone but keep the current offset, I think I am close But missing something. I want the pelvis to move up down with the head and keep the distance NO HEAD GOING IN THE CHEST.

Thank you so much for telling me! I have no idea how I never ran into the issue before, only thing I can think of is my rigs were always heavily modified rigify rigs so maybe it was already named root
Can anyone help me with this: If I create an animation using the animation rig from the Mannies, can I export it and integrate it into the actual player movements? For example, for a jump, since it involves an Animation Sequencer?
How could I control the pelvis bone height with the head bone height But keep them the correct distance


In general the retargetter works great but the shoulders are drooping a ton on my target rig
I've gotten the UE4 mannequin animations to retarget to the rig just fine but using my personal rig causes shoulder issues
does anyone know how can I still move my character for the first part of a root motion animation? I've seen that some combat systems let you do that, just to control direction
taking the chains off of the shoulder seemed to work
Hi all, does anyone know of a good tutorial or method for creating trees/vegetables that grow and produce fruit. I've seen an example using Niagara and one using Morph Targets, was hoping someone might be able to point me to something that's a bit more substantial on the subject as what I've seen only kind of touched the surface.
Vertex animation textures are also a good option for organic deformation
Will try to google this
Can anyone help me with this: If I create an animation using the animation rig from the Mannies, can I export it and integrate it into the actual player movements? For example, for a jump, since it involves an Animation Sequencer?
yeah, when you make an animation in Sequencer using Control Rigs, it will let you bake the animation back onto the character's skeleton
which can then be plugged into Animation Blueprints and stuff
i can't remember exactly how to do it since I don't use Control Rig, but I have seen that it's possible since the whole point is in-engine animation and making stuff "dynamic"
1.) Add your control rig to the skeletal mesh in sequencer
2.) Animate the rig
3.) Right click the mesh in sequencer and select "Bake Animation Sequence" and it will bake the data back to the skeleton into an Animation Sequence file. From there idk how to use state machines since I don't use them for cinematic work, but there's probably a plethora of YT videos on how to hook everthying up. 🙂

So I'm doing a control rig for the first time and do I really need to do this manually for each control I need?

bump
How do I attach a plane shape to a moving vehicle? Driving me crazy for hours
When I use attach in the sequencer, it places it far away. And when I reposition it, the car physics are messed up
Also using rush hour plugin
thanks bro you are the best
having a strange issue after retargeting my mesh into the default 3rd person character controller

he should be running in place, right?

https://youtu.be/P4p7AUvUzSY?si=awCQH2sIZmh55JoL
Hey, could anyone please help me with this root motion issue I'm having

Why does my retargeter make the source's root motion to target's pelvis? That makes the exported animation have no translation on root. Do I have some wrong settings?


Cant figure out why my movement broke. I Was trying import and retarget an amination, i gave up then i went to go back what i was doing before my movement broke.


why the fabrik IK not working

Do anyone know how can I use Upper and lower animation directly in sequencer or any other process
For character
Like these but in sequencer for Cinematic

Check the default group in the montage is the same in the anim BP
Hey guys. I'm new to unreal coming from unity. I want to make it so that I have aninmations for each gun (gun_idle, gun_shoot etc.) but I want to swap those animations when I change the gun so that the fps arm's animations are the same as the gun's. It was called animator override in unity but I couldn't find what it is in unreal. Does anyone know a source where I can learn how to do that ?
I have a track of 1 long animation doing many things that I split up into multiple anims. but they are jerky because the end doesn't match the start. Can I use blend 1D or some other method to make a smooth loop out of them? any good tutorials are appreciated, thanks!
EDIT: right click animation, click "add looping interpolation". works beautifully 🤯
I'm not sure if this is the right channel but I have a sitting and standing anims that i've created a montage from. If i play these via blueprints using the play montage node, everything works as you would expect. However, if I play the montages from a behavior tree using the play animation node, the character goes into the T pose for about half a second. Does anyone have any idea what might be causing it?
Edit: I made a custom BT Task to play the montage instead of using the Play Animation node which seems to have resolved the issue. I think the play animation node suspends the anim BP meaning when I change the anim state during the montage, it doesn't actually update until its starts again. (I could be wrong though, just a guess)
bump...
tried manually correcting the rotation to see how much its off by and try to guess the issue, but it seems the location of the socket is also borked up
snapping to location and rotation of the socket while keeping world scale...
... somehow its suddenly a lot closer to where its supposed to be if i immediately set the actor transform after attaching it??


but still not where its supposed to be so thats fun
all of the other logic is just setting variables after this. im not doing anything to the position or whatever.
wonder if its something weird with metahumans initializing
Hoyo guys, control rig question
I am desperately trying to reconfigure the mannequin / metahuman control rig to work for a simpler character rig, I like all the controls and want to keep all the logic switch and such.
Problem is the spine stuff seems like it only works with a spine of 4 bones. Like, I'm running into walls, some of the logic seems like it requires 4 spine bones to get control positions to feed into arrays that create splines and the whole thing wont compile without at least 4 bones
but I dont HAVE 4 spine bones, I have 2. And I'm getting an error on an array that keeps trying to access an index that it shouldn't even be trying to get.
this bit here. Both of these Get Arrays only have 2 things in them. So I don't understand why this At is trying to get index items 3 and 4 (ID 2 and 3)

Does anyone know if it's even possible to reconfigure this rig for a shorter spine? And how to deal with this At error?
help pls, how can I made my character have a little offset down (pelvis)
currently she floating up

move the pelvis down in the animation preview window is just for looking, it doesn't save or affect in play mode.
In control rig when I add new controls to bones they have to be scaled 100x to be the same size when used as an IK target, is there a model setting somewhere to get clean sizes on control rig?
edit: solved, in blender set units to centimeters
has the side effect of very janky shapes that have to be scaled down to 0.02 to not be 8x larger than the model
Is there any reason to NOT use a bone/joint in place of a socket? I'd prefer to setup "socket" points in Blender instead of adding another step to the integration process but I dont want to commit to doing it this way before getting some outside input
Is there a good Generic UE4 -> UE5 Mannequin UK Regargeter asset to use? I assume there will be a better one than me trying to make one from scratch
For whatever reason my character cannot crouch? Whenever I activate the couch InputAction it slows down the speed like it should on the 3rd picture. so it registers the input correctly.
For some reason I can't get the Animation Blueprint to understand that I'm pressing the crouch button? I tried chanching The Idle/walk transition from IsCrouching to IsNotCrouching and it let my character crouch permanetly, so the transition from Idle/walk to crouch should work.
So for some reason Event Graph dosen't seem to get the fact that I'm pressing the crouch button?


You need to use the 'SetIsCrouching' as a pin from the CharacterMovement Component I think
Or SetCrouching function I think, can't remember exactly
I'm really sorry I might just be bit noob when it comes to this but I'm having hard time understanding this ^^"

Yeah, set the crouching on the CMC directly, dont set it on the actorBP
Because all of your calls are from the CMC
Hello.
I want to make a 'pick up item' animation and using IK to adjust the animation to the item laying on a table. I have created the animation and the control rig with a functioning full body IK. I just don't know how to combine the animation and IK together.
Thanks!
welp this shall be another rabbit hole for me :D I have no idea how that works, thanks tho, I'll look into some tutorials
You need to get a reference to the item you want to pick up and pass it through to the animBP where you should be executing your IK via a control rig node I think
World location / local offset conversion
hey guys, im new to using the retargeter but im not seeing the edit pose option anywhere

Uuh alright, I have no idea why this fixed it, but now it works?
My character can crouch. The 2nd picture is the non-working old setup.


Is there a way to match control rig controls to physics assets? I want to use the transform of the physics assets to drive transform the controls positions
Does anyone know how I can offset a material UV using control rig? Trying to get a 2D face rig off the ground and need to control the position/rotation/scale of the tongue, eyes and teeth materials etc.

has anyone gotten blockbench animations to import properly? GLTF exports have a bug and dont texture correctly, and FBX doesn't seem to want to import a skeletal mesh.
Hello trying to create a dolphin dive animation for my prone system.
I tought I would get away with it by adding a animation transition in my Anim BP but just looks like a sad belly flop in place.
Anyone know how to accomplish something like this?

Feels like im going to need to dable in some anim montages and root motion but really hoping for a easy solution.
Would anyone have any tips on how to accomplish something like this?
Anyone know how to use physics bodies to drive controls in a control rig?
Hi I have a question
How can I combine two animations into one by bones, like blend per bones node?
I want to make one animation sequence from two animation sequences, like Jump animation and Aim animation -> AimingJump animation
does anyone know why the arms arent getting an animation even though theyre correctly on the right

Why this sometimes happen? Two copy keyframes but there is movement between of those.
try adding another duplicate frame after first one
https://forums.unrealengine.com/t/ue5-2-anim-notify-is-not-triggering-from-character-backside/1301253?u=ezcoal_1
Can someone help me with this issue?

Epic Developer Community Forums
I have added character footsteps using anim notify which is playing properly when i am in the distance from the other character. once i started running from backside side angles it will start playing only when we reach closer to the player that too suddenly. Can someone help me with this issue
Hi!
I have an issue with using the MHA head animation while it is attached to a MH body.
I want to use the head animation from MHA with the head attached to the body, while the body has a separate animation.
I have followed this tutorial exactly: https://www.youtube.com/watch?v=hZ2mkcd4C7M
And its not working.
Anyone have experience with this process who has experienced similar issues?
Step by step guide for Unreal Engine's MetaHuman Animator, the latest update for high fidelity facial motion capture. In this video, we are going to show you how to setup your iphone with the LiveLink app to capture your facial motion, then bring the footage into Unreal Engine 5 to Calibrate, Process and then transfer that facial animation to yo...
Hello, I'm following the control rig tutorial on the official documentation

However, i do not have any shape control

am i doing something wrong, or is the doc outdated
Hi, wonder if someone can answer this for me please?
I,m not sure I,m the only one who experiences this but you find a nice character model on the marketplace you think "I,ll buy it" then you find some animations and go these look cool.
Then you try to merge the animations to your new character model and they just do not work (Well retarget) to perfection because surprise surprise your character model is missing a LowerTwist_Arm_L so your hands look all wrong and some others are missing.
How do you guy deal with this inconsistency's I know some animation and models say "Rigged for Epic Skeleton" but Epic Manny 4.27 is different o Epic Manny 5.3 in quite a big way.
And they do not seem to remove "old" characters from the marketplace so you end up getting old models and new animations which just are a nightmare to try to pair together.
Would I be better using a service like Mixamo or is there some other services which provide free characters and animations (I wouldnt even mind buying characters and animations as long as they dont cost 100,s of pounds each). Just when you spend 20-30 on 1 character and another 20 on animations and they do not work together you lose trust in spending 100+ on other assets.
Anyone have any insights on this?
@digital jasper Not sure I can help as I,m having issues myself but maybe could approach it similar to other 3 state anims, so StartDive(Perform Dolphin Dive at the of the Dive have a AnimNotify to move to OnGround) and then MidDive(On Ground) and then use a get off floor anim as said Im not a expert with the animations just thought maybe i,d make a suggestion
Not sure if you got an answer to this already The Edit Pose is now the 3 little dots next to the Running Retarget Pose button in the top left.
Oooooohhhh, thank you!
Did you try scaling the control?
Your scale is 1 vs 3.
Yes, that was the solution, thanks!
i have tried removing Control rig but it worked in preview of AnimBP but not In gameplay
instead float little higher like superman
is it related retargeting.
how do i fix it ?
Anyone know how to use physics bodies to drive controls in a control rig?
I need help
When I make something with the goal of ultra realism, and, I use literally all quixel assets, it looks like a low quality cartoon.. even if I copied a tutorial exactly how it is, it still ends up looking like something out of roblox.. when I made a forest using pcg, with all trees from the quixel megascans and used the ultra dynamic sky plugin, for lighting, execpt for running at 2fps, it dosen't look good.. why??
https://youtu.be/F7V_TwnSQP4?si=RJSWmJTWVGR1Xqhy this was my first one..

Welcome to my channel, where I'm thrilled to unveil my very first 3D animation created in Unreal Engine 5! Join me as I share the journey of bringing my imagination to life through this mesmerizing animation project.
🎮 Unreal Engine 5 is a game-changer in the world of 3D graphics, and I couldn't be more excited to showcase what I've created usi...
This is the pcg forest, why does it look so bad?


K bro.. in a sec
I'm out rn
I'm having trouble with root motion on a custom animation. It's basically just this character bouncing in the air, but when I enable rootmotion it stays planted on the ground. The base bone on the skeleton is named 'root'

Hey there! I got couple of ideas on what might be wrong.
Okay very first when you enable root motion it shows it in place but when you actually play the animation in-game it should work fine.
2nd when I deal with RootAnimations I usually EnableRootMotion that you have here, but it still might look off.
3nd when you have your animation blueprint you need to mess with these options on the details.
So if you want your animation to bounce around wia the root animation enable it and play the animation in-game even tough the animation now shows it being still in the editor


Thank you for all these notes! When I do tick EnableRootMotion, that's when the problem starts. It does indeed stay in place in the editor, but in game it doesn't work as expected, it just stays on the ground. I didn't know about the animation blueprint stuff, I'll try that and let you know if it helps
So one thing I realized was that I had the wrong animation blueprint hooked up, so now I need to make a new one for the character. The probelm is, this character doesn't have a state machine right now, so I don't know what to hook up into the output pose. Is there some default basic node I can use to get the skeletal mesh default pose?
Hello guy I'm going to need a little explain, how, and can I make animation with two separated meshes for example in my situation now I have body and head in my animation and in program blender it's already separated apart but when I import it in ue5
I get one single mesh with whole animation but if I import my head individual it's no longer connected to animation, so what should I do?
So I noticed that the default unreal skeleton faces down +Y as a skelmesh and then the character BP rotates it -90 to face +X. Is this just a legacy content thing or is there some good reason for it? Is it reasonable to just make my characters face +X by default and remove the rotation from the BP?
I notice that Lyra does it this way as well. So I’m assuming this is intentional. Anyone know why?
Coming back, I've ensured that all the settings are correct and still I have no root motion. I have noticed that other animations where I do have root motion don't show the red root motion line when root motion is enabled, and mine still does show it even with it enabled. So is my rig structured or named wrong for root motion?
This is my skeleton heirarchy

It comes from blender, where my armature is named "Armature"
Hi. Anyone know why a Blendspace will only show Helmet for a Modular Character ??

My animation notify isn't not working can't figure out why.


any clue as to why my character shrinks to tiny size when applying to tpp or adding any animations? I triple checked the scale and it is the right size and everything is applied but when I add animation it always shrinks down
Drag the list of bones / controls into your BP and create an Array, then do a for loop and set it for each one. (Obviously this will only work for very basic rigs).
Ah
I've been doing it manually lmfao
That is the basic way to do it 🙂

got it
I also need to figure out the geometry stuff cuz it's acting weird
I have like massive eyes and eyelashes for some reason and they're way off in the distance. Also some random lines too

BTW, I'm not a rigger, I came here looking to pay someone to quickly setup an IK control rig for our character to make it easy to pose. So what I was suggesting there is the simply naive way to get a usable control rig for all the bones you want to do it for without doing endless BP code.
Gotcha
There appears to be a few good folks in this chat though, so hopefully someone can help you!
yeah
Dropping in to say I figured it out... Unreal doesn't allow root motion in the Z-axis unless the character is in Flying mode. sigh
A question about skeletons and curves. I have a montage that has a Curve added to it called RopeAmount. RopeAmount doesn't do anything on its own but there are some points in code that will use GetCurveValue() during the montage to get the value of this curve. This montage was built for an old skeleton, which has the RopeAmount curve in it. Now I have a new skeleton that I want to play this montage on. This new skeleton didn't have a RopeAmount curve, so I added it. Nonetheless, the GetCurveValue() calls are always returning 0, which is behavior I've seen in the past when a skeleton didn't have the required curve.
Any ideas as to what's going on? My understanding of the relationship between skeletons/meshes/montages/curves is pretty bad so any additional context would be helpful
PLEASE HELP. I’m trying to create some animation for MegaJam. My Control Rig looks fine in the Rig editor, but when I drag the Control Rig into my scene, some bone controls are rotated and twisted. Any idea what’s causing this??


does anyone know why the arms arent getting an animation even though theyre correctly on the right

Have you tried exporting your animations with blender units set to meters? It looks like the armature you're working with may have already been scaled to work with unreal's units. Check the transform on the root bone of your skeleton in UE, the unit conversion gets applied to scale on root bone
Your transition rule between prone transition and prone is automatic, so the dive animation will play, but it will also immediately begin to blend into the prone state as soon as it starts playing. Your blend duration on the state change is set to 0.2s so it looks to me like your dive animation is probably longer than 0.2s and you're getting a snappng transition
Is there a good way to restart an animation that's being played via the Animation Graph via blueprint? It looks like the suggested way is to add in a temporary state to transition in/out of it to restart it, but I figured I'd ask if there was something nicer to work with.
It was an issue with visibility based anim tick. previously it was "only tick pose when rendered".
When is worth it use procedural animations?
Does anybody has tips or resources how to cleanup mocap for MetaHuman?
quick question: does something change with animation in sequencer for UE5,3?
i see there Smart Keys interpolation which is new. also i have a lot of problem with gimble lock, all rotation worng when i open scene from previous version. im sure somewhere checkmark to fix it, cant find where. thanks
Hey guys, what could be wrong here? For the life of me I don't get it - two anim packs from the same author, one working and the other not. I'm refering to the walk animations - they're using rootmotion, but I set them to Fixed, and that works for the "working" one, but alas, here's a video showcasing the issue. The animation stops executing after one loop it seems:
https://imgur.com/a/IXThjux
Pinging for help with exporting from Blender to Unreal. Does anyone have some advice for FBX import/export settings? The main issues I am running into are:
1: Unreal SkeletalMesh characters face +Y and then are rotated to face +X in the character and I have no idea why. Even in Lyra.
1a: If I use X forward Z up in my export settings I get rotation baked into my root.
2: Unsure the correct Blender and Export settings for scale. Most of the posts I see will tell you you set blender scale to 0.01 which seems incorrect. I should be able to work in 1 unit = 1 cm in blender, but for some reason when I import my root always ends up with 100,100,100 baked into it's scale.
What would be the best way to have 2 montages blend from one to the other? I currently have one montage play and when finished, play the other. This however doesn't give a nice transition. Any suggestions?
anyone has idea how to smooth out this animation a bit?
if u have animation in blender when you are exporting animation make sure that this white line is at the end of animation

Is it possible to check whether an anim notify is being triggered in editor?
Hey all you UE experts! For some reason my animation(generated within unreal using this sequence as a linked animation) is adding a bunch of wobble and noise to my stab. Does anyone know why this is happening and how I can fix it? I am using a basic IK hand in this control rig.
Easy question for you all (since I guess it is a very common problem), I created a IK retargeter to retarget a rig that is basically the UE4 mannequin rig, to the UE5 new rig, everything's fine except for the fingers, I noticed the UE5 rig has some extra "metacarpal" bones for the fingers. Is there a simple way to correct this issue?
I am creating a car animation and am having issues with the keyframes not working in the final render. For example, the car is coming to a hard stop, once it stops the body tilts forward a little bit. I've animated it all perfectly, but when I render it doesn't show the car tilting at all. Anyone know why its doing this? Or how to fix it?
It's from an asset from the marketplace store 😅 I contacted the owner, as I think it's something wrong with the asset itself as you seem to indicate aswell
Is there anywhere to post reviews of freelance vendors from UE Slackers?
Or is it all done via back channel?
Also: #freelance-jobs message
Is there anyone experienced enough here to do this? We are using CR_Mannequin_Body and want it rigged to a very simple Mesh+Skeleton (from a third party).
The first guy didn’t get it done unfortunately. He put in effort so we paid him 50% of the payment.
This is for UE5.2 and we require a video / screen capture of the fix so that we can reproduce — please not, we don’t need your face on the video, just a screen capture 🙂
So I dunno if anyone here would find it useful or not, but for ages I've had an internal editor plugin for a bunch of my most-used tools that I've written. And I've now had three different friends ask me for a copy of it just to get the animation metadata generator tool portion of it, so I finally decided to just take that animation metadata portion of my internal tools plugin and split it out into a plugin in a public github repo under the MIT license for anyone who wants it.
Basically it provides a whole set of various operations you can perform on the root bone (or any other bone of the reference skeleton you provide) to generate curve tracks. But it works reasonably fast, it works as a background task (rather than locking up the editor while it runs), and it can preserve directory structures in the output directory.
So, if that seems useful to anyone... cheers, enjoy, use as you see fit.

GitHub
The metadata-maker tool from Rooitools, split out into a slimmed-down version of the plugin for public use. - GitHub - Rooibot/metadata-maker: The metadata-maker tool from Rooitools, split out into...
Is there a component, tutorial, or phrase i can look for information on snap-in cutscenes? I want to be able to go into my level and add little cutscenes where the player actor is snapped into the animation, and animate the level sequence in place with the player control rig
I've done level sequences to make animations from the control rig, but using level sequences directly and inserting actors is a mystery to me
My root motion animations ceased working after I changed the mesh, any idea why? I tried to use the old mesh, it didn't work as well. Where should I check?
I have a Skeletal Mesh attached correctly to my character and the phsyics asset has constraints, which are are all set...but the physics isn't working and I'm not sure why.
Could anyone point me in the right direction to a solution for this?


Even tried this off the Event BeginPlay and was kicked with an error. Checked the Skeletal Mesh's Skeleton Tree and it has a root bone. Not sure what I'm missing here. Any help would be great.


hi please help.. when i capture with Metahuman Animator live link.. sometimes eyes when blinking not closing completly? is there way to adjust it without doing that key by key?
Watch this video. https://youtu.be/7IUpa3Pxqug?si=IjZG253t9aoaYYJG

The stories you create aren't static, so why should the look of your characters be? Using the UE5 Lyra Sample Project as a starting point, this session will discuss various techniques available to add, swap, and customize your characters.
We’re excited to bring you sessions from Unreal Fest 2022, available to watch on demand: https://www.unreal...
Highly recommend as it would probably help
Thanks for the link. I already assembled the character in a modular way. That was no problem. My issue is getting the physics to become enabled on the groin armor, specifically - the cloth physics already work correctly.

Thank you for the video link: about 15 minutes in, it shows use of the RigidBody node in a separate AnimationBlueprint for the Skeletal Mesh asset.

Then at about 17 minutes in, set the Post process to use the animation blueprint on the skeletal mesh asset.

Then bypass the Set Leader Pose Component, and Parent it directly to the Pelvis bone, adjust the location & rotation. Works, but has some clipping issues...

I think you have to offset it or probably add some more bones or morph targets to the armor
Is it possible to make a 1d blend space to play an animation at different speeds? For example, with an input value of 1 it plays the Run animation at normal speed, and with an input value of 2 it plays the Run animation at 2x speed?
Then in import settings i think you need tk chose time of animations
Oh I solved the issue, was a problem with the anim BP 😅
Thanks!
Wish I knew what you're suggesting...I've placed it correctly regarding the Transform Location & Rotation, setting the Parent Socket to the pelvis bone, so it is locked into the right place and moves with the character...maybe I'm missing something to make it aware of the character mesh to which it is attached?

Hi everyone. I want to learn more about character movement so if you know any good tutorials on ue5 character locomotive or w/e the fancy terms are please link me. Atm I want to replicate the movement seen in Mario Odyssey and I've gotten close with the "Stack o bot" course but I need more knowledge. I google and search but haven't found something that can help me yet but I bet someone in here knows a good tutorial.
It seems the armor just has one bone. You might have to add more bones. Either with the skeletal mesh editor in engine or an external DCC app
It has enough bones. Seriously, the only thing now is making the armor recognize the body it's attached to. I'm guessing there's no easy way to do this if you're thinking it needs more bones.

it even has the default skeleton embedded in its own structure.
I wish all it needed was more bones.
...so many bones


Oh damn. That’s good enough. Sorry I couldn’t help mate
I thought that video would’ve had the solution as he did something similar with the jacket
All good bro! Thanks for the video link anyway, it contained part of the solution for sure!
Finally did find a solid solution ... and figured it out after nothing else worked ... I had to create capsule shapes on each thigh, size them down just right and viola! (with one little hiccup on that left panel (right side of screen), but all in all, this was a very successful day! - i've been trying to get this character working in my project for like 3 weeks - off and on again)

When I switch the Anim Instance Class of my character ingame, my idle animation falls back to the default UE4 mannequin. What could be the problem here? The class/blueprint works fine if I never switch it. So the idle animation should work, I change nothing else - as far as I know. So that doesn't make any sense unless it's a bug in the engine (which I sure hope is not).
Both animation instance classes are based on the same skeleton.
Ok it looks like the "Movement Blendspace" is not set correctly after switching animation instance classes/blueprints. Is that an engine bug?
That's the "how to tell your game was made in Unreal" spawn hop. Gotta make sure your pawn starts closer to the ground.
can somebody explain to me what this does?

That’s kinda like the final input that gets shown on the skeletal mesh. If disconnected, no animation is passed through
Howdy, does anyone know if you can make Morph Targets inside UE5 to bring into the skeletal mesh editor, or do they all have to be imported? Not a huge amount of info out there about this particular feature yet 🙂

Epic Developer Community Forums
Hey, When I package my UE 5.2 game for Win64, my MetaHuman clothing (SkeletalMeshComp - MasterComp to Body) look like they are lagging one frame/tick behind the body. You can see the body pop out of the clothing on fast animation changes in this live stream. I know that removing the body mesh section would fix the problem, but a lot of my c...
have the same issue with packed build in 5.2 with leader pose what works perfectly fine in older version (i dont use metahumans just self reg stuff)
is it fixed in 5.3 already? or should i wait for 5.3.x?
hello guys this is how my animation looks in the sequence but wen i play the game it just doesnt play the animation of bottom part, the bottom part keeps playing the walking animation

im sort of confused with how stride warping works, do animations HAVE to be root motion? it seems to be doing something but its not actually applying any stride, my character sort of just steps in place lol, anyone know how to fix this?
Anyone ever came across where retargetting an ABP does not do anything? It's specific to one of my chracterABPs but the others work fine.
it lets me select the ik retarget, folder, etc and when i hit retarget, nothing
Not sure if the ABP is too big or something
when using character movement, I found that sometimes the skeletal mesh isn't actually facing the actor forward vector after rotating - anyone knows what's going on?
like the movement/turning animation is stopped prematurely
quick question, when I go to create a blend space there are no assets to add to it. Why would this be happening?

It is likely you need to set it to a full body slot, and then add that slot to the appropriate place in the anim graph

You're using a different skeleton than what the animations are using, its possible that you imported a character and gave it a new skeleton instead of the existing one
Check the output log (not message log) when you do it
Animations do have to be root motion, look at how Lyra implements it
It is the final resulting pose applied to the skeleton, everything preceding it in the chain helps to define what that pose is
How do I set it to full body slot... I am currently using the paragon animation bp it's hard to say where to add it can u help me out
Ty
This dropdown
Unless your anim graph supports the full body slot it still won't work

Ah and wat if it's the direct animation it self not the montage
I put the animationbut ..
that may be because I'm trying to use the same animations across multiple meshes, I imported them from a different model and created template blueprints for this purpose
so of course I need to adapt my workflow around that
Would need to see the anim graph, don't have the information to know what's going on. You'll want to share a video too
good call, i get this error:
LogTemp: Warning: Batch retarget aborted. No animation assets were specified.
okay, so I managed to export the animation data for use on alternate skeletons but on the ones I want to use I'm getting this weird behavior

any idea on what may cause this?
I don't understand what this means, or rather, you might be misunderstanding something
The only way to get one animation to go on another skeleton is through unreal's retargeting, you can't just import it onto a different skeleton
so what should I do to retarget?
That's a question for google, just type in "UE5 animation retargeting"
Or start from here: https://docs.unrealengine.com/5.3/en-US/animation-retargeting-in-unreal-engine/

Describes how retargeted animations can be used with multiple Skeletal Meshes, allowing you to share animations.
Hello! Lately I've been researching how to create procedural animations in UE5 and I found many different approaches. My question is the following:
Is it better to just use Control Rig for ray tracing and foot placement or is there any drawback in using Actor Components for the ray tracing and control rig for the foot placement?
I am currently using an Actor Component for each leg to ray trace and calculate the position of the foot, and control rig to set the foot location, the same approach as Andreas Suika in this example: https://www.youtube.com/watch?v=Z8eqaFG7lZQ&t=230s&ab_channel=UnrealEngine
But I know that you can also achieve the same by using control rig without the need to use ray casts in blueprints, like Lincoln Margison in this example: https://www.youtube.com/watch?v=vKiqs_h1WXM&ab_channel=LincolnMargison-GameDevelopment
I know that UE5 has many ways to do the same in different ways, but I thought to post this here and see if anyone has some experience or can enlighten me with a few pros and cons of each approach.
If I get to any conclusion one day, I will post it here for people with the same question 🙂
Cheers!

The Full Body Inverse Kinematic (FBIK) feature in Unreal Engine 5 allows you to construct IK in Control Rig with a high degree of control and flexibility. In this feature video, we show you how to create a 100% procedural animated character with a highly modular setup.
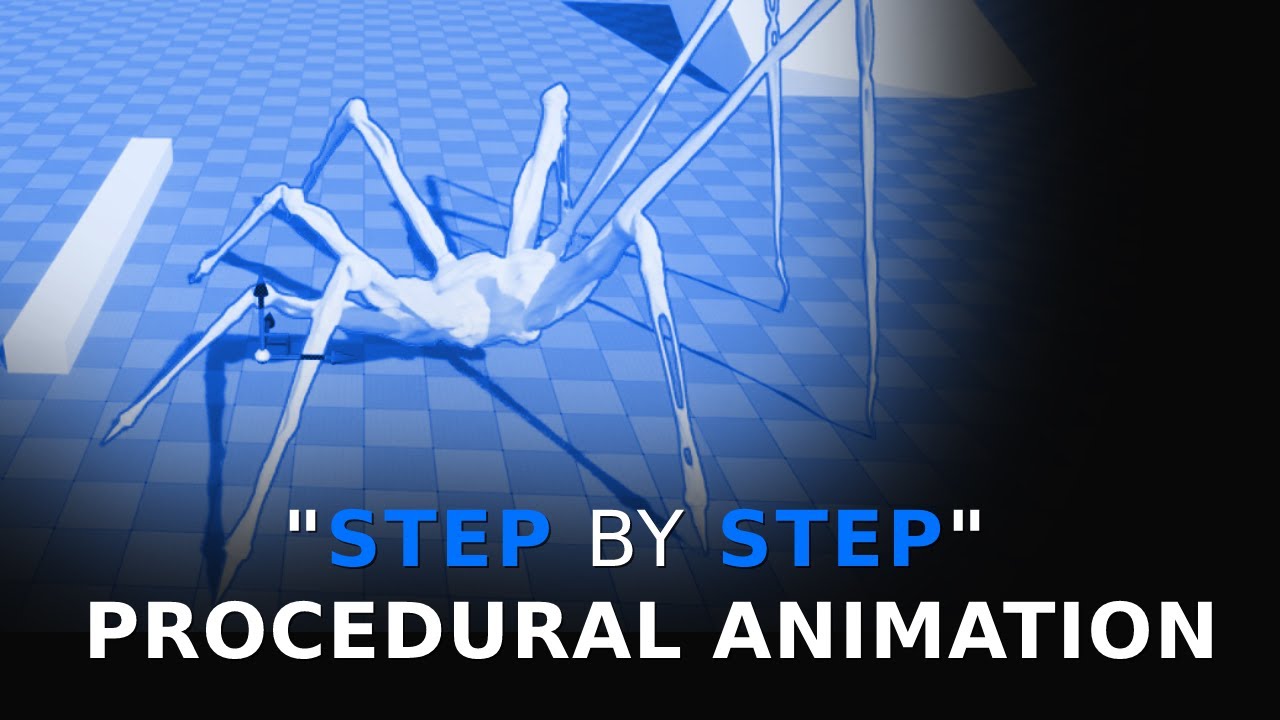
Free download of the spider model: https://twitter.com/LincolnMargison
More coming soon, subscribe, follow, all that jazz.
ah sure just a sec let me record one real quick
I dislike the convoluted mess that is control rig. I find it painful to debug. But that said, it is quite powerful and I do use it for some stuff.
Keep in mind you can also just run an "IK Rig" in the anim graph and use that, I think the first video touches on it (but I don't really watch videos)
There is also the procedural "foot placement" node (experimental) and I've had some good results for generic leg IK.
@smoky shell here u go
Is this what Epic gives you with Paragon

Btw when I asked for a video, I wanted a video of the issue, the stuff you showed is better with screenshots
Where is the place where it plays the animations that are only playing on the upper body?
okay, so the retargeting does need to be updated in the documentation but I was able to get somewhere with it
expect this rest are default

however, the animation once duplicated and retargeted is completely blank and only the t pose is retained
And this is where you're having your issue?
Can you show me where the animations that are only playing on the upper body are?
ya one sec
And have you disconnected everything but the problematic nodes?
in the sense?
Anim graph work requires isolation testing first and foremost when issues occur
You need to find where the issue is happening by isolating it
Remove everything except the ClimbBS, plug it directly into the final outpose pose
And if it works as expected then your issue is elsewhere and you can start reconnecting one-by-one until it breaks again (then you've found it), if the issue remains then you've found the right place
You can also use pose watch, but you probably don't need it yet

So this is the problematic area right?

ya
Connect this directly to the output pose


Yes UE5 completely overhauled (i.e BROKE) it entirely
It's an amazing system, but far more complex for new devs and still needs to be completed and documented properly
oh wait no the climb_bs works fine, the problem is within the locomotion space the left and right wall run... sorry for confusioni


OK, so then plug this directly into the outpose pose and see if it works correctly

I suspect your issue is here but its important to learn how to debug anim graphs

ya it works then

OK now start plugging stuff in, and stop when it breaks again, because that'll be where the issue happens
so test it by connecting every node to the output right
No, one at a time, you want to find the one that causes it to break when you plug it in
ya doing it..
wen i connteced the leg ik it stopped working from below pelvis

OK, so the first thing that comes to mind is to check those animations and see if the IK bones are correctly placed over the FK bones. Many anim packs miss this. In this image its correct.
Because if they aren't placed on the feet, then the leg ik node will go to those bones, which are sitting in world space, which is basically the effect you're seeing


Thanks! Yeah I agree, is quite confusing. In Blueprints I can use timers and seems that it makes more sense to calculate foot positions, because you only want to get a new location when is necessary. In Control Rig it calculates everything on tick but the ray trace seems to be more performant because it returns less things than in the actor context. But still something to explore further for sure 🙂
I'll give you the solution now. This will fix every single animation by snapping the IK bones to the FK bones (on every frame)
- Make blueprint of
CopyBonesModifier, call it something likeB_CopyIKBonesModifier - Use these settings (see
Bone Pairsin 2nd screenshot) - Apply to all the animations in your project EXCEPT for any that actually want different IK bones (these might be animations where the character is reaching for something, but tbh, most projects never need this)


That's the ref pose, you need to check the animations

oh its not aligned with it
Yeah so the Leg IK is pulling the foot to that position
This will fix that animation, and any other you put it on
I put it on every single animation on my project without exception (it would only be exempt if an animation was specifically required to do exactly that)
how do we fix the ik_foot_l so that it will match with the animation?
Again, its this
.
oh sry i overlooked this msg
before u move on i had one other problem this was with crouching the animation takes time to work let me send a video of this


I can't see when you're pressing the input
its on even tick..
i got a trace that detects the beam
then change the animation according to speed from idle to crouch walk
Your graphs are a mess, it makes them hard to read, for future reference you can make it tidy using State Alias (screenshot of my own system)

ty will add it to my onenote rite away
I don't think I can actually help with your issue tho sorry
You will just need to keep isolating and testing, it is a necessary skill for this work
hey guys, I've set up a pose in sequencer for my metahuman, but it only shows if my sequencer is open, if I close the sequencer tab the character goes back to the default pose
My character runs away from the screen like this:
https://gyazo.com/8b4b3a71460ca94558e190a0b8271eb1
but I changed my animations to enable rootMotion + Force rootLock, what else can I try?

I've gotten the enemy head to point towards the player but can't get the enemy hand to do the same thing

it never points in the correct direction and acts completely different from the head
I've been trying for a couple hours at this point and I can't get it to work
who here uses als?
*aslv4
Im trying to replace the character for alsv4 refactored, but idk how to replace it for the animation bp
did you figure this out? How do you drive from a helper bone in unreal?
is it possible to have an animation that moves the root bone in both the XY and Z- planes, but only has root motion in the XY?
Basically a bouncing ball but the capsule for the ball only moves horizontally, even though the animation has verticality
stickman
can somone help, can i apply when i change bones in ue5 to normal animation?
Pretty good for 2nd animation, also this is 1080p vid, couldnt upload 4K

Unreal Engine
505 High Quality Survival MOCAP Animations using Unreal's Skeleton. 345 In Place Mocapped Animations + 160 Root Motion Moccaped Animations ( body and hands animations )
Hey friends quick question, is there a simple way to smooth the rotation applied in a Control rig while using the **Aim **node? I noticed an AimAt function that returns a transform that I can plug into an Interpolate, but I was wondering if there was something simpler I could use to smoothly interpolate between the current value and the value set by the Aim node
Just use the AimMath node and pop that into an accumulate Lerp node and then set the rotation of the bone manually and just forget about the Aim node. Copy that!

Hey. Anyone experiencing weird Out of Bounds issues with ControlRig? There's nothing wrong with my array, it has the correct number of entries and the rig does work fine but somehow ControlRig keeps spamming errors and it makes the editor slow AF. It's barely useable 🤔 It keeps happening with all my control rigs (5.2.1) Any ideas? Ty.

So, to check... what you want is basically to play root motion and have it ignore the Z-axis in the animation (for purposes of the actor's location), but still use it visually? That's certainly possible, but I'm pretty sure you'd need to write your own code to handle it that way.
Is there a reason you can't alter the animations to keep the root motionless on the Z-axis and just move everything else vertically relative to it? That should give you what you want without any extra code.
Just putting this here where it might be appreciated. I've been giving control rig some dedicated time to actually learn it. Had to write a custom node but got there in the end. Surprised to see there are no vector projection nodes available either.
Also, the FBIK doesn't try to fully reach the target. I'm making this in 5.1 so hopefully its fixed in later release.
Nice, do you have to place every rung, left and right? Or just specify the spacing and a single rung?
Spacing + First rung offset
I had to make a node that takes a struct, and that struct needed to gather data from the ladder, and then pass to the node, and even then I couldn't access the struct's static functions to compute the data from it, had to be done in the node, so its quite limiting
Some code if you're curious about how I did it
    const TOptional<FVector> MaybeRungLocation = GetClosestRungToWorldLocation(LadderData, Location);
    if (MaybeRungLocation.IsSet())
    {
        RungLocation = MaybeRungLocation.GetValue();
        const FVector& ProjectionVector = LadderData.LadderRightVector;

        // Remove the right vector from the rung location
        ProjectedLocation = FVector::VectorPlaneProject(RungLocation, ProjectionVector);

        // Add the bone's right vector
        ProjectedLocation += Location.ProjectOnTo(ProjectionVector);

        // Offset it (usually so its slightly above the rung, resting on it instead of inside it)
        if (!FMath::IsNearlyZero(HeightOffset))
        {
            ProjectedLocation += LadderData.LadderUpVector * HeightOffset;
        }
    }


Hey, anyone ever experience aim offsets not appearing as they are previewed? I previewed it and it looks normal, but in-game the bones transform strangely. I haven't done anything apart from pawn control rotation, but I was looking forward at the time
Anyone know what might be causing this? Changing preview skeleton in the animation sequence preview. I've found this can often happen when undoing something in an animation asset. Seems to be an error in preview only (fine in game), but making it's slowing down our animation pipeline.

what would i need to adjust if the "Look At" is always opposite?

Hey, quick update from the other night with my animation question. I just realized that I had converted formatting on the models and was using the original source format, and I was thinking that it could possibly be part of what happened with the weird behavior from my attempts to centralize the animation data. I'm considering the possibility of testing this theory later today, but I'm thinking that it may be something that could legitimately happen.
i managed to get it to face forward kinda, but doesnt always look at the camera quite right..

this one

im new to animation setup stuff so i'm not sure how to use the other node:

https://gyazo.com/da4613c1eee1ac38389e17cf8012ee82 something is offset by like 90 degrees or something?

sequence node not running the nodes at the right time? remember they just run each branch in the order, but doesnt mean the first set of nodes finish before the second ones start
just a guess
also potentially this: do you need something input here

Please help. My animation is not playing in editor. It plays only when I simulate or play the game. What should I do. If I scrub the initial position the animation is previewed.

Realtime is turned on.
If I add the character in a sequence and press play the animation works. But how can I preview it in editor?
yo is there any free animation pack that i can start learning animation (please any thing expt mixamo)
Look for Cascadeur
is there a way to do root motion with control rig?
ok
Does anybody know if I can step through/control the animation from code? Either blueprint, animblueprint, cpp, whatever
Like I am trying to make an animation timeline scrubber inside my game
No reason there wouldn't be. All root motion is, is that the locomotion is driven by the animation itself. So just, move the character in the direction you intend and boom, you have root motion.
right! I don't have a preexisting root motion anim that I'm editing, I'm trying to make a new animation in control rig and have that offset my capsule. I'm transforming the root bone in control rig and it is moving - but the capsule is not following.
The capsule may not follow while you're authoring the animation. After you're done with the animation, go into the montage and check.
oh okay yeah I didn't turn it into a montage. so there isn't a way to do this with procedural animations?
what I'm trying to do is animate the head of a snake and do a trace to respect its environment etc
guys i am searching for a grappleing animation for third person any idea where i can find one > ?
hey guys im fairly new .. i have an issue when importing animation to the engine using my character as my character become messed up entirly .. here is a photo
any help ?? ..

Is there a workflow for creating fairly accurate physics bodies for non humanoid skeletons?
I was told that it's not always that simple, for example there may be differences in skeletal data between the source and destination (which tripped me up earlier as I was using different 3D model types originally). I believe the official way to handle multiple models with animations is through retargeting, but that's an entirely different matter and not well documented (at least not for UE5, the current instructions are hilariously out of date and nobody's bothered to update them).
On a related note, I have a situation where the model is hilariously small when using my current set of animations on the intended skeleton. Other than that, I'm very close to having things figured out in my case.
Hello guys, how do i export animation from unreal engine with translation retargeting data?
i see thx for caring and replaying .. appreciate it
Hi, ive set up locomotion for my character however when starting to walk backwards it kind of very rapidly rotates and only then starts to walk smoothly. Any ideas why?
Back at it with my face rig I'm tryna make. I've managed to import it nicely without random geometry shooting off.
I had an issue with the eyes were they'd come in huge and I've only partially fixed the issue. Even though the geometry appears to be in the right place now it still has something going on with the bones. I had to fix the import of them by weight painting them but I think it's caused an issue with my control rig where it kinda shakes lol

Anyone know where I can get help with deformers?
The defaults in the project settings don't seem to be hooked up. They don't do anything.
I am trying to learn/get better at animations. does anyone have any feedback for me on how this could be better? its a animation test I made using cascadeur and sequencer
Hello! Having a problem with playing animation montages, this animation should play:
But during testing in game, this happens:
And this is how my BP looks like

From what it seems, only the root motion part of the animation works and is being overriden by my walk animation and I'm not sure how to solve the issue
This is what my ABP for locomotion looks liek

Does anyone have an idea how to fix it?
How can I assign a metahuman to quinn as a mesh? I am encountering such a problem.
Using "Look At" to make the robot's head look at the target and using a time line to make the "Look At Value" slowly decrease so it returns to its natural position. But it moves in a bizarre way when it needs to return from a 180º turn... does anyone know how to solve this?


Guys, ik retargeter wont update joint rotations from source to target. Help?
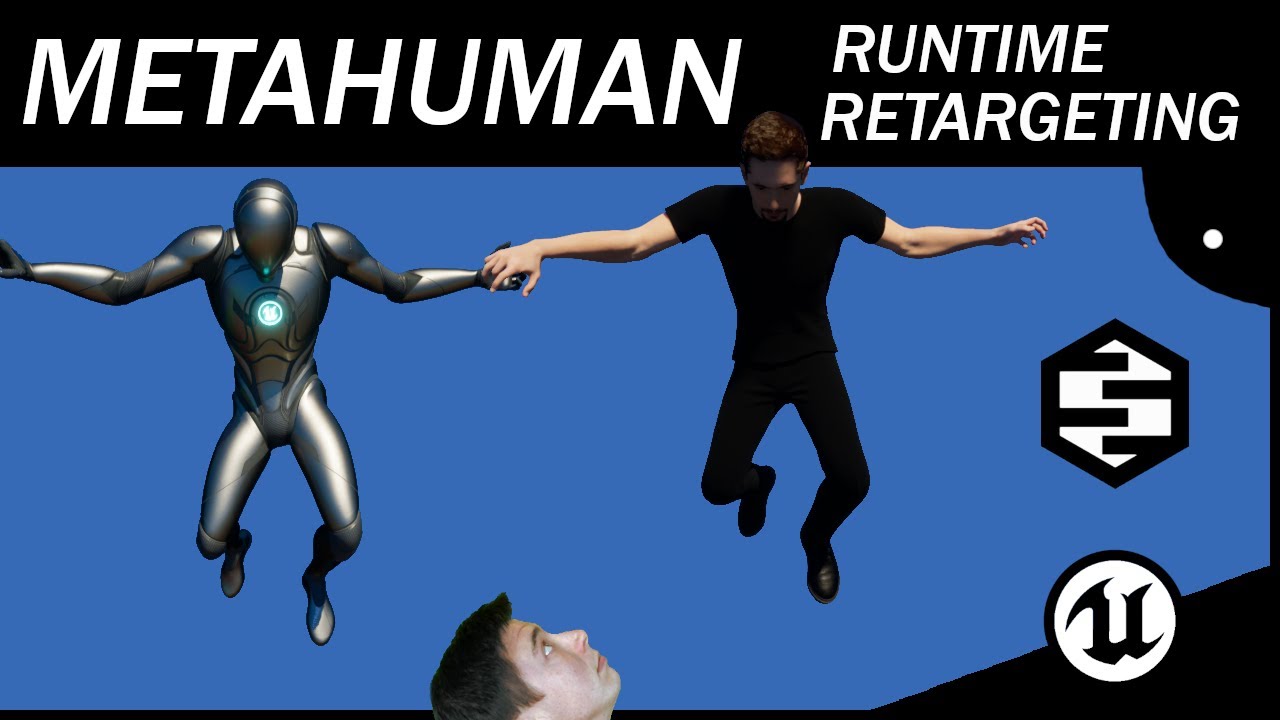
In this episode we set up a child blueprint class of our ThirdPersonCharacter to be a Metahuman character retargeted to our ThirdPersonCharacter using runtime retargeting. Although this is more performance intensive than doing a complete retarget, this allows us to continue doing our blueprint design on the primary thirdpersoncharacter blueprin...
There’s a lot of tutorials on YouTube
When you are retargeting, how does the system handle Anim BPS and montages/blend spaces? how do I make sure those work? since it only lets you duplicate sequences, the references aren't the same
Hi everyone! I'm a bit new with IK Retargeting and I was trying to use some animations from the marketplace. I thought I've successfully retargeted the source IK Rig to the one that i was using since the beginning, but when I created a new animation sequence from the IK Retargeting asset, the animation seems to be skipping frames and also shrinked some parts of the skeletal mesh. Did someone have experienced something like this before? I'm the UE5.0.3 version with this project.
This is are the animations on the IK Retargeting Editor Window:
https://clipchamp.com/watch/aC1Av1Ywk15

Clipchamp
Watch videos made with Clipchamp, the best video maker for everyone.
Edit: I think the links are broken so I'll be sending the video instead
This is the animation after retargeting the animation sequence:
Hey guys is there any experienced animators that could help me or point me in the right direction in solving the issue with fine tuning animations that I'm having now? Any help would be greatly appreciated
Yes you're 100% right, so I'm working on an FPS project and I'm struggling with fine tunning animations for holding the gun properly by the character


like in the images above thumb is going into the gun and the rest of the fingers don't grip the foregrip like they would naturally. I know about editing animation sequences but these animations were created with blendspaces and I can't edit bones in those.
Someone suggested that I use hand pose for that but I couldn't find any tutorials or anything really related to those
unfortunately control rig gave me the same result...
Does anybody knows what the best performance for animations I get:
- I have one complex AnimBP graph and Ai build on it, so player and AI NPCs use same AnimBP.
- Or I have one complex for player and one simple for AI NPCs
What is the best solution?
I did a video on implementing control rig look at which you might find useful: https://youtu.be/I9nu7Bxotdk?si=vLI95sB05bO7Jc6h

In this video, we jump into implementing AI procedurally turning their head and upper body towards a target. The video is designed as a livestream (of consciousness) so go ahead and skip to the parts that are relevant to your needs.
This project, Ealond, is an indie game made by a 5-person team, and is a co-op medieval siege based survival RPG ...
instead of having my character turn, i want it to be instant like old retro games, what would be a good way to get rid of the turning part of a character since i'm doing more of a top down game
Can someone help this dont work. I made a thing that blends animaions from the right arm down so my swinging animation would play. Now that i wana make a kick animation only my arm moves is there a way to make that animation block the blending of animations?


Hey I tried to make directional movement blend space in my multiplayer game, but for some reason, when I try to go backwards, or to the side I can see stuttering on client side. I dont know if or what component should be replicated, I tried to replicate sprint and that seems to be working, but I cant find the solution to this one

show a vid
like you want to see the stuttering or what?
yes
its a normal stuttering wdym like when you try to sprint and you dont have replicated sprinting
Right but im stupid so imma need to see a visual ref of your prob too se if i can help
Cuz i might know what your talking
abt
bc i had the same prob i just wana make sure its the same
bc there are may dif kids of stuttering
exspecially for movement
So please send i vid so i can help ya out
anyone familiar with replacing the ALS mesh with quinn/manny?

Anyone know where the Edit-Pose button is?

could anyone tell me how i can create a AnimNotify that has a blueprint graph? Ive done it before but cant remember how
How do i fix this legs glitch while using control rig?
That
I`m using default manny foot ik
Hey! Not sure if this helps you in any way, but if I understand your problem correctly this should work?
https://www.youtube.com/watch?v=qSR8I9KGMgc&list=PLaYJyt7qt-kFaQ55Sy8H4ZDUDdJ6Rhm9h&index=8

Now that we have some Weapon Animations in place we add in our Aim offset to allow us to look up and down while keeping our weapon in place
If you enjoyed this episode please consider subscribing. If you want a tutorial created let me know what you need to know in the comments.
We Also Now have a discord for anyone who needs help! And to star...
I'm trying to figure out the best way to extend the lyra animation blueprint (ABP_Mannequin_Base) with my own custom movement modes (such as sliding and mantling). I've tried it a few different ways and encountered difficulties that make me wonder if anyone here has advice on how to accomplish this cleanly.
So far I have tried:
- Extending ABP_Mannequin_Base (problem: cannot modify the animation graph)
- Encapsulating ABP_Mannequin_Base via Linked Anim Graph (problem: its update ticks do not seem to run, and I can't figure out how to call them manually from the outer ABP)
- Duplicating ABP_Mannequin_Base (problem: certain configuration settings are getting dropped in the duplication process, leading to a broken anim. more time needed to hunt them down and fix them)
I think that if all else fails, I can spend the time to get (3) working. However I'm wondering if anyone with some more animation experience can provide some tips on the "right" way to go about this
(thanks in advance)
Does anyone know how to link Metahuman eyes to a camera so that they always look at it no matter where they are? Deleting the keyframes from ctrl_c_eye and individual keyframes, I'd have to manually keyframe every single movement of the actor in relation to the camera
Are there any good guides on exporting manny/quin into blender to create your own animations?
Is there a quick way to retarget animations like in UE4?
I've found a significant shortcoming with inertialization. The following situations cause teleportation/snap:
- AnimGraph locomotion transitions
StateA->StateB->StateA, unlessStateAhas fully blended out, snap [ SS #1 ] Set Sequence with Inertial Blendingif you trigger a second change prior to the first completing, snap [ SS #2 ]
And yet, Lyra is the game that tells us, this is how you're meant to make a game, and they use this technique - #1 for Pivot, and #2 for almost everything.
I don't expect a solution by posting in this channel because its an advanced topic. There are certainly easy enough ways to solve #1 such as adding a third entry state and tracking the blend times programmatically. However, I'd like to encourage any discussion that might be beneficial if anyone has thoughts on this. #2 in particular will likely require engine level changes.


Hey, does anyone know how I can rotate the animation on the right?
It's facing the wrong way.


Look at the import transform

Oooh, is this while importing the animations?
Yes, but you can change it on the asset details panel and then reimport
Just posting up a video demonstrating this issue, I had to set the rotation rate quite low to ensure the character constantly strafes when changing directions and then mash the keys to trigger multiple direction changes rapidly
Hey everyone, I'm having an hard time understanding if it's possible at all to create an animation montage asset from an editor utility widget or an asset action utility. I saw that there isn't a lot exposed so I dug a little bit in c++ but didn't find a lot, I'm not that experienced in c++ too. I'd need to create a montage from a selection of clips, add a bunch of sections, and some notifies, is it possible? Best scenario, I can do it from a widget.
I can only get curves on additive animations to manifest when they're not a constant value. If the curve goes from 0 to 100 it prints more or less as expected, but if it's a constant 100 it prints 0. Anyone got an explanation for this oddity?
Hello. How can I mirror an animation in Unreal 4? I can't seem to use Mirror data table as it's not available in UE4. The documentation speaks of other workflows to mirror animations, yet fails to point to any documenation for these other workflows. Can't find anything online either.
I am trying to use the physics animation component like shown in the example map but it's not working

I think it has something to do with my physics asset but idk
Soo what do I do when I have an idle animation and an entry animation end in different positions? Through the anim graph they would slide across the floor to the idle animation position...
First image is the last frame of the entry, second is the idle position. Observe that the end of the entry animation is through the ground


or is my only option to edit the animation directly?
Hey guys, I'm very frustrated even trying to find a tutorial that can help with this. Is it possible to retarget a mesh to be compatible with an already existing character and anim BP? I have my project built with the UE4 mannequin because I had a ton of legacy animations that were compatible. Now I want to use a mesh that has the UE5 skeleton. All tutorials I can find are for retargeting animations specifically. But what about just a mesh?
so if I were to do an animation in blender would i have to have a serperate blend file for each animation or can they all be in one blend file?
Can anyone help me, When I render a sequence, some frame is skipped, each frame take time to render but instead of render frame by frame animation keeps playing and due to this many frame get skip
There's a checkbox called "Allow Frame Stripping" in the animation sequence, you could try disabling that
Any animations I import get their Target Frame Rate locked at 60000 fps, does anyone know why that is? They still have a normal frame count, but if I create an anim montage with them it gets an insane amount of frames.
Even animations I've already imported previously that have a normal 30 fps Target Frame Rate get 60000 if I import the same fbx file again, even though the import settings look identical as far as I can tell.

My character's shooting animation is very visibly jittering. It is being played using a "Play Montage" node, and looks completely fine in the editor.
here's a video
Do any one knwo where is this option in ue5.1

has anyone had luck retarging unreal engine 5 manny lyra animations or any manny animations to ue4 skeleton mannequin
I think it has been completely removed since new ik retargeter
I just wanted to give kudos to the UE5 animation system team for the IK Retargeter. I used this tool for the first time today, and it is over-the-top awesome! It took me a while to get the hang of it, but once you learn your way around, this is an immensely efficient and productive workflow. Thank you!
I have a Modular Character where each body part is attached to an invisible Skeletal Mesh which is running the animations. With this setup, I can't use any of the VisibilityBasedAnimTickOption besides AlwaysTickPoseAndRefreshBones because the main Skeletal Mesh is always invisible. Anyone know a workaround for this so that the engine knows my character is still being rendered even when the parent mesh is invisible?
It doesn't exist. I ran into this during the megajam. What you will need to do instead is build a animation->advanced->retargeting->ikretargeter to retarget from skeleton a to skeleton b.
you will then need to set up the source and destination skeletons. Once this object is filled out, you will use it to retarget your animations to the new skeleton.
Is there a particular issue you're having? These aren't Lyra animations but it is retargeting UE5 Manny -> UE4 Mannequin during runtime so it does work quite well
It is indeed
Rocky start though, was incomplete at the release of UE5 and they trashed the old system 😄
I was very confused looking through the retargetting docs since they still reference UE4
...That is the workaround
You want it to tick the bones, because it needs to retarget from them, that's literally what the option does
What would be the best way to make a custom character use the UE manny skeleton?
IK Retargeter 😄
It's also the only way
And if the character doesn't have a skeleton yet? Is it possible to rig it so it doesn't need to be retargeted?
I want to use OnlyTickMontagesWhenNotRendered for optimization reasons. So I guess there's no way I can use anything besides AlwaysTickPoseAndRefreshBones?
I see. Export UE5 Manny as FBX, import into your animation software as a reference (using Maya terminology), and then create a skeleton for your custom character using the same naming and hierarchy and most importantly the same bone orientation
Main way would be to make sure the skeleton you build has the same bone names and the character is the same size as the character in the animation.
as long as the bone names match, the animation will still work but might be a bit off if the character is different.
Not using AlwaysTickPoseAndRefreshBones means it's not going to tick the bones if invisible, therefore all you have to retarget from is a T-Pose. You either want that or you don't. There is no optimization to be had there.
The character doesn't have to be the same size at all
The proportions can be completely different too
That's the purpose of retargeting
I think the point was not retargeting
Oh I might have misread that
In that case, yeah that's right, make the proportions exactly the same and then just weight to the same skeleton, no need to create your own at all
and even if it is off, it will still work but you will notice it doesn't look right and that is where you retarget.
Well the characters in question both have different skeletons meaning they both need to have their own seperate anims, even for common stuff which is a pain. Plus they don't have a root bone so I'm assessing my options as the skeletons will most likely need recreating. Thanks for the help.
Sounds like they won't match anyway, in which case, this is the right answer
The system has been changed a bit since UE4, you may watch this video to understand it more in depth: https://youtu.be/N7WdyAeeDrw

Hey guys, in today's video I'm going to be showing you how to use the new animation retargeting system in Unreal Engine 5. This is using the IK rigs and retargeting. The example in this video is using a Mixamo character and animation, however this will work for any character, skeleton, and animation you want to use.
Mixamo To UE5: https://youtu...
When building a skeleton to match Manny's do I need to include all the finger bones? Or just the ones the mesh would use?
The mesh in question has glove hands so would probably only really need the thumb and middle finger bones.
When I try to assign a skeleton mesh the editor just freezes . Someone know a fix?
Hi, not looking for detailed answer, just someone knowledgeable to confirm that it is possible to do and is the (more or less) correct approach. I have a top down adventure game where player moves to click location. Not very dynamic. I want to player to answer a stationary phone. I use the Manny for now. Can I handle it like this:
- I create an animation sequence using mannys control rig and phone positioning (is it possible to later „inject” the player character, which is spawned on level load, into the sequence in place of the rig?)
- After a player goes to the marker of phone interaction trigger this level sequence (is it possible to add a blend between player location at the moment of triggering and the sequence in some easy way? I’m not talking about AAA transition, just no „jump”. )
If I knew it’s possible and not a bad practice I would look into how it’s done in detail.
Does anyone here know how I would go by adding an IK rig to a skeleton in UE5?
Hey guys is there anyone here that maybe has any idea why is the left hand moving away from the gun when I crouch
If I use Enable Auto Blend Out to temporarily allow a pose to be held, what is the best way to resume the animation blueprint again afterwards?
Can anyone help with motion matching? (beginner here)
Are you using ragdoll?
ragsoll? I don't think so, not sure what you mean tho
Seems like you attached the hand bone to the gun but its still trying to pose according to the crouch anim
Try adding some key frames in the animations should do the job
move the arm a bit according to ur needs
so I'm using a separate animation for the left hand itself to match it to the gun, I took a simple idle animation and copied it and adjusted the left hand in it to match the fingers to the shape of the gun and that's applied on top of everything else just before the hand IK is applied
so techincally if the left hand IK is applied last it should overlay all previous animations
I'll try modifying crouch anim tho
I've checked the crouch anim and I'm not sure if it is causing the issue because when I compared it with standing idle animation it looks exactly the same


I'm afraid that if i modify this animation it may work for this gun but it may not work for other ones
Usually what I do is I attach the weapon to the bone and it auto adjusts itself according to the situation and bone positioning
But in your case I think its the crouch anim - could be the left hand solo anim as well
yeah so the weapon itself is attached to the weapon socket on the character's right hand and then im using Fabrik node to get the left hand to tracke the foregrip socket of the weapon


Hmm.. it could be the anim translation or the bone trying to adjust weight of the weapon
beats me and I'm only learning this stuff xDDD
Hey anyone know why Unreal 5 can't import animation clips that are only 2 frames in length
If I import 2 frame length clip, Unreal automatically adds a 3rd frame, however only the pose of the first frame seems to play, and there's no motion
been there haha
If I import a 3 frame clip, it interpolates and plays as expected
Is it for character or object?
a skeletal mesh character
mind sharing a preview or screenshot?


Did you had any import errors?
no errors
I've also tried disabling frame stripping, and other compression settings
if I increase the export frame count to 3 frames, it imports as expected with motion
Is the root motion enabled?
no
I haven't had any issues with importing other clips for this skeleton, and in fact these were working fine in UE4
Are you on ue4 or 5?
I'm on 5.1.1 currently
have u tried deleting it and restarting the engine and reimporting the animation?
No but I'm working on a team and this error is consistent across the rest of the animator's machines so I don't think it's an install issue
oh deleting the asset, lol
I'll just restart and import it new
yeah
No dice
Same result
but as I mentioned, it seems to be very consistent behavior, across multiple skeletons and clips
I'm importing FBX files, they were authored in Maya
ok
I'm doing a test on a new simple skeleton - sphere on a joint
also I'm working at 60 FPS for those clips
yeah same thing on a new skeleton
But I wanted to know why or what had changed between UE4 and 5, I actually have 2 frame clips in my project that were migrated from ue4 and they play just fine until I reimport them
so the editor is capable of playing 2 frame clips, instead it seems to be something about the way UE5 imports clip data now vs before
for sure, I suppose I'll just work around it for now, thanks for the input
no worries, I'll definitely look into it more tonight and see if I can find anything useful for you 🙂
Hey thanks, that would be appreciated! I couldn't find anything online, for now I'm just curious if it happens on other versions of UE5 and if anyone else has experienced this
Hey everyone ! Do you guys know a better retargeting workflow to go from the UE4 Manny to UE5 Manny ?
Using the provided ones in the Third Person template is not perfect, the fingers are quite fucked up.
@zenith mirage You can try the retargeter that MoCap Online created for their anims. It matches the UE5 manny better. It could work for you, give it a try. Its in the description of this video: https://www.youtube.com/watch?v=lGOV0RypRvQ
Does anyone know if I can find a Control Rig for the UE5 manny that has IK already set up? It looks like the default rig only has IK for the feet?
hey does anyone know what;s the way to get world delta seconds in a thread safe manner or it's equivalent?
Just tried it and it's exactly what I needed ! Works way better than the default retargeter. Thank you !
Glad it helped!
Turns out the default rig does have ik! I just needed to turn it on, there's a checkbox for it to switch between FK and IK.
Hey guys I'm an archviz artist looking to learn unreal and using datasmith I got an exterior building looking nice but now was to add bystanders walking and possibly cars. Can someone recommend me something to get started on adding that to my scene? I am using 5.2 .1 and it's strictly for architecture visualization needs.
can just set up a looping walking animation bp on the civs and update the position along a path, same with the cars minus the animations
hi guys, is there a way for me to use the same aim offset for different weapon animation?
i prefer not to create every single aim offset for each weapon
what would you guys recommend a good and optimize way of doing this
or do i have to create different aim offset for each weapon?
how do I override character controller velocity with root motion velocity?!?!?1
nevermind! I overrided the function in c++!
I imported an animation from Blender, but for some reason the skeleton's feet have different angle after importing? Both pictures show the same frame of animation. It's like 30 degrees is added on THE x AXIS


Has anyone worked with Control Rig Component before? I'm trying to get the local location (bone space) of the bones after the forward solve (forward solve runs 5 Basic IK for all the fingers) via postforwardsolve event in blueprint. However, the fetched values are wrong when i'm in level viewport and correct when i'm in blueprint viewport. What could be the cause of this.

Hi guys , does anyone familiar with the new motion matching in 5.3?
Can’t get the trajectory
Hello,
I am trying to implement inverse kinematics to a robot consisting of revolute and prismatic joints.
I created an blueprint actor, imported my robot and defined all the physics constraints (joints). When looking for inverse kinematics it looks like a skeleton mesh is needed. Since I don't have a skeleton mesh of my robot I am wondering if it is possible with my static meshes/ blueprint actor or if I have to add bones and get an skeleton mesh (in Blender for example).
Thanks!
Anyone know any good resources for retargeting to the UE5 Manny skeleton?
I am currently trying with MakeHuman. But I fon't mind switching over to blender.
my animation overlay doesnt change. Does anybody knows why ?


Anyone know of a nice Disney style character base for male and female?
guys, is there a way to mirror the left side of my animation to the right side so I can save some time?

I there a way to disconnect state machines after the connections were formed?

I don't put much hope in getting an answer, but is there an immediately obvious reason that an aim offset animation made of animations that work perfectly on a given mesh works not at all on the aforementioned mesh? (that is, it causes the mesh to disappear when applied)
Hey there, I'm trying rig a coiled cable in control rig. In the dcc you can see that the rig behaves the way I'd like. But in Unreal it's a little weird. I'm using SplineIK with 4 controls and the skinned joints as inputs. I've tried all manner of orientations. Does anybody know how I should be going about this?
Hey everyone, I feel like there is a simple fix to this, I have several different lights inside me scene, I want them to all turn on at the same time in sequencer, yet I can't figure out how to key frame the master material and not the individual paramaters of each object in the scene, How can I accomplish this?
Well, posting in any other channel would be a good start
#sequencer
#lighting
#ue5-general
question, im tinkering with control rig and im looking through the rig hierarchy trying to add a control to ik_hand_gun and i cannot find said bone or really any bones that dont have weights on them
Hi, I was wondering if there is a way to create a single aim offset that can be used for every animation. For example, when I have a gun in hand or when I have a grenade in hand and look up or down. Or do I need to create 2 separate aim offset files?
are the any good examples for setting up different montage slots? My current setup requires a bool to switch from the default slot to use an upper body slot which I'm pretty sure isn't a good way to set it up. I was thinking of having different slots for the arms as well and using the same method I currently use isn't going to be ideal.
Pretty sure you can play a montage by it's section or use an anim notify. You can also in the anim graph use layered blend per bone
I understand how to call them. The issue is how to handled different types of slots and how you might go about setting them up. All the info I can find only ever really shows setting up 2 which is default slot and an upper body one.
So I want to add this bool blend when the character is holding a flashlight. I would like to do this in a more global way since going into every locomotion node and adding it seems messy. Does anyone have an idea on how I can achive this?

I ended up chaching the pose and using that as the base pose. Not sure if this is a good workflow since the character will end up holding other equipment as well.

how can I simulate physics on skeletal mesh
I assign a physics asset but still gave error

Evening all. I am setting up animations for my character and I want him/her animated properly when walking or crouching backwards.
So I have my animations in, however I need to get the velocity + and -.
Currently I can only figure out how to get the forward speed.
Hello! Does anyone know why newly added virtual bones in Lyra's skeleton cannot be moved? Their transforms are just greyed out

anybody know if its harder now to import animations from Mixamo with UE5? also would you guys suggest to just put in the time to learn how to animate inside UE/Blender?
can someone help me?
https://i.gyazo.com/36a0953b83aadc19129b160df9327576.mp4
There's a new free plugin available on the Marketplace to help with mixamo retargeting. I just noticed it about an hour ago.
I keep trying to setup my own animations and this happens, has anyone seen this before? not sure where to go to troubleshoot it.


I got some help, Just got it, when I downloaded it in mixamo I didn't have "Inplace" checked
I checked that and retried and its working
This is an animation montage that I am playing in a slot called GunsAndBody. I added the slot just before the outpose in animation blueprint but the gun barrel isnt getting affected in-game
this is in game reload montage from 0:07 in the video
this is the animation blueprint
Can someone please help?
is there any good way to retarget the IKFootRoot on characters? I cant get the IK bones to line up properly with the feet
or a way to force set all of the IK bones to follow their corresponding feet?
these bones here, ive tried IK goals and setting the chain to absolute but it gives undesired results

Hey guys, I followed a tutorial to make an Animation Sequence for Quinn, and after making it I still have the Level Sequence, and the Quinn instance from it is sitting in my game world. Can I delete the level sequence now that I have completed making the animation sequence or is there something else I should do?
ue5 give 2 image that car and the landscape


why this happen?
the car is not at landscape
this is take record
Are there any issues with using inertialization to blend on root motion montages? It feels like it just ignores the blend completely when I try to enable it 😕
I was moving bones for an animation (an mannequin in a level sequence), then I hit save and the mannequin took its original form. The same thing happens with Ctrl+Z. Is there a known workaround to this?
Any1 knows hot to export animation from UE4 to 3dmax?? When i try it , it causes spine and hip to get squashed

o.O I've never had this issue when exporting from unreal to 3ds max. What version are you on? I'm currently using the latest version, but I've used versions 2019+
Anyone here know of any example projects using the new contextual animation system?
I've found the UContextualAnimUtilities class, but seeing how these methods are used would be super helpful.
Hi, I was wondering if there is a way to create a single aim offset that can be used for every animation. For example, when I have a gun in hand or when I have a grenade in hand and look up or down. Or do I need to create 2 separate aim offset files?
4.26
I'm having a lot of trouble importing an animation from Blender with root motion. There are a lot of moving parts so I'll try to describe it all as best I can, sorry for the text block:
- I don't have the unit scale set to 0.01 on my rig and animations because I made the rig before knowing about that. I've always had it at 0.25, which imports it to unreal at the size I want without issue.
- Now that I need root motion, I've had to change the skeleton a bit, basically renaming the rig itself to 'Armature' so UE ignores it and doesn't make it the root bone, then renaming my actual top level bone to 'root'.
- I also added a dummy bone under root to keep the heirarchy identical from unreal's perspective.
After these changes, I get the following import message:
Source Global Transform (1.852932,10.585715,52.869280|-16.593994,140.929319,87.066475|24.999997,25.000015,25.000009),
Converted Global Transform (0.074117,0.423429,2.114771|-16.594000,140.929321,87.066467|1.000000,1.000001,1.000000)
Imported bone transform is different from original```

So it looks like it's complaining that the source transform is 25x what it wants it to be. Is there a clean way to fix this? And why didn't it complain about this before I made all my changes to enable root motion?anyone know how to fix Linked anim layers crashing the engine when simply adding them to a state machine?
Anybody here who did some stop motion like stepped anim stuff in UE? Not with imported Animations but in animbp or control rig?
You can actually drop frames by changing the tick rate on skeletal mesh if you want to fake it 😄
TickInterval=0.1
Now maybe randomize a bit
Looks stop-motiony, but the intervals get too long
I'd also want to base the interval on other factors such as acceleration (in particular) and velocity, when he's moving the poses are a lot more extreme and we need tighter intervals

Attempting to animate either 2D or stop motion on a computer is just a vast amount of work because it means turning off interpolation and posing every frame manually (because this is what happens when you draw frames or pose in stop motion)
I tried it when recreating Guilty Gear Xrd style
Unless you absolutely need the authenticity, faking it goes a long way, it will rarely be worth the time it takes to do it by hand
when importing a character into unreal how can I get a bone diff list between what was imported and the target skeleton? the existing error message could be much more helpful :<
on export the rig has 161 bones, in the content browser it has 162 bones, and when I start the level I get the message: The Skeleton SK_Mannequin is missing bones that SkeletalMesh char1_v2 needs. They will be added now. Please save the Skeleton!
I have a newbie question I guess. I'm more of a programmer/system guy so the animation area eludes me. I did a ton of searching but I can't find an answer. I'm in the process of trying to create an animation of a samurai unsheathing his sword. I plan to use it in ue5. The question I have is do I need bones/rigging for the sword and sheathe? I'm assuming I do since I want to animate drawing, run bobbing, and sheathing. The character would need to grab the sheathe as well.
Yes, you'll want bones for that. You'll want a bone where the sheathe pivots from when held by the character (eg. drawing the weapon), same for weapon, and also where the sheathe attaches to the hip/back/whatever, and probably one for where the weapon attaches to the sheathe
And to be clear you want bones - not sockets
The amount of times a programmer sets up an equipment attachment system with sockets and then hands it to an animator asking for animations... well, lets just say, I wrote a tool that converts sockets to bones 🤣 (sockets can't be exported to 3D software)
Yup no totally get the socket thing. I spent like 4 hours scratching my head and peeling bananas. One more question on that note. I would assume if I'm attaching the sheathe to the hip I would also need a bone on the character skeleton to connect the bone from the sheathe to as well? Since the UE5 Manny doesn't come with one
Yeah
Animators will want bones anywhere that it can ever attach to, for space switching too
Ok Cool. Thanks vaei. So I'm the whole team btw. If only I had an animator
Doesn't matter. Anyone who animates, whether thats you or someone else
Even if somehow done procedurally having those targets will help
I will say animation so far is the hardest thing I've attempted
I hate animating because it requires a type of patience I don't have
I have a lot of patience for a lot of things, just not animating
Maybe its an ADHD thing. I'm actually good at it when I try, though
Either way, if you're animating, you probably want a copy of the Animator's Survival Kit next to your desk
I don't have formal training so this is all a trial and error thing which takes.... a lot of patience and failing
This thing, but its worth getting hardcover coz its the kind of thing you keep for a lifetime
Its also huge and heavy
https://www.amazon.com/Animators-Survival-Kit-Principles-Classical-dp-086547897X/dp/086547897X/

The Animator's Survival Kit: A Manual of Methods, Principles and Formulas for Classical, Computer, Games, Stop Motion and Internet Animators
Yeah that was the first thing I got a hold of. It's more the knowledge of the tools that's the hurdle at the moment
Akeytsu is very simple and free currently (the website might say otherwise until you go a bit deeper, it didn't use to be free)
Lot easier than most full 3D packages
Its a dedicated tool, very user-friendly, I've been using it for unreal for years now
Creates the control rig for you, for the most part
So far I've been using a mix of blender and cascadeur
I'd avoid Blender for animating, convoluted and prone to issues
Cascadeur is meant to be good but I haven't tried it myself yet, might for my next game
I don't know enough to give an opinion on it. I was able to make a walking anim and sprint so there's that
Great 👍
It takes years of dedication to become a good animator
Thankfully game dev uses much simpler anims for gameplay
How so? Do you mean just because our anim are shorter and broken up?
Yeah that’s what I tried first but it doesn’t look good and you already mentioned the reason and that’s to fast animations. I’m currently not having any linear animations and doing everything procedural in control rig. I think simply reducing the tickrate doesn’t do the trick. But a good idea to try variate the speed depending on things. Maybe compare transforms. I’m thinking of trying to use pose saving in a given interval and switch between them.
The fridge I animate by a timeline that is just stepped constants and that’s the look I’m aiming for as you said it’s hard.
Cute game. OK here's an idea.
Bone velocity is easy to compute. I have a footstep component (UActorComponent) that procedurally generates footsteps based on bone velocity and it works extremely well. It just goes like this:
// Update bone location
const FVector& BoneWorldLoc = MeshComponent->GetBoneLocation(F->BoneName);
if (PreviousBoneWorldLoc == FVector::ZeroVector)
{
    // No valid data from last frame
    F->PreviousBoneWorldLocation = BoneWorldLoc;
    continue;
}

// Update bone velocity
const FVector& NewVelocity = (BoneWorldLoc - PreviousBoneWorldLoc) / DeltaTime;
const FVector& ImpactVelocity = F->PreviousVelocity;
F->PreviousVelocity = NewVelocity;
F->PreviousBoneWorldLocation = BoneWorldLoc;

// On cooldown, no need to process further
if (GetWorld()->GetTimerManager().IsTimerActive(F->CooldownTimerHandle))
{
    continue;
}

const float FootSpeed = ImpactVelocity.Size();

// Insignificant movement
if (FootSpeed < F->MinBoneVelocity)
{
    continue;
}
Not all of that would be relevant to you because you're not testing when a foot was moving and then comes to a stop (i.e time to spawn a footstep). But what you can do instead is average out the velocity, especially of bones that represent extents, such as hands and feet. Higher averaged velocity = lower tick intervals.
The more non-extent bones you add, such as spine bones, the less effect the extents will actually have because its averaged between more bones with less velocity, so in theory the results would vary considerably by playing with which bones you actually test.
You could also add control for how much influence higher velocities actually have just to add some adjustability to the end result - for example, if we have 4 bones, one with 40cm/s velocity, and the rest with 10cm/s velocity, you could give a higher or lower weighting from higher velocities, so instead of (40+10+10+10)/4, the 40cm/s could be worth more towards the "average"
I think if you push this solution you might end up with a nice result, perhaps even a really nice result. It might also suck. I'd try it if I needed that kind of result.
Another different solution. Add a curve to each animation you use. This could be procedurally generated via anim modifiers or placed by hand esp. for fine tuning. A sprint animation may have a value of "1" meaning the most extreme, whereas an idle animation may be closer to 0 meaning the least extreme. Then use UAnimInstance::GetCurveValue for the blended result (this is automatic), and use that blended result to map a range for randomizing (or setting) the tick interval.
The bone velocity method if it meets your needs is the least amount of work but the anim curve method will be very easy to fine tune and give very specific directed results
Comparing bone movement from last frame was an idea in my list. I was hoping someone had already a solution 🙂
I think what I will try is save the pose and use kinda two slots and toggle between them. And I think I could compare bone velocities to determinate if I take also 2s or 3s instead of 4s
As said, currently no animation sequence at all. I calculate all movement in control rig driven by gameplay and input.
As said, currently no animation sequence at all. I calculate all movement in control rig driven by gameplay and input.
Ah right, my brain glossed over that detail 🙂
I'll be interested to see the result if you want to share when done
Will do! Thanks for all the ideas to explore!
No worries, gl 🙂
Hi, anyone know of a way to modify (scale) all curves of metahuman at once or if theres a way to create curve groups and apply on those? Right now I feel like I have to add each of them to the node.
I know its possible to script control rig construction to generate graph to modify multiple curves, but im wondering if theres a quick feature somewhere
Is that root motion? Im wondering. because if that is a character with the character movement I'm curious how you made it look like also the movement ist stepping.
Is that root motion?
I don't use any root motion because it ruins the responsiveness
Root motion matches the movement to the animation, but I do the opposite, I match the animation to the movement, you get most of the visual fidelity but none of the issues
You can see clearer in the video
I'm curious how you made it look like also the movement ist stepping
Well, as you can see in the video, it isn't. Its actually just from what I was talking about before - changing the tick interval on the mesh
ah ok. so Its really the advantage of the walk cycle being stepped 😄 I dont have that so my traversal looks smooth. thanks again
Maybe I'm not understanding you but, none of my animations are stepped, at all
can anyone tell me how do i add Birds in my scene?

I mean when you lower the tick rate it looks stepped because you have linear animations that get only shown every other frame. As I do not have animation sequneces at all and its a robot driving with a bit oh head and body movement it doesnt do the same trick as the character is moved through the world smooth. for me to get that effect I either also need a linar animation or I need to do some custom logic to move the character (which I might do anyhow, as I dont need 95% of the stuff in the character mover)
Oh I get you. Yeah even his translation is smooth. Its just the change in his pose that isn't
Control rig should have the same effect applied tho, its still just modifying the pose like anims do
Yeah and its not immidiatly visible the capsule movement is smooth. I dont think I can get away with that. But its ok. its not too comlpicated. I can do some stepped movement.
I wonder if adding mesh location interpolation would work with the tick interval
It does it seems. as its running in the animgraph. its just not enough to look good.
the chacater mover is not very happy if you play with the tick rate in character or the component 😄
Indeed
CMC uses subticks
I think its easier to write something own in my case.
I think so too, provided its a singleplayer only game
I'm also wondering if the effect wouldnt be stronger if all things are synced 😄
even multiplyer. not so much to replicate here.
hey guys Im running into a serious issue with als refactored, i asked there discored and github community but didnt receive any helpfull feedback on solving it
I really need help

this is the pose i have, but when using it in the overlays as a sequence evaluator, it bugs out when trying to blend into the run or walk state
any help is appreciated! pls @ me

this is how im implementing it into the overlay anim blueprint
I figured out how to make it more smooth, but now it snaps when changing pose
thats another issue im trying to fix
and its either in implementing or the pose itself
hello guys, im currently trying to create aim offset for different types of weapon, i started with the 2d aim offset, but thinking about it, i have to make aim offset for each of the weapons.
so i decided to change the up and down aiming using transform modifying bone so that i can move each spine.
but the problem is, the character look up and down way faster than the camera
its not looking directly at the center
anyone know how to fix this?
this is my bp setup
should i stick with aim offset?
Anyone know?
Apologies if this is a newbie question, but I'm trying to get a top down character to play a turn in place animation when the player is rotating the left thumb stick on the game pad for looking in a direction.
How would I go about finding whether the tumbstick is being rotated right or left?
unfortunately we're having the same problem, and no one seems to have the answer 😦
How does exporting Morph Target animation data work?
Say you have an animation they do a wave (bone animation) and smile (morph target data), will they be part of the same animation track?
You need to make sure that the morph targets are set to export from your modeling software of choice (in my case 3DStudioMax) and then make sure that import morph targets are checked on your import options.
if imported correctly, they will show up in your skeletal mesh
Ah, but will make that in the Animation Sequences, the Morph targets will be as the ywere in the animation they were exported?
they will be represented as curves in the animation sequence.
you should be able to add or remove them in the curves section
Oh so they will just be treated as a normal Animation Curve?
I know that i can animate in a sequencer using the controls of a control rig.
I wonder if there is a way to do animation in sequencer with ik rig’s solver.Anybody know??
perhaps you could give my method a try
https://www.youtube.com/watch?v=oAzF3GYHVf8&t=324s
instead of using aim offset, u use the bone to aim up and down
In this tutorial, which is Part 2 of my How To Make A True First-Person Shooter series, I'll show you how to retarget some animations from the Third-Person Template onto your metahuman's skeleton, create an animation blueprint, and use the camera/mouse input to rotate your character's spine bones to look up and down.
Part 1: https://youtu.be/6A...
but unfortunately, you'll be having the same problem as mine
but, if u manage to get it to work, sharing it with me will be much appreciated
this is the best i can do to help
Thanks, I can take a look at that and see. Is it possible that your issue is something with the blend times?
no not really
take a look at the video
the body moves faster than the camera aiming direction
im still new with unreal engine, i dont have the knowledge to tweak it
but i hope you'll have a better luck
it uses the bone spine itself to look up and down rather than the 1d
again, if you do find a way, sharing it will be much appreciated
😄
Will do, thanks!
Hey Guys,
New here, wanted to post a quick question about whether or not I can switch between blend spaces in the anim_graph or is it better to create a full animation locomation instead, I've tried two ways; attached some screenshots.
Thanks in advance.


can someone explain what the "Aim Math" node is doing?
im trying to have the feet of a character match the normal direction of the surface they are on and im seeing this node pop up in others' solutions
and im not sure why that works but doing this method results in a Z offset on the uphill foot


the angles look correct but something is moving the foot location in Z
I'm trying to setup a simple AnimNotify but I'm having problems with getting it to trigger
Does someone know how to choose the color of the transition rules?

how can i find out if a virtual bone is being used somewhere?
is there a way to have multiple animation windows open at once? for example Im making blendspaces but I want to see the animation before dragging it into the blendspace. each time i click a new anim it overrides the blend space window. can this be done?
Right click -> open in new window

Can some one help me understand how to make the transition for the equip weapon. All of my input stuff is in character BP and my animation stuff is in animation blueprint. can't get combat mode boolean into animation blueprint, idk what to do 😦


you can try use interpolation for aim offset value, or use another method for getting this value, you can use delta between character rotation and control rotation (probably). And calculate it inside ABP, not character
you can use many methods for getting "stuff" from character in ABP, but you also can use anim montages and anim notifies for equip (if it's not multiplayer game). That more friendly for unreal newbies
Thank you, Ill look into that. I probably sound dumb, my apologies.
This has been a bit of a reocurring situation up here, getting replys that arent much help and then i'll just spend a couple hours figuring it out myself. I think I'll just dip from here, I always just look stupid and get nowhere doing it.
I would like to formally apologize for being an ignorant tw*t. I'm just drunk and irritated. Your advice was actually well received and implemented. I could edit the post so no one could see me be an uptight jackwad, but I'll stand on it and accept it as my punishment for being one. Thank you for taking time out of YOUR day to help someone else. IDK what I was thinking when I said what I said, and I hope you forgive me.
im still new to unreal engine. can you guide me through the steps?
explain it as best as you can
this anim bp is settup for upperbody slot when i try putting default or full body slot and make cache it dont work do anyone know how to get the full body montage to work in this

Do you mean animation sequence, or skeletal animation? If the latter: Animation Blueprints give you detailed control over skeletal animation.
Can someone please help me out with the equip/unequip problem I was having? I have tried so many ways and watched several videos for the past 12 hours.
Im half tempted to pay someone to help -_-
Sorry, I don't want write a big guide here. You can try something else from youtube. Type "procedural aim offset"
thank you! atleast i have a place to start 😄
ohh btw, comparing between the procedural or individual aim offset for each weapon, which one is much more optimize or less resource intensive?
do you happen to know?
the one way for us to help you is do it for yourself. I don't know what are you really need. You have many ways to equip sword
What is individual? You mean animations like in ALSv4?
i mean making individual aim offset 1d for every type of my weapon
vs making the method u recommend
Cool cool
The blend space can take a less resources but I prefer procedural way. Like you did but with a little difference. Use procedural way you can easy add a new one weapon. And I really don't think that you need worry about optimization of aim offset
alright2, i think for now im gonna use the procedural one, just for learning it, havent heard of that one
thanks for your help man
for pointing the right direction
much appreciated
I set notifies for my draw and sheath animations to be triggered in my character bp. Im having trouble figuring out how to set the draw and sheath animation to where it switches sockets from the waist to the hand
@tranquil flicker I don't know your level but It can be a little hard make something procedural for newbie without a good tutorial. I used his method in my game but It was 2 years ago and I think probably that you can find a better tutorial about it
https://www.youtube.com/watch?v=xsRIttjRvos
this is where Im at with it now

well im not afraid to say it, i suck, for the moment, but not completely new to this if that makes sense
but thanks again, for the resource my friend 😄
ill be checking it out
ayy, man, check this out, maybe u can use this
Awesome, I will. I have been dealing with a GAS issue lately. But once I fix it, I will start taking a look at these. Thanks for sharing!
Figured it out, the play montages just needed to be linked from the on notify node.
General beginner question here, I've made an animation where my character swings a sword and positions the legs to appear like a "swinging stance", all works fine except I noticed the feet, having been moved, are now slightly levitating, and on ramps the back foot will be completely in the air. How do I fix this? I assume it has to do with the foot IK
Does anyone here have a 8 way moving character set up with start/stop animations rather than just all constants?
Does someone know how to properly use linked anim layers?
As you can see the orange line is not showing as it is in ALS

ALS:

has anyone created a blueprint with the "Goblin warrior. Modular" package from the July free for the month? I added a simple blend space which includes idling->walk->run and he is dropping his sword in a loop for some reason. When I use any of the single animations on the sword it works, it is only when I am using them as a blend space this happens.
why cant something like this work?
What do you guys use to create your own animations?
Can someone help me understand how this animation works in this video https://youtu.be/h6koRh1v3nU?t=10. When the cliff/rocks get hit the have a hit animation. I'm not sure what even to call it to search for tutorials on how it works anything like that. Any details would be greatly appreciated!
We are proud to present one of the first titles for Ghost Ship Publishing: Deep Rock Galactic: Survivor
Deep Rock Galactic: Survivor is a single player survivor-like auto-shooter. Wield the full arsenal of Deep Rock Galactic, take on hordes of lethal aliens, mine riches, and unlock powerful upgrades.
It's one dwarf against all of Planet Hoxxe...
So turns out that since I was using Layered Blend Per Bone, any animation like throwing a grenade that I had set the montage to UpperBody slot, pitched mostly fine. But if it's really bad, I will have to try this other method. As of right now, it actually works for what I need it for right now
have you watched the blueprint communication tutorial? there are many ways to accomplish this communication, they might be using Get Overlapping Actors and filtering the rock class and then the rock class is getting the connected rocks and executing an animation
so better quesiton, how is that animation done. I've go other overlap events already working,, just unsure of how to create a animation like this
the only animation I'm seeing is a scaling and z down/up one, and then there's a (assuming) chaos physics element
you could do that with a timeline
okay I'll look more into timelines. Thanks

oh this is awesome! thank you very much
Remember that checkbox added in UE4.almostnothing that did nothing more than spit out a not implemented warning?
As of UE5.1 they finally implemented it, I had given up checking


hello! im here wondering the best practice for multiple character states and blend shapes. I just got my BS running with a idle, walking, and running animations, and a Jump using my state machine. Im wondering how I should go about adding a crouching, blocking, and crouch blocking state to my character? I have animations for everything.
currently working on getting my inputs setup, which is its own chalenge
I am trying to make a grappling gun animation, however I am unsure how to set it up thirdperson. Do I A.) make several animations covering different angles and throw them into a directional blendspace or B.) Use procedural animation and have it based on the direct of the crosshair. ie: Character shoots top right, arm flies top right? This would specifically be just for the "shoot animation"
DO any one know how to play full body montages in this setup as when i try to play montage my legs stay thier and upper body animation blend even when im standing

Is there a way to temporarily toggle the manipulator to world space when animating a control rig in the sequencer?
Hi does anybody know why my root motion animations don't work? I've imported them and ive done the enable root motion things, I've done the root motion from everything in the animation blueprint, and these animations still dont work properly. I did make the animations myself though so that could be the problem, but I dont know what I would have done wrong
nvm I got that fixed
but
now when I play one of the animations with the animbp with rootmotion sutffs it gets superspeed lol
Do anyone come across invisible collisions by using default "SK_Mannequin" and default control rig (CR_Mannequin_BasicFootIK)? I did just create flat level and when I did move around character start detecting unknown objects that even do not have collisions and are not visible on the map at all. Its like a magic 🤔

You will need to actually show your code/logic
It might be sweeping the character capsule/mesh itself but no one can do anything other than guess
There is no engine bug nor black magic happening here
it is weird since it it basic UE5.2.1 ThirdPerson Template, with literally new flat "Basic" level. What I did is just swap skeletal mesh. All the rest is just Template project.
They use a blendspace for additive animations for leaning side to side
The other ones are not used as the reference viewer is clearly showing you, and the other ones are not leans either, they're locomotion but Lyra uses orientation warping to procedurally blend between cardinal animations instead
sound very complicated imma need to research on what is even orientation warping
thank you @smoky shell
bump, stuck on this still
Anyone have experience with blending from a root motion montage into a falling state? I basically have an animation where a character jumps over a railing, but when it starts to blend out, my blend logic is using the movement component's state - which is flying, so it has no idea it should be falling, and it ends up blending to a grounded state before starting to fall, which looks.. pretty bad.
Like you said yourself, you need to set up foot IK 😛
you can read third person foot IK, i feel like their are quite easy to understand even though at first glance they may look very complicated
but make sure to keep an eye for other things as well because the problem may not be in foot IK
I'm using a mixamo animation and added it to an anim montage. The animation is fine when I view the sequence however in game the legs are weird as shown in video
you should go to the animation and move the legs
How so?
Yeah that's why I'm confused aswell lol
Animation itself is fine but when using the montage it seems to be problematic
have you tried animation graph

Hey ! I'm working on a locomotion showcase on unreal with the "Urban Warrior" rig on maya. But I would like to do some clothes simulation with the rig. Is there a specific process for do some clothes simulation in unreal with a custom rig (the cloath has bones and is skinned)

Have you seen any tutorials?
yeah but didn't find one with clothes rigged like I have. Always simulation from nothing
Ohhh in that case I can’t help you out
yo this accidental video/anim style looks dope
it reminds me one of those old play-motion clay films
Well, it wasn't accidental, that's what I was mimicking 😄
then its very cool! gj :D
Today I found a simple way to do stop motion like animation with a control rig that’s also doing in between frames if the movement would be too fast and it would skip frames. Wanted to share in case anybody is interested.

Here the result with 16 frames https://x.com/andidev_/status/1708940933075489069?s=61
I can adjust the frames from outside. As I will have several smaller systems to make it look stop motion.

Oh nice, control rig continues to impress (when it isn't making me angry)
Hey guys, any tips on how I can improve performance on lets say 100 skeletal meshes.
I want there to be some kind of enemy group and testing shows me that the frame rate drops significantly because of the load the skeletal mesh brings.
Whats your solutions? The enemies should be animated thats why skeletal mesh. I know there is the possibility to use vertex shader, is that simple?
I found this resource, im checking it right now https://dev.epicgames.com/community/learning/tutorials/daE9/unreal-engine-baking-out-vertex-animation-in-editor-with-animtotexture

Epic Developer Community
This is an overview and introduction to AnimToTexture, a plugin that can render costly Skeletal Mesh animations into hyper optimized Static Mesh animati...
Whatever solution may exist depends considerably on what you're actually trying to achieve specifically. But you're probably in the wrong channel. This channel rarely has experienced devs, its almost always extreme beginner questions.
Are you trying to make a 100 player battle royale
Or 100 birds way in the background
Or 100 NPCs wandering around
Are they inanimate objects (eg. a flag) or human/creature
Etc
for blender how do i make it so meshes are disabled in my animation when ported to unreal?
just dont select the mesh when you export? or if you are importing the fbx that already has a mesh then you just deselect the import mesh and skeleton option when importing and just select the target skeleton
oh ok. Idk then
Also I have a problem with my root motion animations (UE 5.1). Basically if I set the speed to anything above 0 in the animation blueprint the character just gets super speed, like so fast it breaks the editor and the character falls through the map etc. Does anybody know how to fix this?
You're asking people to guess which is a waste of time
You need to post everything so they can see where its setup wrong
What do you guys think about advance locomotion? It does have everything i need, and also seem better than Lyra?
i want to hear your opinition about AL vs Lyra
Lyra is the foundation of modern locomotion frameworks. ALS is awful and belongs in a dumpster.
But Lyra is exactly that, a foundation, you'll need to build the features you require on top of it
Lyra is overengineered too, not like it's perfect
Lyra certainly has flaws, but over-engineering is not one of them
The techniques they use there are the new standard
hey ur the guy answer my question yesterday. Did that part of lyra i was questioning over-engineered?
I mean, why didn't they just make 3 blendspace?
I don't remember your question, can you link/reply to it
.
there
You have:
- One blendspace, used as additive leaning for jogging, this is standard and not over-engineered at all, the only criticism I have here is that the leans should be in the layer state graph not the core graph (i.e its under engineered)
- Two blendspaces that the system doesn't even use
So.. nope
ok i'll just keep ur take in mind as im going forward
prob check out to see whats inside ALS too. Knowing is still better than not
Anyway would be appreciated if i can hear one more person's opinion (Yeah i know, im very greedy xd)
this is the issue
it just zooms away at a billion miles an hour
when the actual root motion animation itself is like 2-3 m/s
same with the sprint animation which is only 55 kmh but it does the same thing
so uh
yea
if anyone knows how to fix this please let me knw
also if u need info from blender please ask if thats what need to help me
convert mkv into mp4 so people can watch it in discord
there should be a bunch of website do that for free
ok
You need to learn how to get help
There's nothing that I asked for here at all
You didn’t ask for anything specific
I mean you can see the stuff in the detail panels and stuff
I said "You need to post everything so they can see where its setup wrong"
Ya and I posted everything I figured was relevant
So you dragged and dropped that animation into the editor and hit play in editor and it did that?
No
Right, so post what you did
I have a blendspace that is plugged into output in the animation blueprint. And if the speed value of the blendspace goes higher that 0 then it just zooms forward at the speed of light
Can you just post it?
No one will help you if you don't provide information and make it difficult to get it
Just showing off my control rig based slope warping
Is it just me, or does LayeredBlendPerBone breaks Transform(Modify)Bone?
I have a full body idle animation which I blend in the clavicles with an arms-only animation to hold an item. When I try to use Transform(Modify)Bone in bone space for an aim-down-sights functionality, the resulting transform is just wrong
Do I just have to make a full body item idle animation? I guess that would be the Lyra way of doing things, it's just that I don't have a background in animation so I'm trying to take an easier way
Post screenshots of your setup
There is some possibility that it could, with the reasoning that to get the component space transform of a bone we accumulate a bone by it's parent bone transform, and continuing until all ascendants are accumulated including the root bone, so possibly with the layered blend per bone its not blending in the entire ancestry.
But probably its an issue with the setup. But need to see it.
I'll draw a quick diagram to help understand, one moment
Thanks! Getting you some screenshots
So if you use a layered blend per bone that removes the root and bone1, maybe (and its a strong maybe), its not multiplying them correctly
But I've never tested this
And there will be other, probably better ways, depending on your setup

Locomotion and MainStates are regular stuff - 1d blendspace movement + orientation warping, jump, etc.
You can see the settings for the layered blend per bone, which includes the clavicles and VB pov_root.
In my setup I use three virtual bones - pov_root which is a child of hand_r and targets hand_r, pov_hand_r which is a child of pov_root and targets hand_r, and pov_hand_l which is a child of pov_hand_r and targets hand_l.
I use virtual bones since this is what I saw in a marketplace asset after absolutely losing my mind with IK just not working

If you're wondering about the weird pose - he's holding a camera
This is the thing that doesn't work - the function calculates a socket transform (on the item skeletal mesh) relative to the hand_r bone, and moves the pov_root virtual bone in bone space to that transform. Two things are wrong with this, video will soon follow:
- The position is just incorrect. If I do the same thing in component space (calculating relative to the root bone of course) then it does work - but leads to other, weirder, problems down the line.
- The transform is completely stationary - which is obviously wrong because the idle animation should move it a bit.

It seems like you're using a pretty convoluted setup
If you just want pose adjustments then do this


excuse the cluster of bones - I tried marking the correct one with my cursor
You can do this and apply additive animations too
It's a first person game, it needs to line up with the camera
That's why I want to calculate it
Share the code from this function
And share the details panel for the transform modify bone
This isn't the appropriate channel
#hire-a-freelancer
#rules too while you're at it
Discord doesn't accept mkv, use mp4 instead
I think it would be better if you simply detail what you're trying to achieve and coming up with a solution, than trying to modify some frankenstein solution taken from a marketplace asset
Also you keep saying camera, but you've also said he's holding a camera, so you need to distinguish between the camera he's holding and the game camera
My game is centered around a photographer, who needs to be able to take photos with his hand-held camera.
It's a first person game, so his arms are parented to the game camera.
When taking photos, I want the photographer to look down the viewfinder of his hand-held camera. This means that the photographer needs to place his hand-held camera, specifically its viewfinder socket, in front of the game camera.
Just like you would do with a gun in a first person shooter.
Here's the video in mp4
The solution I'm using is to keep a reference for the position of the hands relative to the viewfinder socket, and place that in front of the game camera. Then, when aiming, I use a TwoBoneIK node for each hand, to move them to their references. This should make the viewfinder socket on the hand-held camera line up with the game camera
This all works perfectly fine, except when using a layered blend per bone node
Well, it might work if the player isn't moving the camera much
What you really want to do is parent the held camera under the game camera
Then use IK to place the hands on the held camera
When not looking down the viewfinder you'll want to change the hierarchy so that the camera is back under the bones
Look at how games attach the FPS weapon to FPS hands
And do the exact same thing but with the camera instead of a gun scope
Unfortunately the camera has to be an actor
The FPS gun is just a component IIRC
Would it matter?
You can still attach an actor to your character's capsule/camera/whatever
And attach the arms to that via IK
So another 2 sockets on the hand-held camera skeletal mesh for the hands, another relative transform for aiming, and extra blueprint code
Or just go the Lyra way and have full-body animations per-item
You literally just add sockets to the camera for the hands
And use IK to put them there
And then attach the camera to your character
And change where the camera is attached to when aiming or not aiming
Yeah
Interesting
Is there a way to combine my idle animation and my holding-camera animation in sequencer, and just avoiding that?
Like bake the output of the layered blend per bone into a separate animation sequence
Is there a reason you don't just use additives?
That's all this is, additives
#1158380979925307492 message
Like I said, my background isn't animation 😉 I'll check additives out. Thanks!
Additive animations is basically "take the difference between the poses and slap that difference on top of the current pose"
So if you have an idle animation, but you make a version where his head is tilted up to the sky, and make that an additive, then the difference between poses is the head rotation
So by applying that additive on top of anything else, you're applying that difference in head rotation to any other pose
That's nice
In your example, if the version with the head tilted up is just one frame, it would work the same way, right?
Yeah its very common to have single frame only for additives
My pointing system is actually highly irregular for having actual animation range
Interesting
I tried setting it up like the landing animation and it's not doing anything
I have no idea what that means
I'm not sure if you were waiting for a response or not 😄
😜
I set my camera hold pose as an additive animation in the same way that the default land animation is setup - with the ref frame index being the last one

and used it with an apply additive node

the result is just the regular idle animation
Randomly messing around with the settings also got me nowhere
Show the details on your MM_Camera_Idle_Pose
These are the additive settings for it. What else do you want to see?
It's a one-frame animation that looks like this

This is what's on the node


Yeah you need to change it to use the idle animation
BasePoseType -> Selected animation frame
Assign the idle (not the camera one, the normal one)
As mentioned, additive animations subtract one pose from another then apply them on top of another, you're subtracting it from itself, therefore 1-1=0 and 0+anything=same result
Does anyone know how to go about having a 3rd person character have animations for turning to face the direction they are moving? (Kinda like Hogwarts legacy as a recent example)
hello ppl, good (whatever time of day 😅 )
I'm trying to get animation constraints to work properly, but always failing. Either the editor crashes, or it only ever works the "first time" ... If I save, or close/open the sequence, the constraints "almost" work, but they never calculate properly.
Is this expected, is it a loosing battle, or you guys can make it work consistently, and I should keep looking for a solution?
Thank you so much in advance 🙂 👍
I ended up going the Lyra way with full body animations per item with linked layers. It looks like you were right with your first idea - the layered blend per bone node just messes up bone space calculations
Thanks for your help!
Yep Lyra is the modern standard 👍
Hello. I'm using 5.2 and learning to create control rigs. I'm getting a compile error on Parent Constraints yet Compiler Results says that it compiled successfully (as included image). IF i mouse over the Red Error! it tells me a bunch of Array Indexes are out of bounds. Disconnecting the Get Children Node from FK Chain, the Red Error vanishes. Im unsure where I am making the error - the tutorial i am following doesn't have the issue and I'm pretty sure I haven't missed any steps.
Any suggestions?

Hello, I'm using UE5.2 to make an IK character which has foot tracing and head/torso camera aiming, but I'm running into a wall with the head/torso camera aim, cause for a reason unknown to me, it forcibly applies the translation of my root bone to the chest bone, which is not supposed to happen. I've dissected the issue down to this 1 full body IK node. (My bones are named a bit weird cause we were instructed to use Mixamo rigs, so ignore that it's named Spine2).
I've already gone over all the variables, reference points, sets, etc, everything seems to work fine (I can see the values change within the graph when playtesting). It's just this 1 node malfunctioning.
I'm not sure what else I need to show in order for this problem to be clarified, so if someone wants to take a crack at it just tell me what else you want to see


I'm using an Euler formula for the Scale - Get Transform multiplications.
It's also worth noting I was following a PDF created by one of my lecturers. My blueprint is 1-to-1 with his, but for me, it breaks.
Hello! Based on this tutorial, I wanted to make a rotation extraction modifier (time-stamped video where the guy shows the finished function) to create locomotion for my animations (I use my own model).
But for some reason, when I add a modifier to my animation, the curve does not appear. Pure horizontal line. I've been looking for a solution to the problem for the 3rd day, I can't fix it. Maybe someone here can help 👉👈


Patreon ▶ https://www.patreon.com/UE4tuts
Facebook ▶ https://www.facebook.com/UE4Tuts
Contact ▶ ue4tuts4you@gmail.com
In this new tutorial series we'll setup character Locomotion System from completely Scratch. That will include Walking|Running|Jumping and Also Crouching. We'll use RotationMatching|DistanceMatching for proper location system...
hey guys ive been using the animation blueprint template and ive come across some limitations while using it
ive searched online but found nothing about it, where should i make this kind of reports?
Is there anyway to get my skeleton refernce to be standing up straight ? without making a new one ? The ref is greyed out

Tried control rigs for dynamic animation in early access, are they mature now and worth using? for example, i need to make a character's head constantly follow the player. Seemed like a control rig use case, or is it better to use standard animation blueprint for this?
Hello. How does one use additive blendspaces with anim montages in Unreal 4.27? In the anim montage there is this setting indicating that there seems to be some form of additive animation blending. However, can't find anything on the subject. What's up with this?

In UE 5 the additive settings section of the anim montages has all sorts of settings that allow additive animation blending. My guess is UE 4.27 doesn't support it yet? Makes me wonder why there there is an additive settings sub menu though. 🤔
Hello 🙂
I would like to create a cinematic of a Dirt Bike + Rider.
I have setup the Dirtbike with the help of Marco Ghislanzoni's Tutorial and it works. It drives around, and the steering Handlebars turns as well.
Now I have also setup a Character Rig for a character that got rigged in Mixamo.
What would be a good approach to animating this in a effecient way?
My idea is to record the Bike with Take Recorder, driving around and jumping etc. Then attach the Character to the Bike BP, and animate it with the control rig in Sequencer, BUT, i would also like the hands to stick to the steering wheel so i don't have to animate every turn by hand.
How can I set bones to stick to sockets inside of Sequencer? is this possible?
Your animation probably has no root motion
You could look into the physics control component
Its in content samples, just don't make it in 5.1, 5.2 or later
One of the examples is a character on a vehicle, you'll understand how it could be applied once you see it
Its one major downfall is it can't simulate either in component space or a space relative to a parent, only ever in world space, which severely limits its applications
I'm not sure why but Epic have a track record of doing this, I think they fail to see the use-cases themselves
Ideally with a dirt bike you'd simulate from a space relative to the bike, because you aren't holding on to the bars when riding a motorcycle, you're moving with it, within the air bubble it creates. Which means you would have to make the character hold on. But for a lot of dirt bike riding you kind of do more so than a sport bike on the road for example.
All you'd need is an animation (single pose) of the character seated on the bike then attach the character to the bike via the physics control component as per content examples. If that works OK, then you'd maybe add a few states such as sitting/standing on the bike, make the character shuffle forward on uphills if there's a plank seat, and counterbalance the bike esp. during lower speed turns. The problem is that you'd have to make the character hold on with their hands which you never do in real life, its a death sentence because it prevents the front-end from correcting itself esp. laterally (which is all the time on dirt) and transfers the feedback from the front-end through your body and into the rest of the bike. You'll just have to see how it looks. It could look great.
hey I found a bug
when I bake animation sequence to control rig, it will be rotate like the picture
the rotated bone is ik_hand_gun


Animation question: I'm working on animating a character model I made and rigged in Blender and I brought in the animated model into UE5. The issue is that I just realized earlier that I animated the character in 24 fps instead of 60 fps.
I don't know if this is a huge mistake on my end or if it doesn't matter. On Blender, I scaled the keyframes to the amount of frames I would need for a 6 second animation in 60 fps, exported it, and then imported it into Unreal and I can't notice any obvious difference in the animation.
How bad did I mess up? The character on the left is 24 fps and the one of the right is 60 fps. The work around I did in Blender could do the trick, but one thing that someone pointed out to me is that if I scale it to the right amount of frames for a 60 fps animation and I previously made some changes in the graphic editor, it could mess up what I already set up. I'm not sure how it would be if I just adjust the graph editor after the scale change.
Again, I haven't noticed a lot of differences, but after a while, they will go out of sync. I don't know if that's an indication of anything.
Why do you need 60fps
I figured that if I'm animating a character for an engine like Unreal, I should've been animating in 60 fps. Isn't that what it's rendering at or am I way off base?
If you mean a bone for rotating the torso or a bone that rotates the entire model - I have all that
in the animation I only moved the torso. The rig has a controller that moves the entire model. But for some reason the animation is not saved from it. Most likely because the position of the bones in space is not taken into account by this controller and I don’t know why
We can't see the FPS difference in a video, because your screen capture will not be in sync with unreal's render time
But generally animations in unreal are somewhat standardized to 30FPS
Some marketplace authors offer 60FPS and I'm not sure most people can see the difference at all, certainly gamers can't
Haven't tried 24FPS
Its root motion extraction, which means the root bone needs to have the rotation
The fact you're getting 0 rotation means it doesn't have any
60fps might look smoother but unreal does not have a set fps for rendering it depends on performance.
60 fps just means that you have more frames to move things smoother , but I'd you're happy with the animation just go with 25
The difference is your timelines ability to have more input over 1 second.
And if it for some reason finish the animation faster than 6sexonds , closer to 3, just change the settings to use real time animation then it inherrits the time you had in any other program
I just checked playing the level with the fps and it's running between 34-36 fps. And again, the one on the left is in 24 fps and it's identical to the 60 fps one on the right. It may not even matter and I might be overreacting.
It probably doesn't matter
30FPS is good enough for almost every game and 24 isn't a whole lot different
I see now. I think I'm overreacting then. Me rendering the character in Unreal is really just to showcase the model itself. I'm not actually using it for a game.
Thank you for the tips! I'll keep that in mind if I run into an issue like that.
Then it doesn't even matter in the least
Yeah it does not make a difference.. nothing funky will happen BCS you use 25fps. It's just the interpolation between keyframes that will be not as smooth... and that was already a "problem" in blender if it ever was. If you're happy with the animation, and it works, go for it
Perfect, thank you so much, guys!
Np
hello, i’m very new to unreal engine and i’m trying to create a character to be somewhat of an npc as you can see in the picture i have 3 animation sequence idle, wave, talk i want the talk animation sequence to have the flipbook mouth material (animated talking mouth) that i have create as a default rather than a smile mouth. is it possible to set diffrent material in diffrent animation sequence?


Thanks for the reply, i searched the Physics Control Component demo and it does look very interesting! But maybe a bit too advanced for me atm 😔 but i will definitly keep an eye out if someone makes a tutorial for it. For now i think i'll try it with Poses and just old skool hand animate everything. I even spend a whole day following this Tutorial Series for a MTB https://www.youtube.com/watch?v=6M5BmMnXH8g, but in the end it completely messed up my Control Rig, and in the Take Recorder everything was a mess. so I just reverted everything back to just my Control rig and the Bike.

Project files : https://www.patreon.com/posts/52284736
This is the third part of unreal engine 5 bicycle riding system with full body IK character tutorial series. Here I am going to implement a bicycle riding system based on chaos advanced vehicle system. Bicycle will have a skeletal all mesh with all functioning turning handles, pedals, wheels...
Bumping this
i just can't figure it out where do they put the actual locomotion animation
anyone had this snapping issue and know how to fix it?
i am really struggeling to figure this out right now, so i thought i'd ask here;
i have a vault-state in my Animation State Mashine. i need to play a blend-in animation before, and a blend out animation afterwards.
how would i make the active state switch from the start-vault state to the vaulting state, after startVault's animation has finished.

Im importing an animated camera with Datasmith but need to move the camera but keep the animations, does anyone know how I do this?
Hi,
So I am Using the UE4 mannequin rig for my character model I imported,but when I switch to my character the arms are wider apart from each other and the feet are standing wrong, as you can see in the images I have added.
I tried manually posing the bones, but that will be a lot of work doing that with all the animations I have.
Is there a way to apply it on all the animations or is there another workaround to get a better result?
I used ActorCore AccuRIG to rig my character.


Im looking at this animation pack. It says IK not supported.

and an answer

i havent started working with IK at all so i dont really know what this means in practice. Could someon elaborate?
Hi, this is a question more for Blender. I'm animating arms and weapons, I want to bind the weapon to the right arm using a modifier for the root bone of the weapon - Child Of, but this modifier, so to speak, only visually binds the weapon, but the coordinates of all weapon bones will always remain the same as they were when the Child Of modifier was added. And the keyframes for the weapon bones are not added either, and this is the main problem. Is it possible to somehow apply the modifier Child Of, so that in all the necessary frames appeared frames and weapons animated really, not visually. Or animation should be done in some other way? Just select 2 regs: weapons and hands and just manually move the necessary bones? That way everything will work, but it's very inconvenient

Hi guys. This is probably a simple issue but I was wondering how I'd go about playing an animation on the character when he picks up gun. So I have the gun attach logic all done but he just holds it in his hand. How would I transition to a walk forward iron sights animation once he has the gun in hand?
switch animation on your own custom logic for armed/unarmed
Hi. So upon attach weapon where would I be playing the logic in the graph?
are you using an animation blueprint?
Yes. Blueprints. I have set up everything up to this point. Attach weapon detach weapon attach to socket r etc. Now I want him to not just pick it up. But to move into a new animation once he has attached the gun
Anyone who can elaborate on this ?
Hey i tried to use meta human but the arms are not straight how can i fix that?


How does one check to see if a player copies moves correctly. eg I create an animation and want want player to do same moves. Is there a way to do this and possibly score it.
Intended for full body vr
Did unreal every explain why they switched the animation retargeting system?
hello can anyone help me with some basic animation blending
I am just starting to learn to it and have a few question
Change blend to source on ik retargeter for the ik hand goals
stand up straight, see if you'r arms are straight.
i don't know how to "fix" this issue, just noting that, while just standing, this is reaslistic.
Can anyone help with motion matching?