#animation
1 messages · Page 22 of 1
is the top bone in the skeleton your trying to retarget from called root
r u sure the animation when imported is set up correctly and did u animate its feet
my current skeleton is armature > root > rest of the bones, new skeleton is just root > rest of the bones
Yeah I'll show you give me a sec
go to where u made your model like in blender
or maya depends
yea i use blender
i already have the new skeleton
im just trying to retarget old animations i have
yes but u might need to have the same root bone
its always a good practice naming your armature "root"
how do i do this
Yeah they were imported properly
did you make it a montage or change ABP settings?
he made a mntage
Yeah I made it a montage
i think thats the prob
maybe
cuz u can just use the animation asset
with a anim bp
to control the dif animation u have
or something else thats locking our feet in place
Ahh I see
ABP is set to use root motion only for anim montages by default
how do i do this
u can right click on create one
IK retargeter
then make a IK rig
even if i dont have IK?
yes these assets allow u to copy animations from skeleton A to B
ok
did u ever get it to work
yeah i thought IK rig was suppose to be if your skeleton has IK or something so i skipped over it before but now im on the right track
alright good to know
Anyone here want to make an animation for me?
no
what's some quick and dirty way I can use the lengthen/ shorten anim assets I got from marketplace (at 1.0 rate)? I need to make my attack anim duration uniform
I just imported an animation from Blender, and I found the sheathe/scabbard drifting during the animation. It doesn't happen in Blender, so why is it happening here?

hello, is there any way to save a pose snapshot to disc? how would you handle saving killed enemies that have ragdolled onto the floor (and thusly been frozen into a pose snapshot)?
as in, just their general flopped over pose for when the player loads back in. i dont mind just doing some default "dead" poses to randomize from but if it's possible to actually save this ragdoll state and load it up somehow i'd love to do that.
(sorry it's only sortakinda animation related)
Im not sure if there is built in functionality for this, but I guess its most likely possible to iterate through all the bones and save the transforms, then spawn the actor and apply all those transforms again when they load back in 🤷♂️
thought about that lol
i wonder if there's a plugin for this
Is it possible to access those in C++? The skeleton notifies

So in case you're wondering, I learned pose snapshots can be struct variables (FPoseSnapshot) instead of the usual named FName thing. Instead of calling SavePoseSnapshot, you can call SnapshotPose which takes in an FPoseSnapshot ref to set up for you.
On the PoseSnapshot node in animgraph you can set the type to be an input pin and expose the struct as a pin.
So whenever my game saves, any ragdolling npcs will call SnapshotPose and overwrite their FPoseSnapshot and serialize/save that, and the animinstance proxy's tick just gets that from the character.

i'm ....guessing...? you could enable ragdoll again after the snapshot pose is blended to?
if you wanted?
i might try it just in case it saved at a weird half-way fallen state.
yeah it mostly works. lil bit of bounce due to clipping phys but maybe i can offset the mesh on reload or delay enabling ragdoll for a second something
Hi guys… I know there is motion warping but…
Could you implement it into character to character combined animations?
For example
Cheek rub, can I make 2 characters regardless of their height/head size do this and make the cheeks touch?

I’ve picked the most random example possible
But you get the idea
Even like touching someone else shoulder or forehead without making both characters touch the air
So skeletal mesh to skeletal mesh motion warping but mostly for like skeletons with different proportions/ meshes with slightly different sizes
I'm stuck with some animation retargeting issues. The IK bones don't seem to be attached correctly does anyone know where I need to look to fix this?

Hello, I am trying to stabilize movement of the hand_r bone with IK. My animation shaking hands but I dont want that motion. How can I achieve this. So far I put a socket into root and place it to where I want to place hand. Then I put Two Bone IK and assign that socket location to effector location but its not working, any idea?
does anyone know how I can hide this icon in the animation sequence?

Hello, please let me know if I am in the wrong section for this but I have been trying to debug this issue for a few weeks - basically, I am making a project for a hospital, in it you play as the patient and have a dialogue with the healthcare provider. The point is to test the player's perception so I have all the lines of dialogue set up via a data table. Each item in the datatable (0,1,2,3,etc) triggers a new level sequence based on the answers of the player. In isolation, all of my animations work perfectly, and all of the sequences and audio files are normal. The problem is, after the 2nd or 3rd one of these sequences, the metahuman's face kinda starts getting paralyzed? The amount of articulation that is showing decreases each time until the facial animations just stop. I have had some success playing with the animation weights, but adjusting the weight in one sequence seems to break every other sequence. Selecting "keep state" paralyzes all facial animations afterwards. Selecting return to "default" makes the head teleport. Everything but the animations works, and the animations all work by themselves.
I thought maybe the node "create level sequence player" might be messing it up since it creates every time an animation plays, but I can't get any other node to connect to the "animation sequence" part of the Get Data Table Info node.

How can I reuse an animgraph pose? I want to blend between a pose and the same pose but with an IK rig applied, blended by a bool
Nvm, I figured it out by using a cached pose
anyone know how to fix the crippled fingers in animation retargeting?

it sort of works for the right hand

but on the left hand where she is holding the weapons, it produces these crippled fingers

Hey Guys! So i was attempting to create a simple retargeter between the ue4 manny first person template arms. I hasnt worked even though I have looked at every piece of info I can find and it SHOULD WORK. This is my IK for the arms, the other one is just default unreal one.

Hey, quick question, is there a node similar to "layered blend per bone", except that it only affects one bone? I want to apply an animation to the wrist bone of a character while preserving the animation on either side of the bone. Can that be done with layered blend per bone?

Hello, I am trying to stabilize movement of the hand_r bone with IK. My animation shaking hands but I dont want that motion. How can I achieve this. So far I put a socket into root and place it to where I want to place hand. Then I put Two Bone IK and assign that socket location to effector location but its not working, any idea?
Anybody able to help out with some animation trouble I am having. Followed a YT tutorial and my character isn't behaving the same way the videos was. The character should face the dummy properly for the assassination, but for some reason it is not. I've rewatched the video to make sure I did everything the way he showed, and I swear I did.

how can i have 2 post process animation blueprints active at once because when i tried to merge them blending didnt work im using engore and universal character customization
Too little information here. It looks like you didn't rotate both characters by programming though.
Hello animators

I am finding the way to loop the sequence until i not select the buttons like in this game
anyone know how this can made
Maybe you can just use event at the looping point and set the sequence frame to 0, may be using SetPlaybackPosition
You can help me ?
Not until monday sorry 😅
My laptop cant run unreal
it's fine thanks bro
There was a talk that talked about the various ways of retargeting in Unreal Engine. Not just IK Retargeting but also the Translation Retargeting, comparing them. They also talked about the difference in performance between using the "Set leader pose component" and another option that I forgot.
Does somebody know which talk I mean? I can't find it ☹️
Edit: It was Analyzing Lyra's Animation: https://www.youtube.com/live/5O-nTNMB19Y?feature=share
Did you edit the target character reference pose to be as close to the source skeleton's default pose as possible?
https://twitter.com/QuodSoler/status/1678435765309636609
New Article about IK Retargeting using Unreal Engine!
A quick intro on how to set it up so you can also share animations between characters.
Likes
285
yeah i did that but its no good
i think that animations im trying to use just arent compatible because they got a weapon in left hand
who even bakes a weapon into a characters skeletal mesh... 🤦♂️
Has anyone here made Facial Control Rig setup other than Metahuman ? Haven't yet found tutorials for faceplates and drivers.
I would suggest you double check the target character's fingers reference pose compare to source
I had similar problem with fingers at first, then I overlapped the source and target character in the view, and rotate the target character's fingers to fit the source character's fingers reference pose, then the animation retargeting works fine.
how would i go about that? do you know any good tutorials?
the right hand is working fine btw, its just the left hand with the weapon
I don't think you need tutorials for that, just make source and target character overlap each other and adjust the rotation in different angle of view then you will be fine, at least that's how I did it

i dont think that will work out in my case, like i said i matched it as good as i could, but no matter what i do, the fingers are always inside the hand
the rotation is totally off, and they also dont bend properly
Guys, how can I blend between Rifle and Pistol animations?
Like how to switch between 2 different Aim offsets for aiming specifically
Sounds more complicated than I though,
Have you tried using IK on each finger?
you could make a data table and set up offsets for each weapon
As in ?
AO2D separate?
nope, guess i will try that next
I have made them separate but how can I blend them on the AnimBP ??
My weapon system is a bit different that's why
Let me know if that works👍
not sure if that even can work if my target mesh doesnt have the same IKs
basically im trying to retarget the animations from paragon character to manny
and ive set up the IK rig for the paragon just like the manny one
As long as both target and source mesh have IK with same name and similar bone chain it should work, otherwise congratulation, you find a bug
the paragon characters also come with some rig file, some people said to use that, but im not sure how
its just a "rig" file, not a "control rig" or "ik rig"
guess it must be some old thing thats no longer supported in 5.2
Can you open it in UE?


You are right, this is the old system, not IK retarget
I suggest forget about that, and set up your own IK rigs for both target and source mesh to retargeting,
just need to make sure both target and source mesh have similar IK chains with same name and similar bone chain
it comes with the 5.2 version of the character though 🤡
yeah guess ill just have to keep trying, thx for your help though
Can you check if the left hand of your target and source mesh have same bone chains?
If they have similar bone chains then IK retarget should work
well all the important parts are the same
except the weapon on left hand
but im not sure how to deal with that

but i matched all chains as far as possible

Can you show me the reference poses of both character?


Yeah, I can see the reference pose for fingers is pretty far off though
but its about the same for the other hand

and that one seems to work
Doesn't matter, just make the pose of the fingers fit, it will work!👍
Let me take a snapshot for my character to show you
Fingures have to be rotationally fit

i try to match it a bit better now

now the fingers arent crippled anymore, but they also dont quite match

guess i will just have to try match the poses better

Nice 3D model by the way
its that paragon model

Unreal Engine
Licensed for use only with UE based products. Includes the character model, animations and skins for the Paragon Hero, Serath.
just wanted to grab some free animations, but there arent many melee attack animations on marketplace
Oh, I see, that's why she looks familiar😅
Good thought, trying to build MVP first before heavily investing in it
already got large part of the gameplay done, now im trying to populate it with some free assets 🦕
Do you have any showcase video you can show me? DM is fine
Or maybe when you feel you are ready to share it with the world, either way👍
Anyway, cheers friend, if you meet other problems in the futures feel free to DM me, I have to go to work now
🍻
thank you! feel free to message me if u need help with blueprint aswell
Does anybody have UE4 Manequiin Control Rig in as UE 5 asset ?
Personally haven't done one, but I believe it should be an easy to-do.
Like, make first this project and then migrate the control rig and Manny to UE5 project.

The animations for a skeleton i made are all too big
like the bones are too big
the skeleton has proper scaled bones
but the bones of my animations are all 100 times bigger
Is there a way without exporting
that i can fix this?
It should look like this


but it looks like this..
and thats a really big issue
Hey Guys! So i was attempting to create a simple retargeter between the ue4 manny first person template arms. I hasnt worked even though I have looked at every piece of info I can find and it SHOULD WORK. This is my IK for the arms, the other one is just default unreal one.

Hey guys, I'm working on a video in UE5.2. I have this desert scene and a metahuman. But I want the metahuman to leave footprints in the sand.
I've found tutorials on how to create the footprints, but it's all for games. So I'm not sure if it's possible to create these footprints in the sand for a sequence?
different softwares renders/displays bones differently. The bones are fine, you may select all the bones and scale them down (or ignore it if you dont need to pose/animate in unreal itself)
no they are definitly not fine
you may need to adjust the scale between your 3d software and unreal. ex: using 0.01 scale in blender and scaling the model up and then exporting to unreal gives an okay bone length in unreal.
Why does the animation rotate to the left when I activate root motion?
Is there an easy way to accomplish the below scenario?
Have say 15 different sized props that are fairly similar say doors and door frames for example. I want to be able to do complex animations so I create a skeletal mesh for each door frame/door combo. Now I only want to make 1 animation but have each door use it. Each door can also be a different width/height.
I am planning on animating in a 3rd party program and then import the animations into unreal
Just import them with same skeletons and paint weights on models accordingly
Animations are tied to bones and need same bone structures, but those bones influence vertexes that are tied on to the model (and when weighting the model you weight said vertexes)
(pls help) I want my npc to grab an object midway through their animation. is this possible? it’s a nurse grabbing a needle. maybe i can attach it to the bone structure, but i don’t want the npc to have the needle showing before they pick it up
Before attaching it pull the mesh of the needle, from it get Set Hidden in Game, then attach it and Uncheck Hidden again
you can uncheck it using a delay, or if using montages on complete
no worries, have fun
is there a way to resuse state aliases?
like i have an idlealias
and I want to use that in multiple instances without making stuff like idlealias2 or idlealias3
Anyone figure out... how to do AttachComponentToComponent but instead of Origin to Socket do
Socket to Socket
It's two blueprints and theyre both StaticMesh with one socket each
what would be the best way to prevent this behavior? (the animation spazzing out when the moveto goal is too close)
its using a blendspace from idle->run depending on the speed variable
Hey All...
I need a little help with an Vaulting animation..
It plays from an 'Play Montage' node, but the bottom half doesn't do the animation..?
I added a 'Layered blend per bone' node and checked ‘Mesh Space Rotation Blend’, but that didn't work.
Also tried with other animations, they seem to have the same problem.
any tips/solution on how i can get the lower body to play along ??

Have a slot montage that is not affected by layered blend per bone
What is a slot montage ??
In your anim graph , add a slot for the full body montage and the upper body
When you are playing full body anim you don't want to apply layered blend per bone

Insert entry-points within your Anim Graph to play animation from using Slots.
@night rover I'm using the standard manny... This is what I can find.. Dunno where it converts to an upper and lower body node..?? I don't see it.. Was watching a video about it.. but that one isn't showing where to find it...

You said you used layered blend per bone
Look for that node
U want to use upper body slot for the layered blend per bone
While full body montage should use full body slot, without modifier
I put it in cause somewhere it said to put it in.. to make both parts work.. and then I hear, take it out.. so... I'm getting a bit confused.. 😄
@night rover No upper body and lower body nodes or slots to be found...
Who told you to take it out?
Don't tell me I told u to take it out
I already told you how you should use the anim slots. If u don't understand look for another example
Or read through the documentation
Btw u dont find them you create them. Try to read the documentation
@long summit

This is right from the documentation. Pls just do the reading
No.. Never said you said to put it in or out.. I always search for solutions before asking.. and whatever i find, it's always a different story.. and nothing worked..
Found the way to add the upper and lower body slots.. but then i run into those "locomotion' nodes, that i have no clue of...
and cause i'm getting confused of all these things.. I might look over things..
And biggest thing i don't get.. is.. that I was working on a joke project before this.. and that didn't give me these problems... and i'm vaulting in that one too...
I feel like throwing it all away.. and restarting and see if i run into the same problem..
Thanks for trying to help....
Hey guys, could someone explain this to me? It's a piece of code from the Animation Blueprint of Epic's Manny character.

the animation can make a transition into the "falling" animation when the Z-velocity (read: speed of falling) is greater than 100 and the character movement component has "falling" set to true
Hi, I need help
I want to retarget animations into my mannequin from UE4Mannequin, but there's some misalignments like the picture
I used Blend to Source, but it will break animations.... What should I do next to fix it?


@night rover Restarted the whole project (not that I gotten far. was putting in animations)
Discovered that in the old project it was pointing towards the wrong animation BP...
Added the fullbody to animation.. and changed the ABP.. (took out the 'control rig', doesn't feel like that effected the way character behaves.)


hi i need help i made a car animation and i want my camera to follow the car with the same speed as parent child on blender how to do it please i can't find a tuto?
why are no functions like AimAt, TwoBoneIK ... idk what else are available... but these Control rig functions are not visible in Unreal 4.27..
- Are they not intended to be used in unreal 4 or not available in UE4.
- If there is no availablity of those functions, then what is the work around?
In the blueprint, I would put a spring arm on the car and a camera on the spring arm.
https://youtu.be/zLexfw9rCG4 Made a guide on the Retargeting Source Options that came back in 5.1, that was previously in UE4. Imo it's something good to know when importing Animation into your Unreal Project.

I am finding the way to loop the sequence And break the animation when a player press any key
You can put the control rig after the layered blend pose. Normally u want to apply some logic like ik/fk foot placement in control rig
hey, guys, i need some help with pose asset
So. Look at the picture:
when “base” slider is 0, its ok, it doesnt change anything
when its 1, its ok, it fully come to the pose
but when its -1, it doesnt “go back” from pose.
As you can see, month will be closed on -1, and thats what i need, but i dont know, how to make that.

If you're running the sequence from the abp then you blend by bool (or another data type as applicable) and have the looped animation plugging into one input, and whichever else on the other.
uh... anyone got any idea why a montage wouldn't play?
i hook up the sequence to abp final output, it plays
i then hook up my usual abp result through a default slot
the montage has only 1 slot
it's the default slot
the montage doesn't play
q.q the f*** unreal
Can someone help me. Im willing to pay if you fix this problem. Its very small but I have been trying to add animations for mycharacter for the past 3 days. I watched all 4 parts for this video https://www.youtube.com/watch?v=c0ai-OlHs0U&t=2123s and everything went perfect except for the last 12 minutes of the video. Since i didnt start a new project i have a bunch f stuff in my vent update animations and i dont know where to put the things he added there at 33:11 and for the anim graph i added all the animations just like him in two state machines however i have a bunch of previous code and dont know where to add the state machines for it to function properly. The code above is my animBP and the blue is what i need to add into it


Parkour with First & Third Person animations.
Part 4 of my UE4 parkour series.
Source Code below!
Complete Source code (UE4): https://github.com/DavieMakesGames/ParkourProject_UE4
Complete Source code (UE5): https://github.com/DavieMakesGames/ParkourProject_UE5
Updated Parkour video for Unreal Engine 5: https://youtu.be/jwPlvJRGbWE
I'm live s...
Hello, We've made a simple control rig for one of the tools in our game that we'd like to bring across to UE from Maya so we can animate the device via code. Does anyone know of a good workflow for this? Or are we better off re-making a control rig in Unreal. We're a little stuck 😅

Animation is stucked whenever i used an animation that i created by modifying base animation provided in thirdperson folder by default.

when i swapped the modified animation sequence with others everything works just fine.

i need the Flashlight_Anim_walk to work
any help?
Anyone get this wokring in Unreal engine 5?
I'm trying to use save pose snapshot but i'm getting t poses? I've tried all different kinds of pin types/var setups etc
Asking about save pose snapshot!
Is there any way I can stop an AnimBP from reinitializing on skeletal mesh change? I have an alternate skeletal mesh for a transformation but the minute the mesh change activates the animation "starts over" rather then continues forward from where it left off.
I don't have this issue if I use the animation assets directly but kind of want the extra control of the blueprint
What you could try doing is having a function on the AnimBP that returns all the relevant variables in a struct, including the state obtained with the Get State node, then when you set the new mesh with a new ABP instance, have a function that supplies it with all of these variables and use the Set State node to pick up where the other ABP instance left off.
Thanks but I am only using a single animBP and am simply switching the skeletal mesh in the component of the pawn. Is there a way to save the state in the pawn and send to the animBP?
I noticed when I apply the same skeletal mesh switch in the character blueprint the animation stays consistent even when swapping. Maybe I need to look a little harder at that one. Maybe it's the state machine?
Can you show the different nodes you're using to set the SM asset — the one that reinitializes and the one that doesn't?
Is it normal for these bones not to follow when playing an animation? They follow in the anim sequence window but not during runtime. As far as I can see its all of the twists and corrective bones.
The only big difference is I am not using a state machine or a blendspace. It's just an animation asset directly into the output.
AimTo was renamed to just Aim
and two bone ik is probably also available, just named different
no, thats not normal
I'd like to delete this blend sample but it won't work

Thanks!
Hello can anybody help me with this ? i dont understand why the animantion "bugs" out in the middle while moving from 0 to 180 direction . why is the -180 working fine and then while going to 180 it creates this weird hopping thing
hey devs , i am a trying to aim my tank gun to a certain location , i have checked calcualtions everything is perfecet , but gun mesh is not actually rotataing , it is recieveing a correct location in Control Rig but mesh itself is not rotating , it is set up in anim bp to use control rig screens will be attached but it is not rotating , please any ideas why ?


Yes, You are Phase canceling - one of your cycles has the wrong start pose (the mirror of the others)
I would say no - any chance they either aren't part of the bind pose, or you are running animation on a child mesh rather than your top level mesh and using master pose?
Interesting one. If you swap out the mesh and the animBP belongs to that mesh, then the instance of the AnimBP will switch. Maybe you could run a parent Mesh that runs the animBP and do your switch on a child SkeletalMesh which is using the parent as master pose? That would work because you aren't destroying and creating a new mesh,
I have never seen someone get a control rig into Unreal. You would probably need to recreate it in unreal's ControlRig feature (which once you get used to it, is honestly a lot better than rigging in Maya).
I should have done this from the start but I tested in a clean project using the skeleton and animations that come with the ue5 manny and the same thing happens.
I am also thinking it is a visual bug because the bones do have weight to them so if this were the actual case the mesh would deform weirdly I think.
Maybe, it would definitely worry me. Have you tried regenerating the bind pose in Maya?
I know that sounds like a strange place to go, but since the skeleton is generated from the bind pose, super funky things can happen if all the animated joints of the skeleton are not in the bind pose
I am guessing you mirrored the 180 animation, the fix for this is to set start frame on that sequence player to the frame in the middle of the animation (or cut the first half of your keys in Maya, paste them at the end, then shift the keys back so they start at 0 to flip the cycle phase, reimport that and it will blend great).
Oh that's nice to know. But I can't imagine that that's an issue with the animations that come with unreal.
the extra joints added though, are they on the unreal skeleton?
if I have a niagara system playing through an anim notify state in a animation sequence that's in a montage, how do I stop the niagara from playing if the montage was interrupted?
This is tough because notifies don't hold state. If you ended up doing 2 of these at once one would get stuck on. But what you can do is spawn the emitter (when you do it should pass an object), write that object out to a variable on the animBP, if you get the OnInterrupted event on the PlayMontage node, go get the variable from animBlueprint and destroy the emitter you stored. It's not super safe because if you do it twice you will have the first one just go on living.
I might be able to get the beta of this plug-in to you early next week, this would make it very easy and get rid of the issue of eternal emitters.
the fact that notifies don't hold state has annoyed me for so long, I am working on a plugin to fix it.
this will let you run timers on notifies, create variables, and it spawns this state every time a new notify is hit, so the component can have a bunch running with their own variables and everything. I hope I can get the first version up on marketplace this week.
I didn't add anything myself, they all came default to the ue5 skeleton.
ooh... then I am stumped. This happened in a clean project too?
Yep. My process was create new project, open the anim bp, loop an anim sequence so I could visualize it happening, and that's it
Actually I got it working by simply moving the animation asset into a state machine all by itself rather then connecting directly to the output. Now when I switch the skeletal mesh it no longer restarts and continues as I wanted it. Odd it was such a simple fix.
so you are swapping out the skeletal mesh and the animBP just keeps running?
I guess that makes sense since you aren't swapping out the component, but I would have totally expected the entire AnimBP to instance - glad I didn't send you on a wild goose chase
All I am doing is swapping the mesh, but not changing the skeleton, that is all the same, so it should still just keep using the same animbp
I had a rudimentry version of the code using just animation assets, but hit the snag while trying to convert to Animbp so I could do bone transform adjustments and such
yeah, it's been a long math-filled day for me, sorry I missed that - I am pretty sure if you swap mesh components it will kick off a new AnimInstance, I wasn't sure where the AnimInstance initialized since the skeleton is owned by the mesh I had assumed swapping mesh would fire off a new AnimInstance
My guess would be that the forward and diagonal animations start with different feet. You could try mirroring and see if that fixes it.
its not a mirror its 2 different animation one for strafe_left and strafe_right
Is it possible to save incoming values from parameters inside a AnimlayerInterface?


How can i mirror an animation in blendspace?
you can mirror in unreal 5 now by setting up mirroring. I just meant mirrored the source in maya to get the run in the other direction. For blending locomotion you have to make sure that all your animations start with the same foot planted (or most standard, the plant frame of the left foot) - if you blend one that starts with the plant frame of the right foot you get exactly what you are seeing.
you can run a function on the node to do that. There are relevant, start, update, and exit functions you can add to unreal AnimGraph now.
what kind of input are you looking for? I might be confused by your issue
you want to save that bool out?
yeah
the only thing i could do is make a function with a UPARAM(ref) to save it
and call it inside the graph
one sec, let me boot up UE
i could do that and call it in the graph editor but its just ugly way of doing this i am sure there is a better option

ref symbol missing but ye you get it
can't do it here?

sec let me recoompile
It doesnt provide any params aside from Context and Node

Basically i pass in a value from a master ABP to the linked layer:

now in the linked layer it has a bool incoming but of course only available inside the anim layer
and you cant save variables here unless you use experimental library which anyways lead to something ugly

I hope that clarifies the issue
stumped - I am working on a plug-in I hope to finish this week that would fix this because you could spawn a UObject with my component from a node in AnimGraph and hold the bool there, then have that node self destruct (it's designed for notify states so you can hold state for the specific instance, otherwise they would be overwriting themselves). That would be able to be used here, but crap like this is why I am writing the plug-in to begin with. So sick of not being able to have "Set" nodes in animGraph, I could probably add that to my plugin using the component.
😄
yeah i am stumped as well
its especially frustrating with the lack of documentation when it comes to linked layers, animation proxies and shit
can you add notifies to your input pose?
this is a possibleworkaround, for anyone that may look at this:

yes
you could do that on become relevant so it doesn't constantly save it
or I suppose you want to.
I was going to suggest a single purpose control rig. LOL
This probably would be a lot better in control rig tbh
since i am transforming spine bones
this whole set up is basically i have a procedural pitch offset, using linked layers. now i want to be able to disable/enable that depending on the layer coming in
so whatever new layer is coming in can decide to use it or not
but it got so over complicated
i think i will just try and link/unlink the procedural pitch layer depending on a setting 😄
what about a blend by?
blend by bool in the animGraph prior to the link
and just drive the bool on entry rather than from the linked Graph?
(like prior to the animGraph attachment, so it just doesn't even run unless you have it turned on)
because it feels really bad when the rest of the system is quite modular
everything else simply links and unlinks to the layers they use
yeah you can do that
the blend by is just the last node
in this graph
pass in the input pose directly if false
and run your graph if true
your bool would just blug into the active value

sorry it would actually be that

its purely just manipulating bones
you don't need a state machine, I made thta node as an example
you can take that cached input pose and plug it straight into yourgraph
then save the output pose as "MyGraph" and run the setup above

since it bypasses your entire graph if the bool is false it would be performant as well
that would work but i will try unlinking i think still
If I have a weapon that could be picked up and used by multiple different characters with different animations and skeletons, how would I structure my assets?
Should I have the per-skeleton, reload montages as part of the weapon or as part of the characters?
I would probably make a reload and animate the weapon with IK handles on its skeleton, fire off the montage on the weapon same frame as the character reload from a notify. That way if I didn't want to run Unique animations for unique weapons, the weapon could contain source animations that it sends to the charcter through the on-become-relevant function (that way when you add new weapons, you don't need to edit character BP at all)
i have no idea how to use maya thats the problem
tweak that number on the 180 that triggers the screwy feet, until screwy feet go away

I believe this is by % so 0.5 would probably fix it
sorry, it is % time, so 0.5 was right
@pastel zenith How would you go about blending between layers?
you seen to be a person of knowledge
Layered blend per bone node there is an alpha and you can use blendmasks in UE5
I mean linked layers though
you can use your linked layers in the animGraph directly as nodes
for instance when the layer here goes from LayerA class to LayerB


cant do it with linked anim graphs
because thats a set class
with linked anim layer you can use Link/Unlink layer and it will overwrite that layer with incoming one

for instance


yeah, same as above, these have output poses so you can blend bletween them with a layered blend per bone, maybe I am not following the question
ios that a way to fix this when using a blend space ?

what is wrong with it?
Think of it as a variable, that purple node can be anything, so if i use a references anim graph it will be only that abp

sure, I still don't get the problem - you can either do a "blend by" to switch between them or a layered blend if you want to constantly blend one on and off with an alpha
i dont understand your "them" because there is only one node that changes, which is my issue
so how can you blend when you need two poses
can you explain what it is specifically doing?
that locomotionstate layer gets overwritten everytime you go from relaxed to combat state
so its snapped, cos its changing abp effectively
you could use intertial blend so it doesn't snap
i use intertia but it still snaps cos its replacing abp
why replace ABP instead of Link the 2 ABP and doing a layered blend per bone?
because those abps change everytime you switch state and pick up weapons etc
its very modular that way
instance class is ASubClassOf - you could write a new LinkedAnimGraphNode that allows the ASubclassOf anim instance to be exposed as a pin?
how are you switching the ASubclassOf animGraph now?
void UAnimInstance::LinkAnimClassLayers(TSubclassOf<UAnimInstance> InClass)
Illustrates how you can dynamically switch between subsections of an Animation Graph.
so if that was an exposed UPROPTERY(BlueprintReadWrite) you can just set on become relevant and when you make transition between 1 and 2 you slap in whatever animGraph you want
or if you are doing this in C++ you basically have a BlendByInt node Mod the int by 2 and just toggle back and forth whenever you want to swap the animGraph and specify which animGraph you want in the instance class property
this is engine code
you wouldn't even have to expose it... just linkedGraph1 and linedGraph2 ++ your int, mod it by 2 blend by int and you got it (I used this method to build a state machine in UE that could instance attack-attack-attack without making a 2nd attack state - basicaly this method of having a blend by int with state1, 2,3,4, and I would write to the "next state" with whatever animation I wanted in there. I think you could do that here
we could jump into Unreal Hangout voice chat if you want
I am about to leave now, but maybe tomorrow if you are around then
sure, I'll be around
Having a weird issue I thought someone here might know how to fix.
I've been learning animation workflows and stuff on the side and I have a blendspace that I made with retargeted animations for the Quinn mannequin, but when I go to use them (in this case to push something around) the arms morph all weird like the animations applied aren't retargeted, even though I know they are. The blendspace also doesn't seem to be taking effect, since it's only a walking and pushing animation. I'm expecting to see what's in the video, but the idle looks like this image.
(Using it in action, or trying to, looks like the other video.)
If anyone can educate me here, I'd be SUPER appreciative!
<ANSWER> I hadn't set IKCurve references appropriately in my ABP, along with character direction. Once I did that, it worked as intended.

im a complete beginner in animating and i would like to make a punch animation. however im wondering how the starting position should be. should it be a perfect copy of my for example idle animation? because if for example the other arm is in t pose and the other punches it will look kinda bad?
Hi, does anyone know what to do If I want to get the position current position of the bone from the previous tick/frame? Currently it uses the position from the reference pose which doesnt make sense for me because when I do some Fbik the positions of the bones change and in the next tick I want it to use the changed position from the previous tick instead of the default bone position
I am trying to add a new AnimGraphNode_LinkedAnimGraph C++ child, just making a new C++ class for it in unreal fails to compile and says the include path is wrong for AnimGraphNode_LinkedAnimGraph.h - if I browse the UE5 source I find it is now called in an Public\AnimGraph\AnimGraphNode_LinkedAnimGraph.h but if I correct the path to point at that it then breaks AnimGraphNode_Base claiming:
C:\Program Files\Epic Games\UE_5.2\Engine\Source\Editor\AnimGraph\Public\AnimGraphNode_Base.h(17): fatal error C1083: Cannot open include file: 'AnimGraphNode_Base.generated.h': No such file or directory
can anyone tell me why I can't get this to work?
I hope someone answers this question. It'll help me understand how to go about animations too
Hey Devs can someone tell me how i can rotate bone only on certain axis (yaw/pitch/roll) with Conrol Rig "Aim" node , I got a turret Skeletal mesh and it should aim at certain location in world.(Target Point) Mesh itself got its turret and base(body) so , the turret iself only should rotate(aim) by its PItch(up/down) ONLY and turrets base should rotate by its Yaw ONLY , how i can achive it ?

Does anyone know how to access/set niagara user parameters when playing a particle effect in an anim notify? Is it possible?
Hey there, I have a doubt regarding bones that differ from the skeleton structure
Imagine I have a rigged humanoid done in the specs of the UE4 mannequin... And that character has a special socket bone on it
The socket bone is used to animate the weapon, for stuff like removing it from a sheathe, put it away, or more interactice stuff such as tossing it in the air and catching it
Would the animations for siad character be able to still work even after choosing the vanilla UE4 mannequin as the skeleton? I see the bones still exist within the mesh, but I wanted to ask beforehand
Is there a way to set (in the example below) SKELETONPOSE6 in a blueprint so that I could select different poses per blueprint character?

I just got my ComponentIK plugin working - this is a quaternion alorithmic IK it is not an interative solver so it runs crazy fast... and you no longer need skeletons to make IK Chains! just scene components... whaaaaat?
This is also part of the animation helpers plug-in I am writing which has notifies that hold state, which seriously would have solved so many questions that popped up in here today.
you can do that on the on become relevant function I believe. Although I think on my last project we had a custom node that allowed you to set the anim on a sequence player in those functions, I am not sure that is in basic UE5
I usually would start in my idle, but set start time to a bit later if I am running and use the blend. If you setup your blends to use blend profiles which move feet faster than the rest of the body you can smooth the upper body with longer blends and it will hold up great from runs or other combo animations. I usually trim off the beginning of my attack animations to tune speed as well, so it's really about taking the time to setup blend profiles for the transitions and tune them.
this is an example I built of attack speeds trimmed off based on distance and a speed variable and blend profiles smoothing things out.
this literally baked by brain today to the point where I tried to build it - my only issue is not knowing how to set the AnimBP in the on become relevant function - I tried to make a custom AnimGraphNode_LinkedAnimBlueprint that exposed the TSubclasOf<AnimInstance> as a pin, or figure out how to make the function so that you can actually set properties in the make, but I can't get my project to compile if I do that.
BUT if you can figure that part out out here is how I would fix the rest (obviously internal to your linked AnimGraph, I am guessing you wouldn't do this in BP):
all you have to do is Set whatever is selecting the animGraph you wan to switch to (in my example here its an enum) before you add 1 to the int, the int will Mod between 0 and 1 so with each update it will switch between the 2 identical linked animBPs - the only difference is on become relevant the new one swaps the animBP. doesn't matter what you put in there, it will always blend to whichever you specify.
the only missing link is how you inject the AnimBP to the node you are making relevant with the int. You don't really have to do it on become relevant you can do whatever you are doing now and then ++ the int


why is this happening, Ive never had this problem before and its specifically only between these two animations https://gyazo.com/7ceb86bd76596134fe2956f2a211a9bd

hmm, I guess its because they both start with the other leg forward
Yep, someone else had this issue today. It’s phase canceling. All your animations should start on a plant from of the same foot (so like when running back it would look pose-wise like the opposite of running forward). Industry standard is the frame the left foot hits the ground.
yeah idk how I never noticed that, but I fixed that now https://gyazo.com/dc82a102c5f41f2f62717f1a8db5405f

hello just a quick question i need walk forward right animation for a 8 way movement where can i find it because i see a video and he say mixamo i try serching on mixamo and i cant find that animation i only find it with a gun what i need to search?
Any reason why this would happen when using the animation graph and playing the animation as a sequence?
If I test by just playing the animation through a regular blueprint node it looks fine, and in the Retargeter it looks fine.
For reference to show it in the retargeter
Does anyone know how to set Aiming or Look At to Object in lyra ?
Anyone know why my bones show up like this? Also do you know why Main bone collision show up in proper scale (the light blue selected volume) but there is also a massive green wireframe collision?

Nvm started using the UE addon for blender, everything is much better now
This is too complicated for me, i am not that good at animations so i think fuck it for now 🙂 as for you i'd advise looking at the experimental plugin - animgraph functions
it will let you call functions within from the graph
I would however be careful with threadsafety
Does anyone know how to access/set niagara user parameters when playing a particle effect in an anim notify? Is it possible?
you just need a pointer to that particle effect
are socket update rates tied to frame rate?
I am getting the position of sockets on a timer of 0.01 seconds and drawing a sphere trace. But the consistency of the timing between each trace scales with frame rate, i.e it will draw the spheres more consistently at high frame rates and draw them slower at lower frame rates
actually scratch that its not even sockets the whole mesh does the same thing
so I guess my actual question is: is an animations update rate when it comes to updating positions in world space tied to frame rate and if so how do I make it not do that
Does anyone know why my niagara doesn't play in play mode but in the animation window after I add a notify for it? is there something Im missing?
It works if I switch anim class inside the character blueprint over to ABP_Manny, though that is not what I want to use
Hey folks, when recording gameplay into sequncer using Takes in UE 5.2 anything spawned during gameplay, i.e a sword the player equips doesnt show in the Sequence. Any idea how to get it to record that data into the take?
@oak belfry did you try something like this? no booleans but you can always convert. seems to work

I ended up making a custom instance that unlinks/links the layer automatically instead
I made some helper functions for the above for the future though
yes me too
ok
Instead of that i went for another approach
for saving variables i still did those functiosn tho

it's strange they did it for vector, quat etc, but not for simple types
based on a very basic cpp func

I have:
a set of upper body melee animations. swing, block etc.
a set of upper body movement animations, idle, walk, etc.
I am trying to separate these into 2 state machines.
Because i think that 2 sets of different state pathing is convoluted.
So with this in mind, how do i best design respective state machine and more specifically how to enter/exit them if they run their course.
Right, but how can I create a parametirized instance of a particle effect that I can select via the content drawer?
On your notify you'd have a UPROPERTY() with TSubclassOf<UNiagaraSystem> that you spawn in the notify ?
Or i am not sure i understand what you want
i suppose that... If the animations in the separate two state machines are exlusive to eachther, they can be in the same machine.
ie playing upperbody walk cannot happen dyring charging/releasing a swing
good talk
#animation helpful as always
but answer me this:
What does fully blended state meean?

It's a state in a state machine that has reached its maximum weight or influence over the final animation output
Right, but that's referring to the system class, not an instance of it. I want to be able to change user parameters on the instance
thanks
auto* MySpawnedSystem{UNiagaraLibrary::SpawnSystem(MyNiagaraclass//...)};
MySpawnedSystem->ChangeParam or whatever the function you need
I'm trying to retarget the mannequin animations to a model of my own, and it ends up looking like this. all the animations for my model look fine when i view them in the editor, but when actually applied to the ABP, it turns out like this. what's going wrong?


So its not possible with the default notify provided with the engine?
not sure, id just make my own tbh
would really appreciate some help
is your abp using your models's skeleton?
Hi, I think I got Engine bug
When I use "Two bone IK" in Post Process ABP with compatible skeleton, the animation will be like T-Pose , like this picture....


Could someone recreate this?
Also, when I Enable PPABP and change the animation sequence at twice, Engine will crash
i figured out that the issue with that is that i didn't have IK bones on my new model; removing the control rig from my ABP AnimGraph fixed the issue (but obviously means i can't use IK)
i'm now having a different issue: whenever my character lands, they get way, way bigger. when i view the animation in the editor, it looks normal....again, what's the issue? originally in the editor it was big too, but i changed additive anim type to "no additive" which fixed it, but it's still having this issue ingame

uhh
again, i just retargeted from the mannequin blueprint, so if it's using that node, maybe? i wouldnt know where it would be
ok found it, @oak belfry how should i change this to make it work?

is your Rat_Land1 local space additive?
nope, i've changed it to no additive
is the rat_land1 on the correct skeleton?
uhhh how would i check that? i think that it is
double click the Rat_Land1 sequence player
and check the skeleton matches the one in the abp

im trying to use multiple layers of animation and for some reason the animations of a particular layer im applying are frozen, any idea why 
do you know how to write custom AnimGraph nodes? I do plan to write a node today that does what I described above (I need it for my state machine anyway). Would you be able to help me figure out why any child class of any UAnimGraphNode_* I make in C++ fails to compile and breaks my build? It claims the AnimGraphNode_base.h fails to find AnimGraphNode_Base_generated.h
I didnt make my custom animgraph node i am using the anim graph function plugin from epic that allows to call functions from within the graph, caveat being you dont have return values
i suspect its a linker issue, probably missing a module include?
if you apply something in an additive node it has to be additive. Why would your land animation be using apply additive node?
you don't have returns but you can write to variables on the animBP and use them in the next nodes
i don't know, that's just what the unreal mannequins use by default
unreal mannequins use additives for landings? that's the strangest thing
¯_(ツ)_/¯
anything you plug into that node needs to be an additive
are you using mesh space or local space?
open your sequence
(again, i was just retargeting animations, i haven't set them up myself)
in the details it will have additive settings
can you show me the settings of the animSequence? (Additive means subtract the first frame of the animation, most of the time, and then add just the movement back in so you can add the movement to any pose)
mesh/local
originally it was local space, right now it's "no additive"
it has to be additive if you use it with apply additive...
using local space causes the animation to be massive
so if it's no additive it will explode because you are adding the joint translations
no additive is what seems to "fix" the animation
but it blows up in game right?
yeah
because in persona you don't have that animBP running
(persona being preview)
it will need to be local additive, the default animation in Unreal subtracts the last frame (idle pose) from the animatoin
yes
when you make an additive animation you can add a preview pose
so base pose "Frame from this animation" (you could use frame from another animation and plug your idle in there
which id advise doing
you add a base pose
I would pick local space
Base Pose Type use another animation, put your idle in there, use RefFrameIndex 0
"Selected Animaton Frame" for Base Pose Type
if that is setup it should still preview in persona just fine
make sure you idle isn't an additive though
you have to subtract a regular animation from the frames of the new one
like this?

the Base Pose literally subtracts the animation from the current anim you are working on- if you use a single frame it subtracts that pose from every frame (usually fine)... you can also scale the base animation and subtract each frame from the current frame as it steps through the animaton (very useful for things like attacks, or runs). So lets say I have a run cycle, and a run cycle for exhausted, if you subtract the exhausted from the run cycle, you can then add exhausted to any run cycle in your game and it will apply the difference between that run and "exaused run" to the current animation. Additives are super useful for reducing volume of animaton requirements (especially in games with tons of characters and variety of cycles and stuff)
I think thats too complicated for him
seems to be a newbie so might want to make it a simpler explenation 😄

i appreciate the explanation, i just cant really visualise it since i havent worked with animations in unreal (i have no need to yet)
CurrentAnimationA - BasePoseB = additive pose
You can add additive pose (it would basically be mini little movements in a T pose) to anything you want.
So Idle pose
Idle breathing animation (additive)
Make any animaton breath
that node has alpha so
Idle Pose
Super Heavy Breathing
Many any animation breath a little by setting alpha to 0.25
sorry if its oversplaing - just thought it would be helpful to see what's happening. Epic is going directly into idle very fast, but applying the landing animatioon as an additive to idle so it also adds to run
so if you start running or are running you still appear to "land"
ah okay, i do actually see what you mean
however, ,, i'm not sure how this explains what's occurring right now; is the issue that the additive pose has somehow been scaled up? why would switching it between additive and not additive change anything?
how you've explained it makes it seem like additive is just the "difference" between some animations, but if all of my other animations are normal (and this one is normal when not additive), why does it explode in size?
a real additive animation (if you actually were to visualize it, would slam all joints to the origin (subtracts everything, even local translation).
in the previewer epic does 2 things to show you what is happening - it applies your mesh'
mesh's base translations
so it doesn't crush it in preview. It then applies the base pose to it so you see it like it was the original animation - but in "Reality" epic is hiding the truth of what that animation is
so now imagine if you apply the crused at origin with only rotations animation as if it were regular, it would actually ADD all those transforms back in to get it back to the base pose
which would basically double the distance of every joint from its parent, and scale them all up to 1 which puffs everything up and blows up the character exponentially as it applies scale to parent, then child, then child
you are basically adding 1+1+1+1 to scale channel of every joint in your chains
visualizing additives as what they actually are (crushed) or even what they are after skeleton transforms are added (wiggling around in your bind pose) isn't very useful in preview
so they go ahead and apply the subtracted pose back in, and you get what appears to be your original animation in preview, but in game it does something totally different because of the apply additive node
if you close and re-open the preview after you mess with additive settings, it should "snap back" to the original animation visually
so... how would i fix it?
i need the additive pose so it looks right, but how do i avoid this behaviour?
any idea ?
did changing the source to additive and picking your idle frame 0 not fix it?
you are using local additive not mesh space additive right?
yeah, local additive, posted this earlier

and what does it do in game?
whenever i land, the model gets super big
is that sequence player node in your animGraph the only place this is referenced?
have you tried turning off Force Root Lock?
In case anyone else ever runs into this: A Character that leaves behind invisible collision at its starting point (does not display even with Show Collision, but still blocks), then you should check this setting on the Character's Mesh: Skeletal Mesh -> Advanced -> Kinematic Bones Update Type : "Skip All Bones" causes this to happen.

this kinda worked, i think i may have changed something else along the way because now it becomes really small
as far as i can tell that's the only place it's referenced
Is there a blueprint node that allows you to continually loop an animation while other functions are going on?
A mix of PlayMontageAndWait and Waint until input released?
Why do meta-humans come as multiple separate skeletal mesh parts?
I think for the purposes of changing clothes and modular items and such
gotcha, is there an easy way to make the mesh one so I can animate it? every time i try i have to make them a blueprint, not a skeletal mesh
Not sure on that, but there are plenty of tutorials for attaching the pieces to a regular skeleton
so you animate like an invisible skeleton and the metahuman pieces just go along for the ride
lmaooo that’s funny
Well I animated manny the mannequin, you think i could bake the sequence and have a meta human perform it?
yeah, well what you would do is set the manny mesh to be invisible and then attach the metahuman pieces to it
i'd recommend looking around for some tutorials - something like "using metahuman in UE5 with Manny" or even "Metahuman in Lyra" should have some results
the process is too detailed for me to write up here in a tutorial, and there are sufficient ones floating out on the internet
wait let me ask Claude 2
ahh I don't want to mess with my current session.
Claude 2 might be able to help you - it's like a weaker form of ChatGPT but it's been trained up to a much later date so
its fairly knowledgeable on more recent UE5 stuff
Do you know any talented gun animator? Quality level of Milton Hjort who did the Unrecord gun anims. We have a guy, but need additional help.
is there anything similar to unitys animation flags? or whats the best way to like, play an attack animation and then go back to the regular movement state machine?
PlayMontage in blueprints is a good one
you can have your state machine doing its thing, and then override the whole body or even certain slots (so like, reloading a gun while running - you don't need an animation for reloading while running, while standing still, while crouching, etc.
Does anybody know of a way to stop a specific Anim Montage?
Hello, I am willing to pay if someone were to fix this for me.I would like to just merge two of my code. I have one that is for movement, and one that is for my overall gameplay. I have already moved everything over because I watched all 4 parts of this video. https://www.youtube.com/watch?v=c0ai-OlHs0U&t=2123s The only issue is the last 12 minutes since i don't know how to implement the animations. Can you just watch the last 12 minutes and implement that into my code. And he also has a GitHub that has the entire source code. So to put it simply, I just want the movement he has on his project onto mine. I have everything set up except the animations
Parkour with First & Third Person animations.
Part 4 of my UE4 parkour series.
Source Code below!
Complete Source code (UE4): https://github.com/DavieMakesGames/ParkourProject_UE4
Complete Source code (UE5): https://github.com/DavieMakesGames/ParkourProject_UE5
Updated Parkour video for Unreal Engine 5: https://youtu.be/jwPlvJRGbWE
I'm live s...
thank you!
montage was exactly what i needed
thanks brotha
So i managed to create procedural quadruped locomotion, quite happy with it so far, it can move at any speed and turn at various angles without foot sliding. This whole thing is just using 1 animation:
https://streamable.com/62c958

That is pretty cool. What did you do?
Just a bunch of control rig?
Yes 1 for stride warping, 1 for spine bending and 1 for foot locking. Planning to add foot placement prediction and procedural start/stop transitions. Goal is to use only 1 idle and 1 walk animation
Really cool!
I took some tips from GDC talks for RDR2, Horizon Zero Dawn, and others as well as the ALS plugin.
has anyone ever run into an issue where the skeletal mesh shrinks upon an animSequence being played?
Was the Anim Sequence made for the skeleton or is there some Compatible Skeleton setting or retargeting involved?
It was made for the Skelton
Fresh export from blender
And you've taken care of the conversion from Blender to UE units?
Yes
Scale applied and switched blender to use centimeters instead of meters
Wondering what is industry tool for animation? I used to use Artv1 and Artv2, but seems outdated now
*in Maya
I have a weird problem in case anyone knows.
I am using "Set Leader Pose Component" on the female mesh to the AnimMan (on the left). However this causes the thights to seemingly scale to the capsule of the character?
It seems this is only effecting this mesh, though I can't figure out why

(IE see how she has very chonky thighs)
Scaling issue, theres scale data saved in the anim
Can happen if skeleton was modified/scaled and then used for anim
Try remove all scaling
The keyframes I used in blender do not account for scale
Scale is applied before I set the keyframes
And it’s just rotation. An oven door opening
Any reason why this would happen when using the animation graph and playing the animation as a sequence?
If I test by just playing the animation through a regular blueprint node it looks fine, and in the Retargeter it looks fine.
For reference to show it in the retargeter
Someone please help?
My guess, is that your IK effectors are in the bind pose, not animating for some reason.
Is there a way to select Blend Masks from an animation template? Or anyway to set them through variables such as setting members in a struct?
Okay, then could you tell me why in bind pose...?
skeleton retarget option is this

maybe a dumb question, but where do you see/set the exact gizmo values of a socket in a skeleton mesh?

Anyone good with IKRig? I've setup chains and goals, but the bones are not moving when I test it out. Must have something to do with my controls not working in my Control Rig. They are connected properly to the Full Body IK, but still not working.
if you don't animate those ik effectors to follow the wrists in Maya/MotionBuilder they would be in a bind pose - are you just retargeting from Mannequin animations?
you could draw debug boxes on the IK effectors in blueprint and see if they are actually moving
i was trying to make a custom anim graph node class yesterday and I see what you mean. It is for sure missing a module include, I didnt have time to figure out which was required
Perhaps K2 + Animgraph?
How do you peeps handle first person animations for the first person template? I am trying to add a handgun. But no luck with tutorials.
Even when u dont keyframe it I believe the exporter still record the scale. Try set T0 when importing see if it works
Any idea why exposing a bool as pin on a linked anim graph does not actually provide it with given value (true/false) vs binding to a variable?


hey folks i'm just looking into Metahuman Animator, I'm wondering what the workflow is after you've converted your iphone video into an animation, is it possible to tweak, smoothen, add visemes within Unreal, or for any animation editing - does it have to be exported as an fbx, edited in Maya or something? Thanks in advance!
Hi ! I need to retarget animations to the Meerkat Skeleton from a mixamo animation, but I'm stuck since i don't know in the IK Rig Window what to associate to "Spine"... Anyone could help ? 🙂
This is debugged
VB Hand_R is VB head_hand_r
This is compatible skeleton of UE5 mannequin
Not retarget one


hi everyone, taking an unreal bootcamp rn. wanted to know - is there a way to see the axis values of a bone without having to eyeball it? like in RHino, there is a command 'what' where you can see all the info pertinent to let's say, a pole control - is there such a thing in unreal engine?
How would i go about taking only lower body animations from one graph and upper body from another and combining them?
Cache them then blend per bone
yeah i know that but how do i blend correctly?
Which bone should i use? cos spine01 is whole upper body, pelvis is no good too
depends on your rig, but you'd use the bone that separates, you wont have upper body stuff on the same bone as your feet, so you go further up if you need to.
hey, how do i open the rig graph?
I'm trying to bake an Animation Sequence I made, its only 60 frames long, and for some reason whenever I tell it to bake, UE5 hangs and task manager reports 0% CPU usage.
Basically the engine completely freezes/crashes
im using unreal engine 5.2.1 if that matters
Hey guys so I have some trouble figuring out how to set up an aiming animation. It's a top down game and I want the player to use normal idle and walk animations but when hitting right click the character should either player idle aim animation if its standing or play walk aim animation if its walking
I also wanna use anim blend so idk what the correct approach would be
You want to create a blendMask in the skeleton editor (add one), once you have edited where you want the second layer's joints to be (0 none 1 full movement), switch the layered blend node to use blendmask and add your blendmask in the USubclassOf blendmask spot
blendmasks are way easier than the old way of dealing with blend nodes,

this gives you total control over the weight of every bone in the skeleton - the mask is what the bottom pin, the blended animation will override from the top at what %
(when making them you can also right click and recursively set joints, everything below the only you click, to the same value... so like hips 1, right click and recursive. Don't forget to add your feet IK)
then spine1 - 0 (usually you would taper spine or you get super funky upper body movement like it's on a stick, like 01 = .8, 02 = .3, 03 = 0.1)
Can someone help please?
I tried to blend 2 state machines but it doesnt work well
Cause the upper body is t-posing if I dont aim
UE5 keeps crashing when I try to bake a pose or animation wtf
I finally figured it out
thanks anyways
I used the locomotion state machine cache for the first state in the aim state machine
so the upper body is using the default locomotion states when not aiming
really dumb noob question I'm sure, but I got an animation that has an awkward wrist position that I am trying to fix, if I go that animation sequence asset in the content browser, double click it, and go to the skeleton tree, I can rotate bones at various frames and fix it. Then I click save at the top left, however the changes I make don't seem to appear in game or in the animation blueprint preview.

I'm a coder just trying to fix up a specific animation problem real quick on my own so I am probably making a very dumb mistake but is there something more i need to do to save my changes?
Why can animation layers be only used once ? is there anyway to get around this restriction? I don't understand why it's like this...
Anyone here familiar with exporting path animation as alembic from Blender to UE5? It doesn't seem to work.
You can’t fix them in persona, but you can bring it into a level sequence and edit with a control rig with key frames and then export back to a new animsequence.
i see thanks, i figured it was something like that but it seemed so easy just to adjust the rotation and for my specific case I really just need to change the final frame
Hey everyone, I got suggested to post this here instead of blueprints:
I'm getting
CreateExport: Failed to load Outer for resource
errors with a motion warping notify child bp.
If I reload the asset after the editor is fully loaded, it comes back to normal, but when I save and exit, it's broken again.
I don't have live coding enabled, not sure what else causes this when it's not corruption.
It only corrupts when it's assigned to an anim montage
Hey so, I'm making a really cartoony game featuring an Ostrich, and for the animations, I wanna make the neck all floppy, or kinematic, a bit like gang beasts how the body is physics based, how would I go about that in UE5?
Got some more info about this bug.
When I add a motion warping notify to an animation and save, it corrupts somehow like so:
The one on the left is broken, doesn't function, the one on the right I just added.
Only trigger settings are available to this messed up notify
I fixed all this. Really not sure how my config was the issue, but 🤷

These should help you out:
https://youtu.be/Z8eqaFG7lZQ

The Full Body Inverse Kinematic (FBIK) feature in Unreal Engine 5 allows you to construct IK in Control Rig with a high degree of control and flexibility. In this feature video, we show you how to create a 100% procedural animated character with a highly modular setup.

Watch the recording of our presentation ‘New Character Physics in UE5: Can You Pet the Dog?’, originally shown at our booth at GDC 2023.
The new Physics Control component is a plugin that enables you to add simple, intuitive, and powerful physically based controls to a Blueprint in Unreal Engine 5.
In this talk, we demonstrate the basics of g...
I think that animating in persona is a feature EPIC is actually working on, but I’m not 100%
Hi, anyone know if it is possible to pass in and use parameters for Control Rig construction event? I declared variables but seems like they are only passed in for Forward Solve. This puts a limitation on my fully procedural approach for different skeletons.
Hi is has anyone played around with ragdoll in unreal engine
Having trouble with my character distortion in some areas
Can someone help me about my animations? I have some crouching and else animation but i cant see them in blend space. Did someone know about anything?
Making a slime creature for my game, need to make it hop from spot to spot. I'm guessing that I need to incorporate root motion? or in the animation have the root slide backwards, then up and forward past zero, and slide back to zero...
animating it in blender, and not quite sure how to do it
Hey so I have some trouble with my animations
Yesterday everything was working fine but today the animations dont play at all
oh
its cause the skeleton for them was unassigned for some reason
I eventually found the cause and some animations just un assigned the skeleton for some reason
Anybody has a clue why that would happen?
is there a way to make a "blueprint library" but for animation bps? 🤔
is this what linked anim layers is for? 🤔
Hey guys, I'd like to reproduce this type of animation/interaction in Unreal. https://youtube.com/clip/Ugkx29of7ZJagN7w1Kmen8xnARtdzLb6Q_tN Does anyone know which way I should put my efforts on ?
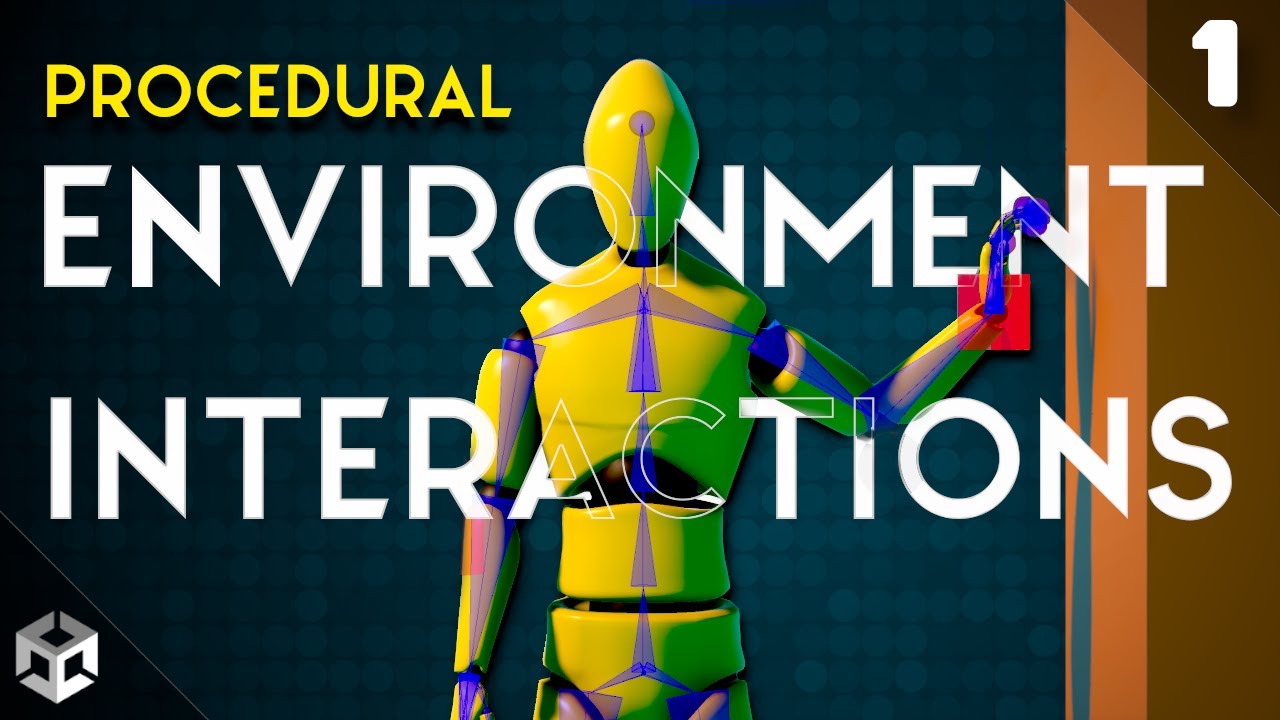
YouTube
9 seconds · Clipped by Theo Cucci Game Development · Original video "Procedural Environment Interactions in Unity | Intro and FAST character setup [1]" by iH...
I am thinking of using alembic for my animations instead of skeletal meshes. Is there any disadvantage to doing this performance wise?
This is because I usually run into issues importing skeletal meshes into ue5 from Blender. Geometry cache works fine and has everything in just one file in the content browser in ue5.
That's called IK (inverse kinematics) and is fairly common in games. There are many tutorials out there for IK.
RandomThought but does anybody here have a notion on what was meant by "Event-based Animation Transitions" in the 5.1 Patch Notes?
Does anyone know a common motion warping bug? Trying to implement motion warping on my AI but it only works on my player character. any reasons as to why that might be? I'm just applying a scale of (-1000, -1000, -1000) as a test
so weird. I figured it out. my motion warping only works on montages
any reason why?
is there a "Transform Bone" Node that takes the bone by parameter? 🤔
a node like this but without the hardcoded bone 🤔

How do you increase geometry cache resolution in ue5. I imported from Blender. Anyone know?
Does anyone know how to make starting pose same as idle in animations?
I'm dragging the rig on the scene, but it's default pose is A-pose, I want to make the default pose same as pose when character idles
Is there a way to copy all the bones parameters from one pose to apply them to other pose?
like their rotation
How can you hide the green spheres that appear in the IK Retargeter? I don't remember ever seen them
hi guys does the ragdoll in unreal engine get created autamically depending on your rig or do i have to create one myself
Hi, I'm attempting to import an animation into unreal, but I keep getting this weird warping of the hands. Does anyone know why this would happen?
found the issue. I needed to check "Preserve Local Transform" when importing
Question, how do UE4 compliant mannequins manage to have proper twisting on the wrists?
i have a similar problem
what how did you fix it
are you using ue5 skeleton
ight the time has come to update my animations for my character creator. Right now I just have a basic set of animations as highlighted in the first bit of this video.
As well as updating the animations themselves I want to add multiple animations that can be swapped out on the fly for when I pick up a different weapon etc.
How can I setup/create my animation blueprint in a way that lets me use the animations that I currently have (i.e. a base idle, walk, run, jump) as a starting point and just change the individual animations. I'm going to have melee and ranged weapons on the same character which ideally would be swapped out on the fly
Do you intend to transform arbitrary bones or just a subset known in advance?
a known subset
(Nvm, my answer didn't really address your question.)
should I make animations in UE5 or blender?
I just want to make a few using the Manny skeleton
I've already used it a few times using sequencer though
can someone tell me what is going on here? everything is fine in the 3D program and it exports and looks fine but when importing for some reason it moves stuff forward


If you're using blender, make sure you applied transform before exporting
whoops, meant to make sure that wouldn't send a notify accidentally hit enter before I checked, sorry.
It's maya
Hey guys,
I was trying to setup the Animation sharing plugin from Unreal engine 5.2 and ran into a problem with the animation blending/Transition asset. Did anyone of you guys use that before?
Heres the official documentation for it: https://docs.unrealengine.com/5.2/en-US/animation-sharing-plugin-in-unreal-engine/
Picture 1 is my Sharing setup.
There seems to be no animation referenced at the from Component node during runtime (Picture2).
You can see my and the documentations try of switching the animation at Picture 3, but its greyed out for some reason and doesn't affect anything.
Its my fourth day learning Unreal as an Internship, so please excuse my rookie mistakes.


Create a character animation system that can be efficiently shared across multiple characters.
Can you retarget animations with converting to humaniod skeleton like in unity?
Hey Im no expert but retargeting is definitly possible in UE. You habe to create an IK Rig if not existing. And then an IK Retargeter to conect the two desired IK Rigs. Thats a tutorial that helped me alot. https://www.youtube.com/watch?v=5x-RWAY70FA
Hello guys, in this quick and simple tutorial we are going to learn how to Retarget in REALTIME in Unreal Engine 5
↪️Just opened my Discord Server, join NOW: https://bit.ly/GorkaGamesYouTubeDiscordServer
↪️Check out awesome Unreal Engine courses: https://bit.ly/GorkaGamesWingfoxHorrorGame
Check out my Steam Game! https://bit.ly/3rVlXU1
Follow ...
Hello everyone 🙂 I'm trying to switch between motion capturing and an idle animation based on if there is movement in the MoCap. But it always plays the idle animation. What am i doing wrong?


Thx a lot
Hey guys. I have a really strange issue going on in my project. When I don't have a directional light source in the world map and simulate, my first person animations freeze after 2 seconds, and if I swap to the third person view they work fine. Has anyone encountered this before? 😅 If the dir. light source has a power of 0.0001 it works fine, but if I remove it it'll freeze the animations again 😅
Alright so Im trying to create a turn in place, basically every 45 degrees you turn (with anim offset) you snap to that position with an animation. I really cant find any good tuts for this so any help (or good tutorials) would be apreciated.
Hey quick question guys, I've been working on a basic (and rather jank) networked animation state by just replicating an animation Id. Is there a tutorial anywhere on how to better do this with montages and state machines? Just a generic good tutorial on how to programmatically integrate with an Animation state machine would also be appreciated
Animations read data from the game.
You replicate your character's state and the animBP reads from that
I’m new to Unreal and I’m figured out a way to animate tank treads on this cude. However I had to key frame and animate the treads and each wheel individually. Is there a way I can have them all spin at the same time together? Do I need to set up a skeleton or blueprint?
So I have an anim sequence and an anim montage that I'm trying to migrate to a new project.
I move just the sequence + montage over, and then it says "Cannot find skeleton, something something" and asks me if I'd like to choose a new one. I click yes, choose the same skeleton (UE5 Manny Skele), and then I lose all the animation data.
Does anybody have a fix for this?
To clarify, I'm just trying to migrate an animation montage from one project to another. The destination project has it's own version of Manny, and the source project has manny. The AM is going to be using the same skeleton either way
Hey, I've good animations but they have a motion
As in when playing the animation the character moves
Which I don't want (the motion is handled by my game)
I've tired enabling "force root lock" but the result is extremely weird, my character is shaking when playing the running animation now
this is called root motion, go to the animation file and make sure root motion is disabled
it is disabled

?????????????????????????
checking the box removes the motion
?????????????????????

me when the box does the opposite of what it says
With that box disabled - the character will move in the viewport
With it enabled - it won't.
There is a view mode that will show you the root motion stuff.
The reason the character stops moving is because it is now being controlled by root motion.
IE - the animation is driving the movement
Don't want this to get buried -
I'm just trying to migrate an Animation Montage from one project to another. The skeleton tha the AM uses exists in both, but somehow when I replace the skeleton I lose the animation data.
It can't be that hard to migrate an animation montage over. What am I doing wrong?
I'm trying to manipulate the hand ik goals on Manny at runtime. I can't seem to find a way to access them and set the transforms from BP
Anybody here do a lot of Root Motion locomotion set ups these days?
Personally I do but on the occasional Character I get issues and im wondering if anybody knows the cause.
I set up one and it works fine. Just as expected. But then ill do a different Character. His root motion shows the proper offset direction on the anim but when hes a pawn he moves side ways when pushing forward. Another moves backwards when I push forward. Same speed at the root motion animation would provide. The forward animations are playing. But the Characters movement is wrong
there are no Movement input nodes. Relies solely on the root motion for locomotion
anybody else face this? Is it poor imports of the model causing issues? Is it an engine bug? IS there a fkin checkbox lol. Anybody else dealt with this lmk
Seen this so often. It has to do with Epic’s 90 degree offset crap. Mannequin is -Y forward Z up in DCC and somehow converts to +Y forward and Z up in engine, then they rotate it -90. There is a way around this. BIND YOUR CHARACTER X FORWARD Z UP (with the mesh frozen X forward Z up, with the root X forward Z up in Maya). If you do that, your mesh and root motion ends up x-forward z up. You can still RIG your character Z forward Y up (rotate the root) and import with the check box to convert scene… OR… like a crazy person… you can set your Maya prefs to Z up and animate exactly like the engine, and don’t have the convert scene checked.
Key is… Y forward Z up root is what unreal expects for mannequin (and I swear it’s like legacy crap from someone making a mistake in 1999)
O wow Thank you Valkyrie
So I have to contact the Artist and tell him that
Of a few of my models I guess.
Personally, I would rather animate Z up in Maya, and never have to think about their ridiculous -90 mesh to character thing ever again. Lol.
If your root is -Y forward Z up locally in your DCC - then you animate with Y up in the world, then you “convert scene” on import. Your mesh will be Y forward Z up which is what unreal expects root motion to be… like an insane person would. That also works. Rolf.
But seriously, if you freeze your mesh with Z up X forward, make your root z up x forward, and bind Z up X forward, you never have to think about this crap ever again. No more spinning -90, no more calculating attachments with a 90 degree offset, all gone.
These are marketplace animals I usually have the issue with. I dont own maya. Is there a fix if its an asset from the Marketplace?
Is anyone familiar with Full Body IK? It's all working properly, except the I'm having an issue with the pelvis simulating weight. Maybe some setting in the IK for one of the bones is messed. Can anyone take a look at it for me?
one possibility is to build a control rigwith a node in between root and hips, and then rotate that node, then put the control rig in an AnimBP and run the animBP in an animation modifier to flip the hips 90. Another is to export FBX and then import with the "convert scene" checked - there is a chance it will progressively screw it up until it's correct if you do it over and over.
I wish Epic would just fix their mannequin to be X forward Z up and create an FBX processor to allow people to fix everything on marketplace if they want to sell it on the "correct" mannequin then no one has to deal with this 90 degree stuff anymore. Honestly with the amount of time you spend wrestling with it in production, it would be way better if Epic just bit the bullet, fixed it, gave everyone an animation processor to process from old to new, and be done with it
That would be amazing. Deal with it way to often
I am currently using a Enum to switch a characters' Hand pose. and just wanted to ask If my current method Is bad, Vs doing it this way?


I'm trying to animate a slime creature that hops around, but its currently sliding in between hops with the movement component. I dont know how to get it to not move while its doing the wind up and landing part of its anim. I've enabled root motion, but doesnt seem to be working
ok found out why the root motion wasnt working. an extra root bone is being added by blender on export
Anyone know how to solve this issue with alembic files when I reimport them, the materials I assigned to the file in the content browser reset to the default world material in ue5 everytime.
How do I pick the animation that plays on a character's blueprint viewport? I am using an AnimBP and my viewport preview is stuck on the character dying. It's quite annoying to adjust components visually on that character's bp. I know I can pause the animation but if I forget that checked they stay paused in game. All the animations run correctly during play but I wish my characters were on their idle in their blueprint preview, like the epic ones do.
I need help in the animation retargeting
I am exported mixamo animation working perfectly in ue
But not on metahuman , so i retargeted both skeleton
Metahuman hands are not working like mixamo
im having an issue setting up control rig for my character
I have all the control set up (Picture 1)
and it works for the bones in the legs (Thighs only) (picture 2)
I set up all the controls the same way (Picture 3)
but nothing outside of the thighs works (Picture 4 & 5)
I set it up from the control right quick start, but it doesnt seem to be working, what am I doing wrong? (all controls were made by right clicking on the relevant bone)


Hi all, I'm having a problem updating my project to 5.2. I created some animation sequences for my mannequin, which I gave two virtual bones for the weapon. After switching from 5.1 to 5.2, it seems that all virtual bones have been "reset" to the position 0 0 0 . Does anyone have the same problem?


Hey, when disabling a animation's motion, it becomes all shaky and weird. Is that a bug? Is it because my animation is made for not having motion? That seems kinda weird
I’m kinda upset, Unreal Engine has all the animation features I’ve been trying to build in other Tools over the past 2 years. Ugh.
Is there anyway at all to reference a bone by a variable without editing ue5 code? All bone modification options seem to be baked and can't be exposed by pins.
I downloaded a soldier mesh and then I downloaded an animation for the mesh. With the animation came a mesh with the animation already attached. How can I attach the animation to the mesh that didn't come with animation? When I change Animation Mode to Asset it doesn't let me select the animation.
Yea, but I could be a UE Pro by now, over that time. So, I got ALOT of learning to do before I can even create something I’d keep.
why i cant see blend pose?


Has anyone workd with the procedural animations video and understand how to make the BP_Leg blueprint as an array?
Hi any suggestions for a good animations tutorial
The animation is working in the editor but on the map when i am triggered it is not working properly idk why


by the way is there any ultimate course of animation in unreal engine in which also discuss about using blueprints for animations?
both the sequence and montage get the error?
i have no idea how to fix but try doing sequence first then making a montage out of it if it works
if it doesnt then you might have to give animation retargeting a shot even tho its the same skeleton
So I am having an issue where my character just bends their knees up and down when going into jog/walk animations. They raise the gun/hold it and maintain upper torso position correctly but their lower body is not working correctly. Is there a particular spot I need to be looking to fix this?
can you explain with more detail? if they're 2 separate animations i believe they'll either need to be montages, have separate caches for each, or be in a layered blend per bone node
is there any way to use motion warping with custom movement mode?
How does get curve value work? I have these keyframes, but when I print the 'get curve value' it isn't 1 completely but goes from 0 to 1 then 1 to 0? Why?

set variables that are in your animation blueprint, and then feed those variables into your control rig, and then use the variables in the control rig as you please
what I had to do was also export the animation as an FBX to the other file - I wasn't aware the AM depended on the underlying animations, but it makes sense in hindsight
hi guys! Currently, I want to make it so when my character is moving forward and my player inputs the opposite direction (so running forward but change of input to backwards), I want do a 180 degree turn kind of animation before continue running in the opposite direction
Just wondering for this task, would it be better to check the input direction offset from previous and current frame and if it's big enough, play an anim montage for it
or should i have state for this in my anim graph? or if there is any other way?
I know blend space is more suited for blending animations, but I don't think it's suited for what I'm trying to do since it's a sudden change? Correct me if I'm wrong.
apologies if this is a dumb question, im quite new at this and still figuring out when might be the best time to play a montage or when might be the best time to just put it in the anim state machine.
while I think there are probably several solutions, I think having a pivot state in your state machine is probably the way to do it? the Lyra sample project uses pivots, but its anim setup is fairly complex (even if it's easy once broken down), so im not sure how helpful it would be as a reference
yeah, I mean you have to at least set up the anim blueprint with the appropriate variables. you can change the variables from a regular BP though
so like I have a control rig that takes a vector input and does some stuff with it, as well as a boolean on if that control rig should be active.
in my ability, I feed in the vector and the boolean while the ability is active. so in this way it's controlled from the ability, but my abp is setup accordingly.
I dont think you can directly access the control rig from a blueprint
You can get ahold of it and do some minor stuff but nothing worthwhile afaik
Hello!
Trying to create a Animation Montage with a Niagra FX ( Via the notify )
It seems like my Niagra FX keeps looping and never dies off
Im quite new to Niagra FX but is there a way to kill the FX from the Montage or is there a config I need to swtich in the Niagra system itself?
Ideally I would like to kill off the FX as soon as my montage is over
I found a loop duration config in some of the FX, switched it to Once
They still loop into each other if my animation montage is not long enough
So do I need to just time it perfectly or is there a better way?
cant seem to import a new animation saved in the same fbx file as my mesh skeleton? It just asks if I want to overwrite the mesh, but doesnt seem to let me import a new animation
You will want to spawn the Niagara effect outside of the montage so you can store the instance and kill it on montage end or interrupt. You could make a custom notify that triggers an event in the same blueprint you kick off the montage from. This would let you spawn the VFX at location etc, but store the instance and then destroy that on the pins for montage end or interrupt
Hello guys, I need some help
I added animations to my character: Idle, walk, and run. When I walk/run, I always get lagged back.
Thx, that would make more sense, ill give that a try
Might be a noob question but how would you trigger a Niagara FX outside the montage?
I created a Anim notify Blueprint class and tought I could just trigger the FX trough a custom notify somehow but cant find any nodes to Play Niagara FX
Cant seem to find anything online either
Where are you triggering the montage from? I believe “Spawn system at location” is the blueprint node you would want.
Im triggering the Montage from a Character BP.
If you create a custom event in the same blueprint. From a notify you should be able to get the mesh owner, cast to your character BP and call the custom event. In that custom event if you spawn system it should have an output of the spawn node that is an object reference to the instance of the system, save that as a local variable. So in your play montage there will be an “on interrupt” pin and “on end” for both of those connect it to destroy nodes and if that variable is valid destroy the system. That should do what you are looking for (I hope this is all correct, I’m not at my desk or I would check). The problem with trying to do it from a notify is there is no way to save the spawned system instance as a reference variable so you can then destroy it. (Literally why I’m working on a plugin that is notifies that hold state so you could do it all from there).
Got it working perfectly now!
Thx again
Is anyone able to help?
I'm trying to import a FBX rig and animation from Blender to UE5 (I mainly need the animation)
but the animation is not in the slightest lining up to the animation in Blender, and the bones are offset
In addition, the import imports as multiple Animation Sequences, is anyone able to help if possible please?

anyone know how to bring the bones back to the actual positions?

might have been a scale transform >o>
I think I've solved it at last
Hey there
I'm still having issues... How can I weight paint the wrist of a character using the UE4 mannequin so that it doesn't break too much when twisting?
Since the mannequin has only 2 twist bones
Alright, definitely new to animation, imported a model off sketchfab, pulled it into a blueprint and made a static mesh, then exported and reimported to make a skeletal mesh, but am unable to add bones from there. Is it true that I have to add bones in blender or another 3rd party software to get the skeleton into unreal? What's the point of a "skeletal" mesh if that's the case?
I have an animation of my character falling down (after getting shot), is it possible to apply a ragdoll physics after a certain moment of the animation? Like towards the end to make him fall down like a ragdoll but still follow the animation it used until a certain keyframe? I'm just using sequencer, not in-game stuff
Does anyone know how to show control rig controls in sequencer while playback is active? I can see and manipulate my controls just fine if there is no playback, but as soon as I playback, they disappear
https://youtu.be/VL9C6DTMntQ integration tutorial coming after this update is posted!
You can now do procedural aiming based on socket location! The wobble effect now decreases when aiming as well. Additionally, the system also got some more changes such as making the logic smaller and getting rid of functions and parameters that weren't necessary. This resulted in a lower performance cost.
You can find the current state of th...
hey guys, I have an animation with root motion that looks all good in editor and as a montage, however, when I play it on my character, the root motion isnt applied?
would appreciate any tips on this ❤️
Check your anim bp that it can do root motion stuff. I forget where the setting is though.
I've set it to use root motion from everything if thats what you're referring to ;-;
You probably have root motion turned. In the sequence, search for "root" in the top left panel and enable force root lock. You can switch to look at the skeleton and highlight the root bone to see how it's moving in relation to the mesh. Unless you want to learn to work with root motion, you should see the root stay in place.
i need some help with attaching a actor to a skeletal mesh in the level sequencer
Is there a way to configure an aim offset to only effect certain bones? I use a strafe blend to show the walking animations but when I right click to go into an aim mode, the offset doesnt have any of the direct/speed logic only pitch logic so my character just stands still while aiming the game up and down. What is the best way to go about this if there is only two axis?
nevermind i got it, I just needed to adjust the base pose in my aim offset to be the strafe pose xd
Using paper zd how can I make animations play in multi directional setting, whilst using point and click to move system?
Is there a way to copy and paste the relative transforms of just a hand and its fingers, for example, to another pose?
I am having a ton of issues with importing an animation into the unreal engine. Im using a software called Mocap Fusion to use my vr as a motion capture suit. I used the metahuman rig in the software, and the animation recorded perfectly. But whenever I upload it to the unreal engine, its like the rig dosen't stay attached at all, with multiple limbs flying all over the place. Would really appreciate any help. Been trying to figure this out for multiple hours.
make sure you are exporting and importing properly with the correct settings. Some times its a bone orientation issue on export
Yea ive watched like 5 different videos on exporting
I genuinely have no clue what im doing wrong. Gonna try one last thing, as I do get an error, i forget exactly what. It had to do with bones not working correctly.
It said to enable T0 as a reference pose. Which is what im going to do now.
Hopefully it works.
Also thank you for taking time to respond. Honestly didn't expect anyone to see my question.
On import, does it show the metahuman skeleton pre-selected, or do you import a new skeleton?
Metahuman skeleton isn't pre selected, but I have the option to select it
when i select the metahuman one, instead of importing it as is, it looks just like yours pretty much
just a jumbled mess of body parts
So Im still trying to figure out if its a software issue, unreal issue, or an exporting issue
If this dosen't work, ill try with the metahuman skeleton while having the T0 option selected
Afterwards, ill see if I can import it with the metahuman skeleton as is, and then mess with the retargeting to see if it fixes it.
Have you tried importing as-is and Re-Targeting to the MH skeleton?
No I haven't ill try that too, just takes a while cause the animation is a bit long
like 1 minute
so its got to import 84k keyframes
It worked
animation and the rig is now in tact
animation played well
going to try retargeting it to the metahuman skeletal mesh now
made all my characters the same height and weight. So hopefully it will work.
when using full body IK in ue5 Control rig, how does one create a pole vector? it seems to have been removed or named something else?
Is there any way to create new animations via c++ or just code in general? Let's say I've got raw joint data for my right hand but how do I convert this joint data onto an animation?
Hi ! On our project, whenever I import an animation I have more than one sequence coming in UE: ArmartureAction_001/002, LOWAction, SphereAction ... and only one of them works actually.
I asked our blender animator and he does not know why.
Would you have an idea ?
Is it a setting in UE or a setting when exporting the FBX from blender that needs to be adjusted ?
we can have up to 20 sequences for one FBX animation ...
as said, one works (right animation), the other are mainly one frame stuff with poses, either same or different
wouldn't that be procedural animation using a Control rig ?
I think they can be copy/pasted, but I might be wrong
you can also remove frames, and I think update the total length in the main settings, on the right (there is a panel for the sequence itself in the montage)
I don't care how but I've got the raw values for the animation and don't wanna enter them by hand
I am not an expert, but functions can be created on a control rig
and the controls (handles of the control rig) can be moved with them
can you link that tutorial here? I want to know how to do that too
especially for reloads
ahh thank you
oh alright
Alright, I have a question, I am trying to make the jump animation for my character but the Jump Start and Jump end animation isn't playing, if you need any screenshots, just tell me what and I'll send it...
Did you create an animation Bp? Or are you using a template?
You can monitor your states while playing the game. Just select the preview instance in Anim BP toolbar.
@silent trail you can use this to visually debug what states are being called and if the entry point condition is met.
Hmmm... I see, I'll try it and I'll get back to this problem later if I haven't found the solution...
Thanks by the way 🙂
Hello guys, I've imported an anim from mixamo as you can see, I did the retargeting and so on it is fine. Now when I play it as a montage is gives the result you can see on my mannequin (looks at the legs), does anyone knows why ? Thanks in advance guys, hope someone knows cause it took time to create those 2 gifs ^^


@undone zodiac And how could I fix that?
Ok let me try
Well it does not change anything

I used the mixamo retargeting v2 plugin
Yeah I did just before but it did not change anything
Lemme try with Force root lock
Nope still the same with root motion enabled and force root lock
And yes I created a montage
Sup lads, I need some help on creating the jump animation for my character in Unreal Engine using an Animation BP. Problem is, the Jump Start, Jump End, and upon further research, the Run Stop animations aren't playing for some reason. I tried experimenting with Preview Instance to see if the state nodes are turning on or not and found that the animation nodes are being triggered, but the animations just aren't playing. If I need to give any screenshots or anything then I'll give...
@undone zodiac I can precise that the anim montage looks fine there is no issue with the legs
I have this Blendspace 2D (image 1) that I configured to play animations depending on the Speed and Direction of this animal. In the Anim BP's Event Graph (image 2), I have set up logic to get the speed and direction of this animal's movement. The logic in the AnimGraph (image 3) is set up to play the blendspace.


But, none of this seems to work.
Can anyone tell me why that's the case?
You can see the problem here.
Where can i find a tutorial on the broad topic that is character animation? I'm looking to setup a humanoid character with lots of states, mostly making use of the default mannequin and animations to start with
Is there a way to make the notify to trigger over a span of time rather than at 1 frame?

You are looking to make a "Notify State" rather than a "Notify"
The problem is you are plugging world rotation into a blendspace that needs local rotation, what you want is "relative to my current facing angle, what should my move angle be). So you need to unrotate the desired move angle (world) so it becomes a local vector to the character's current rotation. From there you can convert to rotation and extract the Z that will give you "relative to my current facing direction what direction do I want to be moving". You will also want to reduce the rotation rate of your character movement

@lofty vortex you may need to use the mesh so that you are accounting for a -90 degree offset (if you have one in your mesh the way Epic does it).
you might need to do something dumb to get the rotation offset correct (I don't bother with epic's -Y forward Z up "convert scene" garbage and instead I just bind my meshes frozen at Z up X forward with my root Z up X forward in Maya and import without convert scene so my meshes are X forward Z up like the root, so I don't have to deal with this crap)


Hello. I animated a scene in blender and now want to tranfer it over to unreal. Is this possible?
export as FBX
will my camera keep its data?
I am not sure what that means. Your character and camera are 2 different things
every root in your scene is a different "actor" in unreal
i see. I animated my cameras movements in blender. So i was wondering if after I make it an FBX would it keep its keyframes
you need to export your character and your camera separately. If your camera is animated it will need to be brought in as a skeletal mesh in unreal and animated. You can't bring scenes from maya or blender directly into unreal as far as I know
This is because you are not animating the foot IK in the the rig. You will need to either create an animation modifier that coppies the world location of the ankles, or just delete the IK control rig from the 3p character
Just remove this

Unreal uses your bind pose when you import your animation. I don't know a lot about blender but in Maya you are best to set it to Z up in your settings. Freeze your rig and mesh so that it is X forward Z up and bind in that pose. then in unreal turn OFF the default "Convert Scene" so that it's false.
That will make your rig (Z up X forward in blender) match you rig Z up X forward in unreal.
If joints are ending up in crazy locations in Unreal it is because unreal constructs the rig from the worldspace location of the bind pose expecting some sort of Z forward Y up conversion from its local X forward Z (while it's maya rigs are -y forward z up... 'cause... you know... that's normal) up and tries to do all kinds of stupid magic to compensate when the reality is... if you just work Z up in your DCC program (Maya, Max, MotionBuilder, Blender etc...) then you don't need any of the crazy and can just have X = forward and Z = up, and have your DCC match Unreal
FIX IT ALL: - set your scene to be Z up. Build your characters facing X with Z up. Freeze your skeletons and your meshes X forward Z up in DCC. Import them into Unreal UN-CHECK "convert scene" and bang. DCC is IDENTICAL to unreal. and you never have to think about any of this ever again. (unless you pull animations off of marketplace or work with metahuman, in which case there really should be an animation modifier called "fix the crazy" that you can apply to correct it)
(part of me wishes that Epic knew this, but I think the -y forward z up thing is legacy from 2 decades ago, and no one really knows why its a thing, other than it's how mannequin is, and so its how all the unreal marketplace animations are and so there is no fixing it... unless they decide to... and provide an animation modifier to fix animations that end up on their side with root motion 90 degrees off).
OK so I thought I was being Clever in solving this Animation flip code to a single node, and then adding it to all states for the right side, ONLY to find it can only be used once Whats the solution here to make something like this for reuse many times

hello! I'm currently trying to do turn running kind of animations, for example 180 degrees turn etc
I tried making a pivot state, but realize there were issues with the transition. Just Run to pivot is fine, but if pivot -> run -> pivot there may be issues, for example, while it is still transitioning from pivot to run, I want to pivot again, since it is still transitioning, it missed out on transitioning back
I also tried using a blend state, via inputting speed and rotation, but the results were weird. I calculate the rotation every frame, and I'm sure because of that, it goes from 0 to 180 back to 0, causing some weird animation issues
I'm doing all these via root motion, and I can't seem to find much tutorials on what's the best pratice for this. Do I just have a turn state? Anyone has any suggestions?
You are right it works without Foot IK, but isn't this Foot IK supposed to work with "pretty much" everything ?
I need some help, for some reason my Jump Start, Jump End and Run stop animations aren't playing... I used Preview Instance and saw that the state nodes were being triggered but the animations themselves aren't playing...
Hey guys I need some help with my animation. After I jump and land my animation getting buged like that.
I've done it in the exact same way you have described in your message but it still doesn't work.
Here is the BP for reference: https://blueprintue.com/blueprint/w2a0o-fw/
Hi, I'm trying to retarget some animations using IK for the hands and feet. Watched a few tutorials then tried it myself this morning, but for some reason the IK goals aren't being used, especially for the hands? I have a full body IK solver set up, and I've mapped the goals using the fuzzy automap functionality. I have no bone settings yet. I'm on UE 5.2. See the video where I show the two rigs and the retargeter, and the undesired behavior where the goals are being displayed but not used. Any ideas what this means? (Note: watch in full screen to see what I mean)
I'm not an expert, but, are your bone chains properly set?
I think you can see it in the bottom right of the video, the chains have the IK goals mapped
I think that's why it's showing that the hands aren't in the right place. Maybe I need a body mover or something because it can't reach?
I recheck the video and actually it looks like your retargeting is kinda correct compare to the left hand of the mannequin no? What if you preview another anim
It's close, but the elbow is all wrong, this video demonstrates it. Will try another animation
It's much worse in other animations, especially with root motion. You can see he's slower
The deviation seems to get worse and I'm not 100% sure he's aiming the same direction, which will matter a lot for a shooter game
I like the visual demonstration that it's deviating from its IK goals, I just wish I knew why
Hey everyone! I have a question and a problem. So I am trying to animate my character in UE5.1. to do simple movement like jumping, walking, running, idle, and now crouching. I set up the animation states and transitions. The jumping, idle, running, and crouching animations work fine, however, when the character falls off a platform, it repeats the jumping animation. I don't want that, so does anyone know why that happens?

Hello all ! I'm trying to animate an actor in a blueprint via a looped montage. My problem is to loop the walk animation (root motion), each time the walk animation loop, the actor reset to the start position, i would like him to not restart is location each time an animation of the montage start. Is there a way to do that ?
I would suggest adding a transition from Walk/Idle/Run directly to JumpIdle or JumpDown (whichever looks best for falling) when a character enters the InAir movement mode and Jump bool is not true
Ok, I did that, and put the "IsJumping" NOT Boolean, from the 'Walk/Idle/Run' to the JumpIdle state, but now it just goes to the JumpIdle, JumpDown, JumpLand in a continous loop. If that makes sense.
Answer to myself with need for a confirmation 🙂 Do i have to use Sequencer for this ?
Ok. Well you need to setup the logic and state transitions to handle these cases. What behavior would you expect a character to have when falling from a ledge instead of jumping?
I'll also note that your issue with the jump state continuously looping also means, in your current setup, if you jumped off a ledge the same flow would happen.
I need some help, for some reason my Jump Start, Jump End and Run stop animations aren't playing, the state nodes are being triggered but the animations just aren't playing...
Is there a boolean I can get to check if a motnage is currently playing?
Hey guys. I have a 3060ti and I"m trying to animate a metahuman using livelink process etc. BUt everytime i go to process performance UE5 crashes and it says my video has been exahusted and exremely poor performance...I have no objects in my level just a plane and my metahuman..what am i doing wrong?
Basically, I did set up the transitions for each of transitions you see in the picture. I even made a new boolean called "IsFalling" where the character is jumping but not falling for the Walk/Idle/Run to JumpStart transition and for the Walk/Idle/Run to JumpIdle transition, I made so the character is falling but not jumping, however, when I run it, the jumping animation doesn't play.
Hmm.. getting a nice multi-state jump and fall anim setup is a bit complicated and I can't explain it all here haha. But you could instead have another state called Fall which contains a looping falling anim. When InAir becomes true you transition to that from the Walk/Idle/Run State. Then when InAir becomes false you transition from Fall to JumpLand. Something along those lines.
But you are close you just need to think about what you'd want or expect to happen in these different scenarios then get the states and their transitions to suppor that.
hey, just pushing this up in case someone can help me out now
The problem is however, is that there is not specific looping falling animation, as each animation is split, like the jumping animation in the picture I sent.
Then you don't have enough animation coverage to do what you want. But you could take the JumpIdle sequence, duplicate it, make the duplicate looping and put that in the Fall state. It might not be a nice looking loop if that anim isn't animated to loop. But its better than nothing
how can i fix
Yo need to show us more
Show us ur bllueprints
for the characterr and anim bp
last time i had this problem one of my transition rules was causing it to enter an undesired state briefly
Hi, anybody know how I can add the leg movement to my locomotion and have it blend nicely? Meaning basically just add the thigh and pelvis movement?
got it

Epic Games has released 20 character assets from Paragon and now we want to show you how to get started with those assets! Shinbi's animation Blueprints are included to give you an example of how to setup the characters. In this livestream, Jay Hosfelt walks through the steps to help you prepare the other characters for use in your games.
Part ...
for anybody ever needing that
Quick question: I downloaded the Scanned3DPeoplePack and would like to create animations such as picking up an object, holding a flashlight, flipping a switch, etc. Would I create these in Unreal using the control rig the pack came with?
Does anyone know why this line trace is misbahiving so badly? it's colliding with something but there is nothing there ... there is only a box in the level


Need help here! Dont want to retype this all out so please see here https://forums.unrealengine.com/t/animation-blueprint-help-with-anim-layers/1247921

Epic Developer Community Forums
so I was using an Enum and passing the result through a series of copy bone node to flip the animation from left to right, But I thought It was getting messy and out of hand as I added mode animations. So I tried to switch to a traditional State machine method like so to clean things up . Only Problem is Im now faced with adding all thes...
How does get curve value work? I have these keyframes, but when I print the 'get curve value' it isn't 1 completely but goes from 0 to 1 then 1 to 0? Why?

Hey folks, anyone using Motion Warping in 5.2.1? I've scoured the web to try and figure out why it isn't working for me, and curious if there's a known issue.
Only thing that I've seen that I do differently from the documentation or tutorials is the skeletal mesh doesn't use an Animation Blueprint, and instead I'm just manually setting the Montage asset.
Anim sequence has root motion, there's a motionwarp notify in the montage, target transform is set before the montage, naming of the target is the same in the montage and the BP.
How to add animation in a character 2? I have an animation on character 1, I want the animation on character 1 to be used on character 2, how do I do that?
And now I've tried making an Anim BP with DefaultSlot added to it and still nothing. The Montage plays correctly, if I do a print of the motionwarp window by target name it finds the motion warp window just fine.. but it never actually translates the skeletal mesh.
anyone know how to get an animation working in sequencer when you already have a metahuman control rig? the picture suggests its possible if I can keyframe the ctrl rig imported from the animation, but I cant figure out how to. currently animations disable when I add a metahuman control rig, even if I set it to additive. I'd use the FK control rig but it is lacking.

Hi All, I have this issue with apparently non-animated terminal bones. Does anyone know what may be occuring here, please? This is during a specific (reload) animation perhaps it is a common problem, but this is where I have seen it. The mesh is a Daz character on a UE5 rig (I rerigged it to the UE5 skeleton, it is not retargetted). It has a facial rig as a child of the head bone (I transferred the Daz facial rig directly to the UE5 rig), but none of the facial rig should be animated. It is also worth noting that the same animation when previewed in the editor looks fine, what you see here is from the game preview. All weight painting looks fine and I assume this is validated by the fact the preview of this animation in editor is also fine. What should I be looking at (I am using UE5.2 and Advanced Locomotion Component). Thanks:

Looking at this tutorial, a squash and stretch rig is created in Maya with help of the maya Node Editor. Will an animation exported as fbx using that squash and stretch successfully be imported into unreal engine, and use the squash and stretch?
https://www.youtube.com/watch?v=dXJzgrIKs2Q&list=PLgala72Uap1rtI7sy75fDHqV7VKQBMknt&index=20&ab_channel=antCGi

Hello and welcome in my #rigging in #Maya series.
We are slowly getting closer to a complete rig, and in its current state we could pass this onto an animator, and they can begin to bring life to this creature.
However, before we do, we are going to do is add in some extra functionality by making the characters limbs and torso more flexible, ...
It looks like the hippo turns too quickly for anim to play. (Just a guess) You might need to turn down the anims turn rate.
that was it!
wow
thank you so much!
now this happens, it looks like the animal is drifting
should I just keep tweaking the turn rate?
You might want to make it so they have to walk forward to be able to turn.
can you give me an idea on how to do that? I'm new to Animations and AnimBPs
For AI based characters I don't know as its not really something I've looked into.
I see, thanks for your help!
Hey, can anyone suggest a method to import non skeleton based animation to unreal? Is alembic the only option? What is a standard method these days? Thanks
does anyone know what im doing wrong? i want the player to push up on the thumbstick and the arm rotates up. right for the arm to rotate right ext. does anyone know what im doing wrong?
what da heck

It seems you're not translating the coordinates into bone space?
The input axis value you receive is going to be in a kind of conceptual input space, it's up to you to translate that into bone space (or whatever space you choose to apply your additive in).
It's not even clear what space the incoming Arm Rotation is in from your video.
Anyone familiar with Motion Warping in here today? Trying to troubleshoot why my skeletal mesh (non-character) isn't translating when the montage plays.
Despite having root motion enabled, the motion warping window set, target names set, and a transform set, collisions disabled.
I feel like there's just a checkbox I'm missing somewhere.

why is the scale so different between these. the mesh size is right. the bone size is not
Well, figured it out. Just in case anyone else is curious - it looks like MotionWarping requires skeletalmesh to be in character class. I was trying to use it for a non-character.
It’s bone space
Just wondering what would the difference be if I kept it at bone space
Just to make sure, can you show how you're getting a hold of it?
Guys, how do I transfer animation from Unity to Unreal Engine? I don't have animation sources except in Unity.
Find a way to export the animations into a format that UE can import. Then import.
There is a built-in FBX exporter - but it transfers the animation to empties when I open it in Blender. In unreal are importing mesh only, without animations
Then find a plugin that gives proper exports or see if there is a Unity -> UE converter made all ready. If not, then you might just be SOL