#animation
1 messages · Page 16 of 1
do i animate with a UE mannequin and then retarget it or do i directly animate the metahuman?
well actually looked at the mannequin control rig
it looks the same lmao
IIRC the rig is the same, but proportions are different. The metahumans also come with the face board which I suppose you aren't too concerned with.
i intend to facially animate the character in just an intro cutscene using an Android alternative to Face Link so yeah not concerned with it
well i guess i would animate it again later on but that's far into development and could change
Mixamo haha (I can’t animate)

Where can I find the transition animation between two stones by searching under which name?


Speaking if rigs. What is the best and affordable ue5->blender->ue5 tool nowadays? I’ve seen Uefy 2, send2ue, game rig tools. Not sure which is more beginner friendly and actually working.
UE to Rigify and SendToUnreal seem to be pretty well supported, I've seen the git repo update recently.
Hi, I have a question
how to use this variables?
I use animation layer interfaces and I wanna use variables from master animBP, but I don't know how can I set as variables

when I click the play button how do I make that display camera view?
if your camera is a component in your player blueprint, it should set automatically
Hey, could someone help me out why my root motion is not working in engine?
I have been combatting this problem for a while now, I have played about with the settings in engine (i.e. all the settings for root motion), however to no avail my animation always resets to the initial position the character was in.
I am starting to think maybe my animation export in blender is wrong, if someone could help that would be great, and yes I have dug through youtube on root motion in blender to unreal could not find any that actually show the process clearly and mostly beat around the bush
Oh I think I can help. I had an issue like this.
At least for me, the armature as a whole, is what Unreal considers to be the root bone.

so I have to move the whole skeleton
it's a weird thing, unsure why it does it, unsure how to properly fix it, but this what I do to work with my problem. If there is a better way to fix it, I'd love to know. But for now, this is all I got, maybe it'll help you too :)
@thin flicker Is on the right track, Blender has a bit of a hard time with Root Motion because of the Armature node which gets exported in your FBX.
There is a way to solve this in your export by making sure your Armature Node type is Null in which case Unreal will ignore it and use the Root Bone as the first bone in the skeleton hierarchy. I would suggest in @thin flicker's case that you have a root bone in your skeleton which is at world origin, instead of using the hips as your root, this will cause problems with root motion as the engine expects the root to be at the base/root of your character.
To make sure root motion is working your in your animation sequence you should see a red bone from the scene origin to the root of your character.
I made a quick example, in the Blender scene I'm using the Mannequin template with the UE to Rigify plugin and the large control at the base of the mannequin is the root control which I can move independently. As this control moves I'm introducing root motion to the animation.

Hey, if you are available, could you hop into vc or something to problem solve, cause I have by default Node Type set to null this whole time, could be something I am doing wrong.
Thanks.
hey everyone, I am running into an issue that is causing me confusion; in general, what I am experiencing is not breaking anything for my project, but the fact that its happening is confusing me, and concerns me in terms of possible performance issues. I am dissecting the Lyra sample project, specifically its use of animation blueprints, and linked anim class layers. For my project, I have gotten to the point where I am able to link my unarmed class layer, via enhanced input events (just to ensure I know whats happening {I have also tried to link the anim class layer via on possessed event, but with the same results}). The issue is that in the animation blueprint that I am linking, I am seeing 5 different instances to preview of this layer, where it should only be one (at least that is what I see when debugging/previewing their linked layer in editor). Does anyone have any ideas as to why there are so many instances of this linked layer when I am only calling the function, Link Anim Class Layers, once? Is there a possible performance concern here? If more information is required to answer, I will be more than happy to do provide it. Thanks in advance!


Quick question about Control Rigs.
I basically only use UE5 for rendering still images right now.
So I need a way to pose characters for a scene inside the editor.
I can do that with Control Rig.
BUT: I need to have some basic logic attached to the character, so I have set them up inside a blueprint. But inside a BP I can't use the Controlrig in the editor anymore.
Is there a simple/"intended" way to get the functionality back without having to recreate controlrig controls inside a blueprint? Ideally something that works without BeginPlay/Tick
Hi. I just ran into a issue I have never seen before, I exported a door from 3dsmax to unreal. I use points to animate in 3dsmax. But when it is imported into unreal engine 5.1.1, the mesh is part of the bones list. Is this common ?

this is how I have always exported to unreal engine in the past, and I can never remember that the mesh is part of the bones list
this doesnt make any sense to me, if I want another mesh to animate using the same rig this would be invalid
Anyone know if its possible to expose a struct to cinematic? That option disappears on that type of variable

wait, you cant use linking to animate with in 3dsmax any more? my problem solved itself when using skinning.

Happy to help problem solve, maybe you could post some screenshots of your blender rig and Unreal Skeleton asset.
anyone ever seen this before?

Yeah sure, I'll post tomorrow pretty late right now.
Yeah UE5 has weird thing where the bone joint scale is exaggerated a lot, to change it, do this
Character > Bones > Bone Draw Size = 0.001 or something low enough for you
It resets every time you re-open
thanks. it's weird because it was working in 5.0 and maybe even 5.1.0
np np, i'm on the NZ timezone so I'm way out of sync
Is there anyone available to walk me through 8 directional movement with start and stop animations? I can't seem to get it down 😦
What are you unsure of exactly? Like most things there are multiple ways to approach a strafe set and locomotion transitions
For one, I can't seem to get the "Resident Evil 2/4" camera. Where I can spin the camera around the character freely, but if I hit forward the character will move/turn towards where the camera is pointing.
Secondly the animations just don't seem to flow together well, I have watched a couple tutorials on it and I have it...kinda. But it doesn't look good.
I see the camera effects I want are in the Advanced Locomotion System pack, but I don't know how to reverse engineer it.
Are Manny's ik_hand_gun and ik_hand_l/r suitable for attaching melee weapon meshes to them or the purpose of these bones is different?
For the controls you might be looking for these settings on the character movement component.
Orient Rotation to Movement will face the character in the direction they're moving.
Use Controller Desired Rotation will maintain the orientation of the character with the camera angle while allowing you to move in any direction.

One thing to bear in mind is that the Use Controller Desired Rotation will rotate the character even when idle, meaning they will spin on the spot.
When it comes to the animations themselves there are a lot of reasons a typical eight directional blend space wont necessarily blend well. The most common is the foot phase of the character, this is usually very evident in sidesteps because the motion of the legs does not interpolate reliably with a standard forward walk/run. And that gets even worse when you're trying to blend a forward animation with a backpedal animation.
If you look at the ALS project you will see that there isnt really a blend space for the core strafe locomotion. Instead it uses a blend multi node to achieve a better blend of the locomotion animation (if I'm remembering correctly).
Another way to approach strafe locomotion is to instead create two blend spaces which cover 180 degrees of movement, one for your forward locomotion cycles, and one for your backward locomotion cycles. The idea here is to create 360 degrees of movement but split your animation assets into blend spaces which will blend reliably, so all the forward cycles blend well, and all the backward cycles blend well, but backward and forward are like oil and water and wont blend well, therefore we keep them separate. So when we want to run backward we flip to the backward blend space using a blend node for example, and when we want to run forward we flip to the forward blend space. You can see this demo'd here: https://youtu.be/4rnsph1eg4s?t=3096
I will say it's not 100% necessary to create an offset blend like the y have here with the 135 degree blend, but it might depend on your assets.

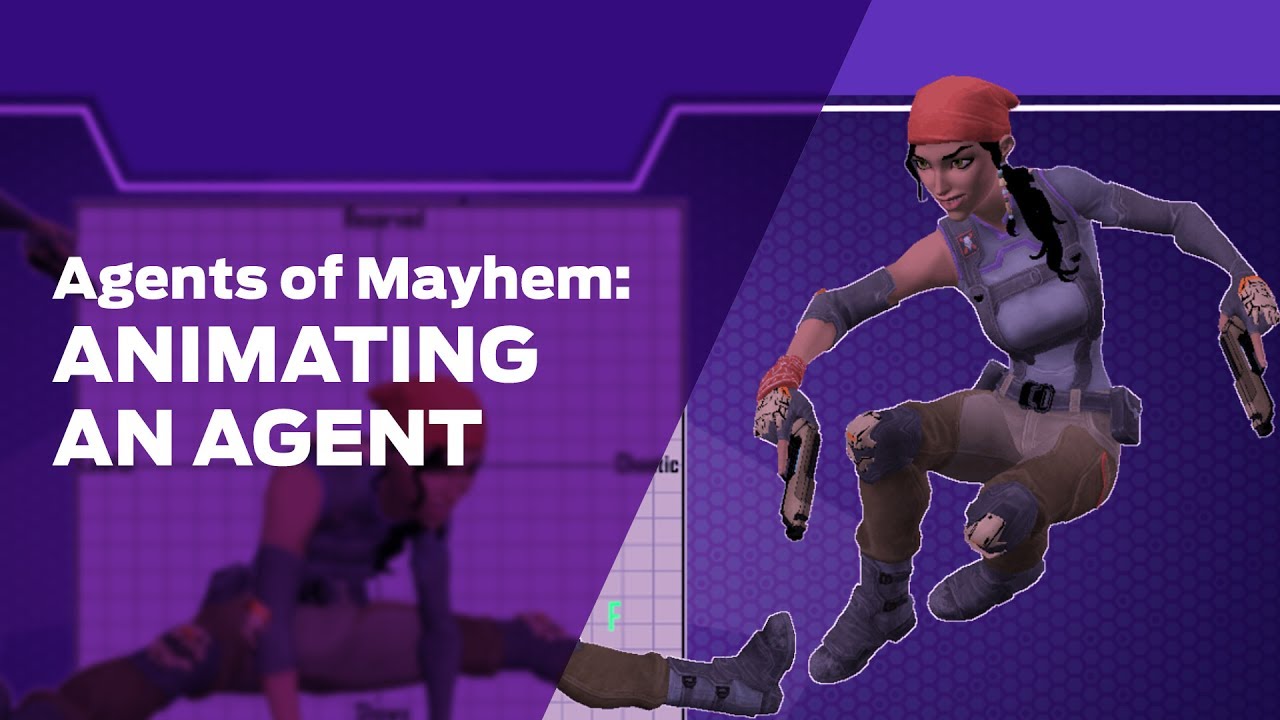
Sr Animator Mike Jungbluth, Technical Animator Evan Cox, and Sr Programmers Rob Rypka and Isaac Vanier do a deep dive into the animation systems of Agents of Mayhem, and everything that goes into animating an Agent!
Join us every Thursday @ 2pm PT/5pm ET/22:00 BST for our weekly stream!
http://twitch.tv/dsvolition
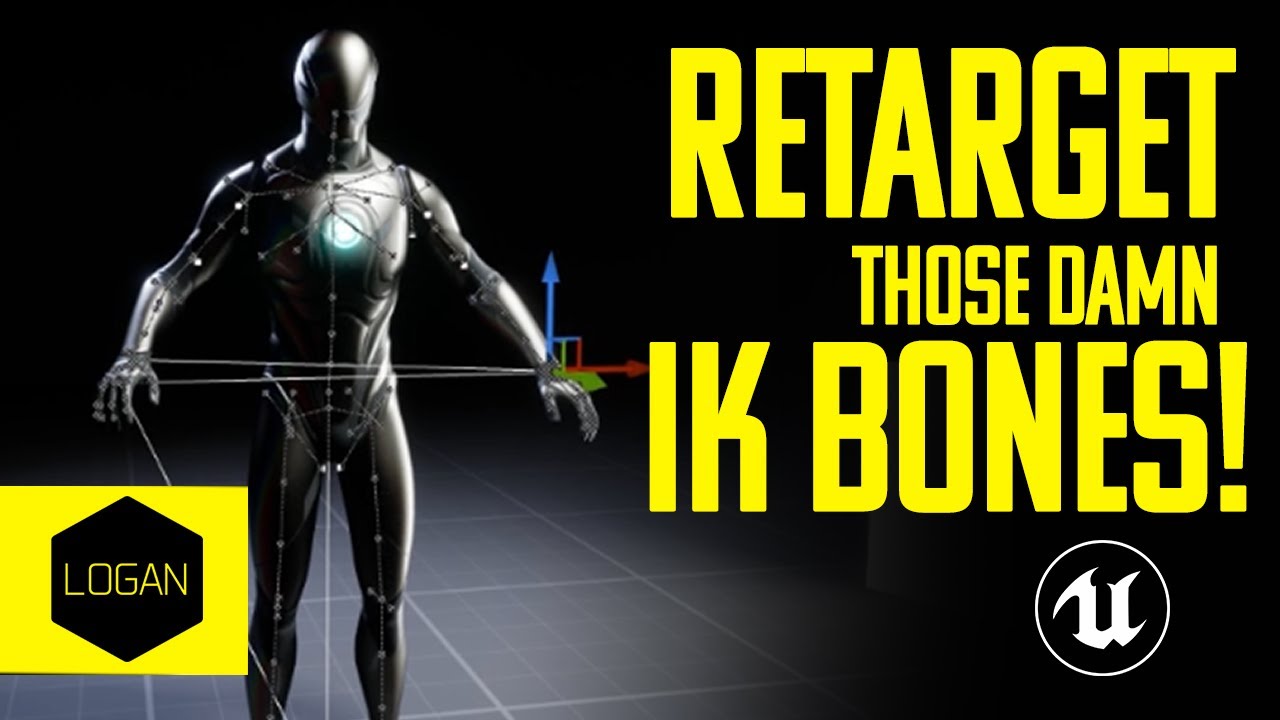
You can attach a weapon to the ik_hand_gun bone, if you want some examples of why these bones exist and how they are used I would recommend this video: https://youtu.be/vZW8mxlQJEk?t=1793
Laurent demonstrates how retargeting can alter a pose and how these IK bones can be used to create accurate hand placement for props and interactions.

Senior Gameplay Programmer Laurent Delayen explores animation retargeting and what it can do for improving your animation workflow.
So it seems like it is not for equipment slot really. I'll proceed with adding additional slot bone for that
I'm running into a problem where I imported a character, retargeted, fixed the IK_foot_l issue it had, but now when my character jumps and lands, when they land they slide about a meter to the left, then slide back. Any idea what may cause this?
hello guys! I have animations for a basic dragon but i want to somehow make a new animation that is throwing a fireball (animating its mouth) while standing idle in flying mode.. what is the best way? can i make it through unreal or should i use another program?
There are in place animations and root animations. Root animations will move the character with its animation.
Hrmmm ok I will have to check - they are just the retargeted animations from manny
so it should all work ok but /shrug what do i know I'm just getting started with the program
Hey, can anyone here help me with an animation issue i'm having in unreal, for some reason all the animations i made in blender has a weird arm glitch when importing into unreal. If someone could point me in the right direction for a fix It would be appreciated 🙂
Cheers. Me too. Just started this week, been constantly wanting to learn more. Using v5.1 when most tutorials are for v4 has been tricky tho 😅
If i have a bunch of skeletal meshes with v different armatures but based on various inputs/variables do the same thing, do i need a separate animation blueprint for each?
is there a way to enter a different animation state at the end of an anim montage? right now it seems as though all the current anim montages transition back to idle
Hey, id like to add root motion to my attack animation, but my skeleton is weird, i have put an empty as parent to the armature, it isnt animated but it is scaled x -1 because my animation was left handed first
So which bone should i animate for that? i think it should be my rootPos bone that i should animate


https://gyazo.com/7e10af4619609d92aecd474f3b30362f Here i added motion in blender but as you can see the camera isnt following, i enabled root motion

This is it in Blender I have 2 rigs one for IK and one for the game that copies transforms from the IK


hello, hope everyone is well. i've been experiencing a problem with an asset as many have too. I am curious if there is a step missing within the animation set up.
UE4 you could pretty much use any character with any set of anims. But UE5 it seems there is a problem with proportional values. so a set of animations made for the manny ue5 skeleton. when used with quinn (or other characters), are really out of place.
My question is, is there some step missing that allows what ever character that is being used to match the animation data correctly?
thanks in advance for anyone who takes the time to read and reply to this 🙂
Hello if you need any animation DM me
Got a question: Trying to prototype a M&B Bannerlord combat system. Basically you can click and hold and it uses the last mouse move direction to decide which way you are about to swing a sword. On release, it would continue the Attack.
Am I right thinking that I should have 3 animations for a swing? Raise (move from idle to a hand high position ready to swing), Hold ( hold at this position, looping montage?), Release (swing through and return to idle)?
With this what would be best practice to have the Hold animation feel decent while walking? I am having a hard time getting a good "hold" animation as the entire upperbody gets locked. Should I be using a AimOffset instead for the Hold animation?
I think you're going to have issues with that Humanoid node, because that is technically your root bone since it's first in the hierarchy. I believe the reason it's appearing is because Unreal needs it to be named Armature in the FBX to know to ignore that node. So I would suggest renaming the humanoid armature object in Blender to Armature and re-exporting.
Ideally you would want to animate that RootPos bone in Blender to achieve root motion. If you read my post above, does your in game skeleton have an Armature node above the root in the bone hierarchy?
yes there is an armature "bone" + an "empty" bone
i showed in my screen that my armature is named "Armature" already
but i think that the empty is the problem
If they're imported into the engine as different skeletons then yes, if they're proportional differences of the same skeleon, then ABP's can be shared, and you could use child ABPs or ABP Layers to achieve the animation goals you have.
I agree I think the empty is the problem. You want to ensure your skeleton asset has the root bone as the first node in the bone hierarchy, and every animation export you make should follow that convention.
yeah the root pos is the first bone in the hierarchy
but i didnt find a solution without using the empty to invert my anims from left to right
so you want to create flipped animations in Blender?
do u know how to do that??
I tried alot of methods and none are working for now
know there's a Paste Flipped for poses, but that seems slow and manual and uncool 😎 There is a mirror node in Unreal if that is more useful.
a mirror node? where?
In the ABP
oh
but how can i do that on all animations?
will it work on everythign?
oh yeah its workiiing wow

but removing the empty will break alot of things in my character system i think
<@&213101288538374145>
So, I have to do some animations for this character still which includes breathing chest, breathing mouth, finger movement, toe movement and each twitching.
So, the "sitting" is already a 1 frame animation, but the question is if it's easy to just make all these animations as either morph targets or proper animations and then just queue it up in a Blueprint to trigger every x, possibly with a certain chance of playing?
Input greatly appreciated.
is this an IK bone? I can't find much info on how to add these. but I suspect I would need to use Blender or something like that

It will probably mean you have to reexport eveything 😬
yeah i guess... meaning the blueprints will be broken? or i would have to import new animations?
and replace the old ones one by one?
IMO the clean way to do it is to reexport and import new animations and create new Blueprints, you could try retargeting to the new skeleton but it seems sketchy with the different root hierarchy
i think i can just replace every animation used in my blueprints, it will take some time but i dont need to recreate the blueprints lol
The thing is you will need to make sure your base skeleton no longer has that empty and armature node, so doing that will mean changing the skeleton, and if the skeleton is different the ABP will become invalid.
So, um, this might be a dumb question I don't know
I am trying to follow along a YouTube video, and I have a little question
So I am on Unreal Engine 4.25.4
Here is what I have running on Unreal:

And this is what is on the YouTube video:

How do I get my screen to the one potrayed in the second picture?
So basically I want to Montage Notify
It's the same Window, the UI is updated in your version of the engine, your notify track is there below the viewport:

Yeah, but how do I make my screen look like what’s on the YouTube video?

I want to do this
Right click here:

Ok, I think I figured it out, thank you
Renamed now all my anims are jumbled where the animation shrinks the character in Unreal due to some import error "Imported bone transform is different from original". Which is odd cause all I did was rename "humanoid" to "Armature" which did work here:

Yes, but the problem is now, you have changed the bone hierarchy, which means your skeleton and anims are no longer compatible. So you'll need to reexport
having issues getting pose watches to be visible in 5.0... seems like an animbp node id mismatch?
oh well, I guess I can live without for now
I've created an AnimNotify that has a variable on it that I want to access when it's triggered. How do I get access to it? I've gotten this to trigger but it doesn't give me any objects to work with.

Looks like I'm able to access my character from within my notify blueprint, that will work for now

Is there an easy way to create the aim offset in engine? I mean the animation adjusted so they're looking up or down?
Hi guys I got a problem when retargeting, the animations I am using are made on the IK_Hand_Gun
They are weapon animations
The Author of the animation made them to align with their skeletons hand, so all the animations match up properly when using their skeleton
My issue is I want it to work with the UE5 Skeleton but the hands are not in the same location
And on the new skeleton
The thing is its 'retargeted' correctly in the sense the values are right
But the offset it due to the hands bing in the wrong location, I think because of size issue or something
As a reference I am using the default UE4Manny to UE5Manny retargeter
So it should be setup properly
This is the original position of the IK_Hand_Gun, and the output of the retargeter


Yes, right click in the browser, go to animation, then aim offset, or if you want a 1D one, animation, legacy, thenAim offset
Right. But don't I need an animation sequence where it should be at maximum?
Or minimum values?
Yeah. I thought so. I was asking a way to do that easy, but there probably isn't. I will just have to do it in Blender, oh well.

Another strange thing, from the retargeter, the bones have some sort of constraints
As you can see where the right hand should be to where it is because of these
this looks like the IK solver on the manny IK rig
the retargeting workflow doesn't seem to handle ik or virtual bones. not sure if this is by design.
hi, i have a timed niagara effect on an animation. is there any way to link the effect to a blueprint to be togglable?
Hello! Does anyone know why exporting an animation from unreal causes some issues? I have this animation (from 4.27.2 on the right) here but as you can see in unreal engine 5.1.1 (on the left) it's bones have gone a bit... funky. As I said earlier, I exported the animation from engine


if anyone knows how to move animations between projects without these issues being caused then please let me know <3
from what I can see it might be caused by moving between engine versions
but still cannot confirm
now it does turn out that the best methodology I have found is migrating assets as opposed to FBX exporting them and then re-importing them
Hey guys! I have probelm on the animation. animation downloard on mixamo and retargeting to our mannqiue but there not as i expcted any one can help how can i fixed?

thanks, i figured it is the case, basically the ABPs are going to always need to be different when you have different skeles
Hi all. Kinda newb question maybe. But how do you animate the root bone in Maya (or any other DCC) without negatively affecting the pelvis? I have motion capture files with movement on the pelvis but the root remains at the origin. I want to setup a constraint to have the root bone follow under the pelvis on the ground plane.. but when I do that the pelvis gets double translations. I understand why its happening, I just don't know the best way to fix it
Forgot mention, I did infact change the name to "Armature" in my animations as well, I have separate blend files per animation
Usually an animation rig would allow you to animate the root bone independently of the pelvis, so you can create accurate root motion.
A common way to approach this if you don't have a rig is to bake the animation of the pelvis onto a locator or other simple object, and then constrain the pelvis to that object. This way the pelvis animation stays the same, but you can now influence the root without affecting the pelvis because of the constraint. When you're happy with your root motion you can bake both the root and the pelvis and remove the constraints.
ah yep, are they coming through with the expected bone hierarchy now?
Lemme check, not on my PC just yet
Yep, the bone hierarchy looks indentical

@viscid willow as you can see the animation on the right shrunk the character down due to some weird bug. I'll probably just redo the animation cycles, and the root motion animation which is an attack move
is there a reason why manually removing frames on an end of an animation within unreal results in the montage on completed function being broken
I can put other animations into the same play montage node and it will return completed when it has well... completed. But my edited animation just doesn't do it
how inside an animation blueprint do i interp a rotation from current to target if i dont have a current?
i only have new targets
it constantly updates
but it glitches atround heavily
with no between steps
i would need to somehow get the bone rotation
but that is wrong too
I'm trying to simulate physics in the tail of a mesh, but the name of the first bone in the tail is "Tail.001". however, the "name" variable doesn't allow periods. how do i pass this into the function?

Control Rig
You could also modify the animations without Control Rig. CR just makes it easier to handle IK/FK when doing so
I don't understand the problem. There should always be a current rotation. Unless you're saying you don't have a current target yet. In which case, you'd just need some default value.
Slowly figuringn this out. I added a character from daz to unreal. when somethinng lands it shifts 3 ft left 3 ft right to come back. If i open the animation in the viewport it shows that the figure is performing the land action to the left of the viewport and not in the cneter.
anyone else ever run into this?

vs. in the middle of the viewport for all other animation previews
Right. I don't have much experience with control rigs though
Second question maybe easier - I bought an animation pack annd it comes with a mannequin is the idea that I retarget that mannequin's animations to my own character?
I'm trying to simulate physics in the tail of a mesh, but the name of the first bone in the tail is "Tail.001". however, the "name" variable doesn't allow periods. how do i pass this into the function?

Anyone know what's causing this in 5.0.3 when I bake an animation...it suddenly started doing it and it seems to be independant of the animation sequence...I went to another one that had previously baked fine and it's also now doing it.

I know this was fixed in 5.1 but I'm on a project that can't currently be converted
check out his awesome AI animated video clip! https://www.youtube.com/watch?v=wnMvDjWvC9o&t=206s

ArrBee Sound - Flight 309 Official 4K HD | AI ANIMATED MUSIC VIDEO
This is a special Gundam inspired music video for my big booty deep house cut!!!
Created with #deforum #stablediffusion #aianimation #gundam
#aiart #HD #AImusicvideo #arrbeesound
Follow arrBee Sound on:
https://www.instagram.com/arrbeesound/
https...
In blender the pelvis moves and the animations looks right. After the import into unreal, the pelvis stays in the same spot and character is animating with everything but pelvis. Root motion is enabled in that animation. Anyone knows why this would be happening? This is a custom skeleton with a mesh
does ue5 have the old ue4 retarget system or i have to make an ikrig each time i want to retarget something?
did you ever find a solution to this? i am having the same issue
If that problem persists, I would check your blender scene scale settings
I did, but I don’t remember which videos I used to solve it… sorry about that. You might want to check that the bones are matched correctly when regathering body animations

How can I obtain the position of a bone relative to another bone in an animation
Needed to drive a FABRIK node for keeping the left hand on my gun
You could use Virtual Bones if you don't already have IK bones set up: https://docs.unrealengine.com/5.0/en-US/virtual-bones-in-unreal-engine/

Resolve layered animation problems by using Virtual Bones with IK.
Does anyone know why my animation rises so much when the original animation barely rises? This happens when I retarget the animation to my character
I think the answer is because my character is smaller, right? If so, is there a solution?
anybody know if there's a way to switch bodies in a physics asset back and forth between kinematic and simulated at runtime?
I've got a ball and chain mesh and I want to run rigid body on the chain, but i'd like to blend it with different alphas at every link in the chain
it's working right now, but I have to use a full copy of the physics asset for every link. seems like a big hack
ok i tried it out
it doesnt quite work in this case
My problem is that I have a blend space for the Aim Offset animations, and the left hand doesnt always stay on the gun
There are 3 bones in the arm btw (Bicep, Elbow, Forearm)


Ok
in the end I think I am going to use FABRIK to fix the hand position (relative to the right hand I think)
the problem is, how do I get the relative transform of the left hand to the right hand in an animation?
same here.. anyone else find a solution?
@slender trellis have you figured out how to resolve this issue?
if you create a virtual bone which is a child of the right hand and targets the left hand, that will give you a bone which is the relative transform between the left and right hand.
You can see an example of this here using IK bones, virtual bones work the same way, the difference being you can create virtual bones in the engine: https://youtu.be/vZW8mxlQJEk?t=1793
Senior Gameplay Programmer Laurent Delayen explores animation retargeting and what it can do for improving your animation workflow.
you can see this in use here where virtual bones are used to fix contacts and parent bone spaces: https://youtu.be/Zwc9uuOYfFg?t=724
Epic Games' Animation Programmer Jurre de Baare recaps all of the animation features built for Unreal Engine over the past year, including those created for Fortnite that have made their way back into the tools. In this presentation from Unreal Fest Europe 2019, you'll learn how new features and upgrades have been battle-tested to improve animat...
I think you might find more reliable results with Two Bone IK, I know you mentioned there are three bones, but the bones you described are exactly the bones you need for Two Bone IK, which is generally more stable.
I'm also of the opinion that these issues might be better solved using Control Rig.
not to sure if this is the right place but can anyone explain why this happens?


^click to zoom loaded weird
The images are a bit low res, it's difficult to read what the inputs of your nodes


but the elbow bone isnt seperate
they are linked together as a 3 bones in the chain
Nope
will try thx
Yes, and that's perfect for a two bone IK setup, the node takes in three bones the shoulder, elbow and hand, same way it works for the legs, it takes in thigh, knee and foot. In both cases the Hand and Foot are the Effectors of the IK constraint, the bones being manipulated in that case are the two bones above the effector bone.
Shoulder = Bone One > Elbow = Bone Two > Hand = Effector
but theres a forearm too
or is this setup for moving the shoulder as well
How many bones are there in the arm from shoulder to hand? Could you share your skeleton?

here you go
(ignore the small bones in the forearm, those are for arm twist, properly parented to forearm and will work)
Oh jeez never mind, does FABRIK allow you to set rotation limits for bones? because that arm could end up behaving like a tentacle with that many bones in the chain
theres 3 bones. dont look at the 4 small bones in the forearm, those arent part of the bone chain and are directly parented to the forearm
they will rigidly follow the transforms of the forearm bone
Oh right yes I see, for some reason I didnt register the yellow forearm, that elbow is likely gonna cause issues though
in blender you just set IK chain length to 3 but idk what will do that in unreal
Two bone IK doesnt work with this chain? I don't need to move the shoulder
CCDIK might give you a solution.
You could feasibly make a chain from elbow to hand, not sure how that might end up looking on the character
What's the purpose of the extra elbow joint btw?
gives better deformation at the elbow (and knees)
without it unless you do some good weight paints or shape keys it kinda collapses like a crushed cylinder

For those of you who like those clean bends, you're gonna need a clean joint system! The double joint system is great way to accomplish that and is the system we will be using for the rest of the series. Hope it helps :)
X-Ray Footage from Noah Weiss:
https://www.youtube.com/watch?v=pOBCCrBymcM
https://www.youtube.com/watch?v=NDFlqyXurzc
Femal...
badly titled video, but this is just about the extra joint bones
how is it different than fabrik?
or rather, is it different
0:07 "the basic rig is great for game design" - that's kinda my thinking too, it's also standard for IK setups
CCDIK lets you set joint rotation limits, so if you had a bone chain longer than standard you could lock the rotation of some bones for the IK to solve.
In your case you want the elbow to contribute to the rotation so you could perhaps set limits there, or just run with FABRIK.
ye thats probably true but as you can see from the overcomplicated wrist and forearm assembly apparently i enjoy rigging more than weight painting
ok yeah sounds good
standard is how long
2?
then you're a stronger individual than I.
I would make the point that Weight Painting is a skill within the Rigging profession, and it's very much an art
standard would be two Shoulder > Elbow > Hand (Hand is the effector)
no i kind of just slap stuff together from tutorials quite quickly
though the wrist deformation system is custom made with help from some help from some other blender users (it is my crowning achievement tbh it doesnt break even in weird rotations)
nice 😎
yeah fair enough
i suppose these are the names of the joints rather than the bones??
i was gonna say the names of the tips of the bones but the forearm bone needs to end at the head of the hand bone
Yes, i suppose that's why Blender typically refers to things like Upperarm, lowerarm, thigh, calf
Maya calls them joints and is primarily geared towards pivots so Shoulder, elbow, hip, knee.
Naming is weird, but so long as its consistent that's what matters 👌
I'm an animator so I'm mostly concerned with pivots so I tend to go by the Maya convention.
I gotta dip, but good luck with the IK setup and the Rig
ahh i see that makes sense
aight thanks for the help
hey i done it with FABRIK btw
CCDIK doesnt allow for setting "Effector rotation source" which means you cant control the hand rotation very well
Oh nice, so it works as you wanted?
is there a way to get the anim curve values directly from the output of an anim node, instead of using the GetCurveValue function
Do you have an suggestions that I can try?
ye pretty much
just set an offset transform from the weaponsocket and the chain start and end, one FABRIK node does it
its just shifting a few cm so i didnt really need to worry about the direction elbow is pointing or wrist deformation and stuff
Noice 😎
also remember to set "Precision" to a smaller value than 1 unit otherwise it will look jittery
is there some sort of documentation on UE RBF nodes in Maya? They come with Metahumans plugin and are used for driving deformation helpers. I'm interested in using them separately but I need to know exactly how they work (the nodes, not the poseWrangler GUI)
- look up tuatec on youtube, he made a tool that can constrain the ik/virt bones. you may need to work out the hierarchy.
- edit the animations directly. I use control rig, but something like blender should work
e: depending on how the animations work e.g. if there is an ik bone that has the animation data for where the weapon would be - then the tool I mention would strip that data and you'd need to add it back manually
I found a semi-decent solution, I just enable force root lock on every animation, somehow it fixes itself
in sequencer, can i key whether or not a track is active or muted?
nvm i figured my prob out, had to bake my animation to control rig in order to edit with controls
Let's say that in my character, I have an axe and there is a tree in the blue cube. I want it to hit the red dot wherever I hit the tree, like the arrows in the pictures. My question is, can I use two bone IK for this, and if so, how can I make the tip of the axe hit that red dot?

Does anyone have an idea why this happens?

im working in blender btw. sometimes it imports like this.
Hi, I have a question
what's difference between local space and mesh space?
which is good for additive animations?
hey so am I able to have a mesh inside an animation play a different animation? like say for reloading a gun, I want the gun to be synced up with the arm animation so it looks right.
Hi, everybody, I'm using Mr. Mannequins to create animations in blender, but seems it doesn't support new ue5 skeletons, are there any fixes for Mr. Mannequins or maybe alternatives ? Thank you
Got it, you can easily retarget animation from ue4 mannequin to ue5 mannequin, thx
hello, other than force root lock, what else do i need to set to keep the animation in place?

I'm wanting to have a bone at the base of the tail control the whole tail (all the tail bones would rotate locally the same way the control bone would, making it swing), but I can't figure out how to do that with Control Rig. Any thoughts on what nodes I should use?
Hey all!
I've been working on a realistic weapon-handling system in UE5, inspired by games like Escape from Tarkov and Ready or Not.
Let me know what you think!

THIS SYSTEM IS A WORK-IN-PROGRESS. I HOPE YOU ENJOY THE PROGRESS AS MUCH AS I DID MAKING IT!
E-Mail: jdspba@gmail.com
Discord: Jordon#1001
Character mesh is a Metahuman.
Animations were made in Blender by @sysrq5354
Pause Menu interface is Minimalistic Menu on the Unreal Marketplace.
Music: Flowhertz - Nice Try (Atmosphere Chapter 3 - Deep...
Force root lock will keep the animation in place without applying root motion.
Enable root motion will mean the character will move using the animated root.
So it might be that you want to only check force root lock if you want an in place animation.
You could use animation notifies to trigger animation on the gun, based on your character animation. Might not be the best solution 😅
Both are good for additive animation, but create different results.
Local space additive solves the additive pose using the local bone rotation of each none of the skeleton.
Mesh space additive solves the rotation in the space or orientation of the skeletal mesh component, meaning if something rotates directly left, the resulting pose will always rotate left no matter the local bone rotation of the skeleton.
Mesh space additive is used a lot for additive animation used for aiming, and Aim Offsets are a perfect example.
One caveat is you cannot mix and match local and mesh space in a single blend space, the settings must be consistent per blend space asset.
https://docs.unrealengine.com/5.0/en-US/aim-offset-in-unreal-engine/


An Aim Offset is a type of Blend Space that uses additive poses, typically for creating aim-spaces.
Do you perhaps have export all NLA Tracks or one of those checkboxes enabled in the export settings?
when using Play Anim Montage, is there a way to get the rate scale from the animation and use that? for when slowing down / speeding up the base animation (not the montage) so play it at the correct rate? changing play rate in the animation isn't respected when using Play Anim Montage

sequence length on the anim montage doesn't seem to change either when changing rate scale in either the anim or the montage
it does speed up the animation correctly, but the return value on the play anim montage is the full length without respect to the play rate in the base animation
Hi! I just realized that some games may have really smooth animations because they start and end into the idle pose. Is this a normal practice?
Sequence Length on Montage should change when you change the play rate in the animation itself, restart the editor? Might be a bug.
Yes, it's usually done with blending back to the idle pose at start and finish of the animation.
You mean by using the blend-in blend-out values on the montage or by baking it into the animation frames themself?
You can try with the blend in blend out, most higher end stuff uses curves though like ALS or similar systems
I i didn't tough about curves, i'm gonna check them out and see if i can get a smoother animation with that without baking it. thanks!
guys i have made a blendspace with idle walk and run animation, i set idle animation to 0 speed walk to 300 speed and run to 600 speed, but when i change the characther speed to 300 instead of using the walking animation it uses the run animation, pls help me

Going little crazy on this one. I'm trying to blend sword swings and block animations to the UpperBody of my locomotion. The result is the upperbody sort of does it, but the head sometimes turns in odd directions and sword swings are shorter than the source animation. I have blend strength at 1 for now and going from spine_01. Ive tried other spine settings with no improvement. Also tests around with the Mesh Space Rotation Blend to no avail. Any ideas?
why are only half of my textures importing into mixamo

what he should look like /

is there a way to check collision of a skeletal mesh with other mesh and correct positions to not clip through other meshes
?
awesome work!!!
Thanks! It means a lot 🙂
IM running into a randomly recurring issue. I have a mesh I am animating in sequencer. I am keyframing animation and everything is normal but once in a while I will move the object and rotate it and it will change the number.
Number I want it to be

Number it changes to when I key frame

This causes the object to spin around and then settle on the final rotation which is obviously not what I want. Happens in local and global and not all the time.
I dont know if you figured it out but Mixamo almost always doesnt show all the textures for me. Once I export the animations or skeleton however they can be reimported and look the same
I'm thinking to which skeleton to stick in UE5.
For my prototype (and mb even future) UE4 skeleton would fit well. I'm concerned if itwould be a mistake to invest into the old version of skeleton in UE5.
What is the killer feature of UE5 skeleton except bigger amount of bones?
Am I losing something by choosing the old skeleton?
I would think youre mainly losing forward compatability. If New assets come out they will be on the UE5 skeleton and you will need to retarget them. Is there a reason why you are thinking of sticking with the old one?
- For me it should be simpler to animate it just because there is lesser amount of bones to manipulate
- I'm planning to have big amount of actors in a scene and suppose that simpler skeletal meshes will be more performant
I'm relatively new to animating but for #1, check out software like https://cascadeur.com/ which helps a ton with posing and makes having more bones a bonus rather than a negative. For #2, unless this is a mobile game or a game with thousands of characters at once I wouldn't worry too much about having too many bones.

Cascadeur is a standalone software for 3D keyframe animation of humanoids or other characters. Never before making animation from scratch or editing one has been so easy and fun. Thanks to its AI-assisted tools, you can make key poses really fast, instantly see the physical results and adjust secondary motion. All while retaining full control at...
Thanks, I'm already using Cascadeur 🙂 The number of bones is not an issue in this app but I still feel like UE5 is overcomplicated for my character. Maybe for big titles with main character story it is good not for one-man project.
I'd say having a thousand of characters is desired number for simulating a medieval battlefield in my demo
That sounds awesome! Another option is to animate using UE5 SK and retarget to a simpler skeleton later if you do need less bones.
Yeah, with using UE4 SK there is no simple way back to the new skeleton as I understand.
You can setup a retarget from UE4 to UE5 SK but youll have to process every anim with it.
Side note, have you got into animating the Melee Attacks yet? I've been having an issue (doing melee as well) where I am using a UpperBody layered blend by bone for the melee swing and it doesn't fully swing. I tried turning on the mesh rotation tick box but that didnt fix it
I haven't got to blending animations yet unfortunately, just preparing animation sequences for swings.
Is there a way to swap meshes quickly for animating in sequencer? I was planning on using sockets, and having a similar thing to swapping weapons for example, but I don't know if that can work the same for sequencer.
For some reason my shape key animation isn't being imported with my simple blender fbx model. I dont have any modifiers, i applied transforms, & checked import morph targets in ue5. The morph targets (keys) show up in the skeletal mesh, and i can change them manually, but the animation has no duration. Are there other settings you need to have to export/import shape key animations?
There should be an import morph targets check box on the mesh import pop up.
hi, I am having issues with warp motion. I want my character to walk backwards and have the characters location follow it as it moves back. For some reason my character teleports backwards immediately to where it should end, then it moves forward back to it original location slowly playing the backwards anim. Any ideas what i am doing wrong? I am using enable root motion.
That's pretty cool. Weapon handling looks a bit much for me though lol. How does it handle cases like revolvers and clip based weapons?
Does anyone know where i can find any wood cutting or mining animations for manny?
Morning! How would I go about getting this animation (done with a modifier) into UE 🤔 Any suggestions or pointers would be appreciated 🙂
https://i.gyazo.com/27b80621b79de36bcea238868f75e900.mp4
Hello i have a First person animation related question. When it comes to weapons, each weapon has their own set of specific arm animations for how they hold an shoot the weapon. I was thinking a single anim BP for the first person arm skeletal mesh would balloon and be too big an convoluted maintaining states, so instead I had the idea of creating an anim BP asset for each weapons anim set an when the player swaps weapons, it switches anim BP instances? Is that a normal approach for something like this?
the way i have my spells, they are actor, i store the spell animation on them. then when i use my casting spell state in my anim bp, it grabs the equipped spell, checks its animation, and uses that. im very new to unreal so not sure if its good / bad but it works
I would say the former is a more common approach, and a lot of the complexity could be mitigated by containing those weapons you have in layers or linked ABPs. This way you can encapsulate all your weapon information into different locations without the need for fully switching ABPs.
I would also suggest looking at reducing complexity by doing things like defining a weapon pose, as a static animation, and use shared additives for idle and locomotion animation.
https://docs.unrealengine.com/5.1/en-US/using-animation-blueprint-linking-in-unreal-engine/
The Lyra project is a great example if this in practice.
(Unless by instances this is already what you meant, in which case 👍)

Illustrates how you can dynamically switch between subsections of an Animation Graph.
Anyone familiar with Mixamo know if there is a neutral idle crouch animation? There's a neutral "Crouched Walking", but I can't seem to find a matching idle crouch that isn't holding something or leaning against an object.
Hey guys. I'm not sure if this is the right channel for this question sice it might be AI-Navmesh related, but my little units are doing some crazy twitchy movement and i wonder if there's a way for em to stop doing it 😄
if you have a character with lots of meshes, and especially bones, attached, i.e for customization, when you import it into unreal from blender, is there a way to disable bones for specific parts of the skeleton, and then re-enable them?

in the picture, imagine that the skirt/hair/cape are customization options that aren't visible at first, but the bones exist on the model
Good morning! I'm having some real headaches getting a root motion animation working from blender to unreal. I set up a simple animation to reproduce the problem. The root of the character just moves around on different axis .
Note in the first animation he moves forward immediately, but when I enable root motion and use it in game, his first motion is upward (rather than forward). I believe this is an import/export issue between blender and UE. I've tried quite a few different configurations and made sure that the orientation for the skeleton and the animation are the same. I've attached my export settings too.


IKtwobone function is messing up the deformation of my skeleton mesh


on the first image, when I execute the fk mode, everything looks fine. But on the second image, if you look carefully, the mesh is deformed, even though, the controls are in place. And also, it makes some strange, broken deformations on the mesh. I find this very confusing. Because if you look at the bones, they are in the right position. But for some reason, the mesh gets deformed in this weird way.
how is that even possible? I should not be deforming the mesh other than what comes from the bones, but the bones are in the place, the mesh should be looking exactly like in the t-pose, or as in FK configuration
ok, it is working. I had to setup the axes differently
so weird, still.
Hello, does anybody knows where i can learn these type of animations?
I got the basic of animations but like... i would at least like to know what are the name of the techniques that are being used so i can search about them, ty all for your time
https://www.patreon.com/clout_games
https://www.instagram.com/chuvabak_art/
music by Karl Casey @ White Bat Audio
hello my animation montage will not play for some reason
i dont get why since I am using play montage it should work right?
Dear Community,
I have published an easy tutorial to Retarget Body+Face to a MetaHuman in #unreal #retargeting #animation https://youtu.be/8yhPieOQqQ8

This is a super simple tutorial to Retarget Mocap Animation Data to a MetaHuman in Unreal Engine.
Enjoy dear friends.
Please don't hesitate to ask for help. Down below I answer all entries.
Like and Subscribe if you feel appreciation :-)
#rokoko #motioncapture #virtualproduction #retargetanimation #animation #facemocap #generativeai #unrealen...
Do you have a Montage Slot in your ABP?
I’m not sure about what that is
Okay. If you want to play a montage, you will need a Montage slot in the animation graph of your animation blueprint.
I am having an issue where my mesh disappears and some the skeleton does too when I set the control rig like this:

Is there something I am doing wrong? If I tick the initial box for the set transform bone nodes, they appear correctly but the control rig no longer moves the bones.
What kind of techniques are there to handle the TPS animations of the character in an FPS game. The first thing that comes to my mind is to use two different animbp but I was wondering if there are better techniques?
Yep, always use the Send2UE addon for skeletal meshes. Everything works fine with the control rig now when I exported the mesh and skeleton using the addon.
Hello guys, I want to make a playing guitar animation in UE5 but I can't find a tutorial, the main point is how to make a string shaking, how should I make it?
manged to get it working


look at them kicking and punching like a pro
(:
Hi everybody, got an Unreal animation related question, not sure where to ask so I'll ask here, if there is a more appropriate channel feel free to remove the message.
I'm trying to plug in a custom control rig animation into the default UE5 mannequin animation blueprint and the animation plays back a bit broken in game, namely the legs seem to snap to a weird neutral position. I assume there is some logic somewhere in the anim blueprint that's messing with this but I'm not nearly knowledgeable enough to figure out what it is and I'm having no luck googling for an answer. If anyone has played around with the built in character controller and has encountered the same issue I'm all ears if you have a solution
It's not possible to animate visibility the same way as in Blender. But there's two ways you could go:
- make a modular character, and then you can switch on/off visibility of individual skeletal meshes
https://docs.unrealengine.com/5.1/en-US/modular-characters-in-unreal-engine/ - control the visibility of parts of your skeletal mesh by adding an opacity parameter to their materials
I imagine 1) is more performant, if you have a lot of bones and meshes. In 2) they would still be loaded but serve no purpose most of the time.
is it easy to attach a separate model to a character in unreal? i.e in scenario 1? thanks for responding
Yeah, it's pretty straight forward I'd say. It is something that will take time though. Depending on what you have. You need to have all skeletal meshes separated, retaining their weight painting and their bind to the skeleton. There's a recent video from Epic Games you could follow: https://www.youtube.com/watch?v=7IUpa3Pxqug

The stories you create aren't static, so why should the look of your characters be? Using the UE5 Lyra Sample Project as a starting point, this session will discuss various techniques available to add, swap, and customize your characters.
We’re excited to bring you sessions from Unreal Fest 2022, available to watch on demand: https://www.unreal...
thank you! I'll give this a look when i can :)
Is there a UE5 game or prototype/Demo with Euphoria like character behavior? (I saw the Project Hexane which has that kinda vibe but still very far even in comparison with gta 5) rly curious, cause that's my goal.
Has anyone else gotten an issue where set focus on an ai does not work properly with rotate root bone? When I have them both running the character does not rotate properly. This is for a turn in place on my AI enemy. My set yaw math is correct, so i dont know how to go about fixing this. Any Ideas?
This is the closet thing I found to a fix, but the fix they mention doesn't seem that efficient It mentions root motion and not the animation blueprint rotate root bone node https://forums.unrealengine.com/t/set-focus-dosent-seem-to-work-with-root-motion/368917

Epic Developer Community Forums
I cant get Set Focus-node to have any effect in 4.12 if animation blueprint is using root motion only. Set Focus still worked in some earlier build (4.10 or 4.9). Would need it to rotate Ai character at target while using walking animation (using Mocap zombie anims). I have tried to enable “Use Controller Desired Rotation” and disable “Orient R...
How are we supposed to refresh a FBX with SK mesh & animations where there is a new ones ?
When i reimport it, it ignores any new animations.
Anyone know a good tutorial/way to replace the first person mannequin arms mesh while keeping the animations?
Hey everyone! Sorry to bother, but can someone help me with using scrollboxes + animation curves?
Basically when a scrollbox's offset > 500, I want to trigger an animation where the scrollbox automatically scrolls from 500 to 1920 in 2 seconds.
Can someone point me to a tutorial on how to create that animation (and then how to hook it up to my on scroll event? I tried using the animation panel on the bottom, but I couldn't find the "offset" property of the scrollbox there...
Hello! Can you advise how to use pose asset in Realtime likewise morph target??
Can someone help me with this, im trying to retarget animations from default ue4 skeleton to an other and if i turn on IK it looks like this,
with ik disabled it looks normal but than i wont have any root motion for the retargetted animations

Hi, anyone experienced with the UE5 retargeting system?
On on the original rig I have a weapon bone that animates weapon position, on the new rig this bone is no longer a thing and was curious if via the IK part of the tool I could copy transform of the bone from old rig to new
My fps character has a camera attached to a head bone.
I use "use pawn control rotation" to move this camera.
I have some animations where my head bone is moving.
For example, the slight shaking of my head while walking.
But I can't seem to use them with "use pawn control rotation" selected.
Is there any way I can do this?
Hey folks, is there a good best practices article/tutorial for how to get assets moving from unreal<->blender reasonably easily?
I've setup the blender tools unreal provides
https://www.unrealengine.com/en-US/blog/download-our-new-blender-addons
And they seem to help fix a lot of the scaling issues I've run into on import/export. However I am still running into issues (for example when importing an anim exported from unreal the root motion appears to be scaled very small). Pretty much every issue I'm running into seems to be scale related in some way.
The importer that Epic provides there appears to do some stuff to apply scale correctly to the 1transforms during import (FBXs imported raw appear to have an unapplied scale transform of .01 to their root object). I've been struggling with getting this pipeline going for a few days now and figured I'd come over here and ask before I just continue banging my head into a wall.
I'm trying to set up a control rig for manny that controls the location of the hand for some procedural recoil stuff.
I have all the procedural stuff working, i just can't get the Primary/Secondary Axis correct for the Basic IK node.
The closest I've got just by randomly choosing numbers is everything correct, except my gun is facing the opposite direction it should be (only when control rig is enabled)
Here is a screenshot of my node

any value other than this makes the arms look like spaghetti in the preview, only this one makes it appear normal
but the -1 is why the gun is inverted i think. Changing it to anything else makes the preview strange
How can I go about finding these axes values without guessing?
are you available to talk about this solution more?
did you solve this?
it didn't really turn out as a solution after all, the only way to solve it was to have the armature bones connected so they have the precise length and orientation in the skeleton
i still don't really know or understand why it doesn't work otherwise
it seems like its a common issue that many people have
i feel like there has to be a solution somewhere lol
guys, I'm not sure if this is the right place to ask, but I'm having trouble doing a nice locomotion system for my characters. The rotation seems off and I'm not sure what I should change to make it seem more natural :/
I found the solution -
Go to your skeleton that the control rig is based off of. Select the bones you're using in the chain, and go to the 'transform' view (where you see the red, green, and blue arrows).
Look at the arrows; whatever one points along the bone, that is the value that should be "1.00" in the primary axis. In my case, the red arrow was pointing backwards, so it had to be "-1.00".
The secondary axis is set by looking at whatever value points to the Pole vector. In my case, that was the green arrow, and so my Y value was 1.00 and the others were zero.
Everything worked great after!
turn in place animations would be helpful here I think
or maybe even tilting your animal depending on the angle of the turn, as a lazy way of doing it
hmm
Please vote for a new #control-rig channel!
#1098080043923681310 message
I am having an issue recently where my ADS in my AimOffSet strangely looks to the left while aiming. It was working previously and I am unsure what I touched to make this happen. Any ideas?
Hello, does anybody knows where i can learn this type of animation? It can be a paid course or whatever thing, i just wanna learn how to do this specifically

does anyone have any experience of posing the metahuman neck?
i feel like whatever i do with the head ik it just looks anatomically wrong

absolutely true! I didn't think of using them at all, thank you very much!
Has anyone here gotten close with runtime control rig setup with out pre-defining the bone hierarchy? I am pretty close with it
anyone got any experience with importing an FBX animation to a metahuman in maya with advanced skeleton?
I have a basic question about the general use of IKs for animation. For a running animation, for example, how does the rig know when to snap the feet to the floor, since they obviously also need to travel through the air? For some reason I haven't been able to wrap my head around it yet.
raycast, duh... It finally clicked
im interested in this, can you explain more? how would this work?
You just access the hierarchy & controller and give it information at runtime for the live CR asset
I'm trying to simulate physics in the tail of a mesh, but the name of the first bone in the tail is "Tail.001". however, the "name" variable doesn't allow periods. how do i pass this into the function?

I just modified an animation using the Keys in unreal engine, but the montage runs without the Layer tracks, does anyone know how to fix it?
What can I do with these animation curves and layering?

Lots ...
but really, is this ALS? Coz if so, the curves are used as weights for layered blends and things like that
Yes it's from ALS, I'm trying to make an effective pistol aiming system, so maybe I can reach out studying these
Does control rig have bone constraints?
Hey guys, I'm trying to understand how to replicate a control rig.
I've replicated the variables successfully (from each animbp i can print a rotator and both client & server recognizes)
and yet control rig is simply not replicating, even though the footik control rig after it works fine.
The variable is replicated inside control rig and the animbp
currently the playerbp sets a replicated rotator on tick, the animbp gets it and sets its own replicated variable, then feeds that to the control rig which sets it as its own replicated variable and uses it to position bones
I'm aware this is a very roundabout way of doing things but I am trying to make it work before making it more efficient
I am trying to animate a simple cabinet with an animation sequence from Blender.
When interacting with it the first time it should play it, when interacting again it should play it backwards (with Flip Flop node).
Now I don't understand how to play it backwards. Do I need to duplicate the animation sequence? If yes, how do I set this up in the ABP?
Is there a way to run a cloth animation in editor? so not during runtime?
is there a way to enable root motion on multiple animations at once ? I really dont want to go through hundreds of animations one by one 😅
does any one know how to fix this i even tried to re export it and i still get this any way to fix
I know this is probably trivial but I have an animation notify that I want to fire here so that I spawn the system once it happens then plays the rest of the animation to play before anything else. How can I get that to happen?


hmm, I have a replicated control rig and I didn't do anything special.
I have the control rig, and I have a variable in it. I didn't mess with replication at all here. I'm pretty sure this is replicated always? But I am using Lyra, so there are a ton of defaults in the project that are made for replication and I'm just extending it.
In my gameplay ability, i call a function that changes some of the variables. This is also replicated using some defaults from Lyra.
Hmm
im out of my depth when it comes to replication, but shouldn't the resultant movement from the control rig be whats replicated, not the control rig itself? haha idk
Hello im trying to retarget a ue4 character to a ue5 assets animation pack but stuff isn't syncing correctly because the iks aren't setup right and bones are different. Can someone do this? I'm willing to compensate
Hello, my AI character is using root motion for walking but doesn't stop when I call StopMovement() from the AI controller. Any idea how to how to stop the AI from walking?
Hey am having an odd issue where my root motion animation almost works in UE5, however there is no vertical offset, basically my character should jump a little and move back however it just moves back
Here is a clip that clarifies it a bit better
does anybody know how expensive control rigs are?
like, im wondering if i should have one monolothic one, or one per type of behavior
like one for recoil, one for turning my head in free look, etc.
the latter seems more correct from a design standpoint but im not sure about compute
this is for runtime animation modifications and such
@native umbra never heard of anyone going to such extends...
right on
on the contrary, the common practice is to try to re-use one control rig across characters
not even talking about using multiple rigs for one char...
i'm not talking about doing animation in sequencer though, i'm talking about using procedural animations mid game
so i could have one monolothic rig and node point that has every possible thing in there, or i could split up the nodes and functions so they're nice and modular
it would be very surprising to me if nobody has ever thought to organize their work in such a simple way.
why would you even want to do so? What can be simplier than use one rig and one node in Anim Blueprints for it?
I'm using the lyra animation system, which comes with a lot of complexity. Dragging in a single Control Rig node in the anim blueprint is super easy.
But I need to do: procedural recoil, lean, head turning - on top of their built in foot IK touch ups and such.
So it was already simpler to go "hmm, that's the foot control rig. Let's just add ours after it". It works great. You can open it up, it's easy to understand and fix, no problems.
So why wouldn't I want to add another node, and within that node handle all the lean stuff? That way if we want to make the recoil better, all the logic is stored in one simple place. If we want to adjust the lean stuff, that's also stored in one simple place.
Makes a lot of sense to me!
But in any case, I'm more looking for an answer to my initial question: how different is the compute to have 2 control rigs with half the responsibilities vs 1 control rig with all the responsibility?
I'm not really looking to argue the other stuff
Suppose you have 20 bones in your character's skeleton. Well, sure, you can create 20 control rigs for each of the corresponding bone, no problem. You can also control any of the bones through one control rig if it's set up for the whole skeleton. I don't really think both approaches would be different in terms of computing - just ease of use.
Great, in that case my way is definitely much easier to use
A control rig adds up to computing only when it moves a bone
sure thing! good luck
thanks, you too 🙂
Hi all, so I’m VERY new to ue5, and I’m making an real time animation of a historical disaster, so my question is how would I make my model destroy its self in a certain area with an explosion, and how would I make the explosion look more like steam?
Any help is appreciated. I have made my models in blender and would like to transfer them to the engine for the animation
Please @ me if you answer
So I've just replaced the standard 3rd person BP model with my own, and I have a mixamo aanimation for my character imported, but I can't find where the original running animaation is actually referenced to replace it. Where do I do thiis?
My animations have root motion enabled but still snap back when the animation is done. Does anyone know how to fix this?

Did you export from Blender? If so make sure to name the armature "Armature" and some bone setting to NULL
Afterwards it should work
i got it from the market place. i have to put it into blender?
Why is it that the only tutorial I can remotely find on the unreal manniquin's ik bones is this one https://www.youtube.com/watch?v=d48mlHtZCm0
00:00 Intro
01:06 The Solution
06:00 The Result
This video talks about how to bake the animations on the hand and foot bones back into the IK bones using FK control rig in Unreal Engine 5. This is the type of issue that developers come across while developing and retargeting animations with no access to the ARTV1/V2 - and it's a free and eas...
there are little to zero tools I have found for actually animating those bones, which would be a godsend considering that you have your ik hands children of ik_weapon, so If you ever did manage to make your animations using those bones animation retargeting for more character meshes becomes a breeze,
I know that ARP for blender has an option in it's exporter to bake your animation to the ik bones, but no tools for the weapon bone, which is the parent of them. It would be incredibly convenient to have a tool where you are able to build your animations around the already existing ik system and where you don't have to be making your own weapon bones. I'm not sure if Mr Mannequin has an option for the ik bones as all the tutorials/documentation I have found all have you making your own weapon bones, and the tool seems like it was built around support for custom weapon bones.
Did you play about with the root motion settings?
I mean if you put it into blender or some other app you may fix it I personally know blender.
if you got your animations off the market place they are already made for the unreal mannequin
you don't need to do any external editing

either force root lock so it doesn't move or enable root motion if you are using a root motion system
newbie question: do I need to rig my character model if I'll use mixamo animations?
Yes. Animations run on the rig
Mixamo just also has a tool that rigs your character for you (usually pretty decently, but rarely perfect).
Even if I’ll do retargeting
Animations run on a rig.
Retargeting requires a rig.
Retargeting is basically taking bones from a rig, and mapping them to bones from another rig
Can I run mixamo animation on non mixamo rig after retargeting?
Depending on the type of rigs, yeah.
You can't run a mixamo animation on a dog rig for example. I mean.. I guess you could. But it'd look pretty goofy.
Ok, thank you
It's good to realize that an animation is (basically) a recording of instructions (rotation, location and scale) to play on bones. Move foot to [position], rotate by [rotation]. Once you realize that it makes a lot more sense why you need a rig. Without bones, there's nothing to instruct.
Or, I guess the skeleton, but the idea is the same. It helps in understanding why you need a rig.
Why does this not play the second aanimation in the blendspace when shootprojectile is activated?

I believe the Animation Blueprint can't react to Input. You could check that with debugging and trying to hit a breakpoint on the InputAction ShootProjectile Event node.
I did not mess with the root motion settings. I thought it'd already been set up.
yea thats what i thought but its still not working
i figured it out it. apparently retargeting messes up root motion sometimes
I want to summarise what options do I have to use character animation:
Option 1
Create model, rig, animations in Blender and import them in Unreal. No questions here.
Option2
Create model, upload it to mixamo, download mixamo rigged model, download mixamo animations. Import mixamo model and animations in Unreal. Problem here could be with bad rig from mixamo.
Option 3
Create model and rig in Blender. Upload model to mixamo, download needed animation from mixamo. Retarget mixamo animations to use my rig instead of using mixamo rig. Better option if I have complicated character (with coat or backpack) and I don’t want to use mixamo rig.
Is everything correct?
I guess so, it depends on the use case.
If you don't want to use the mixamo rig but you want to use mixamo animations you're probably better off just retargeting
Take one of the presets from mixamo, since they work, and use those to retarget to whatver rig you're using.
you mean there is no need to upload model to mixamo in this case?
Yes
You might need to tweak some stuff, but I think that would be easier.
Or.. Just make your own animations/retarget animations in blender
it's to hard to do nice looking animations (
That's why it's a profession I guess :p
I'm shit at animating. Just getting started myself. But it's fun so.. 🤷♂️
agree ) but i think it's better to spend time on creating game instead of creating animations for weeks
In that case you're probably better off going with something like mixamo or finding some team members 😄
Yep, team member is good but it's hard to find good one ( so I'll try by myself
Hi rigging masters! Any tips on how to rig a hydraulic hexapod/motion controller so it respects the physical limits of the hydraulics?
I have a basic rig that just aims the arms towards the top platform, but it does not limit the range of motion, so it is up to the animator to observe when the hydraulics get stretched too far and start coming apart.
What I imagine is the top controller would work more like IK goal - platform would try to follow it as close as possible, but never go further than possible.
My first approach was doing it iteratively - starting from base position and using small steps move toward the goal until any one of the hydraulics reach it's length limit, then stop. It is quite slow as there are a lot of iterations. So I though maybe there is another method for these kind of rigs?

@hexed sparrow Hi! Such sorts of effects are done with VFX. UE has the Niagara system for this. Check out some tutorials on it.
I have the location of the target where the projectile needs to reach. How can I ensure that my projectile hits the specified target location?

Hi guys,
I am trying to learn how to animate directly in unreal with the mannequin, but it looks like IK is off so when I move the hand it just stretches the forearm instead of moving the arm.
Is there a way to turn it on or does it have to be built ?
Hi peeps,
In blender when working on a mesh where is the blender setting to set the world scale to .01?
I don't remember the exact steps I was trying to find them.
But I remember you HAVE to set blender scene to a smaller sizing so when you export to fbx for unreal everything is in its correct size referencing.
Is there a way to use Control Rig to control the visibility of an mesh? Using Control Rig, how do you hook up an meshes visibility to a slider?
what exactly are you trying to achieve?
Hello, when I move the Control Rig Control from an int of 0 to 1, I would like Mesh A to appear. When I move the controller to int 2, I would like Mesh B to appear and when I move the controller to int 3, I would like Mesh C to appear.
you need to transfer information from the Control Rig to Animation Blueprint, from where you can control the visibility of your mesh
Animation blueprint can control visibility?
if you get a reference to your character, you can get the visibility parameter

In this video I explain how to play sounds and trigger events from Control Rig. This is in 5.1, and in future versions I imagine this process will be much simpler, but for now, this is a work-around I came up with to read info from a blueprint, and how to save/encode that information from within Control Rig.
Procedural animation course: https:/...
check out this tutorial when the author does something similar
May I ask how may I transfer info from Control Rig to an animation Blueprint
get a reference, intersting

Does it have to be a trigger event? What if the control rig was animated in Sequencer?
this is the typical process of getting the reference to the character from the Event Graph of the Animation Blueprint
for Sequencer, it's even simplier, you can add a track "actor hidden in game" directly to the skeletal mesh you want to alter
O yes, actor hidden in game. But I have a request to hook this all up with Control Rig and attach it to a control. So the animator only needs to worry about the one controller, not many objects
I see, then check out the video above
Will do. Thank you, Sir.
If the scale is animated in Maya, can UE import the scale animation?
I ask cause when importing into UE, the scale is set to 1.

When I play the animation in UE, I do not see the scale animation from Maya
I'm trying to migrate some widgets from 4.7 to 5.1.. Manual process. Not my code so I'm not familiar with all the code in the graphs and functions... I can copy past all the controls from 4.1 into 5.1. But, I've noticed that all the control variables in the graph that were public in 4.7, are all private in 5.1 and there does not seem to be a way to change them to public...
Is there a work around?
Hello, I've got a beginner kind of question here, how come when I add an animation to a project, the character and their animations are floating?
are you spawning real projectiles?

i believe you want to use the Homing option on the ProjectileMovement component
but your question in this case would probably be better asked in #cpp or #blueprint - none the less, other ways include disabling gravity to ensure the bullet travels in a straight line toward your destination, or increasing it's speed so you don't have to worry about it falling. The most sure fire way to make it reach your target would be to teleport it to the desired location. I'm not sure the context of your question though, so I don't know which solution fits your problem best
the physical location of the character in relation to the collision capsule isn't aligned properly, I believe 🤔
I used the socket of my weapon as a starting point for trace, and the end location is where the line trace hits<
My line trace is followed by the camera, and I have some issues when I aim and shoot the ground
Okay so I myself have a question regarding quaternions again, and their use within Control Rig.
I have the forward vector of a bone, we will call it V1. I want to rotate a different bone around V1 (the reason being that V1 will always point forward, while this other bone doesn't - I'm doing procedural lean and so I want to lean left/right according to the forward direction). How would I do that?
I see no issue here?
the locomotion


post the code for your line trace
- this isn't locomotion, so again, go here #blueprint
- your line trace isn't doing what you think it is
OK
moving the physical location didn't work, here's how it looks whenever I import an animation:
The work around I've found is to export the animation.uasset as a .fbx source, then I reimport the animation with the z translation as -1 until the feet touch the ground
but thats a tedious process when working with hundreds of animations

the animations do, I retarget them after, once the feet touch the ground
same man lol
i have seen this problem in the past, but it was related to location of mesh to capsule collision
i did do some brief google searching and it seems like there are a lot of videos that discuss this, but im not sure if they all apply to you
thanks man, yeah I did some brief searching too but to no avail, I'll keep trying though, I appreciate the help
I just want to make sure this doesn't get lost. I'm looking to use a control rig to procedurally animate some bones around an axis that exists within the world (the camera direction).
Would anybody know how to do this?
aha, ChatGPT knew
sick
or at least it claims to, going to try and implement now
indeed, it has taught me how to rotate quaternions
the answer is to feed the camera direction into my control rig via the anim graph and then create a quaternion from that axis and the angle i wish to rotate about. And then multiply that quaternion by the quaternion of the bone (bone quaternion must go second)
However, new problem is that getting that vector to translate correctly is problematic. I am not sure how to convert it to 'control rig space'
'From World' isn't working for some reason
hmm
I am correct in assuming that Stride Warping requires root motion to be present in the animation right?
Yeah it does
I just confirmed it, I just made my first seamless transition from idle into a loop and you couldn't even tell where one animation began and the other ended
Yeah I use it from time to time and sometimes it's actually helpful but you really have to drill it to get anything real useful out of it
hopefully it gets better
yeah you really have to think sometimes about how you word that stuff
honestly, it is at times much more helpful than google
(and sometimes even more helpful than epic documentation)
GPT-4 though is just as bad as GPT-3 at giving incorrect information, especially on newer stuff in UE5
it wasn't trained on UE5
Yeah some things you won't find specific information on
so it has no way of knowing anything new
well, unless you use memory gpt i guess
but its training window stopped at like 2019
GPT-3 told me that it was trained right around the time UE5 first came out
so its only good for stuff before then
It told me 2020
that could be about right
either way UE5 is changing rapidly
lol yeah
im struggling super hard on how to define an axis in control rig
i really wish there was just a book of detailed explanations of blueprint nodes somewhere
Yeah well it's like that one control rig node Project to New Parent...I'm still not sure if I really understand it
and all the videos on Control Rig just graze over that so I assume nobody else really does either.
Yeah Control Rig is difficult to grasp when it comes to anything beyond the basics
How can I make an animation shorter in length (i.e, keep the same total animation but have it occur over a shorter time.). I have this jump animation and he's barely halfway through the animation before he hits the ground.
increasing the playrate would be one way
i think you can do it in the sequence itself or in your sequence player in the animation blueprint
Hey, curious if anyone could point me in the right direction.
My updated First Person rig has a Weapon Attach bone parented to the Root, not the hand_r, my ADS and Sway system relies on Virtual Bones that are tied to hand_r and hand_l. What would be the best solution for me to link/attach/constrain via some IK attach bone to the hand r? I don't want to exactly copy hand_r position, but when hand_r moves or rotates, I would like the attach bone to follow. For example when I apply recoil by Transform (Modify Bone).
I find out all TPS and FPS animations are same in latest Call of Duty francise. How they can achieve this while they are not using true fps

All Modern Warfare II Weapons Reload Animations In Third Person
Lots and lots of animators lol.
I'm having a problem with my animation system. I need my gun to point at an aiming point.
I want my gun to fire where the cross hair is by using look at. But for some reason, applying look at to my ik_hand_gun bone doesn't work. Any help would be appreciated. And I can show all my blueprint work if that would help...
Heey Hello! while trying to adjust a mo-cap animation with the sequencer, I got stuck on the control rig, I should add it with "bake control rig", but then it doesn't appear in the pop-up menu, even though I previously created a new "control rig" from the skeleton mesh. Did I miss some steps, does the control rig have to be in a specific folder? Thanks for helping :))

is Cascadeur free worth it over the normal sequencer?
Alright.....so this is super strange...there is a bug with Thread-safe animation instances where if you cast to your Main Anim BP correctly it won't show up under Property Access....then suddenly several days later it starts showing up...I have no idea what I did to get it to show up because I initially tried restarting amongst a number of other things and I'm in 5.1.1
I haven't changed anything at all related to how I have the function setup that gets a direct reference to that animbp
It just suddenly popped into existence under my Property Access menu...
3 days later lol
I've been accessing the function from the regular Update event and setting it to a separate variable and then accessing that through the Property Access this whole time
because for some reason it was bugged out and I set it up exactly like they did in Lyra

Yeah lol I was wrong
I misread it I guess I got a little too excited...it's still bugged out
Imagine if your new Animation features were so bugged out that you couldn't even set them up properly? It took an Admin on the Unreal Forums just to get around the Linked Anim Layer bug.
I don't get it, I don't know why this function isn't working....I even tried copying it from the Lyra AnimBP and pasting it into this one and it still doesn't work
maybe one of you can see something I missed

I don't see it
I've cross referenced both and even the Class Settings are exactly the same
No GetMainAnimBPThreadSafe

To make it worse right now breakpoints do not work what-so-ever inside of Animation Blueprints
I just don't get that...I have functions in here....why don't my breakpoints work?
Imagine if you made a compiler without the ability to set breakpoints....imagine the frustration....That's how I'm feeling right now
Well not inside of Animation Blueprints in general I know that my blueprint interface breakpoints work on my Main but on my Linked one they don't work at all
breakpoints don't work inside of these functions I do know that to be sure

Sometimes you gotta uncheck that "Filter Asset by Skeleton" button to get it to show up. You do mean you built the full control rig for the skeleton, controls and graph and all, yeah? (vs just rt-click and Create Control Rig). Just checking 🙂
Jesus.....know what the problem was that entire time....the output value has to be named ReturnValue
Wow
does UE5 have tools to do your own basic character animations within the editor?
Yes. The Sequencer.
Man I'll tell you these On Update Functions are difficult to work with when you can't see what's going on inside them. It's like a black box.
Basically this is my problem now...I'm trying to transition from an Idle to a walk, then from a walk to a walkfast, then from a walk to a run. I've got the setup from Lyra and I'm not really used to working with animations like this but I know they mess with the Explicit Time.
I can transition from Idle To Walk and into the Walking Loop fine...when I go to transition back into the Start State to play the Walk to Walk Fast transition that also plays fine....but when I get to the end of the animation it completely hangs up getting stuck in the Start State

so im trying to add a running animation to my rick but i cant find way to select him can i get help please

Hi guys,
I learned to animate in blender but never mastered getting the animations to work in unreal because the mannequin didn't transfer to blender very well...
Should I learn to animate in unreal and make my games chara ter animations that way or is it better with other software ?
Hello, does anyone know why when I change the value of a morph target, that area that would change remains trembling or flickering?
The Unreal Engine Animation tools are cool and useful, but honestly your going to be better off in Software like Maya or Blender for some time. Control Rig is massively under-documented...outside of bare bones basic functionality good look learning it beyond that....as far as the Animation tools they are great but until Control Rig is better documented it's really difficult to pull stuff off in Unreal that you can easily do is other programs
If you've already learned animation in Blender then I would recommend trying to learn Control Rig on the side, but it's hard to take it seriously when there are no proper videos on how to setup anything outside of a Basic Control Rig that is Unsuitable for Animation.
Has anyone experienced this issue: if you set a 'parent' constraint in sequencer with control rig, save+duplicate the sequence, the constraint ignores the initial offset/breaks?
Not that one specifically but I've had tons of issues with it.
My favorite one is where you set any kind of constraint and your control moves to a different location...or how your entire project can suddenly become corrupt causing ANY animation you bake to come out Malformed where all of your corrective bones for some reason are misplaced in every animation you bake until you give up and trash the project
At least every other thing you do no longer crashes the project...I have to hand it to them they have come a long way with it since the official release of UE5
That Baking bug though....man, when it happens to me it makes me want to give up on it
ive actually not had any real issue, im using it in place of blender for animating now, except this one.. i think it may be when you parent it to something within the same rig though because ive not had any problem parenting other rigs/objects
I have some pictures laying around somewhere, it will give you nightmares
so im thinking perhaps some null objects being used as a middleman for constraints will work
I've only had problems with the constraint system that one time
other then that I haven't had issues with it, no idea what triggered it either
Possibly
this particular issue seems pretty replicable, if you just constrain left hand to right hand, then duplicate the sequence, the copy of it is broken, but opening the original is fine
i think they must be missing copying something when it duplicates, like an initial offset
The malformed animation bug only seems to effect the UE5 Manny...it could have something to do with the template idk or rigs with tons of bones maybe?
You could report it
hmm well that is what im using, so it would add up
yeah im going to test it / make sure im not doing anything stupid first
not entirely clear on the parent thing
the track it adds.. "parent".. when i move the keyframes on that, it moves the location/scale/rotation keys too
not quite understanding that
tbh im actually finding it way more useful than blender overall though
i wish there was a global option for step interpolation, for blocking out animations, rather than setting them all individually to constant

I had to hunt that one down
i get around that by setting FPS of the sequence to 10 or however many frames i need
yikes
that one isn't even that bad compared to some of them I've gotten
once it starts doing that your done
start a new project
ah the ol' delete it start again
yeah....there was a worse one then that at launch
it was like 50/50 your project would be corrupted
It got fixed in the first update
ive done loads with control rig, since first beta, thats got significantly better in a lot of ways, not had any issues at all in 5.1, but animating in sequencer im kinda fresh to
That sounds like the same problem I had not long ago
Yeah as far as 5.1 they've nearly cleared up all the major issues other then the one in that picture
luckily havent run into that yet
sorry typo lol
that was a bad Typo XD
I'm a bit zoned out
I'm stuck on a problem with my Animation System
damn, i missed it before seeing the pre-edit
whats the animation system
my speciality, may be able to help
Oh alright one sec
Epic Developer Community Forums
So, I’m Trying to setup a basic system where I can transition from Idle into a Walk, from the walk into the walk fast, and finally into a run. That’s my only focus for now, but after the first transition I seem to get stuck during the second transition and I’m not sure why…I want to say it’s related to the Explicit Time setup but I’m not sure…b...
I made a video there that's MP4 so you can watch it in the browser
I only post on the Forum when I'm about ready to give up now days lol
I'm trying to learn Distance Matching which I have yet to find a video on....the UE5 Distance Matching not the do-it-yourself ones
not entirely sure on the setup here, why does the cycle state go back to start state when you change to 'fast'?
ahh, im making my own for that atm
because I have transition animations from and to cycles
but a bit more useful than the inbuilt
would it not make more sense to have it pass from cycle state to a cyclefast state, and back?
and you've definitely got all the animations set to 'looping' right
not missed one somewhere
Well I have IdleToWalk, Walk, WalkToWalkFast, WalkFast, WalkFastToRun, Run and then I have the animations for going back the other direction
the looping ones yeah
right now I've only been focusing on getting it to transition out of the WalkToWalkFast into the WalkFast loop
to be honest i wrote off using state machines for anims a while ago so im a bit out of the loop on this setup
but it's sticking
It's similar to Lyra
in fact the Distance Matching setup came from Lyra
There aren't any guides on Distance Matching at all
does that actually use distance matching? i thought it was just stride warping
havent looked into it in depth though
It does but for the Start/Stop animations it uses Distance Matching
also the Pivots
without Distance Matching the feet would slide
even with Stride Warping
hmm yeah not sure i can help, ive not used distance matching with their setup and maybe its unique issue with that
Also there seems to be a limitation to how effective Stride Warping actually is...I tried to use it on some animations and I found that it only seems to work on animations with an actual measurable speed of 300cm/s
yeah its all terrible solutions imo
anything slower and I couldn't get it to work at all
Yeah I'm sure I'm missing something
Man.....I wish they would do videos on this stuff
i found everything get 1000x simpler/clearer to set up your own systems for this stuff
Not when it comes to Transition animations
without using Root Motion on Everything I don't see how you can use them without foot sliding
i convert animations to bone transform data, with extra info given to it (ik lock/unlocks, intended speed of the animation etc) then scale/timewarp/mess with it manually
yeah idk I guess I could use the Distance curve to drive the speed or something
it feels like I would need to make my own Distance matching for that
would you not find it simpler to just IK the legs to where they're locked to, and manually scale the animation time
but the way they are messing with the Explicit Time I believe is related to the problem I'm having with it sticking
It's sticking because of something in the Update Function I believe
Idk, I guess I could do that...I never seem to have enough time to experiment though
I always feel pressured to try to either borrow things or use another animation system and I really want to learn this stuff but I'm currently working for someone and not everyone is as patient as I am.
yeah things like that can take longer to set up
the problem in my setup seems to be that it gets to the last frame of the animation but then it never ends
and since it doesn't end it never transitions
yeah
whats the rule for the transition
to move on after it's done basically
whats deciding its 'done' though
the first one is an automatic rule
ah
the second one is if the Time Remaining is == 0
any change if you set that to some low value?
The animations are chosen inside the Sequence
0.01 etc?
I don't think so, I believe I tried .1
ah, not sure then, havent looked into the newer stuff


the update carries out the Distance Matching

It gets stuck on the update though I believe

is there a way you could simplify the issue down, in a new setup with minimal anims/nodes to recreate the issue
to make it easier to see wassup
I guess I could try
This probably isn't something anyone outside of the Unreal team could probably help me with and unless I fork up $1500 for an Enterprise License I doubt they would even respond
I keep considering it though
It's really tempting
i think an earlier step would just be breaking it down into some super simple setup that shows the issue, i imagine they'd want that anyway even if they were directly supporting
but more than likely, you'd figure out the issue by having to find the way to 'force' it
Yeah maybe I will try picking it apart and seeing what happens
I'll remove the Update Logic and see
It don't even play without that
So I guess my first step is to figure out why
fully procedural locomotion is the future, none of this 50 animation states and 200 transitions nonsense, its so complex/frustrating to do for such a simple task of moving some legs
I'm just going to have to reverse engineer this...it's going to be a real pain though
Yeah, for sure
i'd just start blank, recreate the simplest form of it
Ai is coming
for sure
i think there's gonna be a few years where its inbetween though and procedural will take the reigns
Animation is a serious problem, it's overly complex and those that are good at it seem to horde their knowledge
the issue with AI anims is requiring mocap, which means its basically recreating what you have already, not custom
I mean.....you can't even buy animation courses lol
Yeah I got a Rokoko Suit and sent it back
i think the reason for lack of animation courses, is 90% would be 'watch me just animate for a bit and maybe say 1 or 2 sentences'
The suit felt like I was slipping on Panty Hose...it was so delicate it started tearing after having only put it on twice
And I'm not overweight
i recently made a procedural animation course for ue, and some people been asking for a similar course but for animating with sequencer which is why im looking into it more now. But i can imagine it'll just result in.. heres the basics.. now im going to animate..?
yeah...well I'm mostly referring to the Technical side of setting up the systems
Yeah lol...I don't know It's hard to dig up information on Control Rig
well, control rig ive got in the bag, spent years messing with that
the sequencer part im still getting familiar with but tbf its quite intuitive
I tried to reverse engineer some of the stuff in their Templates but struggled with a lot of the functionality inside it
i'd made my own before they came out with theirs, so had a good grounding of it
Yeah, I just don't like it because it breaks unpredictably
im aiming to remake cascadeur in some form with control rig/sequencer at some point
they do a few interesting things
Yeah that would be cool
think they may be trying to scare people off by mentioning AI
found a better approach than that
ive got a setup where its kinda like motion matching but pose-matching, finds the pose that fits the IKs the best, but still IKs to where you set it
so you just feed it a bunch of poses (from anim data or just individual poses) and it looks for the closest match based on the bones, then applies your IK
so you get specific control with where things are, but the rest is made to look 'natural'
ive not combined that to work with sequencer yet though still figuring out the basics
Interesting idea
works surprisingly well + fast
i fed it the animations from ALS, then did procedural walk for the feet (matching feet bones only to the anims) and it auto-plays the animation
so full foot control + procedurally placed, but the rest of the body is picking the closest/correct matching pose at each frame
Yeah I wish that they would release a project showing off Motion Matching...since they updated it I haven't had time to really look into it...it's like just as soon as I was figuring it out they overhauled the entire thing
now it works totally different then it did in 5.0
do they have inbuilt motion matching? isnt it just 'motion warping' they use with scaling the strides
Yeah it's called Motion Trajectory or something
the plugin
but then it gives you the Motion Matching component
but setting up the Library for it is what they overhauled in 5.1
that's the part I haven't had time to explore...I looked at it for 30 minutes and couldn't figure it out
haven't had time to mess with it since
there is only like 1 video on the entire internet that covers it for 5.0 and none since the update
ahh ill check that out, ive seen some examples of motion matching in UE but everything looks very jittery
Yeah probably the Marketplace one
I've seen a few like that but honestly don't have time to dig into C++ right now
lately ive been using gpt4 for C++ stuff
usually prototype/mess with things in BP
then get a bunch of help with gpt
besides that is all getting phased out by the Official Unreal versions
Yeah, it still gets things totally wrong though
yeah but the things i cant do/dont know, it gets right
I purchased it and honestly it hasn't been any more helpful then the free GPT-3 version for me
like i know how the logic should work and be set up
but idk the functions
ive found it way more useful with 4
Well I don't work from home so I got to go
used it for a bunch of GLSL stuff recently, or whatever it is the material editor uses, just kinda promting it with the errors/mistakes and letting it do the rest
Hello, does anyone know why when I change the value of a morph target, that area that would change remains trembling or flickering?
It just dawned on me what is causing this.
I was about to go and I realized what the only differing factor between those transitions are
One starts from idle...so it's not moving
the others start from motion
the logic I copied over was designed for animations that transition out of a full stop
It uses Advance Time by Distance Matching
I have to go but I'll drop a post in here tomorrow if I figure out a solution
anybody use cascadeur for poses?
Can someone help me with this?
My Goal is to use Orientation warping on a Character.
I use the same nodes as in the Docs (https://docs.unrealengine.com/5.0/en-US/pose-warping-in-unreal-engine/) and animation warping works as it should on Mannequin animations. ✅
But when I use non-default Animations the Orientation warping doesn't work.❌
When I retarget the Mannequin-animation to a different character it works. ✅
When I retarget the non-Mannequin Animation to a Mannequin it doesn't work. ❌
I suspect it has something to do with the skeleton of the animation but I'm not sure.
On the docs they say: "In addition [...] an Implemented IK Rig [...] must be accessible in the project" and I have no idea what
exactly they mean...
When I click on the "IK Rig"-Link they provided they send you to the "FABRIK" docs. This doesn't seem right?
I am a bit new to this and can't find what I am missing...
What is it that I have to do?


Pose Warping dynamically warps a character's animated pose to align with capsule movement.
Hey guys! I'm trying to work out a way to make a bone point at an actor.
Using ik. However, when I use world space in the transform modify bone node. The rotation becomes slightly janky.
And if I try to convert the look at rotation to bone space. My characters arms just completely freak out.
Hey, I am working on something similar. Would you want to tackle the problem together?
I am trying to determine how to properly convert vectors from World Space (in a GA/ability) all the way to the local space of a bone in a control rig. I am trying to get the forward vector of my camera and then draw a vector originating from one of my bones in the same direction so I can do some quaternion math
My task is to figure out a way to communicate the correct direction of the camera forward vector relative to that bone all the way down to local space of the bone. for some reason, everything remains janky tho
Hey everyone. After enabling root motion for my turn animation -- after it ends I get rotation on X and Y, which makes the character standing "wrong"
Any thoughts how to fix it?


I believe what they mean by IK Rig is they mean IK Bones...basically unweighted ik bones like the foot and hand ik bones they have on the Manny
I also believe that Root Motion is required on the animations but I'm not 100% sure about that
UnRotate Vector is often used to convert the space of something into local space, ALS uses it to convert the Velocity so that it's relative to the Player so that when the player moves left the velocity is -x or forward it's +y
I could have those -/+ backwards but that's the idea at least
root motion is required for orientation warping
oh shoot, no way? Okay sweet, this is gold. I can probably find more help in the ALS community discord
(so weird to use that acronym for this, what a sentence)
I did a video I believe on it at one point
let me look
oh shoot, very exciting, thank you so much!
Yeah I made that video a while back
@crystal imp any thoughts on issue I have? Stuck for hours
this
one sec
Are you sure your not trying to rotate the capsule manually?
What mode is your Movementcomponent in?
You have root motion enabled so if it's turning extra it's probably the way you have your movement component setup to keep the capsule oriented to the camera
Yes, I do not have blueprint that enables manual rotating (setrotation, etc.)
My Movementcomponent is "Use Controller desired rotation"
Yeah I believe that's it
hey, Thank youuu 🙂 I just had to uncheck that and then it appears (MetaHuman_controlRig), and then I select that and seems to work. Though is not the one I have previously by following this https://docs.unrealengine.com/5.0/en-US/how-to-create-control-rigs-in-unreal-engine/, (create>control rig)

@crystal imp but even everything is ticked, you can see how the character has a lean back effect when turn animation is done
I still get a bit confused when it comes to those settings without going in and looking at the tooltips

Yeah, I unchecked these. It had no difference
Are you sure it's not the animation then?
It's the 4th Mixamo turn animation I'm trying
All of them have that lean effect at the end when animation is done
What's interesting, if you check animation file solely, nothing is wrong
I even tried importing to blender and seeing there
No issue
oh
Mixamo animations are not root motion
Mixamo characters have no root bone
I believe there is a plugin for blender that retargets them, but root motion means that the motion is on the root bone
Enabling Root Motion only means your telling Unreal to read the animation data that is set on the Root Bone
If there isn't any motion there then there is nothing to play obviously
Inside of Blender create an additive layer...I don't know how to do that in Blender but I'm assuming such a thing exists...or do this in Unreal using the FK Control Rig to bake it to sequencer
open up the curve editor
copy the Z rotation on the hip/pelvis to the root Z rotation on the Additive Layer
Zero out the Z rotation on the hip
then bake it to an animation if your inside of Unreal
this should give you proper root motion....assuming it's only a rotation animation
Thanks so much, I'll try the baking in Unreal. Because previously I tried Blender plugin, and it created jittery animation artifacts
I have a video on how to do this in iClone8 but a lot of people don't have that
Oh yeah I see
Anyway you basically just want the primary motion on the Root
if it's a run forward animation the motion should only be on that axis, or if it's a rotating it should just be on the Z
otherwise it can cause funny issues if your playing a root motion animation and it has motion from side to side...this will result in choppy looking movement
I have the iClone8, can you share the tutorial you have?
from the players perspective that is
Yeah one sec

Comprehensive demonstration for anyone curious as to how Root Motion animations need to be made for Games. This will work in Maya or Blender as well, all you need are Animation Layers and a Curve Editor.
Join Our Discord: https://discord.gg/38ceaJ67Eu
0:00 Intro
0:10 Walking Forward Alignment
6:05 Walking Left Alignment
I plan on doing another video on how to just do this manually...you actually don't need to use the option for transfering hip to root from xy
you can basically just copy the entire curve for the animation on the Z and Zero it out and then Paste it on the additive layer for the other.
your just basically transferring the rotation from one to the other...just don't forget to set the feet to FK before you flatten it or this will mess up the feet.
If you still have trouble let me know and I can do another video
Thank you so much, really appreciate it
curious you guys are talking about mixamo, what about cascadeur?
so this was super helpful, but I'm still having some trouble understanding conceptually.
I have the forward vector of the camera, then I do unrotate, then I pass that vector in as a variable into my control rig.
This Unrotated Vector (Camera Forward), is it spawned at the root, in relation to the mesh space?
I believe this is the case - if so, I need to do something else to convert it to the local space of the bone. As the bone rotates, its local space will remain static - but its rotation in relation to the root, and therefore in relation to the Unrotated Camera Forward, will change

The character is twisting like this, as opposed to leaning left/right
I believe the issue is because in this node:

It seems that the axis I am defining originates from the root, and so the axis about which it is turning is actually pointed in a weird location?
so when I 'rotate about that axis', it actually results in a twisting motion
Ok well I went back and read it and I'm not actually sure that in this case UnRotate Vector is appropriate. I believe your wanting the location to be local to that bone so if you get the world position of that bone and you subtract it from the location of whatever vector it is you want then you will get a vector that is 'Local' in the sense that the vector location will be representative of the offset from that bone. Which is essentially what it means to be local to something

but wouldn't that resulting vector still originate from root? 🤔
basically, I need to get the rotation of the camera angle in relation to the root bone - it seems unrotate is actually perfect for this - and then somehow factor in the rotation of the spine bone in relation to the root bone when adding in that Unrotated Camera Forward

so in psuedo code it would be something like
Get relative rotation of spine bone to root
Add the inverse of that rotation in to the Camera forward rotation
Then add
control rig has updated too much, GPT doesn't know how to use it
case of confidently incorrect - it was the first thing i went to
I know that if you Subtract one from the other then it will result in a vector pointing from one to the other and I know Local space is normally an offset from something
Yeah I figured as much
okay thanks, I think you've affirmed my logic here and that is super helpful
i just need to figure out how to implement it
last time I tried none of the Vector Math nodes it wanted me to use existed in Control Rig
I'm not sure why Control Rig is lacking in Vector Math nodes that exist everywhere else in Unreal
@crystal imp I got it working by downgrading blender version to 3.3 and making sure I transfer the mixamo "root" rotation to the new root for unreal

Oh cool, yeah sometimes those plugins have issues with the latest versions
they do exist in control rig now, but chatgpt stopped learning in like 2019
2020 for Chat-GPT3
ah, well, roughly the same

memory gpt
it is a task I want to tackle here soon,
but i think it should be possible to just feed it all kinds of source codes and such
not sure if it would work because you'd need an example for everything, and im not sure how to feed that data in exactly
I just got access to the Chat-GPT 4 but it's not really much better at least when it comes to Unreal Engine it gets things wrong just as often
yeah
its been great for helping me understand more basic stuff though
like it taught me how to multiply quaternions to get the effect I want, and that was great
It was helpful with helping me understand Additive Animations and how they work but I really had to go at it for hours before it really started making sense
Yeah I broken down and started teaching myself math again at nights to try to get back up to speed, but I never really tackled Vector math, it's basically the only thing I never really dived into
vector math isn't terrible with some practice, I'm just not sure what UE is doing itself in a lot of these operations
I got a Vector Math book and it's so cryptic and hard to understand beyond the first chapter it's ridiculous
lmao
yeah
id be happy to answer any questions regarding that if you'd like
i was a physics major in undergrad and that was our bread and butter
even after I spent 9 months teaching myself Calculus I picked up a Vector Math book and was like....Nah, I'll just do Statistics now
lmao
I'm going to though...I just have to get back into the swing...I've almost completely forgot all the math now.
Oh yeah, I might take you up on that sometime.
right now I just know a few basic vector math tricks
i got you, would be happy to help
Ayyyyyy, let's go man! I'd 100% go for it together! So, with what I've tried, the only solution that has sort of worked was: I drew a trace from the character's head out into the distance, to the max range of the currently used weapon. And then, I placed an actor at the point that was either the hit location of the trace, or the end location of the trace if the character was looking at something too far away. And I only adjusted the X variable in the location to ensure that the performance hit was minimal. I then got the world location of the socket of my weapon, and then the world location of the actor, and found the look at rotation, I then fed that rotation into a system that swapped the roll and pitch. (For some reason look at rotation doesn't work by default), and used a two bone ik node with a transform (modify) node to "replace" the rotation of the bone in "world space" with the rotation I got. This worked. But, the problem is that it's janky. And I think that has something to do with using world space and replacing the current rotation, and I reckon I need to change to bone space and "add to rotation" to make it stop janking.
I'm new to UE and trying to follow a video to do retargeting for a synty marketplace character, what might cause the knees to be weird like this?
would you want to hop into a call and go over it?
we could go to uhhhhhh
Programmer Parlor I guess since its open
Can't hop on a call right now sadly, it's 4:50 am where I am, and I'm about to go to work, what time is it for you? I'm free after 3 pm my time!
its 12:27 pm for me
approximately 10 hours from now, I can do that I think!
good luck at work 🙂
Sweet man! Yeah, lol, I'm a sparky, soooo, hobby and work very different.
Weird, seems like adding any rotation into bone space makes it rotate WILDLY with my ik setup.
However, it works fine if you transform the bone's world location to bone space???
I think my problem from the other day is actually a Bug
For some reason the animation is playing all the way through but when it gets to the end my Main AnimBP is not being updated properly and so the State Machine on the other side thinks the Animation is still playing.
This causes the transition rule for Automatic and Time Remaining == 0 or even Time Remaining < 0.1 to fail even though the Animation is clearly over
To confirm this I had it print to the log from my Linked anim layer True when the PlayTime was == to the Explicit Time
after the first time entering the state the animations will hang at the end printing True to the Log
meaning that the animation is over but the MainAnimBP for some reason is not being notified
Yes it's 100% without a doubt a bug
all my transitions work perfectly if I start from those transitions...it's only after the second time entering that state that the animation is hanging
Seems Linked Anim Layers are seriously bugged out right now
I shouldn't say 100% I should say I'm 90%
I'm pretty sure though. It's definitely starting to look like another Serious UE5 bug
If I had $100 for every day I have spent trying to figure out what I'm doing wrong only to later find out that it's actually a bad bug in UE5 then I would be rolling in money right now
@ me later when you're ready 🙂
If I'm correct then this will be the second serious bug I have found related to Linked Anim Layers in UE5 so far
Edit: Solved below #animation message
[RESOLVED: Anim Notify States Question]
Short Question:
Why does the end event gets called even when I start a new montage midway. Any workaround?
Long Question:
I am working on a combo system using anim notify states in c++.
The notify-state is the time-frame where the player's input would move to the next combo attack.
I have a separate montage for each attack named AM_MM_Attack01 to 04.
The attack montages are stored in an array in an ActorComponenet that's on the Character. The notify state get reference to the actor component and calls the newly created functions called OnNotifyBegin and OnNotifyEnd.
The begin functions sets CanAttack bool to true. The end functions sets it to false and reset the combo counter.
The input checks if can attack is true and progress the counter and plays the montage from the montages array using the index as the combo counter.
The problem now is whenever the second montage plays in the respective time-frame, the "OnEndNotify" gets called before starting the new montage which resets the combo counter and doesn't progress.
I can't find anything in the documentation regarding stopping the end notify. Is it a must that stop gets called if begin started?
Thanks!
I'm experiencing odd issues as well, I was trying to setup distance matching in a project like they did in Lyra....only it would hang at the end after leaving and re-entering the state the second time without coming to a complete stop....seems this may have been why they always went into a full stop before re-entering their start state in Lyra. So I tried to get around this using Anim Notifies and it worked for the second re-entry but then the first blend out started blending out before it was done for no reason at all and without changing anything other then having an Anim Notify at the very end of the second animation being played from that same state. I then decided to add the Anim Notify to then end of all of them playing from that state and only have it transition out when that Anim Notify would fire....only it stopped firing all-together....so now...for some reason The Anim Notify will not fire at all.
I think all of these bugs related to the Animation system are related to this new Thread-Safe agenda they are pushing
It seems like information is getting lost to me
Like their new Thread-Safe system is struggling to keep up with things
Well I just confirmed one thing.....Disabling Use Multi Threaded Animation Update under class settings 100% fixed the issues with breakpoints not firing
So it is the MultiThreaded system causing 90% of these problems
I just had a breakpoint fire on a Sequence Evaluator Update Function and I've never been able to get it to do that.
Hey guys, I'm trying to blend 2 animations, but im not very familiar

right now it blends, but more like switches between the 2 animations
and I want to like play them at the same time
The issue with anim notify not firing at the end sounds similar to the one I faced in Unity where whenever the animation blends, notifies doesn't fire for either animation. Not sure if it's the same case in Unreal.
The thread safe fixing things is new to me too. Thanks for sharing 🙏
I am not sure what are you trying to achieve. To play 2 animations at the same time either the played animation is additive or you override some bones using Slots.
Yeah I was trying to get around another bug though somehow related to either Distance Matching or 'Sequence Evaluator -> On Update' functions which was failing to notify the State Machine that the Animation had finished playing so that it would blend to the next state.....but after the first transition it would get stuck on the last frame of the second one and never exit the state....so I tried reworking it so that it would only blend out when that Anim Notify would fire....but they stopped firing. It seems that the first time it plays it doesn't fire but the second time it does
I think it's a bug
idk
if it doesn't happen after disabling threadsafe then maybe its a bug
Since they are two different animations and it worked when I first added it to the Second one that plays but not after adding it to the first one...I'm not exactly sure what's going on
Yeah I tried that and the first time it doesn't fire...but after switching states which makes the State play a different animation, when I re-enter it in that state it fires
so it's firing on one animation but not the other
but it's the same one on both that is supposed to be firing
Things like that drive me crazy 😦 either I am doing a very obvious mistake or there is a bug and I never know
Yeah it's hard to tell in UE5 sometimes what is a bug and what isn't
[Solution to Anim Notify State Question]
Hi again, This form link said that the Notify state end event will always fire no matter how the event ended "https://forums.unrealengine.com/t/how-to-stop-player-input-from-cancelling-animations/158213/2"
I found that the Begin event has a TotalDuration parameter and the Tick has a delta. So, I created a new float that is set to zero and increased by delta with each tick. When the notify state ends, I check if the new float is more than or equal to the TotalDuration.
I also manually called the StopAnimMontage function before starting the new montage to be safe.
This fixed my problem. Thanks 🙏

Hi
I want to play the first 3 animations in the montage in Upperbody and 4th animation in Fullbody. Therefore I disabled root motion in 4th animation.
I created second slot Default Slot. How do I move 4th animation to 4th Montage Section?

So in this animation I’m making for the destruction of the sultana, I need to make fire spread in certain way. Like make it start out small and spread out throughout the vessel, would anyone know how I’d go about that or be able to direct me to a tutorial? Thanks!
Please @ if you reply
Simple question: can everything done in animation blueprints be done in c++ as well?
I have idle animation which is like just smiling and relaxing and I have talking animation where it moves the mouth. I Want to use the mouth animation in the same time with eyes movement from the idle animation if I make sense
right now when it starts talking, the eyes become static, and when it stops talking it goes back to the idle animation
Hello - If I want to set a mood parameter for my character using blendshapes, should I do this in Control Rig or Blueprint? As far as I can see, you can't set the blendshapes directly in the anim bp?
I'm trying to use the control rig from the content examples with a slightly different sized skeleton in UE5

I saw a video that suggests connecting the forwards solve to the backwards sequence to put the controls in the correct positions and then using "Set Initial transform from Current" to set the position permanently.

but that option isn't available in ue5


I've tried all the options but the control positions reset upon compiling
how do you bind a camera to an actor?
like i wanna bind a cinecameraactor to a metahuman's head
so when the camera goes where the metahuman goes
Hi Guys does anyone have any experience with proceduraly generated walk cycles ?
My character is already setup in control rig'

If I have lots of morph targets, how can I mix between different presets of values?

Well I don't know but on mine something really odd is happening. It took me a while to realize that the animation was not being played from the start but actually starting about 45-50 frames into the animation and then jolting at the end. It was playing normally before I messed with the settings on the Sequence Evaluator but after setting it back like it was it still was jolting at the end. When I add an Anim Notify to this animation....no matter where I put the notify on the timeline....it never fires
So for some reason in my project some bug is preventing Anim Notifies from firing
It all seems to be related to this method I'm trying to use that they use in Lyra

Setting the animation and/or the explicit time of the sequence Dynamically as they do in Lyra seems to causing all kinds of issues
so I'm beginning to think that it may have some odd bugs
It has to be linked to this