#enfusion_model
1 messages · Page 38 of 1
 solemn goblet
 last parcel
found another fix for the problem I had, for those that are having the same issue i extruded the object a tiny bit and that fixed it completly too
solemn goblet
last parcel
found another fix for the problem I had, for those that are having the same is...
So curious as to how this fixed it but if it works
last parcel
could be that it was indeed to small or something else where funky, but hey as long it works 
solemn goblet
If it works and its stupid, it isn't stupid 
 hexed musk
Does anyone know how to create collider(s) for my house model?
 tacit eagle
God the Churchill is a beautiful tank
 quasi thistle
soo, I've done things in blender with textures, saved the texture image as png, imported it into enfusion and set it as material bcr for my sign, but the positioning seems a bit weird and I get the second image as result. Anybody able to help me with that?


 dim gate
have you made sure your UV mapping is correct ?
quasi thistle
what do you mean with that?
I'm kind of new to texturing so please don't expect to much😅
dim gate
go in blender, open your file, click on the button next to the one that says "object mode", select UV editor and post of pic of it
oh and make sure to select your entire model before you do that
if you only see a small Dot on a corner, that mean you didn't do your UV mapping
quasi thistle
is that the thing you needed?
 dim gate
uh it should more look like that
 quasi thistle
ah, wait
dim gate
as an exemple ofc
quasi thistle
hmm, that's kinda empty when I try to open that.
I didn't unwrap it, I used smart UV project. could that maybe produce an issue?
dim gate
probably
 eager hill
No idea whether you've made such things in school, but that's probably the easiest way to show what UV mapping is

Folded it gives a cube
dim gate
that was just an exemple from me, i'll have to redo the UV mapping on my side and retex
if there was UV mapping on his side you should see it on his UV editor window
quasi thistle
ah, I see what you mean. when I try to unwrap it, however I get this error. can you by any chance explain to me how to get around it?
 quasi thistle
soo, what do I need to do for those edge seams?
dim gate
click on select edges button, select the edges following a single line like for seams on clothing, then CTRL +E and "mark seams"
here's an exemple

the red lines are seams
then once you are done, press "U" and select Unwrap
quasi thistle
so, I don't have the error anymore, but it still doesn't show anything on the left for me. what exactly do I need to choose here?
 dim gate
to see your texture, click on the icon left of render result and select your texture file
quasi thistle
quasi thistle
is that the thing you needed?
you mean that one?
dim gate
yep
quasi thistle
so, I unwrapped it now? And when I reexport it, it should work?
or am I missing a step?
dim gate
it will
quasi thistle
aight, let's try that
dim gate
no, it was just your UV maps being borked
quasi thistle
well, it still doesn't work
dim gate
did you replaced your UV map to match your texture ?
basically when you made your texture file the model UV wasn't scalled for it, so now you scalled it you need to reframe it properly
quasi thistle
dim gate
did you replaced your UV map to match your texture ?
how?
dim gate
the same way as scalling and moving your model
R to rotate, S to scale, G to move
on your model view, select all with A
then go to the UV editor window and select the UV faces you want to move around
and one more thing
make sure your texture resolution is always 2^x / 2^y (16x16, 16x32, 64x256, 512x512, ...)
quasi thistle
just before I do anything wrong...aside from the color, should it look like this? or have I done something wrong with seams?
 quasi thistle
I don't know man
dim gate
it look like your only used the "Unwrap"
make sure you only click on that

leave everything as it is and look at the result
quasi thistle
looks like this when I do that
 dim gate
much better
dim gate
now you can paint on your project freely, remember the texture resolution
quasi thistle
can you tell me how to remove of the two?
 dim gate
get out of edit mode first by pressing tab
dim gate
now you can see on the right you have a + and -
click on - to remove the selected material
 dim gate
ah woops i though it was material, my bad
yeah ok i just checked, these are your materials
get out of texture painting and go into object mode

 dim gate
probably because you created 2 texture files to work on
AFAIK you can't remove textures but someone who has more experience might says otherwise
what is important for reforger is materials, texture count doesn't matter
quasi thistle
alright.
dim gate
so make sure you have only one material for your work or just the necessary ammount for it ( like one for steel beams and one for wood plank for exemple )
quasi thistle
so I can paint on the object itself and it shows on the texture, but I can't paint on the texture itself, is that right?
 quasi thistle
dim gate
so make sure you have only one material for your work or just the necessary ammo...
quasi thistle
dim gate
so make sure you have only one material for your work or just the necessary ammo...
ah, alright
dim gate
you also need to make sure you model is assigned to that material, seeing your first pic it already is, but if you have different material for one model, you have to select the different parts and assign them to their respective material
quasi thistle
quasi thistle
so I can paint on the object itself and it shows on the texture, but I can't pai...
oof, nevermind
was in the wrong mode
hmm, still misplaced

before we try anything else in blender, are the opacity and NMO map important for UV positioning?
because I dont have those yet
dim gate
opacity should be your alpha channel and NMO is the normal map so no they aren't
it seems like it reused the previous UV map, go on your model in blender stay on object mode and tell me what you see if you press the object data tab like in that pic

 dim gate
no, that's your active UV map
quasi thistle
so, what now?
well
I've testet it with simply doing everything from scratch. and now it works
no clue, what the problem was, but thank you nonetheless
dim gate
damn i was having a brainstorm here on blender trying to figure it out too
glad it worked out in the end
quasi thistle
well, I owe you something definitely
 thorny rivet
how can i add colliders to model?

 fast coral
thorny rivet
how can i add colliders to model?
fast coral
thorny rivet
how can i add colliders to model?
I actually am just uploading a tutorial for this
should be up in a few seconds
ok maybe a minute or two
dim gate
make a new model in blender with the right collider name prefix
https://community.bistudio.com/wiki/Arma_Reforger:FBX_Import#Collider_shape
basically you need to keep it very simple, no need to remake your model
for you here a simple rectangle is more than enough
thorny rivet
dim gate
make a new model in blender with the right collider name prefix
https://communit...
im zero at 3d modeling, i just download free fbx model and import it in Enfusion
thorny rivet
what i must do?
 dim gate
well first, see where it says camera, light and so on
select camera, light and right click on them, then delete
thorny rivet
done
dim gate
next, make sure you are not in edit mode but in object mode ( it says on top left )
press SHIFT + A and make a cube
then back to where the camera was, double lick on the cube name you created and name it UBX_(whatever you want )
then, it's important your collider overlap your model a bit, so we are going to scale it
thorny rivet
dim gate
then back to where the camera was, double lick on the cube name you created and ...
like this?
 dim gate
yes good
now we have to scale it
stay selected on it and press TAB
then press S to scale and make it smaller or bigger so it slightly overlap your model
thorny rivet
done
dim gate
finally we need to make sure your model is covered by it, you see the colored line ? these are axis
red is X
green is Y
and Z is blue
thorny rivet
i cant see blue
 dim gate
now you have to press S again then while still scaling press X, Y or Z to change the shape accordingly
it's normal, don't worry
thorny rivet
wow so cool
 dim gate
oh btw, you can press A to select all vertices present in edit mode and double tap A button to deselect
if you want to select only a desired object in edit mode, select one vertice/face/edge and press CTRL+L to only select the connected parts
don't forget to also link your collider to the w_root vertex
and now you're done
thorny rivet
dim gate
don't forget to also link your collider to the w_root vertex
how i can do that?
i can only unlink it
 dim gate
select your collider, go into edit mode, press A to select all
look right and click on the green icon that is a triangle with 3 circles
then in the Vertex group tab, click on the + to create a vertex group and double click on the new group to rename it "w_root" ( without quotes )
then click the Assign button to assign the selected collider, exit edit mode, done
ah wait, since it's a prop you might not even have to do that, if it's a weapon you'll have to
oh well, you still learned something new
thorny rivet
 dim gate
yep, that's how to assign a vertex group
thorny rivet
dim gate
ah wait, since it's a prop you might not even have to do that, if it's a weapon ...
it will be a grenade
thorny rivet
😦
dim gate
at this point i recommend you watch a tutorial and come back to it once you have the basic in head
thorny rivet
dim gate
at this point i recommend you watch a tutorial and come back to it once you have...
I'll do it, thank you!
dim gate
i can explain everything step by step, but it's going to be faster and better for you to at least learn the big part
thorny rivet
I am very grateful that you are helping me
dim gate
just learn basic blender use and making an skeletton rig
that's it, you should be covered with these two
no prob bud
thorny rivet
dim gate
just learn basic blender use and making an skeletton rig
that's it, you should b...
is this will work?
 dim gate
yes and no
you created a bone but need to name it correctly
and position it correctly
also i'm stupid, for grenades it's g_root, not w_root

woops
anyways, open your reforger tools and select a base game model to look at how the bones are placed and how they work, basically each one of these bones is placed for an animation
g_root is the base of all and required, the rest is not and can present if you feel like it
so you need to also link the collider and your model to the vertex group "g_root" ( and rename the collider one w_root into g_root )
what you also have to do, is the bone you created, rename it g_root
and the one green icon above your bone named "armature", rename it Scene_root
thorny rivet
dim gate
what you also have to do, is the bone you created, rename it g_root
like this?
 dim gate
yep
thorny rivet
dim gate
so you need to also link the collider and your model to the vertex group "g_root...
how can i link it?
dim gate
except for your collider, no need to create a new one, just rename it
dim gate
only for your base model if it doesn't have one
thorny rivet
I do not know if this model is made normally, should it look like this?
 dim gate
if you click on pCube32, does it only select the explosive model ?

 dim gate
ok, seems like everything else is just empty memory points that are not needed for arma
keep this one alone, the rest delete it
 dim gate
if it changed nothing to the model then it's ok
thorny rivet
yes
dim gate
now to make sure your object is correctly linked to the bone in arma, you need an armature modifer
just make one like this, the armature name has to match yours from your pic it should be "Armature"

leave it as such and don't touch it
i almost forgot, make sure you select your model first for that
no need to go into edit mode
 cedar stream
What is the easiest thing to make? I want to eventually make a custom vehicle but that is the hardest thing to mod. So where should I start?
dim gate
cedar stream
What is the easiest thing to make? I want to eventually make a custom vehicle bu...
your mind is your limit, litteraly
cedar stream
No, i mean, what is the least complex thing to mod?
thorny rivet
dim gate
now to make sure your object is correctly linked to the bone in arma, you need a...
i dont have "wrench" sign
 dim gate
thorny rivet
i dont have "wrench" sign
dim gate
thorny rivet
i dont have "wrench" sign
click on your object, not the armature
it's the object you want to link
thorny rivet
 dim gate
cedar stream
No, i mean, what is the least complex thing to mod?
dim gate
cedar stream
No, i mean, what is the least complex thing to mod?
as i've said man, there's nothing too complex
the only thing complex is your model shape, form and detail
modding it is not complex at all
thorny rivet
i dont have that menu that u have(
dim gate
thorny rivet
i dont have that menu that u have(
click on the "add modifier" and select armature

 thorny rivet
dim gate
that's it
thorny rivet
dim gate
that's it
yeeeees
cedar stream
What are the poly count and texture resolution guidelines for stuff?
dim gate
this is how your export setting should look like
 hexed musk
I'm not having any luck with the colliders, I've already created the Colliders Collection, created 53 different ubx components, imported it into workbench, and put it in the eden map, and I can still walk through the building
thorny rivet
 dim gate
cedar stream
What are the poly count and texture resolution guidelines for stuff?
dim gate
cedar stream
What are the poly count and texture resolution guidelines for stuff?
https://community.bistudio.com/wiki/Arma_Reforger:FBX_Import#FBX_structure
that should cover for the fbx import into reforger, for texture it's always a resolution of 2 so 512x512, 2048x2048 and so on
thorny rivet
it has collider, but doesnt have bones
 dim gate
thorny rivet
it has collider, but doesnt have bones
dim gate
thorny rivet
it has collider, but doesnt have bones
inside reforger tool, click on import setting
make sure Export skinning, Export scene hierachy and Merge meshes are ticked
once done, click on REIMPORT RESOURCES on top and see if it changed anything
thorny rivet
its work!
 dim gate
they are present but seems like there's an error
cedar stream
dim gate
https://community.bistudio.com/wiki/Arma_Reforger:FBX_Import#FBX_structure
that ...
I cannot see poly count stuff
dim gate
cedar stream
I cannot see poly count stuff
i'm afraid i can't help you here, you'll have to wait for the most experienced guys to come back and be able to explain stuff for you
thorny rivet
dim gate
they are present but seems like there's an error
It works, thank you very much!
 normal quail
I keep getting this, RESOURCES (W): Missing some mesh skinning weights (body_LOD0). Weighting them to root. I assigned the Body lod in object mode by selecting that, selecting armature and then ctrl P - Parent auto weights. Is that wrong?
dim gate
normal quail
I keep getting this, RESOURCES (W): Missing some mesh skinning weights (body_LO...
i think i had that error message once too, if i remember well i had some vertices that were not assigned on my model, check yours maybe some are not too
otherwise i don't know
normal quail
okay will do
hexed musk
This is what I have so far:


 dense plover
Add more stairs, so if people place the building on slops, players can enter regardless of how far off the floor the building is.
and if its level ground, you can just lower it into the ground for the proper height.
hexed musk
The issue I'm having is that the collision isn't working, I can walk through the building
 civic plover
hexed musk
The issue I'm having is that the collision isn't working, I can walk through the...
civic plover
hexed musk
The issue I'm having is that the collision isn't working, I can walk through the...
I honestly have no idea what im doing but it looks like you are spawning this straight as an asset. As far as i know you should make a prefab with a RigidBody component or add the rigidbody component in WB and select "Model Geometry" to make the collision work - but as i said i have no idea and this could be totally wrong lol.
 muted ember
has anyone had success getting getting the material override settings on clothing to work? I'm trying to apply camo material overrides to the M70 uniform set but they keep reverting to the alpine material on the model

 regal briar
civic plover
I honestly have no idea what im doing but it looks like you are spawning this st...
regal briar
civic plover
I honestly have no idea what im doing but it looks like you are spawning this st...
How do you make a prefab?
 pine flame
regal briar
How do you make a prefab?
pine flame
regal briar
How do you make a prefab?
Drag your object into resource browser window, pop-up will show, asking for the name
 delicate condor
I believe theres some been posted on the #enfusion_texture
delicate condor
Got a bit curious on the character size and had to test out what is required to fit out Arma 3 character to the new size.
Few observations (some may have been stated before here too).
+The Reforger man is 180 cm tall VS Arma 3 man at 182cm
-
This may be partly due to the different pose ( more straight limb A pose VS more relaxed A pose)
-
The shoulders are angled way more down and the back and neck curve differently, this gives the new skeleton/armature/character different posture and different reach
-
There are some differences to the limb and back proportions too and the hands are more natural shape.
+The lower body is relatively similar, the hips are slightly lower and there is small difference in the leg positioning but the leg differences are very small
+main challenge is the hands which are in very different pose (half grab VS A3 straight palm and fingers) and the difference in both bone length and different configuration mean older models will very likely need lot of hand/gloves tweaking or remaking to fit the new character as the pose cant comfortably be matched with the old A3 skeleton without some quite noticeable mesh and uvmapping deformation.
- some models may have challenges with the shoulder areas too as the shoulders go way more down, which can lead to quite bad results if proper adjustments are not made.
In my test here I have not yet completed all the adjustments and the armored gloves of my armor suit will require full rework due to the issues mentioned above. They were made to fit the previous hand shape.
The torso area is hard armor which I opted to keep rigid in place as well as the armored/powerarmory neck and helmet. The character head sinking into the suits neck works alright and requires only minimal fitting of the hood and helmet interior.

The arms look shorter but that is due to the bend pose they are in, they actually seemed to have little bit longer reach if stretched straight as the Arma3Man
I dont know how final this pose/animation set is but for me it feels like a bit difficult to use and create on.
The old Straight limbed A pose or a Straight oldskool T pose might have been easier to approach?
tacit eagle
delicate condor
Got a bit curious on the character size and had to test out what is required to ...
God's, it the hands are so bad to match poses for assets for me personally but I always struggle with reposing hands so I guess that's no large deal.
Its just the fingers are weird for me.
delicate condor
Yeah, Like I said, Hands will likely need remaking in many cases.
well gloved ones at least
bare hands can just be copied out from the sample
if needed
 opal moat
Opened the example helmet file and cant figure out what these blue edges mean, anyone know?
 delicate condor
opal moat
Opened the example helmet file and cant figure out what these blue edges mean, a...
delicate condor
opal moat
Opened the example helmet file and cant figure out what these blue edges mean, a...
id recommend running some basic blender tutorials to learn the programs featuers. Those are hard edges. They shade different from soft edges.
dense plover
opal moat
Mark edges in edge mode, then right clicking and "Mark Sharp" Its a Smooth shade feature.
 burnt surge
Anyone tested if the 65m x 65m bug doesnt exist anymore? (Falling trough if the object is to big)
 rugged nimbus
Posted by NodUnit in the physics channel in this discord:
That ship is just shy of 50 meters. I scoured my hard drive for something I could use to test your question, and keep in mind it was a very rough, quick slap together without much planning approach.
This ship measures around 423 meters long and was imported as a single mesh.
Character standing still was a bit jittery but in moving seemed fine, and I was able to walk from end to end however placing a vehicle did cause the suspension to fall through the deck... this may however be the collider having the wrong setting.

 tidal latch
 sick shard
Thanks I'll post it there
burnt surge
rugged nimbus
Posted by NodUnit in the physics channel in this discord:
That ship is just sh...
Good to know, thank you for the info 👍
regal briar
pine flame
Drag your object into resource browser window, pop-up will show, asking for the ...
Is it honestly that easy? I've been pulling my hair out trying to figure it out 😂
delicate condor
burnt surge
Good to know, thank you for the info 👍
Gonna do some tests in the near future on that.
burnt surge
delicate condor
Gonna do some tests in the near future on that.
I think i have to hire you to the TG dev team 
 bright raft
Just a bit more to do

 pure forum
bright raft
Just a bit more to do
pure forum
bright raft
Just a bit more to do
funny toy ☺️
 calm rune
tacit eagle
God's, it the hands are so bad to match poses for assets for me personally but I...
calm rune
tacit eagle
God's, it the hands are so bad to match poses for assets for me personally but I...
Ive used the lattis modifier for everything and so far Ive fitted all my old clothing perfectly. Ive yet to try it with fingers though. Might be a challenge.
 daring condor
@solemn goblet mind if I DM you for something quick?
 plain galleon
bright raft
Just a bit more to do
plain galleon
bright raft
Just a bit more to do
nice Carl Gustaf there
which version are you making?
looks like an M3 + rail, but not sure that exists?
bright raft
Yeah I found pictures of M3 versions with that rail, but pretty much always on that rail is mounted scope, which is one of the parts I am still doing 😉
plain galleon
i got some m4 reference but not any on the m3, esp not on that rail I am afraid

 dapper oar
looks similar to the M2 mount with a taller rail on it
plain galleon
yeah looks good, didn't identify it first cause I am more mentally in the Swedish variants than "export"
 hoary arch
muted ember
has anyone had success getting getting the material override settings on clothin...
hoary arch
muted ember
has anyone had success getting getting the material override settings on clothin...
not sure if you've been answered or figured it out or if I'm understanding your issue correctly but all vanilla assets are read-only so changes you make to them won't save, so you need to right click on them and duplicate them to your project
plain galleon
I guess you want to do something like this..

however, i believe (no expert, looked on it 5 minutes ago, thats about it) that want you want to change is actually here..

oh i made a mistake on my first screen, please don't use as guidance
solemn goblet
daring condor
<@112668416673853440> mind if I DM you for something quick?
My DMs are always open. Sorry I just woke up lmao
daring condor
Don't worry
 broken grove
@tidal latch added a new wiki page describing how Object Tools are working https://community.bistudio.com/wiki/Arma_Reforger:Enfusion_Blender_Tools:_Objects_Tools
delicate condor
broken grove
<@105548653594193920> added a new wiki page describing how Object Tools are wor...
normal quail
Is it best to inherit the samplecar prefab or the Vehiclebase prefab. When using the sample car one, I cannot get my wheels to align, or driver idle to the bones set up in blender. Its like its still using the sample cars preset. With the blank vehicle base prefab, I cannot get the car started
solemn goblet
I made a little mini-guide on how I theorize Bohemia does their LODs. LODs 1 and 2 are 1/2 and 1/4 the triangle count of LOD0 (give or take 5%) and LOD3 is just a rough shape. LOD3 is also duplicated and used as a collider often.

A lot of LOD3's reference this material, a 64x64 palette that I'm guessing is meant to save on texture memory. It's called ColorPalette_01_BCR.edds and ColorPalette_02_BCR.edds
 civic plover
broken grove
<@105548653594193920> added a new wiki page describing how Object Tools are wor...
civic plover
broken grove
<@105548653594193920> added a new wiki page describing how Object Tools are wor...
Could someone please explain to me why materials are set to colliders? Is that info used by the engine to play accurate sounds / detect toughness of the material when its hit by a bullet for example?
solemn goblet
It removes a step you'd otherwise have to do yourself via code or something. It was probably to help artists prototype themselves but I have no idea.
 valid torrent
delicate condor
Got a bit curious on the character size and had to test out what is required to ...
valid torrent
delicate condor
Got a bit curious on the character size and had to test out what is required to ...
could you possibly share the pose? it would be helpful for porting my mods i have from arma 3
solemn goblet
valid torrent
could you possibly share the pose? it would be helpful for porting my mods i hav...
There's a link to Bohemia's Github that has these poses and I also made an ez ref here: #enfusion_model message
The Bohemia's Github is here: https://github.com/BohemiaInteractive/Arma-Reforger-Samples
broken grove
civic plover
Could someone please explain to me why materials are set to colliders? Is that i...
Hi ... my expertise in this matter is close to 0 sorry, but something in between those lines, @tidal latch can you provide additional info please, or link to documentation in case this has been already documented?
dim gate
civic plover
Could someone please explain to me why materials are set to colliders? Is that i...
yes
as you can see the materials all have a different name and some armor designation
particulary usefull when making armored vehicles or buildings since you can set up each material types
they also give a different particle effect when hit by a round
delicate condor
valid torrent
could you possibly share the pose? it would be helpful for porting my mods i hav...
Its quite rough at the moment and its a bit unproven to work still.
I altered my armor suits weighting a lot so it does not deform as badly but there is still manual tweaking required
I think the concept is good though but everyone should try out their own pose that deforms their gear the best way
I dont think there is any universal solution
normal quail
Is there any relevant youtube video on how to rig a car for enfusion. Been trying to do this now for a week. I understand bones and armature or at least I thought I did.

 last parcel
nice textures and model
dense plover
Love me some ShardCamo
 plain citrus
Do you know why all my custom prefabs are from the back?
 calm rune
That’s how they export from blender assuming that is what you are using. In the workbench just set the rotation to 180 then “reimport”
plain citrus
calm rune
That’s how they export from blender assuming that is what you are using. In the ...
Thx
 brittle blaze
Has anyone else had this issue when trying to import FBX models and textures into Reforger tools, I can't work out why it's happening at all

 daring blade
Alright so when I'm exporting LODs do I need to make collisions of each LOD as well?
solemn goblet
Collision is shared between all LODs and is generally like 40 triangles. Generally what Bohemia does is duplicate LOD3 and use the duplicate as a collision.
daring blade
Ahh okay, so it does some fancy magic to do it automagically? This isn't something I need to go ahead and do like UTM_Name_LOD1-3?
solemn goblet
While I'm new to Enfusion, I'm gonna go out on a limb and say no for this one. Just a single UTM should do it 😉
LOD is for visual fidelity anyway, collision is a whole different office building.
daring blade
Well there are a lot of office buildings as far as Enfusion is concerned haha
solemn goblet
there are offices within the offices. Don't forget your portals
cedar stream
How many triangles an item such as a compass has?
solemn goblet
You can find this by going into the world editor and searching 'Compass' and clicking on a Compass .xob file. The American compass has 6686 Vertices at LOD0.
The compass has interestingly 5 LODs and LOD4 is only 34 faces (I'm guessing faces are triangles).
cedar stream
Thank you, i was modelling an apple and i was at about 1 k triangles, im used to being on a budget (too much modding city building games)
solemn goblet
In Reforger a lot of LODs go down to less than 100 but up close LODs can be upwards of 10,000
For best practices I'd say you can get away with solid silhouette (minimal faceting) at LOD0 as long as you're being smart with your planar surfaces (no grid fills).
I kind of went over LOD's here but not super in depth: <#enfusion_model message>

 coarse pewter
yeah, dont put 10k, put 100k
solemn goblet
Yeah lol sorry if I wasn't concise. Be smart with your silhouette, 10,000 is just an example number. The AK is around 20,000 but it's an AK with moving parts. An apple is a circle with some grooviness to it, and the character probably isn't holding it. A good example to reference is something like a beer bottle.
cedar stream
is this good enough?

 rain wadi
Sure
solemn goblet
cedar stream
is this good enough?
Yep. Don't forget your LODs
cedar stream
solemn goblet
I made a little mini-guide on how I theorize Bohemia does their LODs. LODs 1 an...
So basically LOD0 is what you see in game up close? What is the hi res version for?
Apart from baking the normal map in the modelling software, does the engine also use it?
solemn goblet
LOD0 is what you see up close, yep. Hires is only used before importing to engine. It's the normal vector information you actually want. Programs that can bake a hires translate it onto your LOD0 to mimic high quality geometry without the performance hit.
cedar stream
yup im familiar
solemn goblet
It's sorta like that Simpsons meme where he has all his fat tied up behind him. That's the terrible, shallow angle triangles under the hood. Your hires bake brute forces some of your imperfect normal vectors and makes it look good for the player.
https://cdn.discordapp.com/attachments/960191618047156244/966030936422645760/bake.gif
Here's an example of what that looks like

And the actual wireframe exposes some of the silly triangles.
 cedar stream
Yeah, i made some mods for cities skylines, it has normal maps as well
solemn goblet
I wonder if the random bears that wonder into your cities have a normal map 🤔
rain wadi
Also, the poly limit is something specific to a project (besides the technical limitations). You're not going to have the same approach if your model is made to complete the vanilla game or if it's designed for a total modification. If this apple is an important part of your gameplay, like your main tool, you want it to look good, especially if you play in first person but if that apple is going to be duplicated thousands of times, then you have to find a compromise. You have to think like that for each of your assets: what is the scope of the project? what are the technical limitations? what is the place of this object in the gameplay or the scene? what is the place of this object in the original game? ...etc
cedar stream
solemn goblet
I wonder if the random bears that wonder into your cities have a normal map 🤔
they must not have, otherwise they wouldnt get lost an wonder into the city
cedar stream
rain wadi
Also, the poly limit is something specific to a project (besides the technical l...
Its for a life mod
solemn goblet
rain wadi
Also, the poly limit is something specific to a project (besides the technical l...
This is a good mindset to have, I agree with it 100%
rain wadi
Ok, 1K is fine. Add some resLODs. You want the last LOD to be as simple as possible.
cedar stream
rain wadi
Ok, 1K is fine. Add some resLODs. You want the last LOD to be as simple as possi...
should i reduce it to 1k or leave 1.5k?
solemn goblet
From what I gather just looking at Reforger assets: LOD1 generally maintains some form of silhouette from LOD0. LOD2 is more of a cost saving measure. LOD3-4 is nuclear. If I were to guess, it'd go 1.5k LOD0, 1k LOD1, 600 LOD2, 80 LOD3.
Some assets have an LOD4 but really that's up to you. Something like an apple probably wouldn't.
I'm guessing Bohemia uses a 'hero asset' workflow where stuff that is held in the characters hands has an LOD4 with the LOD0 being higher than normal. I don't know though, I don't work there.
cedar stream
hm, the apple will be held
solemn goblet
Well, judging by what you've showed us the model is perfectly acceptable as an apple up close. Anyone who complains about faceting is cringe (in my opinion).
cedar stream

 valid hill
you should include the wireframe, so we can judge your topology
cedar stream
 valid hill
but yeah it looks pretty decent
cedar stream
Thanks, it is my first model made for close ups
The others i made were some sketchy ones made to be appreciated from afar lol
 knotty cedar
Regarding visual LODs basic guidelines is to start with LOD0, have a poly budget in mind beforehand and try not to exceed. Then have each subsequent LOD be slightly under 50% of the previous LOD faces count.
For LOD1 we try our best to make it look as identical to LOD0 as possible so lots of hand labor instead of auto reduction. For lower LODs its less important cause errors are less obvious from greater distances.
Last LOD should be extremely simple and under 100 faces
It also helps with performance to only use a single basic material assigned to the last LOD or MLOD. This is especially important for structures because from closeup there is a lot of different materials and textures used which all take up performance, there exist techniques to merge a complex multi material down to a single basic material which only uses a single tiny BCR map for coloring the model when viewed from a great distance.
cedar stream
The lod is triggered sooner than i expected. Is this how the player will see the apple in game?
 sick shard
anyone know how to fix this issue
 knotty cedar
sick shard
anyone know how to fix this issue
knotty cedar
sick shard
anyone know how to fix this issue
You have no layerpreset assigned to your colliders, in blender/3ds/maya
 swift goblet
cedar stream
The lod is triggered sooner than i expected. Is this how the player will see the...
swift goblet
cedar stream
The lod is triggered sooner than i expected. Is this how the player will see the...
you can change lod distances
cedar stream
swift goblet
you can change lod distances
Where?
tidal latch
LOD Factors in MeshOjbect component
sick shard
knotty cedar
You have no layerpreset assigned to your colliders, in blender/3ds/maya
Do you know how I would setup a layer preset? or have an example by chance I'm pretty new to blender lol

this is my current setup
tidal latch
sick shard
Do you know how I would setup a layer preset? or have an example by chance I'm p...
https://community.bistudio.com/wiki/Arma_Reforger:Enfusion_Blender_Tools:_Objects_Tools you can use this tool
if you already imported model has wrong presets, check this chapter https://community.bistudio.com/wiki?title=Arma_Reforger:FBX_Import#Physical_material_.28Game_material.29
you most likely have to remove already imported data and re initiate import
cedar stream
tidal latch
LOD Factors in MeshOjbect component
In blender? Im really new to this
tidal latch
MeshObject component is part of prefab in Workbench
sick shard
tidal latch
https://community.bistudio.com/wiki/Arma_Reforger:Enfusion_Blender_Tools:_Object...
Sorry my bad had I just read through the FBX import wiki I could see I didn't check mark the custom properties button lol my B
 spiral veldt
you gotta make your own LODs? Or will enfusion generate them like Unreal Engine?
bright raft
spiral veldt
you gotta make your own LODs? Or will enfusion generate them like Unreal Engine?
You have to make your own
spiral veldt
Oof.
bright raft
Just use simplygon
rugged nimbus
A couple of questions...
Old GEO LOD had to be convex and closed
What about current collider? Does is have to be closed/convex as well?
Can it be a closed tri mesh? What about limit of vertexes/faces
Any guidelines to follow?
tidal latch
rugged nimbus
A couple of questions...
Old GEO LOD had to be convex and closed
What about cu...
cedar stream
tidal latch
MeshObject component is part of prefab in Workbench
i cant find it :/
 tidal latch
cedar stream
i cant find it :/
tidal latch
cedar stream
i cant find it :/
Prefabs can edited in World Editor. Prefabs have .et extension
cedar stream
found it! thanks
rugged nimbus
tidal latch
https://community.bistudio.com/wiki?title=Arma_Reforger:FBX_Import#Collider_shap...
Thanks I will take a look
tidal latch
https://reforger.armaplatform.com/news/june-update-1
Fixed: Ignoring "Armature" bones from Blender
After that update, if root bone is called Armature, it will be skipped during import to Workbench

Arma Reforger
Read up on minor updates of Arma Reforger on 1st of June for both Xbox and Steam.
swift goblet
niceee
plain citrus
Do you know why the thumbnail is fucked? (its a pant)
 tidal latch
plain citrus
Do you know why the thumbnail is fucked? (its a pant)
tidal latch
plain citrus
Do you know why the thumbnail is fucked? (its a pant)
https://community.bistudio.com/wiki/Arma_Reforger:Faction_Creation#Creating_retextures_using_overrides see fragment about Preview Model . Did you changed that?
plain citrus
tidal latch
https://community.bistudio.com/wiki/Arma_Reforger:Faction_Creation#Creating_rete...
yes ...
 tidal latch
plain citrus
yes ...
tidal latch
plain citrus
yes ...
see note about Preview Model
 tidal latch
and this issue is still there after restarting workbench?
plain citrus
tidal latch
and this issue is still there after restarting workbench?
yes 😔
tidal latch
one last thing - you are sure that Preview Model is applied to prefab?
plain citrus
Yea it is
tidal latch
It might be some bug then, you can try filling bug report over here https://feedback.bistudio.com/project/view/68/
 solemn goblet
knotty cedar
Regarding visual LODs basic guidelines is to start with LOD0, have a poly budget...
solemn goblet
knotty cedar
Regarding visual LODs basic guidelines is to start with LOD0, have a poly budget...
Oh awesome. This confirms a lot of my theories from yesterday. Thank you for this Sasha.
daring condor
solemn goblet
I made a little mini-guide on how I theorize Bohemia does their LODs. LODs 1 an...
so the last lod uses a completely different mat?
wouldnt that fuck with camos?
solemn goblet
daring condor
so the last lod uses a completely different mat?
Yep. Sasha talks about it too, but basically it's a color reference texture of only 64x64.
daring condor
like having a green last lod for a desert vehicle
solemn goblet
You would average the camo color and pick it on the reference.
daring condor
yeah but i want variants
solemn goblet
So something that is red would still be red, blue is blue, sandy colors exist too.
daring condor
wanna use the same model with different base textures
solemn goblet
You could maybe achieve the same effect by creating a separate texture that's only 64x64 pixels 🤷
daring condor
true
i guess whats a bit annoying is that enfusion doesnt have many provisions for making retextures of assets it seems
solemn goblet
I'm not sure that's entirely necessary though, you would be essentially vector coloring your last LOD anyway. You could certainly get different shades using the standard
Sort of like making an ID map you're just making lightmap style UVs. Or not. Stretching isn't really an issue when you're referencing a single pixel of color 😆
daring condor
ye
knotty cedar
solemn goblet
I'm not sure that's entirely necessary though, you would be essentially vector c...
And in some situations for last LOD you may not even need texture maps if you just use basic material with procedural (color picked) solid base color (may have to tweak roughness and metal values in material because you are not importing from texture in that case)
solemn goblet
Nothing wrong with a shining monolith of armor 2000 meters away because your metalness is 1 and your roughness is 0 for some reason, nope.
 unkempt grail
Looks alright

until we get in

This is chucked onto the sample car mod, is this something that needs to fixed within the animation editor/scripts? Or is this a bone thing?
 lime comet
unkempt grail
This is chucked onto the sample car mod, is this something that needs to fixed w...
lime comet
unkempt grail
This is chucked onto the sample car mod, is this something that needs to fixed w...
I think it needs to be fixed via a proper animation, the Unsung M35 truck has a similar problem when using the M923 animations
 dull lynx
unkempt grail
until we get in
dull lynx
unkempt grail
until we get in
Think your car's trying to tell you something buddy.......🤣
unkempt grail
lime comet
I think it needs to be fixed via a proper animation, the Unsung M35 truck has a ...
Would that need to be baked into the fbx? I'd never used blender before a week ago
Or something we can do in the animation editor?
unkempt grail
dull lynx
Think your car's trying to tell you something buddy.......🤣
i'm big boned!
lime comet
unkempt grail
Would that need to be baked into the fbx? I'd never used blender before a week a...
I don't know yet, sorry. The animation part is a bit of a mystery to me right now
unkempt grail
I should say the animations actually work nicely, the wheels spin and the front wheels turn correctly
they just shoot out from under him when I get in
lime comet
yes, but the wheels positions seem to be baked into these animations and hence they are wrong
or maybe it's just an offset somewhere, not sure about it yet
 pure kayak
Is it possible to have a uniform take up two slots?
like, a klmk suit for example or coveralls are one piece
 gloomy stump
pure kayak
Is it possible to have a uniform take up two slots?
gloomy stump
pure kayak
Is it possible to have a uniform take up two slots?
yeah its inside one of the components. You can choose what gridsize for the item to take up in inv. I suggest you copy a game prefab to look for the option
pine flame
pure kayak
Is it possible to have a uniform take up two slots?
Not yet
pure kayak
👀
solemn goblet
The one rig looks super intense. There's like 8 different pouches attached to it.
I'm tired just thinking about making one. Bohemia devs should do me a solid, come to my house and show me how. I'll bake cookies.
swift goblet
pine flame
Not yet
is not possible make an empty uniform that is invisible and when you put the good one, put the invisible automatically on the other slot?
pine flame
solemn goblet
I'm tired just thinking about making one. Bohemia devs should do me a solid, co...
How to do what? Pouches?
Take Alice as example. Vest is adding loadout slots. It is a bit tricky to get right though.
pine flame
swift goblet
is not possible make an empty uniform that is invisible and when you put the goo...
Hacky scripty. I'd rather have proper handling in loadouts system.
solemn goblet
pine flame
How to do what? Pouches?
Take Alice as example. Vest is adding loadout slots. It...
The modular attachment system where all the pouches and such fit in specific places. I'm not a coder so this is probably a handoff for me lol
pine flame
solemn goblet
The modular attachment system where all the pouches and such fit in specific pla...
Currently modularity and compatibility of pouches is not fully implemented on our side.
I suggest waiting for future updates.
You can do prefabs though and some limited modularity in game.
solemn goblet
Cheers. I'll see what I come up with.
plain citrus
Wrong&patched resource GUID in @"Assets/Characters/Vests/Plate_Carrier/Plate_Carrier_Stuffed_Item.xob" for property UCX_PLATESTUFFED resource name @"material/metal.gamemat"
Someone know why i got this error in console when i open my plate carrier are other imported item ?
 trail igloo
Anyone having an issue where when you try and import a FBX file to reforger tools the application freezes?
File is about 500KB
 loud condor
Hey, how'd you make your magazine well? I can't seem to get it to show up while trying to set class
 wheat bay
loud condor
Hey, how'd you make your magazine well? I can't seem to get it to show up while ...
wheat bay
loud condor
Hey, how'd you make your magazine well? I can't seem to get it to show up while ...
Mezzel Component, then look for Magazine Well

You can right click it, then pick a different Magazine Well with change class
loud condor
I meant the script, I can't seem to get it to show in there, even after shift+f7
wheat bay
To create a brand new Mag Well, you have to write Script, or use the one from New Weapon Sample Project, and rename the Variables/Classes to be what you'd like, but make sure to keep source, class, ect. at the end
Send a pic of your script for the Mag Well
loud condor
This is the script they tell you to use in the weapon creation tutorial
 wheat bay
Make sure the script is in the correct folder structure WhateverYourModIs/Scripts/Game/Weapon
Also, you're going to want to rename your classes, so that your mod doesn't conflict with the Sample Weapon, or other People using the same exact Sample Weapon Mag Well
Excuse my bad spelling with this lol, but here is an example

This way, my mod doesn't conflict with yours
loud condor
does it need to be in the same folder as the inherited base weapon or the folder I have my models in?
This is my pathing right now

and my script file
 loud condor
@wheat bay did I mess something up?
wheat bay
We solved the issue, it was file structure. Had the Scripts Folder in a Data folder
tacit eagle
is there a way to occlude like the base mesh, to stop stuff like hands clipping through gloves and what not or no?
 chrome plaza
afternoon lads, I've precured a weapon model from sketchfab and it has a whopping 356,323 Vertices, 1,027,443 Edges and 673,057 Faces/Triangles
How can i reduce the number of Verts and Edges, and, what would be a good target to scale down too?
calm rune
chrome plaza
afternoon lads, I've precured a weapon model from sketchfab and it has a whoppin...
Well I’d recommend going out and looking for a lower poly model or modelling a weapon yourself. There are addons out there for blender which can reduce models fast but they tend to favour organic models and not hard surface. Feel free to spend 3+ hours deleting edge loops. Really up to you lmao.
 sly bridge
chrome plaza
afternoon lads, I've precured a weapon model from sketchfab and it has a whoppin...
sly bridge
chrome plaza
afternoon lads, I've precured a weapon model from sketchfab and it has a whoppin...
this is not really a topic for this channel where the emphasis on makers. Also your question is very general, depends a lot on the software you are/will be using.
Game mesh should he 10-15k max depending on a number of factors
 last hill
sly bridge
this is not really a topic for this channel where the emphasis on *makers*. Also...
last hill
sly bridge
this is not really a topic for this channel where the emphasis on *makers*. Also...
You really don't like us mate.. we don't have a model importers channel but can stop asking for help if you prefer? I know you helped me, but you seem pretty against us buying models outside and bringing them in 😞
sly bridge
i hve no issues with people actually buying models. Their money, they can spend it on licenses or on models. i have tens of thousands euros in 3d models for my archviz business.
But just like with A3, there’s a lot of people that do not understand the difference between buyind a model and a game asset. Sure you can buy a model and bake from it, we have done it with 3d scanned cloths at rhs
actually this channel is in regards to model makers injections purposes, or game assets model makers
 glossy lynx
Would there be a reason why my model takes a long time to import other than the high poly count?
bright raft
glossy lynx
Would there be a reason why my model takes a long time to import other than the ...
How high are we talking?
normal quail
That would take a while to render in workbench
glossy lynx
It doesn't actually cause any performance drops in game, just take a while to import to workbench
normal quail
Yeah I had a model around 150k took a min or so to import
bright raft
It might if you spawn a lot of them 🙂
last hill
sly bridge
i hve no issues with people *actually* buying models. Their money, they can spen...
Ah ok see now that makes more sense. Hence you helping me as I bought a game asset, instead of a baking model
rugged nimbus
glossy lynx
It's a large ship, so it's pretty detailed
My base LOD0 for the DDH destroyer is over 100.000 verts...
And I still have to model the interior 😩
Just post solutions you find while setting up your ship...
And post some pictures!!!!
😜
glossy lynx
rugged nimbus
My base LOD0 for the DDH destroyer is over 100.000 verts...
And I still have to...
#enf_showroom message
If you need any help with your destroyer, I have just finished all of the major components of my ship and can help you with anything you need
rugged nimbus
I haven't finished her yet...
Still modelling. I did a Hyuga for Arma 3 and as it was too small for F-35s, I modified the model for making an Izumo
 zenith quartz
Heya! I wanted to practice by making a glowstick, I was wondering how you achieved the effect though? Is it a particle effect or?
bright raft
zenith quartz
Heya! I wanted to practice by making a glowstick, I was wondering how you achiev...
Isnt it just emmisive material?
zenith quartz
Is it?
solemn goblet
It's probably emissive with an additive multiplier (that's how it works in unreal)
zenith quartz
Hmmmm okay.
bright raft
Havent tested if emmisive material actually shines on surface
But surely looks like it
solemn goblet
Adding an actual light to it probably requires a bit o code but maybe enfusion interprets emissive in a smart way
 hoary herald
@zenith quartz no sir, i modelled the interior of the glow stick (simple cylinder inside a cylinder) and applied emissive textures to said interior.
emissive is done properly like in other engines
which is huge to me
the big issue i still have is making things a bit dynamic. im still stuck with either always on or always off glow sticks
cant figure out how to turn the light on when the "grenade" object is thrown...
if anybody wants to help i'll be happy to share credit
solemn goblet
Maybe you can have it reference a new material?
hoary herald
well the emissive does not create light
its not a source
its just visual
so i added a light component
its literally a matter of changing 1 line of code somewhere i bet...
from a 0 to a 1 or something^^
just the trigger component for the grenade is a bit weird
i have an idea but havent had time yet
solemn goblet
I got no idea, I've got 0 braincells dedicated to code
hoary herald
im also limited on it but have basic understanding
just havent had time to dabble with the new tools in regard to code to much
but yeah, for the model, easy enough
make the hull of the glow stick and then put another cylinder inside it, make the hull slightly transparent (as is the real object) and then add emissive to the inner cylinder
bright raft
So basicly emmisive does nothing, if it does not create light?
hoary herald
it does and it doesnt
it does not create light that bounces off the surrounding environment
but in the pitch black you will see the emissive as if it is a light
so I created a light source to compliment the emissive and vice a versa
sly bridge
from my on experice, it does create some light (A3 style), it does not create a light source (normally), and as such, there are no shadows
hoary herald
that
bright raft
Got ya, thanks
hoary herald
you might see some glow but it is not near as strong as a light source
bright raft
Material can be changed via script, dont know about light
hoary herald
think of it like a light bulp versus the glow inside a wrist watch
but yeah, i have an idea
1 sec
sly bridge
hoary herald
<@148601922721546241> no sir, i modelled the interior of the glow stick (simple ...
any reason you have 2 cylinders (one transparent and one with an emissive applied), instead of a single one?
 sly bridge
are you applying a texture for emissive or you have 2 separate materials?
hoary herald
what a real one looks like

its all on 1 texture
but, having a cylinder inside a cylinder lets me achieve a realistic look at minimal performance loss
my model

let me pull up substance to show it a bit better
 crystal valley
 sly bridge
i'm aware how the real thing looks and works, wasn't sure how you had it setup.
hoary herald
ah
sly bridge
and if you used a procedural emissive material or you used a single texture for that
 sly bridge
yeah, got that from the above reply, cheers:)
hoary herald
im sure you are aware, not to insult your inteligence, but you could make it white to and probably change it more dynamically
ive used that technique in UE4 quite a bit
sly bridge
regarding being able to switch it on and off, you might have more luck in the #enfusion_scripting or #enfusion_configuration
hoary herald
in this case i made a few dif color variatns of just the BCR texture
yeah i'm hoping this weekend to sit down and get back to it. see if i cant get some help on it
sly bridge
hoary herald
ive used that technique in UE4 quite a bit
yeah i'm aware, i am currently much more confortable with UE4 than with enfussion.
hoary herald
hehe yeah it is a bit nicer but enfusion is a huge step in the right direction
still need to dable in ue5 one of these days
but yeah for the light stuff i think right here is where i'll find my solution

this is the timertrigger from the grenade. its where you set how long before the grenade explodes
in this case 4 seconds
projectile effects is what happens after the 4 seconds
it actually just calls on a script in that line i think, so i think if i write a "on/off" script that can be called from there that would solve my issue
not sure though
but
ill see
 stoic heron
how to import and fbx to the engine
hoary herald
ill ask in scripting this weekend and see if anybody can lend a hand
stoic heron
?
hoary herald
i think you can drag and drop @stoic heron
 bright raft
Or put it there, Right click on FBX and select Register and Import
hoary herald
that to
hoary herald
https://www.youtube.com/watch?v=8o3WnGLIQ_4 @stoic heron here bud, watch this video. it will get you started off properly.
 sly bridge
Not necessarily, but it would be wise to try and keep the same vanilla folder structure
stoic heron
thx
hoary herald
if you follow that in terms of setup you will be fine
adjust as needed for your mod obviously
anyways gents, heading off
bright raft
What do you guys use for version control for 3d stuff? Is this even a thing?
 shell hedge
model.1 model.2 model.3 model.new model.old
doesnt fbx have an ascii version? maybe that could work with git, but collaboration for this kind of thing would be quite hard
or commit as binary files so at least you have some revision history
chrome plaza
sly bridge
this is not really a topic for this channel where the emphasis on *makers*. Also...
Where would you prefer I asked mate? I hate to be a bother but I don't see where else I should post?
I work a 60 hour week as it is and can't afford to spend all my spare time learning every inch of blender, let alone the hours required for modelling, so unfortunately some of us have to buy models and do our best to make it work. A little help goes a very long way and me and my fellow modelling virgins really do appreciate it.
 pastel rampart
Does anybody know how to make helmet invisible in 1st person like PASGT? is it model related or prefab related?
 shell hedge
chrome plaza
I work a 60 hour week as it is and can't afford to spend all my spare time learn...
shell hedge
chrome plaza
I work a 60 hour week as it is and can't afford to spend all my spare time learn...
for reducing poly counts in blender itd probably be more appropriate to poke around a blender discord
this isnt enfusion specific
stoic heron
pastel rampart
Does anybody know how to make helmet invisible in 1st person like PASGT? is it m...
you would have to change the way the camera works
its a big change
cause the helmet moves with the camera
even when free looking
pastel rampart
I want to make it Vanilla Like, i PASGT looks hidden simply
dapper oar
chrome plaza
I work a 60 hour week as it is and can't afford to spend all my spare time learn...
You will have to learn some 3D app to work with models you are putting into a game engine, purchasing models always come with pitfalls, especially when they are high-poly which will require to be baked down onto a low-poly mesh to be game-engine compatible - you cannot just click your heels to make that happen unfortunately, so without putting in the effort yourself to at least take baby-steps into using 3D suites and learning the modeling process for working with game-engines any help anyone can offer you is pretty limited I'm afraid.
plain galleon
probaly easier to pay someone to make a model for the engine, than buy a model made for another purpose, like for a movie/render thing.. etc
shell hedge
there are a lot of helpful poly reducing algorithms that can remove based on phong break angles etc but some manual work will be required
sly bridge
chrome plaza
Where would you prefer I asked mate? I hate to be a bother but I don't see where...
while i understand that, also understand the following
- modding is a hobby - a very time consuming and possibly costly one (although there are alternatives to paid software these days - blender for modelling, quixel for texturing - still not at substance painter level). I pay a lot of money/month for all my subscriptions, and i am not the only one (granted, i use all for work). No one is forcing you to take this hobby if you do not have the time.
- this channel is suppose to be a bit software agnostic - BI has released some tools for blender (exclusively, because it is the most convenient to grab one - again the proper free one out there) - there is a discord for blender here - https://discord.gg/blender
- you should ask here if you wanted help before actually buying that 3d mesh - there are a lot out there that far from game ready. You would have received better help then than now. There are a lot of ways to decimated, reduce polycount, none are 100% automated.
- if i were you, i would use that model i already bought as a medium-high mesh and i would bake that data into a lower polygon model (game ready mesh) that i would do myself - model, UVs etc
swift goblet
sly bridge
while i understand that, also understand the following
1. modding is a hobby - a...
And even if you have time, it can take months to make a good polished mod 🤣
solemn goblet
Learning Blender is a lifelong endeavor. People good at it at a level like RHS have probably been modeling and sculpting away for over 10 years.
That being said getting 'good enough' for most players to recognize your asset as an M4 or an AK might only take a few months of solid practice.
shell hedge
solemn goblet
Learning Blender is a lifelong endeavor. People good at it at a level like RHS ...
right? I've been using cinema 4d for years and there are still days where I see a video and I'm like "wait, I can do THIS?"
solemn goblet
I started using Blender in 2008 and yesterday I learned what weighted normals are. haha. Ironic considering I've basically done my dissertation on vertex normals 😵💫
shell hedge
solemn goblet
I started using Blender in 2008 and yesterday I learned what weighted normals ar...
5 years in and I sometimes still forget the hotkey to switch to world space coordinates 
solemn goblet
There are definitely some hotkeys that'd give a master pianist cramps
 willow sage
pastel rampart
Does anybody know how to make helmet invisible in 1st person like PASGT? is it m...
willow sage
pastel rampart
Does anybody know how to make helmet invisible in 1st person like PASGT? is it m...
 willow sage
pastel rampart
Does anybody know how to make helmet invisible in 1st person like PASGT? is it m...
willow sage
pastel rampart
Does anybody know how to make helmet invisible in 1st person like PASGT? is it m...
Located here.

 chilly dragon
Could anybody explain setting skeleton & rigging mesh for vehicles? or point me in the direction of something that might help. The wiki page for vehicle creation doesnt say much on this
tacit eagle
To all you model creators....an idea. A Guidon Flag.
sly bridge
@tacit eaglean idea -> this isn't a suggestion channel.
tacit eagle
Oh I am so sorry. My sincere apologies.

 shut bloom
Hey there I have a Question regarding Buidlings.
I am wondering if there are Lights for the Buildings and if they are working as intended yet, since what I have observed is that there are no lights working inside the game rn. so the question is if its possible to allready setup Lights even tho they might not work yet.
willow sage
pastel rampart
<@183934160195420160> not working :c
Should work now.

 soft tiger
shut bloom
Hey there I have a Question regarding Buidlings.
I am wondering if there are Lig...
soft tiger
shut bloom
Hey there I have a Question regarding Buidlings.
I am wondering if there are Lig...
You may want to ask in #reforger_questions or #enfusion_generic on that one my friend unless you mean something like emissive materials on a model.
 fathom bolt
solemn goblet
That being said getting 'good enough' for most players to recognize your asset a...
fathom bolt
solemn goblet
That being said getting 'good enough' for most players to recognize your asset a...
I thin they use 3DS Max and Maya
sly bridge
fathom bolt
I thin they use 3DS Max and Maya
who?
fathom bolt
RHS, I’ve see a modeling video on 3DS max for an AK
sly bridge
some use max (myself included), some blender, some modo, i think a couple guys maya, fusion (cad) etc. The tool doesn’t matter, is just a tool
 spark marlin
Has anyone made tutorials for weapon modding yet? I've been trying to look for some but haven't come across one yet. The sample mod offers a good insight, but no explanation
spark marlin
A video tutorial would come in handy, but I guess I'll try to settle for the wiki page for now. Maybe I'll upload a tutorial when/if I figure things out on my own
solemn goblet
That's what I plan to do with vehicles once I figure them out. They seem easy enough but I'm sure there are pitfalls.
spark marlin
We're all new to these tools, so there will be hardships on the way, but once people have figured things out thoroughly I'm sure we'll have plenty of material to make the learning process faster for each other
Keep up the good work bois
delicate condor
Id recommend written tutorials. They are easier to search through and update
 latent moon
Does there a concept like predefined building positions for units exist in Reforger?
 shy dust
solemn goblet
That's what I plan to do with vehicles once I figure them out. They seem easy e...
shy dust
solemn goblet
That's what I plan to do with vehicles once I figure them out. They seem easy e...
that would be great, and it would help a lot of people I think, a visual support is more understandable than a textual support.
solemn goblet
I might do both for our foreign friends.
unkempt grail
chilly dragon
Could anybody explain setting skeleton & rigging mesh for vehicles? or point me ...
Take a look at the sample car mod fbx, get a good look at the vertex groups, and how that links to the armature rig
I have possibly fixed my wheelbase issue by animating the steering wheel, (full left at frame 0, full right on 26), export txa to replace the pose file
My problem is that the parent armature has a 180 rotation on it, so everything is backwards. I might have to rebuild the skeleton/rig
When posing the bones, edit the head and tail positions
I only picked up blender recently, and I don't really what I'm doing. So if any of this is wrong don't hesitate to say:)
plain citrus
Hey ! I have buy 3D asset on CGTrader and I have make a mod , but do you think I can do open source projet with all the FBX file etc coming from CG trader ?!
Or it's illegal ?
daring condor
Probably
What license did you get
But open distribution of the asset would very likely not be allowed
delicate condor
usually licenses allow distributing as part of a game or similar package.
open sourcing models is usually not allowed
that would make any sense
you buy right to use model, not give it away for free
 vocal belfry
Gonna make guns out of cardboard that take 40mm flak.
chilly dragon
unkempt grail
Take a look at the sample car mod fbx, get a good look at the vertex groups, and...
Yeah I was trying that last night but it got a bit too confusing. I think I might just make a really simple model to try importing into the game to get the hang of things.
calm rune
delicate condor
Id recommend written tutorials. They are easier to search through and update
I am the complete opposite. I need to visually watch someone else to learn. Written tutorials do me very little help.
delicate condor
I can understand that. but video is still bad format unless the information is absolutely correct as like I said its difficult to fix bad parts
we've had quite a lot of issues with video tutorials in Arma 3 modding where bad practices were used and the video makers had no interest in correcting their work
tacit eagle
i just ignore all written guides myself as they are meaningless when they use terms for actions or features that i have never seen before
like imagine your brand new to blender and some guide says to subdiv and now you have to hunt down what the fuck a subdiv is, but if its a video guide you can just see what it is and go from there.
calm rune
tacit eagle
i just ignore all written guides myself as they are meaningless when they use te...
Exactly!
 worthy citrus
Whats the correct way to save a prefab, every time I try to save one half the doors are missing?
or it just reverts to the base cube
 deft owl
chrome plaza
afternoon lads, I've precured a weapon model from sketchfab and it has a whoppin...
deft owl
chrome plaza
afternoon lads, I've precured a weapon model from sketchfab and it has a whoppin...
Since no one answered with anything helpful, here is a link to a blender modifier to decimate a mesh. It will not be perfect and will most likely have issues that need fixing but it is at least a start. https://youtu.be/JqoIGxUrLbw

Today, we learn how to reduce the number of vertices and faces in our mesh, by using the Decimate modifier feature in Blender!
IMPORTANT LINKS:
Blender 2.79 https://www.blender.org/
SOCIAL MEDIA:
YouTube (skits) https://www.youtube.com/c/kaikayskitsongs
YouTube (gaming) https://www.youtube.com/c/kaiplaysgames
Instagram https://www.instagram.c...
While I agree that modding is a time consuming hobby and there is lots to learn, it does no good to not support someone. That was a terrible attitude to have when replying to someone asking for help. Modding is meant to be supportive, and that was far from it.
calm rune
deft owl
While I agree that modding is a time consuming hobby and there is lots to learn,...
I agree 100% I mean I gave him a solid response on how to go about it. Wasn’t detailed but pointed him in the right direction. Now the other guy who responded to him I just try to ignore because his personality is just rude when it comes to any convo regarding a certain topic.
deft owl
calm rune
I agree 100% I mean I gave him a solid response on how to go about it. Wasn’t de...
Ah must have glanced over it
calm rune
worthy citrus
and why does the save prefab button just not work at all?
I feel like there has to be a bug with the engine rn Bcz it does work but weirdly enough it doesn’t update sometimes. So I just exit out of the engine completely and relaunch and boom it’s suddenly appearing correct.
worthy citrus
when I relaunch its usually worse lol
I think I kind of got it working by just dragging the parent down to the resource library to make a new file but I have no idea how to save an existing one
I wonder if BI used different tools to actually make the game
chrome plaza
deft owl
Since no one answered with anything helpful, here is a link to a blender modifie...
thanks mate, appreciate it
solemn goblet
deft owl
Since no one answered with anything helpful, here is a link to a blender modifie...
That UI brings me back
Something important to note about decimate unsubdiv: It is not a good solver on odd numbers. Triangles can also confuse it. It's totally fine to destructively decimate something but a way better method is the hand picked method with shrinkwraps taught by uhh... Let me find the vid
https://www.youtube.com/watch?v=6sE-p8PcHDo
This one, Grant Abbitt
Grant's Character Course discount link: https://www.gamedev.tv/p/blender-character-creator-2/?coupon_code=GRABBITT&affcode=45216_9b6dqwx2
Grant’s Drawing course discount link: https://www.gamedev.tv/p/complete-drawing/?coupon_code=GRABBITT&affcode=45216_9b6dqwx2
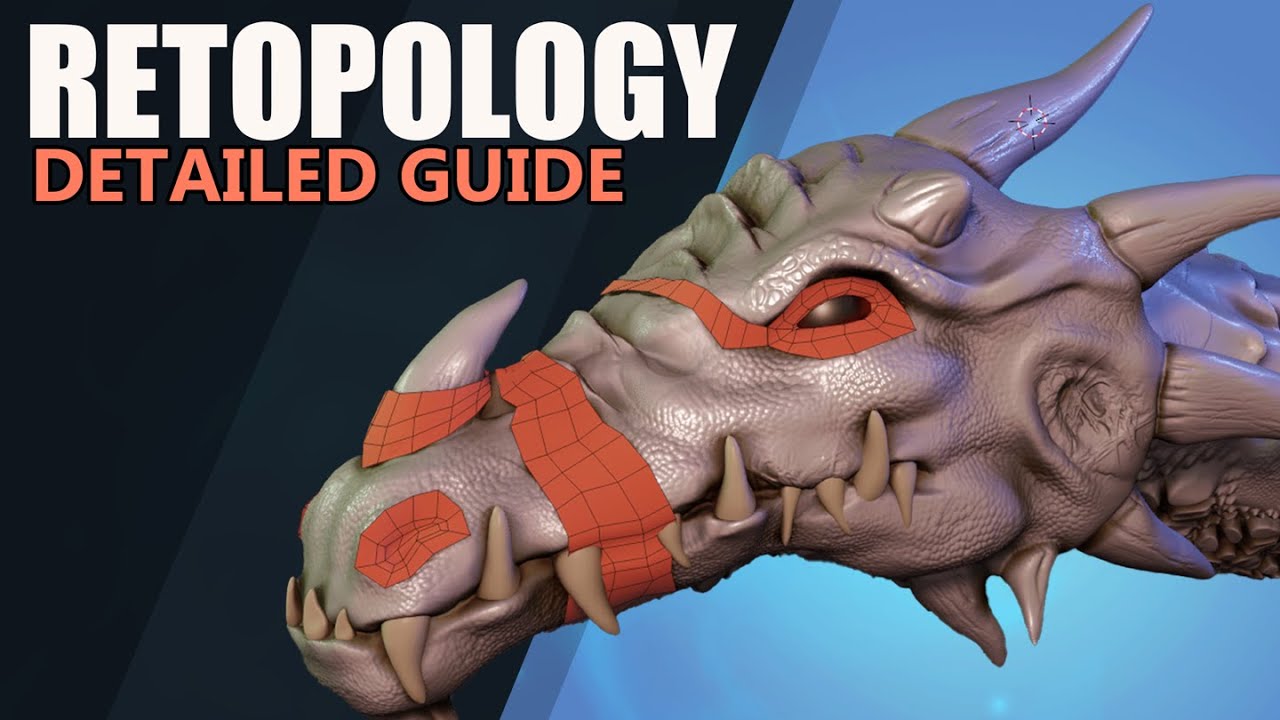
An in depth guide about retopology
-What is retopology
-how to setup 4 retopology
...
calm rune
When it comes to hard surface modelling when lowering your model I feel like the best method is to hand bomb it and just start dissolving edges. At least that way you don’t destroy the UV.
solemn goblet
I like having a bajillion quads then using Grants method to make a new mesh and UVing that, then baking the bajillion into the new one
Here's a fun fact, this is the AK at LOD4
 calm rune
Grants method? Never heard of it. Any videos showing that method?
solemn goblet
I would maybe argue that Bohemia might have been a bit lazy with this one but honestly, who cares. This is what you see with binoculars at like 1000m out. At that point nothing is sacred. So it's not all about being clean all the time, just some of the time.
chrome plaza
The fact that the workbench has been hailed as this easy to use, all in one experience, compared to the overcomplicated mess that was A3 Tools, I think you'll find that there will be a lot of new people who want to get into modding, seeing as its the lifeblood of Arma and all.
Well aware that you need to put in the time and effort to be good at something, just like everything in life, but when your short on hours and can only dedicate maybe an hour a day to this hobby, any help you can get, no matter how seemingly insignificant it is, means so much to someone just starting out.
I know this isn't the right place to ask, but someone who knows better, like Plato or Some_Stranger can spend 30 seconds of there time dropping a link and that means the world to me.
And the only consequence is there is more people creating mods for the community, a community that ought to be more receptive to new modders.
It can sometimes feel a bit gatekeep'ish is all, but thank you nevertheless for the help guys, I really do appreciate it :)
solemn goblet
calm rune
Grants method? Never heard of it. Any videos showing that method?
That's the dragon video I have up above, sorry hehe x)
solemn goblet
chrome plaza
The fact that the workbench has been hailed as this easy to use, all in one expe...
I try and help anyone who posts a picture of their problem and I recognize it. Also my DMs are always open and it's impossible to annoy me. There should be a 'helper' role people can @ or something. Most of my post history is just helping people (this is me humble bragging)
chrome plaza
calm rune
I agree 100% I mean I gave him a solid response on how to go about it. Wasn’t de...
thanks too for this mate
calm rune
solemn goblet
https://www.youtube.com/watch?v=6sE-p8PcHDo
This one, Grant Abbitt
Ah! Yes. I actually bought the blender addon “retopoflow 3.0” for this exact method. It’s a huge time saver. I just need to work on my edge flow.
solemn goblet
I'd say there are 3 addons I can't live without. Texel Density Checker, Retopoflo 3, and the Hardops/Boxcutter bundle (I guess that's four).
Don't get me wrong there are some artists on here that are better than me and I should be asking them questions 😆. I know Avery is one I've seen already. There are probably tons just sitting quietly, plotting, not posting much. In the next few weeks we'll see them more as people smarter than me familiarize themselves with the tools. I'm technically new here.
calm rune
solemn goblet
I'd say there are 3 addons I can't live without. Texel Density Checker, Retopof...
I have way too many addons for someone who only started using blended regularly 5 months ago. I have the hard ops/box cutter, mesh machine, retopoflow, zenUV, UV packer, quad remesh plus more 😅. Scary thing is I actually do use all of them in some way or another.
spiral veldt
I wish I had the time to learn blender but it’s so difficult switching from maya
 bronze kestrel
I'm new to modelling stuff for arma so I'm trying to import a cube with a 2048x2048 uvmapped texture into reforger, but the textures dont seem to be importing with the material. anyone know why that might be?

 terse star
bronze kestrel
I'm new to modelling stuff for arma so I'm trying to import a cube with a 2048x2...
terse star
bronze kestrel
I'm new to modelling stuff for arma so I'm trying to import a cube with a 2048x2...
Because it doesn’t import itself
bronze kestrel
terse star
Because it doesn’t import itself
is there a separate way you're supposed to import textures?
nvm figured it out lol. you have to select the texture as a bcr map
sick shard
anyone know how to fix this issue not sure what causes it but it keeps the black color even when texture is applied

I've noticed this on some of my models and I can't seem to figure out what is causing it
knotty cedar
sick shard
anyone know how to fix this issue not sure what causes it but it keeps the black...
I don't know if this will help you but I had several encounters like that and deleting vertex color set in Maya fixed those for me.
sick shard
Yea a friend just messaged me about it seemed todo the trick thanks for the help
lime comet
any hint on how to get rid of RESOURCES (W): Missing some mesh skinning weights (Object_LOD0). Weighting them to root. ? If possible a short guide how to do it in blender, please.
tidal latch
lime comet
any hint on how to get rid of ` RESOURCES (W): Missing some mesh skinning weight...
In Blender realms, this means that any object with Armature modifier, must be fully skinned to some existing bone through vertex groups. ```That means, that if your Object_LOD0 has Armature modifier and its has only one vertex group for some part of the mesh in the object, then Workbench workbench will complain, since it expects that everything in this object is skinned to something
lime comet
tidal latch
https://community.bistudio.com/wiki/Arma_Reforger:Vehicle_Creation#Setting_skele...
Thanks. I have read that before, but afraid this is above my head right now. I look at the orange square icon object dialog in Blender and as Parent I can only select Object as Parent Type, not Bone
tidal latch
It's about vertex groups
everything in this object has to be skinned to something via vertex group
if you i.e. just skinned wheels, then you have skin the rest to some other existing bone, i.e. v_root
lime comet
the vertex groups are the old selections from Object Builder
tidal latch
delete them then
 urban helm
Any modelers willing to import a gun and helmet I would buy off SketchFab?
lime comet
tidal latch
delete them then
Thanks, warning is gone now, deleted all vertex groups of Object_LOD0. Now onto the next challenge. For some reason my F: Driver: Get In action shows (Obstructed). Any advice there? Is the action point (or whatever the correct term is) inside some mesh here?
tidal latch
you can also change Accessibility Settings
and there is debug for compartments https://community.bistudio.com/wiki/Arma_Reforger:Vehicle_Creation#Debugging
lime comet
tidal latch
https://community.bistudio.com/wiki/Arma_Reforger:Vehicle_Creation#Configuring_c...
Thanks, I enabled debug and I see now some balls and that the compartment def is below the vehicle. Any ideas how to fix it?

also smallish typo on Use Entry Points as RefFerence
there's this blue rectangle, I suspect I need to move that besides the vehicle, not inside, as with the M923?
tidal latch
Passenger Position info is set correctly?
lime comet
I set it to pivot ID driver_getin now and the green ball is on the driver seat now approximately
zenith quartz
I'm working on some cases.

Going to use a multi-mat for cases themselves and then basic mat for all the latches and such.
But, would it be better to try and merge them into the same material? Or have two different mats?
Main thing I like about separate mats is since the components are the same between each box, I can just have one texture for the handles / latches for every box.
 polar lion
bright raft
What do you guys use for version control for 3d stuff? Is this even a thing?
polar lion
bright raft
What do you guys use for version control for 3d stuff? Is this even a thing?
Any artifact storage like Artifactory (a piece of sh*t btw) should do I think
polar lion
solemn goblet
Here's a fun fact, this is the AK at LOD4
Simplygon magic I guess
last parcel
well that depends do you want better details on latches and stuff like that or suffer a bit in quality on them for the use of a single mat
lime comet
tidal latch
check vanilla vehicles
bummer - I found the prob. I had cloned the truck over itself and had hence two instances, blocking each other. One properly setup and the other not. when I moved the truck with the gizmo forward I saw a second one hiding
 pliant bolt
Quick question, are the proper dimensions for buildings (doors, stairs, etc) somewhere?
polar lion
last parcel
well that depends do you want better details on latches and stuff like that or s...
With me the answer is predictable 100% - whatever takes less time 😆
 clever flame
I am super new to 3D modelling. I made a model of a fruit in blender following a tutorial and i would like to get it into the game. Is there a tutorial i can follow for that
brittle blaze
is there a maximum number of triangles that reforger tools can import for an FBX?
delicate condor
I dont think it has been mentioned here before. How much do you have?
anythign above 100k is a little bit excessive
 quasi sedge
Anyone working on structures?
pliant bolt
quasi sedge
Anyone working on structures?
Not yet, will after exams next week. But I need to figure out the basic info like dimensions of buildings in the game rn
spark marlin
pliant bolt
Not yet, will after exams next week. But I need to figure out the basic info lik...
I guess you could import the example character model into the project and use that for scale. Not sure if it will work, but doesn't hurt to try?
vocal belfry
delicate condor
anythign above 100k is a little bit excessive
So the 4.9 million tri object is to much?
delicate condor
yes
 simple meteor
tyre setclass on vehiclewheeledsimulation makes you crash too ?
how car animation works ?
 nocturne island
simple meteor
tyre setclass on vehiclewheeledsimulation makes you crash too ?
nocturne island
simple meteor
tyre setclass on vehiclewheeledsimulation makes you crash too ?
it always crash from some unknown problems 😂
simple meteor
sad
I followed this page my vehicle does not even move forward https://community.bistudio.com/wiki/Arma_Reforger:Vehicle_Creation
no animation
nothing i can just go in xD
nocturne island
wheels' animation can be added in CarProcAnimComponent

 kindred thistle
Is there any tutorial on how to make a simple entity, like a city sign for example? I already have an .xob, but after that I'm kinda lost
 pine flame
kindred thistle
Is there any tutorial on how to make a simple entity, like a city sign for exam...
pine flame
kindred thistle
Is there any tutorial on how to make a simple entity, like a city sign for exam...
Create tab
Generic entity
Add components: mesh, rigid body
In mesh set your xob
In rigid body, configure physics if needed
Save prefab.
Add more components as needed, so destruction if you have, lights and so on. Just open and prefab from vanilla and look through it
pine flame
simple meteor
i've error "wheeled failed to load"
No more details there?
Most probably your config does not fit your model. Can happen if you simply copy stuff from other cars without modifying.
Making a properly working vehicle is not easy, please don't expect that it's gonna understand what you want to make.
Again, observe vanilla prefabs for reference
kindred thistle
pine flame
Create tab
Generic entity
Add components: mesh, rigid body
In mesh set your xob
...
Maybe I'm just stupid (the most probable thing), but I can't find a generic entity thingy in the create tab
 pine flame
kindred thistle
pine flame
kindred thistle
Cause that's not a tab, but pop up for resources files
kindred thistle
what editor should I use?
pine flame
kindred thistle
what editor should I use?
World editor
You have hierarchy tab with all placed objects
And you have create tab, where you have list of entity types you can create
Separated thing is resource browser where you can get existing prefabs.
 subtle rose
hey there, could someone help me figure out how to get my empties (snap points) parented to the w_root bone in blender?
the first image is the ideal structure I'm looking to get (from the M9 beretta)
the second image is my blender hierarchy. I'm only able to parent the empties (red 🔴 ) to the armature and not the specific w_root bone

 kindred thistle
Soo, when I add a LadderComponent to my entity, the model just disappears
calm rune
subtle rose
hey there, could someone help me figure out how to get my empties (snap points) ...

In this Blender 2.8 and 2.90 tutorial I show the rigging of a low poly 3d weapon model using vertex groups and bones. When parenting to empty groups, the vertex groups are created with the names of the bones and an armature modifier is added for them.
Then the different parts of the mesh can be moved around and rotated using the bones.
I also ...
solemn goblet
pine flame
Create tab
Generic entity
Add components: mesh, rigid body
In mesh set your xob
...
This is a great simple description, but is this similar to the write-up at https://community.bistudio.com/wiki/Arma_Reforger:FBX_Import or is it more https://community.bistudio.com/wiki/Arma_Reforger:Prefabs_Basics (under construction).
subtle rose
calm rune
https://www.youtube.com/watch?v=pgLSHwex1dM&ab_channel=Jayanam
unless I missed something, this is just showing you how to rig a model with bones, which isn't what I'm looking for.
My model is already rigged, but enfusion requires some empties which are NOT the same as bones, as they are used to determine the snap points of the weapon
here is an example from the vanilla M9.


my problem is that I cannot get said empties to be parented to the w_root bone within blender for my own model, and I was hoping someone knew how to make it happen
 kindred thistle
pine flame
Create tab
Generic entity
Add components: mesh, rigid body
In mesh set your xob
...
kindred thistle
pine flame
Create tab
Generic entity
Add components: mesh, rigid body
In mesh set your xob
...
I can't safe the prefab. What base class should I use when I want to basically do one from scratch?
solemn goblet
subtle rose
unless I missed something, this is just showing you how to rig a model with bone...
The empties might be bones with 0 vertex weights.
That's how it works in Source at least... 🤷
subtle rose
according to the documentation, bohemia uses these empties, but doesn't elaborate on how to make them work
 solemn goblet
Alright, I'm gonna figure this out.
Somehow it made me mad
Is there a way to add points?
Like in workbench or something
subtle rose
I don't think so, I'm just figuring out the tools as I go
solemn goblet
I'm in Creativity Lounge figuring this out if you'd like to join
subtle rose
sure I'll pop in
calm rune
subtle rose
my problem is that I cannot get said empties to be parented to the `w_root` bone...
You just move them to the desired location. They are just memory points. ie: the barrel chamber is just the location where you see the casing animation fly out. The muzzle you would just put where your muzzle is because thats the animation for muzzle flash.
pine flame
kindred thistle
I can't safe the prefab. What base class should I use when I want to basically d...
I said GenericEntity
If you cannot save the prefab then you are not dropping it into mod maybe
kindred thistle
I'm supposed to be in this window when I try to create it, right?
 pine flame
No, this one

 round orbit
Anyone do boots yet? Must I have the model match the character's foot cause they're crooked

 calm rune
round orbit
Anyone do boots yet? Must I have the model match the character's foot cause they...
calm rune
round orbit
Anyone do boots yet? Must I have the model match the character's foot cause they...
Looks like you have the first release of the samples. They updated some including the character model template.
round orbit
calm rune
Looks like you have the first release of the samples. They updated some includin...
I do yes, awesome thank you
kindred thistle
pine flame
No, this one
Okay so I'm thinking we are talking about different things 😄
I have created the genericentity, assigned the .xbo to it, added a rigid body, but now I want to turn it into a prefab. Sorry if I wasn't clear enough what I meant
subtle rose
subtle rose
hey there, could someone help me figure out how to get my empties (snap points) ...
So I managed to get the model and empties exported, still struggling to get them to line up properly.

above is the model XOB preview ⤴️
below is the prefab preview ⤵️
 pine flame
kindred thistle
Okay so I'm thinking we are talking about different things 😄
I have created th...
pine flame
kindred thistle
Okay so I'm thinking we are talking about different things 😄
I have created th...
 subtle rose
and here it is in action
solemn goblet
subtle rose
above is the model XOB preview ⤴️
below is the prefab preview ⤵️
So the prefab view and the XOB view are all insane and your stuff goes all awry?
subtle rose
the XOB view shows the mesh + bones and memory points (empties) as being correct, but the prefab and ingame mess up somehow
solemn goblet
Yeah I got no idea. Maybe someone really smart and awesome knows what the issue could possibly be.
last parcel
Bacon Are they named correctly ? and the widget xyz axis thingy in either blender or max is setup at the point ? becuse that was a problem i had and that fixed it for me atleast
willow sage
Had same issue with MWS
kindred thistle
subtle rose
and here it is in action
Check the object origin in blender
subtle rose
last parcel
Bacon Are they named correctly ? and the widget xyz axis thingy in either blende...
should be yeah, this is what I had

I'm currently re-rigging the whole thing for good measure
last parcel
worst case scenario i could take a look at it in 3dsmax,
willow sage
MWS xob and Prefab

 solemn goblet
willow sage
MWS xob and Prefab
solemn goblet
willow sage
MWS xob and Prefab
This works in-game good right?
This might confirm my theory that the bones being rotated is an issue (they all gotta be facing Y+)
solemn goblet
subtle rose
Because if you look here the Y tangent handles are facing in directions that, while they make sense, don't work for some reason 😛
willow sage
solemn goblet
This works in-game good right?
Of course not ;D
Everything is broken 😄
solemn goblet
Uh oh
simple meteor
pine flame
No more details there?
Most probably your config does not fit your model. Can ha...
I restarted and had progress 😀
subtle rose
update

it looks mildly better

@solemn goblet sorry my audio drivers died, I had to restart
 solemn goblet
All it would take is like one bohemia dev to stream his process over the course of 1 friday and we'd see more weapon mods 
(or her)
pine flame
solemn goblet
All it would take is like one bohemia dev to stream his process over the course ...
It's cool idea but we are kind of busy atm
Streams with modding will come in future
solemn goblet
🙀
I like to imagine devs are trying to figure out how to get tracked vehicles to work in Enfusion and are having the same issues 😛 I watched Bacon do his pistol and it looked like he was doing quite literally everything right. The sort of 'everything right' to where it'd work in Unity or Unreal but Enfusion is confusion 
subtle rose
Enfusion is confusion
~some stranger 2022
man that's the quote of the year
willow sage
Yeah, just remember the ID of these words 😄
982703829231480842
solemn goblet
but first do not forget to set the ID to about 5 units under origin and set rotation to Y+
subtle rose
and apply all transforms except for your ID's snap points
if you fail to do so, miller will dissolve your vertices
pine flame
subtle rose
*Enfusion is confusion*
~some stranger 2022
man that's the quote of the year
Dont tell anyone, but few years ago I replaced Enfusion logo with selfmade Confusion logo. Looked very good.
But also, few years ago it was in a lot different state than now.
last parcel
didnt find it that diffcult when i figured out how it was all put together
clever flame
What makes an item been able to be picked up into your inventory? I have copied all the components linked to another item that you can pickup but the action does not show. I have also copied all the settings of these components:
 pine flame
clever flame
What makes an item been able to be picked up into your inventory? I have copied ...
pine flame
clever flame
What makes an item been able to be picked up into your inventory? I have copied ...
Action may not show if collider is not working
Check your model of it has same colliders and physics layers as other items which work
clever flame
Ok thank you will check it out i did not setup collider
clever flame
@pine flame I am getting an error when i try Click the Colliders Setup button on the Enfusion Tools in blender i have watched the video tutorial on how to set it up and also checked that a few other people had that issue without clear solution . Do you perhaps know how to solve that issue
 pine flame
clever flame
<@110113662080937984> I am getting an error when i try Click the `Colliders Setu...
pine flame
clever flame
<@110113662080937984> I am getting an error when i try Click the `Colliders Setu...
No, that's not area of my expertise. Check #enfusion_blender_tools ?
 tulip sail
LOL seems on a server (using peer tool) i seem to be missing a head...

never noticed this before lol
shell hedge
seems like a great opportunity for a headless client joke
chilly dragon
Try adding a blank layer to the overide meshes and that might fix it?

 dire owl
is there no way to use a texture atlas in enfusion or is it a little tickbox im overlooking?
spark marlin
@dire owl What are you intending to use it on?
dire owl
spark marlin
<@211979793753833473> What are you intending to use it on?
kinda moved to #enfusion_texture the error being faced is there
 sacred sierra
hello everyone I have a problem with the bones it does not appear in enfusion does anyone know where it could come from please?
http://image.noelshack.com/fichiers/2022/22/7/1654390616-qsdqs.png

 slim silo
Does anybody know how Reforger trees/vegetation are made? Were they done using SpeedTree like in Arma 3?
last hill
sacred sierra
hello everyone I have a problem with the bones it does not appear in enfusion do...
Did you set the import options (export skinning and scene heirarchy) in the xob file and reimport your resource?
sick shard
every time I pickup my gun the game crashes using a custom magazine and the vanilla 9mm
anyone know how to fix this or what I should be looking at?
last hill
sick shard
every time I pickup my gun the game crashes using a custom magazine and the vani...
Is it set up to the magwell of the existing weapon, have the bones etc rigged and the magazine model itself has been rigged and imported correctly?
sick shard
Yea
I'm thinking it's an animation issue
Seems to just crash when I equip the gun into hands
last hill
I never had an issue with animations crashing me, it just didn't animate or animated wrong. Sounds like a possible issue with the configuration in your prefabs. But can't say for sure.
Is it a custom weapon plus magazine, with the magwell having it compatible with the existing magazine? I am trying to figure out if you have something set up wrong.
Did you duplicate the existing weapon and magazine prefabs and change the model references to yours?
Have all of your weapon "sockets" present on the model? Barrel_muzzle etc etc?
sick shard
yes for the first one I even swapped it over to m9 to check still same issue
Yes
and I believe so I've been basing everything off the m9 for components
everything was based of core but I'm going to try just with the m9 inherited
Well that seemed to work guess I might try to avoid the core inherit for right now
 plucky rover
subtle rose
it looks *mildly* better
plucky rover
subtle rose
it looks *mildly* better
look at those delightful properly forward facing memory points, wish i knew what that one felt like 
pine flame
slim silo
Does anybody know how Reforger trees/vegetation are made? Were they done using S...
No
subtle rose
so I noticed that if I move this bone forward in blender, the slide goes back in the prefab editor, but if I move the bone back, the slide goes forward.
It also seems like the bone positions is relative to something that does not get affected when I apply the transforms, so what I see in blender gets messed up the moment reforger reads and applies it


in short, applying transforms in blender does not appear to set the bones to a neutral position, and reforger assumes that the bone has moved some distance based on its default position.
I'm assuming the quick and dirty fix would be to tweak the bone positions by hand until they line up properly within reforger, but I feel like there's a better solution
sacred sierra
last hill
Did you set the import options (export skinning and scene heirarchy) in the xob ...
I can't find this when importing I can't find it anywhere
sly bridge
it is in the workbench import settings

Pro Tip: If you cannot find your memory points in Prefabs, make sure you have this checkbox set. Took me a while to find it #ArmaReforger

 Twitter
·
sacred sierra
Twitter
·
sacred sierra
nice thank you very much
last hill
sacred sierra
I can't find this when importing I can't find it anywhere
Sorry mate, was eating dinner and am on my phone answering, didn't have the image reference handy
sacred sierra
last hill
Sorry mate, was eating dinner and am on my phone answering, didn't have the imag...
it doesn't matter it works thank you very much for your help
does anyone know how to import the properties of the object I created a new prefab but I'm sure there is a way to copy everything rather than putting them one by one
subtle rose
the top two pictures are the result from the enfusion prefab.
the bottom is the blender viewport, for some reason one of the axii is rotated in enfusion despite everything looking good in blender
@solemn goblet you might find this interesting


in the XOB everything looks good

so the problem really comes from the prefab because everything else appears to be correct
subtle rose
negative, it yields the same result
last hill
subtle rose
negative, it yields the same result
Hmmm, is there a bone transform option that is breaking it? Tried looking through the docs for the export settings?
subtle rose
I'll look but everything should match the docs on the export settings
kindred thistle
So I am trying to make a custom deerstand for a map, and when I add the LadderComponent to the prefab the model just disappears. What am I doing wrong?
subtle rose
last hill
Hmmm, is there a bone transform option that is breaking it? Tried looking throug...
top is mine, bottom is the preset from the documentation


in other words, nothing wrong here
 lean spruce
tulip sail
LOL seems on a server (using peer tool) i seem to be missing a head...
lean spruce
tulip sail
LOL seems on a server (using peer tool) i seem to be missing a head...
"PANSHOT!" - the old man yelled
subtle rose
subtle rose
the top two pictures are the result from the enfusion prefab.
the bottom is the...
@solemn goblet @last hill found the problem!
the reason the prefab messed up the locations of some components was because it uses the rest position for the M9 animations as it is an inherited prefab. Because it's a different gun, the M9's bones logically have different positions compared to mine, thus relocating my bones to the wrong coordinates in 3D space.
So the solution is to remake the animations, with a new rest pose, that matches the 1911's skeleton.
for now, I've disabled the animations until I find a way to replace them with something that works.
 shell hedge
I noticed some car releases in the workshop, but they seem to have matte paint on them, is this intentional or were the issues with clear coat materials?
solemn goblet
shell hedge
I noticed some car releases in the workshop, but they seem to have matte paint o...
It's possible they are store-bought models and the people using them don't really understand the PBR process and texture packing methods of Enfusion.
solemn goblet
subtle rose
<@112668416673853440> <@293168886419947530> found the problem!
the reason the ...
Awesome. I'll add this feather to my hat. Thanks for the update.
subtle rose
solemn goblet
Awesome. I'll add this feather to my hat. Thanks for the update.
you don't know anything about animation do ya?
solemn goblet
The way it seems to work in Enfusion is with Blender Enfusion tools. The bones seem to be in weird places but from what I can understand: You create actions in the action editor and export them out (probably just the bone positions) and Enfusion uses that information to move the existing meshes that have vertex groups. I'm guessing it works similarly to source with a bit of a proprietary export process but I'm not certain.
subtle rose
this is gonna be a pain to learn
solemn goblet
Ralian figured out a way to set up a helicopter using just a single idle frame of animation.
You might need a bit more than that for a gun but 🤷
subtle rose
I also have the dumb
spark marlin
subtle rose
I also have the dumb
Don't worry, you're not the only one. I'm trying to figure out weapon animation stuff too, hopelessly. Waiting for good video tutorials
solemn goblet
Maybe today I will apply the source method to Bacon's model and record how to do it for him in creativity-lounge, and if it works then we will all know how to do it.
subtle rose
that would be very pog
spark marlin
Something interesting is happening to my model each time I move the bones. For example, I import the model into reforger, but the fire selector is offset where it shouldn't be. Then I move it downwards in blender to compensate for the offset, import it again, and bam. It has moved upwards instead of downwards
Also the mag isn't where it's supposed to be anymore, for whatever reason
solemn goblet
Wondering if XYZ Quarternion (Blender Default) vs XYZ Euler (What I used for Unreal engine) makes any difference whatsoever.
spark marlin
The same did not happen in a previous version of the model. I'm going back to that version to try and figure out what's going on
hoary herald
stupid helmet is still floating. tried 3 dif skeletons to pull from. have brought in several hats before but for some reason im missing something on this one :/
chilly dragon
have you checked weight paint and did you remember to export skinning and reimport?
hoary herald
yeah its weight painted properly
chilly dragon
how many bones does it say that it has?
hoary herald
163
usually i get 1+162
the default hats are 1+162
for some reason this one is coming up as 0+163

looks like it should be fine
but idk what the 1+162 means vs. 0+163
obv that one is important i think
chilly dragon
the first number is how many bones its applied to
 spring pond
Iirc you need to attach to that Bonę in blender
chilly dragon
yeah have you set an armature modifer and dragged it into the armature?
hoary herald
OHHHH yep
thats probably it
fml i didnt do helmets in 3 days and i forget the details...
yep
thanks yall
results here in a sec
chilly dragon
pro tec helmet?
hoary herald
yep
@chilly dragon

going to make variants of course
is there a way to grab existing mesh and add it? like if i want to use the default goggles and put it on the helmet?
like a child component?
solemn goblet
hoary herald
like a child component?
Maybe have it work like the ALICE vest attachment system.
(I don't know how to do this yet so I could be blowing smoke)
solemn goblet
I think the system is in place for a lot of things, it's very likely doable
sacred sierra
hello I have just created a vehicle I put all the property objects but I do not have any action to get into the vehicle would you know where it could come from please?
solemn goblet
sacred sierra
hello I have just created a vehicle I put all the property objects but I do not ...
You were using the wiki entry for vehicles right?
sacred sierra
solemn goblet
You were using the wiki entry for vehicles right?
I followed the wiki a little but I copied the properties of the vehicle from the samples of arma
solemn goblet
https://community.bistudio.com/wiki/Arma_Reforger:Vehicle_Creation#Creating_actions Keep in mind I haven't made a vehicle yet but I think you're looking for this place here 😄
sacred sierra
thank you but I have already tested all the wikis but nothing works I've been on the vehicle looking for 8 hours but I can't find anything for the moment
solemn goblet
Yeah no idea then friend. Sorry I couldn't help ya
bright raft
solemn goblet
Damn that's pretty rad. Good work 👍
bright raft
Thx 😉
hoary herald
so yeah

its possible
and really easy
gotta scale it but all that is built in
this is going to open a ton of doors
solemn goblet
Could make it attach to the helmet, and then also attach to the character or something? So like the helmet has storage for it
hoary herald
not sure but this is prebuilt into so
solemn goblet
Sorta like how you can use the flashlight, or attach it to your rig
hoary herald
not compalining
solemn goblet
Put it in your backpack, use it, or attach it to a 'connector'
kindred thistle
hoary herald
ah damn... they didnt include a scale
Try duplicating the prefab into your addon, and scale the prefab itself
hoary herald
yeah thats probably what i'll do
would be neat if they made it part of the transform options though
also a "preview" would be nice
cause it shows the ground items
not the full shibang
chilly dragon
i think there is like a debug option to just show the worn item
if thats what you mean
kindred thistle
Is there a limit on how tall a single object can be? I.e the tv tower from A2
last hill
bright raft
There goes my idea of being first to drop a Magnifier. Well done. That your mk18 mod?
bright raft
last hill
There goes my idea of being first to drop a Magnifier. Well done. That your mk18...
Thanks
Yeah, it's available in workshop.
Still need to animate it, and maybe figure out a way to make reddot collimated, instead of PIP
pine flame
bright raft
Thanks
Yeah, it's available in workshop.
Still need to animate it, and maybe fi...
Use only sights component not pip
Will look a bit shit, but still better than PIP and broken 2d
 prisma fjord
Anyone know why i would be getting this when importing a FBX?


This is the object in blender
sly bridge
prisma fjord
polycount?
prisma fjord

Ah makes sense.... new to modeling trying to learn how to make terrain assets for a map.
prisma fjord
What would be a polycount to shoot for? Especially for complex objects?
 valid apex
Dose anyone have a model of a M109 Paladin
sly bridge
valid apex
Dose anyone have a model of a M109 Paladin
yes
sly bridge
prisma fjord
What would be a polycount to shoot for? Especially for complex objects?
that H barrier is not a complex object
1-2k prly
 valid apex
sly bridge
yes
valid apex
sly bridge
yes
would it be okay if i used it for a personal project i wont be making any money from it and ill give you full creds
sly bridge
valid apex
would it be okay if i used it for a personal project i wont be making any money ...
nope
valid apex
ight
daring condor
prisma fjord
how, also the shape is wrong
i filled out hesco barrier will bulge out at the side

 sick shard
anyone know what could be causing this issue looks fine in blender but as soon as I import the model it deletes the round edges off stuff happens with the front post as well
 dense plover
Possible inverted normals
sly bridge
sick shard
anyone know what could be causing this issue looks fine in blender but as soon a...
can you show the wireframe
sick shard
In reforger or blender?
sly bridge
you could also try importing without merge meshes
sly bridge
sick shard
In reforger or blender?
blender
sick shard
sure
sly bridge
there seems to be some autoweld thinghy on import


