

#enfusion_model
1 messages · Page 1 of 1 (latest)
 thorny cobalt
 zenith quartz
Bake bake bake bake!
thorny cobalt
Just slap ProOptimizer onto it and get it down to 16k faces 
thorny cobalt
Well I just checked the UAZ wheel, its 6k verts and 8k faces, so mine is only double of that
 shell hedge
impressive, I only have one face
 delicate condor
oh we have a case of Lou here
thorny cobalt
Thank you for your useless comments, I appreciate the garbage
delicate condor
all in all, it can work if you also add good distance lods to it
it might aggressively lod to lower levels though. or in large numbers it could impact fps
4 wheels would count as 8 "default" wheels and so on
thorny cobalt
My tire treads are made with open subdiv.
I could simply make second lod switch to a version without it, will still look alright but have like 10% the faces 😄
delicate condor
indeed
do components swap lods independently or are they tied to the main objects lod levels? 🤔
probably latter
 tacit eagle
to bad the ural truck tire is just a smooth tire with a bunch of cubes glued on it...
tacit eagle
which tires are those for? they are off-roading mud/sand tires
 mental thunder
I'm noticing that my model gets culled at a distance. All it has is an LOD0 so I'm guessing somewhere it's defined as a max render distance. Any help in that direction would be appreciated.
tacit eagle
I would have to guess that you would have to make more lods
 dense thunder
Same with any game for performance you need lower LODS that render at further distances
mental thunder
dense thunder
Same with any game for performance you need lower LODS that render at further di...
They're not much better than cubes so I don't think I need to worry about optimizing performance. More importantly is that something which blocks bullets be visible at any distance.
tacit eagle
make them planes than
mental thunder
tacit eagle
I would have to guess that you would have to make more lods
I added more LOD's, this did not increase render distance
tacit eagle
hmm there must be somthing in enfusion to define the lod distances
how to do that I have zero idea
 surreal ore
In the xob properties iirc. I know there are properties for lods at least
@mental thunder how many loads did you make?
How big is your object?
mental thunder
surreal ore
<@148942504077557760> how many loads did you make?
I tried making 3 to see if it'd make a difference, I don't think it changed the render distance at all.
mental thunder
surreal ore
How big is your object?
It's not that big but it's very important to render no matter how small / what distance it is. It's shield for turret plating (I just released its called the "Humvee Enhanced" mod). And the problem is if you're a sniper aiming at the humvee, it won't show up because the game culls it at a certain distance.
mental thunder
delicate condor
it most likely is just too small to draw
It's about the height of a person and I can see the person in the humvee. If I watch the humvee while I back up I can see the point where it just disappears, and it's not nearly as far as I'd like.
 mental thunder
delicate condor
mental thunder
delicate condor
Good idea ~ perhaps the LOD is calculated by an invisible bounding box on the mesh
delicate condor
well at least previously "the size" of an object has been its all lod combined bounds
mental thunder
I put a few vertices out into the wild, same result. Perhaps it goes off tris?
delicate condor
you could try last lod that is just planes with the frame texture on
so its one solid part and no tiny frame
 light eagle
Lod switching is done automatically based on Screenspace of object by default. That is what horriblegoat is talking about. There are options to manually set lod switching. That is what zelik is talking about
On the wiki, it talks about manually setting your lod switches. You can try setting them to much smaller screenspace limits so each lod stays longer
mental thunder
light eagle
On the wiki, it talks about manually setting your lod switches. You can try set...
Thanks ~ where would I adjust that?
light eagle
I'm driving, helping at stoplights. Sorry. Check wiki on lod's
mental thunder
kk
mental thunder
Ah I've been adjusting the LOD scale & factors to no avail when I read it inherits it from parents. So adjusting it on the parent fixed the issue.
That being said it fixed it for LOD's coming in too quickly, the actual max render distance seems to still not be affected
Alright I managed to solve the problem by making a big face behind the turret that uses an invisible material to trick it into thinking its taking up more space on the screen.
Also decided against adjusting parent LOD properties since I realized I'd have to adjust the properties of the humvee itself (which are warranted because of how detailed it is) so instead keeping those properties and just using greater LOD's. I.e instead of LOD0,1,2 doing LOD0,1,2,3,4 where LOD0/1 are the same 2/3 are the same, and 4 is the aggressive one. That way when the humvee switches LOD really quick at a short distance, the LOD of the plating 'switches' but uses the same model so it works out.
mental thunder
So the issue is solved and my mod has LOD's. And with adding LOD's also let me add a new feature where if you're further from the plating it uses a slightly more aggressive opacity glass material so at a distance you can still tell that there's glass there.
zenith quartz

Should I pack this to a single 4K or two 2Ks?
I think latter would be better perf wise and I could manage it, but at the same time I'm worried about actually being able to texture it efficiently in substance painter with 2 2Ks 😅
since UVPackMaster is assigning which island goes to which texture automatically
but i guess i could do that part by hand...
zenith quartz
Yup, 1K mag.
 cloud rampart
Hi, im trying to get all bones of a USP I made, I get the bones right, but the memory points get outside the w_root and all mesh up. How can i link it to the root?

 zenith quartz
Maybe a dumb question but would 2 2Ks have the same performance impact as a single 2Kx4K?
 wary eagle
Does the Reforger mod tools not let you import an fbx with a custom rig? I'm trying to import this free little model I got off sketchfab as a test and Reforger tools won't show any bones.
It says it has 0 bones. But importing the fbx into Blender will show bones.
 little kayak
you need to import those with specific settings: https://community.bistudio.com/wiki/Arma_Reforger:FBX_Import#Import_process_in_the_Workbench
wary eagle
little kayak
you need to import those with specific settings: https://community.bistudio.com/...
me?
little kayak
yes
 sly bridge
@tacit eagle - wrong channel
tacit eagle
sly bridge
<@456226577798135808> - wrong channel
where can I post that type of request
sly bridge
nowhere, at least atm
tacit eagle
Err, ok?
sly bridge
closest would be #enfusion_generic, but this channel is not for that sort of thing @tacit eagle +
tacit eagle
thorny cobalt
They do be nice wheels tho <:sad:837067729513086976>
which wheel is this for? is ground friction confirmed 
thorny cobalt
This wheel is for the wheel you can see 😉
I don't know what you mean by ground friction, wheel configs have a tire tread entry, I think its for something thingymabob
 calm rune
thorny cobalt
I don't know what you mean by ground friction, wheel configs have a tire tread e...
calm rune
thorny cobalt
I don't know what you mean by ground friction, wheel configs have a tire tread e...
I think he means different ground materials would have different values for friction. So depending on the tread type on the tire it would react different to different kinds of ground material(sand, dirt, rock, etc.) Your tire looks like a sand tire judging by the tread pattern.
tacit eagle
its def a sand/mud tire
calm rune
tacit eagle
its def a sand/mud tire
100% sand dune style tread. Mud tire has the same pattern but more lenght on the lug.
thorny cobalt
I have no idea if or how that works
tacit eagle
how ground friction would work is that different ground materials would affect vehicle traction. speed, acceleration, climbing ability and the tendency to loose traction during certain conditions such as hard steering inputs and acceleration on something like ice and gravel
maybe having different properties based on certain tires is a little much and should just be vehicle dependent
tacit eagle
How does model making work in Enfusion
 deft owl
 ornate coral
hi can anyone tell me why my model is black when i import an fbx but its normal if i turn it into a p3d and then back into a fbx to import it.

 tacit eagle
i think you have to import the materials separately
ctrl + f and type FBX and you might find what your looking for
 plain galleon
The pants.xob follows the bones when i move them around, so I can deform them as I please.. but ingame the pants are static and doesn't follow at all.


What could be wrong?
sly bridge
tacit eagle
How does model making work in Enfusion
modeling doesn’t happen in enfusion
sly bridge
plain galleon
What could be wrong?
the prefab most likely
 tidal latch
plain galleon
The pants.xob follows the bones when i move them around, so I can deform them as...
tidal latch
plain galleon
The pants.xob follows the bones when i move them around, so I can deform them as...
Skeleton has to match base body
It seems yoy have leaf bones enabled in blender export. Check wiki for more details
plain galleon
Will double check, assumed sample skeleton and prefab based on the reforger models would match
 half anvil
Why is this happening?
dense thunder
Have you added rigidbody and ticked static object and model geometry?
half anvil
from blender?
dense thunder
In enfusion tools, add new component "rigidbody" then in options tick static and model geometry
Doing this will activate the collisions
 dense thunder
Pretty sure it needs to be part of a prefab to work also
If your just dropping in the xob it won't work
half anvil
dense thunder
If your just dropping in the xob it won't work
what should i do
dense thunder
Make it a prefab, use the wiki to do so
plain galleon
leaf bones confirmed, didn't solve the trick but guess one step closer. Only thing I see is that my model lacks the collision lod
half anvil
dense thunder
Make it a prefab, use the wiki to do so
I made it, but i can still get through it 😄
 zenith quartz
ornate coral
hi can anyone tell me why my model is black when i import an fbx but its normal ...
zenith quartz
ornate coral
hi can anyone tell me why my model is black when i import an fbx but its normal ...
Do you have vertex colors on the model? That could be causing it.
dense thunder
half anvil
I made it, but i can still get through it 😄
What's your collisions set as?
half anvil
dense thunder
What's your collisions set as?
where can i see them
sorry i am very new to these
half anvil
i figured out that the model doesn't have any geometry
dense thunder
oh
half anvil
Create entity @"ENTITY:1" ('GenericEntity','Models/Barrier/barrier.xob') at <0.000000 0.000000 0.000000> @"{2D93D6B69CF7B6CE}Models/Barrier/barrier.et"
RESOURCES (E): Trying to create RigidBodyComponent on model @"Models/Barrier/barrier.xob" without geometry
dense thunder
did you make your colliders in blender?
half anvil
i downloaded the model from sketchfab, so no
dense thunder
lol
dense thunder
use the wiki and give it a good read
cloud rampart
Hi, i have done this object as a Icon for statues and monument to my addon and get some zones invisible, anyone knows what happen?

All faces are well on blender
dense thunder
recalculate your normals
half anvil
dense thunder
use the wiki and give it a good read
can you send the link
dense thunder
half anvil
can you send the link
there you go but id learn to use search functions as your gonna need them too.... alot
 fathom elbow
building generator go brr
https://www.youtube.com/watch?v=gKZ074ISG_M

In this video, we check out Buildify - a new geometry node add-on that can procedurally create buildings with modular pieces in Blender. It can also generate complete cities using the Open Street Map add-on as well!
DOWNLOAD BUILDIFY
https://paveloliva.gumroad.com/l/buildify
OSM ADD-ON TUTORIAL
https://www.youtube.com/watch?v=ZsLMt3Ka8UA
Wan...
little kayak
wow, too bad it doesn't generate interiors 😛
But I guess it can be implemented with some knowledge about Blender
shell hedge
this addon also doesn't support sloped roof for now, but square stuff is already promising
it automates the easiest part of making buildings 😛
fathom elbow
the easiest but often still very time consuming... if you dont have a square layout dealing with all the edges, odd angles and transitions is annoying
plus with some extension you could also make it generate technical LOD (collision/fire geometry) along with the visual exterior

 bright raft
zenith quartz
bright raft
zenith quartz
Love the polymer material. Substance?
zenith quartz
Yuppp. Thanks!
zenith quartz
HK433! It's our semi-futurized variant for our project. 🙂
Hence the Titanfall-esque ammo counter too. It also has Tworx-inspired powered rails.
Now to finish retopoing the magazine ughhhh
 whole briar
plain galleon
The pants.xob follows the bones when i move them around, so I can deform them as...
whole briar
plain galleon
The pants.xob follows the bones when i move them around, so I can deform them as...
Check following:
- Make sure add leaf bones is unchecked
2.Make sure the trousers are correctly weight painted - Make sure you got it correctly attached to the armature
- Make sure that sample colliders and memory points are enabled
For me this mostly happened when I transfer weight painted from the sample model correctly but forgot to link my object to the armature or even forgot to reimport the asset with checked hirarchy boxes
plain galleon
Good pointers, but sample colliders I dont recall seeing.. maybe using old/other model? Will hopefully get some dedicated time tonight to poke around
whole briar
plain galleon
Good pointers, but sample colliders I dont recall seeing.. maybe using old/other...
If you open up the sample character template and sort the stuff first with Enfusion tools you will have the colliders in an own group. They might be checked invisible. Just make everything visible and check if the bones are set correct at the trousers and if the colliders are enabled there (kind of a body hull that is turned by 180 degrees to the model). I personally leave it turned like that and turn the object in Enfusion by 180 degrees
 dense shard
can someone explain to me how am i supposed to create shaders? do that in blender and then somehow export using enfusion tools, or does enfusion workbench allow me to do it?
when I worked in unity i would create shaders from scratch using HLSL or shadergraph, is it the same here?
sly bridge
dense shard
when I worked in unity i would create shaders from scratch using HLSL or shaderg...
cannot create new shaders (HLSL) for reforger (at least for now)
dense shard
sly bridge
cannot create new shaders (HLSL) for reforger (at least for now)
How about materials? Should I create them in blender or workbench?
dense shard
RESOURCES (W): Face edge is shared by too many faces. Face 2. ConvexCollider 'UCX_reflex-sight'
RESOURCES (W): Face edge is shared by too many faces. Face 3. ConvexCollider 'UCX_reflex-sight'
RESOURCES (W): Face edge is shared by too many faces. Face 7. ConvexCollider 'UCX_reflex-sight'
RESOURCES (W): Face edge is shared by too many faces. Face 7. ConvexCollider 'UCX_reflex-sight'
RESOURCES (W): Face edge is shared by too many faces. Face 7. ConvexCollider 'UCX_reflex-sight'
RESOURCES (W): Face edge is shared by too many faces. Face 8. ConvexCollider 'UCX_reflex-sight'
RESOURCES (W): Convex is not closed. Edge 3 - 8 non-manifold. ConvexCollider 'UCX_reflex-sight'
RESOURCES (W): Convex is not closed. Edge 3 - 10 non-manifold. ConvexCollider 'UCX_reflex-sight'
RESOURCES (W): Convex is not closed. Edge 7 - 11 non-manifold. ConvexCollider 'UCX_reflex-sight'
RESOURCES (W): Convex is not closed. Edge 10 - 11 non-manifold. ConvexCollider 'UCX_reflex-sight'
RESOURCES (W): Convex is not closed. Edge 7 - 9 non-manifold. ConvexCollider 'UCX_reflex-sight'
RESOURCES (W): Convex is not closed. Edge 8 - 9 non-manifold. ConvexCollider 'UCX_reflex-sight'
RESOURCES (E): Collider is not valid 'UCX_reflex-sight'
what does this mean?
i put a wrong prefix?
are the prefixes even explained anywhere?
nvm, made it convex and it worked
but still
what do the prefixes mean?
why doesnt wiki explain that in object tools page?
nvm, its in pinned
but still, why is it not on wiki
nvm its in fbx import lol
my brain
dense shard
ok, hopefully this one isnt explained somewhere in plain sight and i cant see it
I added armature to my blender reflex sight model to store memory points as bones (adding them as empty points doesnt export anything to workbench (yes, i checked emport empty))
now workbench crashes when i try to import the fbx
what is the correct way to setup memory points and armature for a sight attachment?
do i even need armature?
whole briar
@dense shard I did not use any bones for my scope, just empty points. I used 4 of them, all aligned from back to front (Eye, rear lense, com, front lense). Also make sure that your back and front lenses have own models (you can do that by either select one after another and add an own material per lense in blender or select one after each other and seperate them from the model to be their own models and give every lense a seperate material) -> in workbench you need to be able to use the games glasslenses prefabs for front and/ or your rear lense.
furthermore make sure that every object (LOD) has applied location, rotation, scale and set its geometry to origin.
dense shard
whole briar
<@185102882528296960> I did not use any bones for my scope, just empty points. I...
I have a reflex sight, its not a scope
whole briar
and last do not forget to make a small cube collider with UCX_ prefix, otherwise the game will crash when the weapon/ scope drops to the floor when dying or sth like that.
dense shard
so im not sure about rear and front lense
whole briar
dense shard
I have a reflex sight, its not a scope
so you need only one seperated material (for your one lense). but it needs to have its own material so you can set the glasslense prefab in workbench while you can set any texture to the rest of the model
dense shard
yeah, it has
separate material
and also did the collider thing
thanks for advice
ill try to make it work now
whole briar
if that does not work out i would copy your glass (reflex lense) and paste it right behind the first one so it is technically a scope but you won't notice ingame if they are set close to each other (just a guess that this could be a workaround)
dense shard
whole briar
if that does not work out i would copy your glass (reflex lense) and paste it ri...
yeah but i suppose then game will use PiP to render it
which hinders performance
i guess thats how the game does it, because thats how i did it in my game in unity (surprisingly I find so many similarities in arma to what i implemented about a year ago myself lol)
camera in place of front-sight and camera image is rendered on the rear sight glass texture
whole briar
yeah pretty sure you will need to use PiPsight as a component in your prefabs
but regarding a working model i can only try to help with what i learned from doing my scope
dense shard
I cant, thats not how reflex sight works
i need to do it like i would a one-piece iron sight
whole briar
can you tell me what you mean by that? can't imagine what you think atm
dense shard
reflex sight is basically a piece of glass and if you look through it you see a red dot far in the distance
that acts as your aiming point
it doesnt magnify the image or anything
shame i cant put images here
i showed you in the #screenshots_arma
workshop still crashes for some reason lol
plain galleon
whole briar
If you open up the sample character template and sort the stuff first with Enfus...
another question.. why some pants have colliders, and the BDU doesn't?
 whole briar
plain galleon
another question.. why some pants have colliders, and the BDU doesn't?
whole briar
plain galleon
another question.. why some pants have colliders, and the BDU doesn't?
did you use the character_template from samples? It should have a collider
plain galleon
yeah, i am just puzzled why BIS have it on some, but not on all..
(and still no champagne here.. static pants :/ )
 frosty leaf
How do you get the armature bones to import into enfusion. at the moment it's being treated as a memory point and not a bone (also i don't appear to be able to post screen shots)
cloud rampart
I have a platecarrier on my mod and every time someone shoot it, the shooter crash and if the IA shoot, all the people of the server crash
any clue of the error?
its done from a PASGT chest piece
plain galleon
so when checking an animation, and using our custom pants.. it moves, but once it get picked up ingame, as pants, its still remains static

I think this sorta "proves" that the xob got the bones/weights in order.. but what could be missing then? don't see anything in the prefab beside adding the xob as "worn model" in the baseloadout ?

@tacit eagle solved it.. finally!
tacit eagle
@whole briar https://www.youtube.com/watch?v=fsLrsg-qqLM this will help you

For a quick search is an timetalble here:
0:35 Shading - short introduction
1:38 Blender 2.79 - Shade smooth
2:19 Blender 2.79 - Mark Sharp
3:02 Blender 2.79 - Auto Smooth
3:47 Blender 2.79 - workflow summary
4:04 Blender 2.8 - Shade Smooth
4:44 Blender 2.8 - Mark Sharp
5:09 Blender 2.8 - Auto Smooth
5:33 - Next time
📁 Hey Pixels! In this ...
shading "smooth groups" (in autoschiet products) are very important in the game ready mesh and even for baking high polies
because I saw that every edge on your pak38 was shaded blue
whole briar
tacit eagle
because I saw that every edge on your pak38 was shaded blue
oh where did you see that? do you have a screenshot? And thanks for the tut
tacit eagle
open it back up and you will see
I check it out on the workshop and it has sharp marks around all the cylindrical objects and on the shield where the optics cutout is
you apply sharp marks only on hard edges so anything over 90 and in some cases less
whole briar
Thanks for the feedback! Planned to work on the PaK the next days anyway to inegrate it in tow mod, will try to smoothen it up then. Thank you for your feedback @tacit eagle !
whole briar
cloud rampart
I have a platecarrier on my mod and every time someone shoot it, the shooter cra...
is it in any way customized or made with blender?
whole briar
frosty leaf
How do you get the armature bones to import into enfusion. at the moment it's be...
Make sure your object is correctly weight painted and secondly correctly linked to the armature. Often had problems like static meshes or bones treated as empties because of that
cloud rampart
whole briar
is it in any way customized or made with blender?
Its full made on blender
whole briar
cloud rampart
Its full made on blender
please check if you made a collider and if yes wether it was checked active when exporting
whole briar
to keep is simple just add a cube that surrounds the vest, do not make it to big. make it as small as possible surrounding the object. Name ist sth like UCX_vest, go to enfusion tools, click sort object, check that everything is activated and export it with checked custom properties box and unchecked Add leaf bones box
that should do the job
whole briar
You're welcome! Hope it works. Stumbled across the same problem when i forgot to make colliders
tacit eagle
what is the collider? is that just a collision mesh so that the player and other objects can interaction with it physically ?
whole briar
tacit eagle
what is the collider? is that just a collision mesh so that the player and other...
yes that is what it does, as far as i understood the concept of colliders
ornate coral
zenith quartz
Do you have vertex colors on the model? That could be causing it.
hi yea it looks like at same point the vertex color was made black and i don't know why but thank you for the help
zenith quartz
np 🙂
Hmm. My bones just aren't being recognized for bones for some reason.

I have another weapon which works and I genuinely cannot find a difference between them beyond parts.
 whole briar
zenith quartz
np 🙂
whole briar
zenith quartz
np 🙂
armature linked correctly to the object and weight paint or transfer done correctly? It's like always some of these two for me
zenith quartz
And I have all my mem points parented and my LOD parts.
Hmmmm.
Lemme mess with the vertex groups actually.
I made them but might've not've painted them.
whole briar
if i move my bones in pose mode and they drag nothing with it, it won't be recognized as bones in workbench for me what means i did sth wrong with armature or weight paint in most cases
whole briar
nice man, hope it will work out for you now 🙂
zenith quartz
thanks!
whole briar
you're welcome 🙂
zenith quartz
i parented the bones for the charging handle correctly and bolt but the weight painting isnt working

bones are parented
LODs aren't
do i need to parent the LODs too?
whole briar
which kind of weapon is it? still got problems with that
zenith quartz
Assault rifle
oh
im dumb
forgot to set up the armature modifier for them

Okay I got it working but now they're giant for some reason lol.
Doesn't appear to be a transformation though.
So... not sure?
 chilly dragon
try assigning LODs to your root bone?
zenith quartz
all except the moving parts are
whole briar
zenith quartz
yeah you somehow unlinked it from the armature 😄
zenith quartz
ah okay yup
I had those parented to LOD objects
parenting them to armature fixed it
thanks again!
zenith quartz
How would one go about animating a ironsight folding down?
is it done via armature + anims, procedural anims, or shapekeys?
 last hill
zenith quartz
is it done via armature + anims, procedural anims, or shapekeys?
last hill
zenith quartz
is it done via armature + anims, procedural anims, or shapekeys?
The ones out currently are via procedural animations initiated via scripting and signals linked to said scripting
zenith quartz
Gotcha.
tidal latch
plain galleon
so when checking an animation, and using our custom pants.. it moves, but once i...
can you show pic showing your skeleton in workbench? I wonder if you really have same set of bones as template
and I also hope that you didn't use blender file for making in-game animations for skinning
plain galleon
tidal latch
and I also hope that you didn't use blender file for making in-game animations f...
Currently three people involved, one made the model, I do the “prefab” stuff and megadeth normally do weapons but helped us bridge the gap between blender/workbench… so we will double check before release that everything is in order
frosty leaf
is someone able to provide advice, i seem to be having trouble with a model when i import it, it seems to have some parts scaled up, i've ensured before exporting to fbx (from blender) that scale, location & rotations are set & custom properties enabled. i've got another model that imported just fine however i've compared the two and don't notice any differences..
thorny cobalt
half anvil
is there any video shows to how to do it
You edit the fbx, add a new quad, and name it something like UBX_MainCol_01
You can check here https://github.com/BohemiaInteractive/Arma-Reforger-Samples NewCar and NewProp should both have colliders
whole briar
frosty leaf
is someone able to provide advice, i seem to be having trouble with a model when...
Send me a message with a screen pls maybe I can help
cloud rampart
whole briar
You're welcome! Hope it works. Stumbled across the same problem when i forgot ...
I added the collider, but still crashing
Need any specific type of collider setup?
whole briar
did you use the Prefix UCX_ for your collider name?
Did you sort the list with enfusion tools before exporting?
 whole briar
the collider is way to small
it needs to surround the whole vest
i can also be wrong, cause i did not recognize that this works like uniform moddeling. so if the vest surronding collider does not work, you need to copy the rig into the character template, link it to the armature and delete the charactermodel in the template. that gives you a proper collider, proper skeleton and proper memory points if needed
also if you do that make sure it is correctly weight painted
half anvil
I want this object to ragdoll if a car hits it. What should i do?
 cloud rampart
whole briar
also if you do that make sure it is correctly weight painted
cloud rampart
whole briar
also if you do that make sure it is correctly weight painted
I have a weight paint using the character sample and them modifying some parts to avoid clipping
idk, its really strange the crash, have uniforms and helmet made like this (Even with no colliders added) and only crash the vest
whole briar
cloud rampart
I have a weight paint using the character sample and them modifying some parts t...
does the character sample even have weight paint? Not sure about that, check the vertex groups in weight paint mode wether you got it painted properly or just all in blue
whole briar
cloud rampart
idk, its really strange the crash, have uniforms and helmet made like this (Even...
hm still thinking it must be kind of a collider problem. so ive seen that sometimes stuff works without colliders but most times not, cause there might be an action that causes the crash. for me it was when the gun with the scope was dropped when dying. because of no collider the whole server crashed then
 whole briar
thw whole belt is not painted. so you can have light blue so not heavy paints but avoid sth to be completly blue
cloud rampart
Yeah, cause the belt takes weight from hips and some for legs
Can that cause the crash?
whole briar
can't tell you for sure but could be possible. it does not necessarily take it away cause vest and trousers are seperated objects
so you should paint the belt as well as the trousers
different blender and fbx files
shell hedge
weighted bones on a traffic cone?
cloud rampart
whole briar
thw whole belt is not painted. so you can have light blue so not heavy paints bu...
Was the belt, i remove it from the model and imported and all worked, will study how to do it
whole briar
cloud rampart
Was the belt, i remove it from the model and imported and all worked, will study...
well done
i would just try to weight paint it or did you try that?
cloud rampart
maybe addind other collision for it
whole briar
Imo you need to weight paint everything that belongs to the vest so including the belt and then make a collider that surrounds every mesh that belongs to the vest
the other way is to use the character template collider think one of those two ways will work out
i have a question myself. in blender i seperated different parts of clothing by selecting the parts i need give them a new material and paint it different. Usually that works out for me. this time no matter if i delete all materials or not everytime i make a new material it automatically selects 2 parts of the clothing that do not belong together. i do not even need to select something, just creating a new material selects them both binded. if i seperate one part from the whole clothing it works, but i need to fuse them together before rigging and getting it into workbench. after fusing them together again same problem. anyone got an idea how i can seperate them?
 last thunder
Not sure if I understand you correctly but cant you just create a second material, select all the geo you want to apply the material to and hit assign in the material settings?

At the start all 4 faces are assigned to material 1. Then I create a second material and apply the selected two faces to mat slot 2.. Now Mat slot 1 automatically just has the right 2 faces assigned while mat slot 2 has the left two faces assigned (in the example shown above)
they are basically removed from mat slot 1 by assigning them to a different material
Oh and just in case, if you seperate the mesh at any point do select "by material" otherwise it will assign mat 1 to it.
 cloud rampart
whole briar
the other way is to use the character template collider think one of those two w...
cloud rampart
whole briar
the other way is to use the character template collider think one of those two w...
Nothing work, finally i try to investigate other mod with plate carriers and all made the solution to add it to the pants...So for now, its the solution
whole briar
last thunder
Not sure if I understand you correctly but cant you just create a second materia...
hey marlo, thanks for checking in. assigning does not work for some reason. like i said if i delete all materials and do not even select something just click add material both of them are automatically selected and same colour. i did not seperate by material but tried it afterwards. and that is how i was able to seperate them. the problem is if i fuse them together afterwards for rigging the same issue comes up again. when they are fused into one object again they are kind of automatically bound to each other no idea why
whole briar
cloud rampart
Nothing work, finally i try to investigate other mod with plate carriers and all...
all right. thank you for the feedback and sounds good that it works for you now.
last thunder
@whole briar but thats how it is intended to be. If the mesh has no material assigned and you create a new one everything will automatically be assigned to that material until you say "this part of the mesh should belong to material slot 2"
If assigning to slot 2 (slot 2 also needs a new material) is not working then I dont know what is wrong with your Blender. :/
surreal ore
@cloud rampart what's your face and vert count?
cloud rampart
50k aprox with all pouches and details, but thats not the problem
i solved doing it on 2 prefabs and join them with slots like the Alice
surreal ore
You shouldn't have a crash from a belt
Also only trimesh colliders can be skinned
And you don't have to organize the collections in blender. You just gotta have everything set up correctly.
 fast notch
is there a human model from arma reforger in fbx format?
sly bridge
yes
fast notch
sly bridge
yes
where can I download it?
surreal ore
its included in one of the sample files
just look in reforger_samples like 3 post up is a github link
tacit eagle
Does anyone need a MT-LB model for modding
 finite quartz
Does anyone have a nuclear power plant model?
sly bridge
tacit eagle
Does anyone need a MT-LB model for modding
do you have such model?
tacit eagle
yeah show a screenshot
tacit eagle
sly bridge
do you have such model?
yes not ready but it will be soon


This is the high poly mesh I havent done the baking yet
it currently sits at 150,000 tris, too much for a game
sly bridge
nais model, we @RHS might be interested about it
tacit eagle
sly bridge
nais model, we @RHS might be interested about it
thanks, is there a triangle count you guys would prefer?
sly bridge
70-80k with interior
tacit eagle
it doesnt have an interior though I can make one but it will increase the poly count more
tacit eagle
sly bridge
70-80k with interior
okay
did arma support 3d tracks like this or does it have solid tracks
@sly bridge
sly bridge
tacit eagle
did arma support 3d tracks like this or does it have solid tracks
A3 has solid tracks
i have no clue abour reforger, there is no sample
tacit eagle
okay nice that will reduce the poly count by almost half, so you want it for arma3?
sly bridge
tacit eagle
okay nice that will reduce the poly count by almost half, so you want it for arm...
ideally for both A3 and Reforger. Will DM tmrw
tacit eagle
okay mate I will be waiting
 last parcel
made a little flashlight 🔦
 last parcel
 tacit eagle
isnt that the soviet flashlight
tacit eagle
does it work like bi ones
 simple meteor
tacit eagle
This is the high poly mesh I havent done the baking yet
simple meteor
tacit eagle
This is the high poly mesh I havent done the baking yet
Btr on reforger has 170k tris
tacit eagle
Oh god
 steel elm
Pickaxe I made for Everon Life

 simple meteor
Yup
You can see tris when you open xob
I don't remember for uaz
But maybe 80k I guess or less
tacit eagle
these are very very high numbers but I guess its worth it for the detail
fathom elbow
for modern game its not that much
tacit eagle
they must have made a lot of LOD's to optimize that
tacit eagle
fathom elbow
for modern game its not that much
tbh its true, I have been working with mods for games like battlefield 2 so they seem like a lot to me
simple meteor
Reforger seems to accepts more poly, when you look at vehicle, houses than a3
tacit eagle
war thunder has 300k per tank plus
arma 3 was running on eco mode
well in war thunder tanks are the most important things so its acceptable
tacit eagle
I mean almost everything in that game is pretty hi poly not just the vehicles
 thorn topaz
tacit eagle
they must have made a lot of LOD's to optimize that
thorn topaz
tacit eagle
they must have made a lot of LOD's to optimize that
Consider that they did away with traditional pilot and cargo LOD's, by proxy this means the polycount will be raised. Besides, polygons are the least impactful part of visual 3D as long as you don't have a highly dense mesh.
you'll get more performance impact from the memory hit of very large textures, the draw calls between the cpu and gpu, and of course material complexity, but that can also be mitigated by making better use of the hardware which Arma 3 previously lacked
tacit eagle
if your making vehicles stuff like bolts, handles and other small things can just be deleted for lod1 it practically halves the poly count
tacit eagle
thanks for the tips guys, I know that material count is very important as well
last thunder
tacit eagle
war thunder has 300k per tank plus
exactly
It doesnt even matter with LODs that much. If you sit in there and 5 vehicles are infront of you and everything else is far auto LODs kick in anyway
War Thunder even has like 3-4 Texture Sets for each vehicle when I remember correctly. 😄
tidal latch
I guess even more since you can have decals
tacit eagle
@glossy lynx Not sure if your aware, the RHIB is non-functional at the moment. Crashes the world editor if you try to use the prefab. If you place it using GM, the physics don't work. The boat wont stop, goes underwater.
 glossy lynx
Hmmm I guess I need to take a look at it
Thank you for the heads up
cloud rampart
cloud rampart
I have a platecarrier on my mod and every time someone shoot it, the shooter cra...
Have again this problems, now i get the clue thar before doing the UV map, it crash
bright raft
In the meantime project


 tacit eagle
Thats really cool mate
tacit eagle

 eager topaz

My hard work and progress got a phenomenal upgrade with Enfusion!
tacit eagle
nice F16 landing gear
tacit eagle
sly bridge
ideally for both A3 and Reforger. Will DM tmrw
Hey man, I just wanted to remind you this in case you forgot
sly bridge
tacit eagle
Hey man, I just wanted to remind you this in case you forgot
haven’t, just got swamped, have a work deadline today
 thorny rivet
Does anybody knows why is this green? I didnt use any green BCRs

Even without any materials its green
tidal latch
remove vertex colors in mesh?
thorny rivet
tidal latch
remove vertex colors in mesh?
I dont know how do that(
tidal latch
what 3d software are you using?
thorny rivet
Blender
tidal latch
https://www.youtube.com/watch?v=8mNk6r_bwxI first result in google 😉

Today we share a set of tips that a lot of people would find very helpful.
Links:
BLENDER 2.91 BETA RELEASED!
https://youtu.be/yYLLSqM_FZM
GET HARD SURFACE DETAILER
https://rb.gy/aefuxu
https://rb.gy/wib6x2
GET TRANSPORTATION:
https://blendermarket.com/products/transportation?ref=110
https://youtu.be/V4fTxOVq4rI
GET TREE BOTANIQ ADDON!
https:/...
thorny rivet
tidal latch
https://www.youtube.com/watch?v=8mNk6r_bwxI first result in google 😉
Not my case i think, because i don have any materials on model in blender, enfusion made Default mat
 tidal latch
vertex colors are not materials
perhaps screen from Blender with vertex color tab would be more helpful in figuring out what is wrong in your model
thorny rivet
Yes, there is green by vertex color, but how can i remove it?
tidal latch
watch the video
thorny rivet
Figure it out
tacit eagle
sly bridge
haven’t, just got swamped, have a work deadline today
okay mate
 stray swan
@bright raft sorry for the ping. I'm trying to create a custom sight for a launcher and I need some help with the reticle. I've seen that its an .emat, but its empty.
 leaden trench
Hey guys, just wanted to let you all know about Bforartists; it's a Blender fork with hundreds of improvements to the user interface. It's so much more intuitive you can use it without a manual at all, however the manual is also much improved.
All in one, Free and Open Source 3D creation Get Bforartists now What is Bforartists? Bforartists is a complete, free and open source 3D suite to create CG content. It offers you the full 3D art pipeline to create game graphics, pre-rendered movies and stills. From modeling, sculpting, texturing, rigging, animation, rendering, up to post […]
shell hedge
might make me actually pick up blender at some point
 silver eagle
hey i was working on a model exported it as an .FBX and imported into enfusion workbench. it became an .XOB
I accidentally deleted the .FBX and can't recover it. Is there no way to reimport the XOB to blender?
silver eagle
blender
delicate condor
did you not save the blender project?
delicate condor
no rip. ripping is forbidden.
thorn topaz
death is not allowed lol
tacit eagle
shell hedge
might make me actually pick up blender at some point
the current UI isnt that bad either
shell hedge
tacit eagle
the current UI isnt that bad either
compared to 10 years ago when I last opened it it has indeed much improved
tacit eagle
yea if it stayed the same like that till today I would have never started learning it
last thunder
silver eagle
I accidentally deleted the .FBX and can't recover it. Is there no way to reimpor...
Go to Blender and check your autosaves....
 tacit eagle
in blender if you set your files as xxx_v-1, you can create incremental save files
cloud rampart
I've been working a few days on a platecarrier and if I modify the weightpaint (Try to put the sample one and modify some parts) the game crash when a bullet hit the vest
any idea?
Need to change the weightpaint to solve some clipping
shell hedge
tacit eagle
bacon if you dont use blender you will hurt me
cinema 4d

@tacit eagle do you have a link to a blender quickstart for people that have 3d modeling experience?
no donuts plz
tacit eagle

We've compiled a list of our most useful tips when it comes to switching to Blender. These will save you a lot of time when you're first starting out.
If you're looking for a comprehensive course, check out our new exclusive that goes through the switch for an experienced artist.
Switching to Blender for Experienced Artists
http://flipnm.co/sw...
the biggest problem for me from 3ds max to blender was learning how to use the mirror modifier
you use the 3d cursor and change the origin. you can also use other objects origins for mirroring
and learning the correct terminology, since autoschiet products try to push their own like "turbosmooth" "shell" "smoothing groups"
bright raft
stray swan
<@334260622986575872> sorry for the ping. I'm trying to create a custom sight f...
The material itself is I thing of post process type, and you can set reticle texture in the properties of it, under Reticle Map


 tacit eagle
wut about m39 ebr it just longer barrel
shell hedge
knife with sniper scope
bright raft
tacit eagle
wut about m39 ebr it just longer barrel
Planeed as well 😉
tacit eagle
crowbar with mortor shell 😮
shell hedge
 tacit eagle
 dense thunder
Are there any size limits for mesh?
shell hedge
tacit eagle
I was playing with this for a bit
 tacit eagle
@dense thunder no not that ive been able to notice, you can make it as big as the map
nor poly count limit
dense thunder
Hmm OK then must be another issue I'm having then, pretty big mesh but low poly count, freezes up workbench creates the txo but no further than that, tried splitting into multiple meshes with same issue
leaden trench
tacit eagle
and learning the correct terminology, since autoschiet products try to push thei...
lol if we are going to complain about terminology, WTF is a grease pencil? 😆
tacit eagle
a grease pencil is what they used to write on crt monitors
 leaden leaf
thorny rivet
Does anybody knows why is this green? I didnt use any green BCRs
leaden leaf
thorny rivet
Does anybody knows why is this green? I didnt use any green BCRs
Is that a mod the will be available for Xbox some time?
thorny rivet
leaden leaf
Is that a mod the will be available for Xbox some time?
Yes
leaden leaf
thorny rivet
Yes
Thank god man, love you and love that. Keep up the great work. That’s a nod we’ll needed and wanted
tidal latch
 fluid fern
tidal latch
<#979405352850305144>
fluid fern
tidal latch
<#979405352850305144>
Okay thk, sorry
half anvil
When I setup a collider like this, the game doesn't see it. Why?
 chilly dragon
half anvil
When I setup a collider like this, the game doesn't see it. Why?
chilly dragon
half anvil
When I setup a collider like this, the game doesn't see it. Why?
Are you exporting with custom properties checked?
half anvil
chilly dragon
Are you exporting with custom properties checked?
Where is it?
chilly dragon
half anvil
Where is it?
In the export window.
 half anvil
chilly dragon
In the export window.
half anvil
chilly dragon
In the export window.
It still doesn't show up.
chilly dragon
half anvil
It still doesn't show up.
it seems like the collider itself is the problem then. I'd try adding a cube and exporting the whole thing to test if that works
It could maybe be that the collider is too complex? it seems like its much more detailed than it needs to be. Although I dont think this would be causing it to not register in the tools
half anvil
chilly dragon
It could maybe be that the collider is too complex? it seems like its much more ...
It is probably so complex.
half anvil
chilly dragon
it seems like the collider itself is the problem then. I'd try adding a cube and...
I tried that and worked. The problem is collider itself.
bright raft

 fathom elbow
looking good
tacit eagle
no but i can give you this https://pcpartpicker.com/list/
PC Builder
also I hate modeling the Mi24... god is it asymmetrical mess
light eagle
You don't like the offset rotor?

 tacit eagle
PAIN
tacit eagle
 sly bridge
@flint vale this isn’t a request channel. want something done, do it on your own
 daring condor
tacit eagle
daring condor
tacit eagle

CGTrader
Model available for download in OBJ format. Visit CGTrader and browse more than 1 million 3D models, including 3D print and real-time assets
If ya want to make things easier, it's 9usd tho
tacit eagle
I've already made the template/ base mesh this would be just that but with more errors
tacit eagle
but I will say that the pictures are good reference for panel lines
leaden leaf
Does anyone have a M16A4 project in the works in which you can add attachments just like the M18/M4A1 mod?
leaden leaf
Will this be a item uploaded?
bright raft
leaden leaf
Will this be a item uploaded?
At some point yes. It's getting slowly simply because I am trying to make correct animations for it
sly bridge
leaden leaf
Does anyone have a M16A4 project in the works in which you can add attachments j...
why? do you think of making one yourself?
leaden leaf
bright raft
At some point yes. It's getting slowly simply because I am trying to make correc...
Ah, okay. Sound great can’t wait!
light eagle
Getting an Warning when importing mesh. I'm not sure exactly what I need to fix here.
https://i.gyazo.com/f9b319e9c085b56b419aaaaf25f99856.png

 delicate condor
uv mapping issue it seems
light eagle
I am aware of that. What are exceeding UV coords?
tacit eagle
maybe its been separated?
or inverted normal maybe?
or there was diagonal line like on the other side that had one of its sides slided up and welded or just removed
light eagle
Not sure. All looks good, just get those warnings.
delicate condor
do they have secondary uvsets?
daring condor
light eagle
https://gyazo.com/061ab2cc7209ce248facc298e8bbf0de
Based image projection
light eagle
Success! There was a 2nd UV set with islands well below my screen edge. Just panned down and found them. Deleted UV set and no more warning.
tacit eagle
pawgers
 leaden chasm
does anyone know if there's any meaningful benefit performance-wise in having texture files for a model merged into an atlas rather than having separate files?
tacit eagle
can we even do that? the game rage used a giant atlas texture and apparently it allowed for a good amounts of benefits
leaden chasm
tacit eagle
can we even do that? the game rage used a giant atlas texture and apparently it ...
to certain degree definitely yes
like single 4k texture instead of 4 2k for example
nothing extreme, but does it make any sense at this level?
tacit eagle
faster loading times, higher detail, but this is time where ssd was not really a standard thing, and games were much smaller in size
what are you making anyway
leaden chasm
tacit eagle
what are you making anyway
vegetation
tacit eagle
try asking in texture makers, they probably have people with a better understanding, honestly I would keep things as standard as possible with the base game to avoid complications.
fluid fern
Hi all, if you want, i find an addon to blender for create procedural building https://80.lv/articles/grab-a-free-geometry-nodes-library-for-procedural-buildings-in-blender

This new toolkit will help you assemble new buildings in no time.
I haven't tested it yet
fathom elbow
leaden chasm
does anyone know if there's any meaningful benefit performance-wise in having te...
yes, less seperate texture files means less draw calls. And less draw calls (in any game) is technically better, no matter what game. If it has measurable impact depends on 1) use case/ asset type and 2) game engine.
one poorly optimized asset (say 10k vertices, with 40 different textures) wont be very noticeable. But it all adds up. When an entire mod or total conversion is poorly optimized it can have significant effect - and at that point solving the issue is a nightmare (as every model needs to be optimized after the fact).
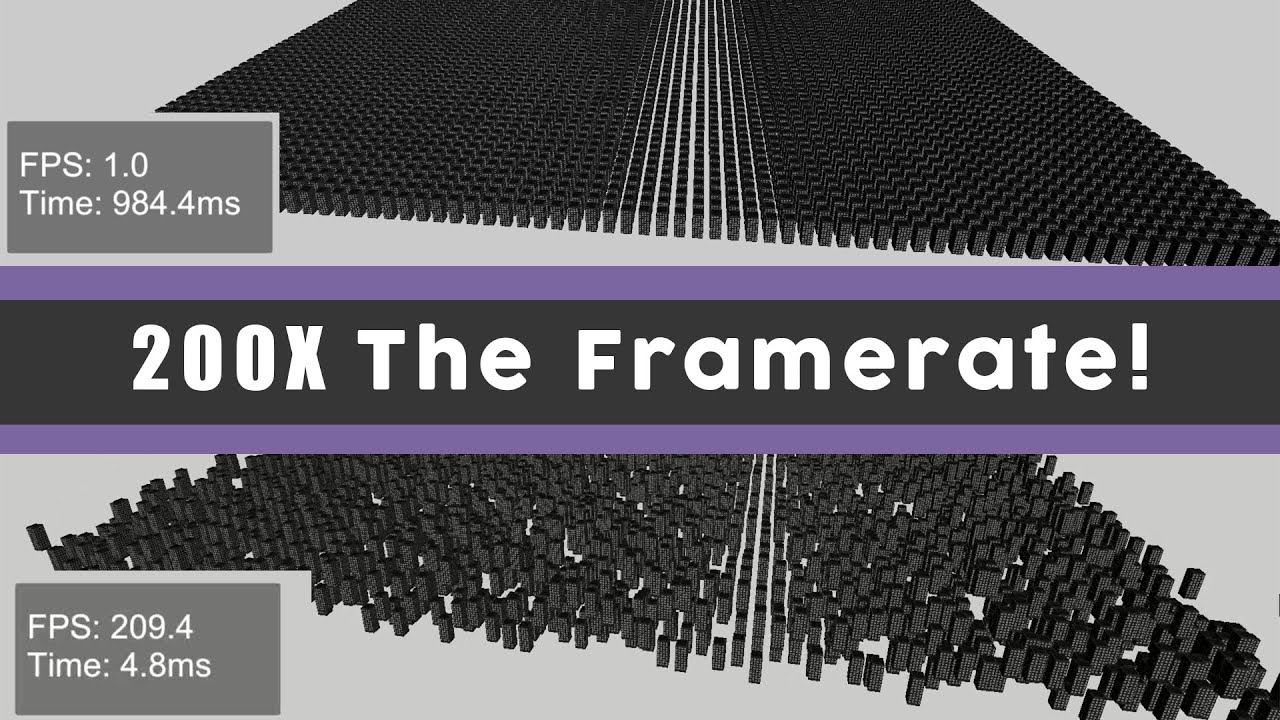
A short video on how to improve your frame rate in Unity. This video covers various optimizations to reduce draw calls such as combining meshes, batching and gpu instancing.
Music Credit: LAKEY INSPIRED
Track Name: "The Process"
Music By: LAKEY INSPIRED
Official SoundCloud https://soundcloud.com/lakeyinspired
Official YouTube Channel:https:/...
options and methods for instancing/batching in enfusion i dont know, but i'm sure there must be some. Better instancing/batching methods in games have huge impact on the performance.
thorny cobalt
afaik enfusion does automatic instancing
A3 also did, I think Enfusion has some special thing for animated objects not sure
leaden chasm
thanks
fathom elbow
the question is if there is even more advanced stuff for instancing/grouping of different objects together
say object 1 and 2 use different models but the same texture. In theory it should be possible to batch them
it could be even object1 at LOD0 and object2 with same model file, but at LOD1 ... in A3 they wheren't batched together.
leaden chasm
fathom elbow
say object 1 and 2 use different models but the same texture. In theory it shou...
that's usually the case for the last lods on trees
different species use same shader and single atlas texture file
tacit eagle
 tacit eagle
 tacit eagle

Does anyone have tips for making tank models?
yeah dont make everything out of a single mesh #1


high - low poly

@tacit eagle

https://www.artstation.com/artovbaz
Greetings, folks! In this tutorial we are baking a normal map for meshes with different shading.
General steps for baking a normal map:
- Create a cage object with your low-poly mesh. Displace it as to let it cover both high-poly and low-poly mesh. Use Displace modifier.
- Mark all angled hard-edges as ...

An introduction to Sub-D modeling.
Asset Stores
CGTrader: https://tinyurl.com/yz76na6m
Gumroad: https://tinyurl.com/yhqbj6dx
Socials
Discord: https://discord.gg/8JB9qD56Eq
Twitch: https://tinyurl.com/yhlmo6ao
Art Station: https://tinyurl.com/2s3rye3
Blender Addons
Kit Ops 2 Pro: https://tinyurl.com/kopspro2
HardOps / Boxcutter: https://tiny...
tacit eagle
Thanks for advice. It's very helpful.
daring condor
Also, you don't have to SubD model everything
tacit eagle
SUB D 4 LIFE
 short bear
tacit eagle
high - low poly
short bear
tacit eagle
high - low poly
T-64 ?
short bear
🤨
daring condor
tacit eagle
SUB D 4 LIFE
i use it because i cant be fucked to figure out how to use shader bevels
and really sometimes just a regular bevel is enough
some things are just quicker to model using Bools
tacit eagle
good results with Booleans? please everything else are bandaids for bad topology
daring condor
for game assets you dont need good topology
only good shading to bake normals
you can waste your time getting things to subdivide properly ooor you can just get a decent model using booleans and things like data transfers and shrinkwrap in shorter amount of time
in the end you dont get bonus points for good high poly topology because the only thing that matters is the low poly
bright raft
daring condor
in the end you dont get bonus points for good high poly topology because the onl...
That could be my motto
sly bridge
daring condor
for game assets you dont need good topology
yes and no. You don’t need good topology for highpoly, although that is recommended especially for all sub/open d. There is no good or bad way to do things, cleaner topolgy helps in the long wrong (uvs, loops etc)
daring condor
yes, i am aware
my point is more that you can use every dirty trick in the book when your intent is to bake to LP
sly bridge
some people are doing their hp in zbrush (been there done that) for hard surface these days
yeah, end result is what matters
daring condor
its not a movie asset that needs to subdivide perfectly
for my low poly i usually take my mid poly and then do a limited dissolve
and triagulate that
sly bridge
daring condor
its not a movie asset that needs to subdivide perfectly
cgi/vfx assets these days are not all sub-d, there are a lot that are having lods because a lot of cgi has moved over to real time game engine renders
daring condor
as ive seen it said by some newspaper
"the mandalorean was powered by fortnite technology"
sly bridge
i think everything works for bakes, from floaters to direct texture normal painting to anything inbetween
sly bridge
daring condor
"the mandalorean was powered by fortnite technology"
lol
the advantage to subd is that you can. iterate and edit faster if things needs to be improved
tacit eagle
how do i fix this shading issue?
 sly bridge
that if you boolean everything and collapse it and/or zbrush you have less control of you want later on to change it
sly bridge
tacit eagle
how do i fix this shading issue?
can you show wire?
tacit eagle

 tame tundra
tacit eagle
tame tundra
tacit eagle
why do you need that on low-poly if you can bake high-poly model with normals?
tacit eagle
how else does one do boolean modeling :S
do I need to have good topology?
whats the point if I can do it with more automated processes using sub d
boolean modeling requires so much clean up, im looking for ways to cheat but havent found any
I need to have smooth bevels at the very least 3 sided to have good shading
sly bridge
tacit eagle
way to many of these very narrow and long tris, these should generally be avoided
ideally create some vertical loops and weld the corners
sly bridge
tacit eagle
boolean modeling requires so much clean up, im looking for ways to cheat but hav...
i am aware that there are many blender users that are using addons like hardops + boxcutter and/or meshmachine, which makes boolean workflow a bit easier
same goes for people using fusion and other CAD software for HP creation
bright raft
Some prefer subd, some bevel workflow. Both are good, and can be used to achieve pretty much same result
sly bridge
bright raft
Some prefer subd, some bevel workflow. Both are good, and can be used to achieve...
best way to do it is to mix and match based on what needs to be done tbh
you can even go double sub-d if/when needed (old school way for max users = 2x tb modifiers)
tacit eagle
I feel like moi3d is probably the best for the boolean guys
its similar to a cad program but with much less defining dimensions
cad programs are just so slow to work with, dont know why anyone would choose that over a 3d program
sly bridge
fusion is pretty sweet, so is shapr (i have on my ipad)
daring condor
bright raft
Some prefer subd, some bevel workflow. Both are good, and can be used to achieve...
I use bevel mods to support my subd
daring condor
tacit eagle
I feel like moi3d is probably the best for the boolean guys
Depends, blender can handle it well if you know what you're doing. Plasticity is an interesting project
Basically a nurbs modelling software designed for artists
 hidden yarrow
Fusion was great used it to make my M2HB sucks to get game ready after converting it to blender tho
tacit eagle
 leaden trench
Not sure why people are arguing in favor of bevel workflow... it gets messy real fast, very difficult to maintain good topology... subd all the way. Your models are beautiful equations instead of child-like scrawls.
 lilac cobalt
tacit eagle
lilac cobalt
tacit eagle
is that gonna be a troop transport or attack heli?
 eager hill
leaden trench
Not sure why people are arguing in favor of bevel workflow... it gets messy real...
eager hill
leaden trench
Not sure why people are arguing in favor of bevel workflow... it gets messy real...
Bevels can be nondestructive. At least in blender you can add a bevel modifier that uses bevel weight or vertex groups
For SubD you need support loops which can be added destructively with edge loops like we used to do it in the past. But they can also be added procedurally with bevels
delicate condor
There is no need to argue about that king of workflow details. Everyone does things in the way that fits their thinking.
 willow sage
delicate condor
There is no need to argue about that king of workflow details. Everyone does thi...
willow sage
delicate condor
There is no need to argue about that king of workflow details. Everyone does thi...
Words of wisdom.
delicate condor

willow sage
Working on a Nest and heavy weapons mount with a front angled protective shield.
This comes to my mind after the X confrontation with BTR, the gunner will be still vulnerable to danger from sides and back.

Will Mk19 be challenging to achieve in game?
eager hill
willow sage
Will Mk19 be challenging to achieve in game?
Shouldn't be. You need to add another type of ammo that inherits from some kind of explosive class. At least in theory
fathom elbow
tacit eagle
cad programs are just so slow to work with, dont know why anyone would choose th...
depends on your training with it, and also what kind of object. If it has lots of complex boolean operations and curved shapes, then CAD is probably faster than trying to make that HP with mesh based modelling. (e.g. complex flash hider or barrel shroud geometries)
We need a tool that combines both into a good package... with good UI (sorry blender)
 shut bloom
fathom elbow
depends on your training with it, and also what kind of object. If it has lots o...
shut bloom
fathom elbow
depends on your training with it, and also what kind of object. If it has lots o...
have you tried Boxcutter ?
tacit eagle
for me it makes no sense to use cad because your spending all that time defining dimensions and doing 2d sketches, plus when im doing low poly I just copy and turn off subd and I have a low poly ready for uv with little effort
fathom elbow
you dont need to dimension (at least in the... better CAD tools)
and you have to constantly worry about topology when creating HP with normal modelling. In CAD you dont have that problem. So in the right situation CAD is better, in other situations normal modelling is better. Which is why a tool that can do both well is preferable
fathom elbow
shut bloom
have you tried Boxcutter ?
i said "with good UI" , that excludes blender
tacit eagle
good UI is subjective, i think autoschiet has terrible ui
bright raft
fathom elbow
i said "with good UI" , that excludes blender
To be honest , I started my modeling in 3ds Max, it was good but very bulky software imho. Then switched to blender, and I like it so far. In terms of modeling, I can be more efficient in Blender
daring condor
fathom elbow
i said "with good UI" , that excludes blender
Blender ui has a simple lifehack, enabling space-bar search 😅
bright raft
daring condor
Blender ui has a simple lifehack, enabling space-bar search 😅
Exactly, love that . But I hate pie menus that are pushed with newer versions, and O wish that keybind setup would be better made.
daring condor
It's honestly one of the fastest ways you could use it besides shortcuts
Personally I do not mind pie menus
I like using machine tools for switching between edit and object mode
fathom elbow
how is max more bulky than blender? Blender can do even more stuff by now...
unless you correlate "bulky" = bigger UI buttons
bright raft
fathom elbow
unless you correlate "bulky" = bigger UI buttons
By bulky I mean the size and install time compared to blender
fathom elbow
how often do you reinstall your modelling software for that to be relevant? xD
And compared to 1 modern game, its peanuts
tacit eagle
every update 😦
fathom elbow
i install once per OS/system lifetime lol
bright raft
fathom elbow
how often do you reinstall your modelling software for that to be relevant? xD
A...
Yeah, that's true :d
Nvm, that argument was invalid
last hill
willow sage
Will Mk19 be challenging to achieve in game?
In theory beyond making the model it should be actually pretty easy. Change the model, prefab, then set up the type of ammunition it fires to the 40mm already in game, setup velocity, zero the sights up to the model, whack it on the tripod or vehicle mount as a prefab (I believe that is how the M2 is setup, don't quote me). Then wham bam thank you ma'am a MK19 variant.
#intheory
willow sage
#intheory
Thanks mate, will see how things will goes.
cloud rampart
its there any way of changing the texture of the preview model of a vanilla retexture item?
willow sage
Yes, it is.
You need to inherit designated prefab and change its texture in its component.
willow sage
It's something wrong with me or firing chamber stay the same in external caliber in both of them?
1 - Length of M2
2 - Length of Mk19
3 - Length of M998
 cloud rampart
Any clue about this?

The faces are not flipped on blender
some faces get invisible
delicate condor
you sure they are not flipped in blender..
cloud rampart
Sure
 delicate condor
is it all 1 object?
cloud rampart
yes
delicate condor
try triangulating it
delicate condor
👍
willow sage
 tacit eagle
tacit eagle
tacit eagle
Found ya 😏
 lusty eagle
willow sage
lusty eagle
willow sage
That's what I could masterbate to
willow sage
lusty eagle
That's what I could masterbate to
Was trying to bring it in game, but there is a lack of samples for hmg's. I will try to create my own skeleton for it.
eager hill
willow sage
Was trying to bring it in game, but there is a lack of samples for hmg's. I will...
M2 is in the game if i remember correctly. I may be wrong but isn't one of the american vehicles in the game equipped with one? You could open a prefab of it in the editor and see how it is made
And for the mk19 I think you could check how the M203 grenade launcher, that's attached to the M16, is created
there should be some kind of a weapon component
bright raft
willow sage
How long did it take you?
willow sage
bright raft
How long did it take you?
To be honest, this is a part of ours project that started 2 years ago. We started to create atgm simulator for android, and this is polished version of low poly assets. To be specific +- 12 days, 6- 11h daily for Mk19.
But whole project is still in progress and I stopped counting in the beginning of this year.
willow sage
eager hill
M2 is in the game if i remember correctly. I may be wrong but isn't one of the a...
This is what I did, the skeleton for m2 with pintle is kinda... unusual. First thing what I have done is placement of root and rotating bones, w_barrel, w_trigger, w_sight etc. But their rotation is still messed up in terms of vectors.
Without proper skeleton this is kinda pointless, plus we don't know yet if reduced amount of bones will work for this kind of object, like it happens for clothes/equipment skeleton.
 bright raft
It will work corretly. What I did with M14, I placed my bones in simiiar positions as visible in engine viewer for M21, then just adjust bone pos -> test in-game -> repeat
willow sage
bright raft
It will work corretly. What I did with M14, I placed my bones in simiiar positio...
This is how mad scientists doing science.
Thanks, will work on it today.
tidal latch
M2 is animated via procedural animations so you don't have to replicate 1:1 skeleton on your model
just place bones/helper in places where it make sense
willow sage
Helper bones are empty axis ?
 tidal latch
ye, like barrel_chamber/muzzle
willow sage
Should helper points like; barrel_chamber, barrel_muzzle be parented to; w_barrel ?
I'm asking because MWS (rig based on sample weapon) seems to not have them parented, but M2 in enfusion have them as childs?
 tidal latch
notice that M2 pintle model is a model of M2 with... pintle
pintle is rotating the weapon and without hierarchy (aka parenting) barrel points are not going to rotate
willow sage
Ik target get lost after + - 40degrees
tidal latch
it seems it tries to rotate the turret
 tidal latch
that is the older implementation
with current anim setup, pintle should be limited to +/- 35 degrees
willow sage
Is there a component that limits it, or ready prefab that should i use ?
tidal latch
did you duplicated m2hb prefab?
turret in current stable is rotated by a/d keys and it shouldn't rotate the base if you are on the horizontal limit as on your video
willow sage
Yep interhited, the M2 with pintle.
 tidal latch


 tidal latch
disregard my pic, this was taken from 0.9.6 build
willow sage
 tidal latch
in any case, would you be will to share that mod with me in DM? I would quickly take a look at it
willow sage
Sure thing.
willow sage
willow sage
Problem with hands not following the grips was caused by me.
Guided by reyhard, In original prefab binding names was LHandIKTarget and RHandIKTarget and i believed that changing them to names from M2 like v_hand_R_target and v_hand_R_target will be recognizable also. Do not change names in AnimationIKTargetInfo because it will be not recognized by Animation system.


Now hands stays on grips.
tidal latch
additional issue lies in M1025_gun_mount_M2HB.et prefab. {8C68C54F9C50A9AF}Prefabs/Vehicles/Wheeled/M998/M1025_gun_mount.et should be used as parent for m1025 mounted weapons
it seems that this prefab was omitted during refactor and probably this issue will be solved in next milestone
willow sage
Willco, thanks in any way.
tidal latch
actually I also think it that inheriting from M1025_gun_mount (which should be weapon agnostic version of prefab) should be more correct
plan was to have in M1025_gun_mount_M2HB.et only m2hb specific parameters - in this case it would be link to weapon prefab only
willow sage
Sighting on mounted weapons isn't working intentionally?
tacit eagle
 cloud rampart
Gettin this error on vanilla asset retexture
RESOURCES (E): Trying to create RigidBodyComponent on model @"Assets/Characters/Uniforms/Jacket_BDU_M81/Jacket_BDU_M81.xob" without geometry```are you trying to use character mesh as item?
cloud rampart
im trying to do a prefab to preview model
im not sure if disable the rigidbodycomponent is enough
tidal latch
can you post pics from the Workbench?
 buoyant depot
Hello, good afternoon, could someone explain to me why in vehicles the chassis is not attached to any bone?
tidal latch
buoyant depot
Hello, good afternoon, could someone explain to me why in vehicles the chassis i...
tacit eagle
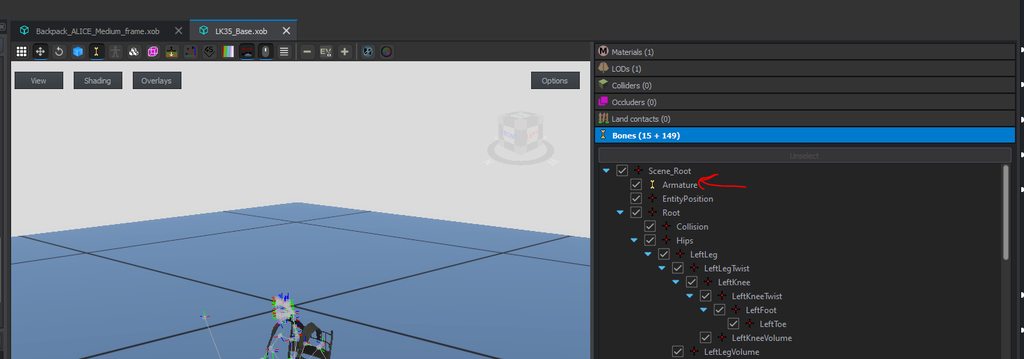
Can anyone tell me why the armature is imported as a bone? https://imgur.com/a/inhH5Er
 tacit eagle
probably using a "controller" with empties
so the petals are being controlled by a single empty moving back and forth
I should say the bones for the petals are being moved by the empty
tacit eagle
While I was rigging the characters for the game, I felt like a lot of what I was doing would make a great Mini-Rigging series, so here's what to expect from the next few videos :)
If you enjoyed this video, I have a small 1$ Member perk available for anyone who would like to help us save up for better tools to improve the content here like Hard...
leaden trench
Is it possible for artist to configure LOD levels? i.e. define when each LOD is shown? If not, is it documented how LOD loading works?
delicate condor
artist should not usually micromanage that as its overall scene complexity and what hardware can run that drives the lod changes
optimized models get most consistent results
 fossil crater
leaden trench
Is it possible for artist to configure LOD levels? i.e. define when each LOD is ...
fossil crater
leaden trench
Is it possible for artist to configure LOD levels? i.e. define when each LOD is ...
In the prefab's MeshObject component, you can configure the LOD scale and the LOD factors
 fathom bolt
leaden trench
Is it possible for artist to configure LOD levels? i.e. define when each LOD is ...
fathom bolt
leaden trench
Is it possible for artist to configure LOD levels? i.e. define when each LOD is ...
LOD can be decreased as the model moves away from the viewer or according to other metrics such as object importance, viewpoint-relative speed or position. LOD techniques increase the efficiency of rendering by decreasing the workload on graphics pipeline stages, usually vertex transformations. The reduced visual quality of the model is often unnoticed because of the small effect on object appearance when distant or moving fast.
From Wikipedia
leaden trench
fathom bolt
LOD can be decreased as the model moves away from the viewer or according to oth...
Thanks dude, but I know what a LOD is lol. Would be more helpful if you read the question.
little kayak
leaden trench
Is it possible for artist to configure LOD levels? i.e. define when each LOD is ...
The BIKI contains some info about LOD's in AR and how to manually override them: https://community.bistudio.com/wiki/Arma_Reforger:Level_Of_Detail#Manual_Override
leaden trench
little kayak
The BIKI contains some info about LOD's in AR and how to manually override them:...
Thanks, this is exactly what I was looking for.
fathom bolt
leaden trench
Thanks dude, but I know what a LOD is lol. Would be more helpful if you read th...
« If not, is it documented how LOD loading works? »
That what you said
shell hedge
leaden trench
Is it possible for artist to configure LOD levels? i.e. define when each LOD is ...
no, you have control over what is inside each LOD level but not distance at which it is active
light eagle
With LOD factors you can adjust the distance with which the lods switch based off required detail. It's in the "Manual Override" section of the Level of Detail Wiki.
leaden trench
shell hedge
is there a way to translate the factor nonsense into actual distance?
depends about FOV, are you looking in 3rd person or 1st person, are you looking in scope/binoculars so distance is not the relevant metric.
shell hedge
leaden trench
depends about FOV, are you looking in 3rd person or 1st person, are you looking ...
how does this answer my question?
leaden trench
shell hedge
how does this answer my question?
What are you asking for? You want a formula to calculate the size of a 3D object based on it's size in screen space?
fossil crater
leaden trench
What are you asking for? You want a formula to calculate the size of a 3D object...
From previous questions regarding this that he has made, it looks like he wants to make it so that for example the first LOD stays on until you are X meters away
tacit eagle
im sure you could just make a grid for the scope reticule and base it off known ranges. say a range scale like on the svd scope
shell hedge
leaden trench
What are you asking for? You want a formula to calculate the size of a 3D object...
I was asking if there is a way to translate the factor values from the sliders into distance
delicate condor
No, its still part of the same scene complexity calculation, higher lods are just preferred longer. But distance is not the only factor in that calculation so it can not be set to X meters per lod.
tacit eagle
had to redo the tail.
 zenith quartz
How are you doing those panel lines?
Cutting out parts of an original piece and shrinkwrapping to it to keep the shading intact?
tacit eagle
:C no im not a butcher I fix all the problems with good topology
tacit eagle
tacit eagle
had to redo the tail.
Looks good! what airframe are you modelling?
willow sage
Making one that will not be flooded by water, with front shield and various armament.

 last thunder
Are you guys remodelling the hmmwv / had it already or are you using the enforger one? If yes how did u export it from engine?
willow sage
last thunder
Are you guys remodelling the hmmwv / had it already or are you using the enforge...
ATM it's impossible to export stuff from Enfusion.
This one is modeled from scratch in blender.
last thunder
ah nice, ok cool! thanks for the answer!
tacit eagle
can you take off the truck cover on the bi model?
willow sage
tacit eagle
can you take off the truck cover on the bi model?
I'm not sure if you are asking about mine model?
last hill
willow sage
I'm not sure if you are asking about mine model?
I think he is referring to the base model, whether you can remove the truck frame from the chassis/engine.
willow sage
last hill
I think he is referring to the base model, whether you can remove the truck fram...
Not yet, the interior is still in early phase.
last hill
willow sage
Not yet, the interior is still in early phase.
No no, I mean he was talking about Bohemia's already in-game model, not your model. Thinking there might be a language barrier issue at play here mate, it is all good
willow sage
last hill
No no, I mean he was talking about Bohemia's already in-game model, not your mod...
No, I have understood everything.
I said this because I would probably do it for the arma. I am probably going in this direction already because I tried to group elements, so there shouldn't be any problems with breaking them down in any case. Just like in enfusion.


 junior thorn
willow sage
Making one that will not be flooded by water, with front shield and various arma...
junior thorn
willow sage
Making one that will not be flooded by water, with front shield and various arma...
Are you the maker of the mk-19 mounted on humvee mod that is currently on the workshop?
willow sage
junior thorn
Are you the maker of the mk-19 mounted on humvee mod that is currently on the wo...
That's correct.
junior thorn
willow sage
That's correct.
I have some bugs on the mod to report to you on the humvee mk19 mod. Where would you like me to post them?
willow sage
Yeah, you can PM me with them.
tacit eagle
 hidden yarrow
tacit eagle
hidden yarrow
tacit eagle
How did you do the uhhh idk what its called but lets just say fence thing lol in a curved angle?
 tacit eagle
I give you a hint, w unsubdivied a cylinder
hidden yarrow
Uhhhh
tacit eagle
set it to a odd number
hidden yarrow
But how did you get the pattern to follow the curve?
tacit eagle
its already curved
last thunder
hidden yarrow
But how did you get the pattern to follow the curve?
Just model it on a plane and curve it with a modifier (Blender -> simple deform, Maya and Max also can do this)
@hidden yarrow
last thunder
you can basically make every pattern fit into anything and its pretty flexible. In case this is what you want.

and thats the other side


 last thunder
Yeah thats also a way of doing it. You can just copy and paste the cylinder grid in case you want to change something later on
tacit eagle
its a advantage to having good topology
last thunder
sorry, I dont understand. What has topology to do with all of this?
tacit eagle
because its harder to do without
last thunder
this is just simple topology. nothing too complicated
willow sage
tacit eagle
Good topology not always == decent poly count
willow sage
tacit eagle
In terms of Hi poly modeling its fine what you did there.
In terms of game dev it's not necessary, i would do that with opacity map while texturing.
For me, it's always the same reaction when getting to this point when you need to recreate LODs
 daring condor
Decimate is dope, saves so much time
I use it set to angle to generate a low poly from a mid poly
Ngons, tris, nothing matters if you have your sharp angles set
last thunder
willow sage
In terms of game dev it's not necessary, i would do that with opacity map while ...
I would argue that opacity is more expensive than geometry. And also I would argue that you would just use the auto LOD feature. It is probably enough.
zenith quartz
I wish I could get simplygon to work with Blender.
But I'm not sure if it's any better than just using decimate.
last thunder
Well in this case topology does matter and makes your live easier. Good topology is more likely to get correctly decimated than a model with bad topology and even ngons.
doesn't matter what algorithm you use
at some point
but my choice would be the auto lod feature. As long as it provides nice results there is nothing wrong using it imo. It is basically the same thing as using decimate modifiers


 inner kelp
Does anyone know if there is a good way to create _NMO-textures in Marmoset 4?
delicate condor
can you combine different outputs/channels into new one in it?
inner kelp
Yes. You could for an example create a R+G+B+A output texture. But the problem with that setting is that you cant use Normalmap in any of the channels, only Bump as the closest. I have tried to use the Normal-texture in the Bump output. But the end results doesnt really match other nmo:s I have seen.
If you want to export a RGB+A texture, then you can use the normalmap but not in the example mentioned above, and that I find a bit strange.
delicate condor
the enfusion textures are very specific for the engine and combine multiple texture types into one for better performance so it may need some work to get them produced right
bump wont work in this use case, you would need 2 channels RG of normalmap and then metalness in B and ambient occlusion in the alpha
last thunder
zenith quartz
Auto LOD?
It is a thing in some modern game engines... Unreal Engine also has auto LODs... Nothing to do with Reforger. Its a feature in Enfusion.
zenith quartz
Meant Enfusion but how do you access it?
last thunder
Your models will automatically decimate on distance (LOD0,1,2,3)
At least I think Enfusion has Auto LODs... let me see in Prefab...
last thunder
@zenith quartz Actually I was wrong appearently. I read this couple of weeks ago and thought it means auto LODs.. seems like Enfusion doesn't have this great feature. Aeew...
 zenith quartz
Ahhh okay.
delicate condor
last thunder
<@148601922721546241> Actually I was wrong appearently. I read this couple of we...
would be pretty cool to have working feature like that
how good is the UE one these days? I suppose good results can be had if model topology is clean
last thunder
I have never really seen issues with it. The mainthing is you can throw so many small assets into unreal (for an environment for example) and its so much less work. If you really want to you can add manual LODs to hero assets (or basically tanks, weapons etc in a game like arma reforger) and go with it.
Really wondering why a simple decimate operation is not in there. It is actually far more work than Ive considered (for an own project inside enfusion) kinda dissappointing tbh but okay..
delicate condor
perhaps its worth suggesting for future?
delicate condor
mm I recall the feedback tracker has a suggestion box too
BI people read this chat too but in the tracker it should get to correct people and theres a record of it
last thunder
I think they either are working on that feature or they don't want it. I don't think they didn't know about it.
delicate condor
mayhaps there are more pressing matters to implement first
light eagle
delicate condor
how good is the UE one these days? I suppose good results can be had if model to...
The ue lodding system is actually really good. Great control from LOD0 to your billboards. Auto generate works decent for worlds with dynamic lighting. Not so much with assets using light maps. It's LOD dithering feature us great on non foliage assets. Allows for a much more seamless LOD transition without the needs for days of fine tuning.
tacit eagle
does arma use billboards? ive only seen it in arma 3 with the M200 intervention where I think cup caused such an issue that every lod past 0 was a billboard
light eagle
I have not seen any, but I'm primarily working vehicles. It's really a foliage deal, so maybe worth a check
 light eagle
Hard to tell on phone. A billboard is just two simple panes with an image texture of the asset itself. Just meant to resemble its base mesh at a great distance.
delicate condor
tacit eagle
does arma use billboards? ive only seen it in arma 3 with the M200 intervention ...
plants use crossing "billboards" as last lod
most other things not
delicate condor
tacit eagle
is that considered a billboard?
no dont think this is bilboard, just mesh scaled to 0 width?
bilboard generally is as low poly as possible so 2 triangles with texture mapped to it
tacit eagle
this is from RHS that ive found, but in my past case it was 2 planes 90 degrees apart
delicate condor
I dont think this is intended look, something might be bugging out
since everything else is in high quality
light eagle
Generally you wouldn't bother using billboards on such low use assets. It's biggest use case is very large quantities of instanced assets. Ie foliage. It's a tradeoff of memory usage for the savings of 1-200 verts per.
 sour sigil
Uh ok guys im trying to make some new gear for Reforger. Should I start by making a blender model? Does anyone have any resources or guides they can point me towards, im kind of lost right now
light eagle
sour sigil
Uh ok guys im trying to make some new gear for Reforger. Should I start by makin...
With the amount of info given it's kinda hard to give a good answer here. Do you know how to 3d model?
tacit eagle
 zenith quartz
Nice.
fathom bolt
After a month its possible to make some hand anim for weapon or not ??
last hill
fathom bolt
After a month its possible to make some hand anim for weapon or not ??
River has done a completely custom IK for his M3 MAAWS recoilless launcher so I am assuming somehow yes.
fathom bolt
ok interessting

 daring condor
bright raft
Todays work:
daring condor
bright raft
Todays work:
Add more loops
 calm rune
This will forever be my most hated part of modelling 😡
 daring condor
Just don't do it then
calm rune
daring condor
Just don't do it then
but I NEED to
daring condor
If it's good enough for AAA it's good enough for you
Can't find the exact source
But somewhere in the final fantasy franchise there's like, a 280mb mesh for a monster
Straight from zbruh
tacit eagle
yeah a real monster
daring condor
Used in game
Only found out about because some bloke was weirded out by Joe laggy an area of the game was
If the pros don't retopo, why should you?
Think about it
tacit eagle
vergy why dont you create a low poly retopo and then subd it with da shirnkwrapz
then you can throw another shrinkwrapy and merge / delete unneeded stuff
calm rune
tacit eagle
vergy why dont you create a low poly retopo and then subd it with da shirnkwrapz
Im still pretty new in the modelling area so my workflow is: Marvelous Designer - zBrush - Retopo high poly - UV low. I still haven't quite figured out all the shortcuts and such.
tacit eagle
just trust me on this
you can use normal local with a smooth Proportional editing to adjust the mesh for the shrink wrap, its much easier to work with a mesh that has 200 polys than 600
calm rune
Interesting. Will try that.
calm rune
daring condor
But somewhere in the final fantasy franchise there's like, a 280mb mesh for a mo...
280mb added onto my mod just for a pair of unoptimized shorts sounds horrible. I currently have like 9 pieces of clothing in my mod with multiple colors and it is only 109mbs lol.
daring condor
I'm not being serious lmao
calm rune
daring condor
I'm not being serious lmao
It's 2022. Nothing surprises me anymore.


 calm rune
well f%ck me... that would save me so much time lol
Well i'll continue these as I normally do but them imma try your method with the same model. God damn that works well from the look of it. Ty!
 tacit eagle
yes its how all those fancy retopy addons work. using basic functions of blender
 minor crystal
Some stuff ive been working on


 tacit eagle
@hidden yarrow
 hidden yarrow
Thanks
minor crystal
render pass ao yeah
minor crystal
tacit eagle
the 1gen upper need to have a draft angle
also wdym
tacit eagle


its not flat for the A1 series

this is a1 model
there is also a slight step in the middle
depending on the tooling that was used, I think the step adds to it tho
minor crystal
oh that
yeah its not completely flat, just a lil too flat
was too lazy to go back n change it tbh
tbh i just kinda fucked up the upper/lower by not working with subdiv on them, would've corrected the look alot better if i did
minor crystal
but at least the scoooop is all nice n done

 leaden chasm
anyone knows how MatPBRTTreeCrown decides what is "local branch"?
willow sage
minor crystal
but at least the scoooop is all nice n done
Nice work, will perfectly fit Reforger era 🙂
@tacit eagle
Where was this step ?


 last thunder
really looking good @minor crystal
daring condor
yeh, gun looks dope
personally i can never really be fucked to go that far into detail 😆
(you can always just use the excuse that you introduced some innacuracies so that its easier to see if someone stole it)
minor crystal
lmfao
 modern zealot
Hey,
I am currently building a house for the Enfusion engine. Haven't seen any documentation on objects such as houses. But does anyone know if there is any know measurements?
What would be the normal/min size of a door for the character to pass normally for example. Is there a preferred wall thickness, both outer walls and inner walls?
calm rune
modern zealot
Hey,
I am currently building a house for the Enfusion engine. Haven't seen any d...
Just use real world measurements.
modern zealot
calm rune
Just use real world measurements.
Yep, that is what I am currently doing.
tacit eagle
hey why do modelers make low poly cylinders with strange sides like 10 - 14 - 18? where you can see vertical or horizontal edges

why not just use evenly divisable sides like 8 - 12 - 16 -24 -32
shell hedge
specifically to annoy you
 covert dune
I don't get that either. I always use even numbers for my cylinders
delicate condor
does it really matter?
tacit eagle
yes its noticeable and I would like to know the reason behind it
sly bridge
tacit eagle
hey why do modelers make low poly cylinders with strange sides like 10 - 14 - 1...
while i think most seasoned modelers will keep to standards, there are instances where it depends on the muzzle break number of cuts etc
minor crystal
ended up going with some fake names just cause the person who commisioned it doesnt want real company's cause of copyright


 willow sage
Cannot wait to check it out! How Xm177e2 is going?
Will you release them together?
minor crystal
willow sage
Cannot wait to check it out! How Xm177e2 is going?
Will you release them togethe...


its done but i need to fix the textures on the xm
and yes i will
willow sage
minor crystal
and yes i will
Keep me in loop 😄
minor crystal
sure thing^^ honestly may dive into both high and lowpoly of the rifle itself to fix some things with it
its tempting, even if its somewhat painful to do it now
eager hill
minor crystal
What lighting setup do you use?
minor crystal
just some random hdri from hdri heaven under the studio category
i think you may be able to find it if you search for "studio08" or something like that
i think thats what the file was called
eager hill
minor crystal
i think you may be able to find it if you search for "studio08" or something lik...
Thanks, I'll check it out
bright raft
minor crystal
ended up going with some fake names just cause the person who commisioned it doe...
Hey, nice texturing on the scope the scope, how many UVs and what res are they?
minor crystal
bright raft
Hey, nice texturing on the scope the scope, how many UVs and what res are they?
the scope is a single UV
the screenshots are taken at 4K however it looks fine and minimal difference in game at 2K
i think it was like 83 pixels/cm or something density at 2k
daring condor
minor crystal
sure thing^^ honestly may dive into both high and lowpoly of the rifle itself to...
Of you are going to jump back into it you might want to do the ejector thing in the carry handle
For visual interest there if nothing else
The entire model is so detailed that that part just looks kinda lacking tbqh
minor crystal
daring condor
Of you are going to jump back into it you might want to do the ejector thing in ...
yeah its mostly the carry handle i want to adjust and the ejector cover
besides that just adding a bevel on the carry handle on the lowpoly since from your first person pov that'd really help keep visual fidelity
minor crystal
daring condor
Love the model btw, what kinda workflow are you doing?
most of it except for the upper/lower is subdiv poly modeling
upper/lower is ngon+bevelmod
as for the lowpoly variant
daring condor
Good god, I couldn't imagine doing subD on an asset like a gun 😆
Well not full subd
I hate doing good topology
minor crystal
in most cases i drop the subdiv mod and bevel mod and then deleted supporting edge loops i dont need
and then bake
daring condor
For vehicles it's alright because you don't notice minor issues
minor crystal
daring condor
Good god, I couldn't imagine doing subD on an asset like a gun 😆
its great practice honestly
daring condor
But guns need to be perfect
minor crystal
after getting better n better at doing guns in subd i feel like i can tackle any object i want to
cause of the amount of small detail
minor crystal
that works, remesh tends to give me yucky blobby results
so i stay away from it unless im in zbrush
minor crystal
very much same
daring condor
I hate texturing anything that isn't painted metal
minor crystal
i have more stuff i want to / need to make than i can deal with lol
my textures undo all of the confidence i gain from modeling lol. so i can relate to that
daring condor
I have no clue how to even approach parkerised metal


 daring condor
Looks good
minor crystal
sadly never took an image of the completed pistol
daring condor
For A2 studios? Or something else
minor crystal
a2 studios? wdym
minor crystal
daring condor
I have no clue how to even approach parkerised metal
same, i throw stuff together until it looks somewhat okay
daring condor
minor crystal
a2 studios? wdym
Guys who make the optre mod for Arma 3
minor crystal
heres the complete thing, unsure if i have textured images laying around

 minor crystal
daring condor
Don't really have much to show from my work
minor crystal
daring condor
Don't really have much to show from my work
relatable
i work too slow

 minor crystal
this is a neat one i did tho, even if i want to retexture it
 minor crystal
daring condor
Most recent thing, should probably texture
minor crystal
daring condor
Most recent thing, should probably texture
ooo thats very beat
neat*