#arma3_texture
1 messages · Page 52 of 1
 full quarry
 I told you the p3d MUST have set of default textures assigned to it
 livid knot
full quarry
<:CattoCry:497974894164705280> I told you the p3d **MUST** have set of default ...
livid knot
full quarry
<:CattoCry:497974894164705280> I told you the p3d **MUST** have set of default ...
I heard you, and it didnt work. On top of that, the rest of the model doesnt contain default textures, and works just fine
full quarry
ok good luck with your mod then
I dont really want to waste time fighting with people about the fundamental rules of mod making.
livid knot
I wasnt at all fighting with you...? I did exactly as you said and it didn't work for me.
 limber dawn
does anyone know how to change the interior of the hunter texture ive made tex's for the ext and turret but the int isnt changing with the setglobal??
 lethal condor
Nope
limber dawn
read through more old threads i think id need to get into the core model files to change the interior out welp there went an a couple hours of my life
lethal condor
Which means you can't
limber dawn
yep even without bi crazy encryption i dont deal with models so a bust either way
 cedar lichen
how does one set up an rvmat emissive value so it's only really visible in low-light/dark conditions?
I remember it being possible with like 'cat-eyes' on the back of pagst helmets
cedar lichen
hmmm I guess this isn't gonna work the way I want it to.
to explain I want to have a sight reticle that's black during the day but changes colour in lowlight
 nocturne lake
Is it a 3d sight reticle or a 2d modeloptics one?
rvmat doesn't work on modeloptics. It did in A2 at release but stopped after Arrowhead and has never worked in A3
But if it's a 3D reticle you can perhaps perhaps try the trick with modelOptics that worked in A2 to use diffuse/forcedDiffuse to force it black in daylight and show its true colour during night (with emissive to enhance it) e.g. ambient[] = {0, 0, 0, 1}; diffuse[] = {0, 0, 0, 1}; forcedDiffuse[] = {0, 0, 0, 1}; emmisive[] = {1, 1, 1, 1}; specular[] = {0, 0, 0, 0}; specularPower = 1; PixelShaderID = "Normal"; VertexShaderID = "Basic";
cedar lichen
It's a 3d sight but uh, a ui model one
the rvmat definitely works for it
that's an interesting way of doing it I only ever tried it the other way (black in the CO, trying to change its colour)
nocturne lake
IIRC the values in rvmat act as multipliers to the colour value of the pixel or vertex. So multiplying the 0,0,0 rgb of a black pixel in a reticle will remain 0
livid knot
Will post this here for future assistance. This issue was fixed by scaling the texture file to 4096x4096, it appears the size of it was the issue.
 ancient parrot
what size were you using?
livid knot
950x1100
If there are specific rules for the size of it and you know them then Id love to learn them
ancient parrot
Oh yes there is a very specific rule when it comes to textures, everything must follow the power of 2.
2,4,8,16,32,64,128,256,512,1024,2048,4096- etc
You can mix them up by having say.. 64x256 and vice versa but the values must always be a power of 2 otherwise one of the programs is likely to break, be it conversion or the engine.
livid knot
Thankyou for sharing that, ill save it for later for sure
ancient parrot
This isn't just an Arma thing either, it's a standard so its good to keep in mind
Also to revisit my previous and to clarify on it, as it may also be helpful to know for later and is again a standard.
If you intend to swap textures then it is important that the starting texture has every channel you intend to use.
For example if you know the texture will be a solid chunk then RGB is fine, but if you then attempt to switch it without altering the original to an RGBA then the alpha portion will appear black, as though it collapsed all channels together.
Thus if your intention for a patch would be to give it a variety of shapes with transparency then the default texture also needs to be a RGBA.
The suffixes will effect how this gets converted btw.
_ca allows for gradients of transparency, such as glass or something that needs a soft edge.
_co is 0 or 1, whatever is black will be invisible and whatever is white will be opaque.
If you have grey's in your texture then upon conversion they will be converted to black or white, there is no in between and edges will appear pixelated depending how many pixels said edge has.
livid knot
Does it default to _co if its not specified in the name of the texture?
ancient parrot
I believe so, haven't done that in a long time but you should always use suffixes so that the converters know what format to use, as different formats use different conversion types.
_co - color or color opacity
_ca color alpha
_nohq - normal map
_smdi - specular (Green) gloss (blue)
_mc - macro/micro color, think of it as an extra layer of color you can add on
_dt - detail texture, greyscale averages between RGBA used for small details such as scratches (tricky to use and requires editing the rvmat matrix most of the time)
_ti - thermal (Red is always white for sun heat, Green channel is engine heat, Blue channel is motion heat, Alpha is for weapon heat or character body heat)
Most of the time you'll probably be using default values for your _mc and _dt in the rvmat but it never hurts to know what they do.
livid knot
Thanks for your insight tonight, appreciate it
ancient parrot
You are welcome, glad to hear that you were able to resolve your original problem, onward to creation!
 merry marten
Anyone know why when exporting textures from substance there are a few smdi textures that are yellow and orange?
nocturne lake
depends on your spec and gloss maps. orange/yellow would indicate high specular and low gloss, where pink is low specular, high gloss
merry marten
ah ok
 blazing kelp
If someone knows how to create and apply texture, please take a look at this mod:
The models are open and they could use help finishing it. Currently this is the best implementation of an APOBs system we have. It just needs final adjustments
 normal basin
With the new substance update transfering over to adobe, seems like my opacity channel from spec gloss is not working anymore. All opacity is just solid black, any tips to fix this?
 wheat hatch
Does it matter if i make textures before vertex groups?
full quarry
wheat hatch
Does it matter if i make textures before vertex groups?
Nope
limber dawn
img to paa isnt working reinstall\verify run compatibility admin im kinda at a loss on this is there a size limit or a format that works best im exporting with photoshop .jpg 8 bit color
limber dawn
png ,jpg. it all fails to convert
full quarry
2048x2048 is most typically used
full quarry
limber dawn
png ,jpg. it all fails to convert
Did you get it to work?
limber dawn
Photoshop had an update an it works now by export png's an imgtopaa works now :/ I swear every time I ask something here I look totally inept lol
full quarry
It may take few years to shrug that off 😅
wheat hatch
Does my model have to be joined in a single group or it can be multiple parts
 frozen blade
?
 scarlet nest
What program and i use to gen SMDI and AS files
ancient parrot
wheat hatch
Does my model have to be joined in a single group or it can be multiple parts
Multiple parts is fine, usually preferred to reduce poly/vert count
 shrewd shard
Hey so ive been trying to merge rvmats using this “
diag_mergeConfigFile ["P:\HDT\Addons\data\Exterior.rvmat"]” but im not seeing any rvmat updates when i execute it and press restart
Am i doing something wrong?
 hollow horizon
You can only merge config files.
rvmats don't work as far as I know, but they might reload automatically like textures. Not sure though
full quarry
rvmats update live with filepatching
shrewd shard
Uhm filepatching?
full quarry
yes
shrewd shard
Ill look into it thanks
 frigid escarp
needs to load unbinned p3d too
 shadow gale
Looking for someone to Texture some stuff for starsim, if someone can hmu with a dm to talk about it
 tepid rivet
in relation to texturing ive been looking for the Ghost Hawk anyone know were i can find the psd?
or is this not where i ask?
limber dawn
tepid rivet
in relation to texturing ive been looking for the Ghost Hawk anyone know were i ...
select the vehicle "left click" then "right click" and click on find in config viewer scroll down till you find the hidden texture that will give you location of the texture file for which ever vehicle or most objects as for the ghost it's in Arma3\Addons\air_f_beta.pbo\heli_transport_01\data you'll need both Heli_Transport_01_ext01_CO.paa \front half
Heli_Transport_01_ext02_CO.paa \ back half
tepid rivet
limber dawn
select the vehicle "left click" then "right click" and click on find in config v...
ok thanks
 mystic cypress
Can arma handle 8192x8192 textures? They’re fairly low detail but high res
limber dawn
mystic cypress
Can arma handle 8192x8192 textures? They’re fairly low detail but high res
the largest texture I've come across so far is 4096 for the Sam turrets, "BI" says 4096 is the largest the engine can handle regardless of detail I'd match the resolution to the base texture's resolution for which ever item\vehicle your working with.
mystic cypress
limber dawn
the largest texture I've come across so far is 4096 for the Sam turrets, "BI" s...
I was aware of the 4096 note,
But I have it working with 8192, but then on another build it doesn’t work, it just shows up white.
I’m trying to isolate if it’s just inconsistencies because the engine can’t reliable read 8192 or if I’ve screwed up something else somewhere.
Base resolution isn’t really applicable because it’s a fresh texture
limber dawn
I had problems with .jpg "photoshop project layers don't export to .jpg very well"
I'm leaning on the engine if it works sometimes,I had to use sleep command to have my textures appear right since I was loading to many .jpgs at a time
so for sure there is some kind of buffer or cache arma has that's pretty limited
if your working with a model program should be able to set Tex size when doing the UV map (get you within the engine bounds at least)
without more info im at a loss
 severe rune
8192 isn't "officially" supported, but might work-ish
full quarry
You are doing something very wrong if you think you need 8k texture@mystic cypress what are you making?
mystic cypress
full quarry
You are doing something very wrong if you think you need 8k texture<@13457851787...
maps to use on screens/mfds
full quarry
For a modeled screen 4k works just fine. Even 2k works since the screens are small and far away.
8k would eat up immense amount of gpu resources too
mystic cypress
the idea is to emulate the 'm' map, but not tiled like it is, so trying to get the quality at zoom, 4k doesn't cut it
full quarry
I see. Tiling is what makes it somewhat performant and working though.
 pure hill
Hey all! I'm trying to model a building, I've got a fair bit done but I'm worrying about my uv unwrap, it doesn't look too bad here https://ibb.co/2PLk7tr but that's without stairs and interior and i'm still not even finished with the building itself. Any tips on how to texture it would be appreciated!
I wonder if I can split the complete model down into parts at the end on blender export to separate p3ds, texture and material each p3d accordingly on objectbuilder then piece together on a final p3d to be packed? but this would be my 3rd model so if that didn't make any sense then just ignore it lol
full quarry
pure hill
Hey all! I'm trying to model a building, I've got a fair bit done but I'm worry...
buildings should use multimaterial rvtmat for their surfaces
its a Arma specific technique to mix 2 uv channels and it uses a mask texture to draw tiled textures on surfaces
your current unwrap would work for mask, MC and AS/ADS/ADSHQ textures and you would need second uvset to align tiling textures the way you want
pure hill
Okay so I've bit off more than I can chew I guess. I wasn't aware of all the other texture map types as I only have experience making CO and SMDI but also still confused at how to fit all my tiles onto one uvmap. I thought the process would be the same as importing objects but just on a larger scale.
ancient parrot
you use a RGBA (or in Arma's case, RGBBlack) the materials are assigned to that color and can then be tiled. Then you use the _MC to suppliment extra details such as graffiti or a marking, maybe some colors to help break up the tiling colors. The ADS/ADSHQ are shadow maps, baked ambient occlusion essentially.
full quarry
there is a wiki page about multimaterial
that should help to at least understand the concept a little better
tiled uvmapping does not fit into single uv space
it can cover multiple ones
beacause the texture is tiling
pure hill
Alright that explains a fair bit, I appreciate you explaining it further. I wasn't aware of the full process of textuing buildings with it being my first. Though you guys have supplied me with plenty of info to direct me the right way, I found this guide which seems to fill all the blanks https://community.bistudio.com/wiki/Multimaterial#9_MC_mapa regarding multimaterial
full quarry
thats the one yes
you can probably also find some more info in the maker channels here and possible on the BI forums editing section history
it will need some learning to get it working right
pure hill
full quarry
tiled uvmapping does not fit into single uv space
That I wasn't aware of, now it all seems manageable
full quarry
but it will be the right way to do buildings
actually this is the tutorial I meant
pure hill
Wow, this comparing to how I've been figuring out modding so far it almost feels like cheating, cheers for that wiki link
full quarry
there is a lot of information online. it just takes a bit to find it
Arma modding is also quite complex in the way that there are lot of technologies involved in all the different ways you can mod it
pure hill
I think this is your third time helping me out here tbh I really appreciate it, I lack knowledge of basic modding terms so I struggle searching for info online, cheers for not gatekeepin modding and sharing
full quarry
👍
 soft oracle
is there a proper way to "extract" the dt map of a dtsmdi texture?
 silver gull
learn how channels in your image editing tool work, then you'll know how to seperate them
 rich atlas
When I export to Arma texture, all metallic parts are something like concrete. Played around with rvmat, smdi, ... but still does not look like metal
rich atlas
rich atlas
https://cdn.discordapp.com/attachments/943216902996623411/962358257245126686/unk...
Substance Painter
full quarry
arma does not use meatalness
specular/gloss workflow is different from pbr metallic/rough
soft oracle
silver gull
learn how channels in your image editing tool work, then you'll know how to sepe...
i mean i tried just taking the red channel as it should but it didn't worked
full quarry
soft oracle
i mean i tried just taking the red channel as it should but it didn't worked
how did it not work?
what are you trying to do?
soft oracle
full quarry
what are you trying to do?
This is how it looks, what i was doing is simply making a new image out of the red channel of the dtsmdi https://imgur.com/ZdoqVGJ
full quarry
yes that looks like a texture 😅
limber dawn
what i do in photoshop is go to the color channels and just delete the color chanels i dont want then you can save or export whats left as what ever you like
 modern reef
does anyone have a retexture template of the base game sandbags?
modern reef
and while I am at it, if there are any for the Cargo Buildings that would be great as well
full quarry
modern reef
does anyone have a retexture template of the base game sandbags?
not official templates at least. Also do those objects even support hiddenselections 🤔
modern reef
hmmm the sandbags might not, now that I think about it
dont see anything in the relevant arrays
full quarry
terrain objects rarely have that since terrain objects dont use hidden selections
modern reef
buildings are counted as terrain objects?
I guess I thought that terrain objects would be used to describe trees and rocks
full quarry
most static objects are terrain objects
modern reef
ahh I see
shrewd shard
Anyone know what could cause my NOHQ to not work in arma? it works fine in object builder
https://imgur.com/gallery/q8Xsp3k (its a little dark but it says test on the side)
shrewd shard
But it worked fine on my gun which was right above it?
tested it to make sure even in sunlight it doesnt work
full quarry
perhaps something got broken in the rvmat
or the path is not right
or model vertex normals did not export right
shrewd shard
decided to switch from treeADV to super shader fixed it
(used tree cause base game camo net also used it)
 high verge
any of y'all know of anyone who has rextured the vanilla mopp suit to be m81 or dcu?
 placid lagoon
high verge
any of y'all know of anyone who has rextured the vanilla mopp suit to be m81 or ...
placid lagoon
high verge
any of y'all know of anyone who has rextured the vanilla mopp suit to be m81 or ...
https://steamcommunity.com/sharedfiles/filedetails/?id=2793899850
Shameless self promotion but my mod has done both. The license allows for you to take the textures and include them in another mod too.
full quarry
placid lagoon
https://steamcommunity.com/sharedfiles/filedetails/?id=2793899850
Shameless sel...
very cool! 👍
high verge
wow thanks ive been looking for this for so long
high verge
@placid lagoon there's no actual m81 option on the cbrn what you have it a tropical multicam
limber dawn
out of curiosity is there any interest in photoshop templates for vehicles and a few props?
full quarry
People usually like those. There is a community template thread on BI forums too
 dense peak
Any idea what's causing this weird noisy effect on my transparent texture?
screenshots below:
https://cdn.discordapp.com/attachments/566060230824165383/964927137796743168/20220416123347_1.jpg
https://cdn.discordapp.com/attachments/566060230824165383/964927138140667944/20220416123358_1.jpg
that's sort of my default rvmat I use for most basic things that don't require extra texture maps,
never seems to give me any issue with basic opaque materials, but idk if it's good for transparent textures
cedar lichen
I had this issue awhile back
apparently one way to fix it is to change the alpha slightly lemme find my notes
Yeah ok the solution was the parts of the texture that you have 100% transparent, change them to be 99%
this sounds stupid but it seriously fixed the same issue I had on plane instruments
ie. from black to very dark grey in the alpha channel
dense peak
Kk I'll try it out, thanks
 stone coral
is there an easy way to convert arma 2 smdi to arma 3 smdi?
the arma 2 ones end up being a bit too bright in arma 3
full quarry
Not really. A2 and A3 lighting is different. all the textures and rvmats need adjusting
stone coral
ok, what would i use for a flat texturing then?
if i want no particular specular effect
or i want to just display a flat color from the diffuse?
should i just remove the stage 5 in the rvmat?
stone coral
ok

 stone coral
i assumed it would use some flat values if the stage was missing
full quarry
you may need to darken its texture
and possible adjust the rest of the shader values
stone coral
alpha?
stone coral
alpha is transparency for diffuse
but i suspect that in smdi textures, rgb and a arent exactly being used for their png-counterparts
so theyre just used as information channels
stone coral
yeah, so im wondering which channel i should reduce
stone coral
full quarry
why dont you just darken the _co texture?
it makes the model look like a black hole at night
full quarry
im not sure smdi will ahcieve what you are looking for
stone coral
so i tracked the issue down to the smdi
full quarry
you sure its not your AS texture and ambient values in the rvmat
stone coral
my AS texture is just "#(argb,8,8,3)color(1,0.58,1,1,AS)";
full quarry
eh?
full quarry
well that would darken it quite a lot in shade/no light situation
stone coral
so 1,1,1,1?
full quarry
worth to try to see the difference
full quarry
how light works is combination of many things
stone coral
yes, and im asking you which things i have to turn down to make this texture not so sunburnt
what is the flat default texture values for the smdi?
no specular i assume 0 on g
so like 1,0,?,?
how do i generate a flat smdi?
full quarry
there is sample super shader rvmat in P:\A3\data_f\
you could also try turning the specular values and specular power down
stone coral
full quarry
there is sample super shader rvmat in P:\A3\data_f\
just leave all the stages out?
full quarry
no
stone coral
i dont see how that's useful in any capacity
full quarry
oko
full quarry
wont hurt look through all of them
stone coral
"#(argb,8,8,3)color(1,0,1,0,SMDI)"
for people looking for it
nope, still as white as... bone
full quarry
perhaps pastebin your rvmat and post picture of the model
or try the default_super rvmat on it
for comparison
stone coral
full quarry
ffs
stone coral
full quarry
this is skin shader
stone coral
it is .rvmat
full quarry
right. have at it
stone coral
im really confused now
full quarry
skin shader works completely different from other shader types
stone coral
if youre going to berate me, atleast tell me what im doing wrong
full quarry
you did not give detailed context
stone coral
you didnt ask
full quarry
ok
stone coral
i dont understand any of this
how am i supposed to know which values are important and which are not
full quarry
look up the wikki page for skin shader
context of question if important.
you could have started: im trying to convert arma 2 character textures/materials to arma 3. they come off as too bright
stone coral
i didnt know there is a significant difference between regular character models and other models
full quarry
if you want easy way, just take the vanilal skin rvmat from A3
stone coral
full quarry
if you want easy way, just take the vanilal skin rvmat from A3
they dont align
the UVs
Arma 3 stores the head separately from the arms
where as on these textures, the head/face is with the arms
full quarry
then you will need to device fitting textures to fill the blanks
stone coral
so there is no process i should follow?
the biki page for skin shaders is arma 2 docu
is it still valid for arma 3?
full quarry
stone coral
so there is no process i should follow?
no. the skin shaders are different in A2 and A3
stone coral
full quarry
no. the skin shaders are different in A2 and A3
so how do i make one for arma 3?
stone coral
that's for arma 2
scroll to the bottom of the page
and so there is no conceivable way to adjust the specular brightness of a skin shader?
what is the channel of smdi in arma 3 that holds the specular highlight values?
so what should i be looking at?
the default_super.rvmat? that skin shader article for arma 2? despit arma 2 and arma 3 being different?
ok, i solved it
FOR ANYONE WHO HAS THE SAME ISSUE AND IS SUPER INCOMPETENT WITH SKIN SHADERS IN ARMA 3, JUST CLAMP THE GREEN CHANNEL OF YOUR SMDI TO 0
there
 inner wyvern
Hey does anyone know how i can find that template thing used to texture my Arma3 characters face?
 tender knot
What is a good source for finding camo patterns for texture use?
full quarry
there are pattern generators online
other than that studying photos and painting your own usually has best results
limber dawn
@tender knot https://flippednormals.com/downloads/camo-generator/ ive been using this one since I found its for adobe subsatance 3d but the player is free to use
limber dawn
https://forums.bohemia.net/forums/topic/176288-community-texture-templates/?do=findComment&comment=3458227 Marshall template is done just need to work through the rest
 young patio
question for you all im wanting to do a retexture of the AAF fennek into the nato colour scheme is there an easier way to do that the camo patterns on the AAF and CSAT vehicles make re texturing a pain im using GIMP btw and my usual way of doing this is to:
Select by Colour, Map, Colour Exchange to the desired colour
so asking is there an easier way to do it for the complex camo patterns?
limber dawn
young patio
question for you all im wanting to do a retexture of the AAF fennek into the nat...
if you want to keep the same pattern not really. (not that i know of) you can rebuild the texture and identify the parts but that will probly take longer than using replace color
young patio
limber dawn
if you want to keep the same pattern not really. (not that i know of) you can re...
oh no i dont want to keep the pattern
the problem is when i try to replace the colour it looks like a paint can thats been thrown into a blender
its patchy as hell and just unsightly
limber dawn
then depending on the camo/tex you can just overlay it on the texture and play with the overloay transparency quick and dirty works pretty well
only other way i can think of is to identify everything and build a new texture
fennek is the strider right?
limber dawn
young patio
oh no i dont want to keep the pattern
oh forgot theres a nato tex for a couple aaf vics a3\soft_f_beta\mrap_03\data\ (mrap_03_ext_co.paa) is the nato paa for the strider/fennek
young patio
limber dawn
oh forgot theres a nato tex for a couple aaf vics a3\soft_f_beta\mrap_03\data\ ...
oh ok didnt know the strider and fennek are interchangeable
limber dawn
isnt the fennek just the rhs name
young patio
nope
AAF
and its in AAF green camo
so its all digi to hell
and what im trying to do and struggling with is make it the simple olive drab
limber dawn
what mod is it from
young patio
but because its all crazy pattern ill probably have to paint over it
its not a mod
its base game
limber dawn
fennek is the IRL name for the arma strider ↑comes with nato texture though would be esaier to change than the crazy digi camo aaf has going on
 umbral swallow
young patio
question for you all im wanting to do a retexture of the AAF fennek into the nat...
umbral swallow
young patio
question for you all im wanting to do a retexture of the AAF fennek into the nat...
There is a NATO color scheme of the Fennek aka Strider already in the game!
young patio
limber dawn
this? https://imgur.com/a/WHDJeDU
yah thats it
i thought the strider was the buggy added in apex
umbral swallow
You don't need to make a texture for a NATO Fennek cos it's already there :D
young patio
with the open top roof
umbral swallow
If you're using GIMP like I do, have you tried setting the layer to Legacy mode and using Color-to-alpha? That way you can put a camo pattern under it, or paint your own if you're working on a vehicle, and the results are 1:1. And also take a copy of the base texture and clip out the details that you don't want to repaint into a separate layer?
limber dawn
yeah finding all the parts on some of these can be a few hours of work (for me at least ocd king) but just a simple color swap or quick camo can be done pretty easy with not very much effort
young patio
umbral swallow
If you're using GIMP like I do, have you tried setting the layer to Legacy mode ...
good to know and yes im using gimp
 prisma fox
Hey guys!
anybody doing retexture to mods?(equipment, helmets, vests, uniform)
full quarry
Many people do that. This is the main channel to ask questions about how it works.
prisma fox
full quarry
Many people do that. This is the main channel to ask questions about how it work...
yeah looking for someone who can do it and get paid
full quarry
That would be #creators_recruiting
 mossy radish
Hello, i have a bit problem. I make a custom liv. on a KA-52 (cup) all do for instructions but game say "Picture ka52_01_co.paa not found" . Help.
mossy radish
full quarry
how are you trying to apply it?
Wdym?
mossy radish
I do liv. for this guide https://www.youtube.com/watch?v=jzI2mh3P134&t=2004s&ab_channel=PatriotSIBLex90
(But it's on the rus lang)
full quarry
so you use the script command setObjectTexture
full quarry
that command expects that you either have full "path\to\texture.paa" if it is in a mod pbo
or that the texture is in the mission folder
otherwise it cant find it
mossy radish
I didn't really understand, that is, I need to create a mission with pbo for it to find it?
full quarry
you either need to create a mod or mission where you put the texture in
when you save a mission in editor they are saved in your windows\user folders
mossy radish
Well, let's take a mission.
full quarry
google can tell you where exactly
full quarry
then you find the mission folder
somethhing like: hammocksAwesomeMission.Altis
you open that folder and copy the .paa you want to use into it
then the command can find it
mossy radish
ok
thx
Wait, what if you replace the skin that is already in the folder with just a replacement?
Or nothing will happen,
?
@full quarry
full quarry
what folder?
mossy radish
C:\Program Files (x86)\Steam\steamapps\common\Arma 3!Workshop@CUP Vehicles\addons\cup_airvehicles_ka52.pbo.cup_vehicles-1.17.1 texture
What is like this
full quarry
no that you cant do
full quarry
you dont modify other peoples mods
you can make a new mod that uses the cup KA52 and puts your texture on it
but you dont replace the original
 spark shore
hello, I have a question, how do you create an ENV texture?
full quarry
take a screenshot of scene
edit it into correct resolution
fiddle with color balance etc until it looks like whay you want
spark shore
any way to edit it so it has the "fisheye" effect?
full quarry
many
you can render it from 3d model
you can use image editing software
you can manually paint it
spark shore
I learned how to do 3d into cubemaps but not into this sphere
I'll try to go the screenshot route since I already have the interiors I want to reflect ingame
dense peak
I have a transparent glass material and I noticed I can't see smoke, dust, particles, other glass or water through any of my glass materials
screenshots below
https://cdn.discordapp.com/attachments/566060230824165383/966468900118220842/20220419222541_1.jpg
https://cdn.discordapp.com/attachments/566060230824165383/966468900738973736/20220419222543_1.jpg
https://cdn.discordapp.com/attachments/566060230824165383/966470901870780497/20220420184407_1.jpg
https://cdn.discordapp.com/attachments/566060230824165383/966470902336323684/20220420184409_1.jpg
 versed axle
Question, I retextured a vehicle skin, put it in JPG, to test it used a script to apply it in game and it looked great. HOWEVER when I converted it to PAA and uploaded it onto a mod and than spawned it ingame it now looks terrible. Any idea why?
https://ibb.co/XS1RdLy This is from JPG from script
https://ibb.co/60PXWd8 This is after PAA convert and upload into a mod
full quarry
Because you used jpg. And may not be using correct suffix type in the file name so converter does not know what conversion to use. And game textures typically are more compressed to save space.
 stray relic
dense peak
I have a transparent glass material and I noticed I can't see smoke, dust, parti...
stray relic
dense peak
I have a transparent glass material and I noticed I can't see smoke, dust, parti...
Try bringing the glass faces to the top of the stack (under Face ordering).
dense peak
stray relic
Try bringing the glass faces to the top of the stack (under Face ordering).
exported as a tga, used _CA, selected windows and hit move to top
full quarry
How transparent is it? More or less 50%
dense peak
full quarry
How transparent is it? More or less 50%
probably like 10% opacity
these are the textures
full quarry
What rvmat shaders you got?
full quarry
Try using the default super from data f
versed axle
full quarry
Because you used jpg. And may not be using correct suffix type in the file name ...
Is there something I can do to make to look not shit?
full quarry
Try tga and sharper lines so you have less colors
But it may be you need to rethink the model design. Maybe use 2 textures
 vernal fractal
Hello guys a quick question how can i make so a picture with transperent background something like graffit in arma ?
versed axle
tga and than convert it to paa?
versed axle
vernal fractal
Hello guys a quick question how can i make so a picture with transperent backgr...
png to paa, or do you mean how to code picture you have into a game?
vernal fractal
No i mean in texture viewer what settings do i have to set for texture to have transperent bacground
full quarry
you make a picture that has transparency
and save it as name_CA.tga
without rle compression (at least in gimp)
and convert that to .paa with imageToPaa
vernal fractal
full quarry
you make a picture that has transparency
Ok so basicly i try this i have a picture with trasperent background. I have name it name_CA.tga and with out rle compression. Also picture is 900x900 and when i try to convert it to paa it says fail conversion is there a way to see why is that and how i can fix it ?
vernal fractal
That did work ty.
vernal fractal
full quarry
only power of 2 resolutions can be used
Also do you guys know anyobject in arma where i can apply this texture so it shows on ground ?
full quarry
you would probably need a custom decal object for that
versed axle
blood?, its object its square and pretty large
vernal fractal
Blood actually worked ty.
modern reef
does anyone have a decent retexture template for the A2 AK107 + GL? currently porting it over using the Licensed Data Packages
full quarry
CUP might if they have ever ported it. other than might be difficult to come up with
you might need to sort it out yourself
on the other hand you could at the same time increase the texture resolution to fit A3 better
modern reef
ahh I see, thank you
 bronze gyro
full quarry
on the other hand you could at the same time increase the texture resolution to ...
bronze gyro
full quarry
on the other hand you could at the same time increase the texture resolution to ...
Doesnt A3 use 2048x2048?
 vernal sage
A2's AK-107 already uses a 2048x2048px texture. Not much you can do to make it look better unless you remake the model entirely (which is what the CUP team did).
vernal sage
bronze gyro
Doesnt A3 use 2048x2048?
Newer vehicles use 4096x4096px (like Jets/Tanks DLC stuff) but 2013-2014 era base game assets are mostly still 2048x2048px.
 ocean monolith
full quarry
CUP might if they have ever ported it. other than might be difficult to come up ...
ocean monolith
full quarry
CUP might if they have ever ported it. other than might be difficult to come up ...
I have seen you mention live loading textures just to make sure im doing this right i need
to be on dev
have file patching on?
have an unbin model
then i can just change the rvmat and it will change the textures?
full quarry
You also need the rvmat and textures with the model in correct places like arma3\mod\folder\structure\file.rvmat/paa
 wind mauve
can i have multiple textures in the same place? im trying to make a simple bottle, and want the glass to be semi transparent, and the lables on top.. or is it possible to do this with 1 texture? whatever i do i end up with a totally invisible glass bottle and just lables showing
wish i could chose a solid color on the texture to be like 50% transparent within the rvmat or something
full quarry
You should be able to have that but perhaps you are using bad rvmat on it.
Or perhaps wrong texture suffix so textures get converted wrong.
wind mauve
yeah you are prob right, i feel its something to do with the rvmat, as i dont really understand it
i think the textures are ok, and the suffix aswell, or i wouldnt see the bottle lables in buldozer
i feel like, since i made a texture with alpha channel, it cuts out everything but the lables
wich would be fine, if it was a leaf for a tree or soemthing, but i want the background to be semi transparent, not 100% see trough
full quarry
did you make the alpha channel fully transparent?
wind mauve
like solid black?
full quarry
for this kind of thing you would want _CA suffix on the source texture before conversion
full quarry
wind mauve
like solid black?
yes
full quarry
not fully
wind mauve
woudlnt that mess with the label and make it transparent or is that ok if i leave white in full solid color
ok i will try
full quarry
you would leave that part solid yes
wind mauve
thanks!
full quarry
try saving the source as tga
wind mauve
hmm same thing

 full quarry
youll need to link them
wind mauve
wont let me
full quarry
as in post elsewhere and copy paste the link to it here
not this link though
this is link the the message
once more into the breach
full quarry

wind mauve
i can link in every other place but this one idk
full quarry
race has nothing to do with it.
wind mauve
ofc not, was a joke 😛
full quarry
what does the texture you got look like?
and have you tried it with the default super shader from P:\a3\data_F?
wind mauve
its normally just the label and nothing else, just in the right position to land on the bottle.. then i did a mark and set alpha channel, making it black background and white where lables are.. then i did as you said and set the density to 50% instead of solid black.. i cant use the transparency as it will make everything transparent, the lables aswell. but even so, its still ends up just showing the lables. converted to all the formats i could think of, tried ca for all, and even co.. before text viewer paa conversion, even tried let OB convert for me when running it for the first time in OB
no i havent, can try that.. but im like, thats all shaders and stuff right? it should still be possible to do this with the right texture
maybe make like 2 alpha channels
idk
wind mauve
full quarry
and it must not be fully transparent, that wont work
as that is then fully transparent
yse no this is not good
the glass must not be fully transparent if you want there to be something to see. and then the label needs to have 0 transparency
full quarry
there is always some color behind the alpha
alpha channel just modulates it to be non visible
in your case it would probably be default white
also you could probably use a normalmap to pop out the label a little bit from the surface of the bottle
and specular map to control the shinyness so the bottle is shiny and label less so
wind mauve
ye i made that, but dont know how to get it working
full quarry
they need to be plugged correct stages of the rvmat
wind mauve
ye ill look into that once i get the glass to be transparent, i got 10 more bottles and then sodas and cans.. so i gotta learn this hehe
 heavy apex
is there a way to randomize the texture applied to an pickup object? So if I place one down in the editor it will pick a different version of the pickup
full quarry
no
that kind of randomization needs to be done on mission side
so you have the different version of your object and a script in mission changes them at random
heavy apex
ok thanks
wind mauve
tga dont work at all, it just makes all solid color
full quarry
odd.
wind mauve
ye i get the normals to work and everything, but the bottle is just solid white now
full quarry
you use photoshop?
so far from all the problems people have with it Im convinced its status as "industry standard" is quite exaggerated
wind mauve
yes
always have, for unity, unreal, or any project really
for some reason, it just doesnt care
i dont really care about the current model or whatever, as i just want to figure out why and how before i jump into anything specific.. i need it to make sense 😄 hehe
wind mauve
white background
full quarry
sounds like your alpha has not exported right
try png then
or try some other program
like gimp
wind mauve
then background is grey, and in buldozer its 100% transparent
full quarry
put this on the bottle
full quarry
probably something it PS export/save that needs some voodoo to work
like I said, I've seen people have these issues no other program has
and im not impressed 😅
wind mauve
gimp actually worked, somehow.. tho the label is all black but the bottle itself is transparent
full quarry
odd
wind mauve
ye same happens if i take that texture u sent and put the label on top, label is black in buldozer and the rest of the bottle is transparent
wind mauve
i will end up having brain damage haha
full quarry
perhaps the rvmat broke
wind mauve
no, ive tried with different ones.. it just wont work
full quarry
can you upload the texture?
full quarry
wind mauve
no, ive tried with different ones.. it just wont work
so on my test cube here you can see the blue is little bit transparent as it should


altered alpha for more transparency

even more

so it should work
now could be your OB is missing texture path parameter in settings
it shoudl be P:
also Im hoping you are actually using P drive for development 😅
full quarry
this is what I used

the default_super rvmat is very basic setup for supershader rvmat
but its usually a good starting point especially when testing stuff
full quarry
wee
wind mauve
again, thanks alot man.
bronze gyro
full quarry
hwo do you make OB have that background :o
full quarry

😅
one would need to inject better lighting config into the P:\bin\config.cpp (either into the defaultworld or as separate world config) and set dozer with that world config as startup world
world world world world world
 latent magnet
full quarry
one would need to inject better lighting config into the P:\bin\config.cpp (eith...
latent magnet
full quarry
one would need to inject better lighting config into the P:\bin\config.cpp (eith...
Where would one find such a config for lighting?
full quarry
any vanilla terrains config can be used for example
livonias might be most "neutral"
tender knot
Has BI released the Syndikat Tiger Stripe type camo for use in retexturing? Or know where I can find it?
 velvet horizon
What are the things that I need to retexture Atleast cup
I wanna start retexturing
 rustic gale
Anyone got a template for a crye g3
full quarry
might be good to say from what mod
rustic gale
Cup or rhs
frozen blade
rhs doesn’t provide templates, cup might
bronze gyro
full quarry
one would need to inject better lighting config into the P:\bin\config.cpp (eith...
@knotty marsh can we get a tutorial in the biki to do this please?
it seems very useful but so hard to figure out 

full quarry
@bronze gyro this pretty much covers it though the main goal is to get clutter work in Terrain Builders Buldozer
Bohemia Interactive Forums
Preface I want to start by saying that my intention isnt to make a quick-and-dirty guide to getting clutter working in Buldozer. I think its important to try and understand how the technology works, so I will explain in probably too much detail how I figured this out. While trying to determine if...
bronze gyro
full quarry
https://forums.bohemia.net/forums/topic/202774-clutter-buldozer-and-you/
thanks but its still hard to figure out what to put where since thats for clutter it doesnt explain the lighting part
 covert spire
any chance i can get some documentation on modeling insignias onto vests
bronze gyro
bronze gyro
thanks but its still hard to figure out what to put where since thats for clutte...
also what should the bulldozer startup params be?
 knotty marsh
bronze gyro
<@137855151120711680> can we get a tutorial in the biki to do this please?
it se...
knotty marsh
bronze gyro
<@137855151120711680> can we get a tutorial in the biki to do this please?
it se...
Have someone write it and I can post it yeah
bronze gyro
ight i'll write it if i can finally figure this out
full quarry
I'll put something up when I can.
 dim cape
so ive been wanting todo uniform retextures for awhile but there isnt really an up to date tutorial, is anyone able to help me? (ping me pls as im not gonna look here much)
blazing kelp
is there a way to resize a PAA other than re-generating it from a PNG?
full quarry
dim cape
so ive been wanting todo uniform retextures for awhile but there isnt really an ...
older tutorials should be still valid, nothing has really changed in the recent years
full quarry
blazing kelp
is there a way to resize a PAA other than re-generating it from a PNG?
no. and editing .paa is not usually best idea as it is compressed image format. editing the source file has better results
dim cape
full quarry
older tutorials should be still valid, nothing has really changed in the recent ...
the .pbo thing is what stops me most the time
most send you to dead armaholic links
 placid elm
Anyone out there made or can make a penguin face paint?
tender knot
Any good tips or tutorials on making skins in arma 3 look good, I managed to make a half decent copy of the Syndikat camo pattern but when compared with the actual Syndikat Arma 3 character pattern in game it still looks very cartoonish/amateurish when in game on character clothing etc....I'd post a screenshot comparing them but for whatever reason I can't figure out how to post screenshots to this server.....or I don't have the permissions for it I guess.
full quarry
tender knot
Any good tips or tutorials on making skins in arma 3 look good, I managed to mak...
you need to post links to pictures
there are no special magic in making retextures look good. usually it helps to match color tones/saturation with the vanilla textures to get textures that behave in same way in the game lighting
limber dawn
lots of little tweaks like Goat said as a start I pick a color I like and half the saturation and start there
tender knot
alrighty
 idle kiln
Hey, anyone good with photoshop? I'm planning on getting some custom helmet graffiti done for the halo unit I'm in. Mostly so that I don't get confused with other people. Partly because I lack DLC to make myself stand out more.
You may be asking "Why don't I do it myself?" First off, because I lack the software and knowhow. And Two... My drawing skills are a bit shit.
dense peak
are you able to edit the Granit-B suit from contact? I'm trying to find a PBO for it but can't find it in the expansion files
full quarry
dense peak
are you able to edit the Granit-B suit from contact? I'm trying to find a PBO fo...
which file?
dense peak
full quarry
which file?
either of them. I can't find the location of the .paa or .co
full quarry
_co is the .paa
what name are you looking for?
and how?
gear is usually in character pbo
dense peak
full quarry
what name are you looking for?
U_O_R_Gorka_01_F
Also known as the Granit-B Suit
I'm looking in the Enoch Addons
as I'm using the offical wiki
it says its in
characters_f_enoch
in which I do see the "gorka" suit that I'm looking for
but its in a .p3d format
and I cannot find it anywhere else
lethal condor
What? p3d isn't a texture
full quarry
you cant get the 3d models
if you want to do retextures you need the .paa texture a model uses and then you need to paint over that texture to make your changes
@dense peak
dense peak
I know. I’m only able to find the 3d model I cannot find the .paa is my issue
lethal condor
Where are you looking at in the first place?
lethal condor
Exact folder
dense peak
I’m not at my computer rn as I already headed off.
I’ll figure it out tmmr
The exact folder it was
lethal condor
It is simply located in a3\characters_f_enoch\Uniforms\Data
 vocal copper
out of curiosity, is it possible to use _nopx textures for normal decal objects?
as far as i can tell, _nopx is only used for terrain textures, at least i can't find any other examples in that area.
lethal condor
Parallax you mean right? As far as I tried (using terrain rvmat into a normal object) causes an insta CTD
vocal copper
yeah, just wondering if someone ever got it to work. guess not then
full quarry
Don't think it works unfortunately
 celest obsidian
 median anvil
How do you guys make ur preview pictures for equipment? (uniforms, vests, helmets, etc)
dense peak
lethal condor
It is simply located in `a3\characters_f_enoch\Uniforms\Data`
Thanks. I got it to work
 solar moss
Not sure if this is the place to ask but im in need of help retexturing some uniforms if possible?
full quarry
this is the place to ask yes.
 hasty osprey
hey does anyone have any templates to use for uniform design?
for example the one used in this video
around 5:33
I believe the template in the video is for the NATO uniform
full quarry
The Arma 3 samples on steam have some if I recall right. And BI forums has a thread for community made templates
 wide turret
Anyone know how to retexture RHS helmets, uniforms, etc, withot making it looking like a cartoon. (I.E Showing stitching, showing dirt, all the fine details) Ive read the EULA, and all reskins/textures will be completely private, for a project of mine
full quarry
@wide turret no crossposting
though this is better channel I'll move my answer here
first of all and just to make sure, it is not a private project if you share it with anyone.
Second of all RHS tolerates retextures when they are made right through config patch mods and hiddenselections, as in no repacking of RHS files.
Third, to answer question regarding making the textures, you "just" need to practice your painting skill in order to preserve details of texture when altering the colors. Usually this is done through various image layers with different purposes
wide turret
full quarry
first of all and just to make sure, it is not a private project if you share it ...
Not sure what this means lol "Second of all RHS tolerates retextures when they are made right through config patch mods and hiddenselections, as in no repacking of RHS files."
and yes, will be private, wont be sharing any files with anyone, only photos and videos of the camos
and I appreciate the answer man🙏
full quarry
its not really private anymore at t that point either
full quarry
RHS tolerating retextures means they usually dont dmca properly made retexture mods unless there is something very jarring done in them
key being properly made without repacking RHS files
wide turret
im not sure what repackcing means
full quarry
like all retextures should be done
you take RHS files
put them into your mod
pack
== repack
wide turret
ohh right ok
full quarry
your retexture mod will only need a config file that creates new classes of RHS items
wide turret
i would just replace the old ones with my retex in the rhs files
full quarry
wide turret
i would just replace the old ones with my retex in the rhs files
no
this is exactly the wrong way
wide turret
oh ok
full quarry
you can use the rhs textures to paint over and then pack those new textures into your own mod
 wide turret
Do yk of any good tutorials for configs, and hiddenselections
cuz I have 0 clue
what that is
i j know how to paint and put them back into a folder and see em in game
full quarry
there is character enconding guide on the BI wiki that goes through them if I remember right
other than that dunno. I've learnt this stuff years ago so im not fully up to date on tutorials
wide turret
All good, thanks man!
 light geyser
Hello guys,
Is there a way to hide that inside texture so make the vehicle fully invisible ?
I used setObjectTextureGlobal but it only has external texture.
Maybe I can apply a new transparent texture to make the vehicle "see-through" ?
https://www.zupimages.net/up/22/19/5a0r.jpg
The reason i want that is to make some wtf creation based on attachTo and resizement
(The basic visibility option make the vehicle unfonctionnal)
full quarry
light geyser
Hello guys,
Is there a way to hide that inside texture so make the vehicle ful...
Not possible
light geyser
😢
wind mauve
Hey @full quarry do you think its possible to get the raindrops on screen effect when staying close to a set radius @ object under destruction? i wanted to experiment with the current raindrops on screen effect (ppEffect WetDistortion or normal_NO?) and a custom animation making a liquid pool appear and hide again at the same time ive set for my shards (currently at 10 for despawning)
say i made this
and wanted it to explode on impact, or on lower caliber maybe just spray my custom billboard/spaceobject liquid text and when in range cause some more immersion
full quarry
some sort of overlay maybe
I would not really waste time on such
its a bit silly effect
wind mauve
ofc it is 🙂 its a game man, why would you say that hehe
full quarry
if you get somethin in your eye your vision blurs
wind mauve
ye
i know what you mean with silly, but this is just me training/learning really and making something thats not that advanced, when i first started and you tought me a couple weeks ago i had no idea on what to start with.. so i just want to continue, i try to see the big picture, like even tho its just bottles, it can easily become other stuff, military equipment or objects, gore, skulls or whatever.. im just learning man dont hate lol
im like this, if i learn something, its not wasted time.
so basicly an normal text overlay that fades on time?
wind mauve
full quarry
if you get somethin in your eye your vision blurs
ye kinda, but ye.. its a mil sim, so im not looking for something insane, more like a couple drops just if in a firefight and something "wet" is hit, kinda like when you shoot glass you see shards flying at you, they dont do anything really, just give more immersion.
full quarry
you would need to do some sort of screen overlay UI thing
 leaden fox
frozen blade
leaden fox
frozen blade
?
 silent onyx
oh nice
 open junco
Hey , Could someone explain to me how to make RVMAT for retexture?
After days of struggling, I still have something like this
full quarry
rvmat is file that dictates the shader used and the "supporting" tehcnical textures like normalmap, ambient occclusion etc. it is basically a textfile where you alter file paths to fit your folder structure
usually you dont really need it though with retexturing
since retexturing usually is just changing the colors
 safe pendant
Do you know guys if it is possible to re-skin the Contact DLC weapons? I am guessing that that is still not a thing?
safe pendant
full quarry
that has been possible for long time now
Was wondering because I see no texture variation mods in the workshop for those weapons.
full quarry
the textures themselves got pbod realtively recently
but the textures have been possible to access through in game
safe pendant
full quarry
but the textures have been possible to access through in game
Thanks, will check it out
median anvil
anyone got texture templates for the Assault Boat? (B_Boat_Transport_01_F)
 echo gyro
Does anyone know of any reason why one specific texture would not be loadable in Texview 2. I have saved dozens the same way, but for some reason this one is just will not open. It is a 2048^2 texture, built the same as everything before it, but texview just wants nothing to do with it. I have tried it in TGA and PNG, at a variety of scales (^2) and even stepwise backward to the source file, but no luck. Any reason this should happen?
Is there anything about the composition of an image that can cause it to not load?
full quarry
echo gyro
Does anyone know of any reason why one specific texture would not be loadable in...
if you are somehow saving it in some incompatible bitdepth then perhaps
echo gyro
Had to go any download PS to find the root cause. For reasons unknown, the file was being saved in 8-bit indexed colour mode. Saving it in RGB corrected the issue
echo gyro
full quarry
if you are somehow saving it in some incompatible bitdepth then perhaps
Appreciate the pointer, I'd nearly given up
full quarry
👍
 viral citrus
Figured I'd be better off asking here than the new reforger area. Went to reinstall GTT for qGIS and ran into this strange error. Not having any luck with google searches:
ModuleNotFoundError: No module named 'qgis-game-terrains-master/gtt'
Traceback (most recent call last):
File "C:\PROGRA~1/QGIS32~1.1/apps/qgis/./python\qgis\utils.py", line 401, in loadPlugin
import(packageName)
File "C:\PROGRA~1/QGIS32~1.1/apps/qgis/./python\qgis\utils.py", line 888, in _import
mod = _builtin_import(name, globals, locals, fromlist, level)
ModuleNotFoundError: No module named 'qgis-game-terrains-master/gtt'
Solution: File I needed is contained within a subfolder for the new GTT build zip. Think I've made this same mistake in the past.
wheat hatch
Can a vehicle have multiple textures like turret, interior, body?
frozen blade
yes
 sweet rampart
is there anyone here that could make a small patch mod for me?
i have the patches digitally they are from my airsoft team and from my 2 arma units but i can only use them during sessions when we play but i would really like to have a mod with the 3 patches on the workshop so i can also put them on ai in the editor for some personal usage and mission making
 calm hemlock
Does anyone know why when I create a custom face, the darker colors become transparent ?
For example black turns into brown ?
While I see other people with custom faces having matte colors
but they said they did not do anything special
full quarry
perhaps link up pictures of your texture and what it looks like in use and then picture of one of those textures that work right
 mint current
I am having a boat load of trouble getting this rvmat open, any help/advice?
full quarry
mint current
I am having a boat load of trouble getting this rvmat open, any help/advice?
wheres the rvmat from?
full quarry
you dont need to modify rvmat for regular retexturing
retexturing is done through config pathc mods that path hiddenselections to use your new textures
mint current
How do I get the main texture then? I can't seem to find it
full quarry
it would not read in the rvmat anyway. if the character heads support hidden selections you should be able to read the paths from the face/identity configs
 ripe shale
Is there a recommended texture size for gui elements that are used in the CfgMagazines?
ping me if anyone has a an answer pls
full quarry
ripe shale
Is there a recommended texture size for gui elements that are used in the CfgMag...
check out the vanilla magazine ui texture for reference
ripe shale
Yeah it's 64x64 in paa format but when I look at actual mods I've seen them use up to like a 512x512
I'll just see which one comes out better
calm hemlock
full quarry
perhaps link up pictures of your texture and what it looks like in use and then ...
For example if I add a beard texture, it appears like a shade instead of a full on beard also
placid lagoon
If anyone cares, this is the set of templates I made for retexturing almost every piece of vanilla equipment in the game, along with an examples of how to use them.
https://www.dropbox.com/s/dqfc5nlzrhe16ji/arma3_vanilla_templates.rar?dl=0
full quarry
calm hemlock
For example if I add a beard texture, it appears like a shade instead of a full ...
are these though the player selectable custom face or via custom identities?
calm hemlock
@full quarry player selectable custom face from profile menu
full quarry
Yeh those are pretty broken.
full quarry
calm hemlock
<@150949769953411072> player selectable custom face from profile menu
For that kind of stark contrast faces you will need to make a new face/identity configs and materials set
calm hemlock
God dammit
Wierd cause from the individual that i got face texture from, he had a picture with it and it was not transparent
Found it on google, just pasted it over another face texture
But even the default custom face he made, appears transparent in my game
full quarry
Could be it was used on some character with different face material
calm hemlock
I dont think so. Its that default model for custom face. Bald head with the chinstrap goatee
Same for my other friend that uses custom face
but he never had transparency issues
dense peak
hi guys, i need some advice on creating a specular map filter as i am currently suffering from potentially overthinking how to go about it. my current workflow involves playing with the RGB channels in photoshop. I am either ending up with material that is too glossy and/or metallic than it needs to be or i end up with the material looking right but otherwise has no proper light interaction. And i've been at it for a week.
to be specific as well, i am trying to create a filter where the cloth bits actually feel like cloth like the vanilla uniforms (specifically aaf combat uniforms, for reference) but they just look obviously laminated no matter how much i adjust the specular in the rvmat. and if i really tone down the specular it ends up looking flat.
full quarry
It's combination of the specular power, specular values and the smdi texture
dense peak
full quarry
It's combination of the specular power, specular values and the smdi texture
aight so i can't just simply edit one file? i have to do both for the most part?
full quarry
Yes
open junco
I want to add a custom rvmat but I keep getting same result with uniform being still black
Is there maybe hiddenMaterials [] the same as hiddenselectionselection [] with hiddenselectiontextures [] ?
Or is there only a HiddenSelectionMaterials[]?
full quarry
open junco
I want to add a custom rvmat but I keep getting same result with uniform being s...
What uniform?
Rmvat causing model be black usually indicates rvmat is faulty
Bad path or faulty texture
open junco
full quarry
What uniform?
df15 from rhs
I just copied rvmat from rhs and only replacing path to new textures


nohq texture

and smdi
https://prnt.sc/syAhDrLINn1p
 full quarry
That normalmap texture is not right at all
open junco
The same was in rhs
I only added a patch
This is original https://prnt.sc/9VywBAOtZUPJ
 full quarry
Odd.

Then likely your texture pathing is not right and engine can't load. The textures
 frozen blade
open junco
This is original https://prnt.sc/9VywBAOtZUPJ
frozen blade
open junco
This is original https://prnt.sc/9VywBAOtZUPJ
you certain that is the original RHS texture?
 frozen blade
weird...
livid knot
Arma cant load this texture for some reason
\shTest\data\PlyWood_CO.paa
Is the path wrong or something? Im stating it in object builder.
TexView is able to view it fine
open junco
livid knot
Arma cant load this texture for some reason
```
\shTest\data\PlyWood_CO.paa
```
Did you wrote right HiddenSelection[]?
livid knot
open junco
Did you wrote right HiddenSelection[]?
I will be, wanted to test it quick first though. I found the issue, it was with the texture itself and the \ was wrong as well, thanks!
 spice agate
Who knows where to find the file path to this building?(PBO file you need to find and repaint the building)
https://i.imgur.com/1xshmKM.jpg
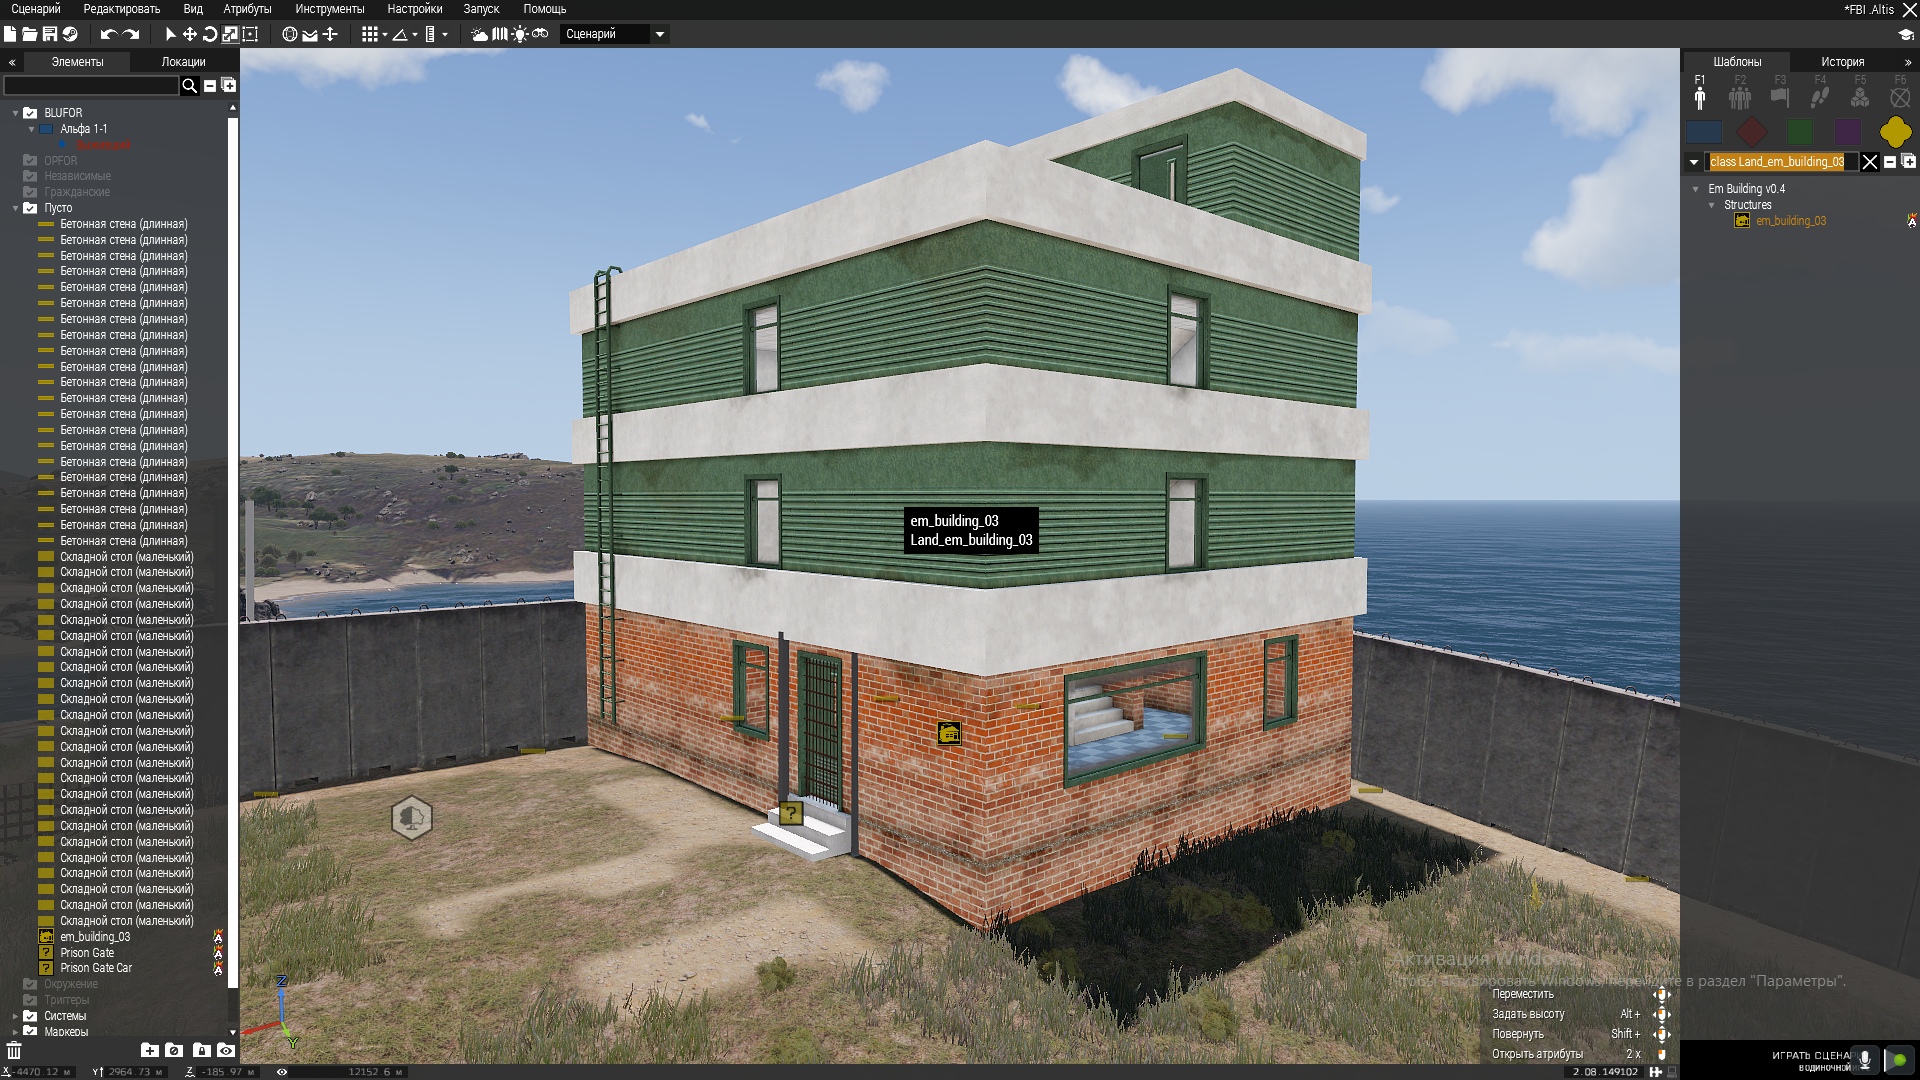 full quarry
I kinda doubt its made so it can be retextured
 olive pawn
how can I enable transparency on object with custom texture and material attributes? Alphatest in the rvmat "works" but not very well at all for things like glass textures. So im pretty stumped.
 wise dagger
olive pawn
how can I enable transparency on object with custom texture and material attribu...
wise dagger
olive pawn
how can I enable transparency on object with custom texture and material attribu...
use your texture with _ca suffix
don't forget to add the suffix before converting your texture into .paa format
full quarry
if the object does not have _CA texture in the p3d you cant
transparency flag is baked into the object on binarization
olive pawn
Oh ok thank you, gosh cant wait to recompile a whole bunch of models ugh
full quarry
olive pawn
Oh ok thank you, gosh cant wait to recompile a whole bunch of models ugh
what kind of a thing are you trying to do
transparency is not a good thing on solid models
olive pawn
full quarry
what kind of a thing are you trying to do
I have props I made to be retextureable and buildable for custom levels, so essentially glass planes like windows and whatnot. User textures are not double sided so I have to use 2 user textures rather than 1 prop.
full quarry
no textures are double sided
you need 2 flipped meshes
but both sides can use same texture
 olive gale
does anyone know where I can find a to-199 template
I found one for the shikra
the dlc one
 shell field
anyone here able to show a fella how to make decent _as and _smdi files mine suck
and i cant find no definitive guide on how to do so
wise dagger
How do I disable shadow rendering on a face? I'm trying to make a feather texture with 2d faces and _ca texture but shadows ruin it (also, is it that right way to do that?) https://prnt.sc/dAyLNrBgKo4w
full quarry
what kind of shadow lod you got for that?
you dont want to disable shadow for it as that would mean it would not get external shadows either
wise dagger
it doesn't have a shadow lod, I mean shadow lod exists but it doesn't have a model for that in it, shadow lod is only for other parts of the model
full quarry
you could try treecrown or hair shader on it
wise dagger
okay thanks
 livid cedar
Hello , anyone here has experience retexturing any of the NIArms weapons? , I am trying to retexture the mk mod 0 , after I replace the .paa texture file with the one I modified the weapon just doesn't appear for me in the Virtual Arsenal I didnt change anything other than the .paa texture file didn't touch config or anything
full quarry
how exactly do you replace it?
my guess is the pathing breaks or your file does not actually get packed into the pbo
frozen blade
dense peak
hi guys can any1 tell me how to add Z symbol on the russian tanks/apc
what russian tanks? there are no such tanks in vanilla
livid cedar
full quarry
how exactly do you replace it?
Obviously I unpacked the pbo where the texture is , replaced the .paa and repacked it… I don’t get any errors some weapons just don’t appear , The is dependent on A3_CBA loading both together didn’t solve it either
lethal condor
That is not how a Mod works
Also, the HG's question implies to ask which software you use to pack it
livid cedar
I've copied the whole mod's folder and into a new folder and loaded it as a new local mod this way I don't mess with the original files , and I use PBO manager to pack and unpack the pbo files...
dense peak
frozen blade
what russian tanks? there are no such tanks in vanilla
Rsh tanks
I mean is there any workshop mod that make texture on tanks because I dont know how to use arma 3 tools
frozen blade
dense peak
Rsh tanks
i assume you mean RHS tanks. And we do not allow any sort of representation of current Ukrainian invasion with out mods
i suggest you read our non derivative EULA.
dense peak
Ok ✅
lethal condor
livid cedar
I've copied the whole mod's folder and into a new folder and loaded it as a new ...
It already is a big mess.
- Do not copy and paste files that you don't even touch
- PBO Manager, perhaps good enough to browse but not for pack. This will make everything worse
- Addon Builder in Arma 3 Tools is a better choice to pack. pboProject if you can, it's the best but has slightly complicated workflow
- You just need to make a PBO that contains the PAA file and corresponded config. That's it nothing else is needed. More like your way is just a gate of the Oblivion
full quarry
Niarms is a bit different in that reagards as its released open and allows standalone packaging. Though that does not mean its the best way to do additional weapon mods.
livid cedar
lethal condor
It already is a big mess.
1. Do not copy and paste files that you don't even to...
I was doing it like that because I kinda clueless with config , is there a tutorial on how to use the Addon builder somewhere?
Nvm I figured how to do it , I am getting CfgConvert task failed for some reason
When I try to cfgconvert without packing using the tools I get the same error
placid elm
Hi, I wanted to edit some helmets from SOG to put decals on them. I noticed the files are ebos. How would I go about opening them or is there no way?
lethal condor
placid elm
Hi, I wanted to edit some helmets from SOG to put decals on them. I noticed the ...
No crosspost - your post in #sog_prairie_fire has been removed
placid elm
👍 , wasn't sure which one to post in.
lethal condor
https://community.sogpf.com/d/537-prairie-fire-texture-templates
And the answer - I'm not sure if it contains the helmet, but might in it
placid elm
Yeah already found that, no helmets.
lethal condor
Hm, then you need to screencap the texture then
placid elm
Looking specifically for the pilot helms, I know they are in the characters_f_vietnam.ebo, but since it is a ebo and not a pbo its encrypted.
full quarry
placid elm
Looking specifically for the pilot helms, I know they are in the characters_f_vi...
You can't get the actual files and templates for those have not been released yet.
You can however use scripting in game to draw the texture on screen and screenshot that to work with.
placid elm
full quarry
You can't get the actual files and templates for those have not been released ye...
Gotcha, appreciate it. Is there a written guide or video on how to do that you could link?
full quarry
Don't remember if there is unfortunately. Could be instructions have been written down on the BI forums somewhere when the same issue has been discussed with other pbos.
Or somewhere in the channels history even.
It involves drawing a ui element filled with the texture and taking screenshot of that
placid elm
Hmm okay, i'll try to look around and learn. Sounds a bit over my head atm haha
Thanks for your help
full quarry
I don't think it's super complex in the end but yeh it requires some learning
placid elm
If anyone could show me how to do this that would be amazing. Been reading through things and can't really find the way to do it.
vn_b_helmet_svh4_02_04 is the specific helm i'm looking for from characters_f_vietnam.ebo. No idea how to get it to place on my screen
 round pier
Looking for retextur master
 lapis oar
trying to do a retexture of the Arma 3 commoner clothes
can anyone tell me whats wrong with my code?
class CfgPatches
{
class WORM_Polo
{
units[]=
{
"worm_polo"
};
weapons[]={};
requiredVersion=0.1;
requiredAddons[]=
{
"A3_Characters_F"
};
};
};
class cfgWeapons
{
class ItemCore;
class UniformItem;
class Uniform_Base: ItemCore
{
class ItemInfo;
};
class InventoryItem_Base_F;
class HeadgearItem: InventoryItem_Base_F
{
class ItemInfo;
class HeadgearItem;
};
class WormVibes01: Uniform_Base
{
author="Worm";
scope=2;
displayName="Worm Vibes 01";
picture="\A3\characters_f\data\ui\icon_U_C_Poloshirt_blue_ca.paa";
model="\A3\Characters_F\Common\Suitpacks\suitpack_civilian_F.p3d";
hiddenSelections[]=
{
"camo"
};
hiddenSelectionsTextures[]=
{
"\WormPolos\textures\WormPolo01.paa"
};
class ItemInfo: UniformItem
{
uniformModel="\A3\Characters_F\Common\Suitpacks\suitpack_civilian_F.p3d";
containerClass="Supply500";
uniformType="Neopren";
mass=4;
hiddenSelections[]=
{
"camo"
};
hiddenSelectionsTextures[]=
{
"\WormPolos\textures\WormPolo01.paa"
};
};
};
};
class cfgMods
{
author="SanctusQuoPeccator";
timepacked="1615048399";
};
lethal condor
Better to tell what was wrong with it first
lapis oar
Model wont appear
lethal condor
Do you have Neopren vehicle?
lapis oar
I dont think so? its just a bit of script I got told to put in the code to make the uniform swim like a wetsuit
do I need to add a call above?
lethal condor
It is not a script, it is a config. No idea who's teaching you, but it is 1000x better to read this guide:
https://community.bistudio.com/wiki/Arma_3:_Characters_And_Gear_Encoding_Guide#Uniform_configuration
lapis oar
lethal condor
It is not a script, it is a config. No idea who's teaching you, but it is 1000x ...
https://forums.bohemia.net/forums/topic/200297-solved-how-to-make-a-uniform-able-to-swim-underwater-like-a-wetsuit/ it was from this
Bohemia Interactive Forums
Hello! I tried searching online but i didnt came with any results, Im trying to make my uniform able to swim normally or dive like a wetsuit even though it isnt a wetsuit. I think there is a config example but when i open the wetsuit config i still didnt find what makes it diveable. Is there a po...
lethal condor
What exactly is the goal, then? Is swimming ability or something even matters/related for you?
lapis oar
just wanted to make a retexture of the commoner shorts and give it the ability to swim fast
but I'm trying to re-write it now based on the guide
lethal condor
Ahem, just in case - do you even know how to make an addon/Mod/pbo?
lapis oar
hodge podge but yeah
lethal condor
Well so I can assume you know how to make a config right
Ah sorry just confused uniformType and uniformClass
class U_B_Wetsuit: Uniform_Base
{
    author = "Bohemia Interactive";
    scope = 2;
    displayName = "Wetsuit [NATO]";
    picture = "\A3\characters_f\data\ui\icon_U_B_Wetsuit_CA.paa";
    model = "\A3\Characters_F\Common\Suitpacks\suitpack_original_F.p3d";
    hiddenSelections[] = {"camo"};
    hiddenSelectionsTextures[] = {"A3\Characters_F\Common\Data\diver_suit_nato_co.paa"};
    class ItemInfo: UniformItem
    {
        uniformModel = "-";
        uniformClass = "B_diver_F";
        containerClass = "Supply80";
        uniformType = "Neopren";
        mass = 60;
    };
};```This is vanilla wetsuit's configagain, hodgepodge knowledge of it but yeah
class U_C_Poloshirt_blue: Uniform_Base
{
author="$STR_A3_Bohemia_Interactive";
scope=2;
displayName="$STR_A3_COMMONER_CLOTHES_BLUE_0";
picture="\A3\characters_f\data\ui\icon_U_C_Poloshirt_blue_ca.paa";
model="\A3\Characters_F\Common\Suitpacks\suitpack_civilian_F.p3d";
hiddenSelections[]=
{
"camo"
};
hiddenSelectionsTextures[]=
{
"\A3\Characters_F\Civil\Data\c_poloshirt_1_co.paa"
};
class ItemInfo: UniformItem
{
uniformModel="-";
uniformClass="C_man_polo_1_F";
containerClass="Supply20";
mass=40;
};
};
and this is the item I'm trying to re-texture
lethal condor
A uniform is made of two parts: CfgWeapons entry and CfgVehicles entry. You need to make both to make the uniform valid
lapis oar
I was under the impression I could just change the hiddenselections texture to display the new one I made
lapis oar
lethal condor
A uniform is made of two parts: CfgWeapons entry and CfgVehicles entry. You need...
one defines the item and another makes it a physical item you can use right?
lethal condor
CfgVehicles defines how it looks/behaves when someone wears it. CfgWeapons defines how it behaves as an item
And CfgWeapons' this config uniformClass="C_man_polo_1_F"; connects both
lapis oar
if I have uniformClass="C-man_polo_1_F"; in the config, do I need tos till write a CfgVehicles entry? or can it inherit from the vanilla one
or do I have to do that to make it also display the new texture
I tried to teach myself this by pooring through the vanilla configs but my main problem was that the config encompasses so much so its hard for me to figure out what is needed for a single item
lethal condor
class C_man_polo_1_F: C_man_1
{
    author = "Bohemia Interactive";
    editorPreview = "\A3\EditorPreviews_F\Data\CfgVehicles\C_man_polo_1_F.jpg";
    _generalMacro = "C_man_polo_1_F";
    uniformClass = "U_C_Poloshirt_blue";
    displayName = "Civilian 1";
    hiddenSelections[] = {"camo","insignia"};
    hiddenSelectionsTextures[] = {"A3\Characters_F\Civil\Data\c_poloshirt_1_co.paa"};
};```This is the corresponded config. As I told you you can inherit this config so you can make a retextured polo shirtso if I wanted to make, lets say, two shirts
one with red shorts and one with blue shorts
would I edit the cfgVehicles to make both seperate textures? just the cfgWeapons? or both
lethal condor
CfgTextures? What are you talking about
lapis oar
sorry typo
would each individual uniform retexture need a seperate cfgvehicle and cfgweapon
lethal condor
One for the visual and bulletproof/blastproof parameters, which I mean CfgVehicles - one for the actual item entry, CfgWeapons. so both
CfgVehicles' hiddenSelectionsTextures part defines what texture it uses when someone wears
lapis oar
class CfgWeapons
{
class UniformItem;
class WormVibes01 : Uniform_Base
{
    author = "Worm";
    scope = 2;
    displayName = "Worm Vibes 01";
    picture = "\A3\characters_f\data\ui\icon_U_C_Poloshirt_blue_ca.paa";
    model = "\A3\Characters_F\Common\Suitpacks\suitpack_civilian_F.p3d";
    hiddenSelections[] = {"camo"};
    hiddenSelectionsTextures[] = {"\WormPolos\textures\WormPolo01.paa"};

    class ItemInfo : UniformItem
    {
        uniformModel = "-";
        uniformClass = WormVibes01;
        containerClass = Supply40;
        mass = 40;
    };
};
};
class CfgVehicles
class WormVibes01: C_man_1
{
    author="Worm";
    editorPreview="\A3\EditorPreviews_F\Data\CfgVehicles\C_man_polo_1_F.jpg";
    _generalMacro="WormVibes01";
    uniformClass="WormVibes01";
    displayName="Worm Vibes 01";
    hiddenSelections[]=
    {
        "camo",
        "insignia"
    };
    hiddenSelectionsTextures[]=
    {
        "WormPolos\textures\WormPolo01.paa"
    };
};
like this?
lethal condor
Might have some error but the idea is correct
See if it packs. After you put a { after CfgVehicles
lapis oar
C_man_1 is undefined
lethal condor
Oh yeah you need to declare it
lapis oar
to do that I have to put class C_man_1; at the top below CfgPatches right?
lethal condor
No
CfgVehicles
https://community.bistudio.com/wiki/Class_Inheritance
Read this for more info
lethal condor
Yes
lethal condor
Does it work as expected?
lapis oar
Yup
lethal condor
Noice
full quarry
@rugged lagoon #creators_recruiting is the correct channel for that.
 spring crescent
hey my pc decided to restart itself when i was doing some retextures, now when i open the arsenal theyre all corrupted
when i look at the paa it looks good but on the model they turn into a single bright color
how do i fix this?
full quarry
Convert to paa again and pack to pbo again
 river furnace
This is my first retexturing attempt in arma and I've been working on the RHS HGU56 and have gotten the front patches and helmet to work fine but cannot manage to get the back patches to change. I've looked at some helmets that have rear patches but i can't recreate it
 molten scarab
I'm having some trouble with glossiness / reflectiveness on a model I've recently completed. Textures were made using substance painter, with an export preset I've used before without problems. I think the problem lies in the RVMAT, but after trying some different solutions, I've yet to solve the problem. When viewing the model in object builder, there seems to be no issues, so I'm at a loss when trying to figure out how to solve this.
https://media.discordapp.net/attachments/910894864265269318/987289543856226364/unknown.png?width=670&height=658
https://media.discordapp.net/attachments/910894864265269318/987289694964445224/icon.PNG?width=586&height=658

 full quarry
molten scarab
I'm having some trouble with glossiness / reflectiveness on a model I've recentl...
full quarry
molten scarab
I'm having some trouble with glossiness / reflectiveness on a model I've recentl...
object builder uses the old lighting system by default so it does not represent what a thing looks like in game properly
if you setup buldozer to use the new lighting you can preview textures/rvmats bit more accurately
I wrote down few steps on that a while back and they got into the PMCwiki Arma 3 modding guide collection
which reminds me now that Im orange I can do this
Buldozer real Arma 3 lighting setup sample (stratis config included)
https://pmc.editing.wiki/doku.php?id=arma3:modeling:buldozer-lighting
full quarry
full quarry
Buldozer real Arma 3 lighting setup sample (stratis config included)
https://pmc...
median anvil
Is there a way to change the texture of helmets on a character while ingame to make it easier to retexture stuff without needing to pack a pbo and restarting the game?
full quarry
no
filepatching would be the solution for original texturing but it does not work with retexturing as it requires the original p3d to be present
molten scarab
full quarry
if you setup buldozer to use the new lighting you can preview textures/rvmats bi...
Thanks for the reply! Just to be sure before I mess something up, do I just copy the 4 files in the .7z into P:\bin?
https://media.discordapp.net/attachments/910894864265269318/987443277563314216/unknown.png
And then change the value here to the one you mentioned in the wiki post, with the correct path on my system?
https://cdn.discordapp.com/attachments/910894864265269318/987443332659699723/unknown.png

 full quarry
molten scarab
Thanks for the reply! Just to be sure before I mess something up, do I just copy...
full quarry
molten scarab
Thanks for the reply! Just to be sure before I mess something up, do I just copy...
your P drive is not set up with Arma 3P is it? your config file has not been converted to .cpp
molten scarab
full quarry
your P drive is not set up with Arma 3P is it? your config file has not been con...
Those are the contents within P:\bin.
I do have a config.cpp within P:\a3:
https://media.discordapp.net/attachments/910894864265269318/987447217008803920/unknown.png
Is this the correct folder to copy the .7z contents into?
 full quarry
no
the bin folder is
The instructions were pretty simple 😅
but they do expect you have P drive set up with Arma3P
if you have used ArmaTools P drive setup I dont know if it will work
molten scarab
That's correct, I used Arma 3 Tools to setup the P drive.
Is this what you are referring to?
https://community.bistudio.com/wiki/Arma3P
full quarry
yes
molten scarab
Well I solved my problem. For some reason I was using CA textures instead of CO. I guess doing work late at night can result in stupid mistakes 🤦♂️
full quarry
👍
 jovial urchin
Hi,
Could someone pass me the cfgvehicle and cfgweapons of the RV outfits?
In private, or here
Thanks in advance, I'm struggling to reskin them
full quarry
jovial urchin
Hi,
Could someone pass me the cfgvehicle and cfgweapons of the RV outfits?
In ...
What kind of problem have you have?
Have you tried the ingame config viewer or creating a "all in one" config dump so you can easily browse through the vanilla configs?
jovial urchin
I tried viewing the configuration in game, but I'm not very good at it.
I've had success with several outfits, but not with this one.
full quarry
are you sure it can be retextured?
also Leopards configviewer addon is very useful as it has a lot better search functionality
jovial urchin
full quarry
also Leopards configviewer addon is very useful as it has a lot better search fu...
I'll check with that, thanks !
jovial urchin
full quarry
are you sure it can be retextured?
Not sure about that 😦
full quarry
try using the setObjectTexture command on them
jovial urchin
It works with the help of the addon you gave to me ! Thanks !
full quarry

wise dagger
after I started to use buldozer lighting setup, buldozer shows "cannot load texture" error, tried putting a P:\ for texture paths and they got working, any ideas how do I get it working without having to add P:\ prefix?
 tardy crown
I downloaded the Arma3 Samples https://store.steampowered.com/app/390500/Arma_3_Samples/
for change the texture of the Advanced Modular Helmet (HBK, LDF helmet).
However, the template H_HelmetHBK_01_template.psd seems to have missing parts in some layers.
Does anyone have the latest template for this?
I'd like to report on this issue, but I didn't know where to post it, so I'll post it here.
https://pbs.twimg.com/media/FVucTRdaAAEahTT?format=jpg&name=orig
Picture: Red is missing. It lacks layers such as chin straps and batteries.
full quarry
@tardy crown are you sure theres parts missing?
the texture looks fairly complete to me
detils layer contains I think everything you show as red


hmm looks like the background manages to overwrite them somehow
ah it seems to be the layer blending method that loses some of the detail layer parts against the black background
if you fill the color background with lighter gray for exmple all the details do show up
 tardy crown
I'm sorry, I didn't have enough explanation.
As you say, the detail layer is included.
However, it seems that some of the coloring layers are missing.
In the image, there is UV on the chin strap near the upper right, but some of it is missing. (Where the fiber details are displayed in red)
wait a sec, I'll taking in game pictures.
full quarry
you can add color to the color layer and get them visible in any way you like
the templates are meant as guides, it is likely they need some work from you to look nice
tardy crown
https://pbs.twimg.com/media/FVuoC1NakAA1kSz?format=jpg&name=orig
Official Texture
https://pbs.twimg.com/media/FVun9sdaAAAxmS2?format=jpg&name=orig
Using Template
https://pbs.twimg.com/media/FVuoF8RagAErguY?format=jpg&name=orig
with Highlight (Red is Missing Color layer)
full quarry
you can draw any color there yourself
tardy crown
Yes, I drew and filled the missing coloring layer.
The missing details (battery wires and some knobs) are filled in by merging the official textures.
But I wonder why it's missing.
Yes, yes, I knew it's a sample, the template guide, not a source, but I was wondering why those points are missing, though I don't know if it's intentional / unintentional. If it was unintentional, I wanted to report it. That's all.
full quarry
liekely unintentional but like I said editing the base color layer brings them all out if you use some other color than black. Or you can use different layer blending modes too on the detail layer
or parts of it
I believe it just really comes down to it being a simple example base to work from
tardy crown
Maybe that's right.
Thanks to your advice, I did find that the battery and knob were passed through and disappeared, and I managed to fix it.
However, there is still a shortage of masks for the chin strap color layer, I made a new mask and fixed it.
Appreciate, HorribleGoat!
livid knot
hiddenSelections for me are showing up white, despite them being the proper size, being defined in object builder and in the model.cfg
livid knot
New
full quarry
does it have texture set in the p3d?
livid knot
No, it just has the rvmat set in p3d
full quarry
all mesh should also have texture set so there is a default texture
and there p3d gets some texture properties baked into it
like transparency
livid knot
Ok, that wouldnt solve the hiddenselections issue though would it?
full quarry
dunno
showing white means it shows what the model has
which is nothing
so its a lead
 spice nacelle
Looking for someone who can make some custom uniforms for my community. Where would I go to commission this type of work/find people?
wise dagger
spice nacelle
Looking for someone who can make some custom uniforms for my community. Where wo...
 velvet tangle
Does cup have templates for retextures I can use?
full quarry
some I believe. Might be posted on the CUP website or CUP discord
round pier
Hello, need a person who can teach me how to retexture, write to private message
lethal condor
round pier
Hello, need a person who can teach me how to retexture, write to private message
No meed to go DM. Just here
round pier
lethal condor
No meed to go DM. Just here
If you can explane me how to retexture from zero, i can listen you here
wise dagger
there are some tutorial videos on youtube
round pier
wise dagger
there are some tutorial videos on youtube
Yes i checked them, but everything wrong with my retexture, but i follow this videos
wise dagger
you got any error messages or what?
lethal condor
round pier
If you can explane me how to retexture from zero, i can listen you here
You obviously need:
- Texture
- Config
- Addon Packer
- Arma 3
How would I start to explain?
round pier
lethal condor
You obviously need:
1. Texture
2. Config
3. Addon Packer
4. Arma 3
How would I ...
I have:
Texture
Addon packer
Arma 3
I need:
Config
lethal condor
Okay let's go to #arma3_config
 short salmon
Anyone that can give me a clue as to why I'm getting these strange triangle shadows on my object? 😦 I think it has something to do with the RVMAT
 lethal condor
Model issue I'm afraid, seems like a wrong normal
Even though I ain't a big modeler guy but that's my guess
short salmon
lethal condor
Model issue I'm afraid, seems like a wrong normal
That was my first thought too, but thats not it 😦
here we go, this is how it looks without an RVMAT hence my assumption. https://i.imgur.com/uGKIfQk.png


 hexed plover
Does anyone know what typically causes these kind of texture warping? Same model, same texture on different vests
https://i.imgur.com/cj0QyIw.jpg
 full quarry
short salmon
here we go, this is how it looks without an RVMAT hence my assumption. https://i...
full quarry
short salmon
here we go, this is how it looks without an RVMAT hence my assumption. https://i...
What type of rvmat do you try to use? Does it have normalmap? Could be bad normalmap or smooth edge along the bottom ring
full quarry
hexed plover
Does anyone know what typically causes these kind of texture warping? Same model...
Mesh not triangulated
short salmon
full quarry
What type of rvmat do you try to use? Does it have normalmap? Could be bad norma...
It does have a normal yes, I will look into that with smooth edges. Thanks!
 still crypt
Hey guys, so I'm facing a packing problem with my reskins. So I get the /uniforms_addon/Data/bme_camo_co.paa not found error. I don't get why as mikero dosn't see any issue when packing and copies the image files fine. In the .cpp it's referenced as hiddenSelectionsTextures[] = {"/uniforms_addon/Data/bme_camo_co.paa"}; and my file tree is as follows:
├───Data
│ ├──bme_camo_co.paa
│ ├──bme_camo_nohq.paa
│ └──bme_camo.rvmat
└───UI```
any clue? thansk guys iron thunder
still crypt
Hey guys, so I'm facing a packing problem with my reskins. So I get the ```/unif...
iron thunder
still crypt
Hey guys, so I'm facing a packing problem with my reskins. So I get the ```/unif...
for starters, write your paths with back slashes