#arma3_model
1 messages · Page 176 of 1
 bright echo
bright echo
bright echo
I thought this might be the case but in the first example I deleted the glass and the emissive texture so it was just the single dial texture
and it was still happening
so there was no faces to Z fight
 stuck oyster
Then it might be moire effect from monitor just not having enough pixels to draw the tiny lines
bright echo
its weird cuz I dont notice it with the vanilla a3 compass and i'm using the same rvmat / slightly modified texture for the face
 charred bolt
Do you have an smdi texture map linked through the rvmat? If so, try reducing it's intensity.
bright echo
it was using the vanilla compass' smdi, we actualyl found a uh, strange solution, atleast for the compass
and this solved it. the solution was switching from 100% transparent to 99% in the textures alpha channel, which stops it from happening it seems
yet to try it on the plane instruments
charred bolt
Ah yes, that was going to be my second suggestion, also a common fix.
 round bloom
Whats the correct way to hide the whole players head when wearing a headgear item?
Just a hide anim on model cfg or is there a more standard config way to do it?
stuck oyster
theres no way to do it.
well possibly setting the character to use "empty" head type 🤔
round bloom
stuck oyster
well possibly setting the character to use "empty" head type 🤔
I'm doing it purely on a headgear item, I've got to avoid using a modified character
stuck oyster
if its worn on the head, it should be fitted to the head mesh
 inland pawn
How far off the ground should bound points for wheels be?
https://streamable.com/joaghj And what could be causing this?
 plain dew
Hey! I would like to ask for advice. I have a model, but it is larger in proportions than a human, is it possible to enlarge the skeleton for the character?
 frail pumice
plain dew
Hey! I would like to ask for advice. I have a model, but it is larger in proport...
frail pumice
plain dew
Hey! I would like to ask for advice. I have a model, but it is larger in proport...
my understanding is that the ARMA engine doesn't actually use skeletons; the "skeleton" config files just define selections of vertices
in order to get this to work you'd have to rescale/retarget all the relevant animations (since they operate directly on selections of vertices)
if your model is just a scaled-up human (exactly same proportions) i wrote a python script that can do that with RTM files
if it's not then you'll have to probably retarget all the animations by hand in blender or something
plain dew
frail pumice
my understanding is that the ARMA engine doesn't actually use skeletons; the "sk...
The proportions are slightly different, but it should work, can you share the script and tell me how it works?
frail pumice
well, are you familiar with python
if not, it probably won't be super useful for you
plain dew
To an extent. I wrote addons for blender
frail pumice
hmm i can't upload files lol, 1 sec
plain dew
O_o
arma and discord hates me
frail pumice
should be pretty self-explanatory
it's just standalone, reads RTM files, writes RTM files, there's a scale_rtm method that immutably creates a scaled copy of the RTM in memory that you can then write
it only handles debinarized RTM files, but e.g. mikero's tools includes a debinarizer for RTMs (deRTM)
frail pumice
sure although i'm on the road for a lot of today so may not be super responsive
there's documentation on the actual format for RTMs here if you want btw https://community.bistudio.com/wiki/Rtm_(Animation)_File_Format
although you shouldn't need to look at it
plain dew
OK, thank you
One way or another, it will take me a while to try all the methods available to me before contacting
frail pumice
oh also if you play with non-uniform scaling it's worth pointing out that rtm file coords are stored as -x,-z,-y (w.r.t how they show up in the engine as x,y,z) but that shouldn't matter if you just want a 2x mans
 sage stag
anyone making characters for A3 can you tell me if your model.cfg has a Hips bone on the skeleton?
 desert notch
sage stag
anyone making characters for A3 can you tell me if your model.cfg has a `Hips` b...
desert notch
sage stag
anyone making characters for A3 can you tell me if your model.cfg has a `Hips` b...
I don't remember seeing Hips. there is pelvis tho
sage stag
right. the sample fbx have a hips bone. i'm thinking it might just be for motionbuilder which likes having a hips bone at the root
though i have seen Hips in unbinarised sample RTMs
desert notch
sage stag
though i have seen `Hips` in unbinarised sample RTMs
I don't see hips in any animation masks
might be a legacy thing
wholeBody is:
["Pelvis",1,"Spine",1,"Spine1",1,"Spine2",1,"Spine3",1,"Camera",1,"weapon",1,"launcher",1,"neck",1,"neck1",1,"head",1,"LeftShoulder",1,"LeftArm",1,"LeftArmRoll",1,"LeftForeArm",1,"LeftForeArmRoll",1,"LeftHand",1,"LeftHandRing",1,"LeftHandRing1",1,"LeftHandRing2",1,"LeftHandRing3",1,"LeftHandPinky1",1,"LeftHandPinky2",1,"LeftHandPinky3",1,"LeftHandMiddle1",1,"LeftHandMiddle2",1,"LeftHandMiddle3",1,"LeftHandIndex1",1,"LeftHandIndex2",1,"LeftHandIndex3",1,"LeftHandThumb1",1,"LeftHandThumb2",1,"LeftHandThumb3",1,"RightShoulder",1,"RightArm",1,"RightArmRoll",1,"RightForeArm",1,"RightForeArmRoll",1,"RightHand",1,"RightHandRing",1,"RightHandRing1",1,"RightHandRing2",1,"RightHandRing3",1,"RightHandPinky1",1,"RightHandPinky2",1,"RightHandPinky3",1,"RightHandMiddle1",1,"RightHandMiddle2",1,"RightHandMiddle3",1,"RightHandIndex1",1,"RightHandIndex2",1,"RightHandIndex3",1,"RightHandThumb1",1,"RightHandThumb2",1,"RightHandThumb3",1,"LeftUpLeg",1,"LeftUpLegRoll",1,"LeftLeg",1,"LeftLegRoll",1,"LeftFoot",1,"LeftToeBase",1,"RightUpLeg",1,"RightUpLegRoll",1,"RightLeg",1,"RightLegRoll",1,"RightFoot",1,"RightToeBase",1]
yeah, i gather it's just a motionbuilder thing
the sample fbx have
Hips
+- Spine
+- Pelvis
do you have a model.cfg man skeleton definition you can post?
desert notch
sage stag
do you have a model.cfg man skeleton definition you can post?
see the pinned message in #arma3_animation
sage stag
the fbx also has weapon and launcher under Spine instead of Spine1
stuck oyster
There is a sample model.cfg for character in the example character folder.
I think the fbx has some differences though like you said. Probably BIs workflow related.
 marble orchid
Hey guys, I've been trying to get blender to work with the arma3 tools but the features it should come with are either partly missing or blender crashes, is there anyone here that has a working blender setup? I've spend a collective amount of 15+ hours figuring it out and for the last few hours I have been stuck at the current issue so here I am asking for help.
Please ping me if you may have a solution and/or are willing to help me out
arma3 tools as in ArmAToolbox (I also know I can create objects directly in Object Builder but like anyone I'd rather build models using Blender)
stuck oyster
marble orchid
arma3 tools as in ArmAToolbox (I also know I can create objects directly in Obj...
Multiple people uses it just fine. How does it not work?
marble orchid
stuck oyster
Multiple people uses it just fine. How does it not work?
Whenever I activate the addon in blender this is the result in the materials tab: https://prnt.sc/210guny
A blanco arma toolbox material settings and a dropdown box for the hidden selection maker without any content.
I will try it again on my main pc later today to see if I can get it to work. I'm using 2.8 blender by the way with the 2.8+ version of ArmAToolbox
Oh and feel free to ping me again (if/when you reply) 🙂
stuck oyster
marble orchid
Oh and feel free to ping me again (if/when you reply) 🙂
Does your object have arma properties enabled
marble orchid
stuck oyster
Does your object have arma properties enabled
That's the thing, those options don't display, I've just received word that 2.8 and above does not work with blender so I'll be downgrading to the legacy versions :) see if that works
stuck oyster
I run 2.9 blender and latest toolbox just fine. @marble orchid
Dunno where you got your info
desert notch
marble orchid
That's the thing, those options don't display, I've just received word that 2.8 ...
are you using the latest version of ArmaToolbox?
I mean the latest master branch
not release
marble orchid
desert notch
are you using the latest version of ArmaToolbox?
Yeah, I currently am running the latest ArmaToolbox (on Blender 2.8) The export functions are there but again no options on the right hand side to enable arma properties
marble orchid
stuck oyster
Did you look into the arma3 tab
Ahh there it is 🙂 It doesnt contain the checkbox though (as shown in the only 2.8+ tutorial i could found)
Oh nevermind, right above it arma heightfield properties, that was the one I needed I think
thanks 😄
stuck oyster

marble orchid
Well here we go again, setting up p drive (nightmare of working across two workstations)
im happy to have made progress though 🙂
marble orchid
Just got my first object in 🙂
 onyx condor
can i pay somone to make a child soilder mod
stuck oyster
Unlikely
I doubt many people would want their name associated with that
and it is a bit bad taste topic.
onyx condor
not really its realistic
inland pawn
What could be the cause of a vehicle leaning backwards when going forwards?
Could that be PhysX related or model?
inland pawn
Think I may have figured out what was causing it
inland pawn
Nope
charred bolt
The problem with trouble shooting vehicle physx is that there are multiple places where you could have gone wrong, and all the parts interlock with each other.
Here's a few to check:
- centre of mass in Geometry LOD is in the centre of the vehicle
- bounding memory points are on the tyre edge, which is on the ground level, and directly vertically below the wheel axis memory points
- damper movement is in the correct direction on all wheels
- spring strength is set to correctly distribute the vehicle weight over the load bearing wheels
- damper translation values (offset0 and offset1 in model.cfg) are correctly calculated based on class Wheels compression/droop and length of damper axis
 fluid copper
while vehicles are being mentioned, I was working on a small drone style vehicle awhile ago and ran into issues, they seemed to stem from the size of the wheels. Is there a known minimum size that wheels need to be for physics to work correctly?
stuck oyster
Not know minimun. How small you haf
Very small and light things do often behave poorly though.
charred bolt
Per real life, one imagines that as objects get smaller and lighter the basic modelling of weight on sprung suspension starts to fail. Aerodynamics begins to dominate and forces like surface tension allow insects to walk on the surface of a pond. So once you push Arma out of its normal range, expect weird things to happen.
 woeful viper
its not just Arma. There are cutoffs and tolerances that make physx not suitable for very small vehicles, because it is based on assumption of car/truck sized vehicle.
inland pawn
charred bolt
Here's a few to check:
- centre of mass in Geometry LOD is in the centre of the ...
Problem was my bounds weren't 100% exact same. Fixed
stuck oyster
😄 that would mess things up for sure 😄
inland pawn
Now, a minor problem of it sinking into the ground
 sleek estuary
Having a problem with my .p3d not wanting to save when i add the geometry for a building... anyone know why?
inland pawn
So, apparently both Blender and Object Builder aren't assigning the weight properly and it sinks into the ground and holds at 16-17 kph
Nvm, it just started working for some reason
 rough idol
as for size limits - I made 4 wheels drone smaller than mini ugv during Contact preproduction and it was working surprisingly well, although you could easily notice in many places that environment is simplified in many places
 ocean patio
What can lead a static emplacement to bounce about dozens of metres into the air whenever it touches the ground, even if it had been spawned perfectly aligned with a perfectly flat floor? Do statics need -gravity1 through 5 like aircraft in their Geometry LOD or something?
 willow lotus
We ran into the same problem with the Black Hornet Nano Drone we were trying to get done. The weights and size would never allow proper function in the flight dynamics. It would get off the ground but we never could figure out how to get it under control. I have since given up.
ocean patio
ocean patio
What can lead a static emplacement to bounce about dozens of metres into the air...
Added gravity thingies, it does at least have proper rotational velocity now but it is still bouncing like a rubber ball during an earthquake. halp?
Also it flies away if its weapon is fired - it's like it has no/very little physics mass or something
stuck oyster
bossibly no or too little mass
ocean patio
Where do I see/set the mass?
inland pawn
ocean patio
Where do I see/set the mass?
Geometry lod
Also had this problem
The geometry could also be too complex
stuck oyster
@ocean patio
no
there is a specific mass dialog to apply mass ot geometry lod verticles
ocean patio
Okay, found it. Can that be set using the Blender addon, or does it have to be done in OB?
inland pawn
ocean patio
Okay, found it. Can that be set using the Blender addon, or does it have to be d...
It can be done in Blender and Object Builder
ocean patio
How
ocean patio
Okay, I must've changed the wrong thing, it's still bouncing and still being thrown back if its weapon is fired
stuck oyster
what kind of weapon you have on it?
how much mass did you give it?
how stable geometry do you have for it?
also that bouncy part when placed is not good
ocean patio
Screenshot of Geometry LoD in OB https://cdn.discordapp.com/attachments/244119488826441729/915758913767485490/unknown.png
I've got CUP's D30 on it, specifically CUP_Vcannon_D30_veh loaded with CUP_30Rnd_122mmHE_D30_M
I gave it 100000 mass, or at least I believe I did - I used that thingy on the top of the window there
It's got sandbags built into it, so the bottom is completely flat
ocean patio
Okay
ocean patio
stuck oyster
just to see if there is any difference
Only difference is it didn't roll away backwards after firing, but it's still bouncing around
ocean patio
inland pawn
Distribute mass on selected
Where's that at
stuck oyster
in edit mode in one of the 3D view right side toolbars
ocean patio
Can you take a screenshot of it please? I can't seem to find it
ocean patio
. _.
inland pawn
ocean patio
. _.
ocean patio
Image won't load for some reason
ocean patio
halp mich
 lime quest
How do you assign more than one material to a helmet in object builder and in the RVMAT?
Im looking at some documentation for multimaterial but its not exactly crystal clear
 shrewd jay
You normally assign textures and RVMats by face, multimaterials are rarely used outside of map objects.
lime quest
shrewd jay
You normally assign textures and RVMats by face, multimaterials are rarely used ...
I've already set up a multimaterial for my helmet, It has a netting that goes over it that I want to be transparent, is this still possible?
(In blender it has 2 material sets)
shrewd jay
Well I don't know if multimat's are usable for normal models, I have used them only once for a map object. As a rule, you cannot make a part of the model transparent and have a different texture come through, that is usually part of the texture itself and a normal map.
lime quest
What do you mean by "come through" exactly? as in having the blacks appear non transparent for whatever is "under" the transparent net (In my case)
shrewd jay
Yeah, if you have a net on the helmet and the original helmet underneath should be visible, you need to "bake" that into the texture.
lime quest
I could probably do another texture bake but that would be a huge pain in the ass lol- My other fallback was to just separate the scrim net and helmet into different categories (helmet, glasses/balaclava) In that case how would I actually make the scrim net transparent? because the blacks are appearing for me?
shrewd jay
For transparency you need a texture with an alpha channel. If your net is a separate mesh part from the helmet, you can do it in a single model, usually netting on helmets is done as a normal map only but that doesn't mean it isn't possible. In that case, you can give the net part an extra RVMat with a _ca texture that has transparency. Major problem with that is that you might be able to look "under" the net and see that there is nothing, but that problem persists whether you have it separate or not.
I would really do it as a single texture and have the net as a bump map, it's the least amount of hassle really. Only downside is you might need more texture variants.
lime quest
So pretty much my Diffuse map just needs to have an opacity channel? Is there a substance painter arma export preset thats up to date?
I thought I had opacity in my diffuse map(Also exported an alpha channel)
(this was transparent)
shit cant post images ugh
but crunching the PBO actually turns the whites black
shrewd jay
Note that transparency in this case only works if the net is a separate mesh. Otherwise the helmet simply becomes transparent
lime quest
well wouldnt the helmet become transparent netting as well?
Instead of just invisible
And by separate mesh you mean like a full on p3d, correct?
sorry for being so specific modding for arma is just the hardest ive done 
shrewd jay
Only if it is a _ca texture, and it also needs proper sorting.
No by separate mesh I mean a separate "layer" of polygons. i.e. you cannot map the netting onto the same surface as the helmet.
lime quest
shrewd jay
Only if it is a _ca texture, and it also needs proper sorting.
No by separate me...
I'm pretty sure this is what I have then?
The scrim net is just simulated over the helmet in marvelous
different set of polygons
shrewd jay
Ah yeah, that is what I meant. So yeah, transparency on that should work. Note though that due to backface culling, you will need to duplicate the net itself and flip the normals on the duplicated part, otherwise the inside will disappear
lime quest
there is no double_sided In arma 3?
shrewd jay
I don't think so, no.
lime quest
Oh well, duping and flipping is easy enough still
shrewd jay
Yeah, it's a bit annoying but nothing really problematic.
lime quest
yeah- SO a CA texture isnt the diffuse right?
Im like frantically looking through my documentation tab
that has the texture abbreviations listed
shrewd jay
I had the same issue on the camo nets of the Abrams. Needed to duplicate parts of the polygons to prevent people from looking under it.
yeah _ca is a color texture with Alpha, _co is without alpha
_ca is diffuse as well, just has an additional alpha channel
lime quest
Ah, So its the diffuse but different abbreviations for alpha/without alpha
shrewd jay
Yeah
lime quest
Okay cool! I think the issue just be my texture doesn't have an alpha channel for whatever reason
I can check the export in substance to see if thats it
Because deleting the blacks in gimp and packing the PBO just essentially make the transparent portions black again
shrewd jay
You should be able to simply add an opacity channel to the texture on export in Substance.
lime quest
and I looked in hidden identity v3 and their textures still had transparency in the packed PBO
Yeah lemme try that
shrewd jay
What do you export the texture to? I had issue sometimes with png, tga usually works best for transparent textures
lime quest
Yeah PNG, I probably should export to TGA since thats what arma wants to convert to .paa
I had too many issues with imageToPaa that I just use the .paa plugin for gimp
to export to paa
shrewd jay
Depending on what tools you use png should work too, but tga for transparent textures is usually my best bet
 fast ore
lime quest
https://cdn.discordapp.com/attachments/483604887947706377/916035348604276756/unk...
fast ore
lime quest
https://cdn.discordapp.com/attachments/483604887947706377/916035348604276756/unk...
This looks sick, is it going to be public? If so I’d 100% download it, I’ve been looking for a Jaeger Corps veil
lime quest
Its going to be private to my unit but I can still link you the workshop file once its done 🙂
I guess the better way of putting it is it isn't going to be obvious
to find on the WS
lime quest
shrewd jay
Depending on what tools you use png should work too, but tga for transparent tex...
Alright I got transparency functioning, and like we discussed the helmet under the scrim net is sharing the texture, how could I get my helmet texture in there?
fast ore
lime quest
Its going to be private to my unit but I can still link you the workshop file on...
That would be awesome!
 terse sail
How do i setup a finished weapon to start working in arma? can someone send a brother a link to read
😄
stuck oyster
lime quest
Alright I got transparency functioning, and like we discussed the helmet under t...
some basics. model is made out of polygons/triangles and each polygon can have its own texture/material combo set on it. Not multiple on same polygon
So your helmet would need to have a no alpha helmet texture/material assigend to it (material_01) and the scrin would have to have its own alpha transparent texture/material assigned to it (material_02)
This is how it works basically everywhere.
lime quest
stuck oyster
some basics. model is made out of polygons/triangles and each polygon can have i...
No I understand that- I have it set up in my blend file; I'm just not sure how to get my second material in arma 3
stuck oyster
you set the first material to have helmet.paa and the second material to have scirn.paa
lime quest
Is there a portion of the RVmat that allows you to make a call for the second material being mapped?
stuck oyster
no
lime quest
stuck oyster
you set the first material to have helmet.paa and the second material to have sc...
So I make two RVmats?
stuck oyster
you assign each blender material their own paa/rvmat
stuck oyster
lime quest
So I make two RVmats?
ys
stuck oyster
this does not look right at all
lime quest
The materials just dont have names
stuck oyster

you should be seeing these boxes where you assign the arma materials
this is what gets saved into the p3d
blenders internal materials do not transfer
stuck oyster
no
stuck oyster
 lime quest
AH!
So currently they both share the same face/RV material file location- and one of them needs to be assigned to its own map and RVmat
stuck oyster
from the picture seems so yes
lime quest
okay so to clarify once more- if I have an object with two material texturesets- they both utilize their own RVMat for each material in game item
stuck oyster
usually yes since different textures usually mean different uvmapping etc so the supporting material textures like normalmap etc that are defined in the rvmat would not fit
lime quest
Okay thank you, I'll try that right now and see what happens, If all else fails i'll be back 🙂
I figured the RVMat is a singular file that contains all of the materia data
Didnt realize you could have more than one RVMAT per item
shrewd jay
lime quest
the arma toolbox shit
With the Toolbox shit being my shit, I take offence 😄
 median bough
🔥
stuck oyster
I would guess "shit" in this case translates to "thing"
 modest portal
where should i start when learning how to use Blender?
stuck oyster
youtube has quite large range of tutorials. also might be good idea to one of the bigger Blender community Discords
 worn pecan
Am I allowed to look for a Model Designer here? I have something I'd like to get modeled and textured.
I looked for a pin stating otherwise
median bough
#creators_recruiting
@worn pecan
and please use the pinned template
shrewd jay
stuck oyster
I would guess "shit" in this case translates to "thing"
I know, that's why I did a " 😄 "
😉
inland pawn
So, update on the missile firing location changing spots
It works
But doesn’t when a missile is fired
It’s switching
Just not the missiles
stuck oyster
you probably should tie it to the ammo count
lime quest
stuck oyster
you probably should tie it to the ammo count
Do you have a shareable arma export preset for substance? Mine isnt generating a correct SMDI for one material of my helmet. It exports a good SMDI for the scrim net however which is weird
inland pawn
Are you using the apex shader
 terse scroll
The reason why this didnt work was because you cannot use animationSourcePhase on an animation source unless it is used in the model. I will add a note to the wiki
 junior saddle
Hi guys. To make a helmet or other body armor effective (character receive less damage), do I need to make a FireGeom lod for the p3d file, or is there a config I need to use? I usually do vehicles, so that's where my train of thought goes.
inland pawn
junior saddle
Hi guys. To make a helmet or other body armor effective (character receive less ...
Config value
junior saddle
ty
lime quest
Does anyone know how to fix this transparency im getting on my secondary material (the Helmet underneath the Scrim-Net)?
It's more obvious with a facepaint
I switched from a _CA Suffix to a _CO Suffix both in the material in object viewer and it seems to have no effect
shrewd jay
Is that the same mesh? If so, you need to make sure that the faces are sorted properly
Same p3d I shouldsay
lime quest
The normals are facing the correct direction I checked face orientation
They are the same object but not the same mesh
shrewd jay
Yeah the problem then is the face sorting.
lime quest
the scrim net is just a separate plane simulated on top
shrewd jay
are you using my Blender toolbox?
shrewd jay
If you have the latest version, it should be able to make faces transparent.
Hold on...
lime quest
shrewd jay
 shrewd jay
No, you probably don't have it. Hold on, I give you a download link
lime quest
Cheers! 🙂
shrewd jay
GitHub
Arma Toolbox for Blender. Contribute to AlwarrenSidh/ArmAToolbox development by creating an account on GitHub.

Go to the green button on top, click it, then "Download ZIP"
shrewd jay
I really need to make a new release, I've added quite a ton of additions.
It should be a zip file
lime quest
ArmAToolbox-master.zip
shrewd jay
Ah yeah... rename it to armatoolbox.zip afterwards
lime quest
I just want to make sure because its a recurring thing that I download masters from github for literally everything I mod
shrewd jay
That's the branch name, downloading a repository from github always adds that name
lime quest
Im not a programmer so i always associate the master as being the raw code for people who want to do their own additions idk LOL
shrewd jay
master (or main) is the branch of the code were people usually work in. Sometimes, there are other branches, like, I maintain a 2.7x branch for bugfixing the old Blender 2.79 code
shrewd jay
It's the o2script.exe in the object builder's folder.
lime quest
gotcha
lime quest
It worked! thank you so much @shrewd jay Now to get double sided normals working and i'll be done
shrewd jay
if you set the O2script path correctly, it should do.
lime quest
Should make normals double-sided?
I thought i needed to duplicate>flip normals= profit
even though that doubles polycount
typically other games have a double sided option but im not sure if arma offers that
shrewd jay
Ah, that's what you mean. Yeah, you need to duplicate/flip
lime quest
rats!, Oh well
lime quest
shrewd jay
Ah, that's what you mean. Yeah, you need to duplicate/flip
How do I change an LOD view distance? is it just increasing the resolution under arma object properties?
shrewd jay
Yeah, you put it on "Custom" and enter the number in the resolution box
lime quest
and what does each integer translate into in terms of distance?
like is 1 just 10 meters or something
shrewd jay
It's arbitrary, and depends on the detail settings the user has. Usually, for something like a helmet, I do LOD resolution 1 to 5, with each level being about half the polygons and the final level being as low as possible without completely losing the shape.
lime quest
What do you mean by detail settings?
sorry
essentially I just want to increase the highpoly LOD distance
because in game its dissapearing too quickly
shrewd jay
Detail settings of the game, whatever the user selects in the options menu.
shrewd jay
Yeah
lime quest
I think its probably my settings since theyre all low
shrewd jay
Yeah if you are on "Low" the lods degrade pretty quickly. For testing, you should try to set to the highest details, even if the game turns into a slide show
stuck oyster
You need to do face sorting to put the skin mesh to be drawn on top
lime quest
stuck oyster
You need to do face sorting to put the skin mesh to be drawn on top
how would that be done?
stuck oyster
There's a menu for it in OB. Latest toolbox might also have something but don't remember exact details
lime quest
what exactly is face sorting and where can I find the menu in the OB?
Ive never heard that term before sorry
lime quest
Okay so everything is nearly finished- I just need to stomp out one issue- my model kind of flickers on and off? The helmet portion of the mesh will dissapear sometimes and reappear, and sometimes the mesh will alltogether dissapear and appear between their legs (as if they arent rigged) and then they will swiftly teleport back to the head where they should be
gif
 plain gulch
Anyone familiar with emission values in rvmats?
emmisive[]={100,20000,11000,1};
bit confused on which numbers mean which
and im trying to get a different colored glow by changing the emission,
does somewhere along the numbers in the emission change rgb?
 polar fiber
They are rgb-a. Emmisive values just get ramped up a lot higher than the usual 0-1 rgb range used for other values, to increase the intensity of the glow
You could think of the above as rgb {1,200,110} with an intensity factor of *100
plain gulch
Ah, so if i emmisive[]={255,0,0,1}; the glow would become red? intensfying it by 100
stuck oyster
by 254
since those values by default are between 0-1
but yes it would be bright red
you can test this in ObjectBuilder/Buldozer
plain dew
Hi. I have a question.
I created custom skeleton and after re-export(RTM from OB) I have a this message in game "no entry 'bin config.bin.cfgskeletons'". All animation what I add stay in A-pose and not moving. Based on this, my question is, what could this error indicate? Into the model. cfg i added link to cfgSkeletons
stuck oyster
there is also config.cpp cfgSkeletons class that you need to define for ragdolling to work right
I hope you did not expect custom shaped characters to be easy
also we want pics
plain dew
stuck oyster
I hope you did not expect custom shaped characters to be easy
In no case)
plain dew
stuck oyster
there is also config.cpp cfgSkeletons class that you need to define for ragdolli...
w8
I took the webnight dreadnought config for the reference, I hope this is not critical and there were no references to the cfgskeleton. Perhaps a mistake was made when I took a reference and had to do it myself.
stuck oyster

stuck oyster
if you use his config for refrence might be best to ask him for details
Im just interested what kind of custom stuff people make
plain dew
plain dew
Heh. Well, I'll cover it with armor from the tank)
In general, I did not find options other than how to make my own skeleton and animation, so I happily climbed to study this issue, but in some places there are hiccups
stuck oyster
yeah that is the only way
 hot hornet
plain dew
Hi. I have a question.
I created custom skeleton and after re-export(RTM from O...
hot hornet
plain dew
Hi. I have a question.
I created custom skeleton and after re-export(RTM from O...
Can you show me your config? I can probably help you. You can also ask webknight. :)
 tardy ember
Any model makers out that could make this id pay for their work. https://eberlestock.com/collections/military/products/x31-lodrag-ii-pack and have it show the rifle in the rifle scabbard.
More for m110 and similar length rifles.
 cedar garden
Hey, so I'm working on a few models. Can someone explain non-convexity and non-closed in Arma? Is it only for shadow LODs, or all of them?
 small olive
cedar garden
Hey, so I'm working on a few models. Can someone explain non-convexity and non-c...
small olive
cedar garden
Hey, so I'm working on a few models. Can someone explain non-convexity and non-c...
checkout the Arma wiki page about LOD
stuck oyster
tardy ember
Any model makers out that could make this id pay for their work. https://eberles...
its not quite possible
at least in "normal" gameplay. would require pretty hacky solutions
round bloom
stuck oyster
at least in "normal" gameplay. would require pretty hacky solutions
Not really, surely could just proxy in the gun like the holsters do on vests?
stuck oyster
no
would have to play with gestures but they are prone to be overwritten at times
for more stable but still hacky method would need to make new animation moves set
tardy ember
round bloom
Not really, surely could just proxy in the gun like the holsters do on vests?
Would really be cool if it would work.
frail pumice
So I want to make a vehicle that passes through and doesn't collide with everything except the terrain surface
Would removing the geometry lod from the p3d accomplish this without horribly breaking the game?
 white jay
idk weather this would be in texture or model but i would be willing to pay for some British Army formal wear as i cant seem to find any anywhere and its annoying me haha. If anyone can make British Parade Wear please message me! money is there ;))
 runic plover
frail pumice
Would removing the geometry lod from the p3d accomplish this without horribly br...
runic plover
frail pumice
Would removing the geometry lod from the p3d accomplish this without horribly br...
doesnt work, works only for soldiers but vehicles will still collide with other objects and vehicles.
runic plover
white jay
idk weather this would be in texture or model but i would be willing to pay for ...
#creators_recruiting is the channel to ask for such
 candid ingot
Can anyone help me with the isSelected stuff for my mod I’m working on? Flux Defense Raider, configged as a pistol. So the stock extended when the pistol is out, retracted in the holster. It’s really beyond my skill level. I’d need the memory points set up in my p3d and the modelcfg work
inland pawn
candid ingot
Can anyone help me with the isSelected stuff for my mod I’m working on? Flux Def...
I don’t think a “holstered” source exists
So, not quite sure that’s possible
candid ingot
well its more like isSelected is when its unholstered, like in the hands
i might not have worded it well
runic plover
candid ingot
well its more like isSelected is when its unholstered, like in the hands
model.cfg
source = "maxHoldsterValue";
also add animPeriod if your animation needs a smooth translation
config.cpp
in cfgWeapons your weapon class add this
holdsterAnimValue = 1;
polar fiber
that's for vehicle weapons, not handguns etc
runic plover
polar fiber
that's for vehicle weapons, not handguns etc
So will isSelected work for handguns etc?
polar fiber
Not 100% sure on handguns - only because I haven't used it on one and perhaps the proxy handling is different. But it definitely works on rifles and launchers
IIRC though you must have the weapon model in the holstered state in the p3d and use isSelected to put it in to the unfolded/extended state. I don't think it works backwards
Also weapons in the Arsenal will appear that way until you click the button to "Try" the weapon, as will the weapon when dropped on the floor or in a weaponHolder
small olive
how do I see only the Geometry LOD in game? it was something like drawonly but I couldn't remember
shrewd jay
You need the diag binary for that, then you can do diag_drawmode "GEOMETRY"
small olive
ok thanks
round bloom
has anyone ever seen a scenario where lights (reflectors) just refuse to work in a model? I've got the config set up right (as I've done without issues multiple times before), got the memory points and hitpoints all defined too. Yet for some reason the lights just refuse to work
 rough jewel
i cant send a screenshot but whats the correct way of importing the base arma figure for modeling vests etc? the template ones have spikes and doesnt look like the base game figure at all
stuck oyster
that is the correct way @rough jewel what you see is collection of the different lods
- the proxy locations
if you need just a size reference you can delete other lods but the 0 one
and edit it to delete triangles
rough jewel
i dont see a zero one, can only see 1 - 10.0
rough jewel
i mean it doesnt look like the one from ingame, but i guess it works for size comparison
stuck oyster
its the same as the underwear/unclothed character
rough jewel
mine has some cold war soviet equipment
stuck oyster
you probably imported wrong one then
rough jewel
Male.p3d from Arma Samples?
rough jewel
ManSkeleton_pivots.p3d?
stuck oyster
a3_character_example...
stuck oyster
yep. wrong folder.
rough jewel
thanks for the help
just out of curiosity, whats the difference between a3_character_example and a3_character_template?
stuck oyster
open them up and see
stuck oyster
template has only the skin parts
rough jewel
oh yea
so why would you use template instead of example vice versa?
both has the skin so is it just easier to use template for skin stuff for some reason?
 pale valley
Now then folk I was wondering if you could help me, four questions that I'm sure have been asked a million times but I'll ask regardless.
1a. what is a good poly count for a helicopter in arma 3? (I've heard 32-40k but wanted to make sure).
1b. is it just polys that count or do I also have to consider other things? (I have 40k verts, 113k edges, 74k faces & 74k triangles, currently).
2a. Do I add things like pylon markers (for example) in the object editor or is it easier to do that in the regular editor (blender) before I port it over?
2b. Do things like pylons have to be a specific size/shape or is it just any triangle labelled a pylon?
Thanks
stuck oyster
1a 1b are basically all same. tris count is just easy way to count it. 40k should be alright for a chopper.
2 if you create proxies in OB they will be the default size. aand if I recall right if you make them with the proxy tool in ArmaToolbox they probably are same. size should not matter though.
shrewd jay
1b - one of the things you should take care of is section count. If you are using the Blender toolbox, it should (depending on version) either automatically optimize that or have a function available to do it.
About the number of polygons, I would go with whatever is needed. 40k is fine, but you can go higher. The biggest model I have made (Abrams) had 100k, which is kind of borderline but still works.
2 - proxy size doesn't matter, it just needs to be non-zero so that the orientation can be deduced. Arma Toolbox can place proxies. Generally, I only use O2 if I want to check something in buldozer, and do all other modeling in Blender
pale valley
think that's pretty much got everything covered, hopefully I can get it working soon enough. thanks guys! 😄
shrewd jay
Good luck
frail pumice
@stuck oyster do you know if there was ever an update on the "projectile hit detection doesn't work when model is too big" problem?
stuck oyster
frail pumice
<@!150949769953411072> do you know if there was ever an update on the "projectil...
No don't think so. I'll have to try to cook up some more testing perhaps.
 silver zenith
hey the rifle bone is just called "rifle" right?
can't check atm
silver zenith
oh thanks
candid ingot
quick question, when save as my p3d as a new name, my zasleh gets messed up and i see a muzzle flash despite renaming everything in modelcfg
what am i doing wrong?
stuck oyster
probably a typo
bright echo
also make sure you dont have it in another selection like 'camo'
candid ingot
it works in my first p3d, just when i save it as another name the zasleh shows a flash now. for sure no typo in modelcfg
stuck oyster
other animations work alright then?
candid ingot
i see my error, good shout
stuck oyster
what was it?
frail pumice
stuck oyster
No don't think so. I'll have to try to cook up some more testing perhaps.
makes sense. i saw the 40k dreadnought mod seems to handle it by making an invisible box via subclassing House_F and attaching that to the guy
stuck oyster
yeh
candid ingot
what would i be looking for in terms of trying to move my gun model higher up in game when my character holds it, like this to the pdw2000 height https://gyazo.com/6fdcfdfa7c34ee88b12560334f9eb6aa https://gyazo.com/ffdfd45df95a7ecf12bd929752812891
stuck oyster
move it more behind in model space and fix the hand animations to same position
dont move the weapon bone though
 marsh fox
Can't figure this one out, Roadway works allowing players to walk ontop of the object, but cars and grenades phase through, players also phase through if the object is tilted unless walking at the roadway side where they snap onto the roadway. Fire Geo works as intended.
candid ingot
stuck oyster
move it more behind in model space and fix the hand animations to same position
perfect. is it possible to have a second hand animation that's different in the view pilot?
stuck oyster
no
stuck oyster
marsh fox
Can't figure this one out, Roadway works allowing players to walk ontop of the o...
normal geometry lod is invalid most likely
firegeometry is only for shooting
marsh fox
stuck oyster
normal geometry lod is invalid most likely
Wdym by "Normal Geometry"? And I cant figuire out why basically a cube would be invalid.
stuck oyster
no mass, no componentXXX name
marsh fox
It does have Component, but how do I check mass?
stuck oyster
if you have to ask then that is 99.9% the issue
OB has a mass dialog that youll need to toggle on
marsh fox
Well in blender I see ARMA group weight 0.57 on this object, 1000 on another
stuck oyster
or in case you use Blender with Armatoolbox addon it has tool for that too if geometry lod object is selected and in edit mode
marsh fox
Oh I see the tool here
stuck oyster
0.57 would not work
marsh fox
What would the minimum mass need to be?
marsh fox
Ah thank you.
frail pumice
is there any way to get the viewpilot LOD of a character to not render in front of everything else (specifically e.g. stuff attached to hands)
or, alternatively, is there a way to get the engine to just ignore viewpilot and render the 1.00 LOD in first-person instead
frail pumice
yeah makes sense :/
hmm is there a way to just copy the animation state from one model to another
then you could in theory create an agent or something with a special transparent-head identity that just plays all your same animations
rough idol
you could also create scripted camera and attach it to the head but this is more for #arma3_scripting
frail pumice
hmm ok ill ask there
stuck oyster
frail pumice
then you could in theory create an agent or something with a special transparent...
can you elaborate what kind of a thing you need to attach on the character?
frail pumice
any object, ideally
frail pumice
yes :/
it seems to kinda work in 3p but it just looks extremely strange in 1p due to this z-ordering issue
stuck oyster
indeed
it is unfortunately a bit off the intended use of the engine
the camera method Reyhard mentioned could work though
frail pumice
yeah, i tried it out; the camera attaches and gets the "view" correctly but it blocks player control input :/
i posted about it in #arma3_scripting so maybe someone knows a way to fudge it
however google suggests that people have asked this question multiple times in the past with 0 replies on the BIS forums lel
stuck oyster
yeeh I've tinkered with similar issues. I dont think there is any very good solutions
especially for characters
You could try attaching an invisible character/turret on the head of your char and remotecontrol its view
hacky
but might be the only way
rough idol
ahh, yeah. It was remote character. In this video I'm controlling mini gun gunner https://www.youtube.com/watch?v=uZ3TxdSZNN4 & using switchCamera

If I remember correctly, observer doesn't have to be visible and hideObject can be used
 hallow steeple
not sure where this goes but- Does it take less resources for a large object that doesn't have collisions? (Static ship I have doesn't have any collisions. I assume that's why.)
 grim crag
and how can i make a png into them with GMP
candid ingot
https://gyazo.com/205d7904b18114bb6b9d23eea742752f
any idea why there's a tiny magazine there whilst reloading
stuck oyster
your magazine is part of 2 animated selections and thus they conflict with each other
only the last bone of a parent-child skeleton bone structure can be used as selection
frail pumice
rough idol
If I remember correctly, observer doesn't have to be visible and hideObject can ...
dang this works great, thanks!
hm does anyone know if there's a selection that corresponds to the 1p camera?
stuck oyster
eyes
frail pumice
oh is it actually just eyes
stuck oyster
or eye
frail pumice
that makes sense i guess lol
stuck oyster
its in the memorylod
frail pumice
oh there's a pilot lod in heads too
anyways that makes sense i guess, as it's memory points
stuck oyster
oh no not in the head proxy model
or maybe in there these days actually
since the proxy is the head 🤔
just not sure if those points are also accessible in game
but worth a shot
frail pumice
hmm so the head just contains a bunch of eye memorypoints and a pilot
stuck oyster
its probably the pilot memory point
frail pumice
the body also contains pilot but no eyes
hm i guess that makes sense since mans are technically vehicles
marsh fox
What would make FireGeo invalid? having reverse problem with another model of Geo working fine but FireGeo not working,
marsh fox
must be a convex issue hidden somewhere then
marsh fox
everything checks outs, but still does not work.
runic plover
marsh fox
everything checks outs, but still does not work.
do you work with Blender or OB?
with OB check this:
-Convexity/Find Non-Convexities```

Every single part needs the Selection Name __"Component01"__ - __"Component25"__ as example, depends how many you have

make the Geometries simple as possibleI use Blender, and OB flags the whole model as non-convex (or at least puts red squares on the vertex points.) The model is very simple which is why im confused.
runic plover
as long red vertex points will show up, it will not work correctly
marsh fox
I realized the issue cause im dumb
I should've split the model and used components. Was overthinking it.
 leaden sun
Whenever you convert convex objects in blender be sure to set the number in the popup box to 0.
sage stag
Am i imagining things or does the game skew certain objects such as walls on a sloped terrain?
stuck oyster
it does yes
if the object is set up for that
but also it only works with terrain objects
sage stag
Yes that's fine. Do you know what controls the skewing?
I'm wondering if the skew is just baked into the .wrp 3x3 matrix
stuck oyster
named property slopeLandContact in p3d activates it. land contact points define the plane that gets skewed on the terrain
no idea how exactly it gets saved.
sage stag
I see. Thanks. I'll figure out the mechanism myself
But i suspect they must just store the skew directly in the .wrp 3x3, i mean why not right
stuck oyster
it could be done runtime too
sage stag
Yeah that's possible too
If it is though, it would be kinda weird for it to only apply to terrain objects
Anyway, it'll be easy to find out. Just open up a .wrp and check the 3x3 of some skewed object
stuck oyster
It does work in runtime in buldozer.
sage stag
Buldozer has to do it at runtime, and it's buldozer which bakes the map too, no?
stuck oyster
No, dozer is just visualizer
or well. could be binarize works with it when packing terrain
sage stag
Yeah pretty sure it's buldozer which craps out the binarised .wrp
 warm leaf
Is there any way to have a flashlight attachment have a secondary light or animate other parts when the flashlight is turned on? like e.g. an indicator light or switch
terse sail
guys, do all weapons need to be rigged?
warm leaf
terse sail
guys, do all weapons need to be rigged?
in what sense? What's the context?
terse sail
warm leaf
in what sense? What's the context?
for reloading
stuck oyster
terse sail
for reloading
If you want moving parts then yes.
terse sail
warm leaf
in what sense? What's the context?
fancy teaching me how to rig a weapon? i can already animate, so got some basis to work off, will pay
warm leaf
I'm planning on making some youtube videos soon
terse sail
warm leaf
I'm planning on making some youtube videos soon
well get me on that VIP list, priority tickets please 😂 😄
hey goat, have had to do source the .p3d job to some pro dude, as it was an absolute mess of .p3ds in the end
stuck oyster
Weapon animations are done in model.Cgf the the wiki pages explain pretty well how those work and there are some tutorials already online if I remember right
terse sail
stuck oyster
Weapon animations are done in model.Cgf the the wiki pages explain pretty well h...
will starting learning and working on this from tomorrow, wont take too long now, figured out the cfgweapons, anims and gestures stuff, thanks to your help, and some others 😄
stuck oyster
Also the sample weapon has animated parts.
terse sail
warm leaf
I'm planning on making some youtube videos soon
may i speak with you on direct message about this rigging stuff, if thats ok
warm leaf
I don't have the spare time right now, there's plenty out there and like I said I'll be looking to make some videos that explain things, I'd rather work on one to many than one to one
terse sail
warm leaf
I don't have the spare time right now, there's plenty out there and like I said ...
understandable, will video tutorial watch again 👍
frail pumice
is there a reference weapon model.cfg file anywhere?
that lists what the bones should be called in the skeleton etc
there's a test weapon in the samples but it doesn't seem to have all the bones that i see when i decompile an actual p3d odol
inland pawn
frail pumice
is there a reference weapon model.cfg file anywhere?
You can technically name the parts whatever you want. But, some places are easier to be named default than custom
Like the tracks on a tank. You don’t need to do anything besides adding them to the sections of your cfg models. If they’re named the default name
 brazen prism
hey guys , what p3d importer do you guys use for blender?
 marsh canyon
Import to Blender or Import to OB?
terse sail
brazen prism
hey guys , what p3d importer do you guys use for blender?
Blender - use this addon;
https://github.com/AlwarrenSidh/ArmAToolbox - check license/read me also
Object Builder - do not know, someone else may know
terse sail
the arma toolbox covers both?
stuck oyster
it has p3d import and export
terse sail
hey guys, showing this dude how to use arma toolbox, and for some reason it wont install?
- tried installing from direct zip - not working
- tried installing from unzip- not working
what am i doing wrong?
desert notch
terse sail
hey guys, showing this dude how to use arma toolbox, and for some reason it wont...
You must install the zip
And you must grab the latest master and zip it yourself
terse sail
its already got a master version?
stuck oyster
github download adds another folder in the zip
the data has to be moved down a folder for it to install right
 bleak heart
I'm converting a car, I need to get a gunner image of the interior of the car, but it shows 144p.
Is there a wiki on this topic?
stuck oyster
converting it from where?
and what exactly shows 144p
none of this makes quite sense
stuck oyster
youll need to upload/post the image somewhere else like imgur
and paste the link here
bleak heart
stuck oyster
oh you mean the picture in picture (PIP)
you probably need to set your PIP video settings higher
bleak heart
My settings are on ultra but thanks anyway
stuck oyster
how do you have the PIP texture configured in the model?
bleak heart
stuck oyster
you could try increasing the 512 to 1024
bleak heart
What happens if I do 1080p?
 ocean stump
Okay, having some trouble having my Ski Pack display correctly on the players back when they have it equipped. Currently the pack is halfway underground (https://imgur.com/a/j714yY3).
Config:
{
    class skiis
    {
        units[]={};
        weapons[]={};
        author="gnomi";
        requiredVersion=0.1;
        requiredAddons[]={"A3_Weapons_F"};
    };
};
class CfgVehicles
{
    class Bag_Base;
    class Ski_Bag : Bag_Base
    {
        author = "gnomi";
        scope = 2;
        model = "\P:\@SKIMOD\Addons\SKIPACK\Skipackb";
        displayName = "Ski Pack";
        picture = "\A3\weapons_f\ammoboxes\bags\data\ui\icon_B_C_Compact_dgtl_ca.paa";
        hiddenSelectionsTextures[]={"\A3\weapons_f\ammoboxes\bags\data\backpack_compact_digi_co.paa"};
        maximumLoad = 0;
        mass = 5;

        class AnimationSources {

            class mountski_Source  {
                source = "user";
                animPeriod = 1;
                initPhase = 0;
            };

        };

        class UserActions {

            class MountSkiis {
                displayName = "Mount Skiis";
                position = "ski_axis";
                radius = 3;
                onlyforplayer = 1;
                condition = (this animationPhase 'MountSki') < 0.5;
                statement = this animate ['MountSki', 1];
            };
            class PackSkiis {
                displayName = "Pack Skiis";
                position = "ski_axis";
                radius = 3;
                onlyforplayer = 1;
                condition = this animationPhase 'MountSki' >= 0.5;
                statement = this animate ['MountSki', 0];
            };
        };
    };
};```Model.cfg:https://pastebin.com/DPRgPzD2
stuck oyster
bleak heart
What happens if I do 1080p?
probably wont work
stuck oyster
ocean stump
Okay, having some trouble having my Ski Pack display correctly on the players ba...
is it weighted with character fitting named selection
also im pretty sure you wont get the skileft animation to work
you cant add bones to the character skeleton
ocean stump
stuck oyster
is it weighted with character fitting named selection
No, would that be parenting the backpack bone to a bone from OFP2_ManSkeleton?
ocean stump
stuck oyster
cant add bones to the character skeleton
ah, that's a damn shame
I'm assuming then I have not weighted it to the selection. Not quite sure how to go about that.
stuck oyster
in OB select model, create new selection for it named Spine3
new selection is automatically 100% weighted
ocean stump
Would that go to all LOD's or just resLOD?
stuck oyster
all lods
ocean stump
Nice, I had it as Spine 2 and just in the reslod.
stuck oyster
id recommend Spine3 since its the top torso bone
if you got any straps they might need different weighting
ocean stump
stuck oyster
id recommend Spine3 since its the top torso bone
alright, ill see what looks best, the pack is literally a pair of skiis and sticks. Trying to keep it as simple for now just to have it looking somewhat correct ingame.
marsh fox
Idk what is happening, but it seems like the UVmap is wigging out in game, it appears completely fine in blender and OB.
stuck oyster
perhaps you got too many uvsets
marsh fox
Just one
marsh fox
Could it be the rvmat doing something wrong?
charred bolt
Check uv transforms in the rvmat
marsh fox
They are the defaut super shader ones
  class uvTransform
  {
    aside[] = {1,0,0};
    up[] = {0,1,0};
    dir[] = {0,0,1};
    pos[] = {0,0,0};
  };
``` they worked just on other models before so im not sure why it has an issue.Here is what the error looks like, forgot to upload it somewhere.
https://litter.catbox.moe/g4q4p2.png
marsh fox
Clean up as in broken geo?
stuck oyster
make it cleaner
marsh fox
Any lower amount amount segments would look bad up close, and thats what the lods are for.
 marsh fox
Its not split in half, each side is one whole face.
marsh fox
Hence why im confused, it appears fine in blender and object builder
runic plover
marsh fox
Hence why im confused, it appears fine in blender and object builder
Just check it in the OB viewer, if it is bad there, its also bad ingame
For me it looks like it has segments and the UV map is disturbed/stretched
Also check if you have unused UV Sets in OB
runic plover
marsh fox
Its not split in half, each side is one whole face.
I see this, poly points which are not used to be there if it should be a clean face

 fringe spire
Didn't know where to post this:
Is there a way to access ACE clear jam animation via weapon model.cfg?
I wanted to create a custom animation for clearing jams but I don't know if I would be able to for ex. move the magazine, charging handle etc.
runic plover
You have to ask ACE for model.cfg, because while binarizing the p3d model, the model.cfg gets merged into it
Or ask ACE for the animation part
fringe spire
will do, thanks
fringe spire
i know that, but you can define custom jam animation in the weapon config
stuck oyster
you cant add animations to p3ds though
fringe spire
I can do that through model.cfg if I can access the ace clear jam animation
it would basically work the same way as reload
polar fiber
marsh fox
Here is what the error looks like, forgot to upload it somewhere.
https://litter...
Is it triangulated in OB or quads?
I've seen something like that where UV coords collapsed towards another UV when the mesh went from being quads to triangulated. It usually happened where two sides of the model had mirrored UVs and the verts along the seam between the two halves, were still welded
If it's quads, triangulate it in OB then check the UV window to see if anything changes
fringe spire
stuck oyster
you cant access the model.cfg
I'm talking about animation source for ex. it's reloadmagazine for reload, I'm looking for the equivalent for ace jam animation
stuck oyster
I dont think ACE adds any animation sources for weapons
as you cant animate weapons with script commands
fringe spire
I thought it does since you can define custom jam clear animation (it's the reload anim as default)... just looking for a way to unload the mag, pull the charging handle and put the mag back in basically (ofc. I would have to do that in model.cfg in animations)... but since ace doesn't add the anim source I'll have to live without it I guess
stuck oyster
yeah cant do that
cant add animations to weapons
you could do the hand movements but thats it
fringe spire
well I've found out that you can add animationSources into cfgVehicles, define an animation inside model.cfg using that source and then call it through userActions.
What I don't know is how to put that inside the ACE Clear jam interaction without breaking ace itself
 livid canyon
Can object builder show the center of mass?
 bold flare
Pretty sure it can. If you select all points that have mass, it also shows Center?
livid canyon
oh, yup. it was just cluttered.
livid canyon
I re-opened OB and now i can't find it again. Aer there some cases where it's not shown?
stuck oyster
only when DX draw mode is off
 molten fractal
stuck oyster
you cant access the model.cfg
molten fractal
stuck oyster
you cant access the model.cfg
Doesn't Eliteness let you extract the skeleton?
stuck oyster
you cant do anything with it
you cant inject changes back into p3d
what he wanted to do just is not possible
molten fractal
Ah, i understand now
 fresh lichen
hi
How can I import a design made by me to the armaa 3 game?
In my case, I did a halo 3 brute and I want to play it in armaa 3, but I don't know how to import it into the game
median bough
@fresh lichen
https://forums.bohemia.net/forums/topic/207631-from-blender-to-arma-3-complete-process-tutorial/
Bohemia Interactive Forums
Hello, As I had many requests, I did this all-in-one tutorial I am sharing today. I hope it will be helpful to you. All important stages are available in videos description. I will try to make more tutorials in the future, so dont hesitate to guide me to parts of the videos that were not explaine...
fresh lichen
I already read it and that post did not help me:, c
median bough
then nothing can
marsh fox
Thank you for all the advise so far, texture is perfect on the model, but the last hurdle is the shadows acting strangely. https://litter.catbox.moe/yfordf.png
The shadows seem to be banding.
runic plover
marsh fox
Thank you for all the advise so far, texture is perfect on the model, but the la...
are you using
sbsource : visualex
?
inland pawn
What's the default names for front left/front right headlights and rear lights?
I have L svetlo and P svetlo and that isn't doing anything
Along with reverse_light
runic plover
inland pawn
What's the default names for front left/front right headlights and rear lights?
            class Left {
                color[]     = {1900, 1300, 950};
                ambient[]    = {5,5,5};
                position     = "Light_L";
                direction     = "Light_L_end";
                hitpoint     = "Light_L";
                selection    = "Light_L";
                size         = 1;
                innerAngle     = 100;
                outerAngle     = 179;
                coneFadeCoef = 10;
                intensity     = 1; //17.5
                useFlare     = 0;
                dayLight     = 0;
                flareSize     = 1.0;
                class Attenuation {
                    start         = 1.0;
                    constant     = 0;
                    linear         = 0;
                    quadratic     = 0.25;
                    hardLimitStart = 30;
                    hardLimitEnd = 60;
                };
            };
            class Right: Left {
                position     = "Light_R";
                direction     = "Light_R_end";
                hitpoint     = "Light_R";
                selection     = "Light_R";
            };
            class Right2: Right {
                position     = "light_R_flare";
                useFlare     = 1;
            };
            class Left2: Left {
                position     = "light_L_flare";
                useFlare     = 1;
            };
        };
aggregateReflectors[] = {{"Left","Right","Left2","Right2"}};```might be Light_L / Light_R
marsh fox
runic plover
are you using
```sbsource : visualex```
?
No
stuck oyster
fresh lichen
How can I import a design made by me to the armaa 3 game?
In my case, I did a h...
Halo brute will not work in Arma without a lot of extra work. I'd recommend starting from something simpler to get familiar with how things work in Arma
rough idol
runic plover
are you using
```sbsource : visualex```
?
you can try using ASDHQ instead of AO (ah, sorry Sentry - replied to wrong message)
marsh fox
rough idol
you can try using ASDHQ instead of AO (ah, sorry Sentry - replied to wrong messa...
I'll give that a look into.
marsh fox
rough idol
you can try using ASDHQ instead of AO (ah, sorry Sentry - replied to wrong messa...
Cant find any info anywhere about what ASDHQ is.
stuck oyster
 marsh fox
Thank you for the correction I see the info now
Not sure if its AS though cause if I use super shader defaut rather an a baked one the same banding happens
rough idol
ahh, sorry for the typo 😓
 calm cedar
Hey ! i have a pretty dumb question. With my unit we are working on creating our own equipment mod. we were thinking on buying this 3D files: https://www.cgtrader.com/3d-model-collections/asr-all-variants
But i don't know if it will be working. Is there a tutorial like how to mod for the noobs ?
Cause i don't really want to spend 30 bucks to have a file that i can't use
stuck oyster
if you have no one with 3D experience buying models will be shooting your own foot
as it will not give you any advantage in learning what is needed
that model probably will work in the end
but it will require a lot of Arma requirement work
and no there is no exact tutorial for that either
calm cedar
well i'd love to learn but idk where to start even if i learn pretty fast.
calm cedar
stuck oyster
that model probably will work in the end
so the file is not important ?
and so to learn to do a mod i need to start randomly on internet ?
stuck oyster
well its naturally important as without a model and textures you have nothing to put into game
but the model will require things to be done that are harder to learn with ready model
instead of starting to use modeling software from the basics
calm cedar
stuck oyster
instead of starting to use modeling software from the basics
ok yeah i see. So better to learn from scratch. Do you have any videos of platform i can learn from ? And i guess i should work with Blender ?
 tawny atlas
Turns out you can put .p3ds in the mission folder and load them in mission, is there any way to actually texture them?
stuck oyster
tawny atlas
Turns out you can put .p3ds in the mission folder and load them in mission, is t...
its not a good way
😛
it slows down the mission quite a bit
tawny atlas
I know but it's cool so I'm experimenting
stuck oyster
you probably would path the textures to the mission folder as root
tawny atlas
yeah that's what I thought, having to make the model for the mission especially
 ebon orchid
this might also be considered something for texturing but idk, i just cant seem to find out why parts of my models are being see trough-ish and everything else is fine (this is in substance painter btw)
stuck oyster
your faces are inverted
ebon orchid
ye i noticed 😁
FYI it is extremely late for my rn so i wont responded for a sold 8 hours from now
ebon orchid
soooo...... no solution then :/
stuck oyster
like I said
your faces are inverted
so they are backwards
you need to turn them to face outwards
ebon orchid
but the thing is they are both completely un touched other then making a few extrudes so i dont understand how they would be inverted
woeful viper
always model with backface culling enabled...
ebon orchid
whats that?
ebon orchid
hmm weird
woeful viper
both completely un touched other then making a few extrudes so
where did you get the model from then?
ebon orchid
i made it all my self, i meant with un touched that i basicly added a mesh (cylinder) and then extruded some bits outward and thats it
woeful viper
in OB you can flip face direction by W iirc, no idea about blender.
ebon orchid
hmm i think i may know what went wrong but still not sure because i did not do this for other models but for the second example i showed, i extruded it inwards first so that i could extrude 4 extensions to the cylinder on the edge https://drive.google.com/file/d/1hA3zhCKMLSQ8rwjuNhTDAgADJ8FFFc-k/view?usp=sharing
stuck oyster
there are many ways to get the face directions mixed up
just turn on backface culling (internet has instructions)
and flip the face normals on the part that has them wrong way around
ebon orchid
alright
leaden sun
calm cedar
ok yeah i see. So better to learn from scratch. Do you have any videos of platfo...
Blender is free and some great software I'd say not just for beginners at this point.
There are many a tutorial, the most often cited being the infamous "doughnut". I recommend Blender Guru's series as he goes into light depth about the user interface and keybind shortcuts that you'll be using most often, these first steps are the most important to build a strong foundation of understanding.
After that I recommend starting with simple things, the usual chair, tables, learn about a few booleans as they 'can' speed up your workflow greatly, but also be infinitely frustrating if you don't understand their behaviors.
Start small and build up, don't try to tackle a fully formed weapon with all of its unique surface details and beautiful smooth curves, begin with something blocky and iterate on it.
Once you've got a strong grasp on the interface and functions then you can move onto modifiers and addons, these can be tremendously useful, especially the "Looptools" addon but again, this is more of an advanced step, the last thing you want to do is cram as much information as possible and come out light headed, because there is MUCH to learn.
Lastly, the key to all is patience and iteration, like all things you need to dedicate time to learning the craft, and what techniques best suit you.
calm cedar
leaden sun
Blender is free and some great software I'd say not just for beginners at this p...
Thanks you very much for this complete answer. I'll have a look for the Doughnut tutorial and learn slowly to be sure to understand.
Is there anything else i should know before hopping in ?
leaden sun
I've a few more recommendations.
Don't rush things, playback any parts of a video that you don't understand multiple times, and if ever you're watching a tutorial on something try to model along with it as opposed to simply watching.
Whenever you watch a video pertaining to any information, try to interact with something of your own along with the video in the same way as this will help cement its function in your mind, and while tutorials are great you don't want to limit yourself to what they show you.
Do some light modelling whenever you have downtime, there will be many "Aha!" moments even years down the line, you're going to discover new techniques, likewise look at what others are doing, as you may discover new techniques and workflows that you were close to but hadn't considered, or considered at all.
Use additional resources such as Pinterest or CG forums, especially the "how the f do I make this" thread, even if the program isn't specifically what you are using.
Lastly is to focus on the basics, learn something new, give your mind time to rest, try the technique out on multiple things and then expand.
as with all things, practice practice practice
Oh and subdivide responsibly so you don't murder your PC
stuck oyster
save often
protip 👆
although blender does keep a "working" copy around too but it can be accidentally overwritten by loading older save
leaden sun
oh yes definitely save often and set your undo steps to max (256) in the Preferences-System tab.
stuck oyster
leaden sun
oh yes definitely save often and set your undo steps to max (256) in the Prefere...
just remember to set it lower if you are working in something massive xD
 cedar garden
Hey, so I have a question about hidden selections. I have all my selections setup in OB, and in the model cfg I have all the selections defined, but in the config when I remove one from them from the hiddenSelections, it will still appear. I'm assuming I'm doing something wrong along the way. Could anyone guide me in the right direction?
stuck oyster
you should not be hiding things via hidden selections
cedar garden
What's the best way to go about it then? I don't want to make a bunch of separate models
stuck oyster
but also removing the hiddenselection entry does not mean it gets hidden
@cedar garden you make bunch of models
that is the best way
if you have 100 different variants you will want to reconsider your design concept
sometimes less is more
if its a vehicle you can use hide animations for some parts
cedar garden
Kinda surprising. I'd assume if you had the same base model, and wanted small changes (like adding a flashlight) you would do it via hidden Selections rather than make a separate model
(like on a helmet)
stuck oyster
nope.
such details would be put as part of the vest normally
uniform is very plain
and in that sense, Id suggest limiting your variant design
round bloom
I've got a bit of a weird issue. I've got a plant with an animation on it to move it up over time to simulate growth. In my case it needs to start below ground and as it grows become more and more visible.
However at the moment, even once grown out can't get cursorObject on it
However if I start it floating, I can track the cursorObject just fine
Seems arma just doesn't like it starting under the map
Any suggestions?
stuck oyster
you cant animate geometries beyond the original bounds
so either increase the bounds size
or model if first in full position
then make the initial animations in under ground state
round bloom
stuck oyster
you cant animate geometries beyond the original bounds
What do you mean with that though? The geo is the size of the plant and set to move with the animation
stuck oyster
the model is X size and your animation tries to make it X+Y size
but the geometry works only up to X size
stuck oyster
yes
that is what I mean
you can not animate parts beyond the original bounds
I dont know how to else say this
round bloom
I'm not though thats what I am saying, the animation moves the plant from just below ground to at ground level, what "bounds" are you trying to talk about here...
stuck oyster
 round bloom
But how does the game draw and define bounds
because I've never seen that as a thing or issue to date
stuck oyster
the overall bounds of the model in its p3d shape
bounding box
those bounds do not dynamically change

 tropic jewel
2 questions does animations (in model.cfg) work with backpacks and is it possible to sqf within the source for example source = "{whatever statement == true}";
stuck oyster
not possible afaik
round bloom
tropic jewel
2 questions does animations (in model.cfg) work with backpacks and is it possibl...
I believe animations should work for a backpack type item, the use of SQF isn't possible in model.cfg, you'd need to do that externally in the mission or possibly run it (on a user action) on the config.cpp
stuck oyster
backpack still runs on character skeleton and rtms
 amber swift
hello guys, so i have already made a 3d model and textures in p3d an paa format respectively, but cant advance past this fase, i dont have much programing knowledge, so despite already have watched a few tutorials, i still dont know how to make the config and model cfg.
can anyone help?
woeful viper
look at the samples BI provides
amber swift
the Test_Weapon_01 folder?
woeful viper
yes
amber swift
so should i just do a copy of this folder replace the p3d and alter the config so that the model refered is the one i made?
woeful viper
you can use it as a starting point yes
amber swift
alright i will try it out thanks
rough jewel
is there any other reason ,than to cut down the vertices, that tracked vehicle treads are just a moving texture?
stuck oyster
No other mechanic has ever been implemented
rough jewel
so can you have fully modeled tracks for a vehicle?
rough jewel
ok
round bloom
Is there any documentation out there on snapping? I get it uses mem points, but I assume there is config stuff to set up too
stuck oyster
No config stuff. It's just TB functionality with memorypoints. BI forums have couple of threads about it.
shrewd jay
Are you using the Arma Toolbox?
If so, it can export to p3d directly, otherwise you need to export to 3ds first and import into ObjectBuilder
white jay
shrewd jay
Are you using the Arma Toolbox?
yes
shrewd jay
Then just go to File -> Export -> Arma 3 .p3d
stuck oyster
Also needs the object(s) to have arma properties ticked enabled
white jay
stuck oyster
config
config?
ebon orchid
coding
white jay
oh
white jay
How do I export the models from to arma 3 as props?
stuck oyster
you export an object as p3d and create a config for it that defiines it as a prop
 analog mason
Is there a way to define on the model where a parachute spawns from when it is dropped from an aircraft? or does it always attach near the centre of the model as it would lie on the ground?
 vernal meteor
so where do i start making vests like i have blender is there any good things to go off of or what should i know
 sharp coral
vernal meteor
so where do i start making vests like i have blender is there any good things to...
sharp coral
vernal meteor
so where do i start making vests like i have blender is there any good things to...
https://www.youtube.com/watch?v=BfS9fBOE7Gw check this out, sokolonko's guides are one of the best out there
ocean stump
Hey people, having trouble applying mass to the Geometry LOD on my vehicle. If I'm getting this right, there should be a "Mass" option in the Arma 3 Object Properties window in Blender, but I don't have it. Checked Geometry and Geometry Physx, both in Object and Edit mode but no luck. I have the newest version of the Toolbox, with the extra folder removed so it should be installed correctly, and the newest version of Blender.
This is what the window looks like for me: https://imgur.com/a/DYe8RYx




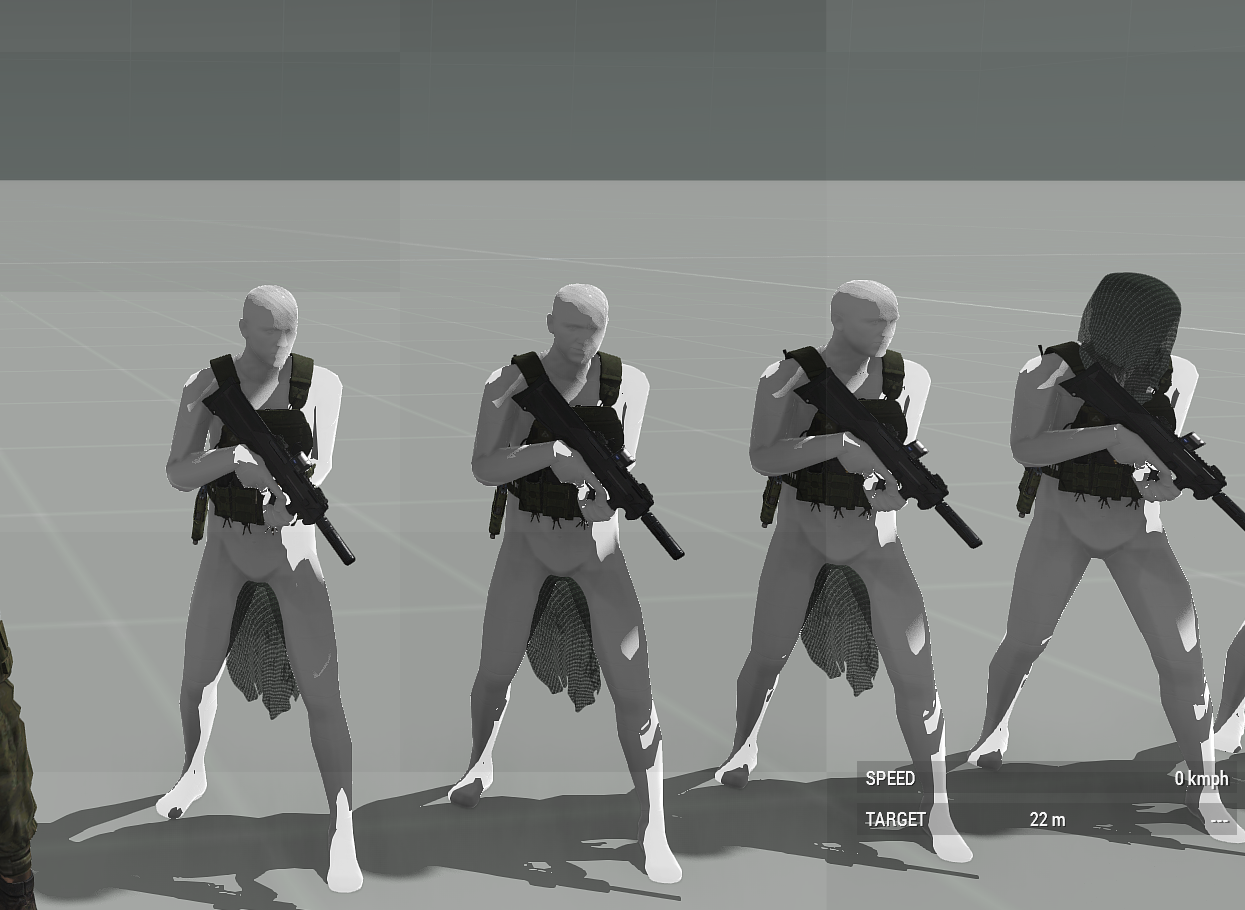


 ocean stump
Right you are, thank you!
shrewd jay
👍
calm cedar
Hey ! I'm working on config.cpp but i can't understand how CfgMagazines and Ammo works. I have this:
    class 30Rdn_762X39_AK12_Mag_F : B_762X39_Ball_Green_F {
        ammo = "B_762X39_Ball_Green_F";
        count = 30;
        descriptionshort = "7.62X39mm mag<br />Rounds: 30<br />Used in: AK12";
        displayname = "30Rdn 7.62X30mm";
        initspeed = 930;
        lastroundstracer = 0;
        picture = "tb_arifle_ak12\UI\gear_ak12_mag_ca";
        model = "tb_arifle_ak12\ak12_mag";
        scope = 2;
        tracersevery = 5;
    };
};
class CfgAmmo {
    class B_762X39_Ball_Green_F {
        airfriction = -0.001425;
        caliber = 0.9;
        cost = 1;
        deflecting = 20;
        hit = 8;
        indirecthit = 0;
        indirecthitrange = 0;
        model = "\A3\Weapons_f\Data\bullettracer\tracer_red";
        nvgonly = 1;
        tracerendtime = 1;
        tracerscale = 1;
        tracerstarttime = 0.05;
    };
};    ```

But it don't works and says that ammo is not defined..
I don't know much about coding i mostly learn it by doing it so i'm kinda stuck rn.. :/Try this:
    class 30Rnd_762x39_Mag_F;
    class Papa_30Rdn_762X39_AK12_Mag_F: 30Rnd_762x39_Mag_F {
        ammo = "Papa_B_762X39_Ball_Green_F";
        count = 30;
        descriptionshort = "7.62X39mm mag<br />Rounds: 30<br />Used in: AK12";
        displayname = "30Rdn 7.62X30mm";
        initspeed = 930;
        lastroundstracer = 0;
        picture = "tb_arifle_ak12\UI\gear_ak12_mag_ca";
        model = "tb_arifle_ak12\ak12_mag";
        scope = 2;
        tracersevery = 5;
    };
};

class CfgAmmo {
    class B_762x39_Ball_F;
    class Papa_B_762X39_Ball_Green_F: B_762x39_Ball_F {
        airfriction = -0.001425;
        caliber = 0.9;
        cost = 1;
        deflecting = 20;
        hit = 8;
        indirecthit = 0;
        indirecthitrange = 0;
        model = "\A3\Weapons_f\Data\bullettracer\tracer_red";
        nvgonly = 1;
        tracerendtime = 1;
        tracerscale = 1;
        tracerstarttime = 0.05;
    };
}; ```Note that it is good practise to put your tag as a prefix to any class that you create (eg Papa_)
Both your new magazine class and ammo class need to inherit from existing magazines and ammo classes in the game, so I made a guess as to which that would be. Those existing classes need to be declared as ready for use in your config before you can inherit from them.
Once you have inherited all the properties, then your new class code that follows changes those specific parameters. In your magazine, you tell it to use your new ammo class.
calm cedar
charred bolt
Try this:
```class CfgMagazines {
class 30Rn...
Ok i see, i've done it and now the magazines disapeared.
My mag classname Papa_30Rdn_762X39_AK12_Mag_F need to be linked on what ?
like another file or ?
Cause i'm really starting this type of codingf
charred bolt
Presumably you have a weapon that you want to use that new magazine in?
calm cedar
charred bolt
Presumably you have a weapon that you want to use that new magazine in?
yeah we have a weapon and a magazine that someone 3d modelled and prepared to be implemanted in game
ak12_mag.p3d
charred bolt
Put the new magazine into the config for the new weapon
If you haven't done already, look at the Arma 3 Samples (free Steam download), Test_Weapon_01. It has sample models, configs etc.
calm cedar
 {
    requiredaddons[] = {};
    requiredversion = 0.1;
    units[] = {};
    weapons[] = {"tb_arifle_ak12",};
magazines[] = {"Papa_30Rdn_762X39_AK12_Mag_F",}; // HERE ? ```downloading it rn
median bough
magazines[] = {"Papa_30Rdn_762X39_AK12_Mag_F",}; // HERE ?
remove the last comma...
@calm cedar
calm cedar
yeah cause if there is the comma i need to add another magazine
but is that at the right place ?
charred bolt
That's a CfgPatches entry by the looks of it. He needs to add the mag into the weapon class.
median bough
yep. you also have a trailing comma in the weapons array
calm cedar
yep just saw that
calm cedar
charred bolt
That's a CfgPatches entry by the looks of it. He needs to add the mag into the w...
I used Zach Gibson's tutorial files but there is not that much info
charred bolt
Papa, continued at config_makers channel...
calm cedar
yeah just saw. Thanks ^^
 open radish
One message removed from a suspended account.
stuck oyster
Are you having some problem? Turret has nothing really special over the tank sanple
livid canyon
I'm getting this repeated in rpt with an edited character model
No point in selection proxy:\a3\characters_f\proxies\weapon.001.
 ➥ Context:     [] L4 ()
Apparently this happens when you try to attachTo a proxy. It works but it doesn't like it.
stuck oyster
@livid canyon what does attachTo a proxy mean?
bold flare
it tells you, the selection you tried to attach to, doesn't exist in the model
wrong name
livid canyon
I did _obj attachTo [_unit, [0,0,0], "proxy:\a3\characters_f\proxies\weapon.001", true];
So, wasn't a model issue.
runic plover
livid canyon
I did `_obj attachTo [_unit, [0,0,0], "proxy:\a3\characters_f\proxies\weapon.001...
Are you sure its called weapon.001?
Maybe its weapon001.p3d or weapon.001.p3d
.p3d is missed at the end
shrewd jay
It's weapon.p3d
runic plover
I was thinking this and wrote it but deleted it cause i wasnt sure if its just weapon.p3d, cause 001 is the proxy index i think 
desert notch
the selection name itself is correct
@livid canyon do you attachTo right after creating a unit?
also I think this is a #arma3_scripting question 
shrewd jay
Wouldn't "weapon" be enough in general?
desert notch
I don't think so
yeah no
@livid canyon I just tried it and I get no such error, so you're doing something wrong
shrewd jay
desert notch
yeah no
Hm, weird... I thought that "Weapon" would be part of the model selections 🤔
desert notch
it is, but its orientation and position are weird 
shrewd jay
Uh-kay... really weird 😐
amber swift
guys i have 2 questions, Why is the shading ingame in my weapon model smooth when it was set to flat, and is 14000 triangles a reasonable size for a rifle model ?
small olive
amber swift
guys i have 2 questions, Why is the shading ingame in my weapon model smooth wh...
which modelling software you're using?
small olive
be sure to set up the filepath for o2script.exe
in preferences: https://prnt.sc/24chb4f
amber swift
oh i see it now
small olive
Steam\steamapps\common\Arma 3 Tools\ObjectBuilder\O2Script.exe
amber swift
thanks!
 glad crystal
Also a blender/ArmAtoolbox question - I have a p3d I'd like to alter the weight on. I know weight is connected to the geometry, and can currently see 'ARMA group weight: 20.00' in the 'Object Data Properties' dialogue, when selecting the geometry in 3D view. Is there a way to edit said weight, either as a whole, or component-by-component?
(I've found FHQWeights, which is a vertex/float attribute, just don't know 1> if thats the target, and 2> how to edit)
shrewd jay
@glad crystalOnly by selecting the group and re-assigning a weight via the "normal" means
Yeah FHQWeights is the per-vertex data layer with the weight of each vertex
glad crystal
Oof. OK. Thank you - I'll see what I can work out!
shrewd jay
Just unselect everything in the model, use the vertex group list to select the vertices, and go to the Arma 3 Tools tab. Then enter the new weight and click "Distribute to selected"
I'll see if I can add a "change weight" box to the weight panel directly.
glad crystal
Maybe I'm using an old version of the toolbox?
Weight Tools has two grayed-out buttons: Problematic Weight Vertices, and Prune Weights to 4 Bones Max... (Then I have other sections - Arma Tools, Relocation Tools, Material Relocation, and Proxy Tools, none of which seem right...?)
shrewd jay
It'S called Mass Tools
 glad crystal
Yeah, I think I have an old version - that's not on my tab... going to re d/l from github to double check.
stuck oyster
Mass tool only appears on geometry lod
So are you trying to alter how much geometry weights (mass)
Or are you trying to alter mesh vertex weighting for animated selections
glad crystal
Mass.
glad crystal
OMG. I'm an idiot. I was in object mode.
Merry Christmas, and where can I get more coffee?
shrewd jay
I should probably make the panel appear always and grey out the buttons when not in edit mode, as it is now it's rather confusing I admit 😐
glad crystal
Well, I mean, I'm a relative newb on blender, but know enough I should have checked that. I'll blame lack of coffee, and being at the in-laws.
shrewd jay
Both valid reasons 😄
white jay
anyone have a link to the arma 3 blender toolbox?
shrewd jay

GitHub
Arma Toolbox for Blender. Contribute to AlwarrenSidh/ArmAToolbox development by creating an account on GitHub.
white jay
thank you
white jay
I've been trying to sort alpha on my object but it starts saying 10 seconds remaining and ends up saying something ridiculous like 722 minutes and it just keeps extending the time remaining

also I don't remember if I'm doing it right but I know alpha sorting is how you get mesh parts inside an object to be visible through transparency like this
https://cdn.discordapp.com/attachments/566060230824165383/887093561361829908/20210913175243_1.jpg

 stuck oyster
the auto sort works only on simple objects
you just need to bring alpha transparent parts on top
white jay
So basically select just the windows on a house and go to faces > move to top
stuck oyster
yes
though if you have many surfaces on top of each other then you have to move them to top in order too
terse sail
what does one need with a weapon model to make it successfully port into arma 3? (included in config.cpp, model.cfg?) anything else?
stuck oyster
p3d, textures, materials (2 latter are optional but without them you get white model)
terse sail
stuck oyster
p3d, textures, materials (2 latter are optional but without them you get white m...
so config.cpp, is the model.cfg even necessary?
terse sail
what is causing this issue?
indexerror: bpy_propr_collection[indeix]: index 0 out of range, size: 0
stuck oyster
probs nothing has arma properties enabled
terse sail
stuck oyster
probs nothing has arma properties enabled
https://imgur.com/NYwLF4t this was after untick arma properties
stuck oyster
no you need to tick arma properties to export a thingy
terse sail
stuck oyster
no you need to tick arma properties to export a thingy
i am completely clueless as to how to fix this, getting the same error for all three objects
shrewd jay
Check if you have an empty material slot on an object.
Although wait... Let me check what this line actually does
That is weird, it is trying to access a non-existent vertex group
@terse sail Can you tell me what you do to get this result?
terse sail
shrewd jay
<@!540584779977064470> Can you tell me what you do to get this result?
to be honest dude, inital issues were quads, 130k tris, stuff like that, got them down to like 9k polygons, but the objects were made by someone else, not familiar with a3, not by me
shrewd jay
🤔
You should definitely put a triangulation modifier on the Pilot View LOD, it has n-gons
terse sail
shrewd jay
You should definitely put a triangulation modifier on the Pilot View LOD, it has...
have done that, but the issue still pops up (https://imgur.com/BZ5PARb)
terse sail
shrewd jay
What version of the toolbox are you using?
got someone to fix it, said person will inform me of the issue tomorrow, as per my request, so will let you know result then, but thanks for trying to help 👍
shrewd jay
Would be interesting to know, yeah
 sage abyss
say I wanted to make a vest or a helmet how would I do that?
shrewd jay
Create a default cube and remove everything that doesn't look like a vest or a helmet
(SCNR 😊)
Seriously, though, check the Arma 3 samples on Steam, there are examples for vests and helmets there.
stuck oyster
first step is learning 3D modeling
using Blender for example
or some other program if you like
round bloom
Is there anythin special you need on stairs that are in water for arma to recognise them properly? I've got a building with stairs go down into the water. Going down works fine but it's impossible to walk back up them
stuck oyster
you will likely need a platform under them so the character can transition from swimming to walking
round bloom
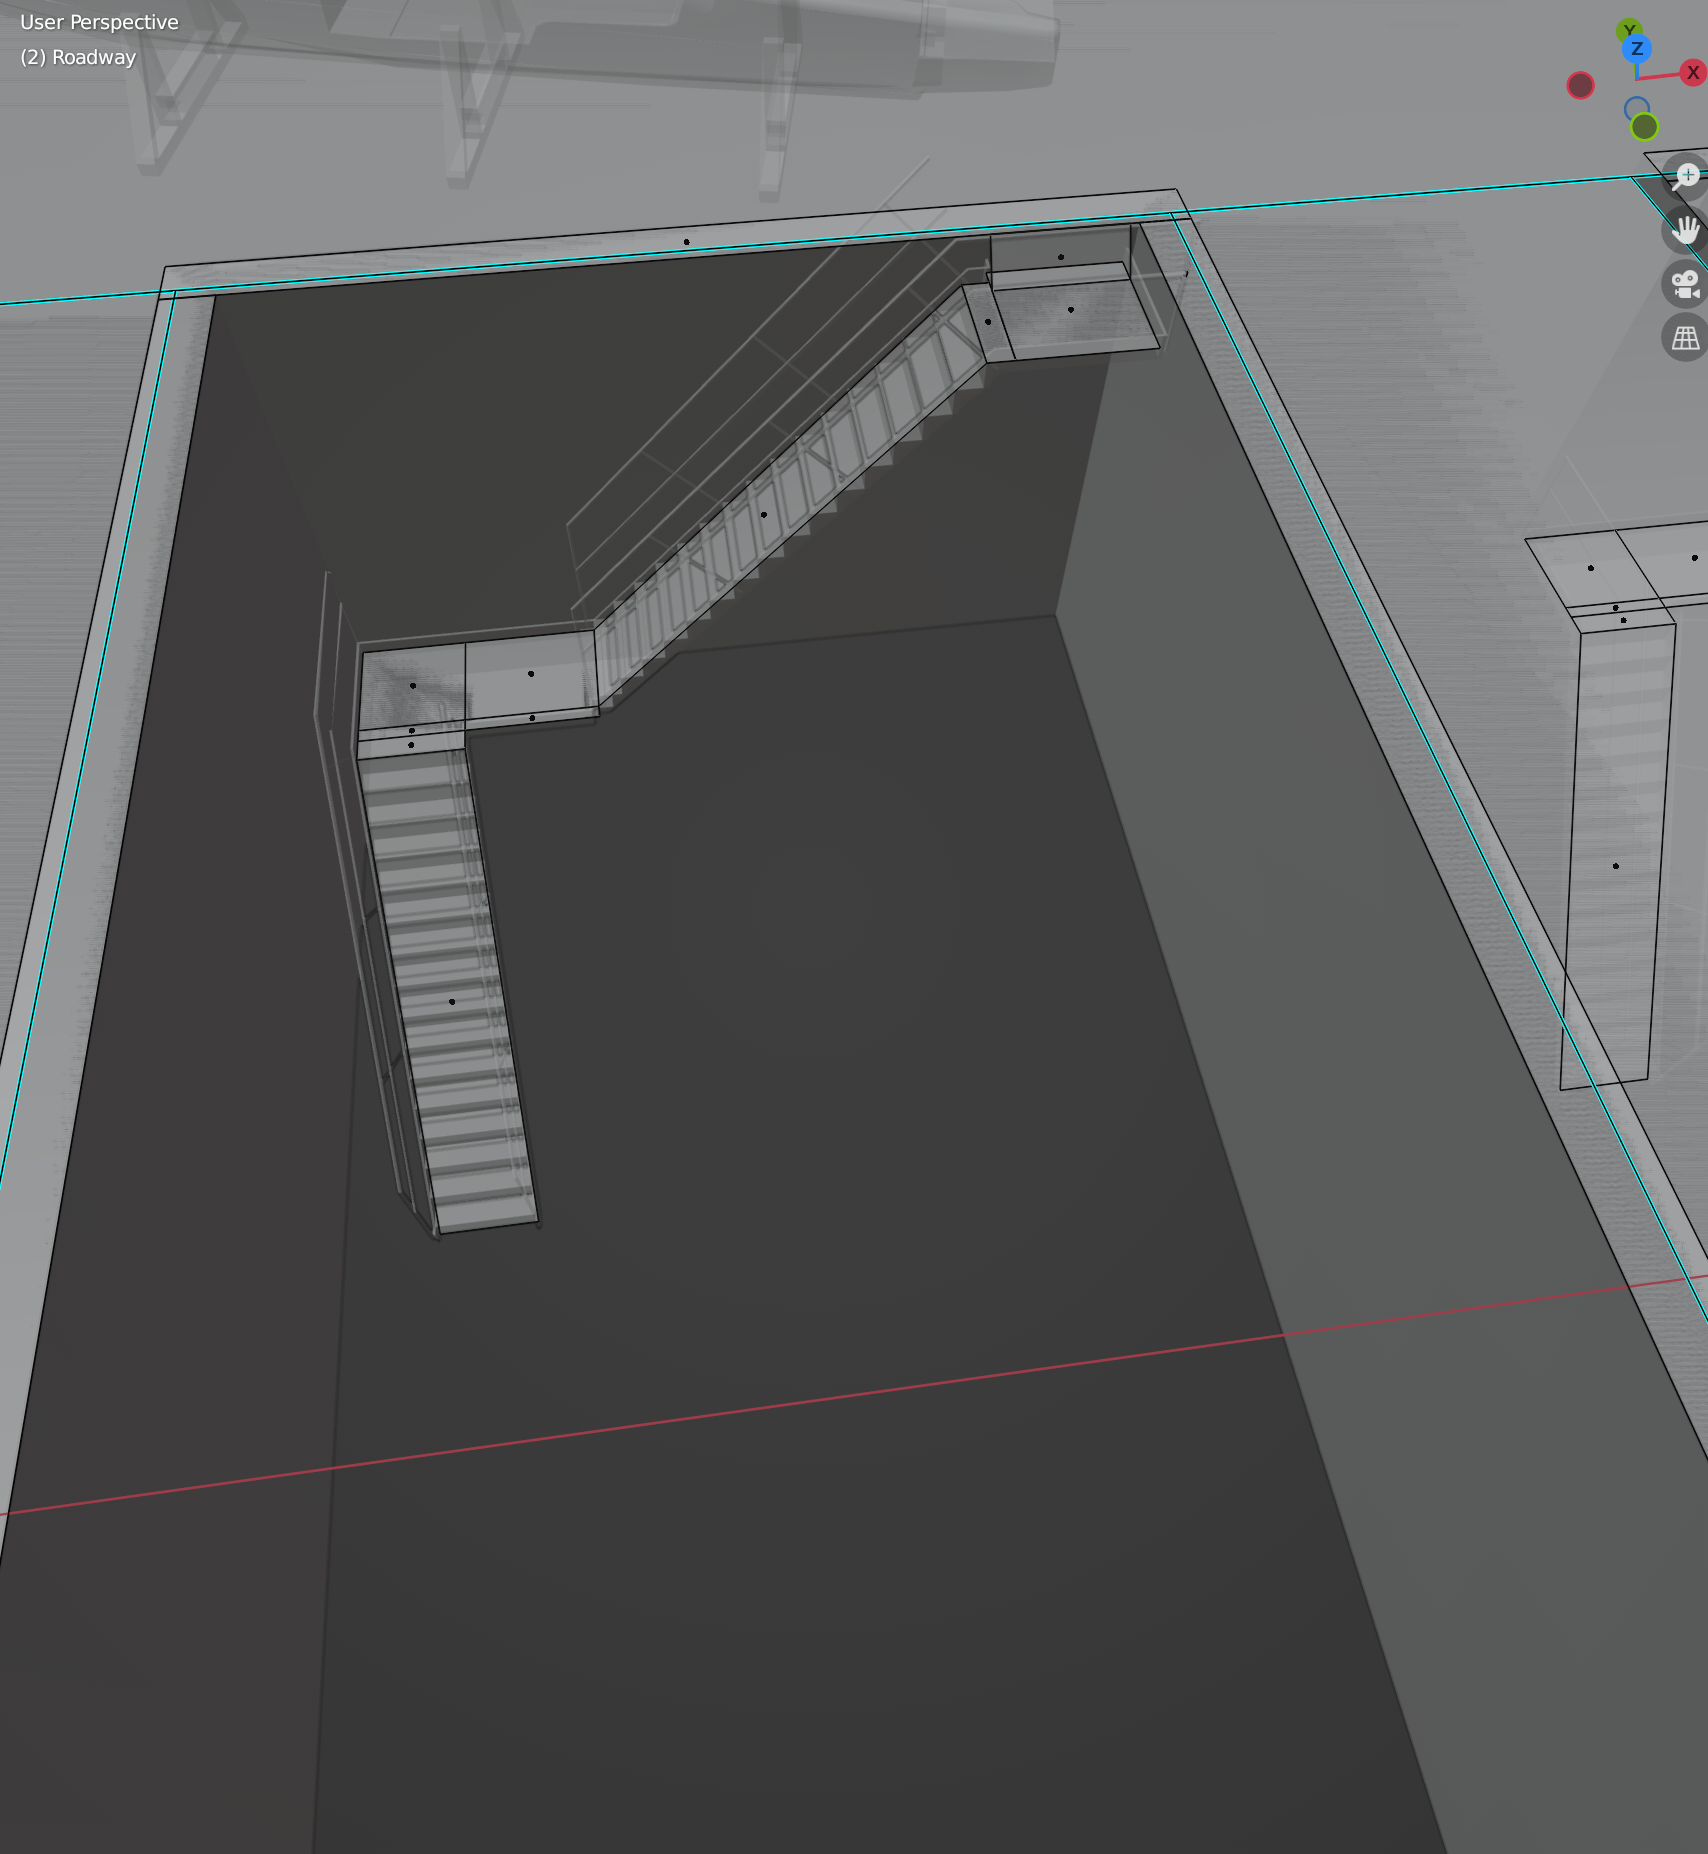
The problem is the stairs go way below water because the water level won't always be at the same place
Depending on the location & terrain
I've got that roadway linked above
stuck oyster
perhaps you need to make a small platform object then that you can place at the bottom of the stairs at any level
round bloom
But how will that make a difference if the geo/roadway now doesn't seem to pick anything? https://i.gyazo.com/d14992b1a1483ad0c646610618a097b6.png
 stuck oyster
if I remember righht it needsto be more flat and at correct depth
 unreal jolt
alright so still pretty new to the modeling scene but right now I am having a simple issue. I have my model in OB and when I see it in game all the text is reversed. like all the words on it are backwards as if the texture went onto the model backwards. where in OB do I go to fix this?
also I press w to reverse it and in bulldozer it looks fine but then in game its like its see through and the textures are on the inside of it or somthing
nermind I figured it out huzzah
 wet quiver
What was the issue?
round bloom
wet quiver
What was the issue?
It would have been his UV needs mirroring
terse sail
how should one make a new picture .paa for a weapon?
desert notch
terse sail
how should one make a new picture .paa for a weapon?
make picture
convert to paa
¯_(ツ)_/¯
if you don't know how to use the A3 Tools one just use this site:
https://paa.gruppe-adler.de/

Gruppe Adler
Online converter for Arma 3's PAA format. Can be used to convert a single or multiple files in bulk and supports paa to png, png to paa, jpg to paa and more.
terse sail
desert notch
if you don't know how to use the A3 Tools one just use this site:
https://paa.gr...
ok, but what does the 2n x 2n mean? and how to achieve this?
desert notch
power of 2