#bots
1 messages · Page 147 of 1
 sand scaffoldBOT
sand scaffoldBOT
sand scaffoldBOT
cuistre, you just advanced to level 1
sand scaffoldBOT
GG @fathom creek , you just unlocked the achievement: Give or Take! 🥳
 sand scaffoldBOT
dadidk, you just advanced to level 1
d24pancake_80341, you just advanced to level 2
sand scaffoldBOT
guy5.slowww, you just advanced to level 1
sand scaffoldBOT
.food, you just advanced to level 1
 turbid kayak
!server
 frank tuskBOT
Free Method
To host a server on your own computer, read the selfhosting guide.
This guide goes over how to install, create, and launch a free Minecraft server on all operating systems (MacOS, Linux and Windows). The guide also guides you through installing Java and optimizing your server for better performance.
If you are installing one of our older modpacks, ignore the "README" file that is included in the serverpack files, as they have outdated information.
Paid Method
We suggest renting a server from Bisect Hosting:
Approx. $10 - $25 a month depending on what plan you choose. You can also get 25% off with Code LunaPixel.
Go here and order a plan which fits you. We suggest 1GB per player but nothing lower than 4GB as the server needs at least 3GB to run.
Go to #server-hosting for more Info!
The following advice works for both the Free and Paid methods:
Transferring Your World
If you're playing Singleplayer and want to transfer your world to your server, simply go to your modpack files and navigate to the saves folder. Inside of this folder, you will see your world saves. Rename your desired world save to world. You can then transfer this folder to your server files. If your world was hosted via world sharing, this process has to be done by the person who would click "Share World".
Fixing Lag
To resolve lag issues, simply run the !tps command in #bots and follow the directions provided.
sand scaffoldBOT
justafuzzy, you just advanced to level 1
jencore, you just advanced to level 3
tywarrior12, you just advanced to level 1
sand scaffoldBOT
chickennoob2956, you just advanced to level 1
sand scaffoldBOT
.dextority, you just advanced to level 1
sand scaffoldBOT
jencore, you just advanced to level 4
.dextority, you just advanced to level 2
GG @toxic laurel , you just unlocked the achievement: Casual Typer! 🥳

 proven dove
!updatemodpack
frank tuskBOT
To properly update the modpack you're playing, it depends on the launcher you are using. This video can explains it on CurseForge launcher, and the same method can be used on other launchers as well, but it's not necessary to use this method on others.
-
CurseForge - See above video
-
PrismLauncher -> Select your instance, and click "Edit" on the right. the 3rd tab down will say "CurseForge", click on it, and there will be a dropdown menu, if not already selected, the latest version of the pack will be at the top of it. click "Update Pack". Sometimes there will be new mods to manually download due to liscensing issues, click "Open Missing" and it will automatically download and checked, and copied to the instance folder. It's safe to delete these mods in your downloads folder once done. Once all are detected, the "Open Missing" will be grayed out. You can click 'Continue" at this point, and it will finish the update process and tell you when its successful.
-
ATLauncher - Under the "Instances" tab, find the pack you would like to update. there will be an "Update" button. There will be a dropdown menu, and if not already selected, the latest version of the pack will be at the top of it to select. Click "Update" once selected. Sometimes there will be new mods to manually download due to licensing issues, click "Open Missing" and it will automatically download and checked, and copied to the instance folder. It's safe to delete these mods in your downloads folder once done. Once all are detected, You can click "OK ", and it will finish the update process.
sand scaffoldBOT
jencore, you just advanced to level 5
sand scaffoldBOT
hugom4, you just advanced to level 1
sand scaffoldBOT
hugom4, you just advanced to level 2
sand scaffoldBOT
kaira7822, you just advanced to level 1
sunsh1ne0012, you just advanced to level 1
bam_dragon, you just advanced to level 1
sand scaffoldBOT
.food, you just advanced to level 2
sand scaffoldBOT
enesenkapodloga, you just advanced to level 2
sand scaffoldBOT
ruben2077, you just advanced to level 1
manswellmcbear, you just advanced to level 7
sand scaffoldBOT
simplysins, you just advanced to level 2
sand scaffoldBOT
Ice, you just advanced to level 1
hamid..._., you just advanced to level 5
GG @radiant pilot , you just unlocked the achievement: Casual Typer! 🥳

Hi, you just advanced to level 10
tfree77, you just advanced to level 4
sand scaffoldBOT
riritzu_, you just advanced to level 1
 somber mortar
SteamPunk - v18 crashed. The logs have been uploaded to mclo.gs:
- 1.20.1
- What launcher did you run Minecraft with? (e.g. CurseForge, ATLauncher, MultiMC, ...)
- Have you changed the modpack in any way except mods?
- v18
- Have you ever gotten past the crash condition without crashing, or does the game always crash?
- What steps cause the crash?
latest.log head / tail (~31k lines) | debug.log head / tail (~11MB & ~70k lines) | crash-2026-04-22_21.23.03-fml.txt | crash_assistant_app.log
Mod list changes beyond the modpack:
Removed mods:
[2;31mXaeros_Minimap_25.2.6_Forge_1.20.jar[0m
Updated mods:
[2;34mforge[0m ([2;31mfmlloader-1.20.1-47.4.1.jar[0m > [2;32mfmlloader-1.20.1-47.4.20.jar[0m)
gamad1x, you just advanced to level 1
sand scaffoldBOT
GG @royal scroll , you just unlocked the achievement: Give or Take! 🥳
 sand scaffoldBOT
estatrix, you just advanced to level 9
 versed vigil
!server
frank tuskBOT
Free Method
To host a server on your own computer, read the selfhosting guide.
This guide goes over how to install, create, and launch a free Minecraft server on all operating systems (MacOS, Linux and Windows). The guide also guides you through installing Java and optimizing your server for better performance.
If you are installing one of our older modpacks, ignore the "README" file that is included in the serverpack files, as they have outdated information.
Paid Method
We suggest renting a server from Bisect Hosting:
Approx. $10 - $25 a month depending on what plan you choose. You can also get 25% off with Code LunaPixel.
Go here and order a plan which fits you. We suggest 1GB per player but nothing lower than 4GB as the server needs at least 3GB to run.
Go to #server-hosting for more Info!
The following advice works for both the Free and Paid methods:
Transferring Your World
If you're playing Singleplayer and want to transfer your world to your server, simply go to your modpack files and navigate to the saves folder. Inside of this folder, you will see your world saves. Rename your desired world save to world. You can then transfer this folder to your server files. If your world was hosted via world sharing, this process has to be done by the person who would click "Share World".
Fixing Lag
To resolve lag issues, simply run the !tps command in #bots and follow the directions provided.
 pallid robin
!rank
sand scaffoldBOT
 pallid robin
!help
sand scaffoldBOT
 Luna Pixel Studios Plugins Commands
**Birthdays**
</help:1145941150495162392> birthdays
**Giveaways**
</help:1145941150495162392> giveaways
**MEE6 AI**
</help:1145941150495162392> ai
**Levels**
</help:1145941150495162392> levels
**Moderator**
</help:1145941150495162392> moderator
**Emojis**
</help:1145941150495162392> emojis
**Achievements**
</help:1145941150495162392> achievements
 Luna Pixel Studios Plugins Commands
**Birthdays**
</help:1145941150495162392> birthdays
**Giveaways**
</help:1145941150495162392> giveaways
**MEE6 AI**
</help:1145941150495162392> ai
**Levels**
</help:1145941150495162392> levels
**Moderator**
</help:1145941150495162392> moderator
**Emojis**
</help:1145941150495162392> emojis
**Achievements**
</help:1145941150495162392> achievements
diego.dev, you just advanced to level 1
 sleek comet
!alternates
frank tuskBOT
If this command was run in response to your question/issue, it is likely because switching away from the launcher you are currently using would fix your problem.
From our experience, the most stable launcher by far is ATLauncher, also known as ATL. Keep in mind that ATL is NOT related to TLauncher in any way, and is not a cracked launcher.
To install ATL, do the following:
1. Go to https://atlauncher.com/download. If you are on MacOS, then choose the "Jar" version under the "Other" tab, this is important as OSX WILL crash the game on Mac.
2. Install and run the setup, then open the program.
3. Login to your Microsoft account that owns the Java Edition of Minecraft from the Accounts tab on the right. This process is 100% safe, as it goes directly through Microsoft. ATL doesn't see your account credentials.
4. Go to the Packs tab on the right, then click "Curseforge" on the left.
5. Search the modpack you wish to download.
6. Click "Install". Then, follow the on-screen directions.
7. Go to the Instances tab, and click "Play" on the modpack you downloaded. If you ever see an "Update" button on the instance, click it.
This video explains the process: https://youtu.be/xMYW1wMbmkM
To transfer your Curseforge world to ATL, simply right click the modpack on Curseforge, or click the 3 dots, then click "Open Folder". Copy the Saves folder, then click "Open Folder" on ATL and paste the Saves folder there. Do the same with the XaerosMinimap folder, or the Journeymap folder, to transfer over any waypoints you've created.
Because ATL downloads the exact same files as Curseforge does, your world will be the exact same and you will be able to join the same servers. ATL also works without an internet connection (after you've installed the modpack, of course), and does not have any bloat from Overwolf. You are free to uninstall both Overwolf and Curseforge with ATL installed.
sand scaffoldBOT
emberwalker31, you just advanced to level 1
sleek comet
/help
 spice tulip
!alternates
frank tuskBOT
If this command was run in response to your question/issue, it is likely because switching away from the launcher you are currently using would fix your problem.
From our experience, the most stable launcher by far is ATLauncher, also known as ATL. Keep in mind that ATL is NOT related to TLauncher in any way, and is not a cracked launcher.
To install ATL, do the following:
1. Go to https://atlauncher.com/download. If you are on MacOS, then choose the "Jar" version under the "Other" tab, this is important as OSX WILL crash the game on Mac.
2. Install and run the setup, then open the program.
3. Login to your Microsoft account that owns the Java Edition of Minecraft from the Accounts tab on the right. This process is 100% safe, as it goes directly through Microsoft. ATL doesn't see your account credentials.
4. Go to the Packs tab on the right, then click "Curseforge" on the left.
5. Search the modpack you wish to download.
6. Click "Install". Then, follow the on-screen directions.
7. Go to the Instances tab, and click "Play" on the modpack you downloaded. If you ever see an "Update" button on the instance, click it.
This video explains the process: https://youtu.be/xMYW1wMbmkM
To transfer your Curseforge world to ATL, simply right click the modpack on Curseforge, or click the 3 dots, then click "Open Folder". Copy the Saves folder, then click "Open Folder" on ATL and paste the Saves folder there. Do the same with the XaerosMinimap folder, or the Journeymap folder, to transfer over any waypoints you've created.
Because ATL downloads the exact same files as Curseforge does, your world will be the exact same and you will be able to join the same servers. ATL also works without an internet connection (after you've installed the modpack, of course), and does not have any bloat from Overwolf. You are free to uninstall both Overwolf and Curseforge with ATL installed.
spice tulip
frank tusk
If this command was run in response to your question/issue, it is likely because...
@sleek cometif you don't see this, restart discord
there is big big text wall
!macjdk
frank tuskBOT
 For Mac devices using Apple Silicon/arm (M1/M2/etc.) CPUs
There is an issue with Java 17.0.8 and newer where you may experience "A fatal error has been detected by the Java Runtime Environment", which can cause the Java runtime to crash under a variety of circumstances. To resolve this:
Mac:
- Go here and hover over the Download buttons until you see one with the option to install a .dmg file. If you have an M-series Mac, then make sure to install the ARM64 version of this file.
- Run the
!alternatescommand in #bots and follow the directions please be sure to download the JAR ver, as the OSX will crash. If you already have ATL installed, move on to step 3. - Click "Settings" on the right
- Click "Java/Minecraft" at the top
- Set "Use Java Provided by Minecraft" to false by unchecking the checkbox
- Manually specify the following Java path in the text box to the left to the "Reset" button:
/Library/Java/JavaVirtualMachines/zulu-21.jdk/Contents/Home
sand scaffoldBOT
moristarr, you just advanced to level 3
sleek comet
ohwww am gonne try to restart
sand scaffoldBOT
midnightdesignerr_27789, you just advanced to level 1
nventus, you just advanced to level 2
sand scaffoldBOT
dotasarr, you just advanced to level 3
sand scaffoldBOT
✟ Damian ✟, you just advanced to level 3
sand scaffoldBOT
sabletiz, you just advanced to level 1
sand scaffoldBOT
tywarrior12, you just advanced to level 2
 wraith lily
sand scaffoldBOT
wraith lily
sand scaffoldBOT
copperthemc, you just advanced to level 1
contemplatingmylifechoices, you just advanced to level 1
 harsh gate
!server
frank tuskBOT
Free Method
To host a server on your own computer, read the selfhosting guide.
This guide goes over how to install, create, and launch a free Minecraft server on all operating systems (MacOS, Linux and Windows). The guide also guides you through installing Java and optimizing your server for better performance.
If you are installing one of our older modpacks, ignore the "README" file that is included in the serverpack files, as they have outdated information.
Paid Method
We suggest renting a server from Bisect Hosting:
Approx. $10 - $25 a month depending on what plan you choose. You can also get 25% off with Code LunaPixel.
Go here and order a plan which fits you. We suggest 1GB per player but nothing lower than 4GB as the server needs at least 3GB to run.
Go to #server-hosting for more Info!
The following advice works for both the Free and Paid methods:
Transferring Your World
If you're playing Singleplayer and want to transfer your world to your server, simply go to your modpack files and navigate to the saves folder. Inside of this folder, you will see your world saves. Rename your desired world save to world. You can then transfer this folder to your server files. If your world was hosted via world sharing, this process has to be done by the person who would click "Share World".
Fixing Lag
To resolve lag issues, simply run the !tps command in #bots and follow the directions provided.
harsh gate
!server
frank tuskBOT
Free Method
To host a server on your own computer, read the selfhosting guide.
This guide goes over how to install, create, and launch a free Minecraft server on all operating systems (MacOS, Linux and Windows). The guide also guides you through installing Java and optimizing your server for better performance.
If you are installing one of our older modpacks, ignore the "README" file that is included in the serverpack files, as they have outdated information.
Paid Method
We suggest renting a server from Bisect Hosting:
Approx. $10 - $25 a month depending on what plan you choose. You can also get 25% off with Code LunaPixel.
Go here and order a plan which fits you. We suggest 1GB per player but nothing lower than 4GB as the server needs at least 3GB to run.
Go to #server-hosting for more Info!
The following advice works for both the Free and Paid methods:
Transferring Your World
If you're playing Singleplayer and want to transfer your world to your server, simply go to your modpack files and navigate to the saves folder. Inside of this folder, you will see your world saves. Rename your desired world save to world. You can then transfer this folder to your server files. If your world was hosted via world sharing, this process has to be done by the person who would click "Share World".
Fixing Lag
To resolve lag issues, simply run the !tps command in #bots and follow the directions provided.
sand scaffoldBOT
GG @scarlet spoke , you just unlocked the achievement: Give or Take! 🥳
 sand scaffoldBOT
masterchief08634, you just advanced to level 1
 scarlet nexus
frank tuskBOT
scarlet nexus
frank tuskBOT
Free Method
To host a server on your own computer, read the selfhosting guide.
This guide goes over how to install, create, and launch a free Minecraft server on all operating systems (MacOS, Linux and Windows). The guide also guides you through installing Java and optimizing your server for better performance.
If you are installing one of our older modpacks, ignore the "README" file that is included in the serverpack files, as they have outdated information.
Paid Method
We suggest renting a server from Bisect Hosting:
Approx. $10 - $25 a month depending on what plan you choose. You can also get 25% off with Code LunaPixel.
Go here and order a plan which fits you. We suggest 1GB per player but nothing lower than 4GB as the server needs at least 3GB to run.
Go to #server-hosting for more Info!
The following advice works for both the Free and Paid methods:
Transferring Your World
If you're playing Singleplayer and want to transfer your world to your server, simply go to your modpack files and navigate to the saves folder. Inside of this folder, you will see your world saves. Rename your desired world save to world. You can then transfer this folder to your server files. If your world was hosted via world sharing, this process has to be done by the person who would click "Share World".
Fixing Lag
To resolve lag issues, simply run the !tps command in #bots and follow the directions provided.
sand scaffoldBOT
criz004, you just advanced to level 3
 edgy tree
!ea
frank tuskBOT
⚠️ Essential Mod Not Supported
We strongly recommend against using Essential with our modpacks, and we add a warning screen during modpack startup containing the following message by default. A free world-sharing alternative is already built-in called Luna - click Share World in the game menu to use it.
Why we don't support Essential:
-
Technical issues: We've received multiple user reports of problems when combining Essential with our modpacks, including reports of world corruption. While there is no conclusive evidence of Essential as the definite cause, we do not have the development or support capacity to resolve issues potentially caused by it.
-
Security concerns: Essential's auto-updater introduces potential security risks that are outside of our control.
-
Ethics: We object to Essential's inclusion of in-game currency and microtransactions in an otherwise free modding environment.
If you choose to use Essential anyway
Please understand that you do so at your own risk and will not be eligible for support from our team. To remove this warning, you can open your modpack instance folder, navigate to config/crash_assistant/problematic_mods_config.json, and under essential-container, change should_crash_on_startup from true to false.
 warm barn
!server
frank tuskBOT
Free Method
To host a server on your own computer, read the selfhosting guide.
This guide goes over how to install, create, and launch a free Minecraft server on all operating systems (MacOS, Linux and Windows). The guide also guides you through installing Java and optimizing your server for better performance.
If you are installing one of our older modpacks, ignore the "README" file that is included in the serverpack files, as they have outdated information.
Paid Method
We suggest renting a server from Bisect Hosting:
Approx. $10 - $25 a month depending on what plan you choose. You can also get 25% off with Code LunaPixel.
Go here and order a plan which fits you. We suggest 1GB per player but nothing lower than 4GB as the server needs at least 3GB to run.
Go to #server-hosting for more Info!
The following advice works for both the Free and Paid methods:
Transferring Your World
If you're playing Singleplayer and want to transfer your world to your server, simply go to your modpack files and navigate to the saves folder. Inside of this folder, you will see your world saves. Rename your desired world save to world. You can then transfer this folder to your server files. If your world was hosted via world sharing, this process has to be done by the person who would click "Share World".
Fixing Lag
To resolve lag issues, simply run the !tps command in #bots and follow the directions provided.
sand scaffoldBOT
spivy8173, you just advanced to level 1
sand scaffoldBOT
tomatosoupter, you just advanced to level 1
sand scaffoldBOT
takemiyashin, you just advanced to level 2
TheFlee, you just advanced to level 1
sand scaffoldBOT
✟ Damian ✟, you just advanced to level 4
sand scaffoldBOT
idekanymoreimprettylosttbh, you just advanced to level 1
scubasteave, you just advanced to level 6
robin7_, you just advanced to level 2
sand scaffoldBOT
raikakiara, you just advanced to level 1
abirdlover., you just advanced to level 2
sand scaffoldBOT
plazio, you just advanced to level 1
sand scaffoldBOT
slime2591, you just advanced to level 1
 covert garden
!alternates
frank tuskBOT
If this command was run in response to your question/issue, it is likely because switching away from the launcher you are currently using would fix your problem.
From our experience, the most stable launcher by far is ATLauncher, also known as ATL. Keep in mind that ATL is NOT related to TLauncher in any way, and is not a cracked launcher.
To install ATL, do the following:
1. Go to https://atlauncher.com/download. If you are on MacOS, then choose the "Jar" version under the "Other" tab, this is important as OSX WILL crash the game on Mac.
2. Install and run the setup, then open the program.
3. Login to your Microsoft account that owns the Java Edition of Minecraft from the Accounts tab on the right. This process is 100% safe, as it goes directly through Microsoft. ATL doesn't see your account credentials.
4. Go to the Packs tab on the right, then click "Curseforge" on the left.
5. Search the modpack you wish to download.
6. Click "Install". Then, follow the on-screen directions.
7. Go to the Instances tab, and click "Play" on the modpack you downloaded. If you ever see an "Update" button on the instance, click it.
This video explains the process: https://youtu.be/xMYW1wMbmkM
To transfer your Curseforge world to ATL, simply right click the modpack on Curseforge, or click the 3 dots, then click "Open Folder". Copy the Saves folder, then click "Open Folder" on ATL and paste the Saves folder there. Do the same with the XaerosMinimap folder, or the Journeymap folder, to transfer over any waypoints you've created.
Because ATL downloads the exact same files as Curseforge does, your world will be the exact same and you will be able to join the same servers. ATL also works without an internet connection (after you've installed the modpack, of course), and does not have any bloat from Overwolf. You are free to uninstall both Overwolf and Curseforge with ATL installed.
 mellow axle
!server
frank tuskBOT
Free Method
To host a server on your own computer, read the selfhosting guide.
This guide goes over how to install, create, and launch a free Minecraft server on all operating systems (MacOS, Linux and Windows). The guide also guides you through installing Java and optimizing your server for better performance.
If you are installing one of our older modpacks, ignore the "README" file that is included in the serverpack files, as they have outdated information.
Paid Method
We suggest renting a server from Bisect Hosting:
Approx. $10 - $25 a month depending on what plan you choose. You can also get 25% off with Code LunaPixel.
Go here and order a plan which fits you. We suggest 1GB per player but nothing lower than 4GB as the server needs at least 3GB to run.
Go to #server-hosting for more Info!
The following advice works for both the Free and Paid methods:
Transferring Your World
If you're playing Singleplayer and want to transfer your world to your server, simply go to your modpack files and navigate to the saves folder. Inside of this folder, you will see your world saves. Rename your desired world save to world. You can then transfer this folder to your server files. If your world was hosted via world sharing, this process has to be done by the person who would click "Share World".
Fixing Lag
To resolve lag issues, simply run the !tps command in #bots and follow the directions provided.
sand scaffoldBOT
kaira7822, you just advanced to level 2
sand scaffoldBOT
frozenice, you just advanced to level 1
sand scaffoldBOT
Chewie~ [Otherworld] BelaEnjoyer, you just advanced to level 15
oldman3338, you just advanced to level 3
 young prism
!server
frank tuskBOT
Free Method
To host a server on your own computer, read the selfhosting guide.
This guide goes over how to install, create, and launch a free Minecraft server on all operating systems (MacOS, Linux and Windows). The guide also guides you through installing Java and optimizing your server for better performance.
If you are installing one of our older modpacks, ignore the "README" file that is included in the serverpack files, as they have outdated information.
Paid Method
We suggest renting a server from Bisect Hosting:
Approx. $10 - $25 a month depending on what plan you choose. You can also get 25% off with Code LunaPixel.
Go here and order a plan which fits you. We suggest 1GB per player but nothing lower than 4GB as the server needs at least 3GB to run.
Go to #server-hosting for more Info!
The following advice works for both the Free and Paid methods:
Transferring Your World
If you're playing Singleplayer and want to transfer your world to your server, simply go to your modpack files and navigate to the saves folder. Inside of this folder, you will see your world saves. Rename your desired world save to world. You can then transfer this folder to your server files. If your world was hosted via world sharing, this process has to be done by the person who would click "Share World".
Fixing Lag
To resolve lag issues, simply run the !tps command in #bots and follow the directions provided.
sand scaffoldBOT
flapacojlbka, you just advanced to level 1
 strong remnant
!server
frank tuskBOT
Free Method
To host a server on your own computer, read the selfhosting guide.
This guide goes over how to install, create, and launch a free Minecraft server on all operating systems (MacOS, Linux and Windows). The guide also guides you through installing Java and optimizing your server for better performance.
If you are installing one of our older modpacks, ignore the "README" file that is included in the serverpack files, as they have outdated information.
Paid Method
We suggest renting a server from Bisect Hosting:
Approx. $10 - $25 a month depending on what plan you choose. You can also get 25% off with Code LunaPixel.
Go here and order a plan which fits you. We suggest 1GB per player but nothing lower than 4GB as the server needs at least 3GB to run.
Go to #server-hosting for more Info!
The following advice works for both the Free and Paid methods:
Transferring Your World
If you're playing Singleplayer and want to transfer your world to your server, simply go to your modpack files and navigate to the saves folder. Inside of this folder, you will see your world saves. Rename your desired world save to world. You can then transfer this folder to your server files. If your world was hosted via world sharing, this process has to be done by the person who would click "Share World".
Fixing Lag
To resolve lag issues, simply run the !tps command in #bots and follow the directions provided.
sand scaffoldBOT
spivy8173, you just advanced to level 2
sand scaffoldBOT
heyitslennka, you just advanced to level 1
sand scaffoldBOT
sharpthealicorn, you just advanced to level 1
strong remnant
!ea
frank tuskBOT
⚠️ Essential Mod Not Supported
We strongly recommend against using Essential with our modpacks, and we add a warning screen during modpack startup containing the following message by default. A free world-sharing alternative is already built-in called Luna - click Share World in the game menu to use it.
Why we don't support Essential:
-
Technical issues: We've received multiple user reports of problems when combining Essential with our modpacks, including reports of world corruption. While there is no conclusive evidence of Essential as the definite cause, we do not have the development or support capacity to resolve issues potentially caused by it.
-
Security concerns: Essential's auto-updater introduces potential security risks that are outside of our control.
-
Ethics: We object to Essential's inclusion of in-game currency and microtransactions in an otherwise free modding environment.
If you choose to use Essential anyway
Please understand that you do so at your own risk and will not be eligible for support from our team. To remove this warning, you can open your modpack instance folder, navigate to config/crash_assistant/problematic_mods_config.json, and under essential-container, change should_crash_on_startup from true to false.
sand scaffoldBOT
jesus2.0, you just advanced to level 2
cfourn, you just advanced to level 1
tfree77, you just advanced to level 5
arthas.cmd, you just advanced to level 1
sand scaffoldBOT
sapnai, you just advanced to level 3
sand scaffoldBOT
somekrazyfool, you just advanced to level 1
sand scaffoldBOT
sunsh1ne0012, you just advanced to level 2
sand scaffoldBOT
dragonknight9227, you just advanced to level 1
sand scaffoldBOT
amgry_leaf, you just advanced to level 1
sand scaffoldBOT
velociraptor4278., you just advanced to level 1
young prism
!help
sand scaffoldBOT
Luna Pixel Studios Plugins Commands
**Birthdays**
</help:1145941150495162392> birthdays
**Giveaways**
</help:1145941150495162392> giveaways
**MEE6 AI**
</help:1145941150495162392> ai
**Levels**
</help:1145941150495162392> levels
**Moderator**
</help:1145941150495162392> moderator
**Emojis**
</help:1145941150495162392> emojis
**Achievements**
</help:1145941150495162392> achievements
franckm1, you just advanced to level 1
sand scaffoldBOT
izadellacruz, you just advanced to level 1
sand scaffoldBOT
erosab2, you just advanced to level 1
sand scaffoldBOT
velociraptor4278., you just advanced to level 2
 shell solar
!server
frank tuskBOT
Free Method
To host a server on your own computer, read the selfhosting guide.
This guide goes over how to install, create, and launch a free Minecraft server on all operating systems (MacOS, Linux and Windows). The guide also guides you through installing Java and optimizing your server for better performance.
If you are installing one of our older modpacks, ignore the "README" file that is included in the serverpack files, as they have outdated information.
Paid Method
We suggest renting a server from Bisect Hosting:
Approx. $10 - $25 a month depending on what plan you choose. You can also get 25% off with Code LunaPixel.
Go here and order a plan which fits you. We suggest 1GB per player but nothing lower than 4GB as the server needs at least 3GB to run.
Go to #server-hosting for more Info!
The following advice works for both the Free and Paid methods:
Transferring Your World
If you're playing Singleplayer and want to transfer your world to your server, simply go to your modpack files and navigate to the saves folder. Inside of this folder, you will see your world saves. Rename your desired world save to world. You can then transfer this folder to your server files. If your world was hosted via world sharing, this process has to be done by the person who would click "Share World".
Fixing Lag
To resolve lag issues, simply run the !tps command in #bots and follow the directions provided.
sand scaffoldBOT
ikeydw, you just advanced to level 1
sand scaffoldBOT
gamers1003, you just advanced to level 1
sand scaffoldBOT
bobthechicken05689, you just advanced to level 1
sand scaffoldBOT
innebsilber, you just advanced to level 1
sand scaffoldBOT
oceanhotsnot, you just advanced to level 2
sand scaffoldBOT
mr_bacon231_24450, you just advanced to level 2
sand scaffoldBOT
arthas.cmd, you just advanced to level 2
GG @rose river , you just unlocked the achievement: It's Alive! It's Alive!! 🥳
 sand scaffoldBOT
evviedawn, you just advanced to level 3
sand scaffoldBOT
enesenkapodloga, you just advanced to level 3
fuhelmaspro, you just advanced to level 1
 shadow sparrow
!tps
frank tuskBOT
Please follow the guide here for changing the Java version your server uses. This will improve performance dramatically. If you are on a third party server host, you likely can not change the Java version your server uses. Bisect Hosting and a few VPS providers do allow changing Java version, though, which can usually be done through your server dashboard.
The method on Bisect is to simply go to the main dashboard page, and select "GraalVM 22" as the Java distribution. If it crashes, use 21 instead.
For further performance improvements, you can also follow this guide. This guide's section regarding GraalVM is completely wrong from our own testing, and we recommend ignoring it.
Reducing server render distance in the server.properties file is also a very good way of reducing lag. Most of our modpacks include mods like Bobby and Farsight, which make it so reducing server render distance will not affect players.
If lag persists, run the following command ingame:
/spark profiler start --only-ticks-over 50
Then, send the link in this channel.
sand scaffoldBOT
arthas.cmd, you just advanced to level 3
sand scaffoldBOT
teufeldrachen26, you just advanced to level 1
erosab2, you just advanced to level 2
 hexed coyote
!server
frank tuskBOT
Free Method
To host a server on your own computer, read the selfhosting guide.
This guide goes over how to install, create, and launch a free Minecraft server on all operating systems (MacOS, Linux and Windows). The guide also guides you through installing Java and optimizing your server for better performance.
If you are installing one of our older modpacks, ignore the "README" file that is included in the serverpack files, as they have outdated information.
Paid Method
We suggest renting a server from Bisect Hosting:
Approx. $10 - $25 a month depending on what plan you choose. You can also get 25% off with Code LunaPixel.
Go here and order a plan which fits you. We suggest 1GB per player but nothing lower than 4GB as the server needs at least 3GB to run.
Go to #server-hosting for more Info!
The following advice works for both the Free and Paid methods:
Transferring Your World
If you're playing Singleplayer and want to transfer your world to your server, simply go to your modpack files and navigate to the saves folder. Inside of this folder, you will see your world saves. Rename your desired world save to world. You can then transfer this folder to your server files. If your world was hosted via world sharing, this process has to be done by the person who would click "Share World".
Fixing Lag
To resolve lag issues, simply run the !tps command in #bots and follow the directions provided.
sand scaffoldBOT
cammmmmmmmmmmmmmmmmmmmmmm, you just advanced to level 1
sand scaffoldBOT
royalsquishi, you just advanced to level 1
sand scaffoldBOT
gantros, you just advanced to level 1
sand scaffoldBOT
klartir321, you just advanced to level 1
owomaster_, you just advanced to level 1
battlestormtitan, you just advanced to level 1
guizz.me, you just advanced to level 1
kyarsrest, you just advanced to level 1
badrifle, you just advanced to level 1
iimber, you just advanced to level 1
estatrix, you just advanced to level 10
guizz.me, you just advanced to level 2
sand scaffoldBOT
yoursweetjesus, you just advanced to level 1
battlestormtitan, you just advanced to level 2
 pearl bobcat
!drivers
frank tuskBOT
You (likely) need to update your graphics drivers in order to resolve the crash. Here's how to go about doing that!
1. Identify your graphics card
if you already know skip to the next step
- Open task manager
- Navigate to the "Performance" tab (on Windows 11 this is the button that looks like a heart pulse)
- Press the GPU 0 graph and read your GPU from the top right
Note:
In some cases you may see a GPU 0 and GPU 1. This means your CPU has its own GPU, as well as a dedicated one. You probably want GPU 1 (which is usually the better one), but you can ask staff to clarify if necessary.
2. Download your drivers from the manufacturers site
Depending on what you read before, you likely need drivers from either AMD, Intel, or NVIDIA
AMD: https://www.amd.com/en/support
Intel: https://www.intel.com/content/www/us/en/download-center/home.html
NVIDIA: https://www.nvidia.com/Download/index.aspx?lang=en-us
Note:
- For NVIDIA you want to select "Game Ready Driver (GRD)" (this is the default option) for the best performance. Once installing you'd probably prefer downloading GeForce Experience, which will notify you when there's an available drivers update.
- For Intel, you probably want to press "Get Started" under the "Automatically update your drivers and software", which will simplify the process and update everything automatically
- For AMD you probably want to just press "Download Windows Drivers", which will download something called AMD Adrenaline, which will update your drivers automatically.
3. Run the installation, restart your computer, and try playing MC again
- At this point, hopefully your Minecraft is running. If it still does not work, please post any new logs and staff will help assist you with finding the right solution.
 naive fable
!support
 gentle solar
!fps
frank tuskBOT
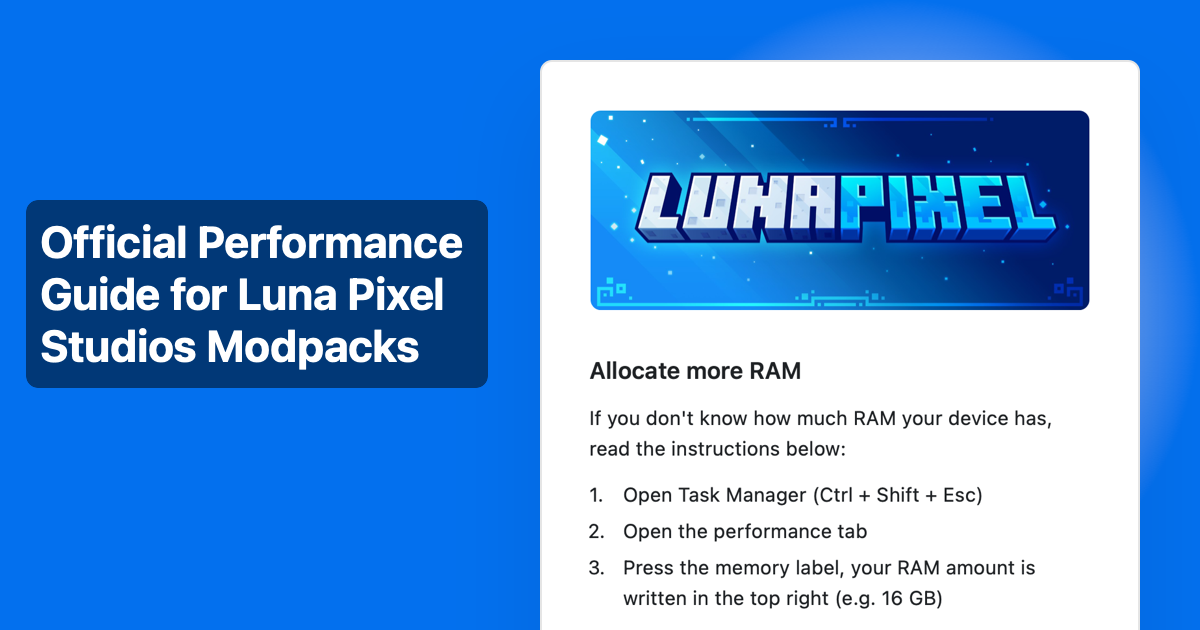 sand scaffoldBOT
kradha, you just advanced to level 8
Can, you just advanced to level 2
jencore, you just advanced to level 6
venomtf, you just advanced to level 1
vic184, you just advanced to level 1
kyarsrest, you just advanced to level 2
sand scaffoldBOT
GG @rapid valley , you just unlocked the achievement: Casual Typer! 🥳
 sand scaffoldBOT
✟ Damian ✟, you just advanced to level 5
itsstqr, you just advanced to level 14
sunsh1ne0012, you just advanced to level 3
dead50, you just advanced to level 2
sand scaffoldBOT
negan2558, you just advanced to level 3
sand scaffoldBOT
contemplatingmylifechoices, you just advanced to level 2
poxipoxipoxipoxi, you just advanced to level 1
spice tulip
!rank
sand scaffoldBOT
 sand scaffoldBOT
twyxelmyumi, you just advanced to level 1
leopard_2_pso, you just advanced to level 1
sand scaffoldBOT
tomsleezy, you just advanced to level 1
heyitslennka, you just advanced to level 2
 grim trout
!vc
frank tuskBOT
Voice chat mod is disabled by default on Bisect servers due to it causing a crash if you're not using a dedicated IP (this is majority of budget servers). Generally all that needs doing to re-enable it is removing the .d from the end of the voice chat mod file (Assuming you have a Dedicated IP + UDP is enabled on the panel).
Then update the port in the voice chat server config. The server will crash if voice chat is running on a port not allocated to the server. https://www.bisecthosting.com/clients/index.php?rp=/knowledgebase/198/How-to-set-up-voice-chat-on-a-ForgeorFabricorSpigot-Minecraft-server.html
sand scaffoldBOT
jencore, you just advanced to level 7
GG @oblique spindle , you just unlocked the achievement: Casual Typer! 🥳

 oblique spindle
100 bumps😭
sand scaffoldBOT
blackness9985, you just advanced to level 1
sand scaffoldBOT
mikey1911, you just advanced to level 2
sand scaffoldBOT
blindblackalt, you just advanced to level 3
sand scaffoldBOT
fate_sparks, you just advanced to level 1
zxge, you just advanced to level 1
fate_sparks, you just advanced to level 2
nphhpn, you just advanced to level 1
gamerbojac, you just advanced to level 1
kyarsrest, you just advanced to level 3
sand scaffoldBOT
xixxevenn, you just advanced to level 3
sand scaffoldBOT
ajanixpanda, you just advanced to level 5
sand scaffoldBOT
erosab2, you just advanced to level 3
sand scaffoldBOT
heliconius., you just advanced to level 3
sand scaffoldBOT
tafolla92, you just advanced to level 6
sand scaffoldBOT
_irondeficiencyman, you just advanced to level 5
iwannabeapetergriffin, you just advanced to level 2
ppllo, you just advanced to level 1
nphhpn, you just advanced to level 2
sand scaffoldBOT
corzajay, you just advanced to level 1
hypotheticaltop, you just advanced to level 1
kisher1, you just advanced to level 1
corzajay, you just advanced to level 2
sand scaffoldBOT
GG @grave zenith , you just unlocked the achievement: To Infinity!! 🥳
 sand scaffoldBOT
roquefortx, you just advanced to level 1
 knotty sable
!server
frank tuskBOT
Free Method
To host a server on your own computer, read the selfhosting guide.
This guide goes over how to install, create, and launch a free Minecraft server on all operating systems (MacOS, Linux and Windows). The guide also guides you through installing Java and optimizing your server for better performance.
If you are installing one of our older modpacks, ignore the "README" file that is included in the serverpack files, as they have outdated information.
Paid Method
We suggest renting a server from Bisect Hosting:
Approx. $10 - $25 a month depending on what plan you choose. You can also get 25% off with Code LunaPixel.
Go here and order a plan which fits you. We suggest 1GB per player but nothing lower than 4GB as the server needs at least 3GB to run.
Go to #server-hosting for more Info!
The following advice works for both the Free and Paid methods:
Transferring Your World
If you're playing Singleplayer and want to transfer your world to your server, simply go to your modpack files and navigate to the saves folder. Inside of this folder, you will see your world saves. Rename your desired world save to world. You can then transfer this folder to your server files. If your world was hosted via world sharing, this process has to be done by the person who would click "Share World".
Fixing Lag
To resolve lag issues, simply run the !tps command in #bots and follow the directions provided.
sand scaffoldBOT
le_chungus, you just advanced to level 1
sand scaffoldBOT
taorose, you just advanced to level 1
peghtu_123._49872, you just advanced to level 2
v0x55, you just advanced to level 14
sand scaffoldBOT
iwannabeapetergriffin, you just advanced to level 3
banfssog, you just advanced to level 1
redreign, you just advanced to level 1
sanskingjoker, you just advanced to level 1
fyirnen, you just advanced to level 1
sand scaffoldBOT
abdulilvero, you just advanced to level 1
asnee2507, you just advanced to level 1
 plain nexus
!server
frank tuskBOT
Free Method
To host a server on your own computer, read the selfhosting guide.
This guide goes over how to install, create, and launch a free Minecraft server on all operating systems (MacOS, Linux and Windows). The guide also guides you through installing Java and optimizing your server for better performance.
If you are installing one of our older modpacks, ignore the "README" file that is included in the serverpack files, as they have outdated information.
Paid Method
We suggest renting a server from Bisect Hosting:
Approx. $10 - $25 a month depending on what plan you choose. You can also get 25% off with Code LunaPixel.
Go here and order a plan which fits you. We suggest 1GB per player but nothing lower than 4GB as the server needs at least 3GB to run.
Go to #server-hosting for more Info!
The following advice works for both the Free and Paid methods:
Transferring Your World
If you're playing Singleplayer and want to transfer your world to your server, simply go to your modpack files and navigate to the saves folder. Inside of this folder, you will see your world saves. Rename your desired world save to world. You can then transfer this folder to your server files. If your world was hosted via world sharing, this process has to be done by the person who would click "Share World".
Fixing Lag
To resolve lag issues, simply run the !tps command in #bots and follow the directions provided.
sand scaffoldBOT
greatcheesytaste, you just advanced to level 1
 dire pebble
!tps
frank tuskBOT
Please follow the guide here for changing the Java version your server uses. This will improve performance dramatically. If you are on a third party server host, you likely can not change the Java version your server uses. Bisect Hosting and a few VPS providers do allow changing Java version, though, which can usually be done through your server dashboard.
The method on Bisect is to simply go to the main dashboard page, and select "GraalVM 22" as the Java distribution. If it crashes, use 21 instead.
For further performance improvements, you can also follow this guide. This guide's section regarding GraalVM is completely wrong from our own testing, and we recommend ignoring it.
Reducing server render distance in the server.properties file is also a very good way of reducing lag. Most of our modpacks include mods like Bobby and Farsight, which make it so reducing server render distance will not affect players.
If lag persists, run the following command ingame:
/spark profiler start --only-ticks-over 50
Then, send the link in this channel.
sand scaffoldBOT
rosssgzz_, you just advanced to level 1
fyirnen, you just advanced to level 2
demingm13, you just advanced to level 1
bobthechicken05689, you just advanced to level 2
sand scaffoldBOT
davidname662, you just advanced to level 5
GG @small wing , you just unlocked the achievement: Casual Typer! 🥳
 sand scaffoldBOT
nventus, you just advanced to level 3
owenxlan, you just advanced to level 1
GG @glad socket , you just unlocked the achievement: Give or Take! 🥳
 sand scaffoldBOT
GG @fickle grail , you just unlocked the achievement: Casual Typer! 🥳
 sand scaffoldBOT
lucidmeta, you just advanced to level 1
sand scaffoldBOT
.ryzenn_, you just advanced to level 1
sand scaffoldBOT
whisper35478, you just advanced to level 1
roquefortx, you just advanced to level 2
sand scaffoldBOT
giggityghost, you just advanced to level 1
sand scaffoldBOT
link1048, you just advanced to level 1
HalfTheWorldAway, you just advanced to level 1
sand scaffoldBOT
guttedandbled, you just advanced to level 1
 arctic locust
frank tuskBOT
arctic locust
frank tuskBOT
If this command was run in response to your question/issue, it is likely because switching away from the launcher you are currently using would fix your problem.
From our experience, the most stable launcher by far is ATLauncher, also known as ATL. Keep in mind that ATL is NOT related to TLauncher in any way, and is not a cracked launcher.
To install ATL, do the following:
1. Go to https://atlauncher.com/download. If you are on MacOS, then choose the "Jar" version under the "Other" tab, this is important as OSX WILL crash the game on Mac.
2. Install and run the setup, then open the program.
3. Login to your Microsoft account that owns the Java Edition of Minecraft from the Accounts tab on the right. This process is 100% safe, as it goes directly through Microsoft. ATL doesn't see your account credentials.
4. Go to the Packs tab on the right, then click "Curseforge" on the left.
5. Search the modpack you wish to download.
6. Click "Install". Then, follow the on-screen directions.
7. Go to the Instances tab, and click "Play" on the modpack you downloaded. If you ever see an "Update" button on the instance, click it.
This video explains the process: https://youtu.be/xMYW1wMbmkM
To transfer your Curseforge world to ATL, simply right click the modpack on Curseforge, or click the 3 dots, then click "Open Folder". Copy the Saves folder, then click "Open Folder" on ATL and paste the Saves folder there. Do the same with the XaerosMinimap folder, or the Journeymap folder, to transfer over any waypoints you've created.
Because ATL downloads the exact same files as Curseforge does, your world will be the exact same and you will be able to join the same servers. ATL also works without an internet connection (after you've installed the modpack, of course), and does not have any bloat from Overwolf. You are free to uninstall both Overwolf and Curseforge with ATL installed.
sand scaffoldBOT
bonobo829, you just advanced to level 1
sand scaffoldBOT
raigas, you just advanced to level 22
 pastel anchor
!server
frank tuskBOT
Free Method
To host a server on your own computer, read the selfhosting guide.
This guide goes over how to install, create, and launch a free Minecraft server on all operating systems (MacOS, Linux and Windows). The guide also guides you through installing Java and optimizing your server for better performance.
If you are installing one of our older modpacks, ignore the "README" file that is included in the serverpack files, as they have outdated information.
Paid Method
We suggest renting a server from Bisect Hosting:
Approx. $10 - $25 a month depending on what plan you choose. You can also get 25% off with Code LunaPixel.
Go here and order a plan which fits you. We suggest 1GB per player but nothing lower than 4GB as the server needs at least 3GB to run.
Go to #server-hosting for more Info!
The following advice works for both the Free and Paid methods:
Transferring Your World
If you're playing Singleplayer and want to transfer your world to your server, simply go to your modpack files and navigate to the saves folder. Inside of this folder, you will see your world saves. Rename your desired world save to world. You can then transfer this folder to your server files. If your world was hosted via world sharing, this process has to be done by the person who would click "Share World".
Fixing Lag
To resolve lag issues, simply run the !tps command in #bots and follow the directions provided.
sand scaffoldBOT
erosab2, you just advanced to level 4
zxaber, you just advanced to level 4
GG @scenic matrix , you just unlocked the achievement: Casual Typer! 🥳
 sand scaffoldBOT
brownie3988, you just advanced to level 1
 kind pagoda
!alternates
frank tuskBOT
If this command was run in response to your question/issue, it is likely because switching away from the launcher you are currently using would fix your problem.
From our experience, the most stable launcher by far is ATLauncher, also known as ATL. Keep in mind that ATL is NOT related to TLauncher in any way, and is not a cracked launcher.
To install ATL, do the following:
1. Go to https://atlauncher.com/download. If you are on MacOS, then choose the "Jar" version under the "Other" tab, this is important as OSX WILL crash the game on Mac.
2. Install and run the setup, then open the program.
3. Login to your Microsoft account that owns the Java Edition of Minecraft from the Accounts tab on the right. This process is 100% safe, as it goes directly through Microsoft. ATL doesn't see your account credentials.
4. Go to the Packs tab on the right, then click "Curseforge" on the left.
5. Search the modpack you wish to download.
6. Click "Install". Then, follow the on-screen directions.
7. Go to the Instances tab, and click "Play" on the modpack you downloaded. If you ever see an "Update" button on the instance, click it.
This video explains the process: https://youtu.be/xMYW1wMbmkM
To transfer your Curseforge world to ATL, simply right click the modpack on Curseforge, or click the 3 dots, then click "Open Folder". Copy the Saves folder, then click "Open Folder" on ATL and paste the Saves folder there. Do the same with the XaerosMinimap folder, or the Journeymap folder, to transfer over any waypoints you've created.
Because ATL downloads the exact same files as Curseforge does, your world will be the exact same and you will be able to join the same servers. ATL also works without an internet connection (after you've installed the modpack, of course), and does not have any bloat from Overwolf. You are free to uninstall both Overwolf and Curseforge with ATL installed.
sand scaffoldBOT
dani_tomi, you just advanced to level 1
brayan26., you just advanced to level 1
 knotty bloom
!server
frank tuskBOT
Free Method
To host a server on your own computer, read the selfhosting guide.
This guide goes over how to install, create, and launch a free Minecraft server on all operating systems (MacOS, Linux and Windows). The guide also guides you through installing Java and optimizing your server for better performance.
If you are installing one of our older modpacks, ignore the "README" file that is included in the serverpack files, as they have outdated information.
Paid Method
We suggest renting a server from Bisect Hosting:
Approx. $10 - $25 a month depending on what plan you choose. You can also get 25% off with Code LunaPixel.
Go here and order a plan which fits you. We suggest 1GB per player but nothing lower than 4GB as the server needs at least 3GB to run.
Go to #server-hosting for more Info!
The following advice works for both the Free and Paid methods:
Transferring Your World
If you're playing Singleplayer and want to transfer your world to your server, simply go to your modpack files and navigate to the saves folder. Inside of this folder, you will see your world saves. Rename your desired world save to world. You can then transfer this folder to your server files. If your world was hosted via world sharing, this process has to be done by the person who would click "Share World".
Fixing Lag
To resolve lag issues, simply run the !tps command in #bots and follow the directions provided.
sand scaffoldBOT
jooiiee, you just advanced to level 3
sand scaffoldBOT
darkgun_78, you just advanced to level 2
kreatorzero, you just advanced to level 2
sand scaffoldBOT
cailleach, you just advanced to level 1
 blissful furnace
!server
frank tuskBOT
Free Method
To host a server on your own computer, read the selfhosting guide.
This guide goes over how to install, create, and launch a free Minecraft server on all operating systems (MacOS, Linux and Windows). The guide also guides you through installing Java and optimizing your server for better performance.
If you are installing one of our older modpacks, ignore the "README" file that is included in the serverpack files, as they have outdated information.
Paid Method
We suggest renting a server from Bisect Hosting:
Approx. $10 - $25 a month depending on what plan you choose. You can also get 25% off with Code LunaPixel.
Go here and order a plan which fits you. We suggest 1GB per player but nothing lower than 4GB as the server needs at least 3GB to run.
Go to #server-hosting for more Info!
The following advice works for both the Free and Paid methods:
Transferring Your World
If you're playing Singleplayer and want to transfer your world to your server, simply go to your modpack files and navigate to the saves folder. Inside of this folder, you will see your world saves. Rename your desired world save to world. You can then transfer this folder to your server files. If your world was hosted via world sharing, this process has to be done by the person who would click "Share World".
Fixing Lag
To resolve lag issues, simply run the !tps command in #bots and follow the directions provided.
sand scaffoldBOT
ii_ans, you just advanced to level 7
tfree77, you just advanced to level 6
titanfactor0969, you just advanced to level 1
sand scaffoldBOT
generalbuttons, you just advanced to level 3
.jaimin.p, you just advanced to level 1
bruhbama, you just advanced to level 1
mxgaming0617_97195, you just advanced to level 2
sand scaffoldBOT
 sand scaffoldBOT
power2355, you just advanced to level 7
sand scaffoldBOT
w3r10s, you just advanced to level 1
daman_12912, you just advanced to level 1
seltax31_9842, you just advanced to level 1
sand scaffoldBOT
boomshakala583, you just advanced to level 1
just_a_guy123, you just advanced to level 1
 covert fable
!server
frank tuskBOT
Free Method
To host a server on your own computer, read the selfhosting guide.
This guide goes over how to install, create, and launch a free Minecraft server on all operating systems (MacOS, Linux and Windows). The guide also guides you through installing Java and optimizing your server for better performance.
If you are installing one of our older modpacks, ignore the "README" file that is included in the serverpack files, as they have outdated information.
Paid Method
We suggest renting a server from Bisect Hosting:
Approx. $10 - $25 a month depending on what plan you choose. You can also get 25% off with Code LunaPixel.
Go here and order a plan which fits you. We suggest 1GB per player but nothing lower than 4GB as the server needs at least 3GB to run.
Go to #server-hosting for more Info!
The following advice works for both the Free and Paid methods:
Transferring Your World
If you're playing Singleplayer and want to transfer your world to your server, simply go to your modpack files and navigate to the saves folder. Inside of this folder, you will see your world saves. Rename your desired world save to world. You can then transfer this folder to your server files. If your world was hosted via world sharing, this process has to be done by the person who would click "Share World".
Fixing Lag
To resolve lag issues, simply run the !tps command in #bots and follow the directions provided.
sand scaffoldBOT
just_a_guy123, you just advanced to level 2
sand scaffoldBOT
felixschreave, you just advanced to level 1
bobthechicken05689, you just advanced to level 3
sand scaffoldBOT
redearth483, you just advanced to level 1
sand scaffoldBOT
eclipsed.draconic, you just advanced to level 6
smelvinfigglebottom, you just advanced to level 1
sand scaffoldBOT
GG @nimble hedge , you just unlocked the achievement: Chatter! 🥳
 sand scaffoldBOT
GG @rich canopy , you just unlocked the achievement: Fire Starter! 🥳

xander_okkrom, you just advanced to level 1
hamstheman_, you just advanced to level 1
sand scaffoldBOT
mikdad, you just advanced to level 1
sand scaffoldBOT
GG @cyan lance , you just unlocked the achievement: Fire Starter! 🥳
 sand scaffoldBOT
darklight5553, you just advanced to level 1
sand scaffoldBOT
_nova_tm, you just advanced to level 1
Jimmy, you just advanced to level 1
marcuzuit, you just advanced to level 1
sand scaffoldBOT
grimmtheotterengineer, you just advanced to level 2
sand scaffoldBOT
matchst1ck__, you just advanced to level 5
sand scaffoldBOT
✟ Damian ✟, you just advanced to level 6
sand scaffoldBOT
connorbrooks, you just advanced to level 1
sand scaffoldBOT
rinzler2400, you just advanced to level 2
sand scaffoldBOT
.dextority, you just advanced to level 3
dabeast13, you just advanced to level 1
sand scaffoldBOT
julien8312, you just advanced to level 1
sand scaffoldBOT
_portugarlk, you just advanced to level 1
 snow tartan
!updatemods
frank tuskBOT
Do NOT Update Mods Manually!
Modpacks use specific versions of certain mods to prevent various issues, such as crashes or major game-breaking bugs. Mods will be updated by the modpack developer when they see fit. Please do not update the mods in a modpack manually, unless specifically told to do so. This includes hitting the "update all" feature on CurseForge launcher it likes to bother users with.
To be clear; this is separate from updating the modpack (such as Better MC / Medieval MC) itself. You should always stay up to date with the latest version of the modpack. To update the pack correctly, you can follow the command!updatemodpack
The easiest way to downgrade mod versions to their original versions in the pack, is to reinstall the pack itself. Before you uninstall, back up both any singleplayer world files you have, and your map folder. LPS packs usually use JourneyMap or Xareos, the map folder will be named accordingly.
- Curseforge -> Right click the modpack instance -> „Open Folder”.
- ATLauncher -> Click „Open Folder” on the modpack instance.
- PrismLauncher -> Select your instance and click „Folder” on the right.
Navigate to the "minecraft" folder, and within that will be "saves" and "journeymap"/"xareos" depending on which the pack has. Copy/Move these folders to a safe location, and you can move them right back to the fresh copy of the pack when reinstalled.
snow tartan
!updatemodpack
frank tuskBOT
To properly update the modpack you're playing, it depends on the launcher you are using. This video can explains it on CurseForge launcher, and the same method can be used on other launchers as well, but it's not necessary to use this method on others.
-
CurseForge - See above video
-
PrismLauncher -> Select your instance, and click "Edit" on the right. the 3rd tab down will say "CurseForge", click on it, and there will be a dropdown menu, if not already selected, the latest version of the pack will be at the top of it. click "Update Pack". Sometimes there will be new mods to manually download due to liscensing issues, click "Open Missing" and it will automatically download and checked, and copied to the instance folder. It's safe to delete these mods in your downloads folder once done. Once all are detected, the "Open Missing" will be grayed out. You can click 'Continue" at this point, and it will finish the update process and tell you when its successful.
-
ATLauncher - Under the "Instances" tab, find the pack you would like to update. there will be an "Update" button. There will be a dropdown menu, and if not already selected, the latest version of the pack will be at the top of it to select. Click "Update" once selected. Sometimes there will be new mods to manually download due to licensing issues, click "Open Missing" and it will automatically download and checked, and copied to the instance folder. It's safe to delete these mods in your downloads folder once done. Once all are detected, You can click "OK ", and it will finish the update process.
sand scaffoldBOT
jherickrm, you just advanced to level 1
sand scaffoldBOT
thetretre, you just advanced to level 1
green_souls, you just advanced to level 1
green_souls, you just advanced to level 2
sand scaffoldBOT
oldman3338, you just advanced to level 5
GG @scarlet spoke , you just unlocked the achievement: Casual Typer! 🥳
 sand scaffoldBOT
fellareus, you just advanced to level 1
sand scaffoldBOT
Can, you just advanced to level 3
krbyy., you just advanced to level 1
zodzu, you just advanced to level 3
sand scaffoldBOT
power2355, you just advanced to level 8
venomtf, you just advanced to level 2
ii_ans, you just advanced to level 8
sand scaffoldBOT
bootstrap22, you just advanced to level 1
sand scaffoldBOT
tfree77, you just advanced to level 7
yourboywulfie, you just advanced to level 1
antain, you just advanced to level 2
kradha, you just advanced to level 9
sand scaffoldBOT
.quintessence, you just advanced to level 1
cloudedvision., you just advanced to level 1
sand scaffoldBOT
peachhsojuu, you just advanced to level 1
GG @wise cairn , you just unlocked the achievement: To Infinity!! 🥳
 sand scaffoldBOT
beeryee_, you just advanced to level 1
sand scaffoldBOT
cyberkid100, you just advanced to level 1
sand scaffoldBOT
_goofycat, you just advanced to level 1
sand scaffoldBOT
randomguy24., you just advanced to level 1
sand scaffoldBOT
ratsratsmakemecrazy, you just advanced to level 1
t4rytaa, you just advanced to level 1
sand scaffoldBOT
metro0579, you just advanced to level 1
sand scaffoldBOT
GG @lusty viper , you just unlocked the achievement: Casual Typer! 🥳

i_fizzy_soda, you just advanced to level 1
titamv13, you just advanced to level 1
_portugarlk, you just advanced to level 2
jencore, you just advanced to level 8
steph2772, you just advanced to level 1
 slender wedge
!server
frank tuskBOT
Free Method
To host a server on your own computer, read the selfhosting guide.
This guide goes over how to install, create, and launch a free Minecraft server on all operating systems (MacOS, Linux and Windows). The guide also guides you through installing Java and optimizing your server for better performance.
If you are installing one of our older modpacks, ignore the "README" file that is included in the serverpack files, as they have outdated information.
Paid Method
We suggest renting a server from Bisect Hosting:
Approx. $10 - $25 a month depending on what plan you choose. You can also get 25% off with Code LunaPixel.
Go here and order a plan which fits you. We suggest 1GB per player but nothing lower than 4GB as the server needs at least 3GB to run.
Go to #server-hosting for more Info!
The following advice works for both the Free and Paid methods:
Transferring Your World
If you're playing Singleplayer and want to transfer your world to your server, simply go to your modpack files and navigate to the saves folder. Inside of this folder, you will see your world saves. Rename your desired world save to world. You can then transfer this folder to your server files. If your world was hosted via world sharing, this process has to be done by the person who would click "Share World".
Fixing Lag
To resolve lag issues, simply run the !tps command in #bots and follow the directions provided.
sand scaffoldBOT
failuresofgabe, you just advanced to level 1
 serene cape
!server
frank tuskBOT
Free Method
To host a server on your own computer, read the selfhosting guide.
This guide goes over how to install, create, and launch a free Minecraft server on all operating systems (MacOS, Linux and Windows). The guide also guides you through installing Java and optimizing your server for better performance.
If you are installing one of our older modpacks, ignore the "README" file that is included in the serverpack files, as they have outdated information.
Paid Method
We suggest renting a server from Bisect Hosting:
Approx. $10 - $25 a month depending on what plan you choose. You can also get 25% off with Code LunaPixel.
Go here and order a plan which fits you. We suggest 1GB per player but nothing lower than 4GB as the server needs at least 3GB to run.
Go to #server-hosting for more Info!
The following advice works for both the Free and Paid methods:
Transferring Your World
If you're playing Singleplayer and want to transfer your world to your server, simply go to your modpack files and navigate to the saves folder. Inside of this folder, you will see your world saves. Rename your desired world save to world. You can then transfer this folder to your server files. If your world was hosted via world sharing, this process has to be done by the person who would click "Share World".
Fixing Lag
To resolve lag issues, simply run the !tps command in #bots and follow the directions provided.
sand scaffoldBOT
rooty, you just advanced to level 7
sand scaffoldBOT
aerynnblitz_8085, you just advanced to level 1
erosab2, you just advanced to level 5
sand scaffoldBOT
sir_chuevee, you just advanced to level 1
sand scaffoldBOT
cloudedvision., you just advanced to level 2
acespadesproto, you just advanced to level 1
sir_chuevee, you just advanced to level 2
sand scaffoldBOT
sir_chuevee, you just advanced to level 3
sand scaffoldBOT
connorbrooks, you just advanced to level 2
sand scaffoldBOT
apollo12cz, you just advanced to level 1
sand scaffoldBOT
non_mario, you just advanced to level 1
green_souls, you just advanced to level 3
 balmy orchid
!best
frank tuskBOT
There is no best, it's based on preference. What's best is to try it out yourself as what you like may be something someone else dislikes.
sand scaffoldBOT
dysphoria__, you just advanced to level 1
sand scaffoldBOT
vipgamer_alt, you just advanced to level 1
melkibren, you just advanced to level 1
sand scaffoldBOT
GG @humble void , you just unlocked the achievement: Casual Typer! 🥳

GG @humble void , you just unlocked the achievement: Give or Take! 🥳
 sand scaffoldBOT
dustypeanut, you just advanced to level 1
sand scaffoldBOT
maulreee, you just advanced to level 1
sand scaffoldBOT
nemesisprimal7, you just advanced to level 1
icantbelieveitsnotbaker, you just advanced to level 1
sand scaffoldBOT
krong, you just advanced to level 1
sand scaffoldBOT
venomtf, you just advanced to level 3
 stoic snow
!server
frank tuskBOT
Free Method
To host a server on your own computer, read the selfhosting guide.
This guide goes over how to install, create, and launch a free Minecraft server on all operating systems (MacOS, Linux and Windows). The guide also guides you through installing Java and optimizing your server for better performance.
If you are installing one of our older modpacks, ignore the "README" file that is included in the serverpack files, as they have outdated information.
Paid Method
We suggest renting a server from Bisect Hosting:
Approx. $10 - $25 a month depending on what plan you choose. You can also get 25% off with Code LunaPixel.
Go here and order a plan which fits you. We suggest 1GB per player but nothing lower than 4GB as the server needs at least 3GB to run.
Go to #server-hosting for more Info!
The following advice works for both the Free and Paid methods:
Transferring Your World
If you're playing Singleplayer and want to transfer your world to your server, simply go to your modpack files and navigate to the saves folder. Inside of this folder, you will see your world saves. Rename your desired world save to world. You can then transfer this folder to your server files. If your world was hosted via world sharing, this process has to be done by the person who would click "Share World".
Fixing Lag
To resolve lag issues, simply run the !tps command in #bots and follow the directions provided.
stoic snow
!ws
frank tuskBOT
Luna Pixel's World Sharing
Our modpacks don't support any mods that add singleplayer hosting / world sharing because we already provide free world sharing. The 'Essential' mod is therefore incompatible.
To share your world using our own world hosting, click the 'Open to Lan' or 'Share World' button in the game menu when in a singleplayer world, and share the world.
It will give you an address, like magma-cube.mc.lunapixel.gg, which your friends can use to connect directly to your world as if it were a server!
We still highly suggest not to play through LAN as LAN is untested and unreliable. Using it will cause longterm damage to your world.
There is no reason to use LAN, as we support both paid and free methods of hosting a server the normal way.
If you get an error in chat when trying to host your world, we highly recommend selfhosting instead as it's free, very easy, and much more stable. Run the !server command in #bots to learn more.
 sand scaffoldBOT
arthas.cmd, you just advanced to level 4
sand scaffoldBOT
.quintessence, you just advanced to level 2
v0x55, you just advanced to level 16
arguskaltaris, you just advanced to level 1
sand scaffoldBOT
xy6r, you just advanced to level 1
sand scaffoldBOT
najflex_, you just advanced to level 3
sand scaffoldBOT
bonobo829, you just advanced to level 2
.quintessence, you just advanced to level 3
felixschreave, you just advanced to level 2
pankaesp, you just advanced to level 2
 frigid parrot
!drivers
frank tuskBOT
You (likely) need to update your graphics drivers in order to resolve the crash. Here's how to go about doing that!
1. Identify your graphics card
if you already know skip to the next step
- Open task manager
- Navigate to the "Performance" tab (on Windows 11 this is the button that looks like a heart pulse)
- Press the GPU 0 graph and read your GPU from the top right
Note:
In some cases you may see a GPU 0 and GPU 1. This means your CPU has its own GPU, as well as a dedicated one. You probably want GPU 1 (which is usually the better one), but you can ask staff to clarify if necessary.
2. Download your drivers from the manufacturers site
Depending on what you read before, you likely need drivers from either AMD, Intel, or NVIDIA
AMD: https://www.amd.com/en/support
Intel: https://www.intel.com/content/www/us/en/download-center/home.html
NVIDIA: https://www.nvidia.com/Download/index.aspx?lang=en-us
Note:
- For NVIDIA you want to select "Game Ready Driver (GRD)" (this is the default option) for the best performance. Once installing you'd probably prefer downloading GeForce Experience, which will notify you when there's an available drivers update.
- For Intel, you probably want to press "Get Started" under the "Automatically update your drivers and software", which will simplify the process and update everything automatically
- For AMD you probably want to just press "Download Windows Drivers", which will download something called AMD Adrenaline, which will update your drivers automatically.
3. Run the installation, restart your computer, and try playing MC again
- At this point, hopefully your Minecraft is running. If it still does not work, please post any new logs and staff will help assist you with finding the right solution.
sand scaffoldBOT
GG @toxic cypress , you just unlocked the achievement: Give or Take! 🥳

 jade lava
!server
frank tuskBOT
Free Method
To host a server on your own computer, read the selfhosting guide.
This guide goes over how to install, create, and launch a free Minecraft server on all operating systems (MacOS, Linux and Windows). The guide also guides you through installing Java and optimizing your server for better performance.
If you are installing one of our older modpacks, ignore the "README" file that is included in the serverpack files, as they have outdated information.
Paid Method
We suggest renting a server from Bisect Hosting:
Approx. $10 - $25 a month depending on what plan you choose. You can also get 25% off with Code LunaPixel.
Go here and order a plan which fits you. We suggest 1GB per player but nothing lower than 4GB as the server needs at least 3GB to run.
Go to #server-hosting for more Info!
The following advice works for both the Free and Paid methods:
Transferring Your World
If you're playing Singleplayer and want to transfer your world to your server, simply go to your modpack files and navigate to the saves folder. Inside of this folder, you will see your world saves. Rename your desired world save to world. You can then transfer this folder to your server files. If your world was hosted via world sharing, this process has to be done by the person who would click "Share World".
Fixing Lag
To resolve lag issues, simply run the !tps command in #bots and follow the directions provided.
sand scaffoldBOT
monkeeartillery, you just advanced to level 1
sand scaffoldBOT
felixschreave, you just advanced to level 3
sand scaffoldBOT
bmancious, you just advanced to level 1
sir_chuevee, you just advanced to level 4
sand scaffoldBOT
xy6r, you just advanced to level 2
ratsratsmakemecrazy, you just advanced to level 2
daman_12912, you just advanced to level 2
yomie, you just advanced to level 1
sand scaffoldBOT
sib3095, you just advanced to level 1
sand scaffoldBOT
ratsratsmakemecrazy, you just advanced to level 3
 main shell
!alternates
frank tuskBOT
If this command was run in response to your question/issue, it is likely because switching away from the launcher you are currently using would fix your problem.
From our experience, the most stable launcher by far is ATLauncher, also known as ATL. Keep in mind that ATL is NOT related to TLauncher in any way, and is not a cracked launcher.
To install ATL, do the following:
1. Go to https://atlauncher.com/download. If you are on MacOS, then choose the "Jar" version under the "Other" tab, this is important as OSX WILL crash the game on Mac.
2. Install and run the setup, then open the program.
3. Login to your Microsoft account that owns the Java Edition of Minecraft from the Accounts tab on the right. This process is 100% safe, as it goes directly through Microsoft. ATL doesn't see your account credentials.
4. Go to the Packs tab on the right, then click "Curseforge" on the left.
5. Search the modpack you wish to download.
6. Click "Install". Then, follow the on-screen directions.
7. Go to the Instances tab, and click "Play" on the modpack you downloaded. If you ever see an "Update" button on the instance, click it.
This video explains the process: https://youtu.be/xMYW1wMbmkM
To transfer your Curseforge world to ATL, simply right click the modpack on Curseforge, or click the 3 dots, then click "Open Folder". Copy the Saves folder, then click "Open Folder" on ATL and paste the Saves folder there. Do the same with the XaerosMinimap folder, or the Journeymap folder, to transfer over any waypoints you've created.
Because ATL downloads the exact same files as Curseforge does, your world will be the exact same and you will be able to join the same servers. ATL also works without an internet connection (after you've installed the modpack, of course), and does not have any bloat from Overwolf. You are free to uninstall both Overwolf and Curseforge with ATL installed.
sand scaffoldBOT
crimsonknight_67152_23087, you just advanced to level 1
sand scaffoldBOT
femle_r, you just advanced to level 2
sand scaffoldBOT
 sand scaffoldBOT
.quintessence, you just advanced to level 4
sand scaffoldBOT
itspixplays, you just advanced to level 2
polymerq, you just advanced to level 21
sand scaffoldBOT
metro0579, you just advanced to level 2
just_tagan, you just advanced to level 1
yveltal.walmart, you just advanced to level 1
hoang017428, you just advanced to level 1
sand scaffoldBOT
GG @ashen imp , you just unlocked the achievement: Casual Typer! 🥳

metro0579, you just advanced to level 3
spice tulip
?tagslist
sand scaffoldBOT
sir_chuevee, you just advanced to level 5
sand scaffoldBOT
GG @radiant pilot , you just unlocked the achievement: Give or Take! 🥳

v0x55, you just advanced to level 17
sand scaffoldBOT
vaccccc, you just advanced to level 4
sand scaffoldBOT
maulreee, you just advanced to level 2
sand scaffoldBOT
the1onlyxander, you just advanced to level 2
thejackster1153, you just advanced to level 4
kappy7546, you just advanced to level 1
sand scaffoldBOT
leivurishere, you just advanced to level 1
sand scaffoldBOT
power2355, you just advanced to level 9
cyberkid100, you just advanced to level 2
sand scaffoldBOT
victor_stark, you just advanced to level 7
sand scaffoldBOT
kyarsrest, you just advanced to level 4
virpultik, you just advanced to level 1
sand scaffoldBOT
itsmefuss, you just advanced to level 1
sand scaffoldBOT
maulreee, you just advanced to level 3
sand scaffoldBOT
dice_dragon_17, you just advanced to level 1
sand scaffoldBOT
panpan2502, you just advanced to level 1
02yakolsfirestar, you just advanced to level 1
 grand linden
!ws
frank tuskBOT
Luna Pixel's World Sharing
Our modpacks don't support any mods that add singleplayer hosting / world sharing because we already provide free world sharing. The 'Essential' mod is therefore incompatible.
To share your world using our own world hosting, click the 'Open to Lan' or 'Share World' button in the game menu when in a singleplayer world, and share the world.
It will give you an address, like magma-cube.mc.lunapixel.gg, which your friends can use to connect directly to your world as if it were a server!
We still highly suggest not to play through LAN as LAN is untested and unreliable. Using it will cause longterm damage to your world.
There is no reason to use LAN, as we support both paid and free methods of hosting a server the normal way.
If you get an error in chat when trying to host your world, we highly recommend selfhosting instead as it's free, very easy, and much more stable. Run the !server command in #bots to learn more.
grand linden
!server
frank tuskBOT
Free Method
To host a server on your own computer, read the selfhosting guide.
This guide goes over how to install, create, and launch a free Minecraft server on all operating systems (MacOS, Linux and Windows). The guide also guides you through installing Java and optimizing your server for better performance.
If you are installing one of our older modpacks, ignore the "README" file that is included in the serverpack files, as they have outdated information.
Paid Method
We suggest renting a server from Bisect Hosting:
Approx. $10 - $25 a month depending on what plan you choose. You can also get 25% off with Code LunaPixel.
Go here and order a plan which fits you. We suggest 1GB per player but nothing lower than 4GB as the server needs at least 3GB to run.
Go to #server-hosting for more Info!
The following advice works for both the Free and Paid methods:
Transferring Your World
If you're playing Singleplayer and want to transfer your world to your server, simply go to your modpack files and navigate to the saves folder. Inside of this folder, you will see your world saves. Rename your desired world save to world. You can then transfer this folder to your server files. If your world was hosted via world sharing, this process has to be done by the person who would click "Share World".
Fixing Lag
To resolve lag issues, simply run the !tps command in #bots and follow the directions provided.
sand scaffoldBOT
GG @hazy sigil , you just unlocked the achievement: This Girl is on Fire! 🥳

02yakolsfirestar, you just advanced to level 2
sand scaffoldBOT
_eluber, you just advanced to level 1
GG @jaunty oyster , you just unlocked the achievement: Fire Starter! 🥳
 sand scaffoldBOT
megaplex_21329, you just advanced to level 5
mimi, you just advanced to level 52
notgodsdream, you just advanced to level 1
sand scaffoldBOT
beeryee_, you just advanced to level 2
sand scaffoldBOT
rosecarnations, you just advanced to level 1
dabidio, you just advanced to level 4
felixschreave, you just advanced to level 4
 fast harbor
!ea
frank tuskBOT
⚠️ Essential Mod Not Supported
We strongly recommend against using Essential with our modpacks, and we add a warning screen during modpack startup containing the following message by default. A free world-sharing alternative is already built-in called Luna - click Share World in the game menu to use it.
Why we don't support Essential:
-
Technical issues: We've received multiple user reports of problems when combining Essential with our modpacks, including reports of world corruption. While there is no conclusive evidence of Essential as the definite cause, we do not have the development or support capacity to resolve issues potentially caused by it.
-
Security concerns: Essential's auto-updater introduces potential security risks that are outside of our control.
-
Ethics: We object to Essential's inclusion of in-game currency and microtransactions in an otherwise free modding environment.
If you choose to use Essential anyway
Please understand that you do so at your own risk and will not be eligible for support from our team. To remove this warning, you can open your modpack instance folder, navigate to config/crash_assistant/problematic_mods_config.json, and under essential-container, change should_crash_on_startup from true to false.
sand scaffoldBOT
narwhal_man, you just advanced to level 1
sand scaffoldBOT
parker12113, you just advanced to level 1
sand scaffoldBOT
lilmezz, you just advanced to level 1
sand scaffoldBOT
snowonewantsthis, you just advanced to level 2
sand scaffoldBOT
icantbelieveitsnotbaker, you just advanced to level 2
tostytaco, you just advanced to level 4
sand scaffoldBOT
.dextority, you just advanced to level 4
sand scaffoldBOT
GG @pure hull , you just unlocked the achievement: Casual Typer! 🥳
 frank tuskBOT
Luna Pixel's World Sharing
Our modpacks don't support any mods that add singleplayer hosting / world sharing because we already provide free world sharing. The 'Essential' mod is therefore incompatible.
To share your world using our own world hosting, click the 'Open to Lan' or 'Share World' button in the game menu when in a singleplayer world, and share the world.
It will give you an address, like magma-cube.mc.lunapixel.gg, which your friends can use to connect directly to your world as if it were a server!
We still highly suggest not to play through LAN as LAN is untested and unreliable. Using it will cause longterm damage to your world.
There is no reason to use LAN, as we support both paid and free methods of hosting a server the normal way.
If you get an error in chat when trying to host your world, we highly recommend selfhosting instead as it's free, very easy, and much more stable. Run the !server command in #bots to learn more.
 dusty hawk
!server
frank tuskBOT
Free Method
To host a server on your own computer, read the selfhosting guide.
This guide goes over how to install, create, and launch a free Minecraft server on all operating systems (MacOS, Linux and Windows). The guide also guides you through installing Java and optimizing your server for better performance.
If you are installing one of our older modpacks, ignore the "README" file that is included in the serverpack files, as they have outdated information.
Paid Method
We suggest renting a server from Bisect Hosting:
Approx. $10 - $25 a month depending on what plan you choose. You can also get 25% off with Code LunaPixel.
Go here and order a plan which fits you. We suggest 1GB per player but nothing lower than 4GB as the server needs at least 3GB to run.
Go to #server-hosting for more Info!
The following advice works for both the Free and Paid methods:
Transferring Your World
If you're playing Singleplayer and want to transfer your world to your server, simply go to your modpack files and navigate to the saves folder. Inside of this folder, you will see your world saves. Rename your desired world save to world. You can then transfer this folder to your server files. If your world was hosted via world sharing, this process has to be done by the person who would click "Share World".
Fixing Lag
To resolve lag issues, simply run the !tps command in #bots and follow the directions provided.
sand scaffoldBOT
magicvoyage_80, you just advanced to level 1
sand scaffoldBOT
GG @outer geode , you just unlocked the achievement: Give or Take! 🥳
 sand scaffoldBOT
darkmago0804, you just advanced to level 1
 gaunt edge
!tps
frank tuskBOT
Please follow the guide here for changing the Java version your server uses. This will improve performance dramatically. If you are on a third party server host, you likely can not change the Java version your server uses. Bisect Hosting and a few VPS providers do allow changing Java version, though, which can usually be done through your server dashboard.
The method on Bisect is to simply go to the main dashboard page, and select "GraalVM 22" as the Java distribution. If it crashes, use 21 instead.
For further performance improvements, you can also follow this guide. This guide's section regarding GraalVM is completely wrong from our own testing, and we recommend ignoring it.
Reducing server render distance in the server.properties file is also a very good way of reducing lag. Most of our modpacks include mods like Bobby and Farsight, which make it so reducing server render distance will not affect players.
If lag persists, run the following command ingame:
/spark profiler start --only-ticks-over 50
Then, send the link in this channel.
sand scaffoldBOT
darksylph, you just advanced to level 2
 static wraith
!alternates
frank tuskBOT
If this command was run in response to your question/issue, it is likely because switching away from the launcher you are currently using would fix your problem.
From our experience, the most stable launcher by far is ATLauncher, also known as ATL. Keep in mind that ATL is NOT related to TLauncher in any way, and is not a cracked launcher.
To install ATL, do the following:
1. Go to https://atlauncher.com/download. If you are on MacOS, then choose the "Jar" version under the "Other" tab, this is important as OSX WILL crash the game on Mac.
2. Install and run the setup, then open the program.
3. Login to your Microsoft account that owns the Java Edition of Minecraft from the Accounts tab on the right. This process is 100% safe, as it goes directly through Microsoft. ATL doesn't see your account credentials.
4. Go to the Packs tab on the right, then click "Curseforge" on the left.
5. Search the modpack you wish to download.
6. Click "Install". Then, follow the on-screen directions.
7. Go to the Instances tab, and click "Play" on the modpack you downloaded. If you ever see an "Update" button on the instance, click it.
This video explains the process: https://youtu.be/xMYW1wMbmkM
To transfer your Curseforge world to ATL, simply right click the modpack on Curseforge, or click the 3 dots, then click "Open Folder". Copy the Saves folder, then click "Open Folder" on ATL and paste the Saves folder there. Do the same with the XaerosMinimap folder, or the Journeymap folder, to transfer over any waypoints you've created.
Because ATL downloads the exact same files as Curseforge does, your world will be the exact same and you will be able to join the same servers. ATL also works without an internet connection (after you've installed the modpack, of course), and does not have any bloat from Overwolf. You are free to uninstall both Overwolf and Curseforge with ATL installed.
serene cape
!ws
frank tuskBOT
Luna Pixel's World Sharing
Our modpacks don't support any mods that add singleplayer hosting / world sharing because we already provide free world sharing. The 'Essential' mod is therefore incompatible.
To share your world using our own world hosting, click the 'Open to Lan' or 'Share World' button in the game menu when in a singleplayer world, and share the world.
It will give you an address, like magma-cube.mc.lunapixel.gg, which your friends can use to connect directly to your world as if it were a server!
We still highly suggest not to play through LAN as LAN is untested and unreliable. Using it will cause longterm damage to your world.
There is no reason to use LAN, as we support both paid and free methods of hosting a server the normal way.
If you get an error in chat when trying to host your world, we highly recommend selfhosting instead as it's free, very easy, and much more stable. Run the !server command in #bots to learn more.
serene cape
!ea
frank tuskBOT
⚠️ Essential Mod Not Supported
We strongly recommend against using Essential with our modpacks, and we add a warning screen during modpack startup containing the following message by default. A free world-sharing alternative is already built-in called Luna - click Share World in the game menu to use it.
Why we don't support Essential:
-
Technical issues: We've received multiple user reports of problems when combining Essential with our modpacks, including reports of world corruption. While there is no conclusive evidence of Essential as the definite cause, we do not have the development or support capacity to resolve issues potentially caused by it.
-
Security concerns: Essential's auto-updater introduces potential security risks that are outside of our control.
-
Ethics: We object to Essential's inclusion of in-game currency and microtransactions in an otherwise free modding environment.
If you choose to use Essential anyway
Please understand that you do so at your own risk and will not be eligible for support from our team. To remove this warning, you can open your modpack instance folder, navigate to config/crash_assistant/problematic_mods_config.json, and under essential-container, change should_crash_on_startup from true to false.
sand scaffoldBOT
taorose, you just advanced to level 2
 tight goblet
!tps
frank tuskBOT
Please follow the guide here for changing the Java version your server uses. This will improve performance dramatically. If you are on a third party server host, you likely can not change the Java version your server uses. Bisect Hosting and a few VPS providers do allow changing Java version, though, which can usually be done through your server dashboard.
The method on Bisect is to simply go to the main dashboard page, and select "GraalVM 22" as the Java distribution. If it crashes, use 21 instead.
For further performance improvements, you can also follow this guide. This guide's section regarding GraalVM is completely wrong from our own testing, and we recommend ignoring it.
Reducing server render distance in the server.properties file is also a very good way of reducing lag. Most of our modpacks include mods like Bobby and Farsight, which make it so reducing server render distance will not affect players.
If lag persists, run the following command ingame:
/spark profiler start --only-ticks-over 50
Then, send the link in this channel.
sand scaffoldBOT
chaserabbitvt, you just advanced to level 1
GG @hushed granite , you just unlocked the achievement: Casual Typer! 🥳
 sand scaffoldBOT
vertex1488, you just advanced to level 1
g2o._., you just advanced to level 3
leivurishere, you just advanced to level 2
thetretre, you just advanced to level 2
sand scaffoldBOT
daumath, you just advanced to level 1
sand scaffoldBOT
estatrix, you just advanced to level 11
sand scaffoldBOT
cinnamooo, you just advanced to level 1
sand scaffoldBOT
psudo_legendary_chomp, you just advanced to level 1
sand scaffoldBOT
psudo_legendary_chomp, you just advanced to level 2
maulreee, you just advanced to level 4
nemesisprimal7, you just advanced to level 2
magiye, you just advanced to level 3
sand scaffoldBOT
player_loki102, you just advanced to level 1
sand scaffoldBOT
gusomega, you just advanced to level 1
yvngmage, you just advanced to level 6
daumath, you just advanced to level 2
sand scaffoldBOT
iri_dark, you just advanced to level 7
sand scaffoldBOT
GG @rare bobcat , you just unlocked the achievement: Give or Take! 🥳
 sand scaffoldBOT
kradha, you just advanced to level 10
meterspersecondsquared, you just advanced to level 1
sand scaffoldBOT
malevolentalt, you just advanced to level 1
noblestork, you just advanced to level 2
 cunning compass
!ea
frank tuskBOT
⚠️ Essential Mod Not Supported
We strongly recommend against using Essential with our modpacks, and we add a warning screen during modpack startup containing the following message by default. A free world-sharing alternative is already built-in called Luna - click Share World in the game menu to use it.
Why we don't support Essential:
-
Technical issues: We've received multiple user reports of problems when combining Essential with our modpacks, including reports of world corruption. While there is no conclusive evidence of Essential as the definite cause, we do not have the development or support capacity to resolve issues potentially caused by it.
-
Security concerns: Essential's auto-updater introduces potential security risks that are outside of our control.
-
Ethics: We object to Essential's inclusion of in-game currency and microtransactions in an otherwise free modding environment.
If you choose to use Essential anyway
Please understand that you do so at your own risk and will not be eligible for support from our team. To remove this warning, you can open your modpack instance folder, navigate to config/crash_assistant/problematic_mods_config.json, and under essential-container, change should_crash_on_startup from true to false.
sand scaffoldBOT
galactikninja, you just advanced to level 1
sand scaffoldBOT
galactikninja, you just advanced to level 2
sand scaffoldBOT
ezilo20, you just advanced to level 1
 tawdry pecan
!server
frank tuskBOT
Free Method
To host a server on your own computer, read the selfhosting guide.
This guide goes over how to install, create, and launch a free Minecraft server on all operating systems (MacOS, Linux and Windows). The guide also guides you through installing Java and optimizing your server for better performance.
If you are installing one of our older modpacks, ignore the "README" file that is included in the serverpack files, as they have outdated information.
Paid Method
We suggest renting a server from Bisect Hosting:
Approx. $10 - $25 a month depending on what plan you choose. You can also get 25% off with Code LunaPixel.
Go here and order a plan which fits you. We suggest 1GB per player but nothing lower than 4GB as the server needs at least 3GB to run.
Go to #server-hosting for more Info!
The following advice works for both the Free and Paid methods:
Transferring Your World
If you're playing Singleplayer and want to transfer your world to your server, simply go to your modpack files and navigate to the saves folder. Inside of this folder, you will see your world saves. Rename your desired world save to world. You can then transfer this folder to your server files. If your world was hosted via world sharing, this process has to be done by the person who would click "Share World".
Fixing Lag
To resolve lag issues, simply run the !tps command in #bots and follow the directions provided.
sand scaffoldBOT
nolynthoj, you just advanced to level 1
tawdry pecan
!ws
frank tuskBOT
Luna Pixel's World Sharing
Our modpacks don't support any mods that add singleplayer hosting / world sharing because we already provide free world sharing. The 'Essential' mod is therefore incompatible.
To share your world using our own world hosting, click the 'Open to Lan' or 'Share World' button in the game menu when in a singleplayer world, and share the world.
It will give you an address, like magma-cube.mc.lunapixel.gg, which your friends can use to connect directly to your world as if it were a server!
We still highly suggest not to play through LAN as LAN is untested and unreliable. Using it will cause longterm damage to your world.
There is no reason to use LAN, as we support both paid and free methods of hosting a server the normal way.
If you get an error in chat when trying to host your world, we highly recommend selfhosting instead as it's free, very easy, and much more stable. Run the !server command in #bots to learn more.
 cedar acorn
!server
frank tuskBOT
Free Method
To host a server on your own computer, read the selfhosting guide.
This guide goes over how to install, create, and launch a free Minecraft server on all operating systems (MacOS, Linux and Windows). The guide also guides you through installing Java and optimizing your server for better performance.
If you are installing one of our older modpacks, ignore the "README" file that is included in the serverpack files, as they have outdated information.
Paid Method
We suggest renting a server from Bisect Hosting:
Approx. $10 - $25 a month depending on what plan you choose. You can also get 25% off with Code LunaPixel.
Go here and order a plan which fits you. We suggest 1GB per player but nothing lower than 4GB as the server needs at least 3GB to run.
Go to #server-hosting for more Info!
The following advice works for both the Free and Paid methods:
Transferring Your World
If you're playing Singleplayer and want to transfer your world to your server, simply go to your modpack files and navigate to the saves folder. Inside of this folder, you will see your world saves. Rename your desired world save to world. You can then transfer this folder to your server files. If your world was hosted via world sharing, this process has to be done by the person who would click "Share World".
Fixing Lag
To resolve lag issues, simply run the !tps command in #bots and follow the directions provided.
sand scaffoldBOT
bonusducks, you just advanced to level 2
sand scaffoldBOT
GG @nimble hedge , you just unlocked the achievement: Stay Awhile and Listen! 🥳
 sand scaffoldBOT
papi_jongli, you just advanced to level 1
sand scaffoldBOT
GG @tribal grail , you just unlocked the achievement: Casual Typer! 🥳
 sand scaffoldBOT
.hisui, you just advanced to level 3
sand scaffoldBOT
meduso.cos, you just advanced to level 7
asashi_nalesnik, you just advanced to level 1
sand scaffoldBOT
ponchodiadingo, you just advanced to level 1
cashhew__, you just advanced to level 3
sand scaffoldBOT
mayouhang, you just advanced to level 1
Cordonbleu, you just advanced to level 1
officershitass, you just advanced to level 1
sand scaffoldBOT
x_martian_x, you just advanced to level 1
ratsratsmakemecrazy, you just advanced to level 4
average_friendless_guy, you just advanced to level 1
average_friendless_guy, you just advanced to level 2
tawdry pecan
!ea
frank tuskBOT
⚠️ Essential Mod Not Supported
We strongly recommend against using Essential with our modpacks, and we add a warning screen during modpack startup containing the following message by default. A free world-sharing alternative is already built-in called Luna - click Share World in the game menu to use it.
Why we don't support Essential:
-
Technical issues: We've received multiple user reports of problems when combining Essential with our modpacks, including reports of world corruption. While there is no conclusive evidence of Essential as the definite cause, we do not have the development or support capacity to resolve issues potentially caused by it.
-
Security concerns: Essential's auto-updater introduces potential security risks that are outside of our control.
-
Ethics: We object to Essential's inclusion of in-game currency and microtransactions in an otherwise free modding environment.
If you choose to use Essential anyway
Please understand that you do so at your own risk and will not be eligible for support from our team. To remove this warning, you can open your modpack instance folder, navigate to config/crash_assistant/problematic_mods_config.json, and under essential-container, change should_crash_on_startup from true to false.
sand scaffoldBOT
fanyaoi11, you just advanced to level 1
average_friendless_guy, you just advanced to level 3
GG @safe kiln , you just unlocked the achievement: Casual Typer! 🥳

 safe kiln
shut the hell up clanker
sand scaffoldBOT
average_friendless_guy, you just advanced to level 4
sand scaffoldBOT
GG @wet sequoia , you just unlocked the achievement: Casual Typer! 🥳

average_friendless_guy, you just advanced to level 5
sand scaffoldBOT
trizzoth, you just advanced to level 2
sand scaffoldBOT
blindblackalt, you just advanced to level 4
sand scaffoldBOT
immortaldiamond, you just advanced to level 3
darkgun_78, you just advanced to level 3
sand scaffoldBOT
trizzoth, you just advanced to level 3
sand scaffoldBOT
yomie, you just advanced to level 2
djstrawberry, you just advanced to level 7
chronormu., you just advanced to level 1
 proper flax
!server
frank tuskBOT
Free Method
To host a server on your own computer, read the selfhosting guide.
This guide goes over how to install, create, and launch a free Minecraft server on all operating systems (MacOS, Linux and Windows). The guide also guides you through installing Java and optimizing your server for better performance.
If you are installing one of our older modpacks, ignore the "README" file that is included in the serverpack files, as they have outdated information.
Paid Method
We suggest renting a server from Bisect Hosting:
Approx. $10 - $25 a month depending on what plan you choose. You can also get 25% off with Code LunaPixel.
Go here and order a plan which fits you. We suggest 1GB per player but nothing lower than 4GB as the server needs at least 3GB to run.
Go to #server-hosting for more Info!
The following advice works for both the Free and Paid methods:
Transferring Your World
If you're playing Singleplayer and want to transfer your world to your server, simply go to your modpack files and navigate to the saves folder. Inside of this folder, you will see your world saves. Rename your desired world save to world. You can then transfer this folder to your server files. If your world was hosted via world sharing, this process has to be done by the person who would click "Share World".
Fixing Lag
To resolve lag issues, simply run the !tps command in #bots and follow the directions provided.
sand scaffoldBOT
i_fizzy_soda, you just advanced to level 2
 quaint sandal
frank tuskBOT
quaint sandal
frank tuskBOT
Free Method
To host a server on your own computer, read the selfhosting guide.
This guide goes over how to install, create, and launch a free Minecraft server on all operating systems (MacOS, Linux and Windows). The guide also guides you through installing Java and optimizing your server for better performance.
If you are installing one of our older modpacks, ignore the "README" file that is included in the serverpack files, as they have outdated information.
Paid Method
We suggest renting a server from Bisect Hosting:
Approx. $10 - $25 a month depending on what plan you choose. You can also get 25% off with Code LunaPixel.
Go here and order a plan which fits you. We suggest 1GB per player but nothing lower than 4GB as the server needs at least 3GB to run.
Go to #server-hosting for more Info!
The following advice works for both the Free and Paid methods:
Transferring Your World
If you're playing Singleplayer and want to transfer your world to your server, simply go to your modpack files and navigate to the saves folder. Inside of this folder, you will see your world saves. Rename your desired world save to world. You can then transfer this folder to your server files. If your world was hosted via world sharing, this process has to be done by the person who would click "Share World".
Fixing Lag
To resolve lag issues, simply run the !tps command in #bots and follow the directions provided.
 severe flare
sand scaffoldBOT
severe flare
sand scaffoldBOT
HiddenTides, you just advanced to level 82
john_740718, you just advanced to level 1
madquack, you just advanced to level 1
blindblackalt, you just advanced to level 5
aphast, you just advanced to level 2
sand scaffoldBOT
bonusducks, you just advanced to level 3
swellerabyss677, you just advanced to level 8
smudge117, you just advanced to level 1
i_fizzy_soda, you just advanced to level 4
hisui [🔔], you just advanced to level 4
sand scaffoldBOT
inzy02, you just advanced to level 2
tukynii, you just advanced to level 7
GG @plain brook , you just unlocked the achievement: Casual Typer! 🥳
 sand scaffoldBOT
⋆˚࿔ Selena 9e˚⋆, you just advanced to level 1
ratsratsmakemecrazy, you just advanced to level 5
sand scaffoldBOT
dadaboss_, you just advanced to level 1
sand scaffoldBOT
nemesisprimal7, you just advanced to level 3
cosmicalt247, you just advanced to level 1
sand scaffoldBOT
cosmicalt247, you just advanced to level 2
dcsiki, you just advanced to level 1
 proven umbra
!alternates
frank tuskBOT
If this command was run in response to your question/issue, it is likely because switching away from the launcher you are currently using would fix your problem.
From our experience, the most stable launcher by far is ATLauncher, also known as ATL. Keep in mind that ATL is NOT related to TLauncher in any way, and is not a cracked launcher.
To install ATL, do the following:
1. Go to https://atlauncher.com/download. If you are on MacOS, then choose the "Jar" version under the "Other" tab, this is important as OSX WILL crash the game on Mac.
2. Install and run the setup, then open the program.
3. Login to your Microsoft account that owns the Java Edition of Minecraft from the Accounts tab on the right. This process is 100% safe, as it goes directly through Microsoft. ATL doesn't see your account credentials.
4. Go to the Packs tab on the right, then click "Curseforge" on the left.
5. Search the modpack you wish to download.
6. Click "Install". Then, follow the on-screen directions.
7. Go to the Instances tab, and click "Play" on the modpack you downloaded. If you ever see an "Update" button on the instance, click it.
This video explains the process: https://youtu.be/xMYW1wMbmkM
To transfer your Curseforge world to ATL, simply right click the modpack on Curseforge, or click the 3 dots, then click "Open Folder". Copy the Saves folder, then click "Open Folder" on ATL and paste the Saves folder there. Do the same with the XaerosMinimap folder, or the Journeymap folder, to transfer over any waypoints you've created.
Because ATL downloads the exact same files as Curseforge does, your world will be the exact same and you will be able to join the same servers. ATL also works without an internet connection (after you've installed the modpack, of course), and does not have any bloat from Overwolf. You are free to uninstall both Overwolf and Curseforge with ATL installed.
sand scaffoldBOT
theyluvvgio0, you just advanced to level 2
sand scaffoldBOT
bioberry, you just advanced to level 1
lone_wolf26., you just advanced to level 1
sand scaffoldBOT
x_vulpine, you just advanced to level 1
sand scaffoldBOT
GG @ashen imp , you just unlocked the achievement: Give or Take! 🥳
 sand scaffoldBOT
the_bremesupream, you just advanced to level 1
sand scaffoldBOT
the_bremesupream, you just advanced to level 2
sand scaffoldBOT
dadaboss_, you just advanced to level 2
god_dekron, you just advanced to level 1
sand scaffoldBOT
oceanman7119_, you just advanced to level 1
sand scaffoldBOT
grimmskaar, you just advanced to level 1
sand scaffoldBOT
soggytoast_, you just advanced to level 1
sand scaffoldBOT
0ldm4n., you just advanced to level 1
pinktitanic, you just advanced to level 1
sand scaffoldBOT
copperthemc, you just advanced to level 2
Birthdays Plugin
Track your members birthdays and automatically wish them a happy birthday
</forget-birthday:1148579673014534184>
Remove your birthday
</next-birthdays:1148579673014534185>
List up to 10 upcoming birthdays
</remember-birthday:1148579673014534186> [date]
Add your birthday
</birthday:1148579673014534188> (optional member)
Show your birthday or another member's birthday
dadaboss_, you just advanced to level 3
apar_akl, you just advanced to level 1
sand scaffoldBOT
leivurishere, you just advanced to level 3
itsallybear, you just advanced to level 1
sand scaffoldBOT
sebuchos, you just advanced to level 1
xawierrr_2, you just advanced to level 1
sand scaffoldBOT
leivurishere, you just advanced to level 4
sand scaffoldBOT
ember.forge, you just advanced to level 1
sand scaffoldBOT
voidsentinel21, you just advanced to level 1
 sterile warren
!ea
frank tuskBOT
⚠️ Essential Mod Not Supported
We strongly recommend against using Essential with our modpacks, and we add a warning screen during modpack startup containing the following message by default. A free world-sharing alternative is already built-in called Luna - click Share World in the game menu to use it.
Why we don't support Essential:
-
Technical issues: We've received multiple user reports of problems when combining Essential with our modpacks, including reports of world corruption. While there is no conclusive evidence of Essential as the definite cause, we do not have the development or support capacity to resolve issues potentially caused by it.
-
Security concerns: Essential's auto-updater introduces potential security risks that are outside of our control.
-
Ethics: We object to Essential's inclusion of in-game currency and microtransactions in an otherwise free modding environment.
If you choose to use Essential anyway
Please understand that you do so at your own risk and will not be eligible for support from our team. To remove this warning, you can open your modpack instance folder, navigate to config/crash_assistant/problematic_mods_config.json, and under essential-container, change should_crash_on_startup from true to false. On newer modpack versions, this is replaced by a migrated .jexl in the same location, which you can also open in a text editor then simply delete the section for Essential.
sand scaffoldBOT
cyberkid100, you just advanced to level 3
sand scaffoldBOT
corbiver, you just advanced to level 2
 olive shell
!server
frank tuskBOT
Free Method
To host a server on your own computer, read the selfhosting guide.
This guide goes over how to install, create, and launch a free Minecraft server on all operating systems (MacOS, Linux and Windows). The guide also guides you through installing Java and optimizing your server for better performance.
If you are installing one of our older modpacks, ignore the "README" file that is included in the serverpack files, as they have outdated information.
Paid Method
We suggest renting a server from Bisect Hosting:
Approx. $10 - $25 a month depending on what plan you choose. You can also get 25% off with Code LunaPixel.
Go here and order a plan which fits you. We suggest 1GB per player but nothing lower than 4GB as the server needs at least 3GB to run.
Go to #server-hosting for more Info!
The following advice works for both the Free and Paid methods:
Transferring Your World
If you're playing Singleplayer and want to transfer your world to your server, simply go to your modpack files and navigate to the saves folder. Inside of this folder, you will see your world saves. Rename your desired world save to world. You can then transfer this folder to your server files. If your world was hosted via world sharing, this process has to be done by the person who would click "Share World".
Fixing Lag
To resolve lag issues, simply run the !tps command in #bots and follow the directions provided.
sand scaffoldBOT
lakeberars, you just advanced to level 1
sand scaffoldBOT
nemesisprimal7, you just advanced to level 4
sand scaffoldBOT
roachamus, you just advanced to level 3
sand scaffoldBOT
jackjackjack44, you just advanced to level 3
sand scaffoldBOT
tomato_kyoko, you just advanced to level 1
sand scaffoldBOT
GG @edgy crypt , you just unlocked the achievement: Give or Take! 🥳
 sand scaffoldBOT
honeydluffy, you just advanced to level 1
 odd cloak
!server
frank tuskBOT
Free Method
To host a server on your own computer, read the selfhosting guide.
This guide goes over how to install, create, and launch a free Minecraft server on all operating systems (MacOS, Linux and Windows). The guide also guides you through installing Java and optimizing your server for better performance.
If you are installing one of our older modpacks, ignore the "README" file that is included in the serverpack files, as they have outdated information.
Paid Method
We suggest renting a server from Bisect Hosting:
Approx. $10 - $25 a month depending on what plan you choose. You can also get 25% off with Code LunaPixel.
Go here and order a plan which fits you. We suggest 1GB per player but nothing lower than 4GB as the server needs at least 3GB to run.
Go to #server-hosting for more Info!
The following advice works for both the Free and Paid methods:
Transferring Your World
If you're playing Singleplayer and want to transfer your world to your server, simply go to your modpack files and navigate to the saves folder. Inside of this folder, you will see your world saves. Rename your desired world save to world. You can then transfer this folder to your server files. If your world was hosted via world sharing, this process has to be done by the person who would click "Share World".
Fixing Lag
To resolve lag issues, simply run the !tps command in #bots and follow the directions provided.
sand scaffoldBOT
afatcatnamedstanly, you just advanced to level 2
playtony, you just advanced to level 2
sand scaffoldBOT
popofdav, you just advanced to level 1
 grave zenith
!help
sand scaffoldBOT
Luna Pixel Studios Plugins Commands
**Birthdays**
</help:1145941150495162392> birthdays
**Giveaways**
</help:1145941150495162392> giveaways
**MEE6 AI**
</help:1145941150495162392> ai
**Levels**
</help:1145941150495162392> levels
**Moderator**
</help:1145941150495162392> moderator
**Emojis**
</help:1145941150495162392> emojis
**Achievements**
</help:1145941150495162392> achievements
grave zenith
!commands
spice tulip
!rank
sand scaffoldBOT
 spice tulip
grave zenith
!commands
spice tulip
grave zenith
!commands
?taglist
hm
this not working anymore
?tagslist
!taglist
!tagslist
?taglist
smh
sand scaffoldBOT
chrisz1606, you just advanced to level 1
sand scaffoldBOT
chrisz1606, you just advanced to level 2
sand scaffoldBOT
hykiucmoi, you just advanced to level 1
sunsh1ne0012, you just advanced to level 4
 olive hinge
!ws
frank tuskBOT
Luna Pixel's World Sharing
Our modpacks don't support any mods that add singleplayer hosting / world sharing because we already provide free world sharing. The 'Essential' mod is therefore incompatible.
To share your world using our own world hosting, click the 'Open to Lan' or 'Share World' button in the game menu when in a singleplayer world, and share the world.
It will give you an address, like magma-cube.mc.lunapixel.gg, which your friends can use to connect directly to your world as if it were a server!
We still highly suggest not to play through LAN as LAN is untested and unreliable. Using it will cause longterm damage to your world.
There is no reason to use LAN, as we support both paid and free methods of hosting a server the normal way.
If you get an error in chat when trying to host your world, we highly recommend selfhosting instead as it's free, very easy, and much more stable. Run the !server command in #bots to learn more.
olive hinge
!server
frank tuskBOT
Free Method
To host a server on your own computer, read the selfhosting guide.
This guide goes over how to install, create, and launch a free Minecraft server on all operating systems (MacOS, Linux and Windows). The guide also guides you through installing Java and optimizing your server for better performance.
If you are installing one of our older modpacks, ignore the "README" file that is included in the serverpack files, as they have outdated information.
Paid Method
We suggest renting a server from Bisect Hosting:
Approx. $10 - $25 a month depending on what plan you choose. You can also get 25% off with Code LunaPixel.
Go here and order a plan which fits you. We suggest 1GB per player but nothing lower than 4GB as the server needs at least 3GB to run.
Go to #server-hosting for more Info!
The following advice works for both the Free and Paid methods:
Transferring Your World
If you're playing Singleplayer and want to transfer your world to your server, simply go to your modpack files and navigate to the saves folder. Inside of this folder, you will see your world saves. Rename your desired world save to world. You can then transfer this folder to your server files. If your world was hosted via world sharing, this process has to be done by the person who would click "Share World".
Fixing Lag
To resolve lag issues, simply run the !tps command in #bots and follow the directions provided.
sand scaffoldBOT
bela_clove, you just advanced to level 92
sand scaffoldBOT
radeghast, you just advanced to level 1
sand scaffoldBOT
plasma206, you just advanced to level 1
sand scaffoldBOT
frog_1, you just advanced to level 1
 fallen lake
!spark
frank tuskBOT
Please record a Spark Profile so we can better diagnose the cause of your performance issue.
FPS issues: (Clients Only!)
If you're experiencing low frames per second, record a rendering profile:
- Run
/sparkc profiler start --timeout 30 - Wait 30 seconds for the profile to finish
- Send the link in this channel.
TPS issues:
If there's a long delay before actions happen, or the world is slow to respond, record a standard profile:
- Run
/spark profiler start --timeout 30 - Wait 30 seconds for the profile to finish
- Send the link in this channel.
Large TPS Spikes:
If you rarely have an extremely long delay before actions happen or the world suddenly stops responding for a long time (a lag spike), add a high --only-ticks-over threshold to the profile and stop it manually:
/spark profiler start --only-ticks-over 100
-# Optional: Run/spark tickmonitor- this prints TPS spikes into chat so you can see if they've occurred- Wait for the lag spike to occur and finish
/spark profiler stop- Send the link in this channel.
sand scaffoldBOT
v0x55, you just advanced to level 18
cory2390, you just advanced to level 5
tinsou, you just advanced to level 1
sand scaffoldBOT
lizard.food, you just advanced to level 1
austincain907, you just advanced to level 1
sand scaffoldBOT
.wiiwa, you just advanced to level 1
sand scaffoldBOT
ember.forge, you just advanced to level 2
ponchodiadingo, you just advanced to level 2
 pliant summit
!server
frank tuskBOT
Free Method
To host a server on your own computer, read the selfhosting guide.
This guide goes over how to install, create, and launch a free Minecraft server on all operating systems (MacOS, Linux and Windows). The guide also guides you through installing Java and optimizing your server for better performance.
If you are installing one of our older modpacks, ignore the "README" file that is included in the serverpack files, as they have outdated information.
Paid Method
We suggest renting a server from Bisect Hosting:
Approx. $10 - $25 a month depending on what plan you choose. You can also get 25% off with Code LunaPixel.
Go here and order a plan which fits you. We suggest 1GB per player but nothing lower than 4GB as the server needs at least 3GB to run.
Go to #server-hosting for more Info!
The following advice works for both the Free and Paid methods:
Transferring Your World
If you're playing Singleplayer and want to transfer your world to your server, simply go to your modpack files and navigate to the saves folder. Inside of this folder, you will see your world saves. Rename your desired world save to world. You can then transfer this folder to your server files. If your world was hosted via world sharing, this process has to be done by the person who would click "Share World".
Fixing Lag
To resolve lag issues, simply run the !tps command in #bots and follow the directions provided.
sand scaffoldBOT
grinchdirty, you just advanced to level 1
 proper jay
!pregen
frank tuskBOT

Noob explains how to Pre Generate your Minecraft World.
▬▬▬▬▬▬▬▬▬▬▬▬▬▬▬▬▬▬▬▬▬▬▬▬▬▬▬▬▬▬
➔ Modpack: https://www.curseforge.com/minecraft/modpacks/better-minecraft-modpack
➔ Discord: https://discord.com/invite/9S5tfrY4Fr
▬▬▬▬▬▬▬▬▬▬▬▬▬▬▬▬▬▬▬▬▬...
sand scaffoldBOT
GG @drifting cipher , you just unlocked the achievement: Casual Typer! 🥳
 sand scaffoldBOT
itsrawster, you just advanced to level 1
sand scaffoldBOT
vitzlol, you just advanced to level 1
 verbal jacinth
!server
frank tuskBOT
Free Method
To host a server on your own computer, read the selfhosting guide.
This guide goes over how to install, create, and launch a free Minecraft server on all operating systems (MacOS, Linux and Windows). The guide also guides you through installing Java and optimizing your server for better performance.
If you are installing one of our older modpacks, ignore the "README" file that is included in the serverpack files, as they have outdated information.
Paid Method
We suggest renting a server from Bisect Hosting:
Approx. $10 - $25 a month depending on what plan you choose. You can also get 25% off with Code LunaPixel.
Go here and order a plan which fits you. We suggest 1GB per player but nothing lower than 4GB as the server needs at least 3GB to run.
Go to #server-hosting for more Info!
The following advice works for both the Free and Paid methods:
Transferring Your World
If you're playing Singleplayer and want to transfer your world to your server, simply go to your modpack files and navigate to the saves folder. Inside of this folder, you will see your world saves. Rename your desired world save to world. You can then transfer this folder to your server files. If your world was hosted via world sharing, this process has to be done by the person who would click "Share World".
Fixing Lag
To resolve lag issues, simply run the !tps command in #bots and follow the directions provided.
sand scaffoldBOT
xswv, you just advanced to level 4
sand scaffoldBOT
voidary, you just advanced to level 1
 ashen dew
!alternates
sand scaffoldBOT
onetruerebel, you just advanced to level 1
 icy warren
!tps
frank tuskBOT
Please follow the guide here for changing the Java version your server uses. This will improve performance dramatically. If you are on a third party server host, you likely can not change the Java version your server uses. Bisect Hosting and a few VPS providers do allow changing Java version, though, which can usually be done through your server dashboard.
The method on Bisect is to simply go to the main dashboard page, and select "GraalVM 22" as the Java distribution. If it crashes, use 21 instead.
For further performance improvements, you can also follow this guide. This guide's section regarding GraalVM is completely wrong from our own testing, and we recommend ignoring it.
Reducing server render distance in the server.properties file is also a very good way of reducing lag. Most of our modpacks include mods like Bobby and Farsight, which make it so reducing server render distance will not affect players.
If lag persists, run the following command ingame:
/spark profiler start --only-ticks-over 50
Then, send the link in this channel.
sand scaffoldBOT
Genarkcraft, you just advanced to level 6
sand scaffoldBOT
nekkorii, you just advanced to level 1
sand scaffoldBOT
nekkorii, you just advanced to level 2
sand scaffoldBOT
echoingzen, you just advanced to level 3
sand scaffoldBOT
sir_chuevee, you just advanced to level 6
matchst1ck__, you just advanced to level 6
sand scaffoldBOT
GG @past obsidian , you just unlocked the achievement: Give or Take! 🥳
 sand scaffoldBOT
novembers22, you just advanced to level 1
micsterend0, you just advanced to level 1
dan458., you just advanced to level 1
sand scaffoldBOT
mihailis135, you just advanced to level 2
goofypainfulness_60614, you just advanced to level 1
sand scaffoldBOT
prawnslive, you just advanced to level 1
sand scaffoldBOT
GG @broken oyster , you just unlocked the achievement: Give or Take! 🥳
 sand scaffoldBOT
sezuel, you just advanced to level 4
sand scaffoldBOT
.miqe., you just advanced to level 3
 near island
!server
frank tuskBOT
Free Method
To host a server on your own computer, read the selfhosting guide.
This guide goes over how to install, create, and launch a free Minecraft server on all operating systems (MacOS, Linux and Windows). The guide also guides you through installing Java and optimizing your server for better performance.
If you are installing one of our older modpacks, ignore the "README" file that is included in the serverpack files, as they have outdated information.
Paid Method
We suggest renting a server from Bisect Hosting:
Approx. $10 - $25 a month depending on what plan you choose. You can also get 25% off with Code LunaPixel.
Go here and order a plan which fits you. We suggest 1GB per player but nothing lower than 4GB as the server needs at least 3GB to run.
Go to #server-hosting for more Info!
The following advice works for both the Free and Paid methods:
Transferring Your World
If you're playing Singleplayer and want to transfer your world to your server, simply go to your modpack files and navigate to the saves folder. Inside of this folder, you will see your world saves. Rename your desired world save to world. You can then transfer this folder to your server files. If your world was hosted via world sharing, this process has to be done by the person who would click "Share World".
Fixing Lag
To resolve lag issues, simply run the !tps command in #bots and follow the directions provided.
sand scaffoldBOT
tinsou, you just advanced to level 2
sand scaffoldBOT
sofianio, you just advanced to level 1
matthewn422, you just advanced to level 1
sand scaffoldBOT
dcsiki, you just advanced to level 2
sand scaffoldBOT
Can, you just advanced to level 5
i_fizzy_soda, you just advanced to level 5
micsterend0, you just advanced to level 2
sand scaffoldBOT
hanoverfist, you just advanced to level 2
sand scaffoldBOT
nightwielder23, you just advanced to level 1
 sterile compass
!alternates
frank tuskBOT
If this command was run in response to your question/issue, it is likely because switching away from the launcher you are currently using would fix your problem.
From our experience, the most stable launcher by far is ATLauncher, also known as ATL. Keep in mind that ATL is NOT related to TLauncher in any way, and is not a cracked launcher.
To install ATL, do the following:
1. Go to https://atlauncher.com/download. If you are on MacOS, then choose the "Jar" version under the "Other" tab, this is important as OSX WILL crash the game on Mac.
2. Install and run the setup, then open the program.
3. Login to your Microsoft account that owns the Java Edition of Minecraft from the Accounts tab on the right. This process is 100% safe, as it goes directly through Microsoft. ATL doesn't see your account credentials.
4. Go to the Packs tab on the right, then click "Curseforge" on the left.
5. Search the modpack you wish to download.
6. Click "Install". Then, follow the on-screen directions.
7. Go to the Instances tab, and click "Play" on the modpack you downloaded. If you ever see an "Update" button on the instance, click it.
This video explains the process: https://youtu.be/xMYW1wMbmkM
To transfer your Curseforge world to ATL, simply right click the modpack on Curseforge, or click the 3 dots, then click "Open Folder". Copy the Saves folder, then click "Open Folder" on ATL and paste the Saves folder there. Do the same with the XaerosMinimap folder, or the Journeymap folder, to transfer over any waypoints you've created.
Because ATL downloads the exact same files as Curseforge does, your world will be the exact same and you will be able to join the same servers. ATL also works without an internet connection (after you've installed the modpack, of course), and does not have any bloat from Overwolf. You are free to uninstall both Overwolf and Curseforge with ATL installed.
sand scaffoldBOT
popofdav, you just advanced to level 2
 meager pollen
!ea
frank tuskBOT
⚠️ Essential Mod Not Supported
We strongly recommend against using Essential with our modpacks, and we add a warning screen during modpack startup containing the following message by default. A free world-sharing alternative is already built-in called Luna - click Share World in the game menu to use it.
Why we don't support Essential:
-
Technical issues: We've received multiple user reports of problems when combining Essential with our modpacks, including reports of world corruption. While there is no conclusive evidence of Essential as the definite cause, we do not have the development or support capacity to resolve issues potentially caused by it.
-
Security concerns: Essential's auto-updater introduces potential security risks that are outside of our control.
-
Ethics: We object to Essential's inclusion of in-game currency and microtransactions in an otherwise free modding environment.
If you choose to use Essential anyway
Please understand that you do so at your own risk and will not be eligible for support from our team. To remove this warning, you can open your modpack instance folder, navigate to config/crash_assistant/problematic_mods_config.json, and under essential-container, change should_crash_on_startup from true to false. On newer modpack versions, this is replaced by a migrated .jexl in the same location, which you can also open in a text editor then simply delete the section for Essential.
sand scaffoldBOT
than_e, you just advanced to level 1
stroam, you just advanced to level 1
dat071163, you just advanced to level 1
sand scaffoldBOT
stroam, you just advanced to level 2
sand scaffoldBOT
stroam, you just advanced to level 3
sand scaffoldBOT
kiramzvahl, you just advanced to level 2
sand scaffoldBOT
nynth, you just advanced to level 1
sand scaffoldBOT
manswellmcbear, you just advanced to level 8
sand scaffoldBOT
eliteskylu, you just advanced to level 3
sand scaffoldBOT
kynothan, you just advanced to level 1
sand scaffoldBOT
arcanemage, you just advanced to level 1
xavieryt_, you just advanced to level 4
hheasstt, you just advanced to level 4
sand scaffoldBOT
franckm1, you just advanced to level 2
sand scaffoldBOT
therealskb, you just advanced to level 1
 viral drum
!server
frank tuskBOT
Free Method
To host a server on your own computer, read the selfhosting guide.
This guide goes over how to install, create, and launch a free Minecraft server on all operating systems (MacOS, Linux and Windows). The guide also guides you through installing Java and optimizing your server for better performance.
If you are installing one of our older modpacks, ignore the "README" file that is included in the serverpack files, as they have outdated information.
Paid Method
We suggest renting a server from Bisect Hosting:
Approx. $10 - $25 a month depending on what plan you choose. You can also get 25% off with Code LunaPixel.
Go here and order a plan which fits you. We suggest 1GB per player but nothing lower than 4GB as the server needs at least 3GB to run.
Go to #server-hosting for more Info!
The following advice works for both the Free and Paid methods:
Transferring Your World
If you're playing Singleplayer and want to transfer your world to your server, simply go to your modpack files and navigate to the saves folder. Inside of this folder, you will see your world saves. Rename your desired world save to world. You can then transfer this folder to your server files. If your world was hosted via world sharing, this process has to be done by the person who would click "Share World".
Fixing Lag
To resolve lag issues, simply run the !tps command in #bots and follow the directions provided.
sand scaffoldBOT
weespshoop, you just advanced to level 6
GG @jade wing , you just unlocked the achievement: To Infinity!! 🥳
 sand scaffoldBOT
dax.innit, you just advanced to level 1
 knotty trail
!server
frank tuskBOT
Free Method
To host a server on your own computer, read the selfhosting guide.
This guide goes over how to install, create, and launch a free Minecraft server on all operating systems (MacOS, Linux and Windows). The guide also guides you through installing Java and optimizing your server for better performance.
If you are installing one of our older modpacks, ignore the "README" file that is included in the serverpack files, as they have outdated information.
Paid Method
We suggest renting a server from Bisect Hosting:
Approx. $10 - $25 a month depending on what plan you choose. You can also get 25% off with Code LunaPixel.
Go here and order a plan which fits you. We suggest 1GB per player but nothing lower than 4GB as the server needs at least 3GB to run.
Go to #server-hosting for more Info!
The following advice works for both the Free and Paid methods:
Transferring Your World
If you're playing Singleplayer and want to transfer your world to your server, simply go to your modpack files and navigate to the saves folder. Inside of this folder, you will see your world saves. Rename your desired world save to world. You can then transfer this folder to your server files. If your world was hosted via world sharing, this process has to be done by the person who would click "Share World".
Fixing Lag
To resolve lag issues, simply run the !tps command in #bots and follow the directions provided.
knotty trail
!ea
frank tuskBOT
⚠️ Essential Mod Not Supported
We strongly recommend against using Essential with our modpacks, and we add a warning screen during modpack startup containing the following message by default. A free world-sharing alternative is already built-in called Luna - click Share World in the game menu to use it.
Why we don't support Essential:
-
Technical issues: We've received multiple user reports of problems when combining Essential with our modpacks, including reports of world corruption. While there is no conclusive evidence of Essential as the definite cause, we do not have the development or support capacity to resolve issues potentially caused by it.
-
Security concerns: Essential's auto-updater introduces potential security risks that are outside of our control.
-
Ethics: We object to Essential's inclusion of in-game currency and microtransactions in an otherwise free modding environment.
If you choose to use Essential anyway
Please understand that you do so at your own risk and will not be eligible for support from our team. To remove this warning, you can open your modpack instance folder, navigate to config/crash_assistant/problematic_mods_config.json, and under essential-container, change should_crash_on_startup from true to false. On newer modpack versions, this is replaced by a migrated .jexl in the same location, which you can also open in a text editor then simply delete the section for Essential.
sand scaffoldBOT
brunjir, you just advanced to level 1
sand scaffoldBOT
y5fk, you just advanced to level 1
sand scaffoldBOT
therealskb, you just advanced to level 2
sand scaffoldBOT
surryc, you just advanced to level 1
sand scaffoldBOT
seth.husband, you just advanced to level 2
sand scaffoldBOT
Lurker, you just advanced to level 25
sand scaffoldBOT
demingm13, you just advanced to level 2
kingofkyles., you just advanced to level 1
sand scaffoldBOT
stroam, you just advanced to level 4
sand scaffoldBOT
stroam, you just advanced to level 5
sand scaffoldBOT
alessio22102007, you just advanced to level 1
sand scaffoldBOT
melge6146, you just advanced to level 1
sand scaffoldBOT
thricebite, you just advanced to level 19
sand scaffoldBOT
y5fk, you just advanced to level 2
sand scaffoldBOT
.balmarog, you just advanced to level 1
sand scaffoldBOT
tr4ck3rx, you just advanced to level 3
 jolly briar
frank tuskBOT
jolly briar
frank tuskBOT
⚠️ Essential Mod Not Supported
We strongly recommend against using Essential with our modpacks, and we add a warning screen during modpack startup containing the following message by default. A free world-sharing alternative is already built-in called Luna - click Share World in the game menu to use it.
Why we don't support Essential:
-
Technical issues: We've received multiple user reports of problems when combining Essential with our modpacks, including reports of world corruption. While there is no conclusive evidence of Essential as the definite cause, we do not have the development or support capacity to resolve issues potentially caused by it.
-
Security concerns: Essential's auto-updater introduces potential security risks that are outside of our control.
-
Ethics: We object to Essential's inclusion of in-game currency and microtransactions in an otherwise free modding environment.
If you choose to use Essential anyway
Please understand that you do so at your own risk and will not be eligible for support from our team. To remove this warning, you can open your modpack instance folder, navigate to config/crash_assistant/problematic_mods_config.json, and under essential-container, change should_crash_on_startup from true to false. On newer modpack versions, this is replaced by a migrated .jexl in the same location, which you can also open in a text editor then simply delete the section for Essential.
sand scaffoldBOT
martin_5626, you just advanced to level 1
sand scaffoldBOT
worldlover912, you just advanced to level 1
sand scaffoldBOT
zaieenn, you just advanced to level 3
sand scaffoldBOT
ikillpeopleforaliving, you just advanced to level 1
 lusty cairn
!ea
frank tuskBOT
⚠️ Essential Mod Not Supported
We strongly recommend against using Essential with our modpacks, and we add a warning screen during modpack startup containing the following message by default. A free world-sharing alternative is already built-in called Luna - click Share World in the game menu to use it.
Why we don't support Essential:
-
Technical issues: We've received multiple user reports of problems when combining Essential with our modpacks, including reports of world corruption. While there is no conclusive evidence of Essential as the definite cause, we do not have the development or support capacity to resolve issues potentially caused by it.
-
Security concerns: Essential's auto-updater introduces potential security risks that are outside of our control.
-
Ethics: We object to Essential's inclusion of in-game currency and microtransactions in an otherwise free modding environment.
If you choose to use Essential anyway
Please understand that you do so at your own risk and will not be eligible for support from our team. To remove this warning, you can open your modpack instance folder, navigate to config/crash_assistant/problematic_mods_config.json, and under essential-container, change should_crash_on_startup from true to false. On newer modpack versions, this is replaced by a migrated .jexl in the same location, which you can also open in a text editor then simply delete the section for Essential.
sand scaffoldBOT
apollo12cz, you just advanced to level 2
ikillpeopleforaliving, you just advanced to level 2
 inland compass
!server
frank tuskBOT
Free Method
To host a server on your own computer, read the selfhosting guide.
This guide goes over how to install, create, and launch a free Minecraft server on all operating systems (MacOS, Linux and Windows). The guide also guides you through installing Java and optimizing your server for better performance.
If you are installing one of our older modpacks, ignore the "README" file that is included in the serverpack files, as they have outdated information.
Paid Method
We suggest renting a server from Bisect Hosting:
Approx. $10 - $25 a month depending on what plan you choose. You can also get 25% off with Code LunaPixel.
Go here and order a plan which fits you. We suggest 1GB per player but nothing lower than 4GB as the server needs at least 3GB to run.
Go to #server-hosting for more Info!
The following advice works for both the Free and Paid methods:
Transferring Your World
If you're playing Singleplayer and want to transfer your world to your server, simply go to your modpack files and navigate to the saves folder. Inside of this folder, you will see your world saves. Rename your desired world save to world. You can then transfer this folder to your server files. If your world was hosted via world sharing, this process has to be done by the person who would click "Share World".
Fixing Lag
To resolve lag issues, simply run the !tps command in #bots and follow the directions provided.
sand scaffoldBOT
n4master, you just advanced to level 6
sand scaffoldBOT
jc16361, you just advanced to level 1
sand scaffoldBOT
steezyblitz, you just advanced to level 1
sand scaffoldBOT
Red, you just advanced to level 1
 glacial dawn
!server
frank tuskBOT
Free Method
To host a server on your own computer, read the selfhosting guide.
This guide goes over how to install, create, and launch a free Minecraft server on all operating systems (MacOS, Linux and Windows). The guide also guides you through installing Java and optimizing your server for better performance.
If you are installing one of our older modpacks, ignore the "README" file that is included in the serverpack files, as they have outdated information.
Paid Method
We suggest renting a server from Bisect Hosting:
Approx. $10 - $25 a month depending on what plan you choose. You can also get 25% off with Code LunaPixel.
Go here and order a plan which fits you. We suggest 1GB per player but nothing lower than 4GB as the server needs at least 3GB to run.
Go to #server-hosting for more Info!
The following advice works for both the Free and Paid methods:
Transferring Your World
If you're playing Singleplayer and want to transfer your world to your server, simply go to your modpack files and navigate to the saves folder. Inside of this folder, you will see your world saves. Rename your desired world save to world. You can then transfer this folder to your server files. If your world was hosted via world sharing, this process has to be done by the person who would click "Share World".
Fixing Lag
To resolve lag issues, simply run the !tps command in #bots and follow the directions provided.
grim trout
.sb @modest oxide ?r compromised account
 twin anvilBOT
Ban result:
 Reason: compromised account
 Moderator: @grim trout

 Details:

 Duration:
Soft Ban: 
Hack Ban:
DM-Members:
<:success:660789936651370497> Successful bans

diddylover766
<:cancel:660789591900684329> Unsuccessful bans
All users were banned!
sand scaffoldBOT
therealskb, you just advanced to level 3
grim trout
.sb @digital hornet ?r compromised account
twin anvilBOT
Ban result:
Reason: compromised account
Moderator: @grim trout
Details:
Duration:
Soft Ban:
Hack Ban:
DM-Members:
<:success:660789936651370497> Successful bans
ellutrixneo
<:cancel:660789591900684329> Unsuccessful bans
All users were banned!
sand scaffoldBOT
pandaowo, you just advanced to level 30
sand scaffoldBOT
sir_chuevee, you just advanced to level 7
tennopone, you just advanced to level 3
sand scaffoldBOT
anna.b_th, you just advanced to level 1
sand scaffoldBOT
f8pp, you just advanced to level 1
sand scaffoldBOT
vallasite.ogg, you just advanced to level 4
sand scaffoldBOT
edwarrss, you just advanced to level 1
sand scaffoldBOT
marcinek_m, you just advanced to level 1
shani_malwo, you just advanced to level 3
 earnest ivy
!server
frank tuskBOT
Free Method
To host a server on your own computer, read the selfhosting guide.
This guide goes over how to install, create, and launch a free Minecraft server on all operating systems (MacOS, Linux and Windows). The guide also guides you through installing Java and optimizing your server for better performance.
If you are installing one of our older modpacks, ignore the "README" file that is included in the serverpack files, as they have outdated information.
Paid Method
We suggest renting a server from Bisect Hosting:
Approx. $10 - $25 a month depending on what plan you choose. You can also get 25% off with Code LunaPixel.
Go here and order a plan which fits you. We suggest 1GB per player but nothing lower than 4GB as the server needs at least 3GB to run.
Go to #server-hosting for more Info!
The following advice works for both the Free and Paid methods:
Transferring Your World
If you're playing Singleplayer and want to transfer your world to your server, simply go to your modpack files and navigate to the saves folder. Inside of this folder, you will see your world saves. Rename your desired world save to world. You can then transfer this folder to your server files. If your world was hosted via world sharing, this process has to be done by the person who would click "Share World".
Fixing Lag
To resolve lag issues, simply run the !tps command in #bots and follow the directions provided.
sand scaffoldBOT
sersukesatomasaki, you just advanced to level 1
sand scaffoldBOT
lonesoldier420, you just advanced to level 2
nels0n0, you just advanced to level 1
sand scaffoldBOT
senox001, you just advanced to level 1
sand scaffoldBOT
manswellmcbear, you just advanced to level 9
kingleonidas2000, you just advanced to level 1
senox001, you just advanced to level 2
 prime sky
my spells say I haven't attuned to this magic, how do I fix this?
sand scaffoldBOT
silver_wolf_65, you just advanced to level 1
gdmzt, you just advanced to level 4
 kind lake
!server
frank tuskBOT
Free Method
To host a server on your own computer, read the selfhosting guide.
This guide goes over how to install, create, and launch a free Minecraft server on all operating systems (MacOS, Linux and Windows). The guide also guides you through installing Java and optimizing your server for better performance.
If you are installing one of our older modpacks, ignore the "README" file that is included in the serverpack files, as they have outdated information.
Paid Method
We suggest renting a server from Bisect Hosting:
Approx. $10 - $25 a month depending on what plan you choose. You can also get 25% off with Code LunaPixel.
Go here and order a plan which fits you. We suggest 1GB per player but nothing lower than 4GB as the server needs at least 3GB to run.
Go to #server-hosting for more Info!
The following advice works for both the Free and Paid methods:
Transferring Your World
If you're playing Singleplayer and want to transfer your world to your server, simply go to your modpack files and navigate to the saves folder. Inside of this folder, you will see your world saves. Rename your desired world save to world. You can then transfer this folder to your server files. If your world was hosted via world sharing, this process has to be done by the person who would click "Share World".
Fixing Lag
To resolve lag issues, simply run the !tps command in #bots and follow the directions provided.
sand scaffoldBOT
eggmandan.exe, you just advanced to level 1
sand scaffoldBOT
resuzu., you just advanced to level 1
sand scaffoldBOT
billgateshater54, you just advanced to level 2
 shell siren
!tps
frank tuskBOT
Please follow the guide here for changing the Java version your server uses. This will improve performance dramatically. If you are on a third party server host, you likely can not change the Java version your server uses. Bisect Hosting and a few VPS providers do allow changing Java version, though, which can usually be done through your server dashboard.
The method on Bisect is to simply go to the main dashboard page, and select "GraalVM 22" as the Java distribution. If it crashes, use 21 instead.
For further performance improvements, you can also follow this guide. This guide's section regarding GraalVM is completely wrong from our own testing, and we recommend ignoring it.
Reducing server render distance in the server.properties file is also a very good way of reducing lag. Most of our modpacks include mods like Bobby and Farsight, which make it so reducing server render distance will not affect players.
If lag persists, run the following command ingame:
/spark profiler start --only-ticks-over 50
Then, send the link in this channel.
sand scaffoldBOT
Jaxx, you just advanced to level 13
sand scaffoldBOT
natenan, you just advanced to level 1
sand scaffoldBOT
destreader13, you just advanced to level 4
sand scaffoldBOT
O₂N/A (OhTuna) (Ping Reply), you just advanced to level 8
sand scaffoldBOT
skyros199, you just advanced to level 1
 covert locust
!ea
frank tuskBOT
⚠️ Essential Mod Not Supported
We strongly recommend against using Essential with our modpacks, and we add a warning screen during modpack startup containing the following message by default. A free world-sharing alternative is already built-in called Luna - click Share World in the game menu to use it.
Why we don't support Essential:
-
Technical issues: We've received multiple user reports of problems when combining Essential with our modpacks, including reports of world corruption. While there is no conclusive evidence of Essential as the definite cause, we do not have the development or support capacity to resolve issues potentially caused by it.
-
Security concerns: Essential's auto-updater introduces potential security risks that are outside of our control.
-
Ethics: We object to Essential's inclusion of in-game currency and microtransactions in an otherwise free modding environment.
If you choose to use Essential anyway
Please understand that you do so at your own risk and will not be eligible for support from our team. To remove this warning, you can open your modpack instance folder, navigate to config/crash_assistant/problematic_mods_config.json, and under essential-container, change should_crash_on_startup from true to false. On newer modpack versions, this is replaced by a migrated .jexl in the same location, which you can also open in a text editor then simply delete the section for Essential.
sand scaffoldBOT
jer_jen, you just advanced to level 1
GG @gritty sphinx , you just unlocked the achievement: Casual Typer! 🥳

the.most.random, you just advanced to level 1
duskgoblin, you just advanced to level 1
sand scaffoldBOT
rikuvandola, you just advanced to level 1
sand scaffoldBOT
elizen__, you just advanced to level 2
sand scaffoldBOT
novembers22, you just advanced to level 2
sand scaffoldBOT
GG @drifting birch , you just unlocked the achievement: To Infinity!! 🥳

.shadoinked, you just advanced to level 5
sand scaffoldBOT
red_shadow_29, you just advanced to level 1
sand scaffoldBOT
hookhandcardoor, you just advanced to level 1
sand scaffoldBOT
GG @little lichen , you just unlocked the achievement: Give or Take! 🥳

sanxaokingzs, you just advanced to level 8
pizza2342, you just advanced to level 1
sand scaffoldBOT
sketcheddunes, you just advanced to level 1
sand scaffoldBOT
pichustan3003, you just advanced to level 1
kynothan, you just advanced to level 3
 ember kettle
!server
frank tuskBOT
Free Method
To host a server on your own computer, read the selfhosting guide.
This guide goes over how to install, create, and launch a free Minecraft server on all operating systems (MacOS, Linux and Windows). The guide also guides you through installing Java and optimizing your server for better performance.
If you are installing one of our older modpacks, ignore the "README" file that is included in the serverpack files, as they have outdated information.
Paid Method
We suggest renting a server from Bisect Hosting:
Approx. $10 - $25 a month depending on what plan you choose. You can also get 25% off with Code LunaPixel.
Go here and order a plan which fits you. We suggest 1GB per player but nothing lower than 4GB as the server needs at least 3GB to run.
Go to #server-hosting for more Info!
The following advice works for both the Free and Paid methods:
Transferring Your World
If you're playing Singleplayer and want to transfer your world to your server, simply go to your modpack files and navigate to the saves folder. Inside of this folder, you will see your world saves. Rename your desired world save to world. You can then transfer this folder to your server files. If your world was hosted via world sharing, this process has to be done by the person who would click "Share World".
Fixing Lag
To resolve lag issues, simply run the !tps command in #bots and follow the directions provided.
sand scaffoldBOT
maxisasillybilly, you just advanced to level 2
 sage skiff
!alternates
frank tuskBOT
If this command was run in response to your question/issue, it is likely because switching away from the launcher you are currently using would fix your problem.
From our experience, the most stable launcher by far is ATLauncher, also known as ATL. Keep in mind that ATL is NOT related to TLauncher in any way, and is not a cracked launcher.
To install ATL, do the following:
1. Go to https://atlauncher.com/download. If you are on MacOS, then choose the "Jar" version under the "Other" tab, this is important as OSX WILL crash the game on Mac.
2. Install and run the setup, then open the program.
3. Login to your Microsoft account that owns the Java Edition of Minecraft from the Accounts tab on the right. This process is 100% safe, as it goes directly through Microsoft. ATL doesn't see your account credentials.
4. Go to the Packs tab on the right, then click "Curseforge" on the left.
5. Search the modpack you wish to download.
6. Click "Install". Then, follow the on-screen directions.
7. Go to the Instances tab, and click "Play" on the modpack you downloaded. If you ever see an "Update" button on the instance, click it.
This video explains the process: https://youtu.be/xMYW1wMbmkM
To transfer your Curseforge world to ATL, simply right click the modpack on Curseforge, or click the 3 dots, then click "Open Folder". Copy the Saves folder, then click "Open Folder" on ATL and paste the Saves folder there. Do the same with the XaerosMinimap folder, or the Journeymap folder, to transfer over any waypoints you've created.
Because ATL downloads the exact same files as Curseforge does, your world will be the exact same and you will be able to join the same servers. ATL also works without an internet connection (after you've installed the modpack, of course), and does not have any bloat from Overwolf. You are free to uninstall both Overwolf and Curseforge with ATL installed.
sand scaffoldBOT
karanlikkr4l_2, you just advanced to level 1
sand scaffoldBOT
maksiim6701, you just advanced to level 1
 glad nebula
!server
frank tuskBOT
Free Method
To host a server on your own computer, read the selfhosting guide.
This guide goes over how to install, create, and launch a free Minecraft server on all operating systems (MacOS, Linux and Windows). The guide also guides you through installing Java and optimizing your server for better performance.
If you are installing one of our older modpacks, ignore the "README" file that is included in the serverpack files, as they have outdated information.
Paid Method
We suggest renting a server from Bisect Hosting:
Approx. $10 - $25 a month depending on what plan you choose. You can also get 25% off with Code LunaPixel.
Go here and order a plan which fits you. We suggest 1GB per player but nothing lower than 4GB as the server needs at least 3GB to run.
Go to #server-hosting for more Info!
The following advice works for both the Free and Paid methods:
Transferring Your World
If you're playing Singleplayer and want to transfer your world to your server, simply go to your modpack files and navigate to the saves folder. Inside of this folder, you will see your world saves. Rename your desired world save to world. You can then transfer this folder to your server files. If your world was hosted via world sharing, this process has to be done by the person who would click "Share World".
Fixing Lag
To resolve lag issues, simply run the !tps command in #bots and follow the directions provided.
sand scaffoldBOT
demingm13, you just advanced to level 3
sand scaffoldBOT
mr.morgan8182, you just advanced to level 1
 vital pier
!server
frank tuskBOT
Free Method
To host a server on your own computer, read the selfhosting guide.
This guide goes over how to install, create, and launch a free Minecraft server on all operating systems (MacOS, Linux and Windows). The guide also guides you through installing Java and optimizing your server for better performance.
If you are installing one of our older modpacks, ignore the "README" file that is included in the serverpack files, as they have outdated information.
Paid Method
We suggest renting a server from Bisect Hosting:
Approx. $10 - $25 a month depending on what plan you choose. You can also get 25% off with Code LunaPixel.
Go here and order a plan which fits you. We suggest 1GB per player but nothing lower than 4GB as the server needs at least 3GB to run.
Go to #server-hosting for more Info!
The following advice works for both the Free and Paid methods:
Transferring Your World
If you're playing Singleplayer and want to transfer your world to your server, simply go to your modpack files and navigate to the saves folder. Inside of this folder, you will see your world saves. Rename your desired world save to world. You can then transfer this folder to your server files. If your world was hosted via world sharing, this process has to be done by the person who would click "Share World".
Fixing Lag
To resolve lag issues, simply run the !tps command in #bots and follow the directions provided.
sand scaffoldBOT
poisonedoak, you just advanced to level 1
zenispade, you just advanced to level 1
sand scaffoldBOT
poisonedoak, you just advanced to level 2
 tight plover
!tps
frank tuskBOT
Please follow the guide here for changing the Java version your server uses. This will improve performance dramatically. If you are on a third party server host, you likely can not change the Java version your server uses. Bisect Hosting and a few VPS providers do allow changing Java version, though, which can usually be done through your server dashboard.
The method on Bisect is to simply go to the main dashboard page, and select "GraalVM 22" as the Java distribution. If it crashes, use 21 instead.
For further performance improvements, you can also follow this guide. This guide's section regarding GraalVM is completely wrong from our own testing, and we recommend ignoring it.
Reducing server render distance in the server.properties file is also a very good way of reducing lag. Most of our modpacks include mods like Bobby and Farsight, which make it so reducing server render distance will not affect players.
If lag persists, run the following command ingame:
/spark profiler start --only-ticks-over 50
Then, send the link in this channel.
sand scaffoldBOT
gameboy240, you just advanced to level 1
sand scaffoldBOT
Tai dumbass, you just advanced to level 4
sand scaffoldBOT
tearsofsouls_6384662, you just advanced to level 1
sand scaffoldBOT
apar_akl, you just advanced to level 2
sand scaffoldBOT
cacahuete9988, you just advanced to level 1
sadisticnightmare, you just advanced to level 1
sumer8795, you just advanced to level 1
sadisticnightmare, you just advanced to level 2
sand scaffoldBOT
tearsofsouls_6384662, you just advanced to level 2
csmittter, you just advanced to level 6
sand scaffoldBOT
GG @cerulean ember , you just unlocked the achievement: Casual Typer! 🥳
 sand scaffoldBOT
dobroski095, you just advanced to level 1
GG @eternal basin , you just unlocked the achievement: Give or Take! 🥳

uzunyasa, you just advanced to level 1
sand scaffoldBOT
ahmadblox22_1, you just advanced to level 1
dobroski095, you just advanced to level 2
sand scaffoldBOT
canzel, you just advanced to level 1
 wintry tiger
!server
frank tuskBOT
Free Method
To host a server on your own computer, read the selfhosting guide.
This guide goes over how to install, create, and launch a free Minecraft server on all operating systems (MacOS, Linux and Windows). The guide also guides you through installing Java and optimizing your server for better performance.
If you are installing one of our older modpacks, ignore the "README" file that is included in the serverpack files, as they have outdated information.
Paid Method
We suggest renting a server from Bisect Hosting:
Approx. $10 - $25 a month depending on what plan you choose. You can also get 25% off with Code LunaPixel.
Go here and order a plan which fits you. We suggest 1GB per player but nothing lower than 4GB as the server needs at least 3GB to run.
Go to #server-hosting for more Info!
The following advice works for both the Free and Paid methods:
Transferring Your World
If you're playing Singleplayer and want to transfer your world to your server, simply go to your modpack files and navigate to the saves folder. Inside of this folder, you will see your world saves. Rename your desired world save to world. You can then transfer this folder to your server files. If your world was hosted via world sharing, this process has to be done by the person who would click "Share World".
Fixing Lag
To resolve lag issues, simply run the !tps command in #bots and follow the directions provided.
sand scaffoldBOT
blehbleh0831, you just advanced to level 1
sand scaffoldBOT
tiredphoenix787, you just advanced to level 1
sand scaffoldBOT
aspect12z, you just advanced to level 1
arguskaltaris, you just advanced to level 2
spice tulip
!rank
 spice tulip
.i 922175355563958283
twin anvilBOT

Who is zei_rahhh?
General Informations:
Username: zei_rahhh
ID: 922175355563958283
 Creation: <t:1639934138:R>
 Discord Badges:
Wick Informations:
 Suspicious?
 Persistence:
 Muted:
 Quarantined:
Banned?
zei_rahhh is not in this server!
sand scaffoldBOT
kyro3_, you just advanced to level 1
 jaunty atlas
!ea
frank tuskBOT
⚠️ Essential Mod Not Supported
We strongly recommend against using Essential with our modpacks, and we add a warning screen during modpack startup containing the following message by default. A free world-sharing alternative is already built-in called Luna - click Share World in the game menu to use it.
Why we don't support Essential:
-
Technical issues: We've received multiple user reports of problems when combining Essential with our modpacks, including reports of world corruption. While there is no conclusive evidence of Essential as the definite cause, we do not have the development or support capacity to resolve issues potentially caused by it.
-
Security concerns: Essential's auto-updater introduces potential security risks that are outside of our control.
-
Ethics: We object to Essential's inclusion of in-game currency and microtransactions in an otherwise free modding environment.
If you choose to use Essential anyway
Please understand that you do so at your own risk and will not be eligible for support from our team. To remove this warning, you can open your modpack instance folder, navigate to config/crash_assistant/problematic_mods_config.json, and under essential-container, change should_crash_on_startup from true to false. On newer modpack versions, this is replaced by a migrated .jexl in the same location, which you can also open in a text editor then simply delete the section for Essential.
sand scaffoldBOT
Fallon, you just advanced to level 2
 sleek kettle
!linux
frank tuskBOT
GLFW
- Download the latest GLFW library files from your distros official repositories. If you are on a slow updating distro (like Ubuntu), instead download the latest pre-built files from my repository at https://github.com/Frontear/glfw-libs/releases
- Add
-Dorg.lwjgl.glfw.libname=/path/to/fileto your launcher java arguments. An example of what this might look like is-Dorg.lwjgl.glfw.libname=/home/frontear/Downloads/libglfw.so.
OpenAL
- Download the latest OpenAL library files from your distros official repositories.
- Add
-Dorg.lwjgl.openal.libname=/usr/lib/libopenal.so(this path might be different depending on your distribution so please double check).
Note: Make sure to add "-XX:+UnlockExperimentalVMOptions" to the top and the path arguments to the bottom of the java arguments section
sand scaffoldBOT
psycro77, you just advanced to level 1
 scenic oak
!server
frank tuskBOT
Free Method
To host a server on your own computer, read the selfhosting guide.
This guide goes over how to install, create, and launch a free Minecraft server on all operating systems (MacOS, Linux and Windows). The guide also guides you through installing Java and optimizing your server for better performance.
If you are installing one of our older modpacks, ignore the "README" file that is included in the serverpack files, as they have outdated information.
Paid Method
We suggest renting a server from Bisect Hosting:
Approx. $10 - $25 a month depending on what plan you choose. You can also get 25% off with Code LunaPixel.
Go here and order a plan which fits you. We suggest 1GB per player but nothing lower than 4GB as the server needs at least 3GB to run.
Go to #server-hosting for more Info!
The following advice works for both the Free and Paid methods:
Transferring Your World
If you're playing Singleplayer and want to transfer your world to your server, simply go to your modpack files and navigate to the saves folder. Inside of this folder, you will see your world saves. Rename your desired world save to world. You can then transfer this folder to your server files. If your world was hosted via world sharing, this process has to be done by the person who would click "Share World".
Fixing Lag
To resolve lag issues, simply run the !tps command in #bots and follow the directions provided.
sand scaffoldBOT
justclawz, you just advanced to level 2
poisonedoak, you just advanced to level 3
 late bone
!server
frank tuskBOT
Free Method
To host a server on your own computer, read the selfhosting guide.
This guide goes over how to install, create, and launch a free Minecraft server on all operating systems (MacOS, Linux and Windows). The guide also guides you through installing Java and optimizing your server for better performance.
If you are installing one of our older modpacks, ignore the "README" file that is included in the serverpack files, as they have outdated information.
Paid Method
We suggest renting a server from Bisect Hosting:
Approx. $10 - $25 a month depending on what plan you choose. You can also get 25% off with Code LunaPixel.
Go here and order a plan which fits you. We suggest 1GB per player but nothing lower than 4GB as the server needs at least 3GB to run.
Go to #server-hosting for more Info!
The following advice works for both the Free and Paid methods:
Transferring Your World
If you're playing Singleplayer and want to transfer your world to your server, simply go to your modpack files and navigate to the saves folder. Inside of this folder, you will see your world saves. Rename your desired world save to world. You can then transfer this folder to your server files. If your world was hosted via world sharing, this process has to be done by the person who would click "Share World".
Fixing Lag
To resolve lag issues, simply run the !tps command in #bots and follow the directions provided.
sand scaffoldBOT
mis.t, you just advanced to level 19
sand scaffoldBOT
Fallon, you just advanced to level 3
sand scaffoldBOT
darksylph, you just advanced to level 3
 junior vessel
!drivers
frank tuskBOT
You (likely) need to update your graphics drivers in order to resolve the crash. Here's how to go about doing that!
1. Identify your graphics card
if you already know skip to the next step
- Open task manager
- Navigate to the "Performance" tab (on Windows 11 this is the button that looks like a heart pulse)
- Press the GPU 0 graph and read your GPU from the top right
Note:
In some cases you may see a GPU 0 and GPU 1. This means your CPU has its own GPU, as well as a dedicated one. You probably want GPU 1 (which is usually the better one), but you can ask staff to clarify if necessary.
2. Download your drivers from the manufacturers site
Depending on what you read before, you likely need drivers from either AMD, Intel, or NVIDIA
AMD: https://www.amd.com/en/support
Intel: https://www.intel.com/content/www/us/en/download-center/home.html
NVIDIA: https://www.nvidia.com/Download/index.aspx?lang=en-us
Note:
- For NVIDIA you want to select "Game Ready Driver (GRD)" (this is the default option) for the best performance. Once installing you'd probably prefer downloading GeForce Experience, which will notify you when there's an available drivers update.
- For Intel, you probably want to press "Get Started" under the "Automatically update your drivers and software", which will simplify the process and update everything automatically
- For AMD you probably want to just press "Download Windows Drivers", which will download something called AMD Adrenaline, which will update your drivers automatically.
3. Run the installation, restart your computer, and try playing MC again
- At this point, hopefully your Minecraft is running. If it still does not work, please post any new logs and staff will help assist you with finding the right solution.
sand scaffoldBOT
regimentroi, you just advanced to level 1
turtlosaur, you just advanced to level 2
sand scaffoldBOT
lanky_rambo, you just advanced to level 1
furinafontaine, you just advanced to level 1
sand scaffoldBOT
.erti., you just advanced to level 4
 ebon oxide
!ea
frank tuskBOT
⚠️ Essential Mod Not Supported
We strongly recommend against using Essential with our modpacks, and we add a warning screen during modpack startup containing the following message by default. A free world-sharing alternative is already built-in called Luna - click Share World in the game menu to use it.
Why we don't support Essential:
-
Technical issues: We've received multiple user reports of problems when combining Essential with our modpacks, including reports of world corruption. While there is no conclusive evidence of Essential as the definite cause, we do not have the development or support capacity to resolve issues potentially caused by it.
-
Security concerns: Essential's auto-updater introduces potential security risks that are outside of our control.
-
Ethics: We object to Essential's inclusion of in-game currency and microtransactions in an otherwise free modding environment.
If you choose to use Essential anyway
Please understand that you do so at your own risk and will not be eligible for support from our team. To remove this warning, you can open your modpack instance folder, navigate to config/crash_assistant/problematic_mods_config.json, and under essential-container, change should_crash_on_startup from true to false. On newer modpack versions, this is replaced by a migrated .jexl in the same location, which you can also open in a text editor then simply delete the section for Essential.
sand scaffoldBOT
mejsio, you just advanced to level 1
sand scaffoldBOT
soggytoast_, you just advanced to level 2
sand scaffoldBOT
GG @rapid temple , you just unlocked the achievement: Casual Typer! 🥳

robin7_, you just advanced to level 3
sand scaffoldBOT
jhambob, you just advanced to level 1
sand scaffoldBOT
jhambob, you just advanced to level 2
gullidumbest, you just advanced to level 1
Fallon, you just advanced to level 4
manswellmcbear, you just advanced to level 10
sand scaffoldBOT
oblique_alastor, you just advanced to level 1
oblique_alastor, you just advanced to level 2
sand scaffoldBOT
oblique_alastor, you just advanced to level 3
 viral blade
!server
frank tuskBOT
Free Method
To host a server on your own computer, read the selfhosting guide.
This guide goes over how to install, create, and launch a free Minecraft server on all operating systems (MacOS, Linux and Windows). The guide also guides you through installing Java and optimizing your server for better performance.
If you are installing one of our older modpacks, ignore the "README" file that is included in the serverpack files, as they have outdated information.
Paid Method
We suggest renting a server from Bisect Hosting:
Approx. $10 - $25 a month depending on what plan you choose. You can also get 25% off with Code LunaPixel.
Go here and order a plan which fits you. We suggest 1GB per player but nothing lower than 4GB as the server needs at least 3GB to run.
Go to #server-hosting for more Info!
The following advice works for both the Free and Paid methods:
Transferring Your World
If you're playing Singleplayer and want to transfer your world to your server, simply go to your modpack files and navigate to the saves folder. Inside of this folder, you will see your world saves. Rename your desired world save to world. You can then transfer this folder to your server files. If your world was hosted via world sharing, this process has to be done by the person who would click "Share World".
Fixing Lag
To resolve lag issues, simply run the !tps command in #bots and follow the directions provided.
sand scaffoldBOT
forcebender, you just advanced to level 1
 lavish oasis
!server
frank tuskBOT
Free Method
To host a server on your own computer, read the selfhosting guide.
This guide goes over how to install, create, and launch a free Minecraft server on all operating systems (MacOS, Linux and Windows). The guide also guides you through installing Java and optimizing your server for better performance.
If you are installing one of our older modpacks, ignore the "README" file that is included in the serverpack files, as they have outdated information.
Paid Method
We suggest renting a server from Bisect Hosting:
Approx. $10 - $25 a month depending on what plan you choose. You can also get 25% off with Code LunaPixel.
Go here and order a plan which fits you. We suggest 1GB per player but nothing lower than 4GB as the server needs at least 3GB to run.
Go to #server-hosting for more Info!
The following advice works for both the Free and Paid methods:
Transferring Your World
If you're playing Singleplayer and want to transfer your world to your server, simply go to your modpack files and navigate to the saves folder. Inside of this folder, you will see your world saves. Rename your desired world save to world. You can then transfer this folder to your server files. If your world was hosted via world sharing, this process has to be done by the person who would click "Share World".
Fixing Lag
To resolve lag issues, simply run the !tps command in #bots and follow the directions provided.
lavish oasis
!ea
frank tuskBOT
⚠️ Essential Mod Not Supported
We strongly recommend against using Essential with our modpacks, and we add a warning screen during modpack startup containing the following message by default. A free world-sharing alternative is already built-in called Luna - click Share World in the game menu to use it.
Why we don't support Essential:
-
Technical issues: We've received multiple user reports of problems when combining Essential with our modpacks, including reports of world corruption. While there is no conclusive evidence of Essential as the definite cause, we do not have the development or support capacity to resolve issues potentially caused by it.
-
Security concerns: Essential's auto-updater introduces potential security risks that are outside of our control.
-
Ethics: We object to Essential's inclusion of in-game currency and microtransactions in an otherwise free modding environment.
If you choose to use Essential anyway
Please understand that you do so at your own risk and will not be eligible for support from our team. To remove this warning, you can open your modpack instance folder, navigate to config/crash_assistant/problematic_mods_config.json, and under essential-container, change should_crash_on_startup from true to false. On newer modpack versions, this is replaced by a migrated .jexl in the same location, which you can also open in a text editor then simply delete the section for Essential.
sand scaffoldBOT
heragonred, you just advanced to level 1
GG @sonic pine , you just unlocked the achievement: Casual Typer! 🥳
 sand scaffoldBOT
justslxde, you just advanced to level 1
sand scaffoldBOT
duskgoblin, you just advanced to level 2
GG @rapid wolf , you just unlocked the achievement: Give or Take! 🥳
 sand scaffoldBOT
therealskb, you just advanced to level 4
etanz., you just advanced to level 2
likemanu97, you just advanced to level 1
olivinism, you just advanced to level 1
averylargeamountofeggs, you just advanced to level 7
GG @stone moth , you just unlocked the achievement: Casual Typer! 🥳

therealskb, you just advanced to level 5
sand scaffoldBOT
GG @umbral harness , you just unlocked the achievement: Casual Typer! 🥳

 serene bloom
!ws
frank tuskBOT
Luna Pixel's World Sharing
Our modpacks don't support any mods that add singleplayer hosting / world sharing because we already provide free world sharing. The 'Essential' mod is therefore incompatible.
To share your world using our own world hosting, click the 'Open to Lan' or 'Share World' button in the game menu when in a singleplayer world, and share the world.
It will give you an address, like magma-cube.mc.lunapixel.gg, which your friends can use to connect directly to your world as if it were a server!
We still highly suggest not to play through LAN as LAN is untested and unreliable. Using it will cause longterm damage to your world.
There is no reason to use LAN, as we support both paid and free methods of hosting a server the normal way.
If you get an error in chat when trying to host your world, we highly recommend selfhosting instead as it's free, very easy, and much more stable. Run the !server command in #bots to learn more.
serene bloom
!server
frank tuskBOT
Free Method
To host a server on your own computer, read the selfhosting guide.
This guide goes over how to install, create, and launch a free Minecraft server on all operating systems (MacOS, Linux and Windows). The guide also guides you through installing Java and optimizing your server for better performance.
If you are installing one of our older modpacks, ignore the "README" file that is included in the serverpack files, as they have outdated information.
Paid Method
We suggest renting a server from Bisect Hosting:
Approx. $10 - $25 a month depending on what plan you choose. You can also get 25% off with Code LunaPixel.
Go here and order a plan which fits you. We suggest 1GB per player but nothing lower than 4GB as the server needs at least 3GB to run.
Go to #server-hosting for more Info!
The following advice works for both the Free and Paid methods:
Transferring Your World
If you're playing Singleplayer and want to transfer your world to your server, simply go to your modpack files and navigate to the saves folder. Inside of this folder, you will see your world saves. Rename your desired world save to world. You can then transfer this folder to your server files. If your world was hosted via world sharing, this process has to be done by the person who would click "Share World".
Fixing Lag
To resolve lag issues, simply run the !tps command in #bots and follow the directions provided.
sand scaffoldBOT
mumarh, you just advanced to level 2