
#Hades - Nebula255 #15
1 messages · Page 2 of 1

wow i think this might've just extended my lifespan, dont have to keep looking at compare_belt_response
Had no clue that was a thing, ty
😂
gonna let the black filament dry for a bit, then do 2 clips in that, keep 2 in red, then a multicolor black + red
I was going to say if you want to see what the clips look like in different colors on black fillers, I actually have red and black solid color clips also printed. 😅
Gonna need to add something to this so I'm not copying all the builds 😂
I think that's pretty much what I did too. 😅
Definitely not a bad Thing(123), your builds fx. are very nice, I would like this to atleast somehow be a bit unique, apart from the cantilever, yet to figure out how though
its not a copy for multiple reasons though
Warped only builds 370 printers
And his is running Hydra
That's true, but a few unique aspects I haven't seen before would be nice, been thinking about what to add
layer change every other layer
I was more thinking something that wouldn't drive me insane after 40 minutes
I think its far to late for that
I wouldn't say I'm fully there yet, like 80%

I have to get creative with the wiring for my cpap in this thing aswell, might run it up one of the cantilever vertical extrusions, then into the extrusion infront of that, then down to the cpap? not sure
how did you make that?
That's just color swaps at layers
Just as @tender haven said, manual filament swaps at certain layer heights. You can see the layer change from the front as well but it was a happy accident that everything sort of aligned and complimented each other.

Couldn’t find my second spool roller thing, so haven’t gotten around to playing with it yet,
Picking skirts up tomorrow, then wiring up ethernet , not sure about USB yet but I’ll see how I feel about that

Gorgeousness!


Super happy with how the skirts turned out, many thanks to @short glen for printing them, despite my red asa spool messing up his AMS😅
I’ll handle the center inlays myself, probably cut some white acrylic for diffusers for the front
I haven't checked-in in a while, it looks amazing 😛. I'm looking forward to see it with the beefy panels
Me too, they should ship very soon as I gave them the go-ahead
Hardware for them should arrive mid December
Yeah it was such a relief to return that blasted red spool! I'll make a respooler asap, but I'm not 100% convinced in any of the design I've seen
Just got the shipping notice from Xometry, they claim the 25th, excited to see them in person
Luckily it’s not with UPS, so they should get here in one piece, knock on wood
Wired the IEC up again, no explosions so far, lights work flawlessly, might move the z a bit again for fun
How did the rear skirts fit
They fit really nicely, maybe a mm or two between them and one of the feet which isnt noticeable


you need to use scaler in the slicer to fix that
looking at that now, I would put the keystones in the other skirt
balance the vents
the vents you never see
yeah, no point really, the keystones fit perfectly, so I'm pretty happy
Also helps that they look amazing (thanks 79bass, still sorry about that red roll 😂 )
these do become heavy enough, that its hard to want to swap feet and skirts lol
Yeah… I’ve resorted to having a tiny bit of the printer having off my desk, and sitting on the floor
The 5160RGB's run kinda hot, need a constant driver on them with my Z, 2a run current, they hit 75c+
ofcourse I don't really have a sense of how hot the normal 5160 pro's run at, but seems like more
And this is at 24v, not even 48
I've only run watterotts myself
I’ve only ran ez 5160 pro’s before, I know the watterotts are better though and run way cooler
Oh I guess I actually haven’t had 5160’s at 2a before, the ones in my v0 run at 1.6
Working on a new solution for the left skirt to include cable points without having to reprint it, may something the screw can hold down
It looks awful at current but I also don’t wanna sleeve it all
More fun to be had with WLED;
Having the default preset of orange at 50% brightness was fine
Changed it to red at 50% and it caused brownout detections,
The fix; make a preset with red at 1%, one with red at 50%, and then a third playlist preset, to merge the two with a duration, now it turns on red at 1%, stays there until everythings booted, then slowly gets up to the 50% brightness i requested

So your LEDs are too much for your 5v PSU?
I have it all wired into the same wagos, so the Pi, ESP32, and 22x WS2812b are powering on at the same time
It's not a PSU, it's a DC-DC converter from meanwell, but the instant load causes the voltage to drop, which triggers brownout detection in the ESP
Time for a dedicated 5v PSU
It has lots of current to give, but voltage is an issue initially 😂 I could just put a cap between the wago and esp, but thats effort
They're all considerably larger than the DDR60G5, it's also a non issue as long as i give the LED's a ramp up time

Even a LRS 75 is 97x99, and thats the smallest psu of the 5 that I just had a look at
I went with UHP 350's, so thats less space for other stuff in there
will WLED be integrated w klipper
I forgot it can do that lol, it might at some point.
For now I’m keeping it as work / mood lighting
I think this might be the first time I’m wishing for a weekend to be over fast, I get my panels on Monday
ship faster.

That is beautiful

Are they installed yet
I have not installed them in the minute since I posted this picture no
Give me another 30 seconds and they might be unpacked
Why not
I work at the speed of me, not the speed of sound
I'm disappointed in reality
thats ok, u can fly out and install them, I don't even have the hardware for them so itll be a temporary mount
I didn't think I would get mine installed the day they arrived.... But once I started to work on installing then I couldn't stop
Just do 6 or 8 for now
Or 4
I would use 1 or 2 on both the upper and lower extrusions, not just on the uprights
yeah ill do as few as possible, theyre easy to replace anyway so its no biggie
Since the uprights cannot keep the panels from sliding down
I start with the center top screw
Yeah, all tnuts are installed and theyre easy to unscrew anyway, so ill just put a bunch of screws in
And slide the panel to line up the others
only annoying part will be lining up the t nuts, but ill use my allen key and wedge it in there
Then do the vertical ones last
sounds good
I slide the panel to one side so I can line up the tnuts on the vertical. Then slide it the other way and repeat on the other vertical
Ahh yeah smart
Will install them once this v0 print is done, then ill get some pics
😍

Are they anodized or painted?
Anodized


In love with these, excited to get the proper hardware to install them, currently using M5x10 BHCS
for M5x12 FHCS and some red countersunk washers on the way
And now it’s time for me to start looking into options for the remaining panels (top, bottom, and door)
Most of the FMG hardware will arrive on the 10th of Dec. along with the panel hardware, friend also received the 8mm 7075 for some of my FMG parts
That is so clean 😩😩😩
Well this was a lie.
I got all the hardware today (I think?), or atleast close to all.
The M5x12 FHCS are a bit too short, I should've gone with some M5x14 FHCS for it, some of them can't grip or engage properly, will order some new ones right now
No, I ordered those for my panels
Ohhh
I have m5x12 BHCS for steppers, all the FMG hardware is accounted for
Someone didn't math
I thought I did, but then again theres only 8mm of thread on these 12mm fhcs
so i just misunderstood how it was measured on FHCS 😂
Since they are for countersunk holes, it's from the top 😂
Yeahhh i didnt take that into account and didn't bother looking
But you need to look at the thickness of the washers as well
its my bad, some fit, some dont, i ordered some m5x14 FHCS for it, since some of these m5x12 fit, i reckon 14 should be fine
So if the washer is 5mm, panel is 5mm, and extrusion is 6mm deep, that's 16mm
Though looks like most are 3mm thick
So that's 14mm
3.8mm for washer, 5mm panel, 6mm extrusion
14 will be perfect then
yeah good, already ordered them 😂
some of these m5x12 can get a tiny bit of thread in there
some cant, so ill just rock a few of them for now
Third time's the charm
Yeah, gonna ask my friend about the FMG plates now to see when hes got time
This is gonna look great, especially once I get the proper length screws lol

Attempt 1 of cpap mounting
This might change a lot, the current planis
2x m3 screws into extrusion, 1x m5 screw into steel plate and m5 nut
Cut CPAP hose up to the adapter im making to get it a small enough ID to pass through, then use the rest of the length

Gonna print a new attempt at a cable cover for the back which will slide onto it

Let’s hope it’s not as much of a pain to mount as the skirt itself
The v0 looks so tiny in there 😛
I thought this was the front and was going to ask how do you open it 
😂 yeah i got it man let me go get my print in 15 minutes
then lift it back on and torque it down
CPAP wiring is gonna be annoying, might need some input from others here, i have a few ideas but none I'm a huge fan of
first idea;
https://likes.cat/xznr1amx.png
running it up the extrusion, under the top hydra extrusion, then down some of the cantilever extrusion
upside; itll work
downside; long wire, ugly

second idea is much simpler, but not sure how i feel or will go about it;
https://likes.cat/f3f6eksb.png
just run the wires down, make a microfit 3.0 passthrough and cut a hole in the deck panel to mount it

Might just do option 2, much easier than using meters of wire for it, I’ll get a little microfit crimp and just file a hole in the PC panel
That's really the only option
option 1 is doable but annoying as hell
ill make a microfit keystone i can screw into an extrusion
Gotta shorten the cpap wires too, which is annoying, don’t have a PA-21 crimp tool, might cut the wires and solder

Thanks to @tender havens attention to detail, for better or for worse, im now taking this all apart so i can flip one of the upright Z rails for the cantilever setup
You are welcome


Might have ruined one of the carriages on the rail, good job to myself,
I was running the top carriage up and down the rail, and i didnt notice a screw poking out (good job me), so it ran right over the screw, with what i would imagine wouldve been intense resistance at lower speeds
gonna see how poorly it runs now
welp, it runs without too much complaining when just doing FORCE_MOVE STEPPER=stepper_z DISTANCE=150 VELOCITY=25 ACCEL=1000
Just need to wire up the bed when and then I’ll continue working on my microfit passthrough and BLDC driver mount for the cpap
So that would have maybe just dented the plastic endcap or rubber seal?
well the entire carriage ran over it
the center is steel and would be fine
the plastic end caps, well they are plastic and I have moved those back after hitting them on MGN12 rails
Ahh
im glad then lol, thought i mightve fucked up some of the ball bearings inside or something
the bearings have ball returns in those endcaps
but those are on either sided, nothing in the center really
the center just has some internal geometry for the grease injection ports
gotcha, didnt hear any weird sounds or grinding when i ran it up and down a few times, so ill assume all is good, and if things start breaking, then ill handle it at another point lol
Currently looking at insulation options for the printer, originally found a lot of listings for 12mm PIR but didn’t look closely enough, most if not all are out of stock or B2B, and it was discontinued in 2020, needs to be 12mm or thinner preferably, so it’s not too close to my cpap or my xy joints (16.5mm clearance to the xy)
Be careful with the CPAP controller board in the chamber and chamber temp
They are only rated to 65C max
Yeah can’t really have it outside sadly
Can’t imagine any easy way to have it outside the chamber
@viral grove don’t you have a pretty hot chamber, while using CPAP? Had any issues with anything so far?
(Hope you’re the right guy to ping lol, swear I remember like 80-90c chamber)
Ordered the remaining smooth pins, fans, etc. so missing some grub screws, and bearings now


Also just spent €60 on 2x 698-2RS bearings for the double shear 8mm 😂
Le fuq?
NSK
I’m starting to hear bearings from FMG I think from heat, also my PC door is a banana now. Other then any printed part needing to be re tightened over and over. Most off all was extrusions getting thermal expansion, also anything above 75c so far has creeps heat into the ebay I can see it on all my octopus and rpi temps
Gotcha, but the cpap driver has held up so far?
Yep so far I know it’s only rated to like 80c
Good to know, also thanks for the info on thermal expansion, reminds me to buy my backers
How thick is your door, 3mm?
Yeah 3mm door, I need to replace it with 6mm
Gotcha, im going for 5 or 6mm aswell, hopefully no bowing, max chamber would probably be 80 ish
You gonna use a chamber heater?
Yeah, should be able to make space for another SSR
If I do some electronics bay acrobatics
Oh yeah you can fit two forsure how does kalico handle chamber heaters I don’t like how klipper does it
My ebay is pretty cramped already,
I haven’t looked much into how kalico does it, gonna read up on it in a bit
If I move the pi and the octo a bit, should be a spot for another


Smart actually
And then another hole for a thermal fuse
I don’t have a picture for that
But same hole just mirrored onto the other side
Yep
thats good to know man, thanks, was thinking about fuses for it lol
Then lots of boron nitrate
Pre flight check your fuses, pop one or two by hand
Make sure they work
not in this case
chamber heater shouldnt get hot enough
normal thermal paste is better here
bn needs at least 80-90C for the solvent to vaporize so it actually works
hey zeanon, now that you're here, off the top of your head does kalico handle chamber heaters differently than mainline klipper? 😂 or do i have to go rtfm
But yeah normal would work most cases
no. treats it like any chamber
i dont think either has a specific section like heater_bed or extruder
normal is actually better here
bn wont work properly in this case
there might be something
brb
nope
just heater_generic
Gotcha, thanks!
So get some thermal paste, some fuses, thermistors, and a heater
might wait a bit, wallet is pretty hurt from this morning with the bearings 😂
I thought this was general chat smh🤣🤣 and isn’t boron nitrate just not electronically conductive after 100c it’s thermal conductivity is still just fully their below the boiling temp
this should be the new general chat for cool ideas and advice imo
was this not already?
i feel like so far its been scope creep
and has been working
ACTUALLY, if anyone has any advice on 12mm ish insulation, that would be nice, 12mm PIR is gone from everywhere since it went out of production in 2020
You said it yesterday aerogel, and your printer will be more expensive then anyone’s on here🤣
Can you not get any pir at all?
I might be able to get some 15mm, 12mm would just be ideal
Yeah 15mm is in stock, 12 went out of production in 2020 and no one has it anymore
15 works fine
yea, i just dont wanna move my cpap the 3mm, nor cut around it
gives me roughly 1.5mm of space between the PIR and the XY joint which is fine
ah I’ll just move the cpap, this is way too much work
Oh
you can squish it with your fingers
Oh nice, instead of all this speculation I could just order a bunch and friction fit it in there, then start my complaining about things, worst case
I do not think friction fit is the way with nebula
it needs to be bonded to the panels
the back has to be cut around things
and the sides need to be tight around the y rails
the rest would be fine
Though I guess you could print some extrusion spacers on the y rails
I was thinking friction fit for the side initially, then push it in to make sure it sits flush against the panel
I should probably do that for mine, to prevent the PIR from creeping out towards the rail
Ohhh
I saw someone in the HT discord that had like
Spikes, on little nuts in their extrusions
Trying to find a pic
But they essentially just impaled the PIR to keep it in place, and had the spikes slotted into their extrusions
At work we use foam adhesive. It comes in a. Caulk tube and it will adhere to PIR

And like turtle said it’s not that rigid at all, you can squish it
Thanks both, 15mm it is, and then hoping for a decent ish friction fit, and if not I’ll figure something out

not 100% sure that this thing is fully straight lol
I’ll cut it and see, worst case I just use the extrusion I already have
what material? alu, ti, carbon?
6063 Alu
wall thickness?
2mm wall, 16mm ID
and its not pre drilled, is it?
will you thread into the walls, or use nuts?
Probably thread into the back wall
Haven’t even ordered my stress concentrators yet
@tender haven do the 5.5 hinges in the nebula repo fit 6mm panels with the foam? Or do you reckon it would be trying to push itself open
Try it, if it doesn't close then you just need to print new hinge bases on the frame side
V0 prints
Gotcha, thanks, gonna order a 6mm door and a 3mm top panel (non structural, you win)
theres a 6mm top variant ?!
no worries, im in no rush
im modelling up the holes for the square tube (thanks warped :D) so i can cut it tomorrow
you can mirror the filament entry file if needed
just print one normal and one mirrored, so you can decide which one you want once setup
Thanks, will look at that tomorrow, trying to be fancy with this and use fusions technical drawing stuff for the square tubes dimensions 😂
Hollow panel clips? Is that just for extra mounting pressure on the top panel or something?
they are optional really
I have one on each side on my 370
just fills in the space
Yeah fair
I dont have any on my 255s
I'll see what fits, might aswell print a few for fun

Wowww
I have one on each side on the black merc
non on red merc, and 2 on each side with the 370
oh the 370 got 2
Yeah i see, they would fill up nicely actually
ill play with it
theyre easy to print and install
well see how this technical drawing stuff fits, accidentally imported the entire nebula255 thing on top of it, and broke the link, so its been computing for a hot minute
Taking panels off to replace deck panel screws with black ones, after turtle pointed it out, next step is black magnets for it😂
You're getting good at blaming me 😂
Well hey, you did point them out, but i am getting good at it, people bat an eye if i say im doing this, but if i mention you its normal
Lol
Made some small drill jigs for the square tube so I can drill it tomorrow, just to get a rough position of where it should be
Hopefully that goes well, then I’ll probably order the top and door panel, and install my Y rails
Don’t really wanna install the rails too early, or atleast when it’s not fully enclosed, they’ll probably sit for a while without any movement due to a lack of… well… my entire gantry


Completely forgot theres a danish (or swedish? i forget) company that can cut 6mm PC for relatively cheap, 6mm top and front door has been ordered for $80-90, same price as my deck panel...
Okay summary for tonight 😂
Ordered 695 bearings from NSK
Ordered top panel, and door,
Ordered magnets,
Ordered black heat inserts
To order;
M4x2.5 setscrew
F695 bearings from NSK
IKO linear rail for X (Gonna order bearings and rail together from alchemy)
Just drilled the tube out, tapping it now
Doesn't look like a SUAFT will fit this build, but a chamber heater should fit nicely
Currently printing top panel clips (thanks turtle), then gonna get onto printing the door stuff
Gonna take a break printing parts for tonight, just noticed my z offset is completely messed up, gonna give up on kirigami and print parts for the CNC bed tomorrow, just need a wago holder initially
This z offset changes based on the rain conditions of some far away nation, hoping a more rigid mount will help, but also tearing down my only printer is risky, so printing 3x of everything I need to do the swap, and hoping the ASA can hold up until I make one out of PPS lol
Why not go for a stealthmax in the back
I’ll import it and see how it fits
https://likes.cat/i7hk9w8v.png
It's uh, pretty large

Don't immediately think theres anywhere i can stuff that into
it sits on the back panel
outside the printer
that's why I suggested it
no space issues inside
cantliever z has a steel panel inside the printer
then nick has 5mm solid aluminuim panels outside
so outside options are not ideal
but I would go with the v1 so you can do DOPM
normal version requires a voron style cutout at the top
DOPM requires round holes to mount (which you can drill yourself)
Either way, i don't have a free back panel
hm
maybe add ducts internally
put it on the top
dopm can go on any panel
just drill the wholes with the drill guide
Mounted to the top pc panel?
yeah
Gonna figure out my ebay and heater situation first, then I'll have a look
the dual SSR looks promising
Almost done with door parts now

Hinges are on

wow thats a really clear door
spent an hour polishing it
now that you're here, https://likes.cat/reuvf7a4.png
5.5mm version of the handle spacer still using just 2x 6x3 magnets? it seems to fit 3

maybe its more now
seems to fit 3, ill just use 3 and cry later if that doesnt work
Extra glue is getting removed soon from the inlays
Such calm music for building
oh right
yeah gotta calm the nerves, the inlays for the mmu printable hinges didn't fit until i scaled to 99% lol
but hey 3x 6x3 magnets fits nicely in the door handle + 5.5mm spacer
you having your handle upside down from cad, made me realize that its upside down in the docs
I read up on which way the text should go, and most say it should read normal if you tilt your head to the left

you got exited with the glue
my thumb did, kept dipping it in the ca glue
i got some ca debonder ont he way which'll hopefully help lol
I just placed small drops into the letter pockets
yeah see i tried that
then pressed in the letters
small blobs were small until i smeared it everywhere
just gotta wait for my panels now, printing the 2040 l/r and the upper inside magnet things
Also the upper frame door catch specifies 10x2mm magnets, had to go re-check, it should be 10x3

opps, that was the old spec
Prints are done, installing now then heading to bed, and then i gotta play the waiting game
It’s all installed now, just have to play the waiting game for all my stuff..
Re-printing deck panel parts after some feedback from here,
Doing a red + black color scheme, the magnetic clips now have a red lip instead of being all red, and I'm doing half and half on the deck panel trim pieces, to see how that looks, only printing the very front ones for now
What do we think of red black deck trim pieces, + magnet clips?🧐

What about red bottom and black top
Maybe actually, I’ll have to play working with it and see, also gotta check how the rest of the deck trim pieces look
the council has decided to put this change into effect
Very happy with this

Definitely gonna multicolor basically all my prints now…
Made some changes to the pause and resume macro to make it easier aswell
Yeah I think that with red clips will balance out well

Do over time

I think solid red is the call on those for 2 reasons. Break up the black, and slightly easier to find where you placed them any time you remove them to work on the electronics
They love to hide
Yeah, I just feel like full red is very intense
I found 4 of them on the cantilever z bed frame 😂
Mmu up the din stuff
That's your main issue
To much red in the electronics bay
Yeah I’ll keep both the clips and not install any magnets yet, then re print wago mounts and DIN rail mounts
Sigh, be back in a few weeks
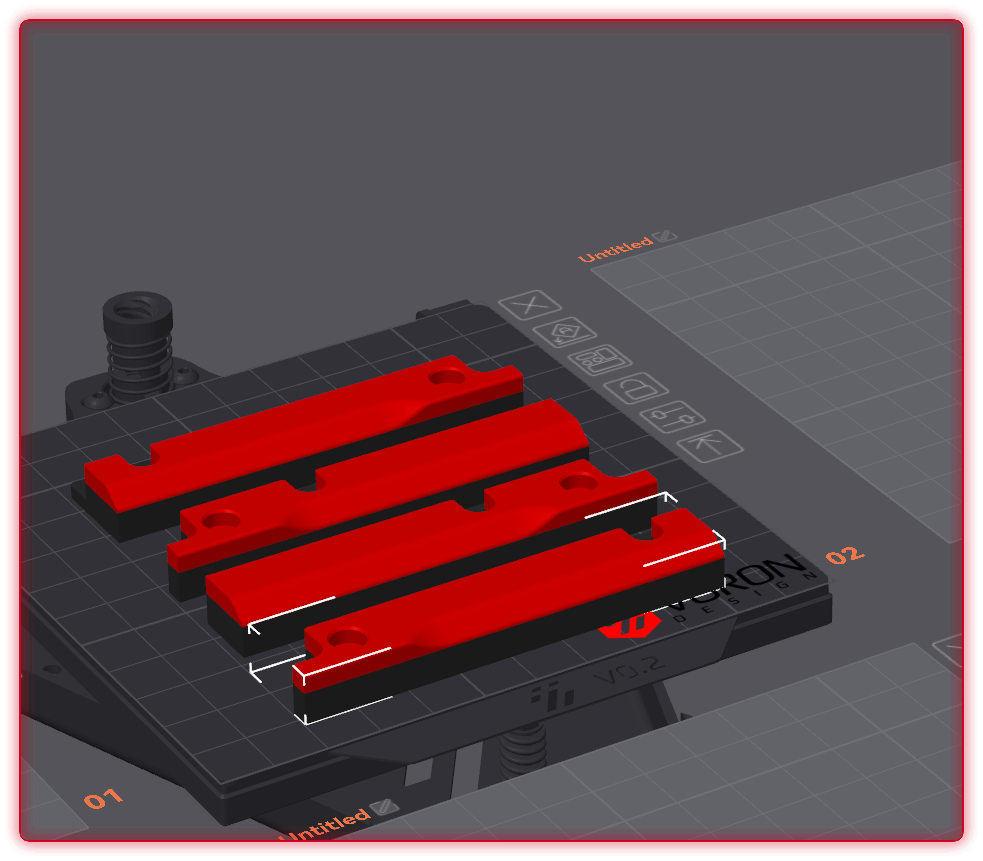
if all goes well (and i have enough filament) I should be able to do 2 more prints of this plate tonight, and then just have to do 1 tomorrow
Then I can get started on DIN drop brackets and such
Remind me to upload the longer drop brackets
They are just 10mm deeper or longer
How ever you want to view it
More space for the fans to breath
sure, dont think I'll run them because my fans are sideways anyway, but i got u 😂
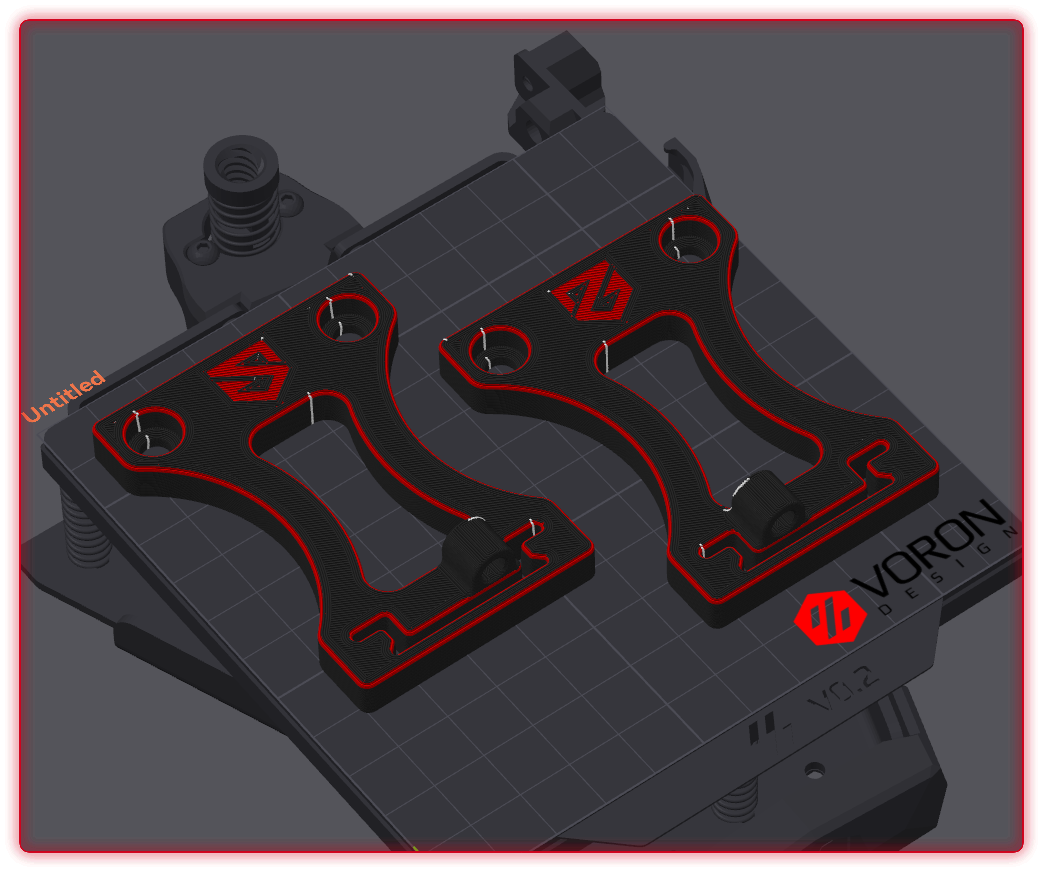
Half of my trim pieces are done now, gonna do my dropbrackets and see if i can have those done by the end of tonight
Then do my wago mounts tomorrow

why the backwards logo
its a left and right, so itll be mounted on the other side
slice and mirror in fusion so you dont have dumb logos
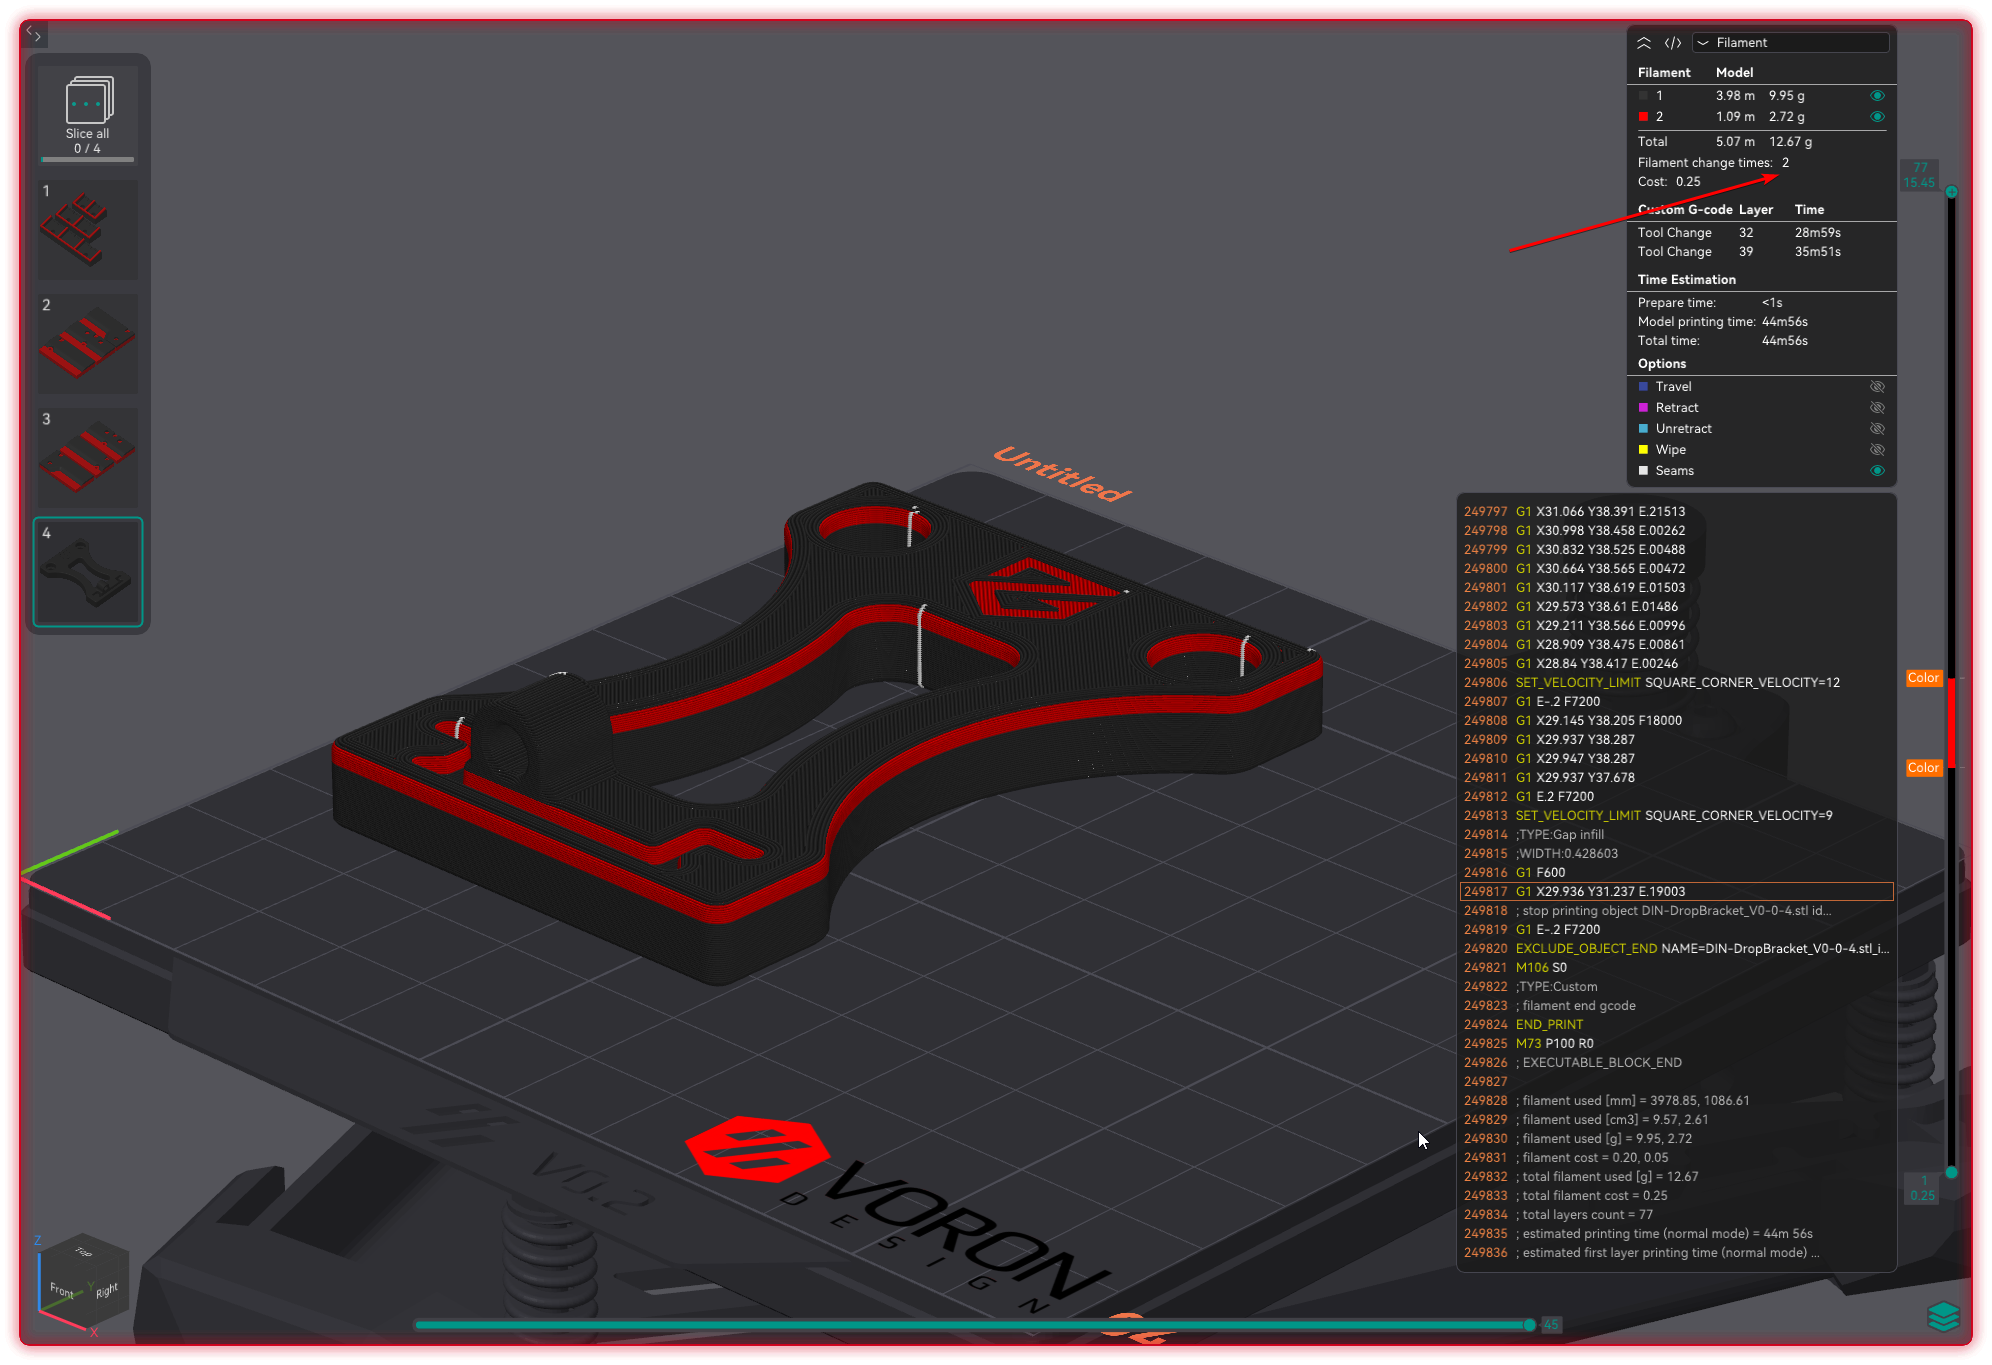
@tender haven too few red layers right
yeah this is 3, I think I changed it to 6 or something, gonna look
Probably will print these tomorrow, it has like 6 changes which I just don’t wanna deal with tonight😂
It does some funny shenanigans in the middle, I’m just using the fill range thing in orca, not sure if there’s a better way
Let me get a video

🥲
how do i go about doing it right
or was this just a general statement without knowing what im doing wrong 😂


Oh then just pause on layer?
then do that

You think I know how to do stuff properly?
You can fake it some times
lol
4am it is
I just recently noticed how angry the sherpa gets if the tip isnt the right shape
downside of 3mm id bowden
the orbiter didn't give a fuck, i could've fed that thing hay
the sherpa will not take any filament loading unless its cut at a 45 degree angled and polished with a microfiber cloth
metal sherpa?
yeah
so i cant even pop the 3mm tube off at the actual sherpa, that thing is also BOLTED on
that metal ecas is the bane of my existence, i literally cant get the tube out, so i just pull the other end 😂
Ahhh
I'm still gonna whine about it ,but now i know why


1 in, 3 to go..

Printing the last dropbracket now, I've installed 2/4, i think nr 2 was by far the worst
I'm not looking forward to the wago mounts, open to feedback on how to print those, might need to do like supports or something
This is how they'll look ideally
https://e-z.tools/ivd42d2z.png
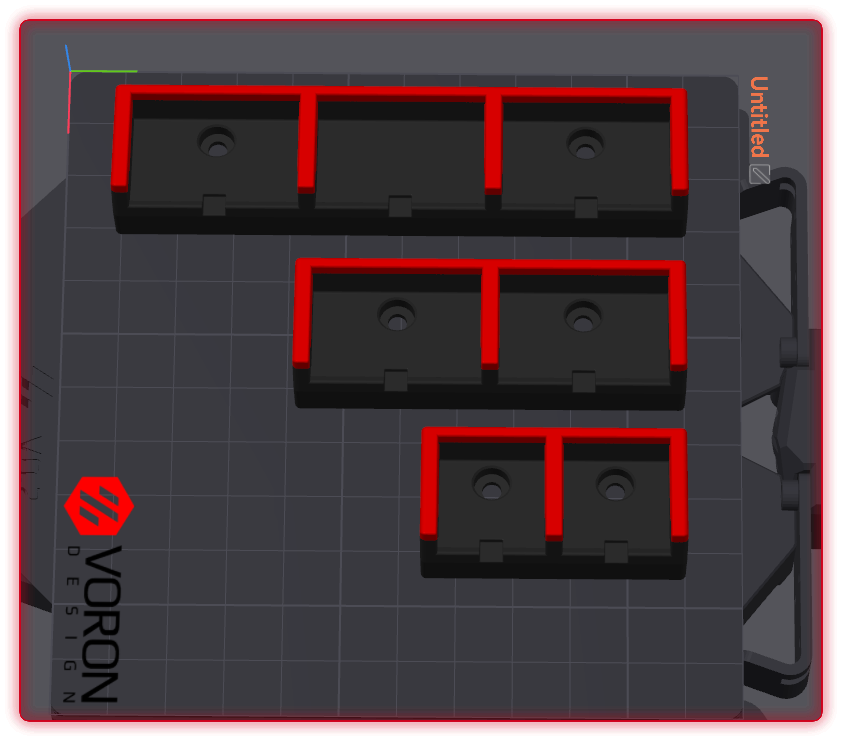
https://e-z.tools/h49u7las.png
But since they're at an angle, this neds up being like 31 changes or something crazy like that
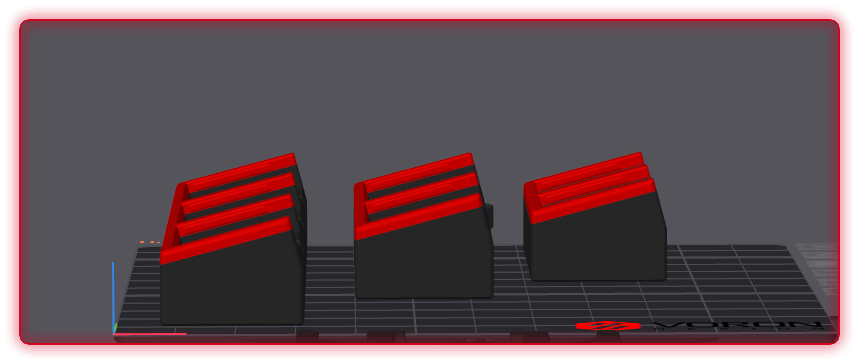
i might try to put them at like a 15deg angle to see if supports can make let me print them "flat"
support away

yeah still a huge gap, so im messing with the spacing and distances
your doing it wrong then


gotcha gotcha, will do that after this last dropbracket
That's good with me, I blame myself for a lot of things that don't work. 😅
Warming up the chamber for it now
Dropbracket finished and came out "okayish"
bottom surface is gonna be very ugly, but hopefully it survives
eh it had a mess up somewhere, I'm gonna finish the print but damn its ugly

rough looking
definitely not an ideal bottom surface

Add an extra layer down there then sand it down
I do have to mess with supports regardless, but good idea, ill probably cut the model to just after the supports end, and mess with some settings
for abs/asa set the interface fan speed high
I can run 0.05mm interface offset with that method
How high are we talking roughly? With dual 4010's I have a static speed of 35% currently
sb with delta 5015
100%
Okay I need to turn down the fan speed a good mount, crazy warping 😂
75% Fan seems better, but supports are a bit too close to be able to get them off, playing more around with it now
My bearings got delayed :(
Where did you get your dual uhp mount for your psu’s
I think I found the og in turtles heavy metal build, and just made it fit the UHP 350's
I think they are mine, buried in my red Merc build thread
Yeah I just made these big boys
I keep putting off saving out the step files and putting them as in one spot to share properly
dual 200 mount, dont know what is right and left, turtle didnt label
😂
https://e-z.tools/sw0zy1ac.png
Another little build addition
I have 200/350 mounts some where as well
Ahh, i have dual 350 😂
Thanks I’ll find it, now I know where to look!
getting better atleast, needs a bit more distance

That looks useable
Yeah agree, supports are just a pita to get off, need to use the creality scraper to pry it
Gonna see if I can get it a tiny bit better, then try an actual print
This build will never be finished😂
Still need the 500w PTC, the new ssr, my 20mm PIR that I have to cut down, uhhh, my panels, my square tube and stress concentrators
I'm checking xometry too often....
For your panels?
Or for new parts you could get CNC’d
Yeah
I sometimes just load up some step file on Xometry and jlc to see how expensive it would be to get it machined lol
$350 for cantilever feet in 6061 if you were wondering

without optimizing it
😂
Damnn, I don’t get any cool progress indicator on my 6mm PC
They keep me in the dark
I would be okay with that
One of the sites said that my package was packed up and shipped by (employee name), so if they arrive damaged, now I know who to blame 😂
Then I wouldn't be checking 6 times a day
I would rather be able to check it every 3-5hrs so I can see every movement and get annoyed
I would just be waiting for tracking around the time they give
Still a week from it shipping
I ordered from 3dkatten a week ago, thought they just didn’t do tracking or updates… but no, turns out it only shipped today
That’s all my belts, dehubbed pulleys, fans, belt clips, etc
From small vendors I half expect that at times
yeahh I’m just spoiled by 3do, often same day packed and shipped and it arrives the day after
And 3dkatten is even closer, distance wise, since I’m close to the Swedish border
Got NSK bearings from both France and Ireland apparently, that’s cool, UPS fucked it up again and they’re delayed
Okay retrying a wago mount again, this time I’m yelling at both of you (warped and turtle) if it fails
Survived the supports, need to swap to red soon and try to remove the supports..
You two live another day

Printing the dual 415 now, then the triple 415
Last 415 is gonna be printed tomorr,w dont wanna do a color change at 5am ngl
Maybe I'll try to make a mount for the CPAP drivers and stuff aswell
What else do you plan on doing at 5am?
Sleeping I hope
But I did just inhale a monster energy in record time so we’ll see

Might figure out my insulation stuff, buy 20mm pir then just cut out where I need, but only to a thinner part, not completely remove
Dumb way of wording it, fx for the cpap, 20mm, then cut it down to 12mm right around it so it fits
Massively over complicating things
Big wago finished, gonna let it cool for a bit, then install that, along with the 2 remaining dropbrackets, and work on a cpap mount
Upped the DDR60G5's voltage to 5.2 thanks to turtle + Bsleep, had some wifi disconnect issues, not really a big issue for me, since I'm gonna hardwire it anyway.. but probably a owrthwhile change regardless
gonna screw this into the inner part of the cantilever setup, for the 2 thermistors, and the bed fan

Missing one of the 2x2’s lol
Also gonna let the printer simmer (stay on) overnight, to test if the pi drops out again after upping my voltage, if so I'm wholeheartedly blaming @tender fossil (and you, turtle)
Aside from bumping up the voltage, I now have my pi slightly overclocked and using over_voltage_delta to see if mine stops disconnecting
"i now have my pi slightly overclocked" is not a sentence i ever thought I'd read
Bumped it up to 1.8GHz
Ln2 cooling yet?
lol not yet
TIL these come individually packaged

I didn't know that had those made in Indonesia
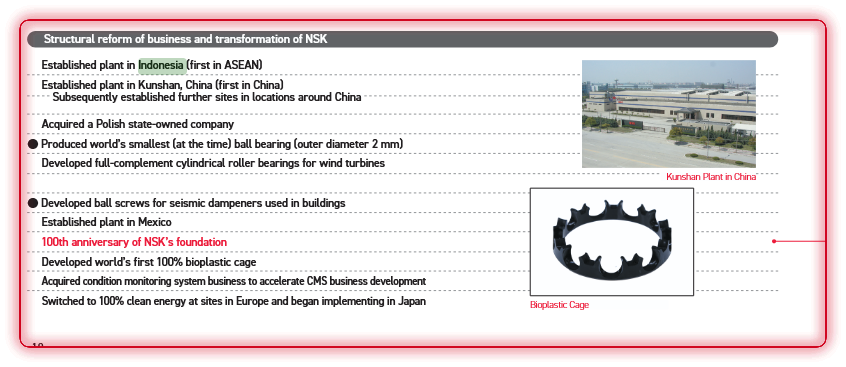
yea i was concerned at first lol
anyway if anyone in here knows of a place a guy like me could get his hands on a 255x255x12mm ATP5 or MIC6 bed, let me know :D
Cpap tube installed on the toolhead, now I actually have to finish that little adapter piece that I never got started on..

Realized I’m an idiot, bought my smooth pins but didn’t realize it was one smooth pin, not a pack, so now I have a bunch of single smooth pins in different diameters and lengths, thinking I’d get 10 of each💀
Finished toolhead assembly, I'm now printing the FMG parts, just missing the last 4th pin mod, which is the top right insert
Finally got the proper screws for my panels, m5x14 FHCS, didn’t even realize but I bought them as Torx instead of hex, so that’s perfect, much better
Slight change of initial plans, friend can only reliably mill one side of my FMG, so I probably won't anodize my first set, it would be raw stock on one side, and dont know how the anodization would look on that
reminder for myself tmrw, gotta print the center skirts x2, and finish cad on the 3rd one to fit the PCB
How raw is raw? Could you feasibly use some sandpaper on glass to get a nice surface finish?
Raw stock, don’t have it infront of me so unsure on the state of it
Weird. With the Pi voltage up at 5.2v, it kept the WiFi for way longer, but disconnected after 4 Days.

Ignore the horrendous bend, I'm not redoing this 😂

Got my 698-RS’ from NSK aswell
I remembered!

Top panel, and front door arrived today, gonna go pick those up a bit later and get them installed
then i need to actually put some brain power towards the insulation stuff, and how I'll get the cpap running
Panels acquired
update; immediately broke a door hinge, dropped a screw so panel was supported slightly less by my hand, snap
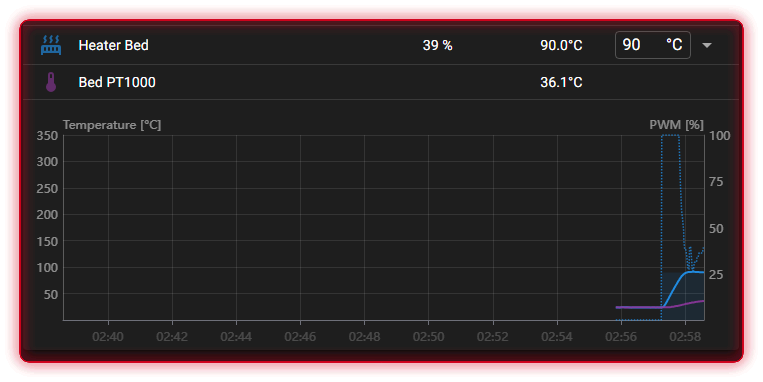
I suspect that my tapped PT1000 doesn’t have a great connection, might just drill out the taps and put in an actual PT1000, with some thermal paste
With a surface temp reader I get about 97c, pt1000 reports 89c and heater thermistor ofcourse reports 110c
Just use a normal thermistor on the bed
Pt1000 is better for higher temps
And they do not seem to be as reliable
i only have a pt1000 on hand lmao
well, i guess now I'm just waiting for my FMG parts, rail, and bearings.
I have all the printed parts, i have my toolhead assembled, I have my enclosure, I'm ordering some PIR from spain?, 4 sheets of 600x1200x30mm for like $10 each, + shipping
Gonna start running endstop wires, and then I have to figure out my CPAP aswell
Ignore the test hole, measure once drill 4 times


😂
Got started on the little quick connect hub under the bed

I’ll be able to quickly connect / disconnect my 2x bed thermistors, and my bed fan
Panel temp after heat soaking, room is hot now aswell😂 need that PIR to arrive


He has none of the hardware, sadly, haven't been able to ship it to him and hes still a bit away
could get him some off of amazon, let me check what the bare minimum of things needed would be lol
So a 5x30 pin, f695, 698, and all other pins are also 5mm, so would just need the x30 pin
Holes tend to be undersized with a CNC machine
So you need to run a negative offset
Gotcha, would he just need a 5mm dowel, an f695 and a 698?
Yeah
ordered then, tyty
Major setback, parts printer, and only other printer, has a cracked bed, won’t be able to get a new heater and magnet for it for a while.


Gonna run some temporary cpap wires just to get it configured,
Gonna modify the deck trim piece to have a little cutout and passthrough included, then cut it in the deck panel, so I can feed the wires through neatly, haven’t decided if it’ll be a keystone or just a loose passthrough just yet.
Cpap passthrough has been made, eventually I’ll extend the deck trim piece to also be there with a keystone to make it look nicer

Damn
Sadly can't do much about the ugly mounting of the bldc driver stuff, this is the only cpap mount I've got, so I just have to deal with it for a bit
no metal cpap?
yeah, wheres the ac cpap? xD
Idk the heatsink kinda threw me off, I’d have to mount it outside my chamber
aw
surely all your solid metal panels would do plenty of heat spreading?
The only metal panel it could be mounted to would either be my back panel, or the internal steel panel, both of which would be in an 80-90c chamber
Will that Cpap even survice those chamber temps?
The 400w cpap? prob not
the ws7040 generic one? also prob not
need to put a muffler on the back, then run a cpap passthrough
put all your panels on
close door
run cpap
it will not be as loud, also the PIR will help
just watercool the cpap
I moreso mean at the 80-90c chamber, I'm not sure the actual ws7040 would survive, so I'd like to put it on the outside of the panel, on the back
That should help survivability
roof mounted cpap
mounting it inside the ebay would probably work the best
feed through the deck panel
my ebay is already filled to the brim 😂

I think burgo used to stock some M32 cpap hose passthroughs? Don't think they're still on the store, but might see if I can find some similar ones
On the octopus pro you can flip the board 180 and get the fans to fit inside the skirts to gain more room
its a pain to get it in their but you can gain another din rail in their
and mount the cpap on another din rail
Shortened my wires a bit for the cpap, since I’ll be moving it around, thanks both for suggestions, I hate making decisions so im gonna delay it for as long as possible

You know that you will not see that red on your deck panels once you add the PIR, right?
Yeah but you told me to add it so it’s your fault
I know it’s there in spirit
they are probably why your bed broke
Also ignore the extremely cursed cpap mount
Sensitive subject 😂 too soon
never to soon
the will never move in those 2040s, so they hold position pretty well
Yeah but this is 2020’s, my issue is, they roll in nicely, but then they keep fucking rolling, I had 2 where the ball stayed pressed up, so they fell out of the frame
thats a roll in issue, they are a hit or miss on qc depending on who you get them from
I have some brands that are a dream to use
others are trash
Don’t even know what these are, paid a hell of a lot for them, 3do stocks them
25usd for 100 roll ins
they just order from who ever in china
and probably havent paid attention to how well they work
most do not seem to understand the qc issues that some brands can have, might also just be RNG on batch to batch orders
they are made from extrusions, and the die's wear over time
Yea im just ordering from ali next time
I have like $100 in t nuts and it’s 4 bags
💀
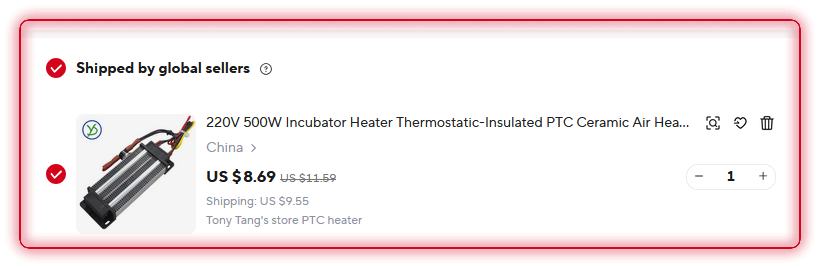
Keenovo can make me a v0 heater at 200w 230v ac for the same price as their regular v0 heaters, with upgraded lomax glue that’ll hold 270c peak, dang
Looking at an anti vibration cpap mount, seems cool
wait what??? can you please send a pic of this?
It’s just a printed clamp ring with some foam tape, and some rubber anti vibration standoffs that go into the mounting
Nothing special, but seemed cool

Still no eta on the v0 bed
eta from now is 6 days until the v0's bed is delivered, i've also gotten my chamber heater, so thanks @viral grove for the advice on thermistor and fuse


 500w 220v, and yeah not drilling through the fins haha, do you have pics of where you drilled for the fuse and thermistor?
Yours has a resettable thermostat on it
V0 bed is here, time to install that and get to prototyping tomorrow
I just saw this, and let me check


That's a cheap one that didn't include the safety thermostat switch
Nick doesn't need to add anything to his
Ur telling me my $8 PTC is bougie?😂
Good to know thanks
The good ones are still affordable
Also the fact that PTC heaters draw less power the hotter they get is another built in safety
Haven’t looked at the actual product site apart from when I ordered, does the thermostat also handle being a fuse or would it be beneficial to add a thermal fuse on it somewhere
The big risks are melting plastic mounts and burning up fans
And they are not isolated circuits
So zappy
Fun fun, I’ve got a metal mount and a SLM fan duct for them I need to tap, it’s got 15 or 25mm of clearance to the back steel panel of the cantilever, so should be ok I think
Yeah its a live circuit, also they are hard to outrun like turtle said fan going bad or mount melting is the worry
If it gets too hot, it trips the thermostat and will not close until it cools down
Ahhhh gotcha
Thanks both, I’ll need to mess with it in person at some point, I don’t even have my dual SSR yet
spicy meatball
Ah yeah ofcourse lol, forgot abt the spicy meatball GitHub, will reference that stuff
GitHub
Mounting plate for a 110V 500W PTC Heater module. Fits on Voron 2.4 bed rails. - GiulianoM/PTC_Heater_Mount
I guess that do not really cover what you want in a heater
also turtle thats not where the thermal fuse is in mine thats where the thermistor is
its placed inside
You bought a cheap one without safety's
No fuse for thermistor needed with the ones they recommend
Yes i know i added a thermal fuse in a different spot
better to have a thermistor inside the heater for saftey & being able to PID the heater
At some point I might play around with the bearing stacks, replacing the 695's with 695 W5 bearings instead
Way in the future though, I do like my NSK's
Yeah, I'm not too knowledgable on bearing stacks, but is there a reason load wise, that we use shims for them? Or could I just stack a W5 between 2 normal F695's and still get the 10mm total stack
No shims for 9mm?
🤦♂️ i theoretically may have been looking at the 6mm stacks..
well, if i ever wanna do 10mm belts, i know what to do lmfao
Maybe you can fix your sleep habits next year
Maybe... don't get your hopes up
Oh yea, going to visit my friend in ireland soon, I'll make sure he gets the plates made while i'm there, ill bring a 698, f695, and a 5mm dowel pin so we can test fit things 😂
So I'll be coming home with a full FMG set, then I'm just missing my X rail, and F695's
nice
when are you getting those?
Whenever I dare reach out to alchemy about them, id estimate in February? Ish
damn ok
Got my shit together and started working on the v0
So far I've
Got the magnet attached,
Wired up the thermistor
Tightened down the bed,
Gonna redo my wiring to go from AC to DC, then I'll start working on my first layer
In Ireland currently getting my FMG parts made;
When I get home im gonna research anodizing them
Order F695-RS bearings from NSK through 3dkatten,
Install my new Crydom dual SSR
Order my chamber heater mounting and fans,
Then I’ll only be missing my linear tail to have a working merc :)


Small update for the v0, ordered a Dragon UHF heatshield

Got the new SSR installed, missing the molex connector for the signal pins, but gonna start wiring up the bed again now,
Won't wire up the chamber heater until i have the mount and fans for it, but should be pretty straightforward


Also ordered my goliath heatshield (finally), and the SLM duct for my heater, along with the 5032 fans, and some high temp grease just incase.
After tallying up everything, from what I can tell, the only thing missing now is
A few dowel pins, and an IKO rail from Alchemy3d, both of which I'll be ordering once ive got the rest of my new parts installed, since the wait isn't long and i dont wanna drown in things to get done lol
Need to order some black foil and PIR aswell to finish up the looks, then I’ll get the v0 printing to prototype the cpap passthrough I’ve been complaining about
Are you planning on getting any special gantry?
Lw cnc alu or alu, ti, carbon or steel tube?
Originally I was planning on a square tube as a gantry, but I think initially I’ll just run a normal extrusion, the square tubes I got ahold of weren’t flat whatsoever
The printer is now running on the new SSR (Crydom CC2425W2V), it's a Dual SSR so I can control both my chamber heater and my bed at the same time in the form factor of a single SSR

hot extruder
Printing the sun
Gotta wait for my SLM duct and fans, then I can get the heater mounted
Been contemplating how I'll handle the CPAP, etc. especially with how optimistic, or stupid, my plans for temps is,
I've started looking into the Mammoth muffler, should be able to drill and tap holes in my alu plate, and worst case, i can just flip it around if i don't like how it looks.
I could run my CPAP tube and my filament path through there, maybe even my toolhead cables (not sure how i feel about having those leave the chamber fully just to somehow get back in later, sounds like it would look pretty dumb)
Integrated the anti vibration mount into the mammoth, will put a fresh spool in tomorrow and try to print it, then see how things go
about a 5hr print for the main body, 1hr for the endcap
sadly the actual cpap passthrough wont fit, so the merc might have to run in limp mode once i get my parts ( limited Y so i don't squash the cpap tube)
Is this yavath? How do you like it?
Yeah Yavoth on the v0
I like it, dual 4010, 2510 for the hotend fan, using a dragon uhf and a sherpa mini
Got the LED Pcb from my friend, I don't think I packed it well enough, the last 2 LED's are dead, presumably a bad solder joint, i don't have a microscope nor steady enough hands to fix it
but 35/37 work
Found someone else using the IKO C lube rails,
1: they aren’t good for toasty chambers, stay under 80c😒
2; they’re also not good for printers in general, will need re lubricating despite being self lubricating
3; gonna go on the hunt for new rails I suppose
Looks like I might go Airtac once I run into issues
That didn't last long
Most of my dumb decisions don’t
Oh someone I know has contacts at factories for genuine hiwin rails
Bst automation for airtachs, message them
Yea brazuka also recommended airtac
Is that what you ordered then
I should order some one day
I'm paying like $130 for 3 rails, and an extra carriage
That’s cheap?
Well seeing as my IKO was $180 for a single rail
3 rails and an extra carriage for 130 is fine by me
Honest questions here; are HoneyBadger high temp, or whatever west3d has for high temp not good enough? Is genuine hiwin high temp? Where do things fall in a quality and price line up? Also, these are just the 330mm mgn12h, right?
For AirTac is that the LRM guide series?
Nick is going for 100c
Well these aren't high temp rails, high temp rails are all metal, these still have plastic endcaps,
Hiwin probably has some stuff that is rated for higher temps, but thats not why i chose these rails
grease is what matters the most for high temp
Yeah
and "high temp" is very vague. What temp do you consider high temp?
This isn't for high temp stuff, this is mainly just because I want nice rails, and the IKO rails were sold on a pitch that doesn't quite work with our usecase
some consider 65c high temp, others set the bar at 80, 100, 120, 150, 200
What to expect of this?

    High quality rails made from 440C stainless steel by IKO Nippon Thomson
    Medium preload
    Smooth operation```

This makes the rail look amazing, and im sure its super smooth for their intended use,

it is not intended to be used flying around at mach fuck in a 3d printer with a bunch of particles in the air, and in a hot chamberSo 'it is not recommended to remove or re-lubricate the motion system, as it is designed to be self-lubricating and sealed' doesnt quite hold up to that
I would think 90-110c is high temp and hotter is probably pushing the boundaries at home. I’m trying to build one printer to hold 65c chamber and was looking krytox or the mobilux grease but I don’t know what I’m doing so……..
anything over 80c requires a lot more planning, plastic connectors and fans are not rated for those temps
Yeah
I've like, 40% planned for it
So my printer will work until it doesn't
and when it doesn't, goddamn am i gonna complain about it
because really, who could've seen it coming
why did my cpap melt????
Hey that’s outside my chamber now
“Sir, we’ve tried nothing and we are all out of ideas!”

Turtle has been here every step of the way giving me scenarios I hadn’t planned for
Such as ‘when the printer runs -‘
I hadn’t even thought that far
Haha
I even helped point up the upside down rail install
Too soon
Still traumatized
Oh also @tender haven since I’m doing the mammoth muffler for the cpap, it also has a filament entry, so I can for no reason whatsoever do a 5mm hardcoat ano top structural panel
what an interesting concoction of words
lol
Finally got an actual time for anodizing the parts at a lab, here on Thursday they should have a time slot
3dkatten has my bearings, dowel pins, and closed loop belts on the way, and I’m waiting for the 3 Airtac rails
Then I’ll be running, and just need to solve my back panel and my PIR
Need to find a way to integrate the mammoth muffler, might buy a new panel but might also just cut the current one

Test assembly

got my JLC order, and my SLM stuff, noticed that the stepper bottom-center that i combined doesn't quite fit, im not sure if i wanna order new plates, or if i want to try to fix it myself
the 698 doesn't go in, so slightly annoying but might be able to sand it or something
Fixed the stepper tower issue  just waiting for dowels and bearings now
Gonna re print things with black inserts, too much red back here, also not a fan of the 2 types of red

Test fitting everything because I’m still missing my bearings
You doing awd or just 2wd 9mm
2wd 9mm for now, i'm down to explore awd in the future but there's no super refined one for the merc currently


yeah, black is cleaner


did you use the same screws from the goliath to mount the heatshield?
No I had some m2x8 iirc, the other ones were m2x6
they were a bit longer atleast
ah okay
Panzarkatten mentioned that the F695's will be at his place tomorrow, then he'll ship my order(s)
My airtacs shipped today, and panzar shipped my bearings


Getting closer.
Front towers and XY joints are done, gonna re check stepper inserts, then build stepper towers today hopefully

damn those CNCd and anodized plates look so clean
Missing 4 bearings to finish both stepper towers, ordered them, even with Misumi express shipping they can be shipped to panzarkatten on the 17th, when they arrive i've got no clue, then he also has to ship them to me which'll take 2-3 days
So hopefully by the 23rd?, I should also have my rails by then
Still playing the waiting game, ordered all the wire and crimps necessary to fix up the toolhead aswell, aiming to have it moving and printing by March
Ordered a few ThermEx borads from simon, so i'll have thermistors out the ass soon
Rails are estimated between 17th and 19th.. would be really nice to get those installed soon so I can get the gantry on
My bearings should also ship at some point during today (17th), from Misumi to 3dkatten, that’ll be 2-3 days, then shipping to me, so about a week?

Bearings arrived to Panza, he's shipping those out soon,
Also just paid the import and handling fees for my rails. I'm expecting to have them in the next 2-3 business days, so hopefully by wednesday
Calibrating dual loop now thanks to bsleep, had some issues both with kalico as a whole (self inflicted, im an idiot) and with the initial dual loop setup, all seems to work fine now
ignore the missing camera, haven't made a cable passthrough yet lol
https://e-z.tools/z20aqy2s.png

Rail time today

Also, had some issues with dual loop PID.
I set the inner loop (heater pad) to a max of 125 initially, this only barely let the plate heat up to 104c, tried 135 on the heater which is the maximum im comfortable with before I get a custom heater with lomax glue.
At 135 it still couldn’t PID the bed at 110c, so had to do it at 100
Did you pid with the bed fan on
I had to run my bed at 80% max without the bed fan, 100% with the bed fan.
I tried at 50%, it wouldn't reach above 102c at 125 max internal
then i tried 0% and it still would reach like 105 or something
Upping the internal loop temp to 135 got me to 110c max but it took a good while
Mine isn't fast, but I can't recall how long it takes
I think i let mine go for about an hour? the plate never reached 110c with a max inner of 125
It would hit 101 ish, then ofcourse PID would want it at 112.5, and it would take way too long to reach, even with the verify heater set to 1c every 300 seconds

I also do not run the double pid stuff though
Yea that’s what caused it, this uses the heat pad at 135 max which isn’t enough for the bed to hit 110 for whatever reason
I think at 140 or 145c on the pad it would be fine but that’s more than I’d like
I saw that until I ran the bed fan
Bed fan murders the pads thermistor reading
Probably still hitting 150 outside of the bed fan
RAILS

Make sure you pay attention to logo orientation this time
I won't install these until after i get my motor towers installed, but dw i am looking out for it
I don't wanna have to move the rail up or down to get even spacing on both sides when i install the motor towers, figured its easier to just install those, then correct it before tightening down the rail
Or just longer bolts in the rail
Then bolt towers on loose. Run the rails against the towers in the back
With front mount they can be flush
Yea I’ll just install the towers and push the rail against it in a bit
Warpedscale pitched an idea to me a while ago, which was to replace the ball bearings in a rail with some Si3N4 (Silicon nitride) ball bearings, figured, why not, so i bought an extra carriage for my Z1 airtac rail, for MGN12H they need to be 3/32", or in normal units, 2.38125mm, the ones I got are 2.381, and there's noticeable wobble in the rail.
They were cheap, and it sounded like a fun experiment to try on an extra carriage anyway, but will not be using it


Worked well for some, so sounded fun to try
Yeah that's what they are labeled, but need to measure the ones you remove and the new ones using micrometers
Yeah but that’s more effort than im willing to go through, that’s why this was an extra carriage😂
It was fun to try for a one off, now I’ll put it on display or something
Ive been running ceramic ball bearings in my xy rail carriages for a while now and its working well
Didnt increase wobble for me
Got my last bearings! Gonna install that, and the stepper into my second motor tower, then get those installed, hopefully
Finished the stepper mounts, installing them now, also found a few m3 t nuts, so if i can find some m3x8 screws, i should be able to install them, and just change out the screws when i get my black ones

First print when?
Still gonna be a bit, some of the wire I ordered is on back order
But I can install steppers and if I have the screws, I can also install my rails today
Any titanium screws?
0 titanium in this entire build
😂 I went for other fancy stuff, also saw that goldy broke like 3 titanium screws or something on his hotend
I’m also kinda looking at swapping toolhead… before even installing breakneck
UAP V6 with a sheet metal carriage does fit our belt path, and I already have a Goliath, would just need another extruder and a smaller cpap hose..
Ive only broken one on my backpanel
And i have titanium screws everywhere, so its rly not that bad
Rainbow ti gives you more accel
Wanna race then?😂
If I ever get this thing running
Build a 370 and we can race 😂

I havent continued my speed benchy improvements this week
Gotta go to 50k accel soon
I want carbonara tho
Once the cad is released Brazuka is making me a carbonara
Oh yeah i think i saw the thread for that
Looks rly good
I would’ve done el fuego if it supported our belt path, but it doesn’t by stock and I feel like messing with the belt path will also mess up the COM or other aspects of it, so printed toolhead it is
Do u know the sphinx toolhead?
I like that its meant for dual cpap xD
Don’t think I’ve heard of that
Just saw it on insta
Probably hard to modify
Isnt it super over engineered with air cooling channels for the hotend and so on?
It’s pretty similar to UAP but made to be SLM printed
Either way I wouldn’t want to modify it, I don’t see anything good coming out of changing things that were made for a reason
I would stick to silver screws with silver rails
I should get rainbow rails for my rainbow screws
Dreams of no silver crushed

I’m fine with silver as long as it fits
And isn’t an eyesore

Gonna grease Y rails and get those installed, my pulleys might be a smudge too high up, I guess we’ll see… I gotta learn not to loctite them before i let the belts run on them a bit
One rail installed, won’t fasten it properly until tomorrow when I have more time to use my gauge block

For now I’ll grease it up and get the other rail installed
@tender haven you thinking logos facing eachother, or facing the same way?
Y logos face in, you cant see the outsides

Both Y rails installed loosely, along with the XY joints and now the temporary X beam until I switch to Carbonara, need to handle the last rail, and toolhead stuff tomorrow hopefully, then it can start moving…

man I can't believe there's finally substantial progress on this thing
Plans for tomorrow when I get home:
*Align the Y rails using my 4mm gauge block
*Clean, grease, and install my X rail, also aligning that with the gauge block
*Install carriage clamp and maybe route belts?
*Try to order sheet metal from JLC so i can try the UAP V6 toolhead eventually
XY rails all mounted, aligned the Y rails with the gauge block, still need to align that
Need to adjust rail position a bit


Every screw, this is madness
I agree, but I am so here for it! (and guilty of the same..)

I started doing every screw last year
im late to the trend
do you think that actually makes a difference?
I don't think it hurts anything
Yeah it consumes double the screws
Screws are not that heavy

where is he from btw? would it be cheaper than to get it shipped by fabreeko?
Portugal, and no it would be way more expensive from fabreeko than (presumably) china
so i can put more ti screws for more accel? 😮
I thought I was every other screw but I just checked and I’m every screw to so I guess not madness lol

lol those look like XOL clips. They’re such a pain
YUP
especially to get the same tooth count
like dude
my fingers are raw from this, and thats even with the callusses i have from playing guitar
BUT, theyre in, gantry isn't racked, tomorrow (6hrs) i get to clean my entire room up, and the rest of the house since i'll be having a friend over for 2 weeks lol
Already seeing some belt walk, gonna give it some tension tomorrow and see if they’re just sloppy and moving, if not I’ll measure and shim accordingly
Some belt walk is normal
Tragic, bought some spacers to replace printed parts and I got some in silver


Are these xol or archetype? I have to do the xol clips eventually and I'm hoping that I can get away with unbolting the tensioners and that it'll be easy after that
XOL and Archetype use the same clips afaik
Okay then I just have no clue what the difference between those 2 toolheads is
Actually, lump a4t in there too
Kinda seems like they're all about the same
A4t is smoother
archetype is an ecosystem for a bunch of fan options
uses the same core n stuff for everything so its easy to swap ducts
WE GOT MOVEMENT ON X and Y
Don't have enough FEP nor crimps to wire up the endstops for now, so just using force move at 250mm/s 10k accel
No, slight difference. The xol/a4t clips are much better unfortunately
?

you're right, i mixed it up. i meant to say archetype has better belt clamps but i forgot that i was using this mod not an official one lol
i had a lot of issues with the normal ones just slipping
I noticed that one, but opted to stay with the normal ones, so far they seem to hold down 9mm gt2 epdm belts just fine
Gotcha, yeah if it works for you neat, for some reason I couldn’t get them not to slip at like 110hz
I think im at 210hz so far
We’ve now come full circle to a v0, uses springs for leveling😂
Initially these are 15mm springs, if the nozzle won’t reach I have 20 and 25mm.

Finally got around to ordering 5 sheets of FF-PIR, its 30mm thick so i'll need to cut it down to 20, and 15mm for some spots, and also get some foil for it
good luck with reducing large areas in thickness
how will you even do it? i guess the professional way would be using a hot wire?
Yeah the plan is either a Hotwire, or some kinda contraption to lay it flat and run another blade over it
i managed to reduce the thickness of a 5cm wide area by cutting in from the side
but idk how you would to it for a whole panel
A hotwire shouldn’t be too bad to make but might be annoying for a full panel
Why springs over shims and rigid mounts?
Nick enjoys the process of screws_tilt_calculate iirc
it was my idea
shims limit how much you can adjust, but also do not allow any thermal flex
springs might work better, maybe
easy to test
turtle also enjoys the process of screws_tilt_calculate
Fedex has now delivered:
50 meters of 24awg FEP
50 meters of 20awg FEP
25 meters of 18awg FEP
10x of 2p, 3p and 4p microfit connectors, and about 1000 microfit 3.0 male and female gold plated crimps
And also the new metal spacers for FMG,
I won't be working on it more until my friend has left, which is tomorrow, so will spend the weekend disassembling it again.
Replacing the printed parts with metal spacers, shimming the bearing stacks correctly, getting endstops wired up so i can actually move it, and finally installing and wiring the toolhead.
Also got some matte black engine paint on the way, to paint the cantilever parts.
Will try either a hot-wire, or a insulation cutter with a few blocks to set the correct height, to cut the PIR.
Crazy bro ur gonna have your printer up before I do
Got the Y endstop mounted and wired now, gonna get the X temporarily installed before i actually get started on the umbilical, just so i can actually check stepper directions, mounts, etc.
Printing the rear cable arm now, then I'm gonna start planning the umbilical
So now that its moving... I'll be taking apart;
The gantry
Z setup
most of the frame
I've been moving it around a lot the past few weeks, I doubt that frame is still square, this gives me a chance to paint my cantilever setup (thanks turtle) and also make sure that its square one final time
Tuesday the weather looks to be clear, should be able to paint all cantilever parts there.
I'm gonna be taking it apart monday afternoon and probably night 😂

Painful


Spending a while shimming the entire FMG system currently, making sure that all my bottom belt bearing stacks are at 39.5mm over the Y extrusions, and things like the pulleys are at 39mm