#Flow - Born from an E5Pro
1 messages · Page 4 of 1
https://github.com/nicolai-wachenschwan/arc-overhang-prusaslicer-integration considering giving this a try next time I need overhangs

GitHub
A 3D printer slicing algorithm that lets you print 90° overhangs without support material. - GitHub - nicolai-wachenschwan/arc-overhang-prusaslicer-integration: A 3D printer slicing algorithm that ...
Interesting. It mentions layers will be much thicker, though
it will depend on each print, overgangs are already rare
another item for my list, reorganize my macros


too close to bed though
might not be waiting on heatsoak for mesh z calibrate etc
purple printing still too close but I'm lazy to restart now -_-
better too close than having parts flying around while printing
true but I don't like the finish and has a sort of elephant foot due to that too
but they just need to be functional here
warp wold have been much much worse
warp means reprint
so 1.1.6 it’s the all new set? x joints front and motor towers?
joints are still tagged 1.1.5
I tough it was only the back towers… ahh ok
Hi. Can not find this exact type for wago 222 3x2. Do you have a link to the stl? Thanks.
can get you the link for STEP
The GrabCAD Library offers millions of free CAD designs, CAD files, and 3D models. Join the GrabCAD Community today to gain access and download!
F3D

amidst chaos, latest merc version is printed
might print hydra just for the sake of having sparea
still need to reprint front and back for eva3
good looking prints
heh not that good really
[gcode_macro LUBRICATE_Z] gcode: G28 Z_TILT_ADJUST CALIBRATE_Z {% for i in range(5) %} G1 Z0 F3000 G1 Z{printer.toolhead.axis_maximum.z} F3000 {% endfor %} G1 Z{printer.toolhead.axis_maximum.z/2} F3000
small macro I did to move Z up and down a few times to help with spreading lubricant
will do something like this for XY
also recalibrated klicky switch offset a little
 UPDATE
Eventually reprint some omnibox parts as this PLA one is breaking
Upgrade to 1.1.6 and change colour (reprinted install needed) 🕐
Start planning EVA3/micro mantis? (printed EVA3 need to test fit it)🕐
Lubricate rails and lead screws (yeah this should have been done a long ago) ✅
Print SCS (because why not) ✅
Finish TR (can't put too many details but can share pictures of the thing after its built)
Print at least 2 ERCP for the TR
damn Z

great the thread lock on the left nylon bracket does not come off
heat inserts have eaten the plastic so now I cant take it off non destructively
FUUUUUUUUUUUUUUUUUUUUUUUUUUCK
oh shit
What thread Lock was that lol
I use purple


yep
it's off, the screw survived
now to redesign for nuts and order new ones 😭
10 das waiting
definitely printing ABS ones, should survive on PLA prints
well for now without them it prints
Eeek
What about using a lock washer instead of thread locker?
Or is it a flat head?
I got new nuts
printing now without the adapters (losing 30mm of bed)
doing a quick test to find out if my ringing comes from them
if it does I need a new bed 😭

Hmm. Think it's the adapters? Or maybe the exaggerate something else?


I thought it would be, but having these side by side, same gcode they look too similar
printing ABS ones, these should be enough until new SLS ones arrive
So printed 2 sets, will put one on and heat to 110 for 30minutes
If they survive I'm not even ordering new ones
@ornate flame I was suspecting something was off
I'll take one off and measure tomorrow
have seen a few people with undersized magnets
not something we were aware was a thing until maybe a few months ago?
@solar stratus yeah I remember seeing some discuss about it
with abs shrinkage they should be a snug fit, I had to push mine in pretty hard
this will be a pain I have to remove the bed
hopefully it improves
also had the ABS bed adapters with bed at 100c for 30mins and things survived
minitanks are 40min so another good test
@solar stratus need to check but it tight on the tank

might print a 3mm one to see if they tighten more
They do have a gap designed in them
Yes, it shouldn't move while printing
alright I'll start printing and keep an eye on it
not much progress lately as I'm busy printing a thousand parts (literally 1000)
might get a pi with 8gb and PoE overkill for the printer yes but PoE is nice and in stock
just lost a bed of parts due to too much load on the server
ah, know I see why you're getting a pi.
it happened once before
but now I'm getting afraid it worsens
still 86 for a pi4B with 8GB
eek. I only use 1GB and 2GB ones
70 if I wait until November
from what I have seen only the 8gb one has PoE
hold on
these mfers lied still needs the hat
ok need an alternate with native poe
less worries on power
just plug ethernet and bam network and power
1 less port on the back too
I have a 5v psu to power the sbc, it takes the power from the same 230v as the ssr and the 24psu
more volume
might do a pi with poe hat

EXCLUSIVE SALE ONLY TO PORTUGAL!
O Raspberry Pi 4 Model B é o mais recente produto da popular gama Raspberry Pi de micro-computadores.
Oferece avanços inovadores na velocidade do processador, desempenho multimédia , memória e conectividade em comparação com a geração anterior Raspberry Pi 3 Modelo B +, mantendo a compatibilidade similar...
yes still not cheap
can I ask what is PoE?
power over Ethernet
@tired pike also if you want a pi let me know you might need to wait but I can get better prices than mauser
the 8gb one difference is around 15e
Ok
Thank you
But already have one waiting for my next build
Only 1gb but it's good enough
shit

I wonder if these belts are giving up on life
returned yesterday, today they are like this


an yesterday y wanted 2hump_ei today mzv
When they're new
they stretch
that's why you "break" them in with some printing for a few hours, and then redo tension
they're not new
yup
double checked something funky on my Y

all I did was rerun shaper
need to check if toolboard is tight and consider getting accelerometer for the nozzle
too much variance
loose bolts everywhere on the toolboard
checked rails etc forgot toolboard 🤦
and yet another item for my list print a spare sherpa mini as this one seems to have some wear on a few areas
got some extra stuff at 100 hz
will deal with it later after upgrading to 1.1.6
later in maybe 2 weeks
evaluating whether I can reuse my 350mm rail to cut down to 330 for the lightweight gantry

will be short 2.5mm on one side, @solar stratus / @ornate flame is that an issue?
You would need to make your own endstop block
one of the sides is fine I can put that one on the endstop side no?
I'm also fine with making my own endstop if needed, at least I don't have to spend the money on the rail
Maybe?
good enough for me
Does the lightweight gantry needs a 330mm rail? Is that lightweight extrution from aliexpress?
It does need a 330 rail to line up with the hole spacing
@tired pike yep I'll be cutting my 350mm one
looking at how the rails bolt into the gantry, and the placement of the M5 tapped holes for the x-joints, there is little room not to cut the rail from both sides 🤔
I assume the holes are evenly spaced from the edges in the 350mm rail
@proud marsh if you look at the image only one side needs to be cut, holes are spaced at 25mm, on the 350mm one the edge is actually shorter
by 2.5mm
I have seen the figure above, but I haven’t watched what was in it 😅. the endstop has a small step designed to set on the rail, it might be 1 or 2mm, you could design an endstop that goes down straight and basically gain back some of the mm lost
don't forget one side will be with the right length
I can use that one on the endstop side or just adjust the block
either way it works just need to find a.place to get it cut, I lack proper tools for steel cutting
I was wondering if I even manage to use the full length of the rail on the other side, I mean if the carriage actually reaches the edge before the toolhead bumps into something
2.5mm is not much anyway
easy to check you have it installed, pull it all the way to the left see how much rail remains
@formal marsh I can help you with that
Is there any discount code for buying 2 extrusions together? 😆
let me see
does not
Ok👌
@tired pike can still order 2 together if you want one
What about shipping? Does it make a difference?
free shipping I think
none, actually I was almost afraid a ball popping out from the mgn carriage 😛
UPDATE
Eventually reprint some omnibox parts as this PLA one is breaking
Upgrade to 1.1.6 and change colour (reprinted install needed) 🕐
Swap to EVA3 (printed waiting) 🕐
Finish TR (can't put too many details but can share pictures of the thing after its built)
Print at least 2 ERCP for the TR
Replace gantry to lightweight
Reprint top X axis joints because I will no longer need the cut ones
Print a spare Sherpa mini
I keep adding stuff
more often than it should
finally made myself draw a new camera support

and where are you mounting it?
front right 2040
nice place, slightly tilted I see, would just reach on top of the tensioning tower
going to put it on the inside of the extrusion as I have the front dropped
@proud marsh same place different mount and higher

oooh good spot
I do like the angle just needs to be higher
also need to reprint top X as I won't need the cuts anymore
after printing a thousand pieces, back to regular business aka more upgrades
sherpa accents are done, next is X block for lightweight and then proper top X joints
then in black new cam mount and sherpa core
suddenly a lot of layer shifting, AB steppers are stupid hot
might need some way to cool them down
yep
1.4A
worth mentioning enclosure was at 41C 😆
and I was stupid on the accels....
aaand I found my problem
loose belts 🤦
terrible gaps

which magnets?
ohhhh
too much PA?
I think it was something else, I was playing with normal vs arachne perimeters might have used the wrong one
Cam? Which one? 😁
cheapest I found on amazon

Câmara Web Full HD com resolução de 1080p para fazer chamadas de vídeo nítidas
focus is flaky
Can I get a screenshot of it? The transition to spain is confusing my phone. Sorry dump
Full HD webcam with 1080p resolution for clear video calling
Thanks
I'm wondering if the digital zoom works.
did not try AFAIK it's just FHD
since I just want an obvious vision if the print is fine or borked it's enough
plans for today run test wiring on the TR


also new camera mount and camera view
I like it
@brave urchin full res view

also belts came loose again, I think I'll move to EVA3 before lightweight arrives
should be a quick swap and retune after
How close does zoom get?
no zoom that's it
you can still zoom on the image/video but that's it 1920x1080
I thought there was a digital zoom
no, but as it is at least for my purpose looks great, need to run a test print though

this was picked why? instead of ercf
ok
I already have the motors on though
Is that your Tradrack?
yep
Looks awesome, is it near release or still closed beta?
costs and complexity? I’ve built mine with most of the ender 5 leftover, a servo and a 10mm mgn9 rail (it’s 15cm long in total with 5 lanes)

has it been tested?
beta tested 😛
Yes, it works. It’s part of my start/end gcode even when I don’t do multi material. just load unload the color/material I need (automatically it load the first lane, but I could load another by the console if I want)
cool
I printed the all thing in 2 plates, basically overnight. and it assemble quite easily even if there are no instructions but just a cad-like model. development is very active
hows tip cutting?
they are still thinking about it. for now is just tip shaping with a gcode
a part some filament that really don’t like this, it works very well
no hang ups or anything?
well, sometimes. but lately didn’t gave me any problems. maybe I adjusted in the right places. there are mods to include an encoder where usually there is just a sensor to detect the filament in the tradrack toolhead, it seems nice and useful (I have the encoder after the tradrack, not builtin) and apparently the tradrack is even supported by the happy hare v2, which is the new version of the ercf software
How's the move to EVA 3 going? Stuck on belts ATM?
nope, have a look

I had some powgee belt
I won't have spare but I can order later
Nice!
second belt in time to cut them up
I still need to crimp new klicky duct wiring
and solder the sensor
PTFE sizes will be tricky as the sensor is in the middle
@pale cloak need a little help

which side is to the front
graduated aka fillet?
filament sensor to put after sherpa is done too
now need to cut the screws for the switch (too long)
and then assemble, replace sherpa body and ready to tension
still need to print rapido mount (crazy will do for now)
the right side (where it slants) will face backwards when installed.
towards the x extrusion
thanks
also lighting above is bad but that's the new colour scheme
EVA still needs 2 pieces in purple
but for now black will do
also RIP parts printed by @tired pike they served me well now they become spares
RIP 😁
Where can I get the EVA3 stl's?
the official parts is still the EVA2.4, right?
@tired pike yes hang on a sec EVA3 is here https://discord.com/channels/747612067951018075/1041406799342997544
any questions ping @pale cloak


EVA3 almost there
and this crazy is not in best shape

need to fix the old one
this one will have to print the rapido nount
next is UHF
Also your hydra chain sag on the side? mine was straight once I superglued the first joint, but after fiddling around with something else it started to sag again (I cracked the superglue and the chain moves again)
Thanks for the tip 😁
Have you thought on the VzBot toolhead?
it does
a little but I like the aesthetics of EVA
The EVA3 for the Mercury, can it take the 4028 fan? Without losing any XY travel
IDK might be worth asking on the cannel
that's the annoying thing about eva3 its bulky
vz maaaaybe when alu one comes out
I wonder if there is a better way than glue (I printed several versions of it, all of them don’t hold the chain for too long)
and it really feels right when the chain stay straight
I don't mind mine sagging, also the bed wire is 2.5mm² overkill for the bed and heavy as fuck
I could use maybe .75
or even .5
also I used beefed up cables, maybe that’s why the first joint doesn’t hold
I just have 2.5 because I was not going with hydra
and I needed longer cable for the stock bed
eww


after of over 1h of trying to find why Z offset was being calculated so off, found that the position where I was probing the switch was not right due to it move after swapping to eva3
🤦
do you have same/less/more clearance on the back with eva3?
good question, I had to increase max Y
to reach the sexbolt properly
still hits the stepper towers, but it already did before
I just never travel there
when homing if Y is too further back hits thr tower by 2mm
might give in and eventually go mantis
z offset still a little flaky
you’d need to build a vzbot?
😅 I'll buy the alu head when it shows up
looking at the CAD vz doesn't seem to gain much in the back
and this random z offset issue is annoying me
need to check if the klicky duct is ok, it's the only part that changed
you know, I keep heading to the mellow shop and checking out if they have a merc option other than RR and hevort… than I check the Goliath and think about it…
hahaha are you saying goodbye to the rapido
no no, it’s just thinking about it
https://a.aliexpress.com/_mODBhfk got one of these arriving monday
I’d have to change soo many things, klicky and stuff. might be a too radical change for little benefit
hahaha
I'm not very happy with the eva swap
belts do grab better, old clips were fucky again (and I don't remember if they were petg or asa)
I’m slowly doing it, by going uhf duct on the eva2
but I have constantly fiddling with z calibration as well
by at least 0.1
but I can run 3 calibrations and they will have too much variance, it wasn't like that
I have to retune the first layer to objectively see what’s the real offset now
I'd have a random issue retune and I would be good for weeks
today every print is different
check the numbers, if it’s bed to probe or nozzle to bolt or probe to bolt that changes the most
I sometimes have variations due to the nozzle to bolt changing a lot
but things gets more consistent if I home z before each calibration
I am marginally concerned about the weird behaviour, but I still haven’t investigated why’s that. too many things to do, and not a real issue yet, but it might escalate and making bad 1st layers soon
I'll start logging the offsets
Mister I had the similar problem forever in my V-core 500
It end up by finding it has bimetal thermal expation on the x gantry
The aluminium extrution expands more than the rail when heat up and afecting the z offset
Dual rail in the X gantry solve my problem
but it is 600mm long x gantry
Not sure if the mercury being smaller can be affected by this
but its something to thing about it
hmm lightweight gantry might help as well
but these inconsistencies are with cold printer
calibrate z should in theory compensate after heat soaka but you never know
printed 2 pieces today and both printed fine
going for a third
You are running klicky right?
I have heard that sometimes the micro switch goes bad (and it needs to be replaced) and something with the magnets not stay in their place
yep klicky, might be the switch on the sexbolt
you have to try unklicky, especially if you are going to add that volcano thingy
yeah I know...
I think there's a unklicky style sexbolt as well
I'm also struggling to reach 20mm³/s without the CHT still need to try to unclog that guy
side note my bed bracket thingies are holding well even 100C temps on the bed

new nozzles, finally got a .6, volcano is .4 and an adapter for rapido so I can use non volcano nozzles as if they were, let's see if it works well
lightweight still on the way
time to print the rapido mount for EVA3
some samples from z-calibration

nozzle ideally should be 0 as this is nozzle to sexbolt
same place as where it homes
probe also has a lot of variance, this is probe on bed so the issue might be on the klicky switch
I have an extra omron and a few others from an unknown brand, might test them out
yes, it’s definitely something odd, since bolt to switch is consistent, means that the magnets binds the probe consistently, but the switch itself has a lot of variation. this is slightly different than a repeatability test, where you probe the switch 100 times consecutively. so it’s possible that the switch gets stuck or something. you can try to clean it and see if there is something on the way (I had a piece of glue once -leftover from some bed adhesion enhancement attempts- )
I don't run glue or any other adhesion stuff, every time I tried out of desperation anded up regretting
same
but that switch is sketchy
but somehow I haven’t noticed a tiny buildup of stuff on a side of the switch. cleaning that up improved for a while
I'll have a look, since I'm going UHF might go unklicky
at least you don’t have complicated switch to deal with, it’s wire-to-bolt dumb connection
as long as I can make it work reliably without getting stuck
Is auto-z probing the switch body on the switch itself?
body, there is a note that if you want trouble and misery you can use probing on the switch 😅
why @pale cloak and I are red and @formal marsh name is only yellow 🤔
maybe it’s gold
He has a "Contributor" role now @proud marsh

hooooo 🫢
it's gold 😛
because I'm "special"
lightweight gantry arrives today

how light?
its pretty close to the weight fusion 360 said it would be, and what is listed
like within 1-3 grams if I recall correctly?
I don't mind it it's off, I was just surprised it's so light
it should be stiff too as its keeping the box design and the diagnal support spreads load well
stiff it is

belts and shaper later
also 18e to get the rail cut and milled
should have bought a new one 😭
also need to put new pom nuts


wow, those results are much better than I'm getting, lol
I think one of those peaks is my kid screaming
lightweight seems to ressonate a lot less
Your Y is reading Z, you might need to define Z as Y to get proper results
Wait
This is a thing?
finding out now
I'll post the outcome afterwards
right now my biggest issue that remains is filament path
what worked fine in the past doesnt now
for some reason
How so?
filament seems to get stuck
I saw you can redefine them to be correct. It’s in the input shaper documentation about chip placement.
might add new ingress
But does it care for that?
or does it just add up X-Y-Z?
here they are with corected axes


note this is from an accelerometer on the toolboard
doesn't seem like it cares
makes it easier to read
Looks very nice...🤤
got it for the looks
You can actually use the input shaper chip while you print too, but needs to be connected to a pc or something and is not really any benefit. My brother thought it had to be on all the time when he was doing his.
It just adds the resonance from all three axes. The klipper docs are explicit that the specific mapping of axes does not matter, as long as they are aligned with the direction of motion.

From the Klipper docs it looks like the axes mapping does not matter.
I interpreted that as you don’t need to line it up as you can swap the axis in config
Yup yup
Lol I’m no expert
UPDATE
Eventually reprint some omnibox parts as this PLA one is breaking (this might take a while)
Finish TR (can't put too many details but can share pictures of the thing after its built)
Print at least 2 ERCP for the TR
Change to Rapido, also UHF
Upgrade to 1.1.6 and change colour ✅
Swap to EVA3 ✅
Replace gantry to lightweight ✅
Reprint top X axis joints because I will no longer need the cut ones ✅
Print a spare Sherpa mini (new printed and installed) ✅
Mostly so I can keep track of what I want to do next
so... I had a test print before the new gantry and lost it
now I can't compare
but IIRC there seems to be a little less ghosting
next step print rapido mount, because both of my crazy need maintenance
also bowden on sherpa is too loose need to find a proper way to make it tighter
Agreed. I'll look for a version with a coupler
So there is a version with a coupler, but from a prior release.

yep it's fan0
also need to remove filament sensor from toolhead
improper tip shaping gets filament stuck in there
I really need a cutter
I was reading about cutters yesterday, so your timing is interesting. I'll keep poking around to find something, but so far nothing's turned up.
I have also asked around in the RR EVA channels
I don't think there is
maybe something that cuts by moving to the left
yes
Mrm. All I can do is keep my eyes open.
I'll sleep on it
ran a little speed test
TEST_SPEED SPEED=750 ITERATIONS=1 ACCEL=40000 BOUND=20


does 40 easily
I'll be setting lower
just for extra safety
ya EVA FILAMENT CUTTER PLEASE. 🥺
it's either that or mantis
chonky
i dont know what chonky means lol
"chonky" is a cute version of "chunky"
ah
speaking of fat cats you have one of those don't you
oh indeed, one of mine is quite a hefty boi.
he was full grown and fat and happy when we adopted him, and he's refused to change his ways
my black one might become like that too
they're very baby-like if you can train them to let you pick them up. very cute.
and less likely to make a mess on you
My big boy does, too, but my mom worked him into being more gentle. He is technically her cat.
now I'm just waiting for it to cool down to get the rapido in place
sh*t! I had a random spare waiting for a thr replacement, and now I still haven’t placed the thr on… if you need a quick replacement I can give you mine
I even have the faulty one if you want/can transplant the mosfet
ohh I would gladly take the dead one
also FUCK ME rapido heats fucking fast
told you!!
I’m in the middle of nowhere until next week. I’ll send you the corpse when I arrive home.
it actually still works, I think it’s just the screw terminal that’s gone, but maybe also@other stuff… the chip was heating too much, the terminal could have been the cause, or a side damage
might replace the terminal
this is why I love auto z
replace hotend
done
only needs pid tune
if you find the right pitch, I bought one, 3.81 pitch, but it was a hair too big
I know a guy who might be able to find it
fast rapido is the point of rapido
it is rapid heating
from cold to 260 by the time to walk over to the printer
every time I mount the nf crazy (twice so far) I regret how painfully slow it’s the heatup process
only the bambu clone is as fast as the rapido
though now that I finally have a load/unload macro, poorly written one... the rapido isnt fast enough for me
I used to manually load and unload... so by the time I walked to the printer it was up to temp
wrote one a long time ago
basic but does the job
now I need new tip shaper one
need to check latest TR one
I should make it with heat and wait temp commands
but then I would want variables for material loaded
I dont need to be loading pla at 260
and to impatiantto load abs at 235
it’s working ok with the rapido, but it’s based on PrusaSlicer one, so maybe you can use it from the slicer directly
my macro loads at printing temperature
I'm getting timeouts and was wondering why (host computer updating)
I should just make dedicated abs/pla loading buttons
I am not sure what I did, but the bulk of it is from the tradrack gcode
though I have only ever printed abs, asa, and pc in my merc
do you have a multi material unit on the merc?
nope
how can you automatically load and unload, just outside the extruder gear than, right?
orbiter sensor has a button for that
@proud marsh did you have to tune the shaper macro from the TR?
it changed a lot since I last saw it
no, just copied the parameters for the rapido I found on a -smilingly equivalent- macro from the ercf
ah good need to find those
I might find it for you…
today? or in a few days

GitHub
New software driver for ERCF control under Klipper - moggieuk/ERCF-Software-V3
I can’t lookup now what is what in the macro, but it should be easy to sort out
I can find it
there was actually a post from ryan, with drawings on the rapido, about it, in the tr beta channel. you can look it up
from ryan post

could be temperature
1 = extruder_load_length
2 = hotend_load_length
3 = toolhead_unload_length

I use 265C
this was 245, 255 was worse
might be that, or just different asa brand, mine also has a few mm hair at times
this is polymaker
but it’s not too bad, the important is not to have bulging parts on the tip
hairs might be annoying but on asa/abs especially they will just bend instead of breaking around… pla might give issues
how the eva3 filament sensor is working?
How is your belted hydra going? I had just stumbled upon a belted hydra with what looks like K3 motor mounts for the belts.
not going, and not sure if I will start
got too much stuff to print now and want to wrap up my todo list
including the TR and buffers
you can’t do anything like that with an electronic enclosure under the printer, right?
Depends how big your printer is I guess? But would make the Omnibox show its strength
The first one I built sat under the Z axis on the printer I was working on. I just cut out about 150mm of Z travel at the bottom. 😆
archetype uses a 2510 lol they recommend a delta, so it will be $$$
that's some curling

it's a pumpkin
printing enclosed with fan and SCS at 70
@pale cloak just as a double check correct for rapido UHF is this https://github.com/jon-harper/E34M1/blob/main/STL/bottom/klicky_bottom_uhf.stl

GitHub
EVA 3 modified for the Mercury One.1 3D printer. Contribute to jon-harper/E34M1 development by creating an account on GitHub.
I believe so, but you are in uncharted waters ATM.
I have not seen it in CAD, IOW
will print anyway then
it's a shame that duct is "harder" to swap
at least compared to rapido HF/UHF swap
without Klicky it's easier, IMO. Remove rear fan, remove two screws, and it falls out.
survived

thinking how I can make an easily adjustable klicky dock for easy HF UHF swap
same with brus
the uhf klicky twins horn from turtle has the same docking height as the standard version
maybe it can be adjusted for eva3 🤔
not in the mood to adjust anything

GitHub
Microswitch probe with magnetic attachement, primarily aimed at CoreXY 3d printers - jlas1/Klicky-Probe
You want to swap between 2 different probes too?
Yea I think I need it for my toolhead adventure I’m about to start
my brush already mounts under, might just make a full piece for each height
what about marking with a sharpie the dock height for HF and UHF?
you could add your most hated thing to make it adjust itself
How do wire nuts enter into this? 😛
Nah servo lol
I'm messing with flow. He hates wire nuts. HATES them. It's a thing. I didn't tell you this, though. Nooope. not me.
he hates servos too lol wont even put it on the frame stationary
lol i jsut had to look up wire nuts
I doubt anyone but the U.S. still uses them. They are awful.
can get ones made here here but never seen them in the wild
most diy people just twist and tape here, so there is lots of signs saying "DIY can be illegal"
@gleaming whale it's not that I hate servos, I just don't want to spend more money on another servo and wire for it, on the toolhead though it's because it adds weight too
as for wire nuts I love to hate them, and even more when I aee DIY where people just twist wires, my brain goes "fire!"
i was thinking of a unklicky style bltouch with a remote servo on the frame using similar to a bicycle brake line to deply it
that's a bowden cable
lol onyl wires i twist and tape are speakers in a house that i am not finalised
@gleaming whale that's fine, usually there's not enough sustained current to burn (depends on sound system)
unamped speakers lol
also @pale cloak I hate a lot of stuff, including people 🤣
yea bowden cable is really big, road bike people are more insane about saving mg than printer people
I hate people too! lol

oh dear
Oh, that's worrisome.
new brush piece, in theory should rotate less and adjusts for crazy rapido UF/UHF

and i think I'll recycle the extrusion side for klicky
can't believe I lost the UHF duct again

Have you printed with the rapido much?
a little I'm loving it
Good!
is it better than the crazy? I preferred the rapido, but I have a wonky nf crazy setup, so I am not sure it’s soo much better for everyone
better is questionable and open for debate I'd say
the crazy with the nozzle adapter for higher flow might make no difference but both crazies need maintenance
the print quality was more or less the same, but the prep is so much easier with the rapido
also ❤️ rapido heating speed
Oooh, can you let me know if that works? my brush moves around a bit
yes, current setup is similar but wobbles a little
guess I'll print the new klicky dock and uhf brush
UHF duct printing 🥳
still on eva 3?
uh oh, toolhead wars!
more warp
aaaah I don't want to
I was going to say the other printed fine but it was not me
@tired pike how the fuck did you print that without warping
there's not a lot of contact area with the build plate for that part, so it curls readily. particularly with the heat rising inside the duct.
😭😭
The fan duct?
Not always prints well
Heat soak very well the chamber
A little more squish in build plate
chamber was soaked to 40C
Try playing with that just the enough to not have elephant foot
Polymaker ASA
Still haven't tried polymaker
it's holding
I think the camera does not like the heat

AND IT PRINTED, a little elephant foot but I'm willing to accept it
also new brush piece also printed nicely, need to mount it
Nice!
now just adjust a little offset to not have elephant foot
and you can save it on prusa slicer to that filament only
if for the type I can just adjust on my start gcode
damn need to get the brush mounted and new duct assembled
who's insane has klipper moonraker etc in docker containers and has just setup update manager for the other components

What do you use to install klipper?kiauh?
Yes, Kiauh is a good option.
mine is just docker containers but I do not recommend it unless your Linux and docker knowledge is good
finally setting up a GIT repo with my config, still private as I need to make sure I'm not exposing sensitive info
another item for my list, pin aliases
pin aliases are almost done
What is that?? 😅😅
you assign names for the board pins, when configuring instead of saying gpio1 you say hotend_thermistor


does it takes a collet/ECAS?
maybe a logo on the front 😛?
of course, I can also test it, I already have a switch wired up there, I only need to move it in the mount
so switch hole is too big, the "legs" to attach are wayyy too thin
filament hole is too thin
aaand requires the version without arm it hits the screw
heh design is not properly parametric
I'm slowly messing it up 😭
might need to design it from scratch
maybe you can have a look at the “orbiter sensor sherpa mod” mount
the issue here is the thickness for mounting
I didn't want to use the back because of the motor and standoffs for the toolboard
now with logo

Can never have enough logos!
z is floating again
nope, seems like the switch offset for klicky floats
now is at .5
started with .40 or so, went to .37 .42 now .50
I think I'll replace it with unklicky
I think I also had that issue, with unklicky the probe seems more robust on that front: the switch offset is constrained by an m3 bolt, tightened on the probe. the mechanism basically works the other way around compared to a microswitch, which need to be triggered. unklicky is constantly triggered, the minimum movement makes it go off
klicky is wired NC as well
yes, but mechanically you still need to press a button
yes, the good thing about unklicky is that the force to trigger does not depend on a spring
with unklicky you… un-click 😅

exactly, but on a magnet repulsion. but it’s advantage, in my opinion, is that any minimum offset, the probe will open
until magnets become non magnetic there's always force and distnce is constant
to be clear I agree with you
no come on!! let’s argue a bit more, I fell so low on the bot ranking!!
help it with a 4mm drill bit?
also the ball need to be relatively free to move, but still pressed between the filament path and the switch, it’s really a challenge to design, I guess
The heatsert unklicky is the best one I have had so far! Can not recommend enough going for that over the normal one. The wire can have a little bit of give where as the heatsert never moves.
Linky?
https://github.com/majarspeed/Unklicky/tree/main/Unklicky_Probes/BFP-HS
It uses 6x3 magnets in the pin so makes it easier to source parts as that’s the same as the klicky connection.

GitHub
Drop in magnet based klicky probe. Contribute to majarspeed/Unklicky development by creating an account on GitHub.
I also moved to use from a 6mm to a 8mm m3 to secure the wire, this gives very little play to the pin. I was afraid that this wouldn’t work, but it works even better, the pins barely move, but it’s enough to open the circuit
might be the final version

Your z is backwards
true I'm dumb
did so many flips
printing another still without logo though
finding a good orientation to print this is a PITA
The top down

I made a printed mount for the Fysetc sherpa sensor... gave up on it due to how fragile it had to be
printing fine so far, slight warp 😭
I see what you mean
Probably better off building it into the sherpa housing
I know, at this point it's more stubbornness than anything else
trying to get that feeling of "I DID IT!"

also put the nrw brush and klicky dock along with an unklicky
unklicky clears the current brush, woth UHF might not
probe accuracy results: maximum 15.457500, minimum 15.415000, range 0.042500, average 15.453425, median 15.455000, standard deviation 0.006161
unklicky
it's a rather large range
probe accuracy results: maximum -0.001701, minimum -0.009201, range 0.007500, average -0.006326, median -0.006701, standard deviation 0.001083
omron d2f klicky
way better
@proud marsh how's your unklicky behaving
probe accuracy results: maximum 15.162500, minimum 15.150000, range 0.012500, average 15.153900, median 15.152500, standard deviation 0.001814
after 2 reassemblies still higher than omron, and almost twice deviation
mine works well, but I have some magnets connectivity issues with my main one now.
that’s a very very small range 😛
my unckliky isn’t about 2x or 3x that range
that’s my latest test
probe accuracy results: maximum 8.670625, minimum 8.660000, range 0.010625, average 8.661881, median 8.661250, standard deviation 0.001585
but it’s the best I can get, the spare is not as tight
I'll keep it for a while and see
also my mesh got screwed up in the back I think it's related to my bed engravings
Did you do 1000 probes with unklicky to get it settled in?
@gleaming whale hmmm with all the testing mught be close to 500 at least
I'll run 500 more
Mines the same as 79bass’s but I am running stock motors. I got some new AB motors so can use my motors from there on my Z so can see if this changes anything.
probe accuracy results: maximum 15.080000, minimum 15.077500, range 0.002500, average 15.077525, median 15.077500, standard deviation 0.000249
@gleaming whale 500 more did the trick
wow, d2f or unklicky?
unklicky

might need to check probe offset with unklicky
that or something is off due to the bed engravings
oh man that mesh is so buttery compared to what I'm dealing with lol
and it still sucks
I would up your probe count if you really want to track it down. But then it gets close to focusing on just chasing numbers. Move the top slider down to what you would actually use of the bed still being there and hat gives you a more realistic range. With adaptive bed mesh before a print on the stock e5+ bed I can get a variance of 0.03 printing on a 200x200 section but the edges where I’m not printing make it say it’s a 0.1 variance.
TLDR - that’s a good mesh given all the variables in the real world.
what bothers me is that it used to be better
try to mesh without the pei, if it’s a build plate issue, there is nothing you can do other than change it
I suspect it's the magnet sticker
some pei sheets I mesh I get 0.05 to 0.07 while others are around 0.1
I'll find out when the new sheets arrive

tiny splitter to test dual 5015
UPDATE
List will finally stop growing
Eventually reprint some omnibox parts as this PLA one is breaking (this will take a while)
Finish TR (hopefully fast)
Print at least 2 ERCP for the TR (after TR is running)
Change to Rapido, also UHF 🕐 (Rapido is there UHF not)
Printed new brush and klicky dock for UHF ✅
Test Owl dual 5015 for E34M1 ✅ (they hit towers but I never move there)
Print SUAFT/something else with HEPA
I will probably need a few of those
that many fans?
new EVA back in along with top
now I have too much X travel
also owl eyes will hit with my current brush position
but other than that looks damn good
also FUCK UPS
tossing the box over the wall again?
I wish
that suuuucks, except for the cameras 🙂
might move the bed forward 10mm
how? move the holes on my voron bed adapters
something I would not be able to do with a proper bed 😁
problem, new klicky and brush supports
finally moved my ass and adjusted my X and Y
needed to move the brush closer to center
now it touches the bed
so homing z fucks up
need to print one 2mm shorter
you're on hydra right? how'd you mount your brush?
ahhh okay
i have all the stuff sitting under the printer i just haven't found a mount point im happy with
sure i'll check it out!
nex time im on computer
printed new brush mount today along with the chain thingy to hold it
so chain held in place hits the brush when raising the bed
might need to get non glued chain ends
@digital harbor https://www.printables.com/model/436868-igus-e2i-10-10-018-0-chain-ends/files these fit the hydra chain?

Printables.com
IGUS E2I-10-10-018-0 chain ends with three screw holes (aka noname chain style) as fastening point. | Download free 3D printable STL models
These are meant for to use IGUS E2i-10-10-018-0 chain (without original end links, just the chain links) with three hole mounts. So if you want to connect the IGUS with appropriate hydra parts with three holes as mount points, then yes that is the intended use. And I did make (and use) them for this use case.
This mod is also listed in community mods https://discord.com/channels/747612067951018075/1090699786476343356 where I have the photo of my hydra installment.
Thank you, I missed it on the community section
chain no longer hits brush
That IGUS chain has very small bending radius (18mm) so you will be likely constrained by the wiring inside. That bending radius is why I did chosen it for mine. Also Voron guys are using it too so easy to source.
wiring is not limiting even though it's 2.5mm² (yes overkill)
the bending on the top was, made it 2links shorter too
Well in my case wiring defines larger bend radius than chain itself. More restrictive, just won't bend that much.
planning first MMU print

TR assisted extrusion actually nice, because the path from tr to enclosure ingress is tight sometimes the extruder alone does not pull, with both it's damn perfect
I really need to change filament ingress
Also filament sensor got bork when unloading filament,.might be TR bug
You’re running a Sherpa mini yea?
I saw this, thought of you lol
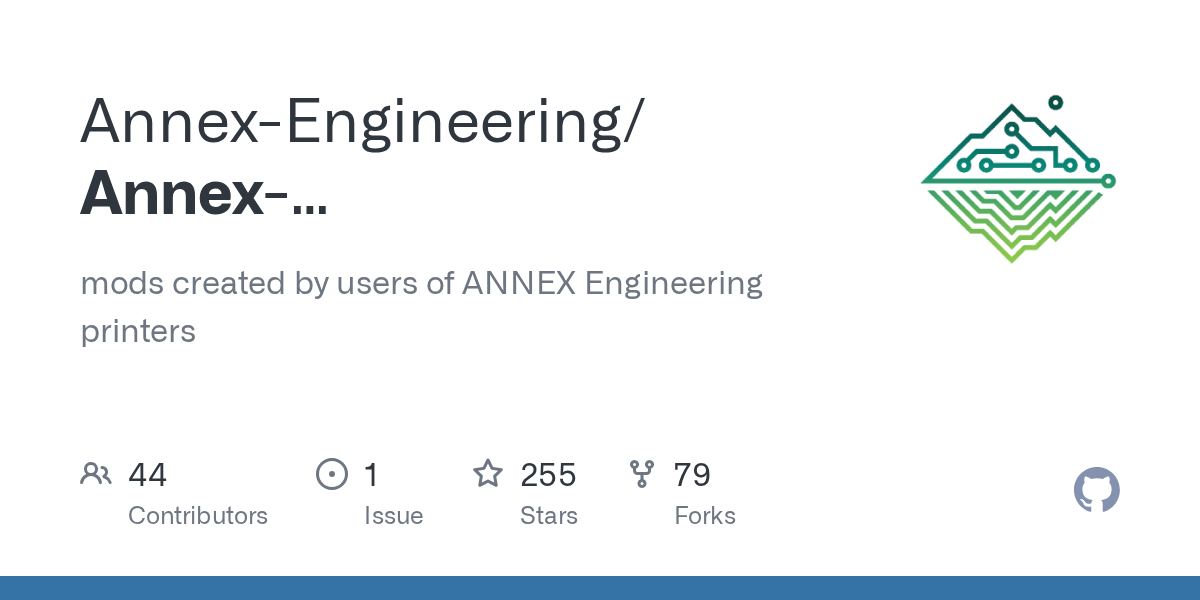
GitHub
mods created by users of ANNEX Engineering printers - Annex-Engineering/Annex-Engineering_User_Mods
huh...I wonder how well that works
yeah, I'm not seeing a reason why it won't...cool!
I read it as “how the hell that works”
MAGIC
I know about it I dont like it

Printables.com
Filament Sensor for Sherpa Mini without having to print a new body. | Download free 3D printable STL models
UPDATE
Eventually reprint some omnibox parts as this PLA one is breaking (this will take a while)
Finish TR ✅
Install Mellow Easy BRD on TR (ordered)
Print at least 2 ERCP for the TR/rewinders need to choose
Change to Rapido, also UHF ✅
Print SUAFT/something else with HEPA
Y

X

X is a little noisy
I need to adjust all the wiring around and tighten everything
also UHF is in

ohh it goes
I can’t find it but where you talking to someone about smaller hydra arms for the 180mm merc you want to make?
turns out I did the frame too small (wrong measurements)
TR board arrives today


daaamn 😝, post it might be a merc record
My 11 minutes pla benchy had big holes on the front
might be the single 5015 fan cooling
and nothing else
this was dual5015 and SCS
need to make a speedbenchy mode
a macro to enable SCS no timelapses etc
Why not go with ABS, less cooling needed 😉
that's the plan but I wanted to see the results on PLA
Fair enough! Cool build by the way, love the lightweight X Gantry
thanks
attempted an ABS benchy, it's too much cooling
😂 the struggles from going from PLA speed printing to ABS.
Couldn't you turn down the fans?
I could but I didn't
the issue was that it came off the bed and was not due to warping
nozzle pushed print
Ah crap
Hate when that happens, at least you're doing a speed benchy and not a 5+ hour print
I use it for non critical stuff, I like its matt finish on the black abs+ fillament
heh same but I hate printing it, the smell
YES UNDER 7MIN
6:59
That's very fast! Nice. Got any pictures of the result? ☺️
https://youtu.be/63c07Ocw1nc in the end, can share photos later

Polymaker Purple ABS at 260ºC
Annex rules
Nozzle is .4 line width .5
500mm/s speed (on everytthing)
40 000 mm/s² acceleration
Lightning Infill at 10%
10 SQV
it's far from perfect but for the speed it was done I'm happy with it
Impressive!
not bad eh?

hahaha
which bed have you sourced?
considering you have a trident bed adapted with some abs printed spacers, I’d say.. amazing!! maybe you can share the adapters as a mod 😛?
250 voron bed might be more readily available
I was weary of doing it, but considering the ABS ones are working fine and handling 100C fine will do
that’s a fair disclaimer
I have order funssor bed kit
ewwww
well replacing picos with skrat is proving painful
cant flash with dfu util from docker 😭 starts but fails
ok I'm stupid, was flashing can not can bridge
it's detected
now define all damn board pins (and they're a lot)
aliases done (I hope) and config adjusted, now need 10min to test
aand magic smoke on the toolboard
Damn..
24v on the can data lines
and a good night sleep?😂
oh crap, yeah they don't like that. You're making me nervous, going to do a CAN setup on my build as well. 
Also to add to this, you could always get some MJF Nylon printed spacers if you can't print Nylon yourself. There are some printing services that do it for quite cheap like JLC3DP. It can handle up to 175c.
I had no sleep that's why I was powering on thr printer at 4am
no sleep as I'm didn't feel sleepy yet
first version was nylon, but screws glue screwed up
also CAN is easy, the hard part is not confusing the fan port with the CAN port on the board
skrat is a nice board but having CAN between 2 fan ports is not very smart
so I only killed the CAN transceiver USB works
that will work until I get a replacement
Oh thats actually really good, seems the board is protected well then
now I also get why the jumpers for the 4pin fans are by default on 5v...
I would still have a toolboard If I didn't change them 🤦
anyway new one should arrive within 1 week until then USB it is
I can continue to setup the easy brd for the tradrack
tomorrow I’ll mail you my broken one so you can Frankenstein a functional one, maybe. are you getting another THR as replacement?
my old one should only have the header borked, so it might be an easy swap
yep ordered one yesterday
at this point I would rather have too many than too few
hey first component for SmolZG
so you won’t use any of the picos you have around for the smol?