#Flow - Born from an E5Pro
1 messages · Page 2 of 1
CAN?
yep
simple reason, I run klipper inside docker
can is a network interface on the host
ah
changing network to host works but I wanted to avoid that
damn not going to work out
needs host net
actually may not be that bad, klipper doesn't use network (except for can)
It's technically tunneled through USB, FWIW, though I doubt that helps with Docker permissions.
does not AFAIK
so does it work by simply set the docker network to host?
should did not try yet
played a little with CAN yesterday flashed klipper in can bridge mode into the toolboard, need to compile new drivers for the kernel
oh yeah, been there!! Are you compiling on a arm machine?
I did it on an amlogic s905, and it took the all day to compile
nah, it's my laptop takes like 10 minutes maybe less, but it was late and I was not in the mood to wait
after I understand that canbus is just a network it was much easier to digest. I am still unsure if the design of the network is just linear, so one start-end all daisy chained together, or it may also have multiple ramifications and and still work as expected. the tech is pretty basic but it’s cool, it’s a little bit like a built-in rest server/middleware in each node that read through a common websocket
reminds me of the ancient token ring LANs
without the token
messages just go around, each device consumes the ones for it's address
that's how I understand it
I think it’s basically the same thing, each node have a uuid, and they care about the messages that ate from them
I finally got to that understanding yesterday
the cool thing is that it’s over 2 wires only. so the low hw requirements is pretty hard to beat
I'll just use the toolboard in that mode to try the container config
then move to the server and reflashb the pico
yeah, it’s not a sort of black magic, and yes, you could even use the tolboard canbus in usb bridge mode and start the network the other way around, there are really no rules
true but needs more wires on the toolboard, not what I want
yep, that's even how the many ECUs on cars talk
sure, just to say that’s pretty free and hard to mess up
once everything is wired up
true
the only problem is that klipper is unforgiving, and as soon something unexpected happens or a slightly delayed, it panics and kills all
yeah, had that issue due to high load
been considering moving klipper out of the home server
but no pi, and I like it in containers
maybe it’s not the right tool, but I can see it allowing more complex built with a slim down wiring
I have found a tinkerboard for 10€ in the marketplace. it’s not the latest cpu, more like a rpi3 than a 4, but it didn’t gave me any issue so far
before I used an android tv box
as long as it can handle klipper moonraker mainsail and klipperscreen
if you want I can send you one of those 😜, pretty cool to play with them
2gig ram, quad cores, they are all chinese chips. the tinkerboard is a rockcip arm hf, the tv boxes are amlogic s905w, arm64 with 2g ethernet and wifi (doesn’t work yet) running an unsupported armbian version
yes the tinkerboard yes, from 2017
ah the tv boxes I have one, played with it, not a fan
yeah, it’s a hit or miss
they are all badly supported
2gb on the tinker?
yes
how much klipper takes
it’s an old mighty
nothing, mainsail is the hog
tempting, looks like the same form factor of the pi
but not even close to a gig
what I mean is the full package
the same one, the pins might change
tempting indeed
just need it to handle klipperscreen as well
not even x server, as that will run on an android
I was expecting the tinkerboard to run worse than the android tv boxes, since on paper they are similar but the tv boxes are arm64. instead the tinkerboard is just unbeatable. I suspect it boils down to the ram used and the overall better build quality
plus the tinker board is fully supported, everything works
jesus, everything became so expansive, just browsing anywhere
found one on ebay.fr for 30€, sold as possibly faulty
anywhere else is > 150€ for something that should cost 40€ max
it's insane
otherwise the pine64 is the board to look now, it’s basically the same as the tinker, even better, and it’s sold at community prices
PINE STORE
still more than I'm willing to pay
also us, no vat and import taxes
The RPi is supposed to hit 1m units a month soon. Prices should start dropping after that.
let's see, if prices drop enough I might move klipper to a pi
Pi4B still retails for $55. Once that backorder is down prices should fall.
Newark is still way way behind. Prices haven't kept lockstep with them being behind, but it's been a decent measure of what to expect. Note: they claim a 10mo lead time.
https://3dpandme.com/2022/08/22/pi-alternatives-for-klipper/ <-- doesn't mention Pine64, but does cover a lot of boards.
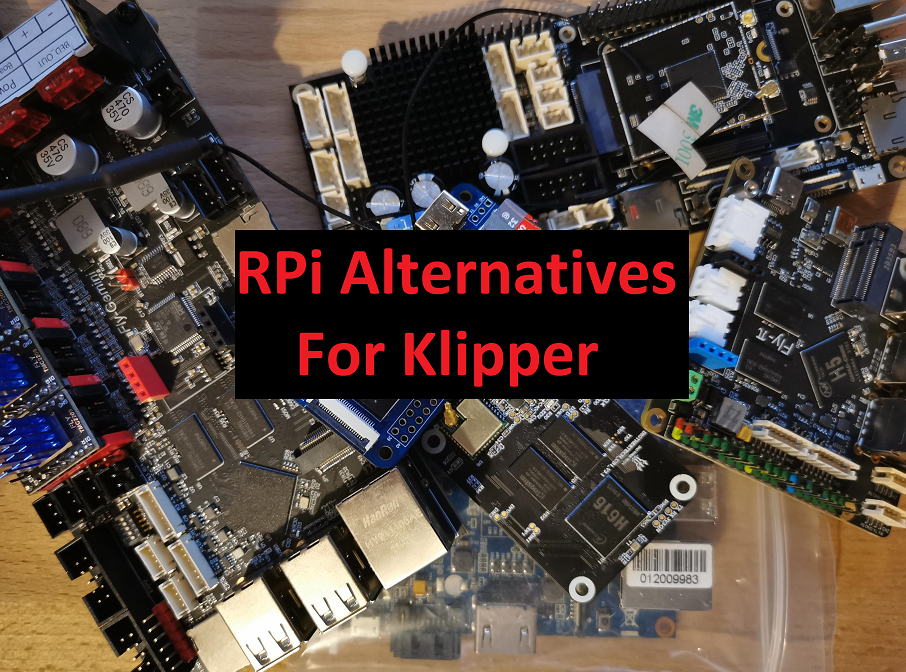
I’ve been slowly creating guides for installing Klipper on as many Single Board Computer (SBC) alternatives to the Raspberry Pi as I could find due to the shortage creating insane demand and …
I'll be waiting for prices to drop
just great keeps skipping
when purging looked like a clog or heat creep but then started printing fine
need to set a thermistor in the enclosure
printing again without door
when you go canbus you can use the hotend pins for the chamber thermistor
I know
otherwise it seems gpio29 might be used as extra thermistor, I use a odd pin on my skr mini to have an extra thermistor
it kind of work fiddling with the pullup_resistor
the plan is to use the free one on the pico
printing petg standoffs for temporary assembly
looks like I ggot the right kernel drivers

oh yeah!
for those using THR36 and want to compile kernel what you need is CAN_GS_USB
and CAN_DEV and CAN_NETLINK (dependencies)
I had to compile on unsupported armbian (amlogic s9xx) but the official armbian on the asus tinker had it already
need to check if I can flash the pico without the boot jumper
stuck yet again
FUUUUUUUCK ME!

and stuck again 😭
where to start first? swap nozzle or the whole damn hotend
printed 2 layers
ill be swapping out the hotend and disassemble what I can (some screws are fucked)
guess I'll be cutting screws as well
I had a similar thing, it was happening when trying to print pla. petg and abs where fine. I thought it was some higher temp filament “contamination”, and I tried to print pla at higher temp. tried cleaning filament, cleanup the nozzle, cold pulls… eventually I just didn’t print pla for a while, and now it works ok
this is with PETG
have you tried asa/abs at higher temps? if it’s not heat creep I mean
not yet trying to print last parts in PETG to then start with ABS
I'll get the cht out and try another
if it prints fine need to find a way to clean it
if not, change to the spare hotend
and try to clean this one
Are you swapping between PETG and PLA?
not recently, printed a lot of PETG fine
K. Checking. I've been told PLA and PETG are more difficult to clear when they mix in the nozzle.
might be something like that
doing another cold pull to get it as clean as possible and then swap nozzles
I don’t know how correct this is but I had a revo nozzle with a blockage in it so I pulled it out and heated it up with a heat gun and kept pushing filament through and letting it cool a little and cold pulling with it out of the hotend. My goto part and filament store has some nozzle cleaning filament in their own brand now so I might get some of that.
@gleaming whale thinking of doing something like that
I was going for something a little different, a blowtorch
The nozzle cleaning filament is amazing. I've stopped doing cold pulls because the filament fixes it. I've used half of 250g in two years, too, so it lasts.
usually it's just nylon filament not sure if it has any additives
even for a cold pull nylon is better
Nylon doesn't have as large a melt range. I thought it was nylon at first, too. Bought some and was very disappointed.
This stuff melts from about 160-something very high
interesting some of the ones I have seen for sale claim to be nylon
Could it be a form of modified nylon? That might explain the origin.
Nope, looks like it's different stuff. Made for cleaning injectino molding equipment, which makes sense.
I didn't know that nylon was actually used for cold pulls. Interesting.
well turned most filament in the nozzle into a liquid
pushed a ppiece through the hotend (without nozzle as well)
reassembling
also past me is an idiot
print finished without issues
also Found canbus_uuid=45684968bae8, Application: Klipper
this is using THR36 as bridge but as a proof of concept works
do you know which pins to use/connectwith the transceiver in the pico?
there's a guide I'll link it

GitHub
Guides for Klipper Things. Contribute to rootiest/zippy_guides development by creating an account on GitHub.
"#$%%$#&/$& it still skips
print finished but had some skipping
could be flow related though
might increase temperature on next print
THR 36 flashed for CAN only
printing some more parts before starting disassembly
specifically moving to a different purge bucket+brush holder

see where it looks a little better? slowed down 50%
not perfect but better
why? it used to print fine its as if the hotend stopped handling those speeds
old nozzle going in
need some cleaning filaments
aaand no same ahit
feeling lost on this
fuck

after drying filament not the problem
trying slower now
wasting a lot of filament on this
has to be either heat creep, hotend somewhow gettint stuck or motor heating too much
I'll just move the electronics out get the enclosure fan working
see if keeping it cooler helps
Third attempt simply stopped extruding, enclosure was at 30 according to my multimeter, motor at 55/60
Could it be wiring related?
idk going omnibox today, most likely canbus as well
Well, if it clears up, you'll know why, I guess.
true but I doubt it's the issue
since most stuff is here or on the way
ill just move forward I don't need to print now
makes easier to swap hotend as well
thermistor has a long wire that I'll have to cut

Update on checklist:
Fix the clog/whatever it is issue (fully disassemble hotend clean and test)
Add toolboard to reduce amount of wiring 🕐
Move electronics into OmniBox 🕐
Add exhaust fan to enclosure 🕐
Eventually reprint some omnibox parts as this PLA one is breaking
Print more braces for the frame
Hydra (will use old creality board for Z motors)
Upgrade to 1.1.5 and change colour
Did a test with the 120mm fan for the enclosure on 20v battery, damn that thing moves a lot of air
Omnibox reprint will wait for @pale cloak to decide go full HSI
24V 120mm fans are insane air destroyers
No pressure, no pressure
none at all
honestly none this one works for now 😆
and still need to find a filament I like
Oh good. I gave a case to a local friend and he had the same thing happen. I was like, "fuuuuck me". That's how I discovered basic PLA does not work well. 😦
Polymaker PLA Pro works well
Oh that's right, Polymaker doesn't make matte PETG. Hmm.
good news can bridge is now working

INSIDE A DAMN DOCKER CONTAINER!!!!
bad news nothing is connected to the board so there's that
@proud marsh stupid question heatsink on toolboard is for mcu or driver?
@sturdy drift FYI even canbus works inside containers
driver
I place it on the mcu thinking it was the driver, so I add one also on the driver
I was assuming driver but good to check
amazon now delivers on Sunday

not bad
more cables for Z
missing SSR, power connector and ground wiring should arrive Tuesday
I did that, too. Juuuuust to be safe.
I won't
thermistor on the toolboard working

disconnecting it makes klipper shutdownn so looks good
now on to actually test everyting through toolboard so I can recrimp in peace
well fuck it a few wires got messed up on disassembly
just rewire and move on
JST XH connectors? I hate them with a passion.
not exclusively

looking clean
no clue why slice thermistors are just one long wire, now I have to crimp it 😭
BTW notes on the THR36 connectors being small, fits 0.5mm² ferrules enough for around 11A at 24V thats a little over 250W enough even for a rapido toolboard stepper etc
not sure if I already said this but thank you @pale cloak for the iwiss recommendation
extruder heater and thermistor crimped and tested fans are next
debating myself whether to simply cut old connectors
or solder new wire
well endstops are not working with new wiring
Make sure you're using GND and the signal pin on the board, not the +5V. I nearly started a fire that way.
thr36 only has signal and gnd
i put 24v through my endstops, blew the tracing on the toolhead and breakout board.... when i do the next iteration update and new belts will chuck the new ones in
@pale cloak starting to feel your hatred of JST connectors
they were nearly broken
X and Y are good
Y homes
X does not
Wires pull free from the pins?
That's what gets me
Have you tested the endstops in Klipper to see if they're triggered or open?
is X on CAN?
could be
ideas welcome
try doing something else, like heating up the hotend.
has worked so far let me see
(something else on the toolhead)
Oh, check your pins! There are three pins for the endstop, too. Could be wired up to the wrong pin.
properly wired checked endstops
randomly homes correcly
toolboard doing nothing or heating same results
Intermittent short on the endstop wiring or CAN noise?
ill check the wire
If too much traffic goes over noisy CAN, maybe it's losing some of the traffic
I wonder if the motor wiring causes the noise
Got error -1 in can write: (105)No buffer space available
Got error -1 in can write: (105)No buffer space available
Got error -1 in can write: (105)No buffer space available
interesting
That's your CAN bus for sure
yep I know
That's the exact error I get on Big Bird.
but its way up in the logs
restarted and homed X only
nothing seems wrong
seems like can latency
need to summon the CAN god
@dapper latch that would be you correct?
What's your /etc/network/interfaces.d/can0 looks like?
config is done with netifrc on Gentoo so it's a little different
give me a sec
the relevant part is this
ip link set up can0 type can bitrate 500000
ifconfig can0 txqueuelen 128
bytes_retransmit and bytes_invalid are non zero, you should start with confirming your wiring is intact. That's your system in docker?
Try increasing txqueuelen, I use 1024 on all my builds
that seems to fix it
homed a few times without issue
I'll continue config if I find further issues I'll summon you again
thanks @dapper latch
👍🏽
well on to do the wiring for the fans+klicky and toolhead is ready
fans are now working
klicky too
all that needs to be connected to the toolboard is done
missing:
z motor
sexbolt (z endstop)
bed power and proper wiring for thermistor
and then ALL the microfits but thats after it's tested

wiring still needs some love
remaining components for hydra should arrive this week, all I need now is to make the feet taller and for that need to still fix the hotend issues
sexbolt connected will try to print with a cold bed 😬
need something quick and dirty to raise the feet 10mm
might design some basic things to put under the regular feet
and fix it later when I got a proper bed
otherwise just cut 4 pieces of wood do a small bore with a forstner, might be easier
yet printing with cold bed is q good test for heat creep
Communication timeout during homing probenot again
I clearly have canbus problems
should I try to twist the wires
@dapper latch any thoughts?
How do bytes_retransmit and bytes_invalid counters look like on your CAN bus MCU?
Definitely check your wiring and connections then
connections look good I have reviewed them must be wiring
might have to get specific wiring for this
I'm 6 hours into a print on the Mercury with 4 CAN devices and see 0 on both counters on all CAN MCUs. Anything accumulating and non-zero means issues
I don't use CAN specific wiring
other than swapping wiring I see no solution
Your crimps?
yes ferrules
U2C?
no, can transceiver on pico
Try reducing bitrate to 250K. Input shaper using the onboard accelerometer is overrated and unusable anyway

Also verify that the resistance between CAN H and CAN L is 120 ohms with the CAN transceiver disconnected from the mainboard
I will
117 on toolboard, 120 on transceiver
(117 with wire included)
I'll try to separate data wires from power and check if it makes a difference
following this: https://www.teamfdm.com/forums/topic/1524-debugging-canbus-and-communication-timeout-while-homingbytes_invalid/

Team FDM
CAN bus toolhead boards have a great benefit of reducing wiring but like many I ran into periodic issues with "Communication timeout while homing" errors as well as getting bytes_invalid increasing regularly in the secondary MCU stats. I've seen some strange advice related to these issues. As I w...
these have no errors

but bytes invalid are going up
@dapper latch did you do any manual twisting on your wiring?
twisted CANL and CANH errors still increase but its doing the mesh fine (would fail fast before)
why did I have to say anything just crapped its pants
but it did improve
time to twist the power ones as well
I also had/have this error. I think is wiring related, but it was popping out always at the same corner during z-tilt… it’s quite hard to debug as I can’t see any log nailing the culprit
but after z tilt it was fine, I might have had other errors due to can (once it stopped mid print because the canboard mcu was disconnected -wiring!-)
good tip, I'll run a full mesh a few times and see if its on a specific spot
but this was definitely the recurring every time the printer started on
@proud marsh how did you end up fixing it
I am in process of re-re-re-rewire the canbus network, let’s see if it improves with a proper cable. it did good with loosely twisted silicon wires so far
strange to say but it comes and go. it improved once I installed the enclosure
time to re-twist
i think it doesn’t like at all when the connection on the thr slightly moves, so I need to take a careful rethink at the strain relief on the 4 wires
time to play with speed
going down to 250k
having a disk being rebuilt on the server may not be helping at all
Mine are all tightly twisted, both data and power, FWIW
250k actually makes it workse
I wonder if 1M will improve
this is not helping

not too tight but both pairs are twisted
routed differently to ensure its not interference
feeling tempted to run both boards on USB
testing 1M homes without issue
0 invalid 0 retransmit

goes against all advice found
did a full bed mesh with 0 errors
@proud marsh you might want to try that
I am at 1M 😎

don't ask.me
all I know is 250k doesn't even home, 500k homes but fails probing, 1m works without errors
time to put the wire in place
lost my good heatshrink though
printing but cold bed is not helping
petg doesn't want to stick
textured PEI sticks, melted toolboard spacers because the damn think got clogged again
makeshift spacers incoming, 2 40mm m3 screws with heat inserts as filler
Thinking should I try to see if the hotend has issues or simply swap it for the spare and attempt fixing if it's really the problem later
give the spare a chance to shine!
Last spare was sold before being needed
Screw it spare will go in, hopefully today not even the CHT will be used
With some luck that's the issue and I can move forward
[tmc2209 extruder]
uart_pin: gpio9
tx_pin: gpio8
uart_address: 3
run_current: 0.30
stealthchop_threshold: 0
Shit...
No wonder the extruder was hot
@proud marsh thr has 2208 or 2209?
2209
schematic shows 2209
[tmc2208 extruder]
uart_pin: thr36:gpio6
interpolate: True
run_current: 0.56 #0.35```Only way to be sure is remove the heatsink, I sort of remember reading 2209
Not sure if it makes much of a difference
I think I copy pasted from their github
So did I, config says 08 schematic 09
or it’s leftover from older config
I'll try with 09
it should be written on the chip
I know, but don't want to remove heatsink as I don't have spare adhesive
same 😂
But I sort of remember reading 2209 on the chip, problem is that thing is small and my eyes are crap
I know, should have read it without glasses, in uber magnifying mode
The only way I can read it is without glasses and still not easy my eyes are getting fucked up even for close stuff
Damn you age
maybe I have a picture
I'll trust it's 2209 current is within limits of both as well as all other parameters
aand extruder motor is dead
TMC 'extruder' reports error: DRV_STATUS: 000900a0 s2vsb=1(ShortToSupply_B!) olb=1(OpenLoad_B!) cs_actual=9
most likely killed by the heatup yesterday
or it was already dying
well monday I print more, until then work on hydra and other connectors
I'm guessing, of course, but this seems the most probable explanation for your extruder issues.
paid 33 eur for a moons one from amazon
would be 20 something on ali but I don't want to wait
Seems a fair trade. Moons steppers are super expensive here, actually.
You can get them on amazon, but it takes weeks.
Huh, I guess that's only true for their NEMA 17 steppers. FYSETC resells their NEMA14 for 25$.
last parts for hydra arrived
last photo of the stock bed

Bye bye stock bed

now I understand what you said about frame imperfections @proud marsh
and I only assembled the bottom motor mounts
should be fun when I start homing
There is some people that had to modify the parts because the 2020 extrusion was twisted 😅… but the mesh will tell you how bad your frame it is
or how good… right?
RIP lower front piece

Oh shit
it looks quite cozy in there
half of me goes inside that frame/enclosure to work on the back arm
it gets hot

motors are in place along with leadscrews
photo later
now on to figure out how to add the fuse

heh figuring out the fuse now
ok faston and some heatshrink

plans for today, add creality board to box, do basic power wiring, motor wiring, configure for hydra
looka like bed holes are not exactly the right place sucks but still gained print area and for sure better heating
z is homing, klicky docking again
remains to do z tilt
some wiring for the bed is done will finish later, new frame will be ordered soon
is one off in particular? or all 3?
it sucks, wasn’t the bed sold as “hydra bed”?
yes but it was advertised as fermio bed, I didn't do the full research
still I saved a ton of money
quick and dirty

still needs work but may print something like this to hold the bed in the right place
just need PC-CF
and a working printer
or pay someone to print it

and this one is too damn high

don’t you have some spacers on the bed?
on top of the minitanks

my offset is around 2.6mm

mine too is above the bed
ha but it will hit when printing
never happened yet
yes, I’m using that
somehow his is below
I'll print with an ultra short Y
or find more spacers to add
I wonder if m5 shims work
I had zero issues with mine being above the bed
my klicky magnets pull it up
yes, that happens 😅
and if I lower the nozzle it triggers
I'll shim it
I don't like it above
I can shim just that side
make sure the trihorn doesn’t touch the bed before the nozzle homes
it won't
I'll shim it to be near 0
might get 10mm spacers
but you do have a point
if you have m4 shims, it might just work, instead of new spacers
I don't just m5 1mm
and I don't remember why I got them
rack msybe
no too thick
upgrade to 1.1.5?
I know how it is
also have the rack needed ones in the cart
anassed 110e more of material
oldhams
another pico
more HSI
I didn’t shim anything. I have 1 printed spacer leftover, and I don’t know where it goes… I hope it’s an alternative for 9mm belt 😅
the oldhams are not neccessary
additionally, there is the wobbleX mod that might be better than oldhams
still debating with myself if I should spend the 33e
doesn't wobble x require a specific arm?
and maybe there are 3d printed wobblex that works ok
there a mod in the community mkd
but yes, it’s a lot of filament to “waste” since you already have legs
yeah requires new hydra parts
I want to keep the PCCF
even though they're older ones
I would get the oldhams if you see you need them. I got mine for 18€ all the 3
so I just grabbed the deal
yes, and I am not sure the fix a problem I have
goes down to 78
I have to make some tower test… not in my priority list atm
wait, are you ordering a new frame? 🫠
doesn’t feel a lot 78€
oh that's not including frame
ahhh
cuts no holes+plates+screws+nuts+feet

78 is for a lot of stuff but includes pico switch iec socket etc
then 40 for psu
ah right, you need to sell the original creality board
yep
i applaud the effort on embarking on the roll back to stock creality. I am disheartened only thing about it
it's a journey
I'll also be upgrading my frame to be 2040 on the bottom
this along with feet fixes my issue of the z motora
i think that it's noticeable that the z motor location is a little off

need to set those better
looks flat

it’s pretty flat!!
Beautiful.
the omnibox wiring is not so beautiful
need to do all the microfits
also need to decide where pi. to put the enclosure thermistor
where do you source the microfit 3 stuff? I can’t find any kit, just sparse connectors type, and at unreasonable prices
You should see the horror I'm working on right now for someone else. It's a secondhand 0.9.8 case and it's bright yellow. 😆
AliExpress or DigiKey
not sure if y'all have digikey over there
a guy I know ordered them through the company where he works
they were not cheap
we also have mauser.pt
Hey, they're headquartered about 1.5hrs from here.
lol, I thought that was Mouser, which is a similar company in the U.S.
Yeah, went to the link and went ohhhh
farnell might have did not check, mouser may have as well
AliExpress knockoffs are decent quality but, looking back, I'd order the real thing again. Mates better (or at least better than the ones I bought)
we have digikey and mouser here lol i ordered some ssr's for the dishwasher for $10 instead of buying them from miele soldered to a board for $200 and they got here in like 2-3 days from hawaii
SSR cost me 15
not the same one lol small ones
and still cheaper through the other guy
otherwise cheapest I could find was 25 IIRC
these are tiny amp ones, ssr for the bed here is like $45 😦
thats $45au so like 22 euro
Exchange rates make me chuckle. Everything sounds too cheap or too expensive.
ahh AUD
AUD is meant to be climbing at the moment, last time it got close to being 1:1 with USD the GFC happened lol
GFC?
global finacial crisis
ah


Your X looks amazing. Y definitely has problems.
most likely belt tension
let me run the stuff for belt tension

one of them is clearly off
Interesting graph. I'm guessing it's your upper belt.
are you going to do blind joints?
no same way as stock with corner plates everywhere I can
aka all corners except top ones (gantry) and bottom front (motors)
so 18 plates total
90 screws
as long as I get it square should be fine
bottom will be 2040 instead of 2020
mine is out of square, I measured around 2~3mm difference. there is little I can do about it, unless I want to tear it down and cut precisely the extrusions
which I don’t have the tools
I think its the x that is not properly placed on the X joints
still working on wiring the omnibox

how much power does the silicone pad have?
mine is fast to heat up, but it needs time to soak and heat-expand evenly
300W
still need to test that
next up swap the extruder motor for the new one
tune the amps and run a test print
if all goes well I'll print the SSR support some wago ones and start properly organizing wiring
@tired pike
Update on checklist:
Fix the clog/whatever it is issue (fully disassemble hotend clean and test)
Add toolboard to reduce amount of wiring ✅
Move electronics into OmniBox ✅
Add exhaust fan to enclosure 🕐
Eventually reprint some omnibox parts as this PLA one is breaking
Print more braces for the frame ❌ (new frame with plates so might not need these)
Hydra (will use old creality board for Z motors) ✅
Upgrade to 1.1.5 and change colour
replace dead extruder motor
Reprint temporary spacers
Print new omnibox tray for dual pico
Print new purge bucket
Print SSR mount
Print PETG PSU mounts
Crimp all remaining microfits
Test black or white led attachment (frame mount or enclosure)
This never ends
Almost all done!😅


Stock in August...
you can buy another 12V and connect them in serie 😂
Wouldn't fit in the case, unfortunately
don't give me ideas
Giving you ideas always ends up with me buying more HSI. I'm not sure how that works, but it does. 😉
you can make 2 onmibox 1 psu each, 1 mcu each... right 🤔
just need to connect in serie the psu first
oh dear
need more filament
need to go back to the old one fast
a lot to print
btw after swapping motors does it even make sense to recalibrate e steps?
maybe.. in theory you should every time you change somethign in the extruder.... I never did it again 😅
I mean still 10 toothed gear
(can adjust just ratio so)
I see no reason to
just wondering
after various calibration I ended up with the exact same number as in the sherpa mini recommendation, so I think you are fine with the old value tbh
RIP hotend
Whole thing? I bent a revo nozzle with some bad g-code, that was an expensive mistake lol it ended up killing my revo heater core slowly after too.
most likely not
throat clogged
possible heat creep
or bad filament removal
disassembling
I need to swap some screws anyway
been holding that up for a while
(months)
unstuck not replacing screws yet

Explains the layers not looking stuck properly
@gleaming whale lead screw is 2mm 4 threads
Should be 8 but I might have screwed it with the 32 microsteps
Nah micro steps is just how much it splits the full steps
I wonder if I got the wrong pitch
Might just measure how much it moves
And compare
If it’s double the height just halve your rotation distance
I did not measure the part but looks like it
For example, the common "T8 leadscrew" has a rotation distance of 8 (it has a pitch of 2mm and has 4 separate threads)
That’s from klipper’s site, but measuring how much it moves compared to what you ask it to move will sort it out to what you need.
Mine didn’t change when I changed mine?
ohhh
damn you creality board
until the second pico arrives I cant really test that theory
but should be it
printing fine now, except the warp, might be dirty bed

small issues, filament temp too low for the speed I was printing

and now it got stuck again
WAT
that's it I'm swapping the hotend
@proud marsh does your crazy handle the enclosure well?
I've got a friend with a Crazy NF in an enclosure. It works well for him.
I still have a very leaky enclosure and I have parked the nf crazy to go back to the rapido (bambu hotend clone arriving maybe in the next few days…)
I am really curious to see how it performs… rapido vs nf crazy vs bambu clone on eva 2.4. I’ll do a proper comparison when the printer is properly enclosed
might because I insist on having it closed
without fan
do you have a good fan on the heatsink?
I already ask this I think 🤔
That'll do it. Too much bowden?
1m 3mm ID
just the way it comes out from the drybox
It was the oposite of what should
going fine now
also had an epiphany on the IS for my Y axis
the melted standoffs 🤦
Looks a bit better

I had to increase the cooling to reduce the warping in the enclosure
What filament is it?
PETG
ahh, right
Always printed fine before enclosure 😅
I was thinking of asa, maybe 100% than
Yea pass lol I haven’t figured out petg for my printer yet
New checklist
Fix the clog/whatever it is issue (fully disassemble hotend clean and test) ✅
Add exhaust fan to enclosure 🕐
Eventually reprint some omnibox parts as this PLA one is breaking
Upgrade to 1.1.5 and change colour
replace dead extruder motor ✅
Reprint temporary spacers ✅
Print new omnibox tray for dual pico (printing) ✅
Print new purge bucket (printed needs shorter mounts) 🕙
Print SSR mount
Print PETG PSU mounts
Crimp all remaining microfits
Test black or white led attachment (frame mount or enclosure)
it's getting shorter
IT'S GETTING STUCK AGAIN, NEW HOTEND NOW!
new hotend old CHT
instant clog
so may have found the culprit
trying a print now
without CHT
Hopefully you’ll receive some clean filament soon 😕
cleaner thingn
I hope not today
I should have sent it with the tracking 🫤
no worries
🤮

yes


The top surfaces that aren't at the very top of the print look okay. That's weird.
last layers look like they didn't print
I hate to say it, but that could be that it's having a hard time pulling filament.
that's what I was going to say


it's inside the enclosure
need to test with 2mm ID vs 3mmID
or change ingress location, enclosure is a little on the short aide
that shows on the can wiring
not loving the idea of making a new one
where?
even manually it's a little hard to pull the filament out of the box
definitely need a shorter path
don't really know how
I wonder if direct without bowden to the enclosure ingress is better
but I'll have issues with the rack in the future
@proud marsh how is that flexible one working
i deleted the gif. it was dumb.
is working ok, but I haven’t tested it that much. until now it has been flawless
a quick print also
might try it out
stuck again
I'm getting crazy with this
it's not something consistent
it can print for hours fine or it gets stuck
might take it out of the enclosure to test
new frame might arrive tomorrow since I'll be moving it might do it
something dumb I am plagued by, knots or tangles in the spool?
maybe you can try to prin without any reverse Bowden, I went crazy for weeks, and it turn out it was that
I also had/have very bad top surfaces at times, very uneven, it’s when the part warp slightly (maybe not even noticeable at first) and the nozzle gets too close to the part
that also results in a risk of clogs
no tangles
I'll remove as much bowden as I can
when I swap the frame
no enclosure
nothing
if it returns to normal printing add enclosure with same bowden only
yes, too many variables have changed since before enclosure.
exactly, I need to start from the basics
printing SSR tray open door now
we'll see
SSR skipped one layer
but otherwise good
also mounting the 120mm fan on the enclosure to try and control temperature better
@pale cloak where are you mounting the enclosure thermistor?
I try to keep it elevated near nozzle height but away from the bed. It's usually near the back frame.
Not near the metal, either


testing now with this, manually pulls a lot better

@wary forum here's the BOM for my frame
That new frame looks great.


Wago Lever [Things We Don't Say Here]
say that word and I will kick you in it
but damn feels good to finally print full speed with 0 issues again
a lot of HSI to put in place after
Sounds like a relaxing Friday evening for you, lol

one support for the purge bucket
another printing
a lot to assemble this weekend
frame swap bucket more omnibox parts
more wiring
 UPDATE
Add exhaust fan to enclosure 🕐 (needs wiring)
Eventually reprint some omnibox parts as this PLA one is breaking
Upgrade to 1.1.5 and change colour
Print new purge bucket (printed needs shorter mounts) ✅
Print SSR mount ✅
Print PETG PSU mounts ✅
Crimp all remaining microfits
Test black or white led attachment (frame mount or enclosure)
Swap frame
Mount all the new stuff (omnibox and bucket)
PID Tune ✅
Calibrate IS
One more item, add an automation to Home Assistant if the Hotend goes above 300C or the bed above 115 kill printer power
Also printed these to test fit on the bed, if these work well I'll get them in PC-CF

if PC-CF fails me I'll go with HT PA15-CF
PETG will melt for sure with bed at 70 😅
BUT PETG IS GOOD FOR ANYTHING
until I start printing ABS and ASA 😅
well automation is done

YET ANOTHER UPDATE
Eventually reprint some omnibox parts as this PLA one is breaking
Add exhaust fan to enclosure 🕐 (needs wiring)
Upgrade to 1.1.5 and change colour
Crimp all remaining microfits
Test black or white led attachment (frame mount or enclosure)
Swap frame
Mount all the new stuff (omnibox and bucket)
Calibrate IS
Get yet another new extruder motor
Preliminary test fit of bed brackets to move into proper position
Looks like you got a bit done from last time, though
mostly cleanup the list and add the extruder.motor again
could have an LED mount printed but the damn motor bork
Damn Swedish motors.
That was a joke about "bork"
It was terrible, even by my standards.
I remain proud of it.
I didn't get it 😅
it’s from the muppets show 😂

Test fit of the bed adjustment pieces


needs a small trim on the RTV proper screws and HSI
which are on the way
Looks like it's going to work very well.
feels solid even with m3 screws where it should be m4 and nuts instead of the hsi
I'll just produce the correct step files and send them away to the guy to print
I'll be losing extra 10mm on the Z
but it's worth the gain in XY
+1 for upping txqueuelen to 1024 - that fixed one or two issues I was having (was using 128 previoiusly).
@pale cloak these
because voron bed
What did you end up getting the part made from?
PC-CF found a guy here in Portugal
Oh that's right. He was really affordable.
My brain is a little off today. Woke up like five times last night.
like 3eur
new frame back into the box

with the PETG bed fixtures/thingies/need a name for them
VB4H?
also decided to weigh it, 28kg
feels a little shaky not sure if its due to the feet or if something is off square due to moving it
with the enclosure ?
without
wow!
stock ender 5 is ~11kg
and no electronics other than motors hotend etc
(basically does not include what is inside the omnibox)
imagine with the PSU MCU etc added
maybe you’ve got quality extrusion instead
I'd say omnibox as it is is around 2kg
frame alone was 12kg IIRC
don't forget I got 2040 for bottom
hoping to get new PSU second pico etc by the end of the week
yes, but it’s twice as much.. ok the bed alone might weight 5~6 kg
new extruder motor only friday 😭
but maybe you’ll also get the standoff
That's part of it. I wonder how much are the corner brackets + screws + t nuts?
they came in a separate box so I might have the weight
I hope
ahh, those are heavy, I got a bag with 12 of those was impressively heavy, felt like ~2kg or so
whole bed package was around 4.5kg
also the steel rails are heavier than the roller carriage
that alone makes 16.5kg
so everything adds up
Ohhh, yeah, the bed
you have 6 rails in there
Dang, we really strap a lot of weight on these.
we should all get a gantry like @gritty summit
I was just about to mention that! Insane.
but gantry doesnt weight 10kg
I'll need to check the scale again
something wrong

find the mistake
6kg of fasteners?
Oh
🤦
math doesn't add up again but
12kg worth of frame 4 of bed
minus packaging weight+gantry
damn I'm an idiot
frame - 3.8
nuts bolts and corner plates - 1.1
weird the tracking mentioned 12kg
good news is pico arrives oh the 29th
motor friday, PSU still unknown but I'm willing to bet that by the end of the week I'll have 2 printers
gah can't find the stock part cooling fan
look a near stock e5pro

have you lost a corner bracket?
mod
you need to print other 3 of those… you can print it with the new ender 5, 6 hours print each
hell no, whatever I print for this one it's on the merc
this one will only print a calibration cube and then it's boxed and shipped
too dann slow
you were quite fast in putting it back together
I was surprised as well
I think it will take more time to tune Marlin for it
(yeah the guy buying wants to start from there)
and those stock stepper driver… well.. I forgot but I remember I bought a skr mini within the first week because of the noise
this board actually has 2209 but in standalone mode
creality 4.2.2
sucks because of stealthchop not being possible to disable
I wonder how many corners creality managed to cut… and if it was worth at the end
probably it was
@formal marsh I got a sktr pico as well... over can 😄
my second one arrives today
reading the specs it's better than the skr e3 mini
but I'll connect it with usb
well, it looks like it's easy to wire up... what the type of connectors on the sides? normal jst?
they look like it... but you never know 😄 those


have you considered wire it also over can? I think once you have the network you can leverage on that instead of dealing with usb cables
yes, I was just thinking it might give you more freedom, usb cables are bulky
yes I get it 😄
I wouldn't think twice if I didn't have the hub 😆
transceiver is less volume than hub
super pissed about having to get one, but I'm also looking forward to get it
well, it's a pro and a cons
less volume which the name implies
a driver dies, no swap
unless you know someone who can solder a new one
I may know actually 😅
I remove and ball soldered a new video card chip in my laptop once, it can't be harder than that, right?
that is the process
heatgun, loooooots of flux
but than... I think you can have this board for cheap, I would just buy another 😅
I hate throwing stuff away
so might ask the guy who's been providing me with electronics stuff
yeah, I have a pile of semi-broken stuff I keep trying to use, than breaking other stuff while doing so...
I finally threw a crap ton of electronics away a few years ago. Yes, I'll need to buy a new UPS now instead of a new battery, but it takes up soooo much less space!
APC 1500VA minimum
That's what all of my desktops are on
750VA is surprisingly enough for a 350W printer
I got, home server, printer, routers etc on one
750 is short with a 230V bed
glad I got a big one
first time I powered the printer with the new bed shelly killed it on warmup
My mom's CPAP will be on one by Friday. Had a scare where the power went out and she still had it on.
PSU was eating 200 bed another 300
shelly had a limit of 400 had to raise that guy to 600 or so
scary
Yeah 😕


They are FUN
I'll need a new back plate on my omnibox, another 4pin for these babies
this will be a nice SCS
Measure the fan thoroughly and compare it features with the model. Those fans have slightly different measurements and characteristics - unless you use exactly the same fans as the maker (assume you use djsplice’s model?)
that is the plan, thanks for the heads up
NP. Had fitment issues with both Gdstime and with Delta fans, each had a different problem and I had to barbarically modify it with a dremel (couldn’t justify a reprint and didn’t want to bother djsplice more than the one time I already had 😬)