#EVA 3 Mercury Mod
1 messages · Page 12 of 1
 still bluff
On the site, there are ducts that do and do not use HSI for Beacon.
I have no idea, just taking an educated guess 😉
 dusky depot
whats hsi ?
still bluff
Heat set insert
dusky depot
oh thx
 velvet wing
dusky depot
oh thx
velvet wing
dusky depot
oh thx
were you able to get it working?
dusky depot
yeah
trying to find the offsets now and z tilt positions for the 375
cant find the probe offset on y axis.. i believe the x axis is 0 ?
what offset did you put to make that beacon probe fit the mesh ?
velvet wing
dusky depot
cant find the probe offset on y axis.. i believe the x axis is 0 ?
x is 0. For Y axis, 40.15
the docs haven't been updated to reflect the Y axis position for Beacon Rev H. It's 6.15mm more than the original, for the record.
still bluff
@velvet wing should this STL be added to the repo for Beacon Rev H or will your current STLs work? #1041406799342997544 message
velvet wing
still bluff
<@755022853040111697> should this STL be added to the repo for Beacon Rev H or w...
It's been tested and needs to be added. @cursive obsidian was modding up the others, but I think he's busy. I'll get a Kraken STL out and get them both uploaded.
ummm...looks like I've got versions of both already.
velvet wing
Done.
 velvet wing
looks good
dusky depot
the beacon attachment for the probe was wrong. i couldnt find the right duct
until you guys helped me so i really appreciate it
velvet wing
dusky depot
you might do a print and see if the beacon properly compensates for those bumps or if they're an artifact. some build plates have magnetic anomolies from how they're formed.
(i.e., the beacon sees rolling bumps that are not there)
dusky depot
everything workd but i have now a 377 x 359 bed.. as the beacon hits the cable chain for the z axis otherwise
still bluff
dusky depot
everything workd but i have now a 377 x 359 bed.. as the beacon hits the cable c...
Look into ways of making it stiff.
dusky depot
i dont understand ?
anywhow im very happy so far, never seen a first layer that good on my printer since the day i have it
i have to say i went from bl touch to beacon tho ahhahhah
still bluff
dusky depot
i dont understand ?
You're not using an umbilical?
still bluff
So a horizontal set of wires?
velvet wing
@dusky depot an umbilical is where the wires go to the toolhead in a free-hanging bundle. The other option is cable chain, but it doesn't sound like you have that.
Below is an example umbilical.


 stable viper
That’s on one of the cast aluminum beds?
Oh nvm I just can’t read as usual
Idk why I’ve been thinking all the beds are within .015 not .15
I think it might have been a unit thing :>
dusky depot
i dont think the bed is crooked.. i think that the magnet under it and the pei are not perfect but the mic6 10mm is perfect that i am 100% sure its basicly machine tool aluminium that is surface grinded
 fervent grove
Or the steel plate the pei is on is a bit shit
velvet wing
stable viper
Idk why I’ve been thinking all the beds are within .015 not .15
0.015mm is at the limits of our ability to measure, but AIUI ATP5 and MIC6 can be 0.1 or better.
fervent grove
People forget it's a combination of, just an expensive flat mic6 bed doesn't get you a perfectly flat print surface. A quality magnet and print plate are also needed and
velvet wing
And Beacon is also way more precise and detailed than we're used to. It's like going to 4k from 640x480.
fervent grove
Oh for sure
stable viper
Understood understood :>>> thanks guys! Maybe a dumb question but how wildly can surface finishes vary between textured PEI? Or whatever surface you’re using?
fervent grove
Depends how big and coarse the pei stuff is. See it has sandpaper
I'm starting to prefer those satin pei plates now
It's more of a smooth surface
Textured kinda masks shit first layers 🤭
velvet wing
fervent grove
Textured kinda masks shit first layers 🤭
i feel attacked 😆
I "only" use textured because ABS sticks better. cough
fervent grove
Haha it's all good
I've been quite happy with Satin pei
Asa and abs sticks very well for me in a heated chamber
velvet wing
I might pick up some next Fabreeko order, then. I like the textured experience but not the finish.
fervent grove
This is ASA-CF though

 latent pollen
dusky depot
latent pollen
dusky depot
Those hills are your bolts in your rail
velvet wing
is that an artifact of the beacon detecting them?
stable viper
I don’t 100% know how beacon works but shouldn’t they ig go away as it gets further away from either side?
dusky depot
What do you suggest me doing 🙂 ? Are they the bolts on y axis ?
still bluff
@latent pollen ^^^
latent pollen
dusky depot
What do you suggest me doing 🙂 ? Are they the bolts on y axis ?
they are, that's why you see them on X as well
but not much you can do
it's just accurate and able to find it XD
dusky depot
Oh ok thx 🙂 so is it a good bex mesh then ?
velvet wing
I'm gonna guess yes. Best guess would be do a nice, flat print and see how the first layer turns
velvet wing
Couple of general questions:
- Orbiter 2 drive: anyone using the new version with lock washers?
- Beacon RevH: anyone using the Kraken mount?
 fringe zephyr
velvet wing
Couple of general questions:
- Orbiter 2 drive: anyone using the new version wit...
fringe zephyr
velvet wing
Couple of general questions:
- Orbiter 2 drive: anyone using the new version wit...
beacon with kraken maybe after new announced release
 compact compass
Might do a kraken for the lulz
 cursive obsidian
I wasn't active for some time here. I tried to go through the messages but if I missed some please remind me.
Anyway @velvet wing here is the PR for universal (RevD RevH) beacon horns https://github.com/jon-harper/E34M1/pull/36. I tried adding everything for you to merge (printer oriented .stl, .step). I am not sure if some newer versions of affected horns have changed (stock and kraken namely) in the meantime (as of #1041406799342997544 message). Feel free to comment in PR or here.
The Kraken horns I have tested myself (at least on D). The stock (H) were tested earlier AFAIK (#1041406799342997544 message). In CAD everything looks OK.
Didn't do UHF as I didn't do original either. I could look at it later too.
GitHub
GitHub is where people build software. More than 100 million people use GitHub to discover, fork, and contribute to over 420 million projects.



Discord
Discord is the easiest way to communicate over voice, video, and text. Chat, hang out, and stay close with your friends and communities.
Discord
Discord is the easiest way to communicate over voice, video, and text. Chat, hang out, and stay close with your friends and communities.
Oh cool just with SW upgrade adding something like TAP for existing Beacon owners ... https://www.youtube.com/watch?v=Zdp6iVPhsWc 

Your Beacon is now more powerful than ever: www.beacon3d.com
 onyx yacht
velvet wing
Couple of general questions:
- Orbiter 2 drive: anyone using the new version wit...
onyx yacht
velvet wing
Couple of general questions:
- Orbiter 2 drive: anyone using the new version wit...
I'm using RevH with UHF Kraken
 forest shore
Any solid EVA options for Bambu hotends + bltouch? Every BL mount I've tried is too low and the probe retracted is below the nozzle.
@bleak stratus
still bluff
forest shore
Any solid EVA options for Bambu hotends + bltouch? Every BL mount I've tried is ...
Might be better off replacing the BL Touch.
forest shore
still bluff
Might be better off replacing the BL Touch.
Not out of the question. What's the next best option? I see lots of beacon work as of late.
still bluff
forest shore
Not out of the question. What's the next best option? I see lots of beacon work ...
Klicky/Beacon are solid.
forest shore
still bluff
Klicky/Beacon are solid.
Was planning on unklicky but wasn't sure about the servo setup on a standard e5pro
cursive obsidian
PCB Klicky is good inexpensive option and provides stable results. I am using Beacon due to the fact my bed is so big. Whole meshing operation with everything else takes sweet time to complete.
 nova garden
@forest shore I am about to do the same with a BL Hotend, which mount did you use? I have both BLTouch and Klicky as options so I am keen to follow...
fringe zephyr
forest shore
Was planning on unklicky but wasn't sure about the servo setup on a standard e5p...
unklicky user here, happy with it. No servo needed
forest shore
fringe zephyr
unklicky user here, happy with it. No servo needed
You're right, no servo. What was I thinking lol 🤦♂️
 willow turtle
Is there a combination of Dragon Ace Hotel module and air product for Beacon rav H? It doesn't fit with anything right now...
velvet wing
willow turtle
Is there a combination of Dragon Ace Hotel module and air product for Beacon rav...
the dragon ace advertising mentions it's shorter than the original dragon, which is why you're seeing issues.
hotend mounts put the nozzle at one of two heights. if the nozzle is higher, you get collisions with the beacon, like here.
 umbral wave
 meager sorrel
Anyone got a source or the ability to mount a new btt eddy to the eva 3 zero g mod?
 wide turtle
it has the same form factor as the original voron inductive probe
so I dont think so
You could always get a beacon which is more compact, compatible and you would also support the original creators
velvet wing
meager sorrel
Anyone got a source or the ability to mount a new btt eddy to the eva 3 zero g m...
as zeanon said, it's the same shape as the tap probe. the only way you'd be able to mount it would be on the ABL arm, which is less than ideal.
 spring scaffold
Aye, I have it mounted on a modded ABL arm atm as close to nozzle as possible on my eva 2.4, but still is off to the side a bit
 deft monolith
I think the docs are outdated on the orbiter 2.0 or my orbiter mount is from testing because it has fewer screw holes than the docs
velvet wing
deft monolith
I think the docs are outdated on the orbiter 2.0 or my orbiter mount is from tes...
the picture is outdated, which means I probably need to correct the BOM, too. that's an updated version of the mount.
yep, it's 2x 8mm, 2x 12mm now
deft monolith
velvet wing
yep, it's 2x 8mm, 2x 12mm now
I figure the 2x12mm in the back and the 2x 8mm in the front?
 obtuse orchid
Hey. I will start with the EVA 3 Toolhead for my Ender 5 Plus to Mercury Projekt. The problem is i would like use the Creality Sprite SE Extruder and the Creality Spider SPeedy Hotend.
The Extruder is no problem. But i cant find a Modul for the Spider Speedy Hotend. Is the a finished Modell?
The Spider Speedy Is identical in terms of dimensions how the stock hotend+
 deft monolith
Somehow the beacon doesnt fit (RevH) (Kraken Beacon Version)
deft monolith
deft monolith
Somehow the beacon doesnt fit (RevH) (Kraken Beacon Version)
I have the right parts, it just does not align. Its like the beacon is too small?!
velvet wing
obtuse orchid
Hey. I will start with the EVA 3 Toolhead for my Ender 5 Plus to Mercury Projekt...
I don't know of any support for that hotend. You may have luck if you find an Mk8 or Microswiss All-Metal Hotend mount. Try Printables.
obtuse orchid
velvet wing
I don't know of any support for that hotend. You may have luck if you find an Mk...
mhh okay. Is there a stock hotend support?
velvet wing
obtuse orchid
mhh okay. Is there a stock hotend support?
not that I am aware of
the stock hotend is called the Mk8, FWIW
velvet wing
deft monolith
I have the right parts, it just does not align. Its like the beacon is too small...
There is a pending pull request with a version that cuiviemen developed, but I haven't had a chance to doc edits necessary for the merge. Let me get the info you need and a link.
obtuse orchid
mhhh okay then i search a little bit or mod one of the finished moduls. Any idea which of these comes closest to the stock hotend?
velvet wing
obtuse orchid
mhhh okay then i search a little bit or mod one of the finished moduls. Any idea...
try the Dragonfly BMS. You might be able to just move the screw holes up or down a little to get the nozzle at the right height.
@deft monolith https://github.com/cuiviemen/E34M1/blob/main/STL/bottom/kraken_beacon.stl
Y Offset is 43.65mm
The FHCS for the rear inlet needs to be no longer than 5mm to avoid interfering with the Beacon sensor (the BOM specifies 6mm currently).
File is in print orientation. Install only the rear pair of heat set inserts.
GitHub
EVA 3 modified for the Mercury One.1 3D printer. Contribute to cuiviemen/E34M1 development by creating an account on GitHub.
deft monolith
velvet wing
<@962664512358613012> https://github.com/cuiviemen/E34M1/blob/main/STL/bottom/kr...
So THATS what is meant with rear screws... maaann i need to print that first. And also find a m3 5mm. Or is one included in the beacon kit? Also the fhcs nut cover didnt work for me, it wouldnt stick 😦
velvet wing
deft monolith
So THATS what is meant with rear screws... maaann i need to print that first. An...
an M3x5mm is not included with beacon. the ones included with beacon you'll need to attach it to the bottom horns, but it doesn't include more than that.
cursive obsidian
With Beacon you get two flat (or low profile button?) head M3 screws that are to be used with heatsets to mount the D or H Beacon accordingly (revH postion shown in SS). In the SS I highlighted the (optional) Countersunk screw ISO 10642/DIN 7991 M3x5 screw that secures the back with bottom to make sealed assembly. And this screw is not included - to be sourced from any decent HW store.
 cursive obsidian
deft monolith
So THATS what is meant with rear screws... maaann i need to print that first. An...
cursive obsidian
deft monolith
So THATS what is meant with rear screws... maaann i need to print that first. An...
Hope this  clears the confusion.
wide turtle
deft monolith
So THATS what is meant with rear screws... maaann i need to print that first. An...
btw, the screw cover goes onto the back countersunk screw, to provide insulation to the beacon connector
cursive obsidian
Oh yea I did https://github.com/jon-harper/E34M1/blob/main/STL/rear/screw_cap.stl to stick it in the hex of that Countersunk screw so the pins on beacon will in no way touch that screw and potentially short them out.


GitHub
EVA 3 modified for the Mercury One.1 3D printer. Contribute to jon-harper/E34M1 development by creating an account on GitHub.
deft monolith
Can i print the bottom horns in PLA or PETG for testing? Just to try it once ;-;
velvet wing
deft monolith
Can i print the bottom horns in PLA or PETG for testing? Just to try it once ;-;
sure, just don't print with those on. 🙂
wide turtle
velvet wing
sure, just don't print with those on. 🙂
I mean one print is probably gonna be fine🤔
velvet wing
wide turtle
I mean one print is probably gonna be fine🤔
Depends on your bed temperature 😄
cursive obsidian
deft monolith
Can i print the bottom horns in PLA or PETG for testing? Just to try it once ;-;
PETG will last couple of hours (about 3-4h) even near the HE with sillicone sock (and in enclosure with ~50°C). But I'd reprint them immediatelly in ABS/ASA when able. I did it this way when I was printing my first Merc 2.0.
 peak quail
@velvet wing with the fysetc alumnium sherpa mini, there is a small gap in between the motor and the support. is this on purpose?
 velvet wing
peak quail
<@755022853040111697> with the fysetc alumnium sherpa mini, there is a small gap...
velvet wing
peak quail
<@755022853040111697> with the fysetc alumnium sherpa mini, there is a small gap...
yeah, it kinda works out that way with my sherpa mini, too. The support is not meant to make direct contact with the motor unless you zip tie it down.
and even then, it's a hack to work around not having the k-type front
deft monolith
cursive obsidian
Oh yea I did https://github.com/jon-harper/E34M1/blob/main/STL/rear/screw_cap.st...
what i dont understand is how this sticks? My caps fall out, they dont stay
velvet wing
deft monolith
what i dont understand is how this sticks? My caps fall out, they dont stay
the cap is an extra step for safety in case the screw backs out. you should be fine if the flat head cap screw is tight.
velvet wing
Thanks to @cursive obsidian we have full Beacon RevH support. Documentation is updated and the pull request finally merged. 😄
 night imp
Heck yeah. Thanks @velvet wing and @cursive obsidian
Just in time before I'll start my assembling process
cursive obsidian
deft monolith
what i dont understand is how this sticks? My caps fall out, they dont stay
It should stick into the inner hex if you have ISO 10642/DIN 7991 M3 - it is designed against this type of screw. And with mine it does. You can measure the dimension of two hex edges, should be 2mm.
The screw cap has peg that should stick tight into the hex holding the cap in place/covering the screw head.

The diameter of the peg is 2.4mm (I just checked the stl) so it is tight fit.
cursive obsidian
velvet wing
Thanks to <@210526068749238274> we have full Beacon RevH support. Documentation ...
Thanks for DOCs 🙇 . I am terrible at that.
cursive obsidian
cursive obsidian
Thanks for DOCs 🙇 . I am terrible at that.
Nitpicking (I know). The old one is RevD not RevB. And if you haven't tweaked the mounts the offsets should be same for all done bottoms stock, kraken, trihorn. Trihorn is missing offsets completely for RevH.
As bonus for potential .eu Beacon customers BOM could now include https://annex-engineering.eu/ as buyer's source since they FINALLY (sorry for caps, I am still sour about paying for big shipping cost from .us and the income tax) acknowledged there is .eu demand too.

Annex Engineering is a tight knit team active across the globe, working on a diverse portfolio of projects
velvet wing
cursive obsidian
Nitpicking (I know). The old one is RevD not RevB. And if you haven't tweaked th...
ooh ❤️
thanks!
 stiff venture
anyone have a good 10x11 cable chain setup with the e34m1? i dont have clearance above my printer to run a lofted wire guide. i am thinking i'll do a direct cable chain like the bambu p1s and x1c and just wondering what others have done so far as i'm ramping up to do that.
velvet wing
stiff venture
anyone have a good 10x11 cable chain setup with the e34m1? i dont have clearance...
Not a lot of folks are using cable chain anymore. I've decommissioned the cable chain from my only printer that was still using it.
sorry for the late response
 haughty fox
Hey guys!
I made a little mock up UHF kraken mount of my own to old a kusba adxl345 and the new BTT Eddy

If anyone is running a similar setup I'm happy to shoot over the stl! Still untested though as I'm waiting for my eddy, but it should have clearance with the frame when homing.
haughty fox

 proven python
Does it clear the x endstop though?
haughty fox
That is the only thing I'm concerned about
it seems like theres enough clearance but cant be sure until its here
velvet wing
haughty fox
it seems like theres enough clearance but cant be sure until its here
you can try flipping the sensor to the other side.
not sure how I feel about mounting something to the side of the duct, though. it's not the sturdiest.
haughty fox
Only reason why I'm pushing for it to be on the right side is that you can get the most bed area measured
the left side leaves a big gap
haughty fox
That's the only reason, anywhere else and youre sacrificing
velvet wing
hrm.
haughty fox
 velvet wing
haughty fox
That's the only reason, anywhere else and youre sacrificing
velvet wing
haughty fox
That's the only reason, anywhere else and youre sacrificing
have you looked at the dual horns? I doubt there's enough room between the horns for the sensor, but it's worth a look
haughty fox
It'll clear the extrusion
velvet wing
ohhh it's below the height of the x joint
haughty fox
Yep, it obviously cant go below nozzle height
velvet wing
ah, and you're on a plus
haughty fox
Ill show another angle
velvet wing
well, if it works it works, y'know?
haughty fox

i hope it does!
I've been racking my brain.. I noticed a drastic loss in print quality with bridges and overhangs when I moved from the trihorn to the dual horn
which is why I really want to make it work with the kraken
velvet wing
ah, gotcha
haughty fox
At the time when i moved to the Dragon UHF, there wasnt anything other than dual horns
i thought i'd give it a shot, if it works then great, if not try again!
I will show you how the mount works

 velvet wing
are those for heat set inserts?
velvet wing
you'll need to widen the walls for sure
1.6mm is a good offset if you can manage that.
haughty fox
I went to bed at 4am i forgot 😭
velvet wing
lol, no worries
haughty fox
Alright I'll figure it out
velvet wing
don't forget print orientation, as well. you might want to fill in the space between the two holes and down to the build plate, then chamfer the edge.
 haughty fox
Absolutely loving the print quality 😍

I decided to make the mount off the front section
Pictures incoming in a moment

Should be assembled this weekend
velvet wing
looks good
haughty fox


I know it's not a nozzle mount but it's very close to hotend location and around the same height
Clearance from the nozzle in the Z plane.is about 2mm, Eddy documentation states having it 1-2mm from the bed
Minimum
@velvet wing I think it's in a much better spot than previously planned
I'm also moving from the dual 5015 inlet to the Owl's eyes, I have a feeling that the fans hanging back so far impacts my Y axis input shaper results having that weight hanging so far back, I'd imagine it would shift the moment of inertia and make it oscillate a bit more, I could be wrong on its total effect but we will find out soon!
velvet wing
haughty fox
I'm also moving from the dual 5015 inlet to the Owl's eyes, I have a feeling tha...
yeah, the owl's eyes were developed later to fix the issues of the regular dual inlet
haughty fox
What issues were people facing?
fringe zephyr
haughty fox
What issues were people facing?
to me collision with regular dual in the back as I wanted more travel for the sexbolt
velvet wing
yep, available y axis, mostly
haughty fox
Ahhh I see, the only issue i had was the fan touching the stepper tower, however fixed it with the toolhead moving off the X endstop a bit to clearance it


 ivory finch
haughty fox
Eddy mount done!
ivory finch
haughty fox
Eddy mount done!
Nice, and I was about to ask if this has been done yet, lol.
haughty fox
Yep! just needed to modify the top piece and create a bracket, it has been working great, I just finished modifying it to have slots to allow for minor adjustments
I'm really happy to send the STEP file to anyone who needs it incase you need to modify it for your setup specifically
one thing I've noticed is that it might potentially need some gold reflective tape applied to protect it from the heat of the hotend
because while printing enclosed the eddy went up to about 102c ;-;
and that was just a clear thick plastic tarp over the printer
velvet wing
i wonder how the eddy handles temperature drift
haughty fox
Well you have to tune it specifically in intervals
The procedure requires you to get it as hot as possible and then do a 3-5c increment from the coldest value
To do a paper clearance test as it heats back up with the nozzle and bed
Takes a long time
But I only did it to 80c which 85 is technically its max operating temp
but I think the proximity to the hotend doesnt help...
Have to remember even in an enclosure, you can have an idle hotend temp lower as the bed stabilises, the eddy wont get very hot. Maybe about 55-60c before it starts printing
Thought I had some gold tape around from the race car but I must have used it all, so it's either I rethink the mounting situation or I get some more and give it another shot, I like the location it's in though, I can get a full bed scan no compromises
 lucid aurora
haughty fox
Well you have to tune it specifically in intervals
lucid aurora
haughty fox
Well you have to tune it specifically in intervals
Have you had any issues with having to change the z-offset for a new print after a save config/fw restart? Ref: https://github.com/bigtreetech/Eddy/issues/5

GitHub
Unfortunately everytime I have to printer restart (I think) eddy seems to ignore the z offset that's been set using live printing and saving from the console in mainsail. I can see it adding to...
haughty fox
I haven't printed much with it lately as I'm waiting for my new adxl
 lucid aurora
That is new and appears like they've updated the readme with the fix that was suggested in issue #5.
haughty fox
Yep.. might need to look into this
That's a real shame, companies love releasing products that aren't ready yet
lucid aurora
The joys of being an early adopter!
 lost dome
@velvet wing I just redid the whole printhead with the newest parts and love the changes - the new belt grabbers are much better!
velvet wing
lost dome
<@755022853040111697> I just redid the whole printhead with the newest parts and...
yeah, I like them a LOT more, too
 ivory finch
@velvet wing which version of cartographer for the EVA 3 tool head?
ordered low profile, lol
proven python
ivory finch
ordered low profile, lol
yeah I think eva34m1 only supports the low profile version, assuming low profile cartographer is the exact same as low profile beacon
ivory finch
proven python
yeah I think eva34m1 only supports the low profile version, assuming low profile...
should be, and when I click on the dual horns version for the beacon, I get the 404 file doesn't exist error...
proven python
ivory finch
should be, and when I click on the dual horns version for the beacon, I get the ...
I prefer to use the kraken horns (and maybe that's why no one noticed the bug) but the ones you're looking for should be here https://github.com/jon-harper/E34M1/blob/main/STL/bottom/stock_bottom_beacon.stl

GitHub
EVA 3 modified for the Mercury One.1 3D printer. Contribute to jon-harper/E34M1 development by creating an account on GitHub.
ivory finch
never mind, just got the stock from the github. lol.
proven python
lol
lost dome
btw any plans to adopt the v-core 4 4028 cooler solution for the eva3? seems to be a beast
fringe zephyr
lost dome
btw any plans to adopt the v-core 4 4028 cooler solution for the eva3? seems to ...
vcore 3.1 also uses it, but I think we don't have room for it
velvet wing
lost dome
btw any plans to adopt the v-core 4 4028 cooler solution for the eva3? seems to ...
won't fit. 😕
lost dome
velvet wing
won't fit. 😕
ok :/ damn - my dual 5015 sounds like a leafblower haha
fringe zephyr
lost dome
ok :/ damn - my dual 5015 sounds like a leafblower haha
don't expect the 4028 to be quieter
compact compass
Is there a goliath hotend mount for EVA 3?
velvet wing
compact compass
Is there a goliath hotend mount for EVA 3?
good question. lemme look.
https://www.printables.com/model/450475-eva-3-goliath-adapter
appears it does have one

Printables.com
This adapts the VZ-Bot Goliath to the EVA 3 Hotend System | Download free 3D printable STL models
definitely read the comments on that model for info you may need
compact compass
Yeah. A good amount of comments at least.
 fossil brook
haughty fox
I'm really happy to send the STEP file to anyone who needs it incase you need to...
fossil brook
haughty fox
I'm really happy to send the STEP file to anyone who needs it incase you need to...
I'd like a copy of your step!
peak quail
@velvet wing is there a version of E34M1 that work with beacon revH?
It works with my low profile revE
but i may have printed the wrong files
nevermind I have outdated files. Thanks
 timber halo
Hello there, I am using Eva 3 Mod with 3 horns and dragon hot end, printed in abs. The only trouble I am facing is the right horn gets melted from time to time by the proximity of the heat cartridge cable. I am in the 3rd duct printed. I must be doing something wrong, just can't figure out what.
 stark cipher
timber halo
Hello there, I am using Eva 3 Mod with 3 horns and dragon hot end, printed in ab...
stark cipher
timber halo
Hello there, I am using Eva 3 Mod with 3 horns and dragon hot end, printed in ab...
Are you using the Mosquito Large Heater block?

If not you're meant to use dual horns.
You could print it in ASA that has a sligtly higher melting point
timber halo
stark cipher
Are you using the Mosquito Large Heater block?
No, I am using Dragon's default
stark cipher
Having the trihorn you get most of the wind going through the center horns
having more wind going through the right horn might be enough to protect it from melting
timber halo
Sure
velvet wing
timber halo
Hello there, I am using Eva 3 Mod with 3 horns and dragon hot end, printed in ab...
Is the heater cartridge itself touching the horns? Or is the cable getting hot enough to melt things? #1 is possible, #2 is bad.
timber halo
velvet wing
Is the heater cartridge itself touching the horns? Or is the cable getting hot e...

The right horn is broken as you can see
The cartridge is not touching the horn. I don't know the temperature of the cable.
cursive obsidian
I would lead the heater cartridge wiring upwards instead of bottom if you can. You will not obstruct the duct and the view at the nozzle would not be obstructed either. The EVA3.0 HE module should have hole for securing the wiring using zip-tie.
 peak quail
Any tips for installing the plastic screw cap for beacon?
can’t get it to press into the back of my FHCS. It is a 2mm drive, which I think is standard on M3 FHCS?
velvet wing
glue it? 😁
peak quail
velvet wing
glue it? 😁
I am worried about heat, I would prefer to press it in place
velvet wing
peak quail
I am worried about heat, I would prefer to press it in place
tbh I don't have a good solution. I super tightened my screw and left the cap off.
stark cipher
velvet wing
tbh I don't have a good solution. I super tightened my screw and left the cap of...
Combined with Vibetite VC3
 true turtle
Does PCB klicky work with the bottom horns?
velvet wing
true turtle
Does PCB klicky work with the bottom horns?
it does not
true turtle
Which klicky is recommended? Klicky NG?
velvet wing
regular, ng, or unklicky all work well
fringe zephyr
unklicky FTW
 spark dragon
@velvet wing heya mate, long time... finally rebuilding my printer and would like to know if you make a mount for the BTT Eddy? Thanks
velvet wing
spark dragon
<@755022853040111697> heya mate, long time... finally rebuilding my printer and ...
@haughty fox made a mount, but don't know if they published it. Hopefully a ping will help with this conundrum. 🙂
spark dragon
velvet wing
<@189966446963589120> made a mount, but don't know if they published it. Hopeful...
thanks. While I wait to see if @haughty fox replies, I did find this, so might give it a try... right after my new EBB42 arrives since I accidentally fried mine, lol
https://www.printables.com/model/914746-eva-24-btt-eddy-mount

Printables.com
This mount allows you to use your BTT Eddy for a EVA 2.4. | Download free 3D printable STL models
velvet wing
spark dragon
thanks. While I wait to see if <@189966446963589120> replies, I did find this, s...
that uses a different mounting method, so almost certainly won't work
also, I ❤️ EBB42 more than EBB36. good choice.
spark dragon
velvet wing
also, I ❤️ EBB42 more than EBB36. good choice.
yeah, the EBB42 has been great. i use it with the bondtech LGX (big) and rapido v2... sucks I wired my CAN BUS power backwards on the rebuild, lol
spark dragon
velvet wing
that uses a different mounting method, so almost certainly won't work
damn, ok. I'll play around with it and see if I can make something work
spark dragon
velvet wing
that uses a different mounting method, so almost certainly won't work
funny thing is, I just realized this thread is for the eva 3, not 2.4 while that mount I posted is for eva 2.4 :/

GitHub
Contribute to bigtreetech/Eddy development by creating an account on GitHub.
velvet wing
spark dragon
found this: https://github.com/bigtreetech/Eddy/tree/master/3D/EDDY_PRINT_PARTS/...
I'm taking a look at those to see if they're workable
velvet wing
ah, I see they all use the ABL mount arm.
spark dragon
velvet wing
ah, I see they all use the ABL mount arm.
yeah, I noticed that also after printing them lol
working on my bastardized rendition of a mount now
velvet wing
spark dragon
working on my bastardized rendition of a mount now
incoming


y offset is 14.6, x offset is 34.25mm
 spark dragon
velvet wing
updated file, too
spark dragon
velvet wing
updated file, too
dude, you're awesome... I've been trying to '3d builder' and 'tinkercad' my way through making a mount for the past 4 hours, lol
 velvet wing
spark dragon
dude, you're awesome... I've been trying to '3d builder' and 'tinkercad' my way ...
velvet wing
spark dragon
dude, you're awesome... I've been trying to '3d builder' and 'tinkercad' my way ...
yeah, I saw you were working on it and didn't want to leave you to suffer forever, lol. the abl arm takes a lot of work to fit in such a narrow space
lmk if you have any issues!
spark dragon
velvet wing
yeah, I saw you were working on it and didn't want to leave you to suffer foreve...
haha, yeah... I started with the cr touch and btt eva3 eddy mounts and have been trying to mash them together, lol. thanks a ton man
spark dragon
velvet wing
lmk if you have any issues!
looks good to me. thanks again man
 velvet wing
I've pushed abl_eddy.stl and the docs entries to the repo. Docs should update shortly. Support is for standard-length hotends only ATM.
spring scaffold
Linked yours in my eddy mount thread, as yours is definitely recommended over mine and what I will use aswell when I swap 😉
true turtle
My original rapido died recently and I replaced it with a rapido 2. I'm using the E34M1 mount with the abl_bl_touch mount. With the new rapido 2, the abl probe is lower than the nozzle. Both are just the regular versions, not the HF flow version. Nothing else has changed in my setup. Are there differences in the two or any other ideas why I wouldn't have clearance now? Actually, thinking about it again, I did replace the pin, so maybe the aftermarket pins I purchased are slightly longer?
velvet wing
huh. how much are we talking? 1mm? 5mm?
true turtle
I might be really dumb. I just realized that the set screw to replace the pin actually adjusts the pin height.
I had it cranked down all the way.
velvet wing
true turtle
I might be really dumb. I just realized that the set screw to replace the pin ac...
technically it controls the sensitivity of the pin to probe touches, but it also controls the retracted height, yeah
 hexed current
I am a little hesitant to post this but every part of my EVA is PETG. I have over 100hrs on it without any signs of issues. FWIW I am running a mosquito hotend and mainly printed PETG so YMMV. I have some ASA to reprint parts with should the need arise.

 velvet wing
hexed current
I am a little hesitant to post this but every part of my EVA is PETG. I have ove...
velvet wing
hexed current
I am a little hesitant to post this but every part of my EVA is PETG. I have ove...
PETG can do okay on the toolhead if you're not enclosed. It's once the air temperature rises that ASA shines.
hexed current
yea I am not enclosed which is a big reason I haven't used the ASA yet. The printer sits about 3ft from me while I am working so probably not a great idea without it.
compact compass
@velvet wing hi, do you have any plans on making a 9mm version for the eva 3?
velvet wing
compact compass
<@755022853040111697> hi, do you have any plans on making a 9mm version for the ...
nope. definitely wouldn't fit in the current design.
velvet wing
fringe zephyr
low?
low profile, yep
velvet wing
I've added @obsidian frigate's 18mm probe mount to the docs. Should be live in a sec.
spring scaffold
thinking I am going to adapt this, as it seems there has still been some problems etc. I might bodgy this one on over into an adapter plate for now

GitHub
Voron mods. Contribute to chirpy2605/voron development by creating an account on GitHub.
velvet wing
spring scaffold
thinking I am going to adapt this, as it seems there has still been some problem...
if it works, def lemme know. lots of folks are looking for a toolhead cutter.
spring scaffold
ok, it will need some modification, but I reckon I could combine the sherpa-mini mount and the cutter mount into one. either way it would have to be adapted per extruder mount, but if we have the extruder mount combined into the top plate, only the top plate of the cutter would need changing per extruder
basically, the cutter assembly replaces the existing changeable extruder mount, and the currect changeable mount basically incorporated into it
stark cipher
Has anyone made or found a minimalist shroud that just covers the 4010 fan?
velvet wing
stark cipher
Has anyone made or found a minimalist shroud that just covers the 4010 fan?
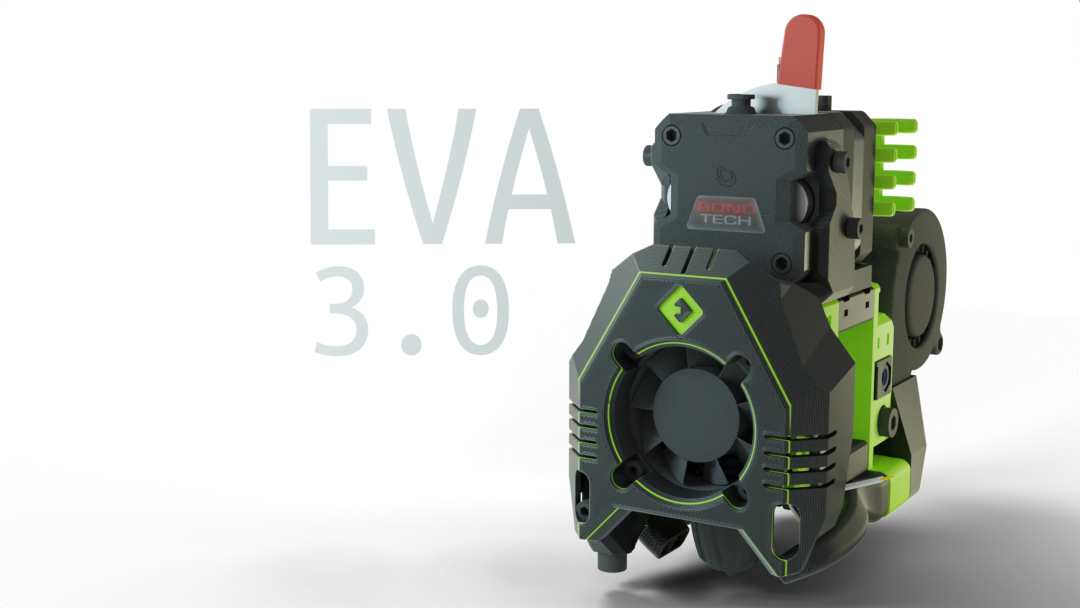
EVA 3 - 3D printer carriage platform
that's the smallest one i know of
stark cipher
Still not minimalist enough. 😄
velvet wing
fair enough 🙂
stark cipher
I saw that, that's closer to what I'm looking:
https://www.printables.com/model/236773-eva-30-slim-shroud

Printables.com
Slim shroud | Download free 3D printable STL models
velvet wing
do you want the fan blades covered?
stark cipher
It's just I got a 3pin 4010 noctua fan cause the NH36 has a 3pin fan connector, but given it's brown color you see why, I'm looking to cover it. 😄
velvet wing
stark cipher
I saw that, that's closer to what I'm looking:
https://www.printables.com/model/...
is this one still too big?
stark cipher
Blades could be partialy cover but not in a way it would hinder air flow
stark cipher
velvet wing
is this one still too big?
It's the RR logo that bothers me
velvet wing
ahhh
stark cipher
I guess I could try and cover it with assembling basic geometry in slicer
velvet wing
yeah, that's probably easiest

 velvet wing
noice
lucid aurora
Been eyeballing the EVA 3 so here come the dumb questions. I have a creality spider 3 hotend which will use the V6 style parts that I have to mod, will the rest of the "ecosystem" work around that?
I modded the 2.4 for this hotend and am wondering if everything else will slap together like the rest of the 2.4 did. https://www.printables.com/model/814278-eva-240-spec-creality-spider-30-mount

Printables.com
Modified EVA 2.4 V6 mount to accommodate the Creality Spider 3.0 hotend. | Download free 3D printable STL models
velvet wing
lucid aurora
Been eyeballing the EVA 3 so here come the dumb questions. I have a creality spi...
the v2 and v3 mounts are not interchangeable, unfortunately. if you can get a mount for EVA 3, though, it will work fine.
stable viper
Just got my lp beacon rev h so was about to print out a new duct and was wondering if the kraekn uhf and the uhf are the same ig z-height for the air flow if that makes sense?
velvet wing
stable viper
Just got my lp beacon rev h so was about to print out a new duct and was wonderi...
like the height that the air blows at?
stable viper
yeah!
velvet wing
yep, effectively the same. it's directly differently, but they function the same
velvet wing
dude it's crazy
stable viper
seen honestly only good things lol
velvet wing
yeah, same. I'm guessing you felt the same way I did when buying it, too.
hopeful glee, that is
lol
stable viper
yeah lmfao I was like dang I kinda want it when it was starting to get big and all the cheaper versions came out and then they pushed contact and was like gimme
Am curious how that differs from what the qidi q1pro and bambu does to set their z offset--I think they marketed it as the only automatic z offset
oh wait maybe they meant probe instead of automatic z offsest in general
velvet wing
I haven't configured that bit yet, too busy troubleshooting other stuff unrelated to beacon.
the contact probe is pretty configurable, though
stable viper
Hope its not too bad lmfao very fun (I'm sweating profusely) when the people making the machine need to trouble shoot 🤡
That is not english nvm I was just trying to be funny
I'll let you know how it goes! probably goign to be asking questions in one of the other channels1
velvet wing
good luck!
peak quail
how do you guys route your beacon cable?

 stuck wing
Is it flat or standard version of beacon that should be used for the horn with beacon mount?
velvet wing
stuck wing
Is it flat or standard version of beacon that should be used for the horn with b...
low profile
velvet wing
peak quail
how do you guys route your beacon cable?
around the right side. the second screw hole for the 5010 fan has a zip tie through it
better yet, use Cuiviemen's rear inlet for beacon, which has a zip tie anchor built in there, too
stuck wing
Going to order the cartographer and second 5015. It is only the owl version that works with beacon like probes right?
velvet wing
i stated that poorly. cuiviemen came up with the idea, and i moved it to the 5015 inlet.
velvet wing
stuck wing
Going to order the cartographer and second 5015. It is only the owl version that...
I'd go with the owl version, yeah. seems less intrusive.
i.e. takes less space
stuck wing
Okay, but do the regular work with beacon? I cant see a becon version of it
velvet wing
stuck wing
Okay, but do the regular work with beacon? I cant see a becon version of it
ohhh I answered before I finished my first cup of coffee, lol. one sec.
Documentation for the EVA3 for Mercury One mod.
stuck wing
Okay, think I will go with the owl but good to know what options I have ☺️
velvet wing
stuck wing
Okay, think I will go with the owl but good to know what options I have ☺️
oh my bad, by regular you're wondering about the normal dual horns. no, I never made a beacon version because the owl's eyes are so much more popular.
(I finished my coffee, lol)
stuck wing
Haha, owl version it is then! 😅
peak quail
velvet wing
better yet, use Cuiviemen's rear inlet for beacon, which has a zip tie anchor bu...
Where can I find that file
still bluff
peak quail
Where can I find that file

Printables.com
Beacon 3D mount solution for E34M1 - EVA 3 for Mercury One | Download free 3D printable STL models
I think?
peak quail
still bluff
https://www.printables.com/model/438193-beacon-3d-mount-solution-for-e34m1-eva-3...
Yeah i will probably just stick with the one I have. I dont want to solder to my PCB
 obsidian frigate
Is de-soldering/re-soldering still required? The STLs are newer in the github than the printables.com page https://github.com/jon-harper/E34M1/tree/main/STL/bottom - pinging @velvet wing for clarification

GitHub
EVA 3 modified for the Mercury One.1 3D printer. Contribute to jon-harper/E34M1 development by creating an account on GitHub.
still bluff
obsidian frigate
Is de-soldering/re-soldering still required? The STLs are newer in the github th...
The page you linked is for the bottom duct, not the rear (if you're referring to Beef's question).
still bluff
obsidian frigate
Is de-soldering/re-soldering still required? The STLs are newer in the github th...
I did not have to desolder my Beacon to make it work with the E34M1.
obsidian frigate
I just bourbon in my hot chocolate 🤪
cursive obsidian
still bluff
https://www.printables.com/model/438193-beacon-3d-mount-solution-for-e34m1-eva-3...
That was my old design for routing cable in between the fan and the back plate. It requires soldering the cable straight to PCB. I wouldn't recommend that as it is non removable instalation - that's why I flag it obsolete. For RLF35 fan I did slide in channels on the backplate that helps securing the cable - #1041406799342997544 message
I will look at 5015 backplate and make the channels there too.
fossil brook
I've ordered one of these "HGX Lite 2.0" extruders from Aliexpress and will be here next week

the mounting dimensions look like this:

Can someone provide me some guidance on creating a mount for this?
velvet wing
fossil brook
Can someone provide me some guidance on creating a mount for this?
do you have Fusion or some other software installed for the task?
fossil brook
I'm using OnShape and have been looking at the orginal Eva 3 OnShape, possibly modifying the Orbiter plates as my starting point.
velvet wing
oh sick. okay, you can import the E34M1 STEP files. they're in the /cad folder on the git repo.
Start with the E34M1 ones. They've all been made lighter.
fossil brook
So ignore EVA 3 and use yours for better outcome?
velvet wing
does this beast mount from underneath?
screw holes are on the bottom of the extruder?
fossil brook
appears to as the M3's are threaded.
Should i start w/ Orbiter or some other drive?
velvet wing
I know I have one for this. One sec.
I don't see it in the git repo, so I'm checking my Fusion files
fossil brook
yeah i looked at your stuff first.
velvet wing
well, dang, I don't have one for this?
Okay, so you'll wanna bore out holes in the bottom of the plate for the screw heads. 3mm deep, 6mm dia.
fossil brook
Use which extruder as my starting point?
fossil brook
i've found this: https://www.printables.com/model/700204-hgx-lite-20-oblique-tooth-extruder-mock-up-model

Printables.com
This is mock-up model of HGX Lite 2.0 extruder (with oblique tooths). | Download free 3D printable STL models
velvet wing
perfect!
make sure the model is lined up correctly with the ptfe tube. the rest is easy.
fossil brook
no idea how accurate this is as i dont have it in hand yet
but those are variables i can adjust
velvet wing
yeah. and you can check the important bits of the model against the drawing.
fossil brook
motor support is prob my biggest uncertainty
velvet wing
yeah. I admit I'm not wild about unsupported motors. and there's a question of how much clearance to leave between the motor and the support. I leave about 0.2mm, I think?
fossil brook
everyone's printer tolerance is different as are the manufacturing tolerances.
velvet wing
I find it kinda fascinating how the resonance appears in the extruded plastic.
fossil brook
If anyone wants to see my progress and clone: https://cad.onshape.com/documents/693ba81475e82b0e1597f9e1/w/0c68e2416a3c23c599acae2e/e/8b7fd801dd8567ab9c49c15b
Sign in to Onshape, the #1 fastest growing CAD system in the world with over 4 million users.
fossil brook
hint on how to deal with these?
Blue arrow: make the recess less than 3mm?
Red arrow: Safe to extend this edge by 3-4mm?
 velvet wing
fossil brook
hint on how to deal with these?
Blue arrow: make the recess less than 3mm?
Red a...
velvet wing
fossil brook
hint on how to deal with these?
Blue arrow: make the recess less than 3mm?
Red a...
red arrow, yes it's safe
blue...you may need to drop that screw hole and use another. there are more places you can mount than the extruder module uses.
 fossil brook
Thanks for the tip! Gotta make sure it makes sense for assembly through
Can't use a hole that gets covered by the extruder since it's bolted on from the bottom
ivory finch
Is there a CNC option for the EVA 3?
fringe zephyr
nope
obsidian frigate
ivory finch
Is there a CNC option for the EVA 3?
I think someone adapted the CNC Vz printhead to M1.1?
fringe zephyr
obsidian frigate
I think someone adapted the CNC Vz printhead to M1.1?
yes there is printed vz
stuck wing
Just got my carto and have printed the kraken for beacon. I am not quite sure on which holes the carto pcb should mount to. back or front ones?
velvet wing
stuck wing
Just got my carto and have printed the kraken for beacon. I am not quite sure on...
i think front. back ones are for beacon rev H, and I don't think it uses that form factor.
stuck wing
Can i check myself somehow?
velvet wing
compare the cartographer specs with beacon?
velvet wing
yep
fringe zephyr
stuck wing
So I guess front ones
good to know, my wallet ended up telling me to try carto, half the price and there was no beacon stock
stuck wing
fringe zephyr
good to know, my wallet ended up telling me to try carto, half the price and the...
I will hopefully get it installed today! Looking forward getting rid of my unklicky as well with this!
fringe zephyr
magnets keep popping off, tired of dealing with it
stuck wing
Happened to me couple of weeks ago as well, one magnet after the other 😅
wide turtle
fringe zephyr
good to know, my wallet ended up telling me to try carto, half the price and the...
Shame on you XD
 fossil brook
velvet wing
blue...you may need to drop that screw hole and use another. there are more plac...
fossil brook
velvet wing
blue...you may need to drop that screw hole and use another. there are more plac...
Got my extruder today; I can now resume designing the mount!
@velvet wing why discontinue the toolhead PCB mounts?
velvet wing
fossil brook
<@755022853040111697> why discontinue the toolhead PCB mounts?
I made them for larger, NEMA17 steppers. There are a number of existing solutions for NEMA14, like Turtlecrawler's.
true turtle
Just ordered a beacon. Is the fan duct the only thing I need to reprint?
true turtle
Nevermind. It looks like there are a few other parts I need to print.
fossil brook
fossil brook
If anyone wants to see my progress and clone: https://cad.onshape.com/documents/...
@velvet wing take a look? I've made the screw head holes 2.9mm to cover the overlapping holes and it fits fine.
I'm also supporting just the edge of the stepper to save a tad of weight and more heat dissipation.
velvet wing
looks okay, yeah
fossil brook
so it turns out I cannot tighten the 2 front screws with the extruder mounted. has there been any observed issues where we can't use the 2 front bolts?
fossil brook
fossil brook
If anyone wants to see my progress and clone: https://cad.onshape.com/documents/...
I can only bolt on the extruder mount via the rear 4 screw holes. @velvet wing take a look again?
 quasi pine
stark cipher
https://tenor.com/view/shame-game-of-thrones-gif-11381550
quasi pine
stark cipher
https://tenor.com/view/shame-game-of-thrones-gif-11381550
I might be to blame for that, I kept poking him to get on the tap beta program… 🤭
but tbh, I thought carto was pure plagiarism, but they did a tremendous work, independently from beacon
velvet wing
fossil brook
I can only bolt on the extruder mount via the rear 4 screw holes. <@755022853040...
sorry, i was awol today. i'll look in the morning.
fossil brook
velvet wing
sorry, i was awol today. i'll look in the morning.
I got it mounted and it extrudes 🙂
velvet wing
fossil brook
I got it mounted and it extrudes 🙂
nice!
fossil brook
Is there a good reason to not integrate a filament runout sensor into the base of the extruder mount?
true turtle
Which holes do you use for the beacon mount on the kraken horns? The guide only shows 2 holes, but the part has 4.
It looks like it needs to be the rear holes to accommodate the USB connector.
Ah, just saw the variant note... Nevermind me...
true turtle
Ok, I swear I read and searched the docs this time. What is the beacon offset for the kraken horns? I'm not sure where to measure from on the beacon.
still bluff
true turtle
Ok, I swear I read and searched the docs this time. What is the beacon offset fo...

Documentation for the EVA3 for Mercury One mod.
true turtle
still bluff
Doh! I give up 🤣
 hollow garnet
In the proces of converting my e5+ to merc1.1, however I seem to be missing something regarding mounting my BL-touch. I am running the eva 3.0 toolhead with a Rapido 2.0 UHF. This means that I of course printed the UHF hotend module as well as UHF bottom horns. Due to sourcing issues, I am running the old BL-touch until I find a vendor with Klicky or beacon in stock in Denmark.
Now onto the problem. the UHF BL-touch side mount does not seem to have the correct length, so the BL-touch is hovering above my nozzle. Furthermore the models appears to be flipped around compared to the stock length side mount, in regards to which side the heat inserts are put in from. Perhaps I am missing something obvious?

 quasi pine
I think there are 2 versions for the bltouch mount, at least in the docs

Documentation for the EVA3 for Mercury One mod.
quasi pine
hollow garnet
In the proces of converting my e5+ to merc1.1, however I seem to be missing some...
for beacon, you should look at the annex shop in eu, https://annex-engineering.eu/product-category/electronics/

Annex Engineering EU
hollow garnet
quasi pine
I think there are 2 versions for the bltouch mount, at least in the docs
Yes, i tried both versions, but unfortunately neither seems to work
hollow garnet
quasi pine
for beacon, you should look at the annex shop in eu, https://annex-engineering.e...
perhaps I should just accept defeat regarding the Bl-touch and order the Beacon from them.
quasi pine
hollow garnet
perhaps I should just accept defeat regarding the Bl-touch and order the Beacon ...
I think bltouch glorious days are past, it works but “it seems so 2019”. I am using a printed (un)klicky since a couple of years now, with a reasonable low amount of frustrations. PS by this rate we’ll have to do a Danish zeroG Day 😝
hollow garnet
Yeah I know, it also gives me quite inconsistens results. Haha, I have been following along on the sideline for quite some time, but only recently decided to start my conversion. But I have noticed quite a few Danes in here.
hollow garnet
quasi pine
I think bltouch glorious days are past, it works but “it seems so 2019”. I am us...
Another question.
Still having to order CAN bus cable so that I can wire this thing, however, I am unsure which cable from 3DO I should choose. Ordinary CAN bus or CAN bus + USB cable. Which one should I get?
quasi pine
hollow garnet
Another question.
Still having to order CAN bus cable so that I can wire this th...
I made my own canbus cable, it’s enough to twist the H/L wires, and having some thicker wires for the 24v+/-. but it depends if you are planning to have beacon/carto/idm (I can see 3do sells the idm scanner) you can use the usb for that. otherwise just canbus cable is fine
hollow garnet
uhh haven't noticed 3DO has the idm scanner actually. But looking at it right now, it has a CAN or USB connection choice. but if I were to choose the CAN IDM version, shouldn't I just be able to go with the regular CAN cable from them?
Seems like the easiest route for me would be their ordinary CAN cable and then purchase the CAN idm version.
Guess the idm scanner is same as beacon right? Same functions or what?
oh and by the way, did you go sensorless homing or did you go physical x and y endstops?
I've got the skr mini E3 v3, so I assume I should be able to configure sensorless homing
quasi pine
hollow garnet
uhh haven't noticed 3DO has the idm scanner actually. But looking at it right no...
I think it’s a bit complicated, beacon is the original creator/idea. right after came out a “cloned” version, the cartographer, which to me it’s now gone its own way and made a compelling alternative to beacon. I think the IDM scanner is the same as the cartographer, but without the cartographer support, and it’s supposed to be sold only in China, but apparently it’s not (I think mellow technical can export it’s a mess as usual)
quasi pine
hollow garnet
oh and by the way, did you go sensorless homing or did you go physical x and y e...
I am still physical endstop for both x and y 😅
quasi pine
hollow garnet
uhh haven't noticed 3DO has the idm scanner actually. But looking at it right no...
yes, that should work, I think they might even provide a splice cable to connect the ebb to the idm. my 2c, I think usb is not to bad either, it’s just less hassle compared to canbus. maybe klipper canbus implementation needs a bit more consolidation
but also I haven’t updated klipper in 6 months so..
hollow garnet
quasi pine
I am still physical endstop for both x and y 😅
Guess i'll start out by running physical endstops as well then haha
hollow garnet
quasi pine
yes, that should work, I think they might even provide a splice cable to connect...
hmm I think I will be bying 2 metres of the ordinary CAN cable from 3DO and their listed IDM scanner with CAN as well. That should hopefully get me started.
quasi pine
hollow garnet
hmm I think I will be bying 2 metres of the ordinary CAN cable from 3DO and thei...
true, be aware that the idm scanner might give you a nice and fast mesh, but right now, the only 2 that replace completely a bltouch are the beacon and the cartographer. they implement a nozzle to bed detection. With the idm (maybe the carto firmware also works, but it’s unsupported) you might need an endstop of some sort to home z
hollow garnet
quasi pine
true, be aware that the idm scanner might give you a nice and fast mesh, but rig...
argh damn, I'm currently finding info on this IDM scanner as we write.
But if that is the case (regarding necessity for a separate z endstop of some sort) that would be a big downside for me.
quasi pine
also idm at 50€, it’s not too far from beacon.. just half
I mean, 50€ is a high price for it imo
hollow garnet
yeah another good point. If going for beacon, the best place would be annex.eu if I recall, right?
Should probably get the low profile version then, as I am running the rapido 2.o UHF, but will have to dig into that
quasi pine
hollow garnet
argh damn, I'm currently finding info on this IDM scanner as we write.
But if th...
well, on 3do discord I just asked, people with idm will try the survey touch feature with the carto fw flashed on, and see if it works 😂
hollow garnet
quasi pine
well, on 3do discord I just asked, people with idm will try the survey touch fea...
Interesting, lets see what people figure out haha
stable viper
I’m pretty sure the UHF one you’re mounting on the wrong side haha one of them the BL touch gets lunged on the bottom while the other the top
From UHF heat set locations @hollow garnet
 hollow garnet
stable viper
From UHF heat set locations <@710615967964725329>
hollow garnet
stable viper
From UHF heat set locations <@710615967964725329>
jesus! 😫 😆 Knew it was something obvious I was missing! Just tried mocking it up, and indeed it seems to be correct! haha
Thanks man! Then atleast I can get this thing running and consider beacon for the future
hollow garnet
 hollow garnet
stable viper
—Dw I did the same thing—
hollow garnet
stable viper
—Dw I did the same thing—
Thank you sir! got it mounted finally haha
stable viper
Yessir 🫡🫡🫡
velvet wing
sorry I'm late, but glad it got sorted 🙂
 tranquil jasper
Is the bottom hole of the kraken beacon horn self tapping? It is the v0.6c version

Also, which hole do I add headsets for the beacon?

oh, just read the variant notes lol. Only downside is that i have a carto, so i am not sure which bottom hole to use for heatset lol
stable viper
I think someone had this problem earlier in the chat
If you search cartographer or carto it might show up :>
tranquil jasper
Sweet! Thanks
tranquil jasper
How recommended is the split ring washers?😅 forgot to pick up them up but i have loctite😅
stuck wing
tranquil jasper
oh, just read the variant notes lol. Only downside is that i have a carto, so i ...
It should be the holes closest to the nozzle 🙂
ivory finch
tranquil jasper
oh, just read the variant notes lol. Only downside is that i have a carto, so i ...
Either set works. I have mine in the ones in the back. Helps keep high heat from the heater block away from it.
tranquil jasper
ivory finch
Either set works. I have mine in the ones in the back. Helps keep high heat from...
Would having the 2 sets of heatsets affect the beacon readings?
Also, am I dumb? I can't see how I am meant to mount the ebb36 on the pcb board mount 😅
 stable viper
It’s the two screws on the left and right
stable viper
tranquil jasper
 tranquil jasper
And how do I connect it to the toolhead?
stable viper
I’m assuming the two screws above? I don’t use any PCBs so I don’t have any solid answers :/
ivory finch
tranquil jasper
Would having the 2 sets of heatsets affect the beacon readings?
No, they won't, as they are outside the scanning area or the carto/beacon. And did you figure out the ebb36 mount?
quasi pine
tranquil jasper
I don’t know why manufacturers made the “36” versions pcb. the 42 versions has a much nicer size (smaller) and shape. jon passed me a mount for the ebb42 with shroud that’s just fantastic. the 36 you’d need to use the same bore for the pcb and the spacer to the motor. the two threads on top are for the pcb shroud
the pcb in display is the THR36, it’s just a different shape but it’s the same principle to mount the EBB36
tranquil jasper
stable viper
I’m assuming the two screws above? I don’t use any PCBs so I don’t have any soli...
That's no worries
tranquil jasper
ivory finch
No, they won't, as they are outside the scanning area or the carto/beacon. And d...
I didn't. I have the mount I was using for the eva 2.4 so I will probably see if that still works
ivory finch
tranquil jasper
I didn't. I have the mount I was using for the eva 2.4 so I will probably see if...
The mount screws into the brass stand offs, and the board then screws into the mount. Not sure if you need heat set inserts of nuts for it.
tranquil jasper
ivory finch
The mount screws into the brass stand offs, and the board then screws into the m...
I figured it out lol. Was kinda expecting the cable coming out of the ebb to go straight up but it is at a bit of an angle
night imp
Picking up the hobby again. Anyone running EVA 3 Mercury mod with a beacon? If so low profile or normal?
still bluff
I am using a low profile with EVA 3
night imp
still bluff
I am using a low profile with EVA 3
That's all I need to hear baby. Time to order😎
 fair lantern
For those of you using the Mosquito and struggling with cooling on the E34M1/EVA3 - it's not you or the mosquito. Redesigned the mounting bracket to duct into the cooling chamber rather than blow into the heatsink creating turbulence, and also went ahead and expanded the exhaust to help with airflow. I was getting really bad heat creep and redesigned the cooling portion of the mount.
I also submitted a pull request on the Github, but I'll let @velvet wing be the judge of whether it's merge-worthy!

 fair lantern
night imp
Picking up the hobby again. Anyone running EVA 3 Mercury mod with a beacon? If s...
fair lantern
night imp
Picking up the hobby again. Anyone running EVA 3 Mercury mod with a beacon? If s...
Definitely go w/ Beacon, but my main issue w/ Eva3 + beacon was w/ the Kraken horns. Never got around to changing the design, but the mounting points for the beacon would show signs of deflection after a print, so the beacon position would change after every heat-cycle. Currently using a TriHorn w/ Mosquito and that's a significant improvement, although the actual horns seem to be uneven relative to the Mosquito. Not sure if it's an installation error, but I had a similar problem w/ my UHF Dragon + Kraken.
velvet wing
fair lantern
For those of you using the Mosquito and struggling with cooling on the E34M1/EVA...
hey, saw your email last night, and I'm definitely going to bring this in. The EVA 3 inlet design there is definitely not good. Your solution is great!
true turtle
fair lantern
Definitely go w/ Beacon, but my main issue w/ Eva3 + beacon was w/ the Kraken ho...
What do you mean signs of deflection? Like physically moved?
velvet wing
fair lantern
Definitely go w/ Beacon, but my main issue w/ Eva3 + beacon was w/ the Kraken ho...
that's very odd and makes me think of loose heat set inserts, fwiw
maybe a very tight usb cable pushing on the pcb?
fair lantern
true turtle
What do you mean signs of deflection? Like physically moved?
No no, like it melts from the heat. And yes, @velvet wing as far as the crooked mount goes I'm definitely suspecting crooked heat sets, but I've reprinted and reinstalled them multiple times with different methods each to try and center into the hole as much as I could and the result has always been the same: right horn(s) sagging lower than the left (sometimes more so over the course of multiple prints). Hence why I'm suspecting it may be from the heat block.
fair lantern
velvet wing
hey, saw your email last night, and I'm definitely going to bring this in. The E...
Thank you! Only problem I ran into during printing was that I forgot to disable slowing down for bridges. My PAHT-CF bridges better when printing at full speed and 80% flow.
velvet wing
fair lantern
No no, like it melts from the heat. And yes, <@755022853040111697> as far as the...
how hot is the area? bed/chamber temps? and what material?
fair lantern
velvet wing
how hot is the area? bed/chamber temps? and what material?
Chamber temps registering at 50C tops, while Beacon is registering the hot plate area during the first 10-15 layers around 80-100C. Material is printing at 300C, and the material used is Sirayatech PAHT-CF
velvet wing
the whole toolhead?
velvet wing
fair lantern
Chamber temps registering at 50C tops, while Beacon is registering the hot plate...
is the whole toolhead PA12 CF?
fair lantern
Not sure if it's PA12, ST advertises it as PA only. But yes the toolhead is a nylon-CF including the horns.

Siraya Tech
Explore high-quality carbon fiber filament for your 3D printing needs from Siraya Tech. Unlock the potential of industrial 3D printing with all your filament needs.siraya-tech-fibreheart-paht-cf-colors-1-75mmfilament-fdmprinting
velvet wing
fair lantern
Not sure if it's PA12, ST advertises it as PA only. But yes the toolhead is a ny...
https://en.wikipedia.org/wiki/Polyphthalamide
This stuff does not mess around.

Polyphthalamide (aka. PPA, High Performance Polyamide) is a subset of thermoplastic synthetic resins in the polyamide (nylon) family defined as when 55% or more moles of the carboxylic acid portion of the repeating unit in the polymer chain is composed of a combination of terephthalic (TPA) and isophthalic (IPA) acids. The substitution of aliph...
velvet wing
fair lantern
Not sure if it's PA12, ST advertises it as PA only. But yes the toolhead is a ny...
do you have any issues installing the M3 x 45mm screws for the horns? could those inserts be crooked?
 next bear
are the tube lengths the same as for the 2.4?
velvet wing
next bear
are the tube lengths the same as for the 2.4?
PTFE? no. check the docs, the lengths are listed for each hotend and extruder
next bear
Cheers, I think I'm just been a bit blind 😅
 river helm
I think something is suppose to go here. What am I missing ? My umbilical cable is not that big
 still bluff
river helm
I think something is suppose to go here. What am I missing ? My umbilical cable ...
still bluff
river helm
I think something is suppose to go here. What am I missing ? My umbilical cable ...
I believe that STL is made for true umbilical wiring, not CANbus umbilical.
You can find a much smaller STL for an EBB36 easily.
 velvet wing
one sec, there's a setting
velvet wing
next bear
make sure "detect thin walls" is on in the Print Settings
lmk if that does not help
next bear
if it helps, from your lot jon, it's only in the kraken one for me so far.
but i was trying a couple 2 and 3 horns for the klicky pcb, they all have the same issue as your kraken with holes showing through.
velvet wing
next bear
if it helps, from your lot jon, it's only in the kraken one for me so far.
but i...
hummm...okay, try it again with detect thin walls/thin walls off.
next bear
turning it off makes more holes,
hollow garnet
Currently finishing up the last wiring on my Mercury, and I ended up going with the top module with a microswitch. However, I am not sure how to optimally secure the switch into the top module? Thinking of super glying the switch in place, but not entirely sure if thats strong enough.
 wide turtle
I think you are supposed to use self tapping m2x10 screws
velvet wing
wide turtle
I think you are supposed to use self tapping m2x10 screws
I believe you are correct, most mods use those screws.
velvet wing
hollow garnet
Currently finishing up the last wiring on my Mercury, and I ended up going with ...
You probably need the self-tappings crews mentioned above. You can "borrow" them from your Ender 5's old endstops, if necessary.
hollow garnet
That's a great idea, will just take a look at them, as otherwise I dont believe I have any lying around
velvet wing
good luck. holler if you run into any other snags with the toolhead.
hollow garnet
will do! thanks a lot!
Now that I have you here, perhaps you have an answer on top of your head of another question I have.
I know this thread is for EVA 3, but regarding hooking up the A and B steppers. I have the BTT skr mini e3 v3. Which stepper should be plugged into the x and y port? Or perhaps it doesnt matter? I suppose I can just invert their direction in the cfg?
velvet wing
hollow garnet
will do! thanks a lot!
Now that I have you here, perhaps you have an answer on t...
X=A Y=B
hollow garnet
Thank you sir!
hollow garnet
Cool, have tried looking for the subject, but have not been able to find any info
velvet wing
check the zerog manual in concepts, page 16. left is x=a, right is y=b
my brain stuttered and i had to look it up, lol
hollow garnet
Will do! Thanks for the help
 charred escarp
Hey I am working on my Merc/hydra build with the E34M1 toolhead and I was wondering if you guys think the kraken fan horn is overkill for my use case? I only plan to run a single 1510 fan. If you guys think its blows air more uniformly than the standared twin horn I will give it a try.
velvet wing
charred escarp
Hey I am working on my Merc/hydra build with the E34M1 toolhead and I was wonder...
yeah, go for kraken. the horns are kinda crooked on the dual horns.
 atomic night
My E34M1 works great with the kraken part cooler. Much better than the dual horn i was running.
charred escarp
Ok awesome, I will give it a shot!
deft monolith
velvet wing
<@962664512358613012> https://github.com/cuiviemen/E34M1/blob/main/STL/bottom/kr...
Has this been merged into your upstream? Or do i need to use cuiviemens fork
velvet wing
deft monolith
Has this been merged into your upstream? Or do i need to use cuiviemens fork
yep, looks like i merged it in a week later
hollow garnet
Finally got the printer fired up again after converting the old ender 5 +, however now onto setting up the klipper config, which will probably be the toughest part for me.
Had the original ender 5 + running shortly with klipper, before tearing the whole thing apart.
Now with all the new hardware installed, including canbus, I am on a mission to have a proper config made
Currently I'm stuck on connecting my x-endstop, which is my only component not yet connected.
Im running an ebb36 with a skr mini e3 v3
Physical endstop is an integrated microswitch into the top module of the E34M1
Whenever I seem to plug in the endstop, the entire toolhead wont power on, until I remove the connector for the x-endstop.
What could I be doing wrong?
Oh well, guess I figured it out finally myself, had forgotten to change my x-endstop pin in the cfg
velvet wing
hollow garnet
Oh well, guess I figured it out finally myself, had forgotten to change my x-end...
oh yeah, that'll cause issues
fossil brook
I've modded the kraken_stock bottom to support PCB Klicky:
https://cad.onshape.com/documents/569a1e4a295d0b5c14fcf17b/w/2eb6d89dc503538ffd07a844/e/9816cbb71f4ce2c3d99ed2e8
Printing now and will let you'all know about my testing results.
Sign in to Onshape, the #1 fastest growing CAD system in the world with over 4 million users.
fair lantern
velvet wing
do you have any issues installing the M3 x 45mm screws for the horns? could thos...
apologies for the delayed responses - between boucing from the shop to the engr dept at school I keep forgetting to check msgs. Nope, no issues - goes right in. For all I know the print may even be warping.
fair lantern
velvet wing
oh yeah, that'll cause issues
So far I have printed with that Mosquito duct for a few hundred hours and it has been great - zero clogging and I can feel the air exhausting comfortably. I use a Honeybadger fan. I have tried using a Noctua 40mm fan previously, but I must've been doing something wrong, because it wouldn't turn anywhere near as fast as the Honeybadger.
Although even with the slower turning Noctua I was doing significantly better than the original duct, that is until I needed to use TPU.
Speeds:

Accels:

Primarily printing at 300*C or more using PAHT and PA6.
velvet wing
fair lantern
Speeds:
if this is for TPU, it's way too fast
if that's the only filamnet you're having trouble with, that's likely why
fair lantern
Oh, no that's for everything but TPU, specifically for filaments engineered for high speed - such as the Form Futura ApolloX and Sirayatech PAHT.
velvet wing
fair lantern
Oh, no that's for everything but TPU, specifically for filaments engineered for ...
gotcha. great accels there, btw.
fair lantern
Thank you! Still need to go back and calibrate PA, but works well all things considered.
And thank you for the Eva port - it's seriously brilliant.
stiff venture
velvet wing
Not a lot of folks are using cable chain anymore. I've decommissioned the cable ...
hey @velvet wing why do you reckon that's the case, that people aren't really using cable chains anymore? and why did you decide to decommission the cable chain from your own printer? I'm trying to decide how to run toolhead cabling in my soon-to-be-built beta frame and cable chain seemed the most appealing to me.
velvet wing
stiff venture
hey <@755022853040111697> why do you reckon that's the case, that people aren't ...
a couple of reasons:
- cable chains require anchor points, which adds mass and complexity to the toolhead
- chains have a minimum bending radius and require wiring that won't wear form the constant strain
- a stiff umbilical is shorter and lighter
- chains can sometimes limit the size of the build plate (usually on the y axis)
- chains are harder to service than an umbilical
 dusk pelican
velvet wing
a couple of reasons:
- cable chains require anchor points, which adds mass and c...
dusk pelican
velvet wing
a couple of reasons:
- cable chains require anchor points, which adds mass and c...
I am using a chain, but agree with all the points you brought up, it can be both functional and handsome but user will sacrifice speed if that is whosever's goal, so using a chain is a personal preference that choices would have to be made. BTW thank you for this awesome tool head, I am extremely happy with my choice of using it, I really can not say you left anything out, your attn. to detail was phenomenal!
fossil brook
fossil brook
I've modded the kraken_stock bottom to support PCB Klicky:
https://cad.onshape.c...
this works fine; I'm working on a mod of Klicky-00 for E34M1 too.
velvet wing
dusk pelican
I am using a chain, but agree with all the points you brought up, it can be both...
thanks!
dusk pelican
@velvet wing also quick question, I was going to try out the Kraken duct, after printing I noticed the angle of discharge was much less than the tri-horn which has aggressive down angle, what is the kraken's main use, like why would someone prefer it over another?
velvet wing
the tri-horn is meant for the mosquito
dusk pelican
velvet wing
the tri-horn is meant for the mosquito
which I have
velvet wing
the dual horn (and the tri-horn, tbh) is crooked
so the kraken is an attempt to fix that
but since you've got mosquito, stick with trihorn
dusk pelican
velvet wing
but since you've got mosquito, stick with trihorn
thats what I am thinking after seeing the Kraken in person, it looks like it would cool the hotend more than the parts lol
velvet wing
dusk pelican
thats what I am thinking after seeing the Kraken in person, it looks like it wou...
the issue with mosquito is the heater block gets in the way of the dual horn airflow. the large heater block obstructs airflow. the trihorn is a band-aid for that.
dusk pelican
and yet again, if you designed the tri-horn fabulous job it works very well using owl eyes 5015 and PETG only use about 20~30%
dusk pelican
velvet wing
the owl eyes i made, though. those were fun
I have been thinking of having either a way to change the 5015 case so fan opening was on same side or remix for 5020's
velvet wing
😬
dusk pelican
yeah my thoughts right now
velvet wing
what about the pabst fan?
dusk pelican
? you mean cpap?
velvet wing
dusk pelican
? you mean cpap?
Documentation for the EVA3 for Mercury One mod.
dusk pelican
yeah cpap, that is over kill, for my needs, heck even dual 5015's are over kill, but I like the look
velvet wing
no, the Pabst fan
dusk pelican
ill look again
dusk pelican
velvet wing
no, the Pabst fan
yeah I didn't look, its a condition I have, just ask the wife lol, I will look more into that, it looks good
velvet wing
dusk pelican
yeah I didn't look, its a condition I have, just ask the wife lol, I will look m...
my mom's the same way, lol
no worries
dusk pelican
@velvet wing you know I can't find one YT with a Pabst fan on a 3d printer lol
velvet wing
it's more common in europe, but it's also an industrial fan
fossil brook
fossil brook
I've modded the kraken_stock bottom to support PCB Klicky:
https://cad.onshape.c...
@velvet wing do you have any plans to support PCB Klicky? I made my own mod cause i was tired of magnets falling off due to thermal cycles weakening my superglue.
velvet wing
fossil brook
<@755022853040111697> do you have any plans to support PCB Klicky? I made my ow...
not particularly, since it's more expensive and less popular. have you tried the no glue versions of klicky?
 sly bolt
dusk pelican
yeah cpap, that is over kill, for my needs, heck even dual 5015's are over kill,...
sly bolt
dusk pelican
yeah cpap, that is over kill, for my needs, heck even dual 5015's are over kill,...
I am thinking about doing the CPAP thing too
I like the idea of moving most of the cooling off the print head, and apparently it's "stupid" good performance
dusk pelican
sly bolt
I like the idea of moving most of the cooling off the print head, and apparently...
it is over kill in most cases, but it does work well, I am not overly concerned with tool head weight at the moment, I am enjoying the great prints I am getting off my first CoreXY machine. I am able to now print mechanical parts in ASA without it being enclosed. I am building one for the merc, well should say it is in design atm. I asked for the beta version but have gotten no answer
sly bolt
Wait how are you doing ASA with no enclosure? Not just because of the cooling???
velvet wing
dusk pelican
it is over kill in most cases, but it does work well, I am not overly concerned ...
Dutch hand-approves the beta applications. He's pretty busy IRL, though, so sometimes it can take a spell. How long ago did you apply?
velvet wing
sly bolt
Wait how are you doing ASA with no enclosure? Not just because of the cooling???
It's possible, but requires really hot bed temps and is more prone to warping.
Get your chamber to 70C and you don't need a heated bed, lol
dusk pelican
velvet wing
Dutch hand-approves the beta applications. He's pretty busy IRL, though, so some...
yeah I know he is busy, still waiting on serial number lol
oh since I am getting no real answers in other server room, can I ask you a ? about converting to CAN bus
velvet wing
if it's been more than two weeks, you might ask what's up. he's caught up on serials as of yesterday, so you might have gotten lost if that's also outstanding.
dusk pelican
I use a server for my Klipper, and my boards are all SKR 3 and SKR 3EZ what besides the EBB36 and cord will I need? do I need to get BigTreeTech U2C V2.1 too, or is that for something else
dusk pelican
velvet wing
if it's been more than two weeks, you might ask what's up. he's caught up on ser...
going to give him a few more days, I re did my YT video, the entire motion system was not in the video lol
velvet wing
dusk pelican
I use a server for my Klipper, and my boards are all SKR 3 and SKR 3EZ what besi...
you need a CAN transceiver on both ends. the EBB36 handles that on the toolhead end. some MCUs provide a transceiver (e.g. the Octopus & Manta). I do not know if the SKR 3 offers CAN functionality, but a search through their docs would answer that for you.
the U2C is only if your MCU does not have a transceiver (or if you don't want to use it)
dusk pelican
it has a jumper for USB/CAN but then how do you talk to klipper? or is there pins most likely on the board
velvet wing
dusk pelican
it has a jumper for USB/CAN but then how do you talk to klipper? or is there pin...
start here: https://canbus.esoterical.online/ 🙂
it will answer all questions save perhaps wiring
dusk pelican
thank you, I have done everything but this lol
velvet wing
that guide is a lifesaver
sly bolt
@dusk pelican https://www.reddit.com/r/BIGTREETECH/comments/11m78rl/skr_3_ez_canbus_2448vdc_questions/ looks like that first comment may have your answer

Reddit
Explore this post and more from the BIGTREETECH community
velvet wing
we need a configuration registry
and associated documentation
"Here's my build config. Here are the guides I found helpful."
sly bolt
surprised one doesn't exist on GH
velvet wing
A curated gh repo of completed configs would be ace.
Gonna drop this in #1117777631430058064 even though it's not exactly Discord, lol
stark cipher
velvet wing
Gonna drop this in <#1117777631430058064> even though it's not exactly Discord, ...
Speaking of that statement inspired me to make that #1117777631430058064 if you want to upvote it: https://discord.com/channels/747612067951018075/1291439290152259725
velvet wing
stark cipher
Speaking of that statement inspired me to make that <#1117777631430058064> if yo...
I, too, made a suggestion! https://discord.com/channels/747612067951018075/1291446966856847490
stark cipher
velvet wing
I, too, made a suggestion! https://discord.com/channels/747612067951018075/12914...
I upvoted yours.
Unless Dutch has a Wiki on the new ZeroG site he's been working on. I am not sure he will want to implement it. I think the wiki format is very approprite for your suggestion.
That said if he's not implementing it, we can look at making a wiki outside the zerog site to help with that.
wide turtle
has anyone in here ever actually completed a build XD?
stark cipher
Twice. 😄
sly bolt
I haven't even STARTED mine, though I have begun ordering parts!!!
fringe zephyr
wide turtle
has anyone in here ever actually completed a build XD?
never will
got new 5015 fans coming, stepper heatsinks
stiff venture
velvet wing
a couple of reasons:
- cable chains require anchor points, which adds mass and c...
that all makes good sense, thanks. i ended up designing a pair of mounts and am testing it now. it's an openable cable chain and contains only a usb-c cable for ebb36 and a 24V pair. it sags more than i expected, so i may need to do something about that. I'll more than likely simplify this back to an umbilical from the high point in the back once i build the enclosure. here it is, showing range of motion. and screenshots of the adapted parts i used to mount the ends.


any good examples of tidy cabling or encapsulation/shroud for toolhead boardS? i'm working on that now (note the difference between my actual build and my 3dm 🤣). and i'm also working on embedding a nozzlecam in that front shroud.
velvet wing
stiff venture
any good examples of tidy cabling or encapsulation/shroud for toolhead boardS? i...
i made a few and found they only work if you include a cooling fan
stiff venture
velvet wing
i made a few and found they only work if you include a cooling fan
oh yeah i remember yours, i tested one for a little bit when i had a bmg/nema17. i should definitely look at that again to perhaps adapt for the orbiter v2
stiff venture
@velvet wing i never stress tested it like you did- which parts did you find needed cooling? tmc driver? mcu? and/or others?
velvet wing
stiff venture
<@755022853040111697> i never stress tested it like you did- which parts did you...
the mcu doesn't have a mcu normally. i added one, as well.
i didn't have issues, it just got way hot too fast without cooling, like 20C over ambient.
stiff venture
ok i see. you added a heatsink to the mcu and the tmc?
velvet wing
stiff venture
ok i see. you added a heatsink to the mcu and the tmc?
yep. they include a heatsink for tmc only
not sure it's as important as the fan, but i found it helpful
dusk pelican
@velvet wing made a little change lol
https://photos.app.goo.gl/kGzCaHcvoc7u5dzUA
velvet wing
dusk pelican
<@755022853040111697> made a little change lol
https://photos.app.goo.gl/kGzCaHc...
oooh
 silk gate
hi guys, is there a mount foreE 34M1, about btt eddy usb for the uhf rapido ?
velvet wing
silk gate
hi guys, is there a mount foreE 34M1, about btt eddy usb for the uhf rapido ?
not for the UHF, I believe
silk gate
sad 😦
velvet wing
silk gate
sad 😦
😕 the eddy mount was made by a third party, but it may be pretty easy to modify. lemme check if I have the source file.
oh hey, there it is https://github.com/jon-harper/E34M1/blob/main/CAD/abl/abl_eddy.step

GitHub
EVA 3 modified for the Mercury One.1 3D printer. Contribute to jon-harper/E34M1 development by creating an account on GitHub.
ohhh wait, no i did do this one
velvet wing
silk gate
sad 😦
hey, are you willing to do some testing?
I believe this will work. It's been dropped the appropriate distance (7mm)


and the file, of course
 buoyant zinc
@velvet wing Do you have (or plan for) front mounted top linear rail?
velvet wing
buoyant zinc
<@755022853040111697> Do you have (or plan for) front mounted top linear rail?
won't work without lots of redesign to the x joints
buoyant zinc
Assumed so, any plans for this mod?
velvet wing
buoyant zinc
Assumed so, any plans for this mod?
no, none in sight. EVA is built from the ground up for top-mounted. I'd change A LOT if I went front-mounted. new toolhead completely, probably.
buoyant zinc
thanks @velvet wing - appreciating your effort to push us up to here!
i am assessing BOM for migration to front facing rail.
velvet wing
buoyant zinc
thanks <@755022853040111697> - appreciating your effort to push us up to here!
out of curiosity, do you have a modified x joint already? are you using the stealthburner one?
buoyant zinc
I have customized X joint - but still not adjusted for linear rail offset.
 foggy raven
velvet wing
out of curiosity, do you have a modified x joint already? are you using the stea...
foggy raven
velvet wing
out of curiosity, do you have a modified x joint already? are you using the stea...
great work! thank you. I've just finished assembly with my e3d revo voron and using the kraken klicky ducts - Unless the magnets are perfectly flush with the bottom of the kraken ducts they are either super close to the same height has my nozzle or i just have a short revo. is there any way to push the revo body down just a touch or perhaps bring the magnet interface up?


looking at it again it just seems super tight -- I'm not out of action tho, I have a CR touch and am printing the stock horn
thank you again
velvet wing
foggy raven
it may be an optical illusion, but double check the heat break on your revo. if it's slightly bent, it can cause the hotend to seem shorter.
foggy raven
Cool. Yeah I’ll check. I’ll give the klicky a go when I get the printer commissioned. Thanks
ivory finch
@velvet wing Do you have a version of the LDO Orbiter Extruder mount with a toolhead sensor for MMU purposes?
Or a top with one?
velvet wing
ivory finch
<@755022853040111697> Do you have a version of the LDO Orbiter Extruder mount wi...
Documentation for the EVA3 for Mercury One mod.
they're not ideal, but it's what we have
an inline cutter would be great, but is beyond my ken
ivory finch
velvet wing
i gotchu: https://jon-harper.github.io/E34M1/modules/other/#filament-sensors
Thank, just have to add the endstop to it. thank you very much
ivory finch
velvet wing
i gotchu: https://jon-harper.github.io/E34M1/modules/other/#filament-sensors
And this may give you ideas with how to incorporate a filament cutter for all hot ends. I will try later when I have the time if you don't get a chance to.
https://www.printables.com/model/647352-filament-cutter-for-eva3-orbiter-rapido

Printables.com
This is a filament cutter that uses slight mods to EVA3 for orbiter and rapido, and a servo actuated pushblock | Download free 3D printable STL models
fringe zephyr
I was working for a while on a design without servo etc but ended up giving up
ivory finch
fringe zephyr
I was working for a while on a design without servo etc but ended up giving up
I may end up going with the EREC for the ERCF, or go back to the Stealth Burner toolhead. Only way I see is a re-design on the gantry carriage to where it put the rails on the side or underside, and mounting a depressor to the top where the rails were.
fringe zephyr
I was modding the front piece where the hotend mount attaches
don't have any images here now maybe on this thread
found one of the attempts

 fleet kernel
Was this cable support for rapido uhf supposed to be removed to make it fit? Maybe i missed something. Also bltouch seems short? Or am i again missing something

Bltouch extended for reference
 wide turtle
fleet kernel
Was this cable support for rapido uhf supposed to be removed to make it fit? May...
wide turtle
fleet kernel
Was this cable support for rapido uhf supposed to be removed to make it fit? May...
That one should definitely stay
With the zip tie!
You need a high temp zip tie for that
 azure barn
Your BL touch looks very high, did you print the UHF or standard part?
 fleet kernel
azure barn
Your BL touch looks very high, did you print the UHF or standard part?
fleet kernel
azure barn
Your BL touch looks very high, did you print the UHF or standard part?
I printed the uhf one. Its a rapido uhf hotend.
fleet kernel
I noticed in the model there’s an immediate collision in thecad with the rapido cable support arm and the “front” part. My fingers hurt after getting my belts through, as they were reused belts
fleet kernel
if i end up reprinting this, i made this notch.
 velvet wing
fleet kernel
if i end up reprinting this, i made this notch.
velvet wing
fleet kernel
if i end up reprinting this, i made this notch.
ooh that's neat. that might help for Dragon UFH users too (i think that's the other one like that)

 deft monolith
No idea if someone asked this before but are there 2 PTFE tubes in the toolhead? Or do you combine the length of the hotend and the extruder PTFE tubes into one ptfe tube?
The guide is not clear about this
In the master step file there are 2 ptfe tubes tho... Hmm
still bluff
deft monolith
No idea if someone asked this before but are there 2 PTFE tubes in the toolhead?...
You combine the two values together.
deft monolith
still bluff
You combine the two values together.
So into one tube? gotcha
hollow garnet
Does anybody have a modified file for a orbiter 2.0 - ebb 36 pcb Mount, With a taller support rod for the umbilical cable?
The once that I’ve tried only have this very short support rod, which is way to short in my opinion.
 hollow garnet
Does anybody have a modified file for a orbiter 2.0 - ebb 36 pcb Mount, With a t...
hollow garnet
hollow garnet
Does anybody have a modified file for a orbiter 2.0 - ebb 36 pcb Mount, With a t...
 still bluff
hollow garnet
Does anybody have a modified file for a orbiter 2.0 - ebb 36 pcb Mount, With a t...
hollow garnet
still bluff
hollow garnet
Does anybody have a modified file for a orbiter 2.0 - ebb 36 pcb Mount, With a t...
hollow garnet
but as I read it, there is no version with long support rod for my EBB36+Orbiter setup?
Or can I use the one that says orbiter+sht36?
velvet wing
hollow garnet
but as I read it, there is no version with long support rod for my EBB36+Orbiter...
I've run into this a bit. I don't have an orbiter version for you, however. what about a hard plastic or metal shim?
hollow garnet
hmm not sure I understand your suggestion
Where should I use this hard plastic or metal shim?
velvet wing
zip tie it tightly to the mount so that it acts like an extension to the support, then zip tie the umbilical to that
a 50mm piece should be about right, i think
hollow garnet
velvet wing
zip tie it tightly to the mount so that it acts like an extension to the support...
Might be my best Bet, Will try
hollow garnet
Printed this little support piece and bolted it directly on to the pcb bracket. Not the prettiest, but far better Than putting all that strain on the cable directly above the connector
 velvet wing
very nice
tranquil jasper
hollow garnet
Printed this little support piece and bolted it directly on to the pcb bracket. ...
do you have an stl for the support piece?
hollow garnet
I do, but bear in mind its a 5 min drawing job.
I just installed 2xm3 heat inserts and drilled corresponding 2x holes in the orbiter bracket
tranquil jasper
hollow garnet
I do, but bear in mind its a 5 min drawing job.
I just installed 2xm3 heat inser...
Lol thanks. Ive been having ebb issues and I think it the umbilical not being properly supported
dusk pelican
@velvet wing what the avoid settings for the slicer ,,,
Like the
Radius
Height to rod
height to lid
I figured you might have messured all that if not no biggie just thought I'd ask
velvet wing
dusk pelican
<@755022853040111697> what the avoid settings for the slicer ,,,
Like the
Radi...
context? what rod or lid?
dusk pelican
velvet wing
context? what rod or lid?
its in orca I think is the the x ganty and the top of the tool head but I am guessing
velvet wing
🤷♂️ sorry, I'm on PS, and I barely know that over Cura. 😆
 velvet wing
lol, sorry, i'm not much use with this one
velvet wing
i do not, sorry. i'm not entirely sure exactly what you're asking, tbh.
dusk pelican
no problem I am going to messure later I will post back after just for future ref
thank you
velvet wing
yep np
dusk pelican
@velvet wing sorry one other quick one, you have 2 two mosiquto hotends in the stl one ends with rw or was that me editing and adding?
velvet wing
that's an edit and add, i would assume
 velvet wing
https://github.com/jon-harper/E34M1/tree/main/STL/hotend <-- it's not in there?
GitHub
EVA 3 modified for the Mercury One.1 3D printer. Contribute to jon-harper/E34M1 development by creating an account on GitHub.
dusk pelican
kk, it was just a quick ? again thank you
fleet kernel
Is the e34m1 beacon mount supposed to thread right into the fan duct? No heat sert?
tranquil jasper
fleet kernel
Is the e34m1 beacon mount supposed to thread right into the fan duct? No heat se...
You use a heatset
velvet wing
fleet kernel
Is the e34m1 beacon mount supposed to thread right into the fan duct? No heat se...
cuievemen made a version that threads directly in, but most use heatsets
 warped snow
I think I’m missing something obvious. What is supposed to go in these two indentations for the post extruder filament sensor?

 tranquil jasper
which top is that?
azure barn
The PTFe tube, one that goes down into the hotend, the other that goes up to the extruder
hollow garnet
Back to trying to get this thing to actually print
Have been following every step of Ellis 3D print tuning guide, However without any improvement at all
Picture is not very good I suppose, but as i mentioned earlier on here, I simply cannot successfully Tune PA.
I get these large “blobs” of filament, and the test print is useless. Tried playing With extrusion multiplier, all the way Down to 0.7 but almost no improvement.
Tried playing With retraction but still no improvement.
Seems like my rapido 2.0 UHF is pumping way to much filament or something.
Does anybody know what I could be missing?
 velvet wing
hollow garnet
Back to trying to get this thing to actually print
Have been following every st...
velvet wing
hollow garnet
Back to trying to get this thing to actually print
Have been following every st...
if you had decent prints with PA tuning disabled, I would suggest reviewing your PA test range (AND other settings for the test). Otherwise, it's a different issue.
fleet kernel
I wonder if you have conflicting settings in kipper config vs slicer
velvet wing
fleet kernel
I wonder if you have conflicting settings in kipper config vs slicer
i agree. i feel like this is a test gcode issue, as well.
which is, thankfully, an easy fix
tranquil jasper
Is there a kraken fan duct mod that has beacon cable strain relief?
velvet wing
tranquil jasper
Is there a kraken fan duct mod that has beacon cable strain relief?
no, but there are rear intakes that handle that
cuiviemen's rear inlets do that
i might've done some others. checking.
tranquil jasper
I am currently using the dual 5015 fan inlets (owl eyes)
velvet wing
computer is being sluggish
tranquil jasper
velvet wing
computer is being sluggish
 velvet wing
im glad that flow convinced me to make the owl eyes
oh!
use the free fan mounting hole
on the right side, zip tie

or left, i guess
if that does not work, lmk
 tranquil jasper
ah ok. Ill give it a shot! Thanks!
fringe zephyr
velvet wing
im glad that flow convinced me to make the owl eyes
and I reused the concept
 velvet wing
fringe zephyr
and I reused the concept
velvet wing
fringe zephyr
and I reused the concept
looks very nice
proven python
So, I was thinking of using a bit of loctite on the toolhead, I see that it can damage plastic, so, is that still a problem when considering heat inserts?
Or only when screwing directly into plastic?
still bluff
proven python
So, I was thinking of using a bit of loctite on the toolhead, I see that it can ...
This stuff is safe to use with plastics.
Vibra-TITE 213 VC-3 Threadmate Threadlocker, -65 to 165 Degree F, 5mL Tube, Red https://a.co/d/75VFqSH

Vibra-Tite VC-3 Threadmate is a powerful locking and sealing coating for threadedfasteners that works on the principle of "friction through viscosity." It utilizes a special blend of acrylic resins to prevent fasteners from loosening , even under extreme vibration. Designed for use on external an...
proven python
still bluff
This stuff is safe to use with plastics.
Vibra-TITE 213 VC-3 Threadmate Thread...
oh nice, I'll get that then!
 real crypt
is there a filament cutter mod for eva3 that works with this
i saw this but i have no idea if it would fit
Printables.com
This is a filament cutter that uses slight mods to EVA3 for orbiter and rapido, and a servo actuated pushblock | Download free 3D printable STL models
velvet wing
real crypt
is there a filament cutter mod for eva3 that works with this
i wish. a couple of us have looked into the filament cutter solution. @proven python and @fringe zephyr, amongst others, but i'm not sure if anyone really had a lot of success.
fringe zephyr
velvet wing
i wish. a couple of us have looked into the filament cutter solution. <@63954317...
unfortunately not, I wanted to embed it on the front
proven python
velvet wing
i wish. a couple of us have looked into the filament cutter solution. <@63954317...
Mine is working so far, just haven't gotten around to uploading it yet
velvet wing
proven python
Mine is working so far, just haven't gotten around to uploading it yet
oooh!
proven python
velvet wing
oooh!
uploaded it here, I'll add assembled pictures in a bit #1309184792083955742 message
tranquil jasper
fringe zephyr
and I reused the concept
Have you built it yet?
fringe zephyr
tranquil jasper
Have you built it yet?
not yet, will start when I have the rat built which should be complete during next week
don't want to dive into this without a second printer
tranquil jasper
Makes sense
I like the idea of screw in terminals. Don't have to worry about microfit crimping 🤣
fringe zephyr
tranquil jasper
I like the idea of screw in terminals. Don't have to worry about microfit crimpi...
that's a THR36
tranquil jasper
fringe zephyr
that's a THR36
I know. The power and can terminals are gonna be held down by screwing. I think it makes it easier cuz it means just adding a ferrule to them and popping them in

I've had some issues with my ebb36 disconnecting because of my shitty crimps 😂
azure barn
Which beacon/cartographer version works with e34m1?
velvet wing
azure barn
Which beacon/cartographer version works with e34m1?
https://jon-harper.github.io/E34M1/modules/bottom/#__tabbed_1_2 The bottom horns module page has that info for Beacon. Unsure about Carto.
Documentation for the EVA3 for Mercury One mod.
fringe zephyr
carto has beacon rev D format so if it works with it works with carto
currently running UHF dual with carto and works fine
azure barn
velvet wing
https://jon-harper.github.io/E34M1/modules/bottom/#__tabbed_1_2 The bottom horns...
Ah thanks, I should’ve checked there first
 hybrid tulip
@velvet wing and others! Absolutely amazing work on this toolhead. What PCB do you personally use/recommend. Personally I was thinking of running https://a.co/d/eQoHgPK, going to have rapido uhf, bl-touch, creality sprite, and owl eye cooling.
fleet kernel
i haven't used can, but judging by a few things, it seems more trouble than theyre worth
true turtle
I'm using an ebb36 in USB mode. It was really easy to setup. Haven't been using it long though. I'm also using the orbitool on my merc. I think it's a good choice if you are running an orbiter.
hybrid tulip
Do you need external power connectors for that, or does it push it through the USB port?
still bluff
hybrid tulip
Do you need external power connectors for that, or does it push it through the U...

 mortal sigil
still bluff
https://lab4450.com/blog/upgrade-can-ebb36-to-usb-toolhead/?srsltid=AfmBOooj6DzT...
mortal sigil
still bluff
https://lab4450.com/blog/upgrade-can-ebb36-to-usb-toolhead/?srsltid=AfmBOooj6DzT...
You know you can do a usb straight to the pi right
proven python
mortal sigil
You know you can do a usb straight to the pi right
That won't provide the 24v for running the connected stuff, making you have to run wires for 24v anyway, kind of defeating the pointing of using the usb connection instead of can
mortal sigil
proven python
That won't provide the 24v for running the connected stuff, making you have to r...
That's true but You have more stable Connection
proven python
can is pretty stable, had trouble at first but was a result of my being unable to crimp well back then
To me the value of usb is the potential for using PD to handle power, and hub capability allowing a future toolhead board to directly connect to beacon and a nozzle camera, allowing everything over a single cable
And similarly simplifying the wiring of the other boards
velvet wing
proven python
To me the value of usb is the potential for using PD to handle power, and hub ca...
YEEEAH
gimme a toolboard with MicroUSB breakouts (or USB C)
deft monolith
I expierenced two times now that plastic cemented itself inside of the hotend and the piece im pulling out with a ridiculous amount of force always looks the same. I figure as im usinf EVA3 i should ask here, or should i ask in another channel what could be the culprit?
velvet wing
deft monolith
I expierenced two times now that plastic cemented itself inside of the hotend an...
what hotend and extruder? what material?
deft monolith
velvet wing
what hotend and extruder? what material?
rapido, orbiter 2, casual pla
velvet wing
deft monolith
rapido, orbiter 2, casual pla
hmm. that's a pretty standard configuration, so it's probably the hotend or extruder itself
fleet kernel
deft monolith
I expierenced two times now that plastic cemented itself inside of the hotend an...
What kind of fan is on the rapido? Is your printer enclosed?
deft monolith
fleet kernel
What kind of fan is on the rapido? Is your printer enclosed?
its a 40x10 fan which was in the e5+ kit from creality.
its not enclosed sadly
fleet kernel
So not a noctua and not enclosed. Weird.
deft monolith
velvet wing
hmm. that's a pretty standard configuration, so it's probably the hotend or extr...
the problem started when the orbiter started skipping often and not grabbing the filament correctly
My theory as an absolute amateur is that the ptfe tube is too short
heres a bad picture of the thing i pulled out
 fleet kernel
Yeah it shouldn’t look like a Lego sword
wide turtle
deft monolith
heres a bad picture of the thing i pulled out
thats the heatbreak
either not fully seated or crushed I'd say
deft monolith
wide turtle
thats the heatbreak
either not fully seated or crushed I'd say
but the heatbreak is made out of metal, how can i crush it with plastic?
wide turtle
deft monolith
but the heatbreak is made out of metal, how can i crush it with plastic?
when screwing the heatblock to the heatsink
the metal is extremely thin
that bulge has to come from somewhere where its warm/hot
so either its the connection between nozzle and heaterblock (or nozzle and mze / mze and heaterblock if you use the worse version of an mze)
or between heatbreak and heatsink
deft monolith
wide turtle
when screwing the heatblock to the heatsink
it came preassembled, is this a warranty issue or?
wide turtle
deft monolith
it came preassembled, is this a warranty issue or?
I am not phaetus, I dont know
how did you tighten your nozzle?
deft monolith
wide turtle
how did you tighten your nozzle?
with a inbus key but not too tight, only so it does not fall off
wide turtle
yeah there is your issue
nozzle needs about 1.5-2.5Nm of torque at 285°C
as stated in the manual
nozzle vibrated itself free and thus created a gap
fringe zephyr
wide turtle
nozzle needs about 1.5-2.5Nm of torque at 285°C
as stated in the manual
TIL I have been tightening my rapido at 260
true turtle
Can I use an adapter to go from the larger CPAP hose to the 15mm hose?
velvet wing
true turtle
Can I use an adapter to go from the larger CPAP hose to the 15mm hose?
let me get a 22mm hose file for you
it's untested but should work
@true turtle Try this. If it works, please let me know so I can publish it properly. 🙂
true turtle
Thank you!
true turtle
Is there any advantage to the slim hose other than weight? I'm on a CPAP so I have plenty of the larger stuff available.
velvet wing
true turtle
Is there any advantage to the slim hose other than weight? I'm on a CPAP so I ha...
slim hose is just more common. use larger if you can.
real crypt
Trying the other e34m1 cutter

Just need to get the BOM
Also mirrored everything so it cuts on the left.
real crypt
 velvet wing
real crypt
velvet wing
real crypt
that looks very clean
velvet wing
I will be on vacation for a week starting Saturday. I intend to have a go at a BTT Eddy eddy mount then.
 hallow marsh
great project Jon... printing it right now 🙂
fair lantern
velvet wing
gotcha. great accels there, btw.
Alrighty, following up on that Mosquito hotend mount. Performs wonderfully, so much so that the 40mms3 VF and 10k accels w/ all metal componentry has torn the PA EVA3 universal front apart. So now I'll be CNCing it since that's the last plastic part left:

it's designed to add to the exhaust vent of the mosquito mount for supposedly improved heat extraction, but no cfd so this is effectively coming out of my ass. That said the last time I did it I ended up with a functioning mosquito cooling system, so who knows.
Still trying to figure out how to optimize the belt routing for CNC since I'm only using a 3-axis milo
velvet wing
oh sick!
fair lantern
reason I didn't do this with the printed part was because the honeycomb actually added to lateral support during movements, so this would've compromised it even further. The EVA3 is great, damn is it picky about materials.
oh btw
while I have you here
velvet wing
fair lantern
reason I didn't do this with the printed part was because the honeycomb actually...
you'll see no issues with metal. aluminum, i'm guessing?
fair lantern
correct
I'm building another printer for even faster speeds.
also based on a merc
any chance you have one in the works for this bby? https://www.fabreeko.com/products/takoto-hotend?srsltid=AfmBOopXtOpDNqhdTHkLAfzy1-w-Ze4bHQc-fxoFoPHgyWXktO-kJ3kr

Fabreeko
what it is: high flow hot-end with dual heater capability and v6 style nozzles. specs: All metal (tested to >320°C) 400c validation in progress Dual vertical heater cartridges (standard Ø6.0 x 20mm, any wattage that your machine can support), clamped in for good thermal transfer Standard Ø3.0 x 15mm temp-sensor (the
fair lantern
velvet wing
you'll see no issues with metal. aluminum, i'm guessing?
your e34m1 port has been a godsend btw
but yeah if you have somemthing for the takoto hotend in the works, I coulud really use it xD
velvet wing
fair lantern
but yeah if you have somemthing for the takoto hotend in the works, I coulud *re...
I do not know of one. I've only seen pics of the takoto.
fair lantern
velvet wing
you'll see no issues with metal. aluminum, i'm guessing?
p.s. the website still shows the old version of the mosquito mount. The mount itself is holding up beautifully, will likely remain printed.
fair lantern
velvet wing
I do not know of one. I've only seen pics of the takoto.
copy, I just might make one then.
velvet wing
fair lantern
copy, I just might make one then.
lmk if you do!
velvet wing
fair lantern
p.s. the website still shows the old version of the mosquito mount. The mount it...
i will be doing updates while i'm on vacation next week. if you're around, please remind me (or open a git issue). i've gotten way behind on page updates.
fair lantern
yeah no worries!
i'll probably forget for the next 3 months anyway
let's see how long until I remember
I honestly want the takoto to be better than the mosquito. Two heaters sounds awesome.
but the mosquito is stupid good
the ceramic heat break insulator is held together by kapton tape and it still rocks
velvet wing
i'm starting work on some updates, both docs and model stuff.
nothing major, mostly new stuff
azure barn
velvet wing
nothing major, mostly new stuff
What’s new??
velvet wing
azure barn
What’s new??
good question. a few things got contributed that need to go in the docs. i'll throw together a full list soon.
- modified Mosquito hotend mount for better airflow
- BTT Microprobe mount
- TD6S hotend support
there's more, but i'm behind so i don't have a full list
velvet wing
- Dragon Ace
 velvet wing
hallow marsh
velvet wing
hallow marsh
what's the use case? uses parts available on hand?
hallow marsh
velvet wing
what's the use case? uses parts available on hand?
i use it so that i have RPM meter in case hotend fan dies on me xD
 velvet wing
hallow marsh
i use it so that i have RPM meter in case hotend fan dies on me xD
velvet wing
hallow marsh
i use it so that i have RPM meter in case hotend fan dies on me xD
ahhh 3 pin fan? I've thought several times that toolhead cooling fans should be 5V with a tach pin.
 vernal finch
real crypt
vernal finch
real crypt
Glad the mirroring worked out!
Finally getting back to working on the filament cutter, working on something to fit inside of the shroud at the top so it can be used for all hotend mounts
 velvet wing
that would be fantastic
vernal finch
@velvet wing Is there a design guide somewhere if there's any standards for holes/chamfers or anything?
velvet wing
vernal finch
<@755022853040111697> Is there a design guide somewhere if there's any standards...
they're based on this: https://docs.zerog.one/standard/cad/guidelines
vernal finch
Ah thanks
And by have time I mean forced to cause the heat break on my rapido just snapped off while printing, no idea how that happens, so I'm swapping to a different hotened 🥲
 real crypt
vernal finch
Glad the mirroring worked out!
real crypt
vernal finch
Glad the mirroring worked out!
yeah issue still exists with how to hold the blade
but i solved it by snipping some of the plastic off
vernal finch
real crypt
yeah issue still exists with how to hold the blade
I dont think it's in the BOM now that i think about it but you can use an m3 set screw in the hole in the blade holder
real crypt
yeah that interferes
the blade holder will not fit into the main housing

see how i had to cut a portion here

because there is no room for that screw
to fit into the side housing
vernal finch
real crypt
yeah that interferes
Strange, I guess the one that I have is shorter fits just fine
m3x3 set screw should fit flush
real crypt
oh i guess a set screw could probably work
im just using a screw from an old box
it has a head on it.
i didnt think about set screws
vernal finch
Ah, that'd do it
Before I found a set screw I just cut off the end of a m3 bolt and cut a slot into it with a Dremel for a flat head. Actually worked pretty well
real crypt
maing a variation for a standard m3 screw with a bit more room could be a great option
but i was able to make a mod using tinkercad really easily

just widened the hole a bit
vernal finch
Yeah that works, working a whole redesign right now, probably going to have to be forced to use a m3x2 set screw just cause of where it has to fit
Trying to shove everything in this 5.2mm gap
 vernal finch
Need to get some sleep but here's some work so far
Decided to mirror the probe mounting points to the other side and will be using that to mount the lever instead of having to remove the belt gripper to remove it and allows for anything else in the ecosystem already to be mounted there
Remade the lever and blade holder from scratch to be much thinner so it will fit with about a millimeter of space on either side of the front walls
Made the blade a bit longer so that the set screw doesn't have to go into the body of the front piece so should be able to fit a full size screw but no idea as I haven't done any test prints yet will probably work on it some more tomorrow after I get home


 velvet wing
vernal finch
Need to get some sleep but here's some work so far
Decided to mirror the probe ...
velvet wing
vernal finch
Need to get some sleep but here's some work so far
Decided to mirror the probe ...
this was my choice of location, though i didn't get very far. sweet!
onyx yacht
vernal finch
Need to get some sleep but here's some work so far
Decided to mirror the probe ...
I've been using your cutter from when you first released probably around a year ago. I have over 4400 swaps/cuts. Still works great and going strong. Thanks for making it!
vernal finch
onyx yacht
I've been using your cutter from when you first released probably around a year ...
Great to hear! It was originally made for the the standard EVA printhead I found on printables
I just modified it for mercury but it's definitely time for a dedicated one for this group
Also as a heads up if you haven't replaced the blade since then I would. I took mine out while messing with something else a while back and there was pretty much a notch the width of the filament where the blade normally was lol
onyx yacht
lol i've changed the blade several times. I also had that notch in the blade that the filament wore out
deft monolith
wide turtle
nozzle needs about 1.5-2.5Nm of torque at 285°C
as stated in the manual
how do i do this? Screw in, heat hotend to 265, torque till my hands bleed, done?
wide turtle
deft monolith
how do i do this? Screw in, heat hotend to 265, torque till my hands bleed, done...
Torque wrench
1.5nm is not much
vernal finch
Test fits went well just need to make the lever mount and I should be done with the print head
vernal finch
Just a few small adjustments and it'll be ready for testing
Anyone feel like taking apart their print head?


 fair linden
I would like to test, however I have to fix a toolhead filament sensor first. Not sure if there exist one for my orbiter 2.5
vernal finch
fair linden
I would like to test, however I have to fix a toolhead filament sensor first. No...
I've got one, I'll see if I can find the link for it
vernal finch
Here's the filament sensor, it just goes in between the normal extruder mount and the top, I think I had to use slightly longer extruder mount screws with this one
https://www.printables.com/model/442650-eva-3-toolhead-filament-sensor-mechanical-and-reli

Printables.com
Toolhead Filament sensor for the EVA 3 platform based on a switch and a ball bearing | Download free 3D printable STL models
And here's the cutter files if anyone wants to test, only has the basic front in there right now
https://www.printables.com/model/1141394-e34m1-filament-cutterv2

Printables.com
Custom Made Filament cutter made for the mercury one EVA 3 Toolhead | Download free 3D printable STL models
velvet wing
ProtoXtruder mount: https://www.printables.com/model/1142327-eva-30-e34m1-protoxtruder-20-mount

Printables.com
The Sherpa mini mount did not fit (the foot for the NEMA14 blocked the mounting) so I designed a new one. | Download free 3D printable STL models
hexed current
vernal finch
And here's the cutter files if anyone wants to test, only has the basic front in...
I assume you are running the endstop on the opposite side then?
vernal finch
hexed current
I assume you are running the endstop on the opposite side then?
Yes I am, just to remove the complexity of a moving lever actuator arm so to cut the filament it just brings the toolhead over to the right and doesn't need to go anywhere specific
hexed current
cool, I think I was smart and printed both options when I was first doing my build. I am going to get this printed and then figure out the code I need to add to it.
vernal finch
If your using the Happy Harev2 it has a filamatrix cutter that you can use for cutting. Works pretty well
warped snow
vernal finch
And here's the cutter files if anyone wants to test, only has the basic front in...
This is awesome you are doing this, thank you! I had edited your previous version to work on a revo hot end and I’m probably near 8k cuts. Interested in this design for sure. About time for a toolhead redo
vernal finch
warped snow
This is awesome you are doing this, thank you! I had edited your previous versio...
Thanks!
Me swapping to a revo is the whole reason I designed this lol
After my second rapido I want something with parts I can actually replace
I think I already found something I need to fix with the blade holder on this one. Likes to get stuck if you push it in too far cause the taper but that should be an easy fix
vernal finch
In case anyone printed out some of the parts yet, some changes have been made as I was assembling mine I found a few small issues
fair lantern

Takoto in progress
Sits higher than the Mosquito on the topside. Split-mount to emphasize airflow vs. pure fit. The Takoto came w/ SIX mounting locations. I paid for six locations, I'll be using all of them.

To clarify, it's equally flush on the nozzle-side. It's just a taller assembly.

Clears just barely on the bottom. Could use a fillet, but not necessary I'd think.
 fair lantern

Completely different monster from the mosquito


Exhaust ports compared. Notice how the heat sink is
a) larger, duh, but also
b) sits right in the middle of the airflow.
I have high hopes. Mosquito mounts are OSR left and original EVA3/E34 right.

Same exact starting cassette: XY position of the mounting screws is identical, they just sit 3mm higher now. Plus the other 4 mounting screws.
 fair lantern
First prototype print - adjustments have been made for what's in the oven now.


 fair lantern


 velvet wing
fair lantern
velvet wing
fair lantern
that mount looks cool. what's up with your filament? wet?
cursive obsidian
I'd say GF/CF ?
fair lantern
velvet wing
that mount looks cool. what's up with your filament? wet?
Thank you! Great question - I print it out of a dry box so I doubt it.
fair lantern
cursive obsidian
I'd say GF/CF ?
Yessir, Sirayatech's ABS Core, it's really nice.
cursive obsidian
fair lantern
Yessir, Sirayatech's ABS Core, it's really nice.
Cool. Waiting for their PET-CF being available on amazon.de