
#3D Printing - Show Off - Help - Tips & Hints - Tools
245 messages · Page 1 of 1 (latest)
First attempt on printing a miniature Tac-2 joystick failed... learning is fun 😄

Second attempt is better, still some ugly ridges where it should be smooth though

Made a bracket for my security cameras, went a bit overkill with the holes for screws, but hey, now you got options 😄

Decided to make a workspace for the 3D printer with tools in arms reach 😄

looks cool you should share how the prints look in your program before you print them
like it'd be cool to see the process behind the scenes of the 3d printing
Can do 🙂
Currently testing ideas for a railing where I can mount different kind of tool holders
First two images are from 3DS Max, the colorful one is in the slicer program (printer application basically) and a progress image from the printers cam 😄


Test pieces work as intended. The small part is just a placeholder that can be remodelled to hold some sort of tool 😀


The smaller piece has a very small ridge on the "flaps" so I grabs onto the railing, but can move freely horizontally
Did not design this one but it is cute and good to have if I need to file or sand down some pieces 😀

Not sure who was more confused.... printer or me
Looked at it, the tool is fine lol

seeing it go from virtual model to a real one is sick
is making these models hard? I've found Blender quite hard and don't know how similar is it
it can be if you never used 3d modelling software, I hate Blender but only because I used to spend so much time using 3DSMax
Blender is very unintuitive for me
every button and combination that normally does 1 thing, is completely different in Blender
the hard part starts really when you need to make more complex shapes, in addition to 3D printing you must also take into account what you actually can print, some shapes, arches and other angles require more planning
3DSMax has a crapton of buttons and shortcuts too, but I felt since I already know most of them in one software I do not want to relearn with another software
oh I'm like that with Paint.net
too lazy to start learning Photoshop because I can already do what I need with Paint.net
yea it's the same
nothing changed
it's a great alternative for photoshop
and if you get the right plugins you can get close to what you can do with Photoshop
Yup, pretty much 🙂
there are online webb apps for 3D printing model making, haven't tried them tho, OnShape seems to be very popular
these are specialized for 3D printing, so you could learn one of those if you are interested specifically in 3D printing since they do not have a plethora of features you do not use anyways
my measurments for a android tablet VESA mount are out of whack... have to a bunch of post-print fixes XD
Tabs on the sides were too wide apart, had to cut into the base and glue new tabs 🤣


I've had a 3D printer for a while, but I won't be able to use it until we move in... expect to see me post here in a few months 
Sweet 😄
Just shooting an idea but how does 3D printing a 3D printer sound?
I assume it's possible except maybe all the electrical stuff
you would have to write all the software for it to get it to work though
and that's a very complicated process
but just a model I guess you can do that
people build guns with 3d printers
Fair, though I assume there are a ton of open source stuff out there
The quality of the printer would be questionable though, but you could make 3d printed brackets and such, build the cage out of aluminum tubing... it has been done 🙂
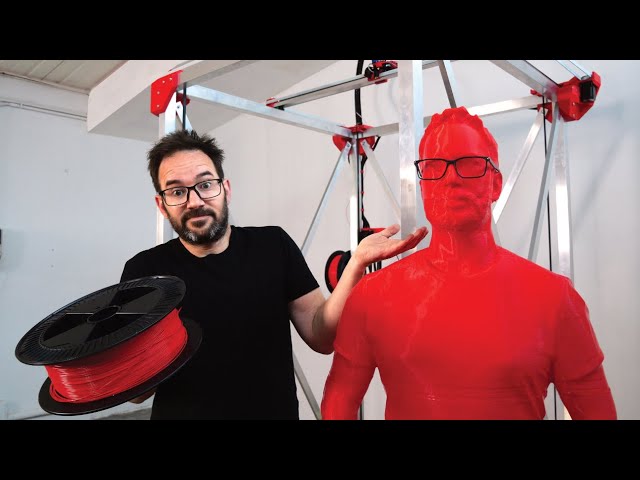
You and your company can try Onshape for Free at https://onshape.pro/ivanmiranda
The files for this 3D printer are here:
https://ivanmiranda.com/products/big-3d-printer-mkv
These files are mostly finished and I'll keep updating them with whatever improvements or changes I make to the machine.
The part 1 of the build where I complete the frame ...
Made an arm for the security camera bracket


Dropped the camera just as I was mounting it, but seems to be in working order 😄
why does it have cute eyes
camera picks up the infra-red diodes 🙂
Lesson of the day, it is easy to break small parts when removing the support material ☹️

Speed glue to the rescue 🤣

(That is a box of screws as a weight)
If your printer supports it, you might want to look into running Klipper or Marlin with it
looking them up 🙂
I got my printer running Marlin firmware that I modified
do'h, someone asking if klipper works on p1p on reddit.... reddit is broken "We had a server error..."
rip
I think I'll bail out on swapping the firmware, the Bambu firmware has stuff I might need later


Oo attack helicopter
done a bunch of small random detail parts I can use for builds like this 😄

Gonna print those tomorrow when I get back from work
what printer do you have? I wanted to grab one sometime, any recommendations?
also your prints are looking really nice
I'm far from being a pro, but to answer your question, I'll answer with an answer I got from a youtuber 😄
Get the Bambu Lab P1P if it is in your price range, best bang for the buck... it is really fast
Their X1 is almost the same but with a cover, and some other neat stuff, but if you don't mind the open frame P1P is fine
X1 costs alot more too
thanks! I'll check those out:D
It has begun, almost 3 hour print XD

Good luck!
Lessons of the day: Tiny parts easily break lose during printing if not supported properly XD ... Do not experiment with too many parts, its a PITA to pick up the failed loose parts while saving rest of the print
Print with a raft or brim enabled
Thanks 😄
overall. it wasn't too bad
Basically these parts got loose and I had to chase them with a pincher so they do not get on top of other parts

Lego man looking a bit wonky 🤣

rickets
I'd be wonky too if I had no clothes and no face 🤣
Just finished his big brother, much better even if no face 😉

woah that's a big boy
had to make it a bit bigger so it doesn't break during assembly lol
the small guy has some parts glued 😦
Something more serious,making this spacer so I can fit a tiny IR remote in this Bluetooth keyboard 😎


Added some random details to my hover ship thingy


my god I hate autocorrect, needed to edit my message like 6 times
Todays build: fume extractor for soldering or using superglue 😎

I will build compartment on the backside to hold a filter some day 👍
nice
Filter compartment with a sliding door so I can change when needed 😎

Dipping into electronics in this room but the enclosure was custom 3d printed 😀


Typing wrong arming code a few times, then the correct one, system goes into arming stage, armed with pulsating red diode. And finally unarming 😎
right now this is a dummy, but next I will learn to hook it up to my WiFi and Home Assistant, which in turn can do fancy stuff like play a mp3 really loud, turn all lights on in red etc 😄
That's awesome!
make it so that if you get it wrong 3 times the thing turns on an explosive inside of it and detonates within 5 seconds, no warning
the explosive used should be a grenade, so that you can't hide from it
XD
Designed a backplate for it, but it is too late to print today

Too late to print? I thought prints are usually overnight
if you got the space for it, I mean I can hear it from the other side of my apartment, not to mention I would most likely disturb my neighbors
How do i make tpu be less stringy? I turned up retraction and i’m already at the lowest temp my filament says to use. Bed temp is like 50
but beds fine
I'm a noob at this and currently having problems with PLA lol ... maybe @open silo knows a thing or two?
oh wow, cleaning the bed with isopropanol actually made a big difference, no floating parts after a while XD
Oh i did the
hmm
glue stick thingy
and that helps it stick
I think I had some fingerprints and what not on mine 😄
fair enough, idk probably my printer since it’s a shitty ender 3v2
Bump. Messed with settings a bit but still some stringing. Also i’ve discovered it’s scratch resistance trying to shave off parts

Bowden or direct drive extruder?

Got the scale wrong, ball does not fit 🤬
This is just one section of three, wasted 3.5h on this print alone
the slot you see there is just a carve-out so I don't waste filament
This is the idea with all three sections together

Almost done 🤣
@long veldt Thought you might want to see the small progress, a start at least 😄
Cool!

Let’s go! That’ll be awesome
4.3h later... ball fits this time lol

I need a farm of 3D printers... gonna take 9 hours with my next parts lol
Camera on my printer sucks so I put up one more security camera in my apartment 🤣

Parts ready for assembly tomorrow 😀

This is a really cool project! Once we're more fully moved in, I'll finally be able to actually use our 3D printer
😄
are you planning to do scoring and have bumpers and that kinda stuff?
Yes 😀
that'll be so sick
you making them, or buying them? seem like a hard thing to DIY, but i dont know anything about how they're constructed
I will try to make bumbers, they are crazy expensive
Now with 3d printed parts 😃
This is the exit from the plunger so the ball can never go back


Small design flaw 🤣

Got my special screen today, made some rudimentary programming 😄

@long veldt some progress 🙂
Modelled brackets for the monitor to attach it to the far back end of the box I've built thus far

That’s awesome! Any plans for the layout of the board?
just the 3d model I did earlier, I got some ideas but I need to figure out how to design "buttons" first
Made one yesterday, but the footprint is huge!

already made a change to this, added a gap at the back so you can pop of the lid if needed
this is the one (times 3) in the video above
table taking shape, with monitor attached 😄

YAY
i need to like
i need to print a new antenna mount for drone 😭
My current one is trash

I don’t have a image but basically it didn’t fit right the first time
so i was lazy and just drilled out all the holes
Ah, they joys of reprinting XD
Like this frame for the monitor, I somehow made it 1mm to small

it’s now permanently attached to the drone
YEAH
And i lost my calipers
(I blame that it shrunk XD)
Eyeballing 😄
the issue is that
it’s like
less than 1mm between too loose and too tight since it’s held by friction
oof
is it a small piece ?
at least that is "good" ... I mean, the frame took me a few hours to print XD
😭😭😭
it took me like a hr or two to print maybe
it’s not big
My printer is superfast ... at least commparred to this heap of junk (Sovol 06) we got at the Makerspace lol
mine is super slow
well
normal speed
but then i have to slow it down
for tpu
have not printed anything in TPU yet
it’s alright, it’s still stringing but like
i don’t really care anymore
im too lazy to change it
plus i only need drone parts and i wouldn’t really use it otherwise
and like drone parts won’t look good anyways since i’m running into stuff all the time
or tapping on stuff with the blades and stuff yk
plus my drone is already covered in dirt LOL
not covered but
like
the outside has dirt on it LOL
inside is fine other than just a bit of dust
😂
i also
need to print a new camera mount
but i’m so lazy
i’ll probably try to find one
LIttle bit of protyping with a solenoid and 3d printed ramp for the ball to return to start position
God this whole project is so cool
Planned on doing the round bumpers at some point too?
I've been thinking doing it yes, but man are those things complicated! I might just buy used ones instead
Prototyping a lift for ball, so it can be, well, lifted to some other plane on the board
https://cdn.discordapp.com/attachments/822061388653658173/1158091826943770754/20231001_192211.mp4?ex=651afc8f&is=6519ab0f&hm=3da7ef28b59ad467a9ea67abe89f1b0ba422fc593955d6e82e45612e17b9633b&
A new design with a "gearbox" which should extend the elevation a bit while still using a 180 degree servo

Gonna be first thing I print when I wake up 😄
Failed 😑 tolerances were too tight making small poor servo to choke
Skippad the gearbox idea, ordered contiguous servos instead
You can modify partially turning servos too
To turn them into continuous servos

CircuitBread
Learn how to modify a regular servo motor to a 360 degree continuous rotation servo motor. Step by step guide with photos to make a servo motor.
Yeah, thats an option, but I might wanna use them for something else 😀
I saw some dumb solutions too, like bypassing the pcb and drive the motor directly lol
https://cdn.discordapp.com/attachments/822061388653658173/1160657549582942258/20231008_211454.jpg?ex=65357593&is=65230093&hm=d4879d6c53195823fd8d9c0d9a074f397076b6e467cf269e5f42cf3debdd81a2&
https://cdn.discordapp.com/attachments/822061388653658173/1160657549876535386/20231008_211336.jpg?ex=65357593&is=65230093&hm=baa85b5ea348daf55878a7fb76fd9d6636a53fe42819d2752ace8cf9d44bc7fd&
https://cdn.discordapp.com/attachments/822061388653658173/1160657550094635029/20231008_211258.jpg?ex=65357593&is=65230093&hm=e9ac81b3213ddca6792e8ef125dfe2ff0cb791da0c418257c3314f4b801eb06e&
https://cdn.discordapp.com/attachments/822061388653658173/1160657550459551844/20231008_211232.jpg?ex=65357594&is=65230094&hm=3eaa2a5f14320feb1f60287258fa7b0d51a5e2c375c49ba9ae5adc21de105b4f&


Pics of my pop bumper prototype, still missing the solenoid that is used to pull down the cone using the two outer rods
The solenoid is triggered when the ball touches the "skirt", which in turn tilts the middle rod making it contact the plate with a hole
Ooo, fancy
might need to redo the plate with the hole as it is a bit too big, the idea is that it should make contact when the ball just barely touches the skirt
very small margins

Lol activate windows
Not my computer 😛
@forest anvil I finally got my printer set up! Quick question, could scaling a model like 10 times as large cause any problems? I have a model that I designed to be 10x10 mm but that was too small. Should I scale it in the modeling software or the slicer? Or does it not matter?
Doesn't matter which one you scale it up in
Ok cool
What he said 🙂
Sorry for the ping, I'm new to this
np 🙂