#✂challenges-feedback
1 messages · Page 29 of 1
@restive otter nice work but the areas you cleared are much blurred need some 😇 sharpen
@agile ivy cool man 😇
thank you
@ember frost good one if you reduce the size of animal according to prospective will help😇
Lots of fun, went to extreme but still some tools could not get to use
@restive otter thank you 😊
Gave +1 Creative Carma to Akanksha
@pulsar walrus thanks!
Gave +1 Creative Carma to shahid kazmi
challenge #2
Day 2 complete - not perfect but good exercise to practise
@bold hatch nice job 👍
Hi guys, my day 1 challenge. What do you think of it?
@pulsar walrus Got inspired by Juan Jose Egusquiza?🙂
@young karma i prectice these things during EQF level 5 deploma, but now i start my presence online
@void ermine Thanks for the feedback
Gave +1 Creative Carma to Jon Leo
Day #1 Challenge, just found this series, which is great Photoshop is defo my weakest of the apps 😃
@jade glade Yep that is the lens flair that I was thinking of. And, I like the rose in your first post.
hello all, here is day 2 ... i wish i could really clean up the garden that quickly ...
Great job @hearty wharf 😄
@wet thistle I love how you preserved the textures, especially on the ground!
I totally forgot to share this here
and finish it up with some ink pen
@young karma is really good you should outline the dark areas with one of the kyle ink brushes for a more finish and organic look! (just saying )
Creative challenge, day 1
Thank you @coral stone !
Gave +1 Creative Carma to Valdair Leonardo

Behance
I think this attempt at retouching is much better than my last attempt!
Day 2!
Good Morning everyone
@tribal axle My hometown.🙃
@cosmic sparrow That's great to hear! I'm glad it will save you time in your shoots!
@woeful storm Great job on your challenge number one attempt. looks very good!
@lone frigate I think you did a great job removing the fence! And what a great concept!
@turbid terrace I think that you did a great job. and the photo looks much better without the boat or the rocks in the first photo.
Love doing this, so I did a few, here's one before
after
Before
After
before
after
Finished just minutes before challenge 3. Removing washing machine tag that's underneath of the paws was a total pain, and wall retouch too, since content-aware didn't get it too right, but well.... the things we do to temper our skills.
daily creative challenge day 2
@tulip fern @fallow bough @young karma - Thanks for the props appreciated
Gave +1 Creative Carma to unicaNL
Finally finished - maybe I bit off more than I could chew with this one. I wanted to remove the cars also but I did not feel there was enough information to rebuild the background. 🙃
Thanks @lethal mural 🙂
Gave +1 Creative Carma to Jesús Ramirez
@bleak fossil Thanks, Sam, for the comment.
Gave +1 Creative Carma to SamPetersonArt
@young karma loved the color retouch. Is hard to remove cars, they steal too much space, maybe you can photomerge it with one pic without cars.
@shadow mural Okay, thank you!
Gave +1 Creative Carma to hgt3
@small copper well done fizha huge defference between both
One I did while following what do you think.
Day 1 challenge
@sturdy vault really great work! And I love the parrot next to me 😄
@sturdy vault *to him correction lol
An old bad photo. Still bad....
Day 3:
Here is my day three!
Retouch a portrait - day 2
Really glad you like it, @bleak fossil. Many thanks for your kind comments.... and apologies for the delayed reply.
I did try to get more hatching on her garment, but the application was unfavourably affecting her hair........... layer mask... of course!
It's good to talk. I'll be on it.
Gave +1 Creative Carma to SamPetersonArt
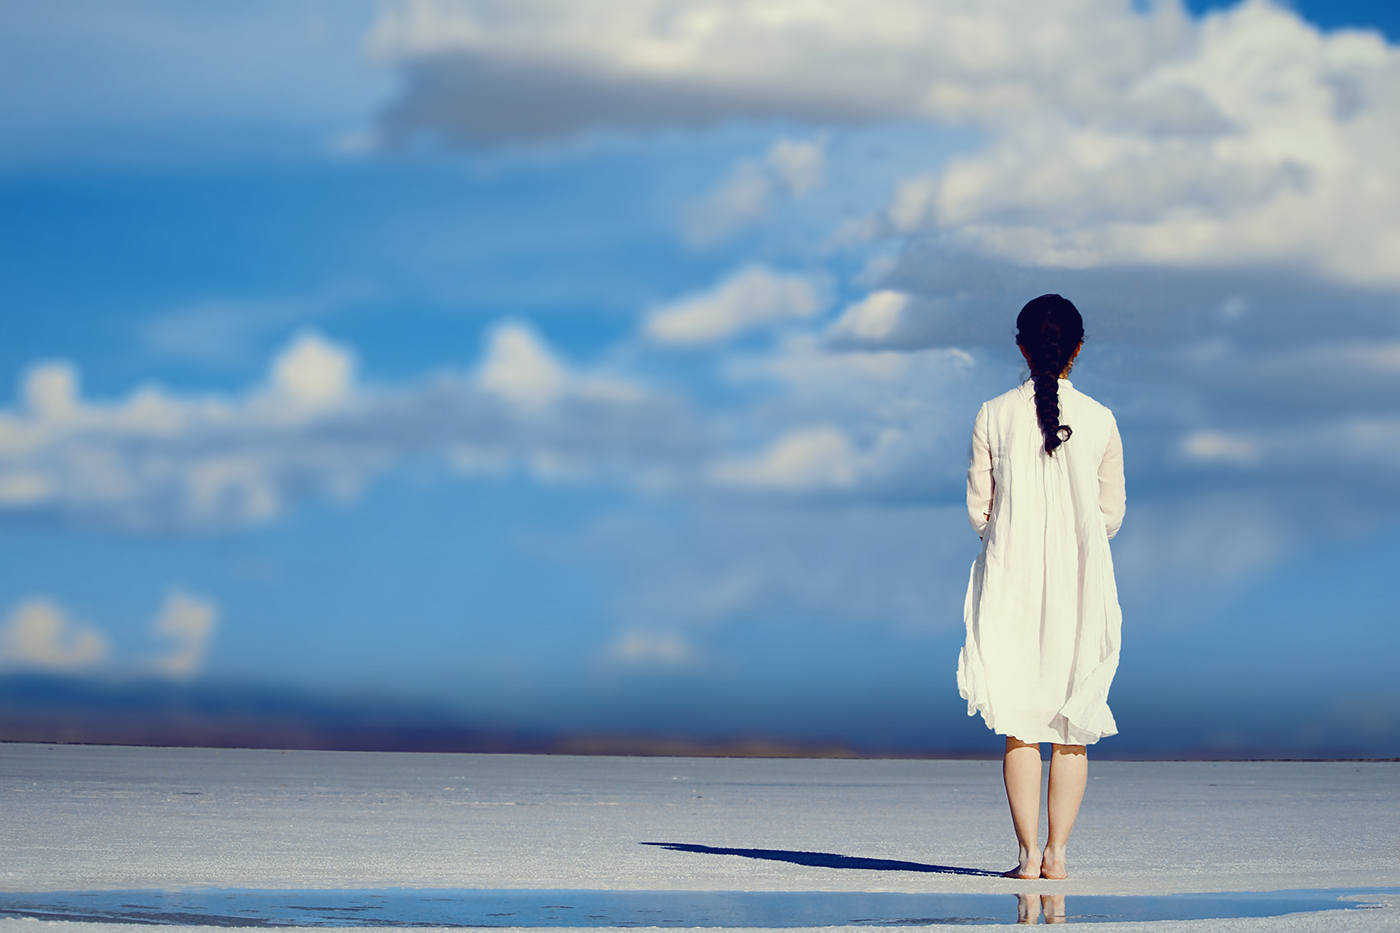
Day 3 / Blur background 😀
Hey, does someone know why radial filter inside camera raw filter is applying its effect to the whole image, not just the circle?
Day 3 Challenge blurring background
Did it right away before i forget it or get busy.
03 Blurred background What are your thoughts After Before
@ember frost Thanks. (I think)
Gave +1 Creative Carma to julie
a picture of my cat with her then new toy. How does my Blurring look?
Used a different filter for the blur, but technique was similar
I thought this was a great way to focus your eye to the subject. Thanks @lethal mural
Gave +1 Creative Carma to Jesús Ramirez
This is after
@blissful badge Great job! The blur really makes the guitarist really stand out in the photo. It looks much more professional.
@hallow trench Make sure that you select "Inside" withing the properties of the Gradient. On the right side panel, below all the sliders.
@wide cradle Good job overall! But make sure that you also get the area in-between his body and his arms!
Day #3
@lethal mural Thank you, great challenges!
Gave +1 Creative Carma to Jesús Ramirez
Remove distractions2: Chose a very busy image so I could use as many tools as possible then realized it would be too hard to see as a before-after set-up so I created a gif. Removed a lot of people, objects and replaced the sky.
w o w, amazing job @cold cedar
@pulsar walrus Agreed, but it was a choice since I didn't like the background.
I'm running a bit behind on the challenges for this week, but can anyone give me feedback on the day 1 challenge?😀
Day 02 sorry I am delivering it late, but it was kind of hard for me, since I am not an expert user of photoshop, nevertheless, I am learning and these tutorials by @novel flare Ramirez are awesome. Thank you.
Gave +1 Creative Carma to Jesus
Day 02 sorry I am delivering it late, but it was kind of hard for me, since I am not an expert user of photoshop, nevertheless, I am learning and these tutorials by @novel flare Ramirez are awesome. Thank you so much for this learning opportunity 😘
Day 3 Loved today tutorial - so much to learn - abut masking, smart objects and bokeh effect 😍 wow
It was difficult to find a picture that I could use them all but here we go
the original
I had 2 other attempts before but the pictures were not really good for bokeh
This is wonderful, it must have been hard to get rid of all those tourist!
@young karma Actually I like it more with the cars - they are not obstructive and it gives the pictures a more natural look. I love what you did with the lighting adjustments 😍
my take on Challenge #3
Great job @gilded pelican! My only suggestion is to remove these edges 👇 . I believe the spot healing brush can do the job 😃
@young karma I loved the way you made the colors pop on the cat photo! Well done!
@fiery trail Really cool mood on your image. Maybe you can play with some channel masking and pattern fills like Jesús did on day 1, so you can give the image a drawing look. You can watch the Day 1 replay anytime 😃
day 03
One more before and after busy photo retouch. This is before...
This is after, lots of things removed.
@coral stone thanks so much for feedback, valdair!
Gave +1 Creative Carma to Valdair Leonardo
these challenges have been great - really useful for everyday problems, thank you very much @lethal mural
Gave +1 Creative Carma to Jesús Ramirez
... and here is my day 3, before and after ...!
@blissful badge nice work just check the right corner of painting
Day 3 - Challenge
Day 3 Blur a background
Day 3 Just noticed I need to fix the mask on the foreground image on the gal's hair to the left. 🙄
feedback appreciated😇
Blur a background - Day 3
There. It's fixed. 😄
Day 3 challenge... Prom Day Floss!
Day 3 - Blur a background
New version: Soften the edges around mask, changed to Tilt-Shift Blur and added a bit of grain.
Original
Hi, this is my day 2 challenge: removing distractions. What do you think?
Thanks @agile ivy
Gave +1 Creative Carma to afonsofidjones
Day 3 I did a vertical then a horizontal titl-shift filter, then a field filter for the trees in the back. I masked the walk to bring it into focus. I could not get the radial filter to work. I only wanted to change what was outside the circle, not inside it. What did I miss? Got the answer in the ask a question section. Thank you.
Day 3 background blur
Day 03 here it goes!
@gilded pelican I really like your picture for day 3 but I think just from my eye you accidentally miss a spot for a blur on the right corner ( top of that brown column) 😊
@short mica I looked at this same image, did you use search terms "woman on street" in unsplash too? 😂
@tribal oak Yes unsplash , I think I searched portraits with backgrounds.......also use https://www.pexels.com/

Free stock photos you can use everywhere. ✓ Free for commercial use ✓ No attribution required
@bleak fossil . Day 1 re-work. I did some changes and I think it might be better. What do you think?
@gilded pelican nice work the. Though I think the blur should have covered the top right corner there unless it was intentional
@gilded pelican
Hi guys, my day 3 challenge. Do you think (the picture on your right) I should blur the background more?
Day 3 Ready for the Fall.
Late day 2 post. before (right) and after (left) of retouching an image
Awesome photo @young karma! Maybe you could increase the blur a little more, to create even more depth 😃
@pine cypress I think you did a great job blurring the background and adjusting the colors.👍🏻
Day 3 for challenge, who want to dance to the music by happy horses? Don't forget throw some coin for them.
@young karma I think you should blur more on the background.
Day 3 with my radial filter flare added.
@bold valley nice 😃 just one thing to keep in mind: if the path is in focus, so should be the ground right next to it - at least if you're going for photo realism 😃
PSdailychallenge July 25, 2019 - Blurring a background. Photo retouching.
@glacial path Thanks, Tim. True. I guess I was looking to draw attention to memorial more than trying to realistic. Really just playing with all the stuff I am learning.
Gave +1 Creative Carma to evil
@jade glade LOL! What a shot 😄 I like the warmer colors and the background blur effect!
@jade glade maybe you can also add a subtle blur to the pavement in the foreground 😃
@grave needle Yeah, that's much better 😄 It looks like the photo is slightly tilted, you could try to correct for that using the crop tool 😃
@glacial path Thank you for the feedback and you did say add a subtle blur to the foreground?
Gave +1 Creative Carma to evil
right around here
if the background is blurred, the foreground should probably also be blurred. only the content in the middle would be in focus 😃
just an idea
@glacial path oh okay, I get it now and thank you for the tip!
PsDCC3 Blur Background. The cool thing about these challenges is how much we learn along the way, like bokeh in the blur gallery — with color! Do let me know what else I can do to improve this image.
Redo over for day 3 challenges, happy horses time ! 🎵🎶
Really enjoyed the 2nd day challenge. Learned a lot, as I've only ever really used the clone stamp, and didn't know about spot healing and patch. 🙃
Day 3- Blur a background!
Wow, this took way longer than I thought it would... Hopefully catch up tomorrow. Here's Day 2 - cloning etc..
Day 3: Blurring a background
I think I took a longer time finding the right photo to use than the actual process.. 😃
Challenge #3
Challenge #3
Here is my Day 2~ Before and After
Day 3 blur a background.
@kindred kernel Nice picture. I think I know those 2 ladies in your picture. Are they from Gary, IN? I think I graduated with them if they are who I think they are.
Day 3 Las Vegas downtown
@scenic anchor Nice job matching up the stripes.
Thank you Valentine
@void ermine Well, you did a really nice job with that. I've done power lines before and whoo!
Blurring a Background: Same family photo from yesterdays challenge (#02) of my beautiful Mom and my awesome Boys! Blurred the background, enhanced the lighting, and added a very subtle light bokeh effect in the blurred background. I absolutely love how this turned out! ; )
@twilit blade You did a good job on removing the objects on your Day 02 entry! Although it also lost some of the (I do not know the right word) coziness, maybe the story that the image tells. I think it can get stronger by cropping some of the top, but then you can not show the good job you did 😃 Then maybe in this case it might help to darken the top of the image, all to give the beautiful cat more focus.
@tulip fern thats great feedback! I agree with adding a darker shadow on the top to highlight the cat more. Thank you so much for taking time to review! 😃
Gave +1 Creative Carma to unicaNL
Day 3~Before and After
Day 1 drawing effect
Day 2 Challenge Original Photo
After
How does the removal of items around orange sign look?
Backgorund blurring
Day 2 Challenge-Second attempt. Please advise what all is wrong...
@naive saffron I like the cleanup on the hair! Don't think you should've removed that rim light on top though, it helps separate you from the background. The blemish removal on the eye and shoulder is nice, but personally I'm not a big fan of removing little moles as they're part of you. 😃
My day 03 entry.
The field blur always looks incredibly fake to me, so I drew a quick depth map for the lens blur. Additional tone curve adjustments, radial gradient for flare, some light wrap and a bit of grain for good measure.
Sounds interesting @supple lion ! How did you create such a 'depth map'? Can you share a link to a tutorial you recommend? The other things yo mentioned I will try to understand 😉
i've applied all the learnings to an old photo of a sketch of mine and was able to rescue it!😀
Day 2
@tulip fern I just drew over the original image with brushes and the gradient tool to represent how close that part of the image was to the 'camera' — white is the furthest away, black is closest by. There might be tutorials about it, but I often generate those depth maps in 3D renders for compositing in After Effects so I'm pretty familiar. Then in the Lens Blur effect you can select the map to be applied for proper blurring.
Thanks @supple lion
Gave +1 Creative Carma to paulvansommeren
Too bad I flattened everything down, but I could do a quick breakdown if you'd like?
@hearty wharf cool 😃 you made a sketch, framed it, made a photo of it, toook that to photoshop to make a clean sketch out of it again. That is a nice circle 😃 Good for you that you managed to 'rescue'it in this way! Looks great.
@tulip fern ha ha - now that you've put it that way it does sound crazy ... but i gave the picture away and only managed a quick photo beforehand, so this was all i had left ... thanks for your feedback!
Gave +1 Creative Carma to unicaNL
here is a new version of my day 3 - with a bit more focus on the front ...
might try your depth map idea next time @supple lion - thanks for sharing!
Gave +1 Creative Carma to paulvansommeren
@hearty wharf I posted a quick tip on how to in #🔥tips-and-tricks if you're interested 😃
oh cool! i'll have a look!
Thanks @cold cedar ! Ya I thought it wouldn’t be too bad but then what else to do when half way done lol can’t leave it like that lol.
Gave +1 Creative Carma to ValentinePierce
Day 1: drawing effect
Done with day 3✌
@bold musk I love the colors and great work blurring the background!
Although when you blur everything including the ground and stuff close to the subject, the subject begins to look photoshoped like they weren't even in the original picture, if you know what I mean
@young karma that is one of the reasons i don't like to blur things but if the client wants it blur then we have to do it or we won't get paid.😅
@young karma I understand what are you talking about. I tried to show the transition from 0% blur to 100% to make a depth. Maybe I overdid a little with blur intensity.
@bold musk it looks awesome but somethings you can't avoid it.
@willow idol Nice to hear it. I drew inspiration from "How to make Bokeh" tutorials.
@bold musk i google it and i feel like you can make it even more blury because in those pictures. you can't even tell what is in the background. you can only see circles of light. i would love to see how that would come out.
 Cat_J, this command is disabled in this channel
@ember frost Thank you for the feedback!
Gave +1 Creative Carma to julie
Hi, this is my day 3, what do you think?
so am I getting this right? You need to be subscribed to adobe stock to work on the challenges right?
otherwise you need to deal with the watermark right?
@young karma preeetty much
hm.... too bad
find the challenges actually a very good idea, don't know why it is necessary to be so restrictive tho.
@young karma There are few websites that you can download free images from to use or use your own images. You don't have to use the images Jesus is working on. Also, you can just use the Adobe Stock images with the watermark.
@sly estuary we all like "something" way too much 😄 Don't stress. Do you.
Learned a lot 😄
I'm VERY tempted to sign up for Adobe Stock though
I got a message saying I leveled up, what the wat
This is my first time actually participating
yeah I am aware that it is possible to fix that, or use a different stock. My personal opinion on this is that if adobe offers these little courses to improve on basic things, which is btw very good and very nice, to offer these free little classes, they should be more inclusive and maybe make I don't know 1 out of 3 challenges like these available for everyone.
also @spark wharf always better to work on the same image as the teacher, just because every image will have different difficulties or problems... So learning how to deal with a specific set of obstacles always help. But if I work on a different picture I might run into something I don't know how to solve etc.... hope you get what I try to express
I totally get that
I've been following the After Effects tutorials and they do give free stuff out from Adobe Stock
So I know they can do it
@young karma Understood. I'd add that to "Challenge Suggestions"
oh there is a room for that 😄 will do
but on the same vein, getting your own pictures and solving those problems does add to what you learned?
@young karma it does seem that today's challenge has an image to use ^^
if ya check it out
it has
I still like the image I'm gonna be working on . Wish me luck I don't ruin it 😄
gl
@supple lion I'm glad you learned something new!
Thanks for that @lethal mural I prefer to use a Photo filter in this case to get a more nighttime look (or Camera Raw).
Gave +1 Creative Carma to Jesús Ramirez
Or I guess a day2night LUT would do just fine too.
Day 3 : Updated Thanks for previous feedback @lethal mural
Gave +1 Creative Carma to Jesús Ramirez
Behance
I'm a day behind but here's day 3 for background blur!
Finally Day 4 :
Day 4 challenge
@coral stone Thank you 😊
Gave +1 Creative Carma to Valdair Leonardo
honestly Blend if is such a strange beast
Any feedback will be helpful and appreciated.
I much prefer using you know...either the channel methor or the quick selection
Hello, here is my Day 4: Change a background
@blazing quail Wow this was a complete transformation!
@blazing quail I like the fact you remembered to turn on the lights and lighten the light areas. It is beautiful
@young karma I like the replacement of the sky.
DAY 4 - gotta admit, kinda cheated on this one lmao
Great job @stark swan I love the mood and the new sky you applied to the photo. Maybe you could play a little more with the blend if transition slider to make the edges of the trees a little more realistic 😀
@sturdy vault Awesome job with the reflection on the sea 😍.
@coral stone I appreciate that. This was a hard one trying to get the shoreline to look right.
Probably picked the wrong starting image. Required tons of touch up and still needs more.
Original
PS Daily Challenge #3 - blur the background and adding a bokeh
Comments are welcome!
I found it hard to find an image I wanted to use... Not sure if i got the lighting all right.. had to take out shadows since obviously no sun.. thoughts?
@cosmic sparrow I like the image you used and the shadow removal was great.. Maybe a little less color on the pier. The water has a tendency to reflect the water a little more than wood.
@sturdy vault Good point!
@cosmic sparrow Really nice work on the shadow removal! I think it works pretty well to make the lighting fit. The main thing I would fix would be that the horizon line on the adjusted image is off. So it appears as though the pier is ramping upwards. If you match the horizon line with the original image the perspective will look a lot more natural. Really nice edits!
@fallow bough I really like the after image. By putting in a different sky and changing the levels on the city you brought our a lot of detail we didn't see before. You made and eh image look beautiful
@bleak fossil I just noticed the pier being off LOL i was fixing that now...
@tribal axle Really great job on the background on Day 3! Really brings some nice focus into the main figure. I think it might be worth doing a levels adjustment on the man to perhaps add a little more brightness and/or play around with his values to make him pop a bit more. Nice work!
@sturdy vault Thanks. I used the Dehaze feature of the Camera Raw Filter to bring up the detail. It's something I learned from Jesus in an earlier challenge.
Gave +1 Creative Carma to pfordie
@coral stone thanks so much! I was blurring my life away trying to figure out how to soften the tree. I’m going to try the ‘blend if ‘ took some more.
Gave +1 Creative Carma to Valdair Leonardo
@fallow bough Thanks, this is my second challenge series. I guess I should go back and check out older challenges.
Gave +1 Creative Carma to Ken Cawley
hello all - day 4! thanks @lethal mural for another fun challenge!
Gave +1 Creative Carma to Jesús Ramirez
@lunar abyss Great work on the Day 3 challenge! Such a simple adjustment but adds so much to this image. Very well done!
@scenic anchor The Day 2 challenge is looking really good! Great job removing the leg, it seems like that could be tricky with all the stripes on the blanket. Perhaps a levels and/or hue/saturation adjustment layer could useful to tweak the values and colors of the image a bit as well?
@hearty wharf Who doesn't love a good storm. You did great work selecting the open areas in the trees.
@sturdy vault I learn something new from each series. I've been poking at Ps for almost 20 years and have only recently learned how to really use it. I attribute my improvement to the Daily Challenges.
@sturdy vault thank you, it's this trick jesus showed today - same here, i've been doing the same old thing i learned in ps in 1999 ...
Gave +1 Creative Carma to pfordie
@twilit blade Nice work on the Day 2 challenge! It looks like you adjusted the values of the cat as well? Looks good! I think when you removed the background object the gradients got skewed a bit on the wall. I think the way the shadows fade from the top focus the attention nicely on the cat below so it could be ice to get that gradient back in the image. Nice work!
@fallow bough I am the same way. In 3 weeks of challenges I have learned more than in the past 10 years. I haven't kept up with the changes in the newer versions. I love the challenges. I watch during my lunch hour at work if I don't have a meeting. I thought I'd died and gone to heaven when I learned about the subject selection.
@cosmic sparrow I like it much better between the horizon and a little lighter pier color it looks good. The water looks like it is reflecting more now.
Day 4 Taking Central California gloom to new levels. Love the selection technique using channels.
@thick vale I want to be sitting in the second one.
@wide cradle the mountain is beautiful I love the pink sky and your color adjustment on mountain well done👌🏻
@blissful badge Beautiful sky and reflections.
day 04
@young karma Lovely sunset.
Day 4 This one using my own sky with my tree.
@sturdy vault thanks 😊
Gave +1 Creative Carma to pfordie
@wind mason nicely done! the blur looks pretty realistic 😃
@bold valley ah yes, this is so much better 😄 You could soften the mask a bit up here:
but I had to zoom in to see the minor imperfections, so that's good ^^
Hey everyone! 😀 I finished the day 2 challenge retouching a portrait can give me feedback? This is the Before image.
This is the after image.
@young karma woooow! This looks super dreamy 😄 I wish you would remove the green in the leaves on the right 😃 You could just color them black or change the hue to a warmer color
Day 4 replace background
@zinc lava great idea 😄 you could try adding some subtle blue tones to the castle. and even though this is a night scene, you shouldn't make it toooo dark. If you want to go the extra mile, you could add some lights to the windows 😃
@glacial path mmm good idea let me try that 😀
@pulsar walrus cool manipulation! I would desaturate the greens a bit to make it look more natural 😃 The oranges are just gorgeous!
Thanks for the kind words @young karma !
Gave +1 Creative Carma to Mina
@glacial path made a few changes I dont know if the lights on the windowscame out correctly
my tree is making another appearance, I had trouble with the finer leaves
Replace a background - Day 4
I did not really use all that was shown in the video. I will keep on trying on other source images. But for now I'm done , I need to dp some gaming 😃 Have a nice weekend you all.
@glacial path hey thanks for the feedback😊 sure will do that 👍👍
Gave +1 Creative Carma to evil
@tulip fern well done! I love the vibrant green colors! I don't think you even need the moon (since you moved it to the corner anyway 😉 )
@umbral vine Niiice! The sky looks super epic 😃 The colors also look pretty realistic 👍
Thanks @glacial path ! I will put it on Behance without the moon 😃
Gave +1 Creative Carma to evil
Day 4
@short mica yes! you have captured the colors of the sky beautifully 😃 Maybe a bit too red, but that's just a personal preference 😉
@glacial path Thanks, truly appreciate it❗🙃
Gave +1 Creative Carma to evil
It took me some time to upload my challenges, but here is the first day.
Challenge 2
challenge day 3.
@glacial path Thanks
Gave +1 Creative Carma to evil
@pulsar walrus Its a great pleasure you took time to Guive the feedback on my image Thanks!
Gave +1 Creative Carma to shahid kazmi
@void ermine very nice! I like the crop you did 😃
Thanks @glacial path ! I just made a few more adjustments and am re posting it... that's what I get for posting it before watching the end of the video! lol Brightened it up and added the grain with the camera raw bit...
Gave +1 Creative Carma to evil
@young karma Wow, looks a mazing, really nice job.
Challenge 4
@lone frigate Really nice work on Day 3! That seems like it could be tricky to remove all those elements. I think it might be nice to get back the top left corner of the original image. The focus was doing something pretty interesting without drawing too much attention and adds a cool effect to the focus of the image. It seems like cropping the edited image just a little bit tighter on the right and top sides might help as well. Great work 😄
@pale lichen Looking good! The blur and bokeh effect really adds a lot to the image. I think the main thing that catches my eye is the hard edge in between the light and tree to the left of her head. That edge seems like it should be a bit more blurred to fit in with the best of the background. The blurs on the ground towards the bottom on the left and right seem to not really match up either, the blur starts earlier on the left side, might be nice to even them out. Well done Darius!
@hearty wharf Great job with the selections, looks really natural! I think two tweaks that might help would be to add a slightly warm tint to the landscape (perhaps with a warming photo filter?) might make it fit in more with the environment. I think easing up the shadows of the landscape just a touch so we can see a little bit more information in the trees might help as well. Really cool edit, completely changes the feeling of the image.
@fallow bough Great job with the levels and colors adjustments! The sky looks great and your edits to the city's values and colors really make them fit together in a natural way. Completely transformed the image, well done!
@agile ivy Hah, nice work! I'm sure having such a clean background definitely helps. It's really cool to see how easy these edits can be though, some simple selection and masking and you can completely transform an image. Nice work!
I need more practice. Day 4 Challenge
Here is day 3 of the photoshop challenge . Any feedback or comments are welcomed😀
@fiery trail hey nice photography! I think the blurred could been more successful if you didn’t blurred the chair. The problem is everything is blurred and a bit too much. I really think if you slight blurred the chair he sitting in the foreground and then the background gradually blurring it. I know it easy to overblurred it but I think that will help👍
Day 4 - Day to night... Not sure which of these I like better. I think they both need some tweaking, especially around the top edge of the foreground, but I went with different lighting ideas. Any thoughts on which is working or not ? Thanks 😃 This is one of the originals... I won't post the other, they are similar.
night version
Take 2
@ember frost Thank you for the feedback it totally helped me😄
Gave +1 Creative Carma to julie
@viral ibex I really like what you did. The after sky is beautiful.
Day 1 Drawing effect
@stark swan Very nice work, the sky looks great! Always fun trying to change the time of day in an image. Only suggestions would be to make the selections of the trees in the background a bit softer so they edges don't look quite as sharp. Here's a video that helps with that technique. https://www.youtube.com/watch?v=c2I7X92IVGk&list=PLD8AMy73ZVxUuKFHp5BTdVKW37-k6Qhcj&index=3&t=0s
Also I think brightening up the main figure just a bit with a levels adjustment and mask might help them read better as a focal point and not be overpowered by the contrast of the sky. Looking good!

Isolate a detailed subject from its background and create a new composition. Featured artist: Temi Coker. Check out more of his work here: https://www.temico...
Been absent! Hopefully, I'll catch up with all the challenges over the weekend.
Day 3 before and after
Day 4 Replace a background
Day 4. Braveheart, I'm proud of this one. Colors were tough to match.
Day 2 removing distractions
PsDCC4 Replace Background: This took me w-a-a-a-a-y too long. Just couldn't seem to get the images to look good. Finally, with a Pexels landscape and my sunset I think I got close. Thoughts anyone? @lethal mural Your thoughts?
day 4 challenge!
@bleak fossil thanks so much for feedback, sam - will have another look over the weekend!
Gave +1 Creative Carma to SamPetersonArt
@lethal mural - would be grateful if the team could provide some feedback to my submissions so far, thanks
Gave +1 Creative Carma to Jesús Ramirez
Day 3 Blur background
@high mesa That looks great I think! So much detail in the photo I like the row of wind turbines way back there. Great job. I’m no pro at this but I can’t see anything that stands out in a bad way to me.
@twilit blade very cool image and great job. Looks like a dawn vs dusk version or maybe even he same time of day but a diff day with totally diff. Lighting conditions. Nice job!
@coral stone and @jade glade I increased the blur on the background. Is it too much?
Great job @young karma. It certainly has more depth now. Well done 😃
Day 1 Image enhancement. Followed all of Kathleens tips and really pleased with how this turned out. I kept the focus on the left eye though.
Day 7 of the first round of challenges in PS. I really like doing the black & white stuff. This is an image i took myself from the Mourne Mountains but the storm clouds are from my cousin in Canada recently. Used the gradient tool on this one to create more depth in the valley.
@young karma no, it perfect now! 👍😊
Im impressed of the many good editers in here! ❤
@young karma this is great Wendy. If you havent used the spin blur tool yet youre going to love it
Day4 before and after changing the background
Day 4 challenge, replace a background!
Day 2 Challenge. Smudge Tool. I see a lot of these wave images on Instagram and have started to collect ones i like.
@wise tartan really interesting photograph I like the cast shadow on her face. And focusing on the left eye seem smart choice where everything else move around with it
Thanks @ember frost yeah this girl has a rea;;y pretty freckled face but the spin blur took most of that out. She also had a little make up design beside her left eye which you cant really see anymore either but its cool. Ill maybe get to use this image again sometime.
Gave +1 Creative Carma to julie
Catching up on the challenges - here comes day 1
@coral stone , @jade glade and @wise tartan . Thanks for the feedback. 😃
Gave +1 Creative Carma to BigfishBC
@young karma no problem 👍😊
@void ermine - many thanks bud, appreciate it
Gave +1 Creative Carma to Jon Leo
Catching up on this week challenges. Day 1 Drawing Effect. This was a challenge and took time to refine. Feedback Welcomed!
Day 4 - Before and After! Ended up using layer masks instead of Blend If as all the colours were too similar!
@wicked nexus Is it something like this you had in mind? The lines are drawn with pen and tablet, something I am not that good in.
and here comes day 2 challenge.. it took quite a bit of refining and when I zoom in I can still see that some areas are blurry - tips & feedback welcome - also re the shadow!
@vagrant sorrel did you combined 2 backgrounds?
Yes
@vagrant sorrel ok. just wanted to make sure, i wasn't going crazy.😂
@vagrant sorrel i never saw that kind of background. i though you used 2 pictures and combine them together. one with clouds and the other with a sunset. didn't think it was one picture
@willow idol In this link you can search for images https://unsplash.com/

Beautiful, free images and photos that you can download and use for any project. Better than any royalty free or stock photos.
@vagrant sorrel thanks
Gave +1 Creative Carma to Ghosty!
How can i give creative carma?
HI
@eternal wagon If someone gives you feedback about your work you can say "Thanks /Thank you @username" to give 1 creative karma point to the person
niceee! Thankss

@jade glade Day 4 challenge looks great, nice job.
@wraith surge Thank you!😊
Gave +1 Creative Carma to bijan47
@wraith surge great work on the blur!
@ember frost thank you very much
Gave +1 Creative Carma to julie
@wraith surge I really like your blur challenge! I like how to you got rid of some of the people that stand out and blur really good. Also, that you bright the picture up a little, truly my main focus is on the skater!
@jade glade Thank you. I choose the tilt shift option because I felt it brought the skater out the most. I am glad you feel the same.
@wraith surge I agree with @ember frost and @jade glade, great job on the blur. I love how the depth created sort of a movement to the image. Amazing!
Here is my contribution to the Photoshop DCC - Day 2. These challenges really open your mind up! I enjoyed doing. this one.
As always, all constructive feedback welcome!
... and the original, a picture I made in Dusseldorf, Germany.😃
@raven atlas that is a very unique statue. Do you know the story behind it, or it’s meaning?
@tough bone
It's actually two of them... I'm still trying to source some information about them.
@tough bone
There's the other one. I call them (for now) Boof and Peng... you can guess which is which. That's my sister playing around in the middle.😂
PS DCC Day 2 - Retouch a portrait
@raven atlas very unique and fun statues. Seems as though your sister is choosing sides. 🤣
@tough bone
Looks like she was more sizing up to Boof.... he's got a really mean scowl going on there.
@lunar mango nice job with removing that chain, I see no blur or smudge. Saweeet!
Thank you @tough bone
Gave +1 Creative Carma to NikonSniper
My day 1 challenge.
@lunar mango very smooth! I think you could crop the picture to put the person more in the center 😃
Catching up .... Day 2 - -Retouch a portrait
@blissful wolf Well done, I like how you have removed the distracting elements in the background and I also like the saturation boost! Good job 😃
Thank you very much! @glacial path
Gave +1 Creative Carma to evil
Catching up... Day 3 - Blur a background
Day 4, replace a background, before
after
Decided to go with something a bit more abstract
Day 4 Background replacement
Just catching up after getting my main PS machine and Cintique back on line... It's been a chaotic month... Anyway, here's a sky replacement - and well heck.. while we're at it, let's do a foreground replacement, too.. Since I'm already working on some images for a story I'm writing..
Here's the original...
And, here's the foreground..
I should have picked a photo with something in the foreground. oh well.
First time joining the challenge. I know I am a few days behind but I'll do my best to catch up. Here is challenge one "Drawing Effect" of a photo I found online.
Thanks @glacial path for the suggestion!
Gave +1 Creative Carma to evil
sooooo i made 3 different images for day 4 lol, midday one is the original https://www.behance.net/gallery/83455785/72619-Photoshop-Daily-Creative-Challenge-Day-4

Behance
I decided to do a whole set of images just to see if I could do the correct coloring for each sky. The midday one is the original image.
Removing distracting elements.... Before
And after (with a touch of sky replacement just for fun..)
@young karma I almost did the same thing!
Here's my contribution to the PSDCC - Day 3.
Interestingly, because I'm so used to dong it, I also did a background replacement in this challenge.... to find out after that the next challenge would be.... yep!
As always, constructive feedback welcome.
... and the original, a selfie I took a couple years ago.
Here's another sky replacement... Took this photo of Devil's Tower a few years ago. Lovely day, but nothing interesting about the sky at all....
Added a little interest to the sky.... 😉
@coral stone @jade glade Thank you very much
Gave +1 Creative Carma to Valdair Leonardo
@tough bone Challenge 4 looks great, nice job with changing the color landscape to match the sky.
@wraith surge oh wow, thank you for the compliment!
Gave +1 Creative Carma to bijan47
@timid pasture This thing really jumps out at you. The original picture alone is awesome with that nice blue sky. On a good day, with a polarizing filter, I couldn’t get a shot like that. The edit looks like a real life encounter. One thing I will say, is that I think if you could had added a shadow cast onto the mountain, would have taken it from excellent to holy isn’t.. nice job.
Day 4 Challenge – The Trevi Fountain
@neat shale you should totally do! I'd love to see the same idea executed in different ways
By the way, great job on the 3 versions of the challenge
Here is my adjusted image for Day 2. I removed the light poles and garbage bin while revealing the mooring lines for the white ship that were hidden by one of the light poles. https://www.behance.net/gallery/83468371/Daily-Challenge-remove-distracting-elements

Behance
Cruise ships docked at the World Trade Center Barcelona
Day 4 Change a background
Great job on the shadows @hallow elk!
Here's my contribution to the PSDCC - Day 4.
As always, constructive feedback welcome.
... and the original, taken in Cologne, Germany.
On the left, my own photograph from Kilchurn Castle, Scotland. Sky with moon by Alex Andrews from Pexels
day 4 challenge
Awesome drama on your work @willow idol . My suggestion is to adjust the transitions of the Blend If sliders so we can see more the branches. Since it's night time, you can decrease the contrast and darken the scene. You can use Levels just like Jesús did on the live stream 😄
Especially in these areas 😃
@oak ermine woah! What a difference 😄 I like the new sky a lot and I think removing the people was a good idea. You did a good job with the blue-ish color theme and the colors work well together. The hint of pink is a nice touch 👍 Now is your chance to take this design further - would some stars look nice? What about a different shade of green for the grass? How would it work as a poster if you add some text 😄
@wet thistle nice background change. I just think the overall tint has caused to much lost of detail in the man , the sand and water. Maybe lessen it some and bring some of the natural color back, other than that, great job 👍🏾
Thank you @tough bone for the feedback... I was already unsure about it, I did a color lookup on top of everything, maybe that was too much. The image itself is also not of a good quality I think. Is this better now, or still too much?
Gave +1 Creative Carma to NikonSniper
@wet thistle the main thing is that you are happy with it. I try to take photos that follow all the basic rules and try to edit like “the pros” and I’m never happy. Anything I say is just opinion and I actually like the dramatic scene of the photo. Others may pick it apart. One thing I have noticed is that, as I get better with editing, I get more and more people who ask me to retouch a photo. It becomes valuable to know how to tweak/adjust in different ways so playing with and changing things gives you invaluable experience. I honestly like the edit.
I probably would not make the sky the way it is now if I would be really editing, I used this sky to work on how Jesus was teaching us to use the red and yellow in order to change the daytime. I agree everything is a little too much...haha... I really appreciate your comments!
@wet thistle you can always adjust. Bad thing is that once you learn to adjust or change anything, you end up always wanting a do-over. I think it’s part of being creative.
And now?
@wet thistle Saweeeet! Can now see differences in the sand, water and sky.
Another attempt at the PSDCC - Day 3... this time with a different image.
Constructive feedback welcome.
... and the original, taken with my mobile phone about 4 years ago.
@coral stone is this better(3rd)? i put all 3 together to see the change.
@willow idol yes, now the branches are more visible, great job! If you want a dark mood you can try to create a Hue/Saturation adjustment layer and choose red on the drop down menu and decrease the saturation, I'll send you a screenshot 😉
It's totally optional, of course :), I decreased the lightness of the reds too since the only light source is the moon.
Hi guys! I'm busy catching up! Watched the live streams but couldn't find enough time to actually work on the challenges. So here's my entry for day 1.
And the after and before of my retouch. I removed the shadow of the photographer on the ground, but couldn't fix the light and shadows on the shoe... 🤔 Any tips?
And my photo for Day 3. Learned some new tricks with the blurring! 😀 feedback is welcome!
Day 2 challenge
@coral stone thanks for the tips
Gave +1 Creative Carma to Valdair Leonardo
Another attempt at the PSDCC - Day 4. This time, I was able to use the blend if tool more effectively.
As always, constructive feedback welcome.
And the original photos...
Day 4 - Replace a background
Day 4 Challenge replacing a background. This is the after image😀
This is the before image.
@fiery trail very nice, but you can still see a white line on the foreground/middleground, you could also darken the the bridge and the rocks a bit and add a blue tint to match the background better, other than that, pretty good.
The water's also a bit translucent in the middle
the newest update. 😁
@young karma thank you for the feedback 😄
Gave +1 Creative Carma to Yazeed
you're welcome!
Day 4~Before and After. This is so much Fun!
I couldn't help myself. I did another.
@scenic anchor nice sky and dark grass changed but the person standing is not fit try some hue adjestment
@fringe thicket day 3 nice work 👌
@ everyone tried to feedback when you view others work it will help to learn alot
Here ishttps://www.behance.net/gallery/83494697/Daily-Challenge-Day-3-Blurred-Background my Day 3 Blurred Background - feedback welcome!

Very nice work. @fiery trail!
This is my Day 1 Add a Drawing effect
This is my Day 1 Add a Drawing Effect
This is my Day 2 Retouch a portrait
Before:
After removed items using content aware retouch with spot healing brush and levels adjustment to make more contrast
Hi guys, this is my day 4 challenge. Let me know what you think?
Hi here is my 04 day challenge, have a nice day. 😃
@gilded pelican those are not at all the same image 😆
It's actually straight from Shutterstock... https://www.shutterstock.com/image-photo/beautiful-sand-dunes-sahara-desert-713084413

Shutterstock.com
Find Beautiful Sand Dunes Sahara Desert stock images in HD and millions of other royalty-free stock photos, illustrations and vectors in the Shutterstock collection. Thousands of new, high-quality pictures added every day.
I would appreciate any feedback on my first attempt at Challenge 4 - replace the sky in a photo to change the time of day
I would appreciate any feedback on my second attempt at Challenge 4 - replace the sky in a photo to change the time of day
hello all - i've done another version of my sky replacement ... what do you think?
@bleak fossil hi sam - after your feedback i've tried to make the foreground a bit warmer and accidentally got a rather dramatic sky. is it too much?
After
Thank you @pulsar walrus Please tell me more about her not fitting. Is it because there is light on the back of her legs and right arm? She should have an orange tint? I really do appreciate you pointing it out and want to get it right.
Day 5:
@wide cradle That was fast! Good job! I would work a bit more on the text texture but good job overall!
@fickle dust great job on the sky replacement!
@faint siren that blurred background really changed the feel of the image. Good job!
Thanks Again @lethal mural
Gave +1 Creative Carma to Jesús Ramirez
Hi there, im Koromi, first time here.. Can i join in this challenge too? 😍
Worked on Texture!!
@supple lion lol really awesome job!
@supple lion I really like the way you did the colors and pick for the background. It fit really well with each other. But did you make up that title ?
🙃
Lol THE ADOBE KING!
@blissful badge That's just beautiful 😄 I love the idea with the balloons in the sky! The highlights look a bit overexposed, but that's not too difficult to fix 😃
@hearty wharf Nice job! It looks epic - I wish the trees would be a bit brighter - you can try tinting them pink to blend with the sky colors 😃
I second Tim. Those are good compositions!
@jade glade haha yep
@young karma yeah! The pattern works really well and the image itself is just great 😃 just the area around the beak looks pretty dark, I think you could brighten it up
3D Title😀
It looks like an image inside of typography.
@young karma I would just slightly desaturate the water 😃 The sky looks awesome!
@hard sable What if you had a side angle of her, get the sea in the background, and blur it?
Or maybe not exactly a side angle. What if it were a medium shot of her with the sun and water in the background?
Still have her face visible.
Feels like today's challenge is about the Lion King instead of 3d looking text
My take on the day 5 challenge
See what I mean?
@magic rampart I don't usually like those over saturated composites but I'm a fan of your work here 😃 Those rock formations are pretty underexposed - you should try and keep the lightness of the original shot 😃 or at least part of it 👍
PsDCC5 3D text - Elephant Queen. How do you like this font? I created the color before I found the elephant. It just happened to match.
Hi everyone. I used an image from Unsplash and applied Gaussian Blur. For the "I" dot I used the Filter > Render > Flare in a black layer and put the blend mode on Screen. Feel free to comment 😄
@young karma Thank You Your feedback!! But I don't understand well..Is it a problem with the picture?Or is it blur's problem??
Gave +1 Creative Carma to Deven Design
@hard sable It's the camera angle. We're only seeing the back of the girl's head and the area she's looking at is blurred. That's why I suggested a different camera angle.
@coral stone Love it! I can't help but wishing that the glowing dot of the "I" was like a twinkle in the Lion's eye or something 😃
thought about trying that out for fun?
@young karma Oh! I got it!! Thank You!!😊
Gave +1 Creative Carma to Deven Design
Great idea @jolly quest 😄 I'll try that! Also I was thinking about changing the background image. Thank you so much 😄
Gave +1 Creative Carma to VooDoo_Val
@silver hornet Nice text! I would suggest experimenting with perhaps adding a gradient shadow between the image and the text or something else that can separate the two a little bit better. I say this because the readability there is low and you really want to show of the awesome text, but it does clash a bit with the busy image behind
@silver hornet Alternatively, you could also try moving the text to a darker pare of the image and adding an "outer glow" to the text or something like gold or white!
that could also improve it 😃
great work!
😀
Ah, man! I remember Surfs Up! Just barely, but I remember it.
I'd see that movie again.
@jolly quest thanks for the tips, I added a bit of drop shadow to try and make the text stand out, but it can definitely be done much better
Gave +1 Creative Carma to VooDoo_Val
@kindred kernel I wouldake the gradient subtler and make the texture less opaque
@silver hornet If you decide to edit it more, please post! I would love to see it!
3D title challenge entry
Day 5 - Movie Title
challenge 5!
@wind viper Very nice!
@wind viper Looks really nice!!
@wind viper I would even love to see some gold glow, like sunlight too. but thats just me haha
Thanks @alpine ravine @jolly quest , I did render a little "spot" light on the left, Maybe I should've put the intense more maybe? Thanks for the feedback!
Gave +1 Creative Carma to VooDoo_Val
@limber birch I think both of you challenge 4 images look really good.
"RAWR"
Rawr i like better lol , r does this look better
@uncut valley I prefer the second one and how the cat face feels more the main subject
Thanks @ember frost
Gave +1 Creative Carma to julie
Hi, I tried Day 5.
@glacial path thanks for feedback, tim! not sure if this fixes it, i messed up my layers and should probably start again ...😅
Gave +1 Creative Carma to evil
@blazing quail I like the font you used in your Day 5. What is it called?
@glacial path ha ha! i see ...
The Lion King
Hi @spark wharf , The font is Cinzel and Cinzel Decorative which I got from Font Squirrel.com
Day 5 - 3D title
@glacial path here is the other one, do you think it works better? i'm seeing shades of pink now when i close my eyes!
@hearty wharf lovely! Well done 😄
thanks so much for the suggestion @glacial path
Gave +1 Creative Carma to evil
My day 5 entry.
Day5 Completed while watching "Making Money" with Charles Payne.
Day 5
First try, wish I had more gradation in the text.
Any feedback on this before I upload? Also does anyone have an advice for bevel bc I feel like that's the one thing in photoshop I've always struggled with 😂
3D Title - Day 5
Day 5 - 🦎
hi all - great challenge! and i've re-used the same sky photo i've had before ...
#✂challenges-feedback , #lionking
Had to do a lot of trial and error to get this , learned a lot about texture though
Native big cat: Mountain Lion (Puma concolor) of the American West 🙂
Replace a background Dali inspired
I made it ☺
Here's my contribution to the PSDCC - Day 5.
As always, constructive feedback welcome.
PS: You're right, @lethal mural... it's the fine tuning that takes up most of the time.... and rightly so!
@plush osprey Looks good. You might want to reduce text size a bit to provide right-left space
PS. Daily Challenge 05 with Jesus Ramirez
Awesome job @fallow bough 😃 I loved the overlap!
Day 4 - I think I'll be using these techniques a lot. We have a marine layer in Santa Cruz during the summer that causes bright light but lots of grey skies. Used a Sunday morning (10ish) beach shot with a sunrise from Hawaii. Does it look fake to you, or would it pass?
@lunar abyss nicely done! it looks very clean and the sky is 100% believable 😃 I like the subtle red color wash you've added to the shadows.
@kindred gate Good job - you nailed the gradient and the texture also looks good 👍 . You could try adding some saturation to the darker color, just to (pardon me for using this phrase) "make it pop" 😄
@glacial path thanks for the feedback!
Gave +1 Creative Carma to evil
@raven atlas interesting! It looks like the text is inverted. Because of the darker stroke it looks debossed. The texture is also inverted. Usually the highlights are above the shadows
@raven atlas if that is on purpose, you did a great job 😄 If not, you should flip the texture
@raven atlas now that I look at it again, it looks normal... what the heck
P.S. Daily Challenge 05 with Jesus Ramirez
@glacial path
Many thanks for the feedback, Tim. I did try inverting the texture... didn't like how it looked.
I actually added an overlay to the highlights and gave it a deep maroon-like colour; for the shadows, I used a lighter colour. Probably why it's looking all Flipmode. Again, your feedback is most appreciated.
Gave +1 Creative Carma to evil
@junior needle woah! This looks really cool! I love how clean it is. You absolutely don't need the texture - bravo 😄
@raven atlas this could also be down to an optical illusion. If you have 4 minutes, I highly recommend watching this video by minutephysics. 😃 and thanks for clarifying 👍 https://www.youtube.com/watch?v=V7C318DGB38

Thanks to Skillshare for supporting this video: http://skl.sh/MinutePhysics for 2 free months! This video is about a multistable perceptual illusion, similar...
Gave +1 Creative Carma to Ess
I've just made 4 minutes, @glacial path... watching now.
@solemn herald What a great picture! Unfortunately your title text has roughly the same brightness as the background and therefore it blends in. try changing the brightness of either the photo or the text. It should help the text to stand out 😃
@hearty wharf 😱 omg! looks like you love your pink skies, huh 😄 ? Well it totally works! I would scale up the gradient so it looks more smooth but that's pretty much it. Bravo!
@glacial path
Immediately after watching the video, I went to Photoshop and turned the text upside down... saw it immediately. It looks as if the light is coming from below, which is fine... except the gradient map has the dark shade down below, too. Hmmmmmmm...... 🤔
@raven atlas haha yeah. darn you, optical illusion!
@glacial path
Right?! It's got me scratching my head like crazy!
@glacial path
Hahahahahaha! I just saw this:
now that I look at it again, it looks normal... what the heck
https://giphy.com/gifs/mrw-reddit-comment-tJeGZumxDB01q @raven atlas that's me right now

😂 😂
@glacial path
I'd so love your feedback on some of my previous challenges... please.
@raven atlas alright. I'm looking at your cologne submission. The sky selection looks really clean, the colors are nice and toasty but the shadows are too dark IMO. They almost look black. I think you can dial back the contrast and you would have a mighty fine submission 😃
you could think about removing this line from the sky. I think it doesn't add too much to the overall shot
@glacial path
dial back the contrast
Noted.
Will remove line, too.
@raven atlas about the other shot from yesterday: the colors look 100% believable. The greens are muted and the gray path got a nice orange color wash!
if you can somehow bring back some of the atmospheric haze (maybe by turning the layer into a smart object, opening camera raw, sliding the dehaze slider to the left, closing camera raw and tweaking the layer mask of the camera raw filter) that would be great! @raven atlas
it could elevate your submission to the next level. If you need reference, just google sunset images like this one 😃
but to be fair, this is a pretty difficult effect
so if you're feeling adventurous 😉
@short mica Cool! I think you can brighten up the bevel behind the text a bit. maybe even decrease the size by a few pixels. The texture looks great and I like how the background isn't 100% black 😃
Challenge#2, ugh trying to catch up haha
Some messages from Friday I meant to post:
@floral root Nice work Shantwan! I think adding a shadow of some kind below the figure and using a levels adjustment to increase the contrast and darken them down a bit might help fit them into the scene more as well.
@tulip fern Enjoy your gaming! Nice work, that's a really cool idea for a sky replacement. One suggestion would be that it looks like you lost the original reflection in the water. So instead of of the soft reflection with the distorted ripples in the water it seems more sharp and jagged. Could be nice to keep the original water and just have the general adjustment layers over it like you do to darken it down. 👍
@umbral vine Wow, that totally changes the feel and mood of the image, very nice! Looks a lot more intense and ominous. Very nice work :D
@short mica Great job, you really nailed it! Love how you handled the color and darkness adjustment, fits perfectly. The only thing I think that could be adjusted is the edge of the hills next to the sky look a little unnaturally sharp. I think that edge could be softened a bit like it is in the original image. This video covers refining a selection to get that more nuanced edge using the "refine edge brush tool" that I think could help. https://www.youtube.com/watch?v=c2I7X92IVGk&list=PLD8AMy73ZVxUuKFHp5BTdVKW37-k6Qhcj&index=3&t=0s
@tribal oak I remember that tree! Really nice work with the sky replacement and adjusting the colors to fit. The selection work looks solid. Nice job!
@zinc lava Very cool! I think you could probably use a levels adjustment to brighten up the image a little bit overall. Even if it's a night image you might notice a lot of night photography still captures a lot of light overall. Usually with a more blue tint. I think the windows could even be a bit brighter as well, and perhaps a slightly more orange hue. Here's a similar example, the windows get fairly bright. https://ak2.picdn.net/shutterstock/videos/11506592/thumb/1.jpg

@fiery trail Nice work! That seems like that could be a challenging image for sure. I think the most obvious issue is the area around the hands that could use a little more reworking. I know Jesús showed a bit of these fine tuning techniques during the stream and I think those could push this image even further if you wanted to. Looks good!
@void ermine Changes look great! I feel like a simple levels adjustment can often go a long way. Really like how well you separated the subject from the background. Really solid work!
@kindred kernel Nice work with the sky replacement! I think it might help to reverse the sky so the sun is on the other side. Currently all the significant visual elements are in the top right corner, changing it to the other side might balance the image more. Looking good.
@high mesa Wow, great work with the sky! Definitely adds a lot of drama and interest. I like how you adjusted the landscape to fit in as well, work very well. Nicely done!
@bleak fossil - thanks for feedback on the sky posting, appreciate it.
Gave +1 Creative Carma to SamPetersonArt
@glacial path👌
thanks @bleak fossil for the comments. I really appreciate it 😃
Gave +1 Creative Carma to SamPetersonArt
@glacial path
When I opened it again in Photoshop, it's only then it struck me how much contrast there was on the building... I'm now wondering if I've taken too much off. Let me know what you think.
And thanks again; I needed a second pair of eyes.
Gave +1 Creative Carma to evil
Hello everyone, here is my Day 2 challenge. Any feedback is welcome.
Day 5
I used my own photo for Challenge 5 and chose Mason Serif OT Bold as the font, because it was similar to the font from LION KING but had an "R" which reminded me of the elephant's trunk. Please provide any feedback but especially related to Layer Styles. Thanks!
Day 5 challenge . For people who don't get it, Cat + Gladiator .
@glacial path
_ this is a pretty difficult effect
so if you're feeling adventurous_
It's my day off, tomorrow (well.... today, now). I'll get some sleep and tackle it once I'm fully awake. Nothing beats a good adventure. 😁
Day 5 of the photoshop challenge. Which on of these images seem more interesting the one without the logo much like the one in the demonstration or the one with the logo?🤔
Day 5! 😅 I can't help it I love the saying, LOL
@lunar abyss good there was no patent granted, you might had owed someone some money 😂
@tough bone or they owe me money, I'm the one coming up with the cool graphics 😝 🙃
P.S. Daily Challenge 05 with Jesus Ramirez
Very nice work! I love the different background combination and lighting @turbid terrace
Thanks! @ember frost
Gave +1 Creative Carma to julie
Not sure about this one. I think I left something out
Day 5 - I was going to explain it, but I'm hoping it's clear enough without an explanation ? Maybe ? lol. Typeface is called Pragmatica , from adobe type kit with layer styles and a pattern that I made from a photo of wrinkled paper. The image/graphic I made in Illustrator.
@cold cedar Thank you for your feedback
Gave +1 Creative Carma to ValentinePierce
@void ermine I like it
@fiery trail Very cool ! I think the second one is harder to read as it could maybe use more contrast between the text and the image ?
thanks @dusty pond !
Gave +1 Creative Carma to Diamondblade
@dusty pond I think yours looks good! What are you thinking you left out ? Like a graphic or image or something more with the text ?
@void ermine I'm not seeing much of an emboss
Ok ya, I agree with that, the emboss is not very noticeable to me. That's not to say it's a bad thing, but you could try to increase the size or something to see what it looks like ? Can't hurt . ?
@void ermine ok, thanks
Gave +1 Creative Carma to Jon Leo
I have to start looking at my work before posting it lol. Always in a rush to get it up. Weird how I didn't notice how tight the text was to the border until I saw it up here. I'm not sure if it adds a sense of like uncomfortable closeness or claustrophobic feel and if that's a good thing or if it's just too close... hm.
@void ermine first drafts are usually tough lol
True true lol
I redid my Day 4 as suggested by @pulsar walrus . I think the figure looks more natural now. Any feed back would be appreciated. Thank you
Gave +1 Creative Carma to shahid kazmi
@hearty karma Nice work getting the hair out of her face.
Day 5 challenge- 3D title
Day 5
@young karma Looks great! Really nice to see it in the context of an image. Colors and texture fit really nicely. I think it might look good if you could sharpen up that beveled edge shadow a bit. Might make the text look a little more solid and rocky. If you wanted to keep playing with it I feel like it could be cool to see a more intense/sharp light hitting the top edge of the text, to make it pop that much more and match the lighting on Simba's face. Well done Mina!
@hearty karma Nice work! Removing the chairs really makes the main figures silhouette stronger. Small suggestion, but it might look good to mask out the adjustment layers for the background of the image (everything behind the wall) to keep that area lower contrast and really let the head and face area of the figure be a bit more dominant by comparison since there's a lot of details and contrasting shapes behind her. Good job!
@short mica Nice work with the 3D effect! Could be nice to throw a subtle gradient on it so the bottom is a little darker and gets lighter towards the top. Made add a little more dimension and compliment the 3D look you already have. Nice work 😄
@kindred gate Looking good Jackie! Digging that little guy’s mohawk 😂 I think using a levels adjustment to push the contrast on the text a little more might help. Increasing both the darks and lights just a touch might help it match the contrast of the rest of the image and stand out even more. Nice work, colors are fitting in very well!
@lunar abyss That sky looks great! Really cool addition to the image. I like how you shifted the colors of the original photo to match a bit better, the warmer tones definitely help. I wonder if darkening down the beach portion of the image just a touch might help? The original photo of the sky was a bit darker so that might help it look more natural, though I think a subtle change would look best. Maybe even a gradient that darkens down the bottom portion and fades as it goes up. Great work, this turned out nicely!
Thank you for the feedback, @bleak fossil I'll work on it some more 🙂
Gave +1 Creative Carma to SamPetersonArt
@raven atlas Really nice work! Great visual balance and colors in this image. I was looking at your image and then realized I was seeing the same thing Tim mentioned. the highlights on the bottom make the texture look embossed/coming outwards. Cool effect either way, nice work!
@fallow bough Great work Ken! Really nice photo to work with too. I kind of like how the text has a bit less contrast than the lighting in the image and kind of works as a secondary read, the way you masked the text behind the guitar really adds to that effect as well, very nicely done. The only thing is that the lines above and below the text barely read as is, might be nice to thicken them up ever so slightly, but still keeping that subtle look they have.
@spark wharf Very nice, I really like how you handled the text color and size, works really well to balance the image. I was looking at your image and something seemed like it could be tweaked, then when I looked at cereal photography I realized they often go for a really warm inviting lighting and a good amount of contrast to really make the food look appealing. It's super subtle but I think a slight warm tint and levels adjustment could look good on this image. Great work 😄
@junior needle Really liking the gradient on this, colors and values look really solid! Did you try adding a texture to it? It could give it a nice effect. Though the current contrast in "realism" between the text and photos is a pretty cool effect on its own.
@wind mason Really interesting image! I like the masking of the lips around the rocks, though I think it could be touched up a little where the lips, rock, and tree meet since the tree seems abruptly cut off. It also might help to move the woman to the left a little so she isn’t crowding the edge of the image so much. Nice work!
@plush osprey Nice work BD, looking good! It might be nice to give the text a little more breathing room so it's not so close to the edge of the frame, but other than that its looking solid!
@high mesa Text is looking awesome! Time well spent, plus it really helps to learn the tools and techniques when you get some extra time to play around with them. Love how crisp the texture looks, very convincing stone effect. Also the underlighting adds some really great drama. Nice work!
@glacial path Thank you 😀 I know what you mean, I don't normally go for the over saturated but I saw the blending mode and thought it looked cool. I've brought back some of the light and details of the rocks/old castle, I think it looks much better, hope you do too.
Gave +1 Creative Carma to evil
Hi, I'm in the UK so a few hours behind everyone else! Just about to do challenge #5
Hi @molten vector , me too, it really doesn't matter though, people on here are great and will give feedback even when you are days behind 😀
@glacial path Better?
Pretty happy with that
Then got a bit over excited and added in yesterday's sky too 😆
@glacial path Thanks Tim. Better?
Gave +1 Creative Carma to evil
@glacial path ha ha! yes - it's all pink sky for me ... thanks for feedback! here is one with a more gradual gradient ....
Gave +1 Creative Carma to evil
Still catching up! 😅 Here's my day 4 photo. I guess I could do more to make the lighting and colors more realistic...?
Day 1 Challenge finally done
day five --- featuring my cat brandi ☺ 🐱
@bleak fossil ,👌🙏 I think the gradient became extremely subtle when I played and changed the blend mode. Thanks again appreciate your time and effort! 🕊️
Gave +1 Creative Carma to SamPetersonArt
@glacial path
Hey! So I tried to add the hazy effect. Instead of using Dehaze via Camera Raw, I added an Exposure adjustment layer, upped the exposure a bit, then gently faded it downwards from the horizon, using a. soft brush. Let me know what you think.
I'm still not happy with the Cologne Dome, so I'll get back to it shortly.
@bleak fossil 😉really appreciate the video
@molten vector
Very nice work and the background works well, too.
Maybe you could sharpen the text a little bit (and maybe brighten the highlights at the base... just touch), so it stands out a little more against that beautiful background.
Wasn't entirely happy with my first effort so have had a bit of a re-think, I think this is better, do you agree?
This is my Day 3 Blur a Background
@bleak fossil - hey, thanks again for your expert view. Reassuring when u give the nod and advise, much appreciated.
Gave +1 Creative Carma to SamPetersonArt
@blazing quail - great work, try and apply a levels adj to the BG to separate it further from the tone used on the font, it may make the text kick out, especially at the base of the type. Just a suggestion, hope it helps.
@void ermine - nice design, really industrial, like it. Just kern the font a touch,; u can always make more space by squeezing the two parallel lines inward. It won't need much, as the design is in great shape. Top work
@jade glade, is that done with 3D type or 2D and layer adjustments? Brilliant reflection
Thank you @high mesa , The contrast really helps the text pop!
Gave +1 Creative Carma to Mykul
@high mesa I playing around with Bevel & Emboss and add chisel hard. And thank, @high mesa.
Gave +1 Creative Carma to Mykul
@glacial path
Hey, Tim!
Which these do you think work better? They both definitely make a heck of a difference to the one I first posted.
Please let me have your thoughts.
Thanks @high mesa ! Good call with the spacing in the center. When looking at it now I think maybe the lines could be thicker too. To clarify I’m assuming you mean to make the letters further apart from each other? I kerned them really close to make room as you already guessed. Maybe I’ll Change the border size. Thanks for the critique!
Gave +1 Creative Carma to Mykul
So based on the comments made by @glacial path and @bleak fossil (both pretty much the same), I've gone back and made some adjustments to my PSDCC - Day 5 contribution. Thanks, guys!
Gave +1 Creative Carma to SamPetersonArt
Here are the adjustments I made...
Day 5 Challenge
Here is my challenge. I left it simple, sorry.
@bleak fossil thanks for the feedback! I didn't think about adding a gradient layer to the beach! You rock thanks for all the feedback it's great to hear!
Gave +1 Creative Carma to SamPetersonArt
Day 5
Hi, this is my day 5 challenge. Thoughts are always appreciated.😀
@unkempt field Well done!
Take III (3)
How's that?
@gilded pelican Hi, the top of your text is disappearing in your canvas. I would give the background another color.🙂
@restive otter Creative! 👍
@unkempt field 3d effects is great, i can't get more better! thanks @young karma 🙂
Gave +1 Creative Carma to Eboniez22
This is my Day 4 Replace a background
that is very good @young karma
I would not recommend to leak this design please. Because this product has two months more to go
Hi, here's my day 5, let me know what you think 😀
http://prntscr.com/om15ll
Lightshot
Screenshot
im having problems with editing this layer
im trying to edit the text but im unable to do so

Oh Heck, spelled it wrong 😂
@magic rampart hey
Where can i find yesterdays replay of the challenge? I wasnt able to catch the LIVE but want to watch it?
Thank you for the feedback @void ermine 😄
Gave +1 Creative Carma to Jon Leo

Join your host each morning at 9:00am PT to learn how to approach each challenge using Photoshop. Complete 9 challenges by Friday, August 2nd and you’ll be on your way to sharpening your skills. Get your questions answered, see what the community is creating and get feedbac...
@willow idol thank you!
Gave +1 Creative Carma to Catherine_Jablonska
At work so could only spend a few minutes on this. First time entering any challenge so probably doing something wrong ha
Hey @gusty grove
@magic rampart lol love the Night King image!
@young karma how did you finish the challenge before the live even started?😂
@lethal mural Thank you 😀
Gave +1 Creative Carma to Jesús Ramirez
Daily Challenge #6 3Dtitle
Daily challenge #3
@willow idol I'm that good 😅
@void ermine - yes, put a tiny bit more space between , they just seemed congested, we are talking a tiny amount but u'll see what I mean
I'm too slow, I got left behind 😅
Day 6:
Fun Challenge!
@cosmic sparrow I like the water bottle ad. The color treatment and vignette are nice. However, I don't see what company it's advertising and I don't see a website.
Also, is that Adobe's watermark?
@young karma I was just using the stock from todays challenge. So, I did not have licensing for the image they gave in challenge. I also just picked a line to go with the image. So, I'm not doing any advertising for it.
Day 6 / Design with masks 😀
very nice @thick vale !
I enjoyed learning this. Now to find my own images.
@thick vale The colors in this are stunning! I have to say that the "water bottle" looks a bit like olive oil because of the green tint, but I really love it
very well done @sturdy vault just bump up the distortion inside the bottle 😃
@sturdy vault great! this could be a camping/lake day advert. very nice!
@agile ruin excellent point!
@cosmic sparrow Nice! loving the added text too!
😀
@thick vale very nice
Decided to see if would work with semi-clear color. Same process worked well.
@kindred kernel nicely done! I like the subtle blue color of the bottle 😃 The bottle cap could be slightly brighter 👍
Challenge #4
@fallow bough Nice! this looks just like the commercials haha
Yesterdays Challenge
@jolly quest Thanks. Bottle seemed a bit small so I quickly resized the background. and moved so liquify still worked.
Gave +1 Creative Carma to VooDoo_Val
Gave +1 Creative Carma to VooDoo_Val
My entry for day six
@sturdy vault yes good job for editing it straight away. i would also try a lighter text to make sure you have enough contrast 😃 I would use the color picker to use the light yellow from the sky or the light cyan of the bottle reflection. very well done! can't wait to see it when you are done!
@fallow bough The grain is a nice touch 😃
@lost prairie The bottle looks a bit dark (except for the cap). I think you could make the plastic a bit more transparent by reducing the shadows layer 😃
@lost prairie you could also reduce the blue color wash like Jesús did during the stream ^^
@glacial path ow thanks for the suggestion
Gave +1 Creative Carma to evil
@hearty karma heya! The new sky looks really good! But be careful with the direction of the light. The shadows of the mountains would imply the light is shining from the right side but the sky suggests it comes from the left 😃
@blazing quail now THAT'S a big bottle 😮
Day 5 Challenge How is it with the sleeping lion added?
Last bit - tagline
@glacial path Thank you so much for the feedback. I'll make the adjustment and would make sure I pay more attention to the light directions. It does make a big difference.
Gave +1 Creative Carma to evil
Went with the blue. The yellow looked bad.
Day 6 - Working with Filters, Layers, and Levels
A couple days behind.... Here's my Lion King recreate. Really cool seeing how to use a pattern as a texture within Blending Mode.
Fresh from Lake Superior
Day 6 - Design with masks
My take on todays challenge..
My First Challenge - Design with masks Day 6😉
threw a quick pic in there to make it a little more movie teaser-ish
Day 3 Challenge
Challenge #1
I increased the bottle size, since that is the focus. I also worked on the mask a little and the shadow. My bottle wasn't as clear as I thought it was from the start so it gave me trouble.
@trim topaz Loks amazing! good job on the water bottles!
@cosmic sparrow I really love your picture! Did you erase the bottom of your bottle?
Thanks @jade glade I didnt erase it, just put a layer of sand over the bottom to look like it was sunk into the sand
Gave +1 Creative Carma to Bubbles
Oh okay that how you did it, thank you @cosmic sparrow ! 😊
@jade glade Yes, first I just copied about the size i wanted from original, then used the patch and other tools to try to blend as best I could.
My Lion King logo for day 5. I think it would be nice to add some more color/texture to the background, but I don't have time for that now. Maybe later 🙃
Also tried to make the letters in 3D, but I'll have to dive into that. Haven't worked with 3D in PS yet and I wasn't sure what I was doing... 😆 Could be a nice one for a future challenge?
So far behind but finally getting a change to do this challenge. I combined days 5 & 6. Any tips on getting the shadows right?
My Day 6 entry. Why did I choose a light bulb?! This was hard 😓 and I am not really pleased with the result. I will try again with other source images. The light bulb did not react that well on the different blend modes as explained by @lethal mural . The explanation was great 😃 but the lightbulb was not 😂
Here's my contribution to the PSDCC - Day 5. I actually filled a [similar] plastic bottle with water to see what it would look like... definitely not like this, so I'm optimistic there'll be a better way to get that effect than with the Liquify tool. But hey... it's called learning for a reason. 😄
As always, constructive feedback welcome.
@raven atlas The bottle looks great, maybe you could just slightly increase the color temperature 😃
The text however could be improved by increasing the tracking (space between the letters) since the two "00" are touching
I think a bigger and bolder font could also help because right now the text feels rather lost in front of the busy background
@tame mason
On it!
Thanks for your feedback, sir!
Gave +1 Creative Carma to Tim Sassen
Today im catching up with all my pending challenges. Here's my entry for challenge Nº4
@glacial path
Howzat?
I didn't do all the last steps, but here it is. I'm enjoying this more everytime!! Thanks Jesus Ramirez. 😀
https://giphy.com/gifs/arg-l2Sq5GffrCyUMEXjW @raven atlas


@gilded pelican cool picture! I think you're almost there - the bottle could use some room between it and the bottom frame
@gilded pelican I think you could make it slightly more transparent 😃 I like the font and the placement is also nice.
To help the white text stand out, you could try this protip and darken the sky 😃 https://xd.adobe.com/view/4f7e61d5-9596-4d44-40c7-946f3bd94a27-394f/screen/d3595d67-6087-4ce2-aaa5-81e4d20a62d7/09?fullscreen&hints=off

A prototype made with Adobe XD
Day 6 Amazing manipulation. LOVE IT!
@short mica
Great idea!
Here is challenge Nº5. I'm almost up to date.
@hallow trench well done! the blue sky looks awesome 😃
@hallow trench the sky looks pretty dark back here. maybe you can also darken the trees slightly to reflect that change of brightness
@glacial path i knew something didn't match but it wasn't clear to me. Thanks i'll correct it.
Gave +1 Creative Carma to evil
@raven atlas🙏 🌞
@tulip fern what a great idea! the bulb looks pretty good, I think you can make it a touch more transparent. I think the image would also look even better if you match the saturation of the lightbulb with the saturation of the lights in the jar 😃
@unreal hornet REAL NICE...today's stream #6 the video at about 24 minutes Jesus discusses shadows.
Day 4 Challenge - Any tips on how to remove the white line on the horizon and around the bird in the sky?
@wise nexus In a previous challenge stream Jesús showed how there was an option to.. I believe.. adjust your selection by a few pixels inwards or outwards. So essentially you get rid of any buffer like that you might have. I'm not sure if perhaps you could still do it by using the quick selection tool or magic wand tool to select those pixels as is. That's what I would try at least.
Yeah, appears as though the technique I mentioned was "Select->Modify->then expand or contract. You can find it here around at 14:00 https://www.behance.net/live/videos/2979/Photoshop-Daily-Creative-Challenge-03
That should help when you're trying to fine tune your selections
Thanks! I'll give it a try!
a little bit late but here we go friend
😩 I had to sacrifice a little bit of color tho
@tulip fern Interesting! I think using different images and objects is a great way to practice these techniques. Great work. I think perhaps pushing the glow, contrast/brightness, and saturation of the lightbulb might help it fit in with the rest of the image. It almost seems a bit dull compared to the rest of the image and the glowing light bulb examples you have. Perhaps something like this? (this was done with just a masked levels adjustment layer with the lights punched up)
Day 6 challenge, water bottle ad
@bleak fossil ooh I like the slightly overexposed light spots in the bulb 😃