#archived-urp
1 messages · Page 1 of 1 (latest)
Because it’s an older version
Newer versions it’s not experimental
It’s not gonna affect anything
what should i do
It’s not going to affect anything
Meaning nothing
Just use them
This isn’t an issue at all
so how other use 2D light?
What
2D lights
it was released before
URP
i saw videos
all use that
Why didn’t you say in the start lol
It’s ok
What does it say when you try to make one?
it is gray and its name is Freeform light 2D (Experimental)
You’re using URP right?
i use the pipeline asset on graphic setting
the pipeline asset needs 2d renderer too
Yeah I feel like it’s something with the pipeline asset
i use that too
mabye
i create it for so many times
i do it step
by step
bot nothing
I thought you just meant it says it’s experimental, didn’t know it didn’t let you create one, so sorry for not being able to help 😬


Me to
it is
 I clicked on this one by accident
ok
Hi!
I hope this is the right place to ask about urp shadows- I've googled around for ages and tried reddit for answeres but didn't find any.
I'm doing a toon shader and I want my shadows to be sharp. As you can see they look very low res and pixelated. I played around with shadows cascade count but nothing seems to fix it.
Anyone know how to fix it?

Does URP working with Graphics.DrawMeshInstanced? Im using outline effect which works through URP render feature and all geometry drawing by DrawMeshInstanced and with this combination outline effect doesn't rendering. It works perfectly just in standard game object rendering
Just followed this brackey's tutorial on making a pixel art outline shader (https://www.youtube.com/watch?v=MqpyXhBIRSw) and i got it to work on the main preview, but then if i actually put it on the scene it looks like i ordered it on wish


Thanks to NVIDIA for sponsoring!
Learn more about NVIDIA Studio► https://nvda.ws/38AaA8K
Razer Blade Studio laptops► https://www.razer.com/studio
In this video we create outline effect using 2D Shader Graph!
● Learn more about 2D Shader Graph: https://youtu.be/5dzGj9k8Qy8
● 2D Glow Tutorial: https://youtu.be/WiDVoj5VQ4c
● Get Gothicvania Ch...
is this way of making the shader deprecated or something? I've copied everything from the video and checked that the material values and defaults are the exact same, but it just wont work still
The sprite asset's Mesh Type probably needs to be Full Rect
Shaders cannot expand the sprite beyond its mesh edges
Hey guys, what's the simplest way to make a Sprite glow in 3D unity?
2D for a year and a half, just started with 3D stuff today
uhh sure I can try, no promises tho
Yeah I saw it, it's 3D. You probably know more than me in that aspect ._. Sorry mate, hope you'll find what you need tho
it ok, ty anyway 🙂
Just so the question doesn't drown, here it is again. Any help greatly appreciated (:
@weary citrus Stop crossposting. You don't need to bother people to look at your question.
sorry
Anyone know why?
I can't find a global pipeline setting for the PP volume update mode, is it actually possible to set this in the urp settings?

What are you clicking on to see these settings? Normally you would select the Volume gameobject that you've added to scene, then in the inspector set the volume to Global or Local.
That's a setting on the camera
Hmm. I don't see that option on my URP test scene. Are you sure you're using URP? Check Project Settings > Graphics to see if you have a URP pipeline selected.
Are you sure you're using URP?
Yep, are you on unity 2021+? That's when that setting got added i think
Ah, I'm using 2020.
No idea why but if I hit Autogenerate for the lighting, it lights proper, then as soon as I hit play or make a build it goes dark. I kept trying, added bakery and tried with that which sort of worked but that was without real time. I did it again working together with Enlighten, it got stuck at 45% and crashed my entire PC. Waited hours just for that to happen. Tried to auto generate again while having real time on, got stuck at 45% again for 3 hours and errored out saying it couldn't perform external something something for clustering job. After giving up, in scene view the lighting looked fine enough so I made a build and here's how the lighting looks -.- Unity is ruining my game dev experience more and more. I've only had a decent time when in Built-In 2019.
This version is 2021.3.6f1 LTS with the latest URP version.

this is "sort of" what it's supposed to look like https://cdn.discordapp.com/attachments/976335496672329741/998130148677259294/Screenshot_9.jpg

I have no idea what else to try/do to fix this. and that's just the lighting issue. There's a few others but this one is more important.
my PC specs are 24gb ram, RTX 2060, i7-7700k
I'm not if this is the issue, but URP has three quality settings; Low, Medium and High. The 'default' setting is usually Low even though you might be building the game with High settings.
I wonder if your build is running at Low quality?

I'll check real quick but it happens even when I hit play. It's almost as if hitting play or building completely undoes my lighting
I've been trying to fix it since 2pm yesterday afternoon. it's now 4:36am XD
Ah, well, time to get some rest and look at it with fresh eyes tomorrow 🙂

So that looks right. It also seems you can set what quality to use on the Camera > Rendering component.

That's just for the Anti-aliasing
Oh, yeah. Good grief. I need to rest my eyes too.
All quality settings are included in a build, but the default one is used by default
Quality settings don't change how baked lightmaps are displayed
(except in the case of shadow distance when baking with distance shadowmask)
Yes, that makes sense now that I think about it. Unity doesn't create different lightmaps for each quality setting.
This might be a bug related to either using deferred rendering, or choice of Lighting Mode (shadowmask, subtractive, etc), I don't recall the specifics
Why max shadow quality is very bad in Android build, is there any other setting.

Quality settings has default setting tiers defined per platform
Ohh I see, let me build again
One trick that helps in situations like this is rotating the light around its forward axis, to minimize the jaggies in particular situations
Yeh you are right but in my case I can not rotate light
Thanks man It worked but now my fps like hell
I have removed everything from scene, no light no environment nothing just canvas still getting 15-20 FPS. Please help me.

Build only working fine in editor
tried this but every thing is normal
I have created new project max fps I can get is 30 in empty scene just skybox is it correct behavior?
It should tell you what the frame time is spent on
I have no experience with optimizing for mobile but they do have various hardware limits for FPS, and vsync can halve the FPS from that if the target can't be reached
How can i check that?
Thank you so much
Yo I think I know the answer, but it possible to have two URPs in one project?
I want to have two so I can create two different types of shadows
not in the same scene I don't think
you can make a different pipeline asset and use it in a different scene
and I think cameras can use different renderer assets too
I'll have to look into that too then. If it is a bug, I really hope it gets fixed soon because this is absolutely atrocious
Thanks, I'll look into that!
Does anyone know how to GPU instantiate grass to a dynamically changing terrain, and make the grass positions & rotations change with it?
Cleared the Gi cache and set the render path to forward instead of deferred and it's doing this crap again.... Stuck at 45% and the timer just keeps going up instead of actually doing the jop it's supposed to -.- Here's hoping that it actually works this time though.

so Enlighten is broken. Turning on Auto Generate (to get this screen) with Enlighten selected causes it to do this bs. changing it to Progressive CPU i've already got more progress.
would be cool to have that Enlighten replacement I keep hearing about XD
wasn't it supposed to be in 2021.1? I'm in 2021.3.6f1
now getting these errors. id 15 and 13

Yeah I spent the weekend trying to attack it but no luck. Must be some shennanigans going on there. I will likely just have to try like you mentioned and approach it from the shader, maybe an overlay graphic of some sort to get the effect I want on the characters
i just noticed this warning. So I deleted my light settings asset and remade it and clicked auto generate but it's still showing this warning?

Help. How can I change the Base Map for my material? It is a URP material. I cant seem to change, it wont change the base map.

whats urp
Universal Render pipeline.
Google it
Hey we have a custom lighting pass and would love to disable the unity default shadow pass. Seems it's a lot more difficult to disable than expected. How to disable the default shadow pass? :)
Disabling the default shadow pass from the project settings will break some internal commands. https://docs.unity3d.com/ScriptReference/Rendering.ScriptableRenderContext.DrawShadows.html this will throw an error for example.

Guys i need help, i keep getting this message and it lags my game
UnityEngine.Experimental.Rendering.ScriptableRuntimeReflectionSystemWrapper:Internal_ScriptableRuntimeReflectionSystemWrapper_TickRealtimeProbes (bool&)```That message isn't responsible for the lag, but it suggests that you have too many high resolution shadow-casting lights
Hey. I'm writing a renderer feature that will render each object with it's assigned material but with a boolean value set, indicating that a different set of parameters should be used than in the main pass. In the renderer feature, how do I access the object being renderered so I can toggle the bool on it's material? Help appreciated 🙂
Hello, I have an issue, when i turn on Reflection Probe Blending, it turns some of my shaders full pink
Hey people. I am using an asset called Highlight Plus but it seems its render feature causes about 0.8kb allocation per camera per frame which  I don't think is sustainable. Anybody know this asset and how to optimize it a bit?
Edit: Nevermind. The devs have reached out to me with a fixed version and its now at 0 bytes in build.
An alterntive question - it is possible at all in a Scriptable Renderer Feature to tell which object is being renderered? Every example I can find of a SRF uses the same material for all objects being rendered
I need a little help with something
I am using an interaction script that was working perfectly well and had 0 problems I decided to upgrade my project to universal render pipeline and it no longer even casts a ray cast or at least I don't think it does, I'm really confused and I've been completely stumped for like a week
here is the first script
(interacting script)
using System.Collections;
using System.Collections.Generic;
using UnityEngine;
using UnityEngine.Events;
public class InteractableScript : MonoBehaviour
{
public UnityEvent onInteract;
public int ID;
public Sprite interactIcon;
public Vector2 IconSize;
// Start is called before the first frame update
void Start()
{
    ID = Random.Range(0, 999999);
}

// Update is called once per frame
void Update()
{

}
}
the interactable script is shorter
(this one here)

Ever wonder how games have interaction features that can do pretty much whatever they want it to do? Wonder no more! In this tutorial we'll teach you how to create a diverse interaction feature that you can use in almost any scenario.
We are being sponsored by Unity and the following links are affiliate links that help us out!
Want to learn ...
i got it from this tutorial
im only a year into games design / coding so please bare with my little knowlage
Just a quick question if anyone can answer this. I want to render specific objects at a lower resolution (as in, pixelate part of a 3d scene)
My idea was to use the built in Render Objects feature, since that does most of what i need.
Is it possible to downsample the output of this before drawing it to the screen?
or will i essentially have to recreate it from scratch?
hey, is it possible to create something like light saber sword using urp ?
it looks a bit more like a volumetric light beam
any useful tutorial?
Sadly thats not possible 😁. Maybe try to ask that on #archived-shaders with some reference picture of the exact effect you want to achieve. Im not exactly sure what you mean by ”volumetric light beam” but shaders are most likely solution to that
I copied some UI from my old Built In renderer game to my new URP game.
The images/ui are so faded compared to the images/ui in the first built in game, is this because of URP? The colours are the exact same.


Do the colors have same transparency too? Urp should render UI exactly same way as birp does so there should be no difference. Most likely you have set up the UI differently (transparency? post processing?)
Yes, it’s easy. In your material, Just add an emission colour to your object and increase the intensity level.
I'll try that , thanks
another thing, i have done exactly the same thing but it look different !

that is from the tutorial
my screen shot is as the following :

Other is just visualized on a sphere and other one on a plane
i'm trying to do the glow effect .. it doesnt look like it's glowing at all , it look like orange box to me
Maybe show a screenshot of what you mean


Fresnel doesnt really work well for flat shaded objects but it seems you dont have bloom effect/hdr enabled. Take a look at bloom post processing effect
where is that ?
On google for sure
im new to shader and everything
I dont bother trying to teach something that id need to google every step myself if you can just google it yourself
i'm trying , im kinda lost, i'll keep trying .. but this is quite confusing


Unity Learn
Bloom gives the illusion of an extremely bright light and is a great way to enhance add visual ambiance to your Scene.
So did you find the place to add effects? Pp is bit different on birp and urp
This is meant specifically for urp: https://docs.unity3d.com/Packages/com.unity.render-pipelines.universal@7.1/manual/post-processing-bloom.html
no i'm still lost, but based on that tutorial, there supposed to be a postProcessing profile in my assets folder, i cant find it though, maybe there arent any ...
Start by checking if theres Volume/Global Volume/smth like that in the scene, if not, add new volume. You should be able to add new profile from the Volume component if one doesnt exist already
nah, there isnt any
but I've created a new "pp profile" and named it as the following

not sure how to activate it
Yes, rhe colour and opacity is the same.
I never put any post processing on either of them.
You have to create global volume in order to make use of that. Youd be better to watch some up to date urp post processing tutorial like this one: https://youtu.be/TG-sTm-Ln2c
thank you! , I'll start with that
Im not able to spot the reason for thst odd behaviour but as far as I know, theres no difference in UI with urp and birp. Iirc urp and birp even uses exactly same shaders for UI elements
thanks it worked , all i had to do is to just right click >> volume >> global volume >> add override bloom and it worked
Also make sure hdr is enabled, otherwise high intensity values will not do anything
So has anyone worked with multiple renderers in URP? I have two Renderer assets listed in my URPAsset, but no matter which one I select with my camera, only the default one renders
I'm trying to do a minimap and I have to do a replacement material because some of my materials don't work well in orthographic mode
But obviously I need my game camera to render normally
cant you use the overlay camera system for that?
I'm rendering to a render texture once at the beginning of the game so I can use it in the UI
I figured it out. It was working properly in the RT but the preview in the Scene view was using the default renderer. That was a pain to figure out.
So, can I implement this one with the URP? Or can I implement the old shaders with URP in general somehow?
https://catlikecoding.com/unity/tutorials/flow/waves/
A Unity Flow tutorial about moving vertices to create waves.
Here is the properties so you can see it is the same

Maybe it just looks different against different background?
I don't think so


It wouldn't be that faded
I also removed the skybox and it was still like that so I don't think its the background
The first one looks much less transparent for some reason
Yeah..
I can't it getting looking similar when increasing the alpha..
hi, I do have it installed, but and it does work but only if made bloom too freakin high to the point were everything is glowing.

You can increase the threshold to make only the brightest objects glow
You have to tweak your bloom settings and the shader properties (i believe theres hdr color you can use to add more emission)
Have you adjusted the emission on the material of the object that you want to glow, like this:

this server has very poor help channel management
well anyway

how the hell does it do that
why is there 42.3 mil tris in a scene like this

enemies each have this amount of tris

there are odd things that are hard to explain .. here is a video
this is just a basic test model (forget about the handle) .... that thing turns DARK for no reason at all
the sword is not a mesh, its a thick line
even after all the efforts, it doesn't look at all anything like the one inn the tutorial

I'm not sure what tutorial you're following so can't comment on why it isn't working.
Just create a default Lit or Unlit material and set the emission like I have in my example. Apply it to your sword to see if that helps a bit.
sorry i thought i shared it earlier. https://youtu.be/ozByDujKyDc?t=321

A Lighsaber modelled in Blender and brought to life in Unity. Using Shader Graph I was able to create a nice looking blade glow effect. I procedurally generated a trail mesh and applied another Shader Graph created material to it which produced a nice looking overall effect.
Find the source code on Github, the link is below!
Git: https://githu...
I'll try to add emission.
Can you show us your whole shader graph too please.
same as he did it on the video

based on his video, his boom is 1 and threshold is also 1
I can't read the text on the image, but I assume you've plugged the nodes into the Emission channel? And you did create an Lit or Unlit shader?
Does anyone know of any good ressources on learning how to code my own passes?
Specifically i want to render objects at a different stage of the pipeline than they would usually be rendered at, if that helps.
Hmm, not sure then. This is usually a pretty simple effect to achieve. Add an emissive material to an object, set the intensity quite high, then play with the bloom settings on the post-processing volume.
I'm not sure why yours isn't behaving.
i figured out what was the issue , in my case, i didnt have a camera in my scene lol
without camera , none of those effects are visable, even without playmode.
its always the stupidest mistakes lol
Curious what you mean by help channel management and how you would improve it
Well URP is a pretty broad topic that has a lot of overlap with other channels that already exist, so splitting it into multiple channels in their own category would be good. I suppose SRP wouldnt even be included in that, but theres no separate channel for that at all right now.
I'm not sure what you mean. Can you be clearer on what the issue is?
YEs
when i want to create a 2D light
The button is gray and it is like this
it is gray and its name is Freeform light 2D (Experimental)
all the lights
@warm island
You may have not set up your environment correctly. I follow this tutorial and it allows me to add the Freeform Experimental 2D lights:
https://www.youtube.com/watch?v=pjpcitJim04&ab_channel=PitiIT
i did ir exactly but no ir won't work
But thanks
It is worked

a good example is the brackeys server. One category called "Development & Help", all major things get their own channel like seen in the screenshot. The main thing here is the #unity channel since a lot of things that people need help with dont fit into the categories presented in this server, as well as there is so many smaller, very specific channels that may not even get that much traction (more channel = less help since people who want to help wont visit all of them at the same time). And in the scenario of someone's problem not fitting into any of the categories they can also go to #other. Oh and brackeys aint perfect either, i think #code_optimization should be just #optimization because there is many instances where people need to optimize their whole projects not just code.

While there are quite a few channels in this server, I think it's necessary to find people with those specialisations to be able to answer questions. Otherwise questions quickly get buried too.
#💻┃unity-talk is our "other" channel. And what Cyan said above.
then its a little confusing since the category is called Discussion
if thats the case then there is not enough of them
whcih side you on if even in this channel management you still dont get an answer
<#531949462411804679 message>
If you have further suggestions please continue in #531949462411804679 . Advise you to search the channel for topics you attempt to raise as well.
Also see #🔎┃find-a-channel for channel descriptions. It mentions the channel usage and purpose.
discord paradox
Is anyone using scriptable renderer features here ?
Doubt it
Theyre hard to work with
Most people just use the blit and object render feature provided by unity
Damn! How do we make image effects in URP then? Worst part, ppl working at unity don’t even reply on the forums
Render objects is experimental. Also some passes that unity provides don’t work or I don’t know how to make them work… so URP cannot be modified much!
It can, but nobody knows how to do it lol
Can use something like this, https://github.com/Cyanilux/URP_BlitRenderFeature
The render objects feature actually just grabs a bunch of values to input into the renderObjectsPass i know that much.
but i have no idea if and how that pass can be modified
because if you can do that you can pretty much do anything.
this has helped me massively. apparently the only reason ive been having issues for the last 2 days was because my blit feature was broken, so thank you for one that works.
Can anybody help me out with this https://stackoverflow.com/questions/73140812/unity-3d-pixelate-individual-3d-objects-but-retain-resolution-over-distance
Essentially I am trying to render some 3D objects in my scene as pixelated, however I want to retain their resolution over distance, but I am unsure of how to accomplish this as most pixelate methods involve taking a render texture, downscaling and using that which has the problem of far objects consisting of less pixels than close objects.

Stack Overflow
I've been doing research around how to create a pixilated effect in Unity for 3D objects. I came across the following tutorials that were useful to me:
ive been doing something similar actually, by applying a pixelation shader through a blit.
theoretically you can dynamically scale that as distance increases, though it works better with an orthographic view.
(in which case its actually size thats increasing, not distance)
I've thought of this, but this wouldn't work for multiple objects, or if I want to have different resolutions for different objects
won't i be restricted by unity's max layer count then?
i suppose so but i dont think theres a way around that.
rip
what do you need 25 different resolutions for anyway?
otherwise the only solution i can think of is recreating the render objects feature, but adding a filter that scales them down, while taking the depth value into account.
This is most likely what i'll do, i just have no experience with render features so doing a lot of reading and googling :p hints / ideas are appreciated tho
Ive been doing the same thing, but no luck so far.
If you find anything let me know.
aight 👍
are you still on the older version by the way, or did you get the feature youve shown to work in 2021.3?
I got it working in 2021 (LTS)
If you havn't managed to get it working and your using the tutorials i've listed in the stackoverflow page then you just have to visit the github issues: https://github.com/Madalaski/PixelatedAdvancedTutorial/issues/1

GitHub
After upgrading the project to 2021.3.0f1, all my materials on the Pixel layer are transparent.
right thats what i needed, the changed handle.
this works a lot better than what i did...all that workaround cause i couldnt find what they changed the reference to
also because im blind and cant see the issue page i suppose
tbf I was the one to reply to the issue page like yesterday lmao
well i started looking for it 2 days ago lol
out of interest where did you look up what they changed the reference to? some changelog i suppose?

I didnt look it up, I just found it by accident on the frame debugger
so for future reference, when unity updates and inevitably changes its name again, just check there
dw so am I lmao, im in the exact same boat, starting looking at this 2 days ago
hence the issue reply also being like a couple days ago
this isnt by any chance because youtube recommended you t3ssel8r videos, right?
guess youtube went on one of their "we must recommend this to everyone" sprees again
indeed
If your also interesting in learning the URP render features you can join me in reading up the catlikecoding tutorials on SRP : https://catlikecoding.com/unity/tutorials/custom-srp/

A collection of tutorials that cover creating a custom scriptable render pipeline in Unity.
since we are using URP some of the stuff is irrelevant, but the shader stuff and render feature passes is useful to know
yeah im gonna do that on the weekend, i think
now ill work on adding a normals pass to the sobel filter
well ive already got the texture so i really just need to copy paste it with different references lol
aight, in case this may be helpful to you, you can also try looking at the shaders that were used in the GBCamera asset https://roguenoodle.itch.io/gbcamera-for-unity

itch.io
A camera setup and custom shader to emulate GameBoy visuals in Unity
yeah ive found that one too, just wanted to get the pixel effect working first
because with shaders i at least have some idea of what i need to do.
lol, doing better than me, i got no clue
Anyone find a fix for the issue when building URP iOS with cloud build, some of the shaders get lost?
same issue as reported here https://answers.unity.com/questions/1870769/how-to-fix-cloud-build-using-fallback-materials-on-1.html
Unity is the ultimate game development platform. Use Unity to build high-quality 3D and 2D games, deploy them across mobile, desktop, VR/AR, consoles or the Web, and connect with loyal and enthusiastic players and customers.
Finally got it working. Height maps. Apparently it didn't like the height maps on the materials. Deleted the height maps, and I was all set.
I'm pretty sure you can do this with elliot's ProPixelizer asset
damn, yeah that's exactly what I'm looking for, thx. I wanna know how they pulled that off
https://medium.com/@elliotbentine/pixelizing-3d-objects-b55ec33328f1
he wrote a medium post about it
cool, thank you so much, also love your videos <3
anyone knows how to change the camera background color in URP ?
first time using it
so its hard to figure out

ahh
Cant be easier 😄
mine was selected as skybox.
^^
We all do sometimes 😛
looks much better now :D

nice style!
thanks :D really appreaciate it
I need help on disabling this fog effect on specific objects

GitHub
Unity URP AtmosphericFog. Contribute to samoliverdev/UnityURPAtmosphericFog development by creating an account on GitHub.
How would I be able to access the alpha value through script?


can help me search "that model (.pmx) replace to my char in my unity game" in yt and others?

https://docs.unity3d.com/ScriptReference/Material-color.html This if the property is named "_Color"
If it's something else like BaseColor you'd do GetColor("_BaseColor")
You'll need to define a color, which is a struct with red, green, blue and alpha
In any case you'd call it on the material, not the shader
 Stop spamming. @mystic delta
@stable geyser Don't cross-post or spam really, what that question is even mean?
I'm guessing that they are trying to hack a game made in unity, probably genshin impact.
this is a problem solved by 5 minutes of googling
hey how to set up Visual Effect graph with URP ???
I tried to install the package, create one by right click >> create >> Visual Effect>>Visual Effect graph but it was empty ...nothing coming out of it like every tutorial I saw over the internet
even the standared templates are invisable !
do I need to do something for it to work on URP ??
i'm also using android
@scarlet lava Crossposting all over will not do you any favors
i dont know what to do, I've been stuck for over a day, ... I though Im posting in the wrong room, no body is committing to the problem, I dont even know if iam in the right room
maybe that is why i got no response.
Would anyone here know why changing the layer of a 3d object might make it invisible, but not the shadow it casts?


I found the reason why


is it possible to gpu instance a mesh with multiple materials?
Are you referring to something like this?

no
I want to spawn many bullets casings using gpu instancing
my bullet case mesh uses different material for the case itself and the primer
however Graphics.DrawMesh() takes only one Material argument
If the meshes you generate have consistent geometry. Do you think it is possible to make a single material with the effect you're looking for?
yes
however I would like to know if I can
use multiple materials
I dont care about working efficiently now, the project is just for fun
Anyone knows how can I achieve a spa/sphere map shine on urp?
I'm not sure what a spa/sphere map is. Do you have an example?

With the standard urp shader, just make sure that your smoothness is high and that you have a cubemap assigned in the environment settings
Alternatively, you can make your own cubemap-reflection shader
Alright ty!
@hard fable The above are two good options for shine, especially the realistic sort
This specific type is most commonly called "matcap"
Ah, matcap. I saw something about this on the Unity Tips thread.
#archived-unitytips message
You don't have to use Omnishade as you can create these quite easily in shadergraph.
"Easily" seems relative
https://twitter.com/bgolus/status/1487224443688554497 Here's instructions from Ben Golus of one way to do it
Hello I just deleted a folder in my project called somehting like URP settings or something, I dont know why but I thought it was junk... that basically messed up all my spritres. Is there a way to undo this?
Thank you so much guys
https://docs.unity3d.com/Packages/com.unity.render-pipelines.universal@12.1/manual/InstallURPIntoAProject.html
You'll need to create a new Universal Render Pipeline Asset, probably with 2D renderer if that's what you were using before, and set it as active render pipeline as per the instructions
And don't permanently delete random things without version control (or a backup of some kind)
thank you! Lifesaver
I dont think its possible (all the materials would need to be instanced separately). Urps srp batcher is pretty good at rendering lots of objects tho
No
Lights and color space may change though
Hi, I have a shader I'm trying to bring from a pre urp build and it gives no errors in the unity console, but it renders as pink. Is there any resources on how to debug this or things to change from pre urp to urp? I got RenderDoc working but I'm very lost on how to approach this so any guidance would be really appreciated.
Shaders can't be converted, you need to recreate it in shader graph or by writing it by hand
Oh I meant editing it by hand to fix the problems
But I manged to get it not pink!

I need to have them moving, sbr batcher works on static objects
solved it by reducing to one material
also i dont want to allocate objets and move them around
Srp batcher has nothing to do with static/dynamic, it works on both
telling game to draw a mesh every frame is simpler
Oh yeah, youre drawing them via code right?
yes
really? i thought it works on static lol
because some yt tutorial said use gpu instancing for moving objects
Srp batcher is the batching system thats automatically enabled (and makes urp/hdrp/srp so performant). Static batching etc. requires statickness.
Can someone please help!
https://forum.unity.com/threads/rendering-to-depth-texture-scriptable-render-pass.1315464/
I am really struggling with that question 😦
keep the same material and change it per bullet with a propertyblock. there is another drawmesh method that takes array of propertyblocks if i remember
I am doing some shadow mapping with directional light. But seems something is off. It renders shadows till rotation is between 0-180 and after that it just doesn’t render shadows… what am I missing to add to the logic ?

[Help Required!] Here's an update on the directional shadows. This time I rendered a single capsule mesh using a command buffer. If you see if the directional...
Is it possible to do a custom grab pass that happens after transparents finish rendering (rather than before, like the opaque pass)?
I think it should be because it’s just a grab pass. You can try creating a pass and enqueue after rendering transparents and then blit it to opaque texture
Or look in the packages folder in URP, there are some passes available. Idk how many of them work 🤣
Should be able to yes, with a blit to a custom texture ID. e.g. https://github.com/Cyanilux/URP_BlitRenderFeature
Or could look at the CopyColorPass that unity provides, it has some extra downsampling options. (May want to change the github branch to match your version) : https://github.com/Unity-Technologies/Graphics/blob/2021.2.16f1.4502/com.unity.render-pipelines.universal/Runtime/Passes/CopyColorPass.cs
One important thing is that any shaders then reading that global texture should be rendered after that. So would need to be taken out of the regular transparent queue (via the mask at the top of the Universal Renderer asset), and rendered via the RenderObjects feature.
If you still need help with this : You'd likely need to manually draw them to the depth texture.
It does kinda depend, as there are multiple ways the depth texture is generated. It can do a CopyDepthPass (where it copies from the depth buffer). Your objects should actually already appear in the texture with that. But I think some platforms don't support it. And it turns off when using MSAA. (see : https://github.com/Unity-Technologies/Graphics/blob/4ccc5351ef4d264e7cf5d4cdab0024770dbc3740/com.unity.render-pipelines.universal/Runtime/UniversalRenderer.cs#L1131)
If it can't copy, then it does a prepass instead (DepthOnlyPass or DepthNormalsOnlyPass) using the default opaque layer mask (hence why your objects don't appear in it). The shader would also require DepthOnly, and/or DepthNormals passes for it to work. Ideally your shader should support both of these if it's code-written. If it's a Shader Graph, should check the generated code (I think DepthNormals only generates in Lit graphs).
(Which pass is used depends if a feature uses ConfigureInput(ScriptableRenderPassInput.Normal);, like the SSAO feature)
For clues to how they work can find these passes in : https://github.com/Unity-Technologies/Graphics/tree/2021.2.16f1.4502/com.unity.render-pipelines.universal/Runtime/Passes
May even be able to create a feature that uses those passes, as the LayerMask is a parameter of the constructor method.
hi, i have a problem, i recently converted my project from built in to urp, and im wondering how my settings should be set up for urp
some shaders are pink and i downloaded the respective urp shader, however it doesn't seem to be fixing the pink shader issues
Pink means incompatible shader. Make sure the pink material is using urp compatible shader and you have urp asset added on graphics settings (Scriptable Render Pipeline Asset slot)
I've done that and the asset that i downloaded had an upgrade package to urp, however it still doesn't seem to work
Hi, I have been trying to implement shadow mask support for my toon shader in urp that it could support shadow light cookies. I tried implementing it with shader graph as well in amplify shader editor but i cannot make it work. i tried Cyanilux https://github.com/Cyanilux/URP_ShaderGraphCustomLighting custom lightning, enabling keywords and all that things but i am still not able to make it work. Maybe you have some reference that i could try to use or something. I tried looking into Unity's urp shaders code but i cannot really find it useful to me.

GitHub
Some custom lighting functions/sub-graphs for Shader Graph, Universal Render Pipeline - GitHub - Cyanilux/URP_ShaderGraphCustomLighting: Some custom lighting functions/sub-graphs for Shader Graph, ...
I would appreciate any info about implementing baked shadowmaps in shader graph or in amplify
or just where can i learn about how unity handles all this so i could implement it on my own
@dry willow will 100% be able to answer this 😄
Hey, I'm looking for a water asset (for URP) that is as realistic as possible, whilst still being very performant and customizable. Do you guys have any recommendations? Yesterday I found out about the KWS water system and heard some very good reviews about it, though Im asking here just to be sure there aren't better options. I have an island with sand as well as rocky beaches, together with many rivers.
oh and, is this the right channel to ask this?
I've been thinking of getting the KWS water because some people say it's better, though it's €61.64 compared to Crest's water system which is only €31.63
at the moment because of discounts. Is KWS truly much better than the Crest water system?
My custom lighting functions don't support ShadowMask yet.
But from what I've seen, it should just be a Custom Function with Out = SAMPLE_SHADOWMASK(uv); (where I believe uv would be an input with the UV1 channel from the UV node, as that's usually where lightmap uvs are stored, but haven't tried it)
With that, you can then edit the GetMainLight(..) (and GetAdditionalLight(..)) functions to include that, rather than the half4(1,1,1,1) they currently use.
Also with the shadowmask / lightmap related keywords. URP/Lit uses : LIGHTMAP_SHADOW_MIXING, SHADOWS_SHADOWMASK, DIRLIGHTMAP_COMBINED, LIGHTMAP_ON, DYNAMICLIGHTMAP_ON. Not sure which ones are important
Hey I m looking for a water asset for
Bit of a rendering issue here -- Coming at you with limited knowledge about the rendering pipeline
I want my world space canvas to render over my outline and my outline to render over my water.
Water's render queue is 2501. The outline is a custom render pass, if the render pass is set to "BeforeRenderingTransparents", it'll be drawn before the water, and if it's set to "AfterRenderingTransparents", which afaik is the next render pass event, it's drawn on top of the world space UI.
I've tried creating a custom shader in shadergraph for my UI stuff but when using sprite unlit, I couldn't override the render queue, and when using regular unlit, it has no consideration for the canvas's hierarchy
Any pointers as to how I could solve this so that the rendering order is the water -> the outline -> the world space canvas?
the render option under create is missing eventho i importet urp

@marble vigil can u help me please ?
i also get this error
Honestly probably not
The kind of problems you get when doing a major upgrade followed by a downgrade are beyond me
@cerulean viper If you get stuck forever, you can always export all your game assets into an unitypackage and import them into a freshly created project on the correct editor version and render pipeline
Takes a bit of boring work to put everything back together but it gets the job done
It's what I'd do in that situation
And going forward always keep backups or have a version control system
Where can I find this setting? I can't find it anywhere.

this should be enabled on the settings asset

Making my first shader here, following the https://www.youtube.com/watch?v=kgXeo2SRDd4 tutorial. He's using a PBR shader graph, as I understand it, that would be the URP lit shader graph. I could be wrong. But after creating the first parameters, he's about to apply the settings to the materials Albedo, yet, I do not have it. So I guess I am using the wrong Shader, i.e. PBR is not Lit, or I am supposed to add it, but I don't think he did add it, or I am just missing something else. Ideas?

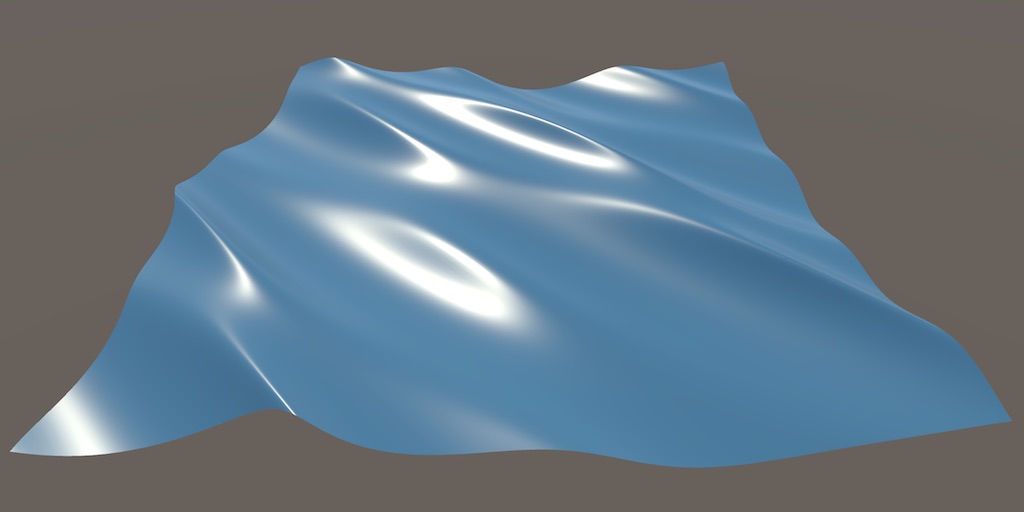
In this one we us a texture based displacement map coupled with a normal map, both made in Blender (not shown) using the ocean modifier. Really simply stuff, but amazing results. We're also using refraction but not in the same way that everyone else is using it, so that's either good or bad.
● Support Links:
♥ Subscribe to learn more!: https://...
Mine:

His:

PBR = Lit, Albedo = Base Color
Thank you! 😄
does anyone know where I can edit the depth of a texture?
I enabled it but nothing appears on my material.

it should look like this

that's a custom value, you have to add it yourself in the graph
I testing out making trees and leaves using transparency. Different video tutorials explains the creation in urp.
But none of them faces my problem that I have some sort of depth sorting issue on the leaves.
Is it something simple that I do wrong or is it much more complex?

the render-queue is just an attempt to solve this
If you don't need partial transparency, could use Opaque + Alpha Clipping instead. Can enable it in the Graph Settings (tab of Graph Inspector window, toggled with button in top right of graph).
Alpha value just needs to be lower than the Alpha Clip Threshold port that appears for it to be clipped.
Oh wow, I did not know that.. Although I still need to get my head around what is really going on here technically.
Thanks for the quick answer!

What are some differences when installing this through the package manager rather than a project template?
Show your terrain, do you have grass ? Trees ? We can't relly tell you
so i had grass, i got rid of them and that made the batches to around 2k

Ok, you should probably check for GPU instancing for your grass then, and for most of your trees and else too, it should help a lot
i've enabled gpu instancing on their materials
2k is still a lot for this kind of scene i think

Are they marked as static ?
yep
And is it the same prefab for each same tree ?
also, what is this?


I think you should uncheck "enable gpu instancing" on the material if they are marked as static
ive also turned off real time lighting
aah
i see
Marked as static = static batching (for non moving objects) and gpu instancing is better for dynamic objects i think
for trees, are they meant to be static?
i see i see
Yes
Even if the leaves are animated using shader, the mesh is still static
aah makes sense
ill double check if all the materials have gpu instancing and stationary objects are static 🙂
so without the trees and everything, the batches count is 279
so the trees and plants are adding a very large amount of batches
Yes, in most of games thats what takes the biggest ressources
Thats why it's very important to optimize them, because they are mosly made to be placed everywhere and in big amount
i see
i think ive done all the steps you've mentioned
the batches didn't seem to change as much
Mh, in game you can use the frame debuger to see why meshes dont batch with eatch other meshes,
ohhh i found one of the issues
Window > analysis > frame debuger
i had small meshes, around 200 of them and i didn't even notice
Oh ok
oh yep
majority of it is 'draw mesh'
it seems to be processing every single tree
do you have something like that writen for each tree ?

On the right window you should have the "description" when you select any batch iteration on the list of the debuger
on "draw opaque object"


Btw, you have 700 batches which is ok, is it with the trees and grass enabled or not ?
with trees enabled only
i dont have grass
Ok
ah, i was looking at the oculus performer lint and it said to have less than 100
so i was very concerned
i think i may need to combine some materials

Oh really ? Never did a project on oculus so i dont really know but I did projetcs on mobile (which i think is less powerful than oculus) and we worked around 500-1000

Oh ok, i see
im making to mobile too 🙂
its the same process i believe-
i seem to have the same material many times0

i see, if urs can work between that range, ill give this a try and see how it tests 🙂
Less is better, actually 1000 is the very maximum, but yes
ill attempt to decrease it as much as i can
i think it is a lot better than having 17k-
You can check your batches on screen by using the slider on the top of the frame debuger
Yes for sure x)
If you can do that, you should try having the same material for multiples meshes, thats saves a lot
Using texture atlases
No problem ! You can ping me or dm if you need anything else
Hello, I have a weird problem with URP's PixelperfectCamera + Cinemachine
The orthographic size I set in cinemachine is not applied to the actual camera IF "crop frame" is set to "none"
I looked around in the source code and found this in Renderer2D.cs

which sets the actual camera orthographic size back to the original one (ignoring cinemachine's change)
Then I searched why it was only happening with crop frame set to none
and
when crop frame is set to anything else, the PixelPerfectBackgroundPass is added as a render pass

Interestingely, it saves the orthographic size when created

and restores it at the end of the pass

I'm pretty sure that is why I had no problem with other "crop frame" values
But it still leaves the problem of Renderer2D forcing the pixel perfect camera OrthographicSize
The pixel perfect camera doesn't touch the orthographicSize if cinemachine is used

So Renderer2D should maybe do the same ?
i have this weird problm where all render settings dissapeared and urp is completely brocken


and im missing one of these in the project settings but i cant create one
because the option is missing
I did, but this doesn't seem to affect the material at all...
For some reason, the Strength and Depth parameters here don't affect my material at all.
only the strength between 0 and 0.001 when in the official Unity tutorial it should be between 0 and 2.
what could be going wrong here?

Hey, I’m trying to figure out the new URP Rendering Layers feature in 2022.2, but aside from being able to create and rename layers under URP Global Settings (Project Settings), I have no idea how to get it to work.
Anyone with and ideas or experience with this new feature (or any Unity Devs on here)?
Thanks! 🙏🏼
I need to counter rotate object space Normal Vectors to its rotation. Pictured is the look I want (done by turning the mesh inside out) but I need a way to do it without turning the mesh inside out.
whatever changes when it rotates +, I need it to do the same change but - twice as much

is this even physically possible? I've tried half a dozen methods and none worked
you could probably flip the normals as a final step, no?
Hey, Im trying to use URP for some post processing, but I cant figure out how to make it work. I've installed the "Universal RP" package. Made a global volume and a volume profil. But my camera doesnt have the "post processing" option so i guess nothing happens? Do I need to set up something else?
It's not enough to install the URP package, you need to configure it as well
Instructions in pinned messages
I reached a point in the shader graph that every change the material preview stops updating
(change to other mesh or dragging doesnt help). Only thing that helps, is restarting the project and preview is back.
Could this be a simple setting in Unity somewhere? 2021.3.6f1

The preview in Shadergraph is not working most of the time.
The best way to make sure how it looks is to add a plane in the Scene and drag a material with your shader on it 😄
@steel vine Don't cross-post, please
Sorry, wasn't sure where to post this issue
I can delete the post in this room or the other
weird question - when displaying the output of a Time node in shadergraph, my GPU starts to buzz real loud and the usage shoots way up


is this normal? Can I make it not simulate time in the preview?
Anyone have any ideas on why a silver metallic material in blender would be coming across as almost pure white in a URP Unity scene?
A lot of vegetation assets on the Unity Asset Store are not compatible with URP, they all do this. Any idea how I can fix it?

uhm.. why does this happen when I enable "Alpha is transparency" on the material texture?


That's the purpose of the checkbox
It expands the color regions so whatever's outside of them doesn't leak into opaque areas when the texture is filtered or mipmapped
So how do I get the transparent parts of the texture to be transparent? I thought they would just show up as transparent immediately
Are you making a material with an existing shader or a new shader with shader graph or the like?
I was attempting to use the standard shader
is it normal for realtime illumination to take like 2 hours to compute?
In some cases yes
Especially if its done on the CPU

You need to enable transparency or alpha clipping on the material
"Alpha is transparency" on the texture asset only improves the appearance of transparency once it's enabled in the material

oh sorry
you said realtime
sometimes realtime illumination just freezes

in my experience, it will freeze until i restart unity completely
im getting scared
if the time keeps going up and doesn't progress at all its frozen and you just have to restart unity
it progresses
Oh duh 
I didn't set it to cutout

Are you quite sure you're working with URP? URP has no "standard" shader nor "cutout"
It has "lit" shader and "alpha clipping"
Nope!
Not relevant to this issue but might be worth checking
I think I meant to use a different channel but I don't know which one
Which one do you use for built-in
Whatever fits the issue
#🔀┃art-asset-workflow would've been the one for this
thanks for the help

I think multiplying the red and green channels by -1 would do that... but that's a guess. I usually work with tangent space normals, not local space normals. Also that's a very strange solution. What is it you are trying to do?
Use unreal =p
Anyone with an idea about this?
Don’t think you can, one of the reasons it’s in experimental mode
HDRP can do realtime global illumination to an extent
"Enlighten precomputed" realtime global illumination was never designed to be calculated on the GPU, which is what the question is about I assum
So HDRP can do real real-time GI?
But I think precomputed real-time GI is way more performant and looks the same almost
You can do realtime global illumination on HDRP and, I think URP, (requires 2021 LTS) with a directional light. It doesn't work on other light types though. I did an experiment a few months ago:
https://www.youtube.com/watch?v=gpYLpW1pHo0&ab_channel=brianer

A quick test to try out the Enlighten Global Illumination feature on Unity 2021 LTS.
I think Enlighten works for all light types?
Only that light from emissive materials can't be moved
how can i create a simple lit shader with shadergraph?
my world curves as the objects get further away so i cant use the default one
Hello, really new to this whole thing. I don't know what to google for to get this to work. But how can I plug the vector3 into the texture slot? I assume I need to add some step in between or something like that?

Also, how could I create a gaussian noise texture like this? While searching I mostly come across blur tutorials and what have you and I haven't been able to get how to convert it to a texture type thing as below:

Alright, I guess I solved that one

Texture input only accepts texture assets, so it's not possible
Not sure why you'd want to anyway
You could use a picture of the noise as a texture and skip the calculation
This is extremely inefficient, and produces potentially unwanted values unless normals are what you need
You could instead use "simple noise", split it's color channels and offset them in different directions
no, I realized what I was trying to do. I misunderstood something I did earlier in a tutorial. I.e. I thought I had to use a texture like below to begin the normal map creation or something. I honestly can't remember my thinking 😛

That is true, but it's still good to know these things 🙂
How would I make the white slimmer? Essentially more black without decreasing the brightness of the white?

A Power node should work
That did it! Thanks!

Hey, so I have this texture that I want to use as a displacement height map. Yet, I can't connect it to any node leading to the vertex position displacement, nor can I attach it directly. I've tried quite a few different things now. And this is what it currently looks like:

And this is the texture I want to use:

So how am I supposed to get this to work? 😛
Had to use Texture 2D Sampler LOD
How would I add just the white part of a black and white image onto a colored image? Like overlay and such in PS
Found "blend". That'll be the one
You need to add the Vector3 node to the position node. Like (Vector3 + Position)
The problem was that I wasn't using a texture LOD. I did try what you suggested tbh

i have this odd problem where my Draw Calls, Polys and everything is Optimized
but my game still lags a crap ton when its built to Android (Quest 2)
By everything you mean no realtime lighting and mobile optimized shaders for all materials + post processing
Is it possible to make Voronoi noise be tileable?
Or rather, how hard is to make Voronoi noise be tileable?
After looking at some various youtube videos regarding voronoi noise it seems to me that it is in essence based on randomness and that lining up the various sides to tile could be quite the challenge. Another question regarding this would be if there's another type of noise like voronoi that is tileable?
My shadows are jagged in URP, how to fix that?

This one goes over it, and I believe it's in the section Adding Sunlight at the 3:00 minute mark https://www.youtube.com/watch?v=5dRVRyyGR4A

Learn how to light an exterior scene in Unity's Universal Render Pipeline (URP).
✅Viking Village URP
https://prf.hn/l/7aNXAQX
✅Fantasy Skybox Free
https://prf.hn/l/6bNX03A
✅Download Free HDRI
https://polyhaven.com/
▬▬▬▬▬▬▬▬▬▬▬▬▬▬▬▬▬▬▬▬
✅PC Configuration
INTEL i9 9900K , NVIDIA RTX 3070, 32 GB RAM, SSD 500GB
▬▬▬▬▬▬▬▬▬▬▬▬▬▬▬▬▬▬▬▬
☑️Quick Links :☑...
Thank you, I will see it
My shadow resolution is already maxed out

Upping the Cascade count seems to have increased the sharpness of my shadows. I'm no expert, just saying, all my knowledge is essentially from that one video I sent you
Yeah, I thought so, but I've been looking for other solutions
Shadows aren't what I'm focusing on atm, trying to get my water to be perfect. But if you do find a way to increase shadow quality, please tag me 🙂
Oh I will, I've been trying to figure it out for almost a year and a half now
Only URP seems to have this problem
But I don't want to use the built in render pipeline
Understandable, it's quite neat what they've done with the shader graphs, especially for someone like me who's never done any shading like this. And also, most of the new assets store stuff are URP.
Seems to mostly affect on the edge there
But at the same time, my shadows have an incredibly short range... Which is what I find the most bothersome about it all

@final crater
Is there a threshold feature in shadergraph such as the one in photoshop?
Do you have "soft shadows" enabled in the light source?
Check out "step" and "smoothstep"
Thanks 🙂
I do not know that unfortunately
That merely hides the pixelation but it still is visible
It would be the "Step" or "Smoothstep" as informed by @marble vigil 🙂
The jaggies in the picture are definitely a result of using hard shadows instead of soft shadows
Hard vs soft


So I am having a pretty annoying issue right now. Which is that I want to create a waterline, and I am using the settings below. Also see the picture for how the basecolor then looks like. Then after knowing how the base color of the black and white layer looks like, I wanted to apply that to a blue color. Yet, when doing that, I get the waterline but the water stays all black. I decided to try with "screen" and "linear dodge" as those exist in both photoshop and shader graph and in photoshop it simply applies the white color on top of whatever other colors are underneath it.
Sadly though, I imagine since the water material is transparent, it doesn't deliver the same type of blending result. And I also imagine that the Scene Depth measures through transparent materials but not through opaque ones so then I don't know how to create a waterline.
Settings to see the base color of the water line:

Result:

Alright, so having hard shadows with non jagged lines is not possible in URP?
Applied to the base color:

Also result:

PS screen blend:

PS linear dodge (Add):


I doubt that's possible in any pipeline
Shadows are textures mapped onto meshes, so they cannot fundamentally have perfect sharpness
Alright thank you
You'd need a custom system which skips the texture mapping part and projects the meshes themselves as shadows like some really old games used to do
How do i find the Mobile optimized Shaders for URP?
To solve the bleding issue I found that the "dodge" blend works, which it didn't in an earlier attempt, guess i must've changed some related setting
doing Mobile/Diffuse doesnt work, its just pink


Instead of sampling the Voronoi with UV coordinates, you could use the Position node set to World space, and Swizzle with "xz".
That won't make it "tile" exactly, but should the coordinates are then continuous so shouldn't create those seams between meshes.
You mean like this?

Don't think I'm getting you correctly, I'm getting this 😛

No, I mean use a new Position node set to World, Swizzle then put into the UV port on the Voronoi node
Literally perfect, thank you!

Would it be accurate to call the Position World node and the Swizzle node as "World UV"?
Sure. It's full name would likely be "World space planar/projected UV", but "World UV" works too.
Ye, just for group and such, thanks 🙂
So, I am currently using the Add node for organization purposes. Like so:

Isn't there an empty node type for just this purpose?
Lol
Double click the connection wire. Or right-click and should be "redirect" on dropdown
right click line and add redirectxD
Exactly, when you ask the question, you start to think "How would I have designed it" 😛
But thanks 🙂
What about this?

What about what?
There are hard shadows in the image that are not pixelated
They're fundamentally the same shadows you've been working with all this time
Wdym
https://catlikecoding.com/unity/tutorials/rendering/part-7/ the picture is from this tutorial
Yes
It explains how to tweak shadow resolution, cascades and soft shadow settings
So the same stuff we've been discussing here
Alright
If you tweak them right you'll have perceptually perfect shadows
It's a bit easier on BiRP compared to URP as URP uses cheaper shadow filtering, but the process is the same
Hmm, is it possible to make URP not use that cheaper shadow filtering?
I guess SRP is designed to be customized but I've got no idea about the specifics of that
Much easier to figure out the best shadow settings with the current tools you have first
Is it a bug that causes it so that I all of a sudden can't set a node to the same node?
Or is it some sort of thing I did?
They are meant for built-in render pipeline only. I think you are left with Sinple Lit shader under the urp category and shaders you can find from asset store/online
I only get the following options when I right-click => create node

Searching for subtract yields nothing etc
It works again now, don't know what happened there
It looks like it's trying to create a master stack block node. (which usually happens if you right-click over the stack I think, but I have seen it bug out a bit before)
Hm, perhaps because I was too far away from the master node or something then :/
Ah well, would explain what solved as I went back to the master node and then just back again
Explains everything
How would I do this in shader graph?
Because I am doing this, and I am getting the results but they are upside down, and I am thinking this might be the reason

And I suppose this would be:
p.x += _Amplitude * cos(f);
p.y += _Amplitude * sin(f);
Whilst it should be:
p.x += _Amplitude * cos(f);
p.y = _Amplitude * sin(f);
I might just be thinking wrong about this, but if this is the cause, do help out if you know how to 🙂
Actually... Seems I've done an add where it should be a subtract
Alright, it works now...
how do I upgrade custom materials to urp?
I downloaded a tree asset from the asset store in my urp project and all the trees are pink
You must find URP-compatible assets or swap the shaders yourself to URP equivalents
how can I swap the shaders?
material assets have a "shader" at the top
You can use the meshes if you replace the shaders with URP's shaders
This can be done automatically if the shaders are not custom
But if they are custom as well, you won't be able to convert them
You can only hope that swapping to a similar URP shader is good enough
So, I have a global light 2d and a point light 2d, how would I make the point light appear over the global light, because I can't see the point light right now
Hello, so I want to tile some planes that I am displacing. Which normally does go well enough. But now it doesn't go well. And I don't know how to correct it. When I use the Position "Object" node, then the tiles line up properly, next to eachother. Albeit they don't actually sync up their meshes during displacement. However, when using the Position "World" node, the tiles decide to separate completely... Any idea of how to tile these planes up?
Position "Object"

Position "World"

It's doing it in this specific way:

Is there a way to use auto exposure with URP? i kinda need it
When using Position World make sure to transform back into Object position at the end or use World position to Sample a noise etc. and apply it to Object position.
Hm... Is there a node that transforms it back to object position? :/ Not sure I understand really :/
This works, seems unintuitive tbh, but it did the trick 😛

Is there any reason I can't connect the same vector3 node to the Vertex Normal and the Normal (Tangent Space) ?


I don't get it, seems so weird, no?
This happens to a lot of nodes as well
Sometimes nodes can get locked to a specific stage when connected. It's kinda annoying but I think you can connect to the vertex stage first, then connect to fragment. But don't think it works the other way around.
That's also assuming there's no nodes in the chain which can't be connected to the vertex stage - like Sample Texture 2D. (Would have to use the LOD version instead). There's also a bunch of other nodes that are fragment-only, I've got a few listed here : https://www.cyanilux.com/tutorials/intro-to-shader-graph/#fragment-only-nodes
I have an FBX with embedded materials. No lighting in scene except for skybox. Lighting is baked. The shine on these metal railings is too high. Is there a lighting setting I can change? Or do I need to extract my materials and make changes to the materials?

just noticed the sample scene came with global volume with bloom already in it 🤦♂️
it still is a bit strong
the default bloom shouldn't go crazy like that for a scene
its a VR project, so I just deleted the global volume gameobject that came in the scene
This is the normal size of my plane:

This is the size of my plane after applying my shader:

And in order to get it back to it's normal size I do:
multiplied by 1E-5


Doing this makes so many things work unexpectedly though... And I can't just change the scaling because then the tiling gets all wrong. Is there really no way to just scale it back normally from from the shader?
Lol, I can't believe I didn't realize I can just change the tiling grid -.-'
So, I have a little bit of an issue right now
I'm trying to find the difference between two shades of the same colour, so that I can then take another colour and amplify it by the same amount of get a shade of that new color
Let's take Weedle for example

I want to be able to make the nose green

This was edited with a tool, but I want to calculate the difference between the shades of red on it's nose and then apply them to the base green to create the different shades

If this is for Shader Graph can probably use the Saturation node for this (or Colorspace Conversion to HSV, which you could use to hue-shift too)
If it's for shader code, there's some snippets on the node library pages which might help still.
https://docs.unity3d.com/Packages/com.unity.shadergraph@12.0/manual/Saturation-Node.html
https://docs.unity3d.com/Packages/com.unity.shadergraph@12.0/manual/Colorspace-Conversion-Node.html
I'll give the Saturation Node a look
It's in Shader Graph, and I've caculated all the differences in the colours by Dividing the Shade by the Base colour; although I'm having limited success then multiplying Green for example by the returned value
This was what I was looking for, thank you ❤️

heya, was wondering how i could perhaps reverse the spherize on my shader graph that i have now so it goes from:

to something like this, dont mind the poor photoshop

not that great at using shaders as im new to it, but any ideas would be nice
probably a very unusual problem with lights:
- I have a transparent glass material.
- when light hits it, the player sees a spec / light reflected on the glass.
Problem: the player does not see the reflected light on the other side of the glass,
from the light on the other side.
Probably because the material on the other side is invisible, since the normals point away from the player?

good point -_-'
Hello ! Any Idea why my texture suits perfectly in blender but does this in Unity ?


Unity vs Blender
Now my tree looks like a cow
It's likely you're not viewing actual textured result in Blender. Make sure you are viewing it using that material render mode.
I only have one material
Can open UV editor there as well and look where are the actual faces on the texture map

Blender has several workflows for materials
Make sure everything is applied and correct material exported
I would find a tutorial to follow and try to spot which part you are doing differently so that your UV are not exported with correct material
I've watched every single tutorial about it, not even joking
Maybe 10 of them
And I just do the exact same thing
One mistake is all it takes. Blender has different workflow for painting textures and you need to make sure you are exporting correct one.
or it was applied correctly anyway
Create a project with simple primitive shape and experiment with it
Also if you are using Blender's node created material it might be ignored completely on import
Simple question but maybe it helps. Do you have an Offset / Tiling in your Unity Material? ^^
No, it's all set to 1/1 and 0/0
Am I supposed to change that ?
I really don't get it
Ok It worked
I just had to click this
That's correct. Best way to figure it out is. <#archived-urp message>

Find proper workflow with that, then look what's different in the current one
I Actually just needed to click the "Swap UV's"
Can anyone tell me why ?
Thank you for your help anyway though
Your UVs were assigned on a different channel somehow. Usually default import settings are fine (usually)
Ok thank you
Can I measure the distance of a vertex to another vertex on a different object?
I.e. Measure the distance from the ocean plane to the terrain plane to affect the height of the waves. (Or any other way to do this)
how expensive is setting the bloom on all materials to some dim virtually invisible color? I'm using material property blocks to turn on and off emission at runtime by setting the emission color, I wonder if I should be using a second material for this, and resetting the shared material to the material copy with bloom enabled
I need help,
Assets\PipelineSettings.cs(62,9): error CS0200: Property or indexer 'UniversalRenderPipelineAsset.supportsSoftShadows' cannot be assigned to -- it is read only
but its a public bool xD : public bool supportsSoftShadows
Thanks infront
Does anyone know if there's a way to have different Render Scale settings per Camera in URP?
If you swap between cameras you'd have to change the quality settings with a script at the same time
If it's an RT camera I think it gets its resolution from the RT texture resolution
Hey I'm using a render texture in my UI to force a 4:3 aspect ratio with a base cam/overlay cam rendering on to it. It works fine when the game view is set to 4:3, but when set to anything wider than that the overlay camera's visuals get stretched wide while the base cam appears to remain shaped correctly. How can I keep the overlay camera from stretching?
Oh nvm lol I figured it out. I had my overlay camera overlayed on the 4:3 game camera AND my display shaped background camera which stretched it out.
Hey I found a bug in the URP Render Asset
You cant change -> public bool supportSoftShadows
I dont know why this is but it should be fixed... It says it isnt public when you change it via code.
Hey I am looking for some resources (tutorials, articles, etc.) about implementing volumetric clouds in urp. I've searched the internet, and everything I find seems either not actually it, fot hdrp or saying "just do a raymarcher - basic stuff". So if anyone knows any good resources, please ping me. Thanks!
how do I make my speedtrees become urp shader with still having wind??
can somebody please tell me why my emissive material isn't working?
and to avoid a waste of time, my camera has pp enabled and it wouldn't affect the scene view anyways


also, it looks to me like it's post processing in general because other effects aren't working either
ok so turns out you are not allowed to change global volume's profile from default, nicely done devs
great now I am getting this 0_o

if you have a solution please @ me and I'll reply as soon as I can
so turns out just restarting unity worked, great!
Possibly silly question: But how do I enable the ShadowMask 😊 ?


I'm guessing it's just not supported on the version I'm on...
It should be available in v10+ (Unity 2020.2+)
Yeah, figured, thanks 🙂 I'm on 2019 - v7
This bit of code works in 2020, but in 2019 I get this:
float2 uv = Uv  * unity_LightmapST.xy + unity_LightmapST.zw;
Out = SAMPLE_TEXTURE2D_ARRAY(unity_Lightmap, samplerunity_Lightmap, uv, 0);

Gargh, figured it out. It was just in the alpha channel instead of rgb.
trying to make a 2D sprite light up with 3D lighting
would putting it on a quad in blender do the trick?
for context. trying to make a game like dont starve
How can I reduce the radius of baked lightmapped GI in UWP? (I want a faster falloff, but I don't want to reduce exposure)

Been redirected here from #💻┃code-beginner -so I'm following a tutorial. I'm not like exactly sure what URP does exactly. I guess it has to do with like all the graphics and stuff.
Now, which is the Pipeline Asset (Forward Renderer)? And what is the difference in the 2D and universal one? Thanks in advance


Have you read the documentation?
Increase intensity
nah that wasn't it I know how to do post and all that it just wasn't working
I sent 2 or 3 more messages explaining why after that and it is really dumb
Does anyone know how to use Post processing on specific layers in URP? Like I want to exclude certain objects from post processing on a single layer. I know how to do it in built in pipeline but I can't get it to work in URP
I want the change the color of my background / depth of field effect multiple times
so I have all my bg in a specific layer, and I want to change the color of every object on that layer
It's a combo effect, changing the base color of 100 different materials just for a few seconds is very performance heavy
Is there actually no way to just make post processing affect a single layer? I understand everything has a work around but I have so many effects I want to stack and everything would just be more straightforward if I could use pp on a layer
Wouldn't be able to smoothly lerp to different colors if I use material variants
There are multiple videos on yt which describe excluding layers from post processing, the only issue is they're all not for urp
I thought it was a simple solution considering it how easy it is to do in built in pipeline
😢
I have an issue. In both scene and game view, the light is now being rendering right. I am not using custom shaders or anything

Here is a photo from a certain distance ingame, where i cant see the light
but when i get closer

i start to see it but still not correctly
The scene has only the house it self, with a cube as the ceiling and a directional light
The tree Tree must use the Nature/Soft Occlusion shader. Otherwise billboarding/lighting will not work correctly.
i tried to place trees using the terrain tree feature but it gave me this warning and i cant place my trees
i tried using the shader its saying but it dosent work in URP
how do i fix this?
I just have a really dumb question that I hope someone can help me with. Wanting to generate a smoothness map from a blender model to bring into Unity (roughness vs smoothness yes, not worried about that atm). I thought getting the map into the transparency of a png would work, but apparently that is not the same thig as an alpha channel? Can someone help me understand if I'm doing something wrong or if there is a different file type for map I should be using? Working with the following material area specifically:

All I seem to be able to do is just apply it as a specular map, smoothness not being affected
Hm so I'm using a stacked camera but the scene view is now basically useless because it doesn't have camera stacking...
anyone have any idea how to fix this?
like ideally I'd just use something identical to the in-game camera but I can't figure out how to set something like that up...
Hello! Does having a lit URP shader set to opaque surface type prevent a transparent material?
NVM
Hey fellas, i just started using URP and i think i got it mostly working, but i downloaded a stylized translucent crytal pack and the shaders on there are pink. I tried upgrading project materials to urp materials but im also kinda scared ill break it. Does anyone have any ideas on how to to fix it?
edit: it says failed to compile. can you have scripts on these?

simply - you must upgrade those materials to use URP compatible shaders
or make new materials for the crystals with URP shaders
i already tried upgrading the materials and it didnt work and i have no idea how these shaders are made
nvm
Basically only Unity's default materials can be upgraded automatically
how do i create a tree in urp? even assets will do, but is it possible
hi, im having a similar issue here. Our game runs URP 2D (12) and I've tried several methods to correctly put a blurred foreground and background in the game. Literally tried for over a year now without success. I'm not experienced enough in this rendering stuff.
it uses like yours, several layers. we call the play area "mainground", and everything else is background, far background, and we have a foreground too etc.
currently im doing camera stacking, where each camera renders one layer each. I place a DoF volume on each of the background layers, getting my desired effect, but i cannot put it on the front camera. this is because the post processing volume is applied to the whole camera image, so it blurs everything, even whats behind.
ive looked for EVER for a solution to fix this, but I still have nothing. Does anyone please have any ideas?
So on this image i post here you can see how the rear layers are blurred

and here's the same thing when I apply a blur to ONLY the foreground camera, the mainground also blurs out. The post processing image is not aware of any alpha, basically drawing the whole image white, so blur appears everywhere.

tl;dr
I only want to blur the foreground and background, like any traditional 2D game. But the limitations of the post processing doesn't allow me, and I'm not skilled enough to figure out a method to do it. I've tried making my own shader too that offsets images, but it looks terrible sadly.
funny thing with the blur being like that, drawing on the whole camera view, is that it "stacks" the blur effect on background, far background and absoltue background. Which is nice, making the distant more blurred. But the lack of foreground kills the look I want.
is this car paint shader looks ok or does it need something?

matte paint
can't do glossy
Well, it will always look at least a little strange since that is uncommon for car paint.
Don't use DOF; that is based on depth and the 2d renderer won't feed it the correct information.
Unless you maybe pass in a custom depth texture based on your 2d data
I am making a game with URP but when I build the game it just gives a black screen, whats going on?
Im just using DOF because its the only thing I can think of for a blur effect. yeah the depth doesnt matter, I get the correct strength on the blurs that I want anyways.
the problem is I cannot use this image effect or any other on the foreground because it fully paints that overlay camera
theres no "cutout" through the alpha map of the image effect render pass
this is my issue. i'd like to find a solution to this
but yeah depth map is irrelevant really. it all comes down to the problem that the image effect pass doesn't have alpha. if you have any ideas how to override that or any other idea that can achieve the result, any tips are welcome :)
Write your own blur?
That is not nearly enough information to even guess what is going on.
Could anyone help me figure out why Progressive lightmapping generates these artefacts?

@marble vigil Thanks I already knew about all this but your link was still extremely useful, as soon as I read normals I realized the shelves you see in the pictures had the normals inverted 😂 Now its all nicely lightened up
Btw i'll take the opportunity to ask another thing, I'm using a specular workflow and even if i have a spec/smooth map i still get the slider for smoothness, is this intended behaviour?
I'm not sure what the intention is, but it seems that the slider and map are applied multiplicatively
So go with value of 1 if you want to give the map full effect
amazing thanks
I recall seeing in some old documentation about maps that it was supposed to go away so thats why i got confused
Any ideas how to fix the bounds ?
[ switching the check box during play mode : ]
when there is no "Update when offscreen" the bounds will be wrong and it will cull the gameobject in odd cmaera angles
if there is "Update when offsecreen" then the skinned mesh renderer will not receive any lightning data
Another option you have is to set the bounds manually with a script to be big enough to cover all the possible deformations
any ideas if that would mess up with the performance ?
The bigger the bounds, the less effectively the mesh can be culled
If they're just big enough to accomodate the deformation I doubt it'll be a problem, but as always with performance your mileage may vary
Hi, I've just switched to URP, and suddenly the leaves on my trees are noisy if viewed from far away, like there is close to zero anti-aliasing.
Here are the differences. I think SMAA is similar to No AA, and FXAA looks blurry as hell 😄
While before URP they looked much less noisy.
Is there some setting missing? Did I misconfigured something? How could I improve it?
Thanks in advance! 🙂


Hey ! Anyone know why I have so many depth related textures in my URP scene ? Is this related to postprocess? Depth texture is disabled in the URP asset. Thank you

@sterile compass Do your leaf textures have mipmaps enabled in import settings?
@marble vigil Yes:

Mipmaps with trilinear filtering (just makes the transition between mipmap levels smooth) could help on the texture noise better than anti aliasing
Btw are you sure it was MSAA and not SMAA that you used with built in render pipeline?
Hmm, maybe MSAA, I'm not sure. How can I find it in URP?
From urp asset i believe
Oh, yeah, found it, it's on with 8x.
I set the texture import to Trillinear, maybe it's better, I can't really say
If you disable all other aliasing methods, do you see jagged edges if you make something with straight line in it (like cube)
If so, msaa isnt working
Thanks, it is working. I guess it was trillinear filtering, I think it improved the quality 🙂

Fog. Can turn it off in the Lighting window if you don't want it
ah thanks
You can take a look at this https://docs.unity3d.com/ScriptReference/Texture-mipMapBias.html and Aniso level if you want better quality mipmaps
@soft lion Ohh, this sounds like my saviour.
But for some reason it doesn't change a thing I think. Maybe the info texts which appeared after I changed the value explains it? 😄
By the way why I can't put a negative aniso level while the doc you've just linked says I can?

Oh wait, mipmapBias and Aniso is not the same. Then where is this Bias on the Texture inspector? 😮
Maybe you can access it on debug mode. Atleast you can set it by using c# script
Yep, but I can't edit it:

Maybe you could change it via editor script then
@soft lion I managed to change it, but doesn't really help. Same noisy till an X value, then hell gets loose 😄
There's two kinds of noises that could be happening
One is noise within the texture when it's viewed from afar which happens if mipmaps aren't functioning correctly or are showing a too high resolution
The second is noise between leaves at the alpha clipped edges
That one needs AA to solve
I don't recall the specifics but some forms of AA only deal with geometry edges, not alpha clipped edges so it's worth looking into
can i upgrade my game to URP anytime by just downloading the package? or i have to start with URP
and if i start with URP will it be different or difficult than normal one?
You can find the URP upgrade guide in pinned messages
There will always be less work and less potential incompatibility problems if you start a project from an URP template instead of upgrading an existing one
Thanks
actually i was just wondering when should someone go with URP , i mean how would someone select if he wants to go with normal renderer or URP or HDRP (idk anything about them so something to read will also be fine) I am asking this because i want opinion of someone experienced in these things
Also i tried URP it is too slow why? i created an empty project (3D URP) added one cube for floor and one character it was just 90fps whereas when i created normal project (3D Core) with same things i get 950+fps
am i doing something wrong
Just converted to urp, but I can't see anything

A difference like that suggests you didn't have vsync enabled before and now you do
Build performance is the one that matters anyway
what it looked before:

HDRP is for cutting edge graphical features and photorealistic rendering, URP is for good performance and maximum feature parity across all platforms
We can see something at least
I guess it's because you use some kind of camera stacking which isn't compatible with URP's camera stacking
multiple render layers
for the weapon
and for the rest
so it doesnt go through walls
URP doesn't have "render layers"
It has camera stacking and "render objects" renderer feature
If i have 2 characters
URP - 18fps
Normal - 200fps
😅
Is that vsync fault?
Probably not
If you upgrade an existing project sometimes weirdness like this can happen, especially if you change editor versions as well
Then I'm out of guesses
Maybe try profiler
Well, it could also be that the default graphics settings in URP templates (like SSAO) are something your machine is just not having any of
Hmm that might be helpful
doesn't let me change render type to overlay

Are you using deferred shading?
whats that
will this help with the overlay not selecting?
No, deferred doesnt support camera stacking. It could be one reason it being greyed out, but I cant remember any other reasons rn
Please someone help, so i have this problem, ive been searching through reddit and apparntly there isnt a fix but sometimes there is
and its scaring me
so
i installed Universal RP
then i got to the step of
changing all the materials to work with it
bc theyre all magenta
and i get these erros
[Worker3] Shader error in 'Universal Render Pipeline/Lit': Couldn't open include file 'Packages/com.unity.render-pipelines.universal/Shaders/LitInput.hlsl'. at line 146
[Worker4] Shader error in 'Universal Render Pipeline/Lit': Couldn't open include file 'Packages/com.unity.render-pipelines.universal/Shaders/LitInput.hlsl'. at line 146
i would appreciate any help
also some materials say that there isnt a converter to upgrade them to the selected pipeline
Window > rendering > render pipeline converter
Cant find it
