#🔀┃art-asset-workflow
1 messages · Page 55 of 1
mans posted that 4 days ago
What do ya'll recommend for someone starting their learning in modelling?
When picking a tutorial on YouTube, make sure they are descriptive about shortcuts and tools they are using. I've learned Blender by watching someone outputting their exact input on the screen, it was very helpful. After getting basics look for more advanced videos to pickup modelling techniques, there are many tricks that are universal to any 3d tool.
Do you recommend using the tutorials Blender themselves produce?
I don't feel like there is nearly as much as what Unity provides, but if it's worthwhile then of course I'll give it a try :p
does anyone know why the trees and foliage i got from book of the dead are invisible when i build my unity project?
@steel geode Are you using HDRP and have all the required shaders?
is it possible to import models with the shader i want?
i need to import it as standard then update to hdrp
WIP!
hot
ok so im trying to use the book of the dead assets to create a map for my project
and im gonna pick 1 tree for an example, but they all do this
in the book of the dead project, in a new scene, enabling or disabling the trees adds setpass calls, but does not increase the tris or verts
while in my project, even with only LOD 1 on the screen, it increases the tri count by about 80k!
the mesh is only 16k tris, im really confused how i can fix the terrible performance im getting using these assets
is your tree static? How many light sources are there?
1 light source, lightmap, ocludee, and reflection probe static
is your entire tree model static.
i would change it to everything, and then make sure that all the children are also all static.
same result
oh, yeah I am not sure then. I am assuming that you are in hdrp?
correct, 2020.2 hdrp 10
have you tried disabling anything else in your scene?
the scene in the screenshot is almost completly empty
just the camera, tree, light, and basic sky+fog volume and a plane
alright then. does your light have any shadows? And have you tried googling for your answer
and a fireball vfx that plays once, disabling it has no effect
i have tried googling it, and yes my light has shadows
have you tried disabling the shadows
oh wow, disabling shadows slaughters the tri count. why is that?
its still higher than the base mesh, but it cuts it in like half
it takes resources to produce run time shadows. You may want to bake your shadows on objects that are static
the trees have a vertex displacement shader, same as in book of the dead
i also remember there being a way to reduce the runtime shadow quality, or something else
can i bake shadows even with vertex displacement?
i havent really messed around with shader graph too much, since i mainly use urp, and it is more limited in urp, but I am not sure. You should try it. Maybe you should also see if the vertex displacement may be causing the issues, with your tri count.
performance is the same even with hdrpLit
ah ook
Hi guys, sorry to interrupt but has anyone used a different mesh (i.e. a Hexagon shaped asset) and put a Terrain component on it? So it can have a heightmap applied to it?
I remember there being a mesh to terrain feature. Although, i havent really used the terrain editor.
oh its probably worth mentioning that the lighting isnt baked in my book of the dead test scene either
so idk if thats the reason or not
The built in Terrain Editor creates a 4 sided object and applies the terrain components to it. But when i add those components to my own asset it wants me to assist a terrain asset to it!?
This is the default one
This is when i want to use my hex for terrain ... its missing Terrain Data ..
to reiterate the issue that im having, a singular tree from the book of the dead demo is using 2/3 the tri count as the book of the dead scene running
wait so when you disable the terrain but keep everything else enabled in book of the dead, the tri count is ridiculously low. how does one replicate this?
made a pirate guy for my game 😋
could've sworn I was in 2d channel, not a bad thing at all I love the style @proven relic
minimalist but not lazy
maybe they are all baked and static? I am not sure
thank you! @maiden tangle
@steel geode i think that is a level of detail effect specific to foliage, is there a particular reason you're really concerned about the tri count?
yea, performance
im getting 40 fps on a gtx 980 in 1080p with only a few trees
vs the 50 average i get in the entire book of the dead
see guys that how to blow mind in blender
showing off some work that I just finished, it's an altar/ritual setup for dark magicks
hey guys,been working on a alleyway for a while
nice dude keep it up never give up 👍
thank you so much dude
your welcome!
looks pretty awesome Snow
can anybody help me in blender
i am following this tutorial for bones
https://www.youtube.com/watch?v=IAiTYaiZmY0

Part 1 - https://youtu.be/zp6kCe5Kmf4
Part 2 - https://youtu.be/bRM0VYSVeQM
rigging basics - https://youtu.be/cp1YRaTZBfw
topics covered:
bones and armatures
skinning
weights
pose mode
edit mode
The Animators Survival Kit
https://amzn.to/30Gh9Do US
https://amzn.to/3042Rw5 UK
This is the must have for animators and gives you the c...
he can hover over ameture and select single bones
but i don't have a option for single bone
i am new to blender and don't know much things
was wondering if theres any easy way to make the models blend more with terrain
actually i have an idea of slightly modifying the models materials so their colors r more like terrain colors
probably some decently advanced shader tech
@marble ingot can you help me 😭
blender is a complex application, so knowing why options are unavailable sometimes is like black magic
so I have no idea
@solar bay Should rewatch that part of the tutorial. It probably requires already added and selected armature to extend with additional bones.
i have much vertices @sullen plank
and i also created a new mesh to try again but same problem
@proper forge thanks dude
@solar bay You can grab any tutorial featuring adding armature and bones and see that part specifically https://www.youtube.com/watch?v=ZmiZ6VkSJBE
ok let me see @sullen plank
@sullen plank nvm i fixed it in edit > preferences > add ons > rigify
so im making a 3d game for the first time
and im making a house
everything seems fine but i wandering if im doing it right or wrong
im making a house with pro builder and pro grids
because i dont know how to model with blender
and im making the house like minecraft placing blocks by blocks
right now i made the first floor of the mansion and i used 300+ cubes
if i were to finish the house im guessing thats a lot of cubes so would that affect performance?
is it better to just stretch the cubes?
i mean for walls and floors and stuff u can use one single block
and just apply a texture to it
im kinda new to game design so im not too sure either
yes
using loads of objects is way more demanding when compared to using a single mesh (one shape, such as a house shape)
All this “per object” CPU usage is resource-intensive, so if you have lots of visible objects, it can add up. For example, if you have a thousand triangles, it is much easier on the CPU if they are all in one mesh, rather than in one mesh per triangle (adding up to 1000 meshes). The cost of both scenarios on the GPU is very similar, but the work done by the CPU to render a thousand objects (instead of one) is significantly higher.
also, my friend tried to do what you did. create a house with just basic shapes.
he gave up really fucking quick and told me 3d design fucking sucks.
can't say i blame him, he was using blender's object mode (so basically the same as adding basic shapes in unity)
it would be so much easier in my opinion to just learn blender modeling or find premade assets/someone else to model for you.
ok but if i stretch/scale it wouldnt the textures be messed up?
i havent gone to the texture part yet im just scaling the blocks first
this isn't a single colour, this is that texture from the last 2 screenshots, but it's really small and repeats a lot
@night mango the whole point of probuilder is to avoid needing to use a million cubes.
i thought the point was to make levels easier?
Well, I dunno if it is actually easier, if what you want is a bunch of cubes.
how to add a collider for this room ?
@bright mesa just add the collider component you want.
guys it is super cool 😂
Add mesh collider👀
Simple
But I would rather recommend a pro builder than make a mesh one by one.
that isn't a question. @remote cobalt
hey guys,made some changes
i'll work on the ground add some cracks and more color variations
nobody is answering me in the regular chat so, how do i make the cube not transparent? also it's black on the 2 sides, no matter how i rotate it it stays black, how do i fix it?
Maybe while exporting if you are using maya u forgot to freeze and reset the transformation
are the normals correct? Also make sure sure the uvs are correct
yeah i figured it out i forgot to say, it was actually a problem with the lighting i just couldn't figure it out at the time, but thank you! 💜
yeah np
when I first started making 3d games, I also had issues with normals and uvs
yeah it's pretty tough learning, whenever i have a problem i google it and if i dont find it there i come here
uhh all of a sudden the scene wants to look wierd
but it wont allow to switch back to 3d so can anyone help me out
@light ingot Did you figure it out yet?
Use that thing in the corner that looks like a cube and four cones. You seem to have shifted to orthographic 3d camera, so you want to go back to perspective. @light ingot
anyone can help me with image material
can someone help me
what i did
-make walls
-make a gap for the door
-make material with texture
-apply material
-looked weird so i set some tiling and offsets
and everythign changed with it
how do i make it so that the wall have the same texture?
im having a really hard explaining what i need help with sorry
i need them to be the exact same in tilings and offset?
but how?
do i have to make multiple materials of the same texture so i can align them individually?
or if possible how do i make a wall with a hole in the middle like that without using extra cubes?
I got a question. When I try to Go to Projects > right click > Import Package I only see Custom, how do I get the character one? (the picture is a youtube tutorial
is there any quality lossless way to convert 6sided skybox to cubemap
how do I make an interior scene look less boring. I do not know how to populate the scene, to make it interesting
what u mean
my scene does not have much in it, which makes it visually boring. I cannot think of things to add to the scene, to make is visually appealing. I just need the general thought process someone would use, to fix this issue
yeah, alright. I already have a few models and mind, and i already have lights
no, it doesnt. it has an interesting color, interesting lights. Although, it does look empty in a few places
ah ok
the uvs maybe?
ok, i have a uv map for an object made in blender, and i just downloaded the hdrp item in my project. i had the map working on an object in urp, how do i get it to work in hdrp?
i would think it would be the same process
@mystic olive no, in urp it was drag and drop, no problem, but in hdrp it doesn't work the same.
oh
i havent used hdrp, so i am not sure
maybe check your import settings for your models
Ok, I'll try that tomorrow
hlo
this things you can get from unity asset store by typing standard assets and importing them..... right now unity does not support this function in newer versions of unity it is functional in unity 5.X version but removed from v 2018.X...
I have no idea how to use assets I downloaded them imported them and I can’t use them
What are you trying to do?
Use the Snaps Prototype Sci-Fi/ Industrial
Make a map with it
It’s importing right now
When I drag something in it’s a neon purple how do I fix this
give it a material
@eager mist Probably rendering pipeline differences
If the original asset was made for built in and you are using URP/HDRP, you can most likely use the automatic material upgrader.
How do I fix these
Does anyone know if this is possible to mimic in Unity? https://www.youtube.com/watch?v=DEgzuMmJtu8 Simply importing an fbx from blender does not give usable results, and I'm not really sure where to start trying to adjust for better results.
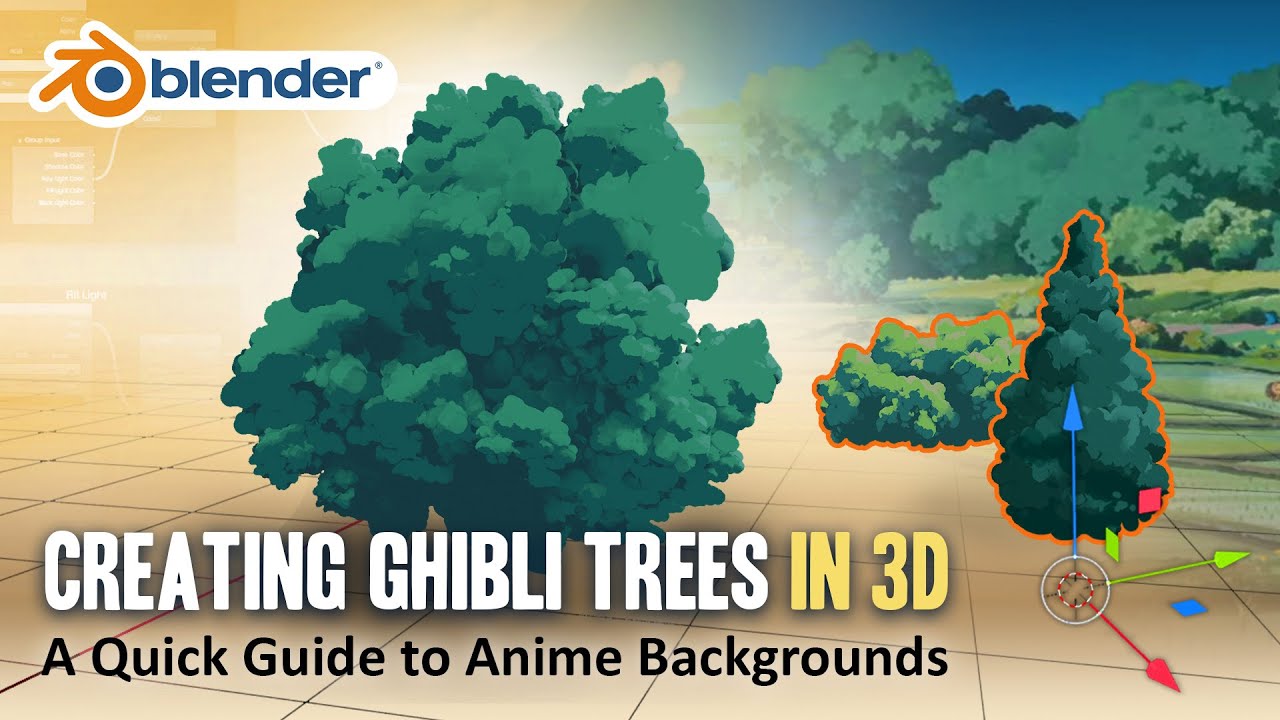
In this video, David from Lightning Boy Studio will show how to create 3D trees in the style of Ghibli films, all in Blender 2.83
https://twitter.com/LightningBoySt1
https://www.facebook.com/dinomancersproject/
You can watch our toon shader tutorial series here :
https://youtu.be/TpWI2rU8iF0
Curious to know more about our upcoming animation p...
Please say if you want to see screenshots or other info. 🙂
You'll have to recreate shader effect in a similar way.
Fogsight: Sorry, I was very unclear in my question. The toon shader I get, what I cant manage to recreate is the look of the smoothed custom normals, when I import the normals from blender it just looks horrible, nothing like it does in blender.
Blender:
Unity
Just make sure they are not flipped, normalize them
and apply any modifiers you use
might want to check proper settings for exporting smoothing groups as well in the FBX
the normals are not flipped. smoothing groups I know very little of, so I'll check that out. thanks!
will inverted HSV color be the same as inverted RGB version of it?
oh its different
inverted yellow in hsv is pink
and in rgb its blue
what is an easy modeling application i can use
ive tried blender and its confusing if theres any other simple ways
blender is the easiest imo
Hi, i imported my blender model into unity via an FBX file but it lost his texture and color, why?
blender:
unity:
Did materials got imported in FBX?
They may need to be assigned manually sometimes, also only diffuse is supported, I think
It picks similar types automatically for you usually. You have to use Unity's materials/shaders.
how
last time i tried to use unity material things they we're just like: Nope
i see
i found a guy explaining it
another problem: why can i see trough it?
like
theres supposed to be wood there
it is there
but its invisible
set material to opaque
or you have normals flipped there
select the object in Blender, select all faces and select flip normals
ok, why are some of the buttons and text red? i just changed from urp to hdrp, and i'm usong textmeshpro
Anyone has a 3D unity footstep audio script?
Any tips on ways to improve the lighting in tree leaves so they don't appear so flat in shadowed areas? I can't use light probes because I'm using instanced indirect with Vegetation Studio for spawning. I'm also using forward rendering, so the various real-time GI options don't seem like an option at the moment either.
@charred panther normal map
Hmm, yeah I had a normal map for the leaves at one point and it looked weird, though I've made quite a few changes since then. I suppose I forgot I had removed those, so I can try that again, thanks.
why wont it render the texture? Or did I do something wrong
are you able to get the textures that it had, and then make it into a unity material?
how would I make a 'Unity Material'?
right click in your project folder while in unity, then go to Create >Material and then insert your textures
and then also apply those materials to the objects
ah ok
my 3D meshes look so bad compared to the above stuff 😂
like this, this is awesome
i used blender for that dresser with paper and pencil
ah ok
the texture worked in blender, worked when i exported as that filetype and opened, just unity wasnt rendering it
oh
yeah usually, when you export a file with material data, the materials doesnt usually save to unity 😦
the colour materials worked fine, just the texture, which is why i was confused ☕
oh
thx dude, that worked ^-^
I'll have to remember that for next time
(worked when i inserted the image to paint from, so i think was just lacking a source to go from and was defaulting)
ah ok
This is what my model is meant to look like
so why does it look like this when I import into unity?
@south ether light and shadows are not the same with blender and unity you should tweak some settings in the light

does anyone know of a good website that has 3d polygon models to use for free?
@elfin salmon google poly has some good low poly meshes and they are free, but i will recommend that you learn how to create your own models
i went to that, but for some odd reason they wont load up on my pc, so i just clicked off.
and I am planning on it, but I do suck at drawing so I do suppose blender will be the same.
You can check sketchfab.
I don't really think that if you are bad at drawing it is going to be the same for 3d at least for me it is not
When i drag out my prefab its not centered. How to make it centered? Position shows as 0, 0,0 https://gyazo.com/3745e08cbca696cd196f310a1171897e
@valid magnet it follows the mouse position,
You can center it after you have placed it on the scene by resting the transform position
ok coding is easy ... but modelling wtf xD i'm trying to use blender .. does anyone now some good noob tutorials?
or a less difficult modelling tool xD
i used to use autodesk and it seemed more easy to use then blender
can anyone tell me why when you import an obj file with a bunch of mesh bodies from Fusion 360 to Unity and then add a rigid body to one of the mesh bodies that the mesh completely disappears and the object falls through the floor?
My Blend Shapes don't seem to be listed from the my blender file. Anyone know why this is the case?
@proper radish Google poly is being shut down so get whatever you want from it fast.
Why me again, i just give him / her a suggestion
Does this street light prefab looks good? This is my first ever unity 3d model
@ashen prism give it some curve at the edge, and some scale in bottom and near the lights.
Advise: when you want to make a 3d model search for inspiration images to have a general idea
Thanks for your advice and your time
Maybe look into blender guru on youtube, he has some good noob tutorials
@little crow jeah i did ... i got the basics down now 🙂 so now the long road to expert xD
Oh, ok. Sorry for the ping then!
np m8
the normalmap in unity looks weird compared to other softwares (here i have this cut in the middle). Mesh is triangulated and in a HDRP scene. Object space is fixing the problem, but i want tangent space since its working better with edges then object space.
thats my uv
thats how it looks in blender. Here its looking good(also tangent space here)
fixed it. still thanks for everyone who read this
Having some issues with alpha cutout in HDRP, I've downloaded some grass textures to use and they have a weird green outline
In Unity none of them are cutout properly (even though they display correctly on the website)
They have alpha maps that come with them but I don't see anywhere to put the alpha maps (I've tried all of the alpha-related settings I can find in Unity)
I've tried cutting them out so that the outline is purely black, and the alpha then works, but it results in some issues where parts of the texture are too thin
this is how that turns out
i guess it's the texture's fault, but I'm certain I've seen a video where someone got textures like these to work fine

curious if i could have some help...
im trying to have bullet holes, they are spawned with a gameobject with a sprite renderer
but theres alot of z-fighting... how can i remove that
give it an offset?
using the hit normal direction
Or just a tiny offset towards the camera view
hey
hrmm,ok
Can someone help me with UV Overlap
I cant bake because of Overlap issues but I cant seem to troubleshoot them either
did you make sure that you enabled "Generate Lightmap uvs" on your 3d model file, in unity
How much would you guys figure a small (lets say scifi grenade) prop should cost to unwrap?
I just hate the process so much gives me no room to be creative would love to just throw it at someone to do if they have time during pandemic
Probably depends on the specific prop.
Dose anyone know a good gun rigging fps tutorial for blender?
It would really help
Can anyone recommend me a good collider generator for 3d models?
@mortal notch what kind? Convex hull?
holy moly wtf Index buffer can either be 16 bit (supports up to 65535 vertices in a mesh), or 32 bit (supports up to 4 billion vertices). Default index format is 16 bit, since that takes less memory and bandwidth.
which one should i go for?
i dont understand though
cause well
btw this is about combining meshes (mesh.combinemeshes) and its max size
omg my mssg gone
oh well i tested it and the memory bonus from 16bit type isnt as amazing https://i.imgur.com/Brp19T4.png

but i guess i will keep it 16 bit
Can someone make a 3d rabbit
so
if I enable Gpu instancing, does it take all materials and models into memory? even if theyre not in the scene?
im asking bcuz theres many materials and models that i will load later during the game
into the memory
about 99% of my materials and models, which result in hundreds of megabytes will be loaded after some time in game, not in first location, thats why i need to know if GPU instancing doesnt load them into memory at the start
who make character this style mobile game ready, send me DM
https://sketchfab.com/3d-models/kokoro-ada176b78ee8405fbce364730f78bb38

プリンセスコネクト!Re:Dive - Kokoro
3D exercises.
I want to make an animation effect.
Choose an animated character-Kokoro.
She is very cute.
This is the triangle piece I use the most.
可可蘿
3D練習,我一直在嘗試動畫風格的製作,這隻最初想做成動畫的色塊上色,
但建完模型後還是忍不住把細節上色,還為了輪廓線給了這作品最高的三角面數,因為可可蘿很可愛!
- Kokoro - 3D model by YAN (@YAN2017) [ada176b]
can someone please recommend some spacecraft/rocket interior (console/button panel) 3D models ?
Hi. So I'm trying to download an asset.I take it from the asset store and then put it in my package manager. After that I click the download button just like every asset. When it's about half-way done it pops the error.If you know why this happens or how to fix it please let me know.
anyone plss
@hearty spade WOW. Awesome.
@winter ledge google the error code; thats what they are for.
Not rlly game dev related just a render i did
@crude topaz Don't cross post.
anyone have any general advice or references for uv unwrapping for good bakes? My bakes in substance painter often have normal artifacts, I'm not sure if it's because my UV unwraps are bad or if it's a polycount issue
Should add an illustration probably to be sure what you are talking about.
I have issues like this a lot when baking UVs, edges and seams frequently have artifacts on their normal maps (and increasing the resolution of the normal maps doesn't help much)
Does anyone have a gun render they can send me please?
... why?
@glacial vector because I suck at modleing and I need a gun render
no results
anyone who knows about meshes and uvs can answer this for me? I've got a 4096 vert mesh of a 32x32 grid (a tile map). I set the tile textures by changing the UVs in groups of 4. I've just thought that I could represent the same thing but with about 4x fewer vertices if the tiles share vertices (eg. tile x shares its (1,0) and (1,1) verts with tile x+1). However, would that totally break the UV tiling?
like, if tile x and tile x+1 share verts, they now also share UVs, right? and updating tile x's UVs will screw up two of tile x+1's UVs
If i import my blender scene as an fbx file to unity some materials are getting reset to the default white. Why does this happen?
Hey.. I just make my animation of archer, and when i import it in unity it just messed up my shape keys animations. Any help ?
@sage shard define 'messed up' better?
Recalculafe normals and also try changing animation type to legacy
When i run that animation that object with shape key animation disappeared
Anyone with rig experience in blender that might have an answer for me Id appreciate it.
My question is:
I have a modular character, which has a chest piece rigged with the humanoid body. That works fine.
I added an extra rig structure for a skirt it has for Dynamic bone usage. Its weighted and all works fine in blender.
When I import to unity the second rig seems to be unattached from the mesh. Ive tried ticking the multy rig box on the rig modifier in blender but nothing changes.
Is it not possible to have 2 rigs on one mesh for unity?
maybe try parenting the 2nd rig with "keep object transformation" in blender , or make the 2 rigs into 1
@rigid pelican fancy!
@sage shard I'm not sure unity imports blendshape animations; there might be something you need to check somewhere in the exporter or the importer.
@viscid garden I believe unity skinned meshes can only have one rig.
Bummer! 😄
Thanks...
Make sure when you export the model with shapekeys to uncheck the box that says apply modifiers.
is there a way to make nice and curvy racetracks without making it super high poly?
@molten terrace there are a variety of techniques depending on your specific needs, but generally the poly density needed doesn't seem that high at a typical scale.
LODs or dynamic tessellation can be used to add detail when you're close.
i was thinking more for the collider, to make it less bumpy
Can anyone help me out with some foliage type UV unwrapping? i'm quite the beginner when it comes to this and i need to do some tricky things to put everything in my scene on one UV map
it will make my character tiny like ultra tiny
I dont know what i should turn in in blender 😄 but in unity i have checked import BlenderShapes. But still
can anyone advise me on the best way to do this? => I have a mesh of 32x32 quads, 4096 verts, which I'm using as the basis for my tilemap chunks. I have one material for a texture atlas, and I set the uvs for each mesh to show different tiles. It loads and pools chunks based on the camera bounds. I'm not sure the best way to render this.
I can't batch the meshes without a way to unbatch them, so currently I'm drawing each mesh individually, I think. I'd like to find some way to draw them faster, in particular which lets me set uvs and pool the meshes. I'm trying to find something like Graphics.DrawMeshInstanced which lets me set uvs, but not luck. Any advice would be super appreciated!
alternatively if there's a better way to approximate tiles on the chunk than setting uvs, i'd love to hear that too. like some kind of texture2darray? No idea!
@molten terrace How are you making your collider? Bumpy in what way?
im not a 3d artist at all but i was addind some model into my game and this one has this weird stuff any idea where this thing come from?
@slate pewter looks like a problem with the material.
Yeah, material does not have proper transparency or cutout.
Anyone who's worked oj generating foliage models in games?
i just started using unity and i'm trying to make a entrance to another room, but whenever i try to scale a wall, it applies to every wall in the project, how do i only scale a specific wall?
Can anyone tell me what render passes I have to look into when using the GPU Profiler when profiling a fog shader. Meaning a shader that uses depth fade.
Should I look at just Render.TransparentGeometry or something else as well?
Thx guys will take a look at it 🙂
Hi guys little problem my character decided to defy the laws of physics lol
how can i fix it ?
@torpid wharf Do the stairs have the correct collider on them?
If you are a Substance Painter/Designer user, that buys perpetual Steam licenses, to then link the Steam license to a Substance3d.com account, to download a standalone version, then shares the standalone version and license with a friend; you should know that you can no longer get this type of perpetual license starting February 2021. If you pre-ordered Substance 2021 on Steam, you have a small time-frame starting the 26th of January until February to create one, after which this option will be discontinued. If you just wish to continue purchasing Steam licenses, 2022, 2023... that won't change for now. However Adobe is slowly migrating everything to their subscription model.
Just a heads up... because I almost missed this myself.
Yesterday I Finally finished a course on Houdini, which took about 15 hours or so. So to see if I still remember the things that I learned from that course, I made this robotic arm (from a reference)
@elfin orchid Can you detailed pls i am a beginner ?
@torpid wharf Wanna do it thru dms?
yes i want
is this even allowed with the substance license @agile timber? You can install the perpetual license on several computers but only your own
hey folks, i am trying to make a simple "stain" material. The idea is it sits on a quad and darkens the 'ground' underneath. This should be simple material, but in URP, I cannot find the right combination of blend modes / texture settings etc. Can anyone help?
here is the current state
and here is the alpha channel (not using simple black/white because i want to include color data in the stain)
if i do without alpha (standard greyscale), by darkinging the MATERIAL, then since it's set to Transparency, the darker makes it disappear
any suggestions?
@glacial vector I just know that's a relatively common use-case for the offline licenses. According to the license agreement itself, no it's probably not allowed. But you are allowed to install it on both a primary and a secondary computer as long as you do not use both installations simultaneously.
i've tried setting the texture settings "Alpha Source" and "Alpha is Transparency" with no luck. Hours into this, shouldnt be this difficult. what am i missing?
Alpha Clipping doesn't seem to do anything
Can you screenshot the material settings @somber token?
i have tried virtually every single possible combination
But can you screenshot the material settings
at this moment, loooks like this
but these settings are abitrary, i've tried clipping no/clipping , all the Blending Modes etc.
seems like MUST be 'Transparency' at least, beacuse i want to cut out the stain
This looks like the right setup
Do you get buttons above the texture preview that say R G B A or just RGB?
sorry not sure what you refer to
In the middle here
hmmm.. sRGB
can you screenshot
standard photoshop Create Channel method
this is good clue..
ha! tried Legacy "Export to Web" (for the 24-bit option) and PS crashed 🙂 fun
unfortunately that process with pngs doesn't work reliably in my experience
You can try exporting a tga and see if that's different
really? this seems so basic...
i've been doing non-Unity stuff for last year and exported thousands of .png w/ transparency fine
that was it! goddamn .png support is borked
this is .tga
amazing
thank you SO MUCH @glacial vector
Yeah when PNG has 100% transparency Photoshop will remove all color data in that area. There's a plugin you can install to save it properly. "SuperPNG"
not sure what you mean '100% transparency'. There is an alpha channel here.
or do you mean ANY 0,0,0 pixels?
I dont think this is PS side, seems like Unity
I mean an area on your image that's completely transparent.
Yea it's the same with UE4, it's annoying
I use substance designer for this now which is so simple and non-destructive in comparison
Same! Heh, love patching up images in there and saving them out, don't even get to make a real substance.
Guess creating a single transparent pixel in a corner would solve it @agile timber 😛
Here this is what I mean: https://graphicdesign.stackexchange.com/questions/63783/how-do-i-tell-photoshop-to-preserve-the-rgb-color-of-fully-transparent-pixels-wh

Graphic Design Stack Exchange
I'm having a problem with how Photoshop handles completely-transparent pixels when exporting as PNG, which is that the red, green, and blue color channels of any completely-transparent pixels are s...
hey! if my imported asset looks like this (Unity 2019.4.17f1, HDRP 7.3.1), what could be wrong?
set surface type to masked @sterile fossil
There should be additional settings when you change it to transparent
I can't see it, can you? @glacial vector 🙏 using HDRP/Lit shader
Blending mode. But I’m not up to date with the HDRP materials
there's Alpha, Additive and Premultiply, none of which seem to work 😦
Does anyone have a arms model I can borrow I would really appreciate it and I will give you creit.
What is Unity's equivalent to UE4's static meshes? When I use UE4, I replace all the worlds BSP's with static meshes I made in Blender.. is it the same for Unity?
@smoky spade there's no BSPs in unity
closest thing is probuilder but it's same as 3d models
You also have RealtimeCSG and SabreCSG that have the CSG/BSP workflow in Unity- without the BSP part.
Lots of new stuff in Unity's HDRP sample :O
@hallow root It sounds like you'd be better off with a curved geometry as the backdrop anyway? as you would see in a photography studio. a wall that curves smoothly into a floor. i'm sure there are many 3d models like this or you could make your own but something like this anyway https://assetstore.unity.com/packages/3d/props/interior/photo-studio-145144

Elevate your workflow with the Photo Studio asset from 3D Everything. Find this & other Interior options on the Unity Asset Store.
Oh
I guess that's a good idea @azure ether
You got my problem really well. Actually I have this kind of intersection https://media.discordapp.net/attachments/493511037421879316/796817488276488222/unknown.png?width=819&height=676
And I'd like to have it blured exactly like this.
https://media.discordapp.net/attachments/493511037421879316/796817758947639296/unknown.png?width=1202&height=676
However actually it works nice because I have two shaders, one reflective for the floor


And one diffuse for the wall
I don't think it would end up well with my setting if I had to use only a pure reflective metalic shader for both floor and wall
@hallow root you could just use the texture map inputs and/or shader graph with a curved geometry like that photo backdrop to smoothly transition from reflective floor to diffuse wall in a single shader & material
same as setting a gradient between two colors, you'd just be setting a gradient for the metallic and smoothness values across the curved part of the geometry using the UV coordinates (probably just the V coordinate)
That will be a damn hell to do something like that with my actual skills. Some hours at least. But i guess I do not really have another option to do a smooth transition, thanks @azure ether now I know what I have to do

Can any 3d modlest help me with my project I would really appreciate it and ill give you credits.
sure thing. this is getting off topic into #archived-shaders now if you have further questions on this part of the solution, but in any case i think this sort of thing is a great place for you to get started with shader graph and shaders. here's a tutorial for working with gradients to control whatever material properties you want in shader graph. instead of "Time" being the input you will plug in the U or V coordinate to apply the gradient for smoothness & metallic across the 3D model: https://learn.unity.com/tutorial/shader-graph-gradients-2019-3

Unity Learn
Gradients are used for many things within Shaders, such as fading transparency, allowing a shift between two or more colors over time, or adding a vignette. Within the Shader Graph, there are two Gradient nodes you’ll want to become familiar with. In this tutorial, you will learn to adjust gradients to customize Shaders.

How do i subtract in probuilder
i put a sphere inside a cube and i wanna make the sphere empty space
Taco, look up Booleans/Pro-Booleans.
I have a question about textures, if anyone could help. I have a render texture that comes from a camera. I am trying to write that render texture to a png file for later use. I have used the code by unity_P_rZF6EevSyxyg in https://answers.unity.com/questions/37134/is-it-possible-to-save-rendertextures-into-png-fil.html. When I use it, it gives me a blank/black image(I can't tell which). Strangely, it has a size of about 1.1 MB, so it's not necessarily an empty file. When I look at it in Unity, it shows as a black square
What am I doing wrong? Why doesn't default texture type work for material?
https://youtu.be/oU5P013sc5Y
Breakdown:
I'm made a pallet of colors in photoshop. And made some hands in blender using that pallet. Exported it as FBX. Put it into blender. Made a Material called Common. Applied the outrun texture to Base. And the colors are mismatch until I change the Texture type.

I got it, nvm
I need help to make this look more cartoony (without using 2 shade lighting) instead of "badly realistic" https://cdn.discordapp.com/attachments/792942691889053696/796849639528595496/unknown.png

Do you have some reference of what you'd like it to look like?
@obtuse imp I haven't found an art style honestly. I'm not much an artist myself, I only have a little bit of knowledge in shader writing, but not in heightmap texture design (to make occlusion an normal maps obviously). My goal is not to aim at realism, but not to use the raw, low poly, marching cube output. I guess Super Mario 3D world's cartoony terrain could be nice but it has a border, and they are a little hard to get right.
Mind you I think the atmosphere/landscape look really nice in that screenshot. The hands feel out of place to me, mostly because they don't reflect the environment. Maybe you could try giving the hands a blue hue, and changing the blood to look frozen too?
Oops I forgot to remove the placeholder hand lol. But if I wanted to keep the same atmosphere, is there anything I could do just to polish the look and make it more professional. And I also stole that normal texture, I need to make my own, how?
I think polish would just include adding more FX and increasing the level of detail in the scenery. But it also depends what the focus of your game is, so that's up to you to decide! As far as generating normal maps on your own, there are a lot of videos/tutorials out there that can help you out!
What kind of FX? Do you have some details suggestion? And I know how to generate normal maps from height maps, I just need to draw a good height map first...
Breathing (since you're in a cold environment), lighter powder snow that could generate from higher mounds of snow, and maybe more buildup with snow in the distance to give greater depth (basically fog). Detail wise I'd say get some references of real life tundras/snowy scenes and mimic what you like. The rest would be determined by your genre of game, and is purely personal choice.
hey guys,i made some more changes.I felt the scene was really empty so i added some more stuff
Have not seen the previous version, but this looks nice! All you're missing are some disgruntled citizens imo
does anyone know any good demo scenes for HDRP I can download? I haven't been able to get fontainebleau to work at all
did you get the new one? https://blogs.unity3d.com/2021/01/07/explore-learn-and-create-with-the-new-hdrp-scene-template/
I can't use anything higher than 2019.4.1f1 LTS because of university. Does it work with 2019?
I don't know. It's probably more down to what HDRP version you use
well considering I made a project using the template and it gave me the old construction site
I don't think I can use it
Hi All, I am learning Unity and Blender. My objective / target design is to build a game with the same art style of Disco Elysium as I try to learn by doing. I am trying to understand how Disco was built and what would be the quickest art / shader pipeline for me, a solo dev with a solid programming bg (no shader, only code). I experimented with some Toon Shaders, URP, various textures etc. and read some posts / tutorials on toon, some stuff on disco elysium dev log, but I am not really getting that style from my tests. From what I understood, Disco Elysium does not have a lot of 3d models, but mostly textures? In the sense that most of it is not really 3d? Anyone can explain it in a better way? The toon shaders don't seem to really give the scene that flat / drawn art style, so I was thinking I could build a whole scene in Blender and render to generate a texture that I will then use with an Unlit shader? I hope this is the right channel for this question. Thank You!
image for reference
seems to me someone actually draw with photoshop those "3d models"? I could be wrong...if that's the case, maybe instead of drawing them I could crecreate the scene in 3d with Blender, apply some materials light etc. and also some filters / AI to make it seem hand drawn and then use it in Unity as texture? (not sure at that point which style of shader I would have to use though). also, characters are actual 3d models and I guess a flat shader was used, looking at how the shadows are clean.
@hard frigate If you're looking to emulate the style of a specific game, then I would recommend looking for resources online released by the team who made it. Have a look at youtube, twitter, their blog, chances are they have given insight on this at some point. For example here is a roundtable they did discussing various elements of the game https://www.youtube.com/watch?v=3m8HfpgNcuo
As for how you can achieve the same look, that's gonna be down to what you're comfortable with doing. So like you said, even if the original assets were drawn in photoshop you could try and create a similar looking asset by rendering a sprite out of blender
Yep, as I said I looked pretty much everywhere and it is not very clear from their dev log. also, time passed an maybe with the latest Unity updates you can do what they did with a different technique. What I would like to get asking here is someone with way more experience than me to guess which is the technique used and give me some hints on how I can try to approach it. for example, do you think that everything on that image was a 3d model or its just texture that looks 3d? if I identity the technique / workflow then I can focus more on those techniques and look for tutorials for that specific workflow. let me know if this is the right channel, I also thought it would have been an interesting discussion to break down a workflow of such a game
Help! I am working on an fps game using ray cast , i followed Brackeys nave mesh tutorial the shooting was working but when i added the animation sometimes it does not detect the collision, and sometimes it does
help! i need help with polygons in unity for an model
My daily workouts
Sick modelling
Hey guys when I import a model to replace (update) a pre existing model the prefab breaks and no model is visible- how can I fix this ?
apparently the prefab broke a connection to the mesh- but the mesh and materials are all correctly pointing to the reimported mesh!!
someone said I had to keep the original meta file !?
this can't be standard workflow man wtf
I uhh... I don't know what I'm doing
how can i make the tail attach to the hips? all i know is how to drag and drop it, but when i go in-game (example, vrchat,) the tail isint connected to the body, does anyone know how to fix this? https://gyazo.com/be0102754c67d32f6da33f59944fbe22 this is what i did

https://twitter.com/1pxlchibs/status/1348859070560821250 had a little fun with a weird idea

Waiting for the bus. [#001]
#unity #unity3d #dreamscape #3d #gamedev #indie #indiedev https://t.co/8RIpYykyGD
Hi guys, can someone help me with something? I am wondering how I can Raise my terrain, with terrain toolbox, so I can sculpt in it.
it's solved
@glacial vector sorry out of topic
is there any hotkeys for view top/left/bottom/right ?
bro ..
I'm no aware of a shortcut like that
Hallo 😄 I've not really modeled before, but is it fairly feasible to use blender to swap some rigged characters' heads around correctly?
probably need to ask someone who knows what they're doing when working with rigs
Alrighty
does anyone know if there is a way i can make these buttons change to bright green when the players target hits it?
Hey, just a question of interest: I was creating a wheel in blender and only assigned basic materials to differentiate the rubber from the rim (and a marker to show orientation). I then imported the wheel into the default hdrp scene.
Why are the Materials semi transparent? I can see the edges of the Cube and i can see the water decals on the floor. When i export the Material (like i did with the rubber in the screenshot) and reassign it to the Wheel it is displayed correctly.
Here are the Blender Settings if they're relevant
I'm guessing Unity simply doesn't understand the Data Blender is giving. So I have to recreate the Material in Unity?
Do i always have to create the Material in Unity or are there softwares/workflows that are compatible?
Hello
I wonder is there any solution for getting 3D of a human face eligible for topology with kinda with photoscan
we send space ship to Mars but we do not have kinda solution right?
If Im wrong please correct me.
Is photoscan solutions good for tolopogy used game-engines?
3D Face Reconstruction from a Single Image
http://www.cs.nott.ac.uk/~psxasj/3dme/
https://link.springer.com/chapter/10.1007/978-3-540-75690-3_10
Could be done with generic faces using blend shapes and trying to find an approximate match I suppose.

Online 3D Face Reconstruction from a Single Image

SpringerLink
This paper describes a model-assisted system for reconstruction of 3D faces from a single consumer quality camera using a structure from motion approach. Typical multi-view stereo approaches use the...
Hi
Hello
so cute lol
Hello. I'm having troubles understanding shaders. To me it seems as if the shader is something that stands between materials and rendering. Now, the question: are shaders individualised per object, or per material, per scene, per project? Should I use one shader on everything for efficiency, or I should have as many shaders as possible, to get better results?
@plain pollen I'd recommend looking up some resources on shading, like this https://www.youtube.com/watch?v=sXbdF4KjNOc. If you prefer reading catlikecoding is great https://catlikecoding.com/unity/tutorials/rendering/
very basic question, but what is the simplest way to make a texture fit the size of an object? Right now I just change the tiling values until it covers it correctly, but there most be a quicker way...? Best of all would be if it not requires a custom shader. I understand that the material will have to be specific for a single object, but this seems like a very common thing. One would have thought that simply setting tiling to "1" would do this...?
The UVs of a model define how a texture is applied to it @harsh steppe
If by "fit the size" you mean that i automatically tiles more, then yes this is possible, but not with the default shaders
@glacial vector thank you for the response. I think what confuses me is when a single object have multiple materials. Like say when I create a square plane and apply my texture tile 1 x 1 it covers the surface as expected. But when I have a model from blender with multiple materials where one part is a plane tiling it 1x1 makes the material much bigger than expected. Does each material on an object use the full UV of the model even if the material is only applied to part of the object?
The UVs don't care about the materials. If you have a plane in blender, and you set the UVs to fill the entire 0-1 space, it will tile exactly the same as the Unity one does
@glacial vector Aha, thanks a lot Ole!
Finally made something again, been learning Houdini for a while now, and now I was able to make this. feedback appreciated! ♥️
hello guys i have problem with Convex. I made this model on blender but in unity i'm selecting mesh collider > convex > on but its adding collider on empety space too. How can i solve this?
use the mesh of the object as a mesh collider
Already i'm using mesh collider @strange apex
interesting, what happens if you uncheck convex? Does it work as intended?
If i uncheck convex, rigibody not working.
no idea sorry, I too would be glad to know how to fix it
did you try googling for this problem?
Thanks mate btw i'll let you know if i found solution
I did but didnt find anything useful
Convex Mesh Colliders are limited to 255 triangles. How many tris is your model? It seems its already under 255
also try Cooking Options-> none
does this object use a rigidbody?
GameObjects that have a Rigidbody component only support Mesh Colliders that have Convex option enabled: the physics engine can only simulate convex mesh colliders.
you cant use non convex colliders with a rigid body
What you mean with that. Sorry i didnt understand it well
did you try Cooking Options-> none ?
Yeah but still same
yea, I think its because you use the rigidbody
try removing the rigidbody and see if it works
So if i will not using rigidbody so ontrigger / oncollison functions will not work
Also i tried with non rigidbody but still same
Unity only supports convex colliders when using a rigid body
Unity docs -> GameObjects that have a Rigidbody component only support Mesh Colliders that have Convex option enabled: the physics engine can only simulate convex mesh colliders.
you can place several box colliders manually along the shape of your mesh
I think this problem about my model. I did something wrong on blender
Thats why it's not working?
i dont know, but I offered a workaround till you resolve your issue
Thanks for that. Lemme research about blender modelling.
I tried the same set up as you, it wont work, Unity does NOT support non convex mesh colliders with a rigid body, the mesh collider cant have holes
can someone send a 3d model fps for low poly game
Does anyone know how to move a skinnedmeshrenderer object that won't move?
I have a prefab of a model with a rig and I added clothes but the prefab didn't update
trying to add them manually sort of works but they're not in the correct place and I can't seem to move them for whatever reason
]
question about performance
I have a pretty big scene in 3D
and I'm placing a bunch of rocks and trees
as it stands there are hundreds of each
how will this impact my game's performance?
Here @strange apex, from the UE4 documentation which also applies to Unity
If you want accurate rigidbody physics on your shape you would have to use a series of rotated cubes
yep, thats what I've told him as well, to use several box colliders
Oh sorry, wrong tag. @final mulch
nah, not wrong tag 🙂 Its good to know I was correct and colliders with holes dont work with RB in Unity. I didnt know that today as well, had to google
I think the UE4 illustration is very simple yet effective so it's a nice way to illustrate it. Unitys documentation is just text
@rose ember static objects with the same material can be batched together at runtime, which means they are treated as a single mesh. This will save you a lof of resources. More here https://docs.unity3d.com/Manual/DrawCallBatching.html
how can i fix this problem
transform.Rotate(Vector3.up * mx * 0.5 * Time.deltaTime);
how tf do i model hands with fingers, im making a fps arm model
If you search for FPS hands there are tutorials on youtube
mmmm no
theres not really
@glacial vector
is there anyway to actually model a good low poly hand
like should i attach it
shouldi model off the arm
Here's one https://www.youtube.com/watch?v=f2jGl9F5-Do
How you go about it and how much of the body you model is up to you
@strange apex @glacial vector Thanks for tip. As Roboserg told me i removed rigidbody on object and unchecked convex. In first time didn't work but after i restart unity it worked. Thanks for help 🙂
Am looking for a 3d artist that can do lowpoly well to do some freelance work, dm me if interested
Hello! I've exported a file as .fbx from blender into unity and none of the textures have transferred. How can i fix this? 🙂
Which engine the best for 3d modelling
Hi guys. So I kinda have an idea for a little game experience I want to make. For the concept, I wanna design my own model of a space ship. I kind of have an idea of what I want it to look like in my head, but I'm TERRIBLE at drawing. Does anyone know some good alternative methods to "sketch" out my ideas before starting 3D modelling? Maybe there exists some kind of sculpting/3D modelling software that's good for just sketching things out?
Started using blender a few days ago
This is a random weapon I made, not actually a real design
The stock is from the m700 tho
Feedback appreciated
Would use, I wanted to code it to work in vr or as a rts weapon. Prolly cause it's in the low poly range. @restive stag so definitely keep going. #nonemodelingfeedback
I have the same issue, did u solve it?
Hello guys, I have an issue where Unity over saturates my textures, here are a photo from blender and then in Unity, I tried different shaders and still the same problem !
Thanks
Are you using an unlit shader?
yes
Well, I think, i'm Using poyomi, I also tried cubed paradox, same stuff for both
I'm not familiar with poiyomi, but I would be curious to see if you just made a standard unlit, drop the texture on and tested it.
Same saturation issue
Are you using any custom node setup in blender?
nope, just straight up texture
Hm, I'm not sure then to be honest. My gut feeling would tell me the lighting setups need to be matched, but seeing as you did an unlit test and it still isn't the same, is odd.
Actually your second screenshot is still lit? Can you show the material for it?
Yeah, that's a standard lit. In the top drop down, look for the unlit variation.
By default, a newly created material will use lit.
Ah okay, so the poiyomi shader is doing the same. Which is technically correct.
I tried all the compression formats, they all don't give the result I need
Does the actual texture look like your blender screenshot? The albedo thumbnail looks bright itself.
What was it?
On blender my color managment was on filmic, not standard
which I think gives a bigger range between bright / dark and colors themselves
I guess there's no way to change that in Unity
Well, you can do colour correction/temperature in post processing.
Otherwise, you can tinker with the import settings of the texture (ie, disable sRGB) to see if anything helps.
But if it can be solved prior to importing (doing it Blender), it's always best to go that route.
yeah, thank you for your help ! 😄
is there any way I can cut prefabs in half without having to go into blender?
also sorry if this is the wrong place, couldn't find a more specific spot to ask
@ me
I also have a really weird problem when I collide with something, my camera gets knocked off it's rotation and I can't walk straight, and I also clip through walls extremely easily
ok fixed the camera thing, just had to freeze all of the player's rotation
I can still clip through walls tho
My character texture is only 80x80, and the front face is tinted brown for some reason, but it can be fixed by removing the headband... does anyone know why?
(I'm actually using Unity2D, but with a 3D character.)
(SOLVED: I needed to turn off compression.)

A new outfit for Leena Poly Style Modular Pack!
#3dmodeling #lowpoly #assetstore #assets #indiedev #gamedev #Blender3d #polygon #gameart
Visit my Patreon - https://t.co/Npvid7VZ5d https://t.co/S8Y7Ztf7LC

Hi, I'm literally completely new to Unity and Game Development in general as all of my previous experience was limited to simple C# and Python Terminal-Based development work. Anyway, I have this OBJ file which I can't figure out how to get the textures functioning in Unity for the life of me. I've tried importing and everything. I even installed Blender to try and convert it into FBX there and it still didn't work! Please can someone offer me some help by looking into it, or converting it for me.
I'll PM the .OBJ file to whoever is willing to help
The preview shows the file like this, but whenever I import in Unity it's grey no matter what. I even tried mapping the textures manually and it still wouldn't work. I’ve messed around with the material import settings to no avail.
@eager mist iirc obj doesn't include textures, so are yiu sure you imported them to the project?
ok so im making a armature but the object i have for the armature is mirrored and the left arm rig will move both and the right rig wont move anything, is there a way to fix this? thx
@oak pulsar spamming won't get you help; ask the question and if somebody knows they'll answer.
When you say it moves both, you mean both sides of the skin?
sry, left arm bones move bot sides because of mirror modifier right doesent move anything
You need to change the weights on the mirrored side, probably.
@fluid oak Yep that’s the root of the problem, it’s the importing I’m having problems with
I’m not sure if it’s me or the files
If I send you a link to the model off Google drive; do you mind quickly putting it into a Unity project so that someone who actually knows what they’re doing can try it out?
I’m at my wits end and I literally haven’t even started any scripting 💀
I’ve gone to Materials and attempted to import the files with every feasible combination but nothing seems to work. Still unsure on whether this is due to some unforeseen incompatibility or due to my own incoherency of the platform.
@eager mist I mean, obj files literally don't store the textures; they are external files that need to be imported separately.
I understand that
It’s primarily just a vector format
However, I have tried importing the textures after the fact which is what I’m encountering the issues with
If you want to auto associate, use fbx?
Yeah that’s the exact issue I’m facing lmao; the file I’m using has only been distributed as an obj file. I tried converting it to fbx by adding it into blender, where I still encountered the same texture BS which literally makes no sense because the MTL file should’ve mapped the textures onto the model irregardless.
Maybe this is me just being stupid because I’m unfamiliar with the platform but, surely, it shouldn’t be this tedious.
So you have a bunch of texture files, and can't import them?
Essentially, yeah. No luck converting the file either. I was hoping I could get someone to try and point out where I was being an idiot.
These are the files, for reference.
Google Docs
Yeah, I'm not gonna download a random zip file off your drive.
Are you getting error messages? Can you open the images in an image editor?
Did whatever you used to rip the game files not have UVs?
That’s fair enough, I understand.
I can open the images just fine
It’s mapping them onto the model file I’m having problems with
Shall I just manually add the textures one by one?
Okay so I managed to fix the model
The importing is just being weird now
But I think it's something that can be fixed with brief trial and error
i need some help
@stoic grotto Don't cross-post on the server, pick a channel. And tutorials are pinned in #💻┃code-beginner You can find example projects with movement among other things there.
sorry
can someone help me with exporting models from fusion360 to unity
why does it say this?
does anyone know a good free vine/ivy pack?
How hard its to make a decent flintlock weapon 3D asset?
@polar forge depends on your personal style and experience.
Like with all things, making something one step above lowpoly would take an hour max.
PBR and high definition bump that up quite a bit.
Running into a issue with my LOD groups. When in game they don't pop up correct and I have the lod bias set to 1. I'll be like 10-20 feet and than they pop up or they will show the second lod.
Anyone know how to convert .META/.ASSET files to .OBJ/other model file type?
I dont think I can open .ASSET/.META with blender and Im kinda new to this whole process
.meta is a Unity text file with meta information of corresponding object basically relevant to the editor only.
You can only export from Unity using FBX exporter package or .obj files created with ProBuilder.
alright thanks
Or write your own exporter of course
fixed it
Anyone familiar with the game Vanish?
Hi, I have a single object which consists of 3 detached planes. Each plane is identical and they fill the same UV space. Is it possible to merge the vertices of the UVs despite the planes them selves not being merged? Reason I ask is because from what I've read, when rendering an object each UV island requires a new draw call, this means my 3 planes require 3 separate draw calls to render 1 UV where 1 draw call would suffice. Not sure if this is the appropriate place to ask, but I think it's the best fit.
They are not split into separate draw calls @azure frigate. The only difference is that where there is a UV seam, one vertex will be split into two. So the vertex count goes up but still a single draw call
That's odd, I originally had them as completely different t objects and my draw calls didn't decrease when I merged them
best way to check is with the frame debugger
so i have the materials and textures, however i cannot join them together
you need to create a new material @torn sky
but these materials had the uvmap
No. The model has the UV map
ah
THANK YOU!!!!
@glacial vector sorry for pinging, but do you perhaps know something about bones, and how it would import into vrchat?
I do not
ah thanks anyway!
Moving this to a more apt channel, only posted it here as it was a follow up to a previous question.
I am trying to import 3d models from sketchfab, they are using a glTF format Unity doesn't know about. There is Sketchfab for Unity 1.2.0 package on github but its bugged and import models with inverted polygons. Any recommendations to how automatically import the 3d models without manually fix all the polygons?
https://streamable.com/rz4spj

@strange apex i wrote this plugin https://github.com/Siccity/GLTFUtility see if it works for you maybe
I am probably blind, but how do I use it? No "how to" on github and nothing under "Window" in unity
In the unity editor you just drag in the model files as you would with an fbx or obj and it'll import automatically. For API scroll down to the bottom in the link i sent
Thanks. When I drag and drop the model - https://i.imgur.com/oub6XIH.png
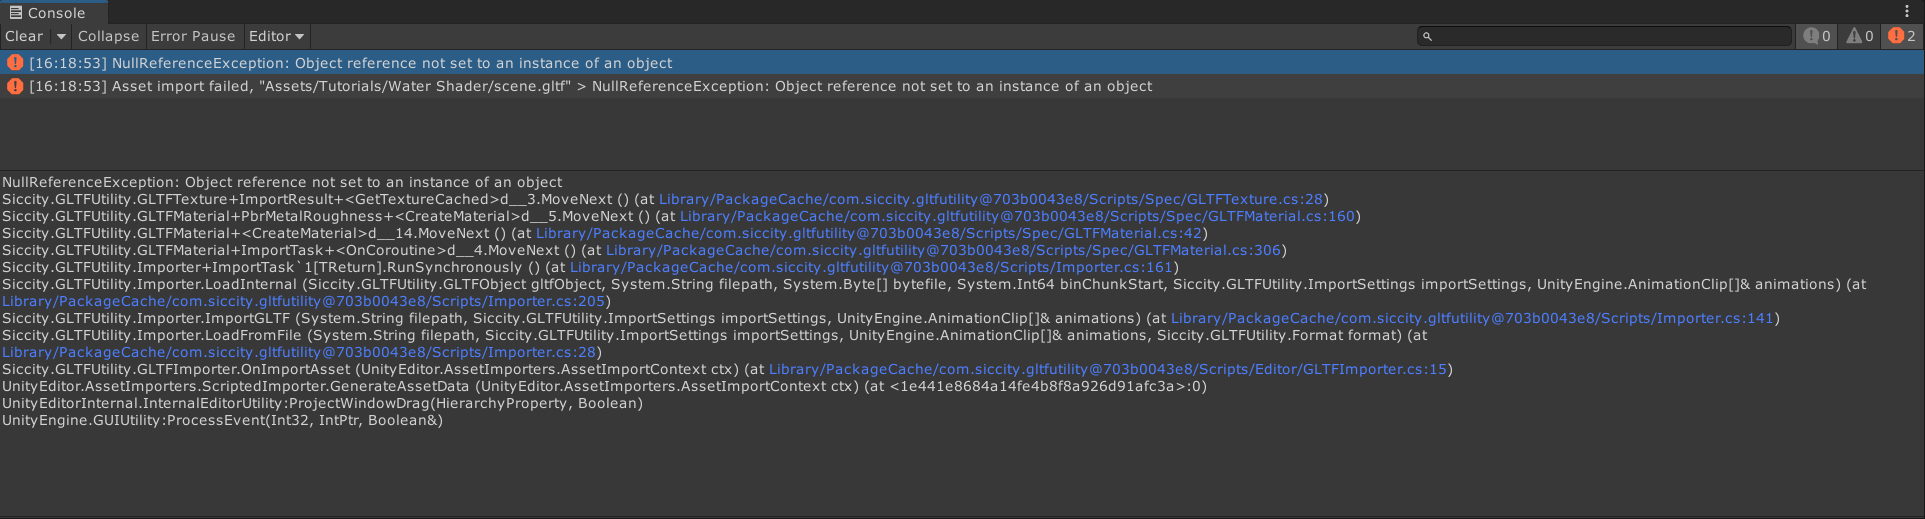
NullReferenceException: Object reference not set to an instance of an object
Siccity.GLTFUtility.GLTFTexture+ImportResult+<GetTextureCached>d__3.MoveNext () (at Library/PackageCache/com.siccity.gltfutility@703b0043e8/Scripts/Spec/GLTFTexture.cs:28)
Siccity.GLTFUtility.GLTFMaterial+PbrMetalRoughness+<CreateMaterial>d__5.MoveNext () (at Library/PackageCache/com.siccity.gltfutility@703b0043e8/Scripts/Spec/GLTFMaterial.cs:160)
Siccity.GLTFUtility.GLTFMaterial+<CreateMaterial>d__14.MoveNext () (at Library/PackageCache/com.siccity.gltfutility@703b0043e8/Scripts/Spec/GLTFMaterial.cs:42)
Siccity.GLTFUtility.GLTFMaterial+ImportTask+<OnCoroutine>d__4.MoveNext () (at Library/PackageCache/com.siccity.gltfutility@703b0043e8/Scripts/Spec/GLTFMaterial.cs:306)
Siccity.GLTFUtility.Importer+ImportTask`1[TReturn].RunSynchronously () (at Library/PackageCache/com.siccity.gltfutility@703b0043e8/Scripts/Importer.cs:161)
Ah
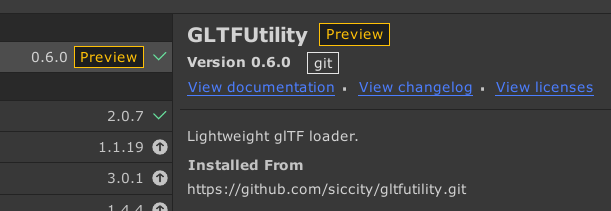
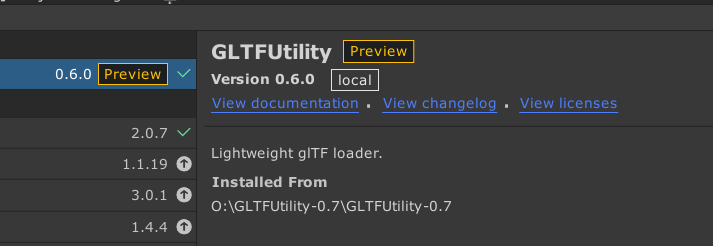
sec let me update the upm version
upm doesnt get the newest version unless i add a tag to it
pretty annoying that i cant just tell it to "get newest"
on github the latest release is 0.6 as well
yeah "release"
but that release is like a year old
the newest version is on the master branch and is about a month or two old
yes I see that and agree with you , it's just if I were googling around I'd only look in the release tab, maybe its just me
i always recommend people to use git submodules instead of upm
but yeah there's probably a lot of people who just see the 'release'
git submodules?
basically upm but better
people are lazy and upm is a really nice way of getting packages
so about installing your package, will you update the upm or do I github clone it?
do I have to restart unity?
nope

oh, well
idk how you update upm, personally i dont use it
maybe go to your packages.manifest
and update the number
I'd wager it takes some unspecified time for upm to register an update idk
i think unity watches that file and will update immediately if you change it
I removed the package and installed it again, its still 0.6 hmm
I think I just clone it. But the problem with github clone is, it will not auto update in the future
thats why i mentioned submodules
but then I have to install new software I'd rather avoid since we have upm
if your project is already on git (which most projects are), you can just right click > update and it's updated
you wouldnt want packages to update without asking anyway, since that could cause issues
you mean with the github client?
for example, yes
personally i use Fork client, but they should all support submodules
i did just add a release
nevermind 🙂
its sooo small I didnt see it
weird upm not seeing the 0.7
the 0.7 zip version still shows 0.6 in ump
I am getting the same error with 0.7 https://i.imgur.com/IZOrcJx.png

can you send me the model? i weeded out a ton of the issues and had all of the example files import correctly
perhaps something in that model you got has something i havent bumped into before?
Alright thanks. I'll have a go at fixing it one of the following days. I'm sorry it didnt work for you :V
np, thanks for trying to help. So you say there is a problem with that particular model?
anyways I really enjoy this new glTF format, seems like what we all needed especially considering fbx worked just fine 👍
@strange apex Unity just hired atteneder, the guy behind one of the best plugins on github. You can try that one as well https://github.com/atteneder/glTFast

GitHub
glTF runtime loading library for Unity. Contribute to atteneder/glTFast development by creating an account on GitHub.
His doesn't support animations or skins yet, so thats a thing to consider
I really hope he will make unity support it natively as well as it supports fbx
Thanks. I am starting to hate that format ... Just use fbx...
@strange apex glTF is a good thing. Full support just isn't entirely there yet
But it's coming along nicely. Godot switched 100% to it and UE4 is also offering official support
hmm, so its only Unity who is lacking behind
Yes, because unity is balls deep with Autodesk, and Autodesk hates glTF :p
but I like 3ds max 🙂
thats fine, but then 3dsmax should just support gltf
nothing is stopping them from supporting it
I am joking, I understand why an open format is a good thing
good :p
so I wished everyone would just use .3ds 😄
yep, same for me. Was the first 3d modeling software I've used like 12+ years ago
used it a bit in 2007 for source modding, then got on a 3d school and used it again with tutors
halfway through the course i switched though
switched to what?
blender
I would use Blender if the controls and the workflow where identical to 3ds max
it got a lot closer with the 2.8 update
I tried it several times, its made for aliens if you are coming from 3dsmax
i had to re-learn everything basically :V
yep
why did you switch? 3ds max is free too for personal use or somehting like that
I just didn't like the vanilla version of the program
The hotkeys were in odd places, and you need plugins to do most cool stuff
Blender i just used out of the box
Also program file size, launch time
And not having to think about licenses
Lots of small things :p
its just for basic modeling my knowledge is enough with 3ds max. So to use blender I have to spend days learning it only to gain the knowledge to do things I already could with 3ds max. My brain says - oh no, you wont do that 🙂
@strange apex yeah just use whatever you're comfortable with
so why are these bones red ?
anyone that uses maya know how to fix this?
For some reason, when my friend plays my game, it immeaditly maxes out his gpu. His cpu, and ram are barely used by the build. I am using urp. What is going on?
I have a armature and i cant select it, i have no idea why. Sry if i'm being vague, thanks
could you send a picture, of what is happening?
sure one sec
@mystic olive
the in front doesn't matter if i enable it it will still just select\ the mesh
oh
well, i am not sure, since i dont have any other info
well, i am not sure. what have you tried doing to fix this
i cant really think of anything other than restarting blender trying different modes etc
oh
re parenting
any ideas?
it is only in the viewport tho
i can select it elsewhere but im weight painting sooo
oh
Why is this happening
@queen mural far clipping plane is too close or your model is too large
fix by scaling model down or increasing camera far clip plane
ok
@queen mural what's the scale of your model in Maya ?
Place a 1x1x1 meters cube next to it
it's 10k*3
10k what ? cm ? km ? m ?
When you create an object, what unit sizes do you have in its parameters
...Isn't there some parameters to set the size of a newly created cube ?
no
it just makes it with a scale of 1,1,1
Okay and how large does it appear next to your 10000 sized model ?
I mean, if the cube is 1 and your model 10k, don't you see the problem ?
Your model is too large, the camera has clipping planes, so some parts are disappearing
i didn't make it cuz i wouldn't even be able to see it
rescale your model, reset the scale (from 0.0001 to 1.0) and export it
Hmm i'm french and we don't use commas for large numbers so I may be confused but... Your model is 10.000 and the cube 1 ?
or model is 10,000 and the cube 1,000
oh i didn't realize i put the wrong commas
the model's scale is 10,000 x 10,000 x 10,000
ten thousand
not 10
Yeah it's too large
it's the size it has to be
A robot 10 kilometers wide ?
I bet for metric, but the unit isn't wrote on the sizes because it's set on generic units
cm is metric
You must have an option somewhere where it's says 1 = 1 Meters
something like this (this is 3dsmax)
Then if teh default cube is 1x1x1 (meters) You robot is 10000 meters wide
The size of a small city or village
idk where to find that
Google is a good starting point, search for Maya System Unit Setup
But even with that, your model is veeeery large
You SURE you want a 10 kilometers wide robot ?
it's cm
Than I don't know for clipping planes issue, but I can for Unity
it's 100m
Since Unity dodge cm or m
i fixed the dissapearing issue but now this hapens
i fixed it by increasing the far clip plane
1,00 cm or 1,00 km (depending on your unit system in maya) Unity will only take the numbers and make it 1,00 meters
wait what's 1,00
oh
wait actually no i needit 10000m
if you scale down your model in maya, you need to somewhat reset it's scale after
if you don't it will import the model scaled down in unity, but it will still be veeery large
i don't understand
Basically you're saying that if he scales down in maya unreal will scale it down again?
the scale in unity need to be 1, 1, 1
if that's the case i should make it 10000 cm since i want it to be 10000meters
if you scale down in maya
in unity it will be at a scale of -10, -10, -10 (ignore the numbers just example)
???
so you need to "reset" the scale so it's 1, 1, 1 in unity
in 3dsmax it's called xForm idk for maya
unit setup is very confusing at first but you'll get around it hopefully
uh not -10, -10 ,-10
more like 0.001
the thing you need to be sure is, your model need to be scaled at 1,1,1 when imported into unity
that's the goal
so how tho
no matter what size you want it to be, in unity it should appear as 1,1,1 in scale