#🔀┃art-asset-workflow
1 messages · Page 50 of 1
I'm learning
@halcyon kite While it is good to learn the basics of polygon modeling Sculpting is essential skill for artists.
@halcyon kite See this playlist if you are not yet familiar with the fundamentals.

The polygon is the basic building block of all 3d models. Here we discover its properties, like the face normal, which shows the direction the polygon is facing and it's three components the face, edge and vertex. Complicated objects are made of lots of polygons put together.
...
Thanks
All the essentials in condenced package. I always show it to my sudents so we are on the same page.
testing mocap with 1 kinect, i've got a 2nd one that needs a usb 3.0 extender and then i'll hopefully add that in and it'll be much better
yeah probably, as you can see as soon your arms are hidden it cant detect them properly
Hi I currently have a plane that the player moves on and was wandering how I could get the plane to extend as the player moves??
Edit: its acctually a flat rectangle and I want to extend it on the z acus
thats more something for #💻┃code-beginner
would guess its the best to just place a new plane when the chracter gets closer to the edge
so just simply spawning new planes in front of it
and by adding a custom shader for example you could hide the surface depending on the distance so that it is drawn depending on the distance to get a smooth appear

@brave slate Hi, I'm not sure if you still have the question about the shader... In any case, yes, and it's pretty much the same setup.
The main difference will be your "Generated Z axis" from Blender, in Unity you'll use "Vertex position" for local coordinates or "World position" for global coordinates. For the ramp use a Gradient node, and you might want to adjust it using a smooth step or a divide-power-saturate setup.
Cheers!
@verbal dagger And is there a way to expose the gradient from the shader to the inspector window, so i can change it in there? Because i found a way of doing it with 2 colors with position, splitting, deviding, smoothing and lerping, but those are just 2 colors, if i would want to add more, i would need to add those steps over and over again ...
It is not possible at the moment. However you could use a texture gradient instead... It would be actually more performant.
If you decide to go this way, change the gradient part of your shader. You'll need to affect the uv coordinates of the texture instead of the "time" of the gradient.
And by texture gradient, you mean a texture, with a gradient on it right?
Right.
Okay, thanks, i will just stick to 2 colors, because that at least gives me more freedom when picking only in unity inspector.
WARNING. Fake Blender site spreading trojans. Uses url biender . site. Has ads on Youtube and Facebook. Report this when you see it! #b3d
Retweets
551
Likes
1105
hello can somebody tell me how to apply different materials to different faces of an object?
You need to use ProBuilder or similar tool in Unity to assign materials and create submeshes. Or use 3d editor like Blender
do things like metallic get transferred from blender to unity?
there's a guide in the manual which materials are compatible
Thank you
So you'd recommend Probuilder and Blender? when starting off in creating 3D games?
ProBuilder is a very simple in-Unity editor great for creating prototypes and low poly shapes.
Oh okay thanks
Guys, I'm currently in a game jam and today is the last day and I need an asset of a person for my game but it has to be sitting, so I found an asset but it's standing so I was wondering if someone can help me to make it like if he's sitting
Trails cant be seen in game, anybody knows how can I fix that?
If you want you can see how we model the cars of Mini Racing World
https://www.youtube.com/watch?v=I3kw3r9RwvY&t=3s

Hello there, we are Kitty In A Box.
This video will show the modelling and texturing process to create the HellKitty, the last car we added to our game Mini Racing World. It took around 2 hours and 30 minutes from start to finish.
Follow us on our social network:
Our Discor...
@agile kraken its something about your UP axis
most likely
@still osprey did you try to change the allignment? if you have bilboards which are parralel to the cam you cant see them
@still osprey did you try to change the allignment? if you have bilboards which are parralel to the cam you cant see them
@tacit mesa tried both allignment methods and it doesnt help
What's the easiest way to bake normals on vertex colors?
Blender 2.7 had an option for it but now it doesn't have it anymore
what kind of effect would be used for doing that @vestal dew ?
http://philippseifried.com/blog/2020/03/blender-addon-normals-to-vertex-colors/ seems to have some info
talks how blender lost that feature and some other options
I'm making a game with some items that have both sharp and smooth edges; I need to outline some of these items so I wrote a shader that does the Outline Hull trick (that is, rendering the mesh with an unlit front culled material that offsets the vertices along their normals); problem is that where the faces are marked as flat in the modeling program their vertices have split tangents and therefore the trick breaks along these edges
so I thought, rather than sourcing the normals from the vertex info, I could source them from the vertex color
this should allow me to keep the correct shading on the model, and at the same time provide me with the correct directions over which I can inflate the mesh
I've installed the Blender addon and I'm about to try it, but I fear that it'll bake the smoothed normals on the smoothed mesh, I have to find a way to take those colors and copy them on the original one
you could do that in unity with editor scripting too
I've done a few tools actually in unity to bake data for other applications, just because I am comfy in unity
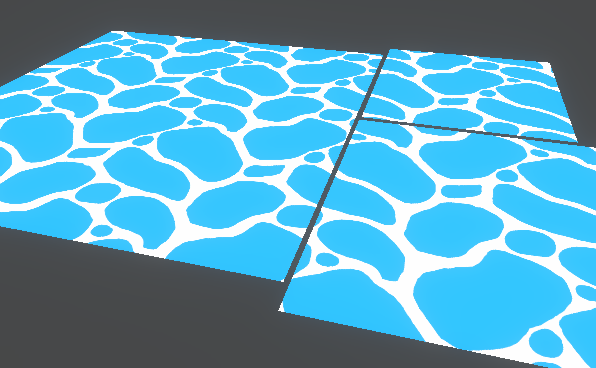
Anyone know how I can keep my mesh from doing this when I bake the lighting?
When unity converts the quads into tris it puts that annoying line down the center of the wall and light bleeds through
@ me if you can help please
@limber field quick update: it kinda worked, but now the hull is ballooning all the way on one side, I'll just have to fix this issue but it's working as intended (sorta)
@vestal dew nice
@limber field still having issues here, I can't override the mesh vertex normals from the shader
admittedly it looks kinda better, but the faces keep splitting
hrm, I imagine you are pushing them around using their vert normals?, which would be different vectors
how is it set up right now?
I'm converting the vertex colors from tangent space to normal space first of all
sorry, I meant world space
then I push the vertices along this new normal
the problem is that the mesh sharp edges are still conflicting, as they somehow command the shader to compute the vertices on the sharp edges as split edges
as split tangents*
this is the dreaded error
yeah, that makes sense, it's a tough one
see how the faces on the front of the piece (right side) are detached from the others
yeah, I think there are other ways of getting an outline that uses buffers somehow
that's because my friend (the one who's modeling) marked those as sharp edges; I thought that maybe baking the normals of the "unsharpened" mesh would force the hull to render without splitting the tangents
but your idea I would think would work if the verts do have the proper data an you only offset those verts with that information, not any of the actual vert tangent/normal info
Front piece, as seen in Blender
but your idea I would think would work if the verts do have the proper data an you only offset those verts with that information, not any of the actual vert tangent/normal info
@limber field that's what I thought too, in the shader I avoid calling anything from vertex info (except for the position ofc)
if you can afford some more geometry, you can bevel those hard edges and use face weighted normals to retain the flatness
I know, but it's for a VR project and I need to go cheap on the faces
also yeah, using face normals would have been better but it's not part of my friend's workflow
let me try something
I can definitely get a split box to have it's verts move in unison, ie not split
the vert info I have is not right, but they don't split
what is your graph, and what do your vert colors look like?
I was shifting some stuff around in the meanwhile, got something almost correct
vertex position set to absolute
now it's inflating the hull correctly, without splitting edges, thought it still tends to inflate towards the bottom more, but I guess that's a matter of geometry
example of the new behaviour
I've got to quit for today, 2 AM here, but I guess that object -> clip is somehow the right way
thank you @limber field
np
Hey people, anyone know of a good place online to find good modeling references for things like TVs or Armchairs? Like front, side, top views ect?
@lone bough https://www.dimensions.com/
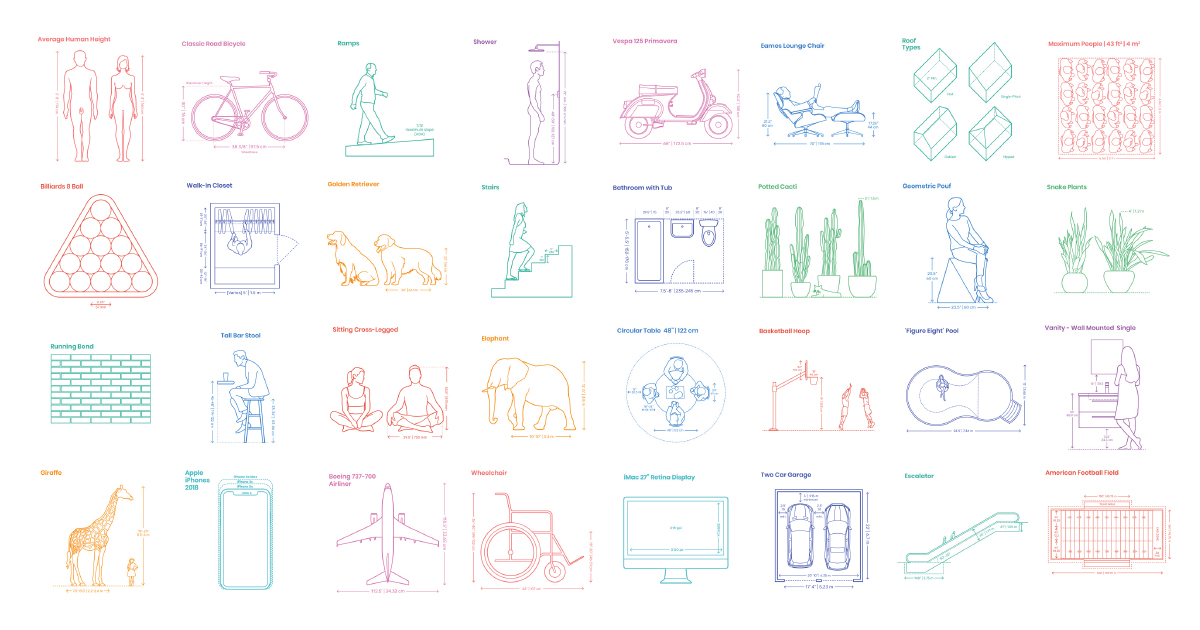
A comprehensive reference database of dimensioned drawings documenting the standard measurements and sizes of the everyday objects and spaces that make up our world.
@errant plover Ah! Thanks!
Hey, dose anyone know how to import models into unity from Blender? every time i try it doesn't load.
what are you exporting them as? @noble lark
i did glb and fbx. glb is the one you see there that doesn't, and fbx comes out blurry.
if its blurry is probably texture encoding being funky
also afaik glb doesnt show a prefab
oh okay! so what do you recommend for me to do?
fbx should work if you change some settings on the texture's import settings
but if you are building for web glb is a lot more efficient, tho I wouldnt worry about it this early on
alright thank you!
The blurriness is on the texture is it not?
If you set the filtering to point it should stop it from doing that
https://youtu.be/Au8oX5pu5u4
At 5:40 He applied a force to the left. Why did the cube stop when he released the key?
Shouldn't it keep moving according to Newton First Law?
(He set the friction coefficient to 0 at 1:30 so no leftward force should be applied)

In this video we learn to control our player!
● Download scripts, assets and project files for this course: http://devassets.com/assets/how-to-make-a-video-game/
● Developer Forum: http://forum.brackeys.com/
Difficulty of lesson: Novice.
···································...
more like 5d for all i care
Been learning how to model in blender. Curious, when making humanoid characters, do you guys start from a base model or build your humanoids from scratch?
Hey guys, how can i delete actions in blender, and make new actions that have no keyframes (that are empty)?

Its a start
Made a combination lock with 3 LODs, what do you think?
Maya, Substance Painter, Screenshots taken in Unity
gj
only thing i would point out is that a lock of realistic size is pretty much just a block from like 5-10 meters away
you could go even lower 🙂
but nontheless it is really good 🙂 quality asset
yeah, nice asset, I think with the tri count it's more about how it's used, is it a hero asset that is picked up and used by the player, or is it just a prop in the world, the former it can be that detailed easy, as a prop you would want to go lower and if there are ever a lot of them around even lower on the LODs
does anyone here at all use kinects for mocap?
@tacit mesa and @limber field thanks!
This wasn’t for work, but just a practice model similar to some of the pieces I create for training simulators, where you’d be right next to an electrical box or building, and might need to interact with the lock - would definitely drop it down to very minimal box shape or cull completely otherwise 🙂
@vestal kite yeah, nice job, I preach a lot of context to people at work and when I teach, if you find out how it's used, that should inform how it's made and finished
@limber field absolutely agree! I get asked way too often at work to provide a definitive guide to the other 3D artists about how many polys certain objects should be, but I can’t possibly provide that without context and it’s different for every project - how many will be in the scene, what you interact with, what has to move, etc, etc
I started as a 3D artist, but now I’m a mix of UX, UI, Unity dev and low poly 3D artist
It’s a small company haha
In Alberta, I won’t mention the name because my company is super secretive about everything haha. Working on my portfolio right now because I can’t show almost anything I’ve made in years
damn, that is secretive, I am in Southern California, we aren't as secretive
Yeah... they used to get mad at us for mentioning that we use Unity on our Linked In and stuff... mostly afraid other people might try and hire us 😅 little paranoid
Oh I’ve helped ship over a dozen products, probably 20+ at this point. But they’re mostly made for the energy industry and not publically available
Theyre kinda gamified training tools haha, so some aspects are similar, but certainly not as fun
oh nice, I was thinking of doing into that sector like medical visualizations and training tools a few years ago, but I crept back to games
but I figured they'd have me make a colonoscopy simulator and I said, no 🙂
Haha. I actually did work on medical visualizations for my bachelors and masters theses, so that’s a field I’ve always wanted to go back into. Maybe one day!
I am having trouble with the fbx exporter on unity 2019.4.14f on Linux Mint. It is giving me an an error that mainly says "ArgumentNullException: Value cannot be null.
Parameter name: key" the entire error is over 4000 words long. What should I do?
@vestal kite so you WANT to make butt probe simulators 😮
I wouldn’t say no 🤣
@mystic olive which version of the fbx exporter are you using? Is it the one from the package manager or the asset store?
Hmm I’m not sure if this helps at all, but I’ve had this or a similar issue a few versions back and it seemed to fail like that when I left some scripts on the models, and I might be remembering wrong but also had an issue exporting if there were colliders.
So if you can’t find anything else, maybe try to export in chunks and see which part is causing the issue. Unless it’s every export no matter what that’s failing
ok
@vestal kite I had a to delete some of the procedural animation components. Works like a charm now
Awesome!
Hi, I have this problem with the skybox shader. There is one big seam only in one spot of the skybox. I have checked the texture and it's OK. Anyone have an idea of the solution?
Try out the different settings on the texture @unique moat, I'm pretty sure that's how I solved it but I can't remember which field it was
hi does anyone know how to do this but in blender 2.8?

Hire my service to do this for you! Send your commision to model2pixel@gmail.com or learn more: https://model2pixel.carrd.co/
Blender file with the base Maple-body for you to use! http://puu.sh/BC3qK.blend
Gods I hate my voice…!
Hope this helps! Now go make crazy and creativ...
like how to turn low poly models to 2D / pixel characters
is 6k tris low poly 🤔
@unique moat yup I’ve run into this plenty, go into the actual texture file(s) for the skybox, and set Wrap Mode to Clamp - that should fix it
Project Name: TBD
Role Required: 3D unity/blender artist
My Role: Owner
My Previous Projects: N/A
Team Size: 2
Project Length: As long as we need
Compensation: N/A
Responsibilities: Make 18 skins for a sphere. Each skin will have a topic that you and me will decide on
Project Description: A simple ball parkour game! But its really hard to complete!
Thanks and DM me if not have a wonderful week!
thats really all you need
dude if you study blender like for 1 day you can do it in your own lmao
its that simple
@vestal kite @glacial vector thank you for the answer. At the end the problem was the mipmap generation
Ah yes that too haha
In this screenshot (from Humankind), what technique did they use to make the trees and forests? Are they just 2d sprites or how do they work?
For those using UModeler: is it worth it? Anybody have any screenshots showing finished work made with it?
@untold copper they look like models. The unity terrain allows you to use brush tools to add terrain detail models as well as 2D sprite “billboards”
Ok thx I’ll need to look into unity terrain then because I don’t know what model means in this context

But how detailed is the model? Would I create such a tree in blender for example?
Since the camera is so far away it might not be very detailed. Yes you can make models in blender.
Maybe ask #archived-game-design
@ruby brook
Helps to sketch out the layout first then realize in 3d, makes for easy iterations
yeah, always greybox stuff first, use the polytools, play and test, etc, detail later
1st session working on a MRAP.
This back knee patch looks insane
@mighty hound MATV?
i have this issue with the skybox. The skybox is a shadere made in Shader Graph. Anyone know how to fix this problem?
@wary eagle yes. MRAP. is a type of MATV.
actually, reverse that sentence and you're right. 😁
MATV is in the family of MRAP. 😉
that's a nice base btw!
MATV just means military all terrain vehicle. MRAP is specifically designed to withstand explosions.
Actually nope!
MATV is a family of all the same vehicles, just different generations.
you're right about the MRAP, that's why an MATV is an MRAP, and not the reverse.
Im not someone to post anything here often, but please be careful with youtube ads rn!
https://twitter.com/tonroosendaal/status/1289920735465496577?s=20
WARNING. Fake Blender site spreading trojans. Uses url biender . site. Has ads on Youtube and Facebook. Report this when you see it! #b3d
Retweets
2566
Likes
4166
Should add a warning
anyone here that knows how to shrink multiple objects in blender and move them at the same time?
i want to add trees to this little island
Oh haha. Goodluck
Hey friends, curious to know if anyone has experienced making curved slopes/ramps in probuilder? Or am I just going to have to blender it?
This is my first time using prefabs and imported .obj's
What is with everything not called default here? Do I have to worry about them at all? Do I reference them or the defaults in scripts?
Is this the right channel?
Anyone here have expertise in modular level design in unity?
trying to optimize UV's for lightmapping in unity
Anybody here know about particle system forcefield?
Its a cube... what is there to optimize?
@serene vortex unity can generate those for you, are you planning on doing your own lightmap Uvs?
@limber field I’m fully aware that unity can generate UVs for me but they tend to be very problematic no matter what settings I tweak
So I opted to make my own uvs for light mapping and store them in UV2
ok, you'd want more of a gutter between the 'sides' of things or unconnected shells of surface
Exactly. But what seems to be happening instead is I get thin black lines between any modular piece
No matter how far apart the UV islands are
I’ve even switched from Unity GPU lightmapper to Bakery which yields better results albeit not good enough for my desired platform
damn
Yeah I’m in the rut but if anyone can throw some wisdom my way it will be greatly appreciated!
can you show your result and the resulting lightmaps?
Gladly haha
interesting there is not a Lighting group, there is a terrain even, unless I don't see it
thats with the same modular system with roughly the same island spacing and such. ive outlined these thin seams with red ink
this is one of the walls
i think uv spacing is ample as the walls are adjacent so it wouldnt matter too much
You'll always have those lines if you are using separate meshes. Nothing you can do about it.
@errant plover is unity's lightmapper really that bad? Ive seen many scenes that use modular meshes similar to mine that have clean lightmaps. I know somethings wrong
then again they do use the enlighten lightmapper... so idk..
Its complicated to explain. Its working as intended tho.
Your walls/floor also have no textures.
If its going to be exactly the same, scale them instead of repeating.
hmmm @errant plover alright ill give that a go
How do I apply a material to a prefab? When I drag it onto it in the assets tab it just becomes a crossed out circle
Open your prefab, drop the material onto the model.
Open it where? In the assets menu?
That opens Microsoft 3D Viewer. Dragging a material onto it does nothing
which one are you clicking on?
I imported the .obj and it made it a prefab
so platform_9 is a prefab?
well a prefab would show that Open Prefab button, it's probably just a model
Where you have Open Prefab I have a bunch of options, one of which is Materials
yeah, it's just a model
you haven't made a prefab
so, in an empty scene (or any scene), drop that model into the scene
@wooden fern
What next?
import settings for model and click materials u can then remap as you like
I found that
and did you plug your material in?
Yeah. I figured that out. I want it to be a prefab now
so a prefab is a collection of assets, any type of asset, and when you 'build' that in your scene, say it's a model with some particles and a light on it, if it has a parent object, you drag that BACK into the project and it creates a 'prefab'
you can do that with a single object too, not as useful, but you can test it
yeah i dont get quite what you mean @wooden fern the way @limber field described doing it is probably the best way. What exactly are you trying to achieve by having it as a prefab?
I'm somewhat familiar with prefabs so I can work with them easier
Oh i see. you should know that all imported fbx or obj from a model are perceived as prefabs by the editor anyway
Oh, I got it
but you can later unpack them to add parents ect and then repack buy dragging it into project library
Eh, this is like my third day with Unity so I wanna stick with where I'm comfortable for now
I unpacked prefabs on my 2nd day, so there 😛
prefabs in unity are pretty cool, unreal it's not as simple you have to use Blueprints or get a store bought tool
blueprints :/ yucky
heh
honestly unreal is kind of yucky in many ways, we'll see if Unreal5 is as they say
If I unpack them, can I delete the model? It deletes the mesh for me and it's really annoying
once you create a prefab in the project, you can remove whatever you have in the scene after that and the prefab will still exist in the project, you can then place as many of those in your scene, instantiate those, all you want
I have this right now, because when I delete circle_9_obj, circle_9 loses its mesh
unpacking just means you are breaking the connect to the original 'prefab' in the project, so you can make something new, otherwise if the connection is still active, you can do stuff like modify the instance of the prefab and save it BACK to the actual prefab in the project
yeah, a prefab just holds a reference to the things in the project
so if circle_9 is a prefab, it's like 'pointing' to circle_9_obj and saying, 'I use that'
so you will never remove the obj
So I have to keep the .obj in the project somewhere? I guess it makes sense, but it's annoying
yeah, it's like the source, just like a texture
just put it in a '/Models' folder and put your prefabs in a '/Prefabs' folder
this works because then if you change the obj, like re-export over it, the prefabs will get that change
np
sorting poorly, is your material alpha test, maybe show the material/shader
@limber field i'm using transparent
i made a custom pbr urp shader
Transparent Render Queue at 3100
how do i fix the sorting?
what is your settings here
transparent
Ohhhhh
Fixed
@limber field changed to opaque fixed it thanks dude
cool!
This isn’t Unity specific, but I was wondering how I could fix this weird normal map joining
Not to forget the very strange way they all put themselves together
One bright, one normal, and one dark
and show your UV's and normal map
Yeah, it’ll be a little bit
and your vert normals
Normal maybe reversed?
Alright, I’ll ping you guys once I have the images
No, it’s not reversed normals. It’s a near perfect gradient across the model from the sides, around the front, and to the shoulders.
Anyone knows if the "Cavity" option (it's in spanish sorry) will make the effect of the edges permanent?
@ruby dust maybe you have extruded points and it's making that weird line
@ruby dust it mainly looks like you just have bad mapping, your textures and UV's don't match
@jovial jetty what do you mean permanent, you mean if it'll bake it into a texture?
@limber field yes
I imagine yes, you'd have to bake right layer for that to be bake, is that a procedural cavity type deal?
@limber field Do you use PolyBrush?
you mean that thing in Unity, if so I haven't
try using it today since pro builder dont have painting any more
it looks cool, paint texture layers, models on the surface, sweet
Say you want to paint vertex on a plane should it have high subd?
Looking good
maybe it's the way it' swaying, catching the light more or less
is that a good thing?
it can be, but I am wondering why it's so harsh of a difference in the back area
but yeah, waving grass undulating is great
how many materials
well the slight seam you have on the lower back are due to there being no padding on your normal map
the upper body just doesn't look like it has the right material on it
when you bake your normal map from the source mesh, make sure you pad the bake by like 8 to 16 pixels per 1024 in resolution
@limber field I went over to color space options, and setting it to non-color corrected the seams for some reason
It's all 1 material, I know that
yeah, your texture for the normal should be set to
I'm currently still in Blender
haha, oh 🙂
I was trying to fix issues with it before I get it out and into something
for sure double check your materials, you might have 2
upper and lower, and the upper isn't using the material the lower is
I checked, I only have 1 material
I was messing with color space options, and non-color removed the seams
I had it on sRGB
oh cool
Though, I feel like I notice some detail loss, but that may be due to the difference in the way it reacts with the light
what do you mean, what is the resolution of the normal and textures?
Nope, testing rendered view, changing the color space to non-color fixed it perfectly
No, it was just that some detail seemed to disappear on his neck, but checking rendered view, it's definitely still there.
nice
It was because the light is now acting right with the normal
yeah, normals are math data, sRGB would mess with that pretty bad
@limber field hi i have a question on performance, i have a environment prop thats pretty large in scale but has 35k tris
would it lower the fps?
depends on a lot of things, like what you plan on shipping on (pc, console, mobile, vr, etc), and how large it is, it's needed detail, etc
35k is high but not horrible for a pc game, with LODs it should be performant though it might eat up some memory
yah when i am close to the model the frame is pretty high but when the model fits the screen my fps down
drops
what is the best tri range for environment prop?
does it have LODs?
again that range is dependent on size and need
if it's just a fencepost, it should be low, a building, high
can you show the asset compared to a human?
ill send you screen shot
cool
Was it fixed 🤔
how do i change the texture of a specific side on a cube
any simple way to do so?
and how do i do that
I tried to make a crouching system but uhh...
anyone have a good workflow for creating clothing/equipment for characters? The weighting is terrible for certain pieces and it the animations look like poop because of it. Not sure if Im just missing something obvious lol
you are probably talking about the topology of your meshes you want to deform when skinned to a skeleton, what does that look like?
this is with default weighting (had to rever to a previous save) I can get it to be somewhat okay, but theres still mesh tearing and I cant find the bone affecting it 😕
Annd upload failed?
😦
okay, can't share screenshots i guess...
well you'd have to open it up in max/maya/blender and fix the weighting or mesh
where is the asset from?
Yeah im giving it another go. its self made
skinning is pretty rough to work with honestly, it takes time to get good at
there might be tools to auto-skin/weight, but usually it comes down to point by point sometimes
Yeah its unfortunate. All the other aspects of 3D work im pretty decent with. ALthough I still hate laying out UV's. But this skinning thing is throwing me off haha
what app are you using?
Im hoping to just make a bunch of generic meshes with weights, then add onto them
blender
haven't used blender honestly, hopefully there are some good tutorials for skin weighting
there are plenty. And i guess i just need more practice at it. Its just sooo time consuming that I'm debating whether or not I should just change art styles all together lol
Think thats the issue... I used the decimate function to reduce the poly count and it killed the armor's topo
guess its time to retopologize -_-
yeah, that will be a rough one
how dense was it before?
when you say 'tearing', do you literally mean the triangles are splitting apart, or just they are stretching bad
lol 75k polys. I duped the chest/shoulders from the base mesh, subdivided and sculpted
just bad stretching
now that you mentioned the mesh... yeahh it needs to be redone
is that the sculpt mesh?
That is the result of the sculpt mesh being decimated
Which I didn't save the initial form of 😦
doh
so yeah, just spend some time weighting, get used to how to smooth between joints (do like up to 4 per vert), etc, and you might want to optimize the fingers 🙂
Yeah... this is why im thinking I may have to call an audible with my game. Im going for a roguelike/crpg blend. So items and item variants are important. If I have to weight each thing individually thats gonna be a no go. Now if I can make a base mesh. Like have all chest pieces share one, then just add to the geometry /retexture/etc... maybe I can make that work
lol i dunno exhales
well either way the skinning/weighting is the same, each piece will have to go through that process
you can transfer weights from the base body to the armor pieces to get a large way there, but you'll always have to hand do stuff to finish it off
yeah thats what I did here. But the topo is throwing me off. Ill just give it another go tomorrow. And tbh, I think the chest will be the most difficult. Lots of possible deformations from the chest/abdomen/shoulders/neck/etc. Everything else is pretty straight forward
hard plate armor like that is tough as it shouldn't bend
it shifts and moves, but it also limits movement depending of the cut of the armor
which is tough as if you share animations between rogues and knights, rogues would be able to do some acrobatics where the knight would clip like crazy
yeah true... i would probably have to create altered animations for everything if the character is wearing plate. hmm... boots up divinity to see how larian handles it
well you 'can' get away with clever skinning, animations and the form of the plates
you can add joints to help things 'slide' and shift property like shoulder plates/pads
just more animation to deal with unless you make it automatic in whatever animation tool you use (set driven keys etc).
im hand animating everything in blender atm so it would be a big time sink
yeah, sadly sometimes there is no way around it 😮
that's why we have 50+ person sized teams to even small-ish games
and it's only going to get worse with each gen 😦
Yeah. Unfortunately I built my entire code base around 3D and all of my features are planned that way. Debating whether or not I could go the Dont Starve route and do a 2.5D thing
yeah, unsure if going 2D would make things that much easier, depends on where your skillset is as an author
usually you just limit the scope to a point where what you 'want' to do is possible
honestly I can crank out most things 3D in a relatively quick fashion. This is my first foray into skinning though and its kicking my ass 😛
heh
I'd stick with 3D then, you can figure this part out, even if it takes a while you can get things in the game to get other stuff done and figure it out later, as long as legs aren't falling off your characters and stuff like that
unless it's a zombie knight
lol its not a bug, its a feature
I worked on plenty of players losing legs, zombies, etc, totally a feature
yes it is
@eager mist This is not a #⛰️┃terrain-3d channel. Again, stop spamming. You can find terrain tutorials on Unity Learn site.
!mute 706260707234152498 60 These are not a casual chat channels.
 ! orang#6969 was muted
he just asked a question?
he spammed his question crosschannel
hey any good texture resource?
example for making a strike thorugh
or grain effect
bricks
etc
This is gonna sound crazy buuuut ... using URP can I get 2d AND 3d lighting working at the same time? Using the 2d renderer 3 lighting appears to get turned off, using the 3d renderer 2d gets disabled.
Sites like https://opengameart.org have free art resources (always check individual licensing)
thanks
I am gonna make a quick humanoid model for use as test for a prototype I had in mind. this is the head
wondering how should I approach the body
Its kinda meant to be a wolf of sorts
You think I have the right idea for ears?
Anyone know how to fix this?
First time using unity and my friend gave me this to test on
looks like its missing textures.
yup ask him for the .mat file
Where can I find transparent volume lights or volumetric light assets? I've looked through OpenGameArt.org because that's the only place I know but I don't think there's any. What do you recommend?
I found the Aura asset in the Asset Store but I that's more of a complete environment system whereas I'm looking for a simple cone-like asset for a single object.
If you need volumetric lighting, consider switching to HDRP?
Thank you! I'll try that on future projects. I'm just starting out so I was looking for faster/simpler solutions.
#archived-lighting channel might have an answer. Most of us stick to one channel lol.
Hello I wanna know how to import character model in unity? Is it need to download import program or anything else?
What would be the best method to achieve these realistic grass layers on a large terrain size
I imagine that is a model and not terrain?
do you have materials made yet?
yes, and the other slots like Normal if you have them, etc
when i drag a material onto the track though
it just covers the whole track
and not the intended area
I imagine the track just has a single material slot on it, show the inspector for the track
yeah

This is the start of a new project series in with I recreate the beloved Mario Kart in Unity.
In this part we focus on getting the driving working and put it to the test in the time trial mode.
Feedback and ideas are allways well apprechiated.
All assets and characters of th...
i was watching this video and wanting to give it a go
but he doesnt show how he ads the tradck in
so im a bit lost tbh
theres an object for the track and just a bunch of pngs
Wii U - Mario Kart 8 - GCN Yoshi Circuit - The #1 source for video game models on the internet!
this is where i got the track
you'll need to take that model into a 3d package and break up the model into how many materials you need
break the model up?
ahh
thatd take forever
maybe ill just use a simple track
its odd that they have a resource for the track but its not ready to use
or is it easier than im imagining
weird it came as one entire model
no collision, etc
there is a lot of work you'd have to do to get that in order

Here is the complete model of Yoshi Circuit from Mario Kart: Double Dash!! This model was ripped by thegameexplorer, so please do rate it and enjoy! #Archipelago #Circuit #Cube #Double_Dash #Game #GCN #Island #Islands #Mario_Kart #Nintendo #Yoshi
would i be better off using this

Just a quick video of importing a 3D model into Unity 3D from Google Sketchup.
I had another Map with the same Material names. So I had to make new Materials for this Map.
Map File: https://3dwarehouse.sketchup.com/model/uce6ecb0a-f8ba-47d6-ae6a-f6dc5a59137d/Yoshi-Circuit-Mari...
just found this
it seems like everythings already broken up and materials slot in nicely
would i be correcT?
you'd have to find out, it 'says' it has 19 materials
GameCube - Mario Kart: Double Dash!! - Yoshi Circuit - The #1 source for video game models on the internet!
ah ok this one is all broken up
no worries
https://www.artstation.com/artwork/rAlK5L PSO-1 done!

Is anyone aware of an (easy) way to “de-atlas” a texture atlas + materials beyond remapping by hand?
how many professional 3D modeler or asset maker here?
@dapper gyro doubt it, and though you could write one in blender or other 3D apps, that shouldn't take you too long to do in a 3D app and photoshop, how many sections on the atlas?
It’s around 8-12 textures if I remember right, but tens of individual models
It’ll probably easier to just copy/paste over the atlas I suppose
yeah, scale and move the UV's so they are 0 to 1, etc, check to see if there is a script in blender though, my search came up empty but I didn't try too hard
@wary eagle that's good stuff, I think if you were to do anything, tighten up shine and lower the pattern strength, looking at images of that same gun with the same patterning it looks to have a lot more gloss painted on it
Will do, thanks!
doesnt really belong here but nobody is responding in the blender server so does anyone know how to make these spikes in blender?
@dapper gyro show us what you are trying to do. We may have a better solution
@drifting basin Make a plane. Subdivide it like 6 or 8 times. Enable Proportional Editing with Randomizer and Connected on. Then grab the center vert and drag it up. Mouse wheel to change the scale. Add another plane, repeat. Not too sure how the damage on the faces is done.
hey guys i imported a model which i modelled in maya,but i'm getting this weird black effect
Is there any way to make a mesh in unity rendered from both sides?
Possibly without having to duplicate vertices/triangles
yes, you just need a material that does not cull back faces
@errant plover I have X number of meshes that share a texture atlas. I want to "break" this apart so that each texture from the texture atlas is a material, and each material applies to the correct mesh part, rather than a single UV mapping over a single texture
Does one such material come with URP?
does anyone want to help on a game with 14 people we need an animator dm me
@dapper gyro why?
Multiple reasons. Replace textures with higher quality than atlas is, use different shaders on different parts, etc.
what's a good place to start when learning to use blender
The default lit shader lets you do this @tight meadow
@random ledge Watch this guys 10 minute speed runs.
https://www.youtube.com/c/Imphenzia/featured
is there a built in way to get the vector that points up from a gameobject and that rotates along with the gameobject when it rotates
or do you need to make that yourself
ah i think transform.up is what i need
@floral pendant you get anywhere with your model issues?
not quite sure if this is the right channel, but how would I go about getting a human model into unity that can have its joints realistically bend? For example, you grab the person in VR and drag one of their limbs downward to the floor, their limbs realistically bend so that the part of the body that you are holding stays in the same rotation and position you drag it to
this is probably really difficult to do and im not sure if its the best approach
please @ me with a response, any help would be greatly appreciated
@limber field no
FinalIK is the asset that's most commonly used for VR @tame wind, I recommend looking at that
does it cost money
oh god its like 90 usd
man i do not have access to money atm, im a student
and also cant work ebcause pandemic
Yep. There are other assets as well, but it's the best one. It's really hard to do
If you look around for VR IK rigs you might be able to find something free
I am trying to make an animated sprite sheet display around my object, but I dont really know how to approach this, I cant seem to find any videos on it either
should I use a particle? should I use a sprite? I am not sure, I have never done thing before
this is the end goal I am trying to achieve
anyone to recommend me a guide for starting unity 3d
Hey! We need A programmer who's good at what they do, who also have Unity Collab. 3D Modelers are also welcome (Please use Blender). DM me if interested! Here's some of our work!
@dreamy hull probably a combination of a particle effect for the small stars/dots, and a billboard sprite for the 'glow', that will sort behind the die, that is if it's a 3D game
Hey! We need A programmer who's good at what they do, who also have Unity Collab. 3D Modelers are also welcome (Please use Blender). DM me if interested! Here's some of our work!
I don't think this channel is for advertising
How much more difficult would you say 3D development is vs 2D?
Depends on your current skill set. If you are new to both. 3D is more man hours. 2D is more reliant on your abilities to draw.
2D is more subjective with the style which can be much harder to nail down conceptually as a lot more of 3D is realistically styled, though there is stylized 3D art, just much more in 2D
@dreamy hull, there was a youtube video about Portal effects that might be of interest, it had animated texture tutorial.
https://www.youtube.com/watch?v=OUq2fsL-gRs Maybe it is helpful for you 🙂 good luck

Raspberry Pi 3 Setup - https://www.youtube.com/watch?v=dDWs7Z34Nu0
-~--~-~~-~-
Come visit us at: http://www.burgzergarcade.com
Do not forget to subscribe, favorite, and thumb me!
We continue with another tutorial in our Hack And Slash demo made with the Unity3d Game...
hello folks I'm create 3d game assets for free.
Enjoy!

Good day guys!
Im just a beginner in 3D Modeling. Quick question how can I make this two objects to one mesh. I created a cylinder over a box and tried attaching it.
If you've joined the objects they already are one mesh. To the right you have the UVs of the object, which are fine being disconnected like that
Does anyone know if there's a low-poly library for modular, frame-based robots? Imagine something like Gunpla frames without the armor pieces
If you've joined the objects they already are one mesh. To the right you have the UVs of the object, which are fine being disconnected like that
@glacial vector Thank you!!!
any chance i could get some blender help please?
@dreamy hull A particle or a sprite would each work for that.
@fluid oak I appreciate not reading my issue.
@still solar I will check it out, thanks
@dreamy hull Sorry that I don't have any convenient tutorials to pull out of my ass. Should I have not answered the part of your question I had an answer for?
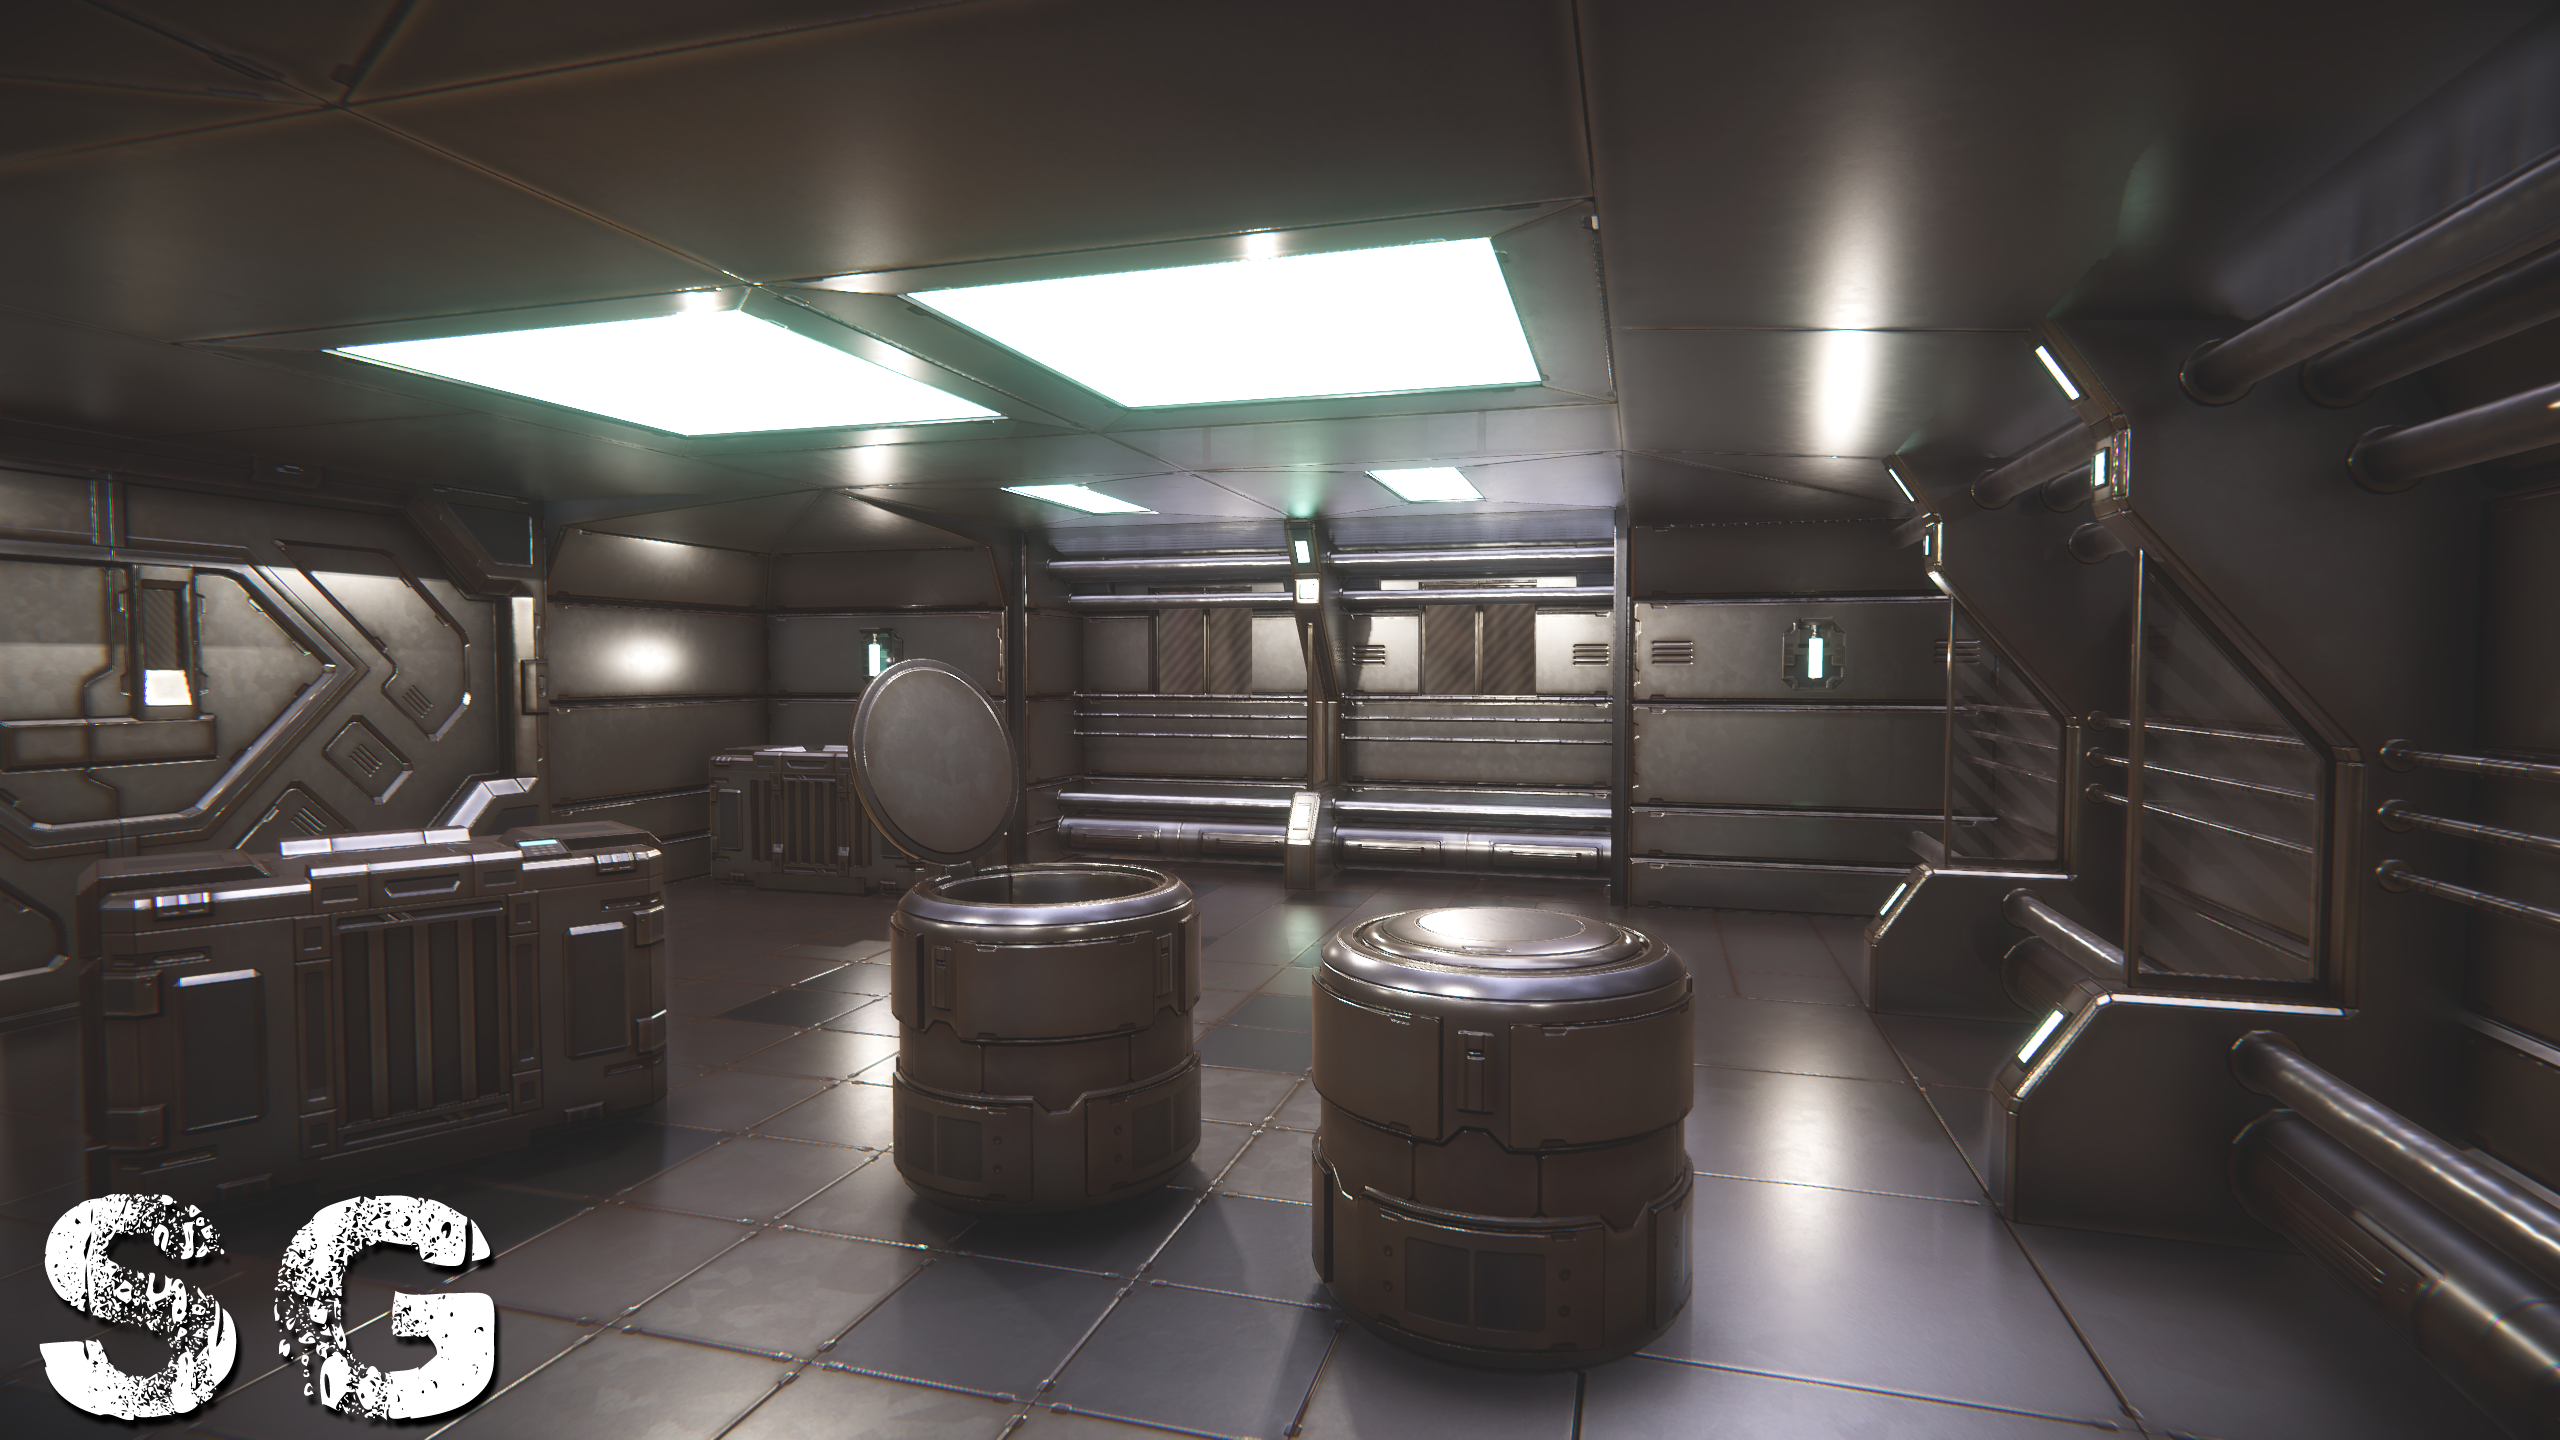
Hey guys, Im not sure which font looks better, the overall environment is a modern lab, react below, let me know which one should I choose
@sleek spear For that sort of use, maybe a stencil font?
Neither of those quite look right to me; the first one is closer in terms of style, certainly.
oh right, something like the first one but with the painting scratches that stencil fonts have, right?
nice
Like, there probably won't be a bunch of scratches or anything up on the high wall like that
But someone still spraypainted it through a stencil
Right
a modern lab wouldn't have something stencil spray painted on the wall, it'd have something cleanly panted or some sticker for the text
@Redotix99#1308 And really not sure what your issue is; just a basic particle system defaults to doing most of what you need(billboard orientation).
@limber field I dunno about that. A lot depends on how cheap they are.
thx for the input :)
There are tons of resources pinned to #💻┃unity-talk. Start with some of the courses at Unity Connect
Sort of newb with 3D modelling, but I'm interested in what opinions you guys have about this question:
Let's say I have a mesh with surface details. I can create that mesh in a watertight way so that the details are integrated into the mesh itself, or I could create the details by adding the detail meshes close to or intersecting the main mesh.
Which is, from a general perspective better?
Lets also say that the details have a very sparse or nonexistant amount of triangles that won't be rendered, so no polygons facing inside the mesh where they can't be viewed.
Lets further assume that I won't be doing any mesh collisions, or if I do, then they will be handled through built in colliders or a stand-in.
Surface details are usually not handled with polygons, but with a normal map
Good catch!
If you do have shape-defining details then you could model it out, but in this case you would want to use LODs which means you remove that detail when you're not close to the object
How about slightly larger details, think chair legs, periscopes, perhaps a hatch for a tank.
Where a normal map would be silly, but modelling those details into the mesh in a manifold way would require greater amount of work keeping the topology clean.
Chair leg is a good example of where you would use LODs. Close up, nice and smooth curves. Further away, just a cube
Mainly thinking about the workflow, adding a cylinder and duplicating it 4 times in order to create the legs is (for me) many times faster than working the topology of a cube in 4 separate places in order to create the necessary circles required to extrude a cylinder..
It should also save triangles, since there won't be as many faces.
Lets further say that I create some really cool lamp or machine gun that I want to re-use in future projects or other parts of the same project, creating these details as a separate mesh is more re-usable, since otherwise I'd have to somehow extract that particular geometry and somehow glue it into a new model.
Make one leg, linked duplicate it three times. Do not extrude it unless you absolutely need the lighting data, in that area, for some close up shot. Like an Ikea photo.
Good call, that makes sense.
How to make the texture not terrible and look like 1 object?
2 ways, fix the UV's or do World Space Mapping https://cyangamedev.wordpress.com/2020/01/28/worldspace-uvs-triplanar-mapping/
This post includes an introduction to using the Position node to sample textures rather than using mesh UV channels, which is also the basis of Triplanar mapping. It won’t be super in-depth but wil…
Hi guys!
How can merge textures from substance painter into one image file (for albedo, roughness, normal etc)
@robust mantle Unity doesn't really need watertight meshes, and modern GPUs can often handle far more triangles than you'd think. Even when using normal maps, having 'floating' polygons used as decals are very common.
@unique ermine Photoshop can do that pretty easily. I am surprised that substance doesn't let you do that.
@fluid oak I found this combiner from gumroad
https://gumroad.com/l/TextureSetCombiner
I tried using and it works!

Gumroad
TSC is a program that automates the process of combining texture sets exported from Substance Painter. It does not require Substance Painter to work and is not supported by Allegorithmic.TSC is a standalone executable (no installation required) that generates an ini file in it...
@unique ermine how are you gonna pack albedo and normal, which both have 3 required channels into one texture?
unless its a b/w image, its not happening rly
roughness, metallic and AO sure. But normal and albedo you cant, you need all 3 channels. Best you can do is pack the roughness in the alpha channel of the albedo
Normal only needs 2 channels
how do you draw that conclusions? @fluid oak
Because if you have two components of a normalized vector, there is only one mathematically possible third value.
you can rebuild a normal in the shader, not advisable though, expensive from what I know
the direction of the light bouncing on a pixel of the mesh and encoding into the texture is a vector3, Im curious how you can pack that into 2 channels
The three channels of a tangent space normal map have to equal one.
Basically, the total length of the vector is a known value.
do you rly wanna save 1/3 of the storage space to compute the entire third component of your normal map tho?
Unity already does it. Look up 'packed normals'
actually you save 1/2 if you go from RGB for normal and A for say height, to RG for normal and B for height
This is how dxt5 compression works.
But yeah, it does take more processing, so it is a tradeoff.
but I wouldn't want to put that kind of pressure on the shader
I would much rather store it than bloat the shader for it
What do you think the 'convert to normal map' button in unity does?
usually you can find other single channel stuff to pack
Anyway, I'm not saying it is the right thing to do for every/most uses.
AO, roughness and metallic are prime candidates imo
MRA we use, we used to use RMA, but roughness does better in the G channel
I have seen people pack scifi stuff textures in channels interestingly
the texture looks weird as hell at the end haha
just the monocolor scifi looking things
either fugly or a fkton of work to get it right
I've done the thing where you take a color image and you break it down into a luminance map (greyscale, just the brightness values), and the actual hue values, then you can recombine those in the shader pretty cheaply, and the hue texture can be like 1/4th or more the size and still look good when recombined, then you can have up to 16 color variants with near pixel control for the price of one
you lose a bit of fidelity, but unless you pixel !@#$ it, you can't tell 🙂
I work almost entirely in 2d
I've mostly been doing atlassed low poly stuff. One texture with square colors. But recently I've been trying my hand at handpainting.
how do i open fbx in blender?
just Import it
ascii
lol

used the preview exporter changed to binary and imported this is how it looks
@limber field
rigged assets are a whole 'nother story, where did you get the file?
there just might be some steps to importing an fbx into blender
kinda wanted to check her
some parameters, etc
not familiar with blender, but maybe the orientation of it is different and you'll have to configure blender to work with it
I think the blender looks better, at least for a monster 😄
all you have to have is the joint order shift 1 and you can get some sweet monstrosities
i tried another model it worked
for some reason t hat model screwed
this is why i like 2D
get darn png or jpeg and done
🙂
ok it worked
i had to convert it to obj
easy fix
no texture or materials on it though
always something 🙂
Hi guys i'm developing a 3d mobile game and i am working with a designer who is asking me a question that i can't really answer. He is designing me a scene with a lava floor that moves and asks the following question: I have a question.
To be smart about the materials, I think I would be better to make the map be a shader in engine but I don't know if that would be a good use of resources. in that way I would use a shader as an smart material, with masks and do the geometry of the map. and the textures for the shader, That way the floor can have smaller textures, but I am not sure.
How can I make a character fit something like a car seat? When I make my character and place him on my car seat to drive or something, his legs are too short
make a different model visible when in the car then when he gets out make that model not visible
@leaden garden
only take some if statements and some hard work
Hello, I am a computer-assisted animator student and I do a lot of different drawings. If you are going to make a game I can give you my drawings for free contact: discord
This is my drawing
Somehow, whenever I add an asset to Unity, the game's camera locks on it and out of the character
Wonder if anyone here knows why
Are you importing your assets with cameras?
Wait
Yeah, I am. Lemme try to remove it and add it again.
It worked! Thank you, @glacial vector
some1 help me pls
when i try to export my package as a obj and put it in a project it repeat the name 3 times, its possible to change for it be like the fbx version?
@eager mist show us the entire model. I have no idea whats going on there.
@lucid dust why not export as FBX?
@spark vigil yeah it only knows to import the mesh, it has no idea where the assigned texture is in your project and how it related to the imported mesh. Has to be manually made in the material tab in blender 🙂
ohk
i got sdome assets from asset store
kind of wanted to check those models to inspect
yeah I recognize them nice find, enjoy!
I love taking models and remaking them in my own texture style, saves time and gets me to the fun part of design lol.
i hope rifle has beatiful
where would Matt Damon be in that image?
Hello, so I've literally just started with materials and uv mapping, and I have like an example model
I want to edit the UV map because it's a bit low res and outdated
Are there rules I should follow?
For example, it has like shading on it? When I'd probably like to do materials for it instead?
Or what is the relationship between materials and a UV map
pixels are mapped directly to the model via the UV's, so you can't change UV's and still have the existing textures work
you'd have to do a texture transfer from one model to another with different uvs
if you don't want to use any textures, just shading you don't really need proper UVs, though it would help to have regional color changes on the model if it shares the same material (or you'd break it up into several materials for the different colored parts)
So essentially, if you have a UV map, you're stuck with one material the whole thing uses basically?
Is it better to just have different materials for different parts of my robot, then assign those materials to faces or something?
what is your final goal here?
you generally want as few materials as possible for performance
so if you can get what you want with a single material on the asset that's better
I seeee
I guess overall, to learn how it works
But I want to make the robot shiny in some places, matte in others
And then obviously transfer it to Unity to play around with how it would look there too
you generally want as few materials as possible for performance
this is understandable though
you can paint smoothness and metalness maps, what render pipeline are you using? @modest imp
https://gyazo.com/4cae9cbb3e866414981bda4bb153a96c
how do i join this or should i just redo this hand

every time i try to fill or merge vertices it leaves a hard black crease and i assume taht due to the difference in polys
vertex normals actually, just re-smooth the normals
thank yoU!

sorry to ask again how do i smooth normals :' )
i checked google it wasnt super helpful
oh nvm i found it
cool, are you using Blender?
you can paint smoothness and metalness maps, what render pipeline are you using? @modest imp
@limber field apologies, I went to sleep since Im in the UK, but I've just moved onto URP. Essentially, this my first project where I've really exploring these aspects such as lighting and materials
If I paint smoothness and metalness maps, won't it look "baked"?
hello this is my new weapon with uv map I hope it has been good
@limber quest looks great but the lighting seems a bit wonky
@junior stone you are right my friend
I tried to light it with sunlight
@junior stone
Which lighting setting do you think I should use?
I would say 3 point lighting
well i am trying
@modest imp unsure what you mean by baked
basically it'll just make those pixels be shinier or metallic or both, using URP the standard lit shader has those options
@limber quest looks like your vert normals are not setup right
I realized I was already struggling with it but thanks for your clean it up
yeah, those can be hard, if you are in blender you can do the harden edge that usually has a degree where it will harden the edges (do a soften before)
@modest imp unsure what you mean by baked
@limber field surely if there's like darker spots on a uv map, those places are predisposed to be darker in any lighting?
Unless I'm misunderstanding what else a uv map does
well I think we are getting terms crossed, UV mapping has no bearing on dark/light unless the textures you apply to the model are mapped that way as the texture is what uses to UV's to know where on the model to be placed
what do your UV's look like on your model, is it what you showed in that texture?
all you should do is use the standard lit URP material, and paint the textures for the different parts of the shader
this one, as you can see you can give a texture that is a metallic greyscale, where white = metal and black = non-metal, and then put the gloss/smoothness map in the alpha of that same texture, where white = smooth and black = matte
what do your UV's look like on your model, is it what you showed in that texture?
@limber field Yeah they look like this, I'm was thinking that surely it's like "baked" shininess and shadows in there that'd make it look weird?
yeah, that texturing is to fake it
Ahhh okay cool, so I don't want this
but you can use that as a base, paint some flatter colors, make a metallic and smoothness map and it'd look cool
Okay I see
well you'll keep the UV's just paint some textures
I think something just clicked in my head
UV refers to the actual model unwrapped
And the texture is the image on it
... sorry LOOOL
Okay okay
hah
Yeah so, I can probably make the texture on there flat colour, and then I can use materials properly
Apologies, I'm super new to this stuff
yeah, experiment with some texturing values for the metallic/smoothness, replace the diffuse/basecolor with just some flat colors ,and see what you get
you have a normal map?
No?
Is that for like, roughness, where you have the noise for it?
Ahh I see, I just googled some
well unity does 'smoothness' which is opposite 🙂
roughness is 0 = shiny, 1 = matte, where smoothness is 0 = matte, 1 = shiny
how do I setup the scene so my canvas is drawn "ontop" of a 3d volume/area?
I seee
Well thank you for your help, rocinante, I think I understand it all a lot better now
I'm gonna work on this texture then
Since this robot looks like its from 2007 with the fake lighting
good luck @modest imp
@modest imp Specifically, UV map is just two extra coordinates attached to each vertex. So you have x,y,z position in space, then u,v texture position.
Where would i look if im wanting to get some folded clothes? like the ones you'd find in a draw or wardrobe
@ me if you know please
i would absolutely sit on this my ass would be in heaven
😂😂 heaven might split open, there’s no cross section between the legs 🤫
@limber quest what do u model in?
weapon,car,tower,etc
what program do u use lol
you use three 3D apps?
you use one for modelling, one for other stuff?
@limber quest that gun looks good, though it seems like you still have issues with your normals, or you might want to harden with a better angle, or look into face weighted normals if you want to do such low poly
I'm trying to fix it, but it doesn't work, it is going out somewhere. Can you help me? @limber field
Can I show tomorrow, I need to sleep now I will go to class tomorrow my brother is a game maker so I am taking lessons @limber field
sure
not bad @muted fjord , what level of realism are you after with this asset?
not too much
How to I keep a canvas "on top" of everything else in a 3d scene?
render it with a different camera
@fluid oak so the first camera (for the 3D scene) renders to texture, which is dislayed as part of the canvas for the 2nd camera?
Created a bunch of low poly guns for practice
those look sick
Thanks
Dunno if this is the right place, but can anyone guess why this is happening? I'm implementing naive surface nets, so the mesh is generated at runtime. The little blank squares on the left and bottom halves have their faces flipped the other direction, and lighting seems to be super wierd
The grid like blank lines are intentional, sort of
If I set the material to not cull back faces it looks like this. Again, super wierd lighting
Are you setting tangents/normals?
I fixed the super weird lighting, it was a normals issue
The holes in the middle is still a thing for some reason
Its probably a math problem
How exactly does unity determine which faces are front and which are back?
wip
@tight meadow Its based on the order of the triangles. Set it in your modeling software.
Blender question! I have a lovely quad with equidistant edges like this:
I want to shift the edges so that they are closer together towards one end of the mesh, and further apart at the other edge. Is there some name for that and/or easy way to accomplish it?
@limber quest what does the gun look in a with just normal grey( matcap) shading?
i think ur normals are all outta wack
like show me in blenders view port on "solid"
@coral hemlock i dont really understand ur question, can u draw it out ?
something like this?
does this help?
imagine they are actually even on the left
but what i want is like 'faces of incrementally ascending size, based on how far along the mesh they are', i guess?
I can almost do it with proportional editing, but i want the overall length to stay the same
i guess i could just do that, make it much longer, and then just scale it back down to size but it feels imprecise
yeah using proportional editing("O") is ur best bet, if u really wanted this done it should be by hand, and if u want both side to be consistent, (if were trying to do this with top and bottom) then just throw a mirror modifier on it
ok thanks, i'll keep at it
I am studying computer-aided design and animators, I do lots of drawings and train it if you need a drawing I can give it for free
@limber quest the LP is a little to High poly, for something like this thats so small and used quite often, u wanna be careful of poly count
the SubD model looks nice though
🙂
thanks
@coral hemlock what is your end result? As it is right now, there is no difference between those two planes.
@errant plover you mean in the drawing? i didn't do a great job representing, but on the left the edges are evenly spaced, whereas on the right they become progressively closer together
And why?
I'm deforming based on a curve and need more geometry towards one end since it curves more
Im so confused. You are trying to make a curve from a plane?
just finished some new crates (the cylinder shaped ones)
https://i.imgur.com/awo9vao.png
@coral hemlock, does blender have a soft select?
maya has this, if you select the edge where you want them to come closer like this
you can then scale and get close to what you want
it's proportional edit in blender, hit the o hotkey
@limber field I can do a proportional scale, but it moves the 'edges' as well, rather than scaling within them.
it's not really clear to me what's happening in maya there -- what's selected?
the left two points are selected in maya
then you expand the radius of the selection
yeah sounds similar to proportional edit. I can probably record something, hang on
@half citrus what are you modelling and texturing in?
with proportional edit, first scale it up, and then select the end point, hit o, and mousewheel up until to make the area of effect bigger, and then slide it back in place
at least that's what I would do O.o
or download Maya 😛
@half citrus yeah that approach roughly works but doesn't feel very precise
eh, that's what I'm used to, blender is always just "good enough" 😄
use Houdini and make the mesh procedurally, then after that you can make the big bux in the graphics industry!
yeah, I feel like if I knew anything about blender scripting it would probably be trivial to use math to space out some edges along a plane like that
but it doesn't really matter, it just felt like the sort of thing that might have a name i didn't know, or some clever method i was missing
(thanks for the help btw) 👍
anyone using blender here?
i wanted to know how can i have my model exported as png transparent image
to be used as 2D game asset
in 2D image editiing software i just use export as png and check transparent
how do i same thing in blender?
if you go into your render settings, and go to film and check the box for transparent
and make sure you're exporting with the alpha channel
here's a video showing how to do it
https://www.youtube.com/watch?v=kFfWX7aFsms
In this video tutorial, I will show you how to render a transparent background PNG file using Blender 2.8.
Understanding how to render transparent background PNG files in Blender is useful when you want to import your content into other applications for post-production.
Subs...
the title of that video was unclear
to me it meanth how do i use transparent images in blender
thanks 🙂
now i can use my blender assets as 2D props
thanks @half citrus
meh
looks like you have some duped faces on the back of the gun top
looks good, I'd slide furniture off of perfect angles to make it look more natural, but that's just me
also, lighting can really improve the look of models. this looks like just a single point in the middle of the room
ok
you should take larger images, but that looks pretty good, just remember to dive deeper into materials and add a good amount of imperfections, especially on things that get a lot of traffic
if you are going to use the HDRP, do you need to select that template from the beginning or can you start with just selecting '3D'
from the splash screen
template or add the package yourself through the package manager
thanks!
i modelled this door but when I import it, the side faces go missing, as you can see
does anybody have a suggestion?
probably flipped, you see them when you rotate around?
is there a way to create a texture for a oddly shaped item, so that the texture wraps around it and stuff, sort of like 6 sides of a cube, instead of just 1 material and it repeating all over the object in small areas
for instance, minecraft armor, like how do i make a material like that for an object
in the way its mapped to 1 png
those are what UVs are for
i see, ty, never really messed with any of the material settings so i have no clue what im doing or what i need to do, so ty
hello
Hi


Does anyone know how it is possible that my normal map looks good in the editor but when you play the game it is inverted all of a sudden?
Y is correctly inverted as you can see in editor (Top picture)
I can't figure out why it's behaving like this. And on Google they only talk about the normal maps when importing, OpenGL and DirectX
Which i kept into account when importing it
i just think it's something with game settings so i turned off Vertex optimization off and mesh generation as well in Player settings. But no luck
Anyone?
I did a Mirror test with this with simple cubes, but test came out fine as well and all normals looked good, i really am stuck about how this is possible and what will fix it.
Today i played with the import settings of my model, switched to culculated, iport Mikktspace etc. But none of them has the effect on it
I also duplicated the texture and set the normal to -1 to and applied it to the inverted objects, strangely it doesnt apply it
btw so what u guys do in modelling software?
just make the models and bring to unity
after that use unity shaders and textures
also the materials inside unity?
Yes
Unity has no textures
Photoshop or a texture application
And you also create the UV's of the model/asset in your 3D Application
Materials and Shaders are mostly done in Unity
Ray I see the difference in your images but I'm not so sure the normal map is the issue. The normal map at least seems the same to me. Have you done a test without the normal map applied?
wish all these 3D formats settles down
its like 2D image formats back then
so basically m wasting my time texturing and shading in blender if I plan to use it in unity
how about the animations?
best inside unity again?
oh well too much work
back to 2D
@glacial vector, Well, the effect that I'm getting is that the direction of the normals are inverted on playMode. The model looks good without the normal map, but the details come with the normal map, so you won't see the difference if you don't apply it to the model.
@spark vigil Animations are also done in a 3D package and imported into unity to use with the Animation/Animator
However you can download pre-made animations at Mixamo.com to use in Unity. If you upload your model in there there's also a possibility to convert a rig for your character
are all the 3D things fighting with each other or something?
Not sure what you mean....?
they should just settle down like SI
They're just different tools, competition is healthy
yeah different tools
but for 2D any tool
there is png export done
now we can use anywhere we like no headache
From your screenshots @thorn juniper you can see a difference, but the difference is the light direction, not the normal format. If the normals were inverted it would look liek it was going outwards
wish that was the case with 3D too