#🔀┃art-asset-workflow
1 messages · Page 22 of 1
Potentially, but what do you mean by "break the way it looks"
at 100 vs at 1


I would guess you also have to reduce Tessellation Step Distance to compensate for the different scale
Or at least the scale should be different with such a big difference in PPU
But it could also be a bug
The advanced tessellation settings may also help
uhhhhhh i think its better if i use regular sprites instead maybe
which leads me to my other question, how do the units of measurement even work?
nvm i think i got it
Unit is 1 metre, but in 2D it's not quite so relevant
Going too small or big away from that scale can cause issues and makes the physics weird
no im not going to sell a game im trying to learn game making with unity and a map is nice?
not decompiling problems...... i downloaded this map from a website with the model file and its textures
holy shit the amount of assumptions and conclusions the people on this community jump to is actually insane
Source maps are not in model and texture form unless they've been decompiled
This was 3 days ago, drop it will you?
Consider that someone trying to decompile content from other games into Unity with nearly the same issues is a weekly occurrence here so this reaction isn't coming out of nowhere
As opposed to insulting people, which is a very sane reaction. There have been no assumptions, except by you. You keep digging yourself in deeper. And if you want to learn there are so many free and legal sources of map assets that this feels like a strange hill to die on. Most everyone here is eager to help.
Hey all, I bet this is pretty dumb but I've looked at a few tutorials. I have a 1x1x1 cube in blender (it's scale is 1x1x1), unit scale is set to 1 meter, FBX export scale set to 1.0, Apply Scalings: FBX All, Apply Transform is checked. When I import it in the import settings scale is 1 but when I put the mesh into my scene it's 100x the scale. What am I missing here?
I unchecked convert units in unity import settings for the cube, now it's 2x2x2
So.. almost there
So reimport didn't work for some reason, I had to delete it, re-import it, disable convert units and then it was fine
What a pain
https://polynook.com/learn/how-to-export-models-from-blender-to-unity this article explains how to prevent the weird transforms when exporting, but it's better to use some custom export script or addon to skip that hassle
Blender's default cube is 2x2x2 in case that's the one you're using
@misty lantern I got it working. I'll look into a custom script, that's a good idea.
hey guys, i have this 3d model of a gun and when i tried to import it into unity it had these holes in it. i've already tried to recalculate the normals in blender but its still the same, does anyone know why this happens?

show the face orientation mode in blender
hello, i wanted to ask, if i am scaling up images using an external program, do i need to manually scale up all of the sprites as well?
you can change pixels per unit on your sprites
Am I doing this right? I mean it seems to be working but doesn't feel right if you get what I mean
That depends what you suppose you are doing exactly
Any context at all would help, like how did the issue appear in the first place
well I dragged the city in and it was all pink, I change to the DummyPipeline and the textures work 🤷
Since it looks like your materials are incompatible with your project's render pipeline, you must run the material converter
how do i do that pls
thank you
for this would it be Material Upgrade?
Yes
awesome ty
what is going to be the best way to add collision to everything here? it's 1 model but the building's.ect are children of the model, there are things like stairs n shit that I wanna moddel correctly to work, would it be easiest to just add box colliders to everything and tilt them.ect for the stairs? I really don't know what to do here

i am new to game dev but i think having hundreds of unused gameobjects to be initialized with collider component might be waste of memory
if its for mobile, it prob not a good idea to put everything a collider
but honestly am not sure, am new to game dev and not exactly aware of optimizations
It's for PC and consoles, and optimisation will come later. This is gonna be a GTA style game and so I need all these colliders for free roam
it looked fine in blender now its elbows look crooked

i see
goodluck
Thank you
guys
why the f is Occludee Static missing in my dropdown? I cant find anything on google
tried layout reset, deleted preferences, no fix ._.

I dont know how to import my character right
so i would like a little help on that
pls
Can you be even slightly more specific?
so i made a character. its completly naked like no clothes. and i rigged and animated it. and now i want to import different sets of clothes and so on
How do I fix these trees? they are meant to be properly 3D but for some reason they r like this and only work with the DummyPipeline

IDK if this is the right spot for it, but does anyone have a good resource or guide on importing rigify rigs with animations into Unity?
What do you think the easiest art/asset form to create from scratch is? Meaning pixel art (specific size), 3d modeling (low poly etc), vector cut out, and whatever else? Keeping in mind things like animating, texturing, etc if applicable.
Hi, I have a disc animation that is currently in Blender as shader and geo nodes logic. How I should set up/prepare the model so I can recreate in Unity?
dummypipeline?
Yea the test renderer
The trees should be using URP shaders like everything else in your project, but you need to set the material settings for transparency or for alpha clipping properly
Try to forget about the dummy pipeline shaders
everything uses dummy pipeline otherwise it's just pink
Well, what render pipeline are you actually using precisely
Are you 100% sure Universal Render Pipeline/Lit shader does not work when used on a material


That seems to be working perfectly well
Your material here is just pure white
Those are not Terrain component's trees so SpeedTree shaders are not applicable
The material likely appears white since there's no texture, color or any other properties defined in it
And why you're struggling with the trees there is likely because you skipped using the material converter earlier
ahhh I see now thank you! I still wonder why it's 2D leaves tho

It's no more or less 2D that it's been previously
But like I said transparency or alpha clipping must be set in the shader for it to appear as intended
how do I do that?
The material asset has properties by those names
You only need one of them, not both
I recommend you practice the basics of making materials
and the basics of pretty much everything else Unity as well first
!learn has tutorials involving almost every topic
:teacher: Unity Learn ↗
Over 750 hours of free live and on-demand learning content for all levels of experience!
now they have gone white again 😭 I didn't even change anything
I doubt that second part
It's very easy to miss what's happening or what you're doing when you're totally unfamiliar with something
Does anyone have any good resources for learning how to actually create detailed levels? I've always been a programmer but I'm looking to learn more about level design from a conceptual level but also how you figure out how to lay out a map. Like how do people create a house and fill it with detailed elements effectively
How can I make a waterfall with ps2 graphics?
The most precise answer I can give to your question is shaders and particles. There's no such thing as ps2 graphics, be more specific. Show and example of the effect you want to replicate. We don't even know if you are talking about 2d or 3d game. We are not mindreaders
There must be whole courses for that, like for all the other disciplines of game development
Level designers must learn the gameplay and art aspects both, and to then use them seamlessly together
For how to make scenes look visually appealing they utilize concept art and real life imagery a lot as reference
I'm making a waterfall and a river using scrolling texture, I followed a tutorial and this is the shader I have

The problem is the tiling is not working and the texture is being too affected to the bloom

it is almost perfect for my purpose, I just need to adjust this two things
This is just bloom settings being set incorrect.
so if figured one thing out:
when i go to the Properties window, there i can see all options in the Tag Dropwdown Menu
but I unfortunately still dont know why its not appearing in the normal Inspector Window
I tested other unity versions, its working fine over there. But not in Unity 6.0.23f1


hey there, does anyone have any idea why it's as if my submit buttons area of effect is much larger than the button ? If i click any of the buttons closest to the submit button, it registers if i click the submit, even if i don't

hi someone here?
i have problem with exporting from unity to blender
This is how looks in blender after export

and here its this exported file from unity

What is this red and blue mess about? Do you have overlapping parts there and/or flipped normals?
huhu
Nah This shader is also beautiful;))
#games
#viralvideo#Trending #Explore #ForYou #DailyVlog #LifeStyle #ContentCreator #YouTubeLife #Unity3D #UnityGameDev #UnityTutorial #MadeWithUnity #LearnUnity #GameDevelopment #IndieGame #GameDesign #IndieDev #GameDevTips #HowToMakeAGame #GameProgramming #GameCoding #GameDevJourney #MakeYourOwnGame #Viral...
Helpppp me rate because my friend criticized too much  ;(((
;(((
I don't know how to improve ;((
broken normals this red and blue its the face orientation
looks like i'm looking at a bigfoot sighting, i have no idea what im looking at 🤣
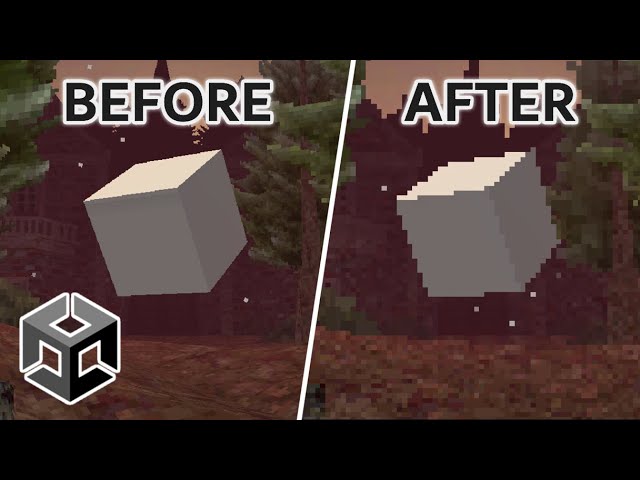
I just tried to simulate that pixel effect huhu🥲🥲🥲🥲🥲🥲🥲🥲🥲🥲🥲🥲🥲🥲🥲🥲🥲🥲🥲🥲🥲🥲
you can add some text or voice to explain what this video is about? if you're showcasing your shader tutorial then you can explain that otherwise people wont know what this is, maybe?
Nah:)))))
Thank youuu
Beacause of this is my first time that i started making video
This is not the place for promoting online content, nor for feedback
just recalculate the normals in blender then
Not works
you can't recalculate the normals in blender via edit mode -> selecting the faces -> ALT + N -> Recalculate Outside/Inside?
If not then do you have any overlapping faces on the mesh like AleksiH said?
Probably overlapping geometry as well as AleksiH pointed out
Possibly you're exporting multiple meshes at once some of which are hidden in blender
look
before


after recalculate
Why does my model look different in blender as opposed to unity? The mesh of the head looks different. The first image is from blender, and the second image is from unity


check if you have overlapping geometry

after recalculating normals? because that is flipped normals, Also check to make sure you do not have overlapping geometry in blender.
this photo after recalculate
show your entire blender screen whilst the object is selected
perhaps you have modifiers active in blender that aren't being applied on export?
Recalculate normals doesn't work on non-manifold meshes which that one seems to be, so you have to flip them manually
It'll be in vain though if you have overlapping geometry
ah I didn't know that it didn't work on non-manifold geometry, good to know
wait
i have 2 materials

first material

after dell
2nd material

after dell

I'm unsure what the expected outcome was, it looks like you just deleted the selected vertices
yes
why 🤔
Also you would have to flip the normals manually for non-manifold meshes like spazi said
so i added my street texture, but when i make the object bigger, the texture goes "censored"/bad


@neon wyvern Has nothing to do with this channel. Use #1180170818983051344 if you want to post your progress, not meme videos.
Usually when a ground or street mesh like that is created, that's done in a modeling program where the UVs can be calculated so there's no stretch for its size or shape
ProBuilder can do that within Unity in a pinch
An alternative is to use a planar (or triplanar) projection shader that doesn't rely on UVs but instead the texture is mapped in world space
Another alternative still (that I'd only recommend for quick and dirty use) is to make a new material and adjust its Tiling properties to be the inverse of the scale of the mesh, so the mesh scale is compensated for
wow, thx for the long and detailed message, I will try that :D And have a great day/night (it's 2:11am where I am :P)
I'm having trouble making these textures look more natural. I'm making a VR game in very early development, and just having trouble of what textures I can use for a Comfortable-looking room. Any suggestions or assets would be much appreciated

(very low poly game btw, and only for floor, walls, and ceiling)
part of the issue is the lighting
the roof is supposed to look like that for now
adding a reflection probe to avoid having your environment reflect the default skybox will make it feel a bit more natural
I have no idea what any of that is tbh
well
your scene, at the moment, has a skybox
which is why the walls look a bit blue or washed out
mhm
if you add a reflection probe, you can have the reflections in your environment act a bit more naturally. It'll get rid of the washed-out look.
so where can I add it
right in the middle of the room
it's under the lights category in the menu for adding gameobjects to your scene
in regards to textures, fixing the UV stretching on the back wall might help. Making a room look comfortable with stone walls isn't easy, so you'll probably want to look into postprocessing so you can use color grading to make it feel a bit warmer and cozier
Ok thank you. The reflection probe worked really well, thank you.
glad to hear it
im using text mesh pro and got working 5 languages, but in russian i got this error in all my mtext files, idk why, change the font but same problem

Hey i recently bought a Concert Stage that was created in Autodesk 3ds Max, it came in fbx format which i wanted to import into unity but when i do its kinda just looking like this
instead of whats it meant to look like. So was wondering if there is something i need to do to fix it and if i could get any help with that


@bitter sapphire tough to say conclusively without looking at the asset, but it's probably a matter of getting the materials/textures/shaders set up. the geometry looks OK.
Why do my animations import as separate sprites?
What does that mean exactly
What kind of animations are you importing and how do they appear separate

Right, and in what form or file did the animations exist before they were imported into unity
PNGs, should I do something else?
No, but if they were separate png files Unity can only assume you're importing them as separate sprites rather than an "animation"
It doesn't really matter though
Clogging files and file structure
¯_(ツ)_/¯
Put them in a folder, or compile into a sprite sheet first and then import and slice as "multiple" type sprite
Hello, I'm having an issue where I've attached a video player to a quad to play a webm VP8 video, but I'm unable to change the playback speed. Even when I manually set the video player's playback speed in the inspector to, say, 5 prior to playing, the playback speed in the inspector shows 5 but the video is obviously not playing at 5 times speed visually. When I changed the video clip to an mp4, however, the playback speed was reflected.
Is this a bug or is it something on my end?
I've attached screenshots of my quad's inspector, but please let me know if additional information is needed.
I appreciate any help🙏


hello yall I got an issue. I have a Mesh that i want to apply the lightmaps into it. I am using URP, and for the mesh i applied the shader URP > Lit. However when i attach the lightmap texture in the emission slot, it kinda looks weird like in the image below and its not using it correctly. Can someone please help me with this? Thanks :). (Sorry if this is the wrong Channel)

I think this goes here
Im trying to make something like this:

How do they work?
from my knowledge, you need X and Y/Z axis split to make these
here ive split the X axis into 14 slices

is that too big?
or is it too little?
How can I make this kind of blue and green texture, like, with this lighting and darker areas (idk the name of this effect)?

Looks like voronoi noise

I’m sure there’s something like that in photoshop, gimp and others
Hi all! I've been looking high and low for any tips on this, since alot of discussion is Blender to Unity as Opposed to Unity to Blender
Alright so! Trying to port a model from unity (left) to blender (right), whenever I do the mesh gets all warped away from the bones. It's still CONNECTED to them, but the actual mesh gets warped.
It is seperate meshes (the head, face mask, for example) if it helps
Is the issue that I'm trying to port it outright from Unity to Blender? Or is it just something on Blenders end I'm forgetting?


Can you just use the source model file?
Mainly trying to port it to fbx, but could I just get the mesh itself from the model file
What format is it now if not fbx
.meta
That's not the model asset, meta files contain only auxiliary data like import settings an UID
i brought in an fbx

why do the shadows look weird
is looks normal heres but idk how do make shadows indoor

you could probably turn on Two-Sided Shadows under the Cast Shadows property in the mesh renderer of that object
https://docs.unity3d.com/Manual/class-MeshRenderer.html

bump so this doesnt get buried
well, presumably, you'd need one slice for each frame
so you'd need 64 slices here
64 slices doesnt seem TOO bad
but to clarify
is the total panel/canvas size my desired resolution? or a square that fits all the volume slices into it? (like if 1000x1000 pixels with 16 frames, its 4000x4000 pixels, for 4 across and 4 down?)
also wym one slice for each frame?
that example you showed has 64 separate tiles
8 by 8
so that'd be 64 slices of the cloud
oh thats what u meant
and if you want to create a 1024x1024 texture with 8 rows and 8 columns, then each image ought to be 128x128 pixels
I thought by frame it was like animation frames and I thought you misunderstood or i was WAY in over my head
kk
clouds will still look good right?
try it and see!
Im pretty new to shader graphs and this in general, so sorry if I make stupid questions
that works, once I get it set-up I can just change the render resolution
you can render one slice and see how it looks
I presume you're creating a "puff of smoke" particle effect here?
trying to make clouds for my game
(flight game)
trying to have them volumetric and raymarched
theyre going to be BIG (at least 10-100 the size of the player's plane), so im thinking a high res might be needed
ah, so this is going to be turned into a 3D texture?
yea
trying not to use houdini
since I dont wanna shell out money
for now ill try 64x 128x128
ideally, you'll script this in Blender so that you can punch in any number of slices
(and changing the render resolution is trivial, of course)
Guys I need help, I'm trying to begin creating a weapon system. So far Ive created a model in blender with working animations, my camera sits just infront of the models eyes, perspective looks great. I now need to figure out how to lineup the weapons sight with the camera's center, and make the model somehow adjust to the gun position, as well as make the gun model fire a bullet in a path towards the center of the camera when hipfiring. Any tips?
Im pretty new to blender and animations, and I have no idea where to start with the animations for different weapons
Im too stupid for that
ill just change the transform size
and copy
like I can manually put down a multiple
snap to grid
change grid to half
move all
repreat
till 64
nvm
this is TELEPORTING everywhere
also should there be lighting or no?
and how?
wat a second
I just
put an array
on a cube
making it have 64 slices
spanning the volume

im too scared to apply it
so ima just let it sit overnight while I sleep
(actually
ima turn off my pc but screenshot incase its gone


Hi, does Unity support animation Actions from a direct Blender import? Say I have a rigged model with 3 actions animated in Blender, and I put that .blend file directly into Unity, is there a way for me to access those animation clips in Unity? When I try, I just get this

Hi! Im not sure if its the right place for my question but maybe I'll get any result.
Iam working on a 2D Point and Click Adventure. It should look hand drawn with a background like paper. The problem is, I have no clue how I can achiev it, that objects that might move or can be picked up, have the background but not the other textures in the scene, I put a screenshot in here for example.
To be clear, instead of coloring every object in my game, I just want the background texture in form of the paper look to be shown, not strokes there which are part of the nest.
I aplogozie for my english, im still learing. I hope Iam as clear as possible that anyone could maybe help me out.
King regards!
Note: ive also tried to cut out the paper texture and inserted it which works but the item then can just be at a specific place.

I would probably have two sprites for each object, one for the outlines onle and one for the fill with an opaque, depth only shader.
kk so now what do i do
im wondering how I can image that slice
just make the camera distance plane size?
and manually move it 64 times?
or is there an auto way
ofc its B&W render mode
but should I TORCH the volume with a light or no?
Wait do I even NEED slices?
if I just make the render distance
the slice distance
I get the same effect...
Lied ^
I dont get the same effect
i dont see anything
im gonna try volume to mesh, and try to slice the mesh up


how do you guys build maps, i've tried doing it in probuilder but it's too hard ig, im literally tired of making maps with probuilder, i've tried doing it with blender but the scale was never right and idk what to do now 🤷♂️
Export blender file to fbx, import, attach animator component to imported model, create an animation controller, select that animation controller as your animation controller through that animator component you made, create your animation logic in the animation controller. You should also be able to just see the clips in the inspector after selecting the imported f x file.
I have a question about how to make the image have a resolution of 480i using a render texture. In this video, the guy who created it uses the target resolution of 256x224, is that right? In this case, wouldn't it be 720x480? https://www.youtube.com/watch?v=WKTZgf7ZDGs
✨ My Links ✨
Discord: https://discord.gg/zMTrPg8ZFB
itch: https://hacktic.itch.io/
Patreon: https://patreon.com/hacktic
🎵 Music 🎵
Music by Purrple Cat
https://purrplecat.com/
Songs:
Birds of a Feather
Business inquiries: hackticdev@outlook.com
@halcyon token Make a #1180170818983051344 if you want feedback. This channel is for intergration help.
Neither would be a precise match, though 244 would be much closer
Hello everyone,
I hope it is okay to ask a question in this channel. 
I'm about to create a point & click adventure game! For this I created a 2D URP Unity Project
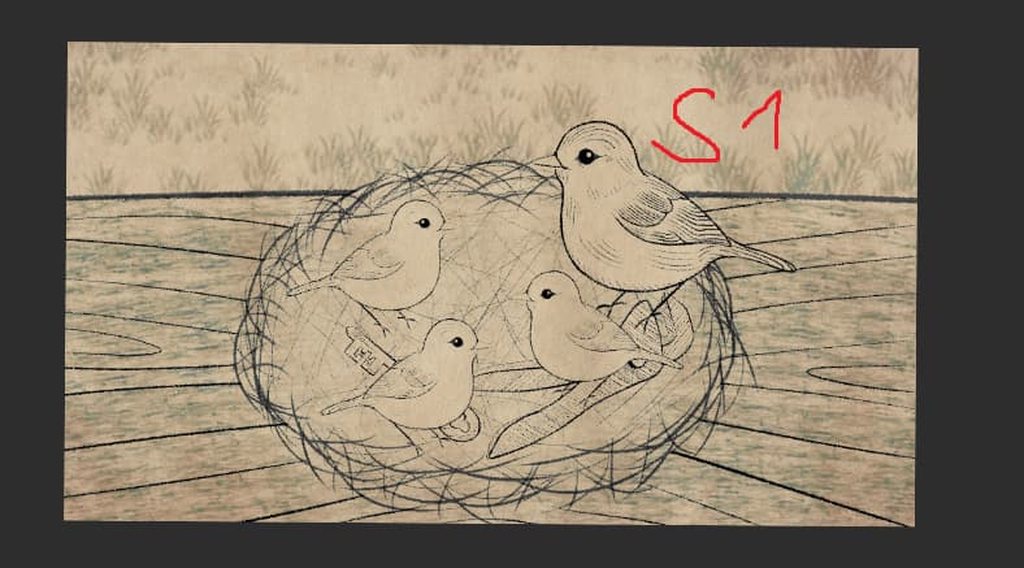
- I have pre-drawn a scene in my drawing program as in screenshot 1 (S1).
- My layers in my artist program are normally like in screenshot 2 (S2) (In this screenshot the background is turned off, normally it is turned on)
- As you can see, my top layer is a background with 66% opacity and the blend mode “Darken”.
I want to bring my drawings into the Unity Engine with the same effect. I want to have the background as the top layer that acts as a “filter” because in my game there are objects that move in the background.
Also, I have items/objects that have a white background to avoid a transparent body (like the birds, if they are not completely white, the nest will show through the body). The filter on top should then color the corresponding objects.
Trying to implement my assets in Unity leads to unsatisfactory results. As an example, you can see screenshot 3 (S3) where I tried to set the background to the highest level and play a bit with the alpha value in the rgba. But you can see that it doesn't look like S1. How can I make this work? I have absolutely no idea how to make this work as I am a Unity beginner.
All Screenshots here since I can't post any screenshots directly: https://imgur.com/a/kXTOQbk
you can make the nest only viewable outside of a sprite mask and then make the birds a mask. This way the nest only draws where the birds arent and the background shows instead
instead of doing whatever white color shenanigans you were talking about
you would need shaders to do that
i am guessing it looks different because there is no blend mode darken in unity like there is in photoshop?
can you bake that into the images instead?
Mh... I could try this out, didn't think about that, thanks. Will keep you updated
I also will try this out, thank you so much
Did you look into the option I mentioned last time you asked?
Which option do you mean? I can't remember that you quote me 😅
There are a couple good options; the easiest would be to have the background added as an overlay and just have all the sprites have solid white bodies.
Why is this object invisible? and I can't see it but I can when I import to Blender with .FBX exporter and how would I fix it?


My skinned mesh appears invisible from reimporting from blender, can anyone help me?

Yesterday I figured something out... I have a background with a paper effect/filter or whatever you want to call it. And I thought that maybe it would be better to overlay the effect. So I have a background with the color on layer 1 as an example and the paper effect is transparent and on layer 2. So I can give my objects a white body, color it like the background in Unity and have the paper effect and no problems moving it.
At a glance the first material slot has no material
That's not the issue
it normally has none there

Hi everyone, I have draw a character in Krita with a size of 4096x4096, and imported to unity. However when the screen resolution in game view is 1920x1080 it’s blurry but when it’s on 4k it looks okay. Is there a way to make the sprite look clean in 1920x1080 like it does in 4k?

Can someone explain how to use rigging/ IK, or point me to some resources on how to use the model rigging system for adding items to a player model, like IK.
Do you want rigging for 3D or 2D?
3d
There are hundreds of resources for IK and rigging. Depending on whether you are using IK in blender or unity there are still videos for both. There are some great videos by code monkey and other devs. https://www.youtube.com/watch?v=LEwYmFT3xDk&t=101s&pp=ygUNM2QgSUsgcmlnZ2luZw%3D%3D

✅ Get the FULL course here at 80% OFF!! 🌍 https://unitycodemonkey.com/courseultimateoverview.php
👍 Learn how to make BETTER games FASTER by using all the Unity Tools and Features at your disposal!
👇
🌍 Get my Complete Courses! ✅ https://unitycodemonkey.com/courses
👍 Learn to make awesome games step-by-step from start to finish.
🎮 Get my Steam Gam...
Here he gets the player to look at a target with a weapon. this should be a good start
Niceeee, Thankyou so much
Does anybody know how to model a polar bear, witha human build, that works
You could start with a bear and then polarize it
Bro I went there and some other mod said to come here
where do y’all want me to go
I guess you don't make it a habit to read beyond the first sentence?
Which won't do well if people are going to spend time helping you
#1180170818983051344 are for showcasing
hello ! ive been trying to fix this for a couple of hours now, but does anyone know why the eyes keep bugging out here? they look fine on the 3d preview, but something is going on causing them to distort on the actual exported model itself.
PLEASE ping if you have a response !! i finally fixed everything else going on but this is still evading me 😭

full asset list and stuff in case that is needed

now im not best in Unity Yet but from it seems like i have few thinks i asume is problem
- Overlaping UV
- Bad Render of Textures
- Face orietantion
What u could try is make eyes a seperate mesh/asset and just anchor them to the avatar itself other then that im not sure
I’m struggling to settle with workflow / pipeline and artstyle when it comes to texturing for the art in my stylized 3D top down game. I’m hoping anyone of you can help me decide.
I make the 3D-models in Blender, and I consider making high poly versions of my models to be able to utilize them for baking (normals, and possibly other maps as well) onto low poly meshes.
For texturing, I am a fan of the handpainted style, However, my impression is (and please correct me if I’m wrong), that handpainted textures are *mostly *used when only base color texture is utilized for the 3D-models?
My main goal with this game project is to learn as much as I can, including utilizing some graphics / render features that intrigue me and that I want to learn more about for games, such as achieving nice lighting for my scenes in different surroundings. I feel that handpainting and only using base color texture doesn’t align with my goal of learning about the possibilities with lighting the scenes in engine (Unity, URP adaptive probe volumes).
So where my mind is at right now, for texturing:
Basecolor
Normal map I’d bake a normal map from high poly mesh to low poly mesh using Substance painter. Are there any other texture maps that benefit from being baked by a higher poly mesh onto low poly mesh? Ambient Occlussion?
Combined / packed texture map (Metallic/smoothenss and potentially AO)
Packed in different color channels of the same texture image for optimization purposes.
So for the basecolor is where I am considering handpainting. Some questions I have about that is what detail and how much detail makes sense to do handpainting? The other texture maps will help with how the material reacts to light in the scene? At the same time it feels like a waste to only leave it in a 100% solid color. If I add details in the Base color texture, I’m not sure how I should approach adapting the other texture maps to base color detail, is it necessary?
I believe it’s possible to bake curvature (not really sure what that does) and AO to the base color map with Substance painter. Then I wonder, should I do this? If yes, in what order? Bake first and then add manual handpainted details or vice versa? Can I have the baked curvature / AO in basecolor on a separate layer to not interfer too much with handpainted detail?
I would work with the following softwares:
**Blender **for 3d modelling and UV-mapping
Substance painter for texturing / baking normal map, packed metallic/roughness/AO. Possibly baking AO / Curvature to base color.
Procreate / 3D-coat - handpainting base color.
Set up with URP lit material in Unity
I don’t expect anyone to answer all of this, but if you have some suggestions or experience to add for some of the addressed topics I am very grateful to hear your thoughts / suggestions. All the best!
Is it possible to bake my material into a texture? I need to transfer an object to Blender, but due to the nuances of how texture channels work in Blender, my materials look completely different there
Not by default. You'll need to implement it or find an asset/plugin that does it for you. It would probably be easier to get it working in blender and exporting to unity correctly.
You bake color to albedo rgba, metalness map to another rgba, roughness needs to be inverted since unity uses smothness, and you have to put it on alpha channel of your metal texuture, if you dont need metalness map then just make a black texuture and add smothness alpha channel there, normal is the same as everywhere
Also in material settings you can choose from where you want roughness, it can be mrtalness alpha or albedo alpha
I use metalness alpha since i get strange color when baking it on albedo alpha channel, not rly sure how to fix that
Also this is urp experience so it might be something diffrent on built in and hdrp
In Unity, it is displayed correctly, my problem is that Blender works differently, for example, it does not have the same support for color preservation from Specular
So I want to do the opposite, bake the material in Unity into a texture, so that in Blender it will be displayed visually the same (even without gloss and derivative)
I tried to look for such plugins or scripts, but everything I find is for Blender to Unity, not vice versa
I bought this model that has a blend file, obj, fbx, unitypackage, etc

It imports fine into blender but when I import it to unity, it does this

There's presumably either blender-specific rigging in that area, or a blender-specific material that's not able to be imported
you'll have to set up the—presumably, skirt—in Unity
Any crash course I could follow for doing that?
No
So I am importing some models from maya to unity and I can't seem to get the scale correct. It is set to meters in maya and on export but it keeps importing into unity and needing to be set to 0.01 scale or else it is huge. Why is this?
Programs most of the time treat units as either meters or centimeters, but it's not standardized which
Export settings generally let you apply some type of unit scaling
If not, unity's import settings let you specify a scale multiplier
so its fine if it imports at 0.01 as long as the scale is correct?
Practically yes
But you can fix that too
hows that? That is what I am wanting to fix lol
both programs are set in meters and the export/import settings are aswell. there is no reason it should be at 0.01 it should be 1 for scale
I don't use Maya so I don't know the exact settings, I just assume it has some for fbx exporting, probably tutorials too
In Unity if the mesh is too big or small, you can multiply its scale in import settings
If the mesh is the correct size but transform scale is too big or too small, you can likewise multiply the import scale and then reset the transform
Is UModeler X worth purchasing?
I am currently trying to export a model with animations under a rigify rig to Unity as an FBX, but it seems that no matter what I do, there's some parts of the bones that are distorted and not in the right positions. For the example images I posted, the Unity Imported FBX's hair and back arm are stretched or out of place and the jacket's shape is wrong, and I'm really not sure what I can do to fix it. Help would be greatly appreciated.


IDK what it could be, cuz the only other tutorial with similar issues said to delete the stretch to constraint on the arm bones, but there's only a few bones that have them, so I don't think it'd do much
I don't think any of Blender's bone constraints, outside of just parenting, are supported in Unity and Unreal without baking the animations.
this is a model and animation how do i put it in unity

Drag the contents into your asset folder. Drag the model into your scene.
What’s weird is that I do have them baked, but they still end up importing wrong
Do they look correct if you import the baked file back into blender?
Just checked, and apparently not
So presumably an issue with either the baking or with the export
Why can I see the tongue through the head 😭
It has only front faces so i'm not sure why it pops through like that


I'm using Blender 4.3 with the regular .fbx exporter. Idk if this is to do with mesh optimization or what
is this a unity issue or a blender issue?
if its a unity issue, its probably rendering layers or something (i've never had that issue myself on import though)
if its blender
!blender
A supportive community for Blender artists of all levels. Share your work, ask for help, and learn from others! https://discord.com/invite/blender
ended up just having the opaque and transparent stuff on separate materials for now
i don't understand the workflow of exporting shapekey/blendshape animations from blender to unity. i keep facing issues such as - animation exporting only when there is another dummy keyframe animation, that too only upto 70 frames max (fbx). any info/ resource would help!
edit- fixed the 70 frames issue by exporting a dummy cube animation with the scene (fbx)
i can't see the issue but check face orientation (select all verts and press shift N to recalculate normals)
Transparent objects are sorted by their position relative to each other
Transparent geometry is sorted by their vertex ID within a mesh
So only use transparent materials where the geometry necessarily requires semitransparency
One thing that can cause this is that if you're replacing the model file that you've already imported after you changed the animations
Unity has already generated the meta data for the clips and their lengths so the changes would not be reflected in those
You can reimport it to generate new meta data, or modify import settings manually to add the new clips / change the length for existing clips
But only if that's why it's happening in this case
i think that might have been the case, the issue fixed after random troubleshooting and i myself don't know what fixed it. but that's interesting, thanks!
HeyHey, super new to speedtree and ive got a silly question!
Whenever i export using the unity preset, i have some unexpected smoothness/glossiness on my materials, but i cant turn it down? Or rather it seems like this shouldnt be the case as without texture packing this doesnt happen, does this ring any bells for someone? I'll be glad to go into greater detail/provide screenshots if somebody wants :)
could this be due to me exporting in speedtree 10, but unity only providing a "Speedtree8" shader?
i believe the issue was that my packed "extra" texture didnt automatically import in sRGB. Doing so makes the asset look alright, though im unsure why this happened when packing & exporting specifically for Unity and if i might be missing some other material/texture specific fixes i dont know about
Hello !
How can I optimize this building that is in one big mesh and that corresponds to my FPS map?
my building/map is made up of just under 10k vertices, so I suppose that's not really a problem, but it's more for the textures, because I'd like to have a realistic rendering, and I suppose that if I put 4k textures everywhere without doing anything to optimize the whole thing, it's likely to be pretty messy.


I mean, short answer: You can break it into pieces. Especially if you plan to use LODs and culling. Texture wise, for large environments trim sheets and other such tricks can go a really long way to reducing your texture resources.
Thanks for your answer ! I'm going to take a closer look 👍
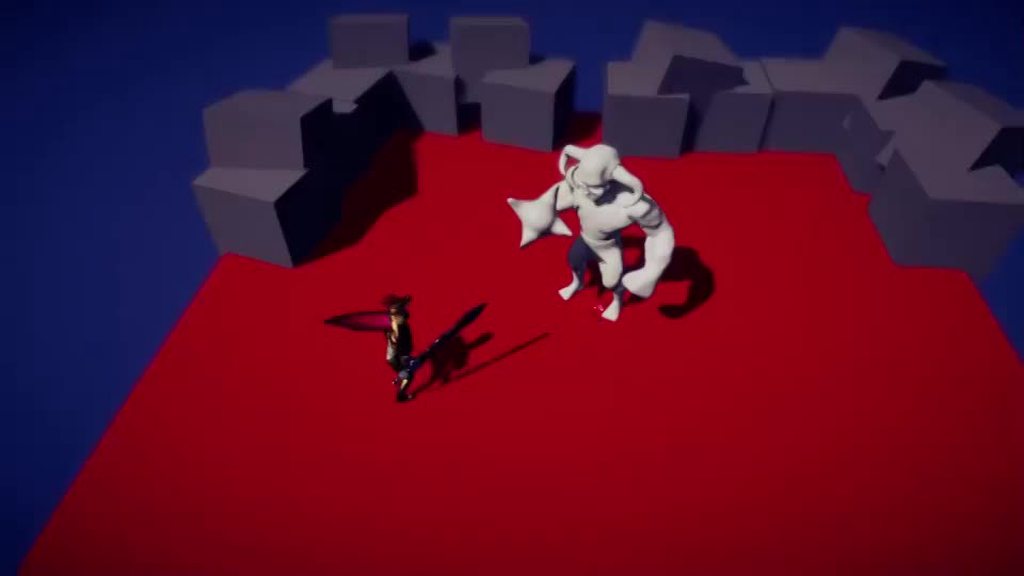
Hey all, i found this and got very intrigued
https://gamelogic.co.za/grids/features/examples-that-ship-with-grids/tiling-a-sphere-with-hexes/
Does anyone know how you could project a 2d tilemap into a sphere like that?
At first i assumed you would do it in post processing but i am not so sure...
Bonus tip, you can use vertex colors to add some slight color variation even if you use repeating textures. Would make it look less flat
but do think this can work well on my building ? because I don't have a lot of vertex ?

It can work but it depends how you want to paint it
You will have to subdivide/knife a face if you need to paint more details in it
But if you have to do that a lot it may have been better to use UV mapped textures instead
so what do you think is the best for optimisation ?
-staying with a low amont of vertex and doing all the texturing and details with textures map
-increase the amount of vertex and use vertex color to make the details
Neither's inherently better
It depends what kind of visuals you aim for which method can better achieve it
And as with all optimization it varies massively between scenes, between projects and between target platforms
Experience can give you an intuitive idea of what's expensive and when, like what platforms can't handle large textures or a lot of vertex data, but even then you have to do optimization separately by measuring what's actually expensive and then ironing out those
Thanks for the explanation ! My goal is to make a game with the best visuals possible, and making it as optimized as possible. As I don't know anything about vertex colors, I will make more research about it, and try to see if it's a good idea or not to use it.
They're just one tool in the toolbox
Like asking if a hammer or a mallet builds a stronger house
Only a very small detail in the whole process, even if the choice might be important at a specific point
I like this way of looking at things, but it's true that I don't want to do things quickly, I've got some game “foundations” that aren't top notch in terms of optimization, and I can't see myself adding even more things to correct in the future. So I'd prefer to get it right from the start
If there is a "getting it right", that's an arbitrary bar you define based on your project's requirements
"Perfectly good enough" no worse than perfect when it comes to asset creation, or any part of game dev really
<@&502884371011731486>
!ban 1120833022883795058 ad spam
 leya_ivy was banned.
not sure if this is the right channel for this, should i be avoiding subdivision surface modifier like this for game models?

when it's applied it turns into a bajillion vertices
a level 6 subdivision is way to much for a game
i get things like this happening at lower values

if you want you can show the number of vertex that your mesh have, so you can have an idea on if is it to much or not
yes so that mean that you're mesh has an issue, and if you increase the number of subdiv, it won't fix the problem but just hide it
weird, originally adding crease to the edges made it look like it fit snugly to the "collar" part of the mesh, now removing the creases didn't ruin that and fixed the other issue
anyway i know this isn't blender help, just wanted to know if i'm going in the wrong direction. thanks!
Hey people, not sure how to phrase it, but does anyone know some good guides for simplistic low-poly skirt rig solutions for blender-unity pipeline?
I don't think cloth simulation would be a good idea here so Im not even considering that option (a mistake?). I've done a stupidly simple setup with 4 skirt bones before for a low-poly character (1000-1500 triangles range including weapons+accessories), but have been wondering if there are examples/strategies/approaches to this stuff, maybe some secret techniques or something, I don't even know.
RN the approach I am ready to follow is to keep simple 4 bone rig and then remove the character's butt/groin so that it doesnt clip through the skirt. The character is for a top-down game so it should be fine.
I know I can't use any complicated bones/constraints setups because they won't be transferred from Blender to Unity (hence why Im looking for the simplest solution possible). Shape keys are transferrable, so I can use those.
I've also been looking through options for physics simulations. I kinda don't want to overcomplicate my models and my game with cloth simulations, especially if I am going to be rendering a shitload of units on screen (which I intend to do) so I am rather skeptical about those. In addition, my searches led me to some stuff called either Physbones or Spring Bones, both of which are paid assets from the asset store? I am hesitant to invest into any stuff like that unless I am 100% I will be able to use it and it there is no simpler way.
What I guess Im trying to ask is, what are basic, in-house solutions for skirt rigs/simulations in Unity? Like, what if I will bake most of the skirt movement into the animations, but I want the fringe to be bouncy and simulated a little bit? Is there some kind of a weight-paint for cloth simulation in Unity?

You should avoid it
A smooth-shaded mesh will often have very little visual difference to a subdivided one, with geometry like this
Details that would stand out are conventially baked to normal maps from the high poly mesh to a low poly
For a case like that, unity cloth is honestly pretty good if you can work with its limitations.
I use Dynabone sometimes, and MagicaCloth2 for some things. there seems to be a built in Cloth Simulation in Unity, but i an not familiar with it
Its main issue is that the ui for it has not been updated in many versions, so it can be a big buggy to work with. The actual simulation works perfectly fine for objects like this though.
If Im not mistaken both are paid assets, right?
they are, yes. Pinballkitty mentions the built in way too. have you googled?
Some parts of this are outdated regarding the cloth component itself but is still perfectly relevant concerning the topology and the weight painting for unity cloth: https://www.polygon-treehouse.com/blog/2017/8/4/howtoponcho

Polygon Treehouse
A few weeks ago we shared a GIF of Lars' amazing physics-driven poncho that you can see above. The response was pretty mega (seems that everyone loves Pom Poms!) and we had multiple requests for a tutorial showing how we set it up in Unity. We're more than happy to help, so this week's blog
One thing different from that article is that unity cloth works fine on skinned meshes now, though I'd still suggest having the cloth bits as a separate submesh just to avoid simulation on a bunch of non cloth that'll just be pinned in place.
Though in one use pretty much the whole body was cloth with no real trouble, the sleeves and poofy pants and the tabard were all simmed. https://img.itch.zone/aW1hZ2UvMjA0MzY4OC8xMjEyODExNy5qcGc=/original/kfRwXF.jpg

Though her hat used a spring bone
Oh jesus christ thank you! I think I saw this tutorial way back in the past but couldnt find it again. You saved me! This will finally help me decide on the approach, because any tutorials I found on the subject are for highly detailed meshes and artstyles. Thanks!
Also, technically... Spring Bone functionality can technically be reproduced, because it's pretty much a script?
Technically, yes, it should be reproducible. IDK if there is a Git that has done if yet though. Paid assets already basically do it
I actually wrote the spring bone script for that, so it is certainly doable 😛
though unity japan has a free one as part of Unity Chan
the code is all commented in japanese but it works fine
vroid also has a version
So I use 'spring bone' as a kinda generic term
Most of my stuff is 2d, so I mostly work with 2d spring bone scripts.
oh I stumbled upon a lot of solutions for VRC stuff (VR Chat)
as if nobody is dealing with cloth outside of that
Ive played with damping/stiffness parameters a bit for now. I'd have to check it with an actual animation with moving legs, but for now it looks like it can get stuck and won't get unstuck. I guess you could make that NOT HAPPEN by tuning the parameters, however it'd be nice if there was a failsafe of sorts? Like... "If X then reset the shape to default" or something
I don't know if its just me, but google search isnt giving useful results, which is weird?
Well, there's a lot of pollution I suppose. And google has turned to shit recently.
Hmm. Don't think AI is helping them in that regard either
Indeed
Of course, unity themselves have largely abandined talking about their own cloth
Ok, I just got on the PC and read that; you could tell they don't give a fuck about updating unity cloth so it doesn't surprise me. It works for now, though. And hopefully they just stick it in a package.
A shame though.
FYI you can turn off "optimal display" on the modifier to see the actual vertices in real time when you go to wireframe mode

It always felt so unfinished
Like, no interpolation option? 
50 tick rate cloth is pretty cronchy at 144+ frames
hey, does anyone have any experience importing 3D models? i'm trying to install this psx forest pack: https://starkcrafts.itch.io/psx-forest-asset-collection-by-starkcrafts, but when I extract the textures it looks like the attached image. any help would be greatly appreciated!


The assigned material has to enable alpha clipping or be transparent
that worked a treat, thanks!
i'm getting some weird behaviour now where there assets don't seem to be properly rendering in every direction. for example the leaves aren't visible from behind. any idea what could be causing that?

here's another image for reference:

Does the material have a "Double-sided" option?
that sorted it, thanks!
Hey people, im having some trouble with a model and textures if anyone can please help me out. I got an asset from Fab (epics asset store) and im trying to import it into my unity project. I have the fbx file and all the textures associated with it and everything was going fine until i got to the hair and eyebrows/eyelashes. In blender there is an option for alpha but in unity i cannot find that option in the material and that is basically what is causing me trouble since I have a texture for alpha/opacity and one for base map. If anone knows how to resolve this please tell me. (I am not very good with texturing so sorry if the solution seems simple)
All of unity's shaders require transparency to be stored in the base texture alpha channel
Probably better to combine them in an image editor or a texture packing tool than to make a new shader that uses a separate alpha texture
Are there any videos that you know of that show you how to do that because I've been looking for a while and haven't found any.
Or I'm just not searching the right thing
On a per-program basis probably
You can apply an image as another image's alpha in most image editors
The result is the same as using a texture packer / channel packer
There's more than one (of varying quality) third party channel packing tools that work within unity's editor interface
And more than one that work as independent applications
It's such a generic task there is no one tutorial for it
Ok makes sense, I'll see if I can find one on gimp which is the editor I use. Thanks for answering
So I combined them and now it looks like this.

how can I make a blob shadow?
A good or bad result?
Does your material have this setting, or similiar

As an art asset a blob shadow could be pretty much any radial gradient or an image of a round shadow
Implementing it to behave like a blob shadow in your render pipeline is something different
Which process do you refer to?
I think there's a better way to do it using projector, I tried but is not working
That sounds very vague
What are you exactly doing and in what render pipeline
Here's the official examples for projectors including blob shadows
Still works in 2022.3. at least
oh thanks, I was looking for that. The standard assets are not avaiable anymore
I mean it could be worse, at least i have the color of the hair now.
ok so I turned it off and it got rid of the foggy look but idk y it has these places where it looks like the hair is just floating around considering that if I do the same thing in blender it works.

Enable "double sided" on the material?
If it's not that, you need to show what it looks like in blender
The double sided thing didnt work either, heres what it looks like in blender and the node groups.


o wait
The background color in this screenshot makes it hard to see the thin outer hairs
i think i got it
there was a texture for height map and i used it but when i took it off and enabled both face rendering it worked
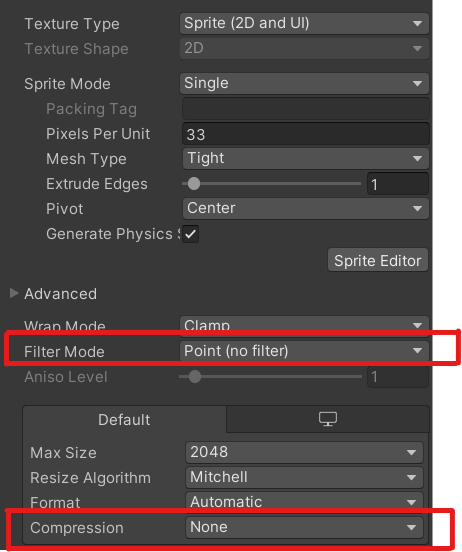
How i can do to dont blur the image

Hello 👋
ty
why is it doing that to my dude??? right is unities doing


Show the Inspector - import settings
Anyone ever used VoxEdit to export a rigged voxel character to Unity 3D?

how do i import the model double faced

Enable double sided on the material
Another option is to use a solidify modifier in blender (if you use that) and uncheck "fill rim" or whatever it was called
I'd just use the double sided option if it's available tho
hey, im getting this problem with textures in unity, what can cause this?


Did you apply the same texture in unity?
yes
Then it sounds like that might be a problem with UVs. How is the texture mapped in blender?


don't mind the mess
oh i dropped the texture to the secondary maps and it works somehow

and only when the UV Set is UV1
So was it in the main map before?
right
yes
that's what I was about to ask next. You may have accidentally made multiple UV maps in blender and only the first one is used by unity by default

If there are many maps in the list, you should remove the ones that you don't need. Generally you are fine with one, second one for lightmaps may be used if that's what you need
it works now, thank you very much!!
And you should obviously use the main maps, not the secondary/detail ones in unity
anyone can tell me why the layering of the tiles is doing this? left is what i have in unity, right is what i want. i have pivot points set at the same height for both tiles.


@gusty roost There's no off topic here, thanks.
no channel for artists?
To showcase your work? No, this is a Unity development server. The only showcases we allow here are related to Unity projects.
got it, thanks
(Nice artwork anyway)
for some reason, exporting from blender to Unity results in wildly incorrect rotation, with the y and z axies being aligned rather than orthogonal

huh.. its called.. gimbal lock? how do I prevent that?
I doubt you're experiencing gimbal lock
and that's just a different rotation, the axes aren't aligned
Blender's coordinate space is different to Unity's so you have to use specific export settings to get it to be as Unity would expect
Apply Scalings All Local
Forward -Z Forward
Up Y Up
Apply Unit Yes
Use Space Transform Yes
Apply Transform Yes
Is generally what I go with

hey, im trying to animate landing gear for my plane, but unity makes a weird animation, is it possible to make it go straight?

Hey yall. Im trying to export models with animations from Blender to Unity, but here's the catch:
My character consists of 4 parts that are supposed to be swapped at some point (Body/Pauldron/Metal Arm/Skirt). I can export an FBX file that has all this stuff in one package with all the animations and it works correct, but... All the models are kinda mushed together in this fbx file and I don't see how I can take those parts out of an FBX (it gives me an error) and replace them with something else?
I can export armature and all the body parts separately, but then the meshes don't hook up to the armature's animation, which is odd because all the vertex groups should have been exported alongside them? I dunno.
Did anyone come across this issue or needed to do this exact thing before?

Hey there, I have this royalty free parking garage scene with a bunch of materials but I can't seem to figure out how to get them imported correctly.
Everything but a few things are completely white even though they have their material applied and remapped


The weights need to be associated with the right bone transforms if they are imported separately. If they are imported together they need to be separate meshes, then they can be individually toggled.
Can that be done without loading an armature together with every separate mesh?
Are they unity materials? Did you apply textures? Are the objects even uv mapped?
Well, loading every mesh is the usual solution but you can import them separately and remap via script if you need to.
The materials are imported from blender so I guess that's a no on unity materials, for textures the materials are greyed out so I'm not sure how
You would need to create unity materials and assign them to the objects.
Isn't that done here? Or is this something completely unrelated?

oh god not the script. why... I guess I can load it all in one fbx file... Then take all the meshes out and shove them into their respective prefabs and then... change them around during runtime when needed?
I would think weightpaint data is stored in vertex groups and does not require a presence of a specific armature to work, because you can parent/unparent meshes in blender and they will "remember" how to behave with the armature. I would THINK that would MEAN I can just export a model and an armature separately and they will 'CLICK' in Unity without any hassle. Silly me.
Oh yeah, thank you!
See how all those materials are 'none'?
Yeah but i changed them all to the correct yesterday and it didn't change anything, that's why im confused on what im doing wrong
And do those materials have, like, textures and stuff set?
Pretty sure they didn't or atleast the majority didn't
Thats why i was confused
I have been running into this problem over the years and never seemed to figure out what is the actual, proper, 100% legit way to export/import rigged character with animations from blender to Unity.
There is always some bizzarre behavior or incorect rotation creeping up somewhere.
RN Im getting what seems to be the correct result (provided I tick 'Bake axis conversion' on in fbx import parameters in Unity) but previews of the model ara facing away from me, and also any animation preview shows me the back of the character. The hip bone is also rotated 90 degrees on X axis.
it APPEARS to be fine when the character is in the scene, but I have this nasty feeling that this is going to go wrong somewhere down the line, and I have no idea what to do about it. This is the best result I've ever got, all previous attempts either introduced more unexpected rotations or broke the model entirely.
Does anyone have the 'ONE TRUE WAY' to do this? Usually you just tick 'Apply Transforms' in Blender, but this doesnt work with rigged models, only with static ones.

The moment you get one true way, Blender or Unity will update 
In the end, yup, it can only be done through a script. This is so stupid, but yup, thats what were dealing with here. Its not like I would rather have this feature be INCORPORATED INTO UNITY BY DEFAULT instead of all the AI STUFF THEY ARE TRYING TO ADD but oh well, that's just me, the guy who does his own models haha.
After some googling I found this thread. The script at the bottom still seems to work, it should be framed and put on display at one of the Unity sites... or all of them.
So yeah, if anyone faces the same problem - there's the solution.
https://discussions.unity.com/t/how-to-re-apply-a-mesh-to-an-armature/200209/3
And its like... Okay, I don't mind even having a big fbx file that contains all of the clothes for a character at the same time, I can then take them out and use whatever I need and put it all into prefabs.
But the NERVE, the absolute NERVE it takes to not implement a system where I can transfer these clothes from one copy of the armature to the other (Im not even talking refactoring between different armatures) WITHOUT HASSLE - is baffling
While I agree about their choice of development direction, I can see it being a bit impractical for them to have an official tool for this - especially when the scripting involved is minimal
Like, it is easy to say they should have the tool you want, but by that logic there are hundreds, thousands of such things people need for their games. So they need to choose what they can actually provide support for, or you just get dead tools and features.
Like cloth, or kinematica... or gigaya
Yeeeah, fair enough. Then again this is such a basic step in the entire pipeline, like if you work with 3d rigged models - you WILL have to do this. I'd say this can easily be at the top list of essential features, but... Im not gonna die on this hill, I just dont know enough.
would sure love for them to improve the basic character controller instead
I dunno. I'm more concerned by them dropping the cloth sim.
Yeah... Ive read the news just recently, when I was looking for solutions to make springy stuff like feathers on the hat.
Funnily enough, Godot had launched a new version where they implemented those exact features. Whoops
Funnily enough, I wouldn't use cloth for that(though you can)
I tried... I wouldn't either. It works kinda okay on enclosed shapes like skirts, but a single strand like a feather is just horrible
You need the right topology mesh, or it will shear
Basically you want to triangulate it in such a way that the connections between the verts is even, unlike how it is usually done with quads, using two tris.
But yeah, a simple spring script on the feather bone works a treat usually
That is probably what I am going to tackle next, yup. The alternative is getting an overkill paid asset... which isnt really an alternative
Also what I seem to not get about these assets - yeah, they are great and all, but by the end of making your game - if you rely on them too much, you'd end up buying like a hundred of those? One for every small feature. It's kinda... unsustainable. I guess if you know what you're doing you can plan your budget ahead and say that, okay you can spend up to a 1000$ on assets, but you will get back, let's say, 10000$ from game sales. I don't know at which point you can actually 'plan' for numbers like that.
Even then, for the first project you probably don't want to rely on that stuff too much, but then, if you don't, you'll learn how to make these tools on your own and... won't need the asset store anymore?
It seems like a paradox to me, I dunno
Sometimes you'll use both cloth and springs on one character https://i.imgur.com/36U0xTp.mp4
spring for a feather, cloth for a cape
Yup
Is it possible to 'instance' a substance graph? The use case is I have multiple objects with different textures I want to use it on, with different values. Is the solution to 'pre-make' these? I was hoping to generate them randomly at runtime but unsure of the process.
any idea why i get the mexico filter when i run the game from the menu scene -> select character scene -> game scene (mexico filter)
and when i run it on the game scene its normal


post process?
does anyone know why when i export a model using FBX extractor in unity it says this error?
"NotImplementedException: The method or operation is not implemented.
UnityEditor.Formats.Fbx.Exporter.ModelExporter.ExportMesh (UnityEditor.Formats.Fbx.Exporter.ModelExporter+MeshInfo meshInfo, Autodesk.Fbx.FbxNode fbxNode) (at Library/PackageCache/com.unity.formats.fbx@4.2.1/Editor/FbxExporter.cs:878)"
the mesh for the model is in .asset btw
i do not even know how it is rigged it's just weird
What would be good general advice when it comes to optimizing textures for a 3D mobile game? I have all of the assets ready (Base Maps, Normal Map, Metallic, Height etc.) in full 4K quality, but I don't know to what parameters I should set any of them. What Max Size I should use for each of the type of asset? What Format to set them? Generating Mipmaps, Filter Mode, Aniso Level and so on
any idea why i get the mexico filter
It is really hard to say because there is no one right answer; it is almost always a matter of tradeoffs between quality, storage space, and video memory and the platform you are building to and the art style can make a big difference.
Especially with mobile, ideal texture size can vary a lot between devices.
REPOSTING QUESTION:
Hi guys! Im importing a avatar from mixamo into blender because I want to change its rest pose, but im struggling to do so. I need to apply the armature modifier modifier but i think because of how the avatar is set up, its messing up? is there a way to select the entire mesh? I always get the error you see here
@opal radish Why would you need to apply the Armature Modifier?
All the tutorials im following say thats how you make the current pose set to the rest pose
oh, yes. that is part of it.
thats one of the steps
thing is this object is kinda weirdly structures, all the assets are below the armature. I dont really want to edit it because I didnt make it i dont wanna break it, but i think thats part of the reason why im blocked at this step

ok, i am going to share something that took me WAY too long to find and utilize. there is a plugin called MeshDataTransfer. you will make a copy of your mesh, and then delete the Shapekeys from the original. do you procedure to change the rest pose, then use the add-on to copy the shapekeys back to the original. You owe me like 75,000 dollars now 😁 let me find a link to it.. oh.. let me see if i can find it for free. I think he started charging for it. one minute
What version of blender are you using?
Ok... thank you! I dont really use blender, i need it for this step, so I just want to get what i need to get done done XD
hmm. see if this version works.. if not, you may have to buy it directly from Gumroad for $1
GitHub
MeshDataTransfer Blender addon. Contribute to Furionk/mesh-data-transfer development by creating an account on GitHub.
Oh, that i cannot help with.. you will have to watch the linked video, and see if you can comprehend it. sorry, teaching blender is beyond me 🙂 if you have problems after the video, perhaps find some basic video courses on Blender, or talk the the !blender server. Unfortunately, blender is one of those things that you have to fight through the basics of, before anyone could even try to say 'Ok, do this, this, then this" because you will have no idea what 'this' is
A supportive community for Blender artists of all levels. Share your work, ask for help, and learn from others! https://discord.com/invite/blender
I have a question, if I apply the armature individually to each element, does it achieve the same effect as selecting it entirelly and applying?
because It lets me do that
i think you are tricking yourself, but if you have a copy of you file, and a few minutes, go ahead and try. it Shouldn't work, but i am no blender expert, (i'd have to find a video tutorial to apply rest pose., still have nightmares about that particular operation) 😆
But, i do not think it will work
sure, ok
thank you, ill try it and see what happens
It worked! 😄
perfect
thank you hunanbean ❤️
Cool deal! yw .. Which part worked though, the add-on, or your one at a time approach?
one at a time approach 🙂
That's great! Thanks for letting me know. I will keep that in mind
The artist I kidnapped (joke) to work on my game uploaded some textures and put them in a Shader Graph, but there are weird black artifacts appearing on the image now. If I turn of compression on the textures off they get covered in black "static" which is far far worse. Anyone know what might be the issue here? This is what the artifacts look like, the little black 'tabs' https://i.gyazo.com/508b636a61a2b01b99a9af92643a68af.png
put them in a shader graph? maybe the shader graph is causing this?
Do the artifacts appear in texture import preview as well
I would try reimporting it, and then importing as different source format
Thank you for the suggestions I'll look into them asap
lol how do I even change the texture of an object in a 2d pipeline?
I'm laughing because I can't figure out how to do that
Don't tell me I need to make like 10 sprites in photoshop for 10 differently textured blocks
if so, that's ridiculous
If you want 10 different textures, you need 10 different art assets. Not sure what you mean by that being ridiculous. Where are the visuals coming from otherwise?
has anyone worked with the naturemanufacture environment assets?
i'm having a problem with height-based blend on URP
there is a shader named "URP Terrain" included in the pack which also comes with an option of height based blend
unfortunately, it's not been working when i apply it to the terrain
it does let you do that, but you still need to adjust all the individual parts via manual weight painting to make it work right
I mean, it's ridiculous that I can't use a regular 2d box sprite and apply different textures to it
or at least I can't figure out how to
You change the sprite on the sprite renderer component
but can you input a texture on the component?
if not, I still need to make different sprites
Just so I understand what your definition is, what's the difference between a texture and a sprite to you? And how do you make "different" sprites that causes this process to be a problem?
Ok and is your regular approach to learning new things to call something you don't understand ridiculous?
Ok but
Sprites are just pngs you've imported.
You change the sprite (PNG) on the sprite renderer component of an object.
Explain one thing which I need to understand
Those sprites (pngs) have to be made somewhere. If you have 10 different pngs, you of course need to create them as art.
That might work for a box because any texture is the shape of a box
But I can't just create a circle and change its textures? Cause I'd need to make circulae sprites
Yes of course. They're pngs. How do you have a PNG of a circle if you don't make it (or get one online)?
Then you drag that sprite into the component and your object now looks like the sprite.
I would have thought something would exist that would cut out the texture in the shape of a box
But ok
Shape of the sprite sorry
That doesn't make sense. What if you replaced "circle" with "character sprite"? What would be ridiculous would be expecting that there would be a way to magically cut the shape from a box.
But again they're sprites. They have transparency.
so sprites are very unlike meshes, got it
These are all squares (boxes), with transparency. That's why when you see them in a game, they're not squares.

yes yes I understand pngs
I mean, technically they are a quad mesh with a texture on it, the texture being the sprite.
Are you trying to cut a literal hole into the sprite?
but wait, does that mean I can't tile it?
like, I need to add sprites onto sprites for length?
if I scale it, it will just get less detailed instead of tiled?
By default, yes. You can set it to tile
https://discussions.unity.com/t/how-to-tile-sprite-in-2d-game-when-scaling-instead-of-stretching/244666
ok that's good at least
I can't seem to be able to change the sprite to my texture even though I changed the type to sprite 2d
You'll need to show what you're trying to do
I thought sprites were just .pngs as you said

trying to either drag the (2d sprite and UI) texture on the sprite field or in the material component doesn't work
dragging it onto the scene doesn't work either
Can you show the import settings of the asset you're dragging?

Change the sprite mode to Single. It's Multiple by default.
ok I knew I wasn't that stupid; it was something non obvious
so does multiple mean a sprite sheet or something?
Exactly
ok
and I figured out how to tile it, too
I think I got the basics of sprites now
thanks for the help
I was frustrated due to not being able to make something so simple work
but it's just that sprites as objects work differently from 3d meshes
Well, they are 3d meshes(quads), but the sprite renderer applies UVs dynamically based on the coordiantes in the sprite asset.
So, how would I go about making a sprite be 1m x 1m in size?
I need actual meter numbers, not consistent sprite sizes etc.
ah, I think the width and height when you make it tile does that
can I have help
of course, but where is your question? 😅
Just set the pixels per unit to the pixel size of the sprite and it will be 1 meter(aka one unit) in Unity.
I am not sure where this question belongs. But uh.. I made a character in Blender, and when importint it into Unity the model has these weird lines all over. It's not related to the textures, and in Blender and other 3D programs the model looks perfectly fine. 😦 Anybody got a clue what might be wrong?


Make sure all parts of it connected mesh and has single smoothing group for relevant faces
Everything is connected. Not entirely sure how the single smoothing stuff is going. Googled it, but the video directs me to an option within the mesh data that no longer is there in my version of Blender.
You can select parts of the mesh and assign smoothing group
if it's a mesh problem and there's seam with duplicate vertices they should be joined as Unity reads smoothing when faces share same vertex
Thanks! I'll give it a look!
blender doesn't have "smoothing groups", as far as I'm aware
you just mark sharp edges
Do the lines move around as you move the camera?
Probably not; the shapes look wrong
It maybe called differently, I haven't touched it for a while, but distinctly remember working with something similar
it just reminds me of non-trilinear filtered textures with mipmaps
sometimes, you can very clearly see the switch between mip levels
I wouldn't expect to see so many different seams though
I can't vertex paint the character that I imported from Mixamo, why this is happening?
maybe I was smoothing per material group...
there is this thing

i still don't really understand what it does
this is part of the FBX export settings
They don't, they are constant. And they are not sharp edges either. It's weird.. not like it matters. I'm probably going to abandon this character. 😄 I mean, was fun making it. Gave me lots of insight. But ultimately not the style I wanna go for. My intention is low poly. xD
Also check that all effects were applied before exporting. One reason how it could export differently
Are you getting seams on the boundaries between UV islands?
I know that Unity uses those to cut the mesh. It was messing up a shader of mine (the shader was bugged)
I'm trying to remove the texture and paint with polybrush, but when I try this in a mixamo characater it doesnt' work, how can I fix this?

You need a shader that uses vertex colors
I'm using one
it works in all other models , only when I import from mixamo that don't work
My guess is the mixamo model might be a skinned mesh renderer, while polybrush is likely designed to work for ordinary mesh renderers
Both points could be incorrect, but I'd check that first
hi
The problem is that the game isn't loading the texture properly, even though it's applied. However, when I apply a different texture, suddenly the previously applied texture shows up in the game.

in unity

changed texture

and the texture

Modding related problems are not something we can help with
Allbut isnt strange?
All butts are strange.
in URP shader is it posible to create a object that is unlit but still cast and recieve shadows?
"Unlit" by definition means it ignores lighting, which includes shadows
Maybe you want to use emission on a lit material..?
oh maybe i'm just overcomplicating things. thanks
im having trouble loading this asset into my scene, the model itself loads weirdly different from the original model i had from blender. Why are the pages transparent from a certain perspective?

You probably need to turn on double-sided on the material in unity, or fix the normals of the pages in blender
Preferably just fix the normals to avoid unnecessarily drawing back faces
You can also Solidify the faces in blender if you need them to be double-sided
Probably!
Receiving shadows does require a "lit" shader of some kind
Emission is applied after all lighting calculations even if the material interacts with lighting outwardly
Lighting is actually many small calculations together, so you might want some but not all
how do i turn on double sided shaders? I downloaded this asset from the asset store but the only texture its letting me edit is the color, not the actual model's texture
If it's available, you can see it in the settings of your Material. Depends on your shader and render pipeline though
this is what i see

Would anyone know how to tweak hitboxes precisely for models and such? Im making a 3d art gallery and I used an asset pack from the asset store. the problem is that my characters camera can go inside a wall and see through it or some of the hitboxes on the walls are just way too big and not uniform on all sides. Would love to get some knowledge and insight on this issue! (I can provide pictures of what I mean)
There's collider components
Primitive colliders can be modified through component properties
Mesh colliders depend on the mesh
How your camera interacts with colliders depends on what's handling the camera collision
There's no one standard way of doing that
Thats a ton of info at once lol. In your opinion, what would be the best way to try and remedy the issue?
Cast, yes, receive no. You can make a custom shader that looks unlit aside from shadows, though.
Hey guys, asking here since I have little idea what I'm doing and nothing I try seems to improve things. Basically I'm used to 2D, trying to learn 3D and Unity, found this nice little tool called MagicaVoxel to build stuff out of blocks, neat, I create a simple doorframe, export it to a obj, import it into Unity, also import a simple prototyping texture, and I apply it to a capsule as a baseline, success, I then apply it to my doorframe, and well it doesn't work at all. Googling seems to tell me a common reason is that the UV wrapping might be wrong, so I've been searching for a few hours to learn a bit of blender to figure it out, but I can't make anything work using Blender.. but thinking about it, if it was just the UV wrapping being weird, wouldn't I see my texture on the doorframe but just in weird shapes or format? This just looks like a noise pattern.
Any help appreciated.

Correct assumptions I think
What do the UVs look like? A grid, sized small enough, will tend to look like noise if every fragment is sampling a uv cood too far apart for filtering to even out
The way magicavoxel generates meshes might not work well for usual uv-unwrapping techniques, but hard to say without seeing the geometry/wireframe or the current UV map
Spot on, that was a theory I had too, because when I messed with the tiling size, sometimes I had darker spots, maybe indicating the texture is hyper zoomed and when I move the tiling I sometimes hit one of the dark line of the grid
the UV wrapping looks like that, doesn't look like anything I've seen in any of the tutorials I've seen about UV wrapping in Blender

Ah, ok.
That type of uv map is meant to be used with a texture that is a palette of distinct colors, so that each block has a single color applied.
So the uvs aren't representing texture coordinates in the usual meaning, but just 'what part of the image has the color for this block'
so it's used in a specific way that isn't how Unity expect to have things setup when you apply a material to an object
Well, it works perfectly well in unity if you use the texture map it was designed for.
But not if you wanted to use a typical texture.
You would need to either UV it, or use a shader that uses parametric uvs.
(Such as triplanar)
so many words I don't get, makes me want to crawl back into the comfort of 2D haha, but I need to grow and learn at some point
Haha, I am primarily 2d myself so I get that
Tldr is 'either make uvs or use a shader that doesn't need uvs'
Or use a texture designed for magicavoxel objects
Yeaa, but my main goal initially was to use MagicaVoxel to rapidly get building blocks for prototyping 3D assets for level design, I feel like it might just be too much work looking at it from a prototyping standpoint, might need to look into other easy building block tools that integrate into Unity with less friction
I spent like 4 hours trying to learn Blender, and somehow, with every tutorial, I've never been able to reach a point where I see anything but an empty UV mapping grid, or this single pixel horizontal line
In any case, it's helpful to at least understand the issue better, I thank you for your guidance
Hello im having issues importing my models from blender to unity, the book works fine but the page isnt visable in some angles, does anyone have a solution?
show it in blender
By 'some angles' do you mean 'from behind?' Because that might just be single sided geometry and a single sided shader.
no i mean when i look at it from the top, only the sides show and when i look at it from the front only the sides only the top shows etc
So the normals are flipped?
Is there any way to update a sprite sheet with more sprites after slicing it up and serializing everything? Seems like the option here is I need to reimport it all with the updated sheet and do everything over again, but that seems like a problem that could be handled with some tools. Maybe I'm not too aware of how Unity processes these sprites, as I always assumed that each sheet contributes to additional drawcalls, so ideally we want to pack as many sprites as possible together.
But for all I know, these asset instances could be handled further at runtime and maybe I'm overthinking everything.
Ah, ok I think I figured a way. I just closed the editor and swapped it out for the new asset and renamed it so the meta wouldnt change
possibly so, idk
im looking into it even more atm, if anyone has a solution itd be great
You can save over a sliced sprite sheet with an image editor, which in my experience keeps the slices anchored in the bottom left corner
Making a Sprite Atlas would compile the sprites automatically at runtime, even if you keep them as separate assets
I think URP has srp batching for sprites in more recent versions so draw calls aren't the issue, though texture loads may still be good to keep optimized
you've been given a solution multiple times already, and your response to it was "idk" so are you gonna check it or not? 😔
and you didnt show it inside blender
Hey - whats a good workflow for getting sprites into the Tile Pallete?
Im a little confused about the best way to approach - having to navigate through the project folder and select the sprite seems cumbersome. Is there a way to do it from when you open the Sprite Editor and improt directly into Tile Pallete?
Example

oh I think I see - you can just drag the sprite sheet in a new tile palette
i add this texture to a plane and it appears with the black background, how i can remove the background?

I have this config in the image

Here's a little trick you can use to make the topology of your character's shoulders, arms and legs a bit more effective.
COMPLETE 3D Character Guide: https://www.youtube.com/watch?v=dd6G2S6MQ6U
COMPLETE 3D Character Guide (written): https://codernunk.com/tutorials/complete-3d-character-guide/
▬▬▬▬▬▬▬▬▬▬▬▬▬▬▬▬▬▬▬▬▬▬▬▬▬
🌐Written tutorials, news...
İsnt triangles bad for topology?
If your texture has alpha transparency and you intend to use 3D meshes rather than sprite renderers or image components, your mesh needs a material that's transparent or enables alpha clipping
Situational
İn which cases it is bad and which cases it is good ?
Any sources for that or some explanation?
As you may know all geometry is rendered as triangles, so if a face is a quad or an n-gon is an arbitrary convention that only affects modeling workflows
Most of the time what quads are preferred for are loops, since a lot of modeling relies on them and triangles and n-gons can't have them
Topology also determines how operations that rely on edges, like subdivision and beveling work since it communicates to them how they should work on the mesh
Since quads and n-gons are automatically triangulated, that can cause issues with skinned deformation, which is why the video shows when you should create a triangle manually for precise control over it
Triangles and quads can both be "good" topology, as long as they're used in an advantageous way
N-gons can be okay just the same, sometimes when you have a face with an uneven edge and/or various holes or extrusions coming out of it, and it's totally flat and you know you won't need edge loops there then it might just as well be convenient to keep it an n-gon
Quads are encouraged because it takes experience to know when to swap them for tris or ngons
It's easy to use them inappropriately and end up with a worse mesh that's harder to make, and even impede learning
As long as you know how each polygon type interacts with modeling operations, vertex normals/data and automatic triangulation it should be logical to weigh the pros and cons situationally
do anybody why unity doesnt recognize the image texture and instead uses the principled BDSF base color?
I tried this like 6 months ago and it worked just fine


Thank you so much
If the texture name is the exact same this usually should work
The embedded material looks for the associated texture in the same folder as the mesh itself, but also in assets/textures/ folder
However, the embedded materials are extremely limited and barely good enough for placeholders, so you would normally make new materials anyway and assign textures and other properties manually
why unity add to the image this green borders?

did you disable compression on it
So uh... my character looks like this (white background) in my 3D program.. then I import it into Unity and it looks horrendous. What am I doing wrong? Lol


yes
can you show it
Not sure what software that is, but it seems to be a difference in normals. Did you recalculate the normals in unity? Does your 3d software export normals?
Blender, and I think it does.
The issue is, I've had this with other models as well. Even prefab models from Blender Market.. they just look fucked in Unity from Blender. It's to tiresome that I'm just considering starting a 2D project because I'd rather go through hell drawing pixel art than trying to fix these normals.
isn't this just because of Unity's shadow-quality?
Try turning shadows off and just adding some SSAO in post-processing. That'll be closer to how the previews look.
Try messing around with shadow-settings too; but don't expect a lot of quality from URP.
The normals seem correct, with the nose being sharp and the cheeks being soft - it's just the shadow resolution and quality that affects it I believe.
cool model by the way. I like it.
yo mb our situation is kind of weird, im working w a modeler and he's the one on blender, im doing the unity work
i showed him the solutions a few days ago and he worked on em
i just wanted to see if there was a fix taht i could do in unity without using blender, guess i was wrong
why can I not edit materials?

you selected the wrong thing, you have to assign your own material
Hi everyone. Why are my assets are grayed out after I import them into Unity? Can someone take a look.

what's grayed out?
if you mean the material then you have to assign a new material to it i think
I think I did not import the textures properly my bad.

maybe it's because of the mip maps?
Hello Guys!!
I wanna ask smthng
when im importing my models from Blender to Unity Im experiencing something that shouldnt happen
This is my export settings from blender

when ever I export a model from blender and import it in unity, then the model is not showing the only thing im seeing is just a empty object in unity
I noticed that when the pivot points of different objects are at different locations it happens (but not everytime)
Any help would be appreciated
Thank u! (In Advance)
Sounds like you do not want to have "slected objects" checked in the export settings maybe
@glacial vector That maybe the issue but when I try to export other models then they gets exported just fine with no issues only a number of models are giving me the problem
So if you have an object selected in blender, export it with those settings, import it into unity, there is no mesh in the file?
@glacial vector Yeah thats the issue im facing
But I noticed that if I try to export more than 1 object then this issue is most likely to occur
If I export that exact model separately then there would be no issue
But I cant do that bcoz that model is a child object of a object and that needs to exported with his parent object
Is there anyone who can use substance painter?

I want to copy the layer I marked on the other side, but the "symmetry" function doesn't work.
Is there a way to copy the same thing at once?
Add a mirror filter on the layer to mirror in UV space
super thank you
Look at the shading errors, especially around the eyes and under the mouth. The hard edges are separate from the actual vertex normals. That isn't a shadow error.
Are you recalculating normals instead of importing them when you import your models?
I tried to do both. Eventually fixed the issue with a cell shader. Still on the fence wether I'm gonna continue it 3D or maybe go 2D instead though but the cell shader was cool.
hmm, they look to check out. Cross-examine the first image with the fourth. Notice the upper lips' shadows and how they match, just different in softness?
what do you mean separate from the vertex normals by the way? They line up no?
It is of course possible that the models don't HAVE proper normals and only looked correct in blender due to the shading.
Hard edges are due to the point being split, while smooth would share the edges between polygons.
So you can have hard/soft edges without proper normals elsewhere.
Does anybody have any good tutorials for making VFX like in league of legends or world of warcraft? I tried to imitate Morgana's Q ability from LoL but couldn't quite figure it out
I tried to make a mesh for the middle thing and a smoke trail with distortion from allin1vfxtoolkit asset to make it wavy

It looks mostly like a matter of breaking down the details; you have the basic form down.
I havent used unity in a year, and i was making a tower defence game
I changed the game version to the latest 6000.smth, from the originial version of 2022.smth
I made a cube thingy in blender and imported it into unity
I used the single prefab cube and copy and pasted it to build little towers
However all of my cubes are now all invisible. Does anyone know the issue?

all of my prefabs are invisible actually, not just the cubes
Here are the files

Oh yeah, and I deleted blender around a couple months ago, would that affect it?
i redownloaded blender but im not sure how to continue from here
Yes, Blender has to be installed
Check the external application preferences in Unity as the warning suggests
Iirc at least previously the Blender installation had to be in Windows program PATH, though installers generally take care of that
oh thank you!
where can I check those?
You can check external application preferences in unity preferences
I don't have instructions at hand how to add a program to PATH
oh is it somewhere in here?

So the warning claims anyway
Last I used direct blend importing it used the version of blender that was installed into windows as the default application for .blend format
yeah that sounds right
I cant seem to find where to set it, I know you said you dont know how to set it to path, do you have an idea where it might be?
Start by googling "windows add program to PATH" assuming you're using windows
oh okay thank you!
I did actually have a similar problem with the code not being able to open, and once i redownloaded visual studio community 2022, it immediately worked, so that was nice
but yeah ill google the rest, thanks so much for your help!
Anyone here knows how to disable aseprite's limiting border? black and white and moving
I dont really know what it is but I cant draw out of the border
You may be referring to a "selection"
Ctrl + D deselects
Yea that was it thanks
What are the best settings in blender for exporting models (non rigged ones)
Also .obj or .fbx which file format is better?
Which of these heads look better in your opinion for a videogame?


FBX supports more features, like armatures iirc
You want export settings that minimize change in scale and rotation, naturally, but there's not any one type of "best" settings because the fbx exporter is not capable of translating blender's coordinate system to unity
So you either need to do a few more tricks as detailed here: https://polynook.com/learn/how-to-export-models-from-blender-to-unity
Or find a set of export settings that work well enough for your purposes
Or find a third party script or plugin that does it better
@misty lantern thnx for that !!
After I deleted blender, all of my prefabs and models went invisible. After I reinstalled, they still won't come back. All the models in the scene are invisible too
How do I reconnect the blender files or smth?


oh yeah and i updated the project from unity ver 2022 to 6000
maybe that contributes too idk
We just talked about that
Anything come out of it?
oh yeah, I searched google, but i think it was mostly talking about the windows system
I did find something about checking 'Find Missing Files' in blender, which could be it
gave me a list of these

not sure where to go from here though
You need to reimport the blender files
They're still present
Unity just threw up when trying to import them (because it could not find Blender)
Since it hasn't seen any change in the files since that attempt, it will not attempt to reimport the files automatically
(Blender being installed isn't exactly something the asset database knows about)
Since you're using windows, the important part is that Blender is in windows PATH and (also I believe) as the default program for opening blend files
Nothing on to do on Blender's side
ohh okay
ill try this, thanks
i figured it might make like duplicates, but hopefully itll just reconnect them
Nope.
Unity still recognizes these assets -- that's handled by the GUID in the .meta file
However, it no longer understands what the files are supposed to mean
i see
I'm not sure if the GUIDs of the individual sub-assets will survive, though
I haven't actually looked into that before
I import it from blender into unity right?
You are directly importing .blend files in Unity.
like drag it into the toolbar thing
you don't do anything with Blender at all here
ohh okay
note that I would suggest just exporting FBX files from Blender, rather than doing this
(That's what happens when you import a .blend file)
I stopped using .blend files directly after working on a game jam where half of the team couldn't import the files properly
(since they did not have Blender)
I also prefer to be able to control exactly what gets exported
you can't really do that when unity does it for you
do i export them one by one?
from this menu?

like open them and then export them
cause i cant seem to export all 5 at the same time
or do i do it from the file explorer

OMG its working i think

Blend files are not exported, only imported
Asset importing is a Unity operation
Oh I see
Exporting means to save a file into a format that's not natively supported by the program
So FBX for example in this case
Ohh okay thank you!
Sorry, meant to reply earlier, i was just fixing some things
but wow, it all works! Everything! All of my errors that I had are fixed, and every single model is back! Absolutely amazing
Thank u guys so much! 🗣️
to clarify: all you had to do was reimport the files in Unity.
The data was still there. Unity just failed to import it.
you did not need to create new blend files or overwrite the existing .blend files
okay yeah, that makes a lot of sense
Everything went right back to the way it was before lol, so it imported and immediately reconnected
Thanks again man!
I have a model in blender that is made up of a few objects. For the hair, I have a separate righ with a root that copies the transform of the head deform bone of the rigify rig. In blender this works great, but when I export to unity the copy transform does not work.
You would either need to bake it, or recreate the constraint in unity.
Unity only imports a small set of maya constraints.
Does unity have a way to apply modifiers to the armature? it looks like only the an "animation clip" is imported, not the rig.
That is correct. Unity doesn't import rigging constraints from blender at all unless they are baked into normal keyframes.
You can apply constraints in unity that mimic some such behaviors, or write a script to do it.
hmm i was originally assuming that since the child rig moved in 3d space and then moved the hair mesh in blender that the hair mesh would also be deformed but it looks like a second anim_clip is made for the hair rig. So then I think I have two options
Merge the armatures and adjust the vertex weights.
Make sure both animations are applied to the separate objects synchronously.
This leads me to an additional question, I had had a shrink wrap modifier to make sure that, for example, the seam of the neck and shirt mesh did not detach. I had thought that this would be part of the deform data that was exported. It seems that this is unfortunately not the case.
Is there a good work around to this or should I just extend my mesh to overlap at the seams?
Deformers aren't exported with skeletal animation; if you really needed to, you can export in some different format that allows for deformation, but in most cases it wouldn't be worth it. If you need a dynamic shrinkwrapping, you may be able to do it with a script in unity.
(An alembic or vat for instance would export the deformed mesh instead of the skeleton and skin)
Is it possible to make shapekeys that completely nullify a set of weights? i have a skinned mesh renderer that i want to stop following certain bones, is there any way to do this??
Not with shape keys
Stop following bones in what way or for what purpose?
I have these mechs that are skinned to an armature, each chunk is it's own mesh
I want to have a "gore" system where you can bonk every bone off of the mech
The problem is that just unparenting the chunk i want to remove doesn't work if it's a skinned mesh, for obvious reasons
Example:
Normal mech, "Destroyed" mech


I thought of swapping the skinned meshes for regular filter meshes but that would present the problem of the rest of the body not "deforming"
What i need is a way to make the weight paint stop following the other bones or something like that, but looking online, i have no clue where to start or what to look for
That's probably not a practical option, and I'm not sure how it'd help
There are those flexible weighted wires connecting the two parts
What should happen to them when one part gets detached?
Well they split obv
"Split" how?

If you were to remove weights from the head-end of the wires, they wouldn't get cut, they'd just ignore the head bone's influence and extend rigidly from the body
While the head's polygons would stretch towards the rigid wires
There's no such option as removing a part of a mesh like that, there's only one mesh and the weights inform what bones they'll stick to
That's what i mean, i want a way to make the influence of certain weights just stop
This HAS to be a thing, there's no way this use case has never showed up before
Also it's 3 meshes
Not 1
This does show up but I'm interpreting a misunderstanding of how weighting works with skinned mesh renderers
Is there no way to make certain weights stop having an effect?
Technically yes, but practically not, I believe
For a body destruction system like that there are a few common methods at least
Keeping the parts as separate mesh objects makes things simpler since they can simply be replaced by a loose mesh object not connected to the skeleton
Skinned meshes are always more problematic because they can't be "cut"
The simplest method would be to shrink the bone of the detached limb to close to 0 and replace it with the loose variant of part
The connective mesh between the parts would then visually become a "stump" which you could attach an extra part that represents the cut and frayed wires
I did think of that solution but it's such a hack job i didn't want to resort to it 😔
Or just having several model variants and substitute the chunks with that but i don't like that method either
Alternatively the connective mesh could be pre-cut, with two overlapping bones at the halfway point that let each half of the wire flop freely when the limb is detached
The downside to that is that it adds a lot of bones, and takes a lot of finagling to make it look good especially since you'd need some method to swap only the wire part to look damaged after the cut
In a situation like that the detached limbs can remain a part of the same skinned mesh renderer, but in some cases that may cause optimization issues since for every part on the sceen the whole mesh needs to be rendered regardless of how far it is
Since your character to dismember is weighted rather than totally mechanical, you'd probably be using the same techniques you can find in many gore systems
Severing a skinned mesh renderer into two or more parts is always a technically tricky process
Or if pre-severed it'll be tricky to make it look right in the start
It's better to fake it whenever you can using shrinked bones, stump covering meshes and rigid detached parts
Removing bone influence probably isn't the way, since that would only make the part more rigid than it was before, I think
Helper bones are an option though, since they give you control over where the other end of the weighted mesh will be when the extremity goes its merry way
I'll look into this stuff, thanks for the help and ideas Spazi
Good luck!
There's also the option to actually modify mesh data to make any arbitrary changes to it, but that's the most complex way and can get easily expensive for performance as well
Hi, I have a problem with a very basic thing. I'm not sure if I'm missing something important or if it's something else, but I need your help with importing from Blender to Unity. Specifically, I want to export an FBX file from Blender with embedded materials and import it into Unity. However, I can't get the materials to transfer correctly. I followed the top three YouTube tutorials, but it's still not working.
Well, for the most part, Blender materials cannot be importerd into or used in Unity
Unless you just mean textures
but materials themselves need to be made in Unity

Yah Unity can't use Blender node graph stuff
how would one do that than? i would like to texture in blender and then import to unity, do i have to bake?
You can make a similar shader from scratch in Unity using ShaderGraph
is this the correct workflow?
the texture itself should import just fine
just make a material in Unity and use the texture in it


Blender materials can be imported, but the nodes can't be more complex than "value/texture to PBR input" which Unity also would have
So in theory that material should work, as long as you've also imported (or extracted, if packed) the texture and placed it in the model's folder or in assets/textures/
Though in my opinion packing a texture in the mesh, then extracting just to use a limited embedded material isn't any less effort than importing the texture separately and making a proper new material for it
i have the feeling that my workflow is completly wrong, can you guys recomend a workflow or a video where i can see a workflow that is optimal
3x workflow in a single sentence, im cooked
Drag and drop the texture from your files into Unity's project window
Create a new material asset in Unity
Assign your textures to relevant material properties
Assign material to mesh either in import settings material override, or whenever you use the mesh (prefab usually)