
#2.4r2 350, Okay Riker, We're Only Upgrading to Cartographer
232 messages · Page 1 of 1 (latest)
 twin plank
Inspired by the Double-T Dual UHP PSU Mount, and that 30% derate without heatsink for us 110VAC users, I'm putting this together. It should fit vertically inside a standard V2.4 electronics bay. Just about ready to try printing/proofing it, will publish.


Dimensions. Should be easy enough to recheck fasteners for torque post install/wiring with a ball end allen wrench.


It may look odd, but the veturi inlet profiles should be at least 1% better than having cut square edged, cylindrical holes in the fan cover/wire management pieces.


 plain wadi
That’s a very funny looking Cartographer probe 🤔
twin plank
Z-direction, vertical, clearance in the standard V2.4 electronics bay.
 twin plank
First test prints fresh off the plate, I need to make a couple tweaks, but no real complaints.


 twin plank

 real creek
I would suggest at least a stock image of a cartographer to vaguely suggest it may have something to do with this thread 
twin plank
Full set of feetsies @100% infill, cost all of maybe .5g extra vs 40%.
 twin plank
real creek
I would suggest at least a stock image of a cartographer to vaguely suggest it m...


 twin plank
Adding these in from earlier, why not, first DIN clamp block proofing print. The idea here is that once the M3 protrudes from the captured square nut, the tolerance on the hole through those layers is on the tighter side so as to create a "constant tension", "quasi-nylock" type behavior to help keep heat cycles/vibration from loosening the fasteners. I was a little tight on that tolerance here, if you look closely you can see radial, white-ish, "over-stress" tell-tale marks, opening that DIAMETER by just 0.10mm in the CAD got it to where I want the fit.


 twin plank
Mmhmmm, mhmmmm


See if I have some cross bolts long enough to pull the halves in
Yep, one or two other tolerances to correct, but here's mockup.
 twin plank
@solar pewter I'm up to no good if you want to see
 solar pewter

Wait what?
Wait I thought Lieutenant Commander Nella Daren was the cartographer for the TNG Enterprise?
Ah HAH!
 twin plank
solar pewter
Ah HAH!
Basically I can't lose, when the terminators take over and need us humans for a little while longer, they know my system telemetry data was lower °C.
solar pewter
twin plank
Yep, one or two other tolerances to correct, but here's mockup.
So watcha building? A blender?
Eye cooling sunglasses?
If the blades spin fast enough youll see through em just fine
Could you make a small hadron collider if you had enough fans and a tube with 0 friction in it?
twin plank
Yes
solar pewter
Well best of luck with that. Please dont go making any blackholes on earth. You remember what happened with the last one that wiped everyones memory of it
Wait. No you wouldnt. Nm
twin plank
Pshhh, it might be irresponsible to play with singularities for drive systems as attractive as those ones are
solar pewter
In all seriousness I would volunteer to cross the event horizon to see whats across it
twin plank
solar pewter
Wait. No you wouldnt. Nm
We agreed to forget about that
solar pewter
twin plank
We agreed to forget about that
 twin plank
Ooh, real close, need to pull these wings out just a little further to get the raised rib to land in the groove properly, but it seems to fit in nicely without the heatsink in the way.

 twin plank
Seems as though I got the borrowed bambu's shrink and skew accurized enough for the A4T parts, time to get to work on the buid portion, finally! I hope I never have to use one again 🤢

 twin plank


Fun trick while doing these, use some FHCS to pull everything in line under tension, then replace one at a time with the final SHCS + loctite.


Always good to inspect your parts/fasteners, give them a once over with isopropyl to knock off anything that'd compromise the grab from loctite.


Still going smooth at this point.

Breaking out supports, fans fit.


Some fun converting G2E to WWG2.
The socket you see between my hammer and anvil is what I was using to drive the bearings into the printed part. ALWAYS ALWAYS ALWAYS apply the force to the bearing race that sits closest to the body you are driving it in to. Why would you put that force through the bearing balls (BBs), and the track they ride in? You'll hear the tone change once it's fully seated, if you listen close.

Ran into a clearance issue with the EBB36 Gen2 and printed mount, good enough for now.


Fun assembly, used the MMU to add some high contrast flavor, decided I like the look of the big knob better.
This guy wouldn't fit with the glued on black part, so I had to get crafty.

Better


Burning my fingers 


 radiant burrow
I'm jealous of the Vitalii live x/y joiners ❤️
twin plank
radiant burrow
I'm jealous of the Vitalii live x/y joiners ❤️
You still get a discount, last I checked, if you order all the gantry bits on Vitalii's site. Assembly couldn't have gone smoother on them, well written instruction manuals.
Excited to see what this new setup is like, and I don't have to worry nearly as much about melting something getting aggressive with stepper current.
twin plank
 twin plank
Flux and tin your pads and wires first, makes life so much easier.
 twin plank
You can fit 22ga if you believe hard enough, but I found my roll of 24ga PTFE right after I finished


If you flag your stuff in the interim, it doesn't matter much what color you use once the conductors are terminated, does it?
Here's how I did the last one in situ. The masking tape and all builds a nice thermal barrier so you don't melt your printed part. Now I know the absolute minimum lengths for when I do the next refit with the easier to fit 24ga PTFE wire.


 twin plank
@gentle pecan Where you been lately?
 gentle pecan
twin plank
<@427195906522087434> Where you been lately?
Just been busy with airplanes and 3d printers and work
twin plank
gentle pecan
Just been busy with airplanes and 3d printers and work
Pitch, yaw, n roll 
 dusty pawn
twin plank
If you flag your stuff in the interim, it doesn't matter much what color you use...
is that sticky tack being used as a helping hand i see?
twin plank
dusty pawn
is that sticky tack being used as a helping hand i see?
Gorilla brand at that
https://www.amazon.com/Gorilla-Tack-56g-Pre-Squares/dp/B09449NW5L
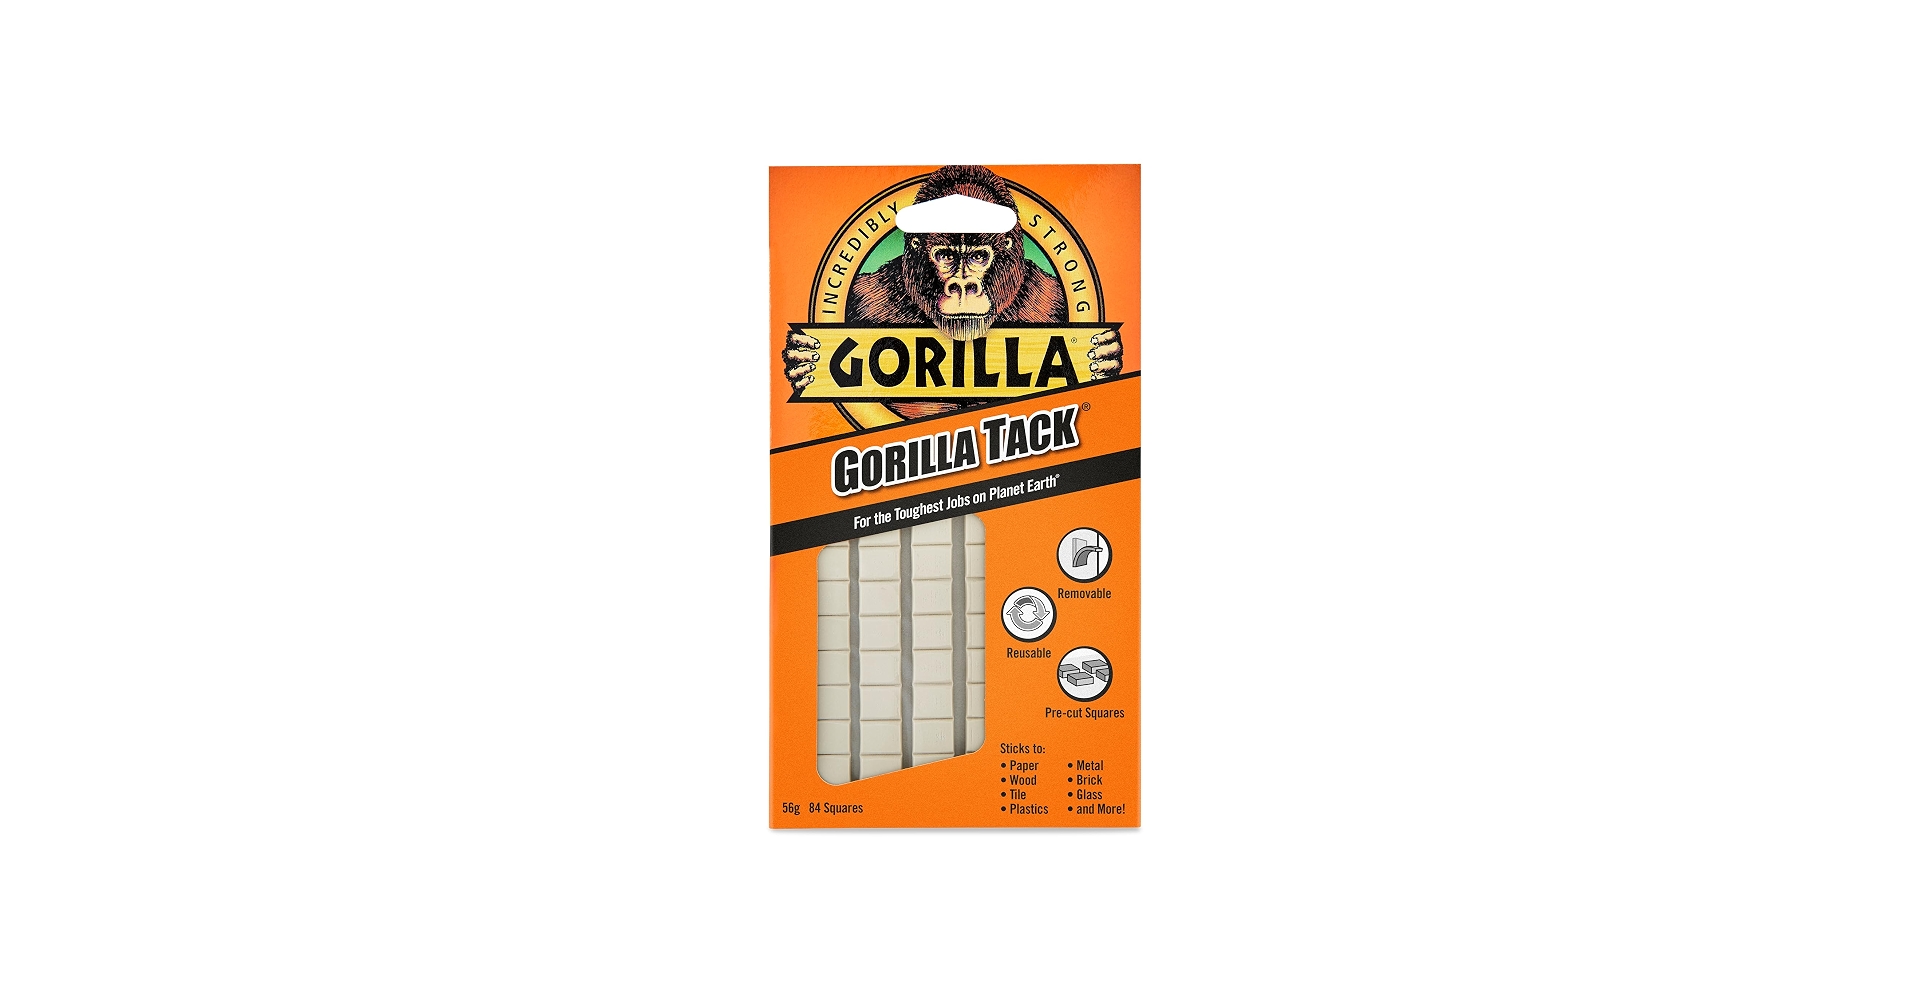
Gorilla Tack is the reusable, removable adhesive tack which can be used to hang lightweight items indoors and out.
twin plank
This is what I really enjoy about the 3220m style crimpers, you have this stick out space where you can see the insertion depth of your conductor, plus its already holding onto your crimp terminal with the first ratchet click. Before you even insert the wire you can use a fingernail to pull the crimp terminal out to this position and it stops out against this other internal ledge for the insulator crimp. It makes the job much easier.


 twin plank


A4T manual calls for some shuttle tape on the back side of the LED holder for DAV, doesn't take a lot to do the rest. Why not put a heat barrier between the fan motors?
DAV back in place, on to test fitting/wiring.


@languid patrol I like all these fastening provisions that line up 🥰

Wiring is going smooth with the EBB36 Gen 2, nice layout all around with this package.

You can twist up your one color wires, then unravel them a bit to open space to move your flags down so you don't lose track of your conductors. They'll go back together clean and easy once you crimp on your terminals, once they're in the plug they aren't going anywhere and its safe to remove the flags.


 fervent eagle
Brother label printers can do heat shrink labels and then the labels can be referenced later.
 twin plank
fervent eagle
Brother label printers can do heat shrink labels and then the labels can be refe...
Like when wiring, I just reverse process if need be, have the pinout handy, re-flag the conductors, de-pin.
I haven't found one yet that can print labels that shrink snug enough for my liking on the smaller wires.
 twin plank
Found red stand offs to make the toolhead more matchy matchy with the Vitalii gantry aesthetics.
 twin plank
Wired up, let's assemble the new gantry! 👀 The cartographer finally made an appearance!
 twin plank
Heatsink arrangement for EBB36 Gen 2 for reference. You're a gentleman and a scholar @ionic sinew #bigtreetech message

 twin plank
Knocked any high points off the inserts, and my special tool for running in the inserts without the spacers.

Ol' faithful

Over 60 years ago, Dr. Jane Goodall made a groundbreaking observation: She watched a wild chimpanzee she named David Greybeard skillfully using a twig to "fish" for termites, forever changing how we see ourselves in relation to other animals. 🐵🍂 This behavior, known as termite fishing, involves chimps selecting a branch, stripping the leav...
twin plank
⚠️ HEADS UP ⚠️
If you are going to run Vitalii's Live Idler X/Y Joints AND Carbonara, you will need 6 M5x12 FHCS to account for the wall thickness of Carbonara, the M5x10 FHCS that come in Vitalii's kit are intended for conventional extrusions and will not have sufficient thread engagement.
Both the FHCS inserted in the bracket pictured below are fully backed out of the threads to illustrate how little thread depth you get if this is overlooked. Remember, unlike BHCS and SHCS fasteners, FHCS are designated by their overall length, top of the head to the end of the fastener.
 twin plank
New gantry components 🥰
 radiant burrow
Let me know how Carbonara is ❤️ it's on my list for later this yr
twin plank
radiant burrow
Let me know how Carbonara is ❤️ it's on my list for later this yr
Stay tuned, I'm just as curious to see how the hard data, IS graphs, changes vs my previous configuration.
twin plank
Got the runice true profile pulleys, only made sense with everything else. They seem nicer than unknown generics for sure on first impression, nicer feeling mesh.


The Z-idler flavor are 14mm width instead of the generic 13mm, so it was a breeze to pop them into the Chaotic Lab Z-tensioners since the 2x 0.5mm shim washers per corner are now omitted.


 twin plank
 twin plank

🤔

@Chen, sweet design there fellow Voron person , feel free to use my pics if you want.
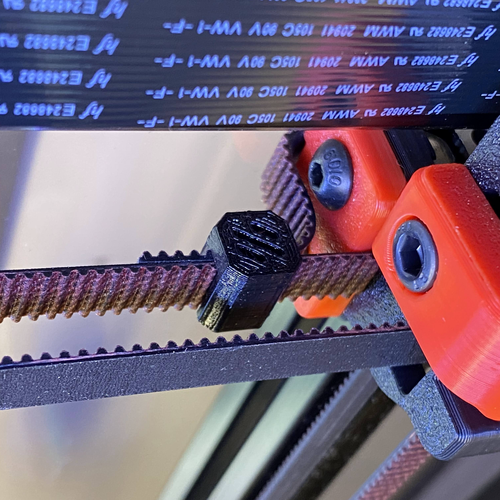
Simple clip to keep extra Z belts clean and away from panels
 slim relic
twin plank
you cant be fr, we using torque wrenches for rails now ? 😭
twin plank
slim relic
you cant be fr, we using torque wrenches for rails now ? 😭
Absolutely, if I can get more uniform clamping load across all these fasteners, I'll take it. I don't have a ton of experience with carbon fiber structural bits either, felt better not guessing. Torque spec was 2-2.5Nm, shot for 2.1 on the SHCS, and again 2.1 locking down the nuts. Shot for the low side on the nuts since the drop of loctite acts, to a lesser extent, like grease/oil until it dries, the reduced friction skews the torque value a shade so it's better to be a little shy of the dry peak torque target than to break stuff.
twin plank
I got this low range, 0-10Nm torque wrench specifically for doing nozzles in all honesty, but since I had it, may as well use it.
slim relic
twin plank
Absolutely, if I can get more uniform clamping load across all these fasteners, ...
the attention to details 
twin plank
Chopped off flush again @fallow zealot , but not before pulling all four and doing the zipper method 3 times again to verify lengths.


 night wren
twin plank
Chopped off flush again <@239626226115936256> , but not before pulling all four ...
what does this have to do with installing cartographer out of curiosity
twin plank
night wren
what does this have to do with installing cartographer out of curiosity
Signal is Signal
 twin plank
Here's the zipper technique I use for matching belt lengths to the tooth.
Establish the necessary belt length on one of your belts (one of the four Z belts, the A or B belt). This is now your standard for measuring and cutting the rest of your belts to identical lengths. I use a small piece of masking tape stuck to the smooth back of my measurement belts so I don't lose track of them while processing the other belts.
Using a paper clamp at one end of the standard and belt to be cut, mesh the peaks and valleys and lock the belts together. The belts obviously have to offset by one tooth to mesh and lock together, you want your STANDARD to overhang the belt to be cut at this starting end so that the belt to be cut is protruding by one tooth and easily accessible with your cutters at the far end.
Now we zipper, a pair of gloves can be useful here to reduce friction of the belts between your fingers. Starting at the meshed and clamped end, pinch the meshed belt between your fingers right at the end of the clamp such that you are preserving the mesh of the two belts. Being careful to maintain the mesh the entire length, run your pinched fingers along the belt until you reach the end of your standard. Using a zip tie as a marker, indicate the valley where the belt should be cut, just past that one protruding tooth mentioned earlier. DO NOT CUT YET, repeat this zipper at least a couple more times until you are consistently landing at the same indicated valley at the marker zip tie, I use a zip tie with just enough tension to stay in place, such that it can still be slid forward or back if it wasnt indicating the proper valley on the first zipper pass. Now that you are positive your belt matches the length of the standard precisely, go ahead and cut it. Rinse and repeat using your standard belt similarly for subsequent belts.


Used a second paper clamp here just to make taking the picture easier. Example of how I indicate the valley to be cut.

In the picture above the bottom belt is the standard, the top belt is to be cut.
Note how the standard protrudes the belt to be cut by one tooth at this starting end (top is belt to be cut, bottom belt is the standard).

Here's the matched lengths of scrap belts I was zippering in the video, I cut one tooth off of one of them to demonstrate how easily you can detect the smallest discrepancy with this method.


 fervent eagle
twin plank
Here's the zipper technique I use for matching belt lengths to the tooth.
Esta...
IDK if you have seen this? https://www.printables.com/model/1192440-belt-runner-gt2-belt-length-matcher

Printables.com
Simple little tool to ensure a pair of GT2 belts are the same length, to the tooth (works with 6mm and 9mm belts) | Download free 3D printable STL models
twin plank
fervent eagle
IDK if you have seen this? https://www.printables.com/model/1192440-belt-runner...
Oh thats a perfect tool for the zipper method. Can be a bit tricky to properly keep the mesh on the longer ones.
fervent eagle
Yep. I have one for the next time I make belts.
twin plank
E-bay's torn down and everythings flagged, just about to run some heatsets into the new mounts and start brainstorming the new layout. Looks like my active cooled dual PSU mount and the other new gear is going to fit nicely.
 twin plank

A tweak or two to make on the active cooled dual PSU design, but I'm happy with the hold/strength on the DIN rail. Looks like it should clear the bottom most deck panel.
night wren
twin plank
i remember seeing you designing that psu a while back, that turned out really nice
twin plank
night wren
i remember seeing you designing that psu a while back, that turned out really ni...
Thanks, always fun designing functional stuff. Ignore the ugly seam here, I just have to print the adjusted end cap for the exhaust side, the intake end has the more finalized design that captures that exposed chamfer on the 2 middle pieces.


@hidden jolt the test fit is looking good clearance-wise, and I'm very satisfied with the clamping strength, I'm all but entirely confident that it's sufficient for vertically oriented DIN rails in a back/side-pack e-bay.
twin plank
So much less jank already.


 hidden jolt
twin plank
So much less jank already.
Thought the music was the NFL theme for a moment
But looking really good
Im about half way through the 2nd iteration of the HexDex Cad. Not home atm so can't show a picture
twin plank
hidden jolt
Im about half way through the 2nd iteration of the HexDex Cad. Not home atm so c...
I should have the prototype more ironed out by the time you need it then. Only really just considered that today, are the DIN rails typically horizontal orientation in back/side packs so the e-bay components aren't constantly fighting gravity?
hidden jolt
twin plank
I should have the prototype more ironed out by the time you need it then. Only r...
In the old version, they were fighting gravity, but the second version does not have the electronics bay laid out yet.
twin plank
hidden jolt
In the old version, they were fighting gravity, but the second version does not ...
a lot of the convenient, quick release, printed spring clamp retentions seem like they'd be all too happy to migrate on vertical DINs 💯
hidden jolt
twin plank
a lot of the convenient, quick release, printed spring clamp retentions seem lik...
Oh definitely
twin plank
Active airflow doesn't really care what way it's oriented anyway
hidden jolt
Could probably put a pin or a screw to lock em down if i need to orient the Dins vertically
Probably a clamp
twin plank
hidden jolt
Could probably put a pin or a screw to lock em down if i need to orient the Dins...
nothing in there is really jumping out at me as "OH, this would definitely benefit from dealing with vertical DINs", most back/side packs seem to take a lot more advantage of the enclosure and just focus on properly ventilating that, like we would a PC tower. Intake at one end, exhaust at the other, make sure air is passing over the components fairly evenly.
hidden jolt
twin plank
nothing in there is really jumping out at me as "OH, this would definitely benef...
Probably itd be fine either way. I'd have to test to know if either or is better im just not at that point yet
twin plank
Okay finally implementing at least one cable raceway like ye olde salts recommended a ways back and I'm already loving it.
I'm just using 3× ≈1 in² patches of 3M Dual Lock to secure it to the panel instead of drilling, this stuff is nuts if you've never played with it. There are different flavors (interface hold strength per area² pretty much), think of it like super velcro that's typically less annoying than hook and loop. The tensile hold can get into the tenS of PSI, and the shear hold strength of the interface between two 1in² pieces is to where the adhesive or substrate fails well before they'll even think about letting go, but you can still peel it apart when you want to... granted the geometry works in your favor and you haven't gone ham applying too much to something like two flat and rigid faces, don't underestimate the stuff, you absolutely may need a pry-bar if you overdo it.
https://www.3m.com/3M/en_US/dual-lock-reclosable-fasteners-us/


Okay finally implementing at least one cable raceway like ye olde salts recommended a ways back and I'm already loving it.
I'm just using 3× ≈1 in² patches of 3M Dual Lock to secure it to the panel instead of drilling, this stuff is nuts if you've never played with it. There are different flavors (interface hold strength per unit² pretty much), think of it like super velcro that's typically less annoying than hook and loop. The tensile hold can get into the tenS of PSI, and the shear hold strength of the interface between two 1in² pieces is to where the adhesive or substrate fails well before they'll even think about letting go, but you can still peel it apart when you want to... granted the geometry works in your favor and you haven't gone ham applying too much to something like two flat and rigid faces, don't underestimate the stuff, you absolutely may need a pry-bar if you overdo it.
https://www.3m.com/3M/en_US/dual-lock-reclosable-fasteners-us/


 unique roost
twin plank
They're kind enough to match and pre-mount the heatsinks too.
noice
I need to somehow make more space in the EBay of my project. might borrow the PSU idea
hidden jolt
unique roost
I need to somehow make more space in the EBay of my project. might borrow the PS...
Hopefully he should be releasing the files at some point
unique roost
hidden jolt
Hopefully he should be releasing the files at some point<a:hehe:8809025700030259...
I think ill do V0/doom style on my SW with 2 electronics enclosures. hv on the underside and DC on the back of the printer
hidden jolt
unique roost
I think ill do V0/doom style on my SW with 2 electronics enclosures. hv on the u...
Thatd be interesting
twin plank
hidden jolt
Hopefully he should be releasing the files at some point<a:hehe:8809025700030259...
I said I'd be sharing the design, just need to make a few tweaks and proof the final. Plumbing in all the ebay, toolhead's built, I'm close to software stage and first print.
@unique roost
hidden jolt
twin plank
I said I'd be sharing the design, just need to make a few tweaks and proof the f...
Can't wait.
twin plank
Mains just about all plumbed in.
Here's mine if it offers any inspiration @dim temple


 dim temple
twin plank
Mains just about all plumbed in.
Here's mine if it offers any inspiration <@224...
I wish mine was that neat
twin plank
dim temple
I wish mine was that neat
these cable raceways are cheap, and an absolute game changer for organization, swear it's making the wiring re-work/re-crimping easier too. Wish I had got the advice to try them before I finished my second refit.
dim temple
twin plank
these cable raceways are cheap, and an absolute game changer for organization, s...
They look very similar to what came with my formbot
twin plank
I guess I should toss this in here for anyone else interested, my SSR heatsink mod stuff.
#voron_electronics message
 twin plank
Change of plans, we're swapping the 5VDC PSU and SSR, more efficient packaging, less EMF worries, maybe more touch safe arrangement.
Can always cut a wire shorter, still working on how to cut em a little longer.

 twin plank
Glamor shot

Standards are a handy go-no-go gauge for wire strip length, and placing color bands if you're into my wacky technique for not buying every gauge in multiple colors. I just set one of my combi squares to depth, and cut these little color bands.


I like this clear polyolefin heatshrink as an extra layer of armor on mains type stuff where you find use for it, it's a pain to remove if you added some where you didn't need it, so it's going to keep your more vulnerable high voltage mains lines out of trouble for sure. I scored a line with a razor and was still fighting to get this stuff apart. You can still see through the transparent stuff with it shrunk down, great for seeing through to make sure a line isn't failing catastrophically somewhere during maintenance inspections.


Amazon
twin plank
Y'all think these would help for structural panel assy/layout?
https://www.amazon.com/Each-Cleco-Fasteners-Made-Pliers/dp/B08Z4FWX5G

Our Clecos are plier operated, spring loaded with a durable steel plated body. Designed for sheets that require precise holding of the material while other operations are completed. The C Series Fasteners are the standard button plunger type Clecos. Use C-200 manual plier. For light clamping forc...
twin plank
Look at this, virtually unusable, 3 years later, same part number, same origin plant, maybe better materials quality, but their black is an entire shade more blackish than eisengrau! I'm definitely buying more Southwire again.
I'm sticking a heatsink to the octo pro I'm so upset, I'm about ready to throw the switch and do some intial software stuff 🥰

 twin plank
Making a section of twisted mains.

Seam rippers are a perfect tool for unzipping heatshrink, plastic conduit, harness tape, etc off harnesses quickly without concern for knicking the wires inside.

I think I'm going to PT1000 the bed since I'm short a thermistor port on the octopus pro.
 twin plank
Redid the SSR mains twisty style to match and clean up the e-bay, may as well knock down EMF at the source where possible.
 twin plank
I have the spare raceways, NTC100Ks, and all, it'll fit under the PEM package and still let the raceway covers readily slide off in service mode. I know you greybeards see it, bear with me.
twin plank
My snap-off flush cutters started getting sticky, so they're getting a little TLC tonight
 twin plank
Excellent, I think these 304 SS m3 fender washers will be perfect for sheet stops. If i'm laying out, drilling and tapping the PT1000 in, I may as well do this mod at the same time. I'll do 2 of them on the rear face, 1 on the left and right face rear corners.
 twin plank
Mildly stressful laying out, drilling, tapping all this, but success! I've sunk a PT1000 into the bed and added sheet stops at 4 points.


Landed the cross drill surprisingly well for freehanding in the lock screw for the PT1000.
fervent eagle
Food for thought next time.
I think I would have preferred the wires for the PT1000 inline with the bed so I would have swapped the lock screw with the clearance hole.
twin plank
fervent eagle
Food for thought next time.
I think I would have preferred the wires for the PT...
For my ~13mm bed thickness, I think it's entirely a preference thing since I have the material thickness to have over 1cm worth of the probe inserted. On a thinner 8mm conventional thickness (iirc?) bed, I'd definitely agree better to sink the probe into the meat of it. Aluminum is such high thermal conductivity, I don't think there should be any wonky reading for me like this. Overkill accuracy too, as nice as that'll be, this was entirely because it seemed best and easiest option to be able to read one more temp sensor.
I have some computer thermal paste thats 12W/mK, rated to 250°C, you figure I should bother squirting some in there before I insert the PT1000 on final assembly?
In other news, my chube compact is in the mail and I just heard the A4T v2 early access is public, excited to check that out, definitely a top of the list item to integrate the chube ASAP once the machine is printing again.
fervent eagle
I was thinking about wire management and on #1317678719485083748 I have bed fans near that edge.
twin plank
Update after cleaning up the workspace for the day:
I tested sheet stop function. Catches the plate great, repeatably, definitely going to be a nice creature comfort having those threaded right into the bed. Credit to the Voron user that hit me with the "duh" moment for that one, catch ya on the flip.
I placed the sheet stop centers 20mm from the back bed corners, after the test drive, I think I'd try to locate the left and right face stops more toward the rearward face. My bed is wider than my sheets so the 2 rear stops are more critical for alignment, but with tighter fitting beds it'd be advantageous to try and get the L/R side ones centered 10mm or lesss, close as fasteners/machining allows, so the sheet will catch them easier.


 twin plank
Remember, after you lay out scribe lines, you can aim for the center of what you scratched in, or you can adopt the method of selecting the hard line of either margin of that already very thin scribe line. Aim small, miss small. Use either edge strategically to get back in alignment if you have to. Aim small, miss small.
Used a flashlight to confirm a successful freehand cross-drill here.
Means and methods if you want them.
 twin plank
Well the saw chipped one of the raceway lids when I was trimming them, so one is 18mm shorter until I replace it, boo. Looks a little better organized with the second raceway though still.

5VDC distribution and 0VDC common reference wagos fit in the raceways 
twin plank
Okay swapped in/installed the trimmed wire raceways, tied in the last couple grounds to the mains block, and detangled the harness in said raceways. E-bay is so close to "done for now", just need to trim down/terminate all these thermistor leads and some other MCU connections. Really nice feature of these raceways is being able to cleanly stow service loops or extra manufactured cable length.

I really prefer to use crimps like these to plumb in all the larger 14AWG+ wire crimp terminals, excellent engagement with the conductor, it has strain relief to the insulation built in, and you can inspect the crimp quality before adding the adhesive heat shrink insulation. I have high confidence everything in the electronics bay has a nice gas-tight crimp.

Welded seam, barrel if I am forced to.
 twin plank
Oh, also had to pull through a couple of fresh chamber temp thermistors since I shortened their leads for the old setup. Wouldn't reach the new port.
Again, now that I see the light on raceways, I have a solution for cleanly storing a little extra wire length should my setup change again, maybe I'll have enough slack to plug and play the new hardware.
twin plank
Previous E-bay iteration.

Some first E-bay with AB 🥰 , gosh the concentric harness for passive umbilical was a pain.


 unique roost
That is a lot of umbillical wires...
I did a 4 wire concentric twist and it was quite easy....
That umbilical twist looks nasty to do
twin plank
unique roost
That is a lot of umbillical wires...
I did a 4 wire concentric twist and it was...
As soon as you're counter-wrapping layers, it's straight up less of a fun time to do by hand.
The black magic factor becomes even more wtf though @unique roost you feel like you've been wrestling an anaconda, and the finished thing ends up being this stupid flexible harness
unique roost
4 18awg FEP wires were pretty flexible when i harnessed them
That is so many more wires
twin plank
@unique roost

@dim temple I'm glad I'm where I am before I do a more wild build, there's still stuff I want to find out here before I'm building up a whole new frame. I'll likely build a trident r2 since I have all these spare parts, still, before I make up my mind on what I want to do with a doomspec
unique roost
twin plank
<@450632055030677505>
Looks sick but painful to make
twin plank
unique roost
Looks sick but painful to make
it looks sick, but it's not about looks, it looks even cooler if'n we had the x-ray vision
twin plank
Sometimes twisting wires just helps to maintain a group of two+, it tends to remove the bend from being spooled (the memory). Good for organization, not mixing up your 24VDC +/- lead with the 48VDC.
I'll print a wiring-sins cover for this, but its pretty touch safe as is
 dim temple
twin plank
<@224608547609116674> I'm glad I'm where I am before I do a more wild build, the...
Your build is super clean
twin plank
The aim is to take things off the shelf, then make them more than the sum of their constituent parts.
hidden jolt
twin plank
The aim is to take things off the shelf, then make them more than the sum of the...
In price or amount?
twin plank
hidden jolt
In price or amount?
Idk 🤔 , the few feet running the machine is way more interesting to me there than in the wall anyway
hidden jolt
Fair
twin plank
hidden jolt
Fair
Cursed mockup and discipline, I still have to tear the thing down again and apply the thermal paste
At least i printed this plug to finalize the prototype housing for now. I'm happy enough with the rest of the design I might try to get an alpha published out there early. I really want to get the machine up, iron out any skew issues, but I know y'all are well capable.
 twin plank
Very technical stuff, put a couple bends, done simply with pliers and such, into the microswitch paddle to move the trigger point out a bit in the Y-axis. Reliably clicks before stopping out physically now, straight paddle wouldn't even do the thing at max physical Y travel, this is why we test/shake-down.
 fervent eagle
twin plank
Very technical stuff, put a couple bends, done simply with pliers and such, into...
twin plank
fervent eagle
FYI: https://www.digikey.com/en/products/detail/aratas-formerly-omron-components...
Yeah, I know they're out there and all, I just happened to have a few of these fresh on hand that I'd ordered for spares. They do a nicer job forming the bend in theirs, but this'll work, hopefully. It's set to where it should be triggering about a mm from physical end of travel, I think that'll be plenty of wiggle room for the brain box to catch it.
Terminating the motors harnesses
 twin plank
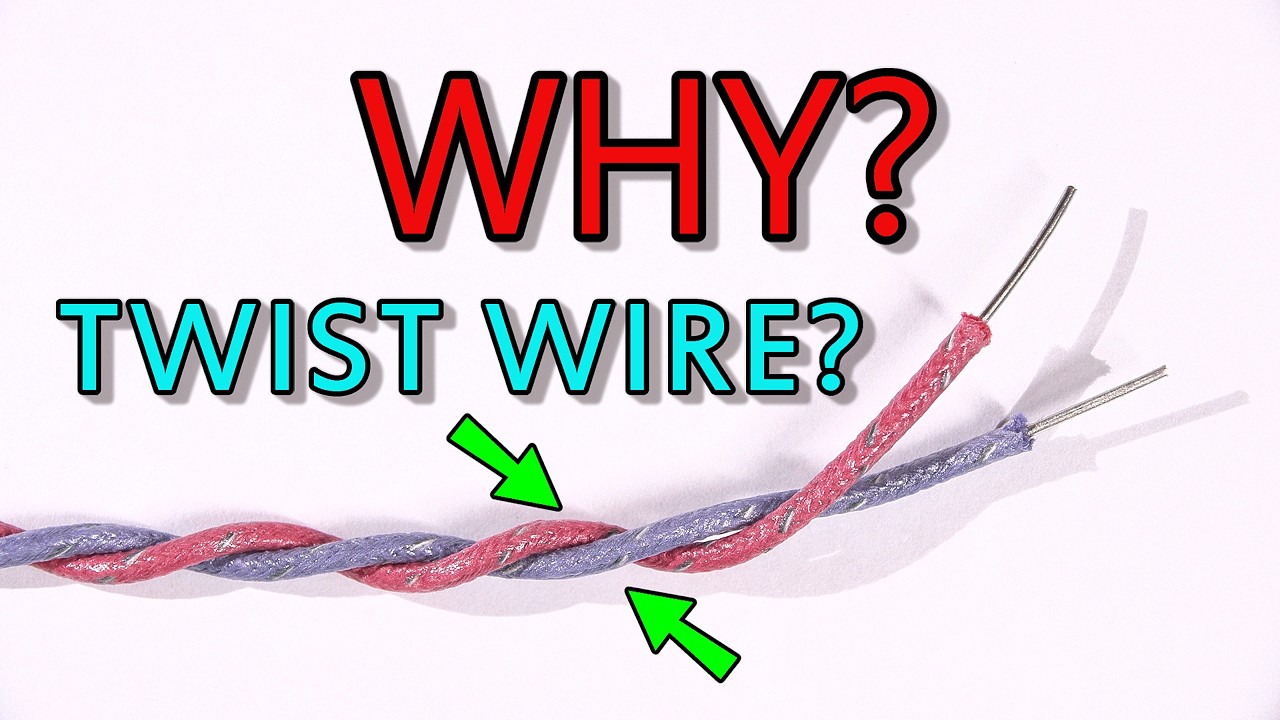
Real Testing And Results! See if twisting wires together makes any difference.
To learn electronics in a very different and effective way, and gain access to Mr Carlson's personal designs and inventions, visit the Mr Carlson's Lab Patreon page here: https://www.patreon.com/MrCarlsonsLab
Check out the Mr Carlson's Lab electronics forum here: htt...
twin plank
@frank pelican always appreciate a second set of eyes looking things over for errors of course, think everythings copacetic so far
 frank pelican
twin plank
<@1374496025011687524> always appreciate a second set of eyes looking things ove...
haii, will have a peruse
noice build btw
i kinda speed ran mine so didnt make a build log 😬
twin plank
frank pelican
i kinda speed ran mine so didnt make a build log 😬
Seemed like fun, good place to drop a bunch of tips and tricks for any newcomers. I'm under review for a helper role now, so good showcase of where my skills are at too I guess.
frank pelican
twin plank
Seemed like fun, good place to drop a bunch of tips and tricks for any newcomers...
oooo congrats
twin plank
Took some assembly pics for the mod write-up


Bolted up and ready to test, I swear I felt the temp of the body drop as I finished tightening in the cross bolts. Excited to proof it on the Voron instead of the clapped out Bambu and inspect the contact pattern tell-tale from the thermal paste.

Sweet tea, not adult beverage, will edit down obvi 😅
twin plank
@tender ermine Pretty high tech solution, it can get a lot more tricky as count increases though.

 tender ermine
twin plank
<@1434264641768263830> Pretty high tech solution, it can get a lot more tricky a...
aaaaaaaaa so pretty
This tickles my ocd brain
Now I have to redo my whole e-bay
goddamit
twin plank
tender ermine
This tickles my ocd brain
see the video a little further up if you're unfamiliar with why it's done besides aesthetics, it's not the whole scoop, but an important facet.
tender ermine
twin plank
see the video a little further up if you're unfamiliar with why it's done beside...
Yea, I just had no idea how to do it easily and properly. Need to read up on it
twin plank
The only stipulation I make in sharing any of my methods is to pay it forward and teach the next person too, I'm tired of servicing other peoples stuff and finding snot-ball solder joints, janky wiring, and the like. I want to plumb in twin turbos, mod PCBs and stuff, not chase down gremlins.
twin plank
Oh good this showed up in time. Still have an open HE port or two and this bag of bad ideas.

I mean look at that thing, and why draw current from the Pi?

 twin plank
"The Prometheus complex refers to a psychological condition where individuals feel a strong desire to create or innovate, often at the risk of their own well-being or societal norms, similar to the myth of Prometheus who defied the gods to bring fire to humanity. This complex can manifest in various ways, including a sense of isolation or conflict with authority." We have a responsibility to make it worthwhile, at least get them to stop pecking at him.
twin plank
Do younger people honestly still fall for that logic?