#Tridentbert
1 messages · Page 2 of 1
oh im onto that, still need to mount the 10kg electrical box 
I’m sure it’s pretty decent! Probably won’t work on all surfaces but what can you ask for
Bigger issue (same with stock vorons) the height of the rubber might allow more sway
oh absolutly. in theory i could just reprint the feet in something none rubbery
the geometry is super simple
That might just turn the vibrations into rotations about the electrical box 🤣
That could be worse, micro vibrations on the surface it sits on will quickly leave marks I imagine
yea will definatly wont be great for the floor
And maybe that’s how it’s meant to be
then again our landlords selected the absolut weakest floor i have ever seen. we have a bunch of tiny scratched in the living room from the cats running on the floor 
I wanna make like a reverse hybrid corexy so an extra motor slings a weight to match the gantry movement
gotta build two machines in one frame where one machine always mirrors the moves of the other 😅
I think the cats are gonna make 4 very circular scratch patterns in a very continent square 🤷♂️
😆
Full idex?
But like not the same purpose at all
nono not idex. like two compelte machines with two beds, two z assemblies and so on in a single frame
someone has already made that exact machine just dont have a picture of it
Yess that’s what I’m saying, it’s like idex but a shared frame instead of a shared x axis
So not idex at all
But like idex can do the mirroring thing so there’s gotta be a good pun there
should be pretty easy as well to do in klipper. have a x and x1 motor where x1 has an inverted pin
if you print a single benchy it will print two and one will be mirrorwed
Oh wait your totally right, I was overthinking it
I was wanting a second trident flipped upside down and turned 180
ofc you might have a hard time homing both machines
For shits and giggles
Dw abt that…
oh well that be true mirroring
Seems like more fun to me 😆
Oooh nice!!
I’m excited to have 4 billion clogs 🥹
Means I’m doing something right I think
but chube is awesome, could fully dissemble it, clean it and put it back together without breaking anything
kinda a first for me ... dont even wanna know how many rapidos i have damaged over time
And I’m scared of the fumes it can make…
thats just the machining oil vaporising
perfectly normal
mine did it as well: #gchat message
Hmm you might be right actually. I was thinking a little vocs and some water vapors but makes sense there’s oil in there
if thats the first time you where heating it up then yea thats expected
Mine only did it during extrusion though
the parts are still covered in oil from the manufacturing process that has to gass of.
And not my first time heating it…
This is scary though… makes sense I guess
ah mhm maybe extruding to hot or the filament is wet? 🤔
could be water from the filament boiling off
cause you can hear some poping as well
Was definitely a little hot, and it was some waste filament it was bubbling soooo badly
I’m really hoping it was mostly vapor 😆
yea then dont worry. To hot + wet filament will turn your hotend into a chain smoker
Couldn’t smell much but maybe I’m just getting accustomed
🤣
Makes sense yeah
Curious how far I can push that now
What happens if you stick a 300c chube into a dish of water?

thats how slice measured max flow rate on one of their hotends back in the day
ya know reasonable printing temperatures for such an material
Feels a little unfair, easier to push gas out of a nozzle than liquid 😆
oh yea lol
I wonder if it’s possible to shoot plastic as a gas and get it to reform onto another part when it hits
Would imagine the structure fails
likely would need a super long melt zone and high temperatures for a polymer to sublimated into a gas
Currently assembling monolith and i have done it once more 👀

Guess il continue to use the steel 695 bearings that i got from the mpx kit way back and see how long they last.
Assembled the front motor mounts and the xy joints for monolith today. Assembly went super well, about as good is i could hope for. In terms of difficulty its no more challenging then a stock voron gantry just that one has to work of the cad model instead of a manual.

Super clean setup
thank you. I still have to figure cable managment for the motor cables out as well as add insulation to the inside of the machine.
Heatup times with all that aluminum is atrocious without internal insulation.
Where did you get the sheet metal monolith?
I got the lasercut parts from laserboost.com but #hobby-store-pl-🇵🇱-🇪🇺 has precut sets available
Thanks
Have you not started outrunning you Galileo yet?
Assembled one motor mount today. The assembly was easy just getting the pins down to the right size and surprising disassembling the old motor mount was an absolute pain. Some of bearings from west3d high a bit of a smaller inner diameter to i had to remove more material from the pins witch took a really really long time.

But oh my god are they looking awesome*!!!
Nope not yet but i also havent pushed the machine that hard at all
Ah understandable
Why no krakens!
Jokes aside, she’s gorgeous
why no krakens? cause i really dont wanna waste money 😅
they are super expensive for what they are. One kraken is ~60€ while a single 2504s from omc is 13€
Sure they have a thermistor but if i really want i could just add some myself.
Finished installing monolith today! Its looking awesome!!

Also ran IS and the results are .. usable


Im not completly done yet. Need to add some grub screws to life shaft, tension the belts correctly (currently a bit undertensioned) and find a solution for the extrusion in the back thats holden bed. It is not connected at the top right now and might be leading to some IS issues.
A small package from @unborn rover showed up today as well. Some really nicely made toothed pullies that il be installing in the future!

Super weird results
Hard to see from your picture, but are your front left motor engages the same belt back right motor?
I see, everything correct
yep front left and back right + front right and back left
but yea the results are .. weird
If I would guess, I will say that 2 motors are not connected 🙂
but belt tension is a bit wack so that might have something to od it with 
Pretty sure Reth can spot something easily
ye but before i bother him il try to fix it myself :D
possible im only running them at 1amp or else one driver is really really unhappy

oh no thats 1.5a sorry :D
even for 1.5
Guess witch one is y1

Also Y1 is so off.
Y1 is the one in the middle with basically no air flowing over it
i gotta rearange the steppers so that xy getts enoug cooling. z, z1 and z2 dont need that much anyways
Sad I don't have picture from my Ratrig 500 anymore - I put 120mm blower fan from the side
2240s?
ofc
If so, with or without Autotune?
without rn
Oh yeah, then temps will be fucked
oh .. great :D
Dropped temps by like 40c on TriDumb lol
wow
Holly hell you are right! With tmc autotune at 1.5a and the drivers are a couple c higher then at 1A but thats it. Damn!

That's more sensible. It's insane how much it drops the temps
oh yea .. guess klipper default setting just suck for 2240
Yeah. It's the chopper frequency, or something like that that's all out of whack
Tensioned the belts a bit more. X is looking pretty good. Y could still be improved uppon :)


Oh yeah, this looks awesome!
Can you please tell what tension do you use for those results?
No wait 6.5lb ... reading the manual is hard
But i could have gone higher but above that the belt slipped in the toolhead.
Gotta take them out of takeoff und put them in without them beeing able to slip nex and see how far i can go
Can I do this on 2209s?
Sure you can use autotune but you wont see that drastically of a temp drop
Oke hmm thanks
Uggg i missread the graph lol its 7lb
Its a 3.1 on the meter

So maybe around 7lb or so
Oh, I meant Newtons.
It is very common mistake in Discord
But amazingly awesome results
Especially if you arent acustome to freedome unit. 30lb? Sure seams fine
Clear graphs and zero vibrations!
Oh yea especially since its laser cut sheet metal
Ive seen far far worth
Kinda proud of that result if im honest
I have moved to US like 5y ago so I steel use g, kg, km, etc
Good. Simply the better system
When i get home i gotta redo the belts on the toolhead and then see what speeds i can get out of it
Tensioned the belts to ~8 - 8.5 lb witch led to a small improvment in max accels values


Also fixed the belts slipping on the toolhead.
Gonna do a couple test prints now and see how fast i can push the motion system.
Autospeed for the win:
GitHub
Klipper module for automatically calculating your printer's maximum acceleration/velocity - Anonoei/klipper_auto_speed
If you run that first, you can learn the limits, then safely derate before you print. You can also see how changes to things like driver current and tensions affect actual max speeds and accels.
woa this is cool, gonna test it out!
Has it become more realistic since I used it?

I'm fairly sure this kills the TriDumb
YMMV. I was happy with it with switch-based endstops, but I know with sensorless you have to adjust the sensitivity.
Here's my two examples


This was on a 250 single shear AWD Trident
I think so. Shared a few outputs above where it let me see the effect of a param change, quickly.


No, it can, just not all at the same time:

Cut a couple holes in the electrical box to add two fans as well as a power inlet. Both sides will get a printed rim/cover to hide the super ugly cut .. but im happy i was able to cut the steel with my jig saw at all. :)


do 16 lbs if it's GT2 or GT2 EPDM
oh damn yea its gt2 epdm
but wont that sort of tension not wear the bearings/rails down super badly?
I'm running 20 lbs on 10mm EPDM and with the lighter CF tube, toolhead, and rail I only need 2WD to match these low tension results.
This is nothing compared to GT3
Tridentbert
Installed the elctrical cabinet today and its looking awesome!
The wooden spacer fit like a glove with the aluminum panel and the insulation.


Actually routing the wires from the chamber to the electrical box was a real nightmare

Din rails and raceways where preinstalled before installing the electrical cabinet onto the printer.

The wiring isnt fully done yet. Still need to ground the cabinet and put some heat shrink on the power inlet.

From the front the machine looks hella chonky!

I think it'd be funny if you cooled it and put some drinks in there :3
I mean its not a fridge haha 😅
could be 
what're you doing for your printer's door?
Im using a clicky clack style door but instead of printed parts its using metal hinges and magnets for the door. #1317580899184807976 message
ah, gorgeous!
Mostly finalized the enclosure.

I still need to design a mount for the filament runout sensor for the top as well as mount the case fans.
so much room for activities
@ripe spindle Whats the board that powers the PI?
its technically underpowered for a pi4 but its been working perfectly fine as the pi never runs at 100%
yea i could have packed it even more closlybut i dont really need many more electronics
maybe a ws9290 (cpap) blower in the future but thats about it
Beautiful setup. I’m discovering new mods all the time and thinking where I’m gonna fit all of it in 300 frame haha
I can’t get my filament runout sensors on wwg2 to even work reliably lmao
im using a btt SFS
works fine for me
Oh I’m using in-extruder ones
I hate BTT SFS 2.0
1.0 is fine
Turned up speed, accels and scv a bit. Printing at 300mm/s with 15000mm2/s
Im like definatly sure that i can go much faster.
Yeah, seems like for your setup it is bottom line 🙂

very much lol
just dont know how much more the motors can handle with the lower ish 1.5a currents that im running
gotta see where the limit with the tmc2240s really lies
this is amazing result for 1.5a
thx yea its not bad. I can see a bit of ringing (even though i tuned IS) that i gotta tune out
otherwhise surface quality and what not is 
And im like sure that im going to get a Carbonara in the next couple of months to make the y axis a bit lighter

Seems like you already have so much power unused, do you even need to ork on making it lighter?
yea i do but im limited on max is accels on y to go faster on the outside
why not fix a problem that might not actually be one
I love the detail, even 90° usb c plugs
Thx the cabinet is not at all super space efficient and i could add like twice as much stuff but its easy to access and even easier to maintaine :)
yeah, thought the cleanlyness, access matters more :))
Ordered a bunch of super cheap asa from Elegoo to print a lot of Gridfinity parts from.

Before i spend 300€ on filament that ive never printed before, i wanted some proof that its decent. Think that proof has been found.

Think thats enough ASA for the next littel while.

Ordered a Crossbow. @junior nacelle lets see if boxturtle works better for me once ive got it installed.

I really really dont wanna use a toolhead cutter but i guess thats the price that one pays
Now i only need a version of G2 that has a filament sensor build it and id be golden.
Nice. Let me know how you like it. It is on my list for the new machine but I haven’t ordered yet
I will! Guess il restort to using the recommend setup anways even if i wast a lot of filament
There is a wwg2 mod with a runout sensor. Id just need to get a top plate that supports orbiter 2 mounting holes. https://www.printables.com/model/972444-wristwatch-g2-filament-runout-sensor/comments

You could steal the one for the A4T and just relocate the mounting holes
Only thing that sucks is that the switch that that mod uses is only rated to 85c
And im assuming that it will get a bit hotter in an 80c chamber where the toolhead parts a bit warmer then that.
Interesting, got a link for me?
The cad is in here. It is what the crossbow was designed to fit. https://github.com/Armchair-Heavy-Industries/A4T
GitHub
[A]nother [4]010 [T]oolhead. A toolhead for Voron front rail printers built around 4010 blower fans, efficient ducts, and easy assembly. - Armchair-Heavy-Industries/A4T
Pretty sure there is a wwg2 option there with switches
ahh thx!

yea there are 2kg of pla but the other 20kg are asa :P
10kg black and 10kg white
The switch should be dissipating a trivial amount of power so it should not have any temperature rise.
how would you rate the elegoo ASA? i assume happy with it since the order is that large 😅
i was on the lookout for new asa to try and after finding a couple of posts online of people complain that it warps a lot i just bought a bunch. Already printed almost a spools and its really lovley.
_ _
Also going to order a bunch more basotect with a aluminum foil added to the front that im going to add to the inside of the chamber where possible to hopefully shrink the painfully long heatuptimes

Going to use the preapplied glue to mount it to the metall panels and im just kinda hopping that the glue will hold
yea very possible it will be just fine .. and if i have to replace the switch every while then so be it.
Got the ordered insulation today and i am installing it rn. Couldnt resist taking a picture of the machine while its all naked.

I just think its neat that we can build amazing machines that are capable of so much with not much more then hex keys and way to much adhd
Printing a drill jig rn and Tridentbert is zzzzooooommmmiinnggg
Also add a temporary badge holder to hold the umbilical up.
Drilled/tapped a couple of screws so that i can mount a sheet of pc to the door.

Added 2cm internal insulation to help with chamber heatup and its looking really good!!

So apparently melamine foam dust is abbrasive ..witch is great cause now its all inside the printer :')
Yeah, Magic Sponges are just melamine foam
TIL yep.
but i dont see the foam giving off much dust
you could probably seal it up with a thin sheet of something, right?
or paint on some glue!
Yea probaply a clear paint or something like that
But id be worried that it would break as the foam is super squishy
Upped the speed to 500mm/s and 30k accels for inner wals and infill.
Crazy! No oozing, blobs or warping at that speed?
zero but the chamber is also sitting at a compfy ~78c


That's a good reason to seal your printer in the correct way!
Getting some nice stacking there!
thx! You can see some fine wood grain in the right light but overall the prints are looking awesome!!
funny you said that i still have a ~1mm gap on my front door. Have yet to seal that printer super well 😅
but a metric ton of airflow and bed fans + 6cm of insulation (4 outside + 2 inside) does the trick as well
Ever thought about just hooking up a heat exchanger / heat pump?
please read the #rules regarding active heating :)
we dont do this here :P
Nonono, a heat exchanger to cool the electronics of course! You have to put that latent heat to use somehow.
the electronics are fine. using beacon thats rated far higher then 80. motors are high temp motors and im not using a toolhead board
toolhead is directly wired to the mainboard in the electronics compartment
and i do want the heat insid the chamber. ever bit helps to maintain temp
i will however put a heatsink on the motors to help with heat transfer as i dont want them to get to hot and melt
Just wondering, with chamber temps that high and such a long thermistor cable running through it, is the thermistor still accurate?
Yea the readings are mostly all the same and similar enough to the temp measured on the nozzle
I dont have a infrared thermometer but i dont have a reason not to believe the 8 thermistors

Does your weather app also have as many temperature forecasts for a single home city? Cause goddamn!!!
I doubt it but thats no where near as bad as @river ivy
This one?

Maaayyybbeee
Oh…
Been looking to add stepper thermistors so I have a dragon dingy on the way how did you mount them? I don’t even know where to begin sourcing thermistors lmao
https://www.aliexpress.com/item/1005005610398354.html? thats what im gonna buy and mount to all my stappers
and what you care about more is core temperature so add another ~25c to the thermistor value to get the core temp of the motor
Do you screw it to the back phillips screws of each stepper right?
yea
its possible that you might need a slightly longer screw depending on the motor
I liked it too much that I'm going to do it also

ive got another therm^2 here so ive got more then enough space for ALL the thermistors
but i gotta fix the printer in the evening cause one of the motors coils disconnected again
yesterday it was a bad crimp this time im not seeing anything obvious
https://magicphoenix.xyz/product/voron-2-4-9mm-ab-2wd-awd-cnc-kit/ You're still using this gantry?
nope installed sheet metal monolith some time ago

and i dont recommend you buy that gantry either
Oh ok...
the atss cnc gantry from ldo + live shaft xy joints from #vitalii3d-🇺🇸-🇺🇦-🌐 are a far better choice
Than monolith gantry?
atss (a tiny shell script) awd gantry is available right now from ldo with some super nice cnc parts ... but monolith is an option as well
but sheet metal is a lot of work thats finicky to get right and way more expensive then the ldo cnc kit. (assuming you want metal ofc)
Oh perfect, really really thanks, where I can find it?
sheet metal or atss awd kit?
atss
and https://vitalii3d.com/products/live-idler-xy-joints-for-voron-printers-6mm-belts?variant=45307720728761 xy joints

Vitalii3D
Description Live idler XY joints for v2.4 and Trident. Machined from 6061 aluminium, with precision pins machined from stainless steel and press fit toothed idler. Assembling Instructions Why Live Idlers Unlike idlers with built-in bearings, live idlers use a freely rotating shaft supported by bigger bearings in the jo
or wait until vitalii releases his cnc gantry
I'll wait definitely I'll buy my 2.4 little by little
maybe by that time monolith cnc is out as well
What's the difference between sheet and CNC
Isn't the same?
its the same mostly but its miles easier to assemble
atleast for my parts some of the pins are ever ever so slightly angled witch leads to belt walk. its not at all noticeable on prints but you can see the belt walk up and down a bit
you wouldnt have that issue with cnc for example
Oh I see, does ATSS have 9mm AWD
yea but the current kit that just released is 6mm
i would NOT be installing the old atss gantry right now
I've drilled and tapped them for M3 thermistors
Added the bage holder permanently to the machine as its been working wonderfully for the lest couple days/prints.


is that WWG2 with Chube air? what size nozzle
G2E with chube air and a 0.5mm nozzle. 0.5mm line width and 0.4mm layer height
I did have to swap spool yesterday and the new spool was fully soaked and print quality took a nose dive from there on out. Gotta dry the spool and reprint the part cause its looking awesome with dried filament.
@ripe spindle Where you bought your frame?
Ah interesting. I’m running air with orbiter 2.5 with a .6 TC .3 layer height maxing out at 60mm3/s
Custom misumi order
what print temp? im printing at 290c with a bozzle
290 ASA standard TC nozzle
Weird maybe bozzle is allowing for more flow
Gonna maybe try a WWBMG or LGX lite I guess. Luke says 60 with orbiter is about right
Weird .. il try without the bozzle installed
I ordered an lgx lite pro lol
Set max_freq to 200 and ran IS again. Id say thats pretty good. :)

i would have expected a giant second peak but only Y has a tiny peak right at 200.
sexy
Very and wall quality is also decent for that speed

I still need to tune IS perfectly but layerstacking, if you ignore the ghosting, is bascially perfect
@junior nacelle look what just showed up!

Nice. Cutting is going to be so much easier for you, as long as the Cnc Sherpa isn’t being used
yea i defiantly wont be using that extruder again
i converted it to a 80€ paperweight
It’s not bad if you have 2mm ID PTFE right before the extruder. Mine is a paperweight as well. 😂
il just stay with my g2
its more then good enough seeing as it can feed chube at 70mm3/s
and the add north pc blend is holding up super well to the 80c chamber
I haven’t even got to the point of deciding on extruder for my current build. Looks like my 2040s will be here Thursday though, so hopefully s9me movement next weekend
very cool!
but il upgrade to wwg2 once i can get a mounting plate for the orbiter toolhead mounitng hole pattern
and there is a wwg2 mod with filament runout sensors so im hopping that box turtle will work a littel bit better
Looking forward to seeing you have that done. Hard mode CAN be fulfilling if you can keep of the frustration
oh yea!
once i can get it up and running il als insulate the box turtle chamber a littel but to hopefully help with drying
maybe a wooden outer shell for boxturtle 🤔
Make it look like an old liquor cabinet
What happened?
its all metal so the extruder gears are getting hot enough to melt asa in a 80c chamber
and also its so finicky with loading that using it in combination with box turtle is a complete no go
Makes sense
Uhhhhhhh what’s goin on I just went wwg2 to cnc Sherpa with an unbuilt box turtle 🥲
at least their v2 version is incredibly finicky to load and i could basically never get it to lead with a box turtle. having a cut of tip helped but also wasnt a guarantee. Maybe the v3 version is better
It’s that metal collet thing right?
id assume yea
your raw gantry has been growing on me so I just pulled the trigger on sheetmetal mono from scs heeh, although I may cerakote them
haha nice! yea the raw sliver looks is 🔥
hey jakob i have been watching your build for couple of weeks if not month and im deeply interested by it i find it fresh and cool, i dont know if im allowed to share pic here but im currently building a moded voron trident similar to you, what got me interested is the way you have the electronics bay at the side i want do similar things since im not using a a toolhead board would u mind walking me through the process, also im using the regular pc panels that comes with kits i add insulation to it but they still warp crazy, what type of panels u got is it steel is it aluminum im interested to learn more from u since my build is close to you of they idea to get high temp enclosure without "a u know what i mean".
Im using 6mm aluminium panels on all sides. aluminum because it has the same coefficient of thermal expansion as the frame. Id love to see your build but please post them either in #voron_build_showcase or make your own #1221643523741323274 to keep this channel on topic :D
just be aware that bolting a lot of aluminum to your frame is really really bad for heatup times. there is a reason why i have 6cm of insulation on this machine and a metric ton of air flow 😅
yah one of the things that i quickly thinking about was that direct contact with them panels and the frame regarding the heat transfer rate i thought about adding like a rubber seal the ones they use for oil pan for an car engine since its easy to remove and it could maybe eliminate the contact, the thing with insulation im kind of limited to 3mm insulation more to that i will be hitting the mgn rail carriage, i thought about a 1mm galvanized steel sheet but that would be like 15kg added to the machine which nets to 30-35 kg which is a lot, im planning on doing a second revision i might do a build log here and maybe do some youtube videos, what about that side electronic bay mount any tips about that.
sounds good yea the electronics by is deffinatly a choice. I think ive done a rather good job integrating it into the build but its really really heavy. the box alone is 10kg .. i dont know if i would do that again on the next build or maybe just stick with top mounted eletronics :D
Did you consider 4020 horizontals at all when designing? Or just straight to 4040
i considered it buy why cheap out when you can have perfection
I’m not on your level of hardcore yet 🥲
How much it was your whole frame?
I need to plan the beast
330€
Parts where cnc cut and i tapped and drilled myself
no idea if you really need them cnc cut and if you dont you could likely get the frame for ~200€
Wdym cnc cut?
Is just a frame right?
well precision cut. tolerance of +-0.2mm. but i assume that the regular cut is good enough for us. misumi does batch cutting so if you order 4 extrusion of x size then they might be x + 0.5mm but they will all be x+0.5mm for example
Ok so it's not a problem as the frame will be square
Yea
Got around to printing a bit today.
Some neat things have shown up from #onetwo3d-🇬🇧-🇪🇺-🌐

I thought the idea was just to build the printers, but now we are actually using them as well!?!? 😂
(What is printing if its something you dont mind sharing?)
yea its INSANE right!!!
print is a custom book/coffee holder for my couch

well that exact print was just a test print. right now tridentbert is without a bed cause im installing the peek lead screw nuts.
Did you tumble your sheet metal parts 👀
Hoping for an all in one step maybe the finish would match that CNC double rigid Z I posted last week
Nope just did an insane ammount of hand sanding to make them look good
do you recommend Basotect over PIR
i might enclose my ender and I see that you have baso on your printer, i have not found a place that sells baso, but i could get PIR from the hardware store
if you can get your hands on PIR 100% go with PIR
id go with PIR in an instand IF i could get my hand on it
Well lets see if the tree supports hold up
@ripe spindle hey jakob one of my friend just got a cnc machine and he offerd me to do some parts for me, i want replace all my z axis parts with cnc ones i modded the motor mounts but the z carriage's is a bit difficult can i get the step files for yours?
i just bought the parts from aliexpress and i sadly dont have the step files for thouse models :(
im getting deja vu lol just skimmed from the beginning. I sourced Mpx 2wd for next converesion before mono, still have box turtle to build, troubles with sherpa mini cnc
sounds like you are on the exact same path as me just like 6months behind
where can i find them
Pushing speeds a littel and seeing where the limts are. This was 300mm/s at 15/45k accels with 15/20 scv
I really need to figure out how to fully eliminate ghosting in the print. Im using up to date is values but i still see some super tiny ghosting's when going slightly faster.
Ik, what I do for ghosting is just print the outer wall at like 5-7k where the inter is like 20-30k
But @wooden kernel might know a thing or two more
I just print everything fast cuz my printer better
Binding in motion system?
Why is it jagged that’s prolly why ur ghosting those look weird
Dont feel anything when moving the toolhead by hand but its possible
Or its just monolith sheet metal not beeing build perfectly

My theory is that the pins holding live shaft are tilted slightly cause im no perfect machinest
I’m sure it’s built better than my machines
Damn thouse are impressiv values for y
But yea i see the jaggered line
The recommendation algo was having a field day
Yea
But i think il fix it by doing nothing and waiting for monolith cnc to come out :)
Very possible at the very least it should eliminate the belt walking down and up on the bearings
Oh that won’t go away
Just to be annoying, but sweeping will give slightly incorrect results afain
Unrelated but is that for your Trident build or the K3?
So will non sweeping
K3
Yea think il calibrate is by just printing a test print
Idk if im doing something wrong but ive never completly removed ghosting using input shape calibrate/shakentune
Sweeping gave me the best results of input shaper to no ringing but everything is flawed
35k dun ring

guess il try sweeping and see if that work better
but also maybe ive got a dead bearing somewhere cause im getting unfixable vfas .. one might have notices that im no expert at fixing vfas, im just throwing money at the problem and seeing what fixes it
Vfas caused by everything
Fans are my main vfa
i dont have a strategie but il try realy low and really high belt tension and seen where it gets worse
and just work my way from there
High is better
Change one thing at a time
yea il do that
going from low (voron stock) tension to super high tension
then doing the same for speed/acces/scv
and just selecting what looks the least worse
I’m willing to bet my belts are around 3x your tension
oh i do not doubt it
but im already higher then most vorons have gone so far
Runing low tension now and artefacts are bad. Going higher now and seeing if things improve

but the artefacts look different then ghosting that im used to, so maybe its really a hardware issue idk
increased tension to max right now, and other then something clicking while tensioning the belts (im sure its fine :)))), lets see if it prints cleaner
Thats now with max tension without tearing everything up to increase tension and it looks just as bad as low tension.

These are some weird inconsistencies
very much and its nothing ive ever seen
it looks like ghosting but then ot really cause with ghosting id expect to see basically perfectly vertical lines with that feature beeing ghosted. thats just not whats happening here
Like ringing and not ringing, pa to high and to low,
yea that as well
and also borth parts where printed with 300mm and 8k accels. that should be nothing for a printer like that
@hot orbit might have a better idea of what could be happening
yea maybe 😅 Also ive had dead bearings before and they are normally really crunchy and can be felt by hand. right now its printing and its quiet as always.
Checked belts with Shakentune. 97% belt similarity is good enough. Left graph is fine too, the right graph is doing .. something.

these are both ringing but thats not all of it
print it with no fan
I’ve seen weird PA issues with WWG2. Not say that’s it. But it’s possible
Maybe its a hardware issue .. thats with a stock orca slicer profile. That littel high pitch sound is also new, but might just be because of the high belt tension
Will do tomorrow 👍
sound is an idler
so normal?
uh its a not happy idler but its not a major issue
Failed half way through but one can still see some ghosting

Ghosting fine but is there the tiny waves all across the surface
any ideas what might be causing that?
If it’s not the fans then maybe motors
See the same waves on mine

I think that’s fans on mine cuz they change depending on fans
👍 i did have to abuse one motor pretty badly when building the machine so maybe its damage is showing now
What motors you have
omcs 17HS19-2504S-H-V1
Oh I never used those but I know the ldo2504s vfa at many speed ranges
the long round shaft once
I know em
my machine used to have awesome print quality but in the last month or so it got way worse without me changing any hardware
Avg printer moment
yea lol
but il remove the motors and check the shafts for runout, should be relatively easy to find out if one is damaged ( i hope )
The key in that last video(seconds 1 and 2) is that sound it makes when moving diagonal. It's a rumble of sorts. This sounds like an alignment issue/binding of the balls in the carriage. You can drop the motor amps to mitigate or play with driver settings.
im going to check the motors first but its possible that something just came out of allignment with the print hours seeing as it pritned fine when i build the printer
especially with monolith sheet metal keeping everything alligned is a bit of a pain
You will get it.. that's the 'fun' of 3DP, ahahahahahahahahah
Mhm i wonder why its not printing well. Its a real mistery.

my oh my, did you do a rework on them mounts or they just moved out, thread lock maybe or to much ?
Forgot to put thread locker on the screws holding that motor in and they all worked them selfs loose / fell completly out
Goes once again to show that when screwing two pieces of metal together in a high vibration area that threadlocker is a must.
u using genuine gate pulleys?
They pullies arent the issue here but the motors are using genuine gates and the live shaft pullies are from 3dkatten
i know im just asking, is it the 1.5 or 2
just want know if its worth to get the 1.5 system i just finished doing some cad work and i want swap the gantry old pulleys with genuine gate pulleys
2 .. like it should be.
You wont be getting any real improvment with 1.5 assuming you are using toothed pullies/idlers
So print quality is better but its still not great. Got this kind of permanent ringing all over 🤔

Sometimes I ignore problems because my mind is occupied by a different one. In this case, I ignored fixing z_tilt_adjust because I wanted to resolve the print quality issue first.
Now, the keen among you might be spotting an issue in the clip. Notice how the bed is going up and down—and up again—while the printer is printing this cylinder?
Turns out that when i installed the electrical cabinet i made a small error when connecting the z stepper.

Z0 and z2 where both driven from the same stepper driver and because of that z_tilt_adjust didnt work.
Print quality is now much better. Still not perfect but the filament is wet and i gotta dry that first before doing anything else.

does this look good in just normal lighting
i wouldnt say good .. it looks usable and the surface is smooth. im drying the filament right now and il print a cube again tomorrow and see how it looks then
Jakob, since u are using m8p, are u using pt1000 for the chube?
Im not using a m8p, got a octopus pro installed rn
The previous set up was m8p?
Im trying to set up the pt1000 on the board and the document on what sensor type to use is lacking
I saw you has the chube and if im not mistaken it uses pt1000., an you look like you routed all your wires straight to the main board
No?
Ive never used or owned an m8p mainboard idk what makes you think otherwhise
I sadly dont know either but maybe someone in #voron_electronics knows more
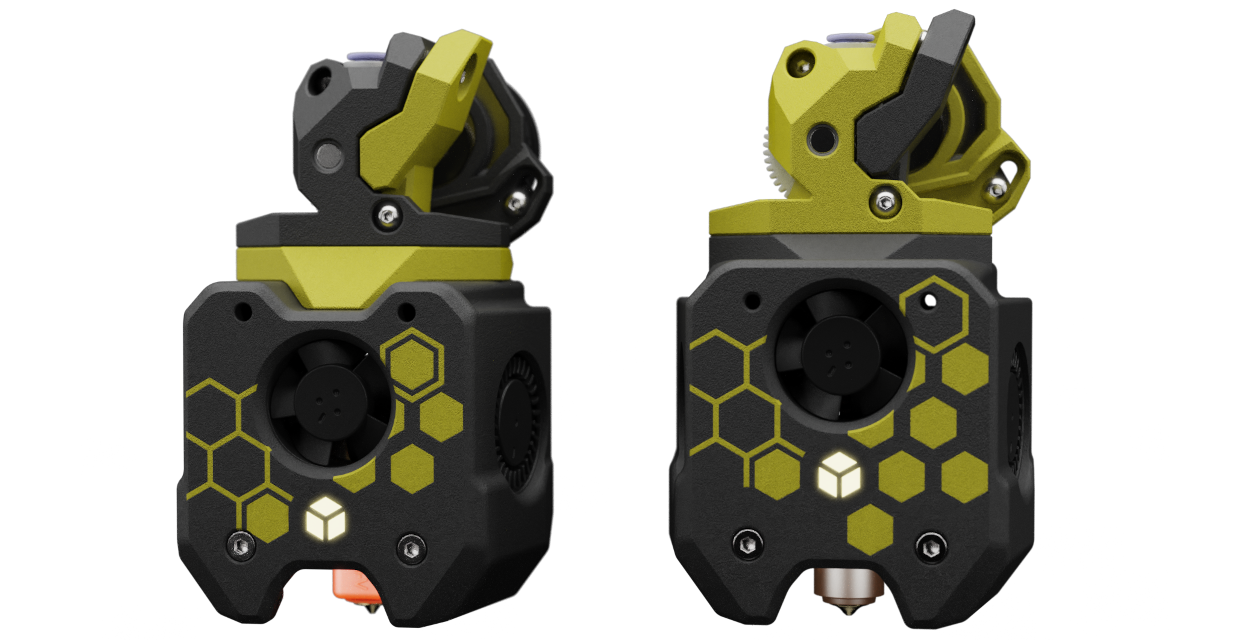
Switched from a cheap hardend nozzle back to my bozzle and wow what a difference.

Which is which
left is bozzle, right is old cheap aliexpress special
wouldnt have thought that it affects overhangs that much.. nice!
yea its extremly weird
i guess the flow is more precise and that affects the side adhesion of layerlines which helps with the overhangs... or something 😄
yea or maybe its the thermal conductivity of the tc and that leads to a smoother extrusions .. or something
Installed a box turtle io board. Pretty cool and handy and i wish it would have come with the ldo kit.

Just need to figure how to power it now cause im definatly do not want to power it with a deticated power supply...
why not? due to having a second power cable or the additional space it requires?
Cause i want the box turtle to power off/on when my printer turns off/on
Going to print all the required parts to install crossbow today .. going to be switching fro a g2 to wwmbg with dual filament sensor in the head.

This extruder looks so good!

Having the umbilical right where the cutter lever is, is not ideal ..

Had to invert crossbow and drill a taper into the upper part so that the filament can feed into the cutter reliably without getting stuck on the lip. Also modified an existing part to allow for inversion in the first place


Got assembled and damn does this look so good!

Now the only thing thats really left to do is get propper cable sleeving to contain the mess of wires.
@junior nacelle check out what i just installed!
I think that still would be easily possible with a second PSU and a relay, like this one from BTT. (https://biqu.equipment/products/bigtreetech-reply-v1-2-automatic-shutdown-module-after-printing). You can connect the wall power going into the second PSU through it and connect the data lines to syour mainboard. Then you just need a macro that starts and shuts down the turtlebox.
yea but instead of all that il just crimp a 2x2 moldex connector and connect it to my printers 24v 😅
i kinda overlooked that i can do that instead .. much easier then what im currently doing 😅
Ah well, as long as it works in the end and suits your needs!
How heavy is your toolhead now after adding the cutter? Or is the added weight negligible?
i dont have an exact number for you buy the cuter and printed parts weigh almost nothing .. in the grad scheme of the toolhead i think its negligible.
Only thing im not 100% sure off if it effects COM negativly because it moves the extruder ~5mm up
you know it
Any negatives with addition of cutter? With increasing toolhead height and higher sensor = more lever force right?
well for one it messes a bit with com. maybe use a lighter extruder to offset that the extruer is higher up idk
👀 did you screw in a thermistor into the coldend of chube air?
neat. how its working for you? i guess you aint printing pla/petg, right?
working well. pla printing requires a desk fan infront of the machine to keep chube cool
finally got 4 real motors on the way for my trident and was thinking if i switch toolheads. didnt know you could run Air passively 👀
Works really well for asa/pc/pet-cf
i read some stories that fans like to die really quickly when you go ridiculous speed so i was thinking of cpap and splicing a little airflow off to chube
Just dont use shitty cheap fans and they will be fine
I was told perma 100k accel und 50 scv eats any fan 👀
Never heared that before
Not like people lie on the internet :)
But at some point if you want more speed just ho cpap
Going to go cpap with a custom slm toolhead as well
But il have to finish #1434612830614585476 first
Not a trident :/
All printers are awesome :))
Started printing parts for #1434612830614585476
Rewired the toolhead today to have fans pwm controlled and also added some 'fancy' sleeving

Seeing as my trident is taking forever to reach temps im finally doing something to combat the issue. Going to install 3mm thick neoprene gaskets in-between the frame and the structural panels to decouple them from each other. Maybe i can even beat@junior nacelle chamber heat up times. 🤔

The 40mm x 2mm neoprene strip will also finally seal the door against the chamber.
I never thought about neoprene there but I think I am going to do the same
why don't u use one of them bed fans mods they can be a game changer
Bedfans dont do a lot if there are >30kg of aluminium to absorb (and then radiate away) the heat inside the printer (but yea ive already got them installed)
really anything will work. Only thing that is important is that the (metal) panels dont contact the frame.
Yep. Already planning to reprint the skirts to give me another 2mm. After I get the machine running though.
What cold side temps does Chube air see when ran fan less
a couple c above chamber temps
What’s your chamber typically?
depends on what i print but asa its 80c
If I were to print PLA, it would be 80° too. Thats why I don't print PLA 😛
I wonder of smol chube works with calamity - im growing interested. should I cancel smol chube and get big chube instead?
no it wont, calamity is only compatible with the big chubes
but if you want to get calamity go with takeoff instead! its apparently much better in the COM department
oops yeah I mean takeoff but dang thank you

Did you see the northprint sale?
First time hearing abotu this website haha, I'm a west3d boy but thank you I'll check it out!
Tunning scv right now and its soo fun seeing the machine zoom around! 
How much fan are you running?
What are you doing in order to tune it?
50%
just increasing values and seeing when i start seeing print quality issues
Ive also spend a couple days installing neoprene strips on all panels to isulate the panels from the frame.


Installation was super easy. Cut them to size, glued them on and then just drilled holes into the neoprene with a drill and a sharp wood drill.
Im really hopping that i can skip the external insulation with 30mm of pir on the inside because its looking so good atm

I’m always curious with people running takeoff… when I ran more than 50% I got bad VFA’s
yea same here
one of the reasons why i want to switch to cpap soon
Yeah, I love the Toolhead, but hate that you can’t run 100% fan. There aren’t enough SLM Toolheads for Chube. I’m currently taking a break from it, and using Trinity with Chube compact. Trinity doesn’t have the same VFA problems.
plastics do absorb vibrations a lot more then aluminum thats for sure. likely a reason why its an issue with takeoff but not with trinity
im atleast planning on going with El Fuego in the future
would be much lighter and also so much cooler looking
or maybe il wait and go with the monolith toolhead .. who knows really
Yeah, I know… that monolith Toolhead looks awesome. I never wanted to mess with CPAP, but it makes me want to try! However, I do like that El Fuego uses Chube…
water cooling a toolhead would be really damn cool
yea and it can be water cooled as well witch i really like!
https://www.thermaltake.com/pacific-pr12-d5-plus.html is currently the pump + reservoir that i would go with if i where to go water cooled. simply because its tiny

The Pacific PR12-D5 Plus has newly designed mounting stands that ensures further stability while holding the 250 ml reservoir. The rotary cap design provides easy water loop options and delivers 16.8 million illumination of color and is supported by the TT RGB Plus Software.
Oh nice! I’m currently designing a Trident build around Trinity, but should be adaptable to options like this down the road. I’m adding extra Z to the frame, since Trinity and a lot of other Toolheads are long.
yea ive added a couple cm as well but i basically never print anything high anyways
Katten thankfully updated my order and im gonna get high temp cpap tupes as well now

Do you think that PTFE insulator for nema works? 🙂 I ordered few for my Voron Trident.. Just for fun 🙂
no idea but we will see 😃
So I’ve only just started looking into toolhead options and I see all these names - but they all look the same to me 🤣
Arnt they all monolith tool head?!
monolith toolhead is the toolhead developed by wayne himself.
So i just ordered something insanly cool for Tridentbert!

Also ordered one of them Mellow LL Plus buffers to try it out!

'El fuego' toolhead? Where do people find these cool things? All on obscure github pages?
This looks like SLM order.
Probably some GIthubs, or it's not been released yet and it's on some Discord closed group only.
yea its an slm toolhead that can be found in the monolith discord server -> https://discord.com/channels/1227971059764953230/1382552084490096670
it does suck a bit that everything open source is nowadays just hidden and cant be found via search engines :/
Isn't there some sort of nda involved?
nope its totally open its just hidden away in the monolith discord
That's on author that they haven't published on Github
or Printables
it does not seem to have cad files available
oh yea but all the discussion around that project is still lost, even if the project files are published
Lost discussion is better outcome than lost files 🙂
that for sure yea!
Well this sucks...

did you add this to your config? ```
[verify_heater extruder]
max_error: 120
check_gain_time: 25
hysteresis: 10
Would also recommend MPC for takeoff and chube if you are not already using it.
Yea .. but its a hardware problem :)))

aw man that sucks...
Its fine, I should have known better
rubbing on something?
Yea rubbing on other cables is my theory
Mine are routed fairly similarly, however, I did sleeve most of them with paracord for this reason in particular. That does seem like alot of wear for just rubbing against the other wires imo.
The fep cables are fine its just the chube heater and thermistor cables that failed .. not that big of surprise seeing as they arent exactly rated for it

Put some heat shrink arround the thermistor wire as the shielding is a tiny bit damaged as well and i just wanna contain the damage
Gonna replace them rather sooner then later but it will do for now
Heat shrink seems like a good interm fix until you can replace the thermistor out right
Yea i hope it holds until i can install el fuego

If you ordered the parts for it from in3dtec they are usually only take about 2 weeks in my experience at least
and its back :3

yea the slm parts arent the biggest issue .. just need to find the time to fully remove the electronics so that i can install the ws9290 into the ebox
Guess that wasnt it 

I do have some spars that im gonna install tomorrow

70W gonna be enough?
No idea but im gonna find out
Connected the heater of chube to a thermistor port to check what readings im getting and ran a bed mesh (works cause a heater is just another type of resistor) and .. ive got questions 🤔
With the line at the top the heater works when the temps drop (so the resistance increases) the heater stops working.

Took chube apart and the heater cable broke right there .. who could have guessed


Should be good enough until your new shiny shows up !
Yep!
Mostly just needs to be good enough to print Chubechanger parts
Its not stupid if it works really well! 🥵

I dont know why, but i think your printer looks like warhammer dreadnought 😄
Dpd showed up today with a very nice (and big) box!


Other then a few small scratches and broken corners the foam survived the trip basically intact witch is nice to see!
Cut one panel with a jig saw witch was easy enough (even if a little bit messy) but it fits like a glove!

And i then covered the panel with a aluminum foil witch looks awesome (even if its not perfect)!


And panza delivered some presents today 🎅

Sadly the heater will now come tomorrow cause Fedex sucks 🙂
And how about PTFE dumpers for NEMA17? I installed them on Z motor on my Trident and i think printer is quiter 🙂
They are in the box as well! Will be a while before i install them as they are gonna go on #1434612830614585476 and i do still need to print a bunch of parts for it!
gonna get Tridentbert backup and running later today.

Looks stupid but im loving it

Printed a full plate of TreeD pc pbt gf over night without any problems! 🥳

Lets see how badly this is gonna go .. once again printing them out of TreeD pc pbt gf!

Parts printed fine but i had to swap to a new spool witch was apparently still not yet fully dry as the color of the parts after the change are much lighter


El Fuego toolhead just showed up and it is SO tiny holly hell! 🔥

I can’t wait to see it installed! I might have to switch my plans and go CPAP….
Also… are these brackets metal???


SLM?

Nice! I might do that too… I have a few things to get SLM’d so I’m looking to add things to the order
I’m also trying to figure out a way to make the bed more adjustable in the Y direction. I’m going to use Trinity, and they bed needs to move back like 25-30mm
Its nice but like totally worthless. Plastics will work just fine for holding two pieces of alu extrusions together :D
did you buy in europe?
where?
I believe he is traveling at the moment. It might take a little while for a response.
tk for the warning 🙂 cheers
FF-PIR is suitable for insulating sauna walls and ceilings, as well as ceiling surfaces in other rooms with plumbing. The insulation boards can also be used in
And yea they ship to mainland europe with reasonable shipping prices
Think they charged me ~35€ for shipping for 5 sheets
Had my first failiure of the LLL plus from mellow today. For some reason it just stopped feeding filament and because of that the extruder ofc ground down the filament and stopped extruding correctly for a full layer :/

Could have been because the extruder gear on the lll plus was rather loose and it might have just shut down trying to feed filament without a sensor triggering ...
hows it working now?
Only happend on the one printing. Seams to be fine now 🤔
Wonder if voron team will ever release an SLM machine so far loving SLM parts 😬
lol
Desktop cncs prob more reasonable
more like a new revision of their current desktop 3d printers 😆
Going to print this tube and screw cutter jig for my dremel. https://www.printables.com/model/64586-rod-tube-and-screw-cutter-for-dremel


Lets hope that this model works cause it wasts like 300 grams of filament 😆

Looks good and works really well, there is basically no slop in the system at all!

Onlything that i can already see is that there are no slots for magnets for the little adapter plate for cutting screws and because the fit is also quit loose it has to be held down by hand when cutting.

Magnets and cut steel may not be a great combo….
Oh mhm yea true 🤣
didn't realize this thread was still going!
ofc it is im just kinda bad with posting stuff 😆
oml this is scary asf
now i want one for a compressed air die grinder.
i'm looking into the LDO desktop CNC, it seems quite great honestly
whats scary? never operated a dremel before?
well less than an angle grinder
rotary tools are bad by default for your health
sure, but at least one isn't violently bad for your health 😂 if it was an angle grinder i'd be especially concerned, but dremels are also bad
whats suppost to be so violently bad for my health, if you ignore the disk breaking (witch has never happened to me in over a decade and wearing eye protection and not doing stupid shit)?
the issue is that dremels were never meant for tube cutting, at least this isn't tube notching
who says im cutting tubes?
if you want to cut thick tubes & rods & screws, bandsaws are the way to go
I didn't say bad for you, I said that jig is scary
😂
🤷
the jig specifically mentions tube cutting in the name, and even with the right cutoff wheel it'll break easily and send pieces
im gonna use it and cut long round objects either with lol
source: know someone who almost lost an eye doing that w/o a 3d printed jig
dont blame the tool for someone not doing their diligence and wearing propery eye protection
thats like saying lasers are bad cause they can blind you .. yea sure but eye protection is a thing that exists. use it.
no no that was with the goggles
angle grinders are much worse if you remove the spark/hand guard, but dremels are no joke either. And all the dremel clones aren't exactly regulated, same for the cutoff wheels
Hahahahahhahaa nice

ey nice! i used mine a couple of days ago and its REALLY nice
and really not at all dangerous right @jagged garden ? 🤣
It worked awesome for cutting my titanium fasteners! Only set some shop towels on fire once….. the dremel attachment is spring loaded the disc itself can wobble if you use too much pressure hehe
The bolt does heat up and can melt the table a bit so heads-up on that
yea ive noticed that as well .. might need to print the bolt holder part out of something much more heat resistent 😆
Can yalls toolhead also play music? 🤣
how are you routing cables into the chamber?
and also where does the insulatiuon go? the cad has no insulation
dont need to cad up panels that i just stuff into the frame 😆
like for the umbilical or what?
i had holes lasercut into the alu panels and also drilled holes into the electrical cabinet

ohh cool
Nothing complex ^^
are you going to do the insulation like this

yep
i liek your printer mine is kind of inspired off of it
thats awesome!
i am also having an electrical cabinet on the side, 300 cubed build volume, etc
for insulation you would idealy place it on the outside where it also covers the frame
basically the same machine lol
and it just gets squished between the panel and the extrusions?
no like outside the panels so that you are not seeing either the extrusions or panels
the less alu is exposed to the open air the less heat you loose
heatloss from the alu extrusions is rather significant 😄
could i see a picture?
i do get this but i just dont understand the placement of the nsulation i was thinking something like the way foam tape is placed on a stock voron
Like this but extend the insulation so that no alu extrusions are visible

yea but ideally you would extend the insulation so that you can not see any alu profiles
how would you put it on then?
that setup was .. fine but not perfect. right now i dont have any external insulation
If you use a rigid material, like PIR, you can just drill a hole and hold it with a bolt and a bigger washer
ah ok. what about for the structural panels? are those just screwed in normally?
yep structural panels are mounted normally
but do yourself the favor and extend the panels so that they cover the full frame
makes external insulation a lot easier
why? wouldnt you want one of the slots on the 4040s to be exposed so you can clip on the insulation?
just add holes to the structural panels in the right place that is als big enough for a bolt to go through it!
i imagine holes here should be more then good enough to hold pir panels tightly to the frame

only difference between mine and yours is that mine uses 4020s for horizontals its much cheaper

yea i just went with 4040s cause ... like .. why not 
got it 👍 👍 ill fix my panels now
also bottom structural panel makes motor alignment super easy! You should be able to just use mine seeing as yours is 300mm in xy
loool that was actually the plan
i looked at your cad and was just planning on using your bottom panel haha
good! Dont forget to add a ptfe spacer between the z motor and the panel. You dont want the hot panel to cook the z stepper
our z steppers are usually not class-h (180c coil temp) motors
https://3dkatten.se/products/ptfe-insulator-for-nema-17-motors? .. thats a eu source but im sure they can be found in the us as well
act as a insulation to isolate the z steper motors from the bottom alu panel
yea but why fix whats not broken ^^ lead screws have been working just fine
oh i think you could just cut those with scissors and a drill at home
oh yea!
they do work fine but i saw it in a yt video a guy used ballscrews on Z
and also ballscrews need to be super straight to not cause problems on their own and really good ball screws are $$$$$
it was a cantilever printer so thats probably why it fixe the issue
https://www.youtube.com/watch?v=4kQZnSzZHD0 this one? 😆

You can get the WobbleX from here ► https://s.click.aliexpress.com/e/_Ddkpe1j
WobbleX interface GitHub► https://github.com/MirageC79/Interfaces-for-WobbleX-integration
After 2 years of looking for the best Z screw decoupling device, I found the ultimate solution.
This video explains the principle behind the WobbleX and demonstrates their be...
I do wonder where MirageC has disappeared of too .. hope the dude is ok
ah no it was a bed slinger with a cantilever
like the prusa mini or a1 mini
but thanks for talking with me i really appreciate it i have been confused about insulation and panels for a while now
ye all good happy to help :D
ye the thing is if you design around a systems constraints then thouse constraints wont be a problem. In case of the tridents leadscrews we allow a tiny bit of side to side wobbly on the z nut and do not fixate the lead screw on the top. that allows the lead screw to wobbly while not impacting print quality
if you tighten the z nut to the bed then yea you might have print quality issues
ball screws have issues that they are thick hard cold rolled steel that might just bend your frame into submission because they warp during manufacturing
there are super straight ball screws but they are hundreds or thousands of dollars per ball screw 😄
oh yea, the base machines are pretty damn well designed for what they are
do you know anything about using z2 preload rails on Z? i know its good for x and y because its more rigidity but for Z do you think it would have any effect on layer stacking?
as far as i know no preload for z or z1 is what one should use
makes aligning the z rails a lot easier
if the rails are all high preload then getting the bed to move smooth is a nightmare
same reason we use no or z1 preload for y ^^
only x should use the hightes preload
oh so the preload would mean things would have to be basically perfect
🙂↕️ 🙂↕️
what grease do you use for your linear rails?
yea the more preload the less the carriage can move side to side
you in the us right? whats your target chamber temp?

Lukes Laboratory
Pick a size of great generic greases for your linear rails and bearings! Comes in syringe with cap for easy application and storage. Temperature recommendations are for linear rails. For bearings, increase the temperature by 20c. Example: You want to print in a 60-100c chamber. Use a grease value for 60-100c for your
but eventually 100C if i can gather the budget lol
and pick the right one for your targeted chamber temp
assuming you are in the us that is
yea at >80C chamber temps that just gonna end as puddle of lubricant on the bottom of the chamber
sadly lol
ideally you would use a grease that has a cSt of 40 - 50 at 80C
https://a.co/d/06Scz1qC theres this stuff i looked at a bit ago

M ITH SHC 220 40X13OZ CAR
too many options lol this is research i need to do on another day
yea grease is a whole topic on its own that i know very little of 😄
im currently using beelzegrease, witch is a cheap gpl 226 knockoff but im gonna get the original in the future
and dont forget to repack bearings as well and not just rails
yea but idk if boxy is currently shipping
like the f695 bearings in the gantry?
he wasnt for a while and idk if does right now
yea
i did not know yuore supposed to grease those
for "normal" sub 70c chamber temps its fine to use whatever is in there
but at >80C that grease tends to run out of the bearings after a while
ep2 seems to be good until 130C
yesnt .. need to look at how viscas it is at what temperature
130c likely means that you can use it up to that temperature but it doesnt say how viscas it is
and it needs to be some level of viscas to stay in the bearing/rails
oh so it might be like false advertising
well kind of
ykwim
im gonna look for that data then
no not really "false" advertising cause it will still grease at 130c but it will behave a lot more like whater then grease
dont the rails get hot when theyre moving though?
if its a sealed of area thats "watertight" then it will happily grease at 130c as well but if there are any gaps its jus gonna run out
not from the moving but from beeing in the chamber yea
thats why you need to use grease that fits your target chamber temp
ive learend that lesson the hard way on my v0 😆
hmmmm alright thenn im going to go look for that and then fix my panels
thanks
family is calling bye thx
baba^^
belted trident is such a cool upgrade.
Yea but why fix whats not broken ^^
whats the point of these extrusions here?

im guessing theyre just like temporary spacers or sokmething to reference while assembling the printer
also, does the extra hegiht of the frame help with the umbelical?
i am reconsidering adding an extra 50mm of height to the frame because then new panels would be pretty expensive, but if im going to have structural panels at some point it might be worht it
yea just makes it easier to allign the gantry extrusions
but ideally you would have them from the bottom extrusion to the gantry extrusions
do you find the extra 20mm of z height useful
yep very!
👍 got it thank you
I know you sold your boxturtle to Mr duck but how was your experience using MMU with takeoff? Was there a negative that made you switch off? MMU is non negotiable for me and I want to start dabbling in tool head optimizing/ridgitizing eventually.
just go with toolchanger 😉
My main reason why i sold it was that box turtle, atleast for me, only worked with a filament runout sensor in the extruder but that is a dealbreaker for me since the toolhead im planning to run does not support said filament runoutsensor
yeah most MMUs require cutters & extruder filament sensors
I love DualFS WWG2 for that sm ngl
with sls pa12 I was able to get tolerances good enough to get all 12 here working consistently.

yea, thats something that i did not want for this machine
i definitely considered it and realized toolchangers are just superior
IDEX is more than enough compared to what most people need for functional parts
MMUs.. just so many things that can go wrong. Just buy a Bambu Lab or Creality K1 plus or something.
Or use BTT's new Klipper one
yep .. having both is the sweep spot!
though having toolhead built-in filament sensors have been awesome
U got the step files for the brackets holding the insulation
Sure thing!
Well looks like my beacon adxl is failing

I have another beacon here it im going to install during the weekend. Also gonna check what adlx chip i need to gonna try and replace it on the board.
i feel your pain i did this too, but know one knows .... but me ...
Yea that mistake really did hurt lol
With VAT?
Yep!
where did you order?
What’s VAT
The thing that pays for our healthcare and social services .. but vat is "value added tax"
Oh so like sales tax
My total order comes out to $240 with belts and cnc monolith
No tax included, but shipping is free iirc
No idea what the price without vat is. In europe products have to adverticed including vat ^^
I think I like that more than seeing “Sales tax: $30” on the checkout page
But I think sales tax is less than VAT but at least you have free health care but enough about countries lol
we europeans just dont really care about vat because we never really see it. buy something at a store? price on the product is the price you pay (so including vat)
i never understood that about merica why the price on the shelve is price excluding sales tax .. such a weird thing
It excludes sales tax because sales tax is per state
I like that vat is included in the price
yea true in europe vat in europe is a federal value thats the same across the country
Maybe for some other reason but per state could be a reason
yea maybe anyways printer talk .. or more like going to bed talk 😆
Sleep tight man
@ripe spindle what are these walls for?

also, how is your door flush with your frame? i have clicky clacky door and theres about a 3mm gap which i filled with foam tape between the frame and the door
also do you think you could send me the cad file for clips you use to hold the insulation on to the frame
one more question, does your umbelical enter the chamber from the side of the printer or from the back, and how do you hold the cable in place when it enters the chamber?
what im thinking of doing is having the toolhead board mounted near the entry point of the umbelical so that the wire running from chamber to toolhead board is the shorted possible
I think buildign both is my main take home point here heh
to space the electronics of the printer structural panel to have space to add 40mm of insulation
#1317580899184807976 message
enters from the right side (since thats where the electronics are). Right now im using a badge holder to hold the umbilical up. The badger holder got a bit melty but still works fine
#1317580899184807976 message
i asked the umbelical question before lol sorry
your printer looks siiiiick
for holding my umbelical i thinkk i might just use a ziptie hooked onto maybe a sheet metal block
my goal is to, eventually, have nothing made of plastic in the chamber (except fans). i am planning on makinng my own custom bed mounts out of sheet metal
sorry if im taking over your thread a little i have a very small room for error and its great seeing that we are both going down a similar path
electronics box is $100 which is a bit much so one thing i was planning is to make my own custom electronics box that is sheet metal and held together with brackets
i also really like your door
im thinking about just ordering the same panel 3 times with the holes in it for the enclosure because its going to be covered in insulation anyway
@ripe spindle After fixing up my V2(monolith preordered!!!!!) and finishing Froron (which are just mundane tasks left at this point that i'm too low bandwidth to tackle) i think i'm def going after a trident build in the near future
Do you think it's a good idea to base the build off your printer, or should I go with something custom like Froron was?
I'd say Froron has been a nightmare of compatibility issues for sure, but I've also learned a lot about designing through the process and am a much better cadder now
But it also seems like Tridentbert is one of the best tridents around here
I wouldnt say that lol
There are a bunch of machines just like this one and mine is in a pretty sad state right now lol
I need to sitdown and fix the wonky y extrusions, cause they arent pararell right now
Takeoff is also only beeing held together by hopes, dreams and superglue
i meant design wise and mods / completion wise lol (not like completed in reality)
Ah yea in that regard ive played the voron modding game to completion 🤣
Yea base it of my printer / do it like everyone else in monolith discord beeing building tridents. 4040 frame + structural panels and some kind of com optimized toolhead.
As for structural panels laserboost now ofers dirt cheap powder coating in a couple of colors.
on your printer, if the yellow on the insulation was foil wouldnt you want it to be facing the inside of the chamber?

Thats just an adhesive backing
I put it on the outside to protect the foam
But Basotect is not that great of an insulator
You are better of with pir and make sure to also cover the alu extrusions, they loose a lot of heat!
👍 I am planning to on 1 inch pir and maybe cork or something under the structural panels
that's some wild levels of insulation haha
I'm just using some simple 1/8" neoprene foam on the structural panels before screwing them into the printer
overall though i care much, much less about the chamber temp than y'all do
Complications start way before then. we also don't discuss going past 80 to stay in line with the rules 🙂
sorry
@ripe spindle Since you have a V2 and a Trident, from a multi-purpose perspective, which do you think is better? What should I consider when choosing one over the other? I'd like to know the pros and cons. Thanks for your help.
Trident. Don't look back
V2. Don’t look back
Both. Don't look back
If you are going to self source a higher speed build, trident is the way. If you want to buy a kit and maybe upgrade to a toolchanger 2.4 is the way.
Also, don’t do a 350 trident because you will have a slower machine that is less versatile for slow machine stuff
Belt lengths are no joke. It takes an absurd amount of mods on a 350 to keep up with even a mediocre awd 250 and a noodle 2020 frame
Yeah I want a fast machine with 350mm volume so then V2?
It doesnt matter. Stealthchanger now has a v2 and trident option
Indx will work on both as well
Both can be modded to be insanly fast assuming a high enough budget
Big machines will always be slower then smaller machines but with the righr mods it should be plenty fast (4040 frame, structural panels and 9mm monolith awd)
The main problem is that I cant have a tophat, so I would need to place the dock in a lower position, that would be impossible in a Trident since the toolhead doesnt have Z movement.
atleat with indx you dont need a tophat
with stealtchanger you very much do