
#Sub 0
1 messages · Page 2 of 1
6bt 12v Cummins powered 3d printer
Now we’re talking
Start a speed benchy and hear that turbo spool up 🤣
I didn't realize that I'd run out of heatsets again. I bought a bag of 100 and used all of those and the ones I already had. At least it's prime day at amazon
Daily update #2:
- skirt corners
- Bambu Lab anti vibration feet mounts
- printed idlers seem to work well but we'll see how long they last
- I burnt my fingie :(


Daily update #3
- skirts done except inlays
- xy joints done
Just waiting on parts now to complete ab drives

Not much as far as progress but pi arrived today and motors should get here tomorrow.

Then it should be ready to go
A pi4 for that is strangely overkill to me. 😅. I used a zero 2w with my pico in the Doron Velta build.
Well, how about this? https://www.cnx-software.com/2023/04/13/7-dongshanpi-picow-small-arm-linux-board-with-usb-wifi-chip-four-12-pin-headers/

Based on its name, the DongshanPI-PicoW board/module aims to be an Arm Linux alternative to the Raspberry Pi Pico W with a SigmaStar SSD210 dual-core
Or maybe one of these: https://wiki.friendlyelec.com/wiki/index.php/NanoPi_NEO2
¯_(ツ)_/¯
Nah still too big
Don't fret, I through in a pi3 I had kicking about collecting dust
The best SBC is the one you already have
Well said
Almost done here

Now that is looking fantastic 😍
Are you cutting your own panels?
That reminds me, I need to do the dxf file for the panels
printing them with translucent petg 😄
Printing back and bottom panels, however not doing side panels
Actually that was my plan I've got some prusameters
I think the translucent green could look cool
Print in place subzero hehe
Maybe I didn't completely think this part through


that does look a bit tight🤏
your pi / pico mount is on upside down too
Ik that's on purpose my power inlet wires didn't reach all the way
Issue is filament has no way of getting to the extruder :/
Sure it does. Just use carbon fiber filament and it will wear its own path through all the plastic. 
make a hole or indent into the orange pi mount and route a ptfe bowden along
That's a good idea
I'll have to take everything off first tho :P
no pain, no gain 😄
do I need more than this to get tighter tolerances lol

we'll see ig

It passed I'll buy it soon
40 bucks might be a bit much but I think it'll be worth it
You could probably get a scrap piece of aluminum for much cheaper than that or possibly free if you called any local machine shops...$40 seems like a lot... could also try send cut send
That's how nemgrea and I got the beds for the build at rmrrf
https://media.discordapp.net/attachments/1037748538140004362/1228486576242429962/20240412_182639.jpg?ex=66a2df47&is=66a18dc7&hm=6aeb1e4cb5d1a471f566570f8625f37847afa772e8c31fca319b45339f091c4b&

No cnc or mill 🥲
Bed holds are tapped and screwed in from the bottom
Sendcutsend ?
I was about say I'll check that
It would definitely be cheaper than $40
Just a through hole then?
Yeah
How thick is that?
I have mine at 6mm rn
Which I think may be unnecessary
Yeah it's 6mm
Looking sweet guys, yeah I got 40 bucks quote price too for the 42mm square bed.
My dad came up trumps though with some 5k series alu plate. Cut and machined it down and faced off the top / bottom surfaces to make it 8mm thick.
Just got to find time to drill and counter bore the holes and get mag and bed plate sorted.
I ended up going with pcbway bc I wanted the fancy add ons
ye it was more money but i mean not by much and I think the difference was worth it
you do anything for the bed plate yet? I'm considering just cutting some glass and putting some pei sticker on it or smth
Not yet, it's a kind of on hold for the time being as if not been looking after myself very well as of late so taking time to get back to good health.
And also going on scout camp next week from Saturday so going to be a little off grid for a while.
I'm hoping the time off and time away will do me some good.
I'd like to say that I'd be back at it after that but life is life and my wife has a big op 3 days after I'm back because of the big C.
So going to be supporting her through recovery.
So might be a while before I'm fully back on the game.
I dare say that you might very well finish yours before I do😁
That's just a gami now
Take care❤️
Thank you
I'm feeling much better now I've been looking after myself amd we have a good plan in place for my wife so things are looking up👍
Well that'll certainly be interesting glad to hear things are well
i should realistically be back in about a months time if all goes well
but we will see what the future brings
hopefully ill be back sooner, but for now i will be just lurking🤣
Well I'll keep you updated.. I'm almost done with the physical build
Just gotta set up klipper
Except the bed ofc


Hey ...that's not right.. usually the Micron is sitting on the bed of the big printer 😂
The tides have turned
Micron in a 350 😂

My 350 trident kit will arrive one day and then I'll be able to stack all 3
I still want to do micron in a 350, in a Phoenix
we need a printers in printers thread somewhere
Nesting dolls at that point
Now add subzero to that

You could fit a micron and subzero on the xl
yee
Love it!
We must go further
Sub zero in a micron in a 350 in a phoenix
I wonder if it'd fit on an orangestorm
I'm gonna try a completely printed rail for x as the current one with the bowden tubes isn't sturdy enough to hold up the toolhead.


Maybe print one part from petg for less friction
I'll try that once it becomes an issue. Huge pain to replace :P
You should look into what zruncho did for printed rails on tri zero
https://youtu.be/JXZt2rP1yQQ?si=OZQYVKoJwI98iU1u
That's certainly a good idea, however my frame is also printed and wouldn't slide that smoothly (also it doesn't actually have the t-slot lol)
I suppose I could print another gantry extrusion with that but again I don't know if it'd be much better
Ah ok
You may want to lubricate it with graphite. Make it glide more easily.
Also yes. Petg would help here a ton.
V0.2 in a flsun v400 delta


Fr
I should build a sub-0 and then do the same with the Doron Velta. 🤣
hold my beer 😄
design a submicron for the 4d chess move
Yes you should
Loving the big feet you went for on this, really sells the smol printer vibe
I'm gonna be gone for 10 days so the build will have to wait until then. Just got to finish writing the toolhead and flashing the boards
https://discord.com/channels/460117602945990666/1267831734406352967 went the wrong way today
I'm back and at it. Flashing in progress, which hopefully doesn't take so long since I suck at flashing
Although I have more experience this time and I don't have to do can
do you use KIAUH?
big i cool, but smol is cooler
I had issues with can board last time
Ugh issues with sd card
brave pushing it in with power on🤣
I've turned it on and off again too many times
might be a bad sd card
or something didnt quite load up properly
had that on one of my builds after i did a fresh install once
had to redo the whole thing again
does it boot if you disconnect the uart cable from the pi?
Tried that already, no change
hmmm.....
might be worth wiping the sd card and having another go
long winded i know but other than that it might be the sd card itself
If it's not working
If it is it should just be on
If you look at the video once I put the sd card in it stops blinking at all
Nope. Might just order another or stop by office store
i did have one that had a slower read/write speed and that caused some issues for me
but it did boot etc, it just hung / slowed down on the odd occation
ctach up with you tomorrow bud, got to hit the sack
Gn
best of luck though
I'll see what I can do
how'd you get on?
I tried another sd card and it had the same issue so I think its something with the board
if it comes to it I'll just buy a pi zero since theyre like 10 bucks
I fear that it may be a faulty pi as nothing I do fixes it, the sd card reader appears to not be working
I just bought a pi zero so hopefully I have more luck with that
issues with the sd card reader seem to be pretty common for the pi 4
F8ngers crossed it works for you
Oh not heard of that one before, I'll have to keep and eye on that. Got 2 v0's with pi4's in. Sub 0 has a pi3
I'm a mess rn I accidentally ordered the wrong pi and wasted like 15 bucks
I often do this when I mess something up I scramble to order a fix and always get the wrong thing
I'm gonna mess around with the 4 some more before I order another
Oh no, sorry to hear that, sounds like you need to take a breather bud.
That's probably a good idea. I'll work on a less stressful project for now.
ay were in

just had to wait for new rpi
bed seems to be taking a while to ship from pcbway unfortunately
@unborn merlin would you mine sliding me your printer.cfg file?
got everything flashed
Would it not be the v0 config but with max distances set way way lower?
sure thing!
sorry for the late reply
I'm lazy
Fair. 😆
No worries, I went to sleep right after I sent that
You were up late then😁
How you doing these days?
Hope the break helped
Pretty good. Definitely needed that break, the project in question was a rpi 5 computer for my 3d printing closet


I can't escape the rpis
Oooo nice project and one I'd love to do one day just for kicks
Oh I forgot to mention, I have the belted Z mod on mine so the printer.cfg will need changing for that bit.
noted, thanks for leting me know 👍
another mini project! soldering those tiny wires was tough
Yep I feel your pain there🤣
Very smol update.😁
Got round to starting the umbilical... top side anyway🤣


Did you get your extrusions pre cut? Or did you cut them yourself?
i cut them myself from a spare siboor frame i had collecting dust
Deciding on to do this, or work on a similar project (salad forks little brother)
Or a pandoras mini box
V0? Or something else
Cause I don’t know if I should buy a few long aluminum extrusions or go with some other option
V0 so it made it easy, just set up the mill once and swap out the extrusions.
took about an hour i think to do the lot.
got to do the top hat later though
that would be cool
depends on if you can cut then yourself, but it would be cheaper to get lengths in than buy a frame and then cut
i think some places will cut to size but comes at a cost normally
I work in a machine shop so it would probably be easier to get it in lengths and cut it down on our automated band saw
Just gotta finish my v2, but I will probably slowly work on the cad here soon
that would be sweet and would be great to get other ideas for the smol printer🫠
looks like the baby printer is about to have more babies
I don’t know what type of psu I should get (I’m not smart enough for that lol) but I know It needs to be smol
well that depends on if you plan to have it in the printer or go for an external one.
the later will free up space for other components and wot nots.
if your not going mad with all the toys and big heaters then 24v at 6A will be enough, otherwise 24v at 8-9A should supply what you need.
i know @stark parcel was working on an printer bound power supply but i think it didnt have a case on it?
you'd have to ask him for more details though
What type should I get? Lrs-50-24 be able to work?
I’ll probably have it in the printer, still have to depend on the size and cad
that would be cool, youll have to make a thread so we can follow your progress
Yessir gonna happen soon ™
Hopefully I will be able to get my v2 up and running by the end of next week
still got to build mine, but we moved so i dont have the room currently.
got to get a workshop sorted in the back garden first, then itll be kitted out for a print room etc
nice, unfortunately for me, all my toolhead parts are from a formbot kit with a can board so ive got to extend every wire once I get to that part :P
good luck hope it goes well for you
will you put everything to your github once finalized?
Links to power supplies, pins etc?
no i mean all parts and stuff, lengths of extrusions and yes maybe what components you used. or put the hole cad online
Right gotcha, yes I will jump back on the project soon. Needed to take a break for family and health reasons.👍
no probs! that has highest priority!
garden fork
I'm trying to go smaller than salad fork lol

spaghetti fork🤣
why go smol when you can go BIG

backscratcher
ooooo me likey

dinglehopper
beat me to it
I like it
whats a dinglehopper?
ur a dinglehopper
oh i see


So… where are we getting our bed heaters from?
that certainly an option
i got a 5w heater to test but i think it might be a bit low on power
looking nice though and tbf mine is not annodised either
Like this?
https://a.aliexpress.com/_mrATAsC
I’ll probably make my own
thats what i did, had a chunk of 5000 series alu knocking about so just milled it to size
I’ll find some scrap material at work and mill it out when I get free time
i think that was the one i went for

yep tiny little smol thing
So… for bed setup
It will need one of those bed fuses (possibly bolted into bed)
Bed will most likely need a screw in thermistor
Holes for bed springs
not sure about the bed fuse, i dont think that heater will reach that temp before self distruct
also where to mount it?
Better safe than sorry… don’t know with those Chinese things
i was going to mill a slot for the temp sensor
very true
Either on the bottom of the bed or mounted onto the bed mount (whatever the actual bed is mounted to)
Oh like sitting over one of the bed springs
Was gona us one of the for the bed temp

Either there, or smushed into the corner of the bed
yeah that could work
I will force it somewhere
ill have to moch it up in the CAD
Same
Gonna work on it tomorrow night and into the weekend.
I just don’t know how to model wires in
thay are a pain tbf and not something i like doing much, unless im in the mood
if you find a good spot ping up a screenshot for me


I think I put the wrong connection type in the klipper file for the pico so imma go fix that rq
Oh look at that I got a little drink next to my name
Tool head design: smol xol
Instead of 3010 fans it will be 2006 fans
And 3010 blowers instead of 4010
how about no fans except for coldend and just aux fans
like on the 24/7 v0
the ducts on the side just direct the aux fans to the parts

its all good for the taking
personally im going to stick with miniSB for now
i think the smaller fans might not help with cooling the printed parts though
but that doesnt mean we cant try right?!
i did consider this but the lack of space in the frame might make it fun to squeeze in... maybe 5015's?
Aux cooling might be a better choice
someone asked a while back to have mini cpap
Any tool head that I’ve looked into just seems to big for the smol printer
im not doing any side panels so 5015s as aux would work fine
im going fully enclosed
Same
no side fans = lots of extra x
top hat... basically the lot🤣
true that
likely not a wonderful idea for a printed frame, etc.
What material did you go with?
abs
oh yeah i forgot you printed the frame.... so cool
have you got the cad up on github, i can link you then on my github
tbf I'm sticking with sb as well.. not really striving for good print quality
I can work on that
it'll do the job fine😁
Going for speed 😎
I should put 48v drivers in this
ig the point is cooling isnt the concern when it comes to quality lol
we have very different builds in mind I suppose
For sure
each to their own🤣
Mines not even gonna be a v0 iteration
I'm spending as little as possible, i'm under $400 i think, probably less
i got 400mm/s @ 20k so ill outrun the miniSB🤣
(if I didn't mess up a couple pis)
damn that's pretty good
yeah not bad from OMC steppers
those cali cubes will be flowing
0.4A @ 24v
Smol breakneck

extra tall tophat
where do the ducts go?

no tophat B)
No clue, just saw it in the armchair discord
yeah they have some mad stuff over there
flycron for starters
all depends on how large your junk drawer is
I have some of the stuff I already need for this build except electronics, frame, and possibly motors
huge
I could reuse creality motors… 👀
mema17 for the win
or you could get those beast mode ldos to go crazy
i had some extra nema17s but I didn't think theyd fit
The printer will need to be bolted to the wall or floor at that point
Would shake so damn much

i saw that vid, mad stuff
yup, I think I watched the makers muse version instead of sanladerers
not currently, but with a mod... maybe😁
i thought it interesting but it just doesnt work out like you'd think
while you're at it why not just do awd with 9mm belts
ngl i watched it a while ago, what was the conclusion again?
funny you should say that
oh no
ʷᶦᵗʰ ᵃʷᵈˀ
it sort of works but the suspention adds new resonances
Feel like it would fit my Tiny fork very well
go for it
I need to see this
Soon 🔜
calicube sub 1 minute
I gotta work on da cad
chube or goliath
Dragon hf

Possibly gonna do crazy dragon
9mm belts
itll be going brrrrrr
you could do hex0 and instead of taking advantage of the extra build, go for a smaller footprint
sub, sub zero
you can print a prime blob... no that's it
I was looking into a little bit bigger than the 30mm cubed, I was thinking like 50mm or 75?
speed benchy
Then possibly 75 or 80mm

almost a v0
Pandoras mini box
perfect
yes that would be cool
was about to say.. getting too close

im only really planning on doing voron cubes anyway
I'm more of a benchy typa guy
I’m doing it for the meme at this point
Was pier pressured
thats how it all stated, i saw the short and was like "I WANT ONE!"
"f*ck zodiac signs, voron cube or benchy"
funny how there was only that one nero short on it
not enough attention 😢
We will make it known
its got some traction now there is CAD
🤝
amen to that

gona head off guys
my bed is calling
gn 👋
Night brotha
Stuff I have:
Nema17 motors (gonna reuse creality motors cause I have so many)
Idlers, bearings, belts
Z axis screws
Pancake motor for extruder (possibly Sherpa mini)
Spare fans (don’t know what I have)
Endstops
Old dragon hf (needs new heat sink and thermistor)
Mini 12684
Fuses and bed springs
Pc panels (will use to enclose)
Stuff to make boop? (Don’t know if i will use that or klicky)
Cb1 to use on manta ez
Stuff I need to source:
1515 frame
Aluminum bed (will make at work)
Bed heater (pi heater)
Psu (uhp-200-24)
Mainboard (manta e3ez)
Kapton tape (to use for bed thermistor)
Linear rails
Din rails
🤔 hmm what else do I need…
I know I need to make cad 😂
wow, so Sub 0 Max?
thats going to be mad

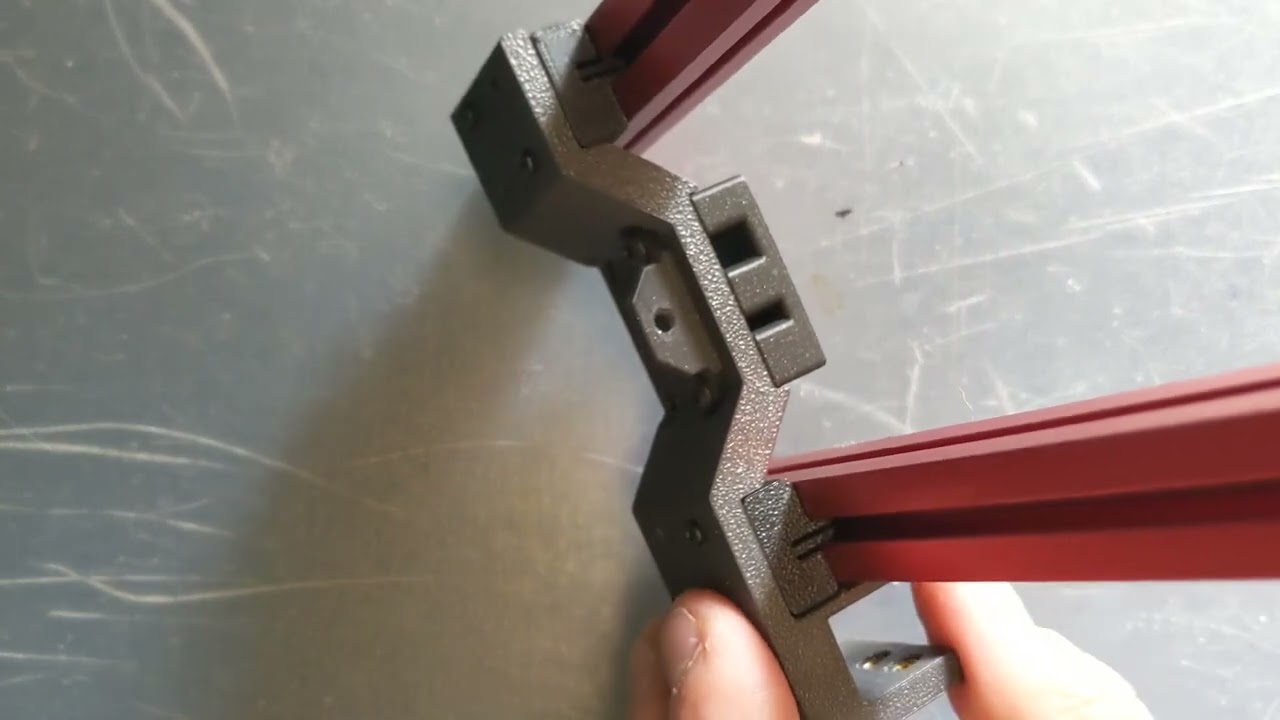
Issue… none of the motor mounts can fit a nema17 motor on a 1515 extrusion
But I haven’t checked the monolith one yet
But that will be tomorrow’s issue… to late for this 😅
Monolith only supports nema 14… time to go custom…
There is a nema 17 motor mount somewhere... I'll see if I can find it

Printables.com
The Voron V0.2 nema 17 mount is a modification of the Voron v0.2 nema 14 mount. | Download free 3D printable STL models
Found it😁👍
Sadly… that’s for the v0… not for a mini fork ☹️
😂


More of a trident than a v0 at this point
thats the point

mini fork
Why not connect the drives?
they are now
Ah
just need some more work to them, so that it can bolted to that rear z extrusion
The horizontal one?
Might not need it at this scale
Oh you mean the vertical one
That might be tricky, good luck
im gonna have it bolted from the top and front, but the only issue i may run into is if the linear rail will be able to fit in there
i could just flip the b motor
looking really good even though you just started😁 👍
its to small, where a m12/pg7 cable gland would not be able to fit inbetween the motors

maybe nema 14's might help?
nah, nema 17 all the way
i didnt spend all this time making nema 17 mounts for nothing
ima make the toolhead cables escape out of the exhaust cover
hoping to get gantry done today
nice work and good work around👍
you going to make your own build channel?
might be a good idea so that you can pool your ideas / cad / build etc
yeah, i probably should do that huh?
more for your sanity
your embarking on the unknown😁
all in the name of science
is there any other way😁
I guess when it's done, it'll be the result of some gland plans.
its gonna be built for a speed benchy, then it will sit in the corner and collect dust
you need one of these just sitting in the middle both A and B motor in one

Didn't even know they did motors like this😱
Looks like ima be doing a mod
Yay, an even smaller printer!
I can finally print an m3 washer without any issues now
those were the steppers i wanted to use on the Micron3030
named for it because its print volume is 30mmx30mm to print ONLY voron cubes
the Z stepper is just asking to use those

imagine a QGL on a 30x30 bed 🤣
need a triple coaxial motor really
Might as well use 15x30 extrusion for the bed
yeah if i was actually going to do that i would probably just use a single extrusion lol
Ah. But that’s the perfect build volume for many small Voron parts. Rail stops, z mounts on Micron+, led diffusers, logos, lots of really tiny things. Now I want one. 🤣
That needs a baby beacon.
Imagine the collection of meme printer we are going to end up with
and people think 120^2 is small
Minicron, Mini Fork, Sub 0, SwitchThread, what’s next 😂
Maybe an even smaller SwitchThread. Might need to talk with @cerulean badger about it
mini doron velta
A voron made from 2x4's.
Have you heard of the Monster Delta?
No I have not 👀
its named because its the size of a Monster Energy drink can
extruder is in the base


sadly the project isnt active anymore
had custom machined parts for it


Are you going to finish the mini 2.4?
maybe one day lol
low on priority atm
also the monster delta wasnt mine it on a different discord
I figured
Busy on other projects?
Yessss tell us your plans 😁
Even smaller? Then you need a smaller toolhead as well 😄

Oh no! What have we done
im feeling the need to get this project rolling again🫠
its been way too long since i got the chance to properly play with this....
@turbid coral how's your build comming?
It’s gonna be a while for mine too… I need to get my v2 rocking and rolling before I can get the mini fork built.
Fingers crossed I can get it complete in the next 2 weeks
I'm working on planning and sourcing my trident build rn... Getting a sick frame from dllpdf. Gonna try to finish this build while parts are arriving and inbetween printing. I'm a little bit short on time since school started up again tho.
thats fair, hope school doesnt kill you off too much this year😁
im expecting more cool stuff from you... no pressure
lots of pressure
I’m going through the same thing right now too. Trying to juggle work and college… but I’m gonna try to chug along with these projects
Bacon Bit
Cable management on this printer is no joke😬 but i got a bit further tonight at least👍


Better see this thing print some ultra fast benchies with that smaller and lighter gantry!
Nema 17 when? Gotta go faster
Well technically you can do it already with this mod...
https://www.printables.com/model/494742-voron-v02-nema-17-mount
Printables.com
The Voron V0.2 nema 17 mount is a modification of the Voron v0.2 nema 14 mount. | Download free 3D printable STL models
I am planning on switching out for Tulip mod at some point though🥰
its got smaller and light motors to boot too
It gets me excited for how the mini fork will be
mine is not super quick, only 260mm/s @20k
but not bad from nema 14's (40mm stack) running 0.4Amps
Aye!
Decrease speed and increase accel
I’m probably gonna be running higher than that. I plan on using gt3 belts (needs higher tension but usually can get more speed from it)
motors stall beyond 20k, they are only babies after all and i didnt go super high on the spec. had to keep it budget friendly
Ah
I think my bom is around 220? I think the only thing I’m forgetting for it is ab motors hardware and bearings
I wouldn't trust that to go overnight.. it would definitely fall off the table
or just fall over
bolt it to the table or wall
Ots OK ill put a V0 on top to stabilise it
Hung from ceiling
Got a new router recently and none of my printers have been connecting so I've been unable to work on it (or print on my v2). Gonna see if I can fix it this weekend
As far as I'm aware you have 2 option
- hardwire to the router
- reload klipper with new ssid credentials
Can’t you just reflash raspberry pi firmware? Cause klipper is already flashed to the mainboard
But I have no clue
You’d lose the configs that are on the sd card in a Linux only partition.
Like printer.cfg? Just copy and paste it
Which you can’t do. Without having internet access or (if you use windows) finding a program that lets you access the Linux partition on the sd card.
Trueeee…. Forgot about that
Oh 3rd workaround is to have the old router plugged into your PC via ethernet cable and that way you can grab all the .cfg files you need before reloading klipper on your sd card👍
It's what I have my V0's on. No Internet just the WiFi for the printers. Just been super lazy reloading klipper now for over a year but it's kinda cool having a dedicated network for my printers😬
I have the old router plugged in still, they just don't connect after the new one was put in upstairs. My dad changed a few settings on certain devices but we checked and it wasn't my printers or my computer. Gonna see if new ssids work
Now the kids are safely back at school I managed to find a couple of hours to finish off one of the aluminium beds😁
Milled this one down to 6mm as the tiny 5W heater might struggle with it at 8mm.
Milled in the mounting holes and counter bored plus a nice little channel for the NTC thermistor to sit in.


Trial fit just to make sure my manually machined bed actually fits

Speed cube time yet? 😆


Funny you should say that
just running up its first heated bed test

two and a half mins to get from 24 degrees to 50🤔
thats not bad for a 5W 24v heater
running PID for 60
lets see how it does
it does indeed reach and hold 60 degrees bed temp
looks like i underestimated this little heater
setting a few things up, but this is almost comical

What about 110c?
dont know if i want to try that😬
thats the plan here too
but baby steps... you know
dont want to break it just yet😁
First tries🎉
The 5W bed heater gets a nice steady 70 degrees.
Tried for 80 and got a klipper shutdown at 78 degrees.
But pretty happy with the results so far.
Gets me excited to start the mini fork
Ooh how'd you get the mainsail bg?
its quite simple to do, once mainsail is loaded on SSH into the rpi and load KIAUH
in the "advanced" section there will be a "mainsail Theme" installer.
install that.
now got to your mainsail printer and in your config files you will now have a THEME folder
download your background in here and change the name to "main-background"
you can also change the side bar too and other things to get it nice an fancy


A collection of community themes for Mainsail.
load more stuff is here
Thanks! Looks awesome
So would it be better to mill a slot for the thermistor or just kapton tape it to the heater?
Milling would be better but kapton would be easier.
I plan on using 2 thermistors anyways
So one will be milled like @unborn merlin then I will have a m3 thermistor in the bed aswell. Just for safe measures
If you heat to 60c, let the chamber warm up, then heat to 70c and repeat until at 90c it should work.
Less power needed if the chamber is up to temp.
That's a good idea🤔
Well, looks like panels are next
of all my V0's?
Yes!
How many?
ALso, would love to see a vid of that legendary speed I heard abotu


three if you include the sub 0😁
ill have to have a dig through my old footage then
Haha no worries. It'd be fun to see but not a requirement.
That is really fast...why does it do that pattern? Is that some test or just a showoff pattern?
Great looking printer!
The diagonal moves are a single motor so it shows off how much each motor can handle before you max out.
So yeah it's kind of a flex
Thank you🥰 it's a bit more colourful atm but will get put back at some point to red and white
Ah that makes sense. Nice.
I dig the Jedi look, and the color scheme you chose. Even on the PC lol. How'd you customize mainsail?
This bit here bud 👆
It's quite easy tbf, if you have a nice background you want just follow the steps above
Tiny!
I think it might hold the world's smallest heated bed...maybe...
Oooo
I am totally guessing though🤣
rofl
What's that mean?
Not seen that one before

https://youtu.be/ilBb-qNrp3E relevant

Got a spare V0 build plate that isn't going to be used so thought I'd see if I could butcher it to fit the sub 0😁
Hoping to get some time tomorrow to do just that and then it's game on time.e for printing stuff🫠

still need to get panels cut though to finish the enclosure and get a top hat sorted too


So smol
Some progress today as I managed to get to the workshop and cut up the build plate.
The theory was to clamp it between two chunky bits of metal to act as a heat sink when cutting with an angle grinder.
Results were quite good tbh and I now have a 46mm² build plate.
Chopped down a spare mag sheet and trimmed after I stuck it down.
Next will be to play and tune it
Hacking parts together has some interesting challenges😁 but is a lot of fun.
Yup, I got some more stuff coming in in the next 2 weeks for my little guy. Including hardware and motion
That's gona be really good to see it start to come together 👍
I really only need to get motors and extra electronics and I’d pretty much have everything?
I also need to get the v2 running again 😂
Od probably start with that one😁
Don't want two non working printers😬
Gotta add bed alignment corners too!
I mean one is definitely more practical than the other
Nah, I opted for an oversized flex plate😁
Helps keep the flat part flat imo and removes that "get it on straight" thing
Ah
Just removes some of the faff
Plus i didn't know that cutting up a build plate with an angle grinder would even work so I went a bit bigger to be on the safe side.
I'll probably do a smaller one as I have enough left to have 3 more goes👍
I might do this though and add it to the github for other to use if they wish, so was a good suggestion 👍
ooo!!!
Dance for me baby
You should seriously duct tape that down, its going to fall over if you go to fast
I think you can run it faster
oh i know i can but it would fall over


This one is amazing tho


not quite, got panels and top hat to go yet
actually...
@spiral lynx would this qualify for  ?
?
I mean technically you don't need that for a serial
Reddit
Explore this post and more from the voroncorexy community
FASTERRRR
happy cake day!

thank you @torpid orchid
To celebrate the first 'd V-Sub 0 Petal is having a small makeover in Teal Blue with the addition of Tulip Mod!


few more parts to print out and its go time!
@spiral lynx i believe we had a deal that you would also get a for your Sub-0 once I'd obtained one for mine😁
top hat and panels are in the works too to get the full package wrapped up
ill go for a speedy run after Tulip is installed😁
ill put it on the table so will have lots of room to dance around
micro sized tulip!!!??? :o
yeah to go on 10x10 extrusion
nah, only had to adapt 2 parts to get it to work on Sub 0👍 the rest is just normal parts
Omg and it's gonna be double shear!
Doubly shear is the only way!
yup
been working on nema 17 versions too
I saw!
I love those comments
almost all are "this is completely pointless and I love it"
oh yes! this is purly to print Voron cubes and nothing else
it was born out of "i want that!" after seeing @spiral lynx 's one...
after that i just made the CAD work so others can do it if they wanted too😁
its been a lot of fun and there have been some crazy idea's for the DEV of this smol printer
It's great printer for conventions, a conversation starter, and a showcase of enthusiasm of people.
Are you coming to SMRRF?
i am yes and ill be bringing the sub 0 with me
This would have place at the voron table 😅

it should be totally finished by then with panels and top hat so shulld be a great show piece and demo for the Voron Table
😁
it'll be great to meet some of the team too🥰
Unfortunately there wasn't a voron table at ERRF, although there were plenty of vorons
We are a secret legion.We are the background noise. We are everywhere.
Especially at the fabreeko tables
oh gosh wrong gif
thats horrible
This is cursed lol
i second this
d'leted 😅
thank you 🙏

Before I managed to favor ite it? Come on
Last parts for Tulip - check
Now got to cut some pins ready for install tonight👍

also going to retiar the 5w heated bed
i have another one i'm machineing up for a 50w cartridge heater
wtf, tell me the used Filament... lol (I have a design with 3DO Makita Blue, 3DO Black and Redline Silver...)
im ashamed to say😬
i have some rolls of... errmm... cough esun abs+🤦♂️
teal blue and cold white
🤣
Tulip?
#1259699805693808681
That’ll be cool
Slow but steady progress
Almost forgot how fiddly Sub 0 is to work on


Sub 0 and Driftrotor powered by monster🫠
Unfortunately not sponsored by😭

Well it was smol before but now having so #1259699805693808681 on it looks even smoler🫠

New mini kirigami stealth front and this time I'm wiring up the NeoPixel

You gonna leave some of the red parts? If you have enough filament I'd reprint everything to match, but maybe that's just me
A few strategic red parts will remain😁... for now
Is that a printed sock for the bed? I wonder if it'll hold up with the new heater
It's was sort of one yes but it was mainly to keep the pei plate in place as the mag sheet is soooo smol that the nozzle kept shifting it about
Bit like this one😬

Yikes
Tiny printer issues
@unborn merlin I noticed your new tag, why not go with "S0.[serial]?"
Or something similar
ᵥ₀.[serial] subscript
Yep going to be doing that in a sec
Tulip mod is done for now😁

What do we think for the red I've left in?
Looks nice actually
I was hoping that, but stuff often seems to work better in my head
Also Sub Disco Sticks

Some more milling on bed plate no2
This one will sport a 50w cartridge heater


Should’ve just put a 70w heater in there. Heat up super fast
Yeah like 5 seconds
Perfect way to 🌮 the bed🫠
But but but that would mean I have to machine up another one😱😭
Made it seem like you haven’t 😂
Why not two 30 W heaters?
Tbf i ha e a third mostly done already 🤣
Didn't have them in stock and cash flow has taken a tumble after the wife's birthday 😬
Ouhhhh
So 50w it is.
I'm just going to dial it back in the cfg and start at 10W
But hey, still works
Here's hopin
Yeah

Oh I like the logo on the back
Thanx, it's ment to be between a petal arrangement and a snow flake
settled on 0.5 max power so 25w and a 3 min heat time from about ambiant to 100 c, not bad
but i kinda want to see what 50w would be like


gave in to the temptaion😬
50w = 1 min 28 secs heatup time (26-100c)

think ill stick with 25 though and see how it does in testing with part cooling going
I believe the gentleman at the front asked for a speed cube
Well i did a whole cube😁
260mm/s @ 15k


FASTER FASTER!!
That tool head and gantry must weigh less than mine! It has to be able to go faster!
yeah but the motors
ITS NOT FAST ENOUGH IF THOSE MOTORS AINT SCREAMIN!
ill do some more testing a bit later and see what it can do now it has Tulip mod on it
last test saw that it can do 300 @ 20k
ill push it a bit hard soon
Why not try 1000mm/sec at 200k?
defo need bigger motors
ill do bowden hotend and cpap
Hey, I do have the good nema 14 motors!
They even have a long boi shaft!
perfect!
i expect big things then😁
They certainly don't disappoint!


ooooo shiny😍
must resist the shiny
dang it, wallet is empty again😖
i got some 1504's on Blueberry and i really like them
No don't resist the shiny! They are definitely S tier nema 14 motors!
love that vid!
mad accels and way too much speed
sub 0 might self distruct at that pace
must have taken quite a while to dial it in
and hungry for POWER
I still have my 1684AH motors that I originally used, they are kinda problematic cauz they have quite the VFAs lmao
Oh yeah, 2 amps is real spicy for nema 14s
what board you got driving them?
Mellow Fly TMC5160 Pro
ooooo nice
Yeah
And also the moons motors that I also never used that came with my formbot kit
oh i have the moons motors on my siboor kit V0 (scarlet and cream) and they do quite well
run cooler than the LDO version too
about the same performance mind
48v drivers when?
ah yes that is in the running but later
got a PITB board to play with
Yeah, I remember they also have 2 amp rated stepper motors but they're a bit hard to get.
pretty shure i can get some of them ones
i have the 1.5a version
same price too afaik
they might be good for the PITB board
what X rail you using?
Z1 preloaded formbot rail
Which I was lucky with the preload lottery
really? wow
i tried a honey badger in the end but killed it in 6 months
Pretty darn close to actual Z1 preload on some of my more expensive SCNEEBERGER rails
Oh jeezus and that's not running it at crazy speeds like mine?
nope
max for me was 800 @ 30k
prety reasonable but yeah the ware caught up with it flinging around
tbf though i print everyday for a minimum of 4 hours and most days its more than 6 so i got a good running with it
its just the price is a bit steep
Thinking about getting a Misumi rail kit
Once I kill something on these poor rails
im prbably going to try an MGN9H rail next, just for kicks and to see if its any better
But heavy
Or actually
If you get rid of X beam then it's worth it
im not going for all out speed i mainly want a good rez graph
high stress means faster ware = more money + more filament gone
Turns out pretty graphs != good shaper result
got to keep it reasonable at least
oooo leme see
As the people in the unicorn chasing channel told me
yeah did my bit of that about a year ago
maintanance means it starts all over again
plus the rail preload lottery (as you mentioned)
my last rail swap saw a loss of 12k accels
Rip
for when you like to live dangerously
When the
Is that nozzle bending?
🤣 not quite yet
It was for a.mini spool I've done, it has a 2mm thick edge and then I was printing the white inner part, didn't think about the nozzle might actually scrape over the top of it though but lucky I had about 0.2mm on the first layer.
The slow mo was taken on layer 3
Came out rather nicely

Iron for scale

I thought active chamber heating is not allowed, pls remove iron or at least share klipper macros for thr iron
Looks cool in blue

have you got a plan for panels? if not let me know (laser cutter in the garage)
Well i have some old 0.1 2mm pannels that i was going to ise as a dona amd ive joined a local maker space and they have a 30w C02 laser that might just do what i need😁
But i will let you know, amd thank you for the offer🥰
Working on Tulip updates atm so might be a few days yet
Chamber lighting... check
epyc!
its slow progress, but progress non the less
Indeed!
A small update...
Swapped out the 20mm die springs for 15mm ones.
Looks much better and i dont have to crank them down as much now.
Stupid thicker bed making my life more interesting


The more I see this thing the more I want to build one. I love it
that build plate works so well with that cartridge heater in it
im most likely going to change the CAD and BOM for it
those 20mm springs were so hard to crank down it hurt my fingers😭
I knew throwing a heater cartridge in a block of metal would be a good idea. Plus. You can exceed server limits with that amount of power. Lmao.
hell yeah
ive got a third plate for option three... what ever it is
Strap a ceramic heater to a block of metal? 😆
i think we did toy with that idea
might be an option to have a thinner bed
At some point I’m gonna play in CAD and make a printed frame for it. Not just printed extrusions.
really need to finish off the frame (top hat) and get panels cut
really
i know @turbid coral did his version of the sub 0 frame that was printed
Yep. Perhaps with tulip mod partially built into it. So that it’s an even easier build.
now that would be cool to see
I think when I “finish” my TriHex build I will work on that. Need something “cheaper” to build next. Since the v0, micron+, and now TriHex will empty my wallet into dust.
Not in one piece mind you, but yeah that was fun. I can share the files if anyone wants. Lots of heatset inserts though 😅
Mine will be 4 maybe 5 pieces in total but like modular sections.
I did the side rectangles each as one piece and then just regular extrusions for the rest, I'll see if I have pictures
I watched you building it. Really good job with it. By chance. Do you have IS graphs from it?

Thanks 😁
I actually haven't officially finished it. I'm awful at firmware and can't quite get the pico up. I'm sure if I have another weekend or two at it I could get it up but I've been busy every since I started my trident build. That being said, I don't have much on it. I'll see if I can get anything done in it this week, but I also haven't finished electronics since the parts I have are meant for a toolhead PCB, which I don't have for this printer.
Gotcha. Well I’ll be very interested in see graphs when you can. I’m curious if the plastic frame affects anything.
Mind you my rails are printed too
That’s what I’m really curious about too.
I'm gonna have to reprint the x rail in petg with direct contact since I couldn't get the ptfe tube method to work as well on that axis. I was considering maybe just getting a cheapo rail but I'll test printed just for the sake of experiment.
I’m curious if you could make it work with an abs rail, ptfe tubes on both sides of it that sort of snap in, and a petg cart that is slightly too small so that it lightly squishes the tube. Perhaps need a bit of ptfe grease in there to allow it to move smoothly.
That's what I did on the other rails but it didn't really work on x with how heavy the toolhead was. Maybe with more experimentation it could but I don't have that time tbh.
Oh wait, for the flex of the petg?
Or something else
The petg is because the glycol in it makes it a slippery filament. Means things rubbing on it don’t wear it nearly as fast as abs or pla.
Oh well for the concept, then yes that's what I did. Just might not last as long.
I'm trying direct contact on x so it will be crucial to use petg there though
Definitely add grease of some kind to it. Personally I think ptfe grease makes sense but it could also just be abrasive. I really should build a test setup for this. Lol.
I really need to get up and go wire the v0 finally…
We need a CNC kitchen video on this
Old msg reply..but I forgotten about this thread and just saw this 😂 that's amazing that you printed a mini spool for it
One trick I've done in the past is make the interface between the 2 colors the same angle as the cone in the nozzle then it wont hit like that if that makes sense
oh it didnt hit and id done as you said, had a 45 chamfer on the inside of the ring
it was mainly an oversight of how thick the rim was compared to the nozzle height
it almost touched 🤏
Ah ok ... perfect 😂 that's so cool I really want to do a subzero one of these days
got a few things to polish up on the cad now that ive built it but its about 90% done
also got to finish the docs for it
Wait chat we can just print the frame?
Finally a good use for my PET-CF from other brands I didn't like as much
Nope, you need to finish your trident first
Just a reminder @plain rain

How the fuck
That's different server business but yea this would be after
I think it would compliment the setup
Little baby printer
V0 abomination
Anything but Tiny, Insulated Trident
Ive got a micron, a subzero (that I'm too busy to finish), and a 400mm trident with a 4040 frame
Ofc 😁
(It's definitely square )
Nah, you need a cheese fork that can print psu now
#1277056619380867092 message
You better be annealing that frame if you do it.
Only the finest annealing in the air fryer immediately yeeted in at 160C.


So its been a while sinse i did anything here but here are a few snaps of sub 0 at SMRRF🥰
Thanx to @hasty rapids for the bed goo to keep prints where they should be😁
I have some interesting ideas to toy with so there should be somthing new to look at soon™
very glad i got to see it for real, very cool lil beastie
So cool 🤩

Hey look! wd2240! 🤣
Looks like catvom so @primal fog as well 😄 (for anyone looking to buy some of the good stuff)
Its a pretty little silly thing as well, I want one even more now xD
Seeing it printing was great
Thanx @gilded ridge
Was great seeing you there🥰

Should have put some on the bed
Sooo... 48v steppers?
I mean, 5160s are supposed to support 60v right?
AWD?
Do it!
Duel power supply madness😁
Not all support 60v. Most support 48v. And a few only support 36v. Depends on the driver itself.
Just use a 24v to 48v boost converter. You only need 1-2a anyways. A 50w one will be plenty for even 1.5a to each motor.
Wooh stedy on
Motor max is 0.4a on these puppies🫠
Tbf though even at 0.35a and on 16t pullies it still does 300 @ 20k
And nearly falls over in the process
@lofty nexus should have given you some of those 17t ones, brought some curse in to the sub-zero
So yea. I’d just use a 50w boost instead of another psu
Yes please🤣
Id need nema 8 motors for it to work
I looked at the nema 14s and it wont fit
Do it! 🤣
If you pay for shipping, it’s yours. Dm me and we’ll get er done
Might have to do another 9ne for crazy mods
Will do
You technically can… it would have to routed outside of the printer though
Wait! Do it like Bambu labs. One stepper but a pulley and belt system that connects all 3.
use the 28byj-48 steppers can get a pack of 5 for $15 on amazon

with m3 threaded rods as the leadscrew 🤣
https://www.aliexpress.us/item/2255800175960791.html
or one of these would be pretty funny

make the base be extra-tall and stagger them in height!
I have this kit

That is our job yes.
no its stands for Dollars Out Of My pocket


build the ToyRep
The Voron v2.4 we have at home

ToyRep printer uses all 28byj steppers

Thats epic🥰
there is also the MicroCube that uses those for Z with a threaded rod

but check out printables there are a bunch of neat projects that use them https://www.printables.com/search/models?q=28byj

Printables.com
Printables.com is an ever-expanding 3D model database for all 3D printer users around the world. Download free 3D printable models, take part in regular design contest, discuss 3D printing with other users, and collect physical and digital rewards for your activities.
Soooo anyone want to sponsor me a frame?
Thats some cool stuff
I was thinking about going smaller with sub 0... pygmy 0?
25mm build
0.25 nozzle
Dr pym 0🤣
not small enough! not fast enough!!!!
Just print a frame on sub-zero
That was suggested at smrrf
Was fun to see that little cute machine live at SMRRF
excited for that Filament idea
funny you should mention that


i have been getting hardware specs to get this idea working
looks promising so far
just gro to sort the base for the printer to sit on
and of course it all has to be printable on a V0
Multimaterial?
Lazy Susan spool holder with a slip ring for power
why does it need power?
The spool stays. The printer turns
Being turned around by pulling filament off the spool. So it's self propelling
use an m4 extruder , but use a longer shaft with it and have a 2nd belt to connect to the spool to spin the printer as its extruding
Yes
The idea has merit🫠
got to get this project back on track

great to see you back in the discord!
Where lazy Susan spool holder?
Yes its great to be back with all my friends🥰
WIP unfortunately
Being broke isnt helping either🤣
Oooi, 
Identifying as a printer is pretty damn cool though!
Helloooo
Ready to make more magic
I identify as a lot of things


Hey dude, long time no see😋
Oh boy, you're back 😄 Welcome!
thanx, its is indeed good to be home again
picoclacker
Little pecker 
The MinMax toolchanger.
I could run with that
Sub mmu?
I like this name😍

needs twist lock panel clips and mini tulip
Put a full size box turtle on it. 🤣
Tiny door!
isn't it missing some tulip stuff? :p
Or pico lith full height panels
Tulip is already on the real one, just not updated the CAD😉


Poor baby!
My issue is my rails are line a z-10 for pre load so they are really bad and i paid 60 quid for them too😬
I might get some new balls (ha ha balls) in to increase the preload
That would be great 👍
I need to do this still, @stable wolf gifted me a Z2 mgn9c 🥰
got to resize them a little but panel clips are on at least

@torpid orchid baby is growing up😊
Its soooo cute🥰

What’s the build volume like?
Cube
Literally Voron Cube
42x42x42mm😋
spent a bit of time dialing in the new size for the panel clips, still a litle more to do to get them to work with the Pico Clacker door latch and hinges though

Thats amazing! And thankyou🥰 💜
This should defo help with some performance issue Sub 0 has been suffering with.
I normally bin mine due to the extreme nature of...

Theres just nothing you can do with these
SAUSAGE

Ah Mr bom, keep meaning to ask.
Are you still happy for me to pop down if i can get some PC sheet to cut some panels?
I might be tempted to go full height if i get enough encouragement 😋
i'd like to do a test of some PC first so if you link me to your supplier i can get some.
my friends who cut stuff for mechboards.co.uk have not had fun results on a 100W machine- stinky/burnt edges
if i can cut it the machine time is yours with love xx
Would acrylic work better? Or is it the same?
acrylic is the bread and butter of this machine
Lets go for that then
Im not going for silly chamber temps😋
https://www.sheetplastics.co.uk/ take your pick 🙂
Sheet Plastics are the UK's leading stockist of plastic sheet products. All items can be cut to your exact measurements. Use code WINTER10 for 10% off all orders over £150.
Ooooo thanx🥰
Now... clear or coloured...
Or both
sent you a dee-emm.
i'd say clear for the door and coloured elsewhere
Coloured!
Clear door and tinted for everything else. It’s
i'll be setting the laser pixies to work on DR's choices

Awww they look so cute🥰
Almost
Gone for white back and clear sides and front