#Sub 0
1 messages · Page 1 of 1 (latest)
Well then the party can continue! 🥳


oooohhhh (love cats)
so, ladies and gentlemen
the Sub 0 seems to have found a crowd, not sure of any other way to call us 😂 but looks like we have a new toy to play with!
what is the general concensus on rail size / print area?
i have gone for a 70mm rail giving a 42mm cubed print area
so 30mm?
or a touch over that
42mm and you can print a 80% benchy
a good heater will solve that
im on the look out
but something to print abs / asa would be good
the chamber wouldnt take long to get up im sure
Seems a bit big

lol
Thoughts?

looks easy to print, so good to go
my only question is
why have to outter 2 fixing points seperate prints?
cause:

panel screw points used
you could print from this side?

separation for mounting, not printing
use the old trick for holes

oh i see now
@unborn merlin Have you already thought about the Bondteech parts regarding belt tensioner?
i'm not familiar with this
bondtech belt tensioner?
no... one moment...
#1011476576266883082 message
Extruder parts...
of sorts yes
i agree that it would be better regarding space and the thread on M3 is 0.5mm per full turn so belt tension would be able to be well adjusted and quite easily
but...
is it really a V0 then? id like to keep mine as OEM as possible
you'd also have to make sure that there would be enough room to get the tool (alan key) in there to begin with.
for the moment i'm concentrating on getting the base model finished before moving onto mods for it.
just my thoughts, but if you want to see if and how it works your more than welcome
it is open source so free game to everyone😁
free game huh... AWD-Nema17 Sub 0 anyone? 😆 (kidding)
now that would be cool
urgh got to love fusion🤦♂️

headless skirt... check👍

The Fysetc AIO controller would be perfect for this
It's a mini12864 display with a full 4 driver 3d printer controller on the back
https://wiki.fysetc.com/AIO_II/

FYSETC product documentation

wow, good find!
whats the unknown file, doesnt seem to be anything i can open?
Should have been asleep long ago... tiredness makes you stupid..... 🤪 🤣 @unborn merlin

love it!🤣
working on making the mini (printed) kirigami get it much needed neo-pixel
It was a picture that didn't upload
oh ok
thanx for the links too
all in good time
Have to make it thinner because of the power supply.
oh i see
also sorted the door handle and frame brace conflict
is it that stadard voron scale for measuring?
only position changed. Base is your file.
Sub 0's brother from another mother
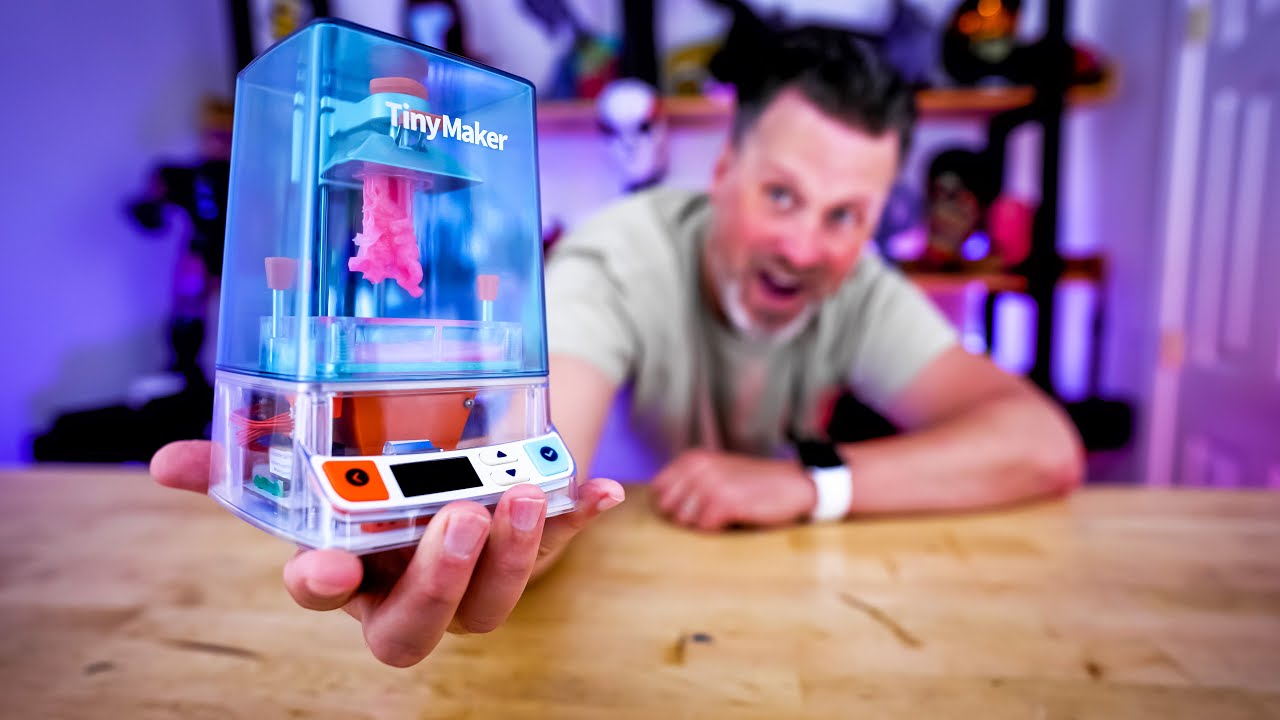
This might be the cutest Resin 3D Printer and it's so tiny! The TinyMaker 3D Printer
It's currently available over on Indiegogo for preorder
https://www.indiegogo.com/projects/tinymaker-open-source-3d-printer--2#/
The original KS Campaign https://www.kickstarter.com/projects/tinymaker/tinymaker-3d-printer
Checkout @teccotoys Printable Action ...
Lol
i watched that video🤣

GitHub
Honey I shrunk the V0. Contribute to Driftrotor/Voron_V-SUB_0-70 development by creating an account on GitHub.
latest push!
it's up if you want it bud

Printables.com
These are printed replacements for MGN9H rails that snap into 2020 extrusions for the Voron Trident. | Download free 3D printable STL models
A viable option?
mini daylight on a stick?
24vdc and 83mm long, 12mm wide
perfect fit for my machine
What extruder are you going to use?@unborn merlin
I saw you are going to go with Bowden toolhead
Mini14 would be a pretty cool extruder to see on it 
https://github.com/hartk1213/MISC/tree/main/Voron Mods/Extruders/Mini14

GitHub
misc stuff. Contribute to hartk1213/MISC development by creating an account on GitHub.
I wonder if it's possible to build a Sub-F-Zero.
Well I've printed the regular MiniSB so sticking with DD for the time being, but that Mini M4 is super cute and would be perfect for the Sub 0 
So it looks like I will end up with one of those on it soon😁
The latest CAD is magnet and frontskirt, right? Or have you updated anything else?
Those were the main issues to check off yes.
But also added neopixel support for printed kirigami stealth front.
Printed kirigami also had some updates too.
What we need now is @uneven spire to make some stealth skirts


excellent job
want the mount?
yes please, ill add it to the repo
now all we need is @vocal patio to come and add 1 million RGB's
going to need tinted panels with these little monsters
done another push👍
For this I chose to go slightly bigger with the build volume coming in at a whopping 42 x 42 x 42mm
i'm just gonna assume this is a hitchiker's reference and say i approve
Gimme some minutes. Trampoline overhaul with the kids...


I Love black 😂

Changelog: Colorchange, modestymesh, what else?
That's it for now, had to run off to help the old boy
Should I continue with this?

looks good to me, yes👍
ref colour change, i liked your colour more than mine and it is in good keeping with the Printer theme
of course! the sum of the universe as everyone knows is 42🤣
@stark parcel are you happy for me to include your mod parts to the repo?
i understand if not.
i can link to your GitHub for them if you want?
Do it
link or include?
include it, and link in readme ☺️
ha ha one repo to rule them all!
*untested as we know
always🤣 untill someone prints it
gosh so many mods🤣
this is going to take me a while
i think i will add them to the CAD under a separate component list as optional extras
With enough mods, the separate components end up being their own full Sub-0 🤔 😅
i think you may be right😅
it will be cool to show and hide parts of the model to see what it looks like
like an options tick box style
If you then go into detail and need different thicknesses for each frontskirt with or without an internal power supply..... 😵💫
Tweaks
@unborn merlin
cool, ill add them in a bit👍
You could also invite people who want to contribute to the repo. (I did that with Timmit when the UFO was still meant as a joke.)
got any suggestions?
kind of new to this😅

well your one of the big players so sent an invite
nice, If it's OK with you, I would now insert the Stealtskirtsv3 into your CAD as a test, separate, as was your idea. Can I also add the colors?
already doing it🤣
oh ok you twisted my arm🤣
tophat and skirts right?
only skirts as test
ok, im just pushing the latest for you
dran slow internet
and done
By the way, have you ever thought about deleting the unused colors? That saves a lot of memory
i'll do
yeah its a mess at the moment
i was going to do it but keep getting distracted by some guy🤣
looool
i'll get on it after youve had a play
i cant find @uneven spire for colab on GitHub for some reason

thats what i typed but nothing found
ill try the other one
hartk1213
got it, but it wont select it.
you click on his name and it changes to some random user that is not found???


strange
Sub - Pandora
very
so does this mean we are developing a printer for baby ants?
test done
PFMA. Printer for micro ants
catchy
i moved your inlet to "feet"
Only because the mod feet have a different inlet. Otherwise it could be confusing.
runout sensor foot could move to optional.
Do it👍
as long as it retains tri-point leveling
g2 setup i think
would you need it with a 42mm bed🤣
g2 2.4 42mm QGL!!!
need? of course not
want? yes. b/c pandora has it
this is for sub-micron. the nano? 1,000 nanometers is a micron

Ha ha, you going to push an update
pushed an update
nothing major, just material clean up (a bit more) and added back in the display skirts (went missing somehow?)
i think bar some small detail bits it is pretty complete now.
do we want to keep adding in options or shall we leave that and host them separately?
just mindful that if we add too much it might be a bit much for others

That's a good idea actually.
If we use the base cad origin for the mods you can import them in the correct placement without the need to move anything.
Does look a bit odd as a single drawing but helps a heap when adding it to the main CAD
Does this mean we should pull the mods from the main cad?
Keep an OEM printer then MODS folder
I think we should combine that power supply with the rear socket foot you did
Keep optional in cad for runout
Mods only adding things: Optional, Mod changing things:Modsfolder
Agreed 👍
Yes defo
Well it's oem for V0 so I think it should stay in skirts, but it is an option so maybe we should move it.
But most users have the screen so maybe move the headless skirt to optional🤣
change namings to your liking

😅
Jokes aside, yes let's put the screen in optional
Nice, you move quick😅
Oh I keep forgetting to ask
The belt chain for the cables to the kirigami... what do you think?
I have modeled some links but nothing mad. I was planning to just add a couple of cable ties to hold them to the belt.
But now we have got a nice machine I'm second guessing myself.
Didn't want a 7x7 chain on it as it's a bit... LARGE😁
build, then improve. 🙂
Ok, start simple😁
ok?

Yep look great 👍
Looks odd I know but make life way simpler later😁
@unborn merlinyou gonna do belted Z? i bet you could do a direct drive belted Z with no problem
with the new g2?
sure!
no not even G2 just a pulley on a stepper lol
its not like it weighs a bunch, doubt you need the gearing
oh yeah we could do
G2Z = Higher skirts or no bottompanel
wouldnt have as fine of resolution but i think you would be fine
this is true
probably in the region of 200g
0.04mm per step should be fine👍
yeah
16 tooth pully = 0.03mm per step
that would help keep it small too
nema 14?
slap a 52mm on it
@stark parcel and i are working through what mods to add to the repo
we have a separate folder for them to keep it simple
but there will be a limit i think, after that it will just be links to the mods as i'm sure others will want to play
i'm doing a bit of a re-jig to the frame at the moment so if you wanted to have a go your more than welcome
i was trying to add you to the colab group on the repo but i can select your name for some random reason
thoughts?


That look quite good 👍
Maybe other switches? Blue one maybe?
I think the color matches quite well now


Regarding the creation of the curved pipes, I need a lesson... I've managed to adjust something somehow, but...
@uneven spire @unborn merlin


🤣
😩
Oh that was a genuine call for help?!
heard about 3d sketch, but never got it working the way i see others do it...
It a just a swept circle along a path I scretched
I'm still not very good at it but the janky tubes were just about good enough
why the reduction gearbox?
direct stepper should be good enough?
curves in one dimension may be easy, but onepath in more dimensions is a riddle... my adjustment in lgx direction was copy, rount move merge...
thats about my extent too
Use the place 🤣 (maybe resolution...) 😅
still need to play with it some more
is it up ongithub?
i can have a look if you like
Geared stepper? ...you could probably make it pretty compact using a round nema14 and bmg gear sets possibly
That's looking great
Not until i know how to mount that stepper...
A round stepper would have the same problem as your V0 G2Z... either higher skirts or no bottom panel.
this might work🤔

What size stepper there for that z?
Nema 17 x 23👍
17?! I was thinking 14 maybe even 11. Lmao. That’s big for tiny printer.
Well got to keep "some" torque in the system🤣 I mean it is only a 23mm one so only has 12ncm of juice.
I was thinking of doing a nema 14 version to see how that works out👍
Moons MS14HS1P4150 is 27.3mm long and has 13.4Ncm of torque. Nema 14.
That would be a good motor.
I was trying to squeeze one in a small space as @stark parcel is working on a power supply so we had some space conflicts.
But I'll do a nema 14 tonight👍
I am a big fan of moons. Lmao. The smallest nema 11 they have with decent torque is still 31mm in length. Ugh. Lol. It’s got 9.1Ncm of torque. MS11HS1P4100. And I want an excuse to use a nema 11 at some point. Lol. They are so cute!
Or even somehow have something that uses their nema 6. It’s only 14x14x30mm!
Wow that is smol
It has a 4mm shaft! Was expecting 3mm. Not 4. That’s crazy big with a motor that small.
Such a nice way to spend money. I f…ing like it 😍
Welcome to the club for everything smol🤣
I just looked at the price tag for that nema 6 motor cause I kinda want to order it for the shear heck of it. I no longer wish to order it for the shear heck of it. A moons nema 14 is cheaper. Lmao. That nema 6. Is $60.
Mini Kirigami get a neopixel 😁

I just wanted to post this very preliminary work I did for a v0 based around makerbeamXS (10x10) and mgn5. I don't have the time, resources, or technical knowledge to pursue this project further, but figured I'd drop the little CAD i had done here. I intended for it use a custom toolhead based around a bambu x1/p1 or deltaprintr mini hotend and use a bowden extrusion system
Sign in to Onshape, the #1 fastest growing CAD system in the world with over 4 million users.
thanx for this, i will take a look at it and see if things are possible
The idea sounds familiar to me 😎. (can't watch it, no account...)
hello fellows
Excellent another victim
I'm playing with a Z belt idea at the moment. Just printed off a few test pieces

First one didn't go so well🤣
before i might build that one there is another build on the list
I think we all have a list🤣
Yep, that seems to work

Fiddly as he'll to get it all on

Just waiting on the last 4 rails to turn up then it's on to milling down a spare V0 bed to the right size
Nice! 👍🏻 maybe you can for triple-Z into it
i did have a look into this but sadly there is not enough space unless i design the feet and skirts to suit
Sub 0 gets some funky custom panels😍

40mm in z.. That’s so small. That even tall enough for a benchy?
42 cubed is the print area and is just big enough for a 80% benchy🤣
Since that would be cheating for a speed benchy print. You’re gonna have to do a speed Voron cube challenge.
Challenge accepted good sir
Uhhh. I just found these tiny things. Now I wanna see a toolhead designed around them with something like a 15mm axial fan for heat break cooling. https://a.aliexpress.com/_mrlTtxY
Will it actually cool the heatbreak though?
Who knows. But it’d be fun to try out. Lol.
Part cooling?
Part cooling would be those blowers I linked. 1504 for axial. Lmao. Only 0.2cfm. Definitely not enough for heat break cooling.
2006 blowers combined with 1504 axial. That would make one tiny toolhead.
🤔
A 20mm axial fan would probably be better since the standard v6 heat break is 20mm in diameter. But I like the idea of a 15mm fan. Lol.
That is very small🤏 might better to stick with at least a 20mm for effective cooling. It might be super cool to go smaller but it's got to work to make it viable or it's just and expensive paper weight🤣
I'm assuming that this should be a bowden setup to keep it smol😁
Oh yea. Bowden would make it even small. And yea. 20mm is probably the minimum for a heat break cooling fan.
#1011476576266883082 message
@unborn merlin got the file from me to continue. should be exactly the fans.

It's in the list of stuff to do👍
i can certainly check it out👍
amazingly it fits quite nicely


Now shrink the Z motion components
Does look very cool though!
this might end up as it's own separate version
dont want to have too much on the same repo as it might get a bit confusing
might even be able to do a pandora's box version
you need a website! 'printers for single-celled organisms"! 🤣🤣🤣
hell yeah!
aquatic protozoa .com
Work has started on the brains of the operation

Wonder if there’s an even smaller mainboard out there than the pico. Or just run can bus with a rpi stepper hat. That could work perhaps.
Could do ebb36 for toolhead (if the toolhead is the standard mini sb) and gbb15 for xy motors. Then you just need 1 more driver for z which you could technically connect to the pi (I think. Haven’t ever tried.). Basically. Make each board a mini can board to spread out where everything is.
Mellow Micro

You uh. Got a link to that?
I'm using a toolhead board for the Z axis on my v0 😂


$24.85 | Mellow Fly Micro4 V1.0 Board HV 4 Axis 32Bit Raspberry Pi RP2040 For Uart TMC2209 3D Printer, Klipper Canbus Voron V0.1 Ender3
That. Is. Amazing.
it's soo smol 🥺
Isn’t it!
fits in rather well if i do say so myself🤣
hoping to have the rest of the rails and stepper motors some time in the next week
they've just cleared customs so should be on a van real soon
after that its just adding belts and i should be able to start testing the motion system out
maybe even IS
With your rate of progress on this thing, you're going to shame me into hurrying up and getting a serial for my but-it's-not-finished-to-me V0
Same here. Still trying to get a solid crimp and this guy developed a shrink ray for vorons
I dono, I was obsessive about "MUST GET MY ZERO TO THE POINT WHERE IT CAN HAVE A SERIAL NUMBER" for whatever reason.
To be fair I did spend a lot of time on the cad work for my own V0 build even before it had turned up
And then even more when it turned up
But THIS project also has some great German engineering too
@stark parcel come take your slice of the pie😜
It only came about because of the "I want one of those!" And "dad! Dad! Can I have one?! PLEASE!!!"

I will be jumping back on this project really soon.
Had some family issues to take care of first, but should be back at it to finish off the repo etc.
I also want to do a Pandoras box version so expect so extra shiny things later down the road.
I know @vocal patio might like one
At some point I do plan on building a sub 0. Lmao. Love this tiny project. For now though. I’m working on the Doron Velta.
😱 they do look cool
Maybe in the future🫠
I’m currently printing the new toolhead on mine. Lol. Love watching this thing print. Kinematics are crazy.
Oh dear lord
I don’t even know if there’d be enough room for even the micro4. Lmao.
Bigger brother gets a little bother today


Somehow they don't look out of place🤔 oh that's right, the whole thing is smol

looks nice and smol
Micro4 would fit even better. Lol.
😅
🤔 it does seem to fit with the ethos🤣
You deserve it bud, you put in quite a number of hours and added some cool stuff to the project
Ladies and gentlemen I believe....
It's go time


Rail install went well but was super fiddly due to the lack of any space.
You have to choose, sight or hand and tool in that area
also added some more Voron Love to the bottom panel


Now just got to wait for the last pully to arrive and then add belts


Damn that's small 
Make it bowden but keep the toolhead shape of the mini sb, but smaller. This way you won't have issues with fitting an entire extruder
ill have a look into this
thins might be a challange to keep it usefull, but i like the idea of it being smaller
That’s what I keep saying. Lmao.
WTF burner is a bust, i could make it a bit smaller but it would take a lot of work to get it to fit
by which point it might not look right.
bowden is defo the way forward


would look sick like that lmao
so current problems i'm working through are thus...
- the bed plate - either machine down a spare bed i have laying about OR get local machine shop to make a custom one from regular alu
- heated bed???? - i'm going with YESSSS - i have a 5w 24v polymide heater (220C max) but it doesnt cover much of the bed plate, so a hot spot is near garenteed - i'm looking at others inc custom Keenovo
- bowden but smaller - part cooling issues? - what design? - could use the original V0? (simpler and in keeping with V0)
- how the heck do you cut down a PEI build plate?????? 10 POINTS FOR NON - SENSIBLE ANSWERS
it does look dope, but print area is like 20x20
you loose soooo much of the Y
but 5015 part cooling for the win
isnt this for looks anyway
Use a TZ hotend (Bambu clone) and do mini CPAP with some pneumatic tubing
And do some aux part cooling aswell
server fans on the side would literally tip it over
well.... at the begining... sort of
it was essentially born from "I WANT ONE!"
but after spending time with the CAD work and having a chat with @spiral lynx who built the first one, who incidentally told me to go for a cereal  , it got me thinking
if i'm going for it, i might as well go the hole hog and build a proper printer with the mindset to print ABS & ASA.
so other details were looked at with a bit more care than originally intended.
well the CAD is up on GitHub if you would like to do a mod

could fit in full size motors then
"stand back! its about to go BRRRRRRRR!" 🤣
Don't tempt me
I love the look of that tiny freaking board. And I’m considering getting one for my Doron Velta. It would fit nicely up in the top electronics bay. And allow for easier awd mod. lol.
See I can't decide now seeing this coming together. Doron, Sub 0, micron120, or mod an F-Zero in to an IDEX and call it fire chicken.
your missing the obvious answer here
All the above will be the goal, the question is which one next xD
i had planned on building another 2 x V0's but then this came along and ruined everything
it's depleted my supplies for the other printers and used up all my spare cash
but it's been a good jeourney and this is something quite special.
but i do know what you mean, i would love a doron velta to toy with and box / pandora would also be cool to add to the family
All at once.
if i had the funding, i need a trident and my own 2.4 would be nice
cant count my dads😖
My v2 is a micron. Lmao. I only own Voron PFA printers somehow. Minus the Enderwire. That one doesn’t count anyways. It’s in pieces atm.
i kinda made my own version of the E3 with 2.4 Z belt mod, was my first big mod on any printer and it still works well 2 years on.
i have an E5+ thats half way through coversion to Mercury one.1
I've just finished my VT rebuild,got parts on the way for HexZero, and need to order the last parts for F-Zero
oh nice! thats going to be fun to build
I like tiny printers, Sub 0 calls to me.
well you know what you need to do
sacrifice to the gods 1 x V0 frame to be cut down
printed parts are identical for the most part
can always look into it
or sheet redirect cooling and just the hotend flailing about 😛
i swear ive seen that
v0 bowden toolhead is a nice size ..would fit nicely on sub0

thats what i was thinking as it has cropped up a few times now
look like voron
works like voron
is voron
not much point in re-designing the wheel🤣
you can even use the bowden toolhead PCB i might be biased tho
paired with your mini M4 extruder too
oh ima go play with this idea
now where would i hang the 2 spools🤣
been playing with that stuff for a while
😱 sub 0 tall boy
just get really long 1515 and build them all with the same vertical extrusions
stop it or im going to spend the next week CADing this up
just trying to live up to my name
already got them🤣
ha they are pretty much done just need to finish the display mount
by chance do you get distracted from what you SHOULD be working on?😁
TaiChi on Sub with dual M4 minis?
does today end in Y?
like every other
as long as it works then who should complain
yeah, you end up like that guy up there👆
that was my original plan for the V0 before i made the other dual extruder thing

not a TaiChi tho
looks cool man
the mini14 extruder works pretty well
i got to build one of those to play with
no those were just micron skirts i was messing with , they turned into the stealthskirts by maverick, we both worked on those together he ended up finishing them
oh i forgot i uploaded those
that is them
Okay, here's a really bad idea: "Just" design a PCB. Bed heater in the copper traces on the bottom, use the top as a for-free G10 build surface.
your right, thats a terrible idea
i like it - it has merrit and i'm defo gona check this out
but how to mount it?
direct to bed screws?
oh nice find!
that looks awesome - think i might have trouble squeezing all that in on a 42x42 (+ a bit extra) bed heater though
there is also not a lot of room to have much extra in that area
i'm also not good at PCB design, but i know someone who is @stark parcel what do you think of these two proposals?
This would be very studly: https://www.we-online.com/en/components/products/SMSE_SMD_STEEL_SPACER_M3_THREAD_EXTERNAL
L 5 to 15 mm | Material Steel | Ø OD 6 mm | Order Samples Free of Charge & Request Quotes Online | High Quality | Fast Delivery
So. Would this printer be a good candidate for a 0.1mm nozzle you think?
What if you just use a PTC heater as a bed, just stick some PEI on the top... https://uk.farnell.com/dbk/hp05-1-10-24/heater-ptc-f-plate-50w/dp/4408391
What about a custom glass heat plate? One like people used to make with resistor glued to the glass as heaters.
I'm cooking something

its not perfect but its somethings
deciding between keeping bowder or adding sherpa micro
We'll call it Miniburner, you removed the Stealth half.
what is with @pearl chasm s new yavoth tool head: https://github.com/chirpy2605/voron/tree/main/V0/Yavoth still too big?

GitHub
Voron mods. Contribute to chirpy2605/voron development by creating an account on GitHub.
Considering how tiny this printer is. Yes. Lol. Ideally. You want a toolhead the same size as a v6 hotend. Unfortunately. They don’t make fans that can move air that small.
Put a 5015 on the electronics bay and have a mini cpap duct to the toolhead
Nano bowden cpap stealthburner, it would be glorious
Use it for both he fan and pcf. Lmao.
I would still have a hotend cooling fan for ahestetics, and fake printed micro part cooling fans on the side
If chamber is hot and you are printing then you need fans of some kind. But yes. Literally any water cooled hotend would be a good solution. Only problem being. Hard to find a heat sink that tiny. Lmao.
Not the hotend heat break. That’s small enough already. Cooling the water heat sink. A radiator that small.
That. Would be ugly. Lol
"Affordable" custom loop liquid cooling, you say.
(I'm being facetious, I have some Alphacool hardware in my own loop. Just funny to see "affordable" and custom loop in the same context, hehe.)
Well it's defo out there with the more interesting ideas , but is it really needed?🤔 Plus as space is at a premium this might prove harder than you think.
But you are more than welcome to use the CAD to come up with some crazy mods
Oh good, for a split second I thought you were serious about checking it out🤣
Rocket engine style heat exchanger to heat the bed with the heat from the hotend.
when nemgrea and i first started the cube printer (sub 0 shown at rmrrf ) i was thinking of doing the same thing with a built in thermistor in the middle


soldered on m3 studs for mounting
Yeah, this is the sort of horrors and hackery I want to see in the world.

you should see the one i was trying to make for a printer that only prints benchys...the coil on the heater was benchy shaped
@languid umbra


thats cool
it was the result of late night and a what if
Had to print one off today, because... well. BECAUSE


16tooth pullies came in today, so belts on tonight👍

should be good to test the motion system tonight
I feel like there was a missed opportunity to have the CT3D.xyz text in the heater. 🤔
nice!
oh that would have been perfect
It's a shame I didn't get another one of the smaller nema 14s as this would have been perfect for it.
It's also a little too big for the Sub 0😭
Had a bit of a play around to see if it could be mounted in a way that didn't look like a "wait we forgot something?!?"🤣
just means you need to make an even smaller one with 3mm belts and a nema8 stepper
Nema 6
how about one of these steppers

yes thats a microSD card its sitting on
🤣
bought those for the nanobeam v2 that i never finished lol

What the heck is that, a 1/4 scale V2?
yes lol
5x5 aluminum extrusions
its at the moment just a model , doesnt work..thats it sitting on top of a v0 top hat https://cdn.discordapp.com/attachments/1011476576266883082/1200078116241023026/20220701_115918.mp4?ex=666c4d57&is=666afbd7&hm=0c789f92d0b05ce7751931f2d4976883c48a4e5eaaeb02d17c67aac421b8ddca&

I applaud your dedication to... uh... whatever it is you've achieved there. 🤣
dude you got to finish that one
i remeber you posting some pics of it a while back
that would be legendary if it was a powered motion😱 🔥 🫠 
No 1.25" screen, hard pass
i want to , i need to reprint it all with a resin printer 🤣
maybe i should rename this channel to "printers smaller than reality"
or "printers so small they defy any real world use scenario"
resin printer will be better...it was really funny printing these out on a 350 v2
https://cdn.discordapp.com/attachments/868289527666581554/975742275294494720/20220514_151647.mp4?ex=666c3cce&is=666aeb4e&hm=f3132b034c0441d18b8c9cbc18babccb2860316e88fbb6c31e57176ad6bc1f56&
i bet it was
30 mins chamber heating
20 sec print time
0.2 nozzle
0.12 layers?
yeah something like that iirc what ever the smallest revo nozzle was at the time
resin will defo be the way to go
details would be poppin
how would you go about the flying gantry though?
thats a good question
if it was a trident i suppose you could use CD player motor lead screws for the lazer
(I'm now imagining that 1/4 scale gantry hanging off a quadcopter)
thats been done, just not 1/4 scale
CPAP will be extra-hilarious. please do it. and use a bendy straw as the hose

CPAP, but it's a 5015 blower and a bendy hose.
Putting the CRAP in CPAP.
it will fit an 80% scale benchy
Gotta get that 0.15mm nozzle out for the 25% scale benchy.
printed in ASA CF🤣

You're going to have to print yourself a microscope to work on these things if you keep that up.
perfect😍
get the models ready i have a resin printer coming next week
After V00.0.xxxx serial numbers will start to resemble IP addresses.
One hotend that can only go up and down and 1mm2 build plate
0.004mm nozzle
flow rate of 0.0001mm/3
So what tension should I be setting here🤔

150... 😛
those look like 12mm belts
just go around saying "this is gonna be the stiffest v0 ever"
V192.168
Oh yeah! Display baby

i wanna see a sub0 with color scheme that makes it look like a toy 😛
Need 48v conversion next.
I'm kinda disappointed it's not blue and black with a yellow and black twin 😂

everyone knows a voron is never finished...
Pitb board in the waiting area
Speaking of not finished, how's yours comming on?
The red is more pastel than it looks on the photos and the white is more natural/creamy colour so it looks more like play dough
Shelved, I'm working on a belted trident at the moment
fair do's, i'm going to hold you to getting a cereal for it though
😎
small update - sorry got distracted on a side quest
small update to the CAD work - new mount for the electronics, so better position and more secure
added Sub 0 Belted Z mod
updated the klipper expander mount - small cut out for the USB cable
STL's have been updated to reflect what you actually need for the OEM parts
STL's have now been added to the Custom parts that need to be printed for the Main printer
still working on getting a bed machined and a custom pei sheet to fit
also still working on a heated bed option
cable chain in dev stage currently, so we will see how that goes
next up though is to properly wire things up and get the toolhead mounted and wired in
Keenovo for the bed heater?
defo an option
might send them an email to see what they can do
was looking for something off the shelf first before going down that route
100w ac bed for the sub 0.
it'd melt
I’d be surprised. Coconut has a 250w ac bed for their v0.
thats true 🤔 food for thought
What wattage would you even need for that bed? Like 40w? Could just add a hole in the bed itself for a cartridge heater for a hotend.
Mains powered bed or nothing. Go from 20c to 100c in 45 seconds
Or less. Lmao. Use a 40w ac heater cartridge. Probably easier to design a bed with a hole for a cartridge rather than find a heat mat for it.
Would that not cause a hot spot and with the hole in the bed plate cause 🌮
One on each side? I dunno. I’m just throwing out ideas. Lmao.
ideas are where the next innovation comes from
Like me throwing a Goliath toolhead on micron+. Lmao.
Get a 42x42x42mm alu block as bed and put the heater in the middle..

Thinking outside the box: https://en.wikipedia.org/wiki/Radioisotope_heater_unit

A radioisotope heater unit (RHU) is a small device that provides heat through radioactive decay. They are similar to tiny radioisotope thermoelectric generators (RTG) and normally provide about one watt of heat each, derived from the decay of a few grams of plutonium-238—although other radioactive isotopes could be used. The heat produced by the...
Hey, this is the weird shit I want to see in the world. I've been making comments.
Are y'all building the Demon Voron in here while I've been busy moving. 
Just putting the "SEIZE HIM!" in the cesium.
Also, imagine how much joy that Fusion Filaments would get from their filament being printed by a nuclear voron.
get a thicker aluminum bed and drill a hole and mount a hotend heater in it
That was my idea! Lmao
really tho i think a bambu clone hotend heater would be great
the flat ceramic heaters like this

Exactly like that! Simple to use and should work great!
interesting idea and not one i have looked at yet
been a little distracted as of late
how would one go about fixing it to the bed though🤔
They are fixed to the heater block with little spring clips ...you could probably use something similar..like a small piece of spring steel that gets screwed to the bottom of the aluminum pressing it against the bed
There's also heat conducting glue..
yeah thats the main reason i suggested a spring clip of some sort, makes it easy to replace if it breaks
How large are they? Could use something similar to the boxxy bed method (unless you're reading this boxxy and you'd like to make a 42mm bed) and use a metal plate to squish it
Baby Boxxy Bed
42mm plate
Those heaters are like 5x10mm
Man I gotta shleep lol. Idk why I thought 20
Group of 4 could be even enough? I think the dragon ace ones are bigger but they don't sell just the heater usually
Mellow has some 6.8*15 ones c:

I just found the git hub and aww 🤏 it's so cute 🥺
Based on the current github is building one toooo difficult or no?
a Sub 0?
its like a V0 but way more fiddly
but its good fun defo!
project is on hold for the time being as funds are a bit tight - just dropped a cool 500 notes on the dog🤦♂️
And way less room for wires.
I wonder if I should try building one but with a printed frame. With it being so small it should be fine. I’ve been wanting to try building a v0 with printed frame and rails. Just for fun. Not speed ofc.
Then you can print a Sub-00 on your Sub-0.
Lmao! That’d be hilarious
I’m also curious about attempting to make 3d printed steppers. This could be a fun project. Lol.
We could stack those like a matryoshka🤣
Go for it, would be good to see one👍
The one thing I have found on the sub 0 is that the motion system is quite stiff (belts) but it is also new belts etc so might need breaking in.
At first few runs it stalled the motors. Had to turn up the amps.
Max is 0.5a and I'm running 0.4a just to get it moving
i have a big box of makerbeam that i ordered by mistake
need to use it up
the standard stuff, not XL
Sounds like you have just found the project you need
i do have a bunch of teeeeny linear rails somewhere too from another project
this might be the tallest sub0
Mine would be very slow. Lol. I’ve always wanted a project to do with printed linear rails. Just for fun mainly. Not meant to be a perfect printer.
where the heck does the extruder go
oh i'm being a doofus. there is room for miniSB dd
For the bowden setup?
just opened the CAD and it loads with the bowden toolhead first
Ah yes, might have to change that
I'm trying to squeeze in the mini m4 extruder that @uneven spire did. I've printed one off to muck about with and it's awesome
i think i'll gradually work on doing a 1010 frame, as ill advised as it is
I briefly touched this and M2 fixings for the frame😬
i needed a new cad project anyway
Fair enough🤣 it will defo be a challenge
off topic, but the last big CAD project is now completed (and also what i have the tiny linear bearings left from)

You've pricked my curiosity
Umm what is it?
Looks like an ice maker?
Waffle maker?
Giant USB thingy
keyboard switch break-in machine
not my cup of tea, but the keyboard nerds love their broken in MX switches
You have to break in keyboards?
not really. but some switches benefit from it apparently (cherry brand, kailh brand)
So, after that you want to switch things up?

Tldr: after using switches for a time, the peaks and valleys should smooth out and create a smoother switch.
Downside of course includes a little more wobble.
Some go as far as to pack them with diamond polishing paste to speed up this effect and end with a smoother final surface
Tldr: a little bit of keyboard scope creep
You learn something everyday
And the weirdest part for me. Is my keyboard used optical switches now. 😅
Vury nice. Why the switch to optical?
What I need me is one of those hall effect keyboards
Ah wait this is subzero thread lemme post something on topic
2% milk keeb

Spilled orange juice on keyboard and needed a replacement. Corsair k100 had the optical switch option. So I went for it.
Could probably put this on the subzero somewhere useful
We need an air filter that small for the sub 0.
Just take the mf nano and make it an mf pico
3007 slim fan from sunon would be perfect
I may need some googling


Right?! I got them for bed fans in my micron+. But they would be a good option for down sizing a filter for the sub 0

@unborn merlin Goliath when?

now that would be crazy
Do you have a link to the TPU Voron?
I do not
whatttt... someone have printed a TPU voron?

@dusk marsh Might just have a photo or video of it they could share perhaps?
AND ITS PRINTING IN TPU?! @unborn merlin @proven pendant #voron_0_questions message
@turbid coral I know you said you found it but also here’s the link anyways. #1243318894521876544 message
It prints TPU quite well, but it's been sitting in a Pelican case for the last year. Doing a full rebuild in the near future, hopefully.
Yes 4015s magnetoX uses those
And ||<REDACTED>|| used them too
Found some time today to start machining a bed up for the Sub 0.
Just got holes to drill for the first one to try it out😁


3d printed frame


Not very square tbh but a good proof of concept. If you can avoid warping better that I could you'd probably have better results
Dude that's awesome
Love the colours BTW
Was that done because you couldn't decide what one you liked best
.step if anyone wants
Nice! Both me and Hartk want to print the frame too but we want it to be a single print.
How's that going to work?
I don’t think either of us know yet. 😅
But I do plan on modeling one up eventually. Just basically needs 0 overhangs and to be printable in 1 print. Shouldn’t be hard to do.
I could have made the walls solid, in which case it would be printable in one piece but I wanted to keep the original look so that's why I didn't go that way
That’s fair. I plan on modeling it up with LED walls in mind. Cause ya know. LEDs.
If I had nitro I'd react with the rainbow voron logo however that's not the case
But that sounds cool
I'm trying to see how much of this printer I can build with the parts that I have lying around / 3d print. I made these linear bearings that work suprisingly well for being 3d printed (uses some ptfe tube to slide). Also modified a few pieces such as the z motor mount as I don't have an integrated z screw.
You’re doing something extremely similar to what I plan on doing. Lmao. 3d printed linear rails and carriages with a printed frame and everything. Just don’t plan on printing fast on it. Friction = heat = melted printer.
I use fusion. Lmao.
https://cad.onshape.com/documents/675096c3f2cee18bff96b9fb/w/44d6ae8969287ede422ec8fd/e/f5a8b277ab0775f2e75436b7?renderMode=0&uiState=668e30b5311fcb1288d0daab well you can download anything you want from it and bring it over
Sign in to Onshape, the #1 fastest growing CAD system in the world with over 4 million users.
or just see what i got
I also modified the rails to use flat head instead of socket head bc that's what I have on hand
@vocal patio no lube and not a super clean print. Could definitely make it more smooth, but at the same time pretty good.
Sounds more than smooth enough for 100mm/s print speeds to me. Lmao. Wonder what input shaper will say. Especially after the weight of the gantry is put on those tubes for a while. Maybe fill the tubes with filament or 2mm pins just to keep them from crushing from weight on them.
Good idea
Z axis in but I want to change a few things before I continue. The frame needs a rework. I think instead of the frame having all the heatsets, it should be the parts and you screw them in through the frame. It's very difficult to do so many heatsets and it's even harder to fix any that are out of place. Not to mention, it's a huge pain to reprint the frame, less of an issue with single parts

Also does anybody know which filament would be best for the frame? I used pla in test as I had some trouble with my bed magnet but idk if abs is the way to go, as it's not as rigid. Maybe cf or gf?
PC blend?
Possibly. Don't want too much warping, which was an issue on the big side pieces due to the weak bed magnet I have.
Update:
- Increased internal rail angle from 40 degrees to 45 for a better clamp
- Inverted some connecters and heatsets to make installation easier
- Removed an arc off of the bottom back extrusion to permit room for the coupler to spin freely
I wonder if I should make a build log. This channel is small enough though lol.

Waiting on hardware to continue
Dude this is awesome work, great to see a different spin on the whole thing!
Keep posting updates
So uh. How long of z you planning?
I've figured out that you don't even need rails at a certain point. It just floats off
Just bought some new sparkly orange abs for this project. Almost out of the hot pink unfortunately :/
I'm dumb lol. I could just use some binder clips. duh.
Iirc if it’s warping that badly binder clips aren’t gonna help. The print will just warp off the bed instead the bed warping off the magnet.
I'll try more glue. I got the good stuff. I have the enclosure too so I'm not sure where the issue is. It could be that specific filament as I've been printing some larger abs pieces with little to no warping.
I'm going to try the vampire bat gantry. Single mgn9 rail (no extrusion) and it's rotated 90. I'm pretty confident that the rails are sturdy enough, especially when the belts are in.

Tbh it'd be really easy to scale up the z. Imagine this thing with like 250mm of z height lmao.

That's true. I may try to combine them by keeping the extrusionless factor
Different filament, minor warping. The pink was I little but old at that point so maybe that was it


Reverse bowden capricorn tubing has enough inner diameter to fit an m3 screw so I think I'll try to use that as the bearing solution for printed idlers.
i suppose the challenge here is to see if i could print-in-place this on my toolchanger
Taking "printed printer" to the next level
"More printers’ printers print prints for printers’ printers than printers print prints for printed projects"
-Zack Freedman
You know, I've only been falling in that category lately.
no one needs a Z height above 150mm
i need to keep this going in one direction or another

well this is comfy

Everything's ready and I'm printing. Only things I don't have are the nema 14 steppers, control boards, z endstop, and front fan (and wires)
I wonder if heatsinks on the steppers would make that work better 🤔 not going to be running it that fast at all tho
keep the motors cool and the chamber hot👍
yeah i know what you mean, i stopped at 400mm/s @ 20k
my micron will fit on my trident's bed, this funny printer will fit on my micron's bed
Remodeled an ender 3 extruder for the small form factor. I hope I won't regret it but again, slow speeds

Those actually work better for higher speeds imo. Since no gear ratio the motor actually turns slower than things like Sherpa mini or wwbmg. At least. In my head they do. 😅.
I don't wanna have to find a new spot to mount one tho. Fits very nicely atm. Ig we'll see if that's an issue.
And then there were two

What a terrible shame, looks like you've got spares to build a second
im going to try the polymide heater i got on one of them and the heater cartridge on the other so i can see what does what and go from there
Let me know what heater works best! I don't have a cnc so I might have to use pcbway or smth. At least I can anodize it a cool color that way
Also dunno about the detachable pei. I wonder if they make them that small.
I could probably get a trimmable sheet and put it on laser cut spring steel sheet
@unborn merlin where did you get your power supply?
Also could I get a quick look at your electronics
this question accualy made me find i had uploaded the wrong format for the BOM on the GitHub repo - so thank you for that, it has now been updated.
but to save you going there...
https://www.amazon.co.uk/dp/B07CHDZQDH?psc=1&ref=ppx_yo2ov_dt_b_product_details

24V 6A DC Power Supply Adapter AC 100V~240V to DC 24 Volt 6 Amp 100W Converter Transformer 5.5x2.2mm Plug for LED Strip Light 3D Printer LED Driver LCD Monitor,Wireless Router,Security Cameras
at the moment its just the rpi and MCU in there, the wiring was just jerry rigged to get it working to test
Ik you said it's ugly, but how did you wire from the power input port to the mcu? Electronics are the one thing I don't have that much experience with and I haven't used a psu like this
Nvm I think I got it. Power to skr pico and pico to pi.
yup that the one


couple of pics to help you out a bit
i have the rpi connected to the pico with the UART cable that comes in the pico box
i trimmed down the soldered connections on the back of the pico board to get rid of the pointy bits and stuck on a couple of layers of polymide tape to protect the cable from the rpi to the pico
Thanks :)
Rq, what's that green board on the bottom for?
oh the klipper expander?
mainly for some lighting in the print area but it just alows for a few extra bits here and there if i get round to fitting some
like temp sensor for chamber temps and maybe some neopixle lighting too
Oh nice. I won't be needing that then. Keeping it nice and simple ;)
thats how mine started
once i have it built and running properly i might throw the Tulip Pin Mod on it just for kicks
I still think the heater cartridge one will be the best one for ease of access. And in just thinking about it. If a 42mm bed warps any amount that affects a print then it will be a visible warp. Since ya know. It’s so freaking tiny.
@vocal patio did you get the sketch i uploaded for you?
I did. I have not loaded it up yet. Lol. But we did manage to finally constrain the stupid thing anyways. Now I gotta figure out the micron logo (which someone has sent to me already) and then somehow do the PFA logo. That thing scares me.
I mean. Just look at this thing. The only benefit it gets is the fact it’s mirrored.

good luck that makes my head jurt just thinking about the constraints😖
Trust me. My head hurt trying to figure out the Voron logo. I’m pretty sure my mind is gonna melt. 😭
I just want parameterized led serial plates. 😫. Why’s it gotta be so hard?! 😅
Btw. That’s why I want the logo constrained so well. The extrusion size the plate is going on is also a parameter.
thats some little project you have🫠
hope you get that working
Me 2. Goal is 6 variants. 3 logos and then left and right versions of all 3.
Despite both the logos being mirrored by accident that I still can’t figure out. I still think this thing turned out great for a first attempt.
ooooo fancy
Looks sick even despite the logos being flipped
It looks like I can print a full-size benchy! 


Prove it by doing it. Sub 5 minutes is all I will accept.
I'm pretty sure it'd completely fall apart
More than likely. 🤣
Although with how small that thing is it’s not unlikely that it will have a huge acceleration benefit.
@unborn merlin Your sub-0 moves already right? Shaper graphs? Pretty please!
It does, but no graphs yet.
Need to sort the software out for that. I might do some of that tonight if I get some time👍
Also remember cheap rails so I'm not holding my breath
We would be very interested. 😁
They are so tiny I don’t think even printed rails are gonna make that bad of a graph.
It has pricked my curiosity for sure, the frame should give some interesting resonances
Preload is not high on these. Got to swap one out as it rattles😖
The other 4 are fine though🤷♂️
I wonder if it's worth cutting down a honeybadger mgn9 rail🤣
Are you going to do your printed rails the same way I am or do you have another plan? It'd be interesting to see an alternative
No idea yet. I’ve got like 12 projects ahead of building another Voron. 😅
Ah fair.
I do plan on printed frame at the very least. And that will be another project before building another Voron. Since ya know. I’ve got to design the silly thing.
The tedious part is getting all the heatset holes. I had to go back probably 20 times to fix any that I missed
I build my printer in cad now. That will be extremely easy for me to find and fix. Hopefully. I’m probably gonna miss like 20. Lmao.
I meant in cad lol + every time I modified something I had to change it. Hex gantry had me moving every hole on top 😭

chamfers, why do you do this 😭

fusion360?
Onshape
ah
not played with that one
have you tried deleating the face to see if it blends the fillets together?
nice
Moving around the bed mounts

for your bigger bed
Yep
60mm?
Enough room for a benchy and a purge line B)
might be worth adding in the bracing on the inside of the rear mounting holes to keep it stiff
how tall is a benchy i cant remember
🤫

thats with 2mm of run off from the rails - i think, gona have to check that
Hex gantry is raised up a lil bit I think
By 5.4
should be enough
Omg that clutched up
yeah i think you can push rail run off by 3mm tops
Then I'm definitely good
I'll add some ribs
mind you, your doing printed rails arent you?
just make them a bit longer and your all good
no need for run off
What I'm doing rn
What exactly is that btw?
its where the carriage goes past the end of the rail - the cart has the rubber seal / buffer and a plastic part on each end so you can push it off a bit before the ball bearings are exposed and you risk them falling out
its typically 2-3mm to be safe but i have heard of some going further
im uk side so terminology might be different
i suppose you could call it over run / over travel
I can also lower the bed a little bit as long as I'm careful
yep that would work too
I just call it "too far" lol
nah thats when the balls fall out🤣
"almost too far"
Printing parts is taking a while but I think it's good to go in theory
always works in theory😁
Well I'm waiting for some parts and I haven't ordered the bed yet
Somethings bound to go wrong 😅
where you getting it made?
planning on pcbway
always, i went through a few iterations on some of the parts that way, but was good to get a real world feel for what i was designing
i got a quote for 42 bucks for the 42mm bed plus shipping
Not too bad
then i remebered i had some 5000 series 10mm aluminium kicking about
Don't have a cnc unfortunately
I also want a laser cut spring steel bed
I'll just stick some pei sticker on it or smth
i wish i had one of thoes
was all done old school
No mill either :(
you can get custom ones
ill send a link
That'll definitely save a few bucks
staple part of a good workshop - sadly not in mine though
went to my dads work to use the machines there
I'm hoping I can get a job somewhere with one eventually

Embrace Making
DO NOT PURCHASE THIS LISTING. THIS LISTING IS FOR INFORMATION PURPOSES ONLY! Note that this listing is currently a generic listing that encompasses all shapes and sizes. I can have any size or shape manufactured for you. Please use the contact form to inquire. In the near future I will be stocking common sizes and shap
its a good tool and great knowledge to have
and a nice lathe
im lucky i have access to both for the time being
do you happen to know where they're located can't find it on the page
probably china but im not sure - hold please
Oh also, which size heater did you buy (will you buy)?
I found another one that ships free that looks nice. They do prints on the plate too so I could get a voron logo too. I'll send an inquery to both and see which is a better price.

Ember Prototypes | 3D Printing Vancouver, Rapid Prototyping, Engineering Design
Custom textured PEI plates for many 3D printer brands (eg. Bambulab, Prusa, Voron and Creality). Get your custom logo on a textured PEI plate.
from what i can stipulate it seems to be a small company (probably 1 or 2 people) that source stuff globally and market them for sale (from the states)
so probably china stuff to be fair
im chasing 2 ideas at the moment
i got a 5w 24v 25mm dia heater (stick on) from ali express to try out
probably very under powered tbh but got to give it a try
the other would be a heater cartridge - so simple hole into the bed
failing that i might contact Keenovo and get a custom mat heater
this look intersting - if they do custom jobs then it might be worth it
would be nice to have a logo on it or something to make it special
this is the small polyamide heater i got
On the idea of the heater cartridge, they come in various lengths (including 40mm and 60mm) so If you inserted one into the side I think that could work
I've gotten a custom sized plate from ENERGETIC 3D Store on AliExpress
What was the price like?
Reasonable?
Yeah that's sort of what I thought too. Also get a thinner one, like the 4mm dia ones
Yep. They had me pick out a standard size and add a note with the custom size. (310x310 for a 235x350)
Probably get 3 or 4 for the price of a 120
Oh that would be cool 😎
12 and 24v 40w 30mm long heater cartridges
I'm wondering about using 2 with temp sensor in the middle.
Could use 12v heaters in series and run duty cycle at 0.25 to keep the power consumption down.
2 x 40w × 0.25 = 20w total.
Should be enough for a 42mm bed
Good idea
I'm going to see if mandala rose works will do it for cheaper.
What about an aluminum PCB heater? Like those pcb reflow heater things but for the bed and bed heater. A 42mm bed doesn’t need to be the spec 6-8mm thick to help prevent warping.
How would you mount it tho
Yeah but it looks the biz though
I've gone for 8mm thickness so I can put a 6mm cartridge in one
I think the bed is possibly the most tricky part to get stuff for
Yes lol
I think it might be a good idea to document the bed stuff for the repo.
The various options or just which one worked best?
Possibly both to start with, then other can have the choice at least
So have a recommended setup and other variants as options
Maybe, might do a separate doc for beds.
I have a think on it
What happened to the link you posted?
Removed it bc i found a better one
1 sec
https://www.aliexpress.us/item/3256803842920373.html?spm=a2g0o.productlist.main.3.48c5dzTOdzTOJM&algo_pvid=64f72add-4623-4e86-8219-af1cd0ef3ba5&algo_exp_id=64f72add-4623-4e86-8219-af1cd0ef3ba5-1&pdp_npi=4%40dis!USD!11.03!11.03!!!11.03!11.03!%402103250717209710662226403eefdf!12000027796017287!sea!US!2914185819!&curPageLogUid=m8Qi8nqSJpyk&utparam-url=scene%3Asearch|query_from%3A I'm not sure exactly how hot it gets but there are a variety of sizes
https://www.aliexpress.us/item/3256803669225182.html?spm=a2g0o.productlist.main.1.48c5dzTOdzTOJM&algo_pvid=64f72add-4623-4e86-8219-af1cd0ef3ba5&algo_exp_id=64f72add-4623-4e86-8219-af1cd0ef3ba5-0&pdp_npi=4%40dis!USD!18.05!18.05!!!18.05!18.05!%402103250717209710662226403eefdf!12000027343135998!sea!US!2914185819!&curPageLogUid=buLwBN8574o1&utparam-url=scene%3Asearch|query_from%3A This one has a really tiny one that might fit on yours
This one might be better
Gona have to change my contry🤣 no available for uk
Oof forgot about that. I had to buy a different psu for same reason lol.
Is it the small polyamide heaters?
Yeah
I got this one, 24v 5w 25mm dia
220degree heater

My concern with these is the mounting holes

Should be fine for that, I could go to 30mm diameter before running into troubles
Loads of room

I'm just a bit concerned that 5w is too low
I'll start gathering the links you posted for USA specific bed bom
https://www.digikey.com/en/products/detail/european-thermodynamics-ltd/ETH-127-14-15-S-H1/13566709?utm_adgroup=&utm_source=google&utm_medium=cpc&utm_campaign=PMax Shopping_Product_Medium ROAS Categories&utm_term=&utm_content=&utm_id=go_cmp-20223376311_adg-_ad-__dev-c_ext-_prd-13566709_sig-CjwKCAjw7s20BhBFEiwABVIMrajv4Wie056f9ciPZnUpanujjO7-tVF-PEjY8ulCDn4MOgA-mPy4yxoCgxEQAvD_BwE&gad_source=1&gclid=CjwKCAjw7s20BhBFEiwABVIMrajv4Wie056f9ciPZnUpanujjO7-tVF-PEjY8ulCDn4MOgA-mPy4yxoCgxEQAvD_BwE I also found this. 40x40 up to 150c but idk about mounting
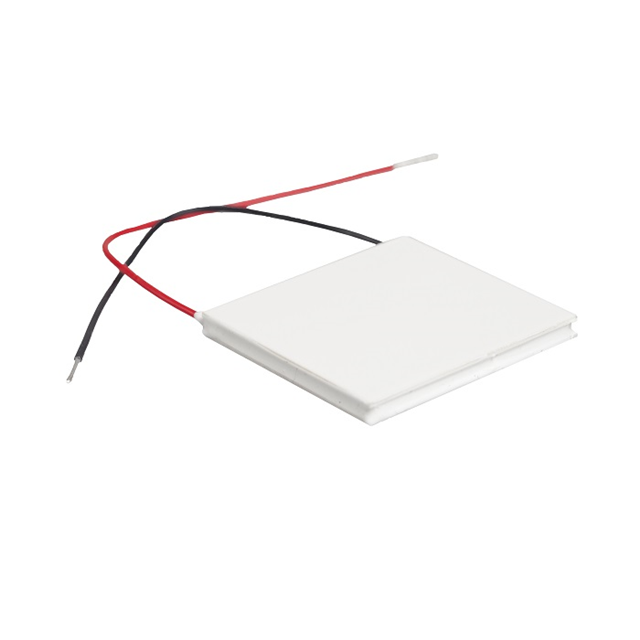
DigiKey Electronics
Order today, ships today. ETH-127-14-15-S-H1 – Peltier Module 60.0W @ 25°C 6.5 A 150°C from European Thermodynamics Ltd. Pricing and Availability on millions of electronic components from Digi-Key Electronics.
https://youtu.be/2tWxbrQyKA8?si=SODLRDMw1SNmPBA- what about one of these?

My smaller thermal sticker concept!
Get a free trial of Altium Designer - https://carlbugeja.com/altium
PCB Manufacturer - https://www.pcbway.com
Music - The Truth - Anno Domini Beats (YouTube Audio library)

GitHub
A 10x10cm Flexible PCB Heater with an adhesive back - GitHub - CarlBugeja/HeatStick: A 10x10cm Flexible PCB Heater with an adhesive back
100x100mm is too big
There’s a 2x2 and it’s open source
Ah didn't see that
Could whip up something specific to sub0
I think 25x50 would work well for me

that wasn't meant to be a reply oops
Would be great to get as much coverage as poss to minimise cold spots👍
Let me go back to my desk and fire up Lucas
No major rush, but if your free😁
As in that looks good or could be better
my other option is inbetween the two top holes
can you do me a favour and export a dxf of the current build plate bottom

Yep give me a sec and I'll fire up lucifer
I removed the chamfers on that btw
Looks like I was beaten too it
Already had it open no biggie :)
Have had to pause to cook dinner but got it started
Minimum 10pcs for a custom size :/
Not the end of the world for some that small, could use them for other things like hanging one from the rear view mirror
Did they quote a price at all?
Keychain
$400 for all of them 🗿
😬
porgress

dun


50 usd from jlc without shipping
for 5
jlc don't offer all these options


It ain't pretty but it'll work

thats awesome work!
i put a post up in the voc pcb channel, see if anyone has any comments
in theory the impedance of that trace should work the same as the original inspiration
thanx bud, ill keep an eye on it
i'll see if i can lump some in with my next business jlc order
is that not considered a little naughty🫠
nah
what material did you go for for the frame in the end?
abs
no warping this time?
Nah idk what's was up the first time
Different spool
Also flipped the lead screw so now it's

oooo pretty
i was lazy and did the belted z
worth putting one of these on the sub 0

Already had the parts laying around, recycling an ender 3
oh nice
What you don't have a nema 8 leadscrew stepper 🤣

T3.5x1 leadscrew
3.5mm OD 1mm pitch basically an m3 screw
tri-sub?
= no z banding🫠
I need to build 2 of these with printed frames , one blue and black with white accents, and the other yellow and black with gold accents
Name them Sub Zero and Scorpion

that would be awesome
The frame I DID set aside for my original one that was going to be next to nemgreas at rmrrf is a gold v0 frame
🤔
thats a lot of hardware though for such a smol printer
that would look cool
i used the original frame from my seboor kit
Yeah I don't think I'll ever do 2 of them but 1 I still want to do
didnt mind butchering that for this project
defo one for the collection
For the silly :)
I would want to make it work off a cordless drill battery so you could take it anywhere
im hoping to get some fund together after build 4 to get a trident and then i have all three
I just need a switchwire
thats a cool idea, i think there is something along that you could use
oh thats in the pipe line for me too, but the trident/veriants are my top list
got an old ender 3 to donate to that
Yeah have a battery slot in the back as well as a DC PSU inlet, that way you could use an actual PSU also
and charge the battery?
the ultimate on the go printer
I was thinking about doing that but decided not to bc I'd need more parts for that than this build
For when you get the urge to print some voron cubes out 🤣
i was thinknig the same thing🤣
Or benchy in my case 😏
now your just showing off
I would never
i might put the tulip pin mod on the sub 0 for kicks
Haven't heard of that one
#1259699805693808681
gona push an update a bit later as ive done some small improvements but its good as it is
That's cool. My build's not done and I already dislike the idea of adjusting belt tension in the back
Dude tulip is so cool...the idlers on the front are
yeah its a sore point for many
I'm going to have to do tulip on mine as the AB tensioners hit each other otherwise since it's so small 🤣
daft thing was it was born out of thowing stuff at the wall and looking to see what stuck
As most of these printer designs are 🤣
Amekyras was pure inspiration for that mod, i just lent a hand
not much wiggle room

Printing off the updated parts to play with

Unrelated, sick cowling design
thanx
not much of my parts are OEM shall we say😁
i bet you could get a fag paper in there
Theres some uk slang I haven't heard before

It could be related. They could be using a similar cowling on the sub-0.

Just need to make that into a bent sheet file and get it bent up and send cut send

Wonder if it's too much extra bulk to just have folks use something like this for their favorite tool brand. Maybe make some remixable mount/base/backpack. https://www.homedepot.com/p/Milwaukee-M18-18-Volt-Lithium-Ion-175-Watt-Powered-Compact-Inverter-for-M18-Batteries-Tool-Only-2846-20/313297952

The Home Depot
The M18 TOP-OFF 175W Power Supply provides faster simultaneous power to personal devices and small electronics. Quickly charge up to 3 devices simultaneously, without the barriers of speed throttling.
That's pretty chunky for a printer of this size tbh but idk what the alternative would be
tbf if the output voltage(s) are correct you could 3d print a carrier/dock for the battery and remove the inverter circuit from the chunky case and possibly pack it in a smaller space

Love the braces
Thanks, tbh I had to trim them a little bit to make room for the bed
https://www.printables.com/model/776688-1515-renforcement-corner-brace They're a remix of some aesthetic ones I made
Along the lines of battery powered. If you used low speeds and low power heaters/motors and possibly not a heated bed. You could probably cram enough 18650 batteries in the bottom with a bms and charging circuit to power the thing for quite a while.
how do the backup printer people power theirs? probably just use that?
Via an ups. Cause they are the trusted go to source of backup power.
but only if its 3d printed!