#help-with-hw-design
1 messages · Page 20 of 1
 supple pollen
It seems sufficient to me. You may even get a longer runtime out of less capacity because you'll get less voltage drop.
 torn plover
supple pollen
It seems sufficient to me. You may even get a longer runtime out of less capaci...
torn plover
supple pollen
It seems sufficient to me. You may even get a longer runtime out of less capaci...
And now i need to do an experiment haha.
supple pollen
One experiment beats a dozen "expert" opinions
torn plover
Its going to be a small scale one haha a 4s1p and a 3s1p and extrapolate. Be a lot of spot welds to do it full size
supple pollen
Yeah, I think that small scale one will tell you plenty
torn plover
Im aware the results wouldnt be 100% due to internal impedances.
supple pollen
For experimenting, you can use clip leads or make up some simple cell holders
torn plover
I had thought of cell holders but yeh the ones ive got are insanely tight haha. Practically destroy them getting my cells out
supple pollen
I'm thinking 3D printed or cardboard holders and sheet brass (or if you want to get fancy, Keystone sells the spring contacts by themselves)
torn plover
Hadnt thought of 3d prints haha. Have only got 3 printers currently idle
 inland jungle
since he's switching through an optocoupler, using 12V to drive the gate would let him use most mosfets without worrying about the threshold voltage
supple pollen
Good point, if there's a way to get the 12V supply onto the board.
 tribal knot
Hi, bit of a random question. If I wanted to outsource the design of a custom board with an esp32, 18650 holder + charger circuitry, and a DHT-22 sensor on it, where would I start looking for someone to do that for me?
Before anyone says it, I know that a similar board (minus the dht-22) already exists, I'm just researching to see how much it would cost to get it all done custom, assuming I wanted to get them mass produced (ie. Hundred of units, but not thousands).
 unreal flax
tribal knot
Hi, bit of a random question. If I wanted to outsource the design of a custom bo...
unreal flax
tribal knot
Hi, bit of a random question. If I wanted to outsource the design of a custom bo...
I'd be looking on Upwork for a freelancer to handle it. You might get lucky with a cheaper person on Fiverr, but I've had bad experience with that platform.
Alternately, since you want to mass-produce them, you could also directly approach a PCB house to use their designers for it. RushPCB, for example, I believe does those kind of combined "design and fabricate" jobs.
tribal knot
unreal flax
I'd be looking on Upwork for a freelancer to handle it. You might get lucky with...
Thanks. I wouldn't have thought of the regular places like upwork.
 jaunty jay
I’ve used JLPCB and SeeedStudio before for small batches (just to manufacture my design) and they are both reasonable. I saw in my emails SeeedStudio pitching their turnkey PCB design and manufacture service. Might be worth looking at their site to give you an idea of costs.
 split obsidian
unreal flax
Alternately, since you want to mass-produce them, you could also directly approa...
split obsidian
unreal flax
Alternately, since you want to mass-produce them, you could also directly approa...
Very cool. Never knew this
 pale umbra
Im confused about the teensy 4.1
specifically the ones sold by sparkfun. Are they the same as the pjrc or what ?
Also what is the name of the 9$ adafruit item that gives wireless capabilities to other MCUs ^
pale umbra
adafruit dont sell the ethernet kit for the 4.1 though
tried to find teensy 4.1 ethernet on adafruit site and only give something for 3.2
argh I cant decide between the grand central express and the teensy 4.1 😦 I dont like how arduino and circuitpython are alpha on it though 😦
 tame sigil
Hi I have a USB connected 6.5 digit DMM project that will use RP2040 as main MCU but it gets detected as Unknown USB device (Device Descriptor Failed) I had checked the cable with another card that uses off-the-shelf RPi Pico and it works just fine. Any reasons why that might happen?
supple pollen
Teensyduino has been out for the Teensy 4 for quite a while, it's stable.
 lusty heath
Wasn't sure which channel to put this. I am having trouble uploading an Arduino sketch if my feather is connected to other stuff. I have a Feather M4 CAN, plugged into a custom board I had made. It has several connectors including one to a RoboClaw motor controller. The other things plugged in are a cheap tiny oled, a couple of motors, and external power. I have a switch on the 5v in, that I turn off when I have USB connected. I can upload the code fine if both the oled and the RoboClaw are not plugged in. If they are plugged in, it stalls out in the upload with this Performing 1200-bps touch reset on serial port /dev/cu.usbmodem14101 (mac usb port) I know if would be impossible for anyone to diagnose here, but I am looking for ideas on what I might have messed up. It seems like the reset via usb can't be made. Can it be a ground issue? If it is, what should I be looking for?
lusty heath
pale umbra
Also what is the name of the 9$ adafruit item that gives wireless capabilities t...
Was that the airlift you were thining about?
pale umbra
yeah ordered 2 of em
supple pollen
lusty heath
Wasn't sure which channel to put this. I am having trouble uploading an Arduino ...
I'm guessing the roboclaw motor is causing noise on the power supply line
lusty heath
supple pollen
I'm guessing the roboclaw motor is causing noise on the power supply line
Possibly? I have the motor power and the electronics power separate. I even had all batteries off and only powering circuit via the usb power from the laptop cable.
pale umbra
lusty heath
Was that the airlift you were thining about?
one of them said feather so I wasnt sure but I read the descriptions of all three and got the "generic" one
lusty heath
pale umbra
one of them said feather so I wasnt sure but I read the descriptions of all thre...
One is a feather shield. The one you got should be smaller with one row of connections.
pale umbra
lusty heath
One is a feather shield. The one you got should be smaller with one row of conne...
I got these

 lucid dagger
hihi i need LED procurement help!
im basically looking for these, as they are part of the kit i am using and i need more, but i dont want to deal with this site any longer: https://keebd.com/products/sk6812mini-rgb-led
is this the same thing..? https://www.adafruit.com/product/2659

KEEBD
SMD RGB LED used on a variety of keyboards for either status light, drop lighting or per key lighting Includes 10 x SK6812MINI RGB LEDs

Itsy Bitsy Teenie Weenie Mini NeoPixel RGB LED-inis! Make your own smart LED arrangement with the same integrated LED that is used in our NeoPixel strip and pixels!These MINI ...
i bought the SK6812mini-E variant thinking that would be smarter for a reverse-mount keyboard, but whomever designed that particular variant made them badly and they arent a drop-in replacement, so i need to use the normal SK6812MINI chips
supple pollen
They look equivalent to me, the same 3535 package
lucid dagger
do the neopixel ones have the same pinout as the SK6812MINI? I dont want to have another SK6812MINI-E situation 😅
supple pollen
Here's the SK6812MINI pinout

Here's the AdaFruit 2659 pinout. Other than the different naming of "GND" vs "VSS" (which refer to the same thing), they look the same to me.

The pin numbering is different, but the locations (which is presumably what you care about) are the same
lucid dagger
🙏🙏🙏tysm
unreal flax
That second diagram is a little cursed. Putting pin "3" right next to the pin-1 corner notch?
supple pollen
And that's the AdaFruit one!
 flat vigil
@lucid dagger I had much better luck with these and a slightly different pcb: https://www.adafruit.com/product/4960

These reverse mount NeoPixel LEDs are an easy way to add a lot of small (but bright!) colorful LEDs to your project when you want the top of the PCB to be flat, or to keep manufacturing ...
I think the pcb files were from https://github.com/josefadamcik/SofleKeyboard/pull/90
GitHub
Rerouting all switches RGBs.
Changed all the underglow and layer indicator RBGs to mini-e as well
 full hearth
I’m trying to find out if there’s a way to have a fine grid of shutters that I can use to block or allow light to pass through. I was thinking use an LCD without the backlight? But the response times are fairly slow (about 5ms for a 240hz display). Could an OLED monitor be made transparent? I saw that OLED has microsecond response times. Thanks!
supple pollen
Like this? https://www.adafruit.com/product/3627
What do you get when you power a layer of liquid crystal material sandwiched between two sheets of glass? A Liquid Crystal Light Valve (a.k.a a LCD Controllable Black-out ...
SparkFun used to offer a transparent OLED display, but it's not useful as a shutter https://www.sparkfun.com/products/15079
One approach in things like video projectors is arrays of tiny tiltable mirrors.
 cursive sentinel
Monochrome LCDs used in resin printers might work, but I don't know how quickly those respond.
LCDs involve physically twisting polarized molecules floating in oil. I don't know what the theoretical minimum response time is for them.
supple pollen
I'm curious what the actual problem you're trying to solve is. It's probably possible with Pockels or Kerr cells, or possibly acousto-optic modulators, but arrays of those would be ... daunting.
unreal flax
full hearth
I’m trying to find out if there’s a way to have a fine grid of shutters that I c...
For faster response, there are ferroelectric panels similar to LCDs. "Spatial Light Modulator" might be a good keyword.
pale umbra
Im surprised that somes tft adafruit sells are actually from au optronics
lucid dagger
flat vigil
<@218929950172905473> I had **much** better luck with these and a slightly diffe...
yeah thats the problem, I already have a pcb and I need LEDs that work in it 😄 otherwise I would get those in a heartbeat
lucid dagger
flat vigil
I think the pcb files were from https://github.com/josefadamcik/SofleKeyboard/pu...
oh!! that's very cool!!
lucid dagger
on second thought, i already bought a second kit because i killed a pcb, so i have all the parts i need to transition to this better pcb should i order one, so i might just do that and benefit from the SK6812MINI-E
lucid dagger
woof that shipping cost though!!
 lucid dagger
thats slightly more palatable
 lucid dagger
ok ordered 😄
 hushed smelt
Actual PCB manufacturing is relatively cheap. It's the shipping that costs the most if you assemble the boards yourself. If you have the assembly service done that can sometimes cost more than the shipping depending on the amount of components and size of the board.
If you go with a US manufacturer it's the inverse with shipping being cheap but manufacturing being more expensive for a basic board. Going with a Chinese fab is overall cheaper for prototypes but can take up to a month while US manufacturers can have same day turnaround if you're in a hurry but it'll cost ya.
lucid dagger
actually I live in the part of the world (ie: the rest of it) where USA manufactured goods are just as expensive to post as everywhere else 😉 😁 😅
hushed smelt
Another plus to US manufacturing is that there's no language barrier. A place like cyber city circuits or oshpark can make recommendations to improve your board if necessary, component replacements, etc.. but with a Chinese fab it's you get whatever you submit.
There has to be some kind of local equivilent for you. Maybe ask Unexpected Maker where a good place in Aussieland is to have boards made?
lucid dagger
I used jlcpcb for this one but I've mostly dealt with OSHpark before and their system of "just upload the kicad file and we'll deal with the Gerber nonsense" was much better than the jlcpcb setup
hushed smelt
I'm assuming that's what the A$ denomination is from?
lucid dagger
Austrian? no they use euro I think, American? that makes the most sense to me
just like
use actual country currency codes? like a sane person?
AUD is right there
but I digress
lucid dagger
exactly!
hushed smelt
didn't know that, maybe bring that up to them.
lucid dagger
it's wrong and confusing!
nah it must be a thing some designer decided on. EKWB uses it too
hushed smelt
weird
lucid dagger
at that point, it's a fad, and those are hard to break
lucid dagger
hushed smelt
weird
very
hushed smelt
shoot them an email, maybe they just don't know any better
lucid dagger
what's worse is when I lived in NZ a lot of sites like EKWB would use their Australian store to serve me, so the A$ was even more confusing because I can't even do pattern matching there.
lucid dagger
hushed smelt
shoot them an email, maybe they just don't know any better
maybe next time if I get the chance. it's just not worth the hassle lmao
hushed smelt
what do they do for rupee or rubel, gotta be rup and rub. not IND and RUS. just bad web design.
lucid dagger
indeed
hushed smelt
standards exist for good reasons
please post up your boards when they come in. people around here love looking at shiny new pcbs 🙂


 jade wedge
The thing with assembly services, is I'm looking at PCBway, and if I do an instant estimate it tells me that assembly is $30... down from $127 for reasons unknown.
This is my current design. Significantly more complicated than the original design. Mostly due to the addition of decoupling caps for the ICs, a smoothing cap for the eventual NeoPixel attachment on the left, resistors to protect the data lines for the NeoPixels (two channels), and a dummy load to keep power banks alive. The ground lines aren't connected because I'll be doing a copper fill for the ground plane.
I think it's pretty good for a first board.
 cursive sentinel
jade wedge
This is my current design. Significantly more complicated than the original des...
cursive sentinel
jade wedge
This is my current design. Significantly more complicated than the original des...
Looks decent to me, although I have a few notes:
- The trace going from pin 4 of J2 to R3 is * very* close to one of the pads on R2. You should add more center the trace or at least add more clearance.
- Since that's a pretty simple design I would actually recommend doing a power supply fill on your top layer. No read need to run a bunch of individual traces for it here.
- If you have space it would probably be worth adding an ISP header for the ATTINY85. You won't necessarily populate it, but at least having the option is good. Plus you can use pogo pins.
jade wedge
Probably easiest way to fix that would be to swap the whole thing around, which honestly isn't a problem.
I thought about doing a power plane, but thought it would interfere with the decoupling, but I guess not?
I thought about using the ISP header, or other way of being able to program without removing it, but I can always just go with a socket for now since it'll also be sharing at least one line from U1, which is the output, and I don't know if they'll interfere. Honestly for this stage I'm fine with socketing it.
There we go. R3 to J2 now routes well clear of R2. And the top copper layer is now a power plane.
I'll happily take fixing minor mistakes/suggestions like that over finding out that I've made an apocalyptically stupid decision.
But I'm learning by trying, so it's inevitable. Now I just have to get up the courage to actually commit to ordering... I mean, it's $15 so even worst case it's not terrible.
cursive sentinel
 jade wedge
I really should. Though first I feel like I should separate the trace that's just scooting past pin 1 of U1
cursive sentinel
Hmm yeah probably should
jade wedge
Apparently everything around it was positioned just right that without changing the grid, there was nowhere to put that trace without it being close to something.
No problem.
hushed smelt
The initial price is for the PCB creation, then you get into the assembly service cost, maybe?
I haven't used PCBWay but that's kind of how it is in the process for JLCPCB.
cursive sentinel
That's entirely through hole. No reason not to assemble it yourself.
jade wedge
Oh I know, I was curious. If I ever miniatureize the design by going to SMD, I'd like to have that assembled.
Though doing SMD assembly they tell you to budget for 10-20 parts to be thrown away due to how they have to load the machines.
Also I was more confused why the "initial" assembly price was $127, but my price was $30.
supple pollen
Most places have common parts on reels they'll just sell you, those don't get the losses. Many other SMD parts are so cheap that losing a handful is no big deal. For expensive fancy parts, you can request a different process where the loss rates are lower.
jade wedge
Something to definitely ask about. Only if I ever got to the point where I'd sell this. I can dream about that, but unless I'm making a few dozen, I'll just do them by hand.
 elder peak
Some SMD parts are just reel cheap.
 molten aspen
elder peak
Some SMD parts are just reel cheap.
molten aspen
elder peak
Some SMD parts are just reel cheap.
... I hate the fact that I literally chuckled at that joke...
BTW: What is currenlty the go to Buck/Boost-converter chip that is recommended for new projects? Mainly looking for outputs of 12V and 5V (so two chips) from voltages 4-13V (can be lower in low end and higher in the high end).
unreal flax
molten aspen
BTW: What is currenlty the go to Buck/Boost-converter chip that is recommended f...
I don't think there's really a "go-to" for that, since there's a lot of variety in voltage ranges and current requirements.
molten aspen
Fair point. I guess it's back to Mouser / Digikey then.
OR is there a easy way how to do multiple voltages (5V and 12V) from single voltage line, e.g. 5V or 12V or even 15V? Is the use of two chips for that the best way when we are thinking with high loads, 1-1.5A
unreal flax
There are multiple-output regulators, including sometimes ones that use a single inductor to save on part count, but they tend to be relatively expensive, so a two-chip solution is often more straightforward, especially if one can be a simple buck.
cursive sentinel
I don't see how it would be possible to do that with a single inductor. It can definitely work with a multi-tap transformer (although only one of the outputs can be well-regulated).
 dry pelican
I'm working on using a PVDF-based piezo sensor as a strain gauge/ force sensor. I'm able to get a signal whenever I hit the ribbon sensor with an op amp buffer and amplifier after that, but adding an integrator to add up the charge on the piezo (and get the force) will make noise accumulate and drive the signal out of the power supply's range. I'm planning to do the integration on a microcontroller anyways since the final project will use a 5x5 grid of piezo sensors with some low leakage multiplexers for addressing the sensors. What do you recommend to get a reliable strain gauge-like reading out of the piezo without overdriving the signal?
 tidal elbow
Hi. I'm new to Mosfet and would like to drive p-channel depletion Mosfet for battery cut-off/backup circuit. The idea is the gate voltage will be saturated when USB 5V is available and disable the battery (3.6V) to energize 3.3V bus, and when unplugged the battery will kick in.
Im following this circuit from YouTube using PMos. I sense the problem to be the P-channel Mosfet, its gate required opposite polarity to drive its gate. Will this circuit worked? And could you suggest me a proper P mosfet for this criteria?
 jade wedge
Ahh... I was all ready to submit my board to PCBway for manufacturing, then realized that I need two sub boards to make my life easier. Basically I need to build my own NeoPixel breakout board because while I am using through hole NeoPixels, they were going to be at the end of wires, and I don't trust myself to do that, plus the cap, and ensure that the wires won't short once installed. Making these sub boards is easy, I just have to figure out how to panelize the whole thing properly.
supple pollen
tidal elbow
Hi. I'm new to Mosfet and would like to drive p-channel depletion Mosfet for bat...
I think you want a normal enhancement mode P-channel MOSFET for this job. Hopefully, as depletion mode P-channel MOSFETs are basically non-existent.
 queen wharf
jade wedge
Also I was more confused why the "initial" assembly price was $127, but my price...
queen wharf
jade wedge
Also I was more confused why the "initial" assembly price was $127, but my price...
You get 1-3 assembly orders a month at 30 dollars which then rises to 90-130 dollars
supple pollen
That's an interesting pricing scheme, and one I could work with.
jade wedge
Yeah, I could deal with that.
 fervent canyon
I'm a total dunce when it comes to circuit design, and I have zero background in true EE (I'm a programmer). That said, I've created a circuit that's .. pretty dumb, and the Adafruit buck converter takes all the hard work out of it. But basically it lets you have a single input for powering higher-power devices, and thanks to the converter, lets you power your microcontroller as well. It's basically a buck converter board, a zener diode, and a capacitor, and I'd love to throw a tiny PCB together that I could make more of these in a smaller package.
For a total moron like me, is there software out there that would be friendly enough that I might be able to figure it out and make a PCB design for this? It's all surface mounted / single layer stuff
lucid dagger
soon™️ 👀
 cursive sentinel

lucid dagger
i must be lucky, this was supposed to be a 3-4 day job before it got shipped, but i got it in two! 😁
flat vigil
lucid dagger
i must be lucky, this was supposed to be a 3-4 day job before it got shipped, bu...
What did you order? The new sofle pcb?
lucid dagger
ye!!
lucid dagger
lucid dagger
on second thought, i already bought a second kit because i killed a pcb, so i ha...
^
flat vigil
I end up ordering more stuff to mitigate the shipping cost. 🙂
I have 5+ spare PCBs now 🙂
dry pelican
I do the bulk order strategy as well
pale umbra
*Order one stemma cable 0.75$ from adafruit 80$ shipping cost because royal canadian customs and royal canadian mail"
elder peak
"Royal Canadian Customs should stick to things like hockey and poutine, not giant fees"
hushed smelt
is there a royal canadian customs hockey team?
lucid dagger
*punts your parcel back across the border, shouting "offside!"*
 left grove
pale umbra
*Order one stemma cable 0.75$ from adafruit 80$ shipping cost because royal cana...
left grove
pale umbra
*Order one stemma cable 0.75$ from adafruit 80$ shipping cost because royal cana...
Just in case you don't know this already: Adafruit says which connector Stemma and Stemma qt are. You can get them on ebay, amazon, etc as finished wires or sets to crimp them yourself.
lucid dagger
idk how hockey works
lucid dagger
left grove
Just in case you don't know this already: Adafruit says which connector Stemma a...
I wouldn't trust ebay or Amazon with a 10ft pole
pale umbra
left grove
Just in case you don't know this already: Adafruit says which connector Stemma a...
yeah no worries before that I wired them myself with individual M-F wires
Im just a bit annoyed that every company seems to do their own connector
and that I cant use stemma if it's not IC
left grove
lucid dagger
I wouldn't trust ebay or Amazon with a 10ft pole
Agree. honestly if you buy there I bet you get some cloned "JST" connectors. But still. If the option is 80$... 😄
hushed smelt
stemma and sparkfun qwick are compatible
yeah there are like hundreds of different JST versions
pale umbra
where as other connectors sometimes will just use less wires in effect but still uses the same physical connector
yeah I know I have 12 qwik extender and a qwik mux thing
to convert my kit sensors to stemma
hushed smelt
JST is like saying Molex. it's a company and type but there are tons of different kinds.
if it's using less than 4 wires then it's probably not I2C and is UART?
lucid dagger
imp sure if I ask someone for a molex cable I will get exactly one kind of cable
pale umbra
no most of my kit sensors are using 3 wires
hushed smelt
or there's JST for battery connections too
pale umbra
would still have liked to have used stemma qt for em 😦
like my IR receiver has VIN, GND and DATA
hushed smelt
one wire communication is possible yes but slower than i2c and both are slower than spi.
depends on how much data you're trying to push, for a simple sensor 1 wire might be fine.
one wire isn't asynchronous so you'll have stop bits and things like that.
pale umbra
the arduino kit IR receiver cant do either but still sorta works for some codes
 rustic linden
lucid dagger
I wouldn't trust ebay or Amazon with a 10ft pole
rustic linden
lucid dagger
I wouldn't trust ebay or Amazon with a 10ft pole
personally it depends for me? for more obscure stuff that I can't find elsewhere, they tend to be the only real options I have, especially when I'm dealing with older or more bespoke equipment
pale umbra
same here. It's that or I cant get anything. amazon doesnt have min orders
where as if I need a 1$ cable on diigkey I have to buy for 100$ otherwise 65$ dhl fee, 100$ customs fee, 8$ shipping etc for a 1$ cable
lucid dagger
yall don't have local hardware stores?
pale umbra
yeah but they are a bit snobby
their screws dont start under 9mm
hobby-grade screws are the hardest things to find for me in canada without a huge min order
lucid dagger
oh for specific screws I'd buy from aliexpress
pale umbra
I accidently bought screws once from m-carr
didnt realize there's no confirmation step
thankfully they dont sell to individuals outside the US
i got a m3/m4 kit recently but I kinda got scammed. They forgot to make a slot for screwdrivers on the head of the screws 😦
pale umbra
I have to use a modular screwdriver to even try to screw them in
 unique patio
amazon has a lot of metric screw kit assortments, looks like they are just as available in CA
hobby shops have RC car metric screws but a lot of them are Allen-head cap screws and kinda expensive in small qty's
supple pollen
I had a need for self-tapping versions of socket head cap screws. Those aren't a standard thing, but I found some on AliExpress in my choice of finishes (I got some black and some chrome). I use them when building props where the sockets look good, but the structure is just 3D printed plastic and wood. The self tappers work better in those materials than machine threads.
pale umbra
I wish it had been just more obvious there was no sockets on em
I never seen such screws before and didnt know these even existed. (like the socket is filled with metal). Kinda work with my bit set but they feel like the worst tools to use on them (was able to screw in and screw out the M3 one) it's just very unwieldy
where as what I thought they actually were (flat SOCKET screw) the flat socket would normally fit in perfectly and even hold the screw while moving it to the hardware to screw if the correct size bit is used
supple pollen
They're ordinary hex head bolts, they're fairly common parts. What I don't get is why the heads seem to be a non-metric size when the threads are metric.
pale umbra
I wonder if on 10mm thick 3d printed pla and 10% infill...
 pale umbra
supple pollen
They're ordinary hex head bolts, they're fairly common parts. What I don't get ...
pale umbra
supple pollen
They're ordinary hex head bolts, they're fairly common parts. What I don't get ...
but they are metric, the heads are 5mm across almost exactly
that's metric no ? Where are 1/X of an inch never is 3 or 4 or 5mm exactly
My socket bits are alledgedly steel-vanadium....
PLA probably going to snap but that's the point (to test the durability)
rustic linden
lucid dagger
oh for specific screws I'd buy from aliexpress
i go to Bunnings (local hardware store) for screws most of the time, but i just sometimes need obscure parts like old camera ports and other electronics parts that i can't find on Mouser, DigiKey, or any of the local electronics stores
rustic linden
supple pollen
I had a need for self-tapping versions of socket head cap screws. Those aren't ...
so you'd recommend self tapping screws for 3D printed parts?
we got a new 3D printer I'm gonna get to open when i get home from my interstate trip in the next day or so, and I'm gonna be using it for a project that needs fastening
pale umbra
rustic linden
i go to Bunnings (local hardware store) for screws most of the time, but i just ...
in Canada hardware stores dont do this and they starts At M9+
The smaller they have are decks screws
the the biggest ones are like M40 for concrete almost a feet long I think at this point they are stakes
One day someone will need to explain to me why a 12inch M8 stainless steel threaded rod is 2$ but a 7.5 inches M4 hobby-grade martensite one that snap easily is 10$...

shouldnt it be like less expensive (less steel used) ?
jade wedge
Higher tolerances and more precise manufacturing process.
pale umbra
But how do I pick a less tolerant one and less precise ?
Im just going to solder iron heat it and push it in the PLA so doesnt matter
jade wedge
Also looking into it, martensite is a slightly different manufacturing process. Is there a reason you need one over the other?
pale umbra
no that was just a way they are usually low-quality
and shear horizontally because they use steel that seems hard for appearance sake but is actually very brittle
usually shear about halfway on the rod
the one at the hardware store I know it's actually 302 steel
it's for my r/c bottom plate. The parts are PLA but I want any screws/rods/washers/bolts to last several repair cycles
Im thinking that if the rod is really hard and not brittle it will absorb most of the crash without crumpling the PLA
supple pollen
pale umbra
but they are metric, the heads are 5mm across almost exactly
Then a 5mm socket should work fine
supple pollen
rustic linden
so you'd recommend self tapping screws for 3D printed parts?
It depends a lot on the design and what you're doing. For actual fastening, I generally use machine screws and nuts or inserts. I went for the self-tappers when I wanted the SHCS æsthetic but needed to engage holes in existing parts and didn't have room for nuts inside.
hushed smelt
yeah that's like saying "i don't know why a 3nm CPU is more expensive than a 10nm CPU when it takes less material to make". 😉
pale umbra
hushed smelt
yeah that's like saying "i don't know why a 3nm CPU is more expensive than a 10n...
yeah not really
it's a big object and uses molds that were made a very long time ago
hushed smelt
some things are more expensive the smaller they are
pale umbra
they could do these tolerances when steel started in 18XX
hushed smelt
they don't mold cast threads, they're cut
pale umbra
it literally take a couple of seconds to pour the steel in and doesnt involve any additional work no matter if itMs m3 or m8 or m20
hushed smelt
not at that fine of a pitch anyway
pale umbra
I dont think the ones on most websites do that unless you go for quality
And like I said it's probably martensite because of improper cooling/sulfur/carbon mixes
hushed smelt
they might mold the rod but they'd need to cut the threads in all sorts of pitches
the smaller the threads the more accurate they must be otherwise more complaints, as lollybomb said it's a matter of tolerances.
which you should be fully aware of after learning about tolerances with 3d printed screw threads. 😉 they matter.
pale umbra
not if you insert them with a soldering iron 😄
but for my bottom support rods yeah that will matter
supple pollen
I've taken to using a round hole with projections when 3D printing holes to be threaded. The projections both keep the screw from wedging apart the printed layers, and give some corners to accept threads. It's not as strong as complete threads, but it's pretty forgiving and works well in a lot of circumstances.
 jade wedge
It was interesting looking into CAD stuff.
"How do you add threads in CAD?"
"Traditionally, you don't."
elder peak
I mean, not to be a CAD about it..
supple pollen
With a tap...
 lucid dagger
tapping a 3d print sounds scary
supple pollen
It goes pretty smoothly
cursive sentinel
You want something that isn't too brittle and with good layer adhesion.
supple pollen
And that anti-wedging feature I referred to above
hushed smelt
actually taping a 3d print is extremely easy. taps are usually meant for aluminum or other metals so it chews right through filament and leaves very clean threads.
here's a short demo of some threads i tapped for a project. works great can highly recommend.

Demonstration of final prototype. Includes on/off power button, two way tint film as LED diffuser, 1/4"-20 standard camera screw mount, USB power with 150mah battery charger, printed in Polymaker 2-color Silk PLA.
i went with standard 1/4"-20 tap which is your standard camera accessory thread type.
elder peak
If you are in the USA and are an obsessive, you can get a tap meant for plastic and other soft materials with slightly different angles from McMaster Carr.
cursive sentinel
M3 and smaller self taps beautifully into a .2mm undersized hole with a .4mm chamfer.
dry pelican
I usually just run my screws into plastic
It somewhat taps the holes
Usually good enough
Works fine™️
elder peak
Either way, lots of taps about how to get screws into plastic today.
unreal flax
elder peak
Either way, lots of taps about how to get screws into plastic today.
Maybe we should start a thread?
elder peak
Well, that's a nutty idea
unreal flax
Bolt it could be useful.
rustic linden
hushed smelt
i went with standard 1/4"-20 tap which is your standard camera accessory thread ...
that's good to know, I'm getting a camera soon, and knowing what to use to make camera stuff is important for that
especially since we got a new 3D printer
elder peak
Yah, 3D printed camera accessories are pretty great.
pale umbra
unreal flax
Maybe we should start a thread?
yes Im interested in the topic too
hushed smelt
another method is to use your soldering iron on top of the screw, melt it into place, let it cool, and you can just unscrew it. another method of taping threads but doesn't work well on voids with infill. you really want to at least attempt to put a hole there in the 3d model so it will create a couple circular walls for the threads to grab onto.
otherwise if you attempt to do that on a section with a void and no infill the screw might just fall inside the part.
i've learned that one the hard way, don't do that.
supple pollen
Good point: wrapping screw holes with extra interior threads and internal bracing can be a good idea (tricky but useful)
lucid dagger
sofle rgb v3 pcb arriveth!!


 lucid dagger
sooooon

it's a pity it arrived so late on a Sunday. I have other plans now and I likely won't get to this until the weekend again
cursive sentinel
rustic linden
lucid dagger
sofle rgb v3 pcb arriveth!!
shiny
 urban lark
Is this channel also for existing hardware with issues? Managed to drop a pico, and cracked the corner off something. Looks like an inductor and maybe I can see two rings under magnification. Can I just superglue/hotglue/epoxy it, or even do nothing? I will attempt replacement for posterity otherwise.


Yes two copper rings in the right light
 supple pollen
urban lark
Is this channel also for existing hardware with issues? Managed to drop a pico, ...
supple pollen
urban lark
Is this channel also for existing hardware with issues? Managed to drop a pico, ...
That corner is largely outside the magnetic path and will likely have little effect on operation. You can probably just leave it the way it is.
pale umbra
Im watching a how to order a pcb tutorial (like the gerber files, what layers to provide and all the options etc). At at some point the streamer make a joke that if you need duroid or rogers you dont really need their tutorial so they wont cover it and then they chuckle. What is the joke exactly because I didnt get it ?
unreal flax
pale umbra
Im watching a how to order a pcb tutorial (like the gerber files, what layers to...
I believe "rogers" refers to a special type of PCB substrate material often used for RF boards. They're saying that "if you care about the advanced stuff like that, you hopefully already know more than what this video would tell you".
pale umbra
What is the material that is used for rf shielding then ? Like the thick metal shields under the pcbs, can you also order those when you order a pcb ?
jade wedge
Thick metal shield under the board? I've seen traditional RF "cans" that solder on top of the board, but nothing "under" it.
 fervent lance
I've seen some on graphics tablets with a solid sheet of metal
In my experience they use whatever cheap thing they can find
Also I may be wrong but laptop manufacturers do use spray paint for shielding
supple pollen
pale umbra
What is the material that is used for rf shielding then ? Like the thick metal s...
For RF shielding, copper or silver are best, but many places use tin plated steel, which is usually good enough. For magnetic shielding, it's similar, "mu-metal" is best, but many places just use sheet steel, which is usually good enough.
I've also seen plastic sheet coated with metal used as shielding under PCBs, but that seems to be less common
pale umbra
I meant shielding like around test instumenrs inside and medical devides. Could find a pic if you dont know what I mean
 late lily
Thats what theyre referring to already, the shielding in test instruments and medical devices etc
supple pollen
Like the metal can in the upper left of this pic?
 cursive sentinel
supple pollen
For RF shielding, copper or silver are best, but many places use tin plated stee...
cursive sentinel
supple pollen
For RF shielding, copper or silver are best, but many places use tin plated stee...
Aluminum is used as well sometimes.
pale umbra
This is the one I saw but medical devices teardown I saw also had something like this all around the device then the enclosure for it

This is from a Rohde&Schwarz SME-03 card
Looks about 5-6mm thick on both side of the card that plug in the unit
late lily
Not had that particular rohde and schwarz unit apart, had others apart
it'll just be a metal plate, some of them are beefed up a bit and also used for structural purposes, but otherwise its just another shield can like the sound card above
supple pollen
While it's not considered part of the PCB fabrication process, the shields (or solder-in nuts for shields to attach to) can be ordered and assembled onto the PCB like other components
pale umbra
so Id have to add holes for screws in kicad if I felt it was needed ?
supple pollen
For a screw-on shield like the one in your picture, yes.
 marsh scroll
supple pollen
I've taken to using a round hole with projections when 3D printing holes to be t...
marsh scroll
supple pollen
I've taken to using a round hole with projections when 3D printing holes to be t...
What are you using for software here?
supple pollen
marsh scroll
What are you using for software here?
OpenSCAD for the one in the picture, I also use Fusion
marsh scroll
supple pollen
OpenSCAD for the one in the picture, I also use Fusion
Cool I’ve been using Fusion and an old SolidWorks installer but very interested in a script based modeler. Do you find any big advantages working that way?
supple pollen
I like it for repetitive features, stuff made out of geometric solids, things with weird relationships I can describe mathematically, and the kind of forms you can easily build by shrinking a "hull" around a group of spheres, cylinders, etc. I usually have a kind of modular, iterative process, rendering it until I converge on something I like. It's also handy for parametric builds where I can change a dimension somewhere, and everything that depends on it adjusts automatically (if I've coded it properly)
 granite sonnet
Im using a feather ESP32-S3 for a design and I want to add an additional USB port for power only. I thought about connecting the second USB port to the battery pins but wont that be a problem if both usb-c ports are populated?
cursive sentinel
Most if not all feathers have a diode between the battery terminals and voltage regulator outputs. But you can't just grab the 5V pins from a USB-C charger, there needs to be some additional circuitry.
There's an excellent series of hackaday articles about it.
https://hackaday.com/2022/12/06/usb-c-introduction-for-hackers/

We’ve now had at least five years of USB-C ports in our devices. It’s a standard that many manufacturers and hackers can get behind. Initially, there was plenty of confusion about what …
granite sonnet
wont the usb on the feather try to "charge" the other usb port?
cursive sentinel
No, not if there's a diode on each of them.
Let me find the schematic...
Ok, it's a bit more complex. The battery is connected to a charge controller. That might try to backpower the port if you try to connect it through the battery terminals.
granite sonnet
yeah thats what i was afraid of
elder peak
Yah, the docs generally state that you must only pwoer it from the main USB port or via a battery, none other.
Although you are a little bit lucky, because there's this ESP32-S3 board: https://unexpectedmaker.com/shop/feathers3

Unexpected Maker
Introducing the FeatherS3 - The Pro ESP32-S3 Development Board in the Feather Format Ships with a set of male headers you can solder on if you required. Each FeatherS3 ships with a UF2 bootloader and the latest version of CircuitPython that supports the ESP32-S3 For more detailed information a
granite sonnet
i already purchased the adafruit feather esp32-s3 and i dont want to get another one. my best bet might be to add a diode to the second usb port, connect it to vbat and then lift the leg of the charging controller to goes to vbat
or lifting the leg off vbus on the charge controller
left grove
granite sonnet
i already purchased the adafruit feather esp32-s3 and i dont want to get another...
What's VBUS (on the pinout) or USB (label on the board)? https://learn.adafruit.com/assets/110811 Maybe you can connect that with a diode to a second USB port 🤔
USB - This is the positive voltage to/from the USB C jack, if USB is connected.
hmm. I would definitely check if there is a diode between that USB pad and the built-in USB port
lucid dagger
flat vigil
I think the pcb files were from https://github.com/josefadamcik/SofleKeyboard/pu...
hey do you have a keymap for this? im trying to figure it out and i cant seem to get RGB_MATRIX working? if i use RGBLIGHT i can get it working, but the rgb_default keymap that uses it is a mess and i cant figure it out. any help would be appreciated 🙏
 woven bluff
flipper has ported blackmagic probe to ESP32-S2 https://github.com/flipperdevices/blackmagic-esp32-s2
can it be used on other ESP32-S2 boards?
flat vigil
lucid dagger
hey do you have a keymap for this? im trying to figure it out and i cant seem to...
I have my own custom code for it that loads a qmk keymap for colemak
granite sonnet
left grove
What's VBUS (on the pinout) or USB (label on the board)? https://learn.adafruit....
The VBUS/USB pin doesnt have a diode on it, unfortunately. I checked the schematics. I ended up removing the charge chip and ill add a diode for the second usb c port to protect it and connect it to the VBAT pin
 ember laurel
is there a way in KiCad to make a Polygon that's connected to a net?
(without creating a Zone)
cursive sentinel
You can do it with a custom footprint I believe.
ember laurel
@cursive sentinel that's definitely not what I want. I found a workaround by creating a zone instead of a polygon, but it is not so neat - you have to fill zones in order to see it.
 loud furnace
I have a question I think I know the answer to...but I'll ask anyways
If I wanted to use a QT Py ESP32-S2 as an I2C target.... I shouldn't power it over the Stemma QT port, right? I
loud furnace
If I read the diagram right, the +3.3V pin isn't protected
unique patio
loud furnace
If I wanted to use a QT Py ESP32-S2 as an I2C target.... I shouldn't power it ov...
it's not expecting to be powered that way. Better to power it separately with the same overall power supply as the other board. If not that, make sure the grounds are tied together.
some discussion here: https://learn.adafruit.com/adafruit-qt-py-esp32-s2/pinouts#power-3107903
 vast flume
Hey guys, I still haven't been able to figure out this darn sensor so I decided to just use a different one. How does this schematic look if I want to access it over I2C?

Heres the application hint from the datasheet:

It is a LPS22HB
unreal flax
vast flume
Hey guys, I still haven't been able to figure out this darn sensor so I decided ...
Nothing leaps out as problematic to me.
vast flume
unreal flax
Nothing leaps out as problematic to me.
Thx
Also does anybody have a link to a tutorial that shows how to communicate with an stm32 over usb? I see some that cover the software side of things but cant find anything that explains if I need a usb to uart chip or how to connect the usb port to the microcontroller
unique patio
vast flume
Also does anybody have a link to a tutorial that shows how to communicate with a...
STM32 is a huge family: some have native USB and some do not.
vast flume
unique patio
STM32 is a huge family: some have native USB and some do not.
I'm using an stm32 f103
unique patio
it has usb 2.0. You could use their SDK, or you could use TinyUSB. Or use some Arduino core that supports it, if there is one.
vast flume
Ok
unique patio
you need some existing library: there's far too much to do to do it from scratch
vast flume
Right yeah ofc
Just trying to figure out the hardware side of things
Am I able to use any of these then?
vast flume
So it doesn't matter if its type b or c?
vast flume
unique patio
do you have a dev board for the chip?
No its on a custom pcb
unique patio
it doesn't matter, in the sense that you can use type c in a compatible way. I'd suggest you prototype this with a dev board. Did you do that already?
vast flume
I didn't
unique patio
then you can distinguish problems between your board and your software
 unique patio
if you find their dev board, you can crib off their schematic
vast flume
Yeah
vast flume
ok cool
Looking at this it seems that I should be able to just send the VBUS through my boards voltage regulator?
 unique patio
vast flume
Looking at this it seems that I should be able to just send the VBUS through my ...
unique patio
vast flume
Looking at this it seems that I should be able to just send the VBUS through my ...
yes, you could crib off our designs too
vast flume
unique patio
yes, you could crib off our designs too
Great
Does this mean that I have to use an external clock or am I able to still just use the internal one?

Also is USBDM the same as "D-"?

Also does this look correct as far as how to connect the port to the chip?
 unreal flax
vast flume
Also is USBDM the same as "D-"?
unreal flax
vast flume
Also is USBDM the same as "D-"?
Yes. DM and DP stand for "D minus" and "D plus".
vast flume
unreal flax
Yes. DM and DP stand for "D minus" and "D plus".
Ok great that was what I suspected but just wanted to make sure
unreal flax
vast flume
Does this mean that I have to use an external clock or am I able to still just u...
Yes, you'll need an external clock. Some STM32 parts can get away with an internal oscillator because they use the USB signal itself to correct the clock drift, but the F103 is old enough that it doesn't do that, so it needs a more precise reference.
vast flume
unreal flax
Yes, you'll need an external clock. Some STM32 parts can get away with an intern...
Ah that sucks
unique patio
the datasheet is likely to have reference schematics you can copy
vast flume
So should I use an 8mhz crystal?
unique patio
what does the datasheet say
unreal flax
vast flume
So should I use an 8mhz crystal?
Usually the chip can accept a range of frequencies with different configurations of the PLL, but 8MHz is pretty common.
 unique patio
this is a general datasheet about USB impl, so also look at the STM32F103 datasheet in paritcular
vast flume
ok
I've been looking in the f103 datasheet but its been hard to find info on this
Ok I found this

It still doesn't say the required frequency though 😦
unique patio
what does the reference design in the datasheet show?
you are just looking one kind of datasheet - the small one. There is a much larger one somwhere else with more info
and no schematics there either :/
 unique patio
being productively lazy can be helpful 🙂
unique patio
eval board uses 8MHz for a STM32F103ZGT6
vast flume
Ok
And then ig in the clock configuration I have to tell it to use the external source and it should just work?
unique patio
the clock shuld be ok, lots more to do 🙂
supple pollen
vast flume
So looking at this it looks like it just connects directly to the chip?
Yes, you can do that, but it's often a good idea to add low value (22 or 33 ohm) series resistors to help dampen out reflections, in case the traces and joints don't all have the ideal impedance.
elder peak
It's pretty much like an Arnold Schwarzenegger movie. You really need the terminator.
 broken zenith
Are there any obvious flaws with this design? Please ignore J3 and its connections, I have some special plans for it 😉
cursive sentinel
Yeah the hardware and software development guides are what you want. The datasheets just contain chips-specific info such as pin functions and electrical specs.
^ re: stm32 usb questions
dry pelican
unique patio
being productively lazy can be helpful 🙂
work smarter not harder
fervent lance
Hi guys,thanks for having me here,i am an electronics engineer and i have experience regarding the manufacturing process of devices so I would liek to discuss this kind of topics, I would like to discuss with you your feedback about this kind of platforms, https://myfastpcba.com/ and how these kind of platforms and "Online" Factories can help us all in order to reduce time from "Idea" To "Product"
My Fast PCBA
Realizzare prototipi e mini serie di schede elettroniche assemblate non è mai stato così facile e immediato. Scopri il servizio!
or pcbway or whatever is it
vast flume
supple pollen
Yes, you can do that, but it's often a good idea to add low value (22 or 33 ohm)...
Perfect, thank you
vast flume
I thought I had it all figured out but it seems that I dont 😅. I don't understand how to determine the values of CL1 and CL2
 unreal flax
vast flume
I thought I had it all figured out but it seems that I dont 😅. I don't understa...
unreal flax
vast flume
I thought I had it all figured out but it seems that I dont 😅. I don't understa...
ST has a good application note that explains this. It'll depend on the crystal you choose. https://www.st.com/resource/en/application_note/an2867-oscillator-design-guide-for-stm8afals-stm32-mcus-and-mpus-stmicroelectronics.pdf
vast flume
Which section? 😅
unreal flax
How about you spend... 60 seconds? ... flipping through the document before asking for help. 😉
vast flume
Found it 🙂
 vast flume
Since this component has a built in capacitor does that mean that CL1 and CL2 aren't needed, or is that the value that I use for CL to determine CL1 and CL2?

This is whats in the datasheet so I would assume so but just want to be 100% sure

(5-6)
 bold basin
would the sense hat (https://www.adafruit.com/product/2738) stack with the Ultimate GPS HAT(https://www.adafruit.com/product/2324) ?
Control the same hardware as used in space... build your very own Astro Pi with the new Raspberry Pi Sense HAT! The Raspberry Pi Sense HAT is attached on top of the Raspberry Pi via the 40 ...

It's 10PM, do you know where your Raspberry Pi is? If you had this GPS HAT, you would! This new HAT from Adafruit adds our celebrated Ultimate GPS on it, so you can add precision time ...
supple pollen
vast flume
I thought I had it all figured out but it seems that I dont 😅. I don't understa...
AdaFruit has you covered https://blog.adafruit.com/2012/01/24/choosing-the-right-crystal-and-caps-for-your-design/

Adafruit Industries - Makers, hackers, artists, designers and engineers!
Learning to design your own PCBs and being able to put together a schematic to solve a specific problem is both a valuable and rewarding skill. There are a number of resources out there to help yo…
vast flume
supple pollen
AdaFruit has you covered https://blog.adafruit.com/2012/01/24/choosing-the-right...
Thanks
 split ingot
Not sure if this is the right place to ask, but I have a question about power on the QT Py ESP32‑S2. My QT is hooked up to a USB power supply. Whats the max current I can draw from the 5v pin on the board? Is there a limit on the board, or could I pull the full 3.0A at 5V that my power supply can deliver?
supple pollen
split ingot
Not sure if this is the right place to ask, but I have a question about power on...
It's mostly just a pass-through, so while there aren't any components limiting the draw,
The 5V pin is connected via a NSR0320 Schottky diode rated for 1A forward current, so you could safely draw a somewhat less than 1A (since the current consumed by the ESP32 also passes through that diode).
split ingot
supple pollen
The 5V pin is connected via a NSR0320 Schottky diode rated for 1A forward curren...
Thank you for the reply! Sorry, I am very new to circuits, so I just want to make sure I understood you correctly. You are saying I could theoretically draw the full 3A from the pin, but if I don't want to run the risk of frying anything I should stay under 1A, right?
If I need more than 1A, would I just use a separate power supply, and make sure the rail that powers my qt is limited to 1A?
supple pollen
Right, if you drew nearly 1A, you could damage the diode on the board. Note that you do not need to limit the current of a power supply rail, these things are basically "up to". So a "3A" supply can deliver up to 3 amperes of current. But each device will simply draw the current it needs, so there's not a need to limit it separately. It's like if you plug a 4 watt night light into an outlet in your house capable of supplying 15 amperes. The light will only draw its rated current (0.033 amperes).
split ingot
supple pollen
Right, if you drew nearly 1A, you could damage the diode on the board. Note tha...
Ok, but now I am confused because that seems to contradict what I just saw in the data sheet (https://cdn-learn.adafruit.com/downloads/pdf/adafruit-qt-py-esp32-s2.pdf, page 14). It says "You can also use the 5V pin as a voltage input but you must have some sort of diode (schottky, signal, power, really anything) between your external power source and this pin with anode to battery, cathode to 5V pin."
Is that just if my power source is anything other than 5V?
supple pollen
No, it doesn't contradict the data sheet, the onboard diodes protect the USB and battery supplies, but not an external supply. If you add an external supply, it also needs a protection diode of its own to avoid the other supplies trying to send current "the wrong way" back to it.
split ingot
Oh, got it. Thank you for the explanation!
 worldly schooner
Also, the diode can handle 1A peak, not continuous. 1A over longer periods of time through the diode will eventually cause permanent damage.
Generally, anything in the range of 3A should be avoided on these dev boards, as the traces are often too thin to safely carry that much current.
split ingot
worldly schooner
Also, the diode can handle 1A peak, not continuous. 1A over longer periods of ti...
Good to know, thank you. I know the answer to this question is probably "it depends", but are there any general guidelines around the max current I can safely run through the board continuously?
supple pollen
Personally, I wouldn't try to pull more than half an amp through it.
worldly schooner
The old usb spec has a 500mA limit, so most boards are designed for that.
Anything higher might be fine in short peaks, like the esp32’s wireless radio bursts, but I’d try to limit peaks to 1A and continuous to 500mA.
supple pollen
worldly schooner
Also, the diode can handle 1A peak, not continuous. 1A over longer periods of ti...
I'm curious, am I misreading this?
 worldly schooner
Hm, no you’re not. I guess I made an incorrect assumption based on the wording of the guide.
So maybe it’s fine to pull anything under an amp.
supple pollen
The guide is presumably conservatively worded, and probably accounts for derating, and the additional current drawn by the ESP32.
worldly schooner
While you have that data sheet open, does it have a peak current rating?
supple pollen
Annoyingly, it doesn't. Which is sometimes the case with these tiny SMD parts that don't have much thermal mass.
In case you're curious https://www.onsemi.com/pdf/datasheet/nsr0320mw2t1-d.pdf
split ingot
I think I'll stick to the 0.5 continious / 1.0 A peak recomendation. At least until all of this stops sounding like a foreign language to me 😄
supple pollen
We all start as beginners, you'll pick it up
molten aspen
Has anyone found/knows a power mux IC that can handle 5-12V input voltages without being a BGA  I'm having huge hurdle to designing a circuit where I can pick either 5V or 12V line inputs as outputs (not both at once of course).
supple pollen
When you say "power mux IC", what do you mean? Like a power control chip with multiple channels, or monitoring and switching or just switching, or what? How many inputs? How many outputs? How much current?
cursive sentinel
molten aspen
Has anyone found/knows a power mux IC that can handle 5-12V input voltages witho...
There are a number of high voltage analog switches available. Analog Devices/Maxim and Vishay make a lot of them. How much power are you talking?
molten aspen
cursive sentinel
There are a number of high voltage analog switches available. Analog Devices/Max...
Maximum of 1A but I haven't seen an option where I could have 2 inputs and one output.
supple pollen
The usual approach is a bunch of MOSFETs to do the switching, did you need something in particular?
cursive sentinel
12V 1A is quite a bit, and you'd want a bit of margin. You're going to have a hard time finding a chip that can do that in a "traditional" package (if you're wanting DIP, forget it). I would recommend looking at discrete options.
molten aspen
supple pollen
The usual approach is a bunch of MOSFETs to do the switching, did you need somet...
Bunch of mosfets could work, I'm not saying but friend suggested power switch IC as you could have more things in smaller footprint and also have some safety features.
molten aspen
cursive sentinel
12V 1A is quite a bit, and you'd want a bit of margin. You're going to have a ha...
I know, I'm here debating that I probably would just do some kind of logic + two individual power switch IC (one for 5V and one for 12V)
cursive sentinel
Yeah, but power + IC = weird package
supple pollen
That clarifies things: you're looking for safety (current monitoring/limiting?) and small size. There should be stuff in SO and TO-220 style packages.
molten aspen
supple pollen
That clarifies things: you're looking for safety (current monitoring/limiting?)...
Exactly!
cursive sentinel
Yeah, it'd likely be categorized as PMIC in Mouser/Digikey.
molten aspen
cursive sentinel
Yeah, but power + IC = weird package
There are a lot of like 8A 22V things in IC field by Texas Instruments
It's kinda surprising how much current they say can safely put that very tiny weenie thingie
 distant raven
Probably GaN
cursive sentinel
molten aspen
It's kinda surprising how much current they say can safely put that very tiny we...
Those specs are under laboratory conditions, i.e. they can blast a bunch of cold (or hot) air on it to maintain a consistent die temp.
molten aspen
True 
But yeah, I kinda need to figure out how to do that 5V or 12V switching. Oooor I could skip it and just go with physical switch
distant raven
There’s some mosfets in XDFN packages that are tiny. 2x3mm rated up to 2.3A and 30V
molten aspen
Yeah, but with MOSFETs, it still works but the issue there that I need to add the safety features manually for like reverse current and also take into account things like delay & dead time
distant raven
This one is rated 16V/2.5A is popular on battery protection circuits https://www.digikey.com/en/products/detail/DMG3415UFY4Q-7/5970445
Many mosfets can effectively work as reverse current diodes due to the fact that when they are off they behave like a diode
This particular mosfet has a nice RdsOn
Fairly low dead time, low threshold voltage too
Only rated for 635mW though
Maybe won’t work
molten aspen
Yep.
cursive sentinel
cursive sentinel
Those specs are under laboratory conditions, i.e. they can blast a bunch of cold...
I know because I was doing this with video ICs yesterday, and will be doing it again today (I'm a characterization engineer at ADI).
molten aspen
plus I would need to find matching depletion MOSFET for that
distant raven
Slightly better
7.8W
😝
But it has two in the package so space saved
Fairly low RdsOn
65mOhm @ 10V 3A
Continuous drain of 4.5A
molten aspen
SC-70 
cursive sentinel
distant raven
7.8W
7.8W < 12W
distant raven
Just don’t pull 1A at 12V, problem solved
molten aspen
Eh... If I'm designing it, I'll rather not already do major downplays already from the start
Even though the 1A state might not ever happen, doesn't mean that it will not happen
But SC-70, I wonder if that could still somehow soldered with solder tip or do I now even need to get that hot air soldering station 
cursive sentinel
molten aspen
Even though the 1A state might not ever happen, doesn't mean that it *will not* ...
Especially when things get hot.
cursive sentinel
molten aspen
But SC-70, I wonder if that could still somehow soldered with solder tip or do I...
Yes. I've done it before.
molten aspen
https://www.ti.com/product/TPS2121
This is something that I was initially thinking
TI’s TPS2121 is a 2.7-V to 22-V, 56-mΩ, 4.5-A, power mux with seamless switchover. Find parameters, ordering and quality information
distant raven
But that’s a battery chip, are you pulling from a battery?
Are you mixing battery voltages into one rail?
molten aspen
I don't really get why they are calling it a "battery chip" cause it doesn't have battery management systems nor whatsoever
Only "battery" related thing is that it has a built in selector for highest voltage among the two inputs but that can be disabled and overruled by MCU
cursive sentinel
Probably has to do with marketing/primary use case.
cursive sentinel
Well, it should handle freezing/cooking better than most of the things on your board then.
molten aspen
inland jungle
the 7.8W should be power dissipated in the MosFET ~RdsOn * current^2. It'
it's rated for 4.5A, so should be able to do 1A just fine
molten aspen
Though, I'll order the PCB's from JLCPCB so I could anyways have couple of them with those TI chips presoldered
distant raven
inland jungle
the 7.8W should be power dissipated in the MosFET ~RdsOn * current^2. It'
Yeah, technically it should do well over, it will just cap out at 7.8W dissipated. Before possibly dying a smoky death
Anyway
molten aspen
...I just always wonder why I end up making my projects from quite simple to "Jeez dude, why are you overcomplicating things?!"
But thank you all for your assistance! 🙂
inland jungle
any difference/virtue to driving a P-channel MosFET from an NPN transistor compared to an N channel mosfet?
elder peak
NPN transistors are current-based devices and thus require biasing resistors, but they can be a bit happier at the lowest of voltages, as a result.
hushed smelt
anyone know what the default battery charging rate is on the Feather ESP32-S3 with ps ram and LC7 chip? https://www.adafruit.com/product/5477
I have a 10K lipo and it charges pretty slow, takes about 2-3 days to fully charge from 3.7v to 4.2v. https://www.adafruit.com/product/5035

Lithium-ion polymer (also known as 'lipo' or 'lipoly') batteries are thin, light, and powerful. The output ranges from 4.2V when completely charged to 3.7V. This battery has ...

it is being used pretty heavily while charging though. :/
supple pollen
I'm guessing it's 200mA like several other recent Feathers, but the Learn page doesn't list it and I can't get the schematic to load.
distant raven
supple pollen
I'm guessing it's 200mA like several other recent Feathers, but the Learn page d...
That sounds right given they’re using a 5k1 resistor on the programming pin on the board
10k would be 100mA, 2k being 500mA
cursive sentinel
inland jungle
the 7.8W should be power dissipated in the MosFET ~RdsOn * current^2. It'
Hmm yeah good point as long as you're just using it to pass DC (so that switching transients don't matter) the only power that thing dissipates will be through RDSon.
hushed smelt
sounds like something i don't want to mess with then.
distant raven
hushed smelt
sounds like something i don't want to mess with then.
With some kapton tape and a smöl nozzle on a reflow gun, it’s fairly easy
inland jungle
fairly nontrivial, or fairly easy?
hushed smelt
might try it if it's easy, you said nontrivial at first which is a big nah i'm good. 😛
if it's only swapping in a 2k smd resistor i can do that. just need a nice diagram with an arrow showing which one to replace
distant raven
hushed smelt
might try it if it's easy, you said nontrivial at first which is a big nah i'm g...
I meant trivial lol, not significantly hard.
My brain can’t keep track of definitions sometimes
hushed smelt
don't even think i have any 2k smd. :/
distant raven
$0.10 at Digi-Key 😬
 silver marsh
hushed smelt
don't even think i have any 2k smd. :/
silver marsh
hushed smelt
don't even think i have any 2k smd. :/
You could piggyback a 3.3k resistor on the existing for 2k.
distant raven
Also an option
hushed smelt
which one though? there are quite a few

the one to the left of the LDO i suspect?
they're all a pretty tight squeeze
 hushed smelt

oh that's the mcp yep that's the one. i'm gonna end up burning the crap out of the battery connector 😅
there's the proof i needed that it's 200ma charging
honestly 1k would do fine too, it's a permanent install i'll likely never change.
would it be a bad idea to do 1k if i'm using about 500ma overall just to run the project? would that have a negative impact on the main regulator?
distant raven
hushed smelt
oh that's the mcp yep that's the one. i'm gonna end up burning the crap out of ...
Like I said, place Kapton tape on everything around the resistor, leave a small opening to access the resistor. It should save you some trouble
Just a little bit of precision to do that
hushed smelt
good idea, will do that. any suggestions on a good 1k to use? i don't want to use the wrong/cheap kind of smd resistor.
silver marsh
Heating from the bottom with a heat plate could work, too.
hushed smelt
i don't have one
distant raven
Any 1% 0603 1K
They’re usually like $0.10, buy 10 for $1
Pay more for shipping lol
Op $0.61 for 10
Even better
hushed smelt
what about power/wattage?
distant raven
Not a concern
It is basically setting the bottom half of a voltage divider that feeds the charge current feedback
silver marsh
Math says 0.018w max in that circuit
hushed smelt
added 100 of the 1k and 2k, at $2.48 why not. 🙂
distant raven
Actually I take that back, it doesn’t feed a voltage divider, it drives a comparator
There’s a constant current source that sets the voltage level to the comparator via the program resistor
Neat
0.5uA of current
silver marsh
hushed smelt
added 100 of the 1k and 2k, at $2.48 why not. 🙂
Add some Adafruit stuff to the order to make it worthwhile. You know you want to.
distant raven
Or some more Pico
I will also say that the MCP73831 doesn’t technically support 1A charge, the datasheet only says up to 500mA
I’m not really sure where Adafruit got the 1A from, but it isn’t listed as an option.
So a 2K resistor is probably recommended
hushed smelt
i'll probably go with the 2k just to be on the safe side.
i tried looking for adafruit stuff but it's just not the same and easy as using adafruit's site.
digikey is built more like warehouse, it's not really just for casual browsing.
any idea what the new clear rotary encoders with the clear knob are? i'm guessing they're pec11 of some type.
silver marsh
hushed smelt
digikey is built more like warehouse, it's not really just for casual browsing.
Agree. I usually wishlist Adafruit stuff on Adafruit then add items to an existing DigiKey order.
Sometimes the Adafruit product page will have a “buy on DigiKey” button.
hushed smelt
only ones i could find are PEL12D and have a bi-color led built in, and unsure if they'd be PEC11 compatible.
the clear pec11 knobs is a mystery knob :/
i'm the opposite, i'll list stuff on digikey and if it's available on adafruit i'll get it from them. all things being equal adafruit's boxes are just way cooler. 😛
especially their padded envelopes, love those things. beautiful design.
supple pollen
hushed smelt
would it be a bad idea to do 1k if i'm using about 500ma overall just to run the...
It's powered from VBUS, so it's the USB supply directly, not via the regulator. As for shopping at DigiKey, you're right: DigiKey has a huge variety of parts, available in quantities from singles to truckloads. When you need something particular, they rock. If you're just looking for mainstream parts, you're right, they're easier to find at sites that offer a useful hobbyist selection.
Note: traditional USB is limited to 500mA, so you may not want to draw more current than that if it's likely to be plugged into a device like that. But it sounds like this is more a "set and forget" build that presumably has a source of known capability that you'll use to power it.
hushed smelt
It's permanently connected to PC via usb so i can use Mu to continually monitor and change the code over time.
500ma it is then
 onyx kernel
Im looking to make a pcb with an atmega328p, however i dont want to have the CH340G (usb to serial) chip on my board. Id rather connect the ic directly to usb, like a atmega32u4. is that possible with an atmega328PB ?
unique patio
onyx kernel
Im looking to make a pcb with an atmega328p, however i dont want to have the CH3...
there are software, bit-banging implementations of USB. We used one for our Trinket Classic board. However, they don't work all that well, and they don't work with USB3. In addition, if the firmware that implements them gets overwritten, you must resort to a non-USB method to reprogram the board.
onyx kernel
so its not just like a atmega32u4. what would you recomend in my case?
unique patio
right, it doesn't have native USB hardware. So do you want to use the 328P, or choose another chip/
we use the CP2012N in our current designs that need a USB-serial chip
CH340G is popular too, much more common with designs from China
onyx kernel
nah im ok with other chips, i just dont want to use a serial to usb chip
unique patio
onyx kernel
nah im ok with other chips, i just dont want to use a serial to usb chip
so 32u4, or many ARM chips, which are probably equally cost effective and have much more RAM and flash, e.g. SAMD21
but that's 3.3V. If you want 5V, more limited. The new Arduino R4 uses a Renasas chip which has very similar specs to SAMD21 except it is 5V
onyx kernel
chose this one STM32F030C8T6. but $0.90 seems to good to be true am i missing something?
unique patio
onyx kernel
chose this one `STM32F030C8T6`. but $0.90 seems to good to be true am i missing ...
3.3v GPIO, though 5v tolerant inputs. If you are happy with the software support, that is the key thing. Are you going to run Arduino with an STM board support package?
there are hundreds of choices; is this a one-off or are you going to make many boards?
jade wedge
I'm either finding a different chip, or a different listing because I see that one at nearly $3 each on Digikey.
Oh, there on... LCSC?
Over 66% off does seem mighty suspicious for hardware.
supple pollen
onyx kernel
Im looking to make a pcb with an atmega328p, however i dont want to have the CH3...
The 32U4 is probably the closest equivalent with built-in USB support
dry pelican
There is also the RP2040
it's $1 for the chip
but you end up having to pay about $3 with all the other hardware
maybe $2 is you cost optimize and get stuff from LCSC
It's also technically 5v tolerant
distant raven
The RP2040 has no 5V tolerant pins
dry pelican
distant raven
The RP2040 has no 5V tolerant pins
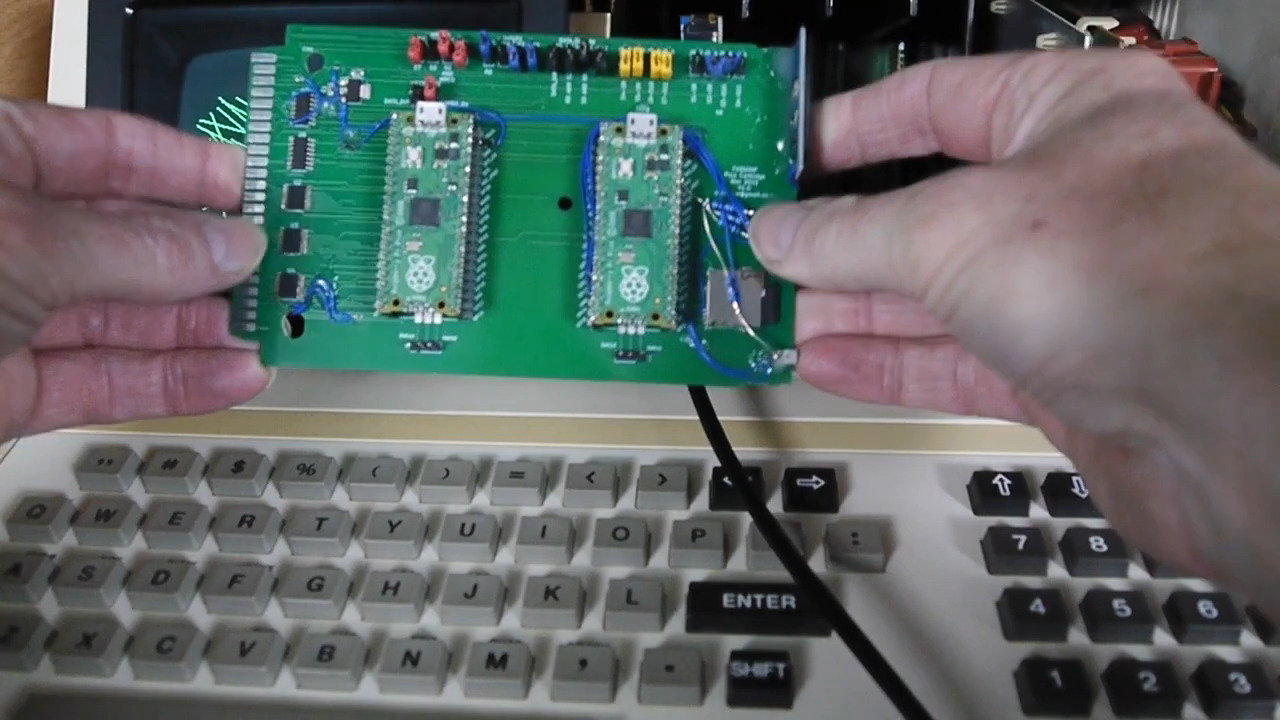
Over the years, we’ve seen some modern microcontrollers turn out to be 5V-tolerant – now, RP2040 joins the crowd. Half a year ago, when we covered an ISA card based on a Pi Pico, [Eben …
technically
distant raven
I personally wouldn’t do it even if it can.
And it does say for input purposes only, so you’d still need level shifters if you’re doing anything bidirectional
dry pelican
yes
cursive sentinel
distant raven
And it does say for input purposes only, so you’d still need level shifters if y...
Unless the input you are driving supports TTL thresholds, then 3.3V CMOS can switch it.
molten aspen
Quite stupid question but: Regarding resistors for LED (just normal ones, no high powers, with very low candela output), wouldn't something like 0.063W options work too since we are talking about low voltage and very low power usage (e.g. 200-470 Ohm).
Basically with U = RI -> I = U/R, we would get 5/470 => 0.01A which would with 5V, make 0.05W.
I'm just making sure here that I'm getting the logic correctly 🙂
distant raven
cursive sentinel
Unless the input you are driving supports TTL thresholds, then 3.3V CMOS can swi...
I’m not saying you can’t, I’m saying using level shifting is a smart idea.
Besides, switching at lower voltages introduces a greater likelihood of false/bad edges, especially at higher speeds and along longer buses.
distant raven
molten aspen
Quite stupid question but: Regarding resistors for LED (just normal ones, no hig...
Are you thinking in terms of resistor rating?
molten aspen
distant raven
Are you thinking in terms of resistor rating?
Yeah, the wattage rating more that it could handle. E.g. thinking that would 0.063W resistor network work in this case or do I just do individual resistors instead.
(resistor network with non-connected resistors)
distant raven
There are 1/16th watt resistors that are used when you’re anticipating low lower dissipation
I’ll use 1/16w for pull ups and for LEDs that have drive low current
molten aspen
Yeah, those are what I'm looking here 🙂 I normally use THT 1/4W ones but I'm eager to try SMD for my project
The resistors would be in line with the LED, like generally there are recommended when connecting LED's to the pins of a RPI/Arduino/ESP
distant raven
There are LEDs that can be driven full brightness with 2-5mA, and good indication brightness with a few hundred uA
molten aspen
So in general, I think they will work. These LEDs are for only indicative so not that bright.
We are talking about those that are 15-50mcd
distant raven
Yeah, if you haven’t settled on any specific LED, look for ones with test current at like 1-5mA
You can usually filter by test current too
molten aspen
I have settled unfortunately, but thankfully, it's not hundreds, only 20mA
distant raven
You can use 4k7 or even 6k8 on 20mA LEDs and get decent indication brightness
molten aspen
Yep, I was thinking to start with somewhere around 1k8 or 2k2 and go up
cursive sentinel
distant raven
Besides, switching at lower voltages introduces a greater likelihood of false/ba...
This is true, but as long as you can guarantee that the VOH > VIH and VOL < VIL it is fine. Running over a long wire may break that guarantee.
distant raven
Indeed
supple pollen
molten aspen
I'm just making sure here that I'm getting the logic correctly 🙂
Yes, your thinking is sound. I normally derate resistors by about half so they don't run too hot, but at those wattages, you should be fine (especially if the LEDs aren't lit all the time)
molten aspen
supple pollen
Yes, your thinking is sound. I normally derate resistors by about half so they ...
Most of them are, but then again, at 20mA.
But it's few of them only.
supple pollen
If you're just getting started in surface mount, you may want to start with larger packages (0805 or larger), which should have plenty of heat dissipation. Normally I avoid tiny 0402 style resistors.
jade wedge
I had to order "giant" resistors for my project. A 100 mA load resistor to keep power banks alive will be trying to dissipate half a watt. Fortunately there's no problem of using too big of a resistor in this regard. So the fact that I'm going to use the same 1/2W resistors as protection for the NeoPixel looks silly, but is fine.
I actually probably won't go the full 100 mA load, so I shouldn't be hitting the 1/2W anyway.
molten aspen
supple pollen
If you're just getting started in surface mount, you may want to start with larg...
Oh yeah, I'm currently planning to go with 0805 🙂
Super super basic question:
Which one in this is the center pole of the DC plug socket? Is the Pin 1 the inner part whereas the 2 is the outer "jacket"?
 jade wedge
Based on the physical design of the elements, yes. Pin 1 looks to be the peg in the middle of the socket, and pin 2 connects to the outside.
That said KiCad does not truly enforce footprint selection, so double check that the footprint you use matches the intended design.
Some barrel jack sockets like that might have the pins defined the other way around. KiCad would let you select it just fine though.
dry pelican
Why does this constant current buck boost converter reference schematic show AGND connected to the LED+ ouput?

could be a mistake since it makes no sense
dry pelican
Should I ignore the weird AGND connection and just connect GND and AGND together (but different copper areas on PCB)?
distant raven
I’d still label them the same as the schematic . I imagine there is some good reason for the distinction
Probably noise isolation 🤷♂️
dry pelican
probably noise isolation for the AGND and VSS distinction, But the AGND connected to LED+ makes no sense
cursive sentinel
dry pelican
Should I ignore the weird AGND connection and just connect GND and AGND together...
How big will the board be?
cursive sentinel
distant raven
I’d still label them the same as the schematic . I imagine there is some good re...
It's mostly for PCB layout guidance. Basically it denotes that ground for those pins can be sensitive to high speed signals.
dry pelican
cursive sentinel
How big will the board be?
I'm trying to make a buck-boost laser diode driver. Most are 10mm * 20~30mm
cursive sentinel
Ok that's tiny. You won't be splitting the ground plane on that.
I believe there are laser diode driver ICs though. One of those would likely be more efficient.
dry pelican
well it's a constant current driver IC meant for driving white LEDs
and I've seen other designs that use similar chips like the LED2000
I think those laser diode driver chips are expensive though
$10 per IC
while this one is ~$1.67
cursive sentinel
Yeah I think they're considerably more complicated.
 oblique patio
hey yall i have a quick question about a switch schematic i saw for use in arduino. the BTN net flag goes directly to a pin on the MCU. would the circled '5v and 10k ohm resistor' even be necessary? isnt this what the internal 'PULLUP' resistor is for and pinMode(buttonPin, INPUT_PULLUP); code is doing? would they be able to just compeltely remove the 5v connection and resistor from the schematic?
 distant raven
oblique patio
hey yall i have a quick question about a switch schematic i saw for use in ardui...
distant raven
oblique patio
hey yall i have a quick question about a switch schematic i saw for use in ardui...
Internal pull ups generally are pretty weak, anywhere 50k sometimes up to 100k. People tend to use stronger pull ups for better consistency. You don’t need them per say, it’s more of a design choice than anything.
cursive sentinel
For a button having a massive pullup shouldn't be a huge deal. May even make it easier to debounce if you use an external capacitor. I think the main concern is that during boot the pin will just be an input (no pullup).
skerr is correct in saying that internal pullups are generally very weak
oblique patio
thanks, if the external resistor is used like that, should the pinMode(buttonPin, INPUT_PULLUP); from the code? or is both fine to use?
distant raven
I’d use one or the other. I don’t see benefit to using both.
Plus two resistors in parallel effectively make your external pull up weaker
cursive sentinel
Actually it does the opposite. It makes it very slightly stronger.
distant raven
47k internal, 10k external means I’d have roughly 33k of pull up
cursive sentinel
That's closer to 7.7k. Where'd you get 33k?
distant raven
Either way, I’d pick one or the other just for the sake of clarity
cursive sentinel
Agreed.
distant raven
For a button that gets rarely pressed, internal pull up is probably more than fine
cursive sentinel
Effectively what you are doing with an external pullup is switching the pin mode between input and output (with the value left at 0).
distant raven
For one that I need a guaranteed state on startup or will be used a lot, external every day. Plus capacitor
cursive sentinel
Yes.
distant raven
I do this on my RP Watchy design
My horribly power inefficient RP2040 watch that wirelessly charges.
 cursive sentinel
Reset buttons, program buttons, and config pins connected to DIP switches should always use external pullups. General purpose buttons whose state doesn't matter at startup/shutdown are ok using internal.
distant raven
I’m also reminded that I have a BLE flex PCB that I can attach to that watch that I should absolutely assembly, program, and see if I can setup Bluetooth UART service on

Has a little 6+2 mezzanine connector on the bottom to connect to the watch PCB
supple pollen
distant raven
Internal pull ups generally are pretty weak, anywhere 50k sometimes up to 100k. ...
Amusingly, the phrase “per say” is what’s known to linguists as an “eggcorn”: it sounds like one thing, but derives from an original that’s less apparent. In this case, the Latin phrase “per se”, which basically means “of itself”.
dry pelican
dry pelican
Why does this constant current buck boost converter reference schematic show AGN...
I think I know what they did. They're trying to do an inverting buck-boost maybe. But there are still some parts of that that don't make sense. This IC is weird.
distant raven
supple pollen
Amusingly, the phrase “per say” is what’s known to linguists as an “eggcorn”: i...
Ah weird, I thought I typed per se lol
But also fascinating
Kind of reminds me of how we have vice versa that came from a Latin term Vicis Versa
supple pollen
Linguistics is a great rabbit hole
dry pelican
What does the inductor current ripple mean? Is this the ripple that the load will experience or can/will that ripple be brought down to a reasonable level by the output smoothing caps?
 distant raven
dry pelican
What does the inductor current ripple mean? Is this the ripple that the load wil...
distant raven
dry pelican
What does the inductor current ripple mean? Is this the ripple that the load wil...
Ripple is generally referred to an event at startup when the output rail is stabilizing
But it can also happen during power change over events depending on the situation
supple pollen
I think of it as the changing current while the switching converter operates. You want the minimum enough to keep current flowing, and the maximum below the saturation value for your inductor
distant raven
supple pollen
I think of it as the changing current while the switching converter operates. Y...
Oh maybe I’m thinking of something else then 🤔
My brain is mixing up inrush and ripple
dry pelican
Load shouldn't change that much over time since it's a laser diode driver. But voltage/current ripple on output has to be very low to prevent the laser from blowing up
My understanding of ripple is that it's the unwanted ripple (like a sine wave at the switching freq) that's added to the stable dc voltage you want to output
supple pollen
That's the tricky part of switching laser diode drivers. The switchers have some intrinsic ripple, and the complexities of sampled data systems in keeping everything regulated and under control. Given some of the exotic failure modes of laser diodes, these details become critical. Many systems use a switcher to efficiently get near the right value, followed by a linear section to iron out the ripple.
supple pollen
dry pelican
My understanding of ripple is that it's the unwanted ripple (like a sine wave at...
That's pretty close, but it's current ripple instead of voltage ripple, which basically means the resulting voltage depends on the load impedance (the dreaded "inductive spike" can appear here for rapidly changing load conditions)
dry pelican
The switcher is meant to drive white LEDs, which have some similarities to laser diodes. But laser diodes are like the angry version of LEDs
dry pelican
supple pollen
That's pretty close, but it's *current* ripple instead of voltage ripple, which ...
The load impedance shouldn't rapidly change since it's just a diode that's slowly heating up.
Here are the steady state waveforms from the datasheet. It seems like the current ripple is about 250mA pk-pk or 125mA overshoots and 125mA undershoots. A bigger inductor and a lot of ouptut smoothing caps will probably help reduce this

 low anchor
Is there a way to connect a solar panel up to a feather board and have it charge the battery?
 latent jungle
low anchor
Is there a way to connect a solar panel up to a feather board and have it charge...
latent jungle
low anchor
Is there a way to connect a solar panel up to a feather board and have it charge...
Solar panels are finicky because their output voltage depends on the load current. So, ideally, you want a maximum power point tracking (MPPT) controller. (Unless it is in full sun, all the time, you cannot just connect it to Vin of a feather and have it work as expected.) But, This Solar Charger https://www.adafruit.com/product/4755 circuit would probably work well. In this case, you'd connect both the panel and the battery to the charger and then connect that to the feather.
low anchor
Hmm interesting. What if instead I got some buck or boost converter to convert the power from the solar panel to 5V into the USB port of the feather? wouldn't that charge automatically and use the battery to run?
supple pollen
If you had a charge controller, yeah
latent jungle
The problem is that a generic boost/buck conveter doesn't know how to load the solar cell properly. Would it work? Maybe. But a charge controller specifically made to load a solar panel is a better option.
low anchor
Interesting. That makes sense, thanks
Or maybe an alternate option could be getting a USB solar panel on Amazon and using that with the onboard charger instead? that way I don't have redundant circuitry for charging
latent jungle
Well, to be useful, that panel would need a MPPT. I have a feeling a lot of those low cost panels don't have one.
low anchor
https://www.amazon.com/dp/B0C4L1L1BD/ so something like this wouldn't work? or is this just the same as hooking up a solar panel to vin?

2pcs USB Solar Panel 6W 5V Monocrystalline Mini Solar Panels with USB 2.0 Port,Waterproof IP67 Lightweight Backpack Solar Charger for Mini Fan,Cellphone,Bicycle,Security Camera and Outdoor
latent jungle
Without knowing what that actually is, it is difficult to say.
But it seems unlikely they are selling two panels plus MPPT circuit for the price of a single MPPT circuit alone.
Ask the seller for a datasheet and see what you get.
low anchor
I don't get why it needs an MPPT though
latent jungle
Because of how solar panels work.
A “5v” solar only produces 5V when the load is a specific current.
So, if those panels have no MPPT, then saying they are “5V, 1Amp” panels is meaningless because their output voltage entirely depends on how much current the load draws.
A MPPT circuit limits the current so that the panel produces a specific voltage. Thanks to Ohm’s Law, a known current providing a specific voltage equals (maximum) power.
low anchor
Oh that makes sense, thanks
low anchor
https://a.co/d/arwUH6k So would these be good then? Seems like they're designed for solar, but I'm not sure how I'd hook it up to the feather since feathers aren't really designed for external power supplies

HiLetgo 2pcs CN3065 Mini Solar Lipo Charger Board Lithium Battery Charge Chip Micro USB DIY Outdoor Application Kit Charging Board Module
 native bough
If i just want an ESP32 with some peripherals attached, is it a good idea of reasonable to just pay somebody from a platform like Fiverr?
Although I COULD probably design the circuit board with enough time, i feel like my time is better spent doing other things in the same project.
Just wondering if anybody has done this before and if they got a decent result.
(Pay somebody to design a PCB)
 sweet cairn
Does anyone know which speaker the Adafruit RP2040 Macropad uses? Seems pretty good but it's only mentioned as 8 mm buzzer.
Or are all piezo buzzers equally good?
dry pelican
low anchor
https://a.co/d/arwUH6k So would these be good then? Seems like they're designed ...
Those can work. It is a linear regulator so you don't want to put a lot of load on it since it's dropping a lot of voltage from the panel (depending on the panel's mppt voltage)
And I think those can charge lipos so it can just plug into a feather with a jumper.
But heat can be an issue
Litium batteries don't like being in the hot sun
Unless you live in a colder area
But cold could also be a problem
I made a solar powered weather station powered by 4 NiMH batteries
Which might be more temperature tolerant
jade wedge
NiMH batteries tend to be very tolerant. You can also charge them with extremely simple designs. If you can adequately control the input current (with as little as just a resistor) you can just slap your power source on the battery with a diode to prevent backfeeding and that's all you need.
cursive sentinel
While technically this may be true, such a charger will be inefficient.
jade wedge
Oh absolutely. But depending on the application you may not need high efficiency. Personally I've been toying with the idea of replacing the innards of a garden lamp just to make the light more interesting. For something like that efficiency is secondary.
The fact that I can use components I care little about (so when it inevitably leaks and dies I don't care), and the fact that I can leave it out year round in New England is way more important.
low anchor
dry pelican
Those can work. It is a linear regulator so you don't want to put a lot of load ...
Basically what I'm going to be doing is building a pulley & motor system that can be retrofit to existing curtains, and I figured I could have a small solar panel to charge the battery. It'll have low power draw most of the time (the motor peaks at like 300mA when stalled) so I don't think that'd be much of an issue
 echo zephyr
just realised that the first one is called a junction
low anchor
can someone explain what this circuit does on this board https://www.adafruit.com/product/4755 and what the symbols on the left are?


This charger is the only one you need to keep all your Lithium Polymer (LiPoly) or Lithium Ion (LiIon) rechargeable batteries topped up. No matter the power source at your disposal! ...
Also there's an optional capacitor on that board; where does that show on the schematic (or does it), and how do I know if I need it?
cursive sentinel
The component on the left is just a DC barrel jack
low anchor
Oh I see. What's the 1 * 2 mean?
low anchor
But isn't pin 2 connected to ground
unique patio
it might just mean that there are two tabs that are both pin 1, both soldered to the board
cursive sentinel
Hmm yeah. It's kinda weird notation. I still suspect it means "there are two pads connected to pin 1" though.
unique patio
that's what I was trying to say 🙂
cursive sentinel
You can actually see it here. There are 4 physical pads. Pin numbers in this case denote nets. In the case of a barrel jack there's the pin, sleeve, and switch (which can be used to detect whether the jack is inserted).
 unique patio
from Eagle, with the "1" pin highlighted. Note 1'
 low anchor
Ah, thanks, that makes sense. I was a bit confused by the numbering because on the chip on that board it has things like pin 1, then pin 2*2, then pin 4 (skipping 3)
 broken python
I'm not sure where to start - and maybe will be cost-prohibitive for the utility it would provide - but I'm looking for some sort of a pressure sensor that I can put in my office chair, or in a floor mat the chair could sit on, to detect if I'm there. So if it's a chair sensor it could just detect anything >= ~10% less than my body weight, or if it's a floor mat it would be a trigger threshold >= ~10% less than (body weight + chair weight). Would also be nice to set an upper limit but that's not required.
I've considered PIR/AIR/ultrasonic but don't want to go that route for this project. Basically I would use this do enable/disable a security camera based on if I'm sitting in my chair (or someone weighing about as much as me) - ruling out detections for smaller humans, dogs, etc..
left grove
I bet it's gonna be extremely cheap 😄
I would use multiple "load cell"s. I built a drink bot which used one (I think <1kg) load cell and a HX711. But the body weight *kitchen *scale I ripped apart used 4. Not sure how to wire 4 load cells but I bet it's pretty easy to find out.

A strain gauge is a type of electronic sensor used to measure force or strain (big surprise there). They are made of an insulating flexible backing with a metallic foil ...
I think you can maybe just add multiple load cells and they add up. So 4x 20kg = 100kg capacity, maybe? 🤔
On aliexpress there are load cells, which look very similar to the ones in my bathroom *kitchen *scale buth higher weight rating https://www.aliexpress.com/item/1005002176327047.html
https://www.aliexpress.com/item/1005004517693415.html single load cell you could use to detect your car 😂
broken python
you'd have to build something to distribute the weight though right?
left grove
not sure 🤔
The kitchen skale I ripped apart just had 4 feet and one load cell in each one. Human weight scales are probably built similarly. (please check that, and don't trust my guess.) So maybe you can just put one load cell on each leg or wheel of the chair
Another idea: (human presence radar sensor) https://www.youtube.com/watch?v=dAzHXpP3FcI
supple pollen
I'd probably put a pressure sensitive mat under the chair. Those aren't particularly accurate, but they're good enough to tell if there's a person in the chair or not.
 feral epoch
could someone help take a look at this question? I am simulating a very simple common source mosfet circuit and I see a negative voltage excursion on the drain terminal, wondering what causes that little dip.

Electrical Engineering Stack Exchange
Hi folks, I'm simulating this very simple common source circuit with an NFET, with a pulse input on the gate input. On the falling edge of the gate voltage, I see a small negative output excursion ...
supple pollen
feral epoch
https://electronics.stackexchange.com/questions/672948/common-source-nfet-droppi...
The answer given there seems right to me: there's capacitance between the gate and channel, so the gate drive signal is being coupled via that capacitance to the output. You can see a similar positive excursion at the beginning of the pulse. Slowing down the pulse (reducing its high frequency content) or reducing the load impedance will reduce the effect. The slowing down can be easily done by inserting a series resistance between the gate drive circuitry and the gate itself: then the resistance forms an RC filter with the gate capacitance.
tidal elbow
I am going to make PCBs to measure the voltage of each battery cell (normally 1.2 V per cell) in a 40S-NiCad battery bank (48 V). To improve the accuracy of the voltage readings and the safety of the controller, I’m gong to use a power isolator (B1205) to isolate the ADC (ADS1115) from the controller and an ISO1540 for the I2C isolator.
I know that voltage measurements require a voltage reference point (common GND) to measure the potential difference. I am considering two approaches to this:
- Should I tie the battery cell low side (battery ground lead) to the isolated PCB ground region of the ADC? Will this affect the accuracy of the voltage readings or the battery power delivery performance?
- Is it better to use two of the ADS1115 inputs to measure the relative voltage differences between the isolated PCB ground side and the battery HIGH and LOW sides, then subtract the readings to get the actual cell voltage? The potential problem with this approach is that when measuring the 10th cell and up I will get a large voltage difference between the isolated ADC ground side and the battery low and high sides that will smoke the ADC. In this case, I would need to use a voltage divider to proportionally lower the voltage.
Please see the dotted yellow area, which approach should I choose? Other suggestion is appreciated
 supple pollen
I'd avoid hooking things to the (far) negative lead, just have each module connect to its own cell. If you want to measure the overall pack voltage separately, I'd use an additional ADC and voltage divider for that purpose.
tidal elbow
supple pollen
I'd avoid hooking things to the (far) negative lead, just have each module conne...
Could it be by connecting the cell's low side to PCB Isolated GND will mess with power regulation on the ADC side?
cursive sentinel
There are also dedicated BMS ICs if you want a more integrated approach.
Analog may also make some isolated input ADCs.
inland jungle
Are you really going to have 40 of these circuits? 1 for each cell? You might be able to switch/multiplex the measurements, but getting ICs which can handle high voltage tends to be a bit pricey.
cursive sentinel
This is true
Also too many cells in series tends to increase the series resistance and reduce efficiency. You might be better off using a boost converter (preferably in module form from someone like Mean Well) that gives the voltage you want. Then you can have the cells in parallel.
inland jungle
yeah, 2-3 cells in series with a parallel arrangement + high efficiency boost makes things a lot easier I think, plus you can size your parallel bank for your application
supple pollen
tidal elbow
Could it be by connecting the cell's low side to PCB Isolated GND will mess with...
I don't think so, since it's floating
cursive sentinel
inland jungle
yeah, 2-3 cells in series with a parallel arrangement + high efficiency boost ma...
This is how virtually all large UPS modules work as well.
And likely solar batteries.
supple pollen
I'll often see higher voltage arrays (72V was common once), to minimize resistive losses in connecting wiring.
cursive sentinel
Yeah, but 72V is still just six 12V cells in series. Not 40.
 night vale
I'm a newb to pcb design and schematics. Does someone mind reviewing my PCB? It's a HAT version of adafruit's max31865 circuit, but simplified to assume a 3wire PT1000 probe.
Here it is. I designed it in Fusion 360
tidal elbow
cursive sentinel
Also too many cells in series tends to increase the series resistance and reduce...
I’m only monitoring the battery cells state of charge and send the reading with BLE. The 40S circuit is for control system backup power, sadly I don’t have saying on how the batteries are arranged
tidal elbow
inland jungle
Are you really going to have 40 of these circuits? 1 for each cell? You might be...
Yes, one for each battery cell. We go with modular system so it could be scaled easily in the future, if needed
inland jungle
What's your rough budget? $10, $100, $1000?
low anchor
How many mA are necessary to charge a 3.7v lipo? I'm thinking of designing an air vent valve system that can be retrofit into existing vents, and I'm thinking maybe to power it I could have a little propeller + motor to generate a little power from the air current and charge the battery that way
distant raven
low anchor
How many mA are necessary to charge a 3.7v lipo? I'm thinking of designing an ai...
You can charge at a rate up to 1C for most LiPo
1C meaning the charge of the cell.
500mA for instance could charge at up to 500mA
supple pollen
Basically, the lower the charge current, the longer it takes a given capacity cell to charge. But there's no real lower limit.
distant raven
Your biggest bottleneck will be the charger itself wing able to supply enough current to do 1C for larger packs
distant raven
supple pollen
Basically, the lower the charge current, the longer it takes a given capacity ce...
I imagine there’s a rate in which you lose more energy than you put in
Given 0.5-3% self discharge rates for the first month (theoretically speaking), 1mA charge rate on a 1000mAh battery would probably barely keep it alive
I’m not 100% sure that it applies in the charging situation
Though apparently most LiPo suppliers seem to suggest doing a 1C charge rate
vast flume
So, I finally got this darn altimeter to have a working altitude sensor. Ended up switching to the LPS22HB from ST. I created another driver library for it (open source as always), however I've discovered that it seems to only give altitude readings in intervals of 29ft or so. If this is the case then its not much of an issue but I just wanted to be sure that this isn't signaling an issue elsewhere. Would any of you be willing to take a look over my code for the driver library? Its only 150 lines. If so, it can be found here https://github.com/kkingsbe/STM-32-Libraries/tree/main/LPS22HB

GitHub
Contribute to kkingsbe/STM-32-Libraries development by creating an account on GitHub.
supple pollen
Sounds like a resolution limit: sensing altitude via air pressure requires a fair amount of sensitivity, and I can imagine a 29 foot quantization (especially if values are being truncated somewhere)
jade wedge
29 feet is fairly close to 9m
I say fairly close, because 9m is something like 29.52 feet, which for a single "unit" of measurement doesn't seem like it's that far off.
vast flume
Ah yeah makes sense
supple pollen
29 feet is pretty close to 1 millibar, so if the sensor reports in integer millibars, you'd expect to see that kind of granularity
jade wedge
That makes more sense than my reasoning. I was just thinking of the conversion from metric to imperial, but the conversion from pressure to altitude makes more sense.
unreal flax
Normally barometers have better resolution than that, so I suspect (without looking at the code yet) that you have some loss of precision in integer math somewhere.
Yep, here it is. The pressure function returns a double, but your altitude conversion is casting it to uint16_t on the return: uint16_t p = LPS_Get_Pressure();
vast flume
I just chekced and it looks like the resolution is 10cm
supple pollen
That's what I was getting at with my "values being truncated" comment.
cursive sentinel
unreal flax
Yep, here it is. The pressure function returns a double, but your altitude conve...
I think the bigger question here is why is a double being used in the first place?
vast flume
unreal flax
Yep, here it is. The pressure function returns a double, but your altitude conve...
Ah jeez that would do it 😅
vast flume
cursive sentinel
I think the bigger question here is why is a double being used in the first plac...
I had switched to a double to see if that would resolve the issue with the resolution
jade wedge
According to the library, it looks like pressure is returned by the sensor as a 24 bit int spread across 3 8 bit registers.
vast flume
jade wedge
According to the library, it looks like pressure is returned by the sensor as a ...
Correct, its a twos complement that has to be divided by the sensors scaling factor of 4096
Ah yeah that fixed it, resolution is now within an inch lol
cursive sentinel
jade wedge
According to the library, it looks like pressure is returned by the sensor as a ...
In that case I recommend sign extending into a 32 bit int (load it into the upper 3 bytes then right shift 8 bits).
vast flume
cursive sentinel
In that case I recommend sign extending into a 32 bit int (load it into the uppe...
What advantage does that give over using a double?
cursive sentinel
Much, much faster to operate on assuming your processor doesn't have an FPU that can handle 64 bit floating point.
supple pollen
More accuracy too
cursive sentinel
Well, doubles do have a 52 bit significand (14 significant digits). But as a general rule it is preferable to avoid the use of doubles in an embedded setting.
supple pollen
In many microcontrollers, double is actually float
A side disadvantage to using floating point variables is it can haul in the entire floating point library, eating a bunch of storage unnecessarily
jade wedge
"Can I have a 64 bit floating point variable?"
"Sure." compiles "Just kidding. You'll get 32 and like it."
supple pollen
Could be worse. Could be a Pentium...
jade wedge
4/2 = 2.0000000~
Actually, looking it up, apparently while it was definitely a bug, "Byte magazine estimated that 1 in 9 billion floating point divides with random parameters would produce inaccurate results"
Intel did recall the processors. It cost them some $475 million that year.
feral epoch
supple pollen
The answer given there seems right to me: there's capacitance between the gate ...
neat! thanks
 honest badger
do these esp-32c modules need an external antenna?
 left grove
honest badger
do these esp-32c modules need an external antenna?
left grove
honest badger
do these esp-32c modules need an external antenna?
Your image: no. I think the white thing with the red marking on it next to the black connector is the antenna
For comparison:
this other board https://www.adafruit.com/product/5348 requires an external antenna. It has this ufl antenna connector
 honest badger
any idea if the difference in range would be significant between the versions being sold with vs without an antenna?
i cant find anyone testing it
left grove
sorry, I don't know either :/
supple pollen
honest badger
i cant find anyone testing it
That depends on the antenna you use. If you use the basic "spring" antenna, it wouldn't provide much (if any) improvement. However, many antenna options offer increased range.
honest badger
honest badger
do these esp-32c modules need an external antenna?
is the little smd antenna on this version on-par with the pcb antennas that are on older esp modules?
supple pollen
While there's data available on the performance of the chip antennæ, it's harder to come up with for the PCB trace ones. My guess, however, would be that they have similar (not impressive) performance. Like the old Muntz television sets with reduced IF amplification, the low-performance design is "good enough" in many situations (lots of places people use these have a good WiFi signal available).
elder peak
Not actually true: Part of why SMT parts were invented was so that engineers wouldn't need to worry as much about that darn Madman Muntz leaning over the board with his diagonal cutters again and snipping bits.
jade wedge
I thought it was because people were worried that having the traces on the other side of the board would cause the electricity to fall off.
elder peak
Maybe they just wanted their designs to be, like the Internet, entirely un-hole-some.
left grove
jade wedge
I thought it was because people were worried that having the traces on the other...
oh so that's what voltage drop is 😄
jade wedge
elder peak
Maybe they just wanted their designs to be, like the Internet, entirely un-hole-...
I hate you for that one.
vast flume
I am trying to get USB set up on my STM32F103 board, and I added a 10MHz HSE. When configuring the clock in stm32cubeide it seems to be impossible to get the correct clock rate to the usb peripheral?


No combincation of USB Presaler and PLLMul will give me a frequency within that range. Everything is either above or below
distant raven
That’s why 12MHz crystals are typically used
vast flume
I should've tested these numbers before purchasing lol
distant raven
Easy 4x PLL multiple to get 48MHz 🙂
vast flume
So no way to get 10mhz to work?
distant raven
Not likely
distant raven
Yeah, 8x6=48
Assuming you can do a 6x multiplier
Which you might not be because it’s not a power of 2
vast flume
Ah yeah looks like that will work
Ok last thing for now, in my current circuit I have a 1M resistor in series with the resonator. Will it be fine to keep this if I switch to the 8MHz resonator?
distant raven
Not sure
vast flume
ok
distant raven
I imagine if the ESR is similar
vast flume
Will give it a shot
vast flume
My computer isn't discovering it as a USB device :(. I followed this tutorial https://controllerstech.com/send-and-receive-data-to-pc-without-uart-stm32-usb-com/. Is there a variable that is "true" while the HSE is working correctly? If so I can check that to see if that is the cause

This tutorial will show you how can we use the STM32 USB to send and receive data from the computer, just like we did using the UART
distant raven
Do you see it under the nRF connect app? It’ll allow you to see all Bluetooth devices near you
distant raven
Ah
sweet cairn
I'm designing a keyboard and I'd like to implement a buzzer like the one in the Adafruit RP2040 Macropad.
Looking at the design of it, I'm wondering why ladyada decided to use an amplifier for the buzzer. Can anyone help me out?
On other keebs that I've seen with buzzers in them, they're hooked straight to a PWM pin on the MCU/Featherboard
sweet cairn
distant raven
I think she used a mono amp for it
Yep, it is a mono amp
I'm wondering why use an amp at all
sweet cairn
Hmmm, wondering whether that's worth having to implement this into my design lol
distant raven
You’d need to consider another chip because they PAM mono amp used is NRND
And could stop being available at any time
supple pollen
It could be some MCUs have more drive power available on their GPIOs. Sometimes all the "amplifier" required is a transistor. You can also (mis)use inexpensive, common op-amps as low-power drivers (many boards do this)
pale umbra
are there going to be complications besides the level shifting to have a pico W (3.3V) talks via UART to a connected 32U4 5V ? Like speed of communiation/protocol etc that would warrant getting an IC that can do all that to manage these complications for me instead of me having to do it in software ?
unreal flax
pale umbra
are there going to be complications besides the level shifting to have a pico W ...
UART speeds and protocol options are pretty universal, so you shouldn't have any issues apart from the level-shifting. This assumes that both are running from a crystal... you can sometimes have trouble hitting the correct baud rate if a MCU is using an inaccurate internal oscillator.
supple pollen
Asynchronous serial is a pretty simple protocol, you don't normally need an intermediate chip. You might even be able to dispense with level shifting.
pale umbra
Im not going to be exchanging much mostly telemetry(gyro,accelerometer, encoders) out of the weaker zumo32u4 to the pico W and a "programming language" out of the pico W to zumo 32u4 to give it processed commands like MOV 30,200, 60 (move 30 times, 200 speed, 60o heading)
So I feel like with a slower speed I should normally not have many issues
I read that without a level shifter it can cause errors but I guess that this is only an issue at higher communication speed
supple pollen
Both the Pico W and Zumo 32U4 use crystal oscillators, so you shouldn't have issues with timing mismatches. You could probably get away with 115200bps, but 9600 is probably sufficient for your needs.
pale umbra
where in my case like 1200 baud bi-directional should be fast enough
supple pollen
The only issue without a level shifter is overdriving the Pico RX input. You can use a resistive divider there to protect it. The other direction shouldn't be a problem unless you have a lot of electrical noise.
pale umbra
can it be a probably that 5V logic hits the pico W pins since they arent resistant above 3.3V... yeah that is what I though
I already have an assdembled level shifter it's just that I'll need to solder it on a cut perfboard to make it takes less space
last question before I do do what I was planning for today. For one-wire the pins says 5V, GND and data. I doubt it absolutely need 5V but without reading the datasheet can I still try to power those sensors with 3.3V and expect there wont be anything that get broken since sensors dont generate voltage afaik ?
sweet cairn
distant raven
You’d need to consider another chip because they PAM mono amp used is NRND
Yeah i saw that. Was thinking of using the PAM8302A. Seems to be very similar and Adafruit has a board with it too so I can reference the design
pale umbra
so there wont be a voltage from the sensors that could damage my 3.3V pins afaik unless they added like diodes/transistors on it
supple pollen
The usual one-wire implementation doesn't need 5V, but many peripherals have a power supply input so they don't have to depend on the one-wire data signal for power. As to whether they'll work with 3.3V, you'd have to check the data sheets for the individual parts.
pale umbra
but the datasheet wont tell me if they added something like a buck-up or a transistor or mosfet or zener diode to the breakout that could damage my 3.3V pin
it will just tell me what the chip on the breakout can endure but not the voltage that might come out of the breakout for it
supple pollen
The one-wire protocol works like I2C: the devices don't pull the voltage up, so a 5V device wouldn't put 5V on the data lead. They just pull the voltage down to signal, and a pull-up resistor takes care of the other direction. For a 3V CPU, you'd just use a pull-up resistor to 3V (again, if the parts support 3V operation)
sweet cairn
supple pollen
It could be some MCUs have more drive power available on their GPIOs. Sometimes...
You're right about that. This is the example application circuit provided on datasheet of the buzzer that adafruit is using

Hmmm should I go with this design or the amplifier design hmmmmmmmmmmm
pale umbra
supple pollen
The one-wire protocol works like I2C: the devices don't pull the voltage up, so...
sorry to reply just to make it easier to follow conversation since there is another one going on. I guess the only issue is that the pull-up resistor pull-down might be for 5V and wont work well for 3.3V (likely it will be too much)
supple pollen
That basically depends on how "fancy" you want to be. For a simple beeper, I don't think high fidelity is probably important.
pale umbra
afaik everything is included on the breakout to use them out of the box so no need to add resistors when using 5V
supple pollen
pale umbra
sorry to reply just to make it easier to follow conversation since there is anot...
They just pull down to 0V in any case.
sweet cairn
sweet cairn
Hmmm should I go with this design or the amplifier design hmmmmmmmmmmm
for context I'll be using this in a keyboard that'll accept arduino pro micro (and other avr boards), rp2040 based boards and maybe a nrfmicro one
pale umbra
bah they are modified datasheet not the original and they all say 5V so I guess Ill have to try it anyway 😦
sweet cairn
supple pollen
That basically depends on how "fancy" you want to be. For a simple beeper, I do...
That's fair. Would the volume be fine though, with the boards I mentioned?
pale umbra
FML 😢
supple pollen
Yeah, the transistor booster will give full volume
sweet cairn
nice! Thanks!!
supple pollen
One-wire is an old protocol, so I'm not surprised it's designed for 5V.
pale umbra
worst that can happen is my pico W blow up or the sensor (dont care about the sensor)
puts the fire extinguisher nearby 🤣 and film it for electroboom style footage
supple pollen
Interestingly, the RP2040 was originally intended to be 5V tolerant on its inputs. However, to claim that, a chip has to actually be tolerant of a little more overvoltage (5.5V), and it wasn't, so 5V tolerance isn't listed, but you might get away with it. However one-wire, as I stated, is pull-down signalling, so if the pull-up resistor is to 3.3V, you won't see 5V on the data line. However, 3.3V may not power one-wire devices properly, so if you supply then with 5V separately (many devices do support this), it would probably work fine.
I don't really want to be confusing or long-winded, but some situations exist at the intersection of several different engineering factors, and this is one of them.
The short answer is, if your devices have separate power supply pins, power them from 5V, pull up your one-wire net to 3.3V, and it should work and not damage anything.
pale umbra
Im jokinjg btw. It's just unclear instructions that seems to say i/r chip is 2.8V to 5.5V but breakout is 5V so I have to try it. I guess that is what you are trying to say too. Theorically many things can happens so nothing like an actual experiment
supple pollen
One of my favourite engineering quotes is “one experiment beats a dozen expert opinions”.
pale umbra
and it's a bit annoying to have 5-6 5V one-wire sensors and have to power them all externally as well as the pi pico W from the same battery pack
supple pollen
That is indeed annoying. What I would do is connect the one-wire sensors to the 32U4 and have it relay the readings to the Pico.
Weirdly, I have experience with this. I ended up implementing software one-wire on a DSP chip, of all things (the one with the big heat slug) to talk to several peripherals, then hand off the readings to the subprocessors (the VLSI chips) via dual port RAM (the Idt chips on the top row). Since the subprocessors booted in 8-bit mode and then shifted to 16-bit mode when they were running, I had to change the addressing of the memory on the fly. It was a complicated mess.
 pale umbra
Im sure it will be fine on the pico W besides I dont have enough pins left on the 32u4. It's just that the documentation doesnt help (like 2 docs says opposite things) and I wasnt provided with original datasheets but instead I have a pseudo-datasheet with a screenshot of code and minimal specs for the breakout
Ill tell you soon have to update the library since "my version" doesnt work on rp2040
but doesnt look good so far since the led is always dimly lighted on the ir receiver
and goes lit up when I press a button on the remote but it shouldnt be visible at all I think normally
pale umbra
it works now 🙂 forgot to change the pin number 🤣
vast flume
If I use a uart bridge such as the cp2102n for adding usb connectivity to an stm32, do I still need an hse?
unreal flax
vast flume
If I use a uart bridge such as the cp2102n for adding usb connectivity to an stm...
Maybe. UART baud rates need to be relatively precise, so you'd want to check how accurate the STM32's internal oscillator is for the specific chip family.
inland jungle
man, how can the Pico W be $6 when the wireless chip is ~$4 or so in quantities of 1k. They must have gotten a good deal. I can't find a standalone module using the same chip for much less than $10
distant raven
inland jungle
man, how can the Pico W be $6 when the wireless chip is ~$4 or so in quantities ...
RPi bought millions of them. Last numbers I saw, like $1.50 a chip
unique patio
The standard selling price of the RPi Pico boards does not reflect a typical markup.
distant raven
unique patio
The standard selling price of the RPi Pico boards does not reflect a typical mar...
Right, it’s not made to be high margin, just high volume
dry pelican
I'm surprised they also use an Abracom antenna design that they had to pay a license for on the PicoW. But the high volume probably makes that cost negligible
sweet cairn
I'm trying to build the PAM8302A audio amp into one of my designs and I'm using the Adafruit Featherboard for that chip as a reference.
Can someone please crosscheck my design for any faults

I'm not using the IN- pin. On the Adafruit board it's recommended to tie that pin to GND if you're not going to be using it. So that's what I've done, but I've also removed the capacitor and resistor that Adafruit uses on those pins. Is that fine?
pale umbra
dry pelican
I'm surprised they also use an Abracom antenna design that they had to pay a lic...
Id guess that it costs less than the FCC certification process for a custom one/new one
dry pelican
sweet cairn
I'm not using the IN- pin. On the Adafruit board it's recommended to tie that pi...
check the datasheet reference design
3 pin jumpers (1-2 shorted) might also be better for switching between onboard and external speaker
unique patio
Adafruit design:https://cdn-learn.adafruit.com/assets/assets/000/112/257/original/components_schem.png?1654276084

if single-ended there is no connection to IN_N, because C2 blocks the connection to ground. Also you don't have a C3, but see the note about C3 to filter HF noise
datasheet does not show a non-differential design
sweet cairn
dry pelican
check the datasheet reference design
Yeah the datasheet doesn't show a non-differential design. Since the Adafruit design is proven I thought I'd use that as a reference instead
unique patio
here is a rather more thorough sdatasheet: https://pdf1.alldatasheet.com/datasheet-pdf/view/246503/PAM/PAM8302A.html
PAM8302A Datasheet, PAM8302A datasheets, PAM8302A pdf, PAM8302A integrated circuits : PAM - 2.5W Filterless Class-D Mono Audio Amplifier ,alldatasheet, Datasheet, Datasheet search site for Electronic Components and Semiconductors, integrated circuits, diodes, triacs and other semiconductors.
sweet cairn
dry pelican
3 pin jumpers (1-2 shorted) might also be better for switching between onboard a...
That's a good idea, thanks!
unique patio
so the one difference is that in our design, if you tie AIN- to ground, you are NOT tying the IN_N pin to ground directly. But you are, in your design
as well as presence/absence of C3
did you breadboard and test your design?
sweet cairn
unique patio
if single-ended there is no connection to IN_N, because C2 blocks the connection...
The product page mentions connecting IN- to ground if it's not being used, so I thought I'd do that directly.
Mine does have a C3 of 10uF capacitance. It's labeled as C4 and is on the top portion of the schematic
sweet cairn
unique patio
here is a rather more thorough sdatasheet: https://pdf1.alldatasheet.com/datashe...
Ah the reference design in this resembles the Adafruit one, this is better yeah 😅
unique patio
sweet cairn
The product page mentions connecting IN- to ground if it's not being used, so I ...
that means the pin, which is on the other side of the blocking cap
not the IN- directly on the chip
sweet cairn
unique patio
so the one difference is that in our design, if you tie AIN- to ground, you are ...
Yep. I get it now. So the cap is still important then.
Does IN- still need to be connected to the trim pot or can I replace that with ground as well?
sweet cairn
unique patio
did you breadboard and test your design?
Haven't. I came up with this just a while back so early days 😅
I don't have the components on hand and have never had experience with them
unique patio
if you ground the pin, then that ties the lower end of the pot to ground, so yes. But the cap will be tied to ground at one end, and do nothing except AC-couple the pin to ground, which probably isn't necessary. So the effect is just to not tie anything to the chip IN_N pin.
weird, the PAM8302 (without A suffix) datasheets show single-ended, the PAM8302A shows differential. Not a great choice of part numbers
sweet cairn
Ok stuff is making a lot more sense to me now, thanks you! Between the datasheets and the Adafruit design I was getting very confused.
So IN- is not tied to anything and I don't need to wire anything to it either
sweet cairn
unique patio
weird, the PAM8302 (without A suffix) datasheets show single-ended, the PAM8302A...
Their datasheets are kinda confusing tbh. I originally wanted to use the PAM8301, wbjch is single ended, as it's done on the RP2040 Macropad but it's a discontinued part now so can't.
unique patio
i was hoping you could try it before you commit to a board design
supple pollen
I suspect you will need to wire it to something (not leave it floating)
sweet cairn
unique patio
i was hoping you could try it before you commit to a board design
I definitely will. There's a lot of new stuff I'm trying out personally with this so need to verify before committing
unique patio
@supple pollen in the Adafruit design, it would be AC-coupled to ground if used single-ended. Not sure if that's necessary or not.
not my forte
supple pollen
Right. I'm unsure what the biasing is like, so I don't know what the appropriate connection would be, just figuring leaving it floating is probably not optimal.
unique patio
there is no datasheet guidance about single-ended. Limor may have just tried it to see if worked fine.
sweet cairn
sweet cairn
Their datasheets are kinda confusing tbh. I originally wanted to use the PAM8301...
Another chip I was looking at was the PAM8304. Seems fairly similar to 8302A but it has two power inputs - PVDD and VDD. One is labeled as Power Input, the other is labeled as analog power input. From what I could gather online, one is power for the chip itself while the other is for the attached speaker

What I was getting confused by was the wiring for PVDD and VDD (I'm not extremely familiar with datasheets 😅)
But im guessing what this calls for is connecting PVDD directly to Vin and VDD using the filtering capacitor as used in the PAM8302A design. Am I right?
supple pollen
The filter capacitor is connected to both there. I suspect the chip offers the option of using separate supplies, but in this implementation, they're both being connected to the same source.

 supple pollen
Even if it's the same voltage, you might want to use a separate supply, so noise from the power output stage doesn't get coupled to the control/input circuitry.
unique patio
note AC coupling to ground in PAM8304 example:

so good idea to leave the second input cap there.
supple pollen
But for a basic implementation, it's sufficient to just power everything from the same source.
In many op-amp circuits, it's advantageous to balance the impedance on the inputs. While this isn't strictly an op-amp, the input circuitry looks similar.
unique patio
so use the Adafruit design, with input caps on each. Don't tie IN- directly to ground in any case. It is internally tied to the feedback resistor
gotta sleep 💤
sweet cairn
I just found a separate 'EVB User Guide' datasheet for the chip (8304) and this one has a much more detailed reference design and implementation

@supple pollen is right, J4 here is used to switch between differential and single ended input, but the IN- pin is not left free in any case. Have to use the cap and resistor
This also seems to explain the PVDD and VDD wiring more clearly
sweet cairn
unique patio
gotta sleep 💤
Thank you for your help!
sweet cairn
supple pollen
But for a basic implementation, it's sufficient to just power everything from th...
Yep both will be powered from the same 3.3v or 5v source
Thank you again danhalbert madbodger!
pale umbra
supple pollen
In many op-amp circuits, it's advantageous to balance the impedance on the input...
my rtl-sdr have the best FM sound Ive ever had and it doesnt even have all of these things
 scarlet jay
constant current source for bipolar analog current output?
molten aspen
If I'd like to have every FAN_TACH have pull-up to 3.3V, is having a resistor for each line (red circle) the correct way or does single pull-up resistor in the 3.3V work instead of the individual (red circle)?
 supple pollen
molten aspen
If I'd like to have every FAN_TACH have pull-up to 3.3V, is having a resistor fo...
supple pollen
molten aspen
If I'd like to have every FAN_TACH have pull-up to 3.3V, is having a resistor fo...
If I'm understanding correctly what you want to do here (my read is you want to connect four separate tach signals to four separate GPIOs), you'd need four separate pull-up resistors. Note that this doesn't necessarily need to be four separate components on a board, many such designs are implemented with resistor networks that include multiple resistors in a single package.
molten aspen
supple pollen
If I'm understanding correctly what you want to do here (my read is you want to ...
You got it right and I kinda expected that.
I was initially planning to use resistor networks but correct sizes are either hard to find, are quite a bit more expensive (as some sizes I need to buy from other place than where I buy the majority) and also; tracing them
But thanks! 🙂 This confirmed it!
supple pollen
All true: whether resistor networks make sense depends on what you're doing. The logistics for hand building a few boards is different from doing a manufacturing run.
molten aspen
Exactly; Since we aren't already having hundreds of components nor building dozens of boards, having couple of board with multiple resistors over a single network, it's a tradeoff that is acceptable at this scale!
vast flume
Does anybody know if the USART flow control pins (RTS/CTS) are required when using the CP2102N with an stm32?
supple pollen
I don't know for sure, but I doubt it. Most microcontroller serial links are just RX/TX without hardware flow control (which would eat up more pins).
distant raven
Rp2040 has flow control pins available when you set up UART I believe
supple pollen
That would make sense: having hardware flow control as a configurable option, I just wouldn't expect them to be mandatory.