#help-with-audio
1 messages · Page 12 of 1
 echo hedge
 versed torrent
that's what I was going to start with if I could find the GCC version... but seems the links to it are all stale based on the old Amtel site and the Microchip site is an impenetrable fortress
versed torrent
Aha - okay - might take a look at that in a bit.... At the moment I've got the other version up and running and back to making my "Pandora's Drumming Box" instrument.
 bronze locust
I'm trying to help my parents choose a microphone for taking Zoom meetings where they are both calling from a single laptop.
- Any recs?
- What should I be searching for? My current search term is "best budget studio mic"
- Am I correct that pretty much any mic will be better than the laptop's built-in one, even ignoring the actual mic specs, since the built-in mic is right next to the speaker so there is heavy reliance on software-based filtering to remove the feedback?
 random bone
The Blue Yeti and its siblings are well regarded. But I have a Logitech C920S webcam, and its builtin microphone is fine. It is also a better camera than is present in many laptops.
random bone
bronze locust
I'm trying to help my parents choose a microphone for taking Zoom meetings where...
^
bronze locust
thanks @random bone! I have been using the C920 and C922 for years, but always assumed the built-in mic was junk
random bone
it is not as good as something like a Blue Yeti, but it seems OK. If you listen to the weekly CircuitPython meetings (available on YouTube and elsewhere), my mic is the Logitech; Kattni and Scott have Blue Yetis or a Yeti Nano
I have a Zoom H2n standalone recorder, which I can use as a good mic, and it does sound better, but it is more work to set up.
bronze locust
I suspect the geometry of these two-person calls will make the requirements pretty different. They sit on a couch with the laptop on the coffee table (mic can be put on any available surface, but I think coffee table is kind of it). So it's two people, each at a few feet of distance, not exactly head-on but off a little to the side.
Being an absolute noob, seems like either a cardioid or omnidirectional mic could work for this?
 glacial spruce
Omnis or twin lavalier mics are easy to set up. The advantage to cardioid pattern mics is they have a deep null you can aim at sources of noise (like computer fans)
bronze locust
ah, as in two lapel mics that get mixed in hardware and present as a single 3.5mm input to the laptop?
 odd oasis
Snowball is another option if you need a cardioid mic. Cheaper than a blue yeti, and audio quality is pretty solid.
glacial spruce
There are dual mic sets available that basically work like that.
bronze locust
it seems like everyone likes the Blue Yeti, and below the $80 price point, there's not that much agreement on which mics are good
versed torrent
Interesting audio observation on a Circuit Playground Express: I'm generating audio via the on-board DAC. When powered by my computer, there is a fair bit high frequency noise on the GND (thanks to computer's USB power...) and now that I have a small opamp between the board and my audio system it is fairly evident......
The amount of noise is proportional to the brightness of the NeoPixels I have lit!
When powered by battery, no problems....
 golden lark
versed torrent
Interesting audio observation on a Circuit Playground Express: I'm generating a...
golden lark
versed torrent
Interesting audio observation on a Circuit Playground Express: I'm generating a...
I have noticed that even when not playing audio. When I set all 10 of the neopixels to 200/255 brightness in Makecode without playing any audio I hear a noise like that. When I connect Adafruit's STEMMA speaker the buzzing is louder. (I discovered this after I hooked up the speaker and plugged the board into my computer to change some code. The old code had all 10 leds at 200/255 brightness.)
 median hemlock
versed torrent
Aha - okay - might take a look at that in a bit.... At the moment I've got the o...
median hemlock
versed torrent
Aha - okay - might take a look at that in a bit.... At the moment I've got the o...
You might try this, it has worked for me in a bunch of places: https://github.com/adrianfreed/FastTouch

GitHub
Contribute to adrianfreed/FastTouch development by creating an account on GitHub.
versed torrent
Similar to the approach that CircuitPython uses... but CP uses an external pull down resistor (1MΩ). I duplicated the CP method - and been working a charm - and in 20 lines of code!
(amusingly, I know Adrian Freed from a very long time ago!)
bronze locust
I am trying to piece together what happened in an A/V adventure I was not present for. I think at one point they connected the 3.5mm headset jacks of two devices together with a 3.5mm TRS stereo cable. What should happen in that case, if it's even specified?
 last prawn
bronze locust
I am trying to piece together what happened in an A/V adventure I was not presen...
last prawn
bronze locust
I am trying to piece together what happened in an A/V adventure I was not presen...
Did something break? It really depends on the device and what the headphone jacks are usually doing (aka - did they have power running through them)
bronze locust
I don't think anything broke. One device had audio playing in the output channel, the other I think didn't.
versed torrent
I'm not sure what they did - "two devices" - what two? Two headphones? Two phones? In general, connecting two outputs together is "a bad idea™". On the other hand, trying to drive two sets of headphones from one output will work, but probably be quiet and might sound bad.
Oh - two devices with "headset jacks" - Okay, so two outputs.
Yeah, not a good plan! Depending on the device's circuitry, you could end up damaging one or the other device, or both could be okay... no single answer really depends on the devices in question. BUT, the one thing that you can expect: Nothing good can come of this arrangement! (There is such a thing as passive mixing - but you generally can only get away with this with outputs designed not to drive a speaker or headphone, and hopefully with outputs you know are designed to handle to it, like modular synth outputs.)
bronze locust
this was definitely not an intentional attempt at passive mixing 😆
thanks for the info @versed torrent!
 grand lance
https://learn.adafruit.com/assets/3730 what are the g pins and how do i use them
glacial spruce
Those give access to the "gain" input on the amplifier chip directly, and via a 100k resistor. Normally you don't need them and can use the gain jumper block to set the gain.
They can come in handy if you want to control the gain with software by hooking them to GPIO pins
grand lance
ok. and gain controls what? im unfamiliar with it outside cb
glacial spruce
It's a way of expressing how much an amplifier amplifies. If you have a low level input signal and want it louder, you'd set a higher gain, for example.
grand lance
so on this 18 is high and 9 is low?
glacial spruce
Yes, you can set it as low as 6dB or up to 18dB
odd oasis
If you go to the specifications section of the learn guide overview, there is a link to the schematic that details what resistor configurations result in what gains.
glacial spruce
In case you're curious
 grand lance
and thats on the pins?
glacial spruce
That's the G and G* pins
grand lance
would a dual linear pot work on it?
glacial spruce
There's also a jumper block for if you want to just set a fixed amount of gain. They both do the same thing, just give you access to do it whichever way is convenient for you.

This sort of versatility and convenience is one of the things I like about AdaFruit designs, but I can understand how it can be a bit confusing.
grand lance
grand lance
would a dual linear pot work on it?
let me correct this because i didnt read the schem fully. would a linear 100k pot work in place of the resistor
glacial spruce
No, that's not how that chip works. You could wire up a 100k pot as a variable attenuator (like in the diagram you linked to), but the chip itself simply offers 5 fixed amounts of gain, selectable by hooking up a pin in various ways.
grand lance
so i would need a rotary selector switch not a pot
glacial spruce
Yes, or you could use a few individual switches, or a couple of GPIO pins if you have a microcontroller available.
grand lance
i do, ill have to see if i have enough pins. i do have a gpio expander so i may be ok
glacial spruce
All that is only if you want the ability to change the gain on the fly. Otherwise, just set the jumper for the gain you want and you're done.
grand lance
i only have 6 gpio pins left on my feather. i know i need at least one of those for what im putting in currently
depending on what else i put in it will help me decide how to handle gain
grand lance
glacial spruce
In case you're curious
i kinda dont get this chart and how it is applied
versed torrent
@grand lance - it means that there is this one pin, Gain:
If you leave it disconnected ("Floating") you get 6db of gain.
If you connect it to +V ("High") through a 100kΩ resistor, then you get 9db of gain.
If you connect it to +V directly, you get 12db of gain.
If you connect it to GND ("Low") through 100kΩ resistor, you get 15db of gain.
If you connect it to GND directly, then you get 18db of gain.
Yes - the table is not really as clear as it could be.
This scheme is a way for the chip to let you pick one of five available gain settings with only one pin. The board makes this easy by having a set of jumpers that can connect that GAIN pin in any of those five ways. Note that the chip does not support arbitrary gain settings, just these specific 5.
The intention of this gain control is not to be a volume setting controllable by the application or user - but to just the range of the amplifier for the nominal level of the input. If what you need is a volume control, you'd achieve that in the system that is sending its output to this amplifier board.
If you really needed to be able to control this gain setting programmatically, you could do by connecting it to two pins on a MCU, one directly, the other through a 100kΩ resistor. The board has two pins G and G' - the first is the Gain pin, and the second is Gain through a 100kΩ resistor... so you could just connect these two pins to the two MCU GPIO pins. — Then, by setting both GPIO pins to inputs, and setting whether they are floating or pulled up, or pulled down - the MCU can control the Gain. You'd need to be very careful to set both pins floating before setting one or the other pulled up/down. I wouldn't design a project this way if I could avoid it.
(sorry for all the edits -- I'm done now... I think it is now clear)
grand lance
ok. so the 100k resistor is built in and pins out to the second gain pin while the other is raw
versed torrent
right.
and you'd only use those two pin (G and G') if you weren't using the on board jumpers to pick a gain.
grand lance
ok. i may add it in and put it under misc settings after i have all the other things pinned out. for sake of testing and sett up ease, ill just use the jumper until then
right now im juggling interface image, buttons and mp3 playback concurently as i need to be able to see, select, and play the test track. unfortunately this is a head ache
versed torrent
I don't know what you're feeding this amp with - but 3db steps are rather coarse - and in general, you'd have some way of controlling the volume of the signal going to this board. And - so this setting is to just set the amplifier to handle the general level of signal you're feeding it. Jumper is probably the way to go if this system is going to just be playing back MP3s.
Are you decoding the MP3 on the feature MCU and playing via the MCU's DAC?
grand lance
versed torrent
Are you decoding the MP3 on the feature MCU and playing via the MCU's DAC?
feather to this: https://www.adafruit.com/product/3678 to the amp

This fully-featured UDA1334A I2S Stereo DAC breakout is a perfect match for any I2S-output audio interface. It's affordable but sounds great! The NXP UDA1334A is a ...
last prawn
grand lance
feather to this: https://www.adafruit.com/product/3678 to the amp
mzero's comments sound right - Adjusting the gain digitally before outputting to the i2s decoder is probably how you want to control the volume - thought you could do something in between the 2 as well
 worthy glacier
quick question (please ping me if you are gonna respond) if i have a microphone module and if i tie the digital output with a audio jack (and ground) will it work? or is it a lost cause?
 solemn flint
worthy glacier
quick question (please ping me if you are gonna respond) if i have a microphone ...
solemn flint
worthy glacier
quick question (please ping me if you are gonna respond) if i have a microphone ...
Depends on the type of microphone. With an I2S digital output, that definitely won't work. With a PDM signal, you'd want a simple low-pass filter as well, but that would mostly work to get you an analog audio signal from it.
worthy glacier
solemn flint
Depends on the type of microphone. With an I2S digital output, that definitely w...
ok cool to know thanks!!
grand lance
https://learn.adafruit.com/adafruit-i2s-stereo-decoder-uda1334a/circuitpython-wiring-test for this board: the row of pins on top, how do i use them and can they be wired to gpio

Adafruit Learning System
A nice and fully-featured I2S stereo DAC for you!
im particularly interested in mute, though i have an alternative in mind if i cant
solemn flint
The Learn guide does explain what they're used for: https://learn.adafruit.com/adafruit-i2s-stereo-decoder-uda1334a/pinouts
grand lance
yes. very briefly. i dont understand them entirely though and it includes nothing for actual use
solemn flint
For more details you'd probably want to refer to the datasheet of the chip it uses.
But the MUTE pin specifically sounds pretty easy: set to logic high to mute the audio.
grand lance
can i do that through a gpio?
solemn flint
Yep.
grand lance
then id have to link it to a button, which im having trouble programing
solemn flint
You could also wire the button directly to the pin if you wanted, with the other side connected to 3.3V.
grand lance
so to make sure i understand: high is power pins, low is ground
solemn flint
Well, high is anything that reads as a logic "1" to a digital input, which you can get either from the power supply or from a GPIO set to output a digital "1", etc. Ditto for low: could be a direct ground connection or a GPIO set to output a "0", etc.
versed torrent
Note - you would almost certainly NEVER programmatically control the other signals there from GPIO - because they don't make any sense to be user or runtime configurable. SF1 and SF0 set the format of the serial data. If you are using I2S - just leave them disconnected. Unless you are integrating with video equipment you will have no use for SCLK and PLL. Lastly - De-Emphasis is something you'd only want if you were specifically playing audio that has been pre-encoded with Emphasis. If you are playing audio files this is almost certainly never the case.
Also - as for MUTE functionality - you might well be better off by simply coding your system to send silence when you wanted mute rather than use this particular pin. The chip datasheet is pretty thin on what mute actually does - so unclear if it will do it in a nice way or not.
grand lance
ok. i got it to play, but it sounds very wierd
lotcs of rythmic clicking and sounds like a neighbor blasting it through the wall, clear enough to tell what it is, but not clear enough to enjoy it.
yeah. i cant fix it
in case its a coding issue, here it is https://pad.riseup.net/p/add_collor
versed torrent
Do you mean it is a noisy version of what you are expecting - like the right audio is there plus other junk.... or that it is all just junk?
grand lance

This incredibly small stereo amplifier is surprisingly powerful - able to deliver 2 x 3.7W channels into 3 ohm impedance speakers. Inside the miniature chip is a class D controller, able to ...
grand lance
versed torrent
Do you mean it is a noisy version of what you are expecting - like the right aud...
So, sleep didnt work, but it did stop it after 10 seconds so i dont have to deal with the choppy for long
grand lance
the feather keeps malfuntioning
glacial spruce
When I have situations like that, I usually eventually discover it's running out of resources (like a memory leak), corruption (buffer overflow, wild pointer), or a timing problem.
grand lance
i removed alot from my code to test just one component. i guess ill have to put alot of resourses on an sd card. currently its crashing and failing to show up unless i put it in to safe mode, which i only seem to be able to do by accident
ill figure it out later. i need sleep. i was unable to last night
last prawn
grand lance
lotcs of rythmic clicking and sounds like a neighbor blasting it through the wal...
I can't tell for sure looking at your code - but I'm using that same i2s decoder and its really tricky to manage getting it samples while also using lots of i2c devices that fire off interrupts ( like your touchscreen ).
I'd try not enabling the touchscreen and see if it sounds better
grand lance
i removed everything and it keeps malfunctioning the board
i wish i didnt need this rasberry for class. i could use that.
grand lance
last prawn
I can't tell for sure looking at your code - but I'm using that same i2s decoder...
i have a metro, should i swap out for that?
last prawn
grand lance
i have a metro, should i swap out for that?
I'd verify what the cause is before doing anything with hardware (also switching out the controller may not be the right solution either way). If changed your code to only have the i2s device and play the sample does it still sound distorted?
grand lance
i dont know. the feather keeps crashing
last prawn
Hrmmm - I'd back up your code from the device, put it in bootloader mode, then reflash with circuit python
random bone
grand lance
i dont know. the feather keeps crashing
Playing audio while doing display operations will cause hiccups in the audio. The redisplay logic can take too long
I don't know why it's crashing: is it really crashing hard, or is it throwing Python excceptions?
last prawn
After that you can try out the examples on https://learn.adafruit.com/adafruit-i2s-stereo-decoder-uda1334a/circuitpython-wiring-test and see if it glitches still just to verify that something else isn't going on
Adafruit Learning System
A nice and fully-featured I2S stereo DAC for you!
last prawn
random bone
Playing audio while doing display operations will cause hiccups in the audio. Th...
Yeah - this is a thing. Theres a thread about audio DMA and I added partial refresh functionality to the display library for sd1306 for my project and it still mostly takes too long (its somewhat manageable if I sacrifice some responsiveness and use sufficient latency)
Next I'd add in the touch display - if that causes the glitching you're hearing then it might be tricky to have both at once
random bone
the sine wave is tiny and in memory, no computation or loading from a file requiredd
grand lance
i keep having to delete everything while in safe mode and somehow reset the board entirely then reinstall everything
random bone
you should not need to do that at all. Just press reset while in safe mode
grand lance
and it goes right back to acting like a usb device
last prawn
random bone
you should not need to do that at all. Just press reset while in safe mode
Thats true sometimes - but I have lots of issues with the boards on windows and a lot on my m1 mac (which isn't officially supported well for lots of things yet)
grand lance
right now the feather is connected but not showing up at all
random bone
you can only import it once. You have to ctrl-D to re-import it
is that because it was crashing?
grand lance
yes.
random bone
if you do a slow double-click, you should be able to get into safe mode, and then rename code.py
grand lance
like i said, the only sure fix is a full reset. i have to nuke it
random bone
you want the second click to happen while the neopixel is yellow. if you click reset during that time, you will go into safe mode
that is the way to enter safe mode manually
see the second paragraph here: https://learn.adafruit.com/welcome-to-circuitpython/troubleshooting#circuitpython-7-dot-0-0-and-later-2978455-21
grand lance
i altered the code name
random bone
my reaction time isn't good enough to see the yellow and then click, but a slow click will get the click during the yellow phase
grand lance
and the code isnt working at all
i saw some code for running other code but cant remember where. that may help
i dont understand this. my original code works just fine, but the trimmed down code crashes my feather
last prawn
Can you link me to the trimmed down code again?
grand lance
last prawn
grand lance
https://pad.riseup.net/p/audio-keep
So what I'd do here is open the repl and type the lines 1 at a time to see which one is crashing it
random bone
or just add a bunch of print statements
are you seeing a backtrace, or is it hard-crashing to safe mode
grand lance
ok. found where it stops i did use the print statement
code.py output:
SPI Loaded
audio bus Loaded
Sine set
sine played
Sine test done
Traceback (most recent call last):
then it just flashes 2 red
i figured it out. my fault. i needed an r on the mp3 line. instead of reading the code past that, it seems to have locked it
random bone
what version of CircuitPython are you using?
it should not crash when trying to print the traceback
grand lance
most recent. unsure of actual numbers. i may even be using the beta
mp3 = audiomp3.MP3Decoder(open("Fields.mp3", "b"))
this was the trouble line
mp3 = audiomp3.MP3Decoder(open("Fields.mp3", "rb"))
this is what fixed it
random bone
the version should show up at the top of the REPL stuff. It is also in BOOT_OUT.TXT
we fixed some traceback printing problems not so long ago, so if you are using a beta, instead of 7.1.0 or 7.1.1, you may be using a version without the fix
but 7.2.0-alpha.1 should be ok
grand lance
it wasnt a traceback issue, it was human error
random bone
but Traceback (most recent call last): should have printed more. Did you just leave that out, or did it not print anything after that line?
grand lance
printed nothing. i left out the read capability of the mp3 line
random bone
but it should print something. It is a bug that it didn't print a backtrace. It should have indicated the error line. So that indicates an internal error. I just wanted to check the version to see if you were using a version before we fixed some traceback issues.
that is, it is not your fault that it printed nothing
grand lance
reguardles , that little r fixed everything
random bone
i understand, but if there is a bug, I would like to get it fixed.
it would have saved you time if it printed a backtrace and indicated a line number
grand lance
ok. like i said, nothing printed after that line. my feathers neopix immediately started blinking 2 slowish red and failed to work till i enterd safe mode and deleted the code file
grand lance
Adafruit CircuitPython 7.1.0-beta.3 on 2021-12-13; Adafruit Feather RP2040 with rp2040
Board ID:adafruit_feather_rp2040
wow, those updated fast. i just got this board last month or 2
random bone
Thanks! It would be good to update to 7.1.1. We've fixed a number of bugs since beta.3, but beta.3 should have the traceback fixes already. I will try out the missing "r" in some test code.
 clever rain
hi there ı want to make a hydophone and ı will find some frequency in underwater . I will use piezo transducer(SMC26D22H13111). ı will make a pre-amplifer(opamp) circuit and ı will amplifier piezo output signal(voltage), then I will make a band-pass filter my hydrophone will detecet between(20khz-50khz) ı think bandpass filter remove some noises and thruster(motor) vibration. I will connect this output STM32F4 DİSCOVERY microcontroller. Then ı want to use FFT and DSP ın my opinion ı can detect some voice and some signals. ıs it work is it possible.

can use Piezo transducer voltage directly to find voice and acustic signal
(Piezo Transducer [voltage]) -->Pre-amplifier-->Bandpass Filter-->ADC(stm32)-->FFT?
This is my pizeo Transducer

My main problem can ı use piezo transducer voltage directly to find acustic signal and voice.
there are a lot of parameter d33/d31/g33/g31 .this parameters how can effect my pre-amplifier or other circuit can you help me about this problem
versed torrent
@clever rain - If I understand, you want to put this underwater, and find interesting things to listen to and and then do some processing on.
The first question is what kind of signals are you going to detect with this? You give a bandpass filter range that is entirely above human hearing. You won't capture any voices humans make or any sounds we can hear....
You'd like to do FFT and DSP. STM32F4 is capable of doing that to a limited degree. It may be a very powerful microcontroller... but it's still a microcontroller! Depending on what signal processing you have in mind, it might be just fine, or it might be underpowered.
Tell us more about the signals you are hoping to capture, and what you'll use them for.
odd oasis
FFT for signals on an STM32F4 is fine for detecting frequencies and simple voice activity detection algorithms, but if you're expecting anything more advanced than a simple classifier, you'll probably need a separate microprocessor or PC to do the heavy lifting.
last prawn
clever rain
hi there ı want to make a hydophone and ı will find some frequency in underwater...
It might be good to clarify what you mean by "detect" and "find" here - if you mean "Can I filter out other sounds so that I can record some voice/other sounds with a hydrophone" the answer is different than "Can I use the controller to classify what those sounds are?"
 clear cliff
I build a breakout board for the Knowles SPH0641LU4H-1 Utrasonic (80Khz) PWM microphone. However, it seems like the PWM input code is hard-coded to only sample at a maximum of 22Khz, is this correct? What I am doing is benchmarking a capture, and calculating the time per sample, it seems no matter what samples rate or number of samples used, it works out to 22Khz every single time.
sample_size = 1024
def benchmark_capture():
    global sample_frequency, sample_size, time_per_sample, hz_per_sample
    start_capture_time = time.monotonic_ns()
    mic.record(samples, len(samples))
    sample_duration = time.monotonic_ns() - start_capture_time
    time_per_sample = sample_duration / sample_size
    sample_frequency = round((1 / time_per_sample) * 10**9)
    print(sample_size, "samples took",sample_duration,"ns or", time_per_sample, "ns per sample", "| Max Sample Frequency =", sample_frequency, "| hz_per_sample=", hz_per_sample)

# Main program
while True:
    left_overs = benchmark_capture()
    print ("left_overs=",left_overs)
    time.sleep(1)```

Output:
```1024 samples took 45898438 ns or 44822.7 ns per sample | Max Sample Frequency = 22310 | hz_per_sample= 85.9375
left_overs= None```
sample_size = 256
```256 samples took 12695313 ns or 49591.1 ns per sample | Max Sample Frequency = 20165 | hz_per_sample= 343.75
left_overs= None```

The sample rate and sample size seems to have little effect on how long the time per sample takes.Can you clarify what MCU you're using and what microphone library? You say "the" PWM input code, but it's not obvious what that necessarily is.
clear cliff
Pi Pico, mic = audiobusio.PDMIn(board.GP0, board.GP1, sample_rate=sample_frequency, bit_depth=8, mono=True)
Regardless of the sample rate specified, every sample takes around 45776.4 ns to complete. Limiting the max sample rate to ~21.8Khz
Even settings a sample_rate of 0 results in the same thing. I wonder if it is just ignoring that entire variable on the PI Pico.
print (mic.sample_rate) gives a result of 44099
random bone
clear cliff
Regardless of the sample rate specified, every sample takes around 45776.4 ns to...
You are right, it is a bug. It does not change the sample rate. Let me check the code history.
random bone
clear cliff
Even settings a sample_rate of 0 results in the same thing. I wonder if it is ju...
Here is rebuild that just uses the passed in sample rate. mic.sample_rate will still be a little different. However, internally the PDMIn code uses a 44kHz windowed sinc filter, so I am not sure this is going to work for you. It also may not be able to keep up at high sampling rates.
clear cliff
Thanks, will give it a try a bit later. Do I just need to copy the uf2 file to the disk and it will update that library or do I need do compile something?
random bone
that UF2 is circuitpython, just copy it to RPI-RP2
clear cliff
random bone
that UF2 is circuitpython, just copy it to RPI-RP2
I do get returns back faster now, but only once in a few reboots, it doesn't work a 2nd time unless I re-write 1's into the sample buffer. But even then it fails to return anything after a few cycles. I haven't yet checked to see if the buffer data is even valid.
sample_frequency = 22000
sample_size = 512

mic = audiobusio.PDMIn(board.GP0, board.GP1, sample_rate=sample_frequency, bit_depth=8, mono=True)
print ("mic.sample_rate=",mic.sample_rate)
time_per_sample = None

def benchmark_capture():
    global sample_frequency, sample_size, time_per_sample, hz_per_sample
    samples = array.array('B', [1] * sample_size)
    start_capture_time = time.monotonic_ns()
    left_overs = mic.record(samples, len(samples))
    if left_overs:print ("left_overs=",left_overs)
    sample_duration = time.monotonic_ns() - start_capture_time
    time_per_sample = sample_duration / sample_size
    if time_per_sample:
        sample_frequency = round((1 / time_per_sample) * 10**9)
        print(sample_size, "samples took",sample_duration,"ns or", time_per_sample, "ns per sample", "| Max Sample Frequency =", sample_frequency)
    else:
        print("sample_duration=",sample_duration)

# Main program
while True:
    benchmark_capture()
    time.sleep(5)```
output:
mic.sample_rate= 44099
512 samples took 976562 ns or 1907.35 ns per sample | Max Sample Frequency = 524288
512 samples took 976562 ns or 1907.35 ns per sample | Max Sample Frequency = 524288
512 samples took 976563 ns or 1907.35 ns per sample | Max Sample Frequency = 524288
512 samples took 976562 ns or 1907.35 ns per sample | Max Sample Frequency = 524288
512 samples took 976563 ns or 1907.35 ns per sample | Max Sample Frequency = 524288
512 samples took 976562 ns or 1907.35 ns per sample | Max Sample Frequency = 524288
sample_duration= 0
sample_duration= 0
sample_duration= 0```
The samples is still all 1's, so it is fast because it is not returning anything valid.
random bone
Hmm, The input sample_rate and the output rate should be close. I may not have fixed what I thought. In any case, could you open an issue, with sample code and output from your original tests? Thank you. https://github.com/adafruit/circuitpython/issues/new/choose
clear cliff
Summitted (went back to 7.1.1 to double check uploaded code) https://github.com/adafruit/circuitpython/issues/5914

GitHub
CircuitPython version 7.1.1 7.2.0-alpha.1-199-gbed724fc1 (attempted for fix by danh) Code/REPL sample_frequency = 16000 sample_size = 1024 mic = audiobusio.PDMIn(board.GP0, board.GP1, sample_rate=s...
grand lance
if i have a radio and an mp3 player in a project, where does the audio for the radio connect? to the decoder or to the amp?
 shut hazel
Howdy! I have a noob project question... I've successfully figure out how to play music from the RP2040 feather and connect a speaker and amplifier. I would now like work on a separate project using the same components but adding a microphone to record short phrases that can play on button press. Will this work on the RP2040 feather? If so, what mic component can I use and how many recordings will the board hold? I'm not super worried about sound quality. Down the line... I would also like to work on a project that uses speech to text (probably from Google Cloud) on a connected board so using the same mic components would be great. If anyone can point me toward a project similar or documentation that would be most appreciated!
random bone
shut hazel
Howdy! I have a noob project question... I've successfully figure out how to pla...
we have audiobusio.PDMIn, which can read short segments from a PDM microphone. However, it has to record to RAM, which is the limiting factor. Right now we don't have a bulk AnalogIn capability that reads analog signals. Both would be limited by RAM. Writing to an SD card or CIRCUITPY can have unexpected latencies, which are not so easy to handle. This is a piece of missing functionality that is not yet solved.
shut hazel
Gotcha! Thanks so much for the quick reply @random bone and for saving me hours of internet searches 😆
glacial spruce
grand lance
if i have a radio and an mp3 player in a project, where does the audio for the r...
If I'm reading your question correctly (and I may well not be), both the audio output of the radio and the audio output of the MP3 decoder would go to the amplifier, presumably with some sort of switch to select which one to listen to.
grand lance
glacial spruce
If I'm reading your question correctly (and I may well not be), both the audio o...
kinda. the component that selects the device will be turning on the device while turning off the other devices. a switch will lock the radio or mp3 to be on reguardless, but both will not run at the same time. not sure how to do the last bit and i still think analog when there is a digital solution
if i use a latching switch mounted to a rotart encoder, i can press it at any time and switch between radio and mp3 as the background player, but still would have to use the rotary encoder to view its data
glacial spruce
I was thinking analog, while I'm dimly aware that a radio could provide some sort of data, I don't really think about that much.
grand lance
im just not sure if it needs the decoder or just the amp. i think its just the amp
glacial spruce
If what needs the decoder? I'm beginning to realize you and I may have different notions as to what's really going on here. I had thought you had three items: an MP3 decoder, a radio, and an (audio) amplifier.
odd oasis
Depends on the radio's output? If you're using a traditional RF module, there's nothing to decode. If the radio spits out some kind of I2S or other digital format, you'll need to decode something.
clever rain
versed torrent
<@!634806456155111463> - If I understand, you want to put this underwater, and f...
sorry ı was working my final exam and ı see your answer so late 😦 . First of all ı want to make a hydrophone my piezo tranducer resonance frequency(43khz) because ı want to detect UBL(Undeerwater Locator Beacon) this Locater produce 45Khz signal(https://www.rjeint.com/wp-content/uploads/2020/04/ULB-362C-ULB-362C-PL-Beacon-Data-Sheet-1.pdf) I have ROV and ı want to detect that. so ı want to make a hydrophone.I read a lot of documantion about hydrophone design, there are a lot of important things for example transducer and circuit. My plain this UBL vibrate my piezo tranducer and this transducer will produce voltage but this voltage(signal) will be so low (10-20mV) first I will amplifer(pre-amp max 3.3V because ı dont want to saturate my ADC port ) voltage with opamp circuit later ı will read this Voltage(Signal) with ADC port. But this signal will be time domain ı will use FFT alghorithm and ı will convert this signal frequency domain after that ı can detect all frequency maybe I can use FIR filter adn Banspass filter ı think CMSIS library have this alghoritm and functions.
this is my ULB(UNDERWATER LOCATOR BEACON)'s datasheet:https://www.rjeint.com/wp-content/uploads/2020/04/ULB-362C-ULB-362C-PL-Beacon-Data-Sheet-1.pdf
this is my piezo transducer: https://www.steminc.com/PZT/en/piezo-ceramic-cylinder-26x22x13mm-43-khz

STEMINC
Piezoelectric Ceramic Supplier - Steminc Piezo Ceramics.

GitHub
Contribute to YetAnotherElectronicsChannel/STM32_FFT_Spectrum_Analysis development by creating an account on GitHub.
sorry ı cant speak english very well. I m trying to improve my english I m student. maybe I cant explain my idea
If ı can do that.I will produce my signal with transducer and ı make my DVL(Doppler Velocity Location). First ı will detect other signal if ı can do that ı will produce my signal and ı will detect this signal later ı will processing this signal.
versed torrent
Ah - okay - So - as I understand it - the beacons are doing something like giving a 10ms pulse every second at some ultrasonic frequency - like 45kHz -
So you want several times that sampling rate - let's say 200kHz..... if you want 1kHz resolution ---- well, you're going to need a 200 point FFT... so - let's say a 256 point FFT... and you'll need to do that at minimum (I'd think) of every 2 ms. (in order to get a few readings during a ping) - so.... every second, 500 256-point FFTs.
 clever rain
versed torrent
So you want several times that sampling rate - let's say 200kHz..... if you want...
clever rain
versed torrent
So you want several times that sampling rate - let's say 200kHz..... if you want...
I try this with MATLAB. It's working
this is not FFT this DFT.
 versed torrent
So - we're talking more than about 5M operations per second. If you're doing them floating point (float ... not double!!) -- then I think the STM32F4 should be fast enough
Sure - but FFT is just an implementation of the DFT that is, well, fast! And for 256 points, the standard radix 2 based FFT is fine. You should be easily able to find the algorithm on-line.
Now - because your FFT would be only 256 samples ever 2ms... and there are 400 samples taken every 2ms... this whole enterprise should be pretty easy.... You could probably press to 512 point FFTs.... but you'd need to overlap your samples (not hard) - and it would increase to ~11M operations per second... still doable, and it would double your frequency resolution.
clever rain
thank you very much ı will try it ı will be here again.and ı will ask a lot of question 😄 thank for helping
thank you very much
🤩
last prawn
clever rain
thank you very much ı will try it ı will be here again.and ı will ask a lot of ...
Noise might be an issue but you might also want to look in to using autocorrelation and staying in the time domain
Your original idea of just bandpassing around 43khz and then using a threshold to look for spikes might be accurate enough if that tone is that distinct and there isn't a lot of noise in that range
bronze locust
Anyone have recent experience with Mopidy and/or Pi MusicBox or similar? I primarily play music through a YouTube Music subscription and am looking into how feasible it is to set up a little home entertainment system for playing music without having to use my laptop or phone. I see Mopidy had support for Google Play Music (which was better that YT Music in every way), but not sure if there is a working YT Music integration yet.
aha, I see there's this
https://mopidy.com/ext/ytmusic/
which is not in the official Mopidy GitHub org.
Mopidy
A backend for playing music from Google’s streaming music service named YouTube Music.
looking at the star count and bug reports, not sure it's functional.
I guess an alternative would be to take a cheap commercial home entertainment system like a Roku stick and plug it into a little display
as far as I've seen, Roku (as well as Chromecast, etc.) expect you to have an HDMI display. What's the cheapest display I could use with one of those things?
ok I see that Google makes a product called Chromecast Audio that runs headless, and is controlled via the Chrome browser. Sells for $50
...and it has been discontinued?
would a cheap Raspberry Pi have enough juice to run a headless X server, load YouTube Music in a web browser and accept the occasional incoming VNC connection? (as annoying as that sounds)
random bone
bronze locust
would a cheap Raspberry Pi have enough juice to run a headless X server, load Yo...
I think so, it is designed to do video fast, and the rest is not that taxing
might depend on which model
bronze locust
Nice, thanks. I'm hoping to run it in a way that doesn't even use video. "YouTube Music" is the (worse) replacement service for the now-discontinued Google Play Music. They have a music library and also pull in results from YouTube videos, but I'm hoping there's a way to disable video playback from the latter in their browser interface.
random bone
i always wondered about that, for YouTube Music.
bronze locust
I'd expect the second-most taxing thing to be the fortress of JavaScript-based OS-within-browser that Google uses on the site.
random bone
"song mode": https://support.google.com/youtubemusic/answer/6313574?hl=en&co=GENIE.Platform%3DAndroid
With a YouTube Music Premium membership, you can choose whether to listen to your music or enjoy the music video experience with a YouTube Music Premium membership. In song mode, you can listen to the
bronze locust
random bone
"song mode": https://support.google.com/youtubemusic/answer/6313574?hl=en&co=GEN...
there are articles for "Android" and "iPhone & iPad" - does it apply to the browser interface?
behold the Settings dialog in the browser interface
 bronze locust
curious why that's a "ha"?
random bone
it says "no"
bronze locust
I guess I'm just used to that
big tech companies with "support" teams that are 1000 miles from the people who have any influence on product development
if you beat the final boss of that dungeon, your prize is "Yes! We acknowledge that this is a wanted feature!"
(or "Yes, this is a bug! Congratulations, we agree with you!")
(no bug tracker link tho)
oh man, on the reddit there's this comment
Been wishing for this feature from a LONG time. Not to save bandwidth, but because many user created playlists contain videos and this feature will in theory switch to better quality songs.
that's great
random bone
I never understood the appeal of desktop youtube music if it's going to play videos. I use spotify desktop and I certainly wouldn't want videos consuming cycles in the background. But the reddit post seems to imply https://music.youtube.com might do the right thing??
bronze locust
not that I can see. I'm a premium subscriber and I do not see any option to disable video
what I really should be doing is looking for how to disable all video playback in Firefox
bronze locust
"YouTube Music's Free Tier Is Becoming Audio-Only" - wow, a free feature that is not available in premium. welp
the chrome extension sounds roughly equivalent to disabling video playback in the browser
I fear that the actual stream traveling over the wire may be a video + audio stream, so that even if the browser doesn't play the video, it's still being wastefully sent
and, more to my issue, if that's the case, then I'm guessing Firefox (and most web browsers) don't have an option to "play this media, but just the audio, not the video"
oh, looks like if you navigate away from the playback page (e.g., to the homepage or some track listing or whatever), the video goes away
or you can remove these classes from the song-video div


it's nice that I can test out this solution (user script to disable the video player in CSS, so that I can't even get video by accident) on my laptop and then move to Pi once it works
bronze locust
update: Stylus extension with this user stylesheet works great. It even still shows actual album covers (images) for non-videos.
#song-video {
    display: none;
}
I'm now looking into getting this Bonnet to use with my Pi Zero 2 W https://www.adafruit.com/product/4037

Add some easy-listenin' tunes to your Raspberry Pi using this basic audio bonnet. It'll give you stereo line out from a digital I2S converter for a good price, and sounds nice to ...
bronze locust
bronze locust
I'd expect the second-most taxing thing to be the fortress of JavaScript-based O...
this indeed seems to be a pretty significant obstacle, on a Pi Zero 2 W
bronze locust
bronze locust
this indeed seems to be a pretty significant obstacle, on a Pi Zero 2 W
potential-nevermind: Chromium significantly outperforms Firefox on this machine.
bronze locust
update: mopidy with the youtube extension can access YT Music! This seems much better than the VNC solution in every way.
clever rain
how can make this signal with matlab (code)
 odd oasis
clever rain
how can make this signal with matlab (code)
odd oasis
clever rain
how can make this signal with matlab (code)
So, that's a 45kHz pulse in a 1 sec period?
clever rain
odd oasis
So, that's a 45kHz pulse in a 1 sec period?
yes
odd oasis
So, something like y = square(2 * pi * t, 100/45000);?
clever rain
 clever rain
clever rain
clever rain
signal is 45 khz
 clever rain
clever rain
clever rain
ı want to 45khz not 37.5 khz
odd oasis
Hoo boy my MATLAB is rusty
 dusty rivet
Same, and I was just using it back in November lol
odd oasis
clever rain
ı want to 45khz not 37.5 khz
Fs = 1e6;
t = 0:1/Fs:3;

pulsewidth = 2e-2;
pulseperiods = [0:10]*100e-2;

x = pulstran(t,pulseperiods,@rectpuls,pulsewidth) .* sin(2*t*pi*45000);

plot(t,x)
axis([0 0.1 -0.5 1.5])
Sheesh that took way longer than it should have
It's nice that I can play with MATLAB scripts online in-browser now.
 toxic tartan
ok, stupid question, but im using the EMG kit, and i'm running it connected to my computer. i dont have a usb isolator, but could i use a usb cable with the data lines connected to my computer and the power lines connected to a usb battery bank?
solemn flint
toxic tartan
ok, stupid question, but im using the EMG kit, and i'm running it connected to m...
That's probably a bad idea. Even though the USB data lines are differential, they'd still want to have a common ground reference coming through the cable with them.
 nocturne stone
Hello! Could I use this module if I only have access to one pin for left & one pin for right audio channels?
http://www.tianjiarun.com/zb_users/upload/2020/04/SJR-BTM525_SPEC.pdf

 glacial spruce
nocturne stone
Hello! Could I use this module if I only have access to one pin for left & one p...
glacial spruce
nocturne stone
Hello! Could I use this module if I only have access to one pin for left & one p...
I don't understand the question. For input, or output? What kind of access?
nocturne stone
Hey @glacial spruce, so the datasheet has those SPK pins which I thought were for audio, but I guess that is actually OUTPUT for when the chip is used as a receiver. Would the AIO pins be what's used for audio?
I'm trying to build a PCB for this to add a bluetooth audio transmitter to a device. I was also looking at it because it would be nice if I could add a mic input as part of the bluetooth.
I'm wanting to tap into the left/right audio channels that are connected to an audio jack. I may follow something like this, since I know where to solder the pins to, but having mic input AND BT 5.0 would be a big improvement.

In this episode of Retro Renew, I will be adding Bluetooth audio capability to the Game Boy Advance SP. This Bluetooth mod is truly music to my ears! This is something I wanted to do for a long time and now we have a fully GBA SP that can charge wirelessly and stream music wirelessly. Sit back, relax and enjoy!
So here's what you will find i...
glacial spruce
nocturne stone
Hey <@!348911944486486016>, so the datasheet has those SPK pins which I thought ...
I'm not seeing any AIO pins, but I do see some MIC pins
nocturne stone
glacial spruce
I'm not seeing any AIO pins, but I do see some MIC pins
It's there, it's the LEDs too
 glacial spruce
Ah, those look like analog GPIO pins. They're likely not particularly good for audio use, but I suppose it's a possibility.
nocturne stone
glacial spruce
Ah, those look like analog GPIO pins. They're likely not particularly good for ...
After reading through this, it seems better?
https://fccid.io/2AMWOFSC-BT806/User-Manual/User-manual-4990883.pdf

There's also an integrated antenna, which would be better. I suspect the other one I was looking at was more focused on receiving
glacial spruce
I don't know, this one also offers mic inputs and speaker outputs.
nocturne stone
glacial spruce
I don't know, this one also offers mic inputs and speaker outputs.
I'm not positive, but I think both are ok. The UGREEN Switch transmitter uses the CSR8670, which is the same bluetooth chip as the last image I sent.

aliexpress.com
Smarter Shopping, Better Living! Aliexpress.com
I've seen the transmitter on Amazon, and it has good reviews
clever rain
odd oasis
```matlab
Fs = 1e6;
t = 0:1/Fs:3;
pulsewidth = 2e-2;
pulseperiods = [0:10]*100e...
thank you very much that's work ,but something is wrong first pulse period(10ms) is true but other pulse period(20ms) is wrong
clever rain
clever rain
thank you very much that's work ,but something is wrong first pulse period(10ms)...

that is first pulse

that is second and other pulse

 odd oasis
clever rain
thank you very much that's work ,but something is wrong first pulse period(10ms)...
odd oasis
clever rain
thank you very much that's work ,but something is wrong first pulse period(10ms)...
Ah, rectpuls is centered around x=0, so some displacement will be needed to shift the negative portion of the first pulse to get the first pulse right. Otherwise, you can just change pulsewidth from 2e-2 to 1e-2.
clever rain
odd oasis
Ah, `rectpuls` is centered around x=0, so some displacement will be needed to sh...
I chanced but first pulse 0.05ms other pulses 0.1s
first pulse

second pulse
 clever rain
second pulse
clever rain
clever rain
second pulse
ıt s have to start 1 not 0.995
odd oasis
Yes, the pulse is centered at x=0. You will have to shift the entire time to compensate for the negative half of the first pulse.
clever rain

 humble whale
Hi friends. First time posting in the Adafruit Discord! I have the PAM8302 amp board. Unfortunately I'm experiencing quite a bit of distortion. I'm powering it from 5V DC with a 8ohm speaker. Should the SHDN in be left floating? THanks for any help!
 lucid anchor
humble whale
Hi friends. First time posting in the Adafruit Discord! I have the PAM8302 amp ...
lucid anchor
humble whale
Hi friends. First time posting in the Adafruit Discord! I have the PAM8302 amp ...
Welcome! I am not super up on audio, so I'm probably not much help, but a quick look at a project that uses it has the SD pin not connected to anything, so I think that's ok. My only thought is have you tried tweaking the volume pot on the board? I'm wondering if, like most anything audio-related, when you have the volume too high, it distorts. Worth checking if you haven't already. But that's all I have to suggest! Someone else might have better troubleshooting ideas. But be patient - the folks who reply most on here are community members, so they answer when they can.
humble whale
lucid anchor
Welcome! I am not super up on audio, so I'm probably not much help, but a quick ...
Thank you for the quick reply and help. Yes, I've tried adjustng on both ends (output of the device feeing it and also nout attentuation trim onthe board) yet unfortunately still distortion at any volume level. Darn.
lucid anchor
humble whale
Thank you for the quick reply and help. Yes, I've tried adjustng on both ends (o...
We don't encourage crossposting, but you might get better help in #help-with-projects, simply because more folks hang out in that channel than this one. I suggest reposting your question there the next time you're around.
 rapid merlin
I remember in using a speaker as a microphone for some high school physics experiment, is that possible in CircuitPython? I don’t see an PWMAudioIn class lol
odd oasis
rapid merlin
I remember in using a speaker as a microphone for some high school physics exper...
No, that’s not possible, unfortunately. PWM audio works due to its ability to simulate analog signals over digital outputs. The inverse, however, doesn’t work that way. Most, if not all, microcontrollers can’t reliably receive analog signals on a digital input due to a gray area voltage range between logic high and logic low. You’ll need to use an analog pin to receive audio signals.
rapid merlin
Neat, the RP2040 feather’s analog pins can also do digital, might have to play with that
 inland matrix
rapid merlin
Neat, the RP2040 feather’s analog pins can also do digital, might have to play w...
inland matrix
rapid merlin
Neat, the RP2040 feather’s analog pins can also do digital, might have to play w...
That works for almost every analog pin on a microcontroller, with the notable exception of A6 and A7 on SMD 328-based Arduinos like the Nano and Pro Mini
odd oasis
If you're thinking about attempting to output and input audio on the same pin, you may be able to, but definitely not simultaneously. The ADC and digital output peripherals are typically separate, meaning you can't run both on one pin at the same time.
You might also need separate external circuitry to amplify the input to voltages readable by the RP2040 ADC...
bronze locust
Is the power draw of a powered speaker negligible when it's getting zero line-in signal? Or is there a noticeable idling overhead (or is "idling" the wrong way to think about it)
random bone
bronze locust
Is the power draw of a powered speaker negligible when it's getting zero line-in...
It depends on the kind of amplifier that's being used to drive the speaker. A class A amplifier has a high quiescent current. But most powered speakers are not class A, they're probably class AB or D. https://www.quora.com/Do-class-D-amplifiers-use-less-quiescent-current-than-Class-A-B-amplifiers
bronze locust
Thanks @random bone! This also gives me the right terms to look further into it.
versed torrent
@bronze locust one thing to be aware of is that this is only true if the signal is truly zero V. I have seen some people send signals that weren't AC coupled to a powered speaker not realizing thier silence had a small DC component... Causing the speaker to use power continuously.
bronze locust
versed torrent
<@779893951285035018> one thing to be aware of is that this is only true if the ...
Ah, thanks. Would the headphone jack of my laptop with nothing playing be zero? (It's not just floating, the speaker is actually quiet)
versed torrent
Yeah - headphone outs of commercial equipment will be "AC-coupled" and be outputting zero volts at silence. You only need to worry about things like modular synths, and DIY audio circuits.
bronze locust
nice. And for the Adafruit RPi DAC board https://learn.adafruit.com/assets/66513, I guess the capacitors C4 and C6 (region B3 in the schematic) mean its output is AC coupled as well?
 dull basalt
If you fail to plug in a load, but do plug in a 1/8" stereo plug to a modern headphone jack .. say for a television .. and have the volume up, does it risk damage to the TV?
(I use a 1/8" stereo splitter as a cheap splice to connect headphones to the end of an audio cable that runs to the heaphone jack of the TV and stays plugged into the TV 24/7 but I disconnect the far end where the headphones plug in).
solemn flint
That sounds okay to me. It would generally behave as the same sort of open circuit as not having the cable plugged in at all.
dull basalt
Thanks @solemn flint - I try to keep it loaded but convenience makes that less than likely at times. ;)
as an aside I get monster RF hash off my PC's headphone jack when I plug a (dual) RCA to stereo adaptor cable into it.
whoops I meant input jack (mic jack).
I have a nice shortwave set with stereo RCA output jacks.
I get 9 pounds of noise on the S-meter when that cable is connected to the PC.
(eton satellit recent model)
 covert portal
I have this adafruit mic amp thingy, which is alright but it picks up a lot of background noise. I've heard I can desolder the onboard mic to attach it to a 3.5mm jack but does anyone know which parts I need to connect? I assume it's the two pins but I don't know which is which


 odd oasis
covert portal
I have this adafruit mic amp thingy, which is alright but it picks up a lot of b...
odd oasis
covert portal
I have this adafruit mic amp thingy, which is alright but it picks up a lot of b...
It varies by device. A TRS stereo microphone, for example, would likely have Tip+Ring1 on one audio channel, Ring2 on the other, and Sleeve to ground, while a TRRS headset would use tip and ring 1 for left and right channels, microphone to sleeve, and common ground on ring2. There is surprisingly little standard available for such a common plug, part of the reason why you often see like 6 of these plugs on the back of old PC sound cards...
covert portal
odd oasis
It varies by device. A TRS stereo microphone, for example, would likely have Tip...
I can probably trial and error which spots to use on the 3.5mm jack end - I was more asking about the pins on the mic amp thing https://shop.pimoroni.com/products/adafruit-electret-microphone-amplifier
odd oasis
Oh, the microphone is soldered in on the mic and amp through-hole pins?
covert portal
I believe so, yeah
my guess would be mic > microphone ring, amp > ground but it's just a guess
odd oasis
My guess would have been the reverse, but I haven't looked at it yet...
covert portal
also, just checked the manual that came with the mic, so I know the standard of the rings
let me see if I can trial and error it by tapping wires together
odd oasis
It might not even make a difference, if I'm thinking about it now...
covert portal
hmm, doesn't seem to pick up
the mic is CTIA standard so I did sleeve > mic and ring2 > ground but it didn't seem to make a difference
I was just touching the wires to the solder points though
odd oasis
Have you soldered the TRRS breakout ends of the wires?
 odd oasis
FYI, you'll get better results with your connections if you solder one end. You need pressure to maintain a connection otherwise, and trying to do so on four unsoldered ends is far more difficult than two.
covert portal
I figured/hoped this would be enough to tell if it was working
odd oasis
It doesn't matter which end you choose to solder first, but I strongly recommend you choose one and test that way.
Wires are easy enough to desolder from my experience, if you have a solder sucker.
covert portal
Yeah, just more of a pain if it doesn't work lol
I guess I'm pretty confident that the leads are correct on the TRSS...
odd oasis
Better that than indeterminate test results though haha
covert portal
Let's see if it makes a difference

welp, you were totally right - worked first time
 azure panther
I have an MP3 with a bitrate of 192 kb/s, which will not play on my pi. I've been advised to try lowering it to 128 or 98 kb/s. Can it be raised back up to 192 kb/s if these two lower numbers don't work?
odd oasis
Not without losses, from my understanding. It would be best to save a copy before making experimental modifications.
azure panther
Cool thanks. This pi isn't playing known good MP3s so I'm going to try another pi
Is there a low-overhead website that will allow me to play sounds? I want to make sure my audio port is working first
dull basalt
I use a local application (audacity). Pretty sure it's ported to other systems besides Linux.
Should be able to write a file at other sampling rates as well, though I don't remember what it'd do if it was sourcing a higher bitrate.
azure panther
I meant more that would have files I can play, Audacity from my experience is for editing files you already have. The files I have aren't working
dull basalt
i installed enough audio tools in linux to have some samples provided with those tools (in particular, to test left, right and combined L+R speakers ;)
archive.org often offers ogg vorbis files which I think are audio-only or maybe they're also used in video with a soundtrack.
Some artists used to publish directly to archive.org.
You might find Grateful Dead, John Popper (Blues Traveler) and also Dave Matthews there.
azure panther
I think something's wrong with my audio jack. I dropped something metal and shorted some contacts nearby a few days ago. I'm going to try a fresh pi.
Nope, not my pi. Let me test the speakers
Speakers work. So it's some kind of software issue
dull basalt
For desktop amd64 linux I like pasystray to adjust sound volume and select channels.
So I can choose a different sink and source.
Including my logitech headphones and the built in audio jacks on the desktop PC chassis.
odd oasis
Is your Pi configured to output audio over HDMI, perhaps?
azure panther
.....
You can't see but I'm making a "disappointed in myself" face rn
I always always always forget that that's the default
there it is
lucid anchor
odd oasis
Is your Pi configured to output audio over HDMI, perhaps?
Oh, seriously? That's the default? I haven't run into this yet, but I almost certainly would have.
azure panther
lucid anchor
Oh, seriously? That's the default? I haven't run into this yet, but I almost cer...
Yuuuuup. It's real annoying
odd oasis
I wasn't 100% sure, but I recall reading that somewhere as I setup my Pi 4...
lucid anchor
Oof.
azure panther
Interestingly for some reason now the two options are:
0 Headphones
1 MAI PCM i2s-hifi-0
Previously 1 was something about HDMI
azure panther
@hazy hound It wasn't the bitrate, it was the default setting of the pi being to output audio over HDMI!
azure panther
how would I go about adding "empty" space to an .mp3? Like just no sound for a few seconds
using Audacity
ahh the key I was looking for was "silence" lol,
 lethal slate
Enjoy it.
 trim steeple

“Has anybody been able to record and plot the 40khz signals from an ultrasonic rangefinder? Here in Audacity I changed the sample rate to 96khz, but the frequency analysis window is only showing up to 20khz. I also tried Sonic Visualizer. https://t.co/Y4y71EXIlI“

 Twitter
·
random bone
trim steeple
https://twitter.com/dcbriccetti/status/1495872261202616321
Twitter
·
random bone
trim steeple
https://twitter.com/dcbriccetti/status/1495872261202616321
see the project rate in the lower left: it's still only 44100 kHz
trim steeple
random bone
see the project rate in the lower left: it's still only 44100 kHz
Hey, @random bone
 random bone
I think you want to set the rate before you import the data?
trim steeple
I set the rate, then made the recording. Exported and loaded into Sonic Visualizer:

Also set to 96khz here:
 random bone
you're recording an analog signal?
last prawn
trim steeple
Also set to 96khz here:
Hrmmm, did you actually use your macbook microphone? It might not let you record above 20khz
trim steeple
Output from HC-SR04 into MacBook Pro’s mic near left speaker.
trim steeple
I could try USB or the “mic in” analog jack.
last prawn
I wouldn't really trust that apple mic or line in to not severely bandlimit your signals.
 fickle leaf
You will need a special audio interface for frequencies above 20kHz.
trim steeple
My goal is to visualize the 8 40khz pulses from the rangefinder, to make it more real for my students.
random bone
that may be easier done with an oscilloscope
last prawn
Based on your recording theres a brick wall aroudn 20k, and then it applied dither.
trim steeple
@random bone Oscilloscope with a mic plugged into it?
random bone
yes
or output signal from the rangefinder , if the mic is not sensitive to those freqs
last prawn
Finding a mic that has a good frequency response that high probably won't be easy either (you could try a cheap reference mic). I'd go straight out of the range finder
trim steeple
I’m hoping to see a square wave of the 8 cycles at 40khz, somewhere.
random bone
CGrover has a lot of audio experience
trim steeple
The range finder only would reveal the trigger and echo signals. (Not the 8 pulses.)
last prawn
If you wanted to use an audio interface you'll probably need something that goes up to 192k to guarantee the input filter isn't cutting out 40k. 96k is cutting it close ( 96k will want to filter anything out above 48k - but since filters aren't ideal it probably starts lower)
trim steeple
Well, good to know it’s not something easy that I’m missing. This may be more trouble than it’s worth.
fickle leaf
Even with a super audio interface, finding a capable microphone presents a challenge.
trim steeple
It can be enough to show the kids the realtime Audacity recording lighting up real big when there’s nothing they can hear. (As I hold the rangefinder’s speaker over the MacBook’s mic at the left speaker.)
fickle leaf
Can you tap into the rangefinder’s output amplifier with the scope’s probe?
random bone
would the mic from an ultrasonic rangefinder be fine? If you have another to sacrific?
this is one of those cheap rangefinders that everybody sells for Arduino, etc., right?
trim steeple
random bone
would the mic from an ultrasonic rangefinder be fine? If you have another to sac...
Oh, fantastic idea.
trim steeple
random bone
this is one of those cheap rangefinders that everybody sells for Arduino, etc., ...
Yes
random bone
you could tap into the mic on the original rangefinder
trim steeple
random bone
you could tap into the mic on the original rangefinder
Oh, and see the echoed pulses?
random bone
yes.
looking at one of these, it looks the identical transducer is used for both sending and receiving. That's not so surprising: you can use a speaker as a simple microphone
trim steeple
Thanks, all, for the great info and suggestions!
random bone
the terminals are accessible on the back.
If you have a dog whistle, you could demonstrate that too
trim steeple
random bone
If you have a dog whistle, you could demonstrate that too
Hah! I think I’ll order one.
last prawn
Wow... manufacturers still don't measure frequency response above 20k... thats frustrating. Most microphones will go above that and it doesn't really matter if they aren't flat if you know the response.
fickle leaf
There used to be some debate about the benefits of capturing ultrasound frequencies to recreate harmonics in the range of the ear, but not much became of that.
last prawn
Yeah, considering the snake oiliness of the industry is feels like not measuring up there is leaving money on the table so I'm just surprised they don't.
Measurement is an area where capturing high frequencies is useful (we get requests in the ghz range at the company I'm at). Also, we used to pitch a lot down when I did sound design and having that extended frequency range helped a lot.
trim steeple
Could this be the 8 pulses? (I’m new with Oscilloscopes, and I have a tiny one.) I probed the speaker connectors so these are outgoing.

 primal lagoon
trim steeple
primal lagoon
trim steeple
Take a look at Bat detectors. I did a lot of work many years ago on these (Before expensive commercial ones arrived). They can tell the calls of bats apart (Audible and visual). A cheap version would be adequate as you already know what signal you are looking for. We were using laptops and headphones to watch them.
glacial spruce
trim steeple
Sure looks like it to me
clear cliff
@trim steeple , I am using a 80KHz capable PDM microphone to detect and FFT an ultrasonic (~38KHz) mechanical remote on a Pi Pico. The SPH0641LU4H-1. I also made a breakout board for it, and it only cost me about $40 to get four boards and the parts.: https://oshpark.com/shared_projects/nfaNGKb1 (Schematic here: https://oshwlab.com/ZapWizard/radiation-king-radio_copy)
 median prawn
Would this form a bandpass?
 versed torrent
i don’t think so
glacial spruce
median prawn
Would this form a bandpass?
No, that's basically what's known as a "capacitive divider"
median prawn
glacial spruce
No, that's basically what's known as a "capacitive divider"
Ok, I'll look into those
I had a feeling that if it did form a bandpass I would've seen it before
 tall mango
What equipment would i need to get a line out from USB?
solemn flint
tall mango
What equipment would i need to get a line out from USB?
The obvious answer is a USB audio adapter, sometimes called a DAC. Are you looking for a particular chip suggestion?
tall mango
I tried a sabrent USB DAC, but it only has a headphone output and I'm not sure they're the same
solemn flint
They're not the same, but you can get a line-out signal from them in a pinch by adjusting the volume. You'd probably get higher quality from a dedicated line-out adapter, though.
tall mango
Yeah, I'm looking to make a cassette recording setup with an old cassette deck I got
solemn flint
Audio quality is probably not a huge concern, then, so that should work fine.
nocturne stone
Would I be able to use a TS3008 or a TS8675 to receive l/r audio signals AND transmit earbud MIC to the module?
https://www.tinyosshop.com/index.php?route=product/product&filter_name=ts3008&filter_description=true&filter_sub_category=true&product_id=1120
https://www.tinyosshop.com/index.php?route=product/product&filter_name=ts8675&filter_description=true&filter_sub_category=true&product_id=1121
I'm aware I can use the l/r audio signals on these, but I can't tell if it supports outputting the MIC signal
TS3008 is a high performance, cost effective, low power and compact solution Bluetooth 5.0 audio modules.
TS8675 is a high performance, cost effective, low power and compact solution Bluetooth 5.0 modules. The Bluetooth module provides a complete 2.4GHz Bluetooth system based on the BlueCore CSR8675 chipset which is a single chip radio and baseband IC for Blu
Would they go through the "SPK" lines?
odd oasis
nocturne stone
Would I be able to use a TS3008 or a TS8675 to receive l/r audio signals AND tra...
I see MIC lines for microphone input, and SPK for audio output. Could you clarify what you’re trying to do?
 pearl depot
Hi! Quick question, is it by any chance possible to use this featherwing https://www.adafruit.com/product/3436 to have direct access to the SD card as well? As in, on top of using it as a player, I'd like to read and write some data to that SD card. Haven't found any info about that yet.

Bend all audio files to your will with the Adafruit Music Maker FeatherWing + Amplifier! It's a fun-size version of our Music Maker shield for Arduino, and similar to our other ...
odd oasis
pearl depot
Hi! Quick question, is it by any chance possible to use this featherwing https:/...
The SD card shares the same SPI SCK, MISO, and MOSI pins with the VS1053, and has its own CS pin. All the pinouts are there in the learn guide, and you can learn more about SPI here: https://learn.adafruit.com/circuitpython-basics-i2c-and-spi/spi-devices
The code will be different if you’re not using circuitpython, of course, but the wiring and hardware concepts are all relevant regardless.

Adafruit Learning System
Learn how to talk to I2C and SPI devices with CircuitPython!
pearl depot
odd oasis
The SD card shares the same SPI SCK, MISO, and MOSI pins with the VS1053, and ha...
oooh right! I can then select who I'm talking to depending on what I'm sending through SPI. Was focusing on needing separate pins for some reason. Thank you! ^^
 boreal pilot
Hey all, recently installed this speaker in my system and it works great. However, there’s a slight buzz before it plays the first sound. Any way I can fix this?

I’ve ran a 104 capacitor between the audio put pin from the arduino and the audio in from the amp. Didn’t seem to do much
glacial spruce
boreal pilot
I’ve ran a 104 capacitor between the audio put pin from the arduino and the audi...
I'm unclear as to where you installed the capacitors, but it could be that it's picking up noise before there's an audio signal. Maybe a 10kΩ resistor from the audio input of the amplifier to ground to absorb stray signals could help.
Alternatively, you could control the power/enable signal to the audio amplifier and only activate it when the rest of the system is ready.
boreal pilot
Those arent bad ideas, ill give them a shot, thanks!
The capacitor is installed between my audio outpin pin (A0) to the L+ input on the amplifier
glacial spruce
boreal pilot
The capacitor is installed between my audio outpin pin (A0) to the L+ input on t...
So more of a high-pass/coupling capacitor than a filter.
dull basalt
What is analog filtering?
 deft silo
it's just filtering of an audio signal without using digital means as i understand it
e.g. using an op amp with a negative feedback loop
oh! anyone got any opinions on this module

The Pi Hut
Hey, have you heard the good news? With Adafruit STEMMA boards you can easily and safely plug sensors and devices together, like this Adafruit STEMMA Speaker - Plug and Play Audio Amplifier. Like the name implies, it's got a class D audio amplifier on board, and our favorite little 1 Watt 8 ohm speaker.Connecting it up
not expecting audiophile sound or anything
just, would like a basic speaker
 haughty zenith
I'm too lazy to do anything about it, but I suddenly imagine with the right software a pi pico connected to an sdcard could make an awesome mp3 player
boreal pilot
Any way to prevent my arduino from making a clicking sound everytime a sound starts and stops playing?
boreal pilot
(fixed the audio loudness issue)
 weary gyro
It depends on the audio library you are using. Clicking from audio PWM outputs (like that from standard Arduino) is usually caused by the audio PWM driver being stopped and started, instead of continuously running. When PWM stops, the output voltage goes to zero, but for PWM the output should continue but at 50% duty cycle. One way to solve this is to "play silence". Another is to do something like analogWrite(audioPin, 512) immediately after stopping sound, but you may still get clicks
boreal pilot
I think the "play silence" solution might work best for me, i can just run it at the beginning
weary gyro
Which audio library are you using?
weary gyro
oh so not Arduino
boreal pilot
I suppose not
its a Feather RP2040.
so i guess closer to a raspberry pi than an arduino, lol.
weary gyro
No, you're right the first time. It's more like an Arduino, but "Arduino" and "CircuitPython" are two very different ways of programming Arduino-class boards
boreal pilot
I see.
weary gyro
In the CircuitPython case, I would recommend using AudioMixer instead of playing the MP3 directly with AudioOut.play()
Let me find an example
boreal pilot
Sweet, thanks!
weary gyro
# instead of doing something like this:
data = open("test.mp3", "rb")
mp3 = audiomp3.MP3Decoder(data)
audio = audioio.AudioOut(board.A0)
audio.play(mp3)
while audio.playing:
  pass

# try this instead:
mixer = audiomixer.Mixer(voice_count=1, sample_rate=22050, channel_count=1,
                         bits_per_sample=16, samples_signed=True)
audio.play(mixer) # attach mixer to audio playback
data = open("test.mp3", "rb")
mp3 = audiomp3.MP3Decoder(data)
# tell first mixer voice to play mp3
mixer.voice[0].play(mp3)
I assume your code looks like the top part. When the audio file is finished, CircuitPython shuts down the AudioOut. In the second part, an AudioMixer is created and attached to the AudioOut. This keeps things running, and then you tell the different mixer voices to play
boreal pilot
Interesting, thats awesome. Thanks for letting me know!
Now I just have to fix my VERY janky speaker. I nudge it a little bit and it shorts something out and makes my board reset.
can I ask you about that @weary gyro ?
weary gyro
I'd have to know what your audio output filter circuitry looks like. Speakers can like a short-circuit to microcontrollers, so that could be the problem. I would recommend feeding to a little powered speaker (like an old bluetooth speaker) or maybe even headphones. And I recommend using a circuit like this: https://github.com/todbot/circuitpython-tricks/blob/main/larger-tricks/docs/breakbeat_sampleplayer_wiring.png

GitHub
Some CircuitPython tricks, mostly reminders to myself - circuitpython-tricks/breakbeat_sampleplayer_wiring.png at main · todbot/circuitpython-tricks
(that circuit is for this demo: https://twitter.com/todbot/status/1494899839871512577)
boreal pilot


Unfortunately I’m limited to having a speaker in the unit.
it's an interactive toy thing
it's super super janky.
weary gyro
oh! also another thing. PWM Audio on CircuitPython can crash the board if you are writing to the CIRCUITPY drive while the program is running. I recommend stopping your program with Ctrl-C in the REPL before saving code.py or writing MP3 files
boreal pilot
Interesting okay
weary gyro
oh so you're using an amp, so I think your audio section is okay. I suspect it's the CircuitPython PWM Audio crashing problem.
boreal pilot
interesting.
weary gyro
I've experienced this problem so much I opened an issue https://github.com/adafruit/circuitpython/issues/6005
 weary gyro
hey I've seen/done worse 🙂
boreal pilot
I was told from someone here to add a 10k ohm resistor from the input on the amp to ground as a bit of a filter.
might be picking up some outside interference
weary gyro
you need an RC (resistor/capcitor) filter on the digital PWM output of the RP2040 chip to turn it into an analog signal. I don't think it would be picking up interference. If you had nothing, you'd probably not hear anything bad. Your little amp will probably filter it fine
boreal pilot
even though there's a buzzing at the beginning?
weary gyro
Not sure what that is. I'd need to hear it.
If it's a high-pitched arhythmic sort of harsh noise that happens just at the start, that's your computer bogging down the RP2040 accessing the CIRCUITPY drive.
If it's a regular high-pitched noise, it could be power supply noise from whatever power supply you have driving your board or your PC's power supply if it's connected via USB.
In both cases, try driving your board entirely from battery, no computer, no AC power
boreal pilot
weary gyro
That sounds like a capacitor charging up. Do you have a wiring diagram of how you have the RP2040 board hooked up to that little amp?
And does that noise happen every time you play a sound after the code starts running? e.g. if you play a sound -> stop -> play a sound in code?
boreal pilot

thats a 104 capacitor
No, it only buzzes after startup. every other time works fine.
odd oasis
boreal pilot
No, it only buzzes after startup. every other time works fine.
If you have a capacitor charging up at startup, one possible workaround is to wire the SHDN pin to a GPIO and have it grounded for a short delay to allow the capacitor time to charge, before sending logic high to enable the amp?
boreal pilot
To be honest I’m not sure why the capacitor is in there. It was just recommended by a professor
tall mango
Is an "Audio Distribution Block" just a bunch of RCA jacks in parallel?
In that case could i just make my own with some RCA plugs?
lethal slate
import asyncio
import board
import time
import usb_midi
import adafruit_midi
from adafruit_midi.note_on import NoteOn
from adafruit_midi.note_off import NoteOff
from neopixel import NeoPixel
from adafruit_seesaw.seesaw import Seesaw
from adafruit_seesaw.analoginput import AnalogInput

def bpm_to_t(rate):
    return 60/rate/4.0

class Ticker:
    def __init__(self):
        self.bpm = 20
        self.tick = bpm_to_t(self.bpm)
        self.note = 38
        self.running = True
        self.tock = 0

async def loop(ticker):
    midi = adafruit_midi.MIDI(midi_in=usb_midi.ports[0],
        midi_out=usb_midi.ports[1],
        in_channel=1,
        out_channel=1)
    while ticker.running:
        midi.send(NoteOff(ticker.note, 0))
        midi.send(NoteOn(ticker.note, 120))
        await asyncio.sleep(ticker.tick)
async def read_ain(ticker):
    seesaw = Seesaw(board.I2C())
    a7 = AnalogInput(seesaw, 7)
    while True:
        raw = a7.value
        ticker.bpm = int(raw/1023*120)+20
        ticker.tick = bpm_to_t(ticker.bpm)
        await asyncio.sleep(0.1)

async def main():
    ticker = Ticker()
    await asyncio.gather(
        loop(ticker),
        read_ain(ticker)
    )
asyncio.run(main())
MIDI Click Track
fickle leaf
boreal pilot
To be honest I’m not sure why the capacitor is in there. It was just recommended...
That amplifier already has DC blocking capacitors on the input pins on-board, so the external series cap on L+ isn’t necessary. A 10k resistor across L- and L+ could help; pin A0 is in a high-impedance state when the board first starts up so the amp inputs will likely pick up some random CPU noise during initialization.
Connecting the SDWN pin to a GPIO pin has a similar timing issue. The state of the GPIO pin is high during startup and won’t squelch the amp until after startup. The GPIO pin is actually in a high impedance state like the A0 pin. It just looks like a logic high because of the amp’s internal pull up resistor on the SDWN pin.
A capacitor on the SDWN pin to ground might help, but a 10uf cap would only provide a few milliseconds of squelching after power is supplied. Might be worth an experiment if the 10k resistor doesn’t do the trick.
boreal pilot
weary gyro
```py
# instead of doing something like this:
data = open("test.mp3", "rb")
mp3 ...
this gives me "audiomixer" is not defined
weary gyro
boreal pilot
this gives me "audiomixer" is not defined
sorry that was a code fragment, you need to import audiomixer at the top of your file
boreal pilot
Thanks! is that a library I need to find myself?
or is it built into the board
nvm all good
it's pre built into my board
weary gyro
boreal pilot
No, it only buzzes after startup. every other time works fine.
Then I think the startup buzzing is just something you'll have to deal with because of the particulars of doing PWM audio with that little amp board
boreal pilot
Ah okay
weary gyro
If you can experiment, you may want to try powering the amp from the "USB" (5V) pin instead of the 3V pin. That amp can be driven from 2.7V- 5.5V and maybe the noise is coming from the Pico. Or if your project is battery powered, run the amp directly off the battery. Chasing noise is a common pastime in audio projects
boreal pilot
I'm using a voltage step-up for the speaker
Now i have to find out why my speaker is constantly crashing. It's really strange
sometimes it crashes so hard it goes into safe mode, apparently.
weary gyro
not sure what you mean by the speaker crashing
but PWM audio in CircuitPython can cause CircuitPython to crash some times, especially if you're reading/writing to code.py or other CIRCUITPY drive files
boreal pilot
would anyone know why this is happening? it's definatley stumping me lol.
glacial spruce
boreal pilot
would anyone know why this is happening? it's definatley stumping me lol.
No, we can't know, we can only guess. I'm guessing a data format problem, a power/ground interference issue, or clock/data issues.
odd oasis
Easiest way is to hook up your output to an oscilloscope, if you have access to one?
Anything outside of that is basically careful guesswork...
boreal pilot
odd oasis
Easiest way is to hook up your output to an oscilloscope, if you have access to ...
I believe we do. At the university
Might be able to look into it tomorrow
boreal pilot
Would it have something to do with the quality of this amp?

When I have no speaker in it works perfectly. Nothing wrong
glacial spruce
How can you tell with no speaker?
boreal pilot
However I feel as though I’ve damaged the chip itself
boreal pilot
glacial spruce
How can you tell with no speaker?
The code works and it doesn’t reset and crash
glacial spruce
Note that the soldering on those pins looks iffy
boreal pilot
glacial spruce
Note that the soldering on those pins looks iffy
Yeah I just desoldered it
That blotch in the upper corner is leading me to suspect that something is wrong with it
boreal pilot
Removed my amp from the board and discovered an awful soldering job. Guaranteed something was bridging
boreal pilot
https://learn.adafruit.com/stereo-3-7w-class-d-audio-amplifier/downloads is telling me not to use this as a pre-amp

is this my downfall?
fickle leaf
boreal pilot
https://learn.adafruit.com/stereo-3-7w-class-d-audio-amplifier/downloads is tell...
It’s specifically designed for outputting to speakers rather than boosting a signal as an input to another amp. That’s why the guide says it can’t be used as pre-amp. Your first video shows the output of the L side going to a speaker as it should.
glacial spruce
Yes, a power amp produces a speaker level signal and a preamp produces a line level signal. Worse, a class D power amp produces a horrible pulse wave that only averages to the desired signal. A speaker filters this out due to its inductance and mechanical limits, so the high frequency garbage isn't a problem. But putting that signal into an input will make a hash of it.
fickle leaf
However some of the soldering of the input, power, and ground pins looks iffy, particularly the second ground pin.
glacial spruce
When my fridge died, I was disinclined to shell out $90 for a new CPU board, especially when it was obvious the original one had some bad solder joints and a burnt resistor. I didn't have a 2 ohm 2 watt resistor, so I made one out of eight 1 ohm 1/2 watt resistors. I bought an appropriate replacement resistor (uprated to 5 watts) but it ran just fine for years with the bodged one.
boreal pilot
I think I found my issue.
It was actually software side.
it still kinda janks out which im not sure why
But it's significantly better
So it will play once, jank tf out, crash, go again and be completely fine
Would anyone be so kind as to take a look at my code? Theres something i HAVE to be doing wrong.
dull basalt
hey so I am using the PAM8302 amp board connected to a 4ohm 3watt speaker. The issue is that I don't know if my board is shorted, or maybe this version of the board is notorious with having similar problems to this, or if this is normal lol, but I have checked over and over again from a variety of sources to make sure my wiring was all correct, and I came down to one thing. I have no idea if this is a problem or not, but the positive and negative outputs both replicate each others voltage, if I just have the wires their own connected to the speaker, the resulting voltage across both of them is of similar proportions to my vdc input, however if i directly connect a ground cable to the negative audio output, both of them share ground. I will upload a picture of my circuitry if needed tommorow, thanks in advance for anyone who might know anything about the subject.
 harsh gust
Hi, guys. I'm kinda new to this community and I hope this channel is the right place to throw this question.
I'm really a newbie when it comes to building circuits and make things in general. I'm kinda crashing learning all the knowledge I need to know (it's pretty tough)
Anyways, I am trying to build a device that can detect ants stridulation with using piezo mic.
So I need an amplifier for that.
I found 3 different amplifier circuit so far.
But I don't know exactly what their difference is, and which one would be the best one for my use.
I would be so much appreciated if anybody can teach me the difference, or give me any advice.
Thank you.
dull basalt
harsh gust
opt 1 : https://makingcircuits.com/blog/diy-contact-mic-circuit/
opt 2: https://...
I recommend just getting something similar to the MAX9814 (make sure to get the one with no mic pre-soldered, since you already have one. The options you have sent here appear to be attempting to make an amp from scratch, which is probably not what you want, as it will come to worse and more expensive than if you buy a mic amp from the internet (such as the MAX9814)
harsh gust
dull basalt
I recommend just getting something similar to the MAX9814 (make sure to get the ...
thank you for your comment!
I'm taking a class that is focused on building circuits so I want to at least give it a try. And I already bought couple of components already..
Why building one of those circuit could be worse? and what is the difference with max9814?
I am curious. I will consider purchasing max9814 but I would like to know the difference, and at least try making those circuits.
glacial spruce
harsh gust
Why building one of those circuit could be worse? and what is the difference wit...
It doesn't have to be worse, but mic amplifiers are working with low level signals, so they're susceptible to noise, interference, and feedback. However, if you're looking at building circuits, rolling your own mic amp can be quite instructive.
harsh gust
glacial spruce
It doesn't have to be worse, but mic amplifiers are working with low level signa...
thank you for your reply! Then what would be the difference between those circuits? And do you also think that using max9814 is the best option?
glacial spruce
Between which circuits? As with all engineering, what is "best" depends on what your parameters are.
My version of "best" often boils down to "what can I build without parts I have to wait for"
dull basalt
harsh gust
Why building one of those circuit could be worse? and what is the difference wit...
adding onto what madbodger said, smaller boards are typically preferred since a consumer-produced circuit with low-grade tools will likely end up in the current travelling a further distance, causing delays, electricity has speed too, obviously this delay won't be too noticable in an amp, but if you want to do real-time manipulation, it might cause some challenges
harsh gust
dull basalt
adding onto what madbodger said, smaller boards are typically preferred since a ...
ohh I got what you mean. Thank you so much for your insights.
harsh gust
glacial spruce
Between which circuits? As with all engineering, what is "best" depends on what...
oh, ok so, since my purpose is to record ants sound and it is quite meticulous and sophisticated work,
I thought I should come up with an amp that has more gain boost and filter/noise cancelling feature
harsh gust
glacial spruce
Between which circuits? As with all engineering, what is "best" depends on what...
I was curious about the difference between option 1,2,3 I mentioned above.
glacial spruce
Option 1 is very basic, and will not provide much gain/sensitivity.
harsh gust
At this point, not in a sense of which one would be the best, but literally, what would be the difference
oh ok
glacial spruce
Option 2 gives a good bit more gain (up to 50dB), and the ability to tune the filtering. However, with that much gain, you will need to use good construction techniques, power supply filtering, and shielding to keep it from boosting certain frequencies unevenly or even oscillating. It's a decent design, but will require some engineering to work optimally.
Option 3 is a little simpler, and will give less gain.
The MAX9814 can offer the most gain (60dB) if you crank it all the way up. It's designed for an electric microphone instead of a piezo, but the impedance is high in both cases, so it should present much of a problem. You could, if you wanted, try adding a buffer (like option 1) between a piezo sensor and the electret chip, which would give a little extra bonus gain, and some impedance buffering.
For your use case, high gain and low noise are probably going to be your dominant parameters.
You might look at some high performance precision op-amps if you want to try rolling your own (the OPA211 might be a reasonable choice, it's extremely low noise and not horribly expensive)
harsh gust
ohh wow
glacial spruce
The OPA1611 might be a good choice too, and has a more attractive price. The various chip vendors offer lots of helpful information like this handy guide on op-amp noise: https://www.ti.com/lit/an/sboa345/sboa345.pdf
harsh gust
glacial spruce
The OPA1611 might be a good choice too, and has a more attractive price. The va...
wow thank you so much for your help.
First I have found this guy on bandcamp
glacial spruce
Your use case is a little unusual, but intriguing
harsh gust

he is an artist making use of ants sounds he recorded and he offers a simple circuitry that he insists he used for the recording
glacial spruce
That is bizarre and cool. I'm amused that he offers the schematics of his circuitry with the album
harsh gust
 glacial spruce
LM386? That is a truly peculiar choice
harsh gust
this was the one and my classmates said it would not be a suitable choice
yeah that was what my collegues said too
and since I am such a newbie of these electronics stuff
I asked them and they suggested me those 3 options
glacial spruce
We all start out as beginners. The LM386 is a low power speaker amplifier, it's not really designed as a pre-amp. It would basically sort of work, but there are better choices out there.
Time for me to head out to dinner.
harsh gust
glacial spruce
Time for me to head out to dinner.
thank you so much for your insight. Have good one!
harsh gust
I just made a simple piezo-amp circuit and connected to my computer
but that is the result. And it keeps producing that noise no matter there is a 9V batteries or not.
And whenever I touch the piezo, it goes like that like a lightsaber

this is the one that I followed. I'm not trying to use that but just tried building one to see how it sounds like.
glacial spruce
That's hum pickup from AC wiring in the area
harsh gust


 harsh gust
glacial spruce
That's hum pickup from AC wiring in the area
harsh gust
glacial spruce
That's hum pickup from AC wiring in the area
what is ac wiring? you mean the 1/4' female component?
glacial spruce
No, I mean mains wiring, like to wall outlets
You probably will want shielded wiring to connectors like that, however.
harsh gust
ohh which parts should I use shielded wiring?
harsh gust
glacial spruce
No, I mean mains wiring, like to wall outlets
so you're saying it's bc of the power outlets near my table, and that is somehow affecting this one, right?
glacial spruce
I'm saying that since the circuitry is not shielded, it's picking up interference from the mains wiring in the area.
Since you're working with low level signals, I would recommend shielding everything.
harsh gust
glacial spruce
Since you're working with low level signals, I would recommend shielding everyth...
ohh how do I do so?
glacial spruce
Place all the circuitry in a grounded metal box, basically
harsh gust
glacial spruce
Place all the circuitry in a grounded metal box, basically
a-ha! thank you a lot really. Do you see any problem with soldering by any chance?
glacial spruce
The soldering looks fine to me, although one of the wires to the jack looks unsoldered.
harsh gust
ohh ok I will look into that
harsh gust
glacial spruce
The soldering looks fine to me, although one of the wires to the jack looks unso...
thank you so much really!
harsh gust
glacial spruce
Place all the circuitry in a grounded metal box, basically
but this guy seems like he did it without anh shielding in the end of this vid

It's amazing what a little disk can do ... when it's layered with piezoelectric crystals. Piezo disks are impressively sensitive to vibration and can easily be adapted to work as a contact microphones. The trick is the preamp - a basic circuit used to match the piezo's signal to levels compatible with modern audio gear inputs. The resulting p...
 vast jasper
I have a problem with my I2S MAX98357A breakout board from Sparkfun, It works but there weird parasite noise, How can I reduce or event surpress them ?
fickle leaf
harsh gust
a-ha! thank you a lot really. Do you see any problem with soldering by any chanc...
@harsh gust It’s not entirely clear in the third photo, but it looks like the blue wire isn’t going to the “sleeve” connection ear on the 1/4-inch jack. If that’s the case, all you would hear is 60Hz hum and noise.
Can you post another photo of the jack from a different angle?
lethal slate
vast jasper
I have a problem with my I2S MAX98357A breakout board from Sparkfun, It works bu...
The docs say you can leave the GAIN pin floating, but that can be a problem. What kind of noise are you hearing?
harsh gust
fickle leaf
Can you post another photo of the jack from a different angle?
ohhh sorry I checked this message now
right on! I will take a pic right now


 fickle leaf
harsh gust
ohhh sorry I checked this message now
fickle leaf
harsh gust
ohhh sorry I checked this message now
@harsh gust I suspect that the Blue wire is going to the Switch terminal rather than the Sleeve. It appears that the Red wire is connected to the correct terminal (Tip).
 harsh gust
fickle leaf
<@!457074697176219658> I suspect that the Blue wire is going to the Switch termi...
harsh gust
fickle leaf
<@!457074697176219658> I suspect that the Blue wire is going to the Switch termi...
ohh so the blue wire(negative ground stuff) should be connected on the other side?
vast jasper
lethal slate
The docs say you can leave the GAIN pin floating, but that can be a problem. Wha...
lethal slate
Which board are you using to drive the MAX98357A? It this an MP3 file or WAV?
vast jasper
lethal slate
Which board are you using to drive the MAX98357A? It this an MP3 file or WAV?
A feather RP2040 and it's a wav file
lethal slate
Are you using CircuitPython? Noisy audio has been problem with the RP2040, but I haven't tried a recent build.
weary gyro
vast jasper
A feather RP2040 and it's a wav file
Is the WAV file saved as 16-bit unsigned PCM? And preferably mono, to start?
vast jasper
lethal slate
Are you using CircuitPython? Noisy audio has been problem with the RP2040, but I...
No micropython, an exemple from https://github.com/miketeachman/micropython-i2s-examples/blob/master/examples/play_wav_from_sdcard_blocking.py

GitHub
Examples for I2S support on microcontrollers that run MicroPython - micropython-i2s-examples/play_wav_from_sdcard_blocking.py at master · miketeachman/micropython-i2s-examples
vast jasper
weary gyro
Is the WAV file saved as 16-bit unsigned PCM? And preferably mono, to start?
PCM_S16LE according to the online mp3 to wav converter I used
weary gyro
vast jasper
PCM_S16LE according to the online mp3 to wav converter I used
That looks correct. What is your wiring to your I2S board? Which Feather RP2040 pins are you using? Also, what is your power to the I2S board?
vast jasper
weary gyro
That looks correct. What is your wiring to your I2S board? Which Feather RP2040 ...
11 for BCLK, 12 for LRCLK, and 13 for DIN and for power I use the board 3.3v power but I also tried using my adafruit buck converter with the USB pin and even the 5v from the USB pin
Can I add some capacitor and ferrite rings to meke the sound better ?
weary gyro
I don't think that would help. I don't know what the original audio is supposed to sound like, but it sounds a little like your speaker is blown or the power supply cannot put out enough power. (it's distorting mostly on the bass it seems? bass draws a lot more power than treble) Or perhaps the gain settings are too high. Do you have a WAV of silence you can play? If it plays back cleanly, then the problem is not noise that you could filter out, but probably an issue with power
vast jasper
weary gyro
I don't think that would help. I don't know what the original audio is supposed ...
maybe it's a speaker problem because it's a big 1.5W old computer speaker and it's a little bit shattered but i had a similar problem trying with headphone jack
weary gyro
I believe the MAX98357A is made for speakers and will distort headphones or line-in, unless the gain is turned very low
 vast jasper
weary gyro
I don't think that would help. I don't know what the original audio is supposed ...
vast jasper
weary gyro
I don't think that would help. I don't know what the original audio is supposed ...
i don't have one but I will try
harsh gust
fickle leaf
<@!457074697176219658> I suspect that the Blue wire is going to the Switch termi...
Hey I really appreciate this. I just switched the blue wire like you said and it now works properly!!
fickle leaf
harsh gust
Hey I really appreciate this. I just switched the blue wire like you said and it...
Super! Let us know how well the stridulation detector works. Would enjoy hearing some footsteps.
harsh gust
fickle leaf
Super! Let us know how well the stridulation detector works. Would enjoy hearing...
thank you!
harsh gust
fickle leaf
Super! Let us know how well the stridulation detector works. Would enjoy hearing...
May I ask one more question real quick?
glacial spruce
You just did 😆
harsh gust
lmaooo you got me

So I made this one on breadboard, and perfboard each.
It almost has zero noise. I cannot hear any. But the volume was kinda smaller than I need.
Anyways, it was really strange that even though they are both exactly the same circuit using same components,
the one built on breadboard has smaller volume than the one built on perfboard.
I checked over and over but it was clear that perfboard one had clearly louder volume than the breadboard one.
Why does this happen? anybody knows?
glacial spruce
Could be the transistors are different, or capacitance or leakage is absorbing the signal.
harsh gust
glacial spruce
Could be the transistors are different, or capacitance or leakage is absorbing t...
no I used exactly the same components
harsh gust
glacial spruce
Could be the transistors are different, or capacitance or leakage is absorbing t...
ohh so is there a higher possibility of leakage when it's built in breadboard?
fickle leaf
harsh gust
ohh so is there a higher possibility of leakage when it's built in breadboard?
Solderless breadboards occasionally have contact quality and reliability issues. There’s some built-in capacitance between contact strips, but that usually isn’t an issue at audio frequencies as in this case.
glacial spruce
harsh gust
no I used exactly the same components
Semiconductors vary a lot, even for the same part number. For an MPF-102, the forward transfer admittance (amplification, basically) can be anywhere from 1600 to 7500 µmhos.
lethal slate
Dealing with that variance is an important part of active circuit design.
median hemlock
Has anyone gotten audio recording and/or processing working on the CPX or CPB? I’m only coming up with VU meter type projects, which seems like wasted potential given microphone, memory, and speaker are all there nice and tidy.
odd oasis
The CPX runs an M0, so it’s pretty limited on memory for recording, and on the slower side for processing audio. I’d imagine the bluefruit has a much better potential in that regard, but haven’t seen an example myself.
median hemlock
Those are really good points. Has anyone tested the Teensy audio library port running on the Bluefruit?
weary gyro
Teensy Audio Library has only been ported to the SAMD51 as far as I know
tall mango
What are some possible fixes for a CD player that recognizes discs, but can't read the tracks or data? I've tried carefully cleaning the lens with a damp soft cloth, and adjusting any potentiometers. This CD player is from the late 80's so I'm not even sure if it's possible to fully revive it. It was working fine yesterday up until one point while playing a CD it just skipped and cut out.
It's a Technics SL-P115
glacial spruce
tall mango
What are some possible fixes for a CD player that recognizes discs, but can't re...
Do you have access to an oscilloscope?
tall mango
Not at the moment, but i might know a place that has one if it's necessary.
glacial spruce
In that case, I'd probably shotgun replace all the low-voltage electrolytic capacitors (especially in the power supply). They could be dried out and not working well enough. I've fixed a lot of electronics of that vintage the same way.
tall mango
Even if they're not bulging or leaking?
glacial spruce
A lot of them fail silently. You can test them if you have an ESR meter, but I don't, so I just replace 'em wholesale.

Unlike this mica capacitor from 1928, which is still fine.
 lethal slate
Whoah check out the magic eye.
tall mango
glacial spruce
A lot of them fail silently. You can test them if you have an ESR meter, but I ...
I'm not able to right now but I'll see what capacitors i have when i get back
Hopefully most of them are the same
glacial spruce
Yeah, that capacitor tester is a bit of a relic, but it's dandy for measuring things like the leakage of high voltage capacitors, as well as reforming them. It can do other tricks as well, such as characterizing the winding ratios of unknown transformers.
tall mango
It would be cool to get a whole setup of vintage electronic testing tools, but if i did they'd probably be outdated or barely working.
My cassette deck barely works as it is because it's so old and i accidentally broke it once only to somehow fix it
glacial spruce
During the lockdown, I amused myself by repairing my pile of broken old oscilloscopes.

Now I have a pile of working, but hopelessly obsolete scopes. I'm trying to figure out what to do with them.
 tall mango
Ooh, i love those round display ones
glacial spruce
I had this one display its own name. Not bad for a 75 year old instrument.
 tall mango
You could make it into a sound visualizer, I've always wanted to do that
Unfortunately i have zero experience with anything that has to do with oscillation, except for sound
 harsh gust
Hello guys! Been awhile.
Today I borrowed the ant colony from a friend of mine, and briefly tested out a simple piezo-preamp circuit on them that I built earlier.
I would like to ask a few questions regarding few issues I faced while I'm testing.
This is the first one. I thought it would be nice if I can get a little bit more gain. There was merely no noise, I could get the sound of ants touching and messing around with the piezo mic. No issues so far.
I disconnected the audio jack for a bit, and put it back on, tried recording again. This time, I could hear this humming noise.
Whenever I touched my macbook, it amplified like this.
This is the crazy part so I suggest you to maybe turn the volume down when you play it.
I tested over and over again and at some point, it started to make crazy noise like this.
The piezo mic was still working, getting the input but there was this crazy noise going on. Anybody guess what is this about?
I'm uploading few photos and video here also.


I took the piezo mic out of nest once it generates that crazy sounds but that is how it looks for now.

This was the piezo-preamp circuit that I used to test it out today.

But I am thinking of making this one for higher gain boost and noise control and test it out.
Could anybody help me out reading this circuit diagram?
I already prepared all the components I need for this one but it takes so much time for me to read it off of that kinda diagram to make one.
If anyone can make easier version of that with sth like Fritzing, I'd really appreciate it.
glacial spruce
harsh gust
I disconnected the audio jack for a bit, and put it back on, tried recording aga...
Probably one of your connections came loose
Or you were touching something with an electric field. Macbook power supplies come with a 2-prong plug and a 3-prong plug. You may want to try the other kind to reduce hum.
fickle leaf
Sometimes recording with the laptop running on battery only can help to reduce audio recording noise, too.
harsh gust
glacial spruce
Probably one of your connections came loose
what would be the best way to check which part of the connection causes problem? and what is the best way to prevent it?
harsh gust
glacial spruce
Or you were touching something with an electric field. Macbook power supplies c...
touching sth with an electric field? could you elaborate a little more? you talked about shielding cables and the components and stuff before, right? would shielding them and encasing them solve the problem?
harsh gust
glacial spruce
Or you were touching something with an electric field. Macbook power supplies c...
how is this noise issue related to whether using 2-prong plug or 3-prong plug?
@glacial spruce @fickle leaf But as yall can see in the photo, I wasn't even using a charger while I was recording.
fickle leaf
Are you feeding the signal into a 3-pin input connector (XLR)?
If so, that could be introducing some noise since one of the 3 pins on the 1/4” connector would be left open.
Is a 1/4-inch “instrument” input connector available?
harsh gust
fickle leaf
Are you feeding the signal into a 3-pin input connector (XLR)?
oh! I'm using 1/4" to XLR(3-prong)
so the 1/4" side is connected to the circuit and XLR is connected to my audio interface (apogee duet)
yeah 1/4" input connecter is available. I just used that cable just because that was the first cable I could find around me 😂
fickle leaf
That’s called a TRS to XLR adapter. Won’t work well in this situation. A regular 1/4” to 1/4” should work better.
harsh gust
So using XLR(3prong) socket on one end might be causing the humming issue?
fickle leaf
Yes. The XLR input pins are +signal, -signal, and ground. One of the signal inputs is left open using that cable.
If you look at the 1/4” side, you’ll notice three connections, the Tip, a Ring, and the ground Sleeve. TRS
It’s currently plugged into a jack that only touches the Tip and Sleeve. TS
fickle leaf
Perhaps. The open connection might be acting as a noise antenna.
harsh gust
fickle leaf
Perhaps. The open connection might be acting as a noise antenna.
that's interesting.
 worldly copper
glacial spruce
During the lockdown, I amused myself by repairing my pile of broken old oscillos...
worldly copper
glacial spruce
During the lockdown, I amused myself by repairing my pile of broken old oscillos...
where does one come across such a pile of broken old oscilloscopes to fix? for a friend...
glacial spruce
worldly copper
where does one come across such a pile of broken old oscilloscopes to fix? for a...
Hamfests mostly, but I also have the word out that I'm interested in odd old electronics, so people tip me off to junk sales and the like.
 worldly copper
glacial spruce
Hamfests mostly, but I also have the word out that I'm interested in odd old ele...
worldly copper
glacial spruce
Hamfests mostly, but I also have the word out that I'm interested in odd old ele...
hamfests? and ive got to make some electronics friend irl so they can tip me off to these things too lol
glacial spruce
worldly copper
hamfests? and ive got to make some electronics friend irl so they can tip me off...
Normally I'd suggest going to the arrl.org website and looking at their list of hamfests to find some near you, but their site is down for maintenance at the moment.
solemn flint
The local electronics swap meet has been defunct for the last two years because of covid restrictions, but it's back next month! 🙌
azure panther
solemn flint
The local electronics swap meet has been defunct for the last two years because ...
Nature...nature is healing.
 fair forge
Can y'all check me here? I'm doing a continuity test on the mic... I put the black lead on the case of the mic and the red - if it's positive, it should still be 1, correct? Thanks
glacial spruce
fair forge
Can y'all check me here? I'm doing a continuity test on the mic... I put the bla...
I don't understand your question. The red lead to what? 1 what?
fair forge
Nevermind... I figured it out. Forgot I posted this.
But to satisfy curiosity... I'm using a multimeter to check polarity and I forgot if one was the pos or neg if the black wire on the multimeter is on the case of the mic.
tall mango
Is there another reason to consider as to why my CD player is failing? I've tried relubricating it, replacing capacitors, cleaning the lens, adjusting potentiometers, and loosening/tightening the laser assembly. It recognizes the disc is there, but it can't read anything off of it. It doesn't have any belts or gears in the actual assembly, it seems to be using magnetic coils to move the laser head, and same with focusing the lens. It's a Technics SL-P115 and has a SOAD32A laser assembly in it, which I can't find online at a cheap price.
random bone
tall mango
Is there another reason to consider as to why my CD player is failing? I've trie...
are you sure it's spinning up? https://audiokarma.org more than one person has motor troubles. The lasers can go bad too, I've heard of that.
interesting no belts. I have fixed my elderly Sony player by replacing the belt (first time with a matching rubber band).
tall mango
The only belt is in the disc tray eject mechanism
I just tore down the laser assembly completely and wiped down the lens components, I'm putting it back together now
random bone
i have not seen them get dirty, but it depends on the atmosphere in your house
random bone
tall mango
The only belt is in the disc tray eject mechanism
yes, now that I remember, maybe that was just eject also
tall mango
Now it just won't eject
Which is strange, i didn't touch the eject mechanism
Also the laser focus lens isn't moving up and down anymore, it's moving side to side
 whole pasture
question for y'all
I have two of these

one has the proper adapter for my headphones, and one has a good mic
I'm tempted to just snip off this bit, swap it, and solder+heatshrink

will that work?
azure panther
If you can figure out which wires go to which, it should
but those wires are very small.
I've tried to work with them before, I gave up and found another solution.
whole pasture
oh I've successfully soldered tiny audio wires before (making use of that youthful dexterity while I still have it lol)
I'm just wondering if there's any weird amplifier stuff that I gotta watch out for
azure panther
I don't think so? But my audio experience isn't super extensive.
whole pasture

Update: janktastic, but it works!
(buying these two units & frankensteining was STILL cheaper than a good mic that works w/ my headphones)
azure panther
That's great!
golden lark
Is there anyone that could help me make a spectrum analyzer for some iregularly shaped RGB matrixes? All I know is I need 35 bins and a way to map the loudness from 0 to 25. (specifically looking for a fourier transorm)
I originally started with this https://learn.adafruit.com/fft-fun-with-fourier-transforms/spectrum-analyzer but attempted to draw the bars in columns.
 glacial spruce
Looks like that link covers the complicated bits (Fourier), you just need a mapping from the output range to your LED column size.
 mental axle
Heya. Im currently tinkering with a mems microphone and to check the quality i first plugged it into my cp2615 devkit.
the quality sounds a bit robotic. Any clue why? inmp441 is the mic. maybe it's just not that good?
recorded at 44khz 24bit
dull basalt
doesn't sound that bad except the mic need a foam cover for sure...
mental axle
No it's not bad. But it doesnt sound 16bits 44khz good.
glacial spruce
It could be your playback hardware doesn't support that resolution and sampling rate. If it's resampling it at 44.1kHz, there are going to be artifacts.
mental axle
im using cp2615 i2s-usb bridge
it can do 16/24 bit and 44/48khz
24bit 44khz should be the correct values for the inmp441. i tried 44 and 48 and it sounds the same :/
 young spire
I guess I'm just not hearing what part of it is robotic?
It's certainly not a large diaphragm condenser mic in terms of quality, but that's a given considering it's MEMS.
mental axle
i heard a comparison recording from this mic, on youtube which does not show the robotic part. so i know it can do it without. just trying to figure out how to get rid of it
glacial spruce
You're comparing 44kHz/24 bit audio with heavily compressed youtube audio?
mental axle
yesnt. i know that youtube does not compress this artifact away, because i observed this robotic noise i mean also in other youtube videos
i can send you an example if you would like
young spire
mental axle
yesnt. i know that youtube does not compress this artifact away, because i obser...
Probably some filtering they're doing along the way, but the fact that you've heard whatever this "robotic" sound is in another recording from another device, seems to indicate something inherent to either this product or your playback equipment, rather than something malfunctioning with your unit.
mental axle
young spire
Probably some filtering they're doing along the way, but the fact that you've he...
Probably. Or it is the cp2615 that has some known incompatibilities as i now found out.
My playback equipment is verified working perfectly.
I will just get another mems or an adc directly and try that with the cp2615. Thank you :)
ah yeah. i almost forgot. i just tried to get the esp32 hooked up as a noise/sine generator to the cp2615, but i just cant get them to talk to each other. (esp32 as i2s slave)
@young spire
 olive cairn
I got an audio fx board with 2x2w amps. I wired it up to a single speaker and tested the pre-loaded audio file by shorting trigger pin 0 to ground. It worked fine then. When I soldered my wires to a button, most of the trigger pins appeared to become shorted to ground permanently. The trigger pin caused a constant loop as if the button was held down.
I desoldered the trigger pin 0 and ground wires. An ohmmeter shows between 400-1700 ohm resistance between the ground pin and most of the trigger pins. I can't see any visible short. Any ideas on what I did wrong and if I can undo it?
glacial spruce
olive cairn
I desoldered the trigger pin 0 and ground wires. An ohmmeter shows between 400-1...
It could be that a short circuit or static electricity damaged the chip
olive cairn
glacial spruce
It could be that a short circuit or static electricity damaged the chip
Thank you. Are there any other obvious possibilities? That doesn't seem like an easily fixable problem.
random bone
olive cairn
I got an audio fx board with 2x2w amps. I wired it up to a single speaker and te...
You are measuring internal resistances on the chip. I tested with the same or a similar board, and I see more like 20k. If you reverse the test leads, do you get the same measurement?
I think this is likely to be a wiring problem. Now the that button is removed, does it no longer work at all?
A clear photo of the pins in question and both sides of the board would help.
olive cairn
random bone
You are measuring internal resistances on the chip. I tested with the same or a ...
I desoldered everything, and the resistances were around 400 or 1.7k for most/all trigger pins to ground. I'm pretty sure reversing the leads gave the same results, or maybe that's what is causing variation between 400 and 1.7k . I believe the resistance is supposed to be around 100k. I can get a photo when I go home. I wiped it with a lint-free wipe and used copious compressed air to blow off any stray particles that might be shorting connectors, but neither of those did anything.
 glacial spruce
Is this powered or unpowered?
olive cairn
I measured the resistance unpowered. If it's powered, the circuit appears to be closed regardless of any button press or deliberate short by connecting bare wires to the pins.
glacial spruce
It could be that what you're really measuring is the conductance of the protection diodes.
 lyric galleon
Hey guys, right now I'm attempting to hack in an aux cable into the power amplifier section of my old sony icf-9650 AM/FM radio. I have a schematic of it (I can post if it'll help), and have determined the following:
- There is a white cable going from the main board to the tone-control (bass/treble knobs). This contains the audio signal that is roughly 0.2Vpp (measured with my oscilloscope).
- There is a 0.022uF capacitor connecting the IFT cans and the ground plane on the tone-control board. I'm assuming this is some sort of noise suppression stuff?
- I disconnected this white cable between the boards and connected it to the audio signal cable from a mono 3.5mm cable. I plugged this into my raspberry pi. The voltage level coming out of the pi is roughly 0.3Vpp.
- I connected my audio ground to the general ground of the radio (seems to be shared by everything).
- I cannot hear the audio coming out of the speaker. If I crank the volume ALLL the way up, I can faintly here the audio.
Any ideas?
 glacial spruce
Could be a signal bias issue: try connecting it before the coupling capacitor
lyric galleon

lemme see if i have another 0.47uF capacitor lying around
because the board is fairly inconvenient to access directly due to all the mechanical capacitor tuning stuff
glacial spruce
It doesn't have to be exactly 0.47µF. A smaller one will work, but you'll have less bass response, a larger one (within reason) is fine
lyric galleon
i've got a 0.1uF cap, should work for just a test
glacial spruce
Might be a little tinny sounding, but should let you know if it's likely to help.
lyric galleon
THAT DID IT
YOU SAVED MY PROJECT
THANK YOU
would it be a sin to just toss 5 0.1uF decoupling caps in parallel and call it a day
or is there anything more special about "audio" caps
or is that magic fairy dust
glacial spruce
No, that should be completely fine, as long as they're not high-K ceramic.
olive cairn
olive cairn
I got an audio fx board with 2x2w amps. I wired it up to a single speaker and te...
I took another crack at it. I threw a 10k resistor on the ground side of the switch for trigger pin 0. The board now only thinks the 0 pin is triggered when the button is pressed, so that's an improvement. On the other hand, it appears to not work for the hold-down-to-loop functionality ("TnnHOLDL.OGG" files). But I hadn't fried the chip, so that's good.
 turbid shoal
I'm looking to fix 2 SMD LEDs on a beat step pro midi controller. Can anyone tell me best way to figure out the LEDs type or is there a schematic?
glacial spruce
I have no idea on a schematic, but there aren't that many kinds of LEDs out there. Do you know what color they are/were?
dull basalt
turbid shoal
I'm looking to fix 2 SMD LEDs on a beat step pro midi controller. Can anyone tel...
got a pic / model+make of the midi controller ?
 keen cradle
HI Guys! I have been trying to get this display to work for the last 2 days and i am my wits end.
ITSBitsy 52840 express W Adafruit 2.13 Featherwing 1680 eink display
I load the code, Pins match their respective numbers in the code. But when I run it I get nothing.
I linked the wiring photo below
I want to double check to make sure I am fully wired up properly, what can i do for testing where the problem is?

 random bone
keen cradle
HI Guys! I have been trying to get this display to work for the last 2 days and ...
random bone
keen cradle
HI Guys! I have been trying to get this display to work for the last 2 days and ...
Since it's a FeatherWing, if you have a Feather board of some kind that can run this code, you could just plug that in directly and see if it works
tall mango
Anyone know of a good compact USB audio DAC IC? something around 48khz stereo should work
 median obsidian
So I just made my own stylophone but there seems to be something wrong with it
New to electronics, so I dont know where to start for a diagnosis
If anyone can help out that would be great
It was working fine for a bit then started making these tick noises.
Since the speaker is making noise I assume the speaker is fine and the connection are fine. Maybe a cap or an IC shorted or something.
No clue how to go about finish the problem. Any direction would be great
 zinc palm
I have a need for audio beat detection with CP and am wondering what the best approach would be. I'm using the Arduino Nano RP2040 Connect which has a PDM microphone, so I can sample audio data on a time basis. My thought is to pass that to a FFT processor to get a frequency breakdown and then analyze the resultant data interactively to get the necessary info. I've seen some options for doing this with Arduino but haven't come across any CP implementations yet. Anyone have any suggestions? Thanks.
glacial spruce
zinc palm
I have a need for audio beat detection with CP and am wondering what the best ap...
To get the beat, you may be able to use a simpler averaging/envelope detection algorithm instead of something as complex as FFT.
zinc palm
K. Can you point me in a direction to learn more about using the averaging/envelope detection approach?
glacial spruce
There's a slide deck that explains the concepts here: https://resources.mpi-inf.mpg.de/departments/d4/teaching/ss2010/mp_mm/2010_MuellerGrosche_Lecture_MusicProcessing_BeatTracking_handout.pdf
This thread includes a link to possibly useful source code: https://www.avrfreaks.net/forum/music-beat-detection-lilypad-wearable-target
AVR Freaks
I'm looking for a s/w algorithm for music beat detection.
 lucid oracle
I'm having quite a bit of trouble getting this microphone to work at 16 kHz sampling rate. I can only get it working up to 12 kHz. Has anyone else had success with this?
https://learn.adafruit.com/adafruit-i2s-mems-microphone-breakout?view=all

 odd oasis
lucid oracle
I'm having quite a bit of trouble getting this microphone to work at 16 kHz samp...
odd oasis
lucid oracle
I'm having quite a bit of trouble getting this microphone to work at 16 kHz samp...
When you say "trouble getting this microphone to work," what kind of errors or bad data are you getting?
lucid oracle
At 14 kHz sampling rate, the microphone outputs normally for a few seconds (maybe up to a minute) and then I get errors in the console (not sure what it's called, but the area at the bottom of the Arduino IDE that prints the uploading messages, etc.) to the likes of "java.lang out of heap." or something to that effect. This is making me think it's some sort of memory problem, but I'm not sure why that would be happening. I'm not storing any data in my code, just printing it directly to the serial monitor. I'm thinking maybe it has something to do with how the I2S library is handling things? Maybe I'm not clearing the buffer as fast as data is coming in. I would imagine that would be handled by the library.
Any sampling rate larger than 14 kHz and the data prints for a few less seconds than it does at 14 kHz (maybe for 10 seconds or so) and then stops printing altogether. No errors show up in the console area (not sure what it's called, but the area at the bottom of the Arduino IDE that prints the uploading messages, etc.)
I'm using a SAMD21 MCU. SparkFun's mini breakout version https://www.sparkfun.com/products/13664, but Adafruit's microphone breakout.
 smoky cairn
Hi all. Any Linux/ALSA audio experts here? Asked on #help-with-linux-sbcs #help-with-linux-sbcs message
tall mango
I have a bit of a problem, i got a Toyota stereo to work as a home stereo system, and i recently rewired it with a removable connector. The problem is now i don't hear a thing! I had L+/- and R+/- wired to the RCA connectors accordingly along with SGND on both ground terminals and i heard nothing. I tried disconnecting the L and R minus terminals but no difference
 glacial spruce
L+ is one pin, L- is another pin, and SGND is a third pin. RCA connectors only have a pin and a shell. How are you wiring these again?
tall mango
Right now L+ on the left channel, R+ on the right channel, and SGND on both channel grounds
glacial spruce
I wonder if the left signal is between L- and L+ instead of between SGND and L+
young spire
tall mango
I have a bit of a problem, i got a Toyota stereo to work as a home stereo system...
found a post online indicating SGND is for Fade? But like madbodger, curious the schematic of your prior wiring that worked
http://www.mr2.com/forums/threads/15667-Toyota-OEM-Stereo-Wiring-Information/page2
I happened to see this on SupraForums, and figured it would be very useful here as well- especially for those looking to upgrade to a newer OEM headunit.
median prawn
I want to have a highpass/lowpass fade between two signals controlled by a knob, what's the best way to do this?

just use a voltage controlled resistor in a RC filter? I ask because I've never used a VCR before
I guess I really want to know how to use a VCR, on Wikipedia there's only one schematic and it looks like I just need an input voltage and then I get a resistance between two pins, is that all there is to it?
last prawn
median prawn
I want to have a highpass/lowpass fade between two signals controlled by a knob,...
In terms of the audio, what is the goal? aka: When the knob is at 50% what do you expect? When its at 25%, 75%?
median prawn
last prawn
In terms of the audio, what is the goal? aka: When the knob is at 50% what d...
It to be at a given frequency, I can calculate what frequency it will be at on my own, that I know how to do
last prawn
ok, but like ,at 50% do you want both signals fully on? or is it ok that signal a is always lowpass and signal b is always highpass?
median prawn
both filters should be the same frequency
median prawn
last prawn
ok, but like ,at 50% do you want both signals fully on? or is it ok that signal ...
Always lowpass/highpass
last prawn
Cool, what you want to look up is a Crossover 🙂
(There is a DJ effect that is similar to what you're describing but a bit more complex)
The DJ effect isn't a crossover
median prawn
Cool I'll take a look at the circuits I find for that, I probably should've searched that but I wasn't sure enough on the term to put in the effort
last prawn

Audio crossovers are a type of electronic filter circuitry that splits an audio signal into two or more frequency ranges, so that the signals can be sent to loudspeaker drivers that are designed to operate within different frequency ranges. The crossover filters can be either active or passive. They are often described as two-way or three-way, w...
median prawn
Thanks!
glacial spruce
median prawn
Cool I'll take a look at the circuits I find for that, I probably should've sear...
Also "tone control".
median prawn
👍
fair forge
Hi y'all!
I'm running the following code on an ESP32-S3. The code works fine, but doesn't quite do what I want it to do. What I want is for all the LEDs to turn on simultaneously with sound activation... but this code moves more like a VU meter. Also, I want all the neopixels to be white, not yellow/green. I've been changing variables for a couple days now but can't seem to get it to do what I want. Can anyone help? Thanks!
from rainbowio import colorwheel
import board
import neopixel
from analogio import AnalogIn

led_pin = board.D6  # NeoPixel LED strand is connected to GPIO #0 / D0
n_pixels = 32  # Number of pixels you are using
dc_offset = 0  # DC offset in mic signal - if unusure, leave 0
noise = 100  # Noise/hum/interference in mic signal
samples = 60  # Length of buffer for dynamic level adjustment
top = n_pixels + 1  # Allow dot to go slightly off scale

peak = 0  # Used for falling dot
dot_count = 0  # Frame counter for delaying dot-falling speed
vol_count = 0  # Frame counter for storing past volume data

lvl = 0  # Current "dampened" audio level
min_level_avg = 0  # For dynamic adjustment of graph low & high
max_level_avg = 512```Full code...
glacial spruce
fair forge
Hi y'all!
I'm running the following code on an ESP32-S3. The code works fine, b...
To get white, you probably don't want to use colorWheel(), just set the pixels to white (I think that would be [255, 255, 255])
fair forge
Thanks @glacial spruce ! I got that one, but now have no idea how to make them all react simultaneously.
glacial spruce
I'm guessing there's a call (or array slice notation) to "set a bunch at once" or alternatively set them then do a global update. However I don't know what those methods are. It might be worth asking that question in #help-with-circuitpython
random bone
fair forge
Thanks <@348911944486486016> ! I got that one, but now have no idea how to make...
I'm not sure exactly what you want to do, but when you create the NeoPixel object, you can set auto_write to True or False. Default is True. If False, the strip will not be updated until you call .show(). So you can make all your changes and then do .show(), and the changes will appear to happen all at once.
If you want to set all the pixels to a single value, use .fill().
fair forge
I'll give that a shot when I get home... Definitely a path toward my understanding of this. Thanks!
tall mango
For splitting RCA signals, do i need an audio distribution block? They all seem really expensive for what I'm assuming is just some RCA connectors soldered in parallel.
glacial spruce
You don't need that, just some Y cables (or just cut some up and attach them yourself)
tall mango
It gets kinda messy, i can't just keep stringing Y cables together for all of my devices. Which is why i was wondering if there's some kind of splitter block that isn't super expensive.
glacial spruce
You could, of course, do just what you mentioned and solder a bunch of RCA connectors in parallel. Arrays of jacks are available inexpensively at many surplus vendors, such as this one: https://www.goldmine-elec-products.com/prodinfo.asp?number=G23612
tall mango
Ok I'm gonna try that. Hopefully I can find enough RCA jacks.
glacial spruce
If you have any multichannel audio amplifiers in your junk pile, they tend to have nice arrays of RCA jacks.
young spire
tall mango
For splitting RCA signals, do i need an audio distribution block? They all seem ...
Depends on what you need for signal integrity.
You don't need to worry much about reflections like with video signals, but if you have a 16-way passive split, you're likely to notice some signal degradation, especially if you're powering speakers directly from that RCA
 rare fog
Hi
I'm trying t play wav files on a Rp Pico using an Adafruit Max amplifier
it's working ok, but I get loud static sometimes
I'm thinking it might be caused by uneven power supply
Is there an easy way to introduce some capacitor or something into the board to even out fluctuations?
bronze locust
should I expect the sound quality from a $10 USB audio adapter (which as I understand it is a DAC) to be worse than the onboard audio of my ThinkPad?
 weak zealot
complete tossup tbh
as a broad note apple's usb c to 3.5 jacks are actually really high quality DACs and they're like 12$
they beat a handful of several hundred dollar units
bronze locust
a friend just told me that. What is going on there... why are they so much better than the rest of the industry?
is apple operating at a loss to attract customers to its white picket fence product line?
weak zealot
It's pretty interesting!

Audio Science Review (ASR) Forum
This is a review, detailed measurements and comparison of Apple's USB-C adapter to the current and last version of Google Pixel headphone adapters. The Apple adapter costs just $9 including one day shipping for free. The Google dongle costs $12.
Not that any of these are large by any stretch...
rare fog
I solved my static problems with the Rpi Pico by feeding the Pico and the Audio board directly from the power source. In the examples from Adafruit and others they feed the Audio board from the 3.3v out on the Pico, but that caused lots of static while the Pico was working
Strange that they wire it like that in the examples. But maybe it's my Pico that is faulty somehow
 scenic axle
bronze locust
a friend just told me that. What is going on there... why are they so much bett...
scenic axle
bronze locust
a friend just told me that. What is going on there... why are they so much bett...
Yeah so apparently the one bad thing about the apple dongles is that the amp isn't super powerful, but as long as you're not trying to drive something super crazy with them it'll work very very well
bronze locust
scenic axle
Yeah so apparently the one bad thing about the apple dongles is that the amp isn...
Just picked up this baby open box for $5.60 and plugged it into my powered stereo through a USB A to C adapter. Mwahaha, I have higher quality audio than my ears know how to tell the difference between!
scenic axle
Awesome! Yeah I used to be really big into the audiophile scene and I remember the apple dongles regularly sounding better than lots of DACs 10-20 times their price
bronze locust
Yeah I'm still truly baffled at that
scenic axle
It happens every once in a while. I'm lucky enough to own two pairs of genuine Sony MH755 IEMs (fancy word for earbuds), which were sold for $7 but regularly outperform IEMs that cost well over $1000
I own an ungodly number of headphones and earbuds and they are some of my favorites despite being the cheapest I own by far
bronze locust
what's the thing that happens every once in a while? that a high quality product is cheap to make, or that a mfr underprices a product?
like why is it that apple is able to sell a high quality device much cheaper than any other mfr does?
is it that they already have the moat of a high quality manufacturing process so it's cheap for them to produce products that are expensive for smaller companies to produce? and if so, shouldn't their bigger competitors also be able to do comparably?
scenic axle
Well I think Apple was able to do it because they have the capability to manufacture things very cheaply at large scales and have engineers that really know what they're doing
The sony thing was much more of an accident AFAIK
 cobalt rain
scenic axle
Well I think Apple was able to do it because they have the capability to manufac...
cobalt rain
scenic axle
Well I think Apple was able to do it because they have the capability to manufac...
Sony is the Apple of Japan. Their good stuff is really good.
My MDR V600 headphones are my reference standard.
scenic axle
cobalt rain
Sony is the Apple of Japan. Their good stuff is *really* good.
My MDR V600 head...
Oh yeah, their stuff is amazing, I just feel like making $7 pair of earbuds perfectly tuned to the harman target was unlikely to be entirely intentional
 mint laurel
I'm trying to get my RPi pico to play a wav file. I'm using an audio expansion card (https://www.waveshare.com/wiki/Pico-Audio) and I can't seem to get sound to come from the speakers. I've tested them though, and they work. Here's the code I'm attempting to use:
`import audiocore
import board
import audiobusio
wave_file = open("BingBong.wav", "rb")
wave = audiocore.WaveFile(wave_file)
audio = audiobusio.I2SOut(board.GP27, board.GP28, board.GP26)
while True:
audio.play(wave)
while audio.playing:
pass
`
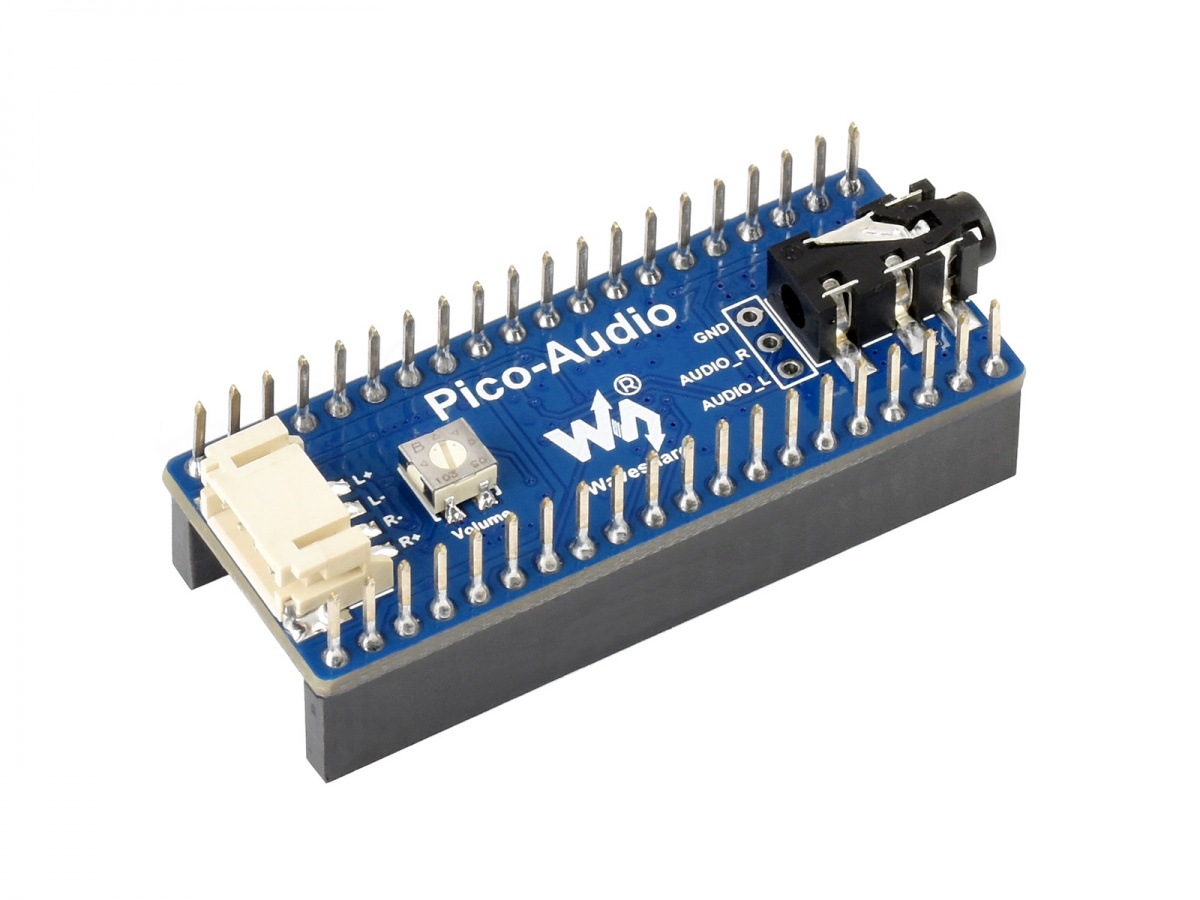

Is this the right place to be asking for help with this?
lucid anchor
mint laurel
Is this the right place to be asking for help with this?
Welcome! You'll probably get better help in #help-with-circuitpython, as it appears that's the language you're using. We discourage cross-posting in genera, but in this case, it's alright to post in the suggested channel. Good luck!
mint laurel
lucid anchor
Welcome! You'll probably get better help in <#537365702651150357>, as it appears...
I appreciate it!
lethal slate
Take out the "while True: " line. You're restarting the clip before it has a chance to produce any sound.
last prawn
lethal slate
Take out the "while True: " line. You're restarting the clip before it has a cha...
will it finish playing if the loop terminates? I have a feeling the 2nd while loop is supposed to be indented
(assuming this is supposed to play the sample over and over)
lethal slate
Yeah, I saw that this was discussed in the other channel.
 solar jasper
Any good, easy way of adding rca audio to a pi0?
I know how to add video. is a hat going to be the easiest and most space saving?
last prawn
I think there are hats with RCA built in - you might save more space with a different kind of output and an adapter though.
young spire
solar jasper
I know how to add video. is a hat going to be the easiest and most space saving...
Easiest is probably just going to be a cable adapter. Depending if you care about vertical space or horizontal space will determine that vs a HAT
lethal slate
 azure panther
This is annoying. I want to read the article but any link I click on adafruit's site leads me to the login page
glacial spruce
Yeah, I get that sometimes. Then I gotta go find my phone.
weary gyro
azure panther
This is annoying. I want to read the article but any link I click on adafruit's ...
I have that problem too. Some weird stale cookie. Clearing the cookies for *.adafruit.com let's me view pages without logging in
 terse maple
i wonder if the recommended non-DAC audio output should be some kind of delta-sigma modulation or PDM? PWM audio seems to need a lot of filtering. though you might need a MCU with a peripheral I/O state machine like PIO to do it with an acceptable CPU load?