
#help-with-wearables
1 messages · Page 6 of 1
 stark storm
That does look as it it might be tiled LED arrays. That would be a logical approach, if you want plenty of brightness. If you don't need all that brightness, one of the round LCD displays might be an option.
 dusty flower
oooh what round displays?
stark storm
SparkFun used to offer one, but it seems like they don't any more. This one is probably overkill https://www.displaymodule.com/products/dm-tftr34-359

DisplayModule
Round Screen 3.4 Inch Round Display 800*800
dusty flower
Wow! I didn't know they existed!
Very cool. Also more cost effective than wiring the many square displays.
stark storm
I didn't either, until someone else pointed them out to me!
 uncut rivet
Well, I'm glad we got this problem all squared away.
 rapid radish
Be sure to circle back when you've got it working...
stark storm
Perhaps when they get around to it...
 modest drum
I'm sure they wheel.
stark storm
That's one way to spin it.
uncut rivet
Clearly, I've unmasked a lot of punsters here.
 sleek ermine
 to all of you
 upper bolt
I wrapped it all up and here it is, a few wires on top need some concealing but overall I’m pretty happy with the design
@knotty depot how's it going? any chance to make a video of the patterns?
 knotty depot
I’ve recently stopped working on it, and working on a separate project, my coilgun.
Well, not recently, stopped working on it once I posted that last image
upper bolt
@upper bolt Hmm. I think it can be both a tool and a focus. I would consider pushing back on that thought process, and suggesting that both can be displayed, and should be.
@amber widget I wound up adding a "Tech Stories" section to the print book for the projects. They vary in length, and I don't have the ideal photos, but it flows well with the projects
Tech Stories in progress
upper bolt
Hey all, I have a question that isn't really about wearables, but came up while we were hacking some LED earrings, and would be interested to hear anyone's thoughts! It takes a sec to setup the question:
The setup: Some friends spent a week posting photos of objects they had balanced, and sort of did thought-explorations about why balancing stuff was enjoyable. This was to help a local museum do a twitter-based activity encouraging people to hack what's around them. Something I enjoyed was that when balancing things you could read through your fingers if stuff was off balance or precarious or solid. You couldn't see it with your eyes, but you could still "sense" it.
Now we are working on simple electronics activities. Like maybe paper circuits or making circuits out of pipe cleaner wire.
My question: when building electric circuits, there isn't really any human sense that can tell you if the circuit is flowing or not. We are using 3v,5v or 9v batteries. Can anyone how to make testing a circuit incorporate senses?
Like, using way to much power then you could feel the tingling... sounds unsafe though.
stark storm
You could stick small magnets to your fingers, and feel some torque caused by current (a fair amount of current, unless it was a coil) in a wire nearby. A low-frequency AC current would make the magnet vibrate.
upper bolt
really?! that sounds awesome! I wonder how much current would register
even if that's not useful for breadboards, it would be cool to use like in a house or something
 chrome kayak
Hey guys, first post here. Could anyone tell me what a safe input current is for the Gemma M0. I've tried searching the literature but have come up short. I'm planning on building something as a gift, and using the USB port and a 5V 2A wall adapter. I'm hoping that this is suitable and won't harm the board. Thanks!
stark storm
That should be fine, the wall adapter simply offers 5V at up to 2A. The Gemma will simply draw as much current as it needs.
chrome kayak
@stark storm thanks a bunch!
 light wigeon
I use one of those LiPo packs with a USB-A jack (meant to recharge cellular phones while mobile) to power small projects (incl. Gemma M0 based) without any connection to a computer or development environment (stand-alone, working projects).
 whole creek
Lets say theoretically that I wanted to build a pair of fpv googles, where could I find 90 hz screens that're really smalle?
stark storm
When you say "90Hz" do you mean the signalling rate, the scan rate, the motion blur frequency, or what? @whole creek
That said, OLED displays like Sony ECX335B are fast.
rapid radish
Microdisplays tend to be hard to find and expensive in small quantities. Tek Gear stocks a collection, for instance: https://www.tekgear.com/microdisplays.html
whole creek
honestly, almost looking at jurry rigging a phone screen
stark storm
I kind of wondered about the 90Hz requirement. I had been considering a CRT based one that could manage that easily, but it's big, heavy, has complex optics, and requires high voltage.
uncut rivet
Yah, that requirement really Hz.
rapid radish
Some microdisplays are monochrome panels with RGB backlights, so they run at triple the normal frame rates or higher to produce color.
 surreal leaf
Hi every one, I like to to a project with conductive thread. I an adafruit video nail polish was suggested to fix the knots of the thread. Could I also use solventless clue instead?
I'm asking because I have already solventless clue and would have to by nail polish.
stark storm
I think that would be fine.
surreal leaf
Okay, thanks
 formal grove
Is there a way to get higher amperage conductive thread, like could I use 20 gauge wire as thread or something? I'm trying to run some small vibration motors on a wearable project, and 100 mA isn't enough. (BTW ping me if you can, I'm not watching discord rn)
rapid radish
@formal grove One simple option would be to use multiple strands in parallel.
stark storm
There's this very flexible 30 gauge wire https://www.adafruit.com/product/3164

Silicone-sheathing wire is super-flexible and soft, and its also strong! Able to handle up to 200°C and up to 600V, it will do when PVC covered wire wimps out. We like this wire for ...
It says it's good for 800mA, which should be plenty
formal grove
@stark storm That looks perfect, thank you so much!
 quaint rock
how do i protect a bone conducting transducer without sugru?
can I wrap it in electrical tape and then medical tape it to the desired area?
stark storm
That or something like Tegaderm might work.
quaint rock
what about duct tape?
dumb question i know
but im serious. I'm wondering if duct tape's ok because you don't have to insulate if the salty liquid never reaches the device, right?
stark storm
You could also try the sort of conformal coating used to protect circuitry from moisture. Nail polish, epoxy, or hot glue might work too. There's also sticks-to-itself sealing tape used for protecting things going through walls and the like.
stark storm
It depends on which part you're covering. For the contact transducers like that, I was envisioning one surface left uncovered, and just the wiring end protected, but I could have the wrong idea.
stark storm
@formal grove Just in case it's still relevant, AdaFruit just announced 36 gauge stranded wire (not in stock yet): https://www.adafruit.com/product/4733

Nothing is going to be as thin and flexible as this wire - it feels a little like waxed thread but can carry current! You could use this in wearables or very fine assemblies where weight and ...
upper bolt
Just a share, making electric / paper hats with mosfet touch activated circuits
That thread looks awesome @stark storm generally I avoid conductive thread like the plague but this looks like something I could work with
 spring oar
Halloween’s around the corner, time to get my lilypads!
 glass dagger
Is it possible to use a charging backpack with the CPX? When I power it through the battery it tries to charge itself - I am used to using an itsy bitsy m4 which has a specific battery port...
 dense raven
@spring oar why not flora?
spring oar
What’s flora
stark storm

FLORA is Adafruit's fully-featured wearable electronics platform. It's a round, sewable, Arduino-compatible microcontroller designed to empower amazing wearables projects.FLORA comes ...
 vague hatch
Hey everyone, I'm working with the Feather 32u4 Bluetooth LE board and one problem I'm running into is everything in my loop function doesn't work until a packet a received. If I remove
uint8_t len = readPacket(&ble, BLE_READPACKET_TIMEOUT);
everything else in my loop works. If I add it in, everything in my main loop stops until a packet is received. How do I make it so my main loop executes and then this runs in the background (almost asynchronous)
stark storm
I'm not familiar with the readPacket() function, but presumably there's a companion function that tells whether there's a packet available. Then, in the loop, call that one and only call readPacket() if there's a packet. There is no real background functionality unless you write it yourself.
vague hatch
Do you know which function that is?
stark storm
Nope, like I said, I'm not familiar with the readPacket() function.
vague hatch
I feel like I'm doing something massively wrong because it literally just hangs 😦
rapid radish
Not to state the obvious, but maybe you could pass in a shorter timeout?
vague hatch
Sorry for delay (no pun intended). I have it set to 500ms, but the delay I'm seeing is sometimes multiple seconds. It's definitely the readPacket function because if I remove it, everything works great.
stark storm
Apparently readPacket() is a "blocking" function, however it's odd that there's not a working timeout option. Which library is this from?
vague hatch
At the top of my code is has this as a prototype:
uint8_t readPacket(Adafruit_BLE *ble, uint16_t timeout);
So I think that's a reference to the constructor of this file (sorry still trying to learn)?
https://github.com/adafruit/Adafruit_BluefruitLE_nRF51/blob/master/Adafruit_BLE.h

GitHub
Arduino library for nRF51822-based Adafruit Bluefruit LE modules - adafruit/Adafruit_BluefruitLE_nRF51
stark storm
Okay, I'm looking through that library. Apparently there isn't a "is data available?" call, but there is an RX callback you can use to automatically receive data when it arrives, without waiting for it. Look at the "callbacks" example for how to do so.
vague hatch
This is the project I am using as a reference: https://learn.adafruit.com/neopixel-matrix-snowflake-sweater/overview

instead of it just being a single design for each snowflake, I'm trying to make it go through multiple designs in the loop; but then add a button in the app that allows you to change through the animated items. This project works great when you flip between snowflake designs that are "static" since you would always be waiting for input, but when you want to loop through designs to animate, that's when you hit the "delay", because the read function is waiting for a control change to continue. Interestingly, the video doesn't show what happens after the showAllSnowflakes function runs.
vague hatch
Ah, here is the piece with the read function
https://github.com/adafruit/Adafruit_Learning_System_Guides/blob/master/Bluetooth_NeoMatrix_Snowflake/feather_neomatrix_bluetooth_snowflake/packetParser.cpp
GitHub
Programs and scripts to display "inline" in Adafruit Learning System guides - adafruit/Adafruit_Learning_System_Guides
stark storm
Oh, that's a different one...
light wigeon
hello everyone, I'm looking for 3D accelerometer (MEMS, integrated with Gyroscope, magnetometer and I2C interface ) with the lowest possible measurement range (accelerations of human body are two low) . would u please recommend me some ? Thank you
stark storm
This one is a good bet https://www.adafruit.com/product/3463

The NXP Precision 9DoF breakout combines two of the best motion sensors we've tested here at Adafruit: The FXOS8700 3-Axis accelerometer and magnetometer, and the FXAS21002 3-axis ...
Another possibility (useful if you're using a Feather and want NeoPixel, LED, or sound outputs) is https://www.adafruit.com/product/3988

The Adafruit Feather series gives you lots of options for a small, portable, rechargeable microcontroller board. Perfect for fitting into your next prop build! This FeatherWing will unlock ...
light wigeon
thank you, im kinda looking for something combines all 3 accel /gyro/mag together in one i want to build my own module
as https://invensense.tdk.com/products/motion-tracking/9-axis/mpu-9250/ but i see it's not recommended
stark storm
You mean a single chip solution?
light wigeon
yes
stark storm
Maybe the BNO085?
rapid radish
The industry trend is to separate out the magnetometer from a 6-axis accel/gyro chip, since putting them together tends to compromise performance. So all of the newest, best parts will not be 9-axis, though they will often have a separate slave interface to hook a magnetometer to.
If you're making your own module, my favorite consumer-level chips these days are the LSM6DSx series from ST, and the ICM-42xxx series from TDK/Invensense.
 terse moon
I was considering making some 6DOF breakouts for my store
light wigeon
appreciate your help guys
vague hatch
Sorry to bubble this up again, but any thoughts on how I can work through the bluetooth blocking function? Also, another thing I don't understand is in following this project, how come I can use the feather that outputs 3.3v @ 500mah of output for a 8x8 display that's 5v at 3amp when fully enabled? Sorry, trying my best to learn :(
Feather 32u4 BLE: https://www.adafruit.com/product/2829
8x8 Neopixel display: https://www.adafruit.com/product/2734
Project: https://learn.adafruit.com/neopixel-matrix-snowflake-sweater/assemble-circuit

Feather is the new development board from Adafruit, and like its namesake it is thin, light, and lets you fly! We designed Feather to be a new standard for portable microcontroller ...
Put on your sunglasses before wiring up this LED matrix - 64 eye-blistering RGB LEDs adorn the Adafruit DotStar Matrix for a blast of configurable color. Arranged in an 8x8 matrix, each ...
 short fjord
I need to glue two silicone pieces together - but it has to stay flexible. Any ideas what could work?
I was thinking shoe glue or something like that
light wigeon
https://www.thistothat.com/. Sorry, no silicone on that list. Useful site though.
short fjord
ah thanks will check it out
short fjord
hm I think that is too big for my application 😄
Some very small parts I am trying to glue together
vague hatch
Sorry to bump this up a third time, but didn't have any luck in the forums as well. Would anyone be willing to help work with me to see if we can figure out how to get around the blocking problem for the snowflake sweater project? I'm even willing to pay for your time in return for the education (hope this isn't against the rules, but this is blocking me from continueing the project so would really like to find a solution).
 exotic tendon
@vague hatch paste your working (if blocking) code using pastebin. gtg now but someone is likely to be able to help. also see "blink without delay" examples which show how to use millis() rather than delay
vague hatch
@exotic tendon it is the default project as-is. GitHub source: https://github.com/adafruit/Adafruit_Learning_System_Guides/blob/master/Bluetooth_NeoMatrix_Snowflake/feather_neomatrix_bluetooth_snowflake/feather_neomatrix_bluetooth_snowflake.ino
Specifically, in void loop(void) the blocking function is this:
/* Wait for new data to arrive */
  uint8_t len = readPacket(&ble, BLE_READPACKET_TIMEOUT);
If you have showAllSnowflakes being called per the button press, you'll notice the delay waiting for the readPacket loop.
GitHub
Programs and scripts to display "inline" in Adafruit Learning System guides - adafruit/Adafruit_Learning_System_Guides
rapid radish
I had a quick look at the readPacket code, and the timeout behavior is a bit surprising, in that it is the timeout between bytes rather than an overall timeout to receive a packet. So if the Bluetooth interface is getting some other data mixed in with the format it expects, it could end up blocking indefinitely waiting for a valid packet.
But you should be able to reduce the timeout value if you just want to loop quicker to perform animation, etc.
vague hatch
The value for the readPacket item I have set to 500ms, but it definitely doesn't seem to return back that quick regardless of what you set. From what I've seen, sometimes it can be 5+ seconds, other times it's almost instant. It's pretty weird behavior.
    while (ble->available()) {
      char c =  ble->read();
      if (c == '!') {
        replyidx = 0;
      }
      packetbuffer[replyidx] = c;
      replyidx++;
      timeout = origtimeout;
    }
This piece here is where I think the majority of the "lag" is happening, since timeout is getting another 500ms each loop
This may have been what you mentioned now that I reread your response. sorry, still trying to learn this is one of my first projects 😦
 supple flint
hi is there anyone here familiar with accelerometer and transformation matrix?
not too sure where else i should ask this
stark storm
There's some discussion on that in #help-with-robotics
supple flint
hmm i did a quick search using in:#help-with-robotics matrix and in:#help-with-robotics rotate but i don't seem to find anything relevant
do you think if i should start a new discussion there?
stark storm
It's worth a try. There are a few people around who understand such matrices, but they're not always here, so you may have to wait for a while before anyone responds, but yes, a specific question is a good idea.
supple flint
alright thanks
 ancient flame
Has anyone else been having screen problems with the pulse-ox meter?
The led lights up, and it beeps, but no display.
I guess I should try stronger batteries.
light wigeon
Anybody have a good link to an article on attaching a neopixel (silicone sleeved) strip to clothing? Specifically an arm, so it's going to be pretty dynamic and moving. I know I can glue it, but was thinking sewing might be a better option. But I have no experience whatsoever.
 fading sorrel
There are sewable neopixels depending on how many you are using. I think strips will pull the sleeve up around the bend of your elbow
But if you use glue, I would leave some of the bend unglued
Sewing may fix this depending on how you do it, but Im not sure what the best way to do that would be
 molten valve
gluing those silicone sleeves only works with like one specific glue. Sewing across the wide part of the silicone might work ok. I'm no good a sewing so I don't think I could make a good connection that would survive any amount of flexing
if I had a sewing machine I might try making a pocket to slide the strip into, on the inside
for any heavy bending sections you'll probably want to cut the strip and run a bit of wire across the crease so the strip doesn't tear
vague hatch
weird question, what is the best way to connect multiple cables to ground using the feather? Right now I have soldered my ground cables together, but it would be nice to maybe switch to a connector of some sort?
stark storm
"Best" is, of course, a relative term. You could use solderless breadboard, power distribution blocks, wire nuts, crimp connectors, etc., but this may be the sort of thing you're looking for: https://www.adafruit.com/product/874

These are like the fancy electronics equivalent of the wire nuts electricians use to bind wires together. They are a lot easier to use as well! Each block connector has a metal block inside ...
vague hatch
The use-case is to try and connect each of the devices together for a wearable project. Moving from prototyping (breadboard) to something more mobile. Since I am sharing ground and power, to the same pins on the feather, this is where I'm trying to figure out how to achieve the same mobile.
I'm looking at using JST connectors for the analog devices, but those all have female/male pins to terminate. Should I chop those off and opt for the wago block or maybe try something else?
stark storm
It's up to you. One non-destructive approach is to get JST pigtails and use the Wago to connect those together.
vague hatch
There are what I'm using, but the wago won't take the male end of this, will it?
https://www.adafruit.com/product/3893

This cable will let you turn a JST PH 3-pin cable port into 3 individual wires with high-quality 0.1" male header plugs on the end. We're carrying these to match up with our ...
stark storm
It might, I'm not sure.
vague hatch
Do you know if these JST cables are solid or stranded?
molten valve
I think they're all stranded
vague hatch
If I cut off the ground header, and then tinned them, think the wago would work fine?
stark storm
Yes, I do.
 waxen shoal
Looking for help with the Monster M4sk eyes if anybody has the time. I keep getting stuck with a screen that reads "code done running. waiting for reload . soft reboot" I have pressed the reset button multiple times, as well as turning it off/on, unplugging, etc. But it doesn't change. Is there something I'm missing here?
stark storm
I'm not sure, but it seems like the code is exiting instead of continuing to run
waxen shoal
I had to follow the steps on this page https://learn.adafruit.com/adafruit-monster-m4sk-eyes/quickstart to get the CIRCUITPY drive. After that's done I should be getting the default hazel eye animation, I'm pretty sure. But I just keep getting this text instead.
The next page https://learn.adafruit.com/adafruit-monster-m4sk-eyes/m-eyes-firmware following the instructions I just did talks about updating the firmware. However, I need to be able to access M4SKBOOT bootloader drive to be able to do that, and I only seem to be able to access the CIRCUITPY drive. I don't know for sure if that's the source of the issue. I'm at a loss here ^^;
stark storm
That's a little beyond me, you might want to take it to #help-with-circuitpython
 cold crest
I'm looking for wired tactile push-buttons like this one , but silent (no click sound) Something like that exists? Thanks for any reply.
Obviously I don't know how to use discord markdown...
😕
 full quail
Maybe touch buttons?@cold crest
waxen shoal
That's a little beyond me, you might want to take it to #help-with-circuitpython
@stark storm Alrighty, I'll check that out then!
stark storm
Tactile buttons are normally clicky, but perhaps you could use elastomer ones like on the Trellis, or maybe these "soft" ones would be quiet enough https://www.adafruit.com/product/3101

Put your project in stealth mode with these silent Soft Tactile Switch Buttons. Tactile switches are standard input "buttons" on electronic projects. These work best in a PCB ...
waxen shoal
Alrighty, I finally got the eyes working and they're currently animated with one of the default eye animations... except only one eye is functional. The one connected to the usb is working. The other isn't showing anything on the screen but the back of the board is lit up. They're connected by wires. Any ideas?
cold crest
Thanks both @stark storm @full quail ! Yes, these soft tactile buttons looks really nice. I don't know how could I wire them? They are not supposed to be on board.
I want to use them elsewhere and wire them to board...
stark storm
You should be able to tack-solder wires to the pins, the trick is to figure out how you want to mount them.
cold crest
Wow, thanks! Yes, that would be solution. Thanks, man!
I want to mount them under fingers, it's kind a typing ball, which you hold in hands.
I'll print a place to put them right. Thanks again @stark storm
upper bolt
@light wigeon to attached LEDs to clothes, I recommend like @molten valve said, first create a fabric tube. something that matches the color of your sleeve roughly. You can pack the tube with other materials if you want to diffuse the light (more fabric, foam, bubble wrap, etc)
@vague hatch would love to hear how tieing the cables together works out. consider making it super secure as wearables undergo a lot of stress from pulling as well as repetitive movement
I'll sometimes zip tie the cables to a perf board underneath, just to make it super strong
vague hatch
@upper bolt honestly thinking of just soldering them together and heat shrink tubing them 😛 That may give more flex vs the wago
upper bolt
one time I opened up one of those multi headed cell phone chargers, and found all the wires got soldered together around a tiny tiny piece of PCB, and then injection molded with a rubber case
vague hatch
haha nice
light wigeon
Looking for a really simple "did someone touch the capacitive input button the on the Gemma" that's not written in Python. Seems simple, but most of the examples are Python and I don't want to rewrite everything from "Arduino" (c) just to get a touch input. (Thanks for any help you can offer!)
light wigeon
Solved -- Took the sample from this page and modified to fit: https://github.com/adafruit/Adafruit_FreeTouch/blob/master/examples/freetouch/freetouch.ino
GitHub
A QTouch-compatible library. Contribute to adafruit/Adafruit_FreeTouch development by creating an account on GitHub.
 bold hill
Hello project gurus. I’m wondering if I am overlooking a way to simplify this project. I want to be able to recharge the battery. Is there a way I can do that with just the Gemma? Or do I need to have the battery connected to the charger and the charger connected to the Gemma with an on/off switch between the two?
 stark lodge
@bold hill a gemma cannot charge a battery on its own. a feather can though
it'll probably be the same size overall or so
short fjord
Has anyone here welded TPU film before? I am trying with a soldering iron (200°C) but it seems to 'melt away' the tpu - I just get some holes in it
 cobalt jetty
I'd like to do a ws2812b dog collar. What sort of processing board should use?
I think I found the appropriate example: https://learn.adafruit.com/circuitpython-feather-ble-neopixel-hat

Adafruit Learning System
Wireless control NeoPixels on your wearables!
 stuck spear
You can get away with a smaller board if you don't need BLE
 queen inlet
hi does anyone have any guides to get started with power width modulation for led sequins?
exotic tendon
@queen inlet this discusses sequins and PWM (Pulse Width Modulation) https://learn.adafruit.com/adafruit-led-sequins?view=all
upper bolt
hey @cobalt jetty what board did you wind up going with? I do lots of similar stuff with either a microbit (can only make simple patterns, but lots of sensors built in) or preprogrammed controllers with like 30 different patterns (costs like a few dollars)
@vague hatch did your wires stay connected, or did they break apart from movement? 🙂 interested to hear out it worked out
anyone: can you recommend microbit neopixel libraries? block coding or text. I tried the neopixel block extension on makecode but it's super simple, a little too simple
vague hatch
@upper bolt to be totally honest, got sidetracked and didn't finish the final model to make the wearable much nicer vs where it's at right now. I did/had ordered JST plugs and heat shrink tubing and the plan is to still solder all grounds together in the same "direction" and then heat shrink around them. Looks like it should work out nicely.
cobalt jetty
upper bolt
hey <@!785645301448966205> what board did you wind up going with? I do lots of s...
Hey @upper bolt - I went with the Adafruit Feather nRF52840 Express, mostly to follow the tutorial without any problems and as an excuse to learn Circuit Python. I'd like some ability to change the colors and Bluetooth seems easy now. Eventually I'd like to use a smaller board and a soft button to change colors with a short press, and change patterns with a long press.
upper bolt
oh nice, I need to order one of those, they seem pretty great. So far I don't do anything over bluetooth. I want to use it with a company that has a visual LED programmer coming out soon
 feral vale
Hi everyone, I'm working on my first wearable project using LED sequins, conductive thread and a 2 cell 2032 battery pack. My current plan is to wire four of them together in line, and just have the switch on the battery pack turn it on and off.
Things are going good so far, as I've just sewed the 3rd LED in. When I went to test it against the battery, none lit up. I checked all of my connections, the LEDs themselves and everything works fine, but for some reason, 3 just don't seem to work. Any clue as to why? According to my research, there should be no problem putting 4 in line off of 2 CR2032s, but am I mistaken?
Ah wait, no I think I did mess up
A CR2032 is 3v each, not 6v each
2 together makes 6v
Well I am a noob
 rotund needle
ok question, I want to take the temperature from 6-8 points on the body with 6-8 MCP9808 sensors, display them to an oled and turn on a reley corresponding to one of the points, what would be a good microcontroller to use? i was thinking the flora, but idk if it has enough pads.
if it doesnt has enough processing power to run a oled, at least send the data to another mcu to interpret the data and display it
 radiant bay
feral vale
Hi everyone, I'm working on my first wearable project using LED sequins, conduct...
radiant bay
feral vale
Hi everyone, I'm working on my first wearable project using LED sequins, conduct...
Can you share a picture of your sequins? They are so teeny sometimes they get flipped/flopped, which could be the issue. Also, you may be able to wire them in a bit of a series (that is, in pairs) since you’ve got 6v.
Do you have alligator clips or something to test with?
feral vale
@radiant bay My friend @silent niche educated me on the differences between series and parallel in another server we're in, so I ended up just wiring it in a parallel configuration, which may be what you are suggesting by wiring it in series, in pairs. It works like a charm now! Happy with the results. :)
Thanks for the response!
 silent niche
jack i forgot i was even in this server
feral vale
Well then, you're welcome
rotund needle
do the flora sensors support circuitpython?
stuck spear
rotund needle
do the flora sensors support circuitpython?
At least the LSM9DS0 seems to. You may have to search for each individually
rotund needle
Thanks
 tidal rune
What is the best os for a pi zero combined with a head mounted display
somthing like chromiumos but without the google
fading sorrel
tidal rune
What is the best os for a pi zero combined with a head mounted display
I would think either a minimal linux or FreeBSD install with i3, you could use the i3 shortucts with a controller to interface to it and that would work quite well
Or, could, not intended use case, but as long as you are not scared of a config file
tidal rune
Currently using ubuntu but I use it with a bluetooth keyboard/trackpad
hoping to switch to a somic data glove soon
Will try
ehh
fading sorrel
tidal rune
Currently using ubuntu but I use it with a bluetooth keyboard/trackpad
I would just use raspbian lite
tidal rune
nah
fading sorrel
And install x11 and i3
tidal rune
its small and a graphical interface would be better. I only need to do light browsing so I might just have a minimal install of linux and run a browser as shell
fading sorrel
i3 is a desktop env, its a GUI
tidal rune
yeah
fading sorrel
Its a minimal GUI, and there is a config file to configure how to handle inputs
So you can tell it to do whatever you want on a whatever button press, open firefox full screen workspace 2 www.adafruit.com
And there is very little clutter around the windows. if you have a small display I image that would help
And you can use button presses to change which window is in focus easy
If you want to make it really pretty, you can do it
fading sorrel
You can customize every bit to your hearts content, and it uses very few resources https://i3wm.org/
i3 is a dynamic tiling window manager with clean, readable and documented code, featuring extended Xinerama support, usage of libxcb instead of xlib and several improvements over wmii
fading sorrel
If you go to r/unixporn, there are examples of people making it look pretty
If... you care to visit reddit
I dont care to, but I do like that section
fading sorrel
Read from "Install i3wm" down, everything above it is not related to what you want https://medium.com/hacker-toolbelt/i3wm-on-debian-10-buster-c302420853b1

Medium
Debian has released its latest version, named “Buster” (the naming convention is itself a story). Debian is the second oldest Linux distro…
And instead of mate terminal, I like Alacritty but you do you, conky is dope to show CPU, memory, network, disk stats on the background, feh to set a wallpaper if you want, dmenu for a simple application chooser
If you dont like i3status, might like polybar
 clear bough
Hello wearable hackers! I’m designing LED skates and looking at the Neopixel featherwing. However, I want to choose a microcontroller board with low battery usage. Here are my options:
- Feather 328P: 3.3V and 8MHz. Neopixels will be driven by the processor.
- Feather M0: 3.3V and 48MHz. Neopixels will be driven by DMA
Which would use less battery? Has anyone made this kind of project before and chosen one board over the other?
My thoughts are that the 8MHz has lower clock speed therefore lower battery. But at the same time, I wonder how much battery is saved on the M0 due to the use of DMA instead of processor for driving the Neopixels
terse moon
You can drive neopixel with the QtPy and the LiPo backpack I make and sell
Or trinket M0 with battery backpack
clear bough
@terse moon I prefer using Feather series because that Neopixel Featherwing is very convenient to attach on top of the board
 alpine shale
Normally power used by the MCU is small compared to the power used by NeoPixels. A single neopixel at full brightness uses up to 60mA - more than the MCU, whether AVR or M0.
terse moon
Also true
clear bough
@alpine shale D’oh, you’re right! Well then I’ll just get the cheapest Feather board here which is the 328P for me
alpine shale
note also that a neopixel, even when off, uses about 1mA. Not much, but if you have 50 of them, it drains the battery pretty fast
 winter solstice
Has anyone tried to fit a pi in one of those collectors edition pip boy kits?
 random wharf
terse moon
Gotcha, the m0 would use less power overall
random wharf
terse moon
Gotcha, the m0 would use less power overall
Wait, how does a 48MHz chip use less than an 8MHz one?
rapid radish
Newer silicon process, most likely, and more attention paid to power consumption in the design. The AVR is quite old technology.
random wharf
Oh
terse moon
Also more functionality for the m0 too which help optimize core feature usage and sleep cycles
 viral edge
@terse moon where do you sell the lipo backpack? 😮
terse moon
Oak Dev Tech
We love the Adafruit Qt Py. It really is a cutie! And we love it so much we wanted to help you take the board and your projects on the go!
This little backpack not only brings LiPo Battery power to your Qt Py, but also battery charging so you can easily recharge your project.
If you need international shipping, just let me know. I can get it set up pretty quickly.
viral edge
Thanks!
@terse moon without the stacking headers is there enough room for me to solder the QT Py directly onto the surface of the breakout board?
actually sorry, I can see that there's a couple of components on the top of the board that would prevent that. Still, I think if I just used male headers on the Py I could reduce the height profile a little compared to the stacking headers 🤔
terse moon
They sell 7 pin stacking headers on Digi-Key if you need them
viral edge
perfect!
terse moon
All I have on hand is 8 pin and it’s a bit tricky getting them to be 7 pin ones 😅
viral edge
I often have that problem too lol
terse moon
I plan to get some 7 pin ones eventually
One of these days I’m going to order a bunch of qt py from Adafruit (as a reseller) to sell kits
I’ve got a few ideas in mind that I want to do
viral edge
I've already ordered several in anticipation of future projects because $6 feels like a steal to be honest 😅
I'm actually just at the point where I've started to think about taking a couple of them portable so this is really helpful, thanks again 😄
terse moon
🙂
 sharp vector
Hello All,
I am a huge Razer fan and love things reacting together. Are there libraries or code for making peripherals that listen to Razer Chroma data for Arduino (currently all I have is MagTag)
 lilac harness
sharp vector
Hello All,
I am a huge Razer fan and love things reacting together. Are there li...
lilac harness
sharp vector
Hello All,
I am a huge Razer fan and love things reacting together. Are there li...
Maybe this can help? https://www.youtube.com/watch?v=6ZbOAO76GmM

This is a quick rundown on how I modded my autonomous.ai desk using Razer chroma, arduino and an addressable led strip.
Materials used:
-
XCSOURCE V3.0 USB Nano ATmega328P 5V 16M Micro Controller Board Module for Arduino (TE359)
http://amzn.to/2kBmu9f -
ALITOVE 16.4ft WS2812B Individually Addressable LED Strip Light 5050 RGB SMD 150 Pixels Dre...
sharp vector
Now just to find a way to port it to CircuitPython... 😛
SERIOUSLY THOUGH THANK YOU SO MUCH...
whole creek
looking into building a diy smartglass thing, and I'm wondering, alignment issues aside, what're the downsides of using multiple mirrors to allow a larger screen at an angle, such that the box hanging off the side of your head is smaller
I am also a complete beginner to this area, so I apologize in advance if I ask any stupid questions
 carmine nexus
hey everyone, I have a simple question about the Gemma v2
stark storm
Just ask
rotund needle
I'm looking into sewing a circuit into clothing that could touch my skin using steel conductive thread, do I need to worry about electrical safety, current draw could be up to 5mA, when wearing the article? I plan to sew the circuit on a shirt. Please ping me, Ill forget otherwise.
carmine nexus
Sorry - is anyone here? I am having some real trouble soldering my Gemma to a 16-led neopixel ring
i have issues with the contacts
they are pretty poor for some reason, and the wires keep falling out of the neopixel ring
stark storm
@rotund needle Low voltage electricity can cause issues https://www.sparkfun.com/news/1513
The necessary dangers of electricity, and whether they're worth it.
@carmine nexus Hmm, what kind of solder are you using? Perhaps the iron needs to be cleaner or warmer, or you need to add flux.
 dusty island
hey friends, i'm trying to figure out how to get apps onto the banglejs watch without using chrome or chromium. anyone have any advice?
fading sorrel
dusty island
hey friends, i'm trying to figure out how to get apps onto the banglejs watch _w...
Seems the nordic toolkit device firmware updater should work looking at their docs
 tidal sand
Hi I am new to this discord. I am looking at getting an nfc implant and I was wondering if it is possible to set it up for payments? As in connect my debit card to it by copying the data from it.
 amber widget
@tidal sand If you're referring to the tap and pay type of interaction you do with a credit card or debit card to a terminal, there is a lot of complexity involved including the chip technology, standards, certifications, and a gated technology in the sense that only big players are authorised by the system. The chips used in payment cards are far more sophisticated than simple RFID or NFC devices. So if you're thinking of a typical NFC implant, the answer is not really.
 sour dome
hello new here ... got a couple projects would like to do.
stark storm
Excellent. You're in the right place.
 frosty raven
Hi there, sorry to be a bother, i am trying to set up a circuit playground, and it won't let me write any files to it, any ideas?
stark lodge
@frosty raven what are you trying to program onto it?
frosty raven
Anything. I have makecode I used on a circuit pro express. But when I copy it to the board, it doesn’t run, and when I reset it’s gone 😕
stark lodge
Is the drive *BOOT and are you sure its the correct file for the board?
the bootloader will ignore files it thinks don't apply to it
frosty raven
ah interesting, i guess it was a big assumption to assume makecode would work with this board
stark lodge
Is it a CircuitPlayground Bluefruit?
frosty raven
Yes sir!
stark lodge
ya, I don't think microsoft ever added nrf support to make code
(do they have it for micro:bit v2? it's a similar chip
 sly marsh
is it possible to get the battery level from an itsybitsy with a backpack? either in arduino or circuitpython
 warm pendant
usually you can do this by using an analog input pin
you might need to set up a couple of resisters to serve as a voltage divider to divide the voltage from the battery in half.
There is a good overview here: https://startingelectronics.org/articles/arduino/measuring-voltage-with-arduino/
Measure external d.c. voltage using an Arduino board. The voltage range measured is increased using a voltage divider resistor network. The measurement results are displayed in the Arduino serial monitor window.
There are some adafruit boards (like Feather M0) that already have the voltage dividers and the connection to an analog input pin set up for you, but I don't think ItsyBitsys do
sly marsh
warm pendant
There is a good overview here: https://startingelectronics.org/articles/arduino/...
Thanks
warm pendant
Np!
 obsidian laurel
does anyone have any experience with Electroluminescent (EL) wire and how bendy/durable it is? im looking at braiding it into my hair/beard and im wondering if it will break or not
radiant bay
obsidian laurel
does anyone have any experience with Electroluminescent (EL) wire and how bendy/...
It’s durable enough that it should be ok to braid, though it somewhat depends on the way the EL to battery is attached. One of the wires is super delicate, but should be ok if properly secured. Of course, it all depends on what you’re doing with your hair/beard (ie running a marathon or standing still?) With heavy movement, I’d mainly be concerned about it wiggling out. Hopefully, it’s cheap enough to test it out and troubleshoot. Also keep in mind that it commonly emits a sound which I personally find annoying and wouldn’t want it near my head!
obsidian laurel
radiant bay
It’s durable enough that it should be ok to braid, though it somewhat depends on...
thanks for the response, that really useful info! my thought was to wear it to concerts, so more of a marathon than standing still. ill just have to try it out beforehand and see what happens. ideally I would like to have individually adressable RGB-leds, but i feel like it would be difficult to make that small
radiant bay
obsidian laurel
thanks for the response, that really useful info! my thought was to wear it to c...
There are strands of rgb leds (similar to fairy lights) that utilize 2020 sized LEDs. Some come in a soft flexible variety and there are others with a stiffer copper wire showing up. Not sure if that supports your desired aesthetic but you can explore. There are also other tiny LEDs if you’re comfortable with soldering.
They may actually be smaller leds. Oh, and there’s also the Effulgent thread with super tiny LEDs. That would look awesome!
rapid radish
Leaky fiber-optic plastic tubes are another potential option. Adafruit stocks some of those, for instance.
obsidian laurel
@humble quartz @rapid radish thanks, ill try to look it up. it feels like if I go the individually-adressable led-route it will get a lot more expensive
 torpid solar
hi @autumn umbra i am not good enough to do so but when you do make that product can you share what it has become?
It looks promising from my sight
radiant bay
Hi! You might want to post here: https://jobs.adafruit.com
Find maker jobs in 3D and CAD, Art, Design, Education, Embedded Development, Engineering, Fabrication, Marketing and Communications, and Web Development
 still solstice
hello i am trying to make the tron hoodie. i have zero experience in soldering. i dont understand what to ,where to and how to solder for this to work out... any help?

for ur reference
 cloud gyro
Try watching the video that explains how to solder EL Wire
short fjord
Does anyone know what material the blue part from this teardown is:

The white film is TPU
But the blue part seems to be hard plastic?
 sly current
@short fjord the blue part can also be TPU
 safe loom
Hey everyone, Day 1 - hanging out with the community for the #livebroadcast and looking forward to learning more about adafruit ! love to connect with users of Flora, wearables , anyone ? 🙂
safe loom
love that flex pcb on/off button action #really cool
 mint comet
I just received the 10x10cm EL panel starter kit. I hooked up the panel, put in the batteries and am getting nothing from the inverter. I tried the panel with a different inverter and it glows dimly (the inverter is from an old bike light). The batteries are good and I tried running the inverter from a bench supply at 6 volts and it drew 0.00 amps when 'on'. Any hints on what to try next?
stark storm
It seems like it should work: any chance you had the polarity reversed?
 thorny willow
hey everyone, I received my Circuit Playground Bluefruit last Saturday and started going through MakeCode tutorials. I can successfully set the board in flash mode (CPLAYBOOT) but nothing happens after I copy uf2 file over. Funny enough it worked flashing circuitpython. Does anyone know what I am doing wrong when downloading/flashing makecode's uf2 files?
stark lodge
@thorny willow I don't believe make code supports the Circuit Playground Bluefruit, only the express
thorny willow
ha, thanks @stark lodge. I just realized I missed this statement on the product's page You can use this board with Arduino or CircuitPython - It does not support MakeCode at this time (there is no ETA when it might be added).
There's a dedicated starters webpage instructions at https://learn.adafruit.com/adafruit-circuit-playground-bluefruit that states For folks who are comfortable with an early-release-version that does not support wireless capabilities, you can also try MakeCode Maker's block-based GUI coding environment on this board. and I guess that's what threw me off while following the steps.
So, the disconnect between the product page vs. learn guide might be confusing to other people as well.

Adafruit Learning System
Circuit Playground Bluefruit: Everything amazing about Circuit Playground, now with the power of Bluetooth!
stark lodge
ya, makecode maker is a bit different I think. I'm not 100% sure
thorny willow
yeah... seems like they are different things. the UF2 file generated by Microsoft's maker.makecode.com flashes just fine. Thanks again, @stark lodge
stark lodge
👍 thanks for letting me know
 marble hatch
Hello; I've been trying to figure this out using the documentation, but just wanted to confirm that the adafruit flora board does not allow battery charging via the USB port, and that I would need to get a separate charger module?
I am trying to make a small wearable bracelet with the adafruit flora and the flora bluefruit LE, but would like the option of being able to charge the attached LiPo battery. I would appreciate any suggestions / advice / pointers to reference projects I can learn from. Thank you! 🙂
stark storm
Correct, it does not include a charger of its own. You could use a dedicated charger board like https://www.adafruit.com/product/4410 or wire up this tiny "backpack" board https://www.adafruit.com/product/2124

Oh so handy, this little lipo charger is so small and easy to use you can keep it on your desk or mount it easily into any project! Simply plug it via any USB C cable into a USB port and a ...
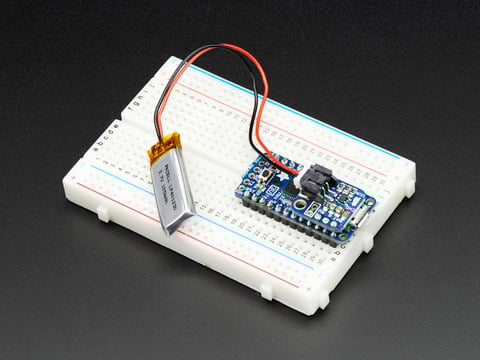
If you have an ItsyBitsy or Pro Trinket you probably know it's the perfect little size for a portable project. This LiPoly backpack makes it really easy to do! Instead of wiring 2 or 3 ...
marble hatch
got it. And I can use this to 'live-charge' the battery whenever the setup is connected to a USB source? Thanks! 🙂
or will I have to disconnect the battery from the flora board? thanks!
stark storm
Yeah, that's what the backpack is designed to do. Its pinout matches ItsyBitsy and Trinket boards, but I'm pretty sure you could connect it to the Flora with wires to get power from the USB port and use it to charge the battery.
marble hatch
got it
would it be possible to use the Micro LiPo charger instead of the backpack, since the micro LiPo charger has a smaller form factor? thanks
stark storm
The backpack is actually smaller (the lead picture shows it mounted on another board). The main difference is the charger has its own USB connector, the backpack would take advantage of the USB connector on the Flora.
marble hatch
oh; got it. So I can use either of the boards (though I'll need to figure out the wiring for each case); in the case of the micro-lipo charger, I will have 2 usb ports, while with the backpack, I will be able to use the flora's USB. In either case, I will be able to connect the chargers directly to the flora board to be able to charge the battery without having to unplug / disassemble the battery. Am I getting this right?
stark storm
Right. The tricky part with the backpack will be finding a spot on the Flora to tap off the USB voltage. I don't think there's a pad on the Flora for this, so you might have to tack a wire to one of the filter capacitors to get it.
marble hatch
ok; and in the case of the Micro-LiPo charger, that won't be an issue, since I can just split off the leads for the battery to the flora power in?
stark storm
I think so.
marble hatch
ok; I'll give it a shot! Thanks @stark storm ! 🙂
 grand tundra
Hi Adafruit! Can you point me in the right direction? I'm interested in making a wearable proximity sensor for social distancing with a vibrate or chime notification for when someone comes within 6 feet, for example. Ideally, it would be wearable on shoes, wristbands, clothing, etc. What are some possible avenues? Thank you in advance!
exotic tendon
@grand tundra that may be more difficult than it would seem at first. PIR sensors are low cost and can detect humans
rapid radish
I'd be thinking sonar, assuming you want to detect someone who isn't also wearing a tag.
Maybe a combination of sonar and a low-res thermal image sensor to cut down on the false positives from inanimate objects.
exotic tendon
the " shoes, wristbands, clothing, etc" specification is tricky
rapid radish
Yeah, I figure that's something which would need to be compromised on in the final design...
Although honestly the time for thinking about this kind of project was a year ago, heh heh.
exotic tendon
lol (i've had my 2nd vax)
rapid radish
First shot just today here. 😁
exotic tendon
for me the only side effect was a sore arm both times for a day
grand tundra
thanks for your thoughts folks! I looked into AWB and saw a Decawave ScenSor UWB Indoor Positioning Wireless Transceiver Module - IEEE802.15.4-2011 compliant online for $15. I also saw a company make a wristband or lanyard wearable for the workforce a year ago. I would want to learn how to make a cheap diy version of it with arduino/raspberry pi for educational purposes. It's not too late for children in school reopenings. 🙂
rapid radish
Ah, gotcha. If you're measuring the distance to other tags, then UWB is a good solution, and the Decawave radios are more or less the default choice for that. Combining that with something like an Adafruit Feather or other Arduino-ish board would be quite feasible. I'd probably avoid a Pi as overkill and too power-hungry for this kind of task.
exotic tendon
so basically "if any tag but mine gets within 2m then do something"?
rapid radish
Yeah. A lot of the commercial solutions also allow you to define in-groups of tags, for people who are allowed to be in proximity because they're in the same pod or whatever, so that you'll only get an alert if an outsider tag is within 2m for some length of time.
The Decawave radios do both data transmission and ranging, so they can communicate unique IDs, etc.
exotic tendon
nice, TIL
 old dew
Hi there! So I am brand new to wearables, and I have a pretty ambitious first project idea, but I could use a little guidance on which board to go with. I want to make a costume with some neopixels sewn in, and I want a remote object, like a cube, to attach a color sensor to that will control those LEDs. I know the Circuit Playground Express is typically recommended over the Flora & separate color sensor (especially for a newbie like me); but I feel like having a smaller, separate color sensor would be best for this project. It seems counter intuitive to have an external color sensor emit back to the express when the express has one built in, but maybe that is the best way to go about it. ? If anyone is willing to offer a little advice, it would be much appreciated. 🙂
rapid radish
You could totally do that. Adafruit has a small separate color sensor board available, so it would just need a few wires to attach it back to the I2C bus of whatever base board you preferred. https://www.adafruit.com/product/1356

Your electronics can now see in dazzling color with this lovely color light sensor. We found the best color sensor on the market, the TCS34725, which has RGB and Clear light sensing ...
old dew
Yes! This is the flora one I was looking at. So I’d basically just have this color sensor wired up to a smaller base board & that to a transceiver, I was thinking this one: https://www.adafruit.com/product/3070 ? And then another would be wired to the circuit playground express on the costume to control the lighting effects. I guess I could just get two circuit playgrounds and have them communicate with their built in IR - but I am afraid the signal won’t be strong enough for what I am thinking.

"You see, wire telegraph is a kind of a very, very long cat. You pull his tail in New York and his head is meowing in Los Angeles. Do you understand this? And radio operates ...
old dew
Oh.. wait! Circuit Playground Bluefruit! That one went over my head... I think this is perfect
 knotty hollow
bluefruit does not have built in IR
old dew
Yes, but it has built in Bluetooth - which I assume has a better signal than the IR sensors
^The CPExpress is what I was referring to with the built in IR sensors
grand tundra
rapid radish
Ah, gotcha. If you're measuring the distance to other tags, then UWB is a good s...
Thank you sir for sharing your thoughts on this!
grand tundra
exotic tendon
<@!834947929063686177> that may be more difficult than it would seem at first. ...
thank you for suggesting PIR sensors. That may be more practical for detecting heat from humans on approach...closing the distance. Just wondering if it can be calibrated for better accuracy within 6 feet of human detection.
stark lodge
old dew
Yes, but it has built in Bluetooth - which I assume has a better signal than the...
Yup, I'd go bluefruit. I did an example with broadcasting a color
GitHub
Bluetooth Low Energy (BLE) library for CircuitPython - adafruit/Adafruit_CircuitPython_BLE
exotic tendon
@grand tundra originally I envisioned a more general case - approach of a random group of humans. Narrowing the scope to school children makes the AWB a bit more practical, if not necessarily economical, since you can tag them all. There are PIR modules that are adjustable but there is a wide range, only 1 to 3 meters might be possible on units with a sensitivity adjustment (the price of lower cost). In addition you may need multiple sensors to get 360 deg coverage. My wife is a teacher so agreed it's not too late for school kids! Feel free to ask away, it's a great project.
grand tundra
exotic tendon
<@!834947929063686177> originally I envisioned a more general case - approach of...
thank you sir!
exotic tendon
you are very welcome
grand tundra
exotic tendon
you are very welcome
I'm a teacher too! 🙂 5th grade school teacher and lead STEAM teacher at my school site. We are creating an after school STEAM program and wanted to tinker around with this project idea. I see that the 360 deg coverage is tricky, hence why I wondered about a wearable device or devices around the shoes, wristbands on both hands, hat/cap, etc. A diy lanyard wearable that only covers the front range of the person would be the first step, then maybe wristbands. Might be sensor device overkill? The smaller the sensor device, the better. Would like to work on one soon, say this summer, and have a prototype ready by school reopening in the fall. I would be the first tester at my school site. 🙂
exotic tendon
Adafruit has a nice overview of PIR, https://learn.adafruit.com/pir-passive-infrared-proximity-motion-sensor
grand tundra
exotic tendon
you are very welcome
I have arduinos, pi zero, pi mod 3 and 4, and littleBits. I'm a beginner, but a very tenacious learner from manuals and videos. If you know where I can begin learning the fundametals with a simple IR sensor or another type of sensor on any of these platforms, please let me know! 🙂
exotic tendon
Since you want reasonable battery life a smaller cheaper mcu will probably serve best. Providing some kind of "alarm" when triggered is trivial, it's the "when triggered" part that is hard.
grand tundra
exotic tendon
Since you want reasonable battery life a smaller cheaper mcu will probably serve...
Thank you for the adafruit pir link. That looks like a good start for me. 🙂
grand tundra
exotic tendon
Since you want reasonable battery life a smaller cheaper mcu will probably serve...
Basically searching for a diy version of this commercial product:
grand tundra
exotic tendon
Since you want reasonable battery life a smaller cheaper mcu will probably serve...
Safe Spacer - Wearable social distance monitor by IK Multimedia | Specifications
exotic tendon
what is the budget per unit?
bear in mind:

a Venn diagram of the axiom : "Fast, Cheap, and Good… pick two"
grand tundra
exotic tendon
what is the budget per unit?
Good point. Wouldn't adafruit parts be in the middle?
exotic tendon
for any given part the cost is all over the place, if you are willing to wait the price is low, overnight, the same part is expensive
these are all pretty much commodity items, the same parts are available from many vendors
the advantage of Adafruit is excellent support, from Random China Corp not so much...
(I don't work for Adafruit btw)
grand tundra
Yes! Good points!
Will keep exploring this! Thanks again sir. Need a brain break now. 🙂
exotic tendon
yes day job calls to me as well 🙂 good luck!
old dew
stark lodge
https://github.com/adafruit/Adafruit_CircuitPython_BLE/blob/master/examples/ble_...
Oh, this is super helpful! Thank you for sharing 🙂
 honest marsh
anyone made an attempt at a gesture controlled LED mask?
 frosty glade
please don't crosspost
 woeful crag
anyone know if it's possible to attach a separate phototransistor light sensor to the monster m4sk, and if so, how? i want to use the feature but since only the screens will be visible in my project the built in sensors will always be covered.
amber widget
@woeful crag There are the D2 and D3 JST connectors that could pretty easily handle a light sensor. You'd need to get a cable like this https://www.adafruit.com/product/3893 and use a breadboard or solder the pins to the sensor. I think that might work for you?
This cable will let you turn a JST PH 3-pin cable port into 3 individual wires with high-quality 0.1" male header plugs on the end. We're carrying these to match up with our ...
woeful crag
amber widget
<@!344979582560239636> There are the D2 and D3 JST connectors that could pretty ...
oh great, thank you! the sensor would definitely need to be on a wire anyway since it'll poke through the shell of the outer mask into the light, so this works well
amber widget
woeful crag
oh great, thank you! the sensor would definitely need to be on a wire anyway sin...
Even if you only need 2 pins, you can use those connectors. I used a STEMMA QT connector to wire up NeoPixels yesterday - as long as you use one of the data pins properly, you can use the pins for whatever.
woeful crag
this one might be a bit of a reach and tricky to do, but would it also be possible to break off the nose bridge so the screens are separate and solder it in to the middle of the 9-pin connector cable so it still functions with the capacitive touch? the wires are still present on the back of the piece, so i'm assuming a real precision soldering job might work. very difficult, but possible?
amber widget
woeful crag
this one might be a bit of a reach and tricky to do, but would it also be possib...
Hmm. So you want the boopnose but you want the eyes separated?
amber widget
Give me a minute. Looking at the schematic.
woeful crag
i'm fitting the eyes into a resin mask, so my thought was to have an eye on each side of it and feed the wire down the snout so the nose sticks out where the mask's nose is
 woeful crag
amber widget
Yes. A real precision job would do it.
woeful crag
amber widget
Yes. A real precision job would do it.
wonderful! i'll have to train up then
amber widget
I'm not certain what it would look like in terms of what you would actually solder to, but in theory it's doable.
woeful crag
amber widget
It's connected through the bottom wire.
ah, so the nose would only need the bottom wire connected rather than all 9? even better
amber widget
Correct. As far as I can tell from looking at it, it's only one line connected to it.
Which makes sense, touch pads are usually only one trace.
woeful crag
this is great, thank you so much for all your help!! 
amber widget
You're entirely welcome! Good luck!
amber widget
woeful crag
this is great, thank you so much for all your help!! <a:crabdance:74970636806311...
The schematic and board files are available on GitHub if you want to be able to look at them yourself. EagleCAD has a free version that's plenty feature-full enough to look at files.
light wigeon
This might be a bit of a stretch for this channel but does anyone here have first generation snapchat spectacles? I just picked some up without a charging cable and I'm having trouble figuring out how to get power to them. I think if I know which pin is positive and which one is negative I can just throw 5V at it and be on my way.
rapid radish
You might investigate whether the cable is actually reversible... some of those magnetic-pin types will work in either orientation and just detect which connection has the positive voltage.
light wigeon
I've only seen pictures of the cable connected in one orientation so I don't think it's reversible sadly
Oh actually I've just come across an official picture of second generation spectacles charging the other way, I know they changed the connector slightly between the two generations but this makes me want to keep looking for a lot longer
Alright it does seem to be reversible actually! Couldn't tell you why everyone connects it one way and not the other but it seems to work either way. Thanks for the idea @rapid radish!
woeful crag
hi again, do any of you know if it would be possible to implement eye tracking (like this https://create.arduino.cc/projecthub/H0meMadeGarbage/eye-motion-tracking-using-infrared-sensor-227467 ) with the monster m4sk? i understand some changes would need to be made with the code, but I’m not really sure where I’d start

Arduino Project Hub
Use an infrared sensor to sense eye movements and control an LED. By HomeMadeGarbage.
light wigeon
@woeful crag Steven K Roberts https://www.microship.com
woeful crag
light wigeon
<@!344979582560239636> Steven K Roberts *<https://www.microship.com>*
? I’m not really sure what you’re trying to show me there
woeful crag
ah, thanks then. I’ll have a look
light wigeon
It's old stuff but he's still fairly active and writes up what he does.
marble hatch
hello! has anyone here used (or is aware of anyone using) the Maxim 86141 / 86150 pulse-oximeter / heart rate sensor with an arduino board via I2C?
https://www.digikey.in/product-detail/en/maxim-integrated/MAX86141ENP-T/MAX86141ENP-TCT-ND/8535546
fading sorrel
marble hatch
hello! has anyone here used (or is aware of anyone using) the Maxim 86141 / 8615...
I dont see a I2C interface on that chip, but there is a SPI interface
marble hatch
fading sorrel
I dont see a I2C interface on that chip, but there is a SPI interface
https://github.com/Protocentral/protocentral_max86150_ecg_ppg these guys made a break-out board based on the 86150..
GitHub
ProtoCentral MAX86150 PPG and ECG chip breakout board Arduino libraries and Hardware - Protocentral/protocentral_max86150_ecg_ppg
pretty cool stuff!
fading sorrel
marble hatch
https://github.com/Protocentral/protocentral_max86150_ecg_ppg these guys made a ...
Ah, see I checked the first part number you gave, which does not have a i2c interface, the 86150 does
fading sorrel
I havnt used that one specifically but cool looking part, pricy
marble hatch
yeah, but used well, could be a good proxy for blood pressure monitoring, in addition to heart rate..
marble hatch
fading sorrel
I havnt used that one specifically but cool looking part, pricy
which ones have you used? Rohm's ICs?
fading sorrel
HRS3300 (Cheap PoC) and another Im forgetting the P/N for
marble hatch
what I am curious about (I have to order the break out board for testing) is whether the green-led versions can reliably detect heart rate when placed under the wrist, as opposed to the finger..
fading sorrel
marble hatch
what I am curious about (I have to order the break out board for testing) is whe...
The HRS3300 did that, it was okay reliable enough if you add lots of error detection but if you want a quick updating value it didnt work out
marble hatch
hmm.. thanks. And I also worry about darker skin tones v/s lighter.. the IC and integration part, even with the Maxim chip, is relatively straightforward compared to trying to get calibrated, reliable data for people
that's a full fledged clinical trial project I guess
https://www.gadgetvictims.com/2019/03/health-watches-vs-fda-approved-device.html interesting article

Gadget Victims
I previously tried my first health watch since a long while with a model dedicated to the SpO2 monitoring with mitigated conclusions. Thi...
light wigeon
Is it possible to append a timestamp to a file, on the Gemma M0, without additional hardware?
rapid radish
You could keep track of the time since the board was turned on, but it doesn't have knowledge of the actual wall-clock time.
light wigeon
@rapid radish thank you!
light wigeon
So... I got these push buttons (with 2 legs) and want to add them to my LED wristband (for connect the 4 buttons with the presets 1-4 in WLED, to switch easily between them without a phone or pc).
https://www.aliexpress.com/item/32804523270.html
So how do I connect the buttons to my ESP32? Solder one leg to ground and the other to any GPIO pin? Only only specific GPIO pins? Do I definitely need a 10k resistor? And what then? Can I just add macros via the web interface or do I need to write a user mod/custom code? The wiki entry from WLED still leaves many open questions... https://github.com/Aircoookie/WLED/wiki/Macros

aliexpress.com
Smarter Shopping, Better Living! Aliexpress.com

GitHub
Control WS2812B and many more types of digital RGB LEDs with an ESP8266 or ESP32 over WiFi! - Aircoookie/WLED
rapid radish
I can't comment on the software library you're using, but on the hardware side, yes, you'd typically connect one side of the button to ground and the other to any GPIO pin. You can use a pullup resistor on the GPIO side, or just enable the internal pullup option for the pin instead.
light wigeon
"This pin is ideally pulled high to 3.3V with a 10k resistor and the configured macro executes when the pin is pulled low (grounded)." (wiki entry)
So looks in this case they recommend adding a 10k resistor to each button?
I assume the resistor is then placed between the GPIO pin and the button? (or ground and the button?)
rapid radish
The resistor would connect on one side to 3.3V and on the other side to the GPIO-button connection.
light wigeon
oohh wait... so it goes GPIO pin -> button -> 10k resistor -> 3.3V pin ? no connection to ground what so ever then?
rapid radish
It's not all in a line like that. The GPIO-button-resistor is a 3-way junction, where they're all connected together. Then then other side of the resistor is 3.3V, and the other side of the button is ground.
light wigeon
oh wait.... instead of just reading the wiki article... I should have also paid attention to the image ^^

the left part shows it...
sorry my mistake
are there any GPIO buttons from ESP32 which I cannot use?
rapid radish
There are some pins which have other additional functions, like the UART or boot selectors, so you wouldn't want to use those without some extra care, but any "normal" GPIO pin should be fine, as far as I know.
 frank nacelle
Hey folks. I am in need of a "fitness tracker" that tracks heart rate (and whatever is related)
Catch is, I need it to have an API that can be accessed by software to generate a stream overlay.
Context is that a streamer I do stuff for plays an intense game once a month and we have been thinking for ages now about having a graph as an overlay on stream that shows heart rate.
I know fitbit has an extensive API, but I can't see what he preimum thing provides and if it'll prevent API access or what.
Are there any alternatives/is there anyone with a fitbit/other device that can give me more info?
stark storm
Maybe start with something you can read directly like https://www.adafruit.com/product/1093

Pulse Sensor Amped is a greatly improved version of the original Pulse Sensor, a plug-and-play heart-rate sensor for Arduino and Arduino compatibles. It can be used by students, artists, ...
 pure echo
https://www.instructables.com/DIY-Blood-Oxygen-Meter/ if you're feeling a bit more diy?

Instructables
DIY Blood Oxygen Meter: In 2020, the world faced an invisible monster named Corona Virus. This Virus made people very sick & weak. Many people lost their good ones.There was a big problem initially, the problem was the unavailability of proper medical equipment like th…
Code is for blood oxygen but it should be capable of heart rate monitoring too
frank nacelle
While I would love to use a raw sensor and wire it all myself, it isn't really practical in this instance
- I would have to send it from the UK to the US once assembled
- Isn't wireless
- on camera so he wouldn't want a bunch of cables visible either
pure echo
I mean, depending on your proficiency with electronic design, it can definitely be integrated, but I don't know of any off-the-shelf consumer products that would do that.
Jk pine64.org has an open source smart watch with a heart rate sensor
Idk when they'll restock though @frank nacelle
frank nacelle
thanks, i'll take a look
Thanks! That seems to be what I am after. As long as an external app can receive the heart rate data, it's perfect
 formal heron
Heya- I’m working in jewelry and I wanted to add some light to a piece. Can anyone recommend a tutorial or have advice on what tiny lights/battery combo I can use for a wrist piece?
stark storm
Perhaps a set like this would do, it has pretty tiny LEDs and comes already wired to a compact holder for a coin cell to power it. https://www.adafruit.com/product/895

Add sparkle to your project with these lovely silver wire LED strands. These strands are very interesting, they use two silver wires that are coated so they don't short if they touch, ...
They're available in several colors
 fair chasm
If you have a 3D printer you can also make your own cell holder for tinier button cells, but tiny cells and more LEDs == less run time
If you're doing a necklace you can kinda get away with putting a larger cell holder in, but a bracelet it might get annoying
 oblique bridge
nice
 molten adder
I want to build sometthing... maybe based on a trinkey with a little screen. how do i power it? Ideally I would like a tiny lipo and a way to recharge it without it bursting into flames.
stark storm
There are small chargers available: https://www.adafruit.com/product/1904

Oh so handy, this little lipo charger is so small and easy to use you can keep it on your desk or mount it easily into any project! Simply plug it via any MicroUSB cable into a USB port and ...
 round sparrow
Silly question perhaps, can you directly connect a 5v USB battery bank to a large Neopixel ring as the power source?
amber widget
@round sparrow As in with a hacked up USB cable? NeoPixels don't work without some kind of microcontroller to send data to them, so you'd still need a microcontroller wired up.
round sparrow
I have an ESP32 connected with just a data wire
amber widget
Ah yeah. Ok, you could wire up a battery pack for power.
I cut apart a USB cable at some point to do that with LEDs.
round sparrow
So I have 5v+ and GND wired to the battery and neopixel ring
a single data wire to the Data in on the neopixel but I have no control over it with WLED
amber widget
I believe they need a shared ground though?.. I could be conflating.
round sparrow
So I should ground the ESP32 board to the neopixel ring too
amber widget
I think so...
round sparrow
Let me try that, it hasn't been working at all with random LEDs coming on, even with the correct amount entered in WLED
Brb
 amber widget
round sparrow
amber widget
round sparrow
🎉 Great!
stark storm
Yes, the data in pin looks for a signal between the ground pin and itself. The power in pin looks for a voltage between the ground pin and itself. So the ground pin is the reference for both the power and the data.
round sparrow
stark storm
Yes, the data in pin looks for a signal between the ground pin and itself. The ...
Got it, so could I think about it as having a loop (I know it doesn't work like that exactly but just as a mental thing) when wiring data from a control board and the receiving device?
stark storm
Yeah, that's one way. Normally I think of current as flowing in a loop, and voltage as a quantity measured between two points.
 compact pebble
I’m interested in purchasing a large durable flexible LED matrix that has at least the dimensions of 1’ x 1’ square… I’d like actually a 12in x 14in rectangle if possible. Does Adafruit carry something like this or if not does anybody know where to get something like this?
stark storm
Like an addressable matrix?
 long mango
"durable" is tricky. It depends on how far you want to flex it.
usually they are not meant for repeated flexing
the product descriptions discuss this
@compact pebble ^
if more flexibility is needed, consider the NeoPixel and DotStar flexible strips, but you'll need to mount them.
compact pebble
@stark storm Yes addressable and preferably flexible
stark storm
The short answer is "not really", the longer answer depends on how many LEDs per mm, how flexible, how often, how soon, and how much you want to spend.
compact pebble
Looking to mount it on the chest and have a curved outward slightly to accommodate the curve of a chest
stark storm
Ah, you could likely assemble that out of a few of the flexible ones AdaFruit offers, and mount them on a chestpiece to support them.
compact pebble
OK cool thanks! do you happen to have a link to point me in the general direction?
long mango
compact pebble
OK cool thanks! do you happen to have a link to point me in the general directio...
See the link I posted above: https://www.adafruit.com/?q=flexible+led+matrix&sort=BestMatch
compact pebble
Thanks @long mango
 unkempt marten
Wie Geht's fellow makers,
TL;DR
Just need to know how to get consistent values using Velostat actuation;
if ( value == 0 )
elif ( value > 0)
Does anyone have any pointers?
Can anyone give me tips on how to get Consistent values when using Velostat paper? a la Firewalker shoes, but retrofitted for glove/fingertip actuation.
I just need to:
get consistent 0s when holding my index && thumb together,

and everything > 0
This way I can tap LEDs to a beat, or shake a hand, or touch my nose, and colors will change. Really just the index-to-thumb will work.
My problems:
I'm getting "0" analog/serial values 'randomly' -> not touching the Velostat.

Sometimes when holding the Velostat - intentionally 0-ing out the analog serial values, the zeroed values _still_ jump to something greater-than 0. Which seems to be inconsistent behavior to me --- not touching it randomly zeroes out, holding it down _to_ zero it out randomly gets values greater-than 0, e.g. the opposite effect.

Can't seem to get consistent 0s when expected,

 Can't seem to get consistent greater-than 0s when expected.
Equipment:
Trinket M0
Micro USB is providing power,
3V TrinkeM0 pad alligator to single NeoPixel 5050,
GND M0 pad /w alligator to NeoPixel 5050,
Data-Out is Pad 3 /w alligator clipped Data-In of NeoPixel 5050,

Data-In to M0 Pad "1~"  connected to jumper + soldered wire taped to one half of Velostat fingertip piece,
 GND to M0 GND Pad connect to jumper + soldered wire taped to the Other half of the same Velostat fingertip piece
Code: attached.
Wie Geht's fellow makers,
TL;DR
Just need to know how to get consistent values using Velostat actuation;
if ( value == 0 ) { show color1 }
elif ( value > 0) { show color2 }
Does anyone have any pointers?
Right now the Velostat is alllmost consistently throwing zeroes. Unless I thouch it. Then it gets crazy =/
Is there a better way to achieve my end goal of consistent wearable actuation?; copper tape with Velostat in the middle?; conductive fabric?


 long mango
unkempt marten
Wie Geht's fellow makers,
TL;DR
Just need to know how to get consistent values...
long mango
unkempt marten
Wie Geht's fellow makers,
TL;DR
Just need to know how to get consistent values...
I think you are going to need to do some filtering on the input, since the velostat is an imperfect analog input. Take some averages over a short period of time (msecs or 10s of msecs) and see if you can consistently differentiate between the states you want to distinguish.
There is noise in the system, and you need to filter for it. An analogy would be a light detector that needs to ignore brief flashes of light from, say, passing cars.
unkempt marten
Gotcha. Thank you DanH
Sounds like a coding solution it is.
unkempt marten
So close.
It works on the bench.
Soon as it's in the glove...
And even if I code for it now, this Velostat is so unpredictable, so far, that I don't think I could rely on it to work in production/donning the glove again.
Much cleaner setup with the solder though 👍 did need a clip for a second ground.
So close.


 languid frigate
compact pebble
OK cool thanks! do you happen to have a link to point me in the general directio...
languid frigate
compact pebble
OK cool thanks! do you happen to have a link to point me in the general directio...
Multiple strips aranged to suit may make more sense too for chest piece attachment
 grizzled yoke
pure echo
https://www.instructables.com/DIY-Blood-Oxygen-Meter/ if you're feeling a bit mo...
grizzled yoke
pure echo
https://www.instructables.com/DIY-Blood-Oxygen-Meter/ if you're feeling a bit mo...
Wow I will try this
 lilac cedar
Hi all, embarking on my first wearable (sort of) project. Is there an common method to connection from microcontroller to the material ? I’m think like studs or something
fair chasm
I've used snap buttons -- for something like a CircuitPlayground you might be able to solder one side of the snap to the board and sew the other side into the fabric
Depending on if you're going to need to machine wash or not, you could just sew it in directly (assuming you're using conductive thread for everything)
light wigeon
Does anyone know of a micro controller that has only one output for a dot pixel controller with a lipo charger built in ? Looking for something small but rechargeable for one led pixel
pure echo
light wigeon
Does anyone know of a micro controller that has only one output for a dot pixel ...
https://www.adafruit.com/product/2124 Not sure if small enough, but I believe you can pair this with a trinket or itsybitsy?
If you have an ItsyBitsy or Pro Trinket you probably know it's the perfect little size for a portable project. This LiPoly backpack makes it really easy to do! Instead of wiring 2 or 3 ...
 vale haven
is this the right place for sewable led questions?
fair chasm
I think so!
vale haven
k...so i'm working with a boutique to make a bralette based on samus's zero suit costume...i was thinking it would be cool to make the purple parts glow...but my attempt to cast light from a phone through some satin obviously resulted in a hotspot...i'm wondering if there's a good textile way to diffuse sewable leds to illuminate a satin garment.
obviously i can't just drop in a piece of frosted plastic as that would add excessive riggidity and would ruin such a garment.
fair chasm
Hmm... Yeah, diffusion in that application is hard. I would suggest EL wire -- it flexes, glow, and doesn't need diffusion
vale haven
doesn't elwire have to have a bulky controller at the end?
fair chasm
It does need an inverter, but many are pretty slim these days, especially if they run from a LiPo
vale haven
everything i'm seeing has what looks like jst-sm connectors...that looks like it'd be rather uncomfortable pressing into my back and/or chest. 😛
el panels are a thing?
fair chasm
If you're comfortable with soldering, you could cut that off and solder it directly to the board
fair chasm
vale haven
el panels are a thing?
Yes they are! But they aren't often very big, I think like 3-6" square sometimes
vale haven
that's actually quite a bit for what i'm doing...could maybe be the right ammount.
so you're supposed to be able to cut elwire to suit your needs right? can you do the same for el panels?
fair chasm
Pretty sure you can cut them to shape, yeah. I assume you're thinking of using one for the logo on the suit?
vale haven
the glyphs on the chest, back and hands yeah...(well hands will be on some armlettes not hte bralette itself.
fair chasm
Gotcha. Let me double check something...
Yes, you can cut them
Not sure if you can, say, cut it in pieces and reconnect all the pieces with wire...
vale haven
this sound inverter gives me an idea of something that would be cool...if i could make a tiny switch that doesn't interfere with teh design and like tiny sound sensor so i could switch between off/on/sound reactive that'd be pretty slick. 😛
fair chasm
Hehe, that would be awesome. A tiny microcontroller might be the best way to do that
vale haven
well i wouldn't need to cut appart one thing and make multiple parts of the glyph. instead like with the front one i'd have a panel cut to make the "birdhead" and then some wire would do the squigle, on the back i'd be using like 9 panels cut to those shapes...
yeah the biggest thing that makes it hard to be ambitious is having to make sure it's comfortable to sleep in. 😛
i assume there's no such thing as a flexxible arduino. 😛
fair chasm
Sleep in? :0 you could probably make a flexible Arduino...
Very curious as to why you need to sleep in it!
vale haven
well that's the main point of lingerie innit?
fair chasm
Ohh >///<
vale haven
///<?
fair chasm
Blushy face
vale haven
i suppose a thing could be just to have the electronics in it if i'm wearing it as a daytop or clubwear then take the electronics out to sleep...
not sure why blushy face...
<<*is autistic*
fair chasm
I'm shy and awkward, ignore me DX but yeah, removing the electronics would be best, you wouldn't want to glow while you sleep anyway (enemies will be able to spot you too easily)
vale haven
though if the lights don't work during sleep then i can't draw attention from friendlies. ;P
 vale haven
i think this' gonna end up taking some experimentation. do you by chance have a link to one of the small inverters you mentioned?
fair chasm
Let me see if I can find one
vale haven
https://www.adafruit.com/product/1350 << oo this isn't very large...wonder how much glowtime it could give me...

A really tiny portable inverter for EL wire. Powers off of a single CR2032 coin battery (not included!), it can drive up to 50cm / 20 inches of our high-brightness EL wire or 10cm x 1cm long ...
fair chasm
Ahh, yeah, those are pretty tiny, but can't do meters -- you might need multiple
vale haven
prolly one on front, one on back and then one for each hand.
stark storm
I'd use a couple of layers of white fabric as a diffuser, I used a similar trick for an arc reactor a while back and it worked well.
fair chasm
I used parchment paper and milk jug plastic for my Arc Reactor XD
light wigeon
fair chasm
I used parchment paper and milk jug plastic for my Arc Reactor XD
Have you guys found a way to imitate photosynthesis to power the body using wearables ?
frosty glade
is photosynthesis an efficient process?
fair chasm
Working on something similar... I have a design in progress for a bioreactor to generate chemical energy from photosynthetic process, but wearable is whole different level, and humans need more than what photosynthesis creates to run, so there needs to be more to it
light wigeon
frosty glade
is photosynthesis an efficient process?
no, but it's better than getting fat because of food 😄
rapid radish
You'll want to do the math on that. Plants have MUCH lower metabolisms than mammals, so it's unlikely that you could make much of a dent in body power with just skin area.
light wigeon
yeah my joke doesn't work, body needs like 8 million joules and photosynthesis is less efficient than solar panels 😦
rapid radish
Sorry about that. Hang around this server for long enough and you see people seriously propose everything as a possible project, so my sarcasm meter is very miscalibrated now. 😅
fair chasm
I also thought it was a serious question XD
light wigeon
I should have put 😄 or given the context that I previously said that I wish the vaccine had positive side-effects like giving photosynthesis or gills or weight loss for the PR instead of just negative stuff
but on other hand something I ask something and I'm surprised by the results so part of it was serious I guess 😄
Since someone said arc reactor I assumed my reply wouldn't be seen as seriouss 😄
stark storm
Photosynthesis is fairly clever, however: it needs the energy of two photons to perform the initial reaction, so the first one stores energy in the molecule, and the second one's energy, along with the stored energy, is sufficient.
fair chasm
I mean... I've been working on artificial gills too, lol
fair chasm
light wigeon
Since someone said arc reactor I assumed my reply wouldn't be seen as seriouss �...
To be clear, this was discussion of cosplay Arc Reactors XD
light wigeon
oh ok 🤣
 knotty iron
I want to make a locket for a 2 chains that glow when they are brought near
Any suggestions how to make it
I want it to be small
fair chasm
How small?
stark storm
NFC might work, there are chips like the RF430FRL153 that are small, inexpensive, and can operate on a single coin cell.
knotty iron
fair chasm
How small?
As small as possible because it want it to be on locket
knotty iron
stark storm
NFC might work, there are chips like the RF430FRL153 that are small, inexpensive...
I think NFC range is too small
fair chasm
Hmm... It depends on how much range you want. Tricky thing is balancing size and power -- a tiny thing won't have much battery, and the larger range your radio is, the more power you need
rapid radish
Audio (ultrasonic) could potentially work. TDK's Chirp sensors will let you get a meter or two with reliability, and they're pretty low power, depending on duty cycle.
knotty iron
fair chasm
Hmm... It depends on how much range you want. Tricky thing is balancing size and...
I just need them for less than a 1meter
Actually I want to gift it 😃
fair chasm
rapid radish
Audio (ultrasonic) could potentially work. TDK's Chirp sensors will let you get ...
Yeah, this is probably better than radio at that range and for low power. They can chirp like once a minute to see if the other is nearby
rapid radish
UWB radio would be ideal, but there aren't many good chipsets available for that yet.
stark storm
BLE might work
 polar shoal
knotty iron
I want to make a locket for a 2 chains that glow when they are brought near
polar shoal
knotty iron
I want to make a locket for a 2 chains that glow when they are brought near
How do you feel about radium?
frosty glade
I feel like radium might be a little... dangerous
knotty iron
Yes I too feel that
fair chasm
Radium bad, there's a reason they stopped using it in watches
light wigeon
polar shoal
How do you feel about radium?
Feel a little warm 😄
 hazy ember
Has anyone been using conductive thread to power LEDs over high flex gaps instead of over fairly static sections of cloth? are they pretty hardy?
fair chasm
Conductive thread should be as sturdy as regular thread on regular use, but I couldn't get a single LED to work from my chest down to the end of a sleeve with just conductive thread
hazy ember
I was thinking more of it maintaining a circuit rather than it's hold as a thread.
I need to just get hold of some to play around with asap really, and some 2x2 or 2x4mm LEDs, I'm in the UK though..
Aha, via pimoroni perhaps.
fair chasm
The thread wasn't really binding anything, but I mean it was too much resistance over that much thread
pure echo
Well that’s an easy fix, just add more threads in parallel.
fair chasm
That gets expensive if I need several DX
pure echo
Oh, chest to sleeve. Yeah, might have to consider a conductive tape…
But for a small flexing gap it’s more than enough
fair chasm
Yeah, I'm probably gonna do thin wire along like, middle of chest where the MCU is to shoulder, some thread across the bend, wire from shoulder to elbow, thread over elbow, wire from elbow to end of sleeve
pure echo
For power, I’d advise thicker wire if possible. Ideally you get some outdoor-rated insulated hookup wire, as losses are pretty significant under 24awg
At least for the non-flexing lengths.
fair chasm
I have the telephone wire I use for literally everything anymore XD
hazy ember
that's what you're using for frequently flexed connections ?
fair chasm
No, just talking about having that along the not-really-flexing-that-much parts and then conductive thread at the joints
 fierce hull
Conductive thread is just as flexible as most fabrics it is being sewn to, but high flex areas (like elbows or knees especially) can apply a lot of tension to the fabric which can pull on circuits/components and possibly weaken how securely they are sewn/connected over time
 main lion
I'm Wanting to make some Neopixel earings but I'm unsure which boards can be programed with Circuit Python and will work with https://www.adafruit.com/product/2124 for charging before I turn them on for a night of fun I'm unsure if this will work with all itsyBitsy Boards I'm thinking the RP2040 I'm still somewhat of a noob and I find info on the boards confuzing size wize the trinket M0 would be better but If it doesn't fit the power backpack than it wont be useful for me can anyone shed light on if Trinket M0 will attach the the the above product ( Power backpack) a QT PY connecting to the Power backpack would be cool but what will fit??? please help thanks
If you have an ItsyBitsy or Pro Trinket you probably know it's the perfect little size for a portable project. This LiPoly backpack makes it really easy to do! Instead of wiring 2 or 3 ...
stark storm
My understanding is that the backpack can be used with the QT PY and Trinket, but the pinout is different so you'd have to wire the pins individually instead of attaching it directly with header. However, since you're considering charging separately anyway, you could just use a separate charger and then plug the cells into your board when you want to wear it: that way, you're not wearing the additional weight and bulk of the charger/backpack.
terse moon
I’d say that I have a LiPo backpack directly for the Qt Py but I’m working on bringing a new version to my store
And I have like. 2 left?
Yeah 2 left

Tindie
A Cute Stackable LiPo Battery Backpack for your QtPy & Seeed Studio Xiao!
 languid jetty
I was wondering if the Stemma Speaker will work with the Gemma M0? If so is there any example code that could get me started? Thank you
hazy ember
I got some 3 ply thread to try, a couple of different bits of silicone wiring as well, and an ItsyBitsy M0 :)
I might have to come up with a new led case for my plans though, really looking for longevity.
 lime ferry
Has anyone played around with cutable fiber optic filament for costuming? Working on an android costume where I want an effect of futuristic wires (some broken) and am wondering if there are any gotchas using fiber optic. (Most of the resources I've found online are for installations or nerf guns)
stark storm
The thick plastic stuff works well and is easy to use
lime ferry
stark storm
The thick plastic stuff works well and is easy to use
haha - yeah, looks like i ordered it too thin.... my 328 feet is not much at all!
stark storm
I was thinking the 1mm stuff that's used for things like TOSlink, or even the really thick stuff like this: https://www.adafruit.com/product/4163

Yay, a plastic tube! No, we jest. This is no ordinary plastic tube, but rather a side-lighting fiber optic tube.This is a pretty neat way to glow up. Light in the fiber optic cable ...
lime ferry
stark storm
I was thinking the 1mm stuff that's used for things like TOSlink, or even the re...
Yeah, I ordered super super thin .1mm but a lot of feet hoping it would be enough to make thick dense strands with a lot of texture. I just put in an order for a bunch of rolls from .5mm up to 4mm - I think the combinations will work well.
stark storm
Oh, good idea, that should give you a lot of versatility
 dusk wharf
@lime ferry Take a look at i-fiberoptics.com. I have used them for years in products to route indicator LEDs. The only gotchas is that fiber optics need to be polished at the end after cutting to get a good result, and you shouldn't ever kink them.
lime ferry
dusk wharf
<@!771166355939786823> Take a look at i-fiberoptics.com. I have used them for ye...
Thanks for the advice. I'll check it out - I got a ton of fiber optic cable and I've been experimenting with it. Mixing strand thickness and length has created a nice lighting effect and sanding gives a nice side-glow when I need a bit more. I did order some of the fiber optic light sources to from adafruit to see if they do better than my bright neopixels + 3d printed terminals.
bold hill
Wondering if anyohe is online who might want to help me troubleshoot a Gemma my Python code. They aren't getting along. the gemma is throwing the onboard led green>yellow> 1 blink yellow.
stark storm
bold hill
Thanks, I had read through that page. I was able to deduce the first errors which were line errors in the code. Now it's indicating "other error"
stark storm
Hmm, can you get a serial link to see if it's printing any diagnostics?
bold hill
`Auto-reload is on. Simply save files over USB to run them or enter REPL to disable.
Press any key to enter the REPL. Use CTRL-D to reload.
soft reboot
Auto-reload is on. Simply save files over USB to run them or enter REPL to disable.
code.py output:
Traceback (most recent call last):
File "code.py", line 10, in <module>
File "adafruit_led_animation/animation/rainbowcomet.py", line 29, in <module>
ImportError: no module named 'adafruit_led_animation'
Code done running.
Press any key to enter the REPL. Use CTRL-D to reload.
`
 orchid shuttleBOT
 mattlonardo#2599 was unmuted
 rocky drift
Sorry about that. Dyno saw your code as... too many things.
bold hill
sorry, did i do something wrong?
rocky drift
I'd advise using something like pastebin
rocky drift
bold hill
sorry, did i do something wrong?
Nah, too much repetitive stuff makes Dynobot go "NO! BAD!"
And... unfortunately that catches code a lot
bold hill
sorry, i'm still kinda new to this
bold hill
cool, thanks. i'll read up on pastebin
rocky drift
I recommend instead of pasting code into discord, to use somewhere like https://www.pastebin.com
bold hill
Pastebin
Pastebin.com is the number one paste tool since 2002. Pastebin is a website where you can store text online for a set period of time.
stark storm
In any case, it looks like you need to install the adafruit_led_animation module
bold hill
I thought so. I can't seem to find one that says adafruit_led_animation module specifically
there is this one within a folder adafruit_led_animation the file says __init__.mpy
could that be it?
stark storm
Worth a try
bold hill
yea... i dunno what i'm doing here. i need one of those brain plugs so I can just learn everything about coding all at once... that would help
bold hill
pixels = neopixel.NeoPixel(pixel_pin, pixel_num, brightness=0.5, auto_write=False) What does it mean when it says Continuation line under-indented for visual indent ?
light wigeon
I'm guessing the line was broken by the typist.
bold hill
would it cause a problem with my code in the end? if I try putting it on one line it says "line too long"
light wigeon
I don't have any idea what environment you are coding in.
bold hill
python
light wigeon
I didn't know you could have a line 'too long'.
It's probably simpler than that.
Looks like you move the 2nd and following lines past the open parens.
pixels = neopixel.NeoPixel(pixel_pin, pixel_num,
                           brightness=0.5,
                           auto_write=False)
pixels = neopixel.NeoPixel(pixel_pin, pixel_num,
brightness=0.5,
auto_write=False)
If that's true I am not impressed with their solution. ;)
lime ferry
bold hill
python
@light wigeon gave a good answer to your issue - I'd recommend reading up on python and whitespace - and then get an editor that lets you view whitespace and can differentiate between spaces and tabs. Python uses whitespace as syntax - which can be confusing when you're first learning it since errors can end up invisible. The line too long means that version of python is enforcing a standard about how long a line can be for readability since terminals of old were limited to about 80 characters per line. If you're using an editor that supports python - you can usually find preferences that'll adjust its auto-formatting to give better results.
 sudden relic
 fair chasm
Is that a resistor on the package? Or a capacitor?
terse moon
fair chasm
Is that a resistor on the package? Or a capacitor?
It’s a resistor
fair chasm
Thought so. Should be good to go then, right?
 uncut hare
Is it safe to have magnets next to the trinket m0
fair chasm
Yeah, as long as you're not passing super strong magnets over it really fast and creating current, you should be fine
So like, not inside a generator, lol
pure echo
I mean, I would avoid placing strong magnets directly on top of any ICs, simply because they have the potential to induce unwanted current when you move them. They pose little to no risk to flash memory, so unless you're using FRAM or any magnetic tape (neither of which a trinket m0 has by default), you shouldn't have to worry about magnets ruining your hard work.
Magnets can potentially be dangerous for HDD and older magnetic-film-based storage devices such as floppies and cassettes, as well as the recent FRAM, (Ferromagnetic Random Access Memory) but solid-state (flash, SD, SSD) and optical drives (CD, DVD) are not prone to magnet damage.
fair chasm
Yup, induced currents usually just cause glitching and no damage
stark storm
Even FRAM barely cares
uncut hare
Thanks!😄
uncut hare
can anyone help me get the hc-05 bluetooth module work on samd 21
keep on getting a exit status 1
rapid radish
uncut hare
keep on getting a exit status 1
That sounds like something else is going wrong with the flashing process instead of having a problem with the Bluetooth module specifically.
uncut hare
Thx!
uncut hare
does anyone know any bluetooth modules that work well with the samd 21 chip (specifically the trinket m0)
looking for a small one
 fluid cypress
Which language?
uncut hare
ide
fluid cypress
I'm unfamiliar
stark lodge
I'd suggest using an nrf52840 board on its own
it'll work better than a samd21 and separate module
 blissful shard
Hey folks! I just bought a GEMMA v2.
I've seen that it has the ability to output sound.
So I want to build a robot helmet, with LEDs for the eyes and mouth.
I figured based off of projects on Adafruit that the LEDs for mouth could react to sound,
but will I be able to use that same microphone and a cheap speaker to give myself a robot voice?
Appreciate the help!
stark storm
blissful shard
Hey folks! I just bought a GEMMA v2.
I've seen that it has the ability to output...
You could presumably hook the microphone to the analog input and the speaker to one of the digital pins. Note that the Gemma V2 uses an older "bit bang" technology to implement its USB port, which does not work well with newer computers. There's an updated Gemma M0 in the same form factor that has native USB as well as a more powerful CPU.
blissful shard
I was mistaken, not the V2. I ordered M0s.
Thanks for your response! I'm just hoping it has enough juice to do it all
terse moon
stark storm
You could presumably hook the microphone to the analog input and the speaker to ...
My brain read Gemma as German. So I was wondering how they got USB on WW2 guided rockets
 icy raft
Hello, I'm working on a HallowingM0 halloween prop for my dog and I've run into an issue! If light the NeoPixel up on the back of the Hallowing, the speaker that I've attached plays a dull whine 😦 Happens on battery and while connected to my laptop via USB.
Any pro-tips for trouble shooting this? Is it just a fact of life with the HallowingM0?
I've tried swapping between battery/USB. Tried adjusting the volume on the HallowingM0 POT, tried dimming the lcd screen to .10
Using 8ohm 1Watt speaker from adafruit. https://www.adafruit.com/product/3923

Hear the good news! This wee speaker is a great addition to any audio project where you need 8 ohm impedance and 1W or less of power. We particularly like ...
Could be related, I'm using the touch pad teeth, and I've had the board fail to boot 4 times this morning with this message from CircuitPython in the console "RuntimeError: No pull up found on SDA or SCL; check your wiring" The message clears when I unplug/replug the board.
icy raft
I've narrowed the issue down to the battery. The whine becomes much louder when I'm powering from the battery 😦
stark storm
I suspect the PWM the LED uses is causing it to draw current pulses that are modulating the power supply. I suspect a decoupling capacitor might help, but I'm unsure where to install one for best effect.
icy raft
Thanks for the insight,
I just ran the battery down a bit and the whine volume decreased dramatically. Since the whine seems to only be present while using the lithium ion header, I may just run the project from a battery w/ USB interface.
Since this is my first time using a Hallowing, I'm more interested in wether or not the board is working as expected. Or possibly a bad unit.
fair chasm
Is it charging the battery? I've had devices where it made noise while charging
 elder cloak
Not sure if this is the right channel, but I've got a neopixel geometry question.
We're doing some jellyfish umbrellas for Halloween and if I want to do continuous end-to-end strips I need to run at least a data wire back from the edge of the umbrella to the center to connect to the next one.
Alternately, I could just have 8 strips that start in the center, each of them connected to a different output on the feather in the hub.
Any guidance on one way or the other? Is dealing with 8 different neopixel strips impossible/super difficult?
rapid radish
Have you also considered zig-zagging the connections, i.e. have a single logical strip that goes from the center to the edge, pops a data wire along the edge to the next strip, which goes back to the center, etc.?
elder cloak
Hmm. Interesting idea, actually, although I was hoping not to run any extra data wires
But that should be better than 8 (7, really) runs back to the hub.
stark storm
This is one way to control 8 strips at once, but it's admittedly massive overkill https://www.adafruit.com/product/1779

This adapter board connects the Teensy 3.1 to up to thousands of WS2811/WS2812 (a.k.a NeoPixel) and compatible LEDs using the OctoWS2811 Library.It features a 74HCT245 buffer chip and 100 ...
viral edge
Depending on the Feather you are using you could also use a NeoPXL8 featherwing
 fair chasm
Mmm, bodges
fair chasm
lol


 elder cloak

The wiring turned into a soup sandwich.
Anybody know what these connectors are and how easy/hard they are to work with?


I'm thinking I should have put an "in" and "out" connector at the top of each string, so I could just chain them around the top.
Ah, looks like jst-sm
clicks "buy now"
fair chasm
elder cloak
Anybody know what these connectors are and how easy/hard they are to work with?
https://www.adafruit.com/product/1663 very easy to work with, although they can be a bit stiff

These 3-wire cables are 163mm (6.4") long and come as a set. One cable has a JST SM type connector plug on the end. The other cable has a matching JST SM type receptacle connector. They ...
elder cloak
Yeah, I already have a crimper so I bought some ends.
I wonder if there's a market for pre-made lengths of neopixels with the in/out plugs at the same end...hint hint...
Umbrellas, curtains...
fair chasm
Hmm… might need a few varieties for different instances, as there aren’t standard lengths for those… although a “one size fits most” approach might be good. But you might be better off selling complete umbrellas
 remote pecan
Needing help to figure out what LED kit is out there to be able to get LEDs into this helmet I printed out. The desired end result is in the 2nd pic. I already have printed out the little containers the LEDs will go in, I just need some gentle nudging toward figuring this part out.

 pure echo
remote pecan
Needing help to figure out what LED kit is out there to be able to get LEDs into...
pure echo
remote pecan
Needing help to figure out what LED kit is out there to be able to get LEDs into...
Do you have approximate dimensions for each container? Also, are these going to be single-color, or are you hoping for RGB?
remote pecan
@pure echo Hoping for addressable RGBs. The containers are about an inch wide by 2 inches
pure echo
Any depth restrictions?
https://www.adafruit.com/product/1461 This strip can cut to about 3 LEDs per container. If that's not enough, the 144/meter strips can get you up to 7 per.

You thought it couldn't get better than our world-famous 32-LED-per-meter Digital LED strip but we will prove you wrong! You wanted twice the LEDs? We got it (well, it's 1.875 times ...
You'll need a decent diffuser for best effect, of course. The black strips behind a good diffuser will get you the best effect for the dark helmet, but you can try the white strips if your diffusion isn't enough to light the entire container evenly.
stark storm
There are lots of good DIY options for diffusion (panels cut from milk jugs, paper, parchment, fabric, 3D printed, etc.). If you want something fancier, there are commercial offerings like the Lee Filters "Zircon" line that are easy to work with and do a good job.
elder cloak
fair chasm
Hmm… might need a few varieties for different instances, as there aren’t standar...
Yeah, I don't want to get into the umbrella business, but was thinking that a swam/mob of them would be fun, so I'm trying to think I'm terms of manufacturability. If only the tape the LEDs were on had one or two spare conductor paths for use later on. I could just bridge the data path to one of those for the return trip.
(also, umbrellas take up a lot more space open than closed, so I'd like to be able to close them for storage, so they need to be somewhat mechanically reliable.)
fair chasm
Lol, fair. But yeah, if not making the umbrellas, a “one size fits most” approach is probably doable
remote pecan
pure echo
Any depth restrictions?
Depth would be about an inch as well
pure echo
More than enough.
remote pecan
What am I wiring into from the LEDs? Assume you are making a kid-level DIY here since LED DIY is super new to me
I’d love it if there was a kit that existed that hopefully didnt require soldering (but soldering is fine - just more work than plugging stuff in)
pure echo
Oooo, you'll need a controller for the data wire, and a nice hefty power source for the power lines.
I don't think you can really get away with soldering for these lights, if you're cutting a strip apart.
https://www.adafruit.com/product/1004 These exist for solder-free joining, but not for the strips I recommended earlier. You'll have to size down to a wider dotstar strip or a non-addressable analog strip for these to be effective...

These ingenious little clips make it easier than ever to use our analog RGB LED strips - no need to solder! The clips snap onto the ends of the LED strip and hold securely. They're not ...
If you are more comfortable with through-hole resistors, you could fit one of these in each container. They can control up to 8 non-addressable RGB LEDs per, and chain together for loads of the non-addressable through-hole LEDs

For all of you out there who want to control 24 channels of PWM, we salute you! We also would like you to check out this breakout board for the TLC5947 PWM driver chip. This chip can control ...
Based on the dimensions you gave earlier, anyways. I don't know if your containers are necessarily rectangular, but there's a slightly smaller 12-channel version for 4 RGB LEDs as well.
Here's a more expensive strand that is connectorized, so you can avoid soldering completely with a couple of these. https://www.adafruit.com/product/322

RGB Pixels are digitally-controllable lights you can set to any color, or animate. Each RGB LED and controller chip is molded into a 'dot' of silicone. The dots are weatherproof and ...
remote pecan
@pure echo thanks! If I wanted to do it the right way (addressable LEDs with maybe a POT for noise) are there any kits out there?
I saw in one video someone down-converting 12v to 6v and right there I noped
Configuring circuits scares me 🤷♂️
pure echo
Not one that I know of for your application. The strand above is 5v, and doesn’t require any sort of conversion.
There are lots for LED matrices, but I can’t think of one that’s particularly adaptable to these types of custom props.
remote pecan

This is what the LED containers look like. This is from someone elses blog


Its going to look incredible (with LEDs 🙃)
stark storm
That looks like a similar idea with LED strips in the compartments. It's a good approach.
remote pecan

The schematics from the maker’s blog. Guess I may just go this route unless there is a more efficient route
stark storm
The LEDs are basically electrically hooked end to end, but you can arrange them physically however you like.
 high cedar
Adafruit used to carry conductive thread ribbon cable and I looked for it and R4R is also no longer selling it. Does anyone know of a similar product anywhere? Another option is to sew conductive thread on a cloth strip. Is this possible with the 2 or 3 ply conductive thread using a sewing machine? I know an experienced seamster who could do the sewing but any tips would be welcome.
stark storm
While I don't know where to get that exact thing, you can sometimes get the functionality you want in some other way (ordinary ribbon cable, flexible PCB, Groovy Noodle, conductive paint, magnet wire, etc.)
I don't think I'd try conductive thread in a sewing machine, but you could lay several strands of it side by side between two layers of interfacing and iron it into a strip.
amber widget
Another option is to use normal thread to stitch over a strand of conductive thread. It's pinned in at that point, though it could still shift a bit.
 mossy mist
@remote pecan I found these brackets on thingiverse. They are sized for a 3 pin jst connector
 rotund needle
how come many flora sensors are discontinued?
pure echo
The ones I see all use old chips that have been discontinued by the manufacturer. Are you looking for a particular type of sensor?
 cloud laurel
I bought a similar pair of rezz glasses from arcane lights and I wanna see if this version of the glasses is able to accept the code for the rezz goggles. Is it possible?

Build your own REZZ inspired glasses with NeoPixels and CircuitPython. 3D print the parts and use the Adafruit ItsyBitsy M4 to make hypnotic NeoPixel animations! Learn how to solder components and get started programming with CircuitPython.
Learn Guide
https://learn.adafruit.com/rezz-neopixel-glasses/
Code on Github
https://github.com/adafruit...
remote pecan
Looking for some help to put together a bit of a shopping list at Adafruit to help me get everything together in order to light up a helmet I 3D printed. I am aiming at the Neopixel 8 light strip to be placed in each of these small containers (pictured below) but from there what do I need? RPi to control the LEDs? Do I need something in between the LEDs and the RPi to also consider? Help me put together the complete list of what is needed. I love documentation and will document this out for the community if you help me up front 🙂 Thanks in advance!

What the finished product would look like so you can see where the LEDs will be placed
 pure echo
remote pecan
Looking for some help to put together a bit of a shopping list at Adafruit to he...
pure echo
remote pecan
Looking for some help to put together a bit of a shopping list at Adafruit to he...
Almost any microcontroller can control LEDs given enough juice from a power source. How do you plan on controlling them?
Definitely need a power source and voltage regulator to provide energy. I assume you'll want this to be battery powered?
remote pecan
Thats right @pure echo
remote pecan
Right now I have on the list - 16 8-neopixel strips 👍
pure echo
remote pecan
Right now I have on the list - 16 8-neopixel strips 👍
The only other two absolute requirements are power and control. You have a couple of options, depending on how you envision this project and what you're comfortable with.
- Feather and LiPo are usually the go-to recommendation for wearable projects. This nifty little featherwing makes it easy to use neopixel strips, but it's built for the M0. Check out Adafruit 3243, 3249, and include a LiPo battery with enough juice to run your neopixels. The M0 has limited RAM, so it's not great if you want to have a lot of complex controls and animations, but it should be sufficient for this. There is a version for the M4, but it's out of stock right now...
- You can save a bit of cost with a 5V-compatible microcontroller, so you can skip the level shifting with the extra featherwing. Check out Adafruit 3677, and power with a USB battery bank and a micro USB cable. This does, of course, assume you have (or can cheaply get) a USB powerbank with enough output for your pixels. Depending on how bright you need them, USB is usually limited to about 500mA, so you might not be able to push as much brightness into as many pixels at once.
- If you plan to use any kind of other controls, there may be other board options that can suit those needs better. WiFi? Bluetooth? Perhaps some other sensors, like onboard acceleration sensing?
Also, keep in mind your project requirements haven't been discussed thoroughly in depth, so a lot of this is very much the bare minimum. Once you have a better idea of controls, charging, and other functional considerations, there's always room for further discussion.
remote pecan
Awesome and thanks @pure echo! Hopefully the following details will help explain further
Usage: The ability to wear the helmet and have the LEDs react to sound and/or play a predetermined animation. I would love to get to exact replica status but can dial it back based on complexity/cost/etc. Controlling from a phone via bluetooth would be incredible and programming it over Wifi would be great as well. I understand this isnt helpful on understanding scale but I'm less worried on budget and more so laser focused on getting the LEDs to look like the actual Daft Punk helmet (or close enough to pull it off)
Power - Would it be better to wear a battery pack in my back pocket than in the helmet? Not sure I have room enough for an in helmet pack and thinking an external cable to a pack would be a-ok
Controls like mentioned above if there is a solution out there that could allow me to control the LEDs via an app, that'd be incredible. If nothing like that exists, if its just a matter of hitting a button to cycle through animations, all good too!
pure echo
remote pecan
Awesome and thanks <@!98211350907490304>! Hopefully the following details will h...
Oooh, you'll need a microphone for that. 1713 and 4346 are both valid options among many others, but they are very different in the way they return data, so do some light research to make sure they work for the MCU you select. Wifi OTA is a bit harder, as I don't have as much experience with this, but I do know this is a thing and has been done.
A separate battery pack is definitely workable. Longer wires can potentially cause a slight voltage drop, meaning your battery capacity may be slightly shorter than advertised. However, it also means you can disconnect the battery more easily for easy recharging. If you go the USB power bank, you can just get a long enough micro-USB cable and power it that way. Just make sure the wires are tucked so it doesn't snag on anything...
Adafruit 2995 stands out as a feather with easy-to-use bluetooth functionality and load switching circuit for battery management. Pair it with a 3249 for the same neopixel-driving feather with Bluefruit functionality. If that's too much, any of the microcontrollers above are perfectly capable of simple button/switch controls.
 mellow bobcat
Hello
Umm I'm new to led circuits so I need some help for cosplay


My plan was to light up the 3 pipes on the arms, the 4 tubes that goes to the each finger, and the 4 syringes. I think 3v leds would work but idk how to connect 11 leds together. Also I'm not sure what kind of battery to use.
Thr second photo is how I plan on putting the leds. And I think it would be a good idea to put the wires through the tubes that goes to the each finger
Not sure if I can find it in my local store but I might use like led shoe laces for the tubes instead of getting an actual tube and put led on the tip
fair chasm
Do you need to control them (strobe/animation) or just full on? If you just want them on all the time, I'd wire them in parallel, and a LiPo with a 3V regulator would probably be the easiest way. Alkaline batteries are an option, could use like 2 D cells in series and no regulator. Oh, you do want a current limiting resistor in series with the LEDs.
mellow bobcat
Sorry I understood like half of what you wrote I don't know much about circuits
Could you show like a visual example?
U can dm me if u like
pure echo
Do you want the lights to flash, or just stay on?
fair chasm
Excuse the crude drawing... But this would be a set of LEDs in parallel [all the + connected to the battery/each other and all the - connected to the battery/each other]

And you can add a switch for on/off
stark storm
You probably want a resistor per LED as well
pure echo
Either end is fine, but I recommend picking one end and staying consistent all the way through.
Resistor value will depend on LED color, battery voltage, and desired brightness.
mellow bobcat
I'll use orange led
I'd prefer it to be as bright as it can without hurting the led
mellow bobcat
pure echo
Either end is fine, but I recommend picking one end and staying consistent all t...
Should I connect it directly on the end or should I wire it like led>wire>restor> wire?
stark storm
Wire - resistor - LED - wire
An ordinary orange LED has a forward voltage of 2 - 2.2V, and takes 20mA for full brightness. For a 3V supply (such as a pair of D cells in series), that works out to a 40-50Ω resistor.
Amusingly, I built something like this a while back, but took a different approach so I could use really thin wire. I hooked the power supply to a "boost regulator" that converted the input voltage to a higher voltage (22 volts in my case), then arranged the LEDs in daisy chain strings. This meant each string of LEDs only needed one resistor.
 mellow bobcat
fair chasm
Do you need to control them (strobe/animation) or just full on? If you just want...
mellow bobcat
fair chasm
Do you need to control them (strobe/animation) or just full on? If you just want...
I just check LiPo batteries are 11 v do I need 2 or 3of em to light up 9 of the leds?
stark storm
Depends on the battery. Three LiPo cells in series yields 11.1V. If you're using that as a power supply, you might want to use series chains of LEDs as well, to take more efficient advantage of your battery power.
You could wire it the same way with a resistor per LED, which would take about a 470Ω resistor, but you'd be wasting 80% of your power in the resistors.
mellow bobcat
I'm gonna check my local store in a bit idk what kinds of batteries they have
pure echo
mellow bobcat
I just check LiPo batteries are 11 v do I need 2 or 3of em to light up 9 of the ...
LiPo batteries typically come in multiples of 3.7V, depending on the number of cells. Larger LiPos for RC cars and the like do run around 11V, but Adafruit offers 3.7V for most of their boards.
mellow bobcat
mellow bobcat
And um if you could write down a material list that would be great
👆 I need a material list to make sure I'll get everything correctly
I'll let u guys know what they have in a bit
Mighf take a 10-15 mins
mellow bobcat
Soo my battery died and I had to use a charging machine 2 blocks away
From the store
Everyone says something and I'm confused
What type of resistor I should get?
Wait it depends on the battery right
And I'd like to remind u guys again that I'm really new to these stuff my knowledge is just making a simple led circuit
With common batteries
I've never used anything other than that
I have a soldering iron tho
pure echo
I mean, you can totally use some double or triple As if you have a battery holder. There are just a LOT of ways to make a simple circuit, so we're trying to not give an exact materials list until we know what you prefer to work with.
mellow bobcat
Something simple?
I dont even know whats the difference a LiPo battery and a normal one
Because Im making a glove I'd prefer it to be portable
Maybe just 1 or 2 batteries that aren't too big
pure echo
LiPo is just a super high energy-density battery. Different chemistry. It's used for a lot of wearable projects for its size-to-power ratio and current draw capability.
mellow bobcat
Or a chargable one so It's portable
mellow bobcat
pure echo
LiPo is just a super high energy-density battery. Different chemistry. It's used...
Oh okay
pure echo
https://www.adafruit.com/category/574 All of the rectangular foil-ish-coated batteries are what we typically call Lipos. They are nice for their portability, but need to be handled with some care as they can explode if punctured.
Adafruit Industries, Unique & fun DIY electronics and kits : Batteries - Tools Gift Certificates Arduino Cables Sensors LEDs Books Breakout Boards Power EL Wire/Tape/Panel Components & Parts LCDs & Displays Wearables Prototyping Raspberry Pi Wireless Young Engineers 3D printing NeoPixels Kits & Projects Robotics & CNC Accessories Cosplay/Costumi...
That being said, all batteries have some level of danger if punctured...
mellow bobcat
Are Lipos more dangerous than normal batteries?
Cuz if so I rather not take the chance of my hand getting hurt
They look less protected than normal batteries
pure echo
Relatively, yes. Realistically, you just have to wire it properly. Adafruit uses connectors for their Lipo products to minimize the risk of user error, but there's significantly less protection on the battery-side.
mellow bobcat
Idk what adafruit is I joined this server cuz I googled discord electronics servers
pure echo
https://www.adafruit.com/ Just another distributor/manufacturer of hobbyist electronics.
Adafruit Industries, Unique & fun DIY electronics and kits : - Tools Gift Certificates Arduino Cables Sensors LEDs Books Breakout Boards Power EL Wire/Tape/Panel Components & Parts LCDs & Displays Wearables Prototyping Raspberry Pi Wireless Young Engineers 3D printing NeoPixels Kits & Projects Robotics & CNC Accessories Cosplay/Costuming Hallow...
mellow bobcat
I'm back at the store now
pure echo
(disclaimer: I don't work for, nor have any official affiliation with Adafruit's business. I just recommend Adafruit products because I feel weird recommending competitor products here...)
mellow bobcat
Oh I see
pure echo
If you have a battery holder for two or three triple-As, you could certainly make that work for a couple of LEDs.
mellow bobcat
I'm not from US so I can't order anything and Not sure they have their products here
pure echo
Well, you can at least use it for a reference. International distributors exist, but if you're at your local electronics store you can pick out your own materials hehe
If you can find something like this and fit in in/on your glove somehow, I think it should be sufficient.
 mellow bobcat
I can fit that in
Just 2 batteries would be enough for it tho?
Like I said, I'm a beginner so If I'm not wrong, I'll use 11 leds, I googled the voltage and it says 1.8v per orange led.
So I need 19.8v?
pure echo
Only if you connect them in series. In parallel, the voltage drop is shared, so 3.3V is enough to power as many 1.8V LEDs as you can provide enough current for.
pure echo
Well, each LED, ideally, will call for 20-30mA per. 11 such LEDs will run you 220-330mA. Alkaline batteries are typically around 860-1200 mAh, so you're looking at around two and a half hours in worst-case.
Best case would be closer to 5 and a half, so kinda big range there.
mellow bobcat
mA?
mellow bobcat
Okayy
pure echo
mAh is milliamp-hours, a typical measurement of battery capacity.
mellow bobcat
mellow bobcat
Would 3 1.5v batteries work?
👆
pure echo
Yes
mellow bobcat
For 4?
pure echo
somewhere in the range of 160 ohms?
mellow bobcat
Would 180 work?
pure echo
Yep.
mellow bobcat
Okay
Okay thank youu
So I got 11 180 ohm resistor, 11 leds, and 2 battery holders
Wires for connecting them
1 button
And 4 1.5 batteries
Do I need anything else?
pure echo
No, but for the button, make sure it's a latching one, or get a switch instead.
Most buttons are momentary, meaning they only close the circuit while the button is pressed down.

 pure echo
If you press it, does it always pop back up to the same height?
Or does it alternate between two levels
mellow bobcat
It alternates
 mellow bobcat
pure echo
Oh, perfect.
mellow bobcat
pure echo
Oh, perfect.
Cool
Thank you so much to all of u
I really appreciate it
Wish me luck I gotta finish this glove for Halloween hahah
light wigeon
If you use C cells or D cells battery holders you may be able to use spacers that adapt from AA and AAA to have more flexibilities.
I use AA alkaline cells in D cell sized spacers to power the Eton 750 shortwave radio - while charging 4x NiMH D cells.
It's only 80 mA draw on the AA cells so they last a while.
mellow bobcat
Sorry I didn't understand most of what you have said. Idk if u read the conversation but I'm really new to these stuff
stark storm
For those LEDs, two cells in series is the way to go. Adding a third cell only wastes power.
mellow bobcat
So I should use just one of these?
mellow bobcat
pure echo
If you can find something like this and fit in in/on your glove somehow, I think...
👆
pure echo
Oh, yeah. If you change the resistors to a 40-ish ohm, that would be ideal.
I think 33 ohms would be max brightness and a pretty standard value.
mellow bobcat
I already bought 11 180 ohm resistors
And I'm back home
If it would be a really big problem
I might buy new ones tomorrow
If not, I'll buy them later on and edit my circuit
I just need it to work for Halloween
 ember sun
Hiya,
I'm trying to wire together an adafruit feather 32u4, a lipo and a SPDT switch so I can turn the feather on/off by hand.
I've checked my lipo polarity to make sure the red wire is positive and the black one is ground.
From then on I'm a bit lost, can you guys recommend resources? Also how do I know to which pin of the jst input port I should solder each pin of the battery? And how should I go about wiring the switch in between those?
Picture for reference:
https://i.imgur.com/kEsDxNV.jpg

 rapid radish
ember sun
Hiya,
I'm trying to wire together an adafruit feather 32u4, a lipo and a SPDT s...
rapid radish
ember sun
Hiya,
I'm trying to wire together an adafruit feather 32u4, a lipo and a SPDT s...
The Learn guide for the board is a good resource. It looks like you've already got wires soldered to the BAT and GND pins on the board, which is great, so you don't need to do anything with the JST connector.
For wiring, you'd connect the GND pin of the board to the negative wire of the battery. The positive wire of the battery and the wire from the BAT pin of the board should go to two adjacent pins on the switch... the side you pick just determines which switch position will be "on" versus "off".
ember sun
rapid radish
For wiring, you'd connect the GND pin of the board to the negative wire of the b...
Thank you, that's very clear and not at all what I was about to do 😅 !
I had those cable soldered on the adafruit because I have a sensor which I plan to connect there. I have two questions:
- Can I safely share those pins between the sensor and battery?
- Will the battery charging process through USB work if I connect to BAT instead of the JST connector?
I had downloaded the adafruit feather datasheet but I didn't find the power management part to be entirely clear, I'll check out the learning guide now.
rapid radish
ember sun
Thank you, that's very clear and not at all what I was about to do 😅 !
I had th...
(1) Maybe. It's usually better to run a sensor from the regulated 3.3V supply on the Feather instead of directly from battery voltage. Ground can and should definitely be shared, though.
(2) Yes, the connector and the header pins should be electrically equivalent.
ember sun
rapid radish
(2) Yes, the connector and the header pins should be electrically equivalent.
Awesome, thank you!
 green dragon
My daughter is working on her costume lighting with a CPX board and MakeCode. Is it possible to store her MakeCode generated program on the CPX and have it boot into it on reset? I was originally planning to hook up the battery, download the uf2, then unplug from the computer, but that process seems wonky.
fluid cypress
Hmm I would think that makecode works the same as arduino and circuitpython in that regard, so I would think the answer is yes
Let me see if I can't find out though
You could test it with a simple code that just blinks LEDs in a pattern
 manic dew
Hi, any tips for debugging with conductive thread in a sweater? I have a flora connected to a series of individual neopixels
One of the connections is loose, maybe power or ground.
I have a multimeter
stark storm
Power and ground are the easy ones: set the multimeter to measure resistance (or continuity, if it has that function), and set the probes at the start and end of each connection and flex the sweater some to see if the resistance varies much. If it does, there's likely a problem with that connection.
If you find one with a problem, you can then start moving the probes around on the connection to narrow down where the problem is occurring.
 upbeat wing
I am working on a heads up display wearable. I have audio too and a 8bitdo zero 2 controller. I have RetroPie working and a camera program working. I still have more buttons on the remote in my launcher program. Any idea what else I could potentially do with a bluetooth gamepad? I was thinking of installing Kodi and trying to use the gamepad with it
upbeat wing
I got Kodi working 🙂 unintended consequence I can now view the pictures and videos taken by the camera in kodi
manic dew
@stark storm thank you, I've started doing that. I think some of the loops around the through-hole connections on the flora and neopixels are loose as well, trying to re-sew them and see if that helps.
stark storm
Sometimes you can get creative with snaps, other times, that's impractical or no help. Such is life when dealing with electrifying textiles.
 worldly mural
I don't have a specific question for a project, kind of just interested in hearing peoples' thoughts.
-
What has been a wearable project you've seen recently that really blew your mind?
-
What was your first OR favorite wearable project you did?
I am in the mood for inspo 😊
rapid radish
My favorite was a prototype smart-glasses project. http://wcc.gatech.edu/sites/default/files/Glass Lennon 4943.jpg
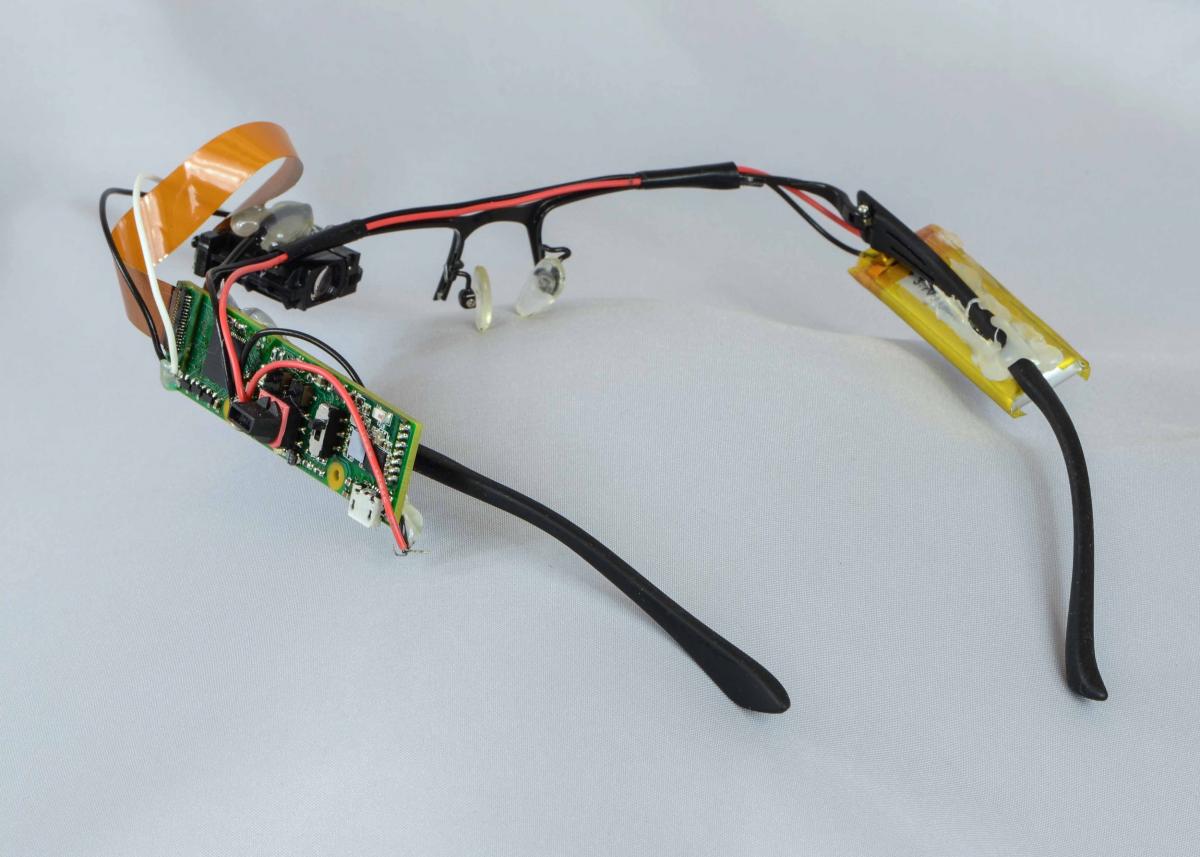
 worldly mural
That screen is interesting! I've never seen one like that before.
rapid radish
It's a picoprojector. If you set the focus to infinity, it works as a near-eye display too.
You have to turn the brightness waaaaaay down, though, heh heh.
worldly mural
I have never in my life looked at a projector and thought, yeah, I want to look directly into that from less than an inch away
That's awesome
rapid radish
Thanks. The project got messed up in team politics and ultimately didn't go anywhere, but I'm still proud of the engineering involved.
 cloud mantle
@rapid radish this is so cool! is there a writeup for the project?
rapid radish
cloud mantle
<@382380426628562955> this is so cool! is there a writeup for the project?
Not public, I'm afraid, since this was part of the Google Glass development effort and most of the writeups are under NDA. There is some info available through a Georgia Tech wearables exhibition, though (this is the "Lennon" system): https://wcc.gatech.edu/exhibition#consumer
cloud mantle
aw well, thanks anyway 👍
i really like this idea for spy camera glasses!
oh thanks for this link though, lots of cool stuff here
rotund needle
im looking at making a cosplay mask, but i want to measure the o2 concnetration inside the mask. any good sensors out there, could i use a voc sensor to estimate the amount of O2 and CO2 entering and exiting the mask?
stark storm
A VOC sensor is for "volatile organic compounds", which does not include O2 nor CO2. However, there are O2 sensors available. https://wiki.seeedstudio.com/Grove-Gas_Sensor-O2/
Seeed Product Document
worldly mural
@rapid radish how would one find a good generic Pico projector? I'd love to work with one but I don't want to buy one and then tear it apart. Is there a good site for buying raw components that haven't been housed in casings?
(Curious for things other than Pico projectors, too!) I just rely on Google right now for sourcing parts or mouser if it's on-board components. But I've been curious about if there is a wholesaler marketplace I don't know about. I sometimes also am looking for things like digital photo frames and other things that don't need to be namebrand
Besides adafruit, of course! :D
light wigeon
are wearables safe for animals ?
amber widget
If it's safe for you, it's safe for animals. I mean, you're less likely to eat your wearable, so I guess keep that in mind...
stark storm
worldly mural
<@382380426628562955> how would one find a good generic Pico projector? I'd lov...
For stuff like pico projectors, I look at eBay, aliexpress, banggood, etc. Raw components are trickier, different ones tend to hang out in different places, and there's a staggering variety of vendors, aggregators, distributors, etc., for various niche items like that. Surplus vendors are pretty hit and miss, there was just a sale for 42 of these little "CyberDisplays" for $10, but that sale ended and now it's 42 for $210 (still a good price if you need something like that, but not as staggeringly good). https://www.goldmine-elec-products.com/prodinfo.asp?number=G19051B

Tiny CyberDisplay® 320M is a monochrome 320x240 active matrix liquid crystal display. These were probably made for a military application and are 100% prime perfect - New! This ultra-compact 0.24" diagonal display features low power consumption. The manufacturer sta
worldly mural
thanks!
 ember prairie
worldly mural
I don't have a specific question for a project, kind of just interested in heari...
ember prairie
worldly mural
I don't have a specific question for a project, kind of just interested in heari...
This is my first wearable project! I added snaps so I can remove it for easy washing of the jacket. Bonus with the snaps: I’ve now attached A1 & A2 to them and set up as touch sensors. I’m planning to run conductive thread down the arm to a rivet and use it to change the patterns 🙂
https://troymcfarland.blogspot.com/2021/10/additional-projects.html

Here are some projects that I'm proud to share, especially the most recent jacket modification: AdaFruit Circuit Design & Scripting, 3D Des...
worldly mural
ember prairie
This is my first wearable project! I added snaps so I can remove it for easy wa...
Love that you call them "barnacles" 😆
remote pecan
If I want to wire up 16 total neopixels (8 on each side of a helmet) what else do I need here? Thinking of linking 4 neopixels at a time and then wiring into a board but looking for all suggestions here on what I have currently (and what more do I need?)
 spring oar
When looking at the guides with flora, it always seems like a lot of components besides LEDs are soldered rather than sewn with conductive thread. Are there any safety or quality reasons for this due to the quality of the connection made by the thread, and if so, what are the things that must be soldered rather than sewn?
pure echo
spring oar
When looking at the guides with flora, it always seems like a lot of components ...
Honestly, the only "safety hazard" involved in sewing over solder is the potential loose ends of the conductive thread poking people in places they'd rather not be poked in haha. The steel fibers can be uncomfortable if the ends come loose, and a small bit of solder is a much cleaner connection with far lower risk of frayed ends. If you don't want to make a permanent connection yet, or simply prefer the needle over a soldering iron, it's perfectly valid to sew other circuit boards directly onto the fabric, as shown in https://learn.adafruit.com/conductive-thread/stitching-around-circuit-boards.
I guess if they come completely loose, there might be other hazards associated with your project falling apart, but for most wearables, that's not exactly life-threatening for most people. When it comes to soldered vs sewn, primary concern is more likely longevity and comfort.
spring oar
Thanks.
light wigeon
Wish I could find an hypo allergic cat that accept a mounted mega 2560 on it without licking it or trying to take it off to have a cheap mobile platform 🤣
fluid cypress
"Cheap" until you get the first vet bill
light wigeon
well less "upfront" investment then 😄
- the batteries on a kitten last like 10-15 years
fluid cypress
If you keep recharging them with kibble :p
ember prairie
Guessing other people have already had this issue. It's kind of a fun bug!
I have a Gemma M0 powering 7 NeoPixels on the back of my jacket. I've strung conductive thread from A1 & A2 down my sleeve to two respective rivets. I made sure that they are not touching each other. But, they are about 1cm a part. Length is about 18" long. If only one is plugged in, it works fine. If they both are plugged in, its as if I'm constantly touching one of them, which is random when I turn the Gemma on.
I'm guessing this is because they are not insulated wires & they are interfering with each other. My physical workaround would be to simply put one wire down the other jacket sleeve. Is there a software solution though?
stark storm
You're using A0 and A1 as touch sensors?
pure echo
ember prairie
Guessing other people have already had this issue. It's kind of a fun bug!
I ha...
If they are being used as capacitive sensors, it is possible for one of the sensors to be acting as a capacitive load for the other, causing it to register as a false touch. For such a long length, no insulation would help them from interfering with each other, but it may be possible to add an extra conductor down the middle to create a guard channel of sorts. That being said, long wires like that should be insulated for protection from other false touch sources, especially since you're essentially wearing it on your arm.
It won't fix ALL of your issues, but it might reduce them somewhat.
My solution would be to move the Gemma M0 as close to the touch sensors as possible and allow longer wires for the neopixel data, or to use a separate touch module on the sleeve to handle capacitive touch?
stark storm
I think there is a way to change the sensing threshold in software but a hardware fix may be more reliable
ember prairie
pure echo
My solution would be to move the Gemma M0 as close to the touch sensors as possi...
Thanks! For this current (unintended pun) design, I’m not able to move the Gemma. I might try that for another project (or if no other solution works!)
Regarding being touched by my arm: you know how jeans and jean jackets have folded over double seams? (I’m not sure what the actual term is) I threaded both wires inside, one on each side.
But, I can yank one wire out, and string a different wire down the other arm. That’s probably my best bet.
ember prairie
stark storm
I think there is a way to change the sensing threshold in software but a hardwar...
I’ll see if I can figure that out, thanks. I might have to do both that and rewiring one of the lines 🙂
 sudden ridge
pure echo
If they are being used as capacitive sensors, it is possible for one of the sens...
sudden ridge
pure echo
If they are being used as capacitive sensors, it is possible for one of the sens...
use some coax wires
light wigeon
does anyone know how tight of turn i can do with something like: https://www.adafruit.com/product/2848
What is better than smart RGB LEDs? Smart RGB+White LEDs! These NeoPixels now have 4 LEDs in them (red, green, blue and white) for excellent lighting effects. These LED strips are fun ...
i'm trying to do light up pentagram but to get the points on the star correctly it'll be tight
so essentially it'll be this on the back of a jacket

without the spinning of course
rapid radish
You might also considering having a little bit of a loop-around of the strip at each star point, and just not light up any LEDs appearing in the loop section.
light wigeon
fluid cypress
If not large you could do a custom PCB in that shape
i would like to be as a big as possible.
fluid cypress
Ah