#show-and-tell
1 messages · Page 15 of 1
 leaden orbit
this is like... the third(?) design for RGB LEDs I've made for this? The first was through-hole and bulky, and didnt allow me to have the screw mount points so was basically useless. The second design used a separate LED controller and LED and the LED was too small to hand-solder, so it didnt work either and was still too bulky. This design uses a backwards-and-upside-down mounted LED with built-in controller, so here's hoping it works 🤞
 leaden comet
@leaden orbit Ooh, mechanical keyboards. Is this for a build you're doing?
leaden orbit
it is, yes 😁 I'm making a replacement for my Razer Orbweaver, because the orbweaver doesnt have quite enough keys and i dont like how loud they are and i want to replace the D-Pad with an analogue stick 
i've been at this for a year now and still dont have a fully working prototype though 😅
if i didnt want RGB i could've been done like 6 months ago 😭
 lapis jasper
Our discord and @sterile lodge got a shout out from @eager pine here: https://blog.hackster.io/interview-with-sophy-wong-2008c1a1a6c2

Hackster Blog
Sophy Wong is a maker, artist and fashion designer based in Seattle. Her projects appear in Adafruit and Hackspace magazine, and you may…
 sterile lodge
Oh nice! I had a lot of fun helping her with that project.
 upbeat geyser
Now I want plans (or a source) for that ring light camera rig @eager pine uses!
 patent nimbus
Today after work decided to decal my headphones 😃
 humble cape
https://v.redd.it/dp7qb5p4why21 here's it swinging

reddit
62 votes and 10 comments so far on Reddit
 north mural
I love reading about all the stuff everyone is doing. So many brilliant ideas out there.
 bitter hazel
how do you get into the weekly show and tell?
i feel like it would be a great commitment device for me. anyone else here tried getting on it?
 warped garnet
I'm presenting stuff at makerfaire for the first time this Sunday, maybe some of it would of interest to folks here
 modest lion
so i am entirely new to electronics, im a professinoal software engineer for a DoD contractor, and i frequenctly work on embedded targets we deploy on aircraft. ive been spending a lot of timne on adafruit and sparkfun for learning remedial electronics topics. among these 2 communities, it has opened up a brand nnew world to me that im absolutely loving
ive never touched a soldering iron in my life, aand and to be honest i wasnt entirely sure what they did
so ive been practicing for about a week. i just received a Teensy 3.6 yesterday and immediately decided to add full headers (and a right-angled pins to expose some of the analog pins on the underside of the board)
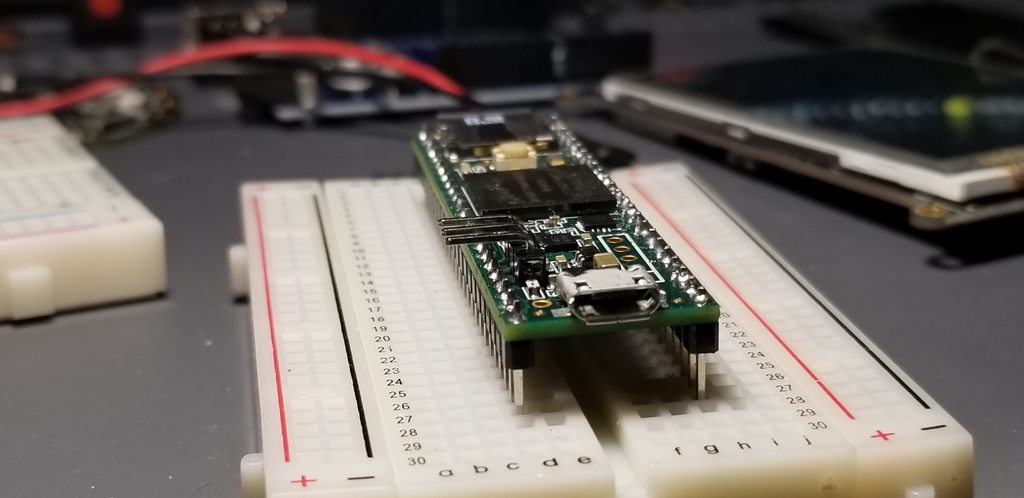
any tiips? how did i do?
sterile lodge
From what I can tell with the angle in your picture, it actually looks pretty good. For soldering tips, you might want to check out this guide: https://learn.adafruit.com/collins-lab-soldering

It's all about making connections.
 solar yew
Here is the Pi network storage setup
 earnest latch
@solar yew Rockin!!
 wraith flicker
I worked with a large number of people to create a "digital dance" where the dancers from a local high school had 40 NeoPixels on them. We had hoped to have dynamic lights but had problems and ran out of time so we went with a static display of rainbow colors. We hope to do this again next year with the school. This was the first year of doing something like this, Here is a film they made of the dance. Look for a possible blog post about this project on Adafruit in the future. It was a lot of fun ! https://youtu.be/b2A57CiNWXY

John Marshall High School of Cleveland Ohio Arts and Technology collaboration. I was chosen to do the filming and editing. Filmed 5-10-19 edited and complete...
 forest acorn
Finished project with 38 bytes to spare (on Attiny85). Had to refactor about 5 times to pull that off, heh. Anyone else gotten close to the Flash memory limit on their projects?
upbeat geyser
Heh, I had a similar experience hooking a Crickit to an ATtiny85, along with the Servo and Neopixel libraries.
 glad roost
@bitter hazel
how do you get into the weekly show and tell?
i feel like it would be a great commitment device for me. anyone else here tried getting on it?
A link to the Google Hangouts we use for Show and Tell is posted in #live-broadcast-chat just beforethe show starts, 7:30pm Eastern time
bitter hazel
@glad roost danh thanks! So any rando can just join the google hangout and start showing their work?
glad roost
Right! Sometimes it gets a bit crowded, but the Adafruit folks often drop off once they are done if there are people in the queue. If you can't get in, note that in #live-broadcast-chat and someone will try to make a space for you
try to keep your show-and-tell in about the two-minute range
bitter hazel
Thanks @glad roost will see if I get enough confidence to try it this Wednesday 😁
lapis jasper
@vernal ferry I still haven't made it there!
glad roost
I used DECtape drives. I stored data on them.
 vernal ferry
@lapis jasper highly recommend! Watched a movie @ Cinerama that gave me $5 off admissions 😊
solar yew
made a custom splash screen for the raspberry pi nas
bitter hazel
@solar yew i bet you have a cat5 cable running out of your pi nas? 🤣
solar yew
yes 😹
 dry idol
 toxic stirrup
Wanted to show some pictures of my Middle School students who made an "escape room" (really a number of puzzles) based on the Circuit Playground. They did an awesome job of coming up with all sorts of fun puzzles, all of which used the Circuit Playground in some form or fashion. We created a number of puzzles that, when they are all solved, lead to the key to a treasure chest full of candy. We took the puzzles to 3rd, 4th, and 5th grade classrooms, where the teachers would try to solve the puzzles in 30 minutes, with all of their students cheering them on. If they could solve all the puzzles and unlock the treasure chest, their students would get candy! These are just a few of the students and their puzzles. I had 14 students, 10 puzzles/projects, and a ton of fun!
Self locking/unlocking box
Students talking about their projects
The Simon Says box!
5th grade teachers trying to solve the puzzles.
3rd grade teachers trying to solve the puzzles.
bitter hazel
@toxic stirrup that sounds awesome! do you have videos of the teachers trying to solve the puzzles? how did you get the students started with learning how to code in circuit python?
toxic stirrup
Yes, there are some videos of the teachers trying to solve the puzzles. I started the students out with the Drag and Drop MakeCode to show them the basic concepts. Then transferred those concepts to Circuit Python. So I'd go over a particular concept (like loops) in MakeCode (so intuitive!) and then go over that same concept in Python. I had a number of kids say that they preferred Python over MakeCode once they got into a bit more complicated code and saw how much easier it actually was to program, debug, and change code in text rather than graphically.
bitter hazel
good to hear. i have been trying to get my class of 1 (my own kid) to learn to code by doing different maker projects with him. he has interest but i know it will not stick until he finds doing something interesting enough that he would do it on his own. i am trying a pygamer/pybadge + makecode arcade this time around. im hoping that he would get to show his game to his friends at school and he goes off and write more games by himself. just found out today that 2 pygamer boards can be linked together to do 2 player games
since your students already have good knowledge of circuit playground, the pygamer/pybadge would be easy for them to pickup
toxic stirrup
It definitely helps to have a venue to show off one's creations. Perhaps your own son could show off his stuff on Show & Tell on Wednesdays.
I've thought about the PyGamer/PyBadge, as games are definitely a draw to kids this age. I have enough Circuit Playgrounds that each student can use one to code. I wouldn't have that luxury with the PyGamer/PyBadge. But perhaps I could teach on the CP and have a couple of the gaming platforms to share. I'd like to see what Adafruit comes up with in the way of Circuit Python to help writing game code easier. The drag and drop arcade coding is nice, but just not the same as actual Python!
glad roost
@astral osprey This is great! 

glad roost

Adafruit Industries - Makers, hackers, artists, designers and engineers!
Teacher Daniel, on the Adafruit Discord chat, writes about his Middle School students’ projects: I wanted to show some pictures of my Middle School students who made an “escape roomR…
toxic stirrup
@danh Very cool! Thanks for putting that up!
dry idol
So it all started when I noticed that all my friends were getting really excited about this thing called Makeitfest. Makeitfest is a non affiliated maker faire located in Nashua New Hampshire which is only 15 minutes from my house. I felt like Makeitfest would have been extremely dull without something to be competitive over so I suggested we have a sumo robot contest and that is what we did.
I looked around my house for parts and purchased some parts for really cheap from my friends. What I ended up doing was designing my own robot in fusion 360 because I couldn’t find a design for the available parts I had laying around so I went ahead and designed my own and uploaded it to thingiverse and even wrote an instructable about it.
https://www.thingiverse.com/thing:3450761
https://www.instructables.com/id/Arduino-3D-Printed-Sumo-Bot/

I couldn't find a design for a sumo bot I liked that used parts I had available to my liking. So I designed this to be compatible with any motherboard that can go inside it, 7 cm servo wheels, ir proximity switches, and a electric switch. Enjoy!

Instructables
Arduino 3D Printed Sumo Bot: So I had a bunch of parts laying around my house. I wanted to participate in a sumo competition coming up in a few months but I didn't have a bot. Instead of buying a bot or using an existing design that would require me to purchase stuff for the ...
The robot was 3D printed on my ender 3 3D Printer and it was a lot of fun. Since then I have written a github repository of my current work.

GitHub
This is a repository for my 3D Printed arduino sumo robot. - nschreiber0813/3D-Printed-Sumo-Bot
Here is the robot so far...
The robot has two ir switch sensors underneath it, hc-sr04 sensor for eyes, and is powered by an arduino uno and two 18650 batteries. It even has an on and off switch. I even filmed it battling in practice runs.

So this goes through majority of the prototypes I went through to make this robot happens along with the final result. Enjoy! https://github.com/nschreiber08...
Thanks!
 eager pine
@upbeat geyser sorry for the delay in replying to you, but here is the info on my ring light (i love it!) I think this is a new version of the one I have, but it's the same company, mine didn't come with the phone holder and stuff https://www.amazon.com/Neewer-Ring-Light-Kit-Self-Portrait/dp/B01LXDNNBW/ref=sr_1_1_sspa?keywords=neewer+ring+light&qid=1558652253&s=gateway&sr=8-1-spons&psc=1
 cedar dew
I made this 23 cm tall wall mount light. I’m still working on some fancy switching for the lights
upbeat geyser
A mazing!
cedar dew
Ty
 lunar venture
I un-broke the tricorder!
upbeat geyser
I agree on both points.
 lucid bloom
@junior agate thats pretty similar to something want to do with my grow system project. are you reading the sensors directly or are you getting the data from somewhere?
 junior agate
@lucid bloom it's connected to a STEMMA soil sensor from Adafruit
lucid bloom
ahh ok
junior agate
This'll be a guide on the learning system soon, finishing photo/video for it rn actually 😃
lucid bloom
nice! I'll have to check that out
I'm a few weeks away from setting everything up and hopefully growing some tomato plants
My goal is to only have to refill the water once a week
lucid bloom
I'm using a cheap vps and influxdb for all the sensor data
one thing I really really want to do is setup my vt220 next to the grow connected to the pi zero im running it off of
junior agate
a pyportal is a bit smaller 😉
lucid bloom
i would like one of those too for watering stats and stuff
I have timed watering with automatic top off if the soil moisture gets below a certain level
basically you give it the total ml to give to the plant per day, and how much to give at a time. Then it spreads of the watering with equal time in between
lucid bloom
I set a lot of ambitious goals for myself, this project is gonna be either a spectacular failure or a total win.
 valid path
@lucid bloom No reason that has to be either/or.
And those are the best kind, I think. 😃
lucid bloom
then i will do both 😉
 signal loom
Fresh off the laser! Some coaster prototypes I have been working on.
Used a coating of shellac on these ones to make them more water repellent.
Left is old and right is new
upbeat geyser
Pretty! Is that slate?
 rain orchid
Hi! I am working on a 3.5A (That's ~45W wow!) dual channel fan control system for computers.
Currently struggling with the MOSFET stage. Using an ehhhh IRLI flavor N-channel MOSFET.
It is prototype and defect but I will try something else
upbeat geyser
MOSFETs are fairly easy to drive, but you do have to turn them solidly on and off quickly if you're switching at high frequency. You also have to protect them from spikes when driving inductive loads (like many fans).
 winged swallow
FYI, if you're using 4-pin fans you don't want to be pulsing the 12V. The 4th pin in a low voltage, almost no current speed signal and the fans have a chip in them to drive the 12V internally
rain orchid
I'm using a 3-pin Delta
modest lion
adafruit doesn't sell any USB data cables with on/off power switches, only cables that carry power. so i put this abomination together. there is a power switch as well as a switch to enable USB OTG, and it works with both USB charge cables as well as charge/sync cables
i was so proud that it actually worked i had to share it with everyone
sterile lodge
That's pretty cool
modest lion
can you tell me if what im doing to turn off the power is safe? basically power going from the usb b micro breakout connects to the middle pin of a slide switch. one leg of the switch completes the connection to the USB A jack power pin, and the other leg is floating, connected to an empty row on the breadboard
so if i leave USB cables plugged in to both jacks, with the power slide switch turned "off", i.e. the micro USB power is floating on the breadboard
im not sure what the correct way to do this is, although what ive done apparently works
 astral lake
Just finished this project

https://github.com/goomysmash/GoomWave https://twitter.com/goomysmash https://www.twitch.tv/goomysmash Shoutouts to the Shinewave project for being the first...
 terse totem
@astral lake that is fantastic!
@astral lake you should bring this on the Wednesday Show + Tell hangout sometime.
astral lake
That would be awesome @terse totem how do i get on the wednesday show and tell? When is it?
terse totem
Super! @astral lake we've got answers here: https://learn.adafruit.com/show-and-tell/joining-show-and-tell

Show us what you are working on weekly on Adafruit's Show and Tell broadcast
BTW, @astral lake I want to build one with my son (who is into Smash) do you know of a source for clear GB controller shells? I want to replace the bottom half w a transparent one on our originals.
astral lake
@terse totem you can get purple top clear back gamecube controllers on ebay. Generally prices are $25-40 depending on the condition
 low dagger
My firefighter training fire develops further and further 😃
 leaden frost
@low dagger Cool! Get some fiberfill batting at the craft/sewing store - stuff used for pillow or stuffed animal stuffing to form a freeform cloud over your neopixel strips. It diffuses your leds to give it that smoke and fire effect. Even covering with a layer of wadded up paper towels or tissues helps to make it more realistic.
Dragon flame effect is one of the fun things I do with it.
 slow zenith
Looking forward to showing off some mini smart home projects that I have been using in some workshops.
low dagger
@leaden frost thank you very much for your advice! I have some milky acrylic glass, which I want to use for this.
We tried it yesterday with a fog machine and without diffusor. It looked really nice, but the thicker the fog the more you was not able to see a 'fire', you just saw the single neopixels 😢 but the two guys attakcing the fire and searching for a missing person missed the period when they had to hit the buzzer so the fire did not shrink 😄 after seven attemps they got the fire down
toxic stirrup
Here's another PyPortal project. It uses DarkSky for the weather. I made a slight Star Wars theme to it. Main page shows a summary of the weather. Touching the center part brings up a screen showing the temps for the next four days. Touching any of the bottom day icons brings up detail for that day. The two Rebel Alliance symbols are hooked to my Adafruit IO account and indicate whether my garage doors are open or closed - green for closed and red for opened. The time also comes from Adafruit IO. All of this was written in Arduino instead of Python, mainly because the DarkSky JSON file is too large to parse it under CircuitPython.
 stiff coral
So I’m making a custom arcade cabinet for my own original arcade game; Tomb Gator. I’m making the game in NesMaker which is a tool that can make original nes Roms. The arcade cabinet is going to be pyramid shaped so I’m 3D printing the top screen enclosure
This is for a 5” screen
I printed another one first for a 3.5 inch one and decided the 5” screen was better
Here’s the original
The hole in the top is for a hallowing eyeball for an Illuminati joke that I’d throw in
 junior dust
Made a print In place hinged crank for rotary encoders https://www.thingiverse.com/thing:3672910

Need a crank for a rotary encoder? Here's a print-in-place model that features a hinged arm and free-rotating handle. The pieces can not be disassembled. It's just one part that prints in about 20 minutes. Press fits over any flat nose rotary encoder, for those times where yo...
upbeat geyser
That's a nice cabinet. What sort of screen are you thinking of using? There's room in there for a 5" CRT.
stiff coral
@upbeat geyser I was going to use an LCD, but do they make a 5" CRT? if So, how much would one run and how difficult is it to get it to work with a Pi
upbeat geyser
I'm fairly cheap myself, so I grab things like this karaoke machine I got at a thrift store for a few bucks. They normally take ordinary baseband video, which a Pi can produce.
stiff coral
Really? My next question is how dangerous is it to disassemble it so I just have the screen? I heard if your not careful you can electrocute yourself
upbeat geyser
They can be dangerous, the CRT is an implosion hazard, and the acceleration voltage is a few thousand volts, which the CRT (which acts as its own filter capacitor) can store for many days, so you have to know how to safely discharge it. Certainly not for everybody, but can lend a wonderful retro experience if you're up for it.
stiff coral
I'd love to have a CRT, but I have no clue how to discarge that and I'm not about to zap myself to death. But Its a future consideration
upbeat geyser
Yeah, if you're not familiar with it, best to avoid unless you have a local knowledgable friend who can safely walk you through it.
stiff coral
Considering I don't know anyone like that, its best to avoid it
upbeat geyser
Agreed.
Also felt like sharing this adorable 4" TV I found that makes a great companion for a little ZX81 computer.
stiff coral
That is awesome!

 humble plaza
I forget where's the link for Show-And-Tell posted these days?
Do they post the link here?
 grave bone
humble plaza
grave bone
humble plaza
Got it. Thanks.
humble plaza
What's this channel for if we have #livebroadcast Just for showing off/demoing cool projects during the week?
solar yew

Doom runing on an unmodified Nintendo Entertainment System. Howchoo's video : https://howchoo.com/g/mti0oge5nzk/pi-cart-a-raspberry-pi-retro-gaming-rig-in-an...
lucid bloom
The environmental controls for my automated grow system are testing very well. i set it to 75f 75rh during the "day" and 65f 65rh during the night. the light cycle is from 5am to 5pm
lucid bloom
eventually all the code will be here https://github.com/matt-desmarais/sensetogrow

GitHub
automated growing system using pi zero w. Contribute to matt-desmarais/sensetogrow development by creating an account on GitHub.
 warped violet
That looks pretty fun. I keep meaning to try out making some sort of growing system so as to remember to water the plants in my back patio so as to have some plants on my back patio.
lucid bloom
this project started out as taking care of a houseplant but I want to see how far I can take it
 supple breach
Not super complex, but had fun building (and writing about building) this today. Digital jewelry that uses a NeoPixel Featherwing and Circuit Python to show (with a bit of animation) various LGBT+ Pride flags. Going to wear it as a pin/brooch to my city's Pride event next month. 😀 https://github.com/tammymakesthings/fw_neopixel_pride

GitHub
Animated LGBT Pride Badge with Adafruit Feather/NeoPixel - tammymakesthings/fw_neopixel_pride
 long bison
some Rust-on-PyGamer progress https://twitter.com/sajattack/status/1137661665682395136


 tardy slate
Made some good progress today on my scrolling message panel.
It's a pretty straightforward assembly of 8 Adafruit 8x8 LED Matrices. The thing I'm particularly proud of here is that I created a Class that lets me treat 2-8 8x8 matrices as if they are one big matrix. In this case 64x8.
The next steps are to put the 8x8s on a perf-board, and place them on a proper mounting. Then change out the Arduino Demi to a Feather Huzzah so it can connect to the internet, to get the messages it will display.

Pretty straightforward assembly of 8 Adafruit 8x8 LED Matrices. The thing I'm particularly proud of here is that I created a Class that lets me treat the eig...
 slate harbor
little 5 min hack --- happy pride! 🌈
 west dune
A diy lab bench power supply
Video and instructable for those who want to have a look: https://youtu.be/0HXDt3QIazk

Instructable:https://www.instructables.com/id/DIY-Lab-Bench-Power-Supply-From-Scratch/ Instagram:@ferferite
solar yew
When i was 12 years old my dad showed me a 555 flip flop
i was fascinated
When i reached 16 i was irritated it was so hard to find parts
so many idea's i could only dream to try
Thanks to the maker society today, i'm in heaven.
honestly i dont know who to thank
upbeat geyser
I'm with you there! I love that there are things like a discrete 555 kit https://shop.evilmadscientist.com/productsmenu/652 too
solar yew
Realtime FFT on PC Audio with PyAudio and PulseAudio Multiprocess Class with a Queue. It supports only for now audio left peak and audio right peak
more methods will come in the future like frequency bands etc. You can start a process, stop a process or get results back from the queue.Let me know what you think about it. I will appreciate some advice and tips
https://github.com/Edris89/Realtime-FFT-Multiprocess-Class-Python3

GitHub
Realtime Fast Fourier Transform Multiprocess Class for Python 3 - Edris89/Realtime-FFT-Multiprocess-Class-Python3
 fallen light
I've really been in to PCB art lately and this is my first try at it! It's a little rotary encoder modeled after a daruma, a Japanese item meant for good luck and goals. The right eye has an encoder, and I'm going to print a knob so it looks like it's been filled in. There were definitely a few challenges, like making sure all the traces ae on one side of the board! It's going to be my first time using POGO pin to flash a bootloader through ISP compatible pads. I really hope I got it right.
 lusty siren
It's not computers or microcontrollers or whatever, but it's still making. Made my dad a tart for father's day: https://www.instagram.com/p/ByxrPQSF8kR/

Instagram
3 Likes, 0 Comments - Jason (@andon_rt) on Instagram: “In the past, I had picked up a fruit tart from work for my dad for Father's day. Now that I have…”
Now to wait for him to get home.
sterile lodge
Nice @lusty siren. I hope your adafruit tart went over well. 😉
lusty siren
It did!
 warm sage
Not my effort here, and probably discussed previously, but thought this epoxy-based diffuser idea was very clever:

How to make a wireless DIY rainbow epoxy resin LED lamp that transforms between a sconce, table lamp, and task light. The first 100 people get 50% OFF their ...
upbeat geyser
Makes sense, as LEDs have epoxy bodies anyway.
 compact furnace


🤠 Midnight Wild, a western-themed metroidvania, is finally available to download for FREE for the BittBoy! 🤠
#GameDev #IndieDev #PixelArt @BittBoy #Arduboy @greycove_ https://t.co/r8wp82EQME
 Twitter
💃 💃
compact furnace
(Arduboy game ported to BittBoy.)
 topaz flicker
How do I join the show in hangouts?
sterile lodge
Sorry, it's over now, but the link is usually posted in #live-broadcast-chat right before it starts.
topaz flicker
The link wasn't working it would only redirect me to the chrome appstore page.
sterile lodge
You may need to do it from a computer. It's through Google Hangouts.
topaz flicker
But the only device with a camera would be a phone. I done have like a webcam.
sterile lodge
I've only used a computer. It's possible if you install Google Hangouts it may work, but I'm not certain.
patent nimbus
After watching i dug out my zx spectrum with its voice add on 😃 https://twitter.com/samsonbx/status/1141811841468960768?s=21


After watching @adafruit show and tell program on youtube today i dug out my zx spectrum and it has a message for the internet 😉 #ZXSpectrum #8bit #Retro #computers #Adafruit #makers https://t.co/tIaTyLVWb8
Twitter
P.s. i hope linking twitter is ok let me no if not and ill not do it again
upbeat geyser
Heh, I'm restoring a ZX computer. Sounds a little like SAM (Software Automatic Mouth), but since you said it's an add-on, maybe Votrax-based?
patent nimbus
U no i have no idea iv never took it apart 😃 it was made by cheetah back in the 80s . Iv been thinking of converting one of my zx to composite video out
upbeat geyser
I'm eyeing that as well, as I have more monitors than TVs available.
Although this adorable 4" TV makes a great companion for it
patent nimbus
Ye it fits it like a glove 😃 . On paper its realy easy to do ( at least for the zx spectrum im not sure about the zx 81
Im off to bed ill check messeged in the morning 😃
valid path
omg, it's my old Timex/Sinclair 1000. RIGHT IN THE FEELS!
upbeat geyser
I read that it's necessary to generate a back porch signal so the monitor can set its black level properly. A little more circuitry can also clean up the video and give a few other options (like inverting the video for light text on a dark background).
topaz flicker
I have a timex sinclair 1000, but it doesn't output video.
patent nimbus
@topaz flicker how odd hopfuly its a simple fix
upbeat geyser
It seems like the usual cause of no video is a dead ULA chip, which is both a common failure (the chip is being run fairly hard) and a difficult fix.
patent nimbus
iv just powered up my battered spectrum thinking ill try the comp vid mod tommy to find out the keyboard has stoped working 😦
upbeat geyser
The keyboard cable is a bit fragile too.
topaz flicker
https://streamable.com/yrlo5
Working on this.
 solar yew
i had my shoulder operation
feeling like a new man
upbeat geyser
Did you offer to help?
grave bone
@patent nimbus This one sounds similar:
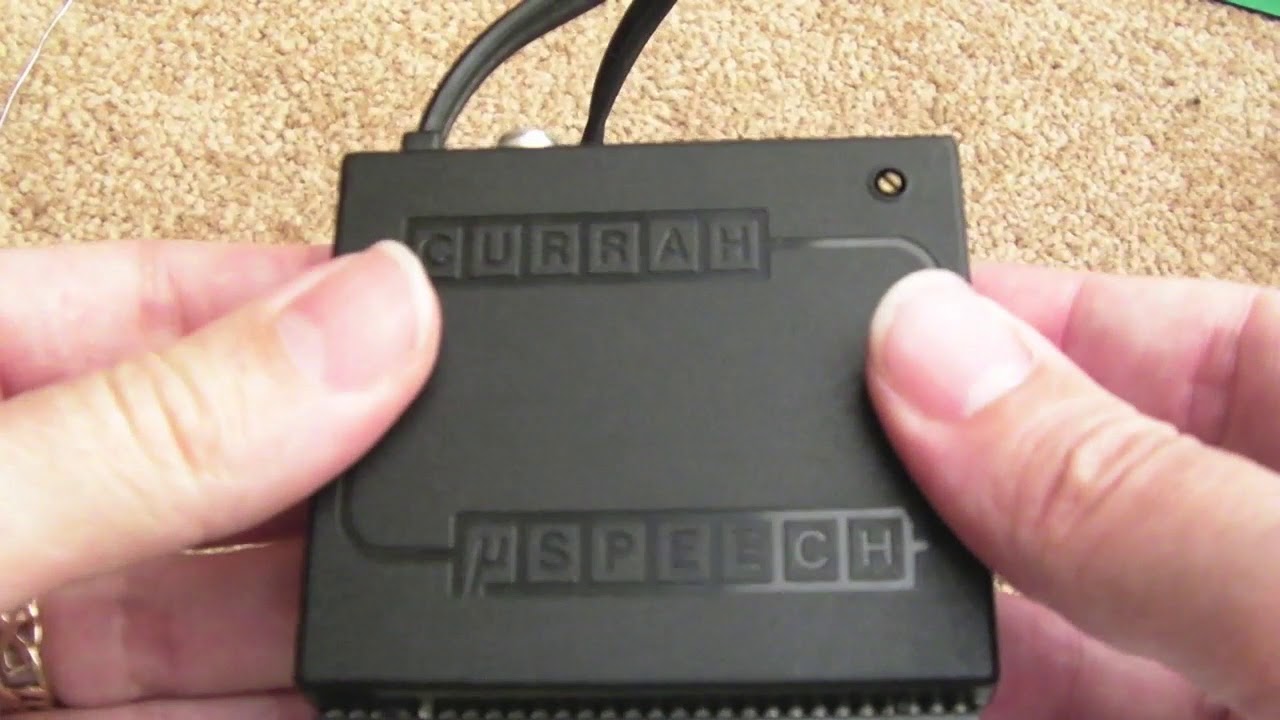
How I modifeid the Currah Microspeech to output audio directly. I show a few games that use the device, and mention compatibility issues with the DivIDE and ...
upbeat geyser
Ah, the GI SP0256 allophone synthesis chip. A classic.
solar yew
@upbeat geyser oh sorry i meant 2 weeks
upbeat geyser
I figured you meant 2 weeks, but I figured people on this discord are the sort that might want to hack their own prosthetics, and a good way to get a head start on such things is to offer to help with the preparation.
patent nimbus
@grave bone thats the add on. I have 😃 i want to try find the dr troniks one as it sounds like the war games computer
Ye cable has snaped 😦
Both of them in fact
upbeat geyser
You can sometimes snip off the ends, peel back the insulation and use the fresh ends, but the old cables are brittle. There are places that offer replacement keyboards.
patent nimbus
I might try that first go fromthere
patent nimbus
Yay that worked 😃
signal loom
New laser project! We had this old bear that held a sign that we had broken a while ago. I designed a new one today!
 toxic mica
On the last show and tell someone made a communication device for kids with PyPortal I would like to find out what code was used for it. I would like to make a couple for some of the kids I Coach
 errant sparrow
Building out a huge rgbw neopixel installation (over 2000 LEDs) for the BLDG 61 Makerspace in Boulder, CO. My colleague Robby Holb designed the boxes and I tackled the electronics. It’s almost done.
Also absolutely smoked an Arduino Due through its VIN the first time i powered up the display (#sparky  ). Pay attention when the guide says "DONT MESS AROUND". Hah!
 slender cargo
@errant sparrow Thats so cool man, do you have an instagram I can follow?
errant sparrow
@ZEDSDEAD#0053 yeah! Social media handle for the space is BLDG61 , and my personal page is atomicwatts
bitter hazel
Yet another security camera added to my collection. It's amazing how simple they are to build and maintain. I have plans to add machine learning on these video feeds to eventually remove the need to actually look at the video. Soon I will be able to tell if my place happens to be on fire without needing to see it first! 🤣 https://madcomputerscientist.ninja/2019/01/23/night-pi-sion-camera/

I purchased a NoIR Raspberry Pi camera a while back thinking I would replace my outdoor night vision surveillance camera feed with a smarter version. All I wanted it to do was to be able to pan aro…
lucid bloom
I created a slack chat bot to control our makerspaces new air conditioner. I am using a pi zero w with an ir transmitter
I will be adding a dht11
leaden frost
@lucid bloom Cool! May I suggest you add some kind of water level sensor? Unless you have that portable air conditioned piped with a hose to remove the excess condensate, you will have to empty the bucket often on really humid days. It will shut down automatically, if it is like the ones I've seen.
upbeat geyser
Does it implement a time delay to avoid restarting the compressor under pressure?
lucid bloom
@leaden frost yea someone else at the makerspace has the job of designing the window mount for the hose. the space is in an old school so the windows are the kind that angle open which is why we couldnt just get a regular ac
@upbeat geyser Ill have to look into that. All I have rn is two codes im sending, on at maximum cool settings and off
I also taught the bot to get the weather, and set it up to return the temp/humidity from a dht11
 viscid stag
I'm making a Raspberry Pi usb dongle. 3D printing the case for it right now.
 hardy gull
hey folks! has anyone in here used circuitpython esp32spi with an open wifi network?
i'm trying to get my pyportal online at a place with open wifi and it... doesn't go 😅
seems like wifimanager only works with password-protected networks.
solar yew
shame this poor lady on floor one is extremely blind and medical science has failed her.
she has a hdmi capable tv but no incoming digital or analogue stations to watch
so i grabbed a pi3 a+
dropped in kodi.
grabbed a cheap media remote.
3d printed brail button covers that i super glue'd on the media remote buttons.
i then added a script to give alot of audio cue's as to where she is navigating
shame she loves movies
she has 2 kids to look after and she hardly has a income
hurts my soul to see people suffer
lapis jasper
@solar yew that sounds like an awesome project
 eternal maple
@solar yew Nicely done. You have a big heart.
 rapid ginkgo
I got a project to share for Wednesday!
sterile lodge
The link to share should be available in #live-broadcast-chat right before the show starts.
 cobalt dove
I'm building an IoT dog-sensing automated door opener mat and I finally got all the electronics and programming working! https://youtu.be/F2v6Hz571mU
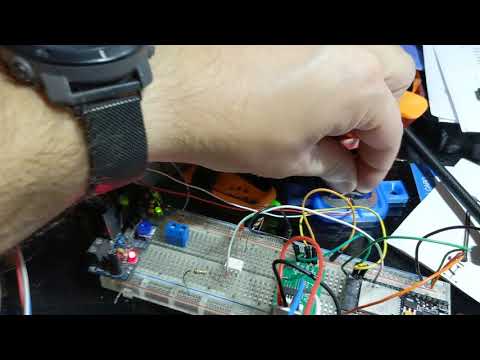
Working with an esp32, an hx711, and a 4N25 optoisolator (optocoupler) to bridge a jumper on my automated door opener (a Skylink DM-150). I'm making this bec...
patent nimbus
Latest project modding a 1980s pocket tv with flat screen crt tube 😃
upbeat geyser
Cool, those tubes are clever and creative.
patent nimbus
Ye the screen is projected as 16.9 then using a lens changed to 4:3
I have to fix the unit first it kind if works needs caps changing
 inland wagon
tried to explain CIC decimator truncation a bit better than the canonical paper
also a python script to calculate the stuff is provided
also random promo: https://github.com/ChinaQMTECH/ these guys make nice FPGA kits for sale on ebay and aliexpress and all their stuff is open source

GitHub
ChinaQMTECH has 13 repositories available. Follow their code on GitHub.
they release source before it's even released so you can take a look at what's upcoming
patent nimbus
4 hours of 80s tv that iv out to gather now rendering now to get the tv working parts are orderd just waiting arrival
 supple mortar
Feather Huzzah + Charliefeather + UV Sensor : UVTron Portable UV meter.
upbeat geyser
That's cool, and looks like it would be readable from a fair distance. Amusingly, when I see the word "UVTron", I tend to think of the Hamamatsu UVTron tubes used to detect flames by the UV they emit.
sterile lodge
Here's a small part of a project I'm working on. Here I'm controlling the color of some NeoPixels with the know on an RC Remote so it's completely wireless using CircuitPython. Once I'm good with the RC Remote PWM library (which builds on pulseio), I'll release it because it really is quite useful.
 jolly ingot
Hey all! Attached is my latest prop experiment that ended up becoming a way to distract myself from the nerve-wracking earthquakes near my city here in SoCal! This a “Sinktube” Lightsaber prop that uses the Feather M4 Express, Prop-Maker FeatherWing, and the L3GD20 breakout board. I’m still working on the “swing” sensitivity and response programming using CircuitPython, but it is definitely helping me to cope with Mother-Nature’s fury!

I’ve been an amateur (light) Sabersmith for over a year now, and have been trying to come up with new ideas for building (lower cost) light saber props. Over...
 maiden pond
2 weeks for PCBs to arrive, can't wait :>
upbeat geyser
That's a cute lil display
maiden pond
heh, yea, its UI is primary web served by the PI / grafana :
upbeat geyser
All that stuff on a teeny display? Looks like 22mm x 11mm or so in the rendering.
upbeat geyser
Ah, okay. That's what I thought (that and the LEDs).
maiden pond
PI zero will be acting as the server , router will route out the grafana port

eBay
Driving Chip:SSD1306. OLED display. Interface Type:IIC. Sensor Module. Test Module. Step Up/Down Module. Function Module. PWM Module.
dear lord ebay
upbeat geyser
Yeah, those teeny color displays are appealing. They're bright and pin-sharp: surprisingly readable.
maiden pond
so fleabay / the internets are full of cheapo LCD displays but generally they have HORRID viewing angles ... so OLED I went
problem with OLED is the O, organic breaks down 😒 ... doing a 24/7 test.... worst comes to worse I replace the 3USD display yearly
upbeat geyser
There are choices for long lived, wide viewing angle displays (LED, VFD, plasma, CRT, and some more exotic ones).
VFD offers a pretty fine dot pitch, and CRT offers a ridiculously fine dot pitch.
maiden pond
I think at a conservative 3USD per year replacement rate i'd come out ahead versus those exotic choices
upbeat geyser
And miss out on all the fun of coming up with a couple of kilovolts for the anode supply, a floating heater supply, a couple hundred volts for focus, and having to drive the beam around with deflection coils, not to mention finding an extra 80mm of depth for the tube and its connector?
maiden pond
the science behind CRT is pretty nifty
upbeat geyser
Yeah, more or less the same basic technology as an electron microscope (hence the ridiculously fine detail obtainable).
 edgy stratus

Google Photos
Just got my audio driven case lighting project "working"
Still ironing out some kinks and need to clean up the application I have getting audio data from the computer and passing it via Serial. But its somewhat operational
edgy stratus
@grave bone yeah it's a strip of RGBW NeoPixels connected over serial via the motherboard. I wrote a C# app to get the audio level of a device and pass that to the arduino
grave bone
Nice!
 hollow hull
I have a soundboard I'd like to demo for show and tell today. (not sure if this is the right place to mention)
solar yew
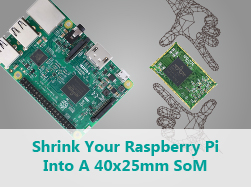
the model B is too big and heavy for some space or weight constrained application like drones, and compute module’s DDR2 style connector is also bulky and tended to loose in the vibration environment. Recently we are working on OpenHD project for drone, and thinking how to ...
i want
 wanton mason
I'm new here, I made a giant LED with a NeoPixel LED ring yesterday :D https://www.instagram.com/p/Bzx7rINIbBC/

Instagram
27 Likes, 0 Comments - Awesome 3D Printing Posts (@3dprintingprinter) on Instagram: “I made a WiFi controlled XXL LED 🤩 . 👥 Follow: @3dprintingprinter 🖨️ Printer: Ender 3 💿 Filament:…”
Model from here: https://www.thingiverse.com/thing:3290837 (I didn't make it myself)
solar yew
got a scope that can finally do this, the same scope that i found the Signetics 8051 in
 glad solstice
Perfect channel to show... who all uses multiplexes for analog inputs, and what's the most analog inputs you've ever used?
upbeat geyser
Most of the microcontrollers we use have multiplexed analog inputs, so we're probably using multiplexers even if there isn't an external circuit doing it.
 odd iris
I wrote some code to turn the PyPortal into my Gen Con conference badge. https://unexpectedeof.net/gencon-pyportal.html#gencon-pyportal

My experience building a badge for Gen Con 2019 using the Adafruit PyPortal.
 shadow sail
I made a "creature collecty" demo for the Pygamer/ Pybadge.
https://arcade.makecode.com/15465-83885-46069-22827
odd iris
Nice!
 onyx glade
@shadow sail, and some people might not be aware that a cool thing about MakeCode Arcade retro game is that they can, not just click on your "share" code link in blue letters above to download the game and environment to play it in simulator , but also, right clicking on the .png image that you provided and saving it, they then can Google search for MakeCode Arcade and IMPORT that .png image into the Arcade and in it is contained your Collecty game ! So, I think, if the .png was saved to an SD card , then a computer off-line which had once been to MC Arcade ; since it is in the browser, could load the game while still off-line from the image on the card. We will try this on Friday on a Chromebook while off-line.
onyx glade
@shadow sail , actually, my idea may not work. the .png image may not contain the code for your game but just a share link URL. We have to test this off-line.
onyx glade
Nope, I have tried loading the program, @shadow sail on a Chromebook while off-line from the .png which was saved to an SD card. OK, that works and brings your program into the off-line Arcade environment. I get the message that the simulator does not work because it is off line. I had forgotten to use "beta#editor" in Arcade because, last I knew, Pygamer programs for Arcade must be loaded from beta onto the console. I switched to that and then the simulator came up, even off-line. Now, downloading does not work for me on Pygamer nor on BrainPad Arcade (have not tried Kittenbot Meowbit). I get the message: Compilation failed, check your code. But I see no way to do that; switching from blocks to JS and back to blocks works OK. No red underlines. Still looking into it. I do like the tilt effect on simulator !
shadow sail
@onyx glade hm that's weird that everything else works but not to download onto device.
& Thanks! I'm pretty happy with how everything came out, and I'm glad the tilt works in simulator
onyx glade
OK, I got your game program to load to both Pygamer and Meowbit but only while on-line. Game plays off-line on symulator....so that's SAMD51 and F401. But did not need to use beta#editor. Funny that the Meowbit shows more active tilt movement of sprites than Pygamer. Will do a video tomorrow @shadow sail
 warm obsidian
vqfn-20 (3mm x 3mm) breakout board fully milled, drilled and routed out on a cheap desktop cnc, didn't think the little thing could do such fine traces but i'm glad i finally tried because up until now i just assumed it couldn't do it
upbeat geyser
That's encouraging, as I was thinking of trying some PCB bits in my desktop CNC and wondered if it was likely to produce a usable result.
 late berry
Hey all~ Just wanted to share my little Pyportal project that displays crypto prices. You can find the code here: https://github.com/partsoven/pyportal-bch-display

GitHub
A pyportal app that displays the current price of Bitcoin Cash - partsoven/pyportal-bch-display
 marsh quest
nice work!
marsh quest
lol we need a SCSI WING
valid path
Okay, if y'all can do that I want a Token Wing
 tiny comet
What about an VGA and PS/2 ports?
Might be possible
I'm suprised that there isn't an VGA one already!
This guy made VGA library for ESP32 https://www.youtube.com/watch?v=qJ68fRff5_k

This is a beginner tutorial how to set up VGA with the least effort on the ESP32. My new Arduino library makes ist super simple to get started and provides m...
warped violet
If you drag your wing through the dirt long enough, you can at least have a scuzzy wing.
 quartz shuttle
Hi, folks. I'm building a train tracker to help me know when to leave the house to make it to the train. I am using a Metro M4 Airlift Lite, and I'm going against the Chicago CTA El train API.
I've got bigger plans for the enclosure (would like a cuckoo clock), but I've got a paper prototype now.
The left arm is the minutes to the next northbound train, the right arm is the minutes to the southbound train.
Initialization video: https://photos.app.goo.gl/q9Znfha6azKjF48i8
Train prediction changes (movement around 20s into the video): https://photos.app.goo.gl/jaxt9bXj2gzX8S198
It is just a paper prototype, but I'm going to make a cardboard one for this version (called Kitty Cat Train Tracker).

Google Photos

Google Photos
tiny comet
Is there also a map of all the current train locations available in your country?
Something like this @quartz shuttle
 maiden wasp
For the entire country in one place, probably not. Cities with mass transit by train in the US are very scattered. Amtrak goes lots of places city-to-city, but is also very unevenly distributed.
I’m about 200 miles from the nearest Amtrak station, for example. 60 miles to any passenger train at all, and that tends to run along one straight route for about 30-40 miles.
quartz shuttle
@tiny comet There is something like that for the city (I live in Chicago). We have an API that provides al the information, which is what I'm using for this.
I've written something before that plots them on a map, especially the line that I take. For this project, though, I'm looking to have my train tracker tell me when I need to leave my house (generally about 3 minutes before the train comes).
bitter hazel
whats the best samd51 dev board thats readily available so I can make my own pygamer? kind of frustrated waiting for the thing to get back in stock, been waiting a couple of months now
 torn viper
it's in stock on digikey, which is probably where you'd buy a dev board anyway https://www.digikey.com/products/en/development-boards-kits-programmers/evaluation-boards-embedded-mcu-dsp/786?k=pygamer
bitter hazel
well ill be. thanks for the info @torn viper
torn viper
yw
warped violet
CUTE!
lucid bloom
I started adorning my grow system with stickers that represent what I used to make it
 random hull
Last night and over lunch today I got an older project back up and running, now with an ATTiny85 instead of the trinket M0 (love the trinket, just wanted to try my hand at a an attiny)
 reef flax
Spent a very nice day designing and 3D printing. 😃 Here is a 'desktop' case for the RPi 4. https://www.thingiverse.com/thing:3772071

This thing was made with Tinkercad. Edit it online https://www.tinkercad.com/things/h2Dt3Li4Upq
tiny comet
Made an VGA featherboard
Works with FabGL library
Haven't received my PS2 connectors, but they can be soldered on to
upbeat geyser
Just bit banging or does the board help with signal generation?
tiny comet
I am not sure, can't find it that easily on his website.
http://www.fabglib.org/index.html
I think it is bitbanging because it isn't that fast
upbeat geyser
Ah thought you might have designed it
tiny comet
I am not that good yet.
I found a esp32 vga + ps2 development board online from China and I couldn't find a featherwing that had VGA, so I created one pretty quickly.
 stable onyx
If you're a fan of Japanese woodblock prints I put together a pyportal weather display that uses them as the background based off of current weather conditions.

GitHub
Japanese woodblock themed weather display for PyPortal - skybohan/woodblock_weather
 unique folio
Hey y'all, just got back from the Seattle Mechanical Keyboard meetup where @clear dove and I finally went public with (one of?) the first "appliance(s)" based on CircuitPython, the KMK Firmware for mechanical keyboards! Some pictures of many Python powered keyboards are here: https://redd.it/cimri8, and the repo is at https://github.com/kmkfw/kmk_firmware. Might do another post when we're at a full v1 release, but for now, here's a public beta!
 glacial glen
Got my 59 pixel neopixel (RIP one pixel I destroyed with a hack solder job) painter code working last night with circuit python, controlled via a web app hosted by the esp32 :)
Now to add more features to the app and build a mobile enclosure for it all. Thinking 2020 aluminum in a T shape for the pixels + perpendicular handle.
upbeat geyser
Stock aluminum extrusion or custom?
glacial glen
Nothing fancy, just stock cut to the right size (1 meter ish)
Will probably 3d print some stuff to attach the electronics
warped violet
You can go to the hardware store and get 1 meter lengths of channel aluminum with a diffuser, BTW.
Which strip are you using? Just the 60 LED /m 5050 strip?
glacial glen
Yeah, just 60 neopixel strip
 kind cape
Hiya! I gotta say thanks to the experts at Adafruit and the equally wise people here for helping make prototype-building a breeze! I just finished up work on the Workbench Assistant prototype, which uses a Itsy Bitsy M4 Express, a PAM8302 Amplifier Module & a AMG8833 IR Thermal Camera Breakout! Thoughts? Feature requests?
https://www.youtube.com/watch?v=u-fHgKbDMJA

Let us know you're interested by subscribing here & at http://WorkbenchAssistant.com !
hat tip to @upbeat geyser for audio-related inquiries & @lapis jasper re: CircuitPython inquiries 🎩
upbeat geyser
Don't remember seeing aluminum channel with a diffuser at the hardware store. Where should I look for that?
warped violet
@upbeat geyser : https://www.homedepot.com/p/Peak-Products-LED-Strip-Holders-50422/206394137 was one I found, albeit now I look more closely and it's only at the pro store.

The Home Depot
Create vibrant and stylish look in your lighting works with the addition of this specially designed Peak Products LED Strip Holders. Features high durability.
reef flax
Here is a picture of my Raspberry Pi 4 desktop. I will be starting my Masters in October so will be giving it a go as my study PC. 😃
Specs are:
Rpi 4 - 4 GIG
Two new AOC G2590VXQ 24.5 1080p monitors
7 port USB 3.0 powered port
32 GIG SD card for OS
128 gig USB 3.0 usb drive which has the home folder mounted on it and a 16 gig swap drive.
Running MATE desktop
Custom 3D printed case with a large heat sink and fan.
This is the case I designed, https://www.thingiverse.com/thing:3772071
This thing was made with Tinkercad. Edit it online https://www.tinkercad.com/things/h2Dt3Li4Upq
P.s. On discord with the RPi 4 now. 😃 It is working well and is very usable.
 rough totem
it looks similar to an ATX power supply
 warped cobalt
Me & buddy agreed to that also when we first saw this . . . after debating doing such build
reef flax
One for the c/cpp people. I've been working on a tool that allows me to build projects without having to relearn makefiles for CMake files. It uses a json file to define the project. Can be as simple as just listing the source files. I view it as an alternative to make. A feature I added recently is to support the shebang #! This allows you to run a source file as if it was an application. It has many other features including built in file dependency checking. It is a work in progress. If this interests you, you can find it at https://github.com/HamAndEggs/appbuild

GitHub
Contribute to HamAndEggs/appbuild development by creating an account on GitHub.
 long vine
Finished my personal cooling device print. Just in time for the heatwave to end and the weather getting freezing 😦 oh well
https://www.youtube.com/watch?v=DByo2_a4ZL0

This is a personal cooler I designed during the heatwave. Sadly it took a while to finish and it's now frigid outside. Oh well. Maybe it could be used for he...
 mystic ruin
I built my first featherwing today, it's for connecting RGB matrix panels. it's only for the huzzah 32 for the moment from a software perspective, but if could maybe made to work with others
vernal ferry
pretty awesome @mystic ruin !
 cunning lava
I cleaned up and documented the MicroPython port of the Stage game library, so now you can play the µGame games on the M5Stack!
west dune

Instructables
DIY Tablet PC: Ever wanted to build your own tablet that can run Windows 10? If so, I have some great news for you! In this instructable I will show you how you can make this tablet!
 raven sorrel
Meet Crabbie: Development Board for Kids - Lots of built in sensors, led's & more! https://www.kickstarter.com/projects/bits4botsllc/crabbie-interactive-development-board-arduino-compatible #sparky #bluesmokemonster Haha sooo many errors when designing pcbs ugh

Crabbie: My 1st Development Board an Arduino compatible hybrid sensor shield. Introduces children K-5th into electronics & programming!
solar yew

We've built a LM! Almost: Mike has hooked the AGC to a LM simulation from the Orbiter/NASSP program. Which is a very good simulation. So good, we can re-enac...
so cool
reef flax
A lovely Sunday evening soldering. 😃 Does life get any better???? 😄
And the finished article. An ZX81
upbeat geyser
Amusingly, I'm currently reading a book on the design of the ULA chip used in the original ZX computers.
sterile lodge
@solar yew, it appears to be this kit: https://www.tindie.com/products/tynemouthsw/minstrel-zx80-clone/. I just googled the text on the board. 😃

Tindie
The Tynemouth Software Minstrel ZX80 clone.
solar yew
nice lil kit
compact furnace

Just released Midnight Wild for the Pocket Go! It includes rumble and some other goodies.
Download: https://t.co/UcsHhy49lo
If you have been using the BittBoy version, I highly suggest downloading and using this version for compatibility's sake. #GameDev #IndieDev https:...
Twitter
😃
solar yew
And even part suppliers dont have much more than just the zx81 cpu's
 lofty flame
after hours of painstaking work in batch (i barely know batch or cmd so yes it was painstaking)
a cool little script to install a quick spigot test server (minecraft)
https://youtu.be/Fb6HGGUwhhE

a little script to quickly install a spigot test server paper, bungee and waterfall support coming soon :D
compact furnace

Circuit Dude 3.1 for the Arduboy is out, along with the new Level Tool that I am also releasing right now! You can transfer custom levels between your PC and Arduboy, save them to share online, and even edit them directly in the Level Tool!
👉 https://t.co/jrirPzG0Yu ht...
Twitter
Whew, busy night. Released Midnight Wild on the Pocket Go and then released the 3.1 update to Circuit Dude, along with a program to transfer, edit, and share your own levels. 😅
solar yew
😮
Technical Specifications
ARM Cortex-M7 at 600 MHz
1024K RAM (512K is tightly coupled)
2048K Flash (64K reserved for recovery & EEPROM emulation)
2 USB ports, both 480 MBit/sec
3 CAN Bus (1 with CAN FD)
2 I2S Digital Audio
1 S/PDIF Digital Audio
1 SDIO (4 bit) native SD
3 SPI, all with 16 word FIFO
3 I2C, all with 4 byte FIFO
7 Serial, all with 4 byte FIFO
32 general purpose DMA channels
31 PWM pins
40 digital pins, all interrrupt capable
14 analog pins, 2 ADCs on chip
Cryptographic Acceleration
Random Number Generator
RTC for date/time
Programmable FlexIO
Pixel Processing Pipeline
Peripheral cross triggering
Power On/Off management
 glass moss

I walk you through a program that maps Circuit Playground Express acceleration values to colors. x, y, and z acceleration components map to red, green and bl...
vernal ferry
😍 it finally arrived tonight
reef flax
Just got the latest firmware for my Dual monitor RPi4 Desktop. Now running at 2GHz ⏩ 😄
 bright sky
Here's the JavaScript REPL in action on an Adafruit Metro M4 Express - https://youtu.be/ShzFOwLUHtA
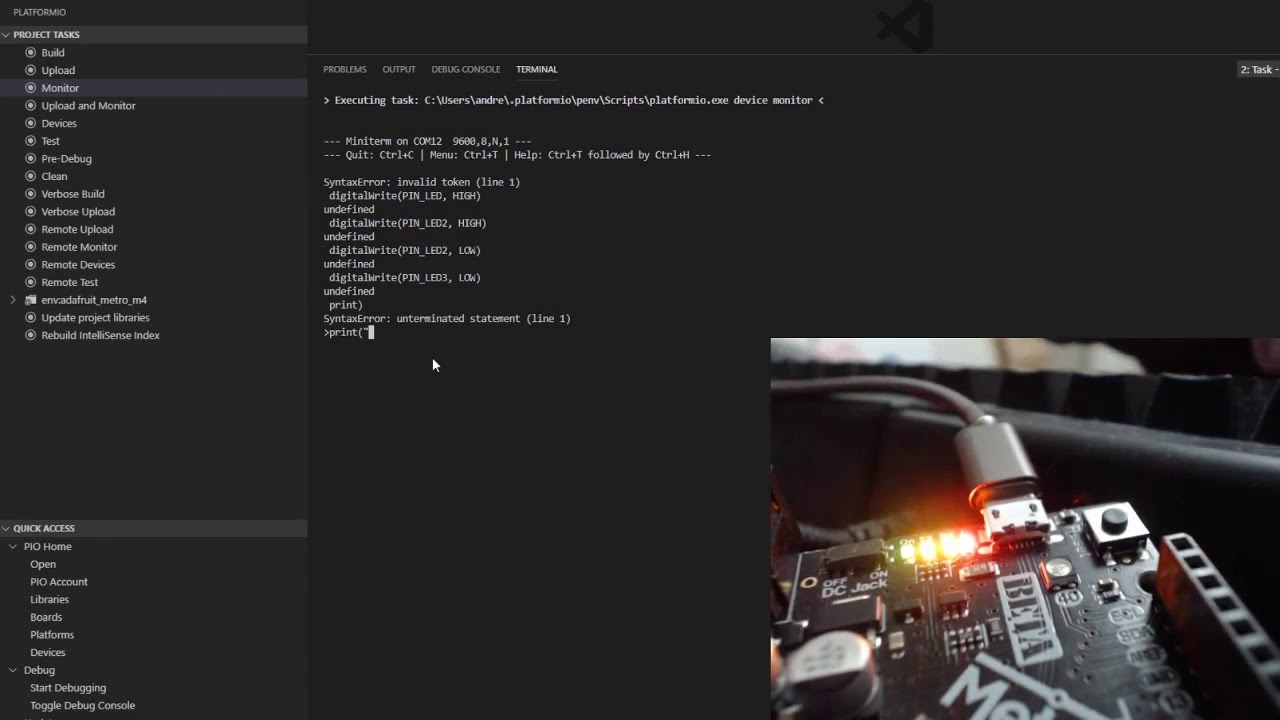
Proof of concept for a JavaScript platform on M4 SAMD51 microcontrollers
lucid bloom
My grow system passed it's last test, the watering test. It is accurate to within 5% of the target amounts. It is officially ready to grow.
warped violet
I, for one, am totally pumped about this.!
 meager ruin
love it
lucid bloom
I am going to be growing a couple types of tomatoes. I will have to start them from seed when I get back from vacation
I am using pi zero w, metro m4 express, nodemcu, some adafruit sensors and the motor hat
upbeat geyser
Interesting heirloom varieties like Reisenstraube tomatoes?
lucid bloom
large red cherry and red zebra, both heirloom. they max out around 4 ft tall so I wont have to constantly prune them down
upbeat geyser
Ah, I think we grew red zebras one year, they were popular.
lucid bloom
I'm going to grow them for as long as possible, my goal is to make it through the winter. The basement temperature is going to drop as well as the humidity and I do not know if that will cause problems, it all depends where it finally bottoms out
valid path
I have nothing to add, I just want to focus attention on the wonderfully bad "totally pumped" pun by @warped violet
warped violet
I mean, temperature control is optionally next.
Then pressurization.
Then full-cycle life support, complete with a little gerbil inside.
Honestly, while I'd love heirlooms all winter, I also feel like any plant that needs to be kept in a cage for it to be safe is maybe not worth the effort.
 hallow imp
I'm not much of a gamer, so my focus with PyPortal tends to lean toward using it as a touchscreen controller for different things. After doing the video switcher, I wanted to add the concept of pages to my baseline interface.
This is the first cut at code that provides multiple pages with tabs to switch between them. The buttons issue different commands depending on which page is active.
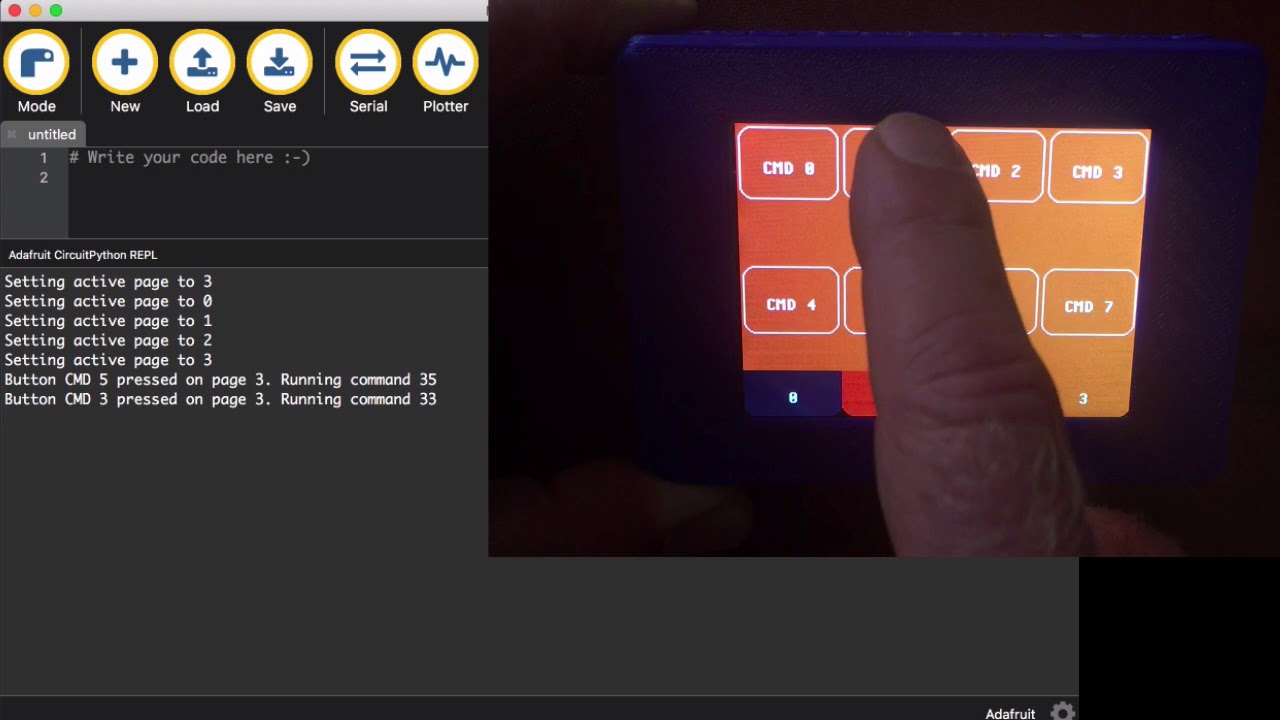
I am not a big gaming fan, so I have been focusing what time I have for #CircuitPython tinkering on using a PyPortal as an HMI controller for different appli...
maiden wasp
Not too complicated, but major quality of life improvement: 3D printed cable holder for dual Thunderbolt 2 and a MagSafe 1->2 adapter. One thing to plug and unplug.
glass moss

 hallow merlin
Here are a few pictures of one of my projects. My first one with Adafruit and a Raspberry parts:

It's a ghost shell from Destiny (videogame)
has a Pi Zero inside with a 240x240 display in the front and a tiny amp+speaker
It's a gift so it will be up to the owner to do whatever with it. I'm not into coding but she was a Linux admin and a big Destiny fan so I guess it's going to the right place.
upbeat geyser
@glass moss I used the accelerometer to adjust the "calligraphic" angle in my light wand automatically too: having the Circuit Playground respond to gravity is a fun technique. https://blog.adafruit.com/2017/11/01/adafruit-extra-credit-the-results adafruitextracredit-circuitplayground/

Adafruit Industries - Makers, hackers, artists, designers and engineers!
Thank you to everyone who participated in Adafruit Extra Credit this past August!! We got a ton of great submissions and it was exciting to see what everyone is doing with the Circuit Playground We…
glass moss
@upbeat geyser Very cool. I see I’m not the only one who thought of the LEDs as being spaced around like a clock, but with nothing at the 12 and 6 positions. I hope to discover that I’m the first to do anti-aliasing, but as smart as this community is, I think that’s unlikely. 😃
I welcome comments on the code, as I’m finishing it: https://github.com/dcbriccetti/Adafruit_CircuitPython_CircuitPlayground/blob/gravity_pulls_pixel/examples/circuitplayground_gravity_pulls_pixel.py

GitHub
CircuitPython library for CircuitPlayground. Contribute to dcbriccetti/Adafruit_CircuitPython_CircuitPlayground development by creating an account on GitHub.
glass moss
@upbeat geyser Here’s a video about “Gravity Pulls Pixel”, and there’s a link to the code in the description. https://youtu.be/sZ4tNOUKRpw

I walk you through a Python program that simulates gravity pulling on a white pixel as you change the orientation of a Circuit Playground Express. Source cod...
viscid stag
This is a project I'm working on - a mini handheld Tetris (and other games in the future) thing. It uses a trinket m0 and the 128x64 oled display. I still have to install the buttons but it's coming along well
The exposed orange cable is for the buttons - each will be on a different ohm resistor in parallel
The tetris game plus the ssd1306 and gfx libraries only takes up about 15% of the program space so when I get it all put together i'll add snake and some other games
humble plaza
Someone hire my student, Nick Bluhm, to make PCB Art.
viscid stag
The game is complete. I'll probably make a new version (with less hot glue) in a while knowing what I know now. The hardest part was wiring up the resistors for the buttons correctly (they're all on one pin)
I love those little oled displays
 warped violet
Gotta hand it to you, that's pretty impressive
 brazen inlet
Hey can someone explain me how can I join to the showandtell show in youtube?
solar yew
oh give me a Ω where the buffalo roam
bright sky
Progress update on my JavaScript platform I'm building. Has setTimeout and setInterval https://twitter.com/chalkers/status/1161865643097911296?s=09


Hello world of electronics in JavaScript, blinking an LED on and off every second, non-blocking! Feel accomplished writing my own JavaScript platform!
Runtime running on an @adafruit Metro M4 express https://t.co/hNs1snEJsJ
Twitter
 grave shadow
Making some cncs. Week long project half way through
Cutting length of 2600mm and the other ones 1200 sq
solar yew
Working on a opensource Realtime FFT on desktop audio. It has 32 frequency bands and sends over UDP values for the color and freq values to a esp8266 with a neopixel ledstrip.
I had made this in python couple of months ago but I must admit. Doing this in C# it gives me way more performance!
Here is a video with non copy right music that I just made.
The idea is to add multiple or single microcontrollers of your choice and then make the ledstrip respond to the music from your desktop.
Also the idea is when choosing multiple strips, you should be able to make a spectrum rgb led analyzer out of it and drive it with this program.
What do you guys think of it?
Let me know. Also I will need some testers some of these days
Here is a video showing it off. I will update this post with a ledstrip video as well.
https://drive.google.com/file/d/1W6MfzCHCWVFFxytuSfue3r_6Ti4YtOGc/view

Google Drive
It has also a fade effect and a vu meter effect. Of course more will be added in the future. For now the function and stability is a priority
cunning lava
The newest iteration of my CircuitPython console has a laser-cut case, I'm pretty happy with how it came out.
humble plaza
Clear soldermask on black substrate. Someone hold me.
solar yew
Whats the general quality of OSHpark pcba
Pcbs
I want to buy some pcbs from there as i usually use jlcpcb, but jlc is very far away and shipping sucks
lapis jasper
@solar yew I've been really happy with OSH Park. Used them for four years or so now
upbeat geyser
OSHPark is high quality stuff. My only beef with their boards is the "mouse bytes" left over from where they were joined into a panel to be manufactured. They're easy enough to snip and sand off, but there are other PCB manufacturers that do that for you.
grave shadow
It's alive!!
 sudden hawk

A how-to video on how to build a Raspberry Pi Serial Console Server. Raspberry Pi website: https://www.raspberrypi.org/
glacial glen
Pixel painter build coming along nicely! Just finished printing and attaching the housing/pcb mount :)
 ancient skiff
I wanted to put custom labels on my pyruler, so I created this: https://emergent.unpythonic.net/files/sandbox/pyruler-label-template.svg
In your favorite vector editor, you can add text or images, then delete the background image, print, cut out, and tape onto your pyruler. The touch sensors still work fine through a layer of paper.
(it controls my music player, digital picture frame, and a lamp)
junior agate
a lamp?!
compact furnace
I ended up releasing Circuit Dude on the BittBoy, LDK Game, and PocketGo. ❤

🎊 Circuit Dude for the BittBoy just released! ⚡ This retro puzzler includes 75 levels, a secret ending, level editor, new SFX, and 4 different color modes: Full color, Game Boy, CGA, and Arduboy modes! 🤯
You can download it, here: https://t.co/de4ueLPvNZ
#IndieDe...
Twitter
 void field
It looks like someone beat me to the punch. But, oh well! Here is the Simon say game for the Adafruit PyRuler with sound: https://youtu.be/hbXfYvanRj8
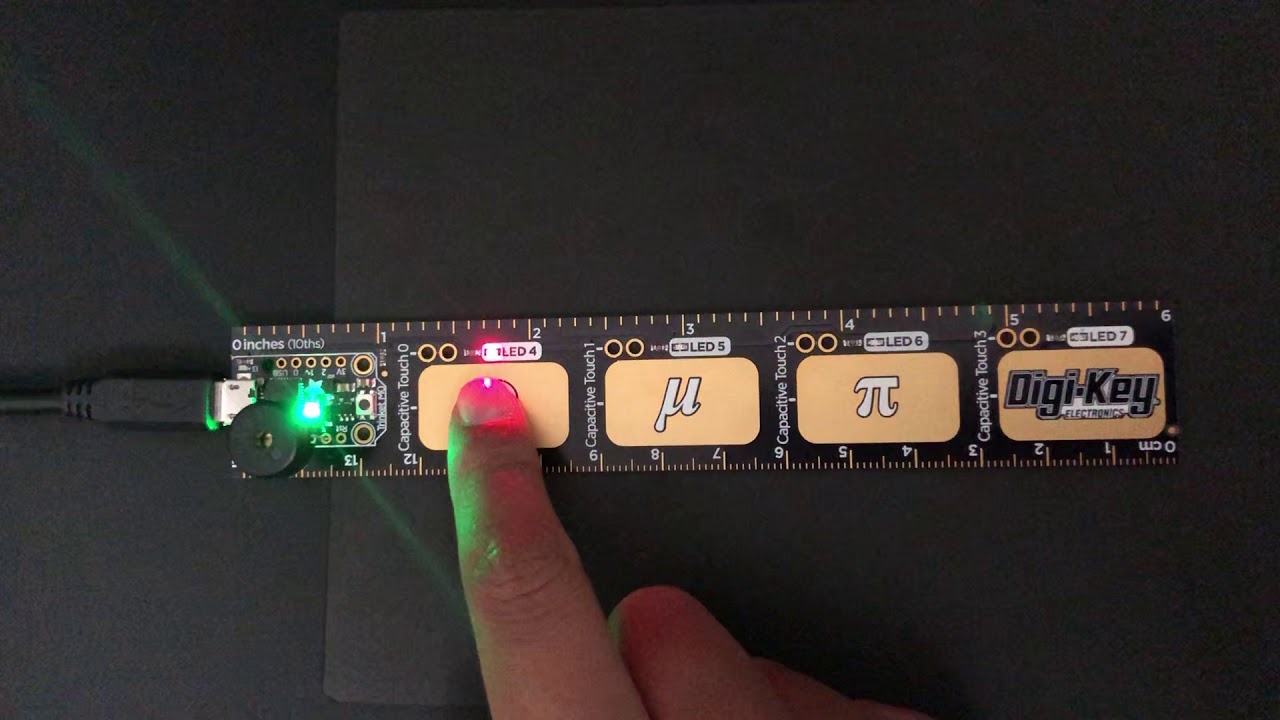
The game was implemented with CircuitPython. The code and instructions are located here: https://github.com/paks/simon.
 full garden
so I was cleaning up my hackerspace and came across a very big micro in the junk pcb pile
now that's what I call a big package
 dusk zinc
Minimalist mobile CircuitPython https://blog.adafruit.com/2019/07/30/its-now-possible-to-open-edit-and-save-python-code-on-ios-for-embedded-electronics-plugged-in-circuitpython-usb-devices-apple-ios-circuitpython/ (even on iPhone) OTG adapter is: https://www.adafruit.com/product/2910

Adafruit Industries - Makers, hackers, artists, designers and engineers!
OK! Big news- It’s now possible to edit and save Python code on iOS to embedded electronics, CircuitPython USB devices! This is a follow up to our post about Apple’s iOS 13 beta, which …

This super slim, super tiny, and super cute Micro-B to USB on-the-go adapter is so slim, tiny, and cute that we'd pinch its cheeks if it was big enough to have cheeks. At just ...
 delicate basalt
Not nearly as impressive as the rest of the posts, but this was my last project, and first actual Ultimaker print(s): http://ryantwalton.com/projects/cable-organizer
if this is the right place to share

RyanTWalton.com
maiden wasp
@delicate basalt cable description sounds like a MacBook with Thunderbolt 2. If so, I’ve got an OpenSCAD model and STL file that can let you plug and unplug power, 2 TB, and USB all at once. Assumes you leave the power adapter at the desk, though. Let me know if you want the files.
delicate basalt
it is, good ol 2015 macbook pro. used to have a henge dock that did everything for me, but half the ports died
sure, @maiden wasp I would like to take a look at the files, if you don't mind sharing 👍
maiden wasp
Will dig up when I get to work. Photo of my current one (MagSafe 1-2 adapter, 2 TB, no USB) is in this channel from dated August 9.
delicate basalt
nice, and nice decal too
maiden wasp
http://thedecalguru.com — “Atom 2”, I think?
The Decal Guru is the most secure, and trusted place to purchase high quality Wall Decals, Car Decal and Macbook Decals
maiden wasp
@delicate basalt https://www.thingiverse.com/thing:1641899/files is where my current one started. May want to do a test print to verify sizes. I seem to recall the original STL and .scad file having different dimensions for the two TB ports. Since I don't want a permanently-attached USB there, I cut mine down to 3 connections, narrower to accomodate the Magsafe 1->2 adapter, and larger to accomodate the Magsafe 1->2 adapter. Originally used https://www.thingiverse.com/thing:221478 , and I see several other similar items on thingiverse by searcing 'macbook pro'

Makes "docking" your MacBook Pro Retina quick and easy. I converted this using onshape.com to a full parametric model with variables so you can easily resize the Thunderbolt and USB cables.
-->Use customizer to get the newest/best design customized for your cables<--
Now in ...

Apple computers are pretty good, unfortunately their Thunderbolt ports aren't, they're way too loose.
Any movement will rattle the connector and "break" the connection, not super cool if you're using the Thunderbolt for file transfer or for an external monitor.
So we cam...
delicate basalt
thanks, I'll take a look! my permanent usb is for the usb hub in my monitor
modest lion
just finished this IR sensor i'm attaching to a roomba for following a person carrying an infrared beacon: https://imgur.com/a/W4cRU9k
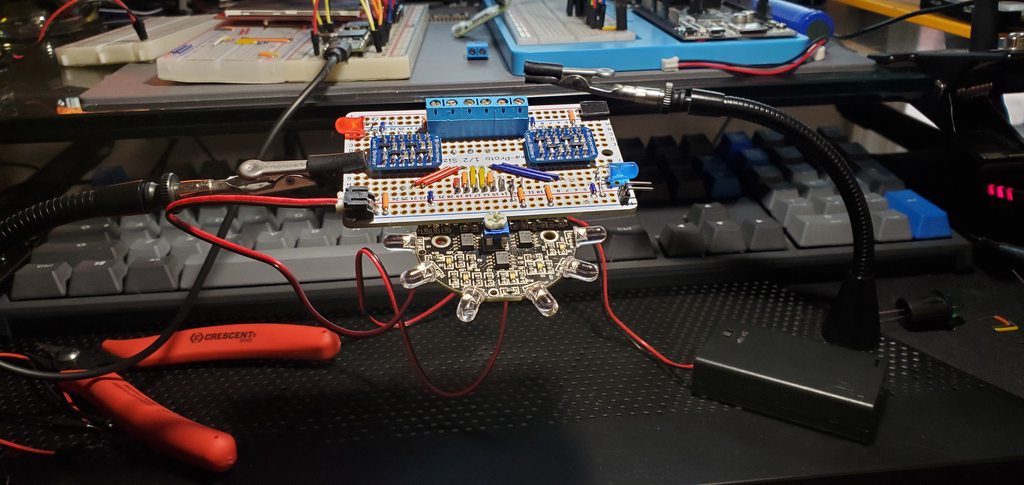 onyx glade
9 yr old programming Mecanum wheel robot car: Video https://www.youtube.com/watch?v=EQWXWCv-ce0
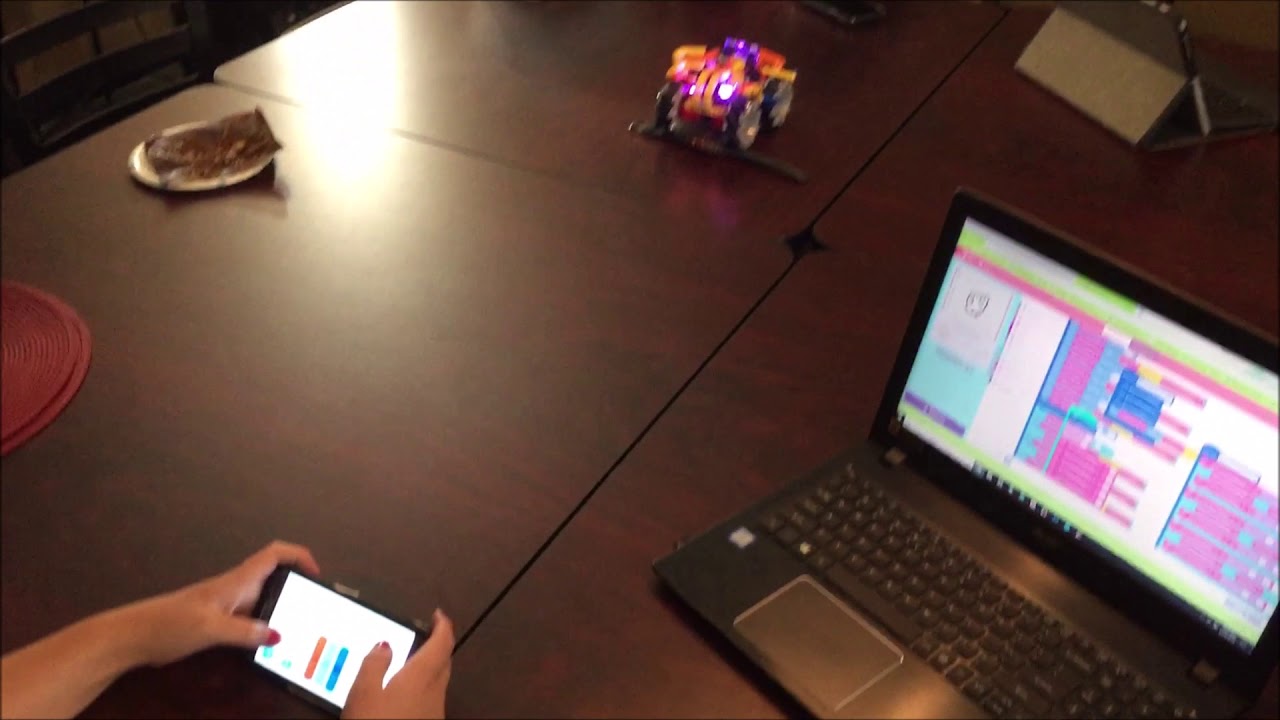
She learned about programming a Yahboom robot car: Omni:bit which has Mecanum wheels. Today at our coffee shop meet-up for coding. This bot car can be driven...
glacial glen
Got my portable USB battery bank in the mail yesterday. Just finished designing and printing a clamp to mount it to 2020 alluminum extrusion.
Painter project hardware nearly done!
torn viper
I wrote a lis3dh driver in Rust
no tap or shake detection yet but I can get readings off it
 raven sorrel
Bare metal. SAMD21E
modest lion
@raven sorrel what am i looking at? is this 4x a breakout circuit for the samd21 ?
raven sorrel
@modest lion Basically. I only made traces for 4 I/0 pins for now.
torn viper
Got my homemade turntable preamp (phono stage) working beautifully.
Put it in a sony amplifier case lol
it had a false start about a week ago because I put in a capacitor backwards
but now it sounds beautiful
what better song could I celebrate with than electr(on)ic man https://www.youtube.com/watch?v=V6495gu_kCI

Titus Andronicus Local Business 2012 (I Am The) Electric Man
solar yew
new monitor for workbench pc
 fallow smelt
Raspberry Pi RPM meter
modest lion
@fallow smelt love the gigantic doomsday switch on top
and the wooden box
what are you using to monitor the rotations? a magnet?
a pi seems like overkill!
fallow smelt
It’s a pi zero, so it’s not like I dropped $35 on the computer in this thing. And it’s reading a TCRT-5000 sensor!
Infrared light reader
Better top view. Honestly the box was the most costly piece haha thanks for the love
ancient skiff
@junior agate very belated answer but yes, a lamp. I have several small appliances controlled by wifi relays, so there's a whole complicated path from the touch sensor to a raspberry pi to mqtt to relay, but the ultimate outcome is that I touch the pad and the lamp turns on or off!
junior agate
@ancient skiff great belated response 🙂 That's neat.
ancient skiff
current project: An adapter from the Commodore (Vic 20 / 64 / 128) USER port to the serial port of any Feather. I would LIKE to present the CircuitPython REPL on a classic Commodore computer, but I haven't figured out how to transfer REPL from USB to UART yet.
but ... so excited about my first custom fabbed PCB in probably 4 years
@junior agate I can't entirely recommend them, because to get them working with MQTT you have to open up and solder on a board that is used with mains voltage, but I am using "sonoff" brand relays with "tasmota" open source firmware. (otherwise, it involves using some third party services and apps to interact with the relays, which I've never actually tried for myself)
(you don't do that while it's hooked to mains voltage, of course, but I'm just always cautious to recommend anyone work with anything that is not always at a safe DC voltage)
sterile lodge
That's pretty awesome @ancient skiff.
solar yew
Ingenic MIPS SoC in a tablet i got recently
cedar dew
Hey guys. Showing off some work I’ve recently done with Lithographs https://youtu.be/xPWfrWPvPxI

A sample of some of my work with lithographs.
upbeat geyser
Lithophanes? Those are really nice. I'm wondering how they'd look with a flickering LED backlight. The touch of color is a nice addition.
cedar dew
I’ve made a lamp holder for some LEDs and will play around with different effects
modest lion
@ancient skiff where did you purchase your particle? if from adafruit, did it come -with- an external 2.4GHz antenna?
ancient skiff
@modest lion yes it was from adafruit and no, there were no antennas included. I haven't actually used any of the RF functionality.
modest lion
oh, well i was confused anyway, the xenon isn't a model with 2.4ghz wifi anyway. the argon is the one im curious if it includes an antenna or not
the email answers (x2) i received from adafruit were the first entirely unhelpful support emails ive ever received from them
ancient skiff
I got what I assume is the same retail box that particle puts together, nothing extra
I only have xenon, not argon. the use case for my xenons was to help with circuitplayground bluefruit work before the preliminary cpb boards were even fabbed.
I'd tell you I am about 90% sure it'll come with the antenna shown in the product photos and on particle's own website. but I'm not speaking for adafruit and I don't have personal confirmation of this.
 craggy parrot
@modest lion My Argon came with the external WiFi Antenna, Nothing came with Xenon. It has an internal BLE antenna.
modest lion
ah, thank you!!
just for reference, this was the support thread i received on this topic
craggy parrot
Xenon also can accept an external Bluetooth antenna but it works pretty well without it.
modest lion
i've been dying to grab one of the CPBs, but they sold out between the time i received the back-in-stock email notification and the time i actually saw the email notification a few hours later
ancient skiff
I have one! and still haven't used any of the bluetooth functionality. 😦
modest lion
i've been playing around with a pair of the new arduino nano 33 (IoT and BLE Sense, the latter with BLE 5.0 radio), which is my first foray into bluetooth territory, and ive been very impressed with both the ease of implementation and responsiveness of the protocol itself
craggy parrot
@modest lion just to clarify, my Argons came from Particle as the "kit" and included the WiFi antenna, I'm not sure if you get one with the board alone.
modest lion
ah, i see, several of the amazon resellers mention the antenna being included, so i was hoping it was a packaged deal from particle; that adafruit would deliver this identical package
craggy parrot
I looks like it does in the Adafruit shop. it is in the picture. It's pretty useless (for Wifi) without it!
modest lion
the longer i wait for another run of the CPBs to be on sale, the more tempted i am to cough up the cash on an argon. but i -really- want all the goodies that come baked into the CPB, simply for academic stimulation
im guessing you guys don't have any insider info on the status of those things, eh? 🙂
craggy parrot
I don't recommend using the Argon for Circuitpython anymore since it can only support the ESP-AT library , not the newer and better ESP32SPI library.
modest lion
to be honest, i dont have circuitpython installed on a single device, im a bit biased in favor of arduino
craggy parrot
That's fine -- The Particle IDE (more or less Arduino) works fine with the Argon.
ancient skiff
Pick what works for you! My main interest is in CircuitPython, but Arduino works really well for a lot of people.
craggy parrot
Does Arduino support the Particle boards ?
modest lion
im not sure. i know particle offers their own equivalent libraries, also in C/C++; though not nearly as prolific in terms of community-supplied FOSS
craggy parrot
yes, I have used the Particel IDE and it works well with the Argon/Boron/Xenon -- the mesh support is pretty nice.
ancient skiff
I think you need to do awful (and maybe even irreversible?) things with a debug adapter before you can use the Particle boards with CP or Arduino
modest lion
not irreversible! just reprogram it with the particle bootloader firmware
craggy parrot
For CP -- you have to pretty must replace all firmeare -- I have "reversing" taht on my "TODO" list -- It should be possible -- with a J-link.
modest lion
luckily the particle boards come with SWD headers
craggy parrot
you also have to reprogam the ESP32 firmware.
modest lion
ah, i actually have no idea what all hardware is on the particle boards
craggy parrot
The argon has an nrf52840 and an ESP32 -- the ESP32 acts as a wifi "coprocessor"
modest lion
doesnt the ESP32 implement its own bluetooth spec too? so there are 2 BT capable chips on there?
modest lion
and i was curious about that particle SWD/JTAG debugger. is it different from e.g. the j-link mini edu? from what i (briefly) read online, it sounded like it has a gdbserver installation on the board itself, kinda like the black magic probe
craggy parrot
I have one, but have not tried it yet. My J-Link has worked fine with it.
modest lion
that's my weapon of choice too, very nice
ancient skiff
part of me wishes for open source debugger HW but j-link works with a lot bigger range
craggy parrot
although I have the full J-Link (EDU but not mini) but I would not expect a problem with the mini.
warped violet
I deeply loathe that we don't have better open source debugger HW.
Like, and the giant bouquet of cables for logic analyzers and usb scopes and programming cables that exist on aliexpress with firmware and software of arguably questionable origins really indicates that as an industry we're making things much harder than they ought to be.
(Also I'm annoyed at the J-Link EDU licensing because I'm not a pro but what I'd probably use it for is likely to violate the license)
modest lion
from my experience, a considerable number of people (developers included) are wholly unfamiliar and intimidated by standard debugging tools, so they resort to judiciously-placed print statements and have no interest in financing, supporting, or improving them
which is unfortunate, if they would only take the time and effort to learn how much time and effort they could save (and insight they could gain)
i know personally i was in the same boat before entering the professional field (DoD), as there was precisely zero incentive or literature on software debugging throughout 6 years of school
 scenic siren
@craggy parrot @modest lion @ancient skiff Product page has been updated. Thanks for bringing this up!
solar yew
Neopixel ESP8266 - Windows Realtime FFT LedDriver over UDP and Wifi
This is a beta program to do realtime FFT on the desktop audio. You can choose your own audio output. The program will scan for it.
It's a driver for your rgb ledstrips that can react on your audio or music.
Features:
- Communication runs over a UDP protocol with my own packet
protocol on top of it. - Choose your own desktop audio as source
- Realtime FFT Analysis with 32 frequency bands.
8 and 16 frequency bands are not supported yet ! - You can choose which frequency band to send to your neopixel
ledstrip - Only support for the esp8266 and the ws28xx rgb leds. More
support is coming - Static color effect
- RGB Vu Meter Effect (Based on the realtime audio)
- Fade In and Out Effect (Based on the realtime audio)
- You can choose color for each of the effect
Requirements:
- ESP8266 microcontroller with the proper usb cable to flash it
- Neopixel ws28xx rgb ledstrip
- Your own power supply, you can also use the 5V rail on your pc
power supply - Windows
- Arduino IDE
WORK IN PROGRESS
- Support for headless
- Server web api support
A video example
https://www.youtube.com/watch?v=0on2L8c0Imc
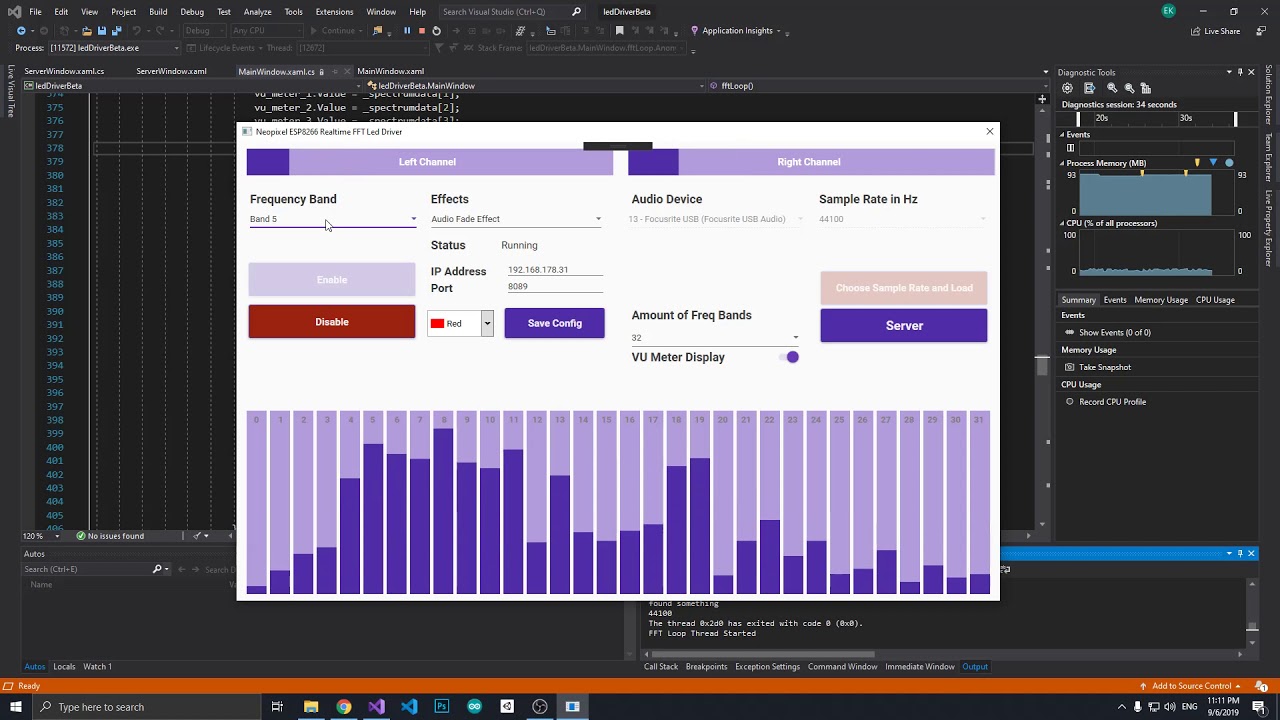
This is a beta program to do realtime FFT on the desktop audio. You can choose your own audio output. The program will scan for it. Features: * Choose your o...
 upbeat geyser
Back to the Future time circuits prototype demo
solar yew
@upbeat geyser niceeee. You could add some effect for each digit as it comes near to its number. Then the next digit and so forth. I cant quit explain what i have on my mind. I hope you understand it haha
A number effect that is randomizing but still hits the proper number or date
glass moss
Two Python programs: One presents the secret message here, the second uses computer vision to decode it. Code: https://github.com/dcbriccetti/cpx-decoder-ring/tree/master
GitHub
Displays and decodes a secret message on a Circuit Playground Express - dcbriccetti/cpx-decoder-ring
upbeat geyser
I could add a slot-machine sort of effect, like is done on nixie devices to avoid cathode poisoning. The entire display and keyboard is operated by a single HT16K33 chip, using AdaFruit's library modified to support a keypad and two 7-segment digits per slot.
glass moss

A quick look at something I’ve been working on. A message is encoded in the pixels, and using Python and OpenCV, I can read it, then output a video, image st...
 ocean osprey
That's very cool, how easy did you find opencv to use?
glass moss
@ocean osprey Thanks. Much easier than I expected. I like how simple it is to get a picture, or frames from a video file or live camera stream. Using numpy made things easier, too.
ocean osprey
this is encouraging, i plan to use it in my project
glass moss
I’ll be making a video today with a lot of details about this project, including a code walkthrough. I think there’s some educational value.
What’s your project?
ocean osprey
Little quadruped robot, planning to use opencv to process a few things
glass moss
Oh, fun!
ocean osprey
 upbeat geyser
It walks! 🎊
glass moss
An engineering marvel, and a bit creepy
upbeat geyser
It does creep, so that's a particularly apt word. That might even be what's known as a "creep gait" (I'll admit I'm not sure).
ocean osprey
It is a creep gait
I think it could do with some tweaking
but, it generally walks but the 4 AA batteries powering the servos are a bit heavy for it, Will eventually be going with a light lipo
glass moss
In the meantime, perhaps you could lighten the batteries using a few helium balloons. 🙂
ocean osprey
Would probably need a fair few haha
lapis jasper
@warped violet @modest lion @elder dirge makes good open source debug hardware: https://1bitsquared.com/collections/embedded-hardware/products/black-magic-probe https://1bitsquared.com/collections/embedded-hardware/products/bitmagic-basic

1BitSquared
Black Magic Probe Mini V2.1 (BMP21) designed by 1BitSquared in collaboration with Black Sphere Technologies is a JTAG and SWD Adapter used for programming and debugging ARM Cortex MCUs. Its the best friend of any ARM microcontroller developer.Black Magic Probe gets rid of...

1BitSquared
This is a Sigrok compatible FX2 based logic analyzer.This product is a developer version of the hardware. We reserve the right to make hardware changes that might not be backwards compatible. This means the cables and extension boards from the current version might not be com...
 proud ether
My magnetic light blocks V2 are lookin good! Next step: assemble 64 so I can make 8x8 pixel art.
ocean osprey
thats sick

 soft condor
@last pulsar Awesome!! I've got a strip of NeoPixels set aside to go on the wheel of my 36" uni if I ever get around to doing it. Nothing as clever as yours though.
 tender oak
what are NeoPixels?
 last pulsar
RGB addressable LED
tender oak
ok i guess
last pulsar
You have 4 pins for each led
Vcc
Gnd
Data in
Data out
last pulsar
Just get some
tender oak
ok
soft condor
@GhostlyCalling https://learn.adafruit.com/adafruit-neopixel-uberguide

Adafruit Learning System
Everything you always wanted to know about Adafruit NeoPixels but were afraid to ask
tender oak
ok
last pulsar
Those already mount as strip
soft condor
Big thing is you can set the color of any one of the lights by sending a signal into the first one, since they're all chained together. And by changing colors quickly you can animate the whole thing.
More importantly though, how long have you been unicycling, @last pulsar? 😄
last pulsar
About a year
soft condor
Cool, are you working towards any skills, mountain unicycling, road rides, any of that?
soft condor
When I first found out about mountain unicycling, I thought it was the dumbest thing I'd ever heard of. It turned out to be super fun and a crazy workout.
last pulsar
 soft condor
A frozen lake sound pretty good too. Lakes don't freeze here but we do get snow sometimes and it's always great to ride in it.
Oh wow, love the light show!
last pulsar
it is took me ZERO lines of code
You just buy the $5 leds from walmart for the TV, and add a usb power bank
soft condor
I see motorcycles with color changing lights like that. I've assumed it was a kit like I've seen on ebay. Not individually addressable lights...
last pulsar
it's come with a nice small remote
soft condor
You've inspired me. I'll have to get my lights working by the time daylight savings time ends, and go riding around at night on it.
last pulsar
unicycles don't spin very fast to make something like a pov
last pulsar
I have a 18" red uni if you want
soft condor
Find a kid who wants to learn. I have ~8 (depending on how you count parts) unicycles already and no space for any more in the shed!
last pulsar
I know the problem.. and I'm a renter
other hobbies that I have is machining and fish tanks
so... space.. is very very limited here
soft condor
Space... the final frontier. As someone once said.
last pulsar
where are you located?
soft condor
North Carolina. U?
I need to go offline for a while. Keep up the good work my friend!
 indigo charm
Thanks @winged swallow and @lapis jasper for helping me out with the mini terminal console on my little data logging graph test for the pyportal. 🙂
torn viper
cool
dusk zinc
That's very cool. Did you end up using a Label or some terminal construct? Ah, nm, found Luminescentsimian's code snippet 😄
tender oak
what device is that program on?
torn viper

PyPortal, our easy-to-use IoT device that allows you to create all the things for the “Internet of Things” in minutes. Make custom touch screen interface GUIs, all open-source, ...
ocean osprey
Low cost pi controlled quadruped
https://youtu.be/QVM9YokbeDM
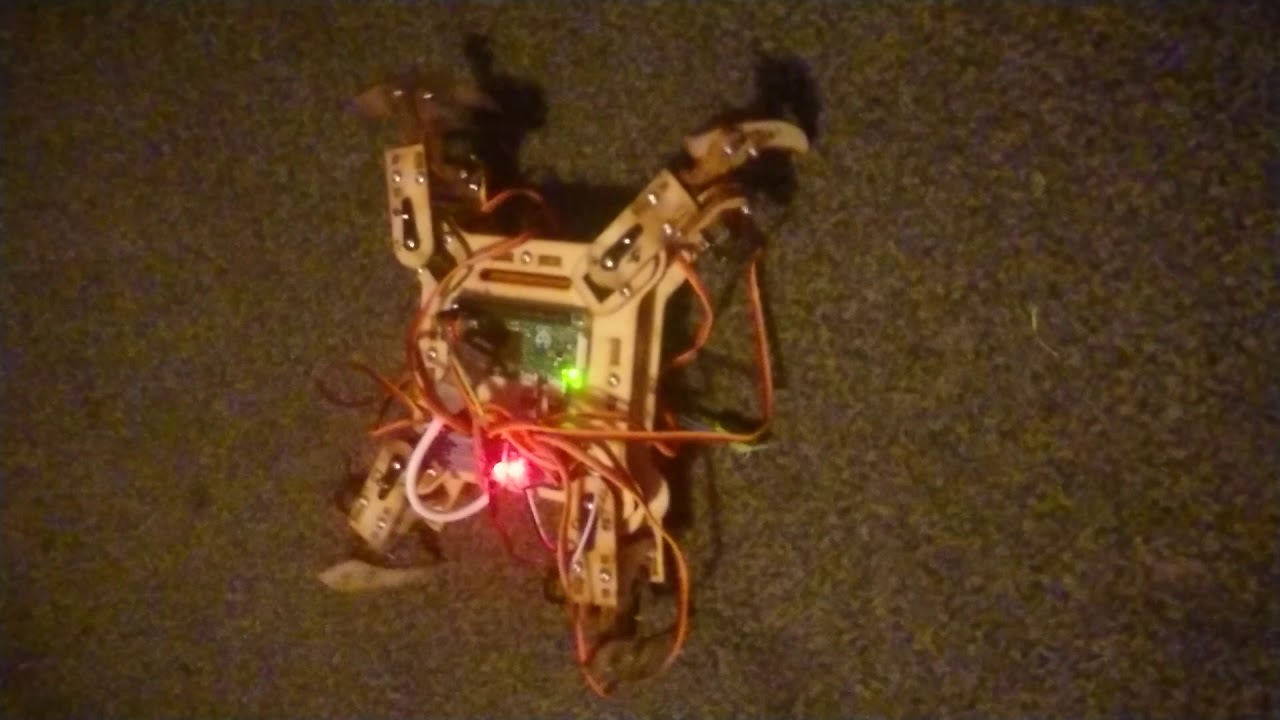
Sparx walking and turning with no power umbilical, batteries are contained within a 3d printed box bolted to the underside. Commands sent via SSH temporarily...
upbeat geyser
Walking faster and more smoothly, and turning nicely too!
ocean osprey
walk cycle isnt perfect, but it goes and hes completely untethered now, no power umbilical
hes been turning on the spot for an hour now
upbeat geyser
Nice!
ocean osprey
Gonna tidy the code up a bit then post it somewhere, someone might want it
as it is you could get one up and running for i dunno, $40 for the frame/servos, $15 for the servo controller, $8 for the pi (or 15 for a pi zero w) and then sprinkle some batteries and boom
upbeat geyser
Not bad!
ocean osprey
ran out of power to its brain at the two hour mark, servo battery still had charge
couldnt tell you how much, but >2 hours of continous movement is enough for me
 chilly kiln
Custom build or a kit? Great job btw..
solar yew
the SoC in one of the tablets that i previously thought used a snapdragon 401
ocean osprey
@chilly kiln Body is an open source kit, made for arduino, i just adapted it to use with a pi and an adafruit servo controller
chilly kiln
@ocean osprey Can you post or DM a link to the kit?
ocean osprey
If you Google meped V2 you will find it :)
chilly kiln
Thx
ocean osprey

Using an open source meped v2 kit, a Pi Zero, and an adafruit pca9685 servo driver to make a low cost quadrupedal robot, with aims to eventually give it a basic ai and autonomous functions.
Put everything ive done so far together incase anyone feels like doing the same thing.
bitter hazel
Still WIP but have all the software running. Uses a movidius chip to run object recognition locally on the pi 0
ocean osprey
Looks cool, what is it
warped cobalt
A web camera?
bitter hazel
Its a pi zero with a camera and has the aiy movidius chip for local object/face recognition
Im also streaming a video feed from the camera over the internet so i can see what its seeing
So the idea would be i used it like a point and shoot and instead of showing me a picture it tells me what it “thinks” it sees
Theres also a small oled on the back where i will be showing what it “thinks” it saw
ocean osprey
oh thats sick, im gonna be trying some object recognition on my pi
bitter hazel
I saw the machine learning monday video from @marsh quest and decided to make one out of parts I already have lying around
ocean osprey
I dont have a fancy movidius chip sadly, i only need to detect some relatively simple stuff , hopefully simple anyway
bitter hazel
If i get it decent enough might “finally” join the show and tell wed
ocean osprey
I dont have a fancy movidius chip sadly, i only need to detect some relatively simple stuff , hopefully simple anyway
bitter hazel
Youre going to want a movidius or any other inference/ai chip to do ML on a pi zero. Its just too slow. Maybe pi 4 can do better but I unfortunately dont have one of those
ocean osprey
good to know, i will likely play around wiht it on my pc first and then see what i can do
bitter hazel
If you want to do it on a pc you could get an intel neural compute stick. Its like 70 bucks. https://software.intel.com/en-us/neural-compute-stick

Learn AI programming at the edge with the newest generation of this tiny, fanless deep learning device.
ocean osprey
my issue is the whole robot has only cost maybe $70 haha
bitter hazel
You can potentially reuse the ai processing as a server solution. One of my long backlogged projects is detecting humans/events at home using pictures taken from a bevy of cameras I have installed all around my house which then gets sent to my home server for processing. This makes it a cheaper alternative to using the cloud to do the ML which gets expensive long term
ocean osprey
not a bad idea, i would LIKE to not rely on a network but if i need to i need to
bitter hazel
But overall this hobby (or addiction for me) does get expensive. I rationalize it by saying im investing in my future of being a iot/robotics/ai engineer 😂
bitter hazel
Dont have battery usage numbers yet. Ill update here or on my blog once I finish the project and take it out in the real world
ocean osprey
well plan is to only use it when battery is allready kind of low
so he can find his charging bay
bitter hazel
You can use BLE if you want it to be cheap
Wont help in driving it perfectly to the desired destination but at least helps in determining distance and direction from the charging bay
ocean osprey
BLE?
bitter hazel
It emits a bluetooth signal that tells the subscribers how close they are and in what direction
ocean osprey
that sounds very useful, thanks ill note that down
bitter hazel
Theyre cheap and you can place them around your house to help with triangulation and improve accuracy
Like 5 bucks cheap
ocean osprey
This is legitimately really helpful, ive been wrestling with how to give my robot a sense of location and I had run through tons of ideas in my head, sonar, lidar, some form of mapping using one of the above, physical markers etc
i mean its confined to the area of the beacons but dang
this is something i run into often, strugglign with a problem because I dont know something exists
ocean osprey
haha ty, much to do
solar yew
*Update Realtime FFT LedDriver (ESP8266 & WS2812 aka Neopixels)
-- User can set multiple devices and set multiple strips to attach to the device.
-- User can set the amount of leds of each strip.
-- User can bind a frequency band to a specific device and strip.
-- User can set port address
-- User can set ip address
-- User can set device name
-- User can set device type
Just wanted to update you guys with the progress
The information is needed to auto generate code for the selected device type
Basically you can make your own custom rgb spectrum analyzer with 1 device or more and couple of led strips
modest lion
ive implemented an infrared direction sensor for driving a roomba, which in theory should follow anything emitting an IR signal: https://www.youtube.com/watch?v=aX8tEkQESIo

An infrared signal-direction sensor using 6 photo resistive diodes, a Teensy 3.6, and an ILI9341 TFT touchscreen display. Using my desk lamp as the demo IR e...
using a Teensy 3.6, and drawing the IR sensor data onto a little TFT touchscreen
and the initial golang driver for controlling the roomba from this sensor: https://github.com/ardnew/oibot

GitHub
A Go library for interacting with iRobot Roomba and Create robots. - ardnew/oibot
ocean osprey
Haha thats cool
onyx glade
Need 3D printed hub to axle adapter as shown in video. https://youtu.be/g8GBzyscDps

Our Axle on the yellow TT motors, 2 wire DC running on 9 volts here, is made for the orange wheel. We want to adapt that axle to our Mecanum wheels from Yahb...
 fervent beacon
I am working on a smart watch that will be based off a esp32, and gameduino and it will connect to your phone via Bluetooth and the phone will tell it what WiFi to connect to, it will have a email, and maybe sms client, music, notes, etc
signal loom
Our school launched an interdisciplinary beekeeping department. We did our first extraction today. I will speak more on Show&Tell but for now I have this

Mamaroneck High School students learning about the critical environmental importance of bees got a sweet payoff Monday; CBS2's Tony Aiello reports.
Let me know if you have any questions
 tiny prawn
I made a jacket cuz I was exited for cyberpunk 2077 I used the 8mm ada fruit neopixles for the lights
ocean osprey
sick!
warped cobalt
Smart watch?
fervent beacon
well
that can only display sensor data
this is using a very graphical display
the gameduino 3
bitter hazel
@warped cobalt watch is pretty dumb. It has a mic and sends a 12-bit encoded audio to the laptop where I have node running to process the 12-bit to 16-bit then send to google cloud for voice to text which then gets sent back to the watch
warped cobalt
Oh
Well, since current series of "smart" watches does about same, except it sends thru a phone instead of laptop. Which only really means more portability
bitter hazel
Also had a version of it where i put some sensors on it to get temp and barometric readings. https://madcomputerscientist.ninja/2018/11/07/how-to-win-an-argument-with-your-wife/

For years now my wife and I could never agree what “cold” meant. She would always tell me that it’s not that cold and I should turn the heat down. Since the winter is upon us agai…
warped cobalt
We're still about 10 years from what I want in smart watch, maybe more since it feels tech taken step back again for that
I love the headline!
bitter hazel
I think it will get smart if it starts doing something “smart”. Tech is not the issue. Its having a real useful use case for wearable thats difficult to figure out
warped cobalt
I can come up with usefulness, it's being able to portably carry the said ammount of proc & such on one's body.
For example, when rasp pi 4 came out, my list of projects grown exponentially.
bitter hazel
We sort of already carry around a super computer on our pockets everyday
But what world changing features does an apple watch have?
Compass
😂
warped cobalt
exactly my point
modest lion
that watch looks genuinely hazardous
modest lion
you could probably fit a fire extinguisher on there
warped cobalt
Fire extinguisher sounds more dangerous as accessary
last pulsar
if you are using firefox, and discord it might be useful for you:
it took me some time to find how to do it, so if you want to change the location of the notifications this is how you do it: about:config > right click > new > integer > ui.alertNotificationOrigin > 0 - Bottom right, 2 - Bottom left , 4 - Top right , 6 - Top left
lucid bloom
I have been working on my automated growing project and I have made quite a few mistakes. I started with 4 plants and now I am basically down to two. The mistakes I made were mainly due to lack of experience growing anything. I used the wrong kind of pots which sucked the water away from my plants. I am hoping that the remaining two will do well. I can always start more seeds if it comes to that. here is an animated gif of my struggles so far
and this is a gif of today. I have automated the process of making the timelapse images and videos
warped cobalt
Well, you can get more seeds. Only way to learn is to do
lucid bloom
yup, I am slightly invested in seeing them live but if they don't I will learn what not to do
this is probably not my strangest pi zero project 😅
warped cobalt
Consdering that I was talking to buddy about me getting into book binding so I can make grimoires. And somehow rasp pi ended up in that . . .
warped cobalt
I mean, what's strange about a traditional bound leather book with rasp pi fully functioning inside of it?
lucid bloom
Idk what is the book title?
warped cobalt
Idk, it's gonna be his grimoire
Probably; "Wizardry thru modern electronics."
Then again, I haven't seen titles marked on grimoires lately
lucid bloom
I read it as Modern wizardry through electronics
warped cobalt
Close enough
Then again, mine is more; Real Alchemy in our daily lives
Altho, it might be modern wizardry to have plants grow full sized without in person maintaining them.
lucid bloom
I have plans to expand the project. I put time released nutrients in the soil. Later on I want to automatically mix nutrients in when the water is refilled
warped cobalt
Most of ones I seen before tackled this project locally done hydroponics.
Not sure which is easier
Then again, seeing your project reminded me of one I wanted to try
It's bit more complicated, as it's 2 levels
1st is what you're doing but that's for seedlings.
2nd is outdoor planter
lucid bloom
Sounds interesting what does the planter do?
warped cobalt
Allows to be out of reach for most animals while outside
I just found some plans for one, that includes a watering system
If ya intend on trying it, cheap way to start off seedlings is using toilet paper rolls cut in half
Then bump up to cups & such
lucid bloom
I am hoping my system works and that I'll have winter pimatoes in my basement
lucid bloom
I am recording quite a bit of data about my pimatoes so if it works I can just "replay" it
Maybe not the first couple weeks 😜
solar yew
Working on a new cleaner UI for my realtime audio desktop fft rgb ledstrip udp "driver"
New UI
Old UI
ocean osprey
Nice, im very guilty of "programmer ui" where its functional...but not attractive, or remotely laid out well,
solar yew
When turned on
Well I first programmed a lot of the functions then updated the UI 2 times. This is the third time haha
And I think I will stay with this one 😛
The first ui haha
solar yew
ok.
i ordered a m5 cam stick risc v
A jetson
And a few tid bits to fix my oscilloscope.
excitement growing
My program to visualize the nand in microcontrolers is getting speed now. too.
soft condor
@solar yew Is this what you're getting?
soft condor
Looking forward to seeing what you do with it! I'd get one if I didn't have so many toys already that I haven't started playing with. ☹
How can you use the camera and AI with Doom? Gesture recognition? Posture recognition?
soft condor
Playing along with your joke. 😛
soft condor
It really is.
Having to wait for something like that to arrive is tough, but I like to always have one or two things on the way to look forward to. It's a little sad when the pipeline is dry.
solar yew
oof i'm deep in south africa
The searching and sourcing becomes a effort
The stores are most just awful.
Their websites are also... shudders.
soft condor
Even for me in the US, things like that usually have to come from China so it's a two to three week wait.
soft condor
I like to support Adafruit and they get stuff here quickly, but for exotic and interesting things...
solar yew
No i agree
our economy is in a terrible state since we stopped producing and stepped up imports.
And oddly south africa used to make very good militry tech
soft condor
Our area used to be huge in textiles and furniture manufacturing and a bunch of other stuff. The story was that half of the blue jeans in the world used denim made at a mill a mile from where I grew up. It's all gone now.
We have the HondaJet factory though. Not that many jobs really, and not something I'll ever own, but it's a reasonably cool thing to have nearby.
I watch the Adafruit factory videos and wonder about setting up something like that. A bunch of smart people worked very hard to get that going.
upbeat geyser
Last I heard, most blue jeans are now made in Mexico. The factories have copyrighted patterns they use to burn away patches of the new jeans so they look "pre-worn". Every fancy brand has their own "pre-worn" pattern (and most of them come out of the same factories).
Some blue jeans are (of course) made in China, but I think the Chinese factories generally use grinders to produce the "pre-worn" effect.
soft condor
Just had an opportunity to check the jeans I'm wearing and yes they were made in Mexico. Those wonderful people need to work too, and the southeast took over textiles a century ago by undercutting New England on labor costs. You can't expect that to last forever.
As for "pre-worn," I "post-wear" them fast enough myself. 🙂
solar yew
Is there a show and tell tonight?
scenic siren
@solar yew Yep. The link will be posted in #live-broadcast-chat when it's ready to go.
solar yew
Awesome, I'll lurk there. Thank you @scenic siren
warped cobalt
I prefer to buy jeans not "pre-worn" affect as mine having the authentic look gets more attention. "Wait, a real cowboy?!?!?"
At same time I both don't shutter from buying from other countries, I seen towns crumpled from economy damage from so many factories leaving to another country. Including one my mother worked at went to Mexico.
ocean osprey
I buy whatever clothes i think look allright for a decent price. Because I dont blame workers in mexico for the policies that forced factories to move there. I may buy stuff specifically to avoid things made in poor conditions of course.
bitter hazel
You got to get them started early https://madcomputerscientist.ninja/2019/09/15/new-dac-10-learning-to-strip-a-wire-next-to-a-hot-soldering-iron-priceless/

Had to repair a broken usb power port on a DAC this morning. Turned it into an opportunity to teach my son how to strip a wire with pliers. After half an hour of work he was able to successfully st…
solar yew
@soft condor
So the m5 stick ai cam.
uses a kendryte k210
https://www.youtube.com/watch?v=fRjF498k2r4

Sipeed MAIX Bit run DOOM https://github.com/sipeed/MaixPy https://t.me/sipeed
last pulsar
I did a surgery to my OLED https://imgur.com/gallery/dkUg1jr
 ocean osprey
what did you do?
last pulsar
@ocean osprey originally it was crooked
ocean osprey
ooh yeah so it was
last pulsar
the link is a gallery
ocean osprey
I know i just didnt see the crookedness haha
nice job
Im always wary of moving the screens cos those cables are pretty fragile
last pulsar
just slice it
modest lion
@last pulsar what did you clean the back and pcb with?
and i would call that more of a facial than full-blown surgery
beautiful nails though
💅
last pulsar
with nail polish remover
modest lion
haha, so bold


 marsh quest
kawaiiii
last pulsar
We need to add 555 and 3904
upbeat geyser
Hans is the 555 🙂
 😀
modest lion
😀
modest lion
I went a little bananas on my previous USB breakout board, and it i s currently looking like this:
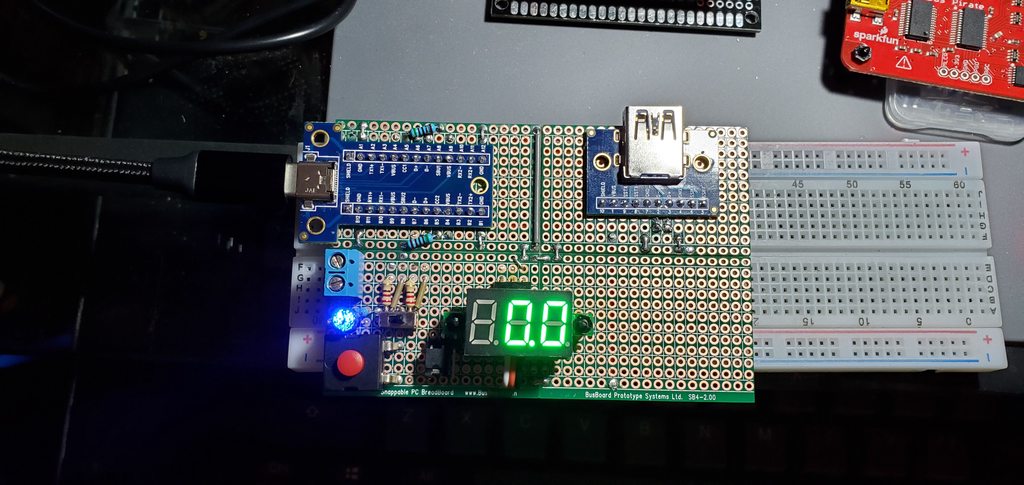
view the gallery for descriptive captions
i now know far more about USB 3.1, and USB Type-C than i thought i would ever wamt tp kmow
@marsh quest your store is sorely lacking in terms of USB Type C breakouts, Let me write up an email to gather my thoughts and offer some suggestions for tthe store
modest lion
the only Type-C breakout in the store can only support downstream facing ports, and can only do USB 2.0
the CC1/2 and SBU1/2 pins on that breakout don't really serve any purpose without the full-featured capabilities to include the superspeed SSTX/RX pins
the CC1/2 pins can provide cable orientation, but that doesn't matter if you can only support USB 2.0. the traditional D+/D- are shorted together regardless
modest lion
the LED was way too bright, so i used my gf's black nail polish to dim it. turns out, it completely eclipses the light, NOTHING gets through
perhaps inspired by you @last pulsar ???
but i used a little toothpick to scrape off some of the polish, and it makes it look kinda stylish camo now
upbeat geyser
Cool. I usually put in a largish series resistor for such LEDs. 
modest lion
that would have been the prudent thing to do 😦
i put 220 ohm resistors on there (it's a common-cathode RGB LED), and i tucked everything in so tight that i'm not confident enough in my re-soldering to replace them
@upbeat geyser if i wanted to place another terminal block on there (identical to the existing one you see on there for input supply voltage) for supplying the VBUS to other devices, is there any sort of protection i would be wise to add? such as diodes or voltage regulators?
im also not certain if i should be including a capacitor anywhere in that circuit
link to album, had to remove the gallery so i could add a few more images: https://imgur.com/a/Qxvdw9G
the parts of the circuit im most proud of are the RGB LED changing colors based on supply source (USB (blue) vs terminal block (green)) + power supplied or not (red). e.g., if you have USB power available it turns blue, and if you enable that power it adds red, resulting in blue+red=purple. similarly, if you have terminal supply it's green, applied with red it turns yellow
and also the little voltmeter jumper which lets you short (a) supply to its (b) sensor wire to display available voltage; or move the jumper over to short (c) applied voltage and (b) sensor wire to display voltage running to the USB type A receptacle; or simply remove the jumper and connect whatever to the middle pin (b) sensor wire as a general purpose voltmeter
as long as it has power from either USB or terminal block, it'll work
i was griping earlier that the adafruit store doesn't carry more-capable USB type C breakouts (specifically ones that can handle USB 3.x), but this board doesn't have the superspeed SSTX/RX pins wired up anyway. still need to connect those
the USB type C spec -explicitly- prohibits connectors like this ive made (specifically type C receptacles to non-type C receptacles) as they are "unsafe", allowing a variety of incompatible connections, since the wiring spec has a funky set of assertions about those CC/VCONN pins
the type A pinout simply doesn't afford any way to negotiate USB 3.1's fundamental communication requirements, using dynamic pullup/pulldown resistance on the CC pins
upbeat geyser
As long as your other devices can run on 5V, won't attempt to supply power, and don't draw too much current, it should be okay without diodes, regulators, current protection devices, etc.
ocean osprey
These little digispark clones are super cute
Made a cute little button cell holder with a switch for it, for no other reason than its adorable
That and keeps me occupied while i wait for parts for my robot
last pulsar
@modest lion You don't need any excuse to use nail polish! LOL
I fixed a design flaw in my Ethernet card.
https://imgur.com/gallery/6to701D
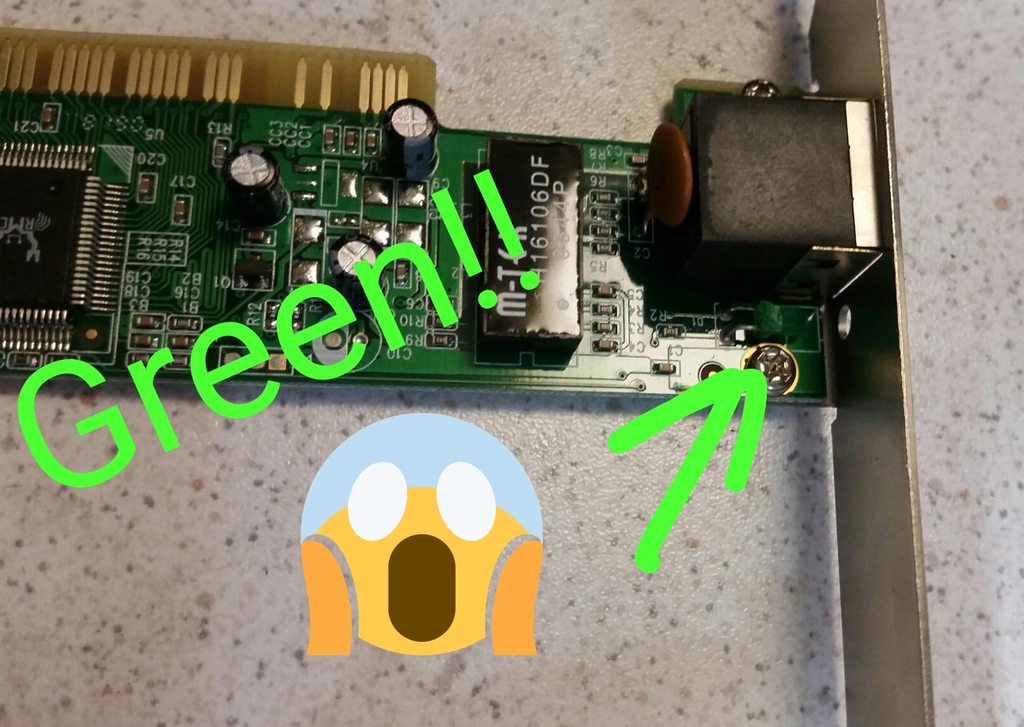 upbeat geyser
There are commercial products for that (Chemtronics CW2500 is good), but nail polish works just fine for most cases.
AdaFruit has a tutorial on soldermask too https://learn.adafruit.com/how-to-solder-mask-pcbs which mentions Mechanic LY-UVH900 UV curable solder mask.

 plush gorge
Salutations from the Buffalo Ny mini maker faire!
 remote crag
literally only designing this to give me cigarettes when I look stressed, I plan to experiment with emotion recognition.
 bright wind
Install an LCD and put a running total of money 💸 on each cigarette given.
upbeat geyser
One of Dalibor Farny's giant handmade nixie tubes connected to one of Marcin Saj's testers
 obtuse walrus
https://cdn.discordapp.com/attachments/480464358674006026/628066501777424387/JPEG_20190929_231141.jpg Put together a little case for a programmable DC-DC converter to make a low-duty bench power supply. Just waiting on a USB C PD trigger board and I can run it from my Chromebook power supply at DC 15V input, or from a beefier PD PSU at DC 20V
 warped cobalt
@upbeat geyser Only if someone would make those tube again!
torn viper
@warped cobalt techmoan actually recently did a video about a company making new nixies, but they're very expensive
Against the odds Nixie tubes are being manufactured again. In this video I look at the new ZIN18 tubes and clock from Millclock. Millclock Products on ebay (...
warped cobalt
Considering how much they cost, not surprising, but given that size of tube, it hasn't been cheap for some time . . .
winged swallow
I watched their video on how they make them. That's a lot of work
upbeat geyser
Dalibor's making them too (that's where I got that one). When he was getting started, he was having trouble finding some particular raw materials, so I pointed him to https://www.almetals.com/
Almetals. Home. Almetals is a specialty metals supplier, slitter, and processor for industries such as stamping, roll forming, and tube producers.
If you want one of Dalibor's gorgeous modern production nixies (with warranty): https://www.daliborfarny.com/product/rz568m-nixie-tube/
I also had him make me a special one with front and rear anode screens so you can see clear through it.
winged swallow
are they as sweet looking in person as they seem?
upbeat geyser
I'd say so, they look great close up.
warped cobalt
What size are they?
upbeat geyser
Tube is 120mm high, 50mm diameter. Digits are 50mm high.
 dusty mason
150 for a single tube?
upbeat geyser
Yeah, they're not cheap, but they're cheaper than the NOS tubes they replace.
The original RFT Z568M tubes go for 300 and (way) up these days.
warped violet
That someone's making nixie tubes again brings me great joy.
upbeat geyser
You and me both. That two outfits are doing so is even better.
 wicked sun
Hey Everyone,
I have been working on a Project that would be an awesome project on Hackaday for students hobbies and makers. Would love the feedback
Open Power Product Showcase. https://hackaday.io/project/164913-open-power Special thanks to the Hackaday Community Sound Track: Blue — Declan DP https://www...

Open Power is about providing Makers, Students, and Hobbyist with a Portable, Versatile Intuitive and Cheap power supply for all their projects.
Prototype 1: Simple and Cheap Constant Voltage/ Constant Current Power Supply variable from 0.6V to 12V with led voltage indicat...
vernal ferry
@plush gorge oooh intense! Kinda looks like WALL-E?
@wicked sun Cool! ATSAMD51! Circuitpython compatibility on the PRO? maybe?
torn viper
babby's first fpga
vernal ferry
oooh! what are we looking at?
torn viper
the test pattern from the book "designing video game hardware in verilog" running on a terasic de1 fpga
hooked up to a vga monitor
upbeat geyser
Noice! That's one of the boards with the VGA connector already on it? Which toolchain are you using?
soft condor
I just looked at my receipt and I've been sitting on one of these for two and a half years, to go with a Spartan-3e dev board that I haven't done enough with either. 🐑 https://www.ebay.com/itm/WS-VGA-PS2-Board-Accessory-board-for-testing-VGA-PS2-interfaces-VGA-connector/251031101624 Nice going @torn viper! I'll at least save the name of that book.

eBay
Find many great new & used options and get the best deals for WS VGA PS2 Board Accessory board for testing VGA PS2 interfaces VGA connector at the best online prices at eBay! Free shipping for many products!
torn viper
@upbeat geyser quartus 13.0sp1, comes with vga, ps2, rs232, and analog audio jacks
@soft condor yeah it's a good book
I'm getting a DE10 nano in a couple months and my friend had this de1 laying around so I figured I could practice on this before getting the big daddy
soft condor
So many toys, so little time! (Why I unsubbed from Adabox even though I love the stuff I got in them. Backlog...) It's great to see you making progress with it. And of course you could sink your whole life into projects just for that. Kinda the point of FPGAs really...
torn viper
yup
I got it up and running this in about 2 hrs
and most of that was installing quartus 😛
soft condor
I don't doubt that for a second!
upbeat geyser
I've tried to install Quartus twice and ended up giving up both times. Now I'm thinking I'll try icestorm with something like a TinyFPGA board.
torn viper
yeah I've been interested in tinyfpga and icestorm as well but the boards it runs on are so smol
I got this for $20 and it's 20kLUT
warped cobalt
Pretty much why I didn't sub to Adabox
torn viper
also installing things on arch linux is pretty easy
there are packages for everything
warped cobalt
Oh?
torn viper
upbeat geyser
You got a DE1 for $20? That's a good deal.
upbeat geyser
I think I tried my usual distros (Ubuntu and CentOS), haven't tried arch.
torn viper
yeah
warped cobalt
Then again, a buddy is talking me into an android phone so I can run linux on phone
soft condor
I started with the Lattice iCEstick after reading this about it. It's limited by gate count but was enough to run IceStorm and learn some Verilog, and it was as simple to set up as it could be. https://hackaday.com/2016/10/26/an-open-source-96-msps-logic-analyzer-for-22/
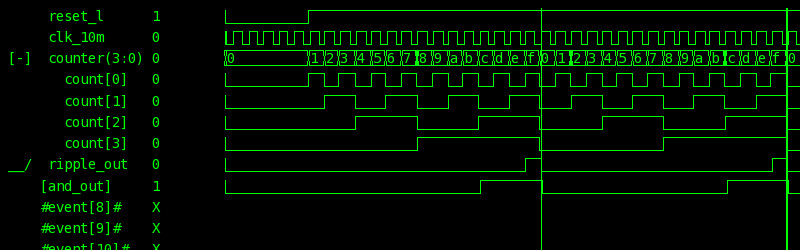
If you are in the market for an inexpensive USB logic analyser you have a several choices, but few of them deliver much in the way of performance. There are kits from China for a few dollars using …
warped cobalt
Altho, we have been speculating on making graphics drivers & such to make more use of epaper displays
upbeat geyser
I played with VHDL/Verilog long ago in the GAL/PAL days. Since then it's gone to CPLD and FPGA so I'm both rusty and out of date.
soft condor
@upbeat geyser It's a wide open field! There are so few limitations on what you can do. Imagination plus perseverance mainly, but those are real factors for most of us...
torn viper
quartus keeps crashing now lol
last time this happened I had to regenerate my project
lol I fixed it
the welcome message was crashing
I hit "don't show this next time" and now it' fine
I think quartus is one of the better vendor toolchains though because all it's synthesis and pnr components are command line tools
so theoretically you could use it with gnu make
upbeat geyser
Ah, cool, I like stuff I can do via ant/make/ssh
torn viper
yeah
plush gorge
Left eye is assembled, and the right eye bracket is printing now. Time to cut the Monster mask. 🙂
@vernal ferry Lol, It does look like Wall-e a bit doesn't it.
Hmm, maybe once I get a couple more servos, I'll design up a set of functional Wall-e eyes.
Lol, you know @vernal ferry that would be pretty sweet and fun to have too. 😄
wicked sun
@vernal ferry Yea, we intend to allow the hacker community to have complete access and keep it open source. it will have onboard flash to allow circuit python. and jtag pinout to change the firmware.
lucid bloom
The plants I thought were dead are doing ok they are just damaged. Gonna restart some seeds soon and try again with more plants
If you want to see my progress all the timelapse images, videos and gifs are here
http://media.sensetogrow.com/
When I (hopefully) successfully grow some tomatoes I will be sharing everything including code, hardware and a build guide
If you have all the growing supplies my system costs about $250 to automatically contol the light, temp, humidity, fans and watering
With a maximum of 4 plants
warped cobalt
What's lights ya using?
lucid bloom
Amazon chinesium LEDs that should be sufficient for what I am doing stuff
https://www.amazon.com/gp/aw/d/B078XHHVKZ
They say they are 600w but only draw 150w each. The lux output is good enough to grow vegetables
Each light raises the temp of the tent by about 7 degrees fahrenheit and they lower the humidity by around 10% each. The tent is 4' x 4' x 6.5'
Everything I have for this project can be bought on Amazon, Adafruit and at home Depot
After my experiment I am going to use the system to start seeds for my own outdoor garden and my friends garden as well so they will be fully established plants by the last frost
soft condor
This is a CircuitPlayground Express connected to an MCP23008 I2C I/O expander, with 4 pins of the expander connected to an MCP23S08 SPI I/O expander, blinking 2 LEDs on MCP23S08 pins by bit-banging SPI over I2C. Just because.
(Please excuse the video quality--old phone, bad lighting.)
torn viper
I got my new c64 modulator installed, it replaces the rf jack and channel selector with an s-video jack and aux jack https://twitter.com/sajattack/status/1179550570807353345
 soft condor
@torn viper Nice! I guess this means you found a diode that worked in that circuit. 😁 Congrats on the success.
torn viper
not really lol, I bought someone else's kit
I got sick of futzing with random schematics I found online and my poor ability to transfer them into working hardware, so I just threw money at the problem 😛
soft condor
"By any means necessary" 👍
torn viper
it was worth it for $30
soft condor
Probably gratifying for the person selling the kit too, someone else putting their work to use.
upbeat geyser
Hmm, @lucid totem was asking about modulators a while back. Which kit did you get?
modest lion
i replaced that tacky 7-segment mini voltmeter with a wifi microcontroller+OLED and a legit voltage/current sensor (INA260): https://imgur.com/a/R4j2Sn1
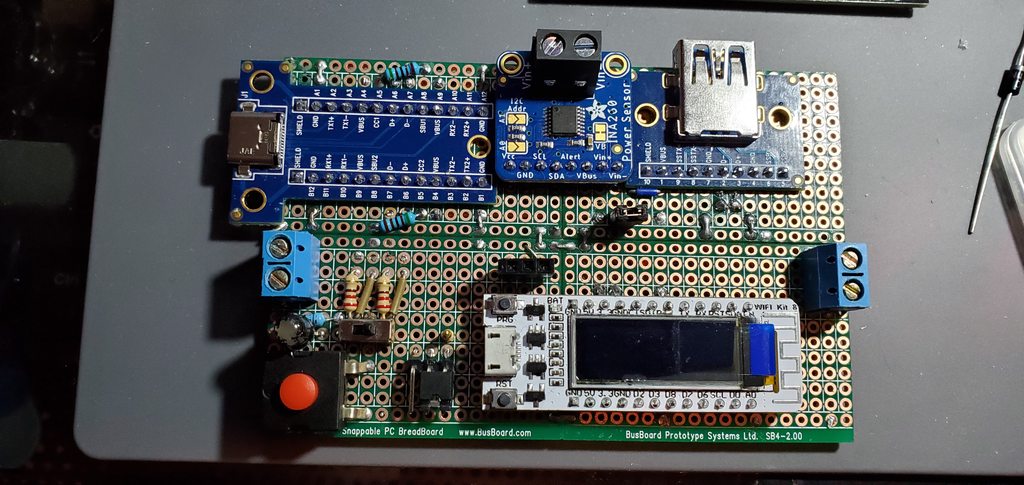
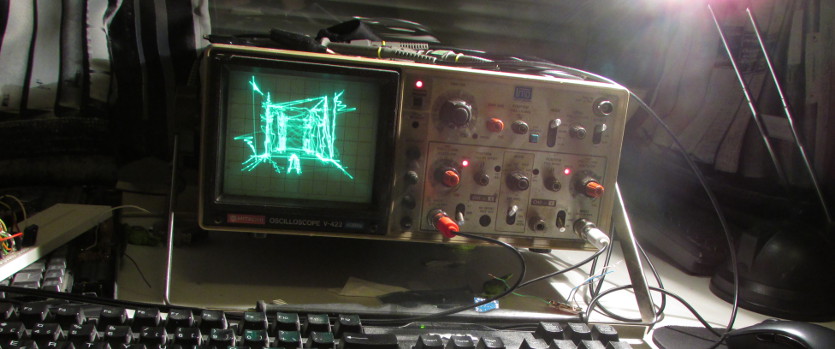

 torn viper
@upbeat geyser modulator replacement rev 3 from forum64.de
solar yew
ok so how did i turn one of these horrible 3 cell vaporizers into a soldering iron.
i grabbed a tip from the popular ts-100 soldering irons.
using this firmware.
https://github.com/ClockSelect/myevic/tree/master/src
i saw the firmware has a usb mode where it can supply a constant 5V @4A and even higher.
Knowing this i knew i could create a mode to supply a constant wattage.
i modified one of the tanks and created a holder for the tip where i can easily replace and remove the soldering tip.
I made a change where i select the wattage "did some research on the TS-100's element resistance and limits"
and began adding a list of constraints as the RX-200s can fire a 10 second burst @220W and easily destroy the soldering tip.
After starting low at what i think was 15W within 17 seconds the iron tip hit that sweet melting point.
Todo:
Run a line from a gpio so i can read the temperature.
Make a awesome video accompanied by smoke effects lights and rock music as this is the best idea i ever had.
How safe is this?
Well these more expensive devices usually have a lot of safeguards.
The device however does have amazing overheat, short and battery balance protection.
Provided you use high quality matched cells you can get over 8 hours of brutal use.
However i feel i need to add some heat sinks to the mosfets if i'm going to solder for more than a half hour.

GitHub
This is myevic Custom Firmware. Contribute to ClockSelect/myevic development by creating an account on GitHub.
ocean osprey
That's quite cool, vape and vape parts are fairly common so that's an interesting new use for them
solar yew