#show-and-tell
1 messages · Page 14 of 1
 cobalt dove
 unborn sphinx
neopixels is a brand name for an assortment of devices containing WS2812b
cobalt dove
Every Neopixel item I've ever got from Adafruit has been WS2812b
Dotstar are APA-102 which is vastly superior (love em! Wish they made them like WS2811 strips!)
 lusty siren
I like the concept of using the ICs to control individual strips (https://www.adafruit.com/product/1378)
unborn sphinx
there's also WS2812 not b, SK6812, SK6812RGBW, SK6812MINI, and I think a handful of alternate badges for identical products sourced from different manufacturers
 upbeat geyser
DotStar strips are available (https://www.adafruit.com/product/2241)
unborn sphinx
the main thing about neopixels that separates them from dotstars is the way you send data out to the strip, neopixels are 1wire devices while dotstars are 2 wire, this has a big impact on the performance of the data protocol so dotstars are faster and that's super useful
comes at a price though~
cobalt dove
@upbeat geyser I mean "strands" like WS2811 ones. All the APA102 stuff seems to come in two forms: flat strips and individual solderable 5050s
Oh, there's also flexible matrix-like displays made with APA102s
upbeat geyser
I'm not sure what you mean by strands here. I figured you meant the flat strips, which is how I usually see WS2811s packaged.
unborn sphinx
there's one form of neopixels where it's the SMD in a little plastic housing along a wire, is that it?
lusty siren
I've seen them strung up like christmas lights before
unborn sphinx

Attaching NeoPixel strips to your costume can be a struggle as the flexible PCBs can crack when bent too much. So how to add little dots of color? Use these stranded NeoPixel dots! ...
seems incredibly expensive, but I totally understand the cost
 strong phoenix
@cobalt dove those look great!
cobalt dove
@strong phoenix Thanks!
cobalt dove

All the letters can be disconnected and rearranged too! So if she wants it can serve a dual purpose: ROADWAY. Or BOAR DAY, WAY BRO, AWARD BOY, YODA BRA
 shy shale
That's awesome!
lusty siren
That's amazing @cobalt dove
Not a tech show and tell, but...
That is rice krispies made with coco pebbles, then a layer of a peanut butter filling, topped with melted chocolate chips
 leaden frost
@lusty siren Sparky says "You need more Snap, Crackle and Pop."
leaden frost
@cobalt dove Nice! Is that a separate set of white LEDs as the bulbs inside the letters and the colors are backlit from something else?
cobalt dove
@leaden frost It's just WS2811 "pixels" stuck through some 12.6mm-sized holes in white plastic letters 😁
 plush gorge
Machining my first parts on my mini lathe. 😃
Lol, a little free hand machining. 😄
upbeat geyser
Nice!
I'm tempted to get one of those Sherline lathes (I have their milling machine which I'm converting to manual/CNC).
plush gorge
I only just got this and am just learning, I'd still totally recommend it! What are u using to automate ur mill @upbeat geyser ? I have an old flashcut system that I'm working on getting working to automate my lathe.
upbeat geyser
I'm using an Arduino Mega running GRBL and a QuadStepper driver. It's (of course) a work in progress.
I have a related project to computer control a K-40 style laser cutter with an EiBot board.
plush gorge
Lol, of course. You should go on show n tell Wednesday night n show urs off. I'd love to see it. I'm going to show mine this week, assuming I can get home in time that is. 😕
upbeat geyser
When I get them in more demonstratable shape, I intend to.
plush gorge
O wow! JUST read about the laser cutter project, shld show that too.
Lol, that's part of the fun, show it in stages. I doubt mine's going to be "demonstratable" by Wednesday, but I'm still going to show it. N then I'll show it again after I get it properly working.
I still have to find the drivers just to get it n my computer to work together.
upbeat geyser
The laser cutter saga got interrupted by a house move and some other life events, but I was writing it up on my blog. Here's Part I: https://bodger.dreamwidth.org/14594.html
plush gorge
I thankfully, FINALLY got the power system to work. Lol, That's been a bit of fight. Sweet, thanks, I'll go take a look in a few.
O wow, @upbeat geyser ,sounds like you have embarked on quite the project to get that Laser working properly. Have you heard anything back sense you wrote that?
upbeat geyser
Part III https://bodger.dreamwidth.org/15356.html The little blue triangles at the bottom let you click to the next entry.
unborn sphinx
You'll get better results if you keep the work piece short, its more rigid that way and will vibrate less
plush gorge
Ya @unborn sphinx , that's one of the first things they recommend you do is securing the lathe to a thick piece of wood with rubber feet for added rigidity and vibration dampening. Still have to do that.
unborn sphinx
I mean the aluminum rod
plush gorge
Lol, oops. Sry, @upbeat geyser didn't scroll quite far enough to see that. Thanks
unborn sphinx
The stickout is about 2.5 the length of the cup, btw nice cup
plush gorge
Thanks. 😃 I'm quite proud of my 2 little cups.
unborn sphinx
You want the material you're working on to be as short as practical, then if it still needs to be long you can get a tailstock with a live center
For those cups you'd probably want about half an inch, or a centimeter, longer than the cup, so you're not right up against the chuck
You should measure the cup's capacity somehow
If you've got any syringes that should be pretty fine, or by weight
 fiery plank
My new workbench I made
unborn sphinx
that looks like about 150$ if you wanted to become a carpenter
depending on your clientel it could go up to 500$ pretty easy
 signal loom
@fiery plank looks amazing! My one critique is the nice wood top. I don’t know if you are woodworking, soldering, or just using it as an office desk but I swear by a MDF top. I built some removable ones into my benches and they help keep it looking like new. If you mess up the top, you just swap it out. If you add some good sealing to yours, it should do fine for most electronics work
unborn sphinx
it wouldn't be hard to make a top that either rests on or clips on
add a skirt to a sheet of inch or half inch MDF so it won't slide around, gravity will do a lot to keep it in place, but then just bolt tabs of wood around the skirt to clamp on for a super solid fix
if you do this I recommend adding something grippy and pliable like cork or rubber sheet under the MDF, it can just be sat there and doesn't need to cover the whole thing, just enough that when you push anywhere the MDF doesn't bow.
a couple layers of plastidip sprayed in spots across the bottom would probably work great
fiery plank
@unborn sphinx the wood itself cost $150
@signal loom I just have one coat of polyurethane on it at the moment. Plan on putting one more on the whole thing and then layer it on the top and shelf
signal loom
Great!
unborn sphinx
must have been some good wood
signal loom
@unborn sphinx even marking 2 layers of MDF and putting the skirt face up on the bottom one. That way you wouldn’t need to make a whole new top. Just drop a board in
unborn sphinx
I can't imagine what you mean
plush gorge
That's a GREAT looking work bench @fiery plank ! U got skilz brah!
Christmas morning came early for me. 😁 Delivery guy just brought my work bench supplies. Can we build it?? YES WE CAN!!!!
Got the plans worked out.
Though, one of the pieces of the melamine sheet is getting used as a white board by my desk to help me plan the creation of the Open Source Power Chair ( The 'OSPoC' project) . I'll just have to save more & get another sheet to help my melamine topped work bench to grow big & strong. ;-D
 grave shadow
I maek a thing!
plush gorge
DUDE! @grave shadow that's brilliant! #awesomemakertool
plush gorge
Just as it is pretty sweet & effective. Ur going to add a motor & trigger as well? SWEETNESS!
grave shadow
oh, I just mean an extra lever to pull the top end down
plush gorge
You should post the STL n do a thingiverse & show it on show & tell, let people know it's out there.
I'm not to that stage of doing that kind of work yet, but when I do. I'm going to want to know how to make one of my own.
upbeat geyser
This is one of the cases where too much is way better than too little.
plush gorge
Lol, no such thing as too much detail. 😉
grave shadow
really wanted that knurl ^-^
plush gorge
Exactly @upbeat geyser
grave shadow
haha 😄
I posted that image twice, one in the opposite direction, discord decided it was expicit
upbeat geyser
I have to admit, I quite like that render, just as an appreciation of the art and engineering.
plush gorge
@marsh quest @rustic stag You guys have got to see this awesome maker tool that @grave shadow came up with. Simple yet superbly effective. https://www.thingiverse.com/thing:3300546

Basically, a mechanical pencil with enameled copper wire as the lead!
Sorry for the shotty printing! (I'm in the middle of repairing my printer..)
 marsh quest
nice!
 lunar venture
WHOO HOOOO JUST MADE DISCORD SWEARBOT!!!!
for FIRST robotics
that code is profane but if anyone wants a copy dm me!
unborn sphinx
you made profane code for FIRST? this seems like a very odd thing to do
grave shadow
@lunar venture what happens if you say things like grapes ?
lunar venture
@unborn sphinx the python code has the swears in it to block
@grave shadow welllllllll nothing because it could actually be said in a sentence (not profanely)
grave shadow
interesting, could I test it out ?
lunar venture
sure, should i dm you the code
grave shadow
negative
lunar venture
1mo
lunar venture
separately:

Trico05A
I've been working on this for two-ish years now, however it has taken many permutations in that time. although recently my breadth of knowledge, however still small, is finally wide enough to really make the project feasible. This is posted under CC Attribution-Non...
plush gorge
The new work bench, but...
No project is truly complete, till it meets kitty approval. Lol.
 jagged harbor
Many ways to plug Micro:Bit into a breadboard but here is one way to do that AND make it mobile...https://www.youtube.com/watch?v=FDGu_ttbt7Y

I split the 170 tie hole solderless bread board in two and hot glued the edges of the Micro:Bit to each half. All parts are Velcroed together so they can be ...
unborn sphinx
custom designed charge controller? nice
 undone pulsar
Gamegear now working from 3.7v lipo
It was designed by greatscott I just changed the resistors to boost to 7.8v
undone pulsar
Only lasted 30mins mind you on such a small lipo :D
 hidden saffron
I like this idea. I have a few game gears sitting around... They eat AA like crazy
unborn sphinx
Sounds like these things could use a small ICE generator
 timber mist
Addressable LED Thermo-Barometer. Pic with yellow LED's in it is current air pressure, 1014 mbar, corrected to sealevel. Pic with red LED's is current temp 28 deg F. Current reading is white, 5 min avg is green, 5 min avg 1 hr previous is blue, and magenta marks 24 hr high-low range. Still work in progress.
lunar venture
Awesome work @undone pulsar
 next thorn
Built this today, it's my first time using 0805 LEDs. I burnt 4 of them but had extras, and I learned how to solder components that are really small
cobalt dove
My Secret Santa Giftee finally got her gift and watched the video I made for her so I can now share it! https://youtu.be/oTSosQ7iYjU

Merry Christmas from your Reddit Secret Santa! This video serves as an overview of your gift. I hope you enjoy it! Music featured in this video: "Up on the H...
 robust fiber
@vernal ferry remember that SAMD10 LCD?
Ran into a few issues, first didn't work because of a missing pad, the second works but there were a couple of legacy issues, but it works!
The third version should run without a hitch
 vernal ferry
@robust fiber awessssome! yes! Do you have the mini tft featherwing??

Add a dazzling color display to your Feather project with this Adafruit Mini Color TFT with Joystick FeatherWing.It has so much stuff going on, we could not fit any more parts on the ...
robust fiber
No why?
vernal ferry
ohh it uses a 09
robust fiber
@vernal ferry looks pretty awesome though!
Ah crudge
Adafruit beat me to the punch
I didn't know it ran on a 09!
vernal ferry
@robust fiber also on the seesaw platform
robust fiber
Yep, I have a seesaw
robust fiber
@vernal ferry better specs + a dev board.
vernal ferry
@robust fiber keeen they are on 'sale' at digikey so might pick up a few chips to play with! Im planning to use it with a similar display
jagged harbor
Trying out SafeYouTube, thinking we might use it for sharing instructional vids. with students in after school program using MakeCode. Please let me know if it does not work as well on your computer as original YouTube:
http://safeYouTube.net/w/149g

safeyoutube.net
OK, I see one big fault right now. I wrote a lengthy description for the original YouTube vid including links to buy products and explanation. That does not transfer over in the SafeYouTube link. Rats !
unborn sphinx
what is this?
robust fiber
@vernal ferry sale? Sounds like you have a cool project lined up!
vernal ferry
@robust fiber yeah there’s 400 qty of atsamd10s going for a buck less. Non cancellable/refundable stock. I want to use displays in project without having to use up the main chip for it
robust fiber
@vernal ferry Is that what non-stock means? Thanks for pointing me at em! I particularly like QFNs and Arrow doesn't stock them.
vernal ferry
@robust fiber aye I think so ☺️ I prefer qfn packages too
upbeat geyser
Oh, that's neat! The last time I used an M4 to output X/Y analogue signals, I repurposed the "Tone" code to provide a regular update interval.
From the circuit layout and scope picture, it looks like you may be using RC integrators to generate vectors?
lusty siren
How I am wrapping Christmas gifts this year. Brown craft paper and a wax seal.
A close up of the seal I used (This was on another gift)
It's thematic, I gave every family their own seal, so I figured I'd seal them with my own.
vernal ferry
@lusty siren BEAuuuutiful!
lusty siren
I've used WAY too much wax on pretty much all of them
vernal ferry
makes an extra secure seal!
lusty siren
Also often seals the seal to the seal, which... can make things messy when you try to remove the seal from the seal
vernal ferry
i like it, makes the wrapping re-usable 😃
 lapis abyss
@upbeat geyser I tried to copy the johnengineer circuit. The blog no longer comes up. Looks like he used an Arduino, but the same rc filter circuit.
upbeat geyser
Hmm, haven't seen that circuit.
strong phoenix
@lusty siren very nice, indeed!
lusty siren
 onyx grove
😃 👌
signal loom
Wow
 median lake
@lusty siren very nice work!
leaden frost
@lusty siren Did you ever try your hand at 3D printing and casting in metal custom seals? My wrapping - it all ends up in the recycling bin anyway.
lusty siren
It's thought but I have not done it yet
leaden frost
In Tinkercad you can import in a svg and it "extrudes" it for your stamp.
 warped cobalt
@leaden frost Reminds me of my family
Who tranfsered to bags & clothing boxes for 'reusable'
leaden frost
@warped cobalt Everyone is family. You will like whatever is inside because I put some thought into it. You should try this https://www.instructables.com/id/Decoy-Gift-Wrapping/

Instructables.com
Decoy Gift Wrapping: The western world's Winter chill is just beginning to strengthen its clutches throughtout, and with the holiday season just around the corner, as is the secret sinister sweater's league, gift giving from all around is about to sky rocket into over...
lusty siren
@leaden frost That is amazing, I love it
signal loom
I’ve done this before. I “Gifted” someone a cinderblock full of jelly beens
 woven relic
In other news, my lightsaber is coming to life and its soooooooooooooooo close now!!!!!!!!
 trail siren
i built a Cassette tape RFID Reader boombox with a raspberry pi and GPIO buttons for Pause,vol up/down,prev and next
 slim thicket
I can safely say, I never expected to see those words in the same sentence in that order. So what does the RFID provide for you?
unborn sphinx
NFC tags aren't usually large enough to store music, or fast enough; so they'd let you turn cassettes into physical tokens for digital references
slim thicket
Ah, I gotcha. I thought this thing was actually playing the cassettes. That makes a lot more sense.
 solar yew
Made a tiny rgb backlit single key keychain. Was destined to be a 3x3 shortcut, but I broke my pro micro, and the show must go on!

Instructables.com
RGB One Button USB Keyboard: Ever felt the need to have a tiny, yet functional, RGB backlit keyboard, no bigger than the size of a single key? No? Who cares, make one anyway! This instructable will guide you through the steps you need to make your very own, slightly useless, ...
 random hull
I made a capacitive touch hoodie for my daughter for christmas 😃 https://vimeo.com/308014235
code for the project is here: https://github.com/chris-schmitz/gemma-jacket

GitHub
A capacitive touch jacket I'm making for my daughter - chris-schmitz/gemma-jacket
and the case I designed for the jewel is here: https://www.thingiverse.com/thing:3209885

Updated
After watching a video by Becky Stern on using snaps to attach components to garments I decided to try updating my model to include garment snaps and channels for running wires to them.
It worked :) so I thought I'd put the updated model up here too.
It's a little b...
jagged harbor
This setup is the basis for an afterschool STEM program. The organizers of it are not flush with money so they provide only Chromebooks for the students. MakerMakeCode is used here. I add LEDs remote from the CPX to give even more action and show how to hook up remote outputs with 'gator clips. I'll get links to code and the MakerMakeCode edit site in the "description " of the YouTube vid. https://www.youtube.com/watch?v=znko02u2PIM
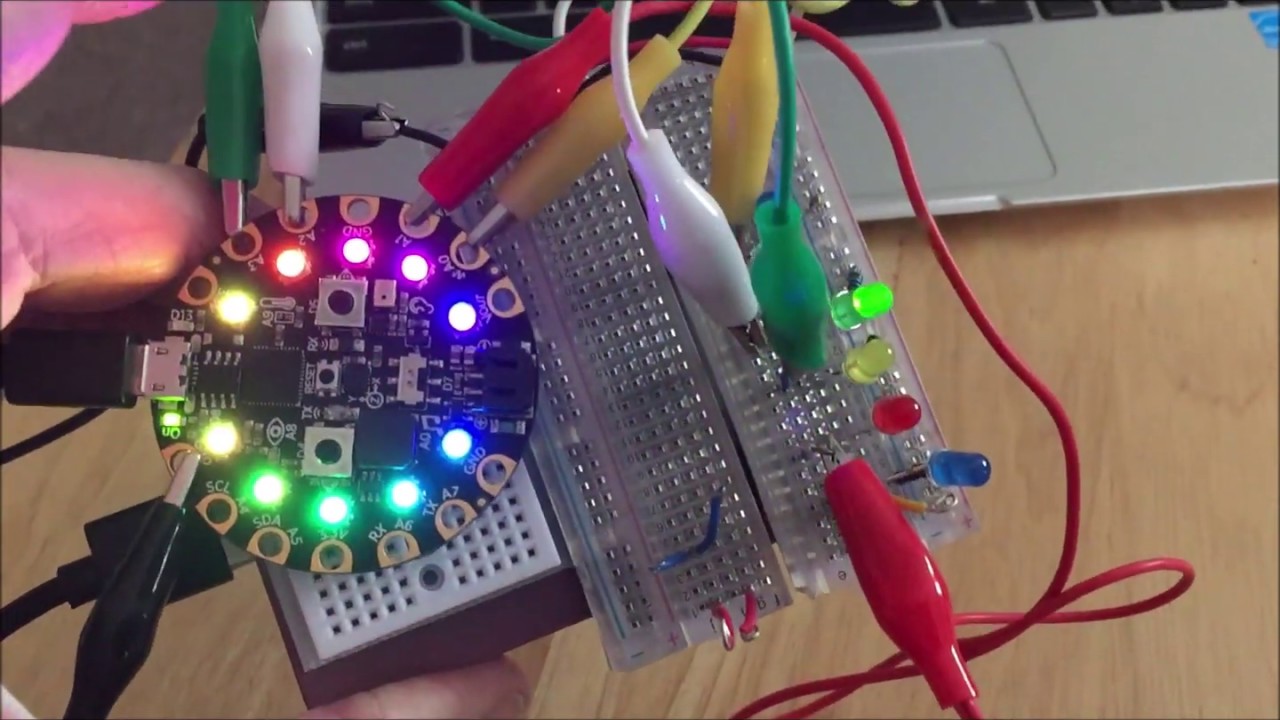
#1 - Microsoft Maker MakeCode used to program Adafruit Circuit Playground Express; click on SHOW MORE below. This is to light up several LEDs both on the cir...
 rich snow
Had to make one, but I wish Adafruit would stock these. Feather Tripler with mount holes for the small enclosure.
https://oshpark.com/shared_projects/cYVNzFc5
 unborn sphinx
the standard trippler has 12 mounting holes in that orientation, although a tripper with slot mounting wings for a standard size of extrusion enclosure would be nice
undone pulsar
@grave shadow what do you mean by sound? You alter the rpm to make tunes?
grave shadow
@undone pulsar so, pretty much playing it louder than the car engine itself
on the car stereo
undone pulsar
Oh must be deafening
unborn sphinx
A lot of modern sportscars and luxury cars are so efficient (read: quiet) and so well insullated, that the driver cant hear the engine, which caused a decline in sales due to percieved weakness. So a number of manufacturers play false engine noises through the stereo to make the driver feel like the car was worth it. Automotive marketing design is fascinating
Like, CVTs are better than automatic transmissions in almost every way but cost, because they are able to convert the engine RPM to the wheel RPM at peak torque at all points while fixed ratio transmissions are most torquy at the bottom of each gear combination and then they drop off.
But CVTs create a smooth forceful acceleration from 0 to fast, which is percieved as ineffectual by the driver. With fixed ratio transmissions you're frequently applying the clutch, decellerating, and shifting to a combination with way more torque, accellerating roughly then that tapers off. Its all very wasteful but a visceral experience the smooth acceleration of a CVT lacks. Sales declined, so they made CVTs that emulate the torque curve of a fixed ratio transmission. They're factually worse but people feel like they're better

 solemn bolt
Since the old method of checking if a twitch user is live as outlined in the Adafruit Automatic Twitch On-Air Sign guide is being depreciated I made this little project that checks multiple streams using the New Twitch API and Brian Lough's Arduino Twitch api Library.
trail siren
@unborn sphinx yes it has rfid stickers that coordinate to music tracks via phoniebox. also has a web app to control music and add rfid cards
 vernal tartan

"No tricks. This potatoe only generates 1.1 volts of electricity. I literally do not have the energy to lie to you"
strong phoenix
Anyone need some last-minute, all-natural confetti? 🎊
leaden frost
@strong phoenix Confetti? You might want to sharpen that blade and tune up the plane so you get ticker tape.
strong phoenix
@leaden frost haha. She'll do ribbons. That was just post-rip cleanup before truing.
trail siren
https://soundcloud.com/420sixtynine/mixxx-neotrelliswav/s-VXwvn a qucik rap mix using the neotrellis and MIXXX. the x and y control pitch and gain 😃

if anyone wants the files to the mixxx map just let me know
 topaz edge
First of many UI windows to come for this project
hueee
Took me 2 hours to figure out the ESP32 SSD1306 library reads .bmp image bytes starting from the most significant byte where as the standard in other libraries is to start from the least significant byte
All the tools that extract hex values from .bmp files follow the latter
I use Roblox studio to write lua code to parse and edit byte arrays, including the fix for the oled .bmp file problem 😂
I write those utilities trashy cause it's not source code anyways
 fallow glen
Finally got my RGB controllers done so I can do this
 tribal delta
I finally got around to making/editing a video on my 4-player 1-d pong using the CircuitPlayground express. Thanks to the #circuitpython-dev people who helped me puzzle out some code issues... https://t.co/Lv4yODvdOJ

Code can be found here: https://github.com/nruffilo/BitsnBots/blob/master/4Player1DPong/code.py This is a game of pong, but a bit different. It's 1-D pong, m...
woven relic
I think I ALMOST have my lightsaber done..... I just gotta finish connecting the wires to the connector and upload the code to make sure each part of it works properly. then I'll upload the full code once the individual parts work. oh, and I gotta swap out the leds in the blade with the new ones because I currently have tooooo many leds in the blade and its taking up toooo much power
 ruby ledge
I wrote a multi-I2C software (bit-bang) library and multi-OLED library to go with it. Now you can get N I2C buses on N+1 GPIO lines (common SCL). Code to be released shortly.
(in photo) Arduino 32u4 (Pro Micro/Leonardo) with 4 displays each set to the same I2C address, yet with unique parameters (display type, flipped, inverted)
ruby ledge
@unborn sphinx utilization?
Transmitting data to each display takes the same amount of time compared to regular I2C, so it's up to you how to manage the displays.
Only one device is active at a time
unborn sphinx
cool
ruby ledge
I guess if you needed more speed, it would be possible to drive multiple displays in parallel, but that's not the aim
I really just wanted to learn if I could share a clock line between multiple I2C buses and this confirmed that it's possible
Since the start transaction signal requires both SCL and SDA to go low, having SCL toggle on unused devices is just ignored
The only concern would be the combined pullup resistance and capacitance of all the shared wires
Still, you could use 1 clock line for every 2 or 4 devices to reduce the total GPIOs needed
unborn sphinx
if it's the same as normal I2C, that's good enough for me
jagged harbor
Microsoft Maker MakeCode looks to still be in development for some boards. The Circuit Playground Express is listed as still being in Beta at this time. There is some amazing work being done now by the MakeCode team to enable CPX in Maker so that we can use the board as a controller for I/O s on a breadboad. Here I show a development yesterday from the team enabling button press; this is very different from CPX coded with MakeCode; Maker will be useful for "little labs" like this elementary one shown: https://youtu.be/PGk92jwgAzc
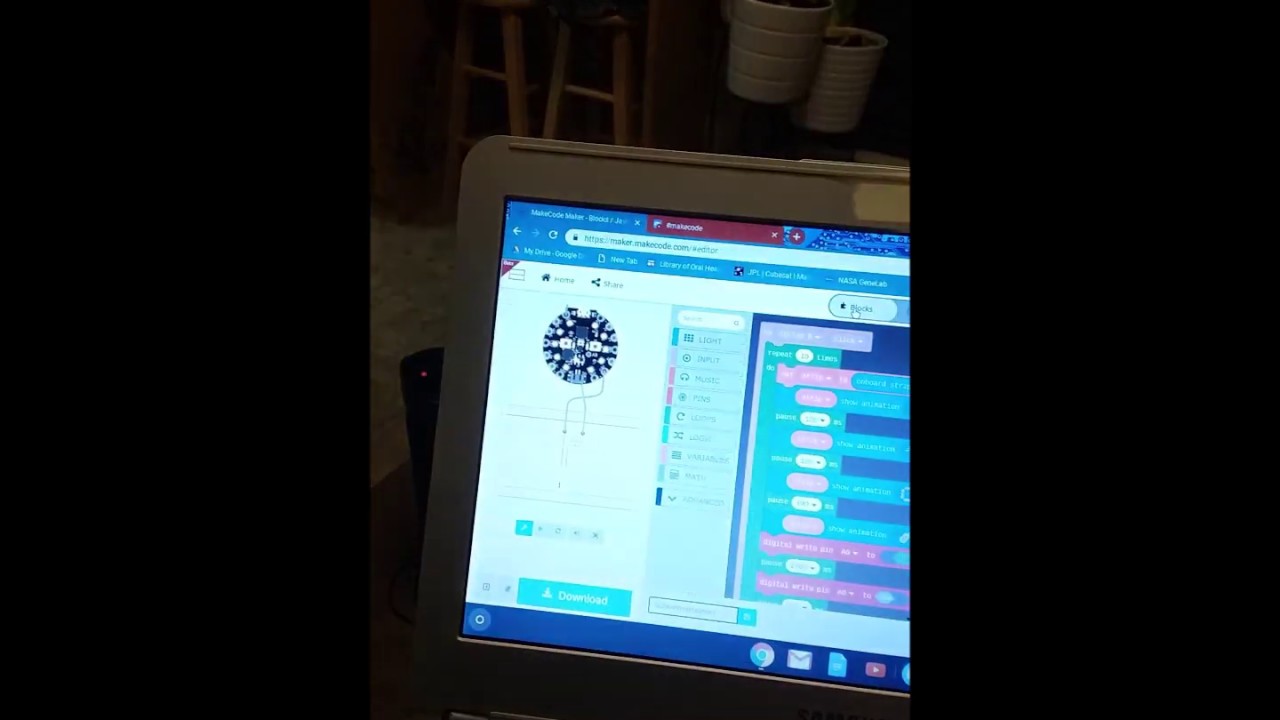
Adafruit Circuit Playground Express programmed with block coding, Maker MakeCode to play on-board LED light show and remote LED. Program here:
jagged harbor
MakeCode music translated into MakerMakeCode for CPX taken from here: https://makecode.adafruit.com/courses/maker/projects/music-maker, This is to show that CPX can be programmed for music using Maker MakeCode by changing an "input on A1" to "input OnGesture" which the code does not object to. We now can program LEDs off CPX on a bread board to light with the music. MakerMakeCode is developing. (you may have to click 'edit' to see the animation): https://makecode.com/_WXUMdWJjeYFv
solar yew
so weird,
i was running adb to a mobile device,
the needed to flash a Arduino flashing started but got stuck
afterward the arduino could not be recognized
so after 20 mins of trying to get it to work i gave up
this morning after a reboot... it works again.
🤔
vernal tartan
https://www.youtube.com/watch?v=iUNTJXLp-Z8 I need a camera stand or a steadier hand. This is a 24 hour clock with 180 degrees of motion. It firsts tests the motion. Then the time it sent forward an hour at a time using a button. Circuit Playground/Circuitpython/servo

Because you need a clock that just says "It's daytime"
unborn sphinx
is that the most wonderful of creative materials, a straw?
vernal tartan
hahah yes 😃 .. warning: not for use in California
 round terrace
I made a CircuitPython based ring clock to decorate my already busy desk at work and also to test a short library I wrote to use a DS1302 RTC. The outer ring shows the hours (in 24 hour time) and the inner ring shows minutes (in increments of 5 minutes). Quite happy about it!
 merry plinth
round terrace
merry plinth
round terrace
Good point. The inner circle is actually meant to be offset towards the top, but the picture made me notice that it's also slightly offset to the right (which was not intended)
unborn sphinx
assuming you made this by hand, a trick you can use is to do your layout on something else and then transfer it, for example draw the positioning on a sheet of paper , once you have the hole centers lay the paper over the cardboard and use something pointy like an awl or a pen you don't care about, maybe a nail, to poke through
round terrace
Oh! I actually didn't think of that. I ended up tracing the rings directly inside the cardboard box to know where to remove the layers of cardboard prior to fixing the rings in place. I may have been a bit too excited at the prospect of getting the clock working that I didn't stop and analyze the physical layout enough... 🙄
upbeat geyser
I know that feeling!
unborn sphinx
great feature of transferring, if you're careful the layout can be used several times
unborn sphinx
bonus trick, you can just print it, sketch this up in some CAD software and get it to print as big as you want
ruby ledge
I just released an Arduino library which allows you to control multiple I2C OLED displays simultaneously using my Multi_BitBang library:
https://github.com/bitbank2/Multi_OLED
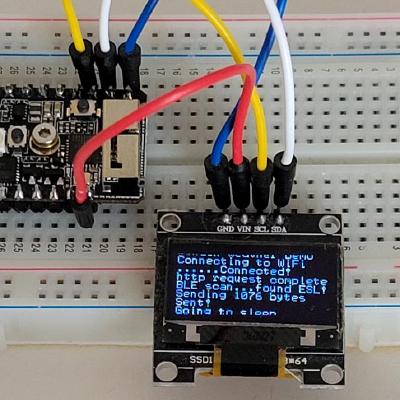
GitHub
Control multiple OLED displays on one or more I2C buses simultaneously - bitbank2/Multi_OLED
signal loom
Some ID plaques for our teams robot. We have a tournament this weekend and need plaques with our ID number on them.
Going to be edge lit
lunar venture
Working m4 in less than in inch square ready for tindie ( when parts or comes in )
Sans power supply
Casteled pads for easy integration
vernal ferry
Nice! @lunar venture
jagged harbor
Afterschool electronics/coding : Maker MakeCode, CPX ,Chromebooks and bread boarding: This is a link to a Google Drive text document with links to the first 4 lessons using Chromebooks, Maker MakeCode, Adafruit Playground Express and breadboard with inputs and outputs. Lessons include activating the onboard and off-board RGB LEDs and single LED and a momentary switch button. The tutorials we have found elsewhere up to this point do not include CPX driving components on breadboards in Maker MakeCode. Nor coding with Chromebooks. https://drive.google.com/open?id=19-Lr1MXqRQE0ikljkle8Z49JBfW9w0znT-qsT-wdU8I
 cedar dew
My current project is a nanoarcreactor. I’ve printed this as one piece in translucent PLA+
Using adhesive foil tape for the metalic finish
 rain wyvern
A recent project of mine was a Nixie clock using some Nixie tubes I'd found in a discarded piece of lab equipment I found at the town dump with my dad probably close to 20 years ago. I started the clock maybe 15 years ago but only finished it with the aid of "exixe" driver boards from a maker on Tindie, an Adafruit trinket, and about 350 hand-soldered connections! 😱
unborn sphinx
very very nice
just to throw it out there, brass sheet is usually pretty easy to comeby, cheap, and simple to work with, it then it's also easy to artificially age, if you wanted to build a cool housing
rain wyvern
Thanks! Yeah, I was trying to figure out a good housing. I was thinking clear acrylic to show off the coolness inside, but maybe some combo of brass and acrylic. It would be nice to ensure the high voltage bits are covered.
unborn sphinx
what would be cool but much harder, have a wood box with brass edging and the top of the box is a sliding dovetail so you can take it off and under that is an acrylic window
rain wyvern
Ooh, that would be cool, but beyond my skills. 😦
Though maybe I could do something like a brass frame for the edges with acrylic panels for the faces. The brass could be bent and soldered pretty easily.
ruby ledge

On my mission to learn as much as possible about "IoT" and all of the accessories/sensors/displays that are popular in the market, I came ac...
solar yew
nice
ruby ledge
GitHub
A fast substitute for Arduino digital pin functions on AVR MCUs - bitbank2/FastIO
new library today 😃
 snow ridge
vernal ferry
snow ridge
vernal ferry
Today I had a final exam on layout design class and used CircuitPython as my source material 😄
these spreads are designed for a fairly tall magazine format
lunar venture
@vernal ferry nice
jagged harbor
please post a link when you wish of your final Automated aquaponics system; much interest.
ruby ledge

Updated my library to support line+pixel drawing for MCUs with enough RAM (anything other than AVR). In this video, I'm demoing it on my shiny new @adafruit #nRF52840 feather. https://t.co/7gwxeni0ry
 Twitter
Updated my Multi_OLED library to support multiple back buffers for pixel and line drawing
ruby ledge
The line drawing code is somewhat unique and tries to minimize the number of bytes sent over I2C by grouping horizontal and vertical changes into as few bytes as possible.
jagged harbor
Barbie's first car: Education for kids with Maker Make Code and Adafruit Trinket M0: video:

This is the beginning of a project for making a car for Barbie which has LED lights coded with Microsoft MakeCode: (click on SHOW MORE) and the Adafruit Trin...
cedar dew
For this nanoarcreactor, I added 2 sets of neopixels one white and the other blue/pink around the edge to mix the effect. The video doesn’t show it that well but it’s coming out nicely
 indigo charm
Achievement Unlocked! Soldering.
cedar dew
If Thanos attacks, I have insurance
strong phoenix
@indigo charm awesome!!!!
indigo charm
😃 school science project. Making her do all the soldering.
leaden frost
@indigo charm That's great getting the kid to solder. I would recommend going to the home center to get a pair of safety glasses - (plastic eye protectors that fit over glasses, not those lab goggles - a little harder to find though, none of the others fit over regular glasses) They help to keep from runing an expensive pair of glasses from solder splatter and can be used when she starts working with other tools. I use mine all the time, its like a pair of clear glasses over my regular glasses. All those free pairs of eye protectors I got at Maker Faire do not fit over regular glasses.
indigo charm
Gah @leaden frost that is an excellent point! We have some already that fit her and I completely forgot! Thanks!
warped cobalt
Like, some cool parent awards should be going out; for creating the next generation of super makers!
jagged harbor
Barbie gets a ring ! One single neopixel, Adafruit CPX, Maker MakeCode and Barbie mannequin. Part of an educational project to encourage girls to code and do electronics. Code included in video description: https://youtu.be/3G-J27Xr-08
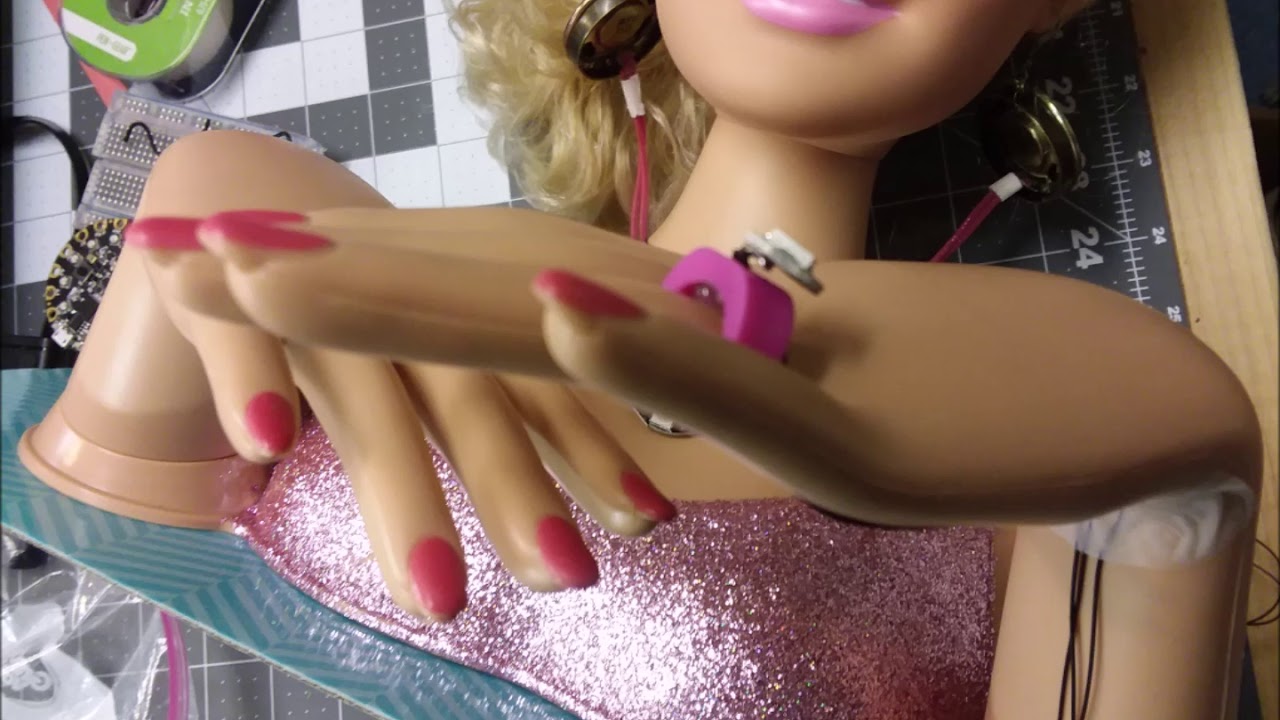
Code is below:( click SHOW MORE)This project is Barbie's new ring; given to her by Ken. It is a single neopixel with 3 wires, GND, Voltage and Signal or (D i...
signal loom
@indigo charm to add into what @leaden frost said, clip-on side shields are invaluable for glasses wearing makers. Although it will not protect her glasses from solder splatter, they are great f you are working on woodworking or metalworking projects for an extended period of time.
ruby ledge
@solar yew can you post a link with more info about what it does? Have you shared the code?
solar yew
need to sort out some finer detailed stuff 1st,
then will drop the source for the Arduino and application.
topaz edge


I created a fancy remote control with an arduino. I’ve yet to finish the source, but the remote itself is just so cute :P https://t.co/pss3HgAc8f
Twitter

 valid path
This isn't an electronics project per se but it was a quick fix to help me corral my wire spools on my limited bench space:
https://cdn.discordapp.com/attachments/327254708534116352/535041268506689536/image0.jpg

Less than $10 of parts and 10 minutes to assemble (it took me longer to rewind my spools)...
leaden frost
@topaz edge Nice! A James Bond car remote controller? Is that the IR led blinking or just a regular blue led?
topaz edge
@leaden frost WS2812b addressable diodes, they’re so dead simple to setup 😛
Cheap, bright as the sun
leaden frost
we call them Neopixels.
topaz edge
That’s specifically the Adafruit line though
based on ws2812b’s
idk if its identical or not
leaden frost
I use the adafruit neopixel library, FastLED but really use Circuitpython more nowadays.
topaz edge
Does it support C libraries
leaden frost
That's beyond me, but neopixels are also sk6812 and then there are the Dotstars AP102? which are more for other controllers like rasp pi more compatible with hardware and where you are more likely to use C directly.
topaz edge
@leaden frost There are simply tons of different modules you might want to use in functional arduino projects and all of their libraries are primarily written in C. I bet Circuitpython solves this issue in one way or another though
those rgb diodes are really the stuff though 😩
leaden frost
Neopixels are great to add to any project.
jagged harbor
Barbie gets and bracelet and total bling. This is about the end of the neopixel fashion for the Barbie mannequin. Next will be music. Her earrings are small speakers to play songs. All with Maker MakeCode and Adafruit Circuit Playground Express: https://youtu.be/8UKA-m4WOvA

Microsoft Maker MakeCode and Adafruit Circuit Playground Express make Big Bling on Barbie's new Bracelet and Ring and NeoPixel Pendent. She's ready to Style ...
 visual sinew
FInished product

GitHub
Contribute to omgitstwan/RGB-Lamp development by creating an account on GitHub.
App made in AI2
We made a RGB-led controllable trough your phone
We 3D printed the mushroom
for a school project
leaden frost
@visual sinew That's neat! What kind of arduino do you have in the log? Did you have to carve out a lot of space for it?
visual sinew
I am using a Nano
It's a fundiono, because its cheaper
And yes, I carved out the wood
This is what the Arduino part looks like
Top left is a bluetooth receiver and top right a power led controller
We used a 3 watt power led
leaden frost
High power LEDs can still get warm and even hot. Be careful with it enclosed in the plastic mushroom cap, maybe put a hole in there to vent it.
visual sinew
Yes
Thats why we used a cooling plate
We later on changed it to a thin piece
Because this was too much
upbeat geyser
Nifty! I had a bad habit of staying with "too much". I'll sometimes do completely unnecessary things like put LEDs on a Peltier effect cooler and add a thermistor to monitor temperature and use the microcontroller running the LEDs to also control the cooler (and a fan) with PWM. There are times which this sort of thing is appropriate, but I'm usually doing it for fun.
visual sinew
Ah
It was our first ever arduino project
3d printing project
we had 0 experience
upbeat geyser
Well done! Huzzah!
warped cobalt
@visual sinew Psychodelic!
visual sinew
Dont know what that means @warped cobalt 😂
warped cobalt
Very groovy
 craggy parrot
@visual sinew Very nice! Congratulations!
visual sinew
Thanks
topaz edge
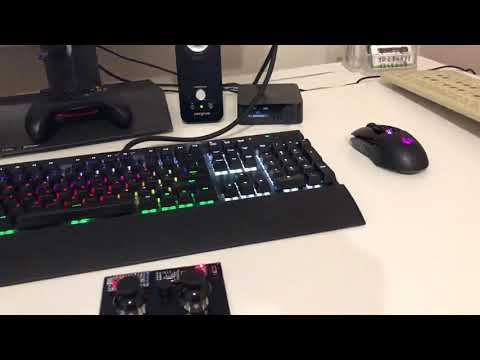
Analog joysticks -> Arduino pro micro -> nrf24l01+ ->nrf24l01+ -> Arduino pro micro -> ESP32
😂
Wanted to have less load on the ESP32 and also have the SPI connection free for the SD card reader
The arduino only sends data when something changes
upbeat geyser
Reminds me of the time I had my phone acting as a WiFi access point, so it was getting data via GSM and handing it off via WiFi, and another phone was getting the data from the WiFi and handing it off to a laptop via Bluetooth. 3 wireless protocols at once.
vernal ferry
@topaz edge cool project!
topaz edge
Too much coding at this point lol
the choppy tone is just a quick proof of concept
ESP32 is more than capable to make it smooth
jagged harbor
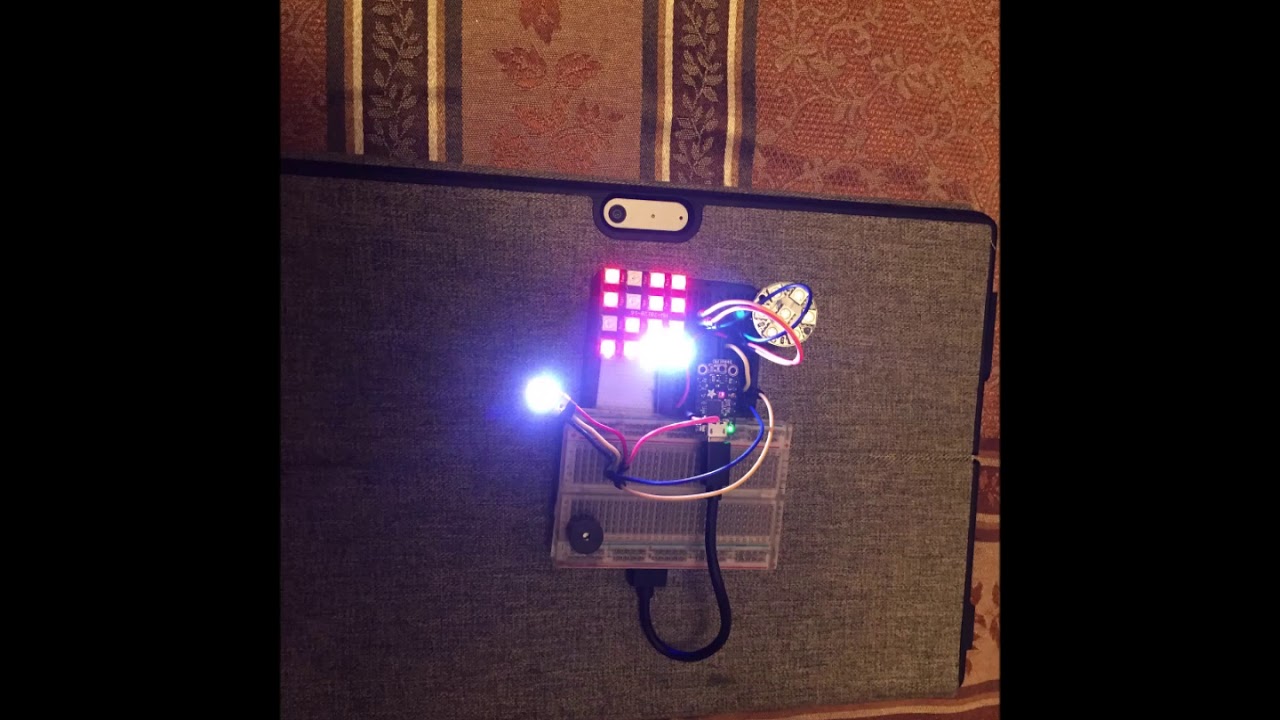
Using the Photon Lightshow function for LEDs in Maker MakeCode programmed on the Adafruit Trinket M0 with a 16 Neopixel matrix and a single Neopixel . Output...
Kind of a cool neopixel play function using Maker MakeCode and Adafruit Trinket M0 with 2 neopixel outputs. I took the code by John Park and @sinful nebula and adapted it to Maker for Trinket M0 with mobile 5 volt power platform so it is wearable with Velcro.
@terse totem
jagged harbor
MakeCode Arcade: Sprite attacks TACO: https://makecode.com/_4JJCpURsYifK
 meager raptor
Has anyone connected a Geiger counter to an Arduino or Raspberry pi?
upbeat geyser
That's basically how the "DIY Geiger Counter" works, but instead of a whole Arduino, it uses the ATmega328 chip. https://www.dropbox.com/s/yfpn2y8yv2e2b9k/GK-B5.6_Sch.png?dl=raw
solar yew
My tft featherwing/feather m4 express based scuba computer. It's been taking me to 60m (200ft) and bringing me home without problems for the last month
Inside view:
leaden frost
@solar yew That's pretty cool. What kind of sensors are on there? I guess this would be prototype size that can be made into a wrist wearable with haptic feedback.
solar yew
@leaden frost the pressure sensor (The big red thing) is an ms5837-30ba originally intended for an ROV. It does pressure and temperature, communicating directly via I2C.
It's certainly the biggest dive computer I've ever seen, but it also has the biggest screen. If I used the 2.4" featherwing it would be pretty much "normal" sized.
leaden frost
@solar yew big screen is better in murky waters. It's accurate or better than other instrumentation?
solar yew
@leaden frost ideally I'd use a 2.8" screen. I was thinking about trying to plug one onto the 2.4" featherwing just to see if it works :)
In terms of raw functionality it's about the same as a shearwater or OSTC (those are in the $1000 range) but with a much richer user interface (IHMO) including a couple of unique features. I've still got to add rebreather support, which might take a little while..
leaden frost
@solar yew Great. I think you should get a couple of underwater pics using your device and submit it to the Adafruit blog, lots of people would be interested.
jagged harbor
Educational moisture sensor for kids' club project: first steps. Will convert the JS code written in MakeCode to Maker MakeCode so we can go from Micro:Bit to Adafruit CPX. (Thanks Stephen at Core Elect. for the Micro:Bit project examples):https://www.reddit.com/r/MakeCode/comments/ahpbed/moisture_sensor_makecode_for_boys_and_girls_club/

reddit
1 vote and 0 comments so far on Reddit
upbeat geyser
Personally, I think Python is a better choice than JS for kids' programming. We did a workshop about a year back using Mu and Micro:Bit, it worked pretty well.
vernal tartan
There just isn't the Scratch-like interface for python that works like Makecode does. I like how they can flip back and forth been the puzzle pieces and the text based coding of JS. It sets them up to do text based python coding later.
jagged harbor
For those restricted to Chromebooks (us) here's a link to Python extension in Chrome and this would be a whole new environment for us: https://chrome.google.com/webstore/detail/python-shell/gdiimmpmdoofmahingpgabiikimjgcia?hl=en

Python shell for your browser.
And we'd like to get 100 % of our kids, 8 yr old and up, to do at least a little coding (blocky type) and then see it in text on the same screen .
 lapis jasper
@vernal tartan have you seen edublocks? https://edublocks.org/
 neon nexus
I built this little cyberpunk laptop last year. It was fun! https://imgur.com/gallery/1vLNfE3
 solar yew
A side-by-side comparison with a $1000 machine yesterday at 40m. We ended up with 35 minutes of decompression stops and my home-build didn't miss a beat.
signal loom
@solar yew dive computers? Who makes the pro one? I am a hobbyist scuba diver so I am always curious.
solar yew
@signal loom Thé computer on the left is a shearwater CCR controller
valid path
@solar yew Whoa! That's cool! How hard is it to waterproof your home-build?
solar yew
There are basically two kinds of waterproof housing. The first is "ambient pressure" which basically means that the whole thing is waterproofed but endures the water pressure (about 100 pounds per square inch for the dives I do). This means that if there are any air gaps, anywhere, the device will be crushed. The second type of housing "atmospheric pressure" (the kind I used) not only waterproofs but pressure proofs - the housing has to resist the 100 psi without crushing or flexing. To be strong enough, the housing is a qurter-inch thick delrin and the window the same thickness of lexan.
valid path
wow
leaden frost
@solar yew Thanks for that tidbit on pressure rating. Now I know my cheapo watch "rated for a couple of atmospheres" will not only get wet but will implode if I wear it in the swimming pool.
solar yew
@leaden frost watch ratings are strange things : a 100ft/3atm watch can't even be taken in the shower, you can go swimming with a 300ft/10atm watch but you need a 600ft/20atm watch to go diving.
 coral gull
Had an issue with the PWR_ON LED on my Pi3 v1.2, turns out Q1 was missing (probably knocked it off during test fitting for some old project). Resolved it with a jumper between the source and drain pads on the PCB.
lusty siren
If it was loose enough to be knocked off without causing other damage, then it was loose to begin with. Good fix though.
vernal tartan
@lapis jasper that edublocks looks neat, I see there's been an annocment while I was out. Sorry for the delay, I tend to slip into hibernate mode at temperatures below -10C
lapis jasper
no worries @vernal tartan I would too 😃
lusty siren
That's about the temperature here today. Cold!
jagged harbor
Starting to show and tell MakeCode Arcade video on YouTube with Tristen Sparks: https://youtu.be/4oChu6W8q3E
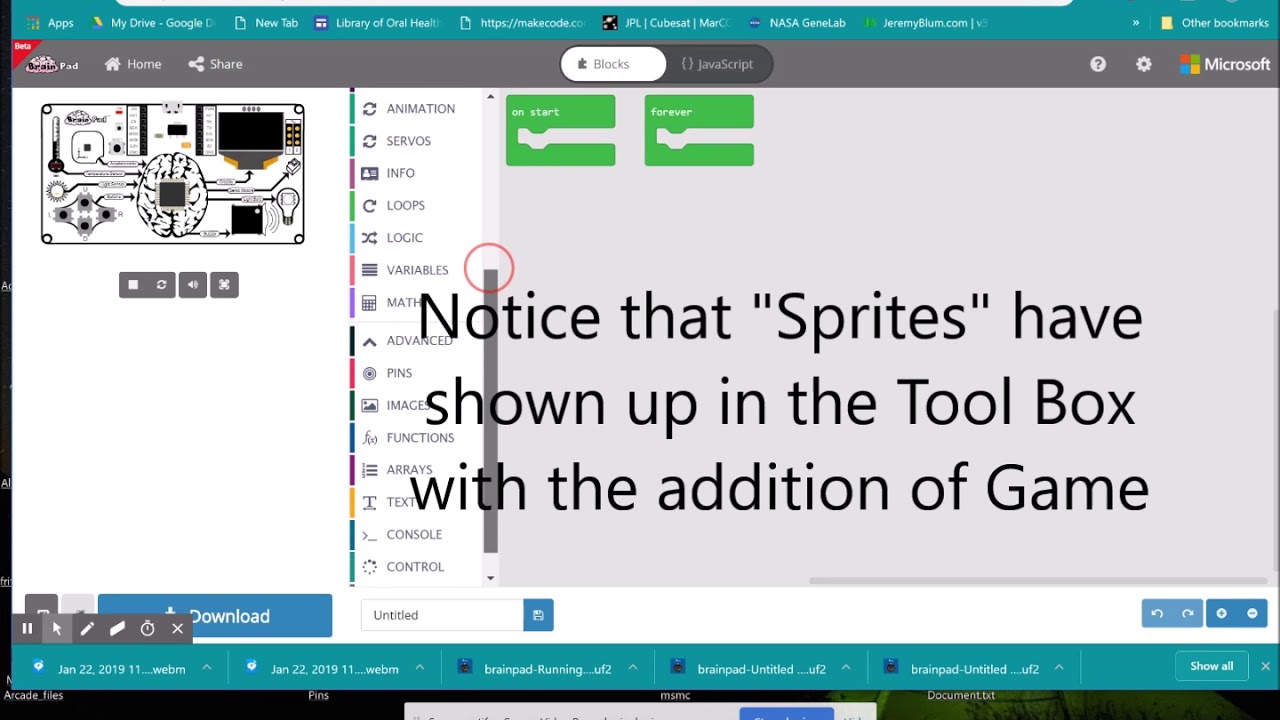
In order to activate some "shared" programs in Arcade you have to choose a board, like BrainPad so the simulator can show you the game. See Show More below. ...
 lapis patrol
Lights Out game in Python for the NeoTrellis M4 Express https://github.com/rarrmonkey/Lights-Out my first public share

GitHub
Python code for the NeoTrellis M4 Express recreating the classic illuminates game in 8x4 - rarrmonkey/Lights-Out
jagged harbor
Show and Tell: video how to upload an Arcade game; MakeCode (JavaScript) to a console: https://www.youtube.com/watch?v=x_ZKGYXrL3M&t=3s

Uploading the Jumping Man program from computer to BrainPad (original version, not the Arcade BrainPad which comes out soon) in the Arcade system. Click Show...
lunar venture
Aaaaaaaaaaaah
 tender palm
My Carbon fiber Raspberry Pi case! Not for losers! https://www.macsboost.com/2019/01/24/mcpi-carbon-fiber-aluminum-racing-raspberry-pi-case/?preview=true&_thumbnail_id=211

The McPi case is precision Machined from 6061 aluminum and anodized in matte silver. Topped with an aerospace grade carbon fiber bonnet and assembled with stainless fasteners, this case has all th…
jagged harbor
New project, educational, using Microsoft MakeCode and LED's. Thanks @terse totem for the music. This may have more appeal to boys than the previous Barbie mannequin and LED project on this same MakeCode and Hardware YT video channel. This should run to several episodes including the speaker/siren on the Jeep hood and a proximity sensor to alert the dinosaur hunter of the animal's approach: https://youtu.be/9OIz2rvAmcE

This is the first episode in the Dinosaur Hunting Adventures with MakeCode and Photon. It features LED lights and an Adafruit Trinket M0 microprocessor board...
See YT channel and video there for links to code and music.
 terse totem
Nice, I wish my Jeep had a light bar like that!
upbeat geyser
Homemade "Divergence Meter" from the Stein's Gate manga and anime
jagged harbor
@terse totem , light bar is in Proton, flash light will be tomorrow. This (Proton function) is a protective laser system to shield dinosaur hunter ;acts as a stungun so needs to be installed on Jeep headlights, taillights, trailer lights. Dinosaur hunter will stun the animal and then hunter can extract DNA from synovial fluid in the dinosaur minor synovials for replication in the event that this last animal on earth dies. That's the plan: (best laid plans of mice and men....and all that) stay tuned. (ps, we need more melodramatic music) .
jagged harbor
Educational Microsoft MakeCode: changing Trinket M0 from 170 tie hole to 400 tie hole instructions for students plus Neopixel code in Maker MakeCode with music by John Park, video: https://www.youtube.com/watch?v=3Hj-Mrg9r6c

Sometimes your Adafruit Trinket M0 is on a 170 tie hole bread board but you want to put it on a 400 tie hole board for more pin access. You can hook up sever...
 jagged harbor
New project for Maddie and her LED lightshow pendant. With extended wires she can add I/O sensors and speakers to the breadboard; coded in Maker MakeCode/JavaScript. Photon function with 'light' in the MakeCode toolbox. Music by @terse totem , https://www.youtube.com/channel/UCYvU-GOQCX97aDu3o4bxl_Q

YouTube
Hi, I'm Frank Schmidt: This is a YouTube Channel about using Microsoft MakeCode programming system and Hardware to use with that system. MakeCode and MakerMa...
coral gull
RasPi3 died, won't recognize SD cards for booting. Tried reflowing the SD card slot pins in case one wasn't getting contact, not much improvement. Now it just flashes the ACT LED as if there was files missing from the SD. Same SD card works fine on RasPi2. Guess I should get a new board
coral gull
On the bright side, I got a handful of 18650 cells at work today from the electronics bin, and I'm recycling them
jagged harbor
We had a good session with MakeCode and Adafruit boards at local library this morning: here's a video of using Maker MakeCode and Adafruit Trinket M0 with button press lesson and musical tones plus LED: https://youtu.be/22j1MAMkjEA

This video shows how to use Microsoft Maker MakeCode with Adafruit Trinket M0 (not Trinket 5 volt-that does not work with MakeCode) and then you can wire a m...
 manic charm
Working on a command and control center using the SmartiPi Touchscreen with the Crickit on the back.
Here's a side shot of th SmartiPi Touchscreen Crickit command and control center.
and the front....
lunar venture
Basis for gui v2 (well 1 kinda, third rewrite ) completed in two days
The rectangle is a object in a page in a window
Movable, re-colorable, etc
 onyx glade
MakeCode educational: Using "Range" function on 16 Neopixel square of LEDs: video. Adafruit Trinket M0 used so MakeCode Maker is needed for the block coding; JavaScript is also shown running in the background on another tab. The code link in description takes the student to the MakeCode web page to view program on simulator/ computer screen: https://www.youtube.com/watch?v=2GtzJuCnPi0&feature=youtu.be .

This video demonstrates using the "Range" function with Adafruit Trinket M0 and a 16 neopixel square. We have to use MakeCode Maker and the code link is belo...
onyx glade
Police siren and flashing red lightbulb: Kids; educational MakeCode . This will be the code to program the dinosaur hunter jeep siren and flashing red light. Video, stay tuned: https://youtu.be/IPoAQzuz4Ns

Ret Lat with Sireen ; like the Policee's: to go on the dinosaur hunter's jeep. This is the program that we can use for the hood siren and red light on the Je...
 proud ether
I made some Energon Cubes: Trinket-powered magnetic color bocks!
 marble mulch
This is my electronic/art project. Using a "Visible Man" model someone gave me i put a bunch of NeoPixel strips in it (totalling over 180 LEDs), gave it a voice using a MusicMaker shield, and added a shiny red button to press. Runs off of an Arduino Mega i had laying around. It's called ZENTAR and predicts the future! 😀 #sparky
https://vimeo.com/314147166 #sparky

An arduino-based project of a Zoltar-like box using LEDs and Sound files to randomly give predictions, sarcasm and even write haiku
Zentar's "insides."
upbeat geyser
I was expecting the LEDs to just be stuffed in there, but they're arranged so they can flow in patterns, that's neat. Can't help being reminded of the Trek episode "Lights of Zetar", however.
marble mulch
LOL I forgot about that! His name came to me more as props to Zoltar prestidigitator from "Big."
upbeat geyser
That makes sense too.
 west zinc
Can’t wait to see how this 7 segment mechanical display evolves. It evokes so many new ideas!
https://hackaday.io/project/163473-peters-7-seg-all-mechanical-display-prototype-2

This is a project i am working on. I now have a working 3D printed 7 segment display prototype, that is fully mechanical, can be used without any electronics. Se my youtube video for best description of it. https://www.youtube.com/watch?v=oHPHFjFOA3IThe goal is to be able to ...
upbeat geyser
I remember a friend of mine had a digital clock that used a mechanical display. It wasn't very loud, but I could just hear it updating, which seemed so odd I wasn't sure I'd heard it.
onyx glade
Using Adafruit CPX with servo motor and LED light show , educational with MakeCode Maker: (music by John Park) https://youtu.be/EKoq9KP6SUI

This video shows how to program the Adafruit CPX and wire in a small servo motor. Servos only turn up to 180 degrees but can be used to toggle a switch or so...
 west dune

For more information,check: https://www.instructables.com/id/3D-Printed-Transmission-Line-Speaker/ Hope you enjoyed this video!If so,be sure to like and subs...
onyx glade
Making Trinket M0 perform output of LED ring like Circuit Playground Express with one button press and light show: Educational for students learning JavaScript/block coding and basic electronics. using MakeCode Maker: https://youtu.be/W0If9sBy3Pg

This is sort of like CPX with 12 neopixels on a ring and playing a light show if you press one button. Adafruit Trinket M0, 12 WS2812 neopixel ring (50/50 RG...
Thanks @terse totem for your "Photon" YouTube video: MakeCode Minute.
ruby ledge
How I spent part of my Saturday...optimizing Philip Burgess' "Sand Box" demo for an I2C SSD1306 on the Adafruit nRF52832 Feather

Adafruit nRF52832 with 400Khz I2C SSD1306 OLED and MPU6050 accel/gyro. I wanted to see how fast I could get it to run on this device. The video shows 100 par...
ruby ledge
Version 2 (removed floating point math) is even faster
https://youtu.be/PIf1v0YDyrk

nRF52832 Feather w/ I2C SSD1306 display. 200 particles bouncing. Faster display updates occur when less screen area is active - in other words, the I2C displ...
@hot ivy would you like me to write a blog post about it (giving full credit to your original code)?
ruby ledge
Shared the code here: https://github.com/bitbank2/Animated_Sand
GitHub
Arduino demo for SSD1306 I2C display + MPU-6050 accelerometer. - bitbank2/Animated_Sand
 grave bone
geekyjacket: A hackathon project a friend and I made over the weekend at DevCamp, using Feather M0 Bluefruit, and the lovely Adafruit Mini Skinny Neopixel strip (adafru.it/2969). What's new here is that it's controlled by an app in Flutter, Google's new cross-platform mobile dev platform. This meant bringing up an interesting new dev toolchain, and playing around in the Dart language. And I'm using one of Google's preferred IDEs, Microsoft's VS Code (!), targeting Apple iOS. Welcome to 2019.
https://twitter.com/erico/status/1092261259544674304


Proud to win #devcamp’s “coolest hack”! @neil_c_heather & I demo #geekyjacket our @flutterio-controlled, blingy wearable.
Flutter controls an @adafruit Feather M0 MCU via Bluetooth LE. NeoPixel LEDs gently diffused w black chiffon (@JoAnn_Stores!)
Thx @dom & @iPhon...
Twitter
 bright rampart
I just created this for a contest on instructables.com 😄 https://www.instructables.com/id/Cardboard-Programmable-Keypad/ pretty much my first soldering project besides some practice beforehand

Instructables
Cardboard Programmable Keypad: As technology develops, people are wanting things to be more and more virtual however sometimes it's just way more practical and convenient to have something physical that you can actually touch and interact with with your own hands. One example...
 molten oar
@bright rampart effective and simple. Nice!
bright rampart
Thanks!
molten oar
I mentor in Stanford's EE makerspace (https://lab64.stanford.edu/), and built a board that is easy to pick up (b/c of circuitpython) but has enough features/depth to "grow" with students as they take more embedded classes.
- it has a SAMD51 running circuitpython and an ESP32 running micropython
- all the design files, firmware, and tutorials can be found on the github so you can make your own!(https://github.com/maholli/SAM32)
grave bone
@molten oar USB micro B, Lipo, assymetrical pin layout – OMG is that Feather-compatible?!
[zooms in]
Le sigh. So close.
molten oar
@grave bone i wanted more IO! 😃
upbeat geyser
There is additional I/O on the connector sticking out
It looks like the antenna partially blocks the mounting holes?
grave bone
That's cool. Maybe for a future rev though? Could help with conveniently adding tons of already tested FeatherWings. And expand your market, if that's interesting at all.
molten oar
@upbeat geyser For traditional mounting holes, yes. But those two are intended to be used with pegs.
upbeat geyser
Ah, understood.
molten oar
good point oesterle! I'll look into what it would take to conform 😃
grave bone
Teensy 3.2's back side might be an interesting approach for adding GPIOs.
You're so, so close!

Boards of a Feather flock together!
upbeat geyser
The backside trick would be tough on this one, as there are components on both sides taking up most of the room.
I'm trying to figure out how the two CPUs communicate. I see TDI/TCK/TMS (to program the flash?), SCL/SDA (I2C), and MOSI/MISO (SPI).
grave bone
Maybe substitute small, fixed QSPI flash for the SD card.
Anyway, amazing accomplishment, @molten oar. I certainly couldn't do that.
upbeat geyser
That is an amazing little board with a lot of functionality.
molten oar
thank you @upbeat geyser and @grave bone!
Considered the QSPI but found students really gravitate to the SD card functionality. Allows a lot of fun data logging opportunities as well.
The two micros talk to each other via UART (TxRx). This allows you to use the terminal to start a REPL with either one (built firmware that lets the SAMD act as a uart bridge).
Although today I learned ladyada built an SPI interface for the ESP32 that allows you to use SPI to perform ESP-related internet tasks: https://github.com/ladyada/Adafruit_CircuitPython_ESP32SPI

GitHub
ESP32 as wifi with SPI interface. Contribute to ladyada/Adafruit_CircuitPython_ESP32SPI development by creating an account on GitHub.
cedar dew
Showing off a set of custom tuned wind chimes I made with a 3D printed mount finished with a bronze coating and various patinas.
lunar venture
thank you for the likes @lapis jasper @eternal maple
 eternal maple
🙂
 next barn
Just a really fun first time looking /really close/
 rotund pawn
@next barn that's beautiful, what part is it?
 wintry pumice
Here is a CO2 detector prototype I made for my FLL team project using a CircuitPlayground Express:

GitHub
2019 FIRST Lego League project for CO2 detector wearable for astronauts - rodoggyro/circuit-playground-co2-detector

 solar yew
I added a compass to my dive computer, glued to the back of the screen with a neoprene pad as a bit of a shock absorber.
solar yew
If adafruit are reading this and are looking for product ideas, it sure would be nice if the feather were mounted at ninety degrees like on the 2.4" tft wing. That would leave so much more room for peripherals. Oh, and make the LiPo charger a bit more beefy. And a way to completely power down the tft card.
next barn
@rotund pawn thank you! It's a lux calculator
I guess really they'd call it a light sensor
rotund pawn
Oh its functional, I assumed it was to show off the inside
next barn
LED!
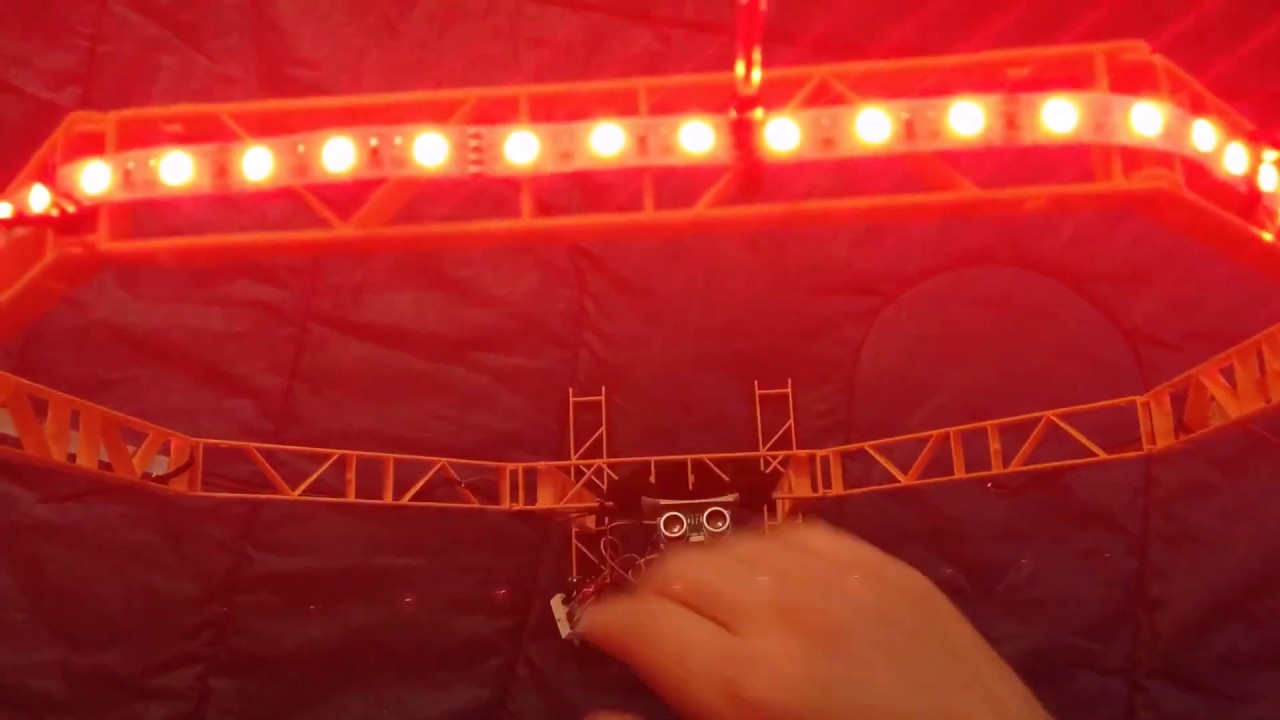
 molten hull
Hi, I was hoping to join the show and tell this week. What's the current protocol? Do I still comment on Google+ or does it route through here now?
lapis jasper
@molten hull we'll post the link in #live-broadcast-chat right before the show
ping me if we forget
molten hull
Gotcha, thanks!
upbeat geyser
Are those constant-current integrators?
 rough dew
Somewhat x3
The DACs put out 0-5 V
First op-amp translates it to -5 -> +5
Second op amp inverts it
Both sets of op amps have a couple 10nf capacitors to try & filter out noise
Left side of the breadboard is just a mini power supply
15V in, stable 5V out
upbeat geyser
Ah, I saw the capacitors there and it reminded me of a project where I used op-amps as vector generators by configuring them as constant current integrators. Then I just need to send the start and end points of the lines to the DACs and the integrators sweep the lines smoothly at a constant rate.
 ocean gull
I made a Midi Keypad Electric guitar using an Arduino Micro
https://twitter.com/m4dnerd/status/1094250707614687232
--> English Tutorial : https://create.arduino.cc/projecthub/labsud/midi-keypad-c68fd2
--> French Tutorial : https://wikifab.org/wiki/Pavé_Numérique_MIDI


Playing #Raamstein with a USB midi Keypad made with an @arduino micro.
Setup for the virtual guitar:
- Reason
- Native Instrument V-Metal
- Guitar Rig https://t.co/LxaXyeNu6S
Likes
254
Twitter

Arduino Project Hub
Making music with a keypad? Seems like a weird idea! But we will see with the good software, we can even make an electric guitar out of it! By labsud and madnerd.
ocean gull
I made a guide to use a @arduino MKR1010 to send message on discord https://t.co/qkr3LHx5kD
Obviously this can also works on @esp32, i'll post my code later 😁
 Twitter
 dark flax
wow the webhook is named Captain Hook
 compact furnace


Oh, of course, I need to upload a video of it veing played. 😅 https://t.co/dZ3pd4k2fd
Twitter
I finished the mod to play my tiny arcade game with a bigger controller!!
😍
 tawdry quartz
https://streamable.com/l1utu Strobo + motor

 errant elk
 signal loom
Now that the season is over I can finally show off our teams FIRST Tech Challenge robot
proud ether
WIP: The Quadricon!
molten oar
@upbeat geyser @grave bone just following up that I took your comments to heart and tweaked my M4/ESP32 board to meet the feather standard 😃 https://github.com/maholli/SAM32

GitHub
Feather-sized SAMD51 with M4 core serving as UART bridge to WROOM ESP32 - maholli/SAM32
upbeat geyser
Nice. Normally the I2C pull-ups live on the peripheral board, but they can be on the CPU board. If there's room for some solder jumpers, it would make it easy to disable them if unneeded.
eternal maple
If you're using CircuitPython, there's a non-destructive way to see if something is connected to I2C. Here's what I've been using to test for an OLED module: ```python
import board
import time
import busio as io
import digitalio
import adafruit_ssd1306
### DEFINE AND INITIALIZE PINS AND DEVICES
set up and initialize oled display
try:
i2c = io.I2C(board.SCL, board.SDA)
reset_oled = digitalio.DigitalInOut(board.D9)
oled_connected = True
except:
oled_connected = False # if no i2C connect
if oled_connected:
screen_pause = 0.2
oled = adafruit_ssd1306.SSD1306_I2C(128, 32, i2c, reset=reset_oled)
oled.fill(0)
oled.text("STARTUP...", 0, 0)
oled.show()
time.sleep(screen_pause)
I've just been using i2c.scan() although I have to wrap that in try_lock() and unlock()
eternal maple
Yours is more elegant and could provide some selective detail. My method is a brute-force beginner's approach. 😉
woven relic
Today I learned you could blend 2 animations in FastLED....
woven relic
Its done!!!! Though I may go back at some point and redo the front barrel to have leds too
This is my fan gun. It was originally made in the fall of 2017. Its been a hit at every event I take it to and at the last event i had this stupid idea to take one of those dumb yelling chicken toys in the barrel and make it yell. it worked but would fall out kinda easily. So i made a new barrel and a proper adapter. the head is completely removable
woven relic
Its my Tactical Assault Chicken
 modest ice
Hello My daughter Josie would like to join Show and Tell tonight. She has two CPX projects but we aren't sure how to join. Thank you for the help.
 junior agate
@modest ice Heya - the link will be posted in #live-broadcast-chat at the time of the show later, keep an eye on that channel
 keen vortex
GPS Logger: It records GPS coordinates (among other geographic stuff) to a CSV file in an SD Card, showing basic info on the OLED featherwing. Smart enough to only save new coordinates if the device changes positions. All done in CircuitPython with Adafruit and Particle hardware.
Big thanks to @craggy parrot for his help troubleshooting some hardware and software issues.
I'll post code and 3D print design on my blog in some days.
upbeat geyser
Cool! Does it save periodically (like every X seconds)? Does it do corner pegging?
lunar venture
Significantly improved refresh rate for the any 2d array sensor in version 2 gui. All online under the MIT license
ocean gull
Make your #pixelart looks delightfully #retro using an #OLED display. We'll see how to make your own image, and animate it.
https://t.co/a3VgPK7RVy
Tested on @arduino micro, @esp32, @esp8266, #m5stick
🇫🇷 on @wiki_fab will be available later!
@xxPixelArt @M5Stack
 Twitter
 torn viper
Thanks for featuring my Rust on Metro M4 project on the blog, totally unexpected. https://blog.adafruit.com/2019/02/26/rust-on-the-microchip-samd51-on-the-adafruit-metro-m4-express-board-rust-rustlang-adafruit-rustlang-rustembedded-bascule-microchipmakes/
Adafruit Industries - Makers, hackers, artists, designers and engineers!
Via Tony Arcieri (@bascule) on Twitter: @rustlang in the machine (in this case, a SAMD51 microcontroller on the Adafruit Metro M4) Heading over to GitHub provides the details that Paul (sajattack) …
ruby ledge
GitHub
Scan I2C buses and identify devices which respond. - bitbank2/I2C_Detector
 wise lance
My son @wintry pumice wants to show his CO2 detector Lego League project tonight if at all possible. Do we just wait for the hangout link in the #live-broadcast-chat channel or is there some list that we need to be on?
 scenic siren
@wise lance Hang out in the #live-broadcast-chat and the link will be posted. 😃
upbeat geyser
Those are really shaping up nice!
proud ether
Thanks! I’m hoping I can show them off during the live show & tell next week
Here’s what they look like from the back. I’m I love with these buttons
upbeat geyser
I like the heavy duty industrial look.
proud ether
Thanks! The panel mount buttons are more forgiving to my less-than-expert dremel skills
Plus they are shiny
They’re a bit pricy at scale- $10 for 5, but I love the way they look and feel
They also have Phillips screw connect for wiring so that’s nice too
Allows me to disassemble these babies
This is what they are under the hood
upbeat geyser
Oh, I like how things are put together so that things can be disassembled and serviced.
proud ether
I don’t like to make anything I can’t take apart
Also, I’ve been known to connect the wrong wires:)
That said I think I’m going to solder the wires on the next one
upbeat geyser
As have I: allowing for that possibility has saved me a fair amount of time and trouble.
proud ether
But I could never solder my Trinket
It’s practical too. I use the hard disk to save the colors so you can power down
But I’ve had a disk fault a few times due to write actions and losing power
But it’s super easy to reformat and reload
One trick I’m using that i had never considered is resistors between each button to step down voltage and then going to 1 analog pin
That allows me 4 buttons on 1 pin which I had a mini-panic about when I realized I was short on digital pins
Anyway, thanks for taking a look!
upbeat geyser
Yeah, the analog button trick comes in handy sometimes.
proud ether
And as my final trick... Blinka!
 rustic stag
@tender palm we removed the ad you posted here, we're OK with links and things to maker stores and more, but it needs to be more than just an advertisement for your company, please do not do that again unless you're part of the community and have been participating more than just a link to a product you are selling
upbeat geyser
Tried the "re-use an LCD from a broken laptop" trick, it worked!
 sterile lodge
Yeah, I have a couple of those setups.
lunar venture
My first website (still in development) https://www.tg-techie.com/index.html
sterile lodge
Nice @lunar venture . Is it just html or do you have it running on a backend like django?
lunar venture
Rn staticly generated with Jekyll. Netlify is doing the hosting. What's Django?
And thanks😁
sterile lodge
Django is a python based backend
lunar venture
😱😱 what
sterile lodge
It's more of a framework really
lunar venture
Do you need a server or host to run it?
sterile lodge
Yeah, I think. I haven't really done anything with it, but I thought you might like doing it in python.
I've mostly done PHP
You could set up your computer locally for development though or a raspberry pi.
Here's something interesting for you: https://codecondo.com/5-platforms-provide-free-django-app-hosting/

I am one of those people who loves to work on a remote machine, rather than my own. It’s not even the fact that there...
lunar venture
Thank you!
sterile lodge
You're welcome
lunar venture
I've heard php is a pain, for you is that true?
sterile lodge
Not if you use a framework. I like using laravel, but have used a couple others as well.
I've been working with it for about 20 years though, so maybe I'm just used to its quirks.
lunar venture
I'm sorry, I forget: what do you do for work?
sterile lodge
Web Development using PHP and JavaScript
lunar venture
Freelance?
On the topic of languages; I recently tried Java, for frc robotics, and was shocked at how 'not that different' from python it was. Granted it is quite typed but... I was quite surprised
sterile lodge
Yeah, Java and C# are very close syntactically.
I think maybe you're thinking of programming looping and control structures and they're about the same in most languages.
lunar venture
Good to know, I will miss namespace when it comes time for c. How did you find cp?
sterile lodge
I've been a customer of Adafruit for years and have been following along. I had dabbled in it a little with some projects, but when I was asked to write a driver for the RA8875, I really dug in and have loved programming in it ever since.
I even took a version of one of the programs I dabbled in and integrated it in the FeatherWing library.
lunar venture
Who asked you to write the driver?
sterile lodge
ladyada
lunar venture
Nice
sterile lodge
I had made some speed improvements to the Arduino RA8875 library before that.
There were a few pieces of hardware I was considering using CP for and noticed the lack of drivers for some of those including the RA8875. I wrote about that in my CircuitPython2019 post at: https://blog.adafruit.com/2019/01/14/makermelissas-take-on-circuitpython2019-circuitpython-adafruit-adafruit/

Adafruit Industries - Makers, hackers, artists, designers and engineers!
MakerMelissa posts thoughts on CircuitPython in 2019: It’s been a while since I’ve been posting a lot on YouTube. I wanted to create a list of Projects that I would like to work on in 2…
How did you get into writing CircuitPython?
lunar venture
I started with Arduino during my sophomore year after my grandpa reintroduced me too Star trek the next generation. I've always loved making prop and toys and when saw Arduino could make things actually function I challenged myself to make a really tricorder, having already made a plastic model via 3d printing. Then when Adafruit released the feather m0 express I hopped on the chance since I had already taken a python class in highschool.
sterile lodge
Nice
lunar venture
When you say character in the cp2019 do you mean text?
sterile lodge
It's always good to have a project when learning something new
Yeah, that's what I meant.
But we have that now
lunar venture
Agreed, my college essay is basically "learning by doing is awesome/addicting." Thanks for sticking around to chat. I should really head to bed.
Have a great night 😁
ocean gull
I made a tutorial on Hackster.io on Jinx / espArtNode, a really fun way to control neopixels leds over wifi with a ESP8266.
If you want to control your leds with sound/images/video or display text it's really easy with it!
https://www.hackster.io/140002/control-neopixels-like-a-dj-dea733
I'll take the opportunity to thanks Matthew Tong (esp firmware) and Sven Karschewski (jinx) for their respective works.
If the ESP8266 firmware was useful to you, feel free to donate to Matthew : https://www.paypal.me/mtongnz

Hackster.io
Use an ESP8266 to control NeoPixels over Wi-Fi like a lightning technician with only free software. By labsud and madnerd.

PayPal.Me
Go to paypal.me/mtongnz and type in the amount. Since it’s PayPal, it's easy and secure. Don’t have a PayPal account? No worries.
 hardy oracle
https://github.com/petrofang/dial-a-hue this is a little color picker circuit I came up with..I drew the schematic in Eagle and soldered the components to an Adafruit permaproto board. This is one of my first times soldering

GitHub
RGB Color Dialer schematic. Contribute to petrofang/dial-a-hue development by creating an account on GitHub.
 hazy mesa
Using my last.fm account to grab my currently playing track and display it on the PyPortal. Album art, artist name, track name and album name.
signal loom
Our wonderful FTC robot. Made it all the way to states this year. For the second half of the year, we switch gears and domains to go from land to the sea. Our MATE ROV construction period begins today. This bot was built using Pitsco parts, 3D printed and laser cut components, and is driven by a android phone
This was a group project from FTC team 8490
 cosmic blaze
Python is scraping a web page/web app that has a RED, YELLOW and GREEN status every 8 hours. It finds the status of the website app and updates an AIO feed with the color values. An AIO dashboard listens to the feed and displays the color of the status. The industrial light indicator listens for serial. So another python script is listening to the AIO feed, when it sees a change, it sends a serial command to display the appropriate color. Here, a test script is running from Red to Yellow to Green.
I'm very impressed with how fast mqtt updates are and how synchronized the dashboard and the light indicator is...
 mint cliff
very cool
 leaden laurel
how do you get into show and tell?
I would like to show a project on show and tell...
scenic siren
It's over tonight, but join the #live-broadcast-chat before 7:30pmEST on Wednesdays, and the link to join is posted.
leaden laurel
oh... ok.. thanks kattni
 outer pewter
Hi all, now the Adafruit nRF52 board support has been released for Platform IO thought you may be interested in an example project: https://github.com/jeremypoulter/nrf_scanner

GitHub
Contribute to jeremypoulter/nrf_scanner development by creating an account on GitHub.
 quasi vault
Hi folks. Am I right that the Sprite class that @terse totem used in the Hallowing project is now a TileGrid of size 1? https://learn.adafruit.com/hallowing-jump-scare-trap/code-with-circuitpython

Scare someone with a rubber spider or roach dropped right in front of their face! HalloWing with a PIR sensor and servo motor do your scaring for you!
Also, what I'm really looking for is a way to flip full screens on the PyPortal. I expect to have 1-5 "screens" that have buttons (like the SoundBoard buttons) and need to quickly flip between them. Is the TileGrid the fastest solution? Is there a lower-level "write this full bitmap to the screen" API?
sterile lodge
Maybe you can adapt the slideshow library to flip between screens?
Also, the tilegrid as you described it is my understanding as well.
quasi vault
Thanks @sterile lodge
craggy parrot
@outer pewter thank you for the platformio project for the feather_nrf52832 --- worked great -- first time using platformio - very nice.
 proper dirge
Now that I've got my workspace sorted out, I am starting to get back into 3d printing and fusion 360. I needed a pen holder for my desk, and figured it would be a good project for a first print back. Figured I may as well share it here as well.
https://www.thingiverse.com/thing:3478156
outer pewter
@craggy parrot no worries, I did a few updates today
signal loom
New Badge for an event coming up. QR code is an affiliate link and scores you a few hundred off
strong phoenix
@signal loom very nice! there is no laser emoticon 😦
signal loom
@strong phoenix I have designs for one
solar yew
 long vine
Nothing too fancy, but today I harvested some dill I grew in the middle of winter (I live pretty far north, so we only get a couple of hours of sun every day). The lights were made using some regular LEDs and a 3d printed case I designed. Used it to make salmon in shrimp sauce. It was tasty.
Here's a video of me making it https://www.youtube.com/watch?v=qgkW6qDAbeQ
 dusk zinc
@quasi vault Cursory reading of the slideshow lib is that it uses one displayio parent group and loads new bitmaps from file for changes? Another way is to have several groups chilling in the background (if enough RAM) and switch by board.DISPLAY.show(splash1) ... board.DISPLAY.show(splash2) Haven't tested enough to figure out performance variables, but curious how you end up solving it.
solar yew
Hi, here is a fun way to use the gigabrain controller with a DIY 3d printed robot arm EEZYbotARM. If you use a RaspberryPi we are looking for your feedback with the controlling experience. Send me a comment/question https://youtu.be/FLwQfgVE51w
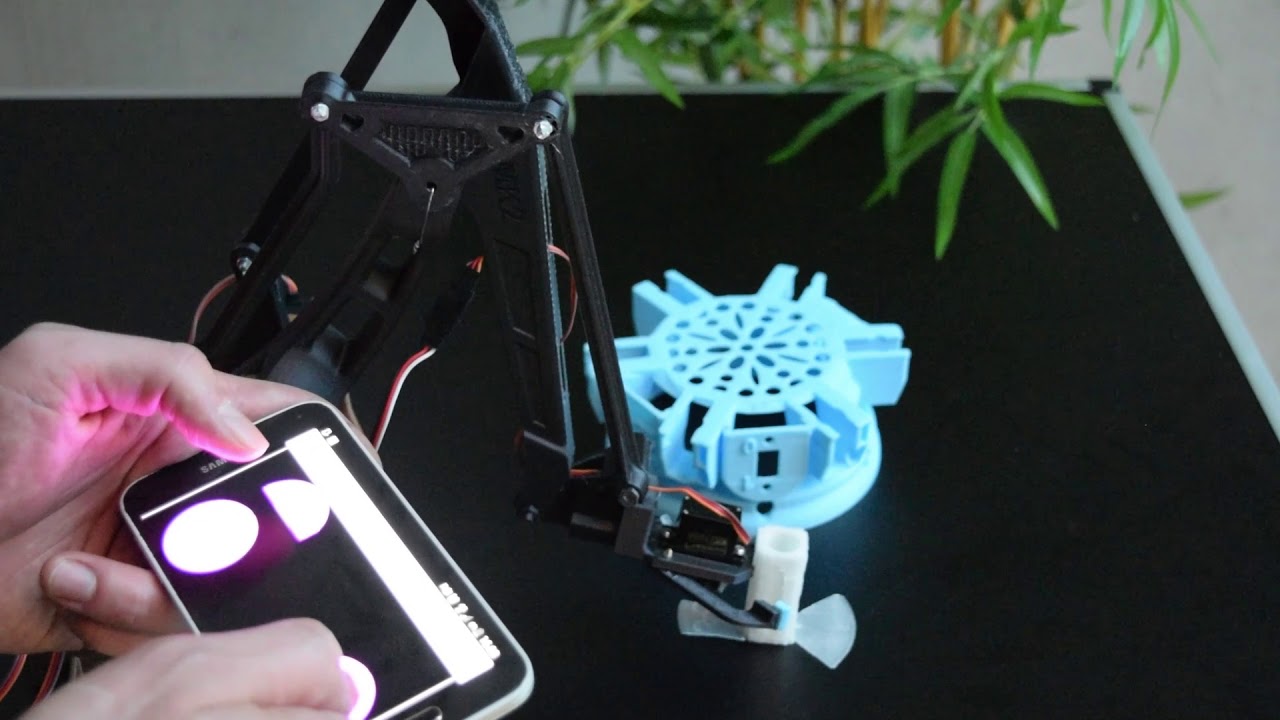
https://www.producthunt.com/posts/gigabrain Shows controlling a 3d printed EEZYbotARM with a mobile phone and Raspberry Pi
We have a new feature also for Arduino: Export a movement that uses multiple servos as Arduino code that can be installed to Adruino boards. The movement in video can be exported to Arduino board also with this. If you are interested in testing this feature, send a comment. You can export a movement like this to Arduino https://youtu.be/aYXkq367deU

https://www.producthunt.com/posts/gigabrain It's Brainyhand a hand that you can record and playback movements and finger gestures. Here's a Thingiverse link ...
 dense finch
https://www.youtube.com/channel/UCk5k-zDWVQuH5xBDswh2Ppg?view_as=subscriber this is my new YouTube channel. I hope you all like what I have made so far! Let me know if you do or don't. I was specifically wanting to show you guys the smart door I recently made.


Thanks for watching! 3D Printed Housing https://www.thingiverse.com/lvdsage/designs Affiliate Links: PARTS Actuator https://amzn.to/2TPhArd make sure y...
mint cliff
Drive my robot

Live control homemade robots. Test drive and learn about robots.
Adafruit motor control board and raspberry pi
solar yew
https://youtu.be/m0-CBM---Oc got my poofer pretty dialed in now. arduino for inputs/outputs, raspberry pi for web control, monitoring
 solar yew


 toxic stirrup
First of the escape room boxes. Circuit playground underneath the lid, using light pipes to bring the neopixel light to the surface.
toxic stirrup
And the inside...
onyx glade
Educational coding for beginners: electronic fashion,
https://youtu.be/bTQyfauzoP8

https://makecode.com/_TDFKgHUygLs7 Here's the first video of electronic fashion using Microsoft Easy MakeCode, block coding and the Gemma M0 microcontroller ...
 dry idol

So this goes through majority of the prototypes I went through to make this robot happens along with the final result. Enjoy!
 timid shore

GitHub
Simplex LoRa Service For Raspberry Pi and SX1278. Contribute to therooftopprinz/PiLoRa development by creating an account on GitHub.
 upbeat geyser
Blumlein? Spot welder? Can crusher?
hidden saffron
coil gun, can kinda see the coil in the second photo
1.5F caps at 70V. Next step is to find a step up transformer to get the voltage up
Took roughly 90 seconds to charge and could punch a bolt mostly through a 1/2" piece of plywood
 mossy carbon
Made my own design printing the other ones now (King at the moment)
mossy carbon
The king is in the building xD
 odd shuttle
Little tabletop arcade machine. (RetroPi, with a Circuit Playground Express controlling the lights in the marquee.) I needed an excuse to learn how to use the router table at my local makerspace.
 bitter hazel
@odd shuttle cool! Where did you get the case?
warped cobalt
Shiney!
 molten burrow
already got the parts, so no reason to make it in cad. but i decided i wanted to. turns out, fusion360 is the best over solidworks, freecad, and sketchup

 maiden wasp
My IOT Office Door Sign, (PyPortal), now with independent refresh timers for background images and Twitter status texts. https://github.com/mikerenfro/iot-office-door-sign

GitHub
IOT Office Door Sign using PyPortal. Contribute to mikerenfro/iot-office-door-sign development by creating an account on GitHub.
 hollow blaze
👋 Made a couple different e-paper name tags recently, with the goal of having a "badgelife"-style electronic badge that didn't actually require any electronics knowledge, just software and crafting. After Adafruit started stocking the new red/black/white Inky wHATs, I had to try one out with an RPi0. If you don't mind the color fading issue, you can put one together 100% from parts from Adafruit, no soldering required. http://vitor.io/e-paper-name-tag-inky-what

with a Raspberry Pi Zero W
solar yew
Shopping in south africa for parts is torture.. no stock or lack of or being limited...
and then the prices are X5 that of the US
leaden frost
@solar yew Maybe one of those listed as a distributor close to you for Adafruit parts might be of help. Good luck. https://www.adafruit.com/distributors
Adafruit Industries, Unique & fun DIY electronics and kits : Hacker Spaces/Distributors Map - Tools Gift Certificates Arduino Cables Sensors LEDs Books Breakout Boards Power EL Wire/Tape/Panel Components & Parts LCDs & Displays Wearables Prototyping Raspberry Pi Wireless Youn...
solar yew
I literally buy my parts from that very distributor
solar yew
XD
solar yew
Communica is overly expensive
http://www.communica.co.za/
And their website is made for the blind.
Stock is outdated.
Mantech
http://www.mantech.co.za
Expensive
old stock
Website is from the dark ages.
Pishop
http://www.pishop.co.za
Stocks the bare minimum
But has new pi boards in stock
only one that stocks the pi 3 A+
MicroRobotics
http://www.robotics.org.za
Stock is always ranging from new to cringe
Website sometimes lists on stocked items
Best stock sadly still not the cheapest
Gets side tracked with industrial parts
Netram
https://www.netram.co.za
Stock is limited
mostly old stock
Full of junk
http://www.electronics123.co.za
Someone please inform them what year it is.
Website is oblivious
https://www.diyelectronics.co.za/store/
Slow
expensive
Nothing 5 other stores cant supply
at least has a few adafruit products
RS Components
https://za.rs-online.com
Great big selection
messy website
Some parts are expensive
That's about 5 extra unlisted hacker spaces
warped cobalt
3D printed fans?
 unique jackal
Adafruit boxes make great prototype project boxes. 😃
solar yew
@warped cobaltnope
solar yew
i was digging for a cheap small amp for my project
after looking thru a few "not so cheap modules"
i remembered i have this
2 screws and a laugh later i had a working amp for my portable
solar yew
You know it's Xmass When you get a box full of new modules and components from adafruit.
🎄

solar yew
And the sent me a 12v fan instead of a 5v fan... GJ.. WP.. microrobotics shop..
 tacit relic
My first PyPortal-based thing is a bus arrival monitor for my local bus stops using the JSON data feed from NextBus.
 modest raven
Render of a KiCAD-designed 8-button keypad using a Pro Micro. Would you guys be interested in an ItsyBitsy version? #sparky since with Rev 1.0 I missed a trace that was shorted to GND.
dark flax
how big is that
dry idol

In this video I will talk about 3 Drones that are quadcopters I have made over the years. Enjoy!
solar yew
My verdict on the Banana pi m2 Zero
-Should have never left the prototyping stage.
 sinful trout
you can say that about a lot of SBCs
solar yew
Great news Microrobotics is replacing everything defunkt free
So the dead battery and incorrect fan will be replaced asap
upbeat geyser
Good for them!
solar yew
I got retropie running on the banana pi.
it was not easy.
upbeat geyser
Think you might write a how-to guide?
solar yew
I think i should yeah
But basically you need to build Armbian
Get the drivers from http://linux-sunxi.org
Get wifi working
Next you need to configure the retropie script to see a mali as the platform
from here it gets easier.
long vine
Hacked together a wake-up light since I work nights and it'll help me get up in the morning
https://www.youtube.com/watch?v=boEhv6Mx6f8&t=36m2s
Disclaimer: I'm a hobbyist, if you find any errors in my videos, point that out and I'll pin you! When you're working nights or live near the poles during su...
modest raven
The keypad kit is almost done. Couple more tweaks to work out. Contains PCB plates and the previous keypad PCB. Has support for single-colour backlighting and Neopixel underglow.
 hearty grotto
@modest raven What wizardry are you using to upload multiple pictures in a single post ? I don't seem to have that superpower ??
modest raven
iOS lets you do that by using the paperclip icon more than once
modest raven
Inside view
 lucid bloom
My ASCII photo terminal is nearly done I have it printing from a regular printer and a receipt printer, here are some of the latest tests
vernal ferry
@solar yew nice! Is the darker ones just the regular image or a reverse?
@modest raven what'd you use to design the pcb? which keys are those?
modest raven
- KiCAD
- The keys are Kailh BOX switches from NovelKeys
vernal ferry
@modest raven thanks :)!! nice work!
modest raven
@vernal ferry No problem, and thank you
lunar venture
@rustic stag pure circuit python: https://twitter.com/tg_techie/status/1112467124134531075?s=21

 rustic stag
@lunar venture nice keyboard!
lunar venture
thanks, char switching takes a while tho :-(. still loving the pyp 😃
 ashen plank
Not my work, but I found someone else's PyPortal project showing blood glucose data and I thought it was really neat. https://www.hanselman.com/blog/DisplayingYourRealtimeBloodGlucoseFromNightScoutOnAnAdaFruitPyPortal.aspx
AdaFruit makes an adorable tiny little Circuit Python IoT device called the PyPortal that's just about perfect for the ...
 patent nimbus
This is an older project of min but thort people might like it , its a quartz candle holder with neopixel ring below housed in a laser cut base 😃
upbeat geyser
I suspect that's not quartz, but selenite.
patent nimbus
could be right quartz was our best guess
upbeat geyser
In any case, it looks great lit that way.
patent nimbus
Thanks 😃
discord is not letting me upload the video but looks really nice animated
solar yew
So the shop that sent me the wrong fan
sent the new fan to some random address and according to the waybill was delivered.
solar yew
Been their customer for years and now this starts to happen.
bright rampart
I just made this using an Itsy Bitsy board 😄 https://www.instructables.com/id/Automaton-Origami/

Instructables
Automaton Origami: This instructable is for the making of a moving origami kinetic sculpture/machine. This will also show you how to use servo motors with an arduino type micro-controller. I have been wanting to figure out how to use motors with the arduino for a wh...
solar yew
A big shout out to micro robotics
They got all the parts i ordered to me in a few hours.
dark flax
(apologies for the image quality) https://cdn.discordapp.com/attachments/349239459167993857/563044496712007711/unknown.png

it's a Lua-powered SAMD21 microconsole (OLED + Capsense =  ) built for my school's STEM program
upbeat geyser
Slick, looks useful for making badge-type projects.
dark flax
I originally wanted to design a badge and then I realized we don't have the budget for that many RGB LEDs
(because why else would you want a badge)
 rotund stag
How was the alignment on your soldermask? It's the only complaint I've had about OSH Park's PCBs
dark flax
I've heard about that
lemme get a closer look
it looks aligned
maybe it's just one of their fab suppliers
upbeat geyser
Generally soldermask is lower resolution than copper, so it can make sense to have larger openings in the soldermask (I think it's called something like "copper-defined pads".
dark flax
yeah makes sense
dry idol

Instructables
Arduino 3D Printed Sumo Bot: So I had a bunch of parts laying around my house. I wanted to participate in a sumo competition coming up in a few months but I didn't have a bot. Instead of buying a bot or using an existing design that would require me to purchase stuff for the ...
 unkempt plover
Hello My daughter (Josie) and I both have projects to show. Josie made a Harry Potter sorting scarf with her CPX and I have a jean jacket that I made a "wave activated" flag using a flora, neopixels and magnetometer - but I'm having trouble with the direction readings, Elizabeth
torn viper
lapis jasper
@unkempt plover sorry it was full! please come back next week to show it off
tacit relic
Second PyPortal project, a random Cards Against Humanity generator (it took a while for it to show one clean enough to post)
warped cobalt
That is far cleaner than any CAH game I ever seen!
hearty grotto
In this project, I recorded the signals from my Keyes remote, then recorded a combination of signals from my Sony remote. The program on the Arduino now listens for specific Keyes remote signals, and in return, it will emit the pre-recorded combination of Sony remote signals.
So what that means, is that I can press a single button on the Keyes remote, and Shazam !!! The TV is on, Sound is on, Channel selected (etc etc).
Could be any combination of IR remotes really !!
https://arduinobasics.blogspot.com/2019/04/universal-remote-grove-infrared-project.html
plush gorge
Say hello to my little friend. 😄 I've finally settled on a face & figure for my OSPoC mascot. Any thoughts on a name for my little friend? My little Ork friend is going to be the mascot for the low cost Open Source POwer Chair that I've designed & am working to bring to production. 😃 #MobilityForAll
@rustic stag Not sure if this violates anything, if it is please don't hesitate to say. I'm just really proud of this project and am excited to share & talk about it. 😃 So I really hope that my posting about this is okay, if not sorry.
plush gorge
upbeat geyser
Cool! For some reason, I want to call him "Rodney".
plush gorge
@upbeat geyser Lol! I like it, reminds me of Rodney from Stargate Atlantic. Ok, it's on the list. 😃 Thanks.
upbeat geyser
That last picture with the circuitry is a little disturbing. It reminds me of the "fembots" from Bionic Woman.
plush gorge
Lol, wow ya that is wrong looking
warped cobalt
Normal in shows from that decade
upbeat geyser
You printed your own phone?
west dune
yup
I am using a orange pi 3G board
Here is the instructables for it: https://www.instructables.com/id/The-Orange-Pi-Smartphone/

Instructables
The Orange Pi Smartphone: In this instructable,I will show you how I have builded a smart phone,running android KitKat 4.4 and that has some unique perks!The phone has:-40 gpio pins-A unique design with transparent back-A speaker,microphone and a headphone jack-Support for...
upbeat geyser
Slick! So that's why you wanted to load Android onto an Orange Pi.
west dune
Yup, it also has sim card support
solar yew
Just released a movement (supports simultaneous movements for multiple servos) live recording and export support for Arduino and compatible controller boards. Video shows how to record a robotic movement live and export it to Arduino device. Any comments, please just send a message. https://vimeo.com/329054573

Record a robotic movement with your desktop browser and export it to an Arduino board that is connected to multiple servos.
dry idol

This is my milling machine story so far and how it has gone from total nothing to something working. Thanks!
 reef flax
I have just updated my tool for compiling c/c++ projects. It is an alternative to makefiles and CMake. I have just added a very handy feature. The tool can now act as a shebang at the top of a c++ source file making that source file executable, just as you would with a python file. 😃 https://github.com/HamAndEggs/appbuild

GitHub
Contribute to HamAndEggs/appbuild development by creating an account on GitHub.
patent nimbus
Good day all just want to make sure my maths is right . Is show and tell gose live at 19.30 eastern time that makes it 00.30 uk time ?
Im finish work late so might try catch it on wensday
scenic siren
@patent nimbus That sounds correct? I would check through Google though. We have Daylight Saving Time which sometimes puts it off by an hour.
patent nimbus
Cool 😃 keep forgetting about daylight savings
 tepid otter
Hey all, I wanted to experiment with the Johnny-Five framework + Arduino and I decided to make a self-watering-plant-system: https://github.com/hectorleiva/self-watering-plant-system

GitHub
Moisture Sensor, Sonar Sensor, and Submersible Water Pump combined to water a plant based on the water level available and moisture level of the plant itself. - hectorleiva/self-watering-plant-system
sinful trout
Hey guys. Just got home from the Makerspace with some new stuff. This is for the 2.13" e-ink Featherwing + feather m4 Express + battery. Still have some sanding to do.
And then there is this
lapis jasper

MIDI is coming from my computer into the black GameBoy pocket. CircuitPython running in the cart processes it and then queues the sounds in the GameBoy. Any ...
upbeat geyser
Got curious about core memory and decided to give it a go. Don't have any tiny ferrite cores handy, so I tried a larger one with 10 turns through it to increase the magnetic field without having to run dozens of amperes through it.
Writing a 1
Writing a zero
torn viper
@lapis jasper I see your 3 gameboys and raise you 1 c64 https://drive.google.com/file/d/1zeMi_hzKevuAIn-txuWl5CIbwbiklKOW/view?usp=drivesdk

Google Drive
apologies for the shaky cam
dry idol

This is actual footage from my drone recorded over in bedford NH of it flying.
 untold vigil
lapis jasper
untold vigil
lapis jasper
@torn viper had to request access
lapis jasper
@torn viper looks cool! we need a circuitpython mod tracker 😃
torn viper
:)
lapis jasper
makes me want to get my c64 going
torn viper
Good
The tracker I used is called SID Wizard
It has "instruments" which are baiscally different SID waveforms and filters but I didn't know what to use for this so it's just using sawtooth
And afaik it's compatible with a couple midi carts
lapis jasper
nice! I'm hoping to make a version of my cart for other systems too
torn viper
I think I'm sorta on to something with the instruments
Google Drive
I'm not a musician so it's very hard to get it right
the speed is maybe off too
 humble plaza
How are we doing Show and Tell now that Google Plus is out?
patent nimbus
did they shut every thing down i throught it was just the + social bit ?
sterile lodge
Show and Tell is currently done on Google Hangouts, which seems to still be going. However, it may be gone by this time next year in which I'm sure Show and Tell will have moved to a different platform by then.
They post the hangout link in the #live-broadcast-chat channel right before it starts.
patent nimbus
thats good to here its still going . cool will keep an eye out . do u have to ask first before going on or do you just need the link ?
sterile lodge
I think lately it's just posted and like the first 9-10 people who get in are on the show.
Unless somebody drops off after showing.
Usually, that's about all there is time for though, so it works.
patent nimbus
rightyo 😃 im off work the next two show and tells ( its 00.30 when it airs over here ) so might try drop in for one of them : )
sterile lodge
Sounds great! I'd love to see what you have.
patent nimbus
👍
humble plaza
@sterile lodge cool. Thanks!
sterile lodge
yw
molten burrow
so far so good... but im getting myself bogged down in thinking too far ahead. keep trying to hold myself back
1 step at a time
😛
long vine
Common project, but I made a little kit that lets me convert an old windshield wiper jug into an automatic plant watering system. (Timecoded to end of video for those who don't want to see the whole making of)
https://www.youtube.com/watch?v=Fqjugu2UjO8&t=35m51s

Source, models, and parts list: https://github.com/Jasdoge/AttinyPlantSystem Save the environment by repurposing things!
 long bison
I've been playing around with the NeoTrellis M4 using bare metal Rust. Wrote a little accelerometer demo: https://github.com/atsamd-rs/atsamd/pull/51

GitHub
Bumps the adxl343 accelerometer crate to the latest version, and adds an orientation-detecting example which uses the accelerometer.
Action shot of the neopixel_orientation example:
showing all of the supported orientations
hrmm guess it doesn't like gifs, well click through to the PR to see it animated
 knotty thicket
@long bison Nice!
Ok, so I would like to show something on show and tell this Wednesday but it's more of an idea. I have some 3d models of it on Autodesk Fusion 360. Still have to learn some Arduino stuff to actually complete the actual project. Would that be ok? I would be able to explain it in about five minutes or less.
I know that most of the show and tellers have a visual so I don't know if that would be ok?
lapis patrol
So, I'm having trouble with depression and find it hard to motivate myself to do anything including showering regularly but today this happened - https://youtu.be/yPlpD7GSdQU
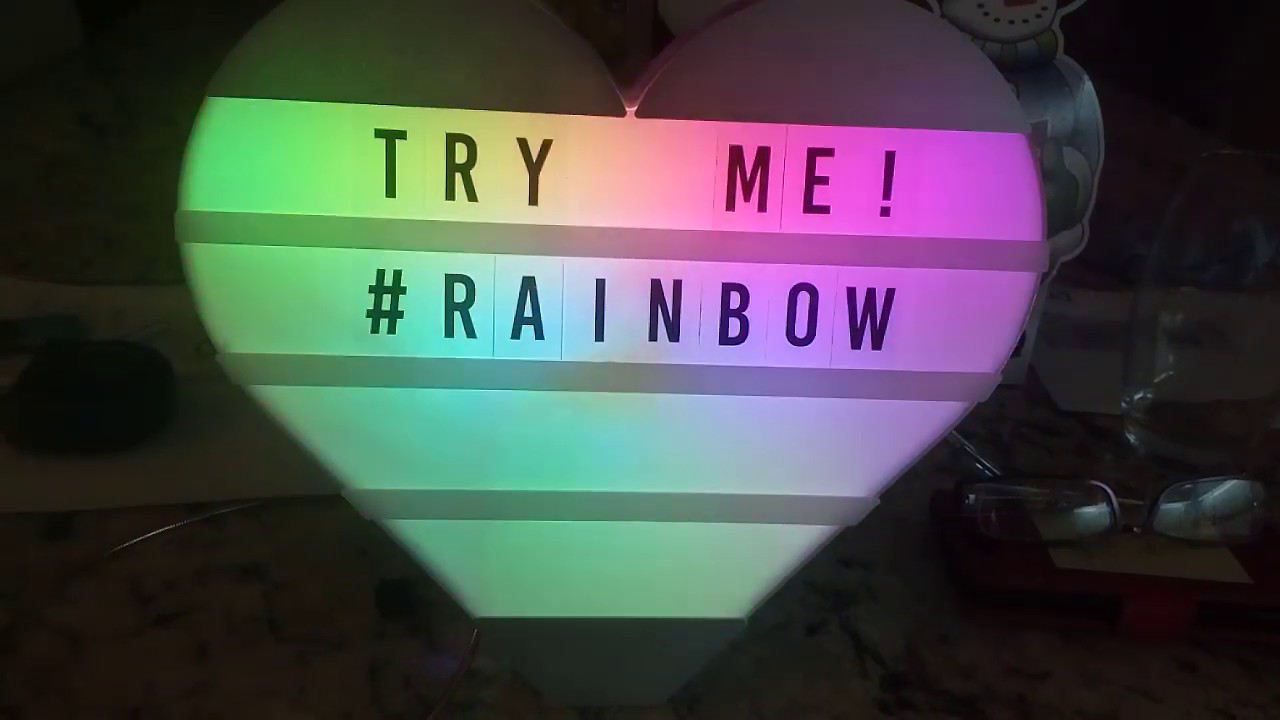
Been having trouble sleeping and this project has been on the back burner since I found the original white led message board while Christmas shopping in Dece...
I couldn't sleep so I did this all in less than 4 hours between 10:30pm and 2:15am UK time.
The motivation struck and I managed to just go for it.
marsh quest
@lapis patrol looks awesome - late night hacking is WHERE ITS AT 😃
lapis jasper
@lapis patrol play celeste if you can. it's supportive
 topaz flicker
A drone/quat-copter board I am working on. It will be using a NRF24l01 and a ItsyBitsy M0. I would love to program it in circuitpython. (Still is looking for libraries on the NRF24l01)
knotty thicket
@topaz flicker Noice!
topaz flicker
Yeah I'm only waiting for some parts I ordered before I do more work on it.
topaz flicker
Later I might post some circuit schematics on how I'm making it. (Currently building it of the top of my head, but most of it is an easy concept to put on paper)
knotty thicket
Cool. I hope to see the schems!
lapis patrol
Version 2, fixed code for smother rainbow scrolling.
PS this looks really good in person
lapis patrol
thanks
knotty thicket
No problem
lapis patrol
CFX?
knotty thicket
I meant CPX
lapis patrol
CPX?
knotty thicket
Circuit Playground Express
lapis patrol
Gemma M0 and a NeoPixel strip I cut in three.
knotty thicket
Oh nice
lapis patrol
Yellow and White wires are original and unused red black and blue are new, gemma is connected with nuts and bolts
knotty thicket
Sweet
lapis patrol
My plan is to power the Gemma from the original circuitry 2x3 AA battery holder, alternative power jack and on/off switch
I just need to locate a 2-pin JST connector. Or can I power a Gemma via 3v or Vout pads?
knotty thicket
I can look it up for ya.
knotty thicket
One of the mods might know and if by the very very very small chance they don't one of the admins can help for sure.
lapis patrol
I could just try it and see, either it will work, it won't work, or it will break.
lapis patrol
Thanks ❤
knotty thicket
No problem
topaz flicker
Could not completely get it finish, but here is most of the idea.
 glad solstice
MIDI foot controller in the works. Going to be programmable to the user. The final product will, of course, be a standalone ATMega circuit.
(Foot switches are installed, just have to finish deciding where the rest of the jacks are going, then gotta re-print the enclosure)
 hidden pine
Can I be on show and tell today?
lapis jasper
@hidden pine chat for it is in #live-broadcast-chat
running out of time for tonight but check out that chat channel next week for the link
hidden pine
Found the link, thanks!
craggy parrot
Work in Progress...Deer Deterrent DevIce - uses LoRa , on an m0 RFM9x and a Raspberry Pi with RFM9x Bonnet. Triggered by PIR or remotely from RPi or via AIO....
sinful trout
Completed!
knotty thicket
Awesome!
sinful trout
Thanks!
Took the PiGRRL 2, added the two joysticks, trigger button, stereo headphone jack that turns off the speaker, a real time clock, and a light pipe for the Powerboost 1000C. And the design on the case is 3D printed in two colors.
sinful trout
I've been toying with the design for a couple months. Once a new Makerspace opened right by me that had Ultimaker 3 3D printers I knew I had to make it. So I printed the case last weekend and assembled it all last night. Just got done with the software
I'm going to see if the Powerboost can handle the load. If not I'll figure out a way to boost the available current. There's still a little room in the case
If it does well, I'll put it all up on thingiverse
sinful trout
It was a lot of fun seeing it come together
knotty thicket
Yeah, I've been reverse engineering an old sound board and I've already got the components and stuff. So, I know what ya mean
torn viper

Playing with the hd44780-driver crate for @rustembedded with my @adafruit Metro M4
 Twitter
 unkempt olive
Woah - you're developing in rust on Metro?
unkempt olive
😮 - I'll have to look into that when I've finished playing with the pyportal
torn viper
GitHub
Target atsamd microcontrollers using rust. Contribute to atsamd-rs/atsamd development by creating an account on GitHub.
unkempt olive
it just seems like the natural language for microcontrollers
torn viper
@long bison is planning a pyportal board support crate
torn viper
haha don't we all
lusty siren
I could use another week or so of time every week, that's for sure.
topaz flicker
I got 2 of the Google AIY Voice kits for ~$15 each at target yesterday. The only thing I'm having trouble with is the mini hdmi of the raspberry pi zero.
 night wedge
@topaz flicker You'll need a couple of these then: https://www.adafruit.com/product/2819

What an adorable little pug! Sorry - plug! What an adorable mini HDMI to HDMI plug. We find this plug adapter really helpful. It's a great way to convert any mini HDMI ...
 leaden orbit
long time no see, but im still working on this custom keyboard project. finally got a layout on the PCB that allows me to attach it to the plate via screws 😅
and the pcb itself
i used a neat little trick that Blender has for instancing meshes to get the positioning of the screw holes perfect - radial symmetry really is amazing https://gfycat.com/PertinentSophisticatedCrossbill
 topaz flicker
@night wedge Thanks!
 placid moss
Using PyPortal to track my running goal for the year. Strava API through google apps script, then pulling json from my published Google Sheets.
 warm crescent
@placid moss looks great! And great idea, I think google apps script + published google sheets might be a cool way to keep trend data for any sort of activity API — like wiki edits or Robinhood stocks 😄
placid moss
@warm crescent Thanks! Yes, there are all kinds of possibilities for google apps script.
patent nimbus
I found this paper weight on the way home yesterday so challenged myself to a small one day build to make it light up 😃 what i dont show on the photo is theres a uv light as the jelly wish is glow in the dark 😃
long bison
we got Rust running on the PyPortal!
working on getting the ILI9341(?) display working now
solar yew
Two NXP 74HC595N shift registers driving 7 segment 4 digit LED display.
Arduino IDE program running on Trinket M0.
Firmware:
https://github.com/wa1tnr/tkm0_7seg-a Arduino IDE / Cpp
http://adafru.it/450 Shift register
http://adafru.it/865 7 Segment display
http://adafru.it/239 Breadboard
http://adafru.it/3500 Trinket M0
http://adafru.it/3258 Panel mount USB
http://adafru.it/753 0.1 uF disc ceramic
http://adafru.it/3366 Stacking headers
.. and several resistors. 470 ohms by the look of them (been a while).
bitter hazel

Ever since I “installed” my Raspberry Pi IR Blaster on the living room lamp, I have been getting a flood of praises from my wife about how well it goes with the decor and how she barely…
Has anyone here worked done any projects that have aws services integration? I begin to wonder why amazon is not as close to the maker community as google and even microsoft is
west dune
Finished my 30W bluethoot speaker.What do you think?

Instructables
DIY 30W Bluethoot Speaker: Ever wanted to listen to your favourite song,or just watch a youtube video but your speaker are not powerful enough?In this instructable I will show you how to build this 40W class D bluethoot speaker for under 70$!
solar yew
 solar yew
I'm working on a transcript (of what was typed into the Forth interpreter running on NTM4) but the main point of the video was to do a quick test of videography, and publication on YouTube.
To get this resolution (and duration) was a very long upload to YouTube's server farm.
openshot video was the software used, on Debian, to translate the camera's video to a more YouTube friendly format.
Videography platform is Mabef M/22 easel (holding NTM4) and a smaller (Creative Mark 'Van Gogh') easel, set in the drawer of the M/22 ;)
The two devices (smartphone/camera and NTM4) are about six to seven inches apart.
toxic stirrup
Decided to finally put my Adabox004 items to use in a music player/box using a Neotrellis keypad and a small OLED I had. Simple $2 box from the craft store. Plays both from the SD card and various streaming sites from the Internet.
 livid dirge
Making an air quality sensor from a few Adafruit parts. Intro to using Adafruit IO as well. 😃 https://www.jaredwolff.com/homemade-indoor-air-quality-sensor/

Jared Wolff
Learn how to monitor your air quality with some simple off the shelf components. Harness the power of Particle hardware and their cloud platform route the readings to places like Google Docs and Adafruit’s IoT service. (Adafruit.io)
bitter hazel
Anyone here tried using ROS (Robotics Operating System). AWS seems to be pushing it with its AWS Robomaker service

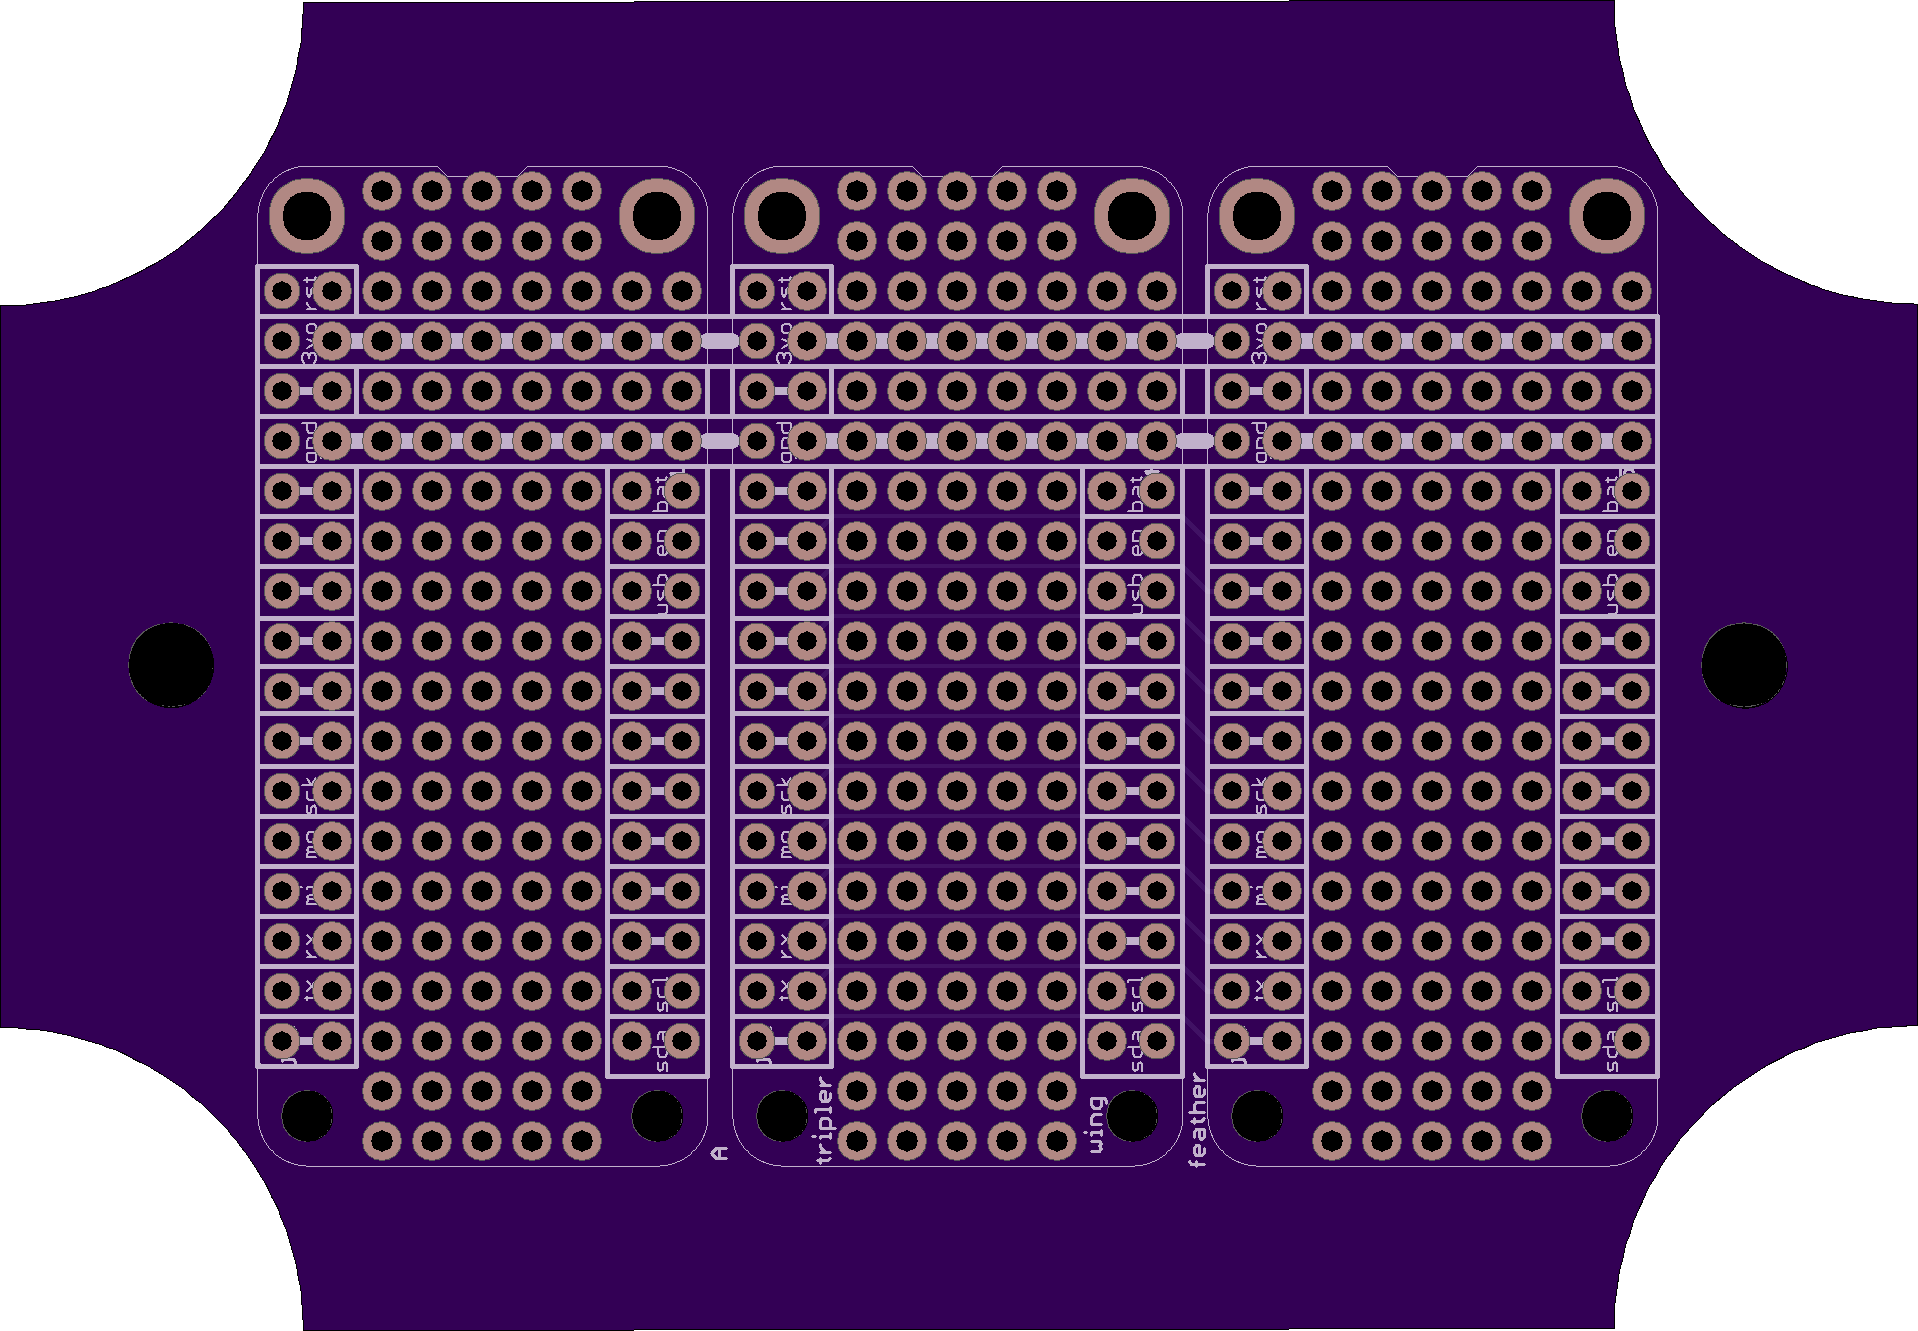
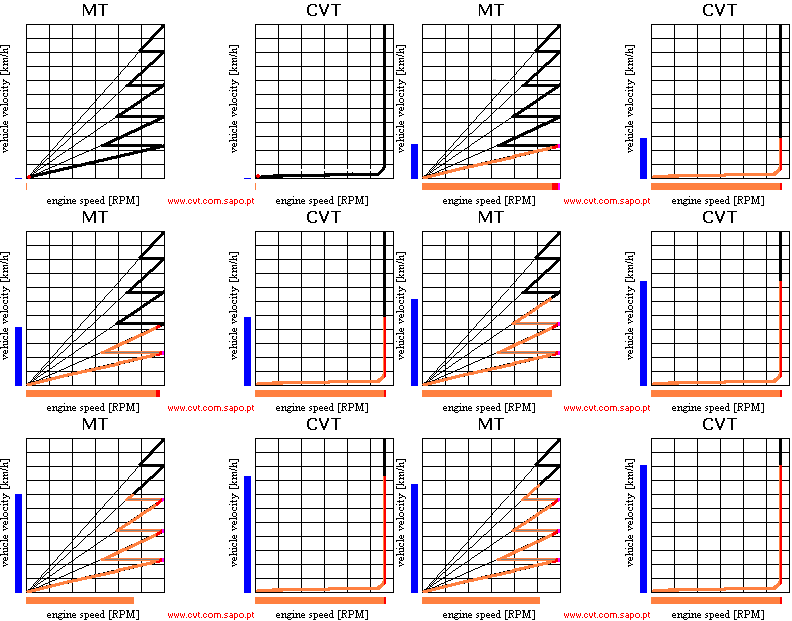


 leaden comet
Doing some in-car work on the feather wing gps module on the way home from pycon
rough dew
Finished the projects section of my website!
Portfolio | Timber Monson's Portfolio
A portfolio containing projects designed, created, and built by Timber Monson.
upbeat geyser
Those are some nice projects and writeups! Well done!
rough dew
@upbeat geyser thank you so much!
rough dew
Tried hand-sewing a cable channel for the sash!
I’m not too good, but I’m learning :)
bitter hazel
@rough dew awesome wearable build. What do you plan to do with it?
bitter hazel
I wonder if other IoT developers in this group feel the same way about Amazon's lack of focus with makers and hobbyists

I had the opportunity to talk to an Amazon IoT engineer about his views on how they can better support the makers, hackers and hobbyists in the IoT space. The IoT world is very young and brimming w…
upbeat geyser
I stopped doing business with amazon years ago, their corporate practices don't seem to be good for anybody but Jeff Bezos.
leaden orbit
using slots to create internal cutouts 😬