#help-with-3dprinting
1 messages · Page 45 of 1
 iron remnant
Like, there's only so many ways to build a simple switchy thingie that doesn't have too many performance requirements in terms of switching fast or handling super-high voltage.
 gloomy anchor
what do you guys think of a printer like this https://www.aliexpress.com/item/1005001412815588.html

aliexpress.com
Smarter Shopping, Better Living! Aliexpress.com
im mostly looking for something that can print things out relatively fast and require low maintenance. What kind of price range would you recommend?
 arctic dragon
Honestly, my impression on these things are basically gambling. If it works, it'll probably do just fine. If it breaks, good luck fixing it. Treat these guys as a consumable that will only last so long before the whole thing needs to be outright replaced.
Something in the 200-300 price range will at least be maintainable, though you may have to go higher if you want something reliable and easy to use straight out of the box.
If you're simply looking to print stuff without any of the technical tinkering efforts, Flashforge might be a good place to start?
gloomy anchor
ah that sounds right from the reviews ive seen. Would you say something like https://3dprintersonline.com.au/creality-ender3-s1-3d-printer/ is pretty fair?

3D Printers Online
Ender3 S1, High-quality printing with "Sprite" direct extruder, CR touch automatic leveling, and dual z-axis synchronization.
gloomy anchor
arctic dragon
If you're simply looking to print stuff without any of the technical tinkering e...
thanks i'll take a look at them
 vestal thicket
If you get an Ender, prepared to learn as much about its hardware as you will about 3d printing in general. 🙂
That was the advice i was given when I bought my Ender 3v2 6 months ago, and they were right.
arctic dragon
gloomy anchor
ah that sounds right from the reviews ive seen. Would you say something like htt...
Creality Ender3 is solid thanks to its community support, but it does take some assembly IIRC.
vestal thicket
Absolutely agree - you can find almost anything you need help wise
arctic dragon
Not the low-maintenance printer you'd expect to be perfect out of the box, but a fine machine.
gloomy anchor
hmm so what about flashforge's community? Is it as good as enders?
arctic dragon
Probably less so, but it's a closed unit so there are a lot less people looking to make modifications to their Flashforge printers compared to Creality. Different sort of mentality there.
gloomy anchor
since enders are pretty easy to get on amazon, i might just go for it. I want to learn more about 3d printers in general too. Though a lot of things can also be done with cnc for subtractive
gloomy anchor
arctic dragon
Probably less so, but it's a closed unit so there are a lot less people looking ...
ah i see
vestal thicket
gloomy anchor
since enders are pretty easy to get on amazon, i might just go for it. I want to...
If you do get an Ender, check ou the BV3D channel on YouTube, Bryan does a lot of Ender 3 videos, they're good
 quaint torrent
I currently have ender 3 I think it is good 3d printers for beginners it's cheap, easy to learn and modify. there are tons of mods out there for this printer and only thing that you need to worry about is hot end and when you assemble the printer make sure the frame is level
Thingiverse has lots of mod files to print only thing that you need slice it on Cura and print
iron remnant
This is the list that the 3D Printing discord uses as the default "What printer to buy?" question: https://docs.google.com/spreadsheets/d/1QjCOsMmEbKsQXktG-MrRGlfk_lk5pMwYuc7GaMYguNg/edit#gid=1788915849

Google Docs
How to use this spreadsheet
Welcome to the Spreadsheet of Budget 3D Printers
(wherein budget apparently means under 1000€)
This spreadsheet has been created to try and help beginners and advanced users alike to choose their first or next printer.
This spreadsheet consists of 6 main pages, liste...
I kinda suspect we're starting to see some Ender 3 alternative printers on the marketplace more recently.
The good thing about the Ender 3 is that there's a lot of community support, interesting mods, et al. The bad thing about the Ender 3 is that it kinda requires you that in order to be a useful printer.
There's also the Prusa printers which are more carefully oriented towards less messing around, at a much higher cost.
vestal thicket
@iron remnant May I ask which Discord server that is? I'd be interested in joining it, but a few different ones come up when I search
iron remnant
vestal thicket
<@!214758164099366912> May I ask which Discord server that is? I'd be intereste...
DM'd it to you given that I think invites are removed by the bot, LOL.
vestal thicket
👍
 spring herald
hi! so
3d printed hinges
how reliable are they
i'd like to model a box without having to like
use much glue or screws
im using a prusa i3mk3s for reference, so i think the printer can make them reliably?
 oak heart
Do you have a more specific question? I’ve had no trouble with moving print-in-place stuff myself.
spring herald
yeah that's fair, i guess im like
trying to figure out whether i should spend the time to sit and model them if they're gonna be brittle and break
I'd want to design something that can swing back to a certain point and then stop and support like, a 5" screen
but is that possible with PLA+, or am i better off looking into a different solution than print in place hinges
im mostly asking because a similar project uses a lot of separate pieces and i dont want to spend a lot of time and energy making this if it isn't feasible
oak heart
I’d recommend borrowing an existing hinge design if you can
I will say I’ve found PETG to be all but necessary for hinges that snap together as opposed to being print in place
(I’ve only tried PLA and PETG; can’t speak to other filaments)
spring herald
that's fair, i have a roll of PETG that i (think) is fine for printing
iron remnant
Hmmm.
So, getting the whole design together with print-in-place hinges can be a real pain.
You probably want to know about this: https://www.prusaprinters.org/prints/120766-print-in-place-geared-hinge
If you want to make a laptop-y thing, the swing-back-and-stop thing is a little tricky.
The part you are looking for is a friction hinge and I've not seen anybody as yet demonstrate a print-in-place friction hinge.
 carmine peak
every time I print something on my brand new PEI bed, permanent marks are left
should I worry about this?
i've tried using alcohol to get them off.
Also, using a spatula to remove the prints leaves scratches
 stoic echo
carmine peak
every time I print something on my brand new PEI bed, permanent marks are left
stoic echo
carmine peak
every time I print something on my brand new PEI bed, permanent marks are left
which bed did you get?
stoic echo
carmine peak
Also, using a spatula to remove the prints leaves scratches
this is normal, and you shouldn't use a spatula or anything metal on that bed, if you are having trouble getting the print to detach, and you have a magnetic bed, you can remove the PEI surface and bend it slightly to make the print pop off
I use this one, and it's fantastic:
https://smile.amazon.com/gp/product/B08PFHBR2D

HICTOP Flexible Steel Platform with PEI Surface and Magnetic Bottom Sheet with Adhesive 235x235mm for Ender-3 Pro, Ender-3 V2,Ender-3 3D Printers
carmine peak
stoic echo
this is normal, and you shouldn't use a spatula or anything metal on that bed, i...
Alright. How do I damage control?
I got the Creality magnetic PEI bed
its basically a cheaper quality version of yours. Spring steel.
carmine peak
well by cheap i mean quality
stoic echo
"supply chain problems" and "material shortages"
as if they actually stopped the mines in China 😄
carmine peak
the creality one is like 40$. I guess im paying for the convenience of them being readily availiable in a store
stoic echo
wow
OK, so best way to clean a PEI bed is with warm water and soap, and then you can blow-dry it gently.
obviously don't use anything that will snag on the bed, like cloth or paper, I usually just wash my hands with soap and then rub some alcohol on them to get rid of as much oils as possible, then I scrub Dawn and water with my fingertips on the PEI surface.
carmine peak
dang, my plan was to use a washcloth
stoic echo
it'll snag on the PEI surface... it's basically heavy grit sandpaper 😄
spring herald
PEI is kinda
well you wanna wash it every time you touch it to be honest
ur biggest enemy is grease
acetone might be good but if you use it too much it'll ruin the sheet
i've heard the best way to clean it is like
lots of dish soap, and hot water
dunk no scrub
stoic echo
Thanks for Bee-splaining what I just said. 😄 You can safely rub it with your fingers, though... just don't use like something with bristles or whatever.
oak heart
The bottom part of this vase mode print is sagging significantly - about a finger’s width. Does that seem like a part cooling issue?
 carmine peak
what's a good 5015 part cooling duct that won't break while I remove support material from it?
its getting ridiculous
spring herald
hey
so

how bad of an idea is this
i can print this in a lab where it should, ideally, not be touched or interfered with
and im using a Prusa i3mk3s
stoic echo
spring herald
how bad of an idea is this
Personally... I would not dare do that. It's a time-consuming print, and there are so many factors that can affect how the scaffolding behaves... any gusts of air or changes in temperature can make spaghetti out of that in no time at all.
I would look into splitting it up and using joiners to make pretty seamless joints between the parts
for instance, with OpenSCAD, you could use https://github.com/revarbat/BOSL/wiki/joiners.scad
I am not sure what you have at your disposal in your CAD app of choice.
spring herald
im working in fusion 360 for this
stoic echo
Not sure what Fusion has available. Maybe someone else knows.
spring herald
see i did make the model with splitting it in mind for the most part, but then someone in the lab suggested i just alter the print rotation and see what happens
stoic echo
but, yeah, that part is taking up pretty much the entire build plate, and unless it's 100% level, it's going to be gnarly trying to get it to print right
it would require constant attention and manual adjustments to nozzle offset and whatever
See what happens... "Just print this 3 day part and see what happens!"
spring herald
well we have 3 decent printers in the lab, i guess it's not a huge concern and they probably wanna use it as a stress test, knowing them
stoic echo
and supports are weebly-woobly as it is, and to make them that tall... hic sunt dracones
I mean, if you don't have to pay for material or really care, go for it. I would not try it myself, with my own printer.
spring herald
yeah that's fair, honestly just not having to glue it together is the most tempting part of all of this
stoic echo
To me, that takes a back seat to how long it takes to print, because reprinting is a sad affair and it always makes me annoyed.
so, the joiners that BOSL have available do not even have to be glued, they snap together
you can also elect to have screw holes to literally screw the parts together
spring herald
see this is the kind of thing i'd like to carry around as a unit and im a little worried about joiners just, snapping on me one day or something
stoic echo
aaah
spring herald
screws would be nice but i dont have any taps so it becomes an issue of like... hving to track down some self tapping screws
stoic echo
BOSL has screw modules that will create the thread for you
stoic echo
I have had great success with PLA on an Ender 3 V2 down to M2.5
obviously not an option for you now, but I would recommend taking a look at OpenSCAD and the BOSL library (and others). They are amazingly easy to use when creating enclosures for 3D printing.
there's super easy ways to split parts up and add joiners and whatever as well
and the programmatic nature of OpenSCAD enables you to add a boolean to the customizer to select if you want the part split or not
spring herald
ooh actually
you mentioned enclosures
might be worth seeing if i can just. put a box over the printer
the windows are supposed to stay closed at all times buuut... just in case
carmine peak
I washed the everloving heck out of my PEI bed and there's still tiny bits of plastic that won't come off
Am i printing too close to the bed?
The first two layers are always transparent for me
vestal thicket
Yes
I highly recommend going through this: https://teachingtechyt.github.io/calibration.html
This page at the bottom has some great pictures of good and bad first layers: https://teachingtechyt.github.io/calibration.html#firstlayer
spring herald
hey does anyone know what would slicer settings would cause a printer to not push out the filament at the right rate?
whenever i slice in Cura i get a pretty perfect slice, but i know someone else who sliced in the Prusa slicer and had an issue where the filament just, wasnt coming out of the hotend properly
tested it on the day of too and it was definitely a slicer issue
 empty sedge
Filament diameter? Flow rate?
oak heart
empty sedge
Filament diameter? Flow rate?
@spring herald I think this one’s for you
spring herald
oop I have no idea, can’t check right now sorry !
 undone raft
Hi everyone! So this isn't 3D printing but it's somewhat related imo haha. I got access to the laser cutter at my school and I'm going to design a new chassis for a robot I'm working on so that I don't need to use ducttape to hold to imu, rpi, etc in place haha. I'll leave a picture of what it looks like right now. First question: should I make a completely new chassis or build something to put on the existing one? And second question: laser cutting (never worked with it before) cuts (well technically 3D objects) but like I can't really cut something like I would print something with a printer you know? So does anyone have some tips for how to build a chassis with a laser cutter then? How do I hold the "walls" on the "floor" or how do I make something to make wires go through or to screw my rpi in. But mainly the walls and floor thing, not sure what to call it but like how would I use these 2D (not really but hey) parts to make a 3D robot? Thank you so much in advance! I need to catch a deadline and could use any help haha, I'm going to sleep now though so that's why I may not respond, any resources or tips are welcome :)

 thin breach
undone raft
Hi everyone! So this isn't 3D printing but it's somewhat related imo haha. I got...
thin breach
undone raft
Hi everyone! So this isn't 3D printing but it's somewhat related imo haha. I got...
Design a totally new chassis. Wires go through: round holes. Screw in: round holes, tight fit. Search Amazon for little robot designs; they all look laser cut. You usually don’t need walls. Use standoffs to get vertical separation/support if needed.
 sacred hamlet
if you have access to a press break you can bend walls after you laser cut the chassis pattern
arctic dragon
If not, you could also 3d print some right-angle brackets and secure with screws?
 muted cloak
anyone know anything about usb-c otg adapters? got one to try setting up octo4a with a cheap tablet, but charging doesn't work with the tablet. If I connect to my phone instead, charging works, data appears to work. With tablet, charging doesn't, and data only works if charging cable is disconnected.
Tablet may not be capable of running a print anyway, so don't want to keep buying adapters hoping to find one that works.
undone raft
thin breach
Design a totally new chassis. Wires go through: round holes. Screw in: round hol...
Yeah, a completely new chassis seems to be easier for the wires and rpi than adding one to the existing haha. Searching Amazon is a great idea! I may get some inspiration from it haha I didnt even think of not using walls, thanks for the advice :)
 raven coral
What are the most common things that are broken which cause my 3d printer tool heating element not to work
Because due to static electricity I might have fried something
Can the heating element itself die from static electricity
raven coral
Oh god i somehow fixed it by unplugging and plugging back in the heating element
oak heart
When I hit enter, I'd expect it to delete the selected vertices, but instead, it hangs for a bit with the menu open, then the menu closes and the selected vertices are still there but deselected now. I'm getting this behavior with both Blender 3.1.0 and 2.93.8 on Windows 10, so I suspect I'm doing something wrong but I have no idea what. Any suggestions?

 haughty thistle
does anyone know if the Semitec 104NT thermistor (e3d thermistor https://e3d-online.com/products/thermistor-cartridge) can work with the bigtreetech octopus pro
oak heart
I figured it out - because it's a 3D scan, vertices are sub-pixel, and I didn't have x-ray enabled, it was only deleting vertices at the density of my monitor pixels. Turning on xray fixes this.
 winged helm
I'm using my friends 3d printer for something. I think it's an ender pro 3? I'm making a piece that is rectangular. How much, if at all, should I fillet the corners?
And edges
stoic echo
winged helm
And edges
Rounded edges on the X/Y planes can be problematic with adhesion... the corners (Z) you can fillet how ever much you want. Does that make sense? And I hope I used the correct planes, haha!
winged helm
Hmm, my buddy with the printer actually recommended filleting the bottom edges.
stoic echo
Sometimes you can use it to avoid "elephant's foot" issues, but it can also lead to some issues with the edges curving upwards and pressing into the nozzle as it prints, and if you're not careful with how your piece is sliced and it has a lot of crossing printed parts, you can knock the piece off of the plate.
winged helm
hmmm ok, well he's doing the slicing and knows a good bit more than me.
One day I'll own a 3d printer
stoic echo
hey, if he's got it dialed in, go with his advice
I generally run into issues if I have chamfered or filleted edges on the bottom X/Y edges unless I run the plate really hot to make sure that the edges don't curve upwards as they cool
winged helm
If I didn't need to spend the money on a new laptop, I'd be considering a Prusa right now
winged helm
Hmm I've read that Prusa is what you want if you want minimal fiddling
Which is what I want, badly
stoic echo
I didn't need to fiddle with my Ender 3 V2, and it has a larger print surface, and below $300. A Prusa is $349 for the kit, which has a wait-time of something like 12-16 weeks, or about a month for the semi-assembled for $399.
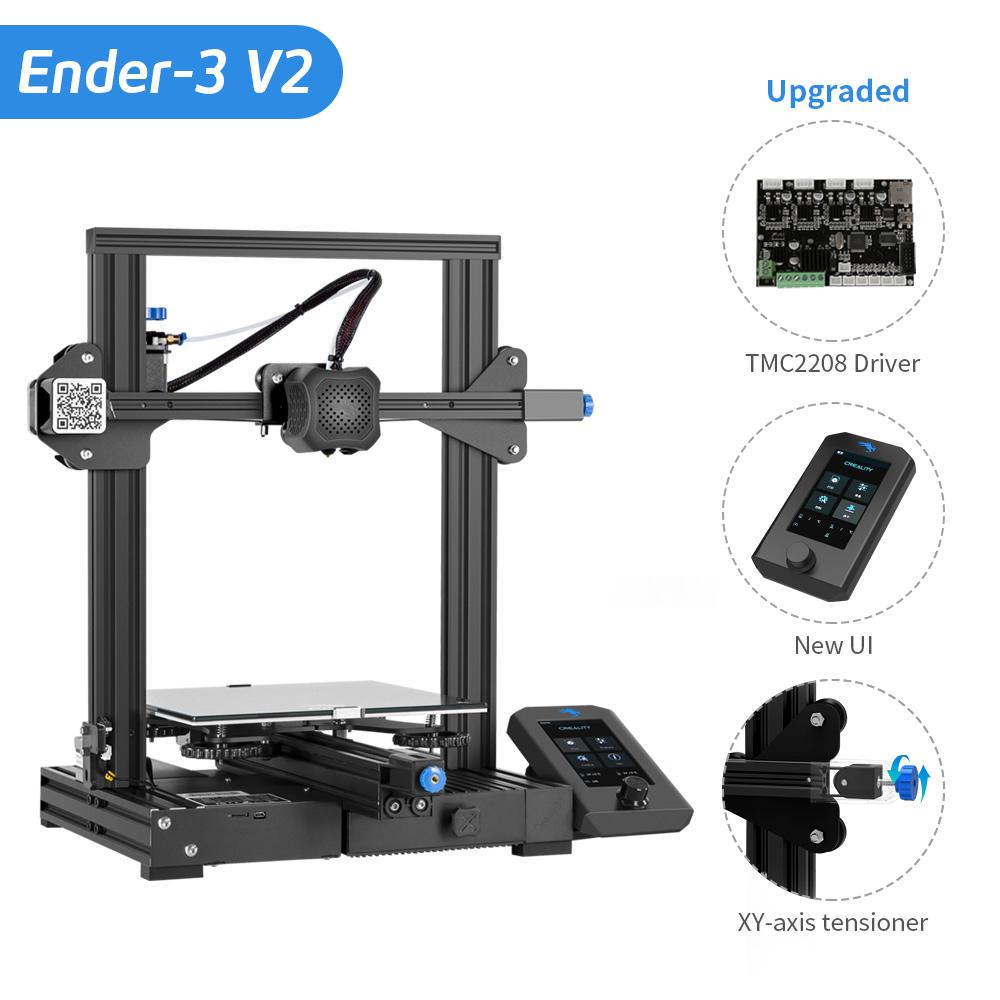
Buy Creality 3D Printer Online. Creality Ender-3 V2 is great at your Best budget 3D printer. The main selling point of Ender 3 series 3D printers is stable printing and affordable price. Apply "CR200PRM" and Get an extra $10 off
winged helm
Hmm OK, I haven't looked super deeply into it. I'll get more into when I go to buy
stoic echo
$262
winged helm
I really want one for my job
This would be about the 1000th tool that I will be bringing with me whenever I leave lol
stoic echo
You've been listening to fanboys, most likely. Prusa fans can be a bit... zealous.
winged helm
Could be
stoic echo
My stepson has several Prusa printers, and they are great, for sure. My Ender 3 V2 produces Benchys that are almost identical to what his Prusas do. There are a few minor things to tweak with the Ender 3 V2 when it comes to bridging, but once configured, it's dead-on.
FWIW I use Prusa Slicer with my Ender.
winged helm
Hmm, yeah aren't there a lot of upgrades available for the Ender?
stoic echo
Yeah, a bunch. It's very easy to upgrade. Best upgrades are BLTouch sensor and filament sensor.
winged helm
Hmm, yeah I guess what I read was that once you upgrade it to the "level" of a Prusa, you've spent the difference in cost essentially
stoic echo
Then you just 3D print a little T-slot case for a Pi and mount it to the side of the printer
nah, not really
stoic echo
winged helm
Hmm, yeah I guess what I read was that once you upgrade it to the "level" of a P...
the Prusa doesn't come with BLTouch or filament run-out sensors either, so they're on equal footing there
And either way, you'd use Octoprint.
So that argument doesn't hold water either.
The BLTouch kit is $41.99 on Amazon, totally worth it. You can definitely print without it, but it's great to have when you are running prints back to back because the mesh leveling is clutch.

Creality BLTouch V3.1 Auto Bed Leveling Sensor Kit for Creality Ender 3 V2/Ender 3/Ender 3 Pro/Ender 3 Max/Ender 5/Pro with 32 Bit V4.2.2/V4.2.7 Mainboard 3D Printer
that's the kit you'd want
then the filament runout sensor will set you back $18 https://smile.amazon.com/BIGTREETECH-Printer-Filament-Detection-Detector/dp/B07Z97582P

BIGTREETECH 3D Printer Part Smart Filament Sensor Break Detection Module 1.75mm Filament Detector Sensor for SKR Mini E3 Octopus V1.1 3D Printer Control Board
And you don't HAVE to have OctoPrint on a dedicated Pi connected to the printer. You could run it locally off of a laptop and only start it and plug it up as you wanted to print. If you didn't have a spare Pi 3/4 about.
stoic echo
I think OctoPrint would run on a Zero W or a Zero 2 W.
But, the issue is mainly CPU related, you have to make sure the Pi is fast enough to send the instructions to the printer.
Please note that the Raspberry Pi Zero and Zero W are not recommended explicitly since severe performance issues were observed, caused by the WiFi interface when bandwidth is utilized (e.g. the webcam is streamed), negatively impacting printing quality. See also here. The Zero 2 however is recommended.
Recommended hardware: Raspberry Pi 3B, 3B+, 4B or Zero 2.
you could use a Zero W as long as you don't have a webcam that's streaming from the same device
for instance
Or, you can run OctoPrint on some other computer, doesn't have to be a Pi. OctoPi is just super-easy to maintain and run.
arctic dragon
winged helm
hmmm what kind of pi?
https://depau.github.io/3dprint-wiki/wiki/hardware/octoprint-devices/
You could set up a rock pi or orange pi, just a couple of extra steps it seems.
stoic echo
winged helm
Is octoprint related to octopart?
not that I know of... Octopart is an NYC company, and OctoPrint is written and maintained by Gina Häußge, who lives in Germany.
winged helm
Neat thx
 glass relic
I run octoprint in docker so that the pi can do other stuff too
winged helm
How feasible is it to seal a 3D printed object to make it more water resistant?
like a part with a cavity that you don't want water getting into
 willow sedge
winged helm
How feasible is it to seal a 3D printed object to make it more water resistant?
willow sedge
winged helm
How feasible is it to seal a 3D printed object to make it more water resistant?
I'm fairly sure it's feasible. Noe and Pedro have done it, but they might have used Ninjaflex to create a seal, which is possibly outside what you're set up to do. Hot glue can be used to seal things, though. If you 3D print it to screw the cover into the base, you can put some kind of seal around the opening, and use the screws to create pressure on the seal as well.
Hot glue could even be a seal if applied properly, I believe.
arctic dragon
winged helm
How feasible is it to seal a 3D printed object to make it more water resistant?
You could use a spray sealant like flex seal, if you don't need to fit tight tolerances?
I remember seeing a vase with clear flex seal on reddit somewhere....
Epoxy resin would be Ideal, I believe, but not super easy to work with. Acrylic conformal coating would work, too, but I think flex seal is more cost effective?
winged helm
arctic dragon
You could use a spray sealant like flex seal, if you don't need to fit tight tol...
The portions that would be sealed wouldn't really. Do you mean because the sealant would add to the dimensions?
arctic dragon
It might add some unknown thickness, yes.
winged helm
Ah ok, that's fine on the outside
iron remnant
Here's two Prusa articles:
https://blog.prusaprinters.org/watertight-3d-printing-pt1-vases-cups-and-other-open-models_48949/
https://blog.prusaprinters.org/watertight-3d-printing-part-2_53638/

Prusa Printers
Have you ever tried printing vases, bowls, cups and other waterproof models? If so, what type of filament did you use, what settings did you…

Prusa Printers
In the first part of the watertightness series, we’ve shown you how to print waterproof vases, bowls, flowerpots, cups, etc. Today, we will go one…
winged helm
Thanks folks!
muted cloak
arctic dragon
https://depau.github.io/3dprint-wiki/wiki/hardware/octoprint-devices/
You could...
Is Orange pi still available? the buy links all seem to have expired
muted cloak
maybe they've moved to newer models? orange Pi LTS seems to have valid buy pages, don't know the difference
arctic dragon
Me neither. I only heard they work, never tried myself.
Yeesh, some of these prices on Amazon. Might as well get a win10 mini PC at that point...
muted cloak
looks like LTS has less gpio, If things are equivalent, orange pi Zero2 might be the way to go, since RPI zero2 works.
so I googled orange pi zero 2 octoprint, reading up on it now
I've already had a microSD decide it wasn't formatted in under a month of having an ender, and not even powering it on most of those days, so that's probably one of the top reasons to try getting octoprint going.
through amazon, still comes to $64 and delivers march 31-april 7. through aliexpress, $30 april 25
 broken orbit
Is there a good 3D printing network that the average person can volunteer their printer on to print custom models for money??
winged helm
Huh, that's not something I'd ever considered might exist. Neat!
broken orbit
Like MakeXYZ or something, but that's not available for the average person...
iron remnant
I've used treatstock before I had a printer.
I'm not sure how lucrative it is, actually.
muted cloak
likely between shipping, processing fees, probably eats up a lot of potential profit, then the time you spend, and materials, power, ends up being real hard to be worthwhile.
Someone with a large number of printers with a standard setup where power is cheap can spend the same labor hours printing many times the quantity.
stoic echo
winged helm
like a part with a cavity that you don't want water getting into
if you don't care about taking out what was put into the cavity... fill it with epoxy. 😄
Browse our wide selection of waterproof and weatherproof enclosures built to protect electronic and electrical components in any environment. Purchase durable waterproof NEMA rated enclosures and weatherproof electrical boxes from Polycase!

this for instance is $11 and it's IP68 and NEMA 13
wireless will be harder with that one, though
winged helm
stoic echo
if you don't care about taking out what was put into the cavity... fill it with ...
Haha not an option unfortunately
stoic echo
there's a few cheaper alternatives from Polycase that's still waterproof, and not alu but plastic
winged helm
I think the fact that I can get a decent sized O-ring on a 3-d printed design is more attractive. I can also do custom mounts for the things that go inside
stoic echo
Not to rain on your parade, but Polycase enclosures usually come with mounting bosses or similar inside, I 3D-print my mounting solution for those, then just screw it and the project into the box.
Are you building something that's going to be 100% submerged for longer periods of time?
winged helm
I'm familiar with them, but the O-ring thing is still attractive to me. And I'd end up lasering/printing something to match the polycase insides anyways. I won't dismiss it out of hand, I just don't think it'll work out for me precisely.
No, just needs to survive being underneath an awning that will get rained on.
stoic echo
oh snap, you'll be good with 3D printing then
when you said waterproof I was like... "so IP68"
what are you putting in the enclosure?
stoic echo
Oh. Then you should be able to 3D print something for sure.
stoic echo
also, check out this silo from Ruiz Brothers:
https://learn.adafruit.com/air-quality-sensor-silo-house

Adafruit Learning System
3D print an enclosure for your air quality sensor project.
you could adapt it and use some translucent materials
winged helm
I like that! But it's not quite what I need.
winged helm
Anyone have experience mounting printed things onto wood using tabs and wood screws? Anything I should be aware of?
iron remnant
I wood not think it would present much of a problem.
iron remnant
I mean, it depends on how creative you want to be.
You can always make a french-cleat or dovetail thing that just holds the screw tab to the wood and then clip the rest of the piece into that.
winged helm
Nothing wacky
I was thinking of something similar, except I need force holding the plastic against the wood
iron remnant
Yeah, I was goofing with that exact problem but just haven't been adequately motivated to play with it as yet.
For some reason my ESP32 HUZZAH board suddenly drew too much power.
winged helm
Hmmm, I'm happy to do my design and let you know how it works
 shy kelp
So I bought this
https://www.amazon.it/gp/aw/d/B07WSBW18M?psc=1&ref=ppx_pop_mob_b_asin_title
Because it was cheaper than getting a thermoster locally
But I have no idea what thermoster does it use, checking the resistance at Ambient temperature it says 128.5 ohm
On marlin for custom values I do see this, but I don't know how to turn it around
Is the 25C a costant or does it vary? Ence I do need another sensor to get the first sensor value


LZDseller01 - Kit di punte per stampante 3D Hexagon Universal Hotend da 0,4 mm per stampante 3D Robo R1
broken orbit
iron remnant
I've used treatstock before I had a printer.
Cool
 unkempt lake
shy kelp
So I bought this
https://www.amazon.it/gp/aw/d/B07WSBW18M?psc=1&ref=ppx_pop_mob_...
unkempt lake
shy kelp
So I bought this
https://www.amazon.it/gp/aw/d/B07WSBW18M?psc=1&ref=ppx_pop_mob_...
I am not sure, but this looks like an Ender 3 hotend clone. Perhaps it uses the thermistor standard to that hotend?
<looking to see what that might be...>
@shy kelp Here is something I found on the stock Robo R1+ hotend:
The R1+ comes with a hexagon hotend. This is a hotend for 1.75mm filaments. Compatible nozzles must have a M6 thread (1mm thread pitch) which are the most common online. The top collar/groove that holds the hotend to the X carriage in a Robo R1 is 4.2mm and is hold by a "Quick Release" bracket.
I got this replacement set in amazon.
Thermistor is EPCOS 100k ohms, 4.7k pullup. You may use others but must be configured on the firmware.
The rest is found on this page: https://github.com/ctkjose/robobo3dr1plus/blob/master/readme.md
Maybe you can find something else?

GitHub
All things Robo3D R1 PLUS. Contribute to ctkjose/robobo3dr1plus development by creating an account on GitHub.
shy kelp
Thanks man
unkempt lake
I got some sensors that Klipper calls a "generic 3950". the thermistor is attached to 1m of wires.
I got another set of thermistors from another vendor a few months ago, and each was split with inline jst quick-release connectors. I like this method as it makes changing them simpler.
I split the new ones and crimped on a set of connectors for each, so they are all quick-change now.
Does this affect the resistance? I would think if it did it would be small. I only have an Ender 3v2, not a high end printer, so will this make a significant difference?
PID tuning seems good so far.
no problem @shy kelp
I guess that's an r1+. so maybe not the same. i didn't see much for the r1 out there
 sullen zinc
oof, my mk3s is not happy. I just changed out the nozzle (2nd time ever) and I'm trying to run first layer calibration. during mesh bed leveling, it reaches the 3rd point (front on my right) and announces "Some problem encountered, Z-leveling enforced" on the LCD. octoprint sees "Recv: Bed leveling failed. Sensor didn't trigger. Debris on nozzle? Waiting for reset."
it's not hitting the bed, but it's consistently in that particular spot. the sensor always works fine at the first 2 positions.
steel sheet is in place. if I remove that, it fails at the 2nd position instead of the 3rd (front center)
sullen zinc
trying "manual z calibration" and it seems to have fixed it. I guess I wrenched ahem something out of alignment when changing the nozzle, that the automatic calibration couldn't fix.
"manual z calibration" just seemed to move the Z axes to their top of travel a little more vigorously and then do the magnetic sensor calibration a bit more forgivingly
🤷
if it's fixed I'm happy
empty sedge
sullen zinc
"manual z calibration" just seemed to move the Z axes to their top of travel a l...
Yeah, it aborted the z probe because it measured the movement parallel to the bed as being off in z by more than about 2mm across the length or width. Crashing into the top is how it gets the x axis close-enough-to-aligned with the bed
muted cloak
Trying to figure out how I would print something like https://www.thingiverse.com/thing:4687847 without a massive amount of supports. Not seeing any info in the comments, or in the comments on the one it's remixed from to indicate how. Someone mentions printing it with less supports, but doesn't explain.
Bed only supports don't look sufficient, everywhere makes it fill with a solid block of support, tree somehow uses even more support material.
I've tried in cura and prusa, and just not seeing a setting to reduce the support in a reasonable way
muted cloak
currently trying to learn custom supports in cura, but since the print is so big it has to be placed diagonally, scale and move tools aren't oriented conveniently.
raven coral
ive got a question, what 3d printer plastic brands are reliable?
because im looking for some petg and tpu plastic rolls and im not sure about which ones i should choose
iron remnant
The last time it came up, Atomic Flaments was mentioned and so I got some and have had good results with those, plus they've got some amazing PETG formulations.
The only TPU I've used so far is the Matter Hackers BUILD series and it's been fine. I've gotten a buncha filaments from Matter Hackers because it's not Amazon and it's relatively close so it arrives fast.
TPU in the 90A-98A hardness range is relatively easy to get going on, whereas the super-flexy Ninjaflex is going to be more work to get all dialed in. Matter Hackers BUILD is in that range. I've got a roll of the 85A Ninjaflex that I haven't tried yet.
muted cloak
I got my pla from matter hackers, One of the colors is translucent, and I've seen posts saying they can vary from one order to the next. Seems to be good printing quality, maybe some spiderweby stringing, and I couldn't get a temperature tower to fail going up to 260 so gave up on fine tuning.
arctic dragon
I've tried a couple of PLA rolls, and so far the most consistent has been from MatterHackers? Some of the cheaper stuff like Geeetech translucent seem to need some dehydrating prior to use, though, so I'll be on the lookout for a hot summer day to bake my filament if I don't get a dehydrator anytime soon...
For the "drying filament in the hot car" option, do I just need an airtight container and dessicant? If so, is there a recommended amount of dessicant or any setups that work better than others?
shy kelp
What's called on marlin that travel optimization that makes it travel something like the first squarebox and not like the second?
 empty sedge
shy kelp
What's called on marlin that travel optimization that makes it travel something ...
empty sedge
shy kelp
What's called on marlin that travel optimization that makes it travel something ...
Avoid crossing perimeters? Also would be a slicer option not marlin
shy kelp
empty sedge
Avoid crossing perimeters? Also would be a slicer option not marlin
No, but In the end I've solved, though I can't quite remember again it's name 😅
arctic dragon
shy kelp
No, but In the end I've solved, though I can't quite remember again it's name 😅
Hilbert space-filling curve, I believe?
shy kelp
arctic dragon
Hilbert space-filling curve, I believe?
Yes
carmine peak
I'm on an Ender 3 Pro with an Skr Mini E3 V1.2 running TH3D firmware
At the very end of a print that was very tall, it stopped printing midair and started emitting a loud beeping noise. I turned it off and when i turned it back on, the LCD had only a solid blue screen. I turned on my pi to check octoprint and it couldn't connect
I reflashed the firmware, and it still does the blue screen
It's been like that for half an hour now
carmine peak
the heck do i do?
oak heart
How did you flash the firmware? Put it on the MicroSD card? If it’s that dead how do you know it performed the flash if it didn’t display a boot screen? Have you modified the wiring at all, like by adding a bed or filament sensor?
@carmine peak
carmine peak
oak heart
How did you flash the firmware? Put it on the MicroSD card? If it’s that dead ho...
I added and later removed a BLTouch a long time ago
raven coral
is there a way to show the differences between two print settings on superslicer?
because one seems to show me 8h print time and another one shows 4h
oh wait the width is different
0.4mm vs 0.2mm
shy kelp
carmine peak
At the very end of a print that was very tall, it stopped printing midair and st...
the beeping noise and shutting off could be a lot of things... from a temperature sensor not working, heater not working, it's a mystery... The printer does this out of a safety precaution. -- turning off is better than not knowing what temperature something is and starting a fire.
i'm guessing you weren't able to catch the error message on either the printer or the octoprint
oh. i just noticed i'm responding something from 5 days ago.
rip.
 cosmic star
Is there a recommended modeller software for complete 3-D printer noobs to use on Linux?
Also, does the concept of "parts" exist that I can just add to a model? Like, can I just say "add snap-fits at this point to hold down a PCB of dimensions X by Y"? Or do I have to draw all that manually?
empty sedge
@cosmic star openscad is pretty approachable, so is tinkercad. Maybe solidworks or inventor would have a library of features that would include sprung latches like you describe but I expect most people just model them themselves
You can also try freecad. All of the applications I mentioned have different workflows and ways of working that might make them more or less suitable to the ways you think or the parts you have in mind
(blender is an art tool but is also useful for manipulating 3d models)
arctic dragon
cosmic star
Is there a recommended modeller software for complete 3-D printer noobs to use o...
https://itsfoss.com/cad-software-linux/ lists some good options to start with. From those, I can personally recommend FreeCAD and OpenSCAD as two options I've actually played with a bit. I don't think TinkerCAD is available on Linux...

Let's have a look at some open source and non-open source CAD software available for Linux, their features and installation instructions.
empty sedge
you use tinkercad in the browser
arctic dragon
...duh. How did I forget that...
 strange ledge
"Top 7"... ?
Is that an example of RNG, or are there only 7 options?!? 🤣
arctic dragon
Linux systems are fairly limited in terms of available software, but I’m sure there’s more than that. That “top 7” list has a couple of additional honorable mentions…
carmine peak
shy kelp
oh. i just noticed i'm responding something from 5 days ago.
No. Couldnt see the error
strange ledge
arctic dragon
Linux systems are fairly limited in terms of available software, but I’m sure th...
Personally, I think it's more the case that quality options are limited...
I'd never opt to use something created by an opinionated neckbeard who thinks he knows everything and doesn't grok "meritocracy".
raven coral
okay so i have two pca9685 pcbs and they both have normal pin holes and pin headers for the stuff like vcc, sda and scl and i see that theres direct contact between them with a multimeter
so can i like just daisychain them like that simply?
arctic dragon
raven coral
okay so i have two pca9685 pcbs and they both have normal pin holes and pin head...
Yes, so long as you make sure to give each board a unique address for your software to differentiate them.
raven coral
alright
winged helm
Anyone have an opinion on the new AnkerMake printers?
iron remnant
🤷 A company the size of Anker or Creality shouldn't need to do crowdfunding for their printer and if they are promising all sorts of things but disclosed that the software is only 2% done, I've got a lot of sympathy for their software team.
winged helm
Reasonable
iron remnant
I mean, the 3D printers discord server has a repeat bot that reminds people to not buy 3D printers off of kickstarter because the record is so bad.
winged helm
I'm shopping for one for my work to buy. I don't think I can really come close to justifying an industrial grade one, so I'm leaning towards Prusa. The claimed 250mm/s print speed of the Anker is impressive, and I like their chargers a LOT, but these are different techs
iron remnant
Yeah, there's a giant blob of chaos that comes when someone who gets the electronic and low-level controller side of things tries to interact with software folks....
...I lived that for a bit and it sucked.
empty sedge
Get a prusa. The reliability is worth it
winged helm
Yeah of the kinds we can afford, I think they are the best option
broken orbit
iron remnant
Yeah, there's a giant blob of chaos that comes when someone who gets the electro...
 cosmic star
Is tinkercad.com supposed to duplicate the object when you click and drag?
Or, wait, is that just this stupid learning thing not acting like the real app?
strange ledge
winged helm
Anyone have an opinion on the new AnkerMake printers?
Much rather build my own, just for the experience.
winged helm
I can see the appeal
strange ledge
As a technician/builder, yeah. 😁
winged helm
I have to find something that minimizes setup time and debugging
arctic dragon
winged helm
I'm shopping for one for my work to buy. I don't think I can really come close t...
Creality claimed 250mm/s as well, but the stock settings aren't equipped for that. Unless people are already running at those speeds, take em with a grain of salt.
muted cloak
On anker and kickstarter, it's more in the line of marketing for them. They get preorders made, and get a bunch of hype, and when they ship their usually quite good product they get a bunch of free word of mouth advertising and unboxings/reviews etc. But with a 3d printer, and they are planning on all that new functionality they don't have the software for yet... for someone who already has 3d printers and the money to spare might be worth the risk. For a first printer probably want to wait for launch. might be delayed launch, revised specs, etc.
arctic dragon
That being said, some of the higher-end Creality printers are worth considering too, depending on your needs.
For a work setting, if you can convince the office to get a nice printer that comes with an enclosure, those usually come pre-assembled?
winged helm
Ooh, well the person making the decision probably wants the best they can get.
Reasonably of course
I like everything I've read about prusa
arctic dragon
I'd love to put down some money on a Prusa XL if I had it...
empty sedge
I doubt the XL is arriving this year but I put money down for one
winged helm
Wow that's a wild machine
carmine peak
How do i check if my printer's motherboard is dead?
The display shows nothing but a solid blue screen. The hotend fans work but not the board fans
USB doesn't work either.
I've removed and re-inserted everything
arctic dragon
carmine peak
How do i check if my printer's motherboard is dead?
Have you tried reflashing the board?
I've seen flash memory get corrupted before, and sometimes it's recoverable.
carmine peak
arctic dragon
Have you tried reflashing the board?
Any guide online?
Also if it helps i did try updating the firmware
arctic dragon
Well that would count as reflashing the board.
So uh, did anything happen between it working and it not?
@carmine peak If you've opened up anything or rewired anything, it could contribute to an issue? If you felt any kind of static while handling the board, it could be dead?
carmine peak
I felt a little. Is therr a proper method of checking fir static?
arctic dragon
Nope, if the board stopped working, it could be any combination of things getting zapped... I've zapped a couple of boards at my job, and even as a professional Electrical Engineer responsible for these boards, I can't always figure out exactly which component failed. All I can really recommend is doing your due diligence to try to determine whether or not it's recoverable, and replace it if it isn't...
Which motherboard are you using?
Display is a solid blue? Usually I'd expect a TFT LCD to go white or stop working at all in cases like these... What kind of display?
 hot hearth
If you want to build your own 3D printer and need large size and quality, then RatRig V-Core 3 is a viable option.
 grave helm
(Keyblade) https://www.thingiverse.com/thing:3582947#Parametric Customization
Hello everyone! This might be a long shot, but I might aswell ask. I am trying to scale down the Keyblade design Adafruit released on Thingiverse. But I can't for the life of me edit the perimeters, no matter what I do in Fusion360. Is there a way? Can even find and edit perimiters on STLs? Because the tube tester needs some "fixing" at 75% it seems. Best wishes, Rasmus. :D

Update April 24, 2019 Parts sized to fit 250mm x 210mm x 210mm
https://youtu.be/aASsWYpQr8c
Does the world need another Keyblade? This Keyblade is designed to be an easy-to-build kit with parts that screw fit together. No support material is required! 3D print and build your own Kingdom Key!
Download files in learn guide:https://learn.adafruit.c...
muted cloak
anyone know where to look for why I can't connect to octoprint with the web browser? I'me trying to get it set up, on an orangepi zero 2 following the guide at https://blog.cyril.by/en/3d-printers/installing-octoprint-on-orange-pi-zero-2 but I can't get the browser to connect. connection times out. searching has so far found no helpful info. I can ping it, and the ssh window is giving server heartbeat messages.

Tutorial installing Octoprint on Orange Pi Zero 2
empty sedge
@muted cloak are you connecting to port 5000?
muted cloak
attempting to, yes
192.168.1.150:5000
and now I try again and it connects, after trying all day
ok, been using the same window all day, and even last night, and I typed it starting with 198 ....
muted cloak
ok, more directly printing question, starting to use petg, using default generic petg profile in cura, and the first couple layers look like this. Not sure what to adjust
 shy kelp
Those two drivers are dedicated to what?

Trigorilla 2560 board
I could reopen the thing up and test it without
But actually I'm trying to understand why at one point it does stop
Googling I find out that stealthchop doesn't work well on the extruder
So I replaced the last one on the right from a tmc2225 to an a4988
But the issue is still present
arctic dragon
shy kelp
Those two drivers are dedicated to what?
E0 and E1 would be Extruder 0 and 1, respectively. If you have 1 extruder, try replacing the second one from the right instead?
shy kelp
arctic dragon
E0 and E1 would be Extruder 0 and 1, respectively. If you have 1 extruder, try r...
In the end I kinda solved by replacing the last driver with an a4988, and disabling linear advance from the config adv on marlin, I'll later retry with the tmc2225, to confirm if they are both, or it's just the linear advance that does give issues
Though there's a further issue, the bed leveling bilinear isn't working, the printed thing is uneven; on the start gcode is specified to use the stored valued, it doesn't work, then I tried to recall g29 after g28, it doesn't work anyway
And since it's not like working, playing with the z offset it's useless, because, since it's uneven, it might fix in one side, and break the other side
 arctic dragon
That... would probaly be better answered by someone else. I'm mainly a hardware guy, haha.
empty sedge
muted cloak
ok, more directly printing question, starting to use petg, using default generic...
Hotter nozzle and slower maybe, but it's not going to get completely clear
muted cloak
empty sedge
Hotter nozzle and slower maybe, but it's not going to get completely clear
Going to try hotter slower later today, main issue though is the mess of chunks of plastic
empty sedge
muted cloak
Going to try hotter slower later today, main issue though is the mess of chunks ...
Ooze is a common complaint printing petg. There isn’t one easy solution
muted cloak
empty sedge
Ooze is a common complaint printing petg. There isn’t one easy solution
Seems to not be an issue once it gets past the first layers. Haven't figured out if it's ooze or is pulling bits already printed off the bed or what
muted cloak
empty sedge
Ooze is a common complaint printing petg. There isn’t one easy solution
Sliced in prusa, 240c first layer was looking good, but now blobs. Maybe I need to examine the nozzle
 empty sedge
muted cloak
Sliced in prusa, 240c first layer was looking good, but now blobs. Maybe I need ...
empty sedge
muted cloak
Sliced in prusa, 240c first layer was looking good, but now blobs. Maybe I need ...
First layer can also be too low. your bed leveling or offset needs adjustment
muted cloak
extruder esteps might have been too high, I'd recalibrated with another color, and was almost 20% too high with this one, recalibrated and trying a print again
muted cloak
ok, with redoing bed tramming after changing nozzle and recalibrating esteps: printing cleanly, though I do see the edges lifting off the bed
hot hearth
Raft is often the easiest solution.
muted cloak
I think I may have the bed lowered a touch too much. Will have to fine tune before next print. Got to look into how to add mouse ears or otherwise do partial rafts, since a full raft is just more work to remove than really needed. Printed a fang duct a couple of days ago, small bit in the middle came loose from bed like 5 mm into print, so added raft, but less lines, still was a pain getting it all cut out.
Of course now the fans I ordered from mouser to use with it may have burned up in a UPS fire, so may not be installing any time soon
muted cloak
I actually added some adafruit tools to that order, since it didn't add to the shipping charge, and their ground shipping rate is lower than adafruit's. $7.99 ups ground for the whole shipment, while Adafruit's ups ground starts at $20.85
I guess Mouser negotiated a much better rate somehow
 loud silo
Even though we ship thousands of packages a week, we don't ship at the rate of the really big sellers.
 vocal pilot
I'm currently working finishing my Commodore's Pi 2.0 with adafruit's DIY Hdmi but I don't know how to make a little casing to have the board inside.
muted cloak
loud silo
Even though we ship thousands of packages a week, we don't ship at the rate of t...
Seems like big sellers are either not getting hit by increased rates, or they are eating the cost. And it seems like the adafruit rate may be more than full retail rate? I both don't see how Mouser has kept it so low, and don't see why adafruit's rate has gotten so high. I can put a small breakout board in cart, and shipping is 20.85.
I can go on UPS and calculate NY to my zip simple rate cost for up to 100 cubic inches is 10.15 without any discounts. Have to go over 650 cubic inches to get over $20
Just seems so extreme it seems like an error.
 ionic heath
hi hi @muted cloak (dan alerted us to your message), (pt@adafruit.com here...) ... that's correct, sometimes the rates are higher for us than Digi-Key, mouser, or other resellers, and sometimes other sellers subsidize their shipping or have other calculations, ours is a pass-through directly, whatever we have is what we are quoted
sometimes we used additional packaging for something that needs it like a screen or a product that requires a box, and dimensional shipping is used
and sometimes there are address locations that are residential vs business or an area a carrier charges us extra for
all depends on a lot of things, however - if you can get the same adafruit item at a lower shipping cost from Digi-Key or mouser, totally OK with us, please do 🙂
 elder oxide
muted cloak
Seems like big sellers are either not getting hit by increased rates, or they ar...
elder oxide
muted cloak
Seems like big sellers are either not getting hit by increased rates, or they ar...
Many big distributors have negotiated rates with shippers which allow them to offer a specific price based on a promised minimum monthly or quarterly volume shipped. It’s hard to negotiate rates like that consistently for smaller companies. Sure Adafruit sells a lot, but probably not shipping the volume that shippers are looking at for guaranteed flat rates.
Adafruit technically could go through a third party shipping vendor who negotiates rates on behalf of customers (Shippo is who I’ve used) and first class/USPS and other rates tend to come out close, sometimes a bit lower than what I see Adafruit quote
iron remnant
I end up getting a decent chunk of my AdaFruit stuffs via DigiKey just because then I can bundle it up with my other random circuit bits.
muted cloak
I was going to order a product pick a couple of weeks ago, about the only time I've caught the video, since I'm normally working, but the shipping was much more than the product, and I couldn't come up with enough stuff I needed to make it worth it. Seems like shipping went up even more since then though. I just can't figure out why it's quite so high looking at UPS shipping calculator unless they ran out of boxes smaller than the ones adabox ships in or something.
loud silo
UPS has a fuel surcharge that keeps going up: https://www.ups.com/us/en/support/shipping-support/shipping-costs-rates/fuel-surcharges.page
As Phil said, the shipping charge is strictly a pass-through, and can vary based on box/bag weight vs dimensions, etc. in unexpected ways. Digi-Key ships so much they have UPS trailers parked outside that they fill up, and other large distributors are similar.
See https://www.adafruit.com/shipping for some background. We offer USPS shipping to some places, but sometimes don't provide it: "We do not ship USPS to some locations that have had known slow downs or issues."
vocal pilot
Is there any 3d models of Adfruit's DIY HDMI I could use to make a custom housing for it?
spring herald
Hey what’s best practice for screwing things into a print?
threading isn’t an option at the sizes I’m working at so I’m wondering if I just print a pilot hole and hope I can bite into the plastic with the screw??
arctic dragon
spring herald
Hey what’s best practice for screwing things into a print?
For applications without a lot of unscrewing/rescrewing, that should be fine. You might have to play with your model and 3d printer settings to really dial those sizes in right, as without additional hole expansion in your slicer, holes tend to print smaller than they're modeled IIRC.
If you plan to unscrew this frequently, I'd recommend a threaded insert instead. PLA/PETG threads aren't the most durable thing in the world, and they will wear down with time. https://www.adafruit.com/product/4255 would be a good example for ones you would use for M3 screws, though if you need smaller sizes you'l have to look for another supplier.

Wanna improve the connection strength between your project's 3D-printed parts, and also have nice clean surfaces? Instead of gluing bits together, or screwing plastic screws directly ...
spring herald
arctic dragon
For applications without a lot of unscrewing/rescrewing, that should be fine. Yo...
Alright, thank you! I have some brass inserts in my basket for later projects but honestly it’s just for a prototype robot frame that isn’t gonna get too much stress, and I’m going with whatever’s easiest from this point because a lil bit of a time crunch 😭 chip shortage hours
arctic dragon
Another option would be to add a space to insert a nut on the side or back? Takes a bit more effort to model, but it might be more reliable if you don't have well-ccalibrated holes.
spring herald
truuue, I probably have some nuts around too, at that point I’d make the hole a little bigger than the threading and just rely on the screw and the nut pulling it together right?
arctic dragon
Indeed, if you decide to go down that route.
And if your holes don't clear the screw, you can just use the plastic hole to grip the threads directly haha
spring herald
omg yeah, fair, that does make the shrinkage issue a bit easier to work with
iron remnant
The embedded nut route, especially with a washer or two, is going to be stronger than the heat-set insert. Even though, yeah, the heat-set insert is cute and clean and not that weak.
 normal briar
Hi. I've been really struggling with fixing a Y axis layer shift issue over the last few weeks and I was hoping I could get some advice.
Printer: Ender 3 Pro
Print Speed: 60 mm/s
Problem:
- Layer shift only in the Y Axis
I can reproduce this consistently with a hollowed out cube stl. Once the infill start printing the layer shift start's happening. I assume from the vibration caused by the zig-zag motion.
What I've tried:
- Checking the Y axis belt (it trums like a guitar).
- Tightening the eccentric nuts for the wheels on Y axis (just until they stop turning freely)
- Tightening the 4 nuts on the X carriage
- Swapping the X and Y axis steppers (issue still appeared in the Y axis so I don't think it's the driver unless the stepper itself is the issue)
Tightening the eccentric nuts did seem to help at first (and I made a few successful prints). But things seemed to have gotten worse again.
I may have over tightened the eccentric nuts originally but have since tried loosening them a bit (still no luck).
Any advice appreciated.
 half dew
normal briar
Hi. I've been really struggling with fixing a Y axis layer shift issue over the ...
half dew
normal briar
Hi. I've been really struggling with fixing a Y axis layer shift issue over the ...
Have you tried loosening the belt a little? My printer doesn't like being tightened that much (the steppers get hot and skip).
Before adjusting the tension - its worth disabling the steppers and moving the axis yourself to see if you feel anything at a certain point.
normal briar
half dew
Have you tried loosening the belt a little? My printer doesn't like being tight...
Haven't tried that. I've been some what reluctant to touch the Y belt since it seemed ok and this issue wasn't happening before. Will try disabling the steppers and checking again. Would I just be checking if the belt feels like it's getting stuck?
half dew
normal briar
Haven't tried that. I've been some what reluctant to touch the Y belt since it s...
yeah, feel if there are any snags
normal briar
So no snags as far as I can tell. Is there a good way to narrowing down electrical vs mechanical issue? Seems weird to me that mainboard over heating would cause only y-axis shift
 river cipher
normal briar
So no snags as far as I can tell. Is there a good way to narrowing down electric...
river cipher
normal briar
So no snags as far as I can tell. Is there a good way to narrowing down electric...
could be the y motor and/or y driver overheating, not necessarily the mainboard itself
confirm that the cooling fan is still working (the one blowing on the mainboard/drivers) and that the heatsink hasn't fallen off
you can try reducing infill speed/acceleration to make it less likely to happen
your belts basically only have to be tight enough that there's not any slop and not much tighter, too tight can cause VFAs and overheating
shy kelp
fdm do have marlin and some other free firmwares
resin printers don't have any of that?
arctic dragon
Not to the same degree, anyways. https://github.com/kondor3d/kondor is a work in progress, and nanoDLP is a thing, but if you’re expecting a marlin equivalent on every machine, that unfortunately doesn’t exist…

GitHub
firmware for LCD based 3D printers. Contribute to kondor3d/kondor development by creating an account on GitHub.
 snow moth
Could someone redesign the case from link below? I have no 3D modeling skills whatsoever. I would like the hole for the screen to be filled in and for the hole for the switch to be resized to fit the Breadboard-friendly SPDT Switch. This would be greatly appreciated.
https://learn.adafruit.com/wordle-personal-esp32-s2-web-server/build-the-server-case

Adafruit Learning System
Bring the "Before-Times" Wordle to those around you
winged helm
What are folks favorite ways to get threads into 3d prints? I think I'm going to end up with the "soldering iron press in" method, but wondering 1) if there are better methods 2) what's a good brand to use
iron remnant
Depends.
You can generally just force a regular old screw in at least some of the time, you can use a self-tapping plastic screw.
Frequently I just print a thread.
Or tap a thread
I got some cheap thin M3 inserts off of Amazon to print other people's designs although I seldom use them.
Apparently the brand does matter? I think there was a Youtube video by one of the usual suspects.
half dew
winged helm
What are folks favorite ways to get threads into 3d prints? I think I'm going to...
I've used the type you're talking about and they work great. The benefit is they can take up less space since they come in different sizes.
For alternatives:
- Just using a regular nut and carving a space for it in your model will usually be just as strong or stronger.
- If its not something that will be taken apart a lot or doesn't need a ton of strength, I'll usually just leave a hole in the part, add extra walls, and tap it
arctic dragon
I like to think of the heat-set inserts as the ideal option for something that's going to be screwed often, like holding a lid to an enclosure. The embedded-nut approach is better for raw holding strength, and for prototypes you can often just directly screw threads in if your tolerances are dialed in properly.
I don't use them enough to recommend brands, but do make sure you get the ones meant for heat-setting, not the injection molding ones.
winged helm
My goal is to have something I can do well, once, and have it work for as long as possible
half dew
Inserts are probably the way to go then!
 merry cobalt
I need to buy a replacement power supply for my Taz 6 printer, I know its 24V 21A 500W. Is there anything i need to look out for when buying power supplies for 3D printers?
empty sedge
merry cobalt
I need to buy a replacement power supply for my Taz 6 printer, I know its 24V 21...
You can buy the exact same meanwell power supply if you'd like
cheap amazon supplies with the same specs will probably work but legit meanwell supplies are good and aren't that much more expensive
I'm guessing in that case is a meanwell SE-450-24 or SE-600-24
though, maybe they switched brands when they made it external and slimmer?
merry cobalt
Thank you @empty sedge I’ll try and see if I can find a Meanwell one.
shy kelp
I don't understand
using marlin 2.0 bugfix
using bed leveling bilinear, it looks like it is ignoring the points
at the start gcode it's specified to use the stored points but it doesn't
I tried to make g29 after g28 it does not work anyway
the points do look stored in the eeprom, if I call them back via pronterface, I can see them stored
oak heart
I had my first print failure due to tangled filament. It crossed over itself and I hadn’t noticed; it was several hours in. :( Any suggestions for untangling spools?
 torpid grove
oak heart
I had my first print failure due to tangled filament. It crossed over itself and...
torpid grove
oak heart
I had my first print failure due to tangled filament. It crossed over itself and...
Sorry to hear that. If you have a spool to untangle my suggestion is put on a nice podcast prepare to be very patient. I would personally say theirs not much to it other than that. I've had one case of budget filament that was so tangled I just used it for little prints that I could baby sit. At a certain point your time will be worth more than the filament you're untangling.
Some general tips to avoid tangled filament. Get filament from reputable brands I've only really had issues with twisted filament when I bought the really cheap stuff. Minimize the distance from your spool to Bowden tube / feeder. Try to have the filament following a straight path this will prevent it building up twisting stress about the filaments axis. If you get to much twist the filament will either break or get tangled.
oak heart
Good to know, thanks. I think this one tangled because I used a clip that clipped the end of the filament to adjacent filament, but I picked the wrong adjacent one and crossed them. I should probably find a clip that goes on the side of the spool to hold the end.
river cipher
oak heart
Good to know, thanks. I think this one tangled because I used a clip that clippe...
your spools don't have holes on the edge for threading the filament through? and yeah, unloading/loading is the most dangerous part for tangling because if you slip and let the strand go, it flies back to the spool and can tangle itself.
oak heart
river cipher
your spools don't have holes on the edge for threading the filament through? and...
They do, but that seemed like it was liable to kink the filament by bending it too far. I guess that’s preferable to a tangle.
river cipher
oak heart
They do, but that seemed like it was liable to kink the filament by bending it t...
I usually use them, I don't think I've ever had an issue with the filament being kinked, but even if it's kinked too far, imo its preferable to clip 2-3in of kinked filament than to lose 10-100+ meters of filament and hours and hours due to a tangle :/
the only issue i've had was with wet filament that after a few weeks/months, became too brittle and cracked due to the stress in the bend through the holes, so then it released and luckily didn't tangle, but could've.
raven coral
So i tried printing this part but for some reason the "top" side looks really weird and seems to have quite large line separation

The bottom is fine though
 tall osprey
this looks overextruded I think? Run some flow rate calibration tests
broken orbit
So.... Noob question, but my 3D printer is printing really thin sometimes... I have tried increasing the temp, I've tried unclogging the nozzle (multiple times)
I'm using shiny gold PLA
It's also not underextrusion
since it still happens when I run an extruder test on my printer
 round reef
Could be a broken extruder lever. Almost always happens with Ender printers and their plastic extruders. Hasn't happened to me yet, but it would account for under-feeding from the extruder.
raven coral
It might be because when inserting your filament you didn't get it completely on the idler wheel, causing the extruder not being able to grip the plastic, happened to me once.
raven coral
Can static electricity kill a heater cartridge?
It doesn't work for me for some reason, measuring the continuity between a new and the one that's probably dead, the new one has continuity but the old one doesn't
tall osprey
Heater cartridges are literally a loop of wire in some ceramic
Static electricity can't damage them in other words
raven coral
weird
but the thing doesnt have any continuity between the two ends of the cable
unlike a spare one i have
raven coral
How do i pick out the right thermistor for my printer
Like the values I should look for
Or rather
How do i find out the values I should look for
broken orbit
raven coral
It might be because when inserting your filament you didn't get it completely on...
I figured out that the filament's grinding, but IDK why
shy kelp
I'm not so bright how do you assemble this?


 hushed lotus
raven coral
It doesn't work for me for some reason, measuring the continuity between a new a...
hushed lotus
raven coral
It doesn't work for me for some reason, measuring the continuity between a new a...
Something else probably killed it
raven coral
but when i connect a different heating element it works tho?
hushed lotus
Yeah the heating element is definitely dead, it’s just that it was not due to static electricity
raven coral
i have an anet a8
except its modded so its using aluminum extrusions instead of acryllic parts i think?
hushed lotus
Was it the thermistor or the heating element that died?
hushed lotus
raven coral
How do i pick out the right thermistor for my printer
Ok, I was just wondering b/c of this
raven coral
although im ordering a new one because due to my foolishness and not realising the fan was cooling off the printer too much after fiddling with thermistor the insulated parts later along the cable have stripped off lol
but otherwise it works fine
hushed lotus
Ah
raven coral
im pretty sure it would have figured out that somethings not right with the thermistor if it were to short out
raven coral
well ive been running it between 200-230 degrees
i got it to reach 240 degrees too
although when at 240 i cant use the fan because it cools off the print head too much and throws me a thermal runaway error
hushed lotus
So it is reading out the correct temperature
raven coral
waiting for the thermistor and a silicon sock to arrive tho
hushed lotus
raven coral
waiting for the thermistor and a silicon sock to arrive tho
if its reading the correct temperature but blowing too hard, then the issue isnt with the thermistor, its with either the fan or the control board
set the fan speed manually and see if it works
raven coral
yeah i know that
well i just dont let it blow at 100% usually and it works
but it might be that the part cooling shroud might be angled incorrectly causing it to blow on the block too much
well either way i cant test anything rn due to the heating element being dead and me not having the right allen keys on hand to replace the heating element
hushed lotus
wait so why arent you ordering a new heating element?
vestal thicket
I've never printed with TPU before, and I have two different kinds, and they both say the bed doesn't need to be heated when printing - does that match other people's experiences?
 brittle hornet
@vestal thicket I haven't tried printing TPU without heating the bed. My current settings for TPU on my Ender 3 clone are for 55c for the bed [and I am a gluestick fanatic]. I have had TPU prints separate from the bed a few times. Most of my success with TPU has usually involved printing slow [30 mm/s], or with up to 100% infill. Also more success with models /slices that don't have large travel distances in the print where the nozzle is not laying down filament.
vestal thicket
@brittle hornet Thanks! I went with a normal 60 degree bed and it look good half way in on my Ender3v2
vestal thicket
Slightly off-topic, but for the new LED Neon Sign learn guide, do you think white PLA or transparent PLA would work better for the flexible LED strip? https://learn.adafruit.com/led-neon-signs-with-neopixels
 weary lichen
vestal thicket
Slightly off-topic, but for the new LED Neon Sign learn guide, do you think whit...
weary lichen
vestal thicket
Slightly off-topic, but for the new LED Neon Sign learn guide, do you think whit...
Personally, I'd go for white
vestal thicket
thanks, appreciate it!
 loud jolt
This is my prusa mini plus mainboard and I have two questions, is this easily repairable (I have limited mobility in my hands) and if not should I get a like for like replacement or a different mainboard since I'm already running klipper.
 arctic dragon
loud jolt
This is my prusa mini plus mainboard and I have two questions, is this easily re...
arctic dragon
loud jolt
This is my prusa mini plus mainboard and I have two questions, is this easily re...
The grounding pads you pulled out are there for mechanical stability moreso than electrical function, so you might be able to get away with supergluing or epoxying the connector back down and soldering the USB pins on the back. Whether or not this is an easy repair for you, on the other hand, depends on your experience with this type of operation.
strange ledge
Doable, yes...
Easy? No.
arctic dragon
I don't know how limited your mobility is, but if you're not comfortable with soldering, I'd just replace the board.
Easy is relative, anyhow.
arctic dragon
The gluing is just gluing, you should be able to manage if you can place the connector in the right spot. Once it's glued down, reflowing the solder with a fine tip shouldn't be too bad if you glued it in the right spot.
You do need soldering experience and the right tools, but it's neither the easiest nor the most difficult of board repair tasks.
A larger tip and flux could work too, if you can get a good angle.
Mobility can be compensated to some extent with tools, but the prerequisite skills aren't something you'd pull out of thin air haha.
loud jolt
I used to do a lot of soldering, I think I can get it done, worth a try anyway. If I do screw it up can anyone recommend a good board to power a prusa mini frame?
arctic dragon
The Buddy mainboard is what, 4 TMC2209 drivers? If you're already locked into Klipper with a Pi, I think the SKR Pico might be a good replacement on a budget. Otherwise, you should be able to get a Buddy clone for ~50 USD?
Almost any mainboard designed for a 3d printer can drive XYZE, so if your budget allows, and you plan on doing additional upgrades, you could opt for something more powerful, too. Duet 2 Wifi would definitely be overkill, but plenty of options in between.
iron remnant
You could get a BTT Octopus just in case you want to convert your printer into a CoreXY machine with automatic leveling. * laughs in ender *
But, yeah, I think I know that connector. You'd probably want to clean it all out first, get any residual solder off, then you'd want to make sure the pins were aligned and tack them down with a tiny bit of solder and a bunch of flux, and then hit the big four support pins.
I used that connector in a bunch of designs but I am dissapoint.
arctic dragon
Oh, speaking of connectors, I never did double-check the connectors on the SKR Pico to make sure they were compatible with the mini. Chinese Buddy clone might be safest and easiest as drop-in.
 high stirrup
Wait are these custom ones or can I ask questions about creality too?
loud silo
high stirrup
Wait are these custom ones or can I ask questions about creality too?
in this channel? You can ask about 3d printing in general, not just custom-made printers
high stirrup
Ok thanks
 dry sonnet
Picked up a cheap HDMI 4 Pi: 5" Display w/Touch and Mini Driver - 800x480
https://www.adafruit.com/product/2109
Anyone seen / got a good way to mount this and the associated boards?

Yes, this is a cute little 5" TFT display with WVGA 800x480 resolution and it has a resistive touchscreen overlay. And yes it comes with an equally cute little driver board and ...
half dew
dry sonnet
Picked up a cheap HDMI 4 Pi: 5" Display w/Touch and Mini Driver - 800x480
https...
A quick look on thingiverse - this might be the right thing: https://www.thingiverse.com/thing:571515 (theres an associated front panel

Notice I need to move the four mounting holes on the rear of the backshell, as they interfere with the buttons.NEW
Woops, almost forgot the button extenders! Print 5 of these; you might have to clean up the print a little; it's a tight fit.
Also, I put a 1mm fillet on the outer edges and pushed the front and back side edges of the power socke...
dry sonnet
i must have been using completely the wrong search terms as I also found this https://www.thingiverse.com/thing:2354850

https://www.youtube.com/watch?v=0-_-eaSlWbA
This is a 3D printed case for a 5" (800x480) TFT Display, Adafruit TFP401 HDMI display driver, PowerBoost 1000C and 2500mAh battery. Check out the full tutorial here: https://learn.adafruit.com/portable-5in-monitor-with-hdmi/overview Parts and CAD source files are available in the learning guide.
empty sedge
I must have some garbage PLA. it’s been a while since I have seen parts curl up off a heated bed
empty sedge
tried again with glue stick on glass and part stuck so well I thought I was going to break the glass. Heated to 80C and peeled off the parts so I don't break the glass because this part I don't care about the shape of
half dew
empty sedge
tried again with glue stick on glass and part stuck so well I thought I was goin...
My experience is that glass is a horrible surface and just isn't consistent... I switched back to PEI sheets for most things. I think that a lot of people in the 3d printing community are just really comfortable with having to do a lot of really weird things to get prints to work.
empty sedge
half dew
My experience is that glass is a horrible surface and just isn't consistent... I...
PEI spring steel would be nice but I don't know anyone selling that for this round bed. This printer is a rostock max 3
I don't want to print on bare glass because I don't want to pull chunks out of it, so I need to find something that lets prints release
I might just put a layer of that green pet tape lulzbot used to use down
half dew
Ahh, - gluestick is definitely the thing I've seen suggested for that then
I've also used painters tape but it leaves a texture
empty sedge
with glue stick prints stick down very well, but they don't pop off when cool
yeah I can do that too. I forgot about that
half dew
Do you have a delta 3d printer or one of those weird ones with the turntable? I almost got a delta when I started
empty sedge
this is a rostock max v3. it's a larger delta printer
I also have a kossel mini but I haven't used it in a year. I mostly use my printer that is mostly a prusa i3 mk3
half dew
Nice, yeah - I have an Ender 5 that is basically just the frame at this point... I have a Prusa XL on preorder but since I want to run Klipper-like speeds I'm considering risking the Bambu X1 Carbon
iron remnant
An Ender that's basically just the frame at this point.... Or, as we say.. an Ender.
Making it work better than it came out of the box, tho... That's hard.
half dew
Haha yeah - I really should have just built from scratch since the modifications were more than the cost of the printer....but its as close to "Press go and walk away" as you can get with an older style printer without AI, vibration sensors, lidar, etc
 shell adder
hello all! I need to design a simple casing for a project I'm working on. Just needs to have like 6 or so places for machine screws and keep the components suspended. Any advice on best program to use to design it?
tall osprey
pretty much any cad tool, take your pick
f360 is nonfree (as in freedom) software but pretty popular and easy to use
there's also freecad and scad for free-as-in-freedom
and for 10$/mo you can get solidworks
weary lichen
I've used FreeCad for some time, it's decent enough. Not the best UI, but there's tutorials for pretty much anything
 hollow tartan
Any recommendations for a 3d printer for home use by a hobby tinkerer?
Or a buyers guide?
loud silo
what is your budget?
I am not much of an expert but I found the discussions and reviews at https://all3dp.com/ to be helpful.
@hollow tartan ^
hollow tartan
Awesome! Thank you. I have no idea on budget (I don’t have an idea of price range, but I’m okay with saving up for the right one)
loud silo
hollow tartan
Awesome! Thank you. I have no idea on budget (I don’t have an idea of price rang...
something I would say about 3d printers: this is kind of like cars 100 years ago or something. They can break down often, and may require tinkering to keep them running. Also people love customizing them. The more expensive ones can be more reliable. Consider build volume (how big a thing can it print), accuracy, heated bed (needed for certain materials, but not others), noise.
weary lichen
Some of the cheaper ones can be super reliable too. My $200 Powerspec Duplicator i3 mini I picked up at microcenter a few years back just... works. No heated bed is about the only complaint I have about it.
Well.
Other than "The bed's too small" but I could have a printer that could fit a skyscraper and I'd find something that wouldn't fit
realistically speaking, the bed fits most things I'd want on it. There's a lot of features it doesn't have and you can definitely pay more for those - and they're often worth it! - but they're not necessary, per se
loud silo
i have a Flashforge Finder I bought on Craiglist for $150 from someone who refurbished them. He got them from another Craigslist (& eBay) person who bought batches of Amazon Flashforge returns, many of which were just returned, and never used (still had the zip ties, etc.)
 calm tree
Ender 3 v2 is my recommendation for a starter printer. Advice and parts are cheap and plentiful, and the v2 has most of the upgrades you want over the original or pro.
vestal thicket
If you have more time than money and want to learn the hardware too, I love my Ender 3v2. If you have a bit more money and want something that just works without a lot of tweaking, I'd recommend a Prusa
elder oxide
Nice this about my Ender 3 pro is I haven’t leveled the bed in.. probably a year
half dew
3d Printers seem to be going through a technology jump this year - it also might be worth waiting for things to level out a bit
arctic dragon
These things jump forward every year though, to be fair. This year seems to be moving away from requiring some DIY ability and shipping fully assembled printers with advanced capabilities, but most of the hardware in the sub-300 range probably won't be changing all that much anytime too soon.
It's like holding off on a new car; of course the newer ones will be better, but they improve every year, so best to just buy what's available when you're ready to use it.
half dew
Previous years jumps were super incremental though and a lot of the "good stuff" were upgrades or DIY. This year we're seeing a lot of smart features - actual auto-calibration, ai, first layer inspection by the printer, and high speed out of the box.
If we're real - there really wasn't much innovation in the last 3 years for the maker space. Everyone was just racing to the bottom with i3 clones and sometimes you got to see a badly implemented core x/y from creality or somethign like that
arctic dragon
I don't fully trust the high-speed improvements, but the AI stuff looks pretty neat. I imagine it's only a matter of time before someone makes it a regular feature on Klipper or something, though.
Fair point. It is worth noting though, that the last three years were also hit hard with pandemic and shortages all around.
half dew
Yeah, I'm definitely being optimistic - but with that Anker, that new Bambu Lab printer, etc I think we might be hitting a crossover point from hobbyist -> functional
(My big worry about the shift is that both those printers have proprietary parts of their systems 😦 )
If hobby is the interest - its really fun to learn how to adjust and tweak the printers. Just keep in mind that upgrades stop being cheap when things go wrong and always be skeptical of the "just print and install" upgrades like fan ducts and such - I find that they rarely work/fit on the first try.
 tight cove

does anyone know why im consistently getting a Z band?
things ive tried:
- Changing to a flexible couple
- Flipping the Z rod
- Loosening the Z-nut bolts
- Cleaning the Z rod
- Adding/Removing a spacer between the motor and the extrusions
- Removing the bolts holding the motor to the frame and removing the Z rod in and out until it perfectly goes into the coupler, measuring that gap and printing a spacer
after all that the Z band is noticeably better but still there
the band is roughly between 15mm - 16mm

left is at 0.3mm layer height and right is at 0.2mm also my latest
brittle hornet
@tight cove I have no idea. I like the rod flipping solution. Curious, does this occur in other printed models at the same height?
tight cove
i havent printed anything recently besides those cubes, ill try another model
 silent veldt
Tips and tricks for the Prusa Mini?
I just got shipping notification so I'm getting excited.
 leaden mason
silent veldt
Tips and tricks for the Prusa Mini?
leaden mason
silent veldt
Tips and tricks for the Prusa Mini?
Firstly… read the manual! I see so many people complaining it doesn’t work properly and they just skipped over the manual and thought they could go straight to work. Congrats though. I’ve had my Mini for a year now and I freaking love it! (Be sure to setup Octopi too, being able to just press print in PrusaSlicer is a game changer!). Also be aware the provided USB drive is a piece of crap and will probably flake on you. Use their live chat if you have problems, they’re awesome!
silent veldt
Excellent, thanks!
shy kelp
using marlin. it looks like they are using that the two steppers are using the same driver
then a Z port and the E1 port do make the stepper behave in the same way
the weird thing is that it worked well for a while, now it doesn't. I'm rechecking the pin declaration, and everything seems alright
the issue is nor about the drivers nor steppers, but it's either fw, or board
empty sedge
looks like you're plugged into Z and e0?
[that or the board has two z ports wired in parallel and one of your motors isn't working]
shy kelp
empty sedge
[that or the board has two z ports wired in parallel and one of your motors isn'...
it has two Z ports, which one of them works correctly, while the other one doesn't and the E1 port seems to mimic the faulty Z port, giving the same issue; nor drivers nor the steppers are the issue, because swapping them, they work fine, unless you do plug the steppers to those two specific ports
here there are more informations...

3D Printing Stack Exchange
I'm using a trigorilla 2560 and marlin bugfix 2.0.x, and two stepper motors that I'm using as two Z axis
for some reason both Z ports, and the E1 port are being driven by the same stepper driver , ...
empty sedge
Weird. I can figure out the firmware question today but we’re cleaning the hackerspace. However it doesn’t make sense to me one of the Z ports works but the other doesn’t. They should be soldered in parallel so unless the solder is broken or the connector or the motor they should both work the same.
shy kelp
empty sedge
Weird. I can figure out the firmware question today but we’re cleaning the hacke...
I tried to change cables, motors and eccetera, and they are not the issue
all I know is that one z port works fine, the second Z port doesn't, and the E1 port doesn't too
and all of three seems to use the same driver
meanwhile one driver seems to not be used anywhere
shy kelp
the only thing that I did not try to change is the atmega board
empty sedge
What do the solder joints for the problem z connector look like? Can you test the connection to the pins in your plug and also to the other z plug with a multimeter?
shy kelp
empty sedge
What do the solder joints for the problem z connector look like? Can you test th...
connections do seem fine, also resting with a tester
 shy kelp
empty sedge
What do the solder joints for the problem z connector look like? Can you test th...
shy kelp
empty sedge
What do the solder joints for the problem z connector look like? Can you test th...
indeed it might be the cables
it looks like that 1/10 cables works well
all the others when plugged do give problems
weird af
empty sedge
shy kelp
indeed it might be the cables
it looks like that 1/10 cables works well
all the...
If you have a mix of motors they might have different pin outs on the motor end. There should be two independent coils in the motor and you can quickly find which is which with a multimeter. If the motor just buzzes instead of rotating when you wire up the two coils reverse one coil pair.
shy kelp
empty sedge
If you have a mix of motors they might have different pin outs on the motor end....
I did not understand the coil part, how should I reverse that?
anyway the motors should all be the same, besides they all work fine with just that 1 cable, so I suppose as you said that the isse are the other cables then, since everything that's plugged with those cables does give issues
also the cable are config the same
thanks
shy kelp
they do this behavior
empty sedge
shy kelp
they do this behavior
At the control board the pin out is something like A+,A-,B+,B-
If it vibrates like that swap A+/A-, or B ones but not both
The motor data sheet shows the coils inside like this

 elder fulcrum
Hi there! I’m having trouble with my Ender 3. The z axis keeps making this dreadful noise and for some reason will only go down when I attempt to run the move axis. At first I thought it was binding but then I tried all the reccomended help options and non of them seem to work. Then today I just wanted to see if the new motor I bought was actually working and it seems to have the same vibrating issue when it’s not even hooked up to the threaded rod. Any idea why this might happen? My initial hypothesis is it’s a dead wire but I don’t want to spend more money if I’m not sure thats the issue
elder fulcrum
empty sedge
elder fulcrum
Hi there! I’m having trouble with my Ender 3. The z axis keeps making this dread...
Do you have a voltmeter?
elder fulcrum
I unfortunately do not
empty sedge
do you have a small paperclip? or male to male wire jumper?
empty sedge
elder fulcrum
with a jumper you can check the wiring of the stepper motor. From the connector that plugs into the control board there are two coils. One coil is across pins 1-2, the other across pins 3-4. If you unplug the motor from the control board it should spin by hand without much resistance. If you short 1-2 it should resist spinning in a "clicky" fashion, if it spins the same it's not wired right.
Same for if you remove the jumper then short 3-4 it should also resist spinning in the same "clicky" fashion and if not it's not wired right.
If you short both 1-2 and 3-4 with their own jumper the motor should resist spinning but not feel "clicky".
shy kelp
swapping two A in one motor and one port seems to work, now I'll try with tje others thanks
but I have a question, how is it possible that it worked just fine, and then all of sudden without touching anything it started with this problem?
@empty sedge
empty sedge
no idea
shy kelp
idk
now doesn't even work like before but the other cables do work fine
winged helm
Someone with better grab cad-fu, please help. I'm trying to find an stl of a 3d flame, like you might find over a cartoon campfire. Any ideas?
 muted cave
Is anyone printing dragons over here? Can you help me out with some settings talk? I've been fighting with both printers for three weeks now on. Multitude of filaments and nothing will work. They all fail after getting some sort of jam, even though the only part of the print that looks melted or even warm is the very tip of any pull I do.
thin breach
Post a pic or video. That description isn’t enough. What have you done to calibrate your printer. Post details.
muted cave
The printers are dialed in to hit print and walk away. It's not filament, and both printers act the same. 5015 fans, new nozzles, new Bowden tubes, metal extruder kits, pei bed, bi metal heatbreaks.
I've been printing for seven years and I've never had this kind of trouble. I'm convinced it's in the gcode, and it's probably retraction related because everything else prints just fine.
It fails every couple hours. The only way to catch it is to hear the extruder clicking, and do a pull and cut at least the tip off the filament and put it back. Helps more of I push a good solid bit through the hotend before I restart too. But if I dont pull, I cant push it through
empty sedge
Is the extruder idler too tight or too loose? What retraction settings, on what extruder, on what hot side, with how long of a Bowden tube, with what polymer and brand and color are you using?
Are the teeth in the extruder drive gear clogged with plastic?
It could also be you’re printing faster than your heater can keep up with or your cold side is getting too warm causing jams.
muted cave
appears to have been heat creep. replaced some hot end parts and did the hotend fix
 coarse thistle
Hi! I've been researching SLA 3D printing for a while and I might get my own SLA printer soon. But I have a question regarding disposal of cleaning materials. I've heard that once you wash a print in isopropyl alcohol or soapy water, that water then becomes hazardous waste. Does that mean I have to dispose of it at a hazardous waste dump? Or can I simply dump it down the drain? Also for water washable resins is it safe to rinse it in the sink?
 tender sparrow
My 3d printer has a problem where not enough plastic comes out of the nozzle and i know it’s the gcode. does anyone know a setting in cura that increases the flow rate?
tall osprey
coarse thistle
Hi! I've been researching SLA 3D printing for a while and I might get my own SLA...
dump down the drain
No, it's hazardous toxic waste. Lethal in marine environments.
Water washable down the sink
Nope, still hazardous toxic waste. WW resin is a complete scam pretty much.
The most common way that isn't hazardous waste disposal is to just let the ipa evaporate and throw out the remaining resin that hardens at the base. This isn't really a great option but it's better than the sink.
You can get a lot of usage out of IPA and with a couple reclaiming methods you can use it for an extended period of time
This guy has a great blog covering a lot of resin printing and he did this just recently https://blog.honzamrazek.cz/2022/05/on-the-topic-of-disposing-dirty-ipa-washing-bath-from-resin-printing/
Resin printing is wonderful. I love it – it's fast and detailed compared to FDM printing. Also, the materials are getting better and better. However, compared to FDM printing is a really messy process. The resin frequently drops where you don't want it to, and you have to wash the models in an IPA bath. And here comes the problem
Also on the subject of resin printing you need to be able to provide substantial active ventilation for the printer- not just leaving the window open, actively pushing it out. Filtration systems are also a scam- ~40-60% effective on a good day.
Grow tents provide an effective and affordable way to do this.
I'd also mention to avoid anycubic resin printers because they have awful firmware and QC
I'd make sure any printer you end up buying has at least one * on this list https://mango3d.io/lychee-slicer-supported-3d-printers/

Discover the list of 3D printers supported by Lychee Slicer. There is a high chance that you will find your 3D printer.
arctic dragon
No experience myself with SLA, but would an ultrasonic cleaner be a viable alternative to IPA washing?
tall osprey
it sure is- it's nearly strictly better as a process, but you're still left with toxic waste
some people use household cleaners like simple green to fill up their ultrasonic baths
coarse thistle
Is creality a good brand? I have one if their FDM printers but idk about their SLA ones
tall osprey
no
their resin printers in particular are known as mechanically unsound
resin printers need to be super built- a medium-sized buildplate will need to support 20-30 pounds of force on initial layers
(fwiw, they actually don't do it properly, they all have ~.5-.7mm of backlash in the z axis due to using improper bearings in the stepper motor and anti-vibration mountings)
the backlash tends to not matter if you're just printing minis raised off the printbed but if you want to print on the printbed it matters a lot
and some things (like gears) can't reasonably be printed off the printbed
you can resolve this by adding a thrust bearing and shaft collar https://media.discordapp.net/attachments/576711196829286400/981307626283470869/IMG_20220512_192948.jpg?width=531&height=708
like I have done here

which afaik is an original mod so I need to do a writeup on it at some point
empty sedge
tender sparrow
My 3d printer has a problem where not enough plastic comes out of the nozzle and...
There should be a flow rate option which lets you override this. First check the filament diameter setting is correct though.
tender sparrow
It is correct
 inland galleon
TIL if your printer keeps freezing up mid print, your sd card might be dead (Creality CR-10v2)
 balmy pulsar
mine does that, but its the card reader i think, not the card
tender sparrow
A little isopropyl alcohol might fix it if you put it on the card contacts then insert and remove it a few times
It might be corrosion or dirt on the contacts in the reader
arctic dragon
The same applies to the card itself, as well.
Some cheap slots could also lose contact pressure on the card, especially if the card is exposed to external forces while in the slot. Not that there's an easy fix for this, but it's good to take precautions to prevent accidental bumping if possible.
balmy pulsar
i shall try that
i was thinking maybe the heat was hurting it
one printer is fine, the other craps out after some random time. often 90% through a print
cause it hates me
haha
 latent marsh
@supple stratus @idle crest DONE!!!!!!!!!


 faint sky
is it inappropriate to ask for someone with a 3D printer here if they're interested in designing & printing something for me? I don't have a 3d printer. i checked the rules and didn't see anything.
whipped up something in sketchup but it's far from usable other than an idea.

is there free software out there anyone can recommend for making 3D printable files? Sketchup won't import .brd or .sch files for the TFT from adafruits github.
 exotic echo
faint sky
is it inappropriate to ask for someone with a 3D printer here if they're interes...
exotic echo
faint sky
is it inappropriate to ask for someone with a 3D printer here if they're interes...
I might be interested, shoot me a DM with details.
empty sedge
faint sky
is there free software out there anyone can recommend for making 3D printable fi...
Kicad can convert eagle files and output solid models of just the circuit board
 tepid geode
exotic echo
I might be interested, shoot me a DM with details.
tepid geode
exotic echo
I might be interested, shoot me a DM with details.
Is that an open offer? I also need something printed.
tepid geode
Lol
 copper rose
Is this a reasonable first CAD project?: A folding light bulb caddy, similar to folding dish racks like the attached but holds light bulbs instead of dishes. Won't necessarily 3D print this one, might just use CAD to show the design to a friend and then build it with hand tools. But I'd still like the skills I learn in the project to transfer to situations where I do want to 3D print.
Any resources, suggestions, etc. appreciated.
copper rose
copper rose
Is this a reasonable first CAD project?: A folding light bulb caddy, similar to ...
 balmy pulsar
light bulbs? what is this 1987?
i cant realy visualise what you mean with bulbs
hehe
copper rose
no i'm designing it for my home in 2022
it is a somewhat ridiculous setup. I have a few table lamps that take ordinary E26 bulbs, and I achieve mood lighting by swapping in different bulbs at different times of the day. So I'm designing a little holder for the bulbs that are not in use at a given time.
balmy pulsar
ah, neat. anything with a defined end goal is a good cad project though. so as long as you know what this device has to do, it should teach you a lot
so, maybe a bit more like a cnc tooling rack
copper rose
awesome, thanks 🙂
 copper rose
balmy pulsar
so, maybe a bit more like a cnc tooling rack
copper rose
balmy pulsar
so, maybe a bit more like a cnc tooling rack
yeah. Though I think a folding mechanism could be good here because it helps space out the bulbs, whose tops are bigger than their bases.
copper rose
yep.
aesthetics matter here too. These are faux-walnut side tables, so wood with earthy colors is desirable
balmy pulsar
walnut i pretty
or contrast with maple
with printed inserts, kinda like that rack
makes the woodworking part more simple
modular
copper rose
yeah that makes sense, good idea
depending on the design, the woodworking could be easy regardless. For example some designs would contain solid strips of wood into which one simple needs to cut and sand some circular holes
balmy pulsar
yes, but if all holes were ther same, and your printed inserts could be made for each light bulb
makes it a bit cleaner
balmy pulsar
fusion 360 is free for hobby. not to push an adesk product, but because so many people also use it you can get help and colaboration easily
faint sky
@copper rose "I achieve mood lighting by swapping in different bulbs at different times of the day" You do what? You know they make RGB smart bulbs now.
Why not print bulb sockets and screwing them in as a holder instead of a rack? I mean technically light bulb sockets are their natural holder.
copper rose
faint sky
<@779893951285035018> "I achieve mood lighting by swapping in different bulbs at...
I do know that. I am not installing a freaking smartphone app to control my table lamp. Smartphones are a disaster and Internet of Things is a disaster.
copper rose
faint sky
Why not print bulb sockets and screwing them in as a holder instead of a rack? I...
This is a cool idea. Probably want it to be quicker to insert and remove bulbs, but the perfect fit factor of what you describe is appealing.
faint sky
you can find bathroom vanity fixtures in e26. they would have a rectangular base with the benefit of mounting it under a cabinet or shelf for easy organization. depends on how many you have. if you have a large amount then a box organization system sounds like a better idea.
 copper rose
Nice. I'm talking 4 or 5
faint sky
i have smart bulbs all over my house. while i agree about the app and IoT security they are very convenient. if you're swapping light bulbs multiple times a day then you're definitely the kind of person that should give serious consideration to a smart bulb.
copper rose
Yep, I gave them serious consideration lol
balmy pulsar
thats what i meant by printed inserts, to get a snug fit. you could print in a flexible clip that grabs the trheads, but doesnt make you actually twist the bulb
copper rose
oh that's a cool idea too, thx
faint sky
that's true, all you really need is a collar because bulbs are flanged
 fluid finch
Does anyone happen to have an .stl for a pimoroni hyperpixel 4 screen and/or one for a pi 400 cyberdeck hat enclosure?
tender sparrow
Does anyone know how to stop or at least limit the corners of the print coming off of the print bed
empty sedge
tender sparrow
Does anyone know how to stop or at least limit the corners of the print coming o...
getting the bed temperature exactly right is the biggest help. Trying going up another 5C. for PLA printing on blue tape or 10:1 diluted PVA (white glue) can help. For other plastics visionminer nano can help
tender sparrow
It’s fine while printing but when it’s finished it’s warped
empty sedge
do you let the cool before removing the print?
empty sedge
I doubt it curls after the print
tender sparrow
It’s fine for the first ~10 layers
empty sedge
Yeah, then I'd just repeat what I said above
tender sparrow
I’l try it
empty sedge
it can also curl off if your bed is too warm, or if there's too much ambient air movement
tender sparrow
The bed temp is 60c
empty sedge
what plastic of what brand on which printer on which print surface are you having trouble with?
tender sparrow
Amazon basics translucent red
empty sedge
if you're not using blue tape or PVA or nano it can help to clean the print surface with rubbing alcohol or dish soap
PLA?
empty sedge
I've had trouble getting uncolored PLA to stick before I put blue tape on this printer
tender sparrow
The filament says max bed temp 55c so i’l try 50c next time
empty sedge
eh, that's weirdly low
if it's too hot the plastic stays too soft so it can be pulled up. it's worth a try I guess
tender sparrow
55 degrees celsius
balmy pulsar
ive never had pla warp on my glass heated bed. i do keep the printer enclosed though. that i found 100% necessary for abs and nylon so i just keep it like that for pla too
fluid finch
tender sparrow
55 degrees celsius
Try releveling the bed and using a glue stick. Working through the same issue for one of my prints this week
tender sparrow
I have releveled the bed multiple times and the prints a bit big for a glue stick
balmy pulsar
O_o
glue stick (pva) works better the bigger the print is
more surface area
i only use pva for nylon though
acetone/abs slurry for abs. nothing for pla and petg
tender sparrow
Oh
loud silo
tender sparrow
Oh
I print PLA just fine on my cheap printer with an unheated bed. Have you tried just turning off the bed heater?
I use a glue stick on blue tape
balmy pulsar
I do a lot of big and / or flat PLA prints. Make sure your printer is not in a breezy room, next to AC etc.


anycubic 60c glass bed, no glue or tape or anyting else, but the machine is boxed in to retain heat
tender sparrow
balmy pulsar
I do a lot of big and / or flat PLA prints. Make sure your printer is not in a b...
It’s in a compartment so not much airflow
tender sparrow
loud silo
I print PLA just fine on my cheap printer with an unheated bed. Have you tried j...
The problem just started
I had excellent results before
balmy pulsar
new filament brand?
tender sparrow
Nothing has changed between the good prints and the bad ones
tender sparrow
I’ve washed it with dish soap multiple times
tender sparrow
tender sparrow
The only thing i can think of is needing to dehydrate the filament
I haven’t dried it since February and the printer’s compartment is outside
tender sparrow
balmy pulsar
dish soap. that leaves a film
That might be it
balmy pulsar
yeah id get some IPA
balmy pulsar
any should be fine
the main thing is it disolves grease and evapourates
methanol works too
but methanol is... evil
ha
tender sparrow
balmy pulsar
but methanol is... evil
Methanol aka liquid death
balmy pulsar
methanol is more aggressive, but also the fumes are bad for you
tender sparrow
My printer has a problem where the bed gets unleveled constantly so i have to re level it every time i want to print anything
Does someone know how to fix it?
balmy pulsar
which printer?
beds move. thats kinda what they do and why levelling is so in your face. i relevel my small one every few prints. the big one has multi point levelling and seems to stay put
tender sparrow
Ender 3 pro
Even 5 min prints make it unleveled and the bed moves down instead of up so the leveling knobs are getting tighter
balmy pulsar
hmmm. maybe it is losing vertical steps
tender sparrow
That might be it
tender sparrow
How do i fix it?
sacred hamlet
I just got a Prusa Mk3 up and going with OctoPrint and Cura. Surprisingly not too painful.
tender sparrow
balmy pulsar
hmmm. maybe it is losing vertical steps
Fix this
balmy pulsar
you need to find out why its doing it, if in fact it is. could be a bad drive, loose belt, tight belt, too much weight bent lead screw, etc
tender sparrow
It can’t be the belt ones
balmy pulsar
i dont know the machine, just throwing out possible things to look at
tender sparrow
The printer had several issues when i got it so idk what it could be
balmy pulsar
printers are made of issues. haha. but you gotta narrow it down one variable at a time.
tall osprey
tender sparrow
My printer has a problem where the bed gets unleveled constantly so i have to re...
this is a common and known issue with enders
balmy pulsar
measuring some stuff might help. like, run a print with no heated bed and no filament,
common, but whats the cause?
tall osprey
I've heard replacing the springs can help
balmy pulsar
not sure i buy that, but i guess it could be.
tall osprey
when your printer costs 99$ there are going to be some corners cut
balmy pulsar
$99?
tall osprey
microcenter (and a couple others) run 99$ coupons for it every other month
balmy pulsar
the pro?
tall osprey
 tall osprey
They run it literally every other month
balmy pulsar
anyhow, this still doesnt tell us what the issue is.
tall osprey
This and the reputation they have from ~3-4 years ago leads to the ender3 being the most popular first printer on the market
Anyway I've seen people put on nylocks, use silicone dampeners instead of springs, locktite, etc
Installing an ABL probe also helps by just circumventing the issue
tender sparrow
Found the problem
Loose screws
The beam that the nozzle moves across was loose
Almost a 1/4 inch play
The last owner had half a dozen loose screws
That’s why he sold it as not working
balmy pulsar
aha
oh this was a basket case
thats fine then. i though you got it new not working
tender sparrow
It was a good 1.5 turns away from being tight
balmy pulsar
now now
 latent smelt
hi. noob to 3d printing. is there a good guide/wiki for someone who wants to get a 3d printer? im pretty tech and handy so im sure i can deal with setup and minor adjustments. my first question i guess would be should i get an ender 3 or an ender 3 v2? most of the printing im planning to do would be for small casing/housing or parts for my electronics projects. dont need a lot of resolution but i want it to at least be semi reliable
tall osprey
don't buy an ender if you want reliability is what I would say
with a pretty small budget bump you can get significantly better printers
ie the artillery genius is ~350 and that's a much better printer
latent smelt
thanks @tall osprey. is the reliability more of a one time setup issue with enders? what are the alternative options?
tall osprey
I've never seen a settled ender
Everyone I know who has one always has something going on
But broadly if you want to print small stuff the prusa mini is relatively affordable and that's very nearly a press and go printer
latent smelt
ive looked at the prusas but they seem a bit out of budget at 700+. ive seen the mini but not sure if the 7” is good enough for printing cosplay props
although tbh maybe those 2” difference wont be that big in the big scheme of things
tall osprey
If you want the ~200x200 build plate that's common with "regular" sized printers take a look through the various chinesey printers- artillery, elegoo, anycubic etc
Oh no it's pretty significant
latent smelt
ive heard of the anycubic. ill go look for more info online
tall osprey
Anycubic resin printers are bad as a note
latent smelt
tbh ive been looking into getting into this 3d printing thing for years and now im really going to do it
tall osprey
It's a hobby accelerator for the most part
Lots of impossible things become possible
latent smelt
i know im going for an FDM instead of resin
i dont have a lot of use case for better resolution
most of the stuff i need before i hand carve out of old plastic cases and boxes
like a caveman. lol
tall osprey
Resin is tremendously difficult to work with just because of the safety hazards
But I can bust out 40 really tiny gears in a half hour
latent smelt
does anyone have an ankermake? based on what ive seen on promo videos it looks like the ultimate commercial 3d printer for beginners
tall osprey
I don't think anyone has one yet
Their marketing is at best untrue as well for various aspects
Broadly find them highly suspicious but who knows
latent smelt
ok so i guess its artillery genius or anycubic kobra?
tall osprey
Those are pretty distinct printers but I believe they're both good
Kobra is to my recollection a corexy large format
latent smelt
what does that mean?
corexy
theres also anycubic vyper which kind of spec’d the same in terms of print size
tall osprey
I was thinking of a completely different printer, disregard comments re:kobra
Also note you can get prusa mk3 clones for ~450 from China and I've heard good things for the most part
tall osprey
latent smelt
corexy
Corexy is a movement system type
Uses differential belts to produce movement
Results in a smaller, lighter carriage which works well for larger buildplates and retains speed lost by other mechanisms
balmy pulsar
the ankermake is curious, but yeah, i wouldnt touch one until a few hundred thousand other suckers have tried it out.
haha
i have anycubic megas and chiron
they mostly work fine
those are from the mega. but like all fdm printers, they are fussy things with many points of failure.

 latent smelt
thanks. ive kind of semi decided to go with the anycubic vyper. dual z-axis does seem important for stability. ill read up some more recommendations and hopefully i can “push the print button” on it this week
tender sparrow
The printer works now :)
balmy pulsar
woo
tender sparrow
it has no more problems that i need to fix :)
 scenic musk
im in the process of modifying a ring box for my friends proposal. unfortunately doing anything i would normally find simple has been extremely difficult. This is my first time working with a mesh models so maybe im overlooking something very easy. could anyone take the time to load this up in fusion 360 and give me some pointer on how i could create a sketch on the "flat" part on his back? https://www.thingiverse.com/thing:2772227

Ring Box with Magnets - Bulbasaur
Its not perfect, one magnet is sticking out a little on one side and it is very specific to the ring size right now.
Using 3mm can neodymium magnets, no glue just pressure fit.
balmy pulsar
ah. fusion in meshes is tricky. from memory, you would want to define a construction plane from vertices. i havent done it in ages so i dont remember exactly
tall osprey
You can convert mesh to brep and go from there
Googling mesh to body should help
But it's pretty funky to work with even after that
balmy pulsar
might be too heavy
brittle hornet
@scenic musk Sorry I don't have the fusion chops yet but I grabbed the stl and brought it into Maya where I'm comfortable. Maybe you would at least find this test useful. STL, Fusion -> OBJ export, OBJ -> Maya for boolean subtract /union. OBJ [368 MB] -> CURA to take a look. You can see by the picture that the boolean union text become illegible. It would need to be bolder. Boolean subtract sliced better. Also sliced for a .6mm nozzle but you get a basic idea. [need help? shoot me a DM. I will volunteer some time for a good cause...]
 balmy pulsar
oooh. you can do that in fusion btw. you can convert the text to mesh and then boolean them inside there.
but all the text size readability will still apply of course
brittle hornet
balmy pulsar
but all the text size readability will still apply of course
Cool, i figured as much. I swear I will bite the bullet and start/end a simple project with fusion. Btw, the fact that the plane in question is rotated 31 degrees in x, also isn't helping with the "rasterizing"? "aliasing"? , whatever you would call the conversion to sliced print lines. I would be inclined to rotate the model in Cura so that plane is flat. Of course that might make for a messier bottom.
gloomy anchor
do you guys use klipper?
seems quite fast. Paired with a pi zero
also what do you guys think of this https://markforged.com/3d-printers/metal-x. Supposedly prints metal
balmy pulsar
it is impractical
and expensive
dmls or similar is more useful for metal
(via services, owning one is silly)
 hexed sedge
gloomy anchor
seems quite fast. Paired with a pi zero
hexed sedge
gloomy anchor
seems quite fast. Paired with a pi zero
are you using a zero2? or running off of zero/zerow
 crimson pawn
Hey guys, I am trying to build a case for my project. ( Consists of a 64x32 RGB Matrix LEDs, a ESP32 & a Metro M4 ). I was considering using TinkerCAD. What do you guys recommend? Should I use other software? I am new to 3D printing.
balmy pulsar
fusion 360 is free for hobby
i havent really used any of the other cheap/free cad softwares
faint sky
there are like a 20 different versions, can you link to the free version that's best for 3D printing design. there are so many versions it's really confusing.
balmy pulsar
id just start with fusion, but i am probably biassed at this point
balmy pulsar
yes
thats the freebie
theres a start up version as well. but you need to actually provide real company data
and then theres the full paid "bite me" version which is now rather expensive ($500us/y?)
the downside to the free one is they tend to change features on a whim.
tall osprey
I'll be a bit contrarian here and strongly suggest going with the SOLIDWORKS hobby license at 10$/mo
I've had enough beefs and issues with f360 that SW can just chew through no problem
But transferring my learned skillset to SW is a pain in the but such that I really wish I had just started with it instead
balmy pulsar
sw hobby, this is new? normally you had to request the PE versions an it only ran a year
i like sw better overall, but i need fusions build in CAM
tall osprey
No clue on if it's new but it's a good deal
balmy pulsar
if it isnt heavily restricted
tall osprey

Dassault Systèmes
Professional design tools for hobbies and personal projects. Easy to learn, fun to use, and only US$99 a year or US$9.99 a month*
balmy pulsar
"Files and data created with your Maker account are digitally watermarked and can only be opened up in another Maker platform"
yeah thats a no then
also not compatible with plugins
they always do this
make it basically useless
sigh
tall osprey
Yeah that's the big footnote but it only applies to the native files- step and such is still OK
I wouldn't be surprised if it was somewhat easy to remove, just flip a bit or something....
balmy pulsar
if it was free, sure, i have no right to complain. but this is not viable for a paid product
tall osprey
Perhaps we shall get lucky and freecad will get the blender experience
Though it seems more likely blender will get CAD instead...
balmy pulsar
possibly
thin breach
crimson pawn
Hey guys, I am trying to build a case for my project. ( Consists of a 64x32 RGB ...
I have used OnShape - geometry is strong. Not as good for organic features as Fusion 360.
balmy pulsar
ah yes onshape,w as trying to remember that one. my friend uses it, seems to like it
faint sky
got it installed, looks straight forward enough. now i can follow along with the Ruiz brothers 3D videos and learn new things. 🙂
 stuck trail
if anyone replies to this, please ping me.... not much of a issue but I wanted a opinion if possible. I am about to buy the pursa mini+ and was wondering what extra sheets are worth getting. I do plan to mostly print with PLA but I might occasionally use something different

kind of only want to buy one sheet extra
tall osprey
smooth PEI sheet is a must I would say
stuck trail
I can't find out what sheet it comes with -_-
I think it is the steel sheet though
but I will take your word on the smooth pei
tall osprey
I would expect it comes with smooth pei
textured sheet is good for petg and other stickier materials
stuck trail
the site doesn't show the contents for the kit, the manual only talks about the steel sheet
kind of a missed opportunity X/ would be nice to get info on the full package contents X/
tall osprey
could just pop em an email
considering ship time from Prague its worth getting right
stuck trail
yeah, I was going to wait a bit until I saw
 tall osprey
I don't have experience with the satin sheet but I will say having both is very good
stuck trail
what is different between smooth and satin?
tall osprey
the textured one is notably less sticky
stuck trail
yeah the last thing I want is prints moving midway
any accessories you'd recommend from their site?
I am getting the filament sensor
tall osprey
it comes with one
stuck trail
yeah, it is a option on purchase I am going with, just didn't know if there was any side accessory they have you might know
tall osprey
just took a quick scroll I don't see that I'd recommend anything besides one of the other sheets
threaded inserts are nice to have
stuck trail
oh I have some from my old printer still, but I will bookmark those now and think about that after I see the price with tax XD
the sheet in the kit is just called the PEI mini sheet
 tall osprey
I'd pop an email
tall osprey
or you could trawl their forums
stuck trail
I am guna watch a unboxing video XD
I was on their knowledge base for a minute
yeah, everything seems to point to them shipping with a steel sheet
Print bed material: Removable magnetic PEI spring steel sheet
I will assume that it is, I will buy it with the smooth sheet but email them as well
shy kelp
my printer does not update the temperature of the extruder
it reports 29C, when trying to heat it up, it gets in protection and shuts down
checking the thermistor with a tester it reports around 83 ohms, so I don't think that there are issues with connections
trying to use another pin, does give the same issue, another board pretty much the same, when shorting the pins it goes again in protection and shut down, so I don't think that's an issue of a faulty board
using marlin bugfix 2.1.x



 tender sparrow
shy kelp
my printer does not update the temperature of the extruder
it reports 29C, when ...
tender sparrow
shy kelp
my printer does not update the temperature of the extruder
it reports 29C, when ...
What model printer are you using?
shy kelp
tender sparrow
What model printer are you using?
an anycubic i3 mega, more or less
tender sparrow
Are you sure you’re using the right marlin config?
tender sparrow
tender sparrow
Are you sure you’re using the right marlin config?
I meant to say are you using the config for the board version in your anycubic i3 mega
Nvm i just checked and it only has one board version
Check the heater
It might not be heating up so marlin errors as a failsafe
balmy pulsar
new hot ends for the mega are $18 or so. just get one and get bak to printing
shy kelp
balmy pulsar
new hot ends for the mega are $18 or so. just get one and get bak to printing
and indeed it is new, and I did try with other hotends that previously did work