#help-with-3dprinting
1 messages · Page 43 of 1
 shy kelp
i'll agree creality is good brand, but you do make some trade offs to hit that price point
while it will print out of box, a portion of creality owners make some modifications to their printers from the stock configuration.
 elder oxide
shy kelp
while it will print out of box, a portion of creality owners make some modificat...
elder oxide
shy kelp
while it will print out of box, a portion of creality owners make some modificat...
Sure, moves to direct drive filament feeder or linear rails for faster printing, adding BL Touch for leveling, quiet motor boards, etc..
shy kelp
for the price, it's a good entry point
elder oxide
Sure, I bought one with a glass bed, metal feeder assembly.
 iron remnant
I mean, yeah, but * sighs in Ender * I did have to replace my motherboard after slightly more than a month's usage and the stock extruder allegedly will die after a few months of usage and the bowden tube was toast after only like about 4 kg.
elder oxide
I love the tempered glass though I print mostly smooth side
I’ve had my Ender 3 pro since May 2020
shy kelp
iron remnant
I mean, yeah, but * sighs in Ender * I did have to replace my motherboard after ...
i replaced mine immediately for a silent board. because omg that motor noise
iron remnant
But the not-smooth side will eventually wear off, so you need to temper your expectations.
Oh, yeah, I got the 3v2 so I'd get the silent board with the 32 bit controller.
elder oxide
Works very well, I have a buddy who has a ton of Ender 3 that he only upgraded after using them for 2-3 years
iron remnant
I dono, I highly suspect that at least some of the mods are fully questionable.
elder oxide
He prints almost exclusively in ABS or PETG
Sure, absolutely a valid point
He mostly did like full metal hot end and things like that
shy kelp
i like the all metal hot end because i just crank up the temperature and melt out any clogs
iron remnant
Yeah, I just upgraded to Bondtech DDX extruder and a Mosquito hot end becuase I make poor life choices and spend more on an upgrade than I did on the printer.
elder oxide
Lol
shy kelp
i would say, creality has made some improvements
they are just baking into their later printers
my CR10S vs Ender 3 Max... it's got some quality of life improvements
elder oxide
The Ender 3v2 was a huge upgrade quality wise from the original Ender 3, that’s for sure
And I’ve heard really good things about the Ender 6
shy kelp
i wish they did proper version numbering
elder oxide
Yeah
shy kelp
not this ender 3 v2 , v2 pro, S, max, ect
elder oxide
My buddy has an Ender 5 and really loves it
shy kelp
i also with the number actually meant something
as it, in corrosponded to like build size
elder oxide
Yeah
iron remnant
I dono, Naomi Wu is mad at them lately over QC issues.
shy kelp
ender 2 = 200 x 200 ender 3 = 300x300 ender 4 = 400x400 ...
shy kelp
iron remnant
I dono, Naomi Wu is mad at them lately over QC issues.
there is ALWAYS QC issues and thats why both creality and 3rd parties will happily sell you upgrades
iron remnant
And, as I said, I did have to replace some stuff not because I wanted to upgrade it but because it died early.
elder oxide
I feel like QC is a big problem with 3D printers in general
elder oxide
A lot of people fawn over prusa but or other “high end printers” and I’ve had equally frustrating experiences
elder oxide
The maker bot printers my university maker space had were.. horrible
shy kelp
really?
elder oxide
But they worked more regularly than the $5000 industrial 3D printers we had
We had these three with massive print beds and auto leveling, and filament warnings, and a decent UI but they were garbage
Customer service was abysmal.
Especially because the company was right down the street from the university too
shy kelp
elder oxide
We had these three with massive print beds and auto leveling, and filament warni...
i love massive print beds
elder oxide
It was huge
shy kelp
ooo
i want that
i might still have to split my models into sections
but i could 2 sections instead 4
elder oxide
It was one of these

Profound3D
The Fusion3 F410 delivers professional 3D printing for the most demanding applications. Fusion3 understands the innovating power of 3D printing technology for businesses, as well as schools, universities, libraries, and other educational institutions, and is committed to providing 3D printers with the features and reli
We had 2 F410 and one F400
I don’t recommend them at all
The CEO told my friend who has a 3D printing business and is now a systems engineer at Lenovo that he would be the person fixing 3D printers rather than getting to do real engineering work and getting g promoted
So, the CEO is trash and I simply won’t recommend their products to anyone
My friend has like.. 10 printers, most of the creality
shy kelp
one concern i have going with super large print area is print failure
would set me back so far.
right now i have 3-4 day prints
elder oxide
Yes, prints failed sooooo often
And the system for holding the Bowden tubes was horrible. They would regularly pop out causing the print to fail
The feeder would regularly grind down the filament causing the print to fail
I spent.. hours working on those printers. More than I’ve spent on my Ender 3 pro
Anyway, I’d buy any other brand of large bed 3D printer before recommending fusion3.
shy kelp
any recommendations of a 400x400?
my one requirement is that it MUST be T shaped printer.
--- like how the ender 3s look.
 empty sedge
no
shy kelp
so i can wedge it in the closet that i put my printers in.
the door way is much narrower than the interior
it's like a naria closet
elder oxide
Honestly, Ender 5 is a box, but my buddy has had really good luck with it
shy kelp
what mainstream 3d modeling app is tinkercad closest to ?
empty sedge
Eh, tinkercad has like 4 features that every cad package has but nothing else
 torpid grove
shy kelp
what mainstream 3d modeling app is tinkercad closest to ?
torpid grove
shy kelp
what mainstream 3d modeling app is tinkercad closest to ?
Somewhat depends on what your trying to model / accomplish. Fusion 360 is a good go to for solid modeling. And it has some freeform tools as well. Blender is another option not sure how well it does with solid modeling though.
shy kelp
fusion 360 not an option for me, I use a fablab so I use what they have
torpid grove
shy kelp
fusion 360 not an option for me, I use a fablab so I use what they have
Do you have a list the 3D software that is available at the fablab? If offered FreeCAD is another option but... it has some big hurdles to overcome that you could avoid with other software.
shy kelp
they told me for 3d printing they use tinkercad and nothing else, might be able to change it long term as a volunteer but I think I'd be out of line if I used fusion 360 and asked them to adapt to me
they have a printbot, a tevo tarantula and a sense3d
torpid grove
shy kelp
they told me for 3d printing they use tinkercad and nothing else, might be able ...
Well that does seem rather restrictive. Of course they may have some very valid reasons for doing so. Still not really knowing the exact restrictions or work flows present at the fablab I would see if they'll just let you bring your own stl's. If they do allow this, then you'll have the freedom to use whatever 3D software you find best suits your needs. As far as I know virtually all 3D modeling software can export stl's.
shy kelp
they told me if I uised autocad they don't know how to convert to the stl correctly for their hbardware and I'd be on my own
and I know nothing about 3d printing except that I'll need it to make a joystick for a game
and that the result need to be though because I need to install a tractor keyswitch in there<
torpid grove
You should be fine to export the stl from AutoCAD. Truly the only hurdle you should encounter is making sure that it's scaled correctly. You can always verify the scale by previewing the file in whatever slicer the fablab uses. Once you have the stl in the slicer it should print just as well as any model that came from Tinket CAD.
shy kelp
what about fusion 360 eould there be no hurdlr or blender or even sketchup?
torpid grove
Yeah actually fusion 360 is still my recommendation knowing a little more about what you're doing. It has solid modeling which means whatever stl's you export from it can be guaranteed to be water tight. This means the slicer software will process them without issue. Other software like blender on the other hand doesn't make those guarantees so you could end up going back and forth until you get the model water tight. Sorry I should have mentioned that earlier when talking about bringing the stl into the slicer, I use CAD software often enough that I've started to take these things for granted. Can't really speak to sketchup as I've never used it but it looks capable of doing 3d modeling at the very least.
shy kelp
I'll ask them when they give me the mandatory training
they work on badges so can't use it by myself until I get the badge
torpid grove
Asking them seems like a good idea. Best of luck with your project!
shy kelp
does fusion 360 also use csg add/substract 3d modeling behavior ?
 knotty laurel
shy kelp
does fusion 360 also use csg add/substract 3d modeling behavior ?
knotty laurel
shy kelp
does fusion 360 also use csg add/substract 3d modeling behavior ?
Yep. It also has some other modes for things like mesh modeling.
 sharp thunder
On an Ender 3v2, what upgrades are recommended to start out with?
shy kelp
start with what do you want to do with your printer? what problems are having?
other upgrades only pair well with other upgrades -- for example the creality bed leveler pairs well with something that lets your read out the level of the bed and know where to make adjustments
so you get something like this:

(octoprint, bedvisualizer, creality bed leveler on a ender 3 max, for those keeping score)
other upgrades, like the direct drive has trade offs. because it's a got more mass you have move around, you can't move the nozzle around as fast. and you print slower
i hope this helps @sharp thunder
 unique pendant
sharp thunder
On an Ender 3v2, what upgrades are recommended to start out with?
unique pendant
sharp thunder
On an Ender 3v2, what upgrades are recommended to start out with?
I found this the most helpful: https://m.youtube.com/watch?v=7tCxO17XZtw

Chuck shows you a simple hotend fix for your Creality Ender 3, CR-10 or just about any Creality Printer. He uses a technique created by Luke Hatfield to create a higher temp insert for the Hotend. But Chuck adds his own twist to the design to give you a higher temperature solution. He explains all the reasons behind the design so you will fully ...
And this is a useful series on tons of upgrades, though the z-axis mod is controversial (I didn’t do it). https://m.youtube.com/watch?v=kG_YKeJDaX8
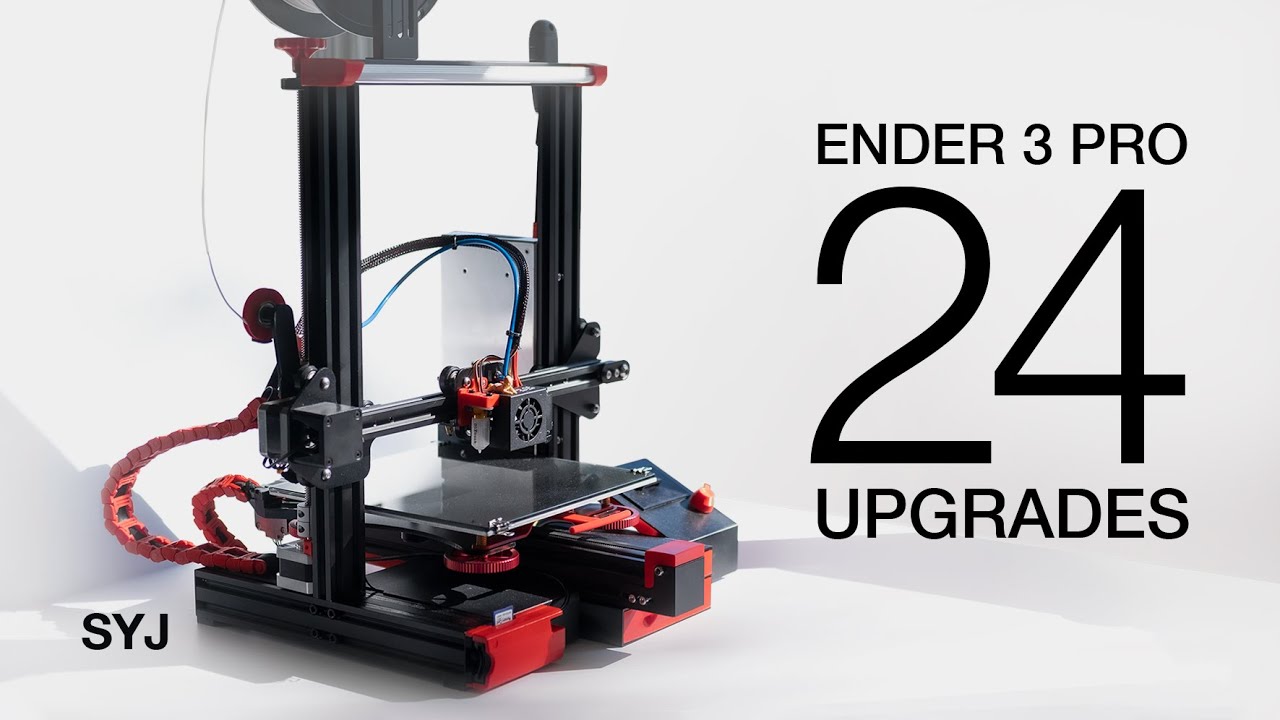
Part 2 - https://youtu.be/uBfMoOqCgPc
Part 3 - https://youtu.be/4jk6kZIwsQA
All music by Cameron Luck: https://rb.gy/nzcwrw
My Instagram: https://www.instagram.com/scottyujan/
If you decide to buy an Ender 3 Pro or other products from Creality, please consider using my affiliate link to help support my channel:
Creality (cheaper) - https://bit...
Also, if you live in the USA, these guys test and adjust every printer before sending it to you so you don’t get a lemon. https://tinymachines3d.com/collections/all-3d-printers/products/ender-3-v2

Tiny Machines 3D
Ships from our USA facility! Ender 3 V2 3D printers are are fully inspected and tested by Tiny Machines 3D in Houston, TX. Upgrades are available and installed! FREE SHIPPING!
Oh, it looks like they’re shipping internationally now.
sharp thunder
I was looking at the tinymachines3d site as well. I’m ok spending a little extra to have them work out the kinks. Was thinking of adding the BL touch as well as the micro Swiss all metal hotend. They usually have some black friday deals
Any thoughts on needing a filament sensor?
iron remnant
I mean, only put an all-metal hotend on if you intend to print things other than PLA.
But, yah, overall I much prefer using the BLTouch to measure the bed level with bedvisualizer than to use feeler gauges and/or paper.
shy kelp
speaking of bl touch issues
right now i'm having Z offset problem
where changing the Z offset doesn't seem to take effect
M851 Z-5;
M500;
G28;
G0 Z5;
and thats still directly on the bed.
not 5 milemeters up
even if i change M581 Z20 or Z0... doesn't matter
G0 Z5 is always directly on the bed
unique pendant
Assuming you mean the nozzle is directly on the bed... Is this the method you're using? https://marlinfw.org/docs/gcode/M851.html
A larger Z value will bring the nozzle closer to the bed. Your probe should not be lower than the nozzle, it should be a negative value. What happens if you make the offset -20?
 carmine peak
There's a coupon for the Ender 3 Pro right now at my local store that drops it to 100$
I already have an Ender 3 that ive been upgrading a lot but something breaks every few weeks that makes it a pain to use
I'm wondering if i should just cut my losses and sell the 3 or scrap it
What do you think?
 vestal thicket
sharp thunder
On an Ender 3v2, what upgrades are recommended to start out with?
vestal thicket
sharp thunder
On an Ender 3v2, what upgrades are recommended to start out with?
Replace your extruder - get a metal one. The plastic one is guaranteed to break, and fast.
vestal thicket
carmine peak
What do you think?
That's just what Enders do, imo. I have a v2 and it's always in need of tweaking or fixing or something. The Microcenter deal is pretty good, but I wouldn't scrap it. You'll want the parts anyway. 🙂
carmine peak
do you think it's worth it?
Either to give away my old printer to someone else or have a setup where there's a dedicated PLA printer and a dedicated ABS one or something?
vestal thicket
I can't really answer that for you, but in my experience if you're frustrated with your Ender 3 now, the Pro isn't going to be much better, just newer. If it were me, I wouldn't give it away, I'd either do something dedicated like that or have a backup for parts
carmine peak
alright, thanks
unique pendant
carmine peak
do you think it's worth it?
If you're frustrated with your Ender 3, it may be time to upgrade to a more robust printer, in which case, getting another Ender is not going to work for you. Maybe save up for a Prusa? Maybe if you find yourself making primarily smaller prints, you could do fine with a Prusa Mini? Or if you want to go Voron, there's some nice 0.1 kits out there... https://www.fabreeko.com/collections/printers/products/voron-v0-1-full-kit-by-ldo
https://www.mandalaroseworks.com/shop/voron/voron-01-kit

Fabreeko
Preorders Now open for batch 3 expected to land here mid November if you choose air shipping or mid to late December via Sea Please Note your color preference for frame via email info@fabreeko.com Otherwise black will be shipped out no printed parts are included full BOM here: http://docs.ldomotors.com/voro

Mandala Rose Works
Our next batch of V0 kits have arrived! We now have the option of Gold or Red extrusion colors.
Mandala Rose Works is pleased to be able to offer the Voron0 kit, with a little of our own added in. The Voron 0.1 Kits manufactured by LDO that we are carrying will include our popular Voron0 Magbed, and we have decided to do the panels ourselves...
carmine peak
unique pendant
If you're frustrated with your Ender 3, it may be time to upgrade to a more robu...
I find myself making larger prints.
shy kelp
unique pendant
Assuming you mean the nozzle is directly on the bed... Is this the method you're...
turns out since i didn't have an SD card in the machine
it was just ignoring any values i set
shy kelp
unique pendant
If you're frustrated with your Ender 3, it may be time to upgrade to a more robu...
Voron printers are good, but they are also very small.
I'm looking for an upgrade for my CR10S, something like 400x400x400 and in a T shape
... so like how the CR10 or Enders have a flat bed and middle section that goes up
unique pendant
shy kelp
Voron printers are good, but they are also very small.
That’s the small one. There’s much larger Vorons
unique pendant
shy kelp
I'm looking for an upgrade for my CR10S, something like 400x400x400 and in a T s...
I have one of these with an x-rail mod and I really like it. Great quality. https://www.formbot3d.com/products/vivedino-raptor-20-large-3d-printer-with-400x400x500mm-build-size

FORMBOT 3D Printer
Latest Version of Single Extruder Big Size 3D Printer
vestal thicket
I agree with @unique pendant - my best friend was frustrated with his Ender, bought the Prusa and loves printing now. 🙂 It just works, no tweaking
elder oxide
vestal thicket
I agree with <@449766464342458371> - my best friend was frustrated with his Ende...
It’s hit and miss, I haven’t tweaked my Ender 3 pro since April and it prints like a champ, a buddy of mine has like 5 creality printers and abuses them and the just keep going (he was printing just about 24/7 at one point)
vestal thicket
@elder oxide I'm with you, I rarely have to level mine and it's been printing non-stop the last couple months. They are definitely hit or miss
I remember reading something that basically said if you're buying an Ender you'll learn as much about the printer hardware as you will about printing
elder oxide
Yeah, that’s pretty fair
I know plenty of people who buy creality just to have a cheap frame to make it to their own
vestal thicket
I have more time than money, so the Ender made more sense for me than the Prusa
unique pendant
elder oxide
It’s hit and miss, I haven’t tweaked my Ender 3 pro since April and it prints li...
Unfortunately, Enders have been all miss with me, 3 for 3. Have to upgrade so much just to get decent performance. Learn a lot about tearing down and building up tho'. Everyone I know (including me) who uses a Prusa has not been disappointed.
elder oxide
See, my experience with prusa has been the opposite lol
unique pendant
3D printers, no matter who makes them, are far from perfect! 😄
elder oxide
There’s just a chance you could end up with a lot of work no matter what brand of printer you buy
Higher with some brands
iron remnant
I mean, I deliberately got an Ender so if I broke it, I wouldn't feel that bad.
unique pendant
iron remnant
I mean, I deliberately got an Ender so if I broke it, I wouldn't feel that bad.
Nice philosophy.
iron remnant
Then again, it did print PLA pretty decent out of the box for the first month, at which point the motherboard broke.
 winged helm
I guess I'll ask my work to buy a Prusa
I've lurked here a bunch and they seem really nice
iron remnant
Pretty much, I felt like if I had a Prusa, I'd probably want to keep it completely stock and do nothing to it, lest I cause it to become subtly broken.
Whereas if I got an Ender, I'd do ill-advised things.
winged helm
I'd prefer something with as little fiddling as possible
iron remnant
Yeah, and I also tend to feel like Prusa is at least being reasonable and engaging with the community in positive ways.

 half dew
I see a lot more reports of quality issues with Creality printers lately (new ones mainly) - I think its probably due to parts shortages. I loved my Ender 5 - it worked amazingly for a long time...but once the issues started I went crazy and kind of upgraded everything on it. I'm at a point where I just want a printer that works and the new Prusa looks like it might be the thing so I threw down a pre-order (also, I want to be able to print water soluable supports so I ordered the 2 tool version)
 lunar oar
My cooling fan on the side (not the one for the heat block) stopped spinning. The sodering seems fine, so I went to the board. No issue I could see with my eye, so is switched it to the other fan one

Now to me it seems to be spinning way faster than before, is this okay?
empty sedge
lunar oar
My cooling fan on the side (not the one for the heat block) stopped spinning. Th...
Do you have a voltmeter? Are those two outputs the same voltage?
shy kelp
lunar oar
My cooling fan on the side (not the one for the heat block) stopped spinning. Th...
have you tried replacing the fan
i've replaced the one on the heat block so many times
they just get dust and junk in them and stop spinning
lunar oar
empty sedge
Do you have a voltmeter? Are those two outputs the same voltage?
Yes and it reads 0
lunar oar
shy kelp
have you tried replacing the fan
Well if it was the fan, then switching the port would have no effect, right?
shy kelp
i'd just take the fan out and test it seperately
isolate the variables
plug it in a power source
if it does, then it's a mainboard problem, GCode problem (where it says don't spin the fan)
if it doesn't, it's a fan problem
shy kelp
half dew
I see a lot more reports of quality issues with Creality printers lately (new on...
yup
right now i got a creality branded auto leveler
that isn't registering when it's touching the bed, it's just straight up ramming the nozzle straight into the bed
elder oxide

shy kelp
shy kelp
right now i got a creality branded auto leveler
yea mine unleashed it's magic smoke everywhere...
 broken orbit
elder oxide
It’s hit and miss, I haven’t tweaked my Ender 3 pro since April and it prints li...
broken orbit
elder oxide
It’s hit and miss, I haven’t tweaked my Ender 3 pro since April and it prints li...
I love my Ender 3
I just leveled mine manually
vestal thicket
After all that talk of Ender 3 vs Prusa the other day, and a week of my Ender 3 v2 printing perfectly, of course something goes wrong. Repeat after me: It's always the bed level. 🙂
half dew
Yeah - I really hope that the Prusa XL has actually solved bed leveling like they claim... its an expensive printer but if 3d printing is ever going to get non-hobbyist adoption then things like I having to level the bed, set z-offsets, put tape or glue on the bed, etc need to be fixed
empty sedge
Works $10,000 markforged has manual bed leveling. I think the expensive stratasys machines might also
That said the markforged has only 3 adjustment screws and comes out perfect when you follow the wizard and use the included shim stock as a feeler gauge
half dew
They always need to be readjusted at various points though - and industrial machines come with an expectation that you'll need to maintain them a certain way. I want my grandma to be able to 3d print things and shes just never going to learn how to do that
3d printers really need a company analogous to Sonos where they spend the money to make auto-setup automatic
 cosmic star
How do I just how long a print will take? My local public library has an Ultimaker 2+, but we can only do things that take under 3 hours.
unique pendant
You'll have to print fast and small.
cosmic star
what about something like this? https://www.thingiverse.com/thing:2209964

YouTube: https://www.youtube.com/watch?v=jy7a-z19UEQ
NEW UPDATE April 8, 2016 – Added new parts for Adafruit 2.4" TFT Feather Wing
This is our 3D printed case for the Adafruit Feather. It’s for anyone looking to put their project in a box. It’s a multipurpose enclosure, so you can use it for a number of different projects. It’s designed to house...
unique pendant
If you put the STL in your slicer, it will give you a time estimate. Your library likely has profiles they could send you, or you could just download the Cura profile for their printer from the Ultimaker site and it would be close enough. Might do a web search to see how fast you can set the print speed on that printer and still have good quality.
 sand crater
Whats the best material for tiny little gears in a old car tuner ? Needs to be precise but strong, nylon ?
lunar oar
just got some z banding on my creality e5+
whats weird is that my printer has two lead screws, and 4 alignment bars, i didnt even thing this was possible on it and the fact that i just printed fine on it... and this randomly came up... the frick
i loosened the screws that hold it to the bed, adjusted the couplers, made sure both sides were level, cleaned up the screws to get rid of any gunk, no squeaks, but no solution....


any solutions?
empty sedge
good luck, it could be a million things
it could be temperature control on the bed, but I doubt it'd be as consistent
it's probably something with the z couplers or leadscrew
lunar oar
the only thing that changed was printing pla that was recomended for 210-220 to 180-210, thats it
lunar oar
not the filament...
 lunar oar
empty sedge
it's probably something with the z couplers or leadscrew
lunar oar
empty sedge
it's probably something with the z couplers or leadscrew
i mean how did that change from one print to the other?! the lead screw is straight, the couplers are tight, no squeaks or visible wobbles to be afraid of...
empty sedge
lunar oar
i mean how did that change from one print to the other?! the lead screw is stra...
Did you move your printer? did you change your target print temperature? did the ambient temp or breeze change? Are any connectors or wires loose? Did the leadscrew slip in one of your couplers or the motor slip in a coupler? Are the v-wheels binding more?
lunar oar
There's no banding on the printer next to it, so it's most likely not the room temperature. No wires are loose. I re-fastened the couplers nice and tight. The v-wheels are performing fine...
half dew
lunar oar
There's no banding on the printer next to it, so it's most likely not the room t...
Try printing a different model?
Sometimes weird model geometry shows up in prints
lunar oar
half dew
Try printing a different model?
Nope. I had the same idea so I printed am an old model. And it still had ribbing
cosmic star
unique pendant
If you put the STL in your slicer, it will give you a time estimate. Your librar...
What do you mean "slicer"?
empty sedge
cosmic star
What do you mean "slicer"?
Probably Cura. It’s the software that converts the model to the path the printer follows to print your object.
unique pendant
cosmic star
What do you mean "slicer"?
Correct. Since your library uses Ultimaker, they almost certainly will have directions on their web site for Cura since it is made/maintained by Ultimaker. Either way, have a look at some beginning 3D printing directions/videos and the workflow will make sense. There are many beginners guides to 3D printing that might be good for you explore. I don't have any particular recommendations, but I did a quick search and found this obscure one that has setup instructions for Cura you can do on your own computer so you can just bring your own file to the printer at your library. https://www.youtube.com/watch?v=mXl3UXzXDC0

Join our community of 3D Printers and D&D Players on the Slice Print Roleplay Facebook Group!
https://www.facebook.com/groups/548942172387140
Download Cura here:
https://ultimaker.com/software/ultimaker-cura
Barkeeper
by VaeVic...
cosmic star
unique pendant
Correct. Since your library uses Ultimaker, they almost certainly will have dire...
I downloaded the prog for Linux, tried an STL for an RGB matrix case, and it told me it was too long. 😦
half dew
Yeah, 3d printing is a lot slower than people imagine
unique pendant
How long was it? Make sure the nozzle settings for your library match, and you can make it go faster by speeding up the print speed in the slicer, and/or increasing layer height. If it's a .4mm nozzle, you can print layers up to 0.3 max, and if it's a 0.6mm nozzle you can print 0.4 mm layer height no problem.
carmine peak
how do I print ABS with a zip up enclosure?
do I just take the whole thing outside?
 arctic dragon
The purpose of the zip up enclosure is to keep the temperatures stable, it shouldn’t need anything special after being enclosed.
carmine peak
Yeah but
ABS. Therefore, fumes
What do i do with the fumes? Wait for the enclosure to magically absorb them?
 pulsar zodiac
Anyone have a good/reliable method for converting .STL formatted files to .OBJ?
 halcyon crane
pulsar zodiac
Anyone have a good/reliable method for converting .STL formatted files to .OBJ?
halcyon crane
pulsar zodiac
Anyone have a good/reliable method for converting .STL formatted files to .OBJ?
I usually just import to blender then export
gives you a chance to fix any import weirdness too
pulsar zodiac
Thanks for that tip. I'm hoping to find something that doesn't require installing a full CAD program.
halcyon crane
fortunately blender is really lightweight (183mb) but I understand the concern
let me see if there's anything else out there
halcyon crane
carmine peak
What do i do with the fumes? Wait for the enclosure to magically absorb them?
open a window, get one of these: https://www.amazon.com/gp/product/B08HYZYZZX

Solder Fume Extractor - MUIN 3 Stage Filtration Solder Smoke Absorber for Soldering and Wood Burning,Portable Soldering Fume Extractor Fan for Soldering Station (Black)
@pulsar zodiac is the conversion just a one-off thing or will you be doing it often?
pulsar zodiac
I have a number of files to convert, but that should be it after they're done
halcyon crane
maybe this then: https://products.aspose.app/3d/conversion/stl-to-obj
STL to OBJ: online STL to OBJ converter for free
alternatively, blender can actually run headless so you could script the conversion if you need to do it a lot
pulsar zodiac
That could work. Headlless blender also sounds interesting. Thanks very much!
carmine peak
halcyon crane
open a window, get one of these: https://www.amazon.com/gp/product/B08HYZYZZX
Ohh, now i see
Put it in the enclosure, route the wires like with the power cable?
 agile stirrup
Hi! I used the link to Thingverse to download the STLs for the NeoPixel Ring Lamp project https://learn.adafruit.com/neopixel-ring-lamp/3d-printing and the Thingverse page loaded, but when I clicked the link to download the STLs it gives a 404 when the countdown completes and the files should start downloading. Is there another place to get the STLs?
shy kelp
you can scroll down and download them indivdual
ly
for some reason the download as a zip isn't working
@agile stirrup
agile stirrup
Oh! Thank you.
 left veldt
@pulsar zodiac Accutrans 3D is a program I have used for a long time and it works great at converting lots of 3D polygon formats: http://www.micromouse.ca/. Meshmixer can also be used but is harder to optimize.
pulsar zodiac
left veldt
<@264599503619883008> Accutrans 3D is a program I have used for a long time and ...
Thanks, I'll have a look.
 raven coral
when mounting a bltouch probe, it has to be strictly around 8mm above the hotend right?
iron remnant
So, it needs to be solidly mounted so it won't move.
It needs to be a defined X,Y offset from the nozzle, some firmwares let you configure that easily some dont.
And you need to be able to probe without crashing the nozzle into the build plate.
And you need to be able to print without crashing the probe into the part.
raven coral
ok so have the probe 8mm above the hotend
and my mount should be sturdy enough not to bend at the slightest of resistance of magnets
shy kelp
Hi there, I'm having trouble getting microstepping working on a Feather M0 Express with a Adafruit DRV8833 DC/Stepper Motor Driver Breakout Board.
My problem is in some foggy errors I get combining example code. Errors pop up in the library. I think it expects some setting from me in the code.py, but the tutorials are vague about it.
my first question: is this a better place to ask this? or stick to the #help-with-circuitpython?
 willow sedge
shy kelp
my first question: is this a better place to ask this? or stick to the <#5373657...
willow sedge
shy kelp
my first question: is this a better place to ask this? or stick to the <#5373657...
Probably better off in #help-with-circuitpython.
shy kelp
OK, thanks
They have been helpfull out there, but this looked more specific motion related. I thought I'd try.
willow sedge
Yeah that's fair.
shy kelp
I haven't found a place where I can look for code samples from others regarding this. Is that available on Discord, or should I look on Github?
willow sedge
Leave it posted here too, but follow up in the other channel when you get help, so folks know you're getting help in another channel.
willow sedge
shy kelp
I haven't found a place where I can look for code samples from others regarding ...
Mmm..... Discord you can search, and hope to find something. Sometimes folks post code, and sometimes it's simple to find. GitHub might be a better option though.
shy kelp
OK, just made an account there, I'll dig into the search options. Thanks
willow sedge
You're welcome! Good luck
raven coral
at which point when beggining a 3d print should i run bed leveling
at the very beggining, or maybe while the hotbed is heating up so it could save some time
empty sedge
when everything is warm if you can, or just the bed is if you can, least preferably before heating
the bed moves the most as it heats up
 stoic echo
Yeah, you can add commands in your slicer to have the bed start heating up, even wait a few seconds, then you can run bed leveling.
unique pendant
@raven coral If you are using Marlin, you can wait until bed temp is reached before proceeding with the M190 command. Do you know what firmware you’re using? https://marlinfw.org/docs/gcode/M190.html
Marlin Firmware
This command optionally sets a new target temperature for the heated bed and waits for the target temperature to be reached before proceeding. If the temperature is set with S then it waits only when heating.
raven coral
I'm using marlin 2.0.9.2
unique pendant
Ok. You can use M190 as part of your startup code in your slicer. It’s best not to probe until the bed is all the way heated because the bed can warp and will be a different shape depending on temperature.
raven coral
Ah so i probe it after it has reached the bed temperature but before heating up the nozzle
raven coral
also where do i put/uncomment the #DEFINE SERVO0_PIN 27
i look at this https://www.youtube.com/watch?v=iAz47riSjLQ video and he finds that next to the //#DEFINE BLTOUCH but i dont have one

The Ender 5 is similar to the Ender 3 in many ways, including many people receiving theirs with warped beds. This BLtouch guide will take you through step by step on how to fit this very popular auto bed levelling probe. It covers printed parts, physical installation/wiring, firmchange changes and configuration.
This guide assumes you have alre...
raven coral
nvm i got it to work
unique pendant
So, if you don’t have a probe, and you’re using the paper/nozzle method, you should heat up your nozzle for the same reason. Metal expands when heated.
Oh wait. Maybe you meant you didn’t have that line of code, not that you didn’t have a BLtouch. 😆
 exotic cipher
Finally got the initiative to disassemble and fix the broken filament feed gear in my prusa.
 inner saffron
is there a way to add knurling to a flat surface in fusion 360?
empty sedge
inner saffron
is there a way to add knurling to a flat surface in fusion 360?
Try sketching a linear pattern of long thin rectangle slots, doing an extruded cut, but set a draft angle of 45 degrees
[or extrude upwards with the same draft angle if you want pointy bumps instead of grooves]
inner saffron
actually, i was able to get it. thanks anyways though
raven coral
unique pendant
Oh wait. Maybe you meant you didn’t have that line of code, not that you didn’t ...
yeah i didnt have that line of code
also what is the correct gcode order to use mesh bed leveling?
do i do a G28, then a G29, then M420 S1 ?
uhhh
i tried to print something and i noticed that the printer is just going really fast
raven coral
the print speed in slicer settings is at max 60mm/s, and that is only in some parts, but not the whole first layer
the first layer should go at a slow 30mm/s
havent really changed anything in the slicer either, only added G29 and M420 S1 for bed leveling
raven coral
trying some older prints also seem to have the same issue with it going really fast
empty sedge
There's a feedrate override in percent that you usually adjust by turning the knob on the LCD when not at any menus. 100 means 100% speed
raven coral
i have noticed that its not a feedrate isssue at this point
i set the bed temperature to 80C
and ran some G1 commands
like
G1 X100 Y100 F1800 and G1 X0 Y0 F1800
and every time i ran one of those commands
the whole printer moved faster and faster
arctic dragon
raven coral
the whole printer moved faster and faster
I think I heard of an issue like that where an LCD was disconnected, but the firmware kept polling an ADC to read buttons and got a funny result from that. Have you made any modifications to your printer setup reecntly?
raven coral
wlel
well
i have disconnected my LCD
since i didnt really want to splice the lcd cable
arctic dragon

GitHub
Bug Description Whenever I print, with each move the printer makes the feed rate decreases untill the printer is at a crawl. If I run an m244 command back to 100% it willjump to 100% and decrease a...
Yeah, that could do it. Depending on the default action those buttons might be at, your system could be seeing false button presses. Try reconnecting the LCD, or make sure your LCD is disabled in firmware.
raven coral
where would I disable the lcd from the firmware
arctic dragon
No idea. What are you using?
arctic dragon
Can't remember offhand where in the code that would be
but you would have to recompile and reupload via Arduino or whatever
It's probably in your configs somewhere
Haven't used Marlin in a long while...
raven coral
alright
arctic dragon
probably Configuration.h?
raven coral
so probably i comment out this one
 arctic dragon
Yeah, that's the one.
stoic echo
raven coral
do i do a `G28`, then a `G29`, then `M420 S1` ?
for an Ender 3 V2 that's correct
raven coral
What about not an ender 3 v2?
raven coral
ah okay
im curious is it possible to hook up some I2C devices to a 3d printer so you can "expand" the number of available pins since there can be multiple devices on a single I2C buss
since iwas thinking of connecting a filament runout sensor to an anet a8 but it has very little free available pins
especially when using an lcd
arctic dragon
raven coral
since iwas thinking of connecting a filament runout sensor to an anet a8 but it ...
Anet A8 doesn't have any I2C buses IIRC, at that point I would consider Octoprint or a controller board upgrade?
raven coral
i suppose
arctic dragon
You could use the Serial pins to connect another microcontroller, though.
raven coral
well i could probably attach stuff to the raspberry pi
and hope theres the right plugins for everything
arctic dragon
The Pi itself has some limitations, being a 3.3v device without Analog pins, but it at least has the I2C bus available for expansions.
If you're comfortable coding your own firmware modifications, a serial device from J3 can also handle external expansions.
raven coral
at some point i kinda considered that but i do not feel confident that i know the whole firmware works
ill probably just reprint my raspberry pi case's top part so it has holes for gpio lol
it has no vent holes really
raven coral
can i somehow make the pause button in octoprint put the printer's extruder somewhere to the side of the whole thing, and when i resume it would put it back where it was when i clicked the pause button?
since i have no filament runout sensor thing yet, i have to do everything manually, so i wouldd rather not have the hotend stay over teh same spot for long times
arctic dragon
 raven coral
ye the gcode settings there but im not sure what should i put in there
empty sedge
raven coral
can i somehow make the pause button in octoprint put the printer's extruder some...
octoprint probably can't put it back
empty sedge
there's a pause feature in marlin you can enable that does have an option to park, but without an LCD this isn't going to be useful to you
arctic dragon
Octoprint can, it does save the position before pause to a pause_position variable. How accurate it actually is, I don't have experience with, though.
raven coral
so those two scripts
 arctic dragon
Worth trying.
raven coral
alright
 crimson merlin
raven coral
im curious is it possible to hook up some I2C devices to a 3d printer so you can...
crimson merlin
raven coral
im curious is it possible to hook up some I2C devices to a 3d printer so you can...
your best bet to do this is to upgrade the board or use octoprint.
raven coral
Alright I'll do it with octoprint
crimson merlin
You can get relay boards for the pi and use those along with a plug in. Some people use them to turn their printer on/off
 tranquil gyro
I'm trying to get started with using fasteners for 3D printed parts. Where can I look? (and please reply to me cuz I got my own notification settings)
empty sedge
tranquil gyro
I'm trying to get started with using fasteners for 3D printed parts. Where can I...
What are you trying to do?
tranquil gyro
Trying to design parts that can be screwed onto eachother so I make a big model, as well as adding them to another plastic element that isnt 3D printed
unique pendant
You can either print holes in the plastic at the appropriate diameter (if you plan on rarely taking it apart) or you can use heatset inserts if you think you may want to disassemble/reassemble. In the non-printed plastic element, you could simply drill holes of the appropriate size for either screws or heatset inserts.
If you plan on never taking it apart, you can use adhesive.
I use heatset inserts all the time using this method: https://hackaday.com/2019/02/28/threading-3d-printed-parts-how-to-use-heat-set-inserts/

We can make our 3D-printed parts even more capable when we start mixing them with some essential “mechanical vitamins.” By combining prints with screws, nuts, fasteners, and pins, we ge…
iron remnant
You can also put slots for nuts to be inserted into.
And, like, if you are talking about something like a 1/4 UNC or 20mm bolt, you can just print a thread and it'll probably just magically work.
Or you can use self-tapping screws.
carmine peak
i just assembled my ender 3 pro for the first time
The Z axis wont move past a certain point and makes a loud grinding noise (leadscrew jerks back and forth). The point at which his happena changes every time I take it apart and put it back together. Please help
 pure quail
Make sure the brass but that guides the leadscrew on the gantry mount is loose. Like so loose you think it's wrong. It needs to be loose to compensate for a bent rod/misaligned stepper mount. If not it will jam like you are finding.
pure quail
Welcome to 3D printing. I've been doing this for 5 years and just stumbled into a new mystery today lol. Glad you solved it!
carmine peak
Can I use my Ender 3's motherboard and firmware with my Ender 3 Pro?
 shut dirge
Hi, I'm trying to make some lithophanes. I was able to power a single 12v (very dim as expected) LED (not from strip) with this https://www.adafruit.com/product/4090. But when I tried to solder it to the strip, it won't work. This is the strip I'm using https://www.amazon.com/gp/product/B07PRSP3K3/ref=ppx_yo_dt_b_asin_title_o07_s00?ie=UTF8&th=1. I would like to point out that I cut out a piece of the strip and it didnt work. Tried the entire strip, didnt work. Soldered back the original usb a cable, didnt work either.
I was just wondering if the breakout board would actually work.
empty sedge
it should but you might need some resistors to tell the power supply something wanting 5V is connected
empty sedge
shut dirge
Hi, I'm trying to make some lithophanes. I was able to power a single 12v (very ...

Engineering and Component Solution Forum - TechForum │ Digi-Key
What I’m writing about today is a simple way to get 5V at up to 3A, power supply permitting using the USB Type-C standards for current sinking end devices from just two resistors on the USB-C connector on your end device, otherwise known as Upward Facing Port (UFP) This communication goes both ways, USB Type-C standards also has a specification...
shut dirge
Thank you for the information!
carmine peak
I installed the BLTouch and compiled marlin for the Ender 3 Pro and the first thing i printed, it acted completely normally UNTIL the hotend finished heating up. After which, the printhead homed, then moved into position to begin the first player, then hovered a few millimeters and the print said it was over.
Even showed me how long it lasted. 4 minutes.
 thin breach
Did you produce the G-code for the print yourself? Any chance it has a mistake & doesn’t actually do anything? Can you see the path of the hot end in the slicer?
empty sedge
carmine peak
I installed the BLTouch and compiled marlin for the Ender 3 Pro and the first th...
Did you change your start gcode for bltouch?
 thin cape
I have never 3D printed in my life. However i want to try it. Is it possible to make a box that is "flat" but then you can like make it into a box
like the stuff you did in kindergarten
you first cut out the shape and then at the "lines" fault it into a box
like this

Creating a bit more detailed box with flaps and dielines going all the way through.
Comment with any questions, issues, praise or criticism (hopefully praise).
And if you haven't already check out the live demo of my app at https://mockup3d.com/
will it be "stable" if i print it out?
empty sedge
Yes, but you might be able to fold it only once if you print from PLA
Here’s one living hinge example I found quickly. https://www.thingiverse.com/thing:2044034

These printable designs are foldable versions of your favorite regular 3D shapes, the five Platonic Solids! The shapes are flat (in the form of the polyhedron's net), but when printed in a flexible filament, they can be folded up into the finished shape.
Video: https://youtu.be/s5DxOxjLCuI
stoic echo
Oh, speaking of Blender... did y'all see this? https://www.humblebundle.com/software/learn-create-game-art-blender-software

Humble Bundle
We’ve teamed up with GameDev.tv for our newest bundle. Get courses like Complete Blender Creator Course & Blender Character Creator Course. Plus, pay what you want & support charity!
some of that's easily translatable to 3D-printing
 lament dove
thin cape
I have never 3D printed in my life. However i want to try it. Is it possible to ...
lament dove
thin cape
I have never 3D printed in my life. However i want to try it. Is it possible to ...
https://fab365.net/items/199
this company makes several "foldable" designs if you need any inspiration 🙂

With the request and high vote from FAB365.net's request page, I designed this foldable Willis Jeep.
Willis MB Jeep request ➪
Through this folding Willis MB Jeep, I made my first convertible car. The convertible car requires a lot of work as it is necessary to make a chair and interior, and there is little space to put the structure. In this wor...
not quite exactly the same as a completely flat box, but it's actually pretty awesome to see it all come together
i guess a lot of it is e.g. ball joints rather than flat folds...but i think they use some of those as well
thin cape
lament dove
i guess a lot of it is e.g. ball joints rather than flat folds...but i think the...
i only need the "basics"
like a flat cuboid
with an opening at one of the sides which can be closed and opened
iron remnant
Well, if you want to play with a beta library and learn OpenSCAD, there's this: https://github.com/revarbat/BOSL2/wiki/hingesnaps.scad

GitHub
The Belfry OpenScad Library, v2.0. An OpenSCAD library of shapes, masks, and manipulators to make working with OpenSCAD easier. BETA - hingesnaps.scad · revarbat/BOSL2 Wiki
So, the problem with 3D printing it is that PLA tends to break instead of bend.
As previously mentioned.
So, either you need to get a material that's more friendly towards that (PETG, Nylon, Polypropylene) all of which come with attendant complexities that mean that an inexpensive Ender 3 might not be a great option or you need to design for 3D print instead of folding.
Making things with hinges and catches is going to work much better with PLA.
Also, laser-cutting is an option.
The big thing is that, at least for me, it's a lot easier to make multi-part foldable things when you can easily fab a bunch of variants.
So, if you want to go down the laser-cut route you probably want one o' those.
stoic echo
iron remnant
Well, if you want to play with a beta library and learn OpenSCAD, there's this: ...
great pick, I still haven't migrated my stuff from BOSL to BOSL 2
iron remnant
I have a buncha BOSL2 stuff. I should post more of it to thingiverse.
It's seriously handy.
stoic echo
That reminds me, so since Thingiverse doesn't support BOSL out of the box, do you know if there's any kind of script where I can just inline the entire thing, like all the stuff I've included?
That way it would still work in the customizer.
@iron remnant this is all I've really made so far (that I am willing to share) https://github.com/NascentMaker/OpenSCAD-Models

GitHub
Models for OpenSCAD that I have created. Contribute to NascentMaker/OpenSCAD-Models development by creating an account on GitHub.
iron remnant
Uuuuugh.
Yeah, so what I really think someone ought to write is a general-purpose OpenSCAD package manager.
(or, you know, use Crates or something)
stoic echo
Not a bad idea.
Do you know if there's been any work done towards that, at all?
well, there's this: https://github.com/lostapathy/scad_bundler

GitHub
A package manager for OpenSCAD powered by RubyGems - GitHub - lostapathy/scad_bundler: A package manager for OpenSCAD powered by RubyGems
but it's using Ruby
iron remnant
Yah, there's a few floating around.
stoic echo
and Ruby is like the slowest thing since... I dunno.
iron remnant
I think there was also a ticket inside of OpenSCAD that was "Oh, yeah, We Should Have A Package Manager"
stoic echo
and it's been abandoned for 2 years
iron remnant
Yeah, the problem is to be truly amazeballs, you'd probably have to convince Thingiverse, which is allegedly two people keeping it from total necrosis at an uncaring larger company, to support whatever it is.
iron remnant
No idea.
stoic echo
Hmm. Maybe somebody at Adafruit knows them?
iron remnant
I think they are just too busy to bother?
Alternatively, prusaprinters is a nice site.
stoic echo
Yeah, they probably have actual jobs on the side outside of Thingiverse, I assume.
Do you know if there are any other parametric CAD programs out there that are similar to OpenSCAD, and that have libraries that they might need managed?
iron remnant
https://github.com/supermerill/FreePySCAD
https://github.com/jscad/OpenJSCAD.org
https://github.com/SolidCode/SolidPython

GitHub
Like openscad but in python inside freecad. Contribute to supermerill/FreePySCAD development by creating an account on GitHub.

GitHub
JSCAD is an open source set of modular, browser and command line tools for creating parametric 2D and 3D designs with JavaScript code. It provides a quick, precise and reproducible method for gener...

GitHub
A python frontend for solid modelling that compiles to OpenSCAD - GitHub - SolidCode/SolidPython: A python frontend for solid modelling that compiles to OpenSCAD
I think there's another one out there too.
I dono, like, there's an overall feeling that Cad Is Just Doin' It Rong.
stoic echo
Alright, do they already have package managers for these?
Just curious if we need something universal that can align with all these, or no.
iron remnant
I think some other folks have tried to write more generalized package managers.
And, dono, if you are doing package management, you also need to think about stuff like https://github.com/nophead/NopSCADlib where yeah, it's a library system but it's also a vitamin system and part manager that comes along for the ride.
GitHub
Library of parts modelled in OpenSCAD and a framework for making projects - GitHub - nophead/NopSCADlib: Library of parts modelled in OpenSCAD and a framework for making projects
So, there's probably part one that's just managing OpenSCAD library files that are comprised of other OpenSCAD files, but I guess once you get that far it starts to invite the question of "Well, what about importing a STP or STEP file as a part?" or "What about a buildchain that lets you use SolidPython as a preprocessor since that's kinda what it is"
Even like FreeCAD and Fusion360 have some parametric modelling and... dono, at least for FreeCAD it might not be super-hard to wrap it up such that you could use a FreeCAD part as a resource.
Oh, yeah, ugh.
So, expounding on that a bit, there's a whole world of people out there doing what is basically "Git for CAD" and apparently they are all very expensive nasty products that don't have Git-level or even CVS-level functionality and they are called Product Lifecycle Management apps.
So an entirely valid and potentially useful product is something that... well, think of it kinda how npm works, where yeah it handles the dependencies, but it also holds attributes for the deployable thing you are working on.
stoic echo
Also, here's a thread on some of this discussion from OpenSCAD: https://openscad.rocklinux.narkive.com/6nmM4vHY/does-openscad-have-a-need-for-a-package-manager
But, they're discussing an actual package manager for the application OpenSCAD itself, and how that would handle dependencies. That's a bit outside of the scope of what I am willing to tackle, and I don't have any desire to try to put out any feelers, since it already looks like the OpenSCAD team doesn't care, and do not want anything to change.
iron remnant
I mean, that was years ago so who knows.
stoic echo
Well. It was 8 years ago. And they still don't have a package manager. Actions speak louder than words.
iron remnant

GitHub
There were tries to implement a package manager, Or something with same goals (#2377, #2384, #3124, #1913, ...) But they were left without result. I open this issue for a place to solution-neutral ...
stoic echo
Yeah, that sounds cool. But, it's a whole package manager. I dunno.
I was just thinking about a stopgap solution.
iron remnant
Yeah, I mean, a tree-shaker build process that would assemble the bits out of a library into a thingiverse-able blob is almost certainly possible.
stoic echo
Just analyze the actual dependencies of the SCAD file, roll them all up into one fat file and ship it up to Thingiverse so they can smoke it up in the Customizer.
iron remnant
Yeah.
I've seen people push libraries up but I don't use the Customizer.
I guess it wouldn't cause licensing trauma as long as you clearly separated it.
Actually, a OpenSCAD minifier might be helpful for some folks regardless.
"Here's a minified file, you can customize it, good luck reverse-engineering it"
stoic echo
yeah
that's not an entirely bad idea
I like where your head's at
OK. I am going to start looking into that and create a repo for it over the weekend. I don't have time right now.
iron remnant
I spent just long enough working at a 3D printed car company to understand the horrors of CAD/CAE software.
I will never forget some of the weird stuff I discovered.
I also kinda feel like some of the pushback that we got inside of said company suggests that if there was a better tool, a lot of people would reject it so I can't even follow my passion there.
(And, like, I could be horrifically wrong, too)
stoic echo
yeah, it's weird... the entire field is trained to use these tools that basically suck... well, they do... they're horrible. But, they're all invested in them with years of college degrees and whatever else, and not to mention companies being invested in the software itself.
iron remnant
Yeah. It's like Sigourney Weaver in Galaxy Quest. "MY JOB IS TO SELECT LITTLE TETRAS IN THE CAE TOOL ALL DAY LONG BECAUSE THE MESHER WON'T PRESERVE THE DATA FROM THE CAD PROGRAM. IT'S A SILLY JOB BUT I'M DOING IT!"
 forest kayak
@iron remnant what ever ended up happening with that company?
iron remnant
forest kayak
<@!214758164099366912> what ever ended up happening with that company?
CxO suite sillyness
forest kayak
iron remnant
CxO suite sillyness
Ah yes, tale as old as time. Sorry to hear it, sounds like a cool idea
carmine peak
whenever I print with a glass bed, the first layer is always nonexistent
The rest of the print is fine
unique pendant
Likely your nozzle is too close to the bed.
 verbal sail
https://www.adafruit.com/product/1314 https://www.adafruit.com/product/1743 does anyone have simple stls for these 2 parts? with slots for female headers on the screen enclosure if possible

Listen up! This 3" diameter speaker cone is the perfect addition to any audio project where you need an 4 ohm impedance and 3W or less of power. We particularly like this cone as it has ...

Add some jazz & pizazz to your project with a color touchscreen LCD. This TFT display is really big (3.2" diagonal) bright (6 white-LED backlight) and colorful! 240x320 pixels with ...
i can design one if i need to but hoping i wont have to
carmine peak
unique pendant
Likely your nozzle is too close to the bed.
I use auto bed levelling. Do I change my Z Offset or just fiddle with the bed wheels?
empty sedge
z offset
torpid grove
stoic echo
yeah, it's weird... the entire field is trained to use these tools that basicall...
As someone who lives most of my working life in CAD/CAM let me confirm the tools are bad. But I use them because they're the best tools available (to my knowledge), despite all the time and infrastructure I've built up around them I would happily ditch the current CAD tools I use daily. So if you know of some alternatives please do let me know.
iron remnant
torpid grove
As someone who lives most of my working life in CAD/CAM let me confirm the tools...
Good to hear. I know that at least some of the CAD/CAM folks at my past job were burned by a company that decided to use some sort of remote-desktop solution for the software that did not perform, so it might have been that bunch of people.
 inland galleon
any fusion360 masters around?
im working on a monitor bezel, so it will go around a monitor. What I want to do is have it slope from the higher inside to the lower outside all the way around

i achieved it previously by using planes to slice it into 8 (corners separate) and then more planes to cut at an angle, but i wasn't super thrilled with the result and assume there is probably an easier way
unique pendant
Loft
winged helm
echoing loft. Lofts are useful to learn and pretty neat
inland galleon
hmm thanks
iron remnant
...I guess that means you've got some lofty goals for the rest of the day.
inland galleon
heh yep
empty sedge
inland galleon
im working on a monitor bezel, so it will go around a monitor. What I want to do...
Try changing the draft angle on the extrude feature. Looks like they call it "taper angle" https://www.youtube.com/watch?v=6SJFpxbXgbY

Fusion 360 Extrude Taper Angle | Fusion 360 Taper Extrude | Fusion 360 Taper Angle. This tutorial shows how to use taper angle from extrude tool in Fusion 360
inland galleon
that was my first thought actually. but since it has a hole inside it tapers from both sides
unique pendant
The general rule for CAD is to make the large overall shapes first, then work your way from bigger to smaller through the details. the quickest way to make that piece you showed (assuming it's symmetric) is to:
- sketch the bottom of the frame with two rectangles, one inside the other
- extrude to the entire depth
- chamfer the outer edge (note that chamfers do not have to be at the default 45 degrees, you can make them asymmetric)
- make your holes at the bottom surface of the piece. (I like the hole tool, but some prefer to sketch circles and extrude). You can control how deep you want the holes, you can even make them go all the way through.
If you are 3D printing it, you would then make tiny bevels at all outer and inner corners that are made along the Z direction (e.g. 0.1 - 0.2 mm) to help prevent ringing along the flat surfaces. You can go in and edit anything along the way by double-clicking its icon in the timeline and it will change and propagate accordingly.
It's possible you may be stuck with whatever you have in that picture tho' too, and may not be able to start over. In that case, extrude the face that has the hole in it (including the circle edge for the hole so your extrusion is solid), then chamfer the outer corners of the top rectangle you just made with the extrusion.
stoic echo
I cannot recommend OpenSCAD enough for things like bezels, enclosures, and what-have-you. For an idea of what you can accomplish with pretty few lines of code, take a look at this repo: https://github.com/NascentMaker/OpenSCAD-Models
It's a much simpler way of thinking about 3D objects than Autodesk.
I almost gave up on making anything custom, and almost gave up on 3D-printing in general until I found OpenSCAD. I can just write code, show a preview, and export as STL (or other formats) and I can easily import more complex sketches to extrude from by using Inkscape.
Then again, maybe you work with CAD software professionally, or maybe you want to, and you'll have to use Autodesk Fusion 360 (isn't it a mouthful) much to your own (and your wallet's) chagrin.
I used it for about a month and hated every single second of it. It's the least intuitive application I have ever used since having to reverse-engineer Ingres II OpenRoad "stored procedures."
arctic dragon
Coming from using Autodesk Inventor and Solidworks, Fusion 360 does a lot of things really well, and is a good balance between a professional tool and a hobbyist CAD suite. It does have its shortcomings, but I still like to recommend it as a way of dipping one's toes into professional CAD software. While I believe OpenSCAD is absolutely phenomenal, it's really doing the same things Fusion360 is doing, but with direct access to the lower level functionality via scripts instead of the organization scheme of a modern CAD suite.
Regardless of background, OpenSCAD is definitely a tool you want to have access to. Whether you use it as a primary CAD tool or as a supplement to your traditional CAD suite, on the other hand, depends on what you're more comfortable with.
Scripting every geometry is powerful, but isn't for everyone.
 stable zealot
I'm a therapist with zero training in CAD...or engineering...or EE of any kind....anyway I use fusion360 enough that I asked my work to pay for it . It's worth it. The difference between FreeCAD and Fusion360 are just....staggering. I'm not code-minded enough for OpenSCAD and think it's neat but rarely useful for the sorts of things I make and too slow to iterate quickly compared to Fusion. I'm all for FOSS and will jump for joy when something comes to github that truly challenges solidworks/Fusion360. FreeCAD has that nassttttty internal naming bug and just needs to go.
The tutorials are all written for fusion360 or solidworks and you get what you pay for with these packages. OpenSCAD uses it's OWN language and that's just more than most people have time for. Not trying to holywar here, so I'm going to back off now. I just think OpenSCAD is too much for a beginner, as is FreeCAD because of the bug, and I think it's worth it to a newbie to learn Fusion360 for free because the skills genuinely translate to other packages.
Autodesk really has done a phenomenal job making a product that's (probably too) tolerant of PEBKAC errors that gets something functional out of the computer and onto the printer. k
 loud silo
I have looked through lists like this: https://all3dp.com/1/best-free-cad-software-2d-3d-cad-programs-design/ and wonder about any of the other alternatives, such as OnShape (also free only for non-commercial work), LibreCAD, etc. For myself, Tinkercad has been the easiest to learn, but I have only done very simple things. I never found Sketchup very intuitive, despite that being its premise.
iron remnant
I mean, they all kinda end up having certain very appealing features.
The problem with a lot of the browser-based apps is that they are too impermanent and if you are doing it full-time, that's probably OK because that just means that you are executing a migration plan, but if you dabble with things, you are likely to discover that they re-arranged everything, deleted your account, or decided that that particular app was ready for Our Incredible Journey (translation to the in-joke: every blog where they discontinue something after being acquired starts with "Our Incredible Journey")
My usual joke is that I taught myself FreeCAD to prove that Naomi Wu is right and we all should just get over ourselves and use Tinkercad.
Arguably a free-as-in-freedom Tinkercad-esque tool would actually be really good for the democratization of stuff, even though it's actually the hardest of all open source programs to write because everybody really wants an open source powertool like FreeCAD or OpenSCAD and the making-it-friendly-and-easy part is really hard.
unique pendant
There is someone in my makerspace that has managed to use Blender for CAD for 3D printing. He does pretty elaborate stuff and it seems to work well for him. I use F360 tho' because I learned on Maya years ago, then moved to Inventor for several years, then F360 came out and I migrated over. It's really not that expensive if you use it a lot. And if you don't need any of the higher end features, it's free (for now that is). I have recently begun to use Blender for materials, lighting, and rendering and version 3.9 is quite impressive. I tried Blender 20 years ago and it was pretty bad. They've come a long way.
iron remnant
Yeah, like, if you want mechanical parts, something like F360 or FreeCAD is better than if you want to sculpt
unique pendant
F360 sculpts too. It's actually pretty nice.
Totally different design mode tho', but it interacts with the regular design mode.
stoic echo
loud silo
I have looked through lists like this: <https://all3dp.com/1/best-free-cad-softw...
If you already write code, OpenSCAD is a snap to learn and use. I recommend the BOSL library (BOSL2 is out, but it's a little too wild for my tastes) because it has a lot of useful 3D-printing functions to both save filament and make the parts stronger.
That is if you are making parts that are simple, like enclosures and the like. Super easy to make boxes with PCB standoffs and similar.
If you're sculpting miniatures or something, Blender is probably the way to go like the smart ones said above.
Caveat emptor, I am not an engineer (just a lowly software developer that has no formal education). So my recommendations are influenced by what I was able to teach myself out of Fusion 360, FreeCAD, TinkerCAD, and others. And I found OpenSCAD to be really simple to use for what I needed: project enclosures.
loud silo
thanks, boxes or stands for things are what I am usually doing. The syntax looks fine, not idiosyncratic, so I think it's just learning the primitives, good libraries, and some idioms.
stoic echo
to give you an idea of how simple OpenSCAD is to use and write code for with BOSL, this is a plate for the MacroPad: https://github.com/NascentMaker/OpenSCAD-Models/blob/main/adafruit-macropad-rs2040-switch-plate/rs2040-switch-plate-v1.scad
difference()
{
    cuboid(size=flatten([plate_size, [plate_thickness]]), fillet=2.5, edges=EDGES_Z_ALL, $fn=24);
    grid2d(size=[plate_size[0]-20,plate_size[1]-20],
            spacing=switch_size[0]+switch_gap, cols=colunms, rows=rows, stagger=false)
        cuboid(size=flatten([switch_size, [plate_thickness+0.1]]));
}
It's like. That would have taken me several hours in Fusion 360. Why? Well, I am not a formally trained person, or someone with real work experience with Fusion 360, and I do not really want to invest that amount of time learning a software that I'll use 10% of and still pay $500/year. I already do that with Adobe. 😉 (Main difference is that I have a lot of experience with the core suite of Adobe products)
just the fact that all I needed to do with the holes is use a 3x4 2d grid blew my mind when I designed that part.
Anyway. I digress. But, yeah, I love OpenSCAD for the stated purpose. Designing enclosures and plates and whathaveyou.
Oh, I forgot to mention, BOSL also has support for metric screws, socket caps, countersunk, all kinds, and it makes it super simple to spreadx/y and difference out holes for screws, they can even be threaded (final render/export to STL takes a bit, though) so you don't have to use self-threading screws or nutserts.
iron remnant
As a BOSL2 YOLOer, that lib makes a huge difference in making things quickly.
Also Nopscadlib.
stoic echo
iron remnant
As a BOSL2 YOLOer, that lib makes a huge difference in making things quickly.
I want to, and I don't want to, refactor all my stuff to BOSL2.
iron remnant
It's ok. I got bit by the beta nature of BOSL2 and had to refactor
unique pendant
Speaking of Adobe... Photoshop Elements is less than $100 and you own it outright, no subscription. It has almost all the functions of Photoshop. It doesn't have CMYK separation into separate layers tho' -- but that would typically be something a professional would use Photoshop for of course.
stoic echo
We have some heavy use of Illustrator, Premiere Pro, and After Effects in this household, though.
I do not really do use the level of composition and layering that Photoshop is great for, I mostly either do UI/UX related things in Illustrator, or if it's just straight photo manipulation, I tend to use Luminar for that.
https://skylum.com/luminar
I am using Luminar 3, though. Because, I got it in a Humble Bundle. 🙂
 plain dirge
loud silo
I have looked through lists like this: <https://all3dp.com/1/best-free-cad-softw...
plain dirge
loud silo
I have looked through lists like this: <https://all3dp.com/1/best-free-cad-softw...
Tinkercad has been the easiest to learn, but I have only done very simple things.
You can actually use TinkerCAD for some complex 3D printing projects. I still use it over blender for some stuff, as being able to combine objects, cut holes, etc. is super useful for modelling projects.
 clear vector
I have this RepRap printer from 4+ years ago. It has a 2560 for its controller. I am not sure what model it is.
https://www.reprap.me/3d-printer-kit-ramps-1-4-arduino-mega-2560-drv8825-2004-lcd-pcb-heat-bed-mk2b.html uses this controller

3D Printer Kit RAMPS 1.4+Arduino Mega 2560 +DRV8825 Stepper Motor+2004 LCD+PCB Heat Bed MK2B
empty sedge
what seems to be the problem?
 serene quest
I have a few questions about bed leveling, I've done it for a while and always heated up the bed to temp before doing it but are you supposed to do that? I keep seeing conflicting info on it.
And say if in cura you have your first layer height set to 0.2, should the nozzle be exactly 0.2mm away from the bed physically?
 void niche
serene quest
I have a few questions about bed leveling, I've done it for a while and always h...
void niche
serene quest
I have a few questions about bed leveling, I've done it for a while and always h...
I have found that it works much better if I preheat my bed ( on a Ender 5 pro )
serene quest
I see
void niche
I don't know about your second question -- i just level mine with a sheet of paper.
 river cipher
serene quest
I have a few questions about bed leveling, I've done it for a while and always h...
river cipher
serene quest
I have a few questions about bed leveling, I've done it for a while and always h...
When you level with a sheet of paper you're only leveling, not setting first layer height, setting first layer height is done with a separate setting and you need to calibrate that separately by iterating and starting prints over and over and see if it has to raise or lower
Most likely your z endstop offset distance
stoic echo
Anybody got any tips on OpenSCAD libraries that have snap-together type joiners for cases?
I found this: https://www.thingiverse.com/thing:1860118

This is a simple snap-fit joints library based on "Snap-Fit Joints for Plastics - A Design Guide" by Bayer MaterialScience LLC .http://fab.cba.mit.edu/classes/S62.12/people/vernelle.noel/Plastic_Snap_fit_design.pdf
The idea is to correctly dimension the snap-fit joints, according to the elongation at break that can withstand.
-The global variabl...

GitHub
OpenSCAD Hinged Box generator and toolkit . Contribute to sbambach/MarksEnclosureHelper development by creating an account on GitHub.
stoic echo
oooh, I may have figured some stuff out here...
stoic echo
How do I speed up time so that I don't have to wait 20 minutes for my print to finally let go of my PEI print surface? 😄
 toxic kite
 elder oxide
Lol
river cipher
stoic echo
How do I speed up time so that I don't have to wait 20 minutes for my print to f...

no flexplate no problem...
raven coral
ok so for some reason the filament wont stick to the bed, i have set up ABL so bed leveling shouldnt be a problem
could it be something with my firmware was configured wrong
weirdly enough it was all going fine until i changed the filament to a different one
although the material type is still the same
unique pendant
Not sticking after changing filament that did stick could be any number of things. Most common: fingerprints on the bed that need to be cleaned off. Also consider wet filament, z-offset too high, temperature too low for the filament… Tons of other possibilities. Maybe posting a picture would help?
raven coral
Well the main print happens somewhere to the right so that's clean

Filament was stored previously next to the radiator so it should be good
I feel that z offset might be high?
Although i noticed that
Only one side doesn't stick
It feels like the abl isnt compensating enough?
verbal sail
is a window open or a fan running?
arctic dragon
raven coral
It feels like the abl isnt compensating enough?
The most common surface inconsistencies are level, cleanliness, and temperature distribution. Depending on what your printing with and what you’re printing on, it could make quite the difference.
verbal sail
if anyone needs a, enclosure for the 3.2'' tft lcd breakout with resistive touch, let me know. i designed one
its untested so far, nut it should fit s the measurements were taken directly from the board. its designed to sit in a large windowed tin
 raven coral
I'll probably try leveling the bed in this case
iron remnant
stoic echo
oooh, I may have figured some stuff out here...
what did you figure out about snap-together joiners? I'm curious.
stoic echo
iron remnant
what did you figure out about snap-together joiners? I'm curious.
I kind of whipped something up. I'll ping you when I've pushed it up.
stoic echo
iron remnant
what did you figure out about snap-together joiners? I'm curious.
Here's what I ended up using (and it works pretty well with PLA):
https://github.com/NascentMaker/OpenSCAD-Models/blob/feat/hyperpixel4/pimoroni-hyperpixel4-square-notouch-enclosure/snap-fit-enclosure.scad
So, those measurements are not accurate, and need to be adjusted. I am working on it, but don't try to print that and then yell at me. 😄
 tight cove
if my part cooling fan doesnt turn on m106 s255 does that mean the pinout has burnt up?
i tested it with a multimeter and it reads 3.5v
when its on or off
the wires between the mainboard and fan are fine, the fan is fine
SKR Mini E3 V2.0
empty sedge
tight cove
i tested it with a multimeter and it reads 3.5v
What's the voltage from the fan + pin to the power input negative? I think it should be 24V. (It will be the same when on and off. the negative side is switched not the positive side)
stoic echo
stoic echo
Here's what I ended up using (and it works pretty well with PLA):
https://github...
hey there, I have uploaded the model for the case: https://social.thangs.com/m/42318

Thangs
Supports mounting on the Adafruit Cyberdeck standoff.
stoic echo
Also, the ArcWelder plugin for OctoPrint makes a HUGE difference. Holy smokes.
 wooden girder

Anyone know why I am getting these arms off my towers? I tried lowering the print temp but then the nozzle clogs
empty sedge
the plastic is oozing out slowly as you travel between two locations. This unfortunately has a bunch of potential causes:
retration length and speed being wrong
retraction wipe being off
some mechanical extrusion issue like a poor seal between nozzle and heat break
the filament being wet
That looks like a TAZ. Which extruder are you using and what extrusion settings are you using?
stoic echo
and, which type of filament are you using?
wooden girder
It is a Taz 6. Its the stock extruder. I have it setup with mostly default pla options. I was going to try tweaking the retraction... I'm using PLA by 3Dfuel. Fossil black
Ive had the spool for prolly over a year but its been in a low humidity environment
stoic echo
wooden girder
Ive had the spool for prolly over a year but its been in a low humidity environm...
Have you tried with a different filament?
unique pendant
I don’t even bother taking a chance on wet filament any more. It’s so simple to just pop a reel in the dryer overnight so you don’t have to worry about any printing problems being due to wet filament.
arctic dragon
unique pendant
I don’t even bother taking a chance on wet filament any more. It’s so simple to ...
Out of curiosity, what do you use to dry your filament?
 pliant dagger
I use one of those round fruit dehydrators with the stacked trays. cut out the grids in a couple of the trays and can fit two rolls with all the trays stacked. Cost about the same as 2 rolls of (cheap) filament.
(they're really really just a dry/hot air chamber)
iron remnant
unique pendant
I don’t even bother taking a chance on wet filament any more. It’s so simple to ...
For you, this is a cut-and-dried issue.
 stoic echo
arctic dragon
Out of curiosity, what do you use to dry your filament?
stoic echo
arctic dragon
Out of curiosity, what do you use to dry your filament?
I've got one of these, and it's been OK... but, overpriced in my opinion:
 void niche
stoic echo
I've got one of these, and it's been OK... but, overpriced in my opinion:
void niche
stoic echo
I've got one of these, and it's been OK... but, overpriced in my opinion:
but it does seem to work well. I've been happy with mine.
stoic echo
oh for sure, it's solid, just a bit expensive since it only fits one roll
void niche
yeah, but I only use one roll at a time 😉
stoic echo
hahaha, true
void niche
I use it in the Summer when it is quite humid here. don't worry about it much in the Winter. I do store the filament in vacuum bags when I am not using it for a long time.
stoic echo
void niche
I use it in the Summer when it is quite humid here. don't worry about it much i...
we've got a humid winter here in NC, some years worse than others
My wife has a Gourmia GFD1680 for when she decorates cookies, and I was like... I need me one of them haha
void niche
I'll bet -- it gets very dry here in NH in the winter
stoic echo

Phenomenal Features! Six perforated drying trays provide plenty of room to get creative drying anything from sweet pineapple slices to sticky dates and even chewy beef jerky! Also comes with a bonus fruit leather sheet and drip tray.
void niche
She probably would not appreciate you "borrowing" hers.
stoic echo
I don't think so either 😄
 sullen zinc
https://skyline.github.com/ if you use github, now's a good time to 3D print a graph of your 2021 contributions.

View a 3D model of your GitHub contribution graph. Share it, print it, and more!
last year I had trouble in prusaslicer, it messes up on the lettering. time for that rare occasion to use cura...!
 sullen zinc
22.5g here 😜 must be all my hard work in 2021.
https://github.com/prusa3d/PrusaSlicer/issues/6159 prusaslicer folks say the problems are due to the original model, but it works fine in cura

GitHub
Version 2.3.0+ Operating system type + version PrusaSlicer Version: 2.3.0+ Build: PrusaSlicer-2.3.0+-202101111304 Operating System: Macintosh System Architecture: 64 bit System Version: macOS Catal...
stoic echo
This massive gap in the middle of 2021: https://skyline.github.com/tbjers/2021

3D model of the GitHub contributions made by @tbjers in 2021.
arctic dragon
void niche
I use it in the Summer when it is quite humid here. don't worry about it much i...
Amen to that. One summer day in NH with a broken AC ruined a roll and a half of PLA...
I really should've sealed the lid for the full roll. Mistakes were made.
stoic echo
Ouch.
 humble dawn
Does anyone know where I can find the drivers for the dremel 3d20 printer?
shy kelp
i apologise for the dirty heat block but i was wondering if anyone can tell me which this is? i have a feeling its the e3d v5 or some variation but im really unsure. printer is an flsun q5

its dimensions are 16.23 x 16.27 x 12.27
vestal thicket
Oooh, thank you for sharing the Skyline yesterday Jepler
humble dawn
Does anyone know where to find the windows 10 drivers for the dremel 3d20 printer?
empty sedge
shy kelp
i apologise for the dirty heat block but i was wondering if anyone can tell me w...
E3d v5 predates the cartridge thermistor. E3d has drawings you can compare to though. It might be an early v6 block or clone. That said I don’t remember having a heater setscrew instead of a clamp at the same time as a cartridge thermistor.
carmine peak

Whenever my printer homes, the printhead is really, really high up. The BLtouch stops a full two fingers height above the bed
I've done the Z offset wizard 8 times, half with the heat on both ends, it's set to -6. I've used it on -6 before and it's never done this until now. What the heck do I do?
stoic echo
carmine peak
I've done the Z offset wizard 8 times, half with the heat on both ends, it's set...
Do you even have springs on that bed?
it's hard to tell at this angle, but it looks like they're fully compressed, maybe let them all up?
carmine peak
yes, picture's at a weird angle, sorry
Sure, i'll do that
And while i'm under the hood, i have yellow springs, should i install them?
stoic echo
yeah, why not!
(says the guy that has had a filament sensor sitting in a basket of things for about half a year now)
carmine peak
I ask because... i mean, they're yellow springs. I feel like they don't offer extra stability if they're not compressed
Then again I do not know everything about engineering and only have a high school understanding of physics, and i can imagine it'd wobble less i suppose
stoic echo
it shouldn't wobble even with the springs fully expanded
especially since the print head isn't touching the bed, so wobble shouldn't be a thing... could you press down on them with your hand and make the bed move, sure, but that shouldn't impact your bed stability even with fully extended springs.
stoic echo
carmine peak
Whenever my printer homes, the printhead is really, really high up. The BLtouch ...
So, maybe a dumb question, but you have gotten it to home before, right? Before you installed the BLTouch? Also, you have taken out the Z-stopper right?
because... if you forgot to take out the z-stopper, then, yeah... it won't ever touch the bed
(at least on an E3V2)
carmine peak
stoic echo
So, maybe a dumb question, but you have gotten it to home before, right? Before ...
I took out the z stopper. Yeah, im just imagining things, its supposed to do this
stoic echo
OK, so the BLTouch probe does touch the bed, right?
carmine peak
Once, yes
stoic echo
oh, then you should be fine
which firmware are you using?
one note, be ready to play a bit with z-offset, I recommend doing a few manual paper levels to dial it in, because otherwise you'll either be too high or too low, and too low is... pretty bad for your bed, and nozzle 😄
I am guessing there's probably a way to actually tweak these settings in Marlin, but I am too lazy to figure it out so I just use z-offset and it works
I could probably just change the position/height value of the BLTouch by -2.3mm and everything would be hunky dory.
stoic echo
If you'd like a second set of eyes on your config files, feel free to put them in a gist or in pastebin or something and I can look them over.
carmine peak
Thanks
Now everything seems to be working fine
besides the first layer being transparent of course
stoic echo
if the first layer is transparent, you may want to adjust your z-offset
like... add 0.05-0.1 mm or so to it...
carmine peak
Well i've been adding a ton more than that. The first layer of a -6 and a -5 print are both transparent
So i have no idea what went wrong
stoic echo
hmm
do you hear any scraping?
maybe it's just pressing too tight on the bed
because, the thing is, when you have a BLTouch you won't know the z-offset until you start printing, so I recommend using the tweak section or whatever it's called and adjusting the z-offset as you're laying down the first layer
and also do a manual paper level and then a mesh with the bltouch, and then print
carmine peak
oh god my marlin install doesnt have babystepping
stoic echo
things I learned the hard way... (read I broke my bed (well, scratched it), hahahaha)
shy kelp
is there anything i can do about uneven bed levelling with a fixed bed?
stoic echo
shy kelp
is there anything i can do about uneven bed levelling with a fixed bed?
what printer do you have?
shy kelp
flsun q5
heres the issue

its printed the 2nd layer, i do always get this problem but i rarely print anything big enough for it to be an issue
first layer is pretty much forced into the bed at that corner
shy kelp
they seem fine
stoic echo
can you remove the bed from the frame of the printer?
shy kelp
tbh ive never tried
shy kelp
is that really an option?
stoic echo
No no. I was mostly kidding.
shy kelp
ahh ok
i kinda accepted that this is a flaw with fixed beds but idk if i was doing anything wrong
stoic echo
But, let's think about this. So, the first layer, though, is that the same thickness as the other sides?
shy kelp
yeah except the corner
stoic echo
so the corner is smushed down on all layers, correct? at first I was like, wait, is it only starting to smush it on layer 2?
shy kelp
yeah it seems to be all layers so far
i was hoping it would sort itself out but it doesnt seem to be
stoic echo
are the arms adjustable?
shy kelp
im not gonna cancel this print tho cuz the first layer took over an hour 😅
nope they arent
i believe its all properly calibrated
stoic echo
like, there's no play or ability to adjust these?
 shy kelp
nope they are fixed
stoic echo
these too?
 stoic echo
it almost feels like something is slightly off, by like very little
it is a gradual slope, though, so maybe... let me do some research, I don't have this printer myself
shy kelp
cuz u run the probe calibration and it does several points around the bed to create a bed mesh and it should adjust itself when it gets to those areas but idk ive always had this problem
yeah its a gradual slope
very much isolated to that small area
i am running klipper on it, not that it makes much of a difference
stoic echo
it could be the radius is too large
shy kelp
this is the dimensions of the item im printing
 stoic echo
I am wondering... I'd take a look at this document:
https://web.archive.org/web/20180324104527/http://minow.blogspot.com/
and also check out the stack overflow answers here:
https://3dprinting.stackexchange.com/questions/6016/delta-printer-nozzle-not-moving-square-with-a-perfectly-level-bed-as-if-the-bed
My thoughts on calibrating 3D Delta printers

3D Printing Stack Exchange
I've been having this problem with my delta 3D printer where my nozzle isn't moving flat with my print bed (as if the bed is bent) but I have used the edge of my steel ruler and it seems to be perf...
so, could be that you need to tweak something in Marlin
and from what you described, sounds exactly like the problem you're having
so, it's probably a Marlin setting
also, this took me down a rabbit hole I didn't expect
shy kelp
i do have these in my config

i had to take someone elses configuration when setting up my printer in klipper since i had no like reference to anything
i can look into it and see if it makes a difference
thank u :)
stoic echo
you're welcome
and yeah, check if tweaking something in there gives you a better result
like... just do a three layer box to test
shy kelp
okay :) thank u!!
shy kelp
I think in a way it’s kind of sorted itself out?? I’m unsure. I’ll still try to change some things and see if anything happens but thought I’d share

The top layers look nice
shy kelp
i havent yet as it would interrupt the print, i will try to change some things once its finished :)
shy kelp
lots of reading to do :)
stoic echo
hopefully you don't mind reading
shy kelp
its ok, can be confusing tho
according to klipper i can run a manual calibration at several points and adjust the z height myself rather than the probe doing it
so i can give this a go
stoic echo
Hey, glad I was of some help here! Keep us posted on your progress on perfecting that first layer.
shy kelp
thank u :) i appreciate ur help, i will try my best as the first layer always bugs me if it isnt perfect 😅
stoic echo
shy kelp
thank u :) i appreciate ur help, i will try my best as the first layer always bu...
me too, I will reprint over and over until I get it perfect
usually also involves manually slowing down the print speed to about 60% and a slightly hotter nozzle and bed for maximum adhesion. Sometimes it gives me tiny elephant's foot, but, it's only one layer and I can easily cut that with an Xacto knife.
And brim. 5 rounds of brim. ALL THE TIME.
shy kelp
i usually print those small 20x20x0.21 cubes to check if my nozzle height is good and it pretty much always works for me. i edit the z offset in my config file then re-probe for my bed mesh and print again until its good. i do probe at the bed temperature which i usually print at. for a while i did print at like 200c and 60c bed and it would be hit or miss if id get good first layer adhesion but since raising it to 215c and 70c for the bed i pretty much always get perfect layer adhesion. i am getting the elephants foot but i have ordered a deburring tool so im excited to see how that helps :)
its just tricky to calibrate a delta and a fixed bed, a bit envious of my brothers ender 3 ahah 😅 but i do love my delta. i usually print my first layer at 10mm/s then the rest at like 80-120mm/s depending on the part. ive not had any major issues with printing, its been a big learning curve for sure but yeah this corner of my bed has pretty much been a mystery for me but u have defo helped :)
i used to run a brim on my adventurer 3 but since getting my delta i havent had a need for one. theres still lots to learn, ive only been printing for i think maybe a year now? but i love it so much
stoic echo
awesome! Glad you are enjoying it! print some stuff, sell them on etsy, buy an Ender 3V2 with the profits. 😉
or just switch the printers one day when he's out, and pretend like nothing happened. That might not go over well, depending on how well your brother takes practical jokes
shy kelp
lmao i think he will notice 😅 we have thought about selling stuff but i dont think we are quite there yet, maybe one day!
vestal thicket
This may be off topic, and if so, I apologize - does anyone have a recommendation of how to mount or 3D print the acrylic Adafruit sells on the 32x64 LEDs? I have 2 set up as a 64x64 matrix and I'm kicking myself for not ordering the 12" acrylic, but my search engine-fu hasn't turned up a lot of solutions on how to attach it
Ah, should have added diffuser to my search, this turns up, which is close: https://www.thingiverse.com/thing:4773491
unique pendant
Not used to repairing Prusas, but I have to fix our maker space printer, and getting "MINTEMP BED" error on Prusa MK2.5S, and I'm assuming that the thermistor wires are fatigued. Have bed off now and can't get discontinuity on thermistor wires nor on power wires. Everything was well connected on board. Any advice on how to proceed? Just go ahead and replace thermistor? Or is this error due to power wire failure? Both? Neither? 🤷♂️
 patent thistle
unique pendant
Not used to repairing Prusas, but I have to fix our maker space printer, and get...
patent thistle
unique pendant
Not used to repairing Prusas, but I have to fix our maker space printer, and get...
If the current temp in the space is higher than 5C then this is most likely a bad thermistor.
 lilac crown
unique pendant
Not used to repairing Prusas, but I have to fix our maker space printer, and get...
lilac crown
unique pendant
Not used to repairing Prusas, but I have to fix our maker space printer, and get...
a thermistor is a temp based resistor. if you don't get a reading then it's toast. a google should get you a good valid value range for that thermister as it varies based on temp
unique pendant
I get 150 k-ohms. However, I've replaced it with a spare thermistor, and I'm getting the same error. It's 24 degrees celsius in the space.
carmine peak
how do i prevent warping?
iron remnant
Depends on the material. Generally some combination of bed adhesion, bed temperature, enclosure temperature (if you have one), different material selection, or adding of a skirt.
carmine peak
PLA
bed's at 60
Adhesion is great, only weird thing is that it's weak enough i can take prints off the bed with my hands
z offset is -3.17
iron remnant
So, one thing you might try is glue stick or hair spray to really stick it down.
At least for me, on my Ender 3v2 textured glass bed and PLA, I can get away with a lot of printing with just the bare bed but if I hit it with the purple Elmers glue stick, it's a lot higher adhesion but it's also a lot less likely to warp.
YMMV of course, some folks found the glue stick useless and insist on other things.
carmine peak
Alright, how many strokes of the gluestick?
I worry whenever i do that that its too thick
 solemn parrot
Personally I just give it a once over with an Elmer's glue stick and just make sure to cover where the edges of the print will be. Once (maybe twice) over a certain spot has been enough in my experience although I do print on blue painter's tape, not glass.
 oak heart
I set the Z offset incorrectly after adding a BLTouch to my Creality Ender 3 Pro and it started gouging the bed after levelling

Adhesion is now inconsistent and looks something like this

Does this seem like something I'll be able to dial in, or might the bed be no longer flat? I thought that levelling was supposed to make adhesion work consistently throughout the bed.
half dew
oak heart
Does this seem like something I'll be able to dial in, or might the bed be no lo...
I doubt the probe hitting the bed caused that - more likely you just need to manually level (you'll still need to do this from time to time even with a probe), readjust your z probe offset, and go.
Also, make sure the probing happens after the bed is heated.
Unfortunately, a lot of Enders ship with fairly warped beds. My specific bed - if I leveled the corners had such a significant dip in the middle that it was impossible to use the entire bed even with a probe - I ended up cutting a square piece of aluminum foil for under the magnetic mat in the center. Eventually I just replaced the bed with a flat one but that was somewhat expensive.
 gusty shuttle
half dew
I doubt the probe hitting the bed caused that - more likely you just need to man...
gusty shuttle
half dew
I doubt the probe hitting the bed caused that - more likely you just need to man...
I wonder if sending it to a machine shop and just have them do a simple facing operation on the bed would be expensive
half dew
gusty shuttle
I wonder if sending it to a machine shop and just have them do a simple facing o...
it might - but aluminum foil in the middle of a concave bed is much cheaper!
oak heart
Hm, alright. I was getting that sense yeah. I have a tempered glass bed on the way so hopefully that does a better job of being flat.
oak heart
gusty shuttle
I wonder if sending it to a machine shop and just have them do a simple facing o...
That’s an interesting idea - do you figure I could call a machine shop and ask?
This bed has a heating element in it though and I haven’t found them selling replacements, so perhaps it wouldn’t work out.
half dew
oak heart
This bed has a heating element in it though and I haven’t found them selling rep...
When I replaced my bed I had to replace the heating element and the magent as well. I did use a glass bed for a while but I didn't like having to do crazy things to get PETG to stick to it which is the only thing switched back (A lot of people are perfectly fine needing to smear glue and add tape to print PETG - it was too annoying for me to clean and the regular pei sheets work without needing to do any of that)
gusty shuttle
oak heart
That’s an interesting idea - do you figure I could call a machine shop and ask?
can't hurt, it's just a phone call
 austere vault
oak heart
https://cdn.discordapp.com/attachments/702606632315650098/929187400951947294/IMG...
austere vault
oak heart
https://cdn.discordapp.com/attachments/702606632315650098/929187400951947294/IMG...
just dont use magnetic bed
i also have ender 3 pro and this bed is really likes warping
mostly center of the bed is really warp
just use cheap 23x23cm glass and you dont have headaches
oak heart
I have definitely noticed that I can carefully level at the corners and then the center is completely different
half dew
oak heart
I have definitely noticed that I can carefully level at the corners and then the...
Yeah, the ender beds tend to be concave. Whats interesting is that the single heading element beds actually end to warp in the middle while heating up and I was wonder if maybe this was intentional in order to try and compensate - but it really just doesn't work.
gusty shuttle
has anyone bought from this company? I'm looking at this FEP sheet for using on an Elegoo Saturn and the price looks reasonable
https://kraftandkitchen.com/products/fluoropolymer-clear-roll-bulk-fep-for-purging-and-slab-storage-50x16?variant=31103590629455

Kraft & Kitchen
Bulk FEP and PTFE rolls. Laboratory supply wholesaler for PTFE and FEP rolls. lowest price anywhere on fluoropolymer films. FEP is perfect for polar and non-polar solvent exposure and other scientific applications. Terpene and solvent resistance along with excellent nonstick propertiesFast shipping
shy kelp
@stoic echo hii again, so i believe i recalibrated my delta again and did it properly and i can say that now the bed is more universally level but i do think in that far corner it is still a bit too low but its like proper far into the corner. i was printing a large object and i was having that problem where it was too low in that corner and so i decided to properly calibrate it by manually probing the bed (i did at one point slam my nozzle into the bed cuz i was stupid and lowered it too much) and after doing that and updating the bed mesh then getting my z offset done, i reprinted the same thing and it isnt too low in that corner anymore and overall the first layer looks good :) so thank u for talking to me about it a while back!
I am having an issue I am not 100% sure on

are these gaps in the lines caused by under extrustion?
ive increased my flow rate and temperature and it seems to have reduced it
its a 0.6mm nozzle, 220c, marble pla, 80mm/s print speed and i think after adjusting its 127.5% flow rate
before changing the flow rate and temperature it was 205c and 105%
shy kelp
What is happening to my walls?

nvm i think i know what was wrong with the walls, tho idk what the distinctive line about half way up is
unique pendant
127.5% flow rate is way out of range for how that adjustment should be used. You should only need to tweak that a few percentage points of deviation from 100%. It’s used to fine tune the difference between different filaments. Sounds like you may have skipped some hardware tuning like e-steps. Maybe read through this guide and approach things step by step in the correct order. https://teachingtechyt.github.io/calibration.html
Also if that first photo is your first layer, that’s just your nozzle too high from the bed surface. You would baby step down to increase squish. Though you’re very close to correct already. Maybe only need 0.02 mm closer or so if anything at all.
oak heart
Who wants to gawk at how poorly my bed is levelled
 vestal thicket
You've got a little work to do there. 🙂


 vestal thicket
@oak heart That looks great, nice work!
Whenever I see photos of beds, I try and grab them and rotate them like I would mine, lol
half dew
oak heart
aluminum foil good
Awesome! Glad it worked!
gusty shuttle
has anyone used Formware 3D with the Anycubic Photon Mono X?
https://www.formware.co/slicer
not having a yearly subscription looks so tempting
carmine peak
what would be a safe temperature to ultrasonic clean 3D printed parts?
I have two parts that are really dirty and have support material in places i cannot reach
 rugged osprey
Can anyone give me a hand with a BL touch issue? I am getting rapid binking red light for alarm and am seeing different answers as to the solution.
Also While doing some reading I have seen that the wire harness can come backwards and I think I might have that issue
but I can find both wiring directions from images online so I don't know how to tell what is right..
If facing the board does the white go on the left or right?
Kinda frustrating....
vestal thicket
@rugged osprey My BLTouch on my Ender3v2 is on the right
rugged osprey
vestal thicket
<@272863901840834560> My BLTouch on my Ender3v2 is on the right
Thanks!
vestal thicket
 vestal thicket
I don't remember, sorry
rugged osprey
all good thanks for the help!
oak heart
I added more points (5x5 instead of 3x3) to try to level more thoroughly and I'm missing something about how to apply Z offsets to leveling. One of these used -2.235; the other 1.235. I'd expect the Z offset to be used as a constant offset for all mesh values. Is that not right?

 arctic dragon
oak heart
I added more points (5x5 instead of 3x3) to try to level more thoroughly and I'm...
arctic dragon
oak heart
I added more points (5x5 instead of 3x3) to try to level more thoroughly and I'm...
It's dependent on the system of course, but to my knowledge the Z-offset is typically added AFTER the leveling process, so there's a good chance it never shows up in said mesh.
arctic dragon
Depends on the system and the desired quality of prints, of course. From my experience, if the system adjusts your prints based on the mesh data, a good leveling is mostly important for the flat bottom surface; the mesh will automatically compensate to some extent for higher layers, but a nice flat bed can prevent you from needing a raft on every print.
unique pendant
oak heart
I added more points (5x5 instead of 3x3) to try to level more thoroughly and I'm...
Do you happen to have a magbed, and are you using BLTouch?
oak heart
Yes to both
oak heart
unique pendant
Do you happen to have a magbed, and are you using BLTouch?
What might that cause?
unique pendant
BLTouch uses a Hall effect sensor, so it will not give accurate results when it is near magnets. Make a map of your magnets on your bed, and then design a probing algorithm to keep the BLTouch as far away as possible from the magnets when probing. You will get a more accurate bed mesh.
oak heart
Oh!
unique pendant
There is a probe based on a tiny microswitch that will not be affected by magnets. I’ve purchased one, but haven’t got around to installing it yet. I don’t have an Ender of my own, but I think it will work in case your interested. Let me find a link…
This place will assemble them for you (I wish I would have known that before I bought elsewhere, because $10 is totally worth having someone better at soldering than me do it) 😂 https://lukeslabonline.com/products/euclid-probe-kit?variant=40699568947385

Lukes Laboratory
Update 1/2/2022 - Approximately a week out from the restock The highly accurate and magnetically coupled Z probe for your 3D printer, laser and CNC machine. Check it out in action below. There are so many different bed sensing options out there, so why Euclid? Direct Surface Sensing Swap out your surface for glass, tex
oak heart
Cool, thanks!
unique pendant
Yes, they have directions and STLs for Enders at their github https://github.com/nionio6915/Euclid_Probe
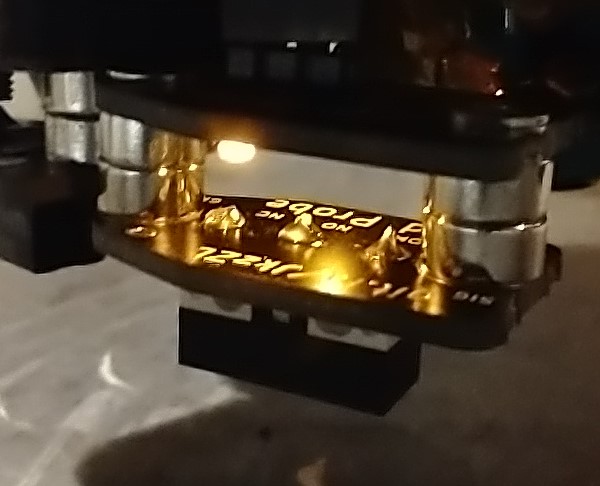
GitHub
Euclid probe, a magnetically coupled Z Probe. Contribute to nionio6915/Euclid_Probe development by creating an account on GitHub.
oak heart
I uh… ahem. Uninstalled. The magbed. We’ll see if that changes any behavior.
oak heart
This glass bed seems like a way, way smoother flatter surface.
unique pendant
Just an interesting note about glass beds… plain old 1/4” mirror is “optically” flat and makes a great glass bed. Some people like to print on the backside of mirrors too.
oak heart
I did that for my Monoprice Mini Delta.
oak heart
Is Z offset different from Z probe offset?
I keep lowering Probe Z offset in Marlin's configuration menu and it doesn't seem to be printing closer to the bed.
It might be, but I also might be tricking myself with tiny fluctuations like I was when adjusting the offset and thinking it was affecting the bed leveling output.
unique pendant
A higher Z offset moves the nozzle closer to the bed.
oak heart
oh, not a lower, more-negative one?
Am I misunderstanding https://marlinfw.org/docs/gcode/M851.html ?
unique pendant
Well, Marlin can be different.
Depending on how you adjust it.
My only Marlin printer adjusts Z offset live, so I observe live and then store settings. I don’t usually look at the numbers. My other printers all run Duet.
oak heart
Maybe it's time to enable the probe offset wizard
shy kelp
unique pendant
127.5% flow rate is way out of range for how that adjustment should be used. You...
hi i reduced my z height during a print by 0.02 and it seems to be better. i didnt want it too close to begin with otherwise my first layer ends up too squished to the bed. ill keep trying to play around with it. thank u!
i have another question, i have searched google for a while now trying to find a solution but i havent been able to find anything. i have an flsun q5 delta printer and ive noticed for a while now i believe my front left belt keeps making squeaky rubber noises when it moves up and down. sometimes my back belt does it too. my belts seem tight and i havent had the printer terribly long, less than half a year. it might possibly be coming from the motor but its definitely a rubbery squeaky noise. my print quality is fine, the noise is just extremely annoying and i dont want it to possibly turn into anything bad? wondering if anyone has any ideas?
its not the normal belt whine when the effector is moving quickly
oak heart
@carmine peak You could make a copy of the gcode and edit it to remove the things between startup and where it stopped on layer 97? Assuming your printer doesn't have lower-level resumption support.
I've discovered a source of some of my confusion: the Creality BLTouch firmware has a Z Offset, where it's the value of Z when the nozzle is actually at (within a sheet of paper) the bed. Stock Marlin has a Probe Z Offset that's measured using the probe and bed, not nozzle and bed.
carmine peak
oak heart
<@!123924397068255232> You could make a copy of the gcode and edit it to remove ...
i'm doing that right now
The gcode doesn't match any tutorial whatsoever
Do i literally just delete the entire gcode until Layer 97 and then have it so instead of layer 0 it's layer 97?
verbal sail
need a little help. i need a laser cutter that is small enought to fit on my ender 5+
oak heart
@carmine peak No, you still need the gcode that sets coordinate modes and temperatures and feed rates and stuff.
@carmine peak and my suggestion assumes the gcode is using absolute coordinates
but otherwise yes, that's my idea
you could delete / modify within layer 97 to get closer to where it stopped if you measure carefully
you might want to have a skirt first to make sure extrusion is good\
hm, good luck homing with a print on the bed 😬
arctic dragon
verbal sail
need a little help. i need a laser cutter that is small enought to fit on my end...
What are you trying to laser cut?
arctic dragon
You should be able to laser cut acrylic with a 40w co2 laser module, but you’ll need to either operate it outside or prepare a fume extractor setup, as the fumes from laser cutting acrylic can be toxic.
If you have an ender 5, you should be able to 3d print enclosures with its bed size?
verbal sail
yes but also no. i can print enclosures but nor clear ones
arctic dragon
Laser cutting clear acrylic is much harder than most, not sure if a standard 10W laser cuts it.
CNC is a bit messier, but it’s much more reliable as a diy machine, and you can get a cheap desktop cnc for about the same price as a high power laser module.
Oh, I guess thickness is also a factor. Cnc machines don’t cnc thin acrylic very well, so you may have to experiment with a 10w output laser…
Just make sure to keep ventilation and eye protection in mind.
 agile gorge
Laser cutting needs at least a co2 laser, diode lasers cannot cut clear acrylic
Not that it's hard, but accessible diode lasers cannot do it
verbal sail
slight miscomm: by clear i mean see through, not transparent
shy kelp
What is causing my bottom layers to look like this?

My walls seem to be okay
tho sometimes they seem to separate
ugh this is so frustrating
stoic echo
shy kelp
What is causing my bottom layers to look like this?
Have you tried using a different filament? Same result?
Also, what filament are you using, and what are your temperature settings for nozzle and bed?
shy kelp
stoic echo
Have you tried using a different filament? Same result?
i havent tried another filament yet. it is eryone marble pla, my first layer nozzle and bed temps are 220c and 70c then after that it is 210c and 60c until its finished. speeds are 20mm/s for first layer then top/bottom layers are 80mm/s and flow is 110% for my top/bottom layers. i do have my esteps calibrated
stoic echo
OK, so 220c is pretty high for PLA, have you tried lowering that temp to like 200 and then 195 for the second layer?
bed temps at like 65 for first layer and 60 for remaining
shy kelp
mm i only do 220c and 70c for adhesion for my first layer, but i havent tried printing cooler in my other layers
ive tried using colder temps but i dont really get much adhesion when it begins to print and it peels up
stoic echo
like I said, 220c is really high for PLA
shy kelp
yeah it is high but its only my first layer so i didnt think it would be a problem, my first layer is good its only the other layers that seem to be worse now
i havent had this issue with other filaments ive been using but while using this filament i did properly calibrate my printer and tighten some loose screws, but surely if it was that then all my layers/walls would be bad?
stoic echo
yes, if it was a mechanical printer issue it would definitely affect everything
shy kelp
its why im so confused cuz ive tried adjusting flow but it doesnt do a huge amount and i gotta adjust it really high, lowering my z offset doesnt do a huge amount and causes my nozzle to scrape on whats already been printed and can also ruin my first layer
i will try lowering my temps after its finished this one
i do usually print at 210 first layer then 195 for my other layers
i did find out that the rubbery squeaking noise is coming from my x axis stepper motor at certain heights so i have purchased some new motors hoping to get rid of that
tho afaik that isnt causing any print quality issues, its just top/bottom
stoic echo
so, if you're having issues with adhesion, you could try Elmer's Glue sticks, the purple kind. Or, get a PEI sheet for your bed.
Also, have you handled the bed with your bare hands at any point?
shy kelp
mmm i have used glue stick but i like to avoid it cuz it leaves residue on the bottom of the print/is a pain to clean up (im lazy i know) and makes the bottom of the print look ehhhh. i havent tried a pei sheet yet but unfortunately my bed is unremovable and i dont really want to stick something onto it i might not be able to take off
the only issue ive had with 70c bed for pla is elephants foot but i can remove it afterwards plus it can be quite minimal at times
also i clean my bed with isopropyl alcohol usually after each print
stoic echo
Fair enough. So, in that case, maybe try using something like Dawn dish-washing detergent to clean off the surface of the bed, then wipe it down with water, and once dry, use rubbing alcohol to wipe it down.
The problem here is that the isoprop alcohol doesn't actually dissolve oils, so you can wipe the bed down, but the "grease" from your hands will remain.
shy kelp
i thought isopropyl alcohol and rubbing alcohol were the same?
i will try the dish soap tho
shy kelp
its ok!
stoic echo
make sure you use dish soap that's meant to break up fat/oil
shy kelp
im gonna try these settings while keeping my speeds the same
 stoic echo
and obviously, if you've got a PEI sheet, be very careful with what you wipe it with, since it'll tear off fibers from your cloth/towel/paper
shy kelp
I have been getting this issue with these prints I’m doing

its on every single one, it doesnt really happen on other stuff ive printed
but its where the z seam is
i assume its under extrusion but i dont know why
i dont have linear advance turned on
stoic echo
hmm, so, it could also be temperature related
if you're printing PLA at higher temps, it'll behave weird
I would try to lower the temps first, before you mess with any other parameters
shy kelp
It is different on each model for some reason

even tho the settings are exactly the same
stoic echo
That's kind of similar, though.
OK, so, do you have any fans or other things blowing air near your printer?
shy kelp
the line where it stops on the model on the left is in line with the bit on the front of the model
i dont no
stoic echo
good
shy kelp
i have 2 30mm part cooling fans
stoic echo
Were those stock?
shy kelp
nope, ive completely changed my effector
but i wasnt having this issue after i changed my effector
stoic echo
so, when did you start having this issue?
I say lower the temps and try to print again. And, if that doesn't fix it, I would try with a different filament, for sure.
shy kelp
its kinda recent with this material i think? its hard to tell
stoic echo
PLA is hydrophilic. It'll absorb humidity.
shy kelp
This is the other filament I’ve used with this, it’s pretty much had no issues. It’s wood pla same settings as the marble
 stoic echo
So, if you're in a humid environment, and you do not store that PLA in an airtight container with absorbers, it can definitely start printing weird.
shy kelp
i also keep my unused filament in bags with desiccant and while im using the filament i keep it in a sunlu filament dryer which goes through capricorn into my extruder then down ptfe tube into my hotend
so ye i try to keep it as dry as i can!
i can only assume its some settings or i wanna possibly say the model?
since i get zero popping and all other times it prints fine
stoic echo
Yeah, I don't think it's the model. I would reset the extrusion rates and head speed and then lower the temps and see what that does. Obviously, if you're having issues with adhesion, those are not going to affect the rest of your print as long as you can get the first layer to stick.
shy kelp
Idk if it’s easy to see but this is my first layer

i like to think that its levelled nicely
i have kinda always printed at 80mm/s, i did used to print at like 120mm/s but quality starts to suffer so i lowered it
i hadnt messed with the flow rates either until i had this issue, they were always at either 97% or 100% and then 105-110% for the first layer for better adhesion
I think it looks nice so far
 stoic echo
That looks pretty good.
shy kelp
will have to wait for the next layers i suppose, fingers crossed
this is at 40mm/s first layer cuz i got bored waiting
it seems to be sticking fine tho
stoic echo
good
I tend to manually set the speed for the first layer, and then fix it for the second... I know I could do it in my slicer, but I am a stubborn old man
shy kelp
ahh i kinda hate adjusting it during printing, i rather it work perfectly first time
i do sometimes adjust it tho like right now when i got bored
on here o;
 stoic echo
I like to sit for the first layer, and once I've confirmed it's nice, I will adjust and go live my life.
shy kelp
ohh yeah sameee
i like to think once the first layer is good and has all finished, the rest should be fine
stoic echo
usually it is... only times you have to watch out is if you have a lot of supports
shy kelp
all these parts still function perfectly fine its just that i want the quality to be good too, i want to get better at 3d printing and understanding how it works and so on
tbh i dont always watch that, i usually watch um
1-3 layers to make sure
i really do love 3d printing soooooo much but it can be such a pain with these things
It still has gaps in it :(

It’s 195c
stoic echo
So, my personal experience with 3D printing comes solely from using an Ender 3 V2. I have discovered that some filaments are just not great to print with this printer. Especially in the PLA range. I have had way better success with PETG. However, PETG requires higher temps, and also eject way more PM < 2.5 particles.
stoic echo
shy kelp
It’s 195c
OK, so now, get different filament. New filament, try the same thing.
And, PETG is hydrophobic.
shy kelp
stoic echo
So, my personal experience with 3D printing comes solely from using an Ender 3 V...
oooh okay, i started with the elegoo mars 2 resin printer but the post processing drove me insane so i brought an adventurer 3 and it was nice to get into fdm printing but i kinda hated it cuz it started having some issues and because the parts for it werent as easily to come by as other printers such as the ender 3 being able to buy nozzles from amazon or u know being able to upgrade the mainboard or doing other things to it. i then brought my current printer which is the flsun q5 and i do honestly love it but its these moments that drive me mad
i have always struggled to print petg but my brother seems to print it just fine on his ender 3 using the same settings as pla
stoic echo
I have had bad luck printing PETG at PLA temps
as long as I adjust the temps, everything else works pretty much great
shy kelp
i will have to try another filament tomorrow! cuz i do need to sleep now, ill let these finish printing as they will be sufficient for what i need. i just hate them being imperfect when it could be so much better
it is my first time printing with marble pla, i do use a 0.6mm nozzle
i usually print with normal pla
shy kelp
stoic echo
I have had bad luck printing PETG at PLA temps
same, i have no idea how my brother does it but im jealous. the quality of his parts is really good too
stoic echo
nice
shy kelp
i have brought some carbon fibre pla ive yet to use tho
stoic echo
maybe he just happened to get the one Ender 3 with a flat bed?
shy kelp
lmao tbh he said his bed wasnt flat, hes had a few beds for it i think and recently got a pei sheet for it which hes really enjoying at the minute
he has done quite a lot of mods to it and it does look nice
stoic echo
I love my PEI sheet
shy kelp
i have been thinking about getting a voron switchwire or voron 0.1 but i really should save my money and make my current printer work first
i did love printing on garolite but unfortunately i cant get a circular piece for my bed, its only cut in squares
i have been thinking of printing on silicon wafers but i dont think it would be any different to printing on glass
stoic echo
I seriously want to build a VORON 2. But. $2,000. Basically.
shy kelp
haha yeah it is expensive, i have a colleague at work whose currently building a voron 2.4
stoic echo
but, yeah, it's probably the coolest-looking 3D printer around
shy kelp
totally, i really love how fast they are